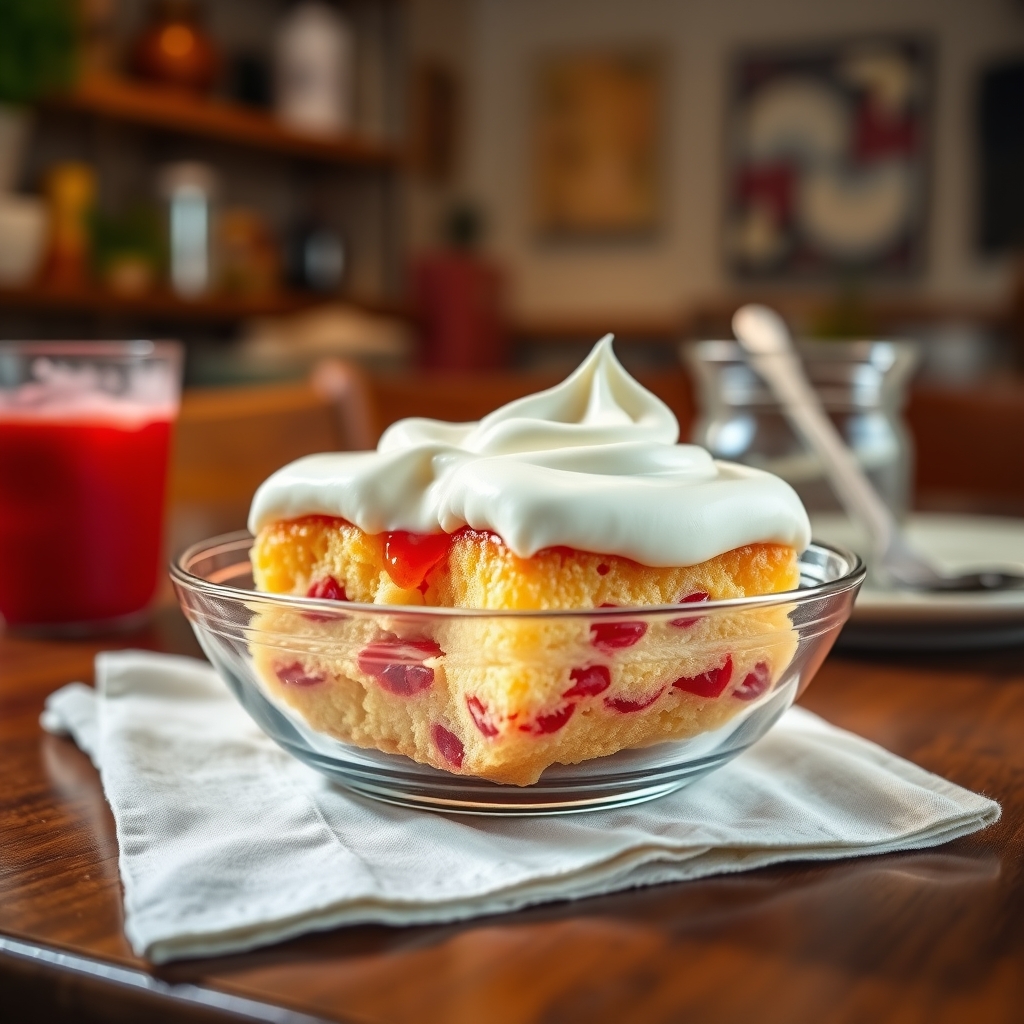
Jell-O Poke Cake with Whipped Topping
There’s something undeniably magical about a Jell-O poke cake. It’s a nostalgic dessert that brings back memories of potlucks, family gatherings, and summer picnics. The vibrant colors, the burst of fruity flavor, and the cloud-like whipped topping make it an instant crowd-pleaser. Whether you’re a seasoned baker or a beginner looking for an easy yet impressive treat, this Jell-O poke cake with whipped topping is the perfect recipe to add to your collection. Let’s dive into the details and create a dessert that’s as fun to make as it is to eat.
Why You’ll Love This Recipe
First, let’s talk about why this Jell-O poke cake deserves a spot in your recipe rotation. Here are just a few reasons why it’s a standout dessert:
- Effortless Elegance: With minimal ingredients and simple steps, this cake looks like it took hours to make but comes together in no time.
- Customizable Colors and Flavors: Whether you prefer strawberry, lime, or blue raspberry Jell-O, you can tailor this cake to match any occasion or theme.
- Perfect Texture: The cake stays moist thanks to the Jell-O infusion, while the whipped topping adds a light and airy finish.
- Crowd-Pleasing Appeal: Kids and adults alike adore the playful look and refreshing taste of this dessert.
- Make-Ahead Friendly: This cake actually tastes better after chilling, making it ideal for parties or busy schedules.
Ingredients Breakdown
Understanding the role of each ingredient will help you achieve the best results. Here’s what you’ll need and why each one matters:
- White Cake Mix: The base of the dessert, providing a neutral canvas that lets the Jell-O flavors shine. You can use homemade cake batter if preferred.
- Jell-O Gelatin: The star of the show, infusing the cake with vibrant color and fruity flavor. Choose any flavor you love.
- Boiling Water: Dissolves the gelatin to create the liquid that seeps into the cake.
- Cold Water: Helps cool the gelatin mixture slightly before pouring it over the cake.
- Whipped Topping: Adds a light, creamy finish that balances the sweetness of the cake and Jell-O. Fresh whipped cream can be used as a substitute.
- Optional Garnishes: Fresh fruit, sprinkles, or extra Jell-O powder can be used for decoration.
How to Make Jell-O Poke Cake with Whipped Topping
Follow these step-by-step instructions for a flawless Jell-O poke cake every time:
- Bake the Cake: Prepare the white cake mix according to package instructions and bake in a 9×13-inch pan. Let it cool completely.
- Prepare the Jell-O: In a bowl, dissolve the Jell-O powder in boiling water, then stir in cold water. Let it sit for a few minutes to thicken slightly.
- Poke the Holes: Use the handle of a wooden spoon or a skewer to poke holes all over the cake, spacing them about an inch apart.
- Pour the Jell-O: Slowly pour the Jell-O mixture over the cake, letting it seep into the holes. Refrigerate for at least 2 hours to set.
- Add the Whipped Topping: Spread the whipped topping evenly over the chilled cake. Garnish with fruit or sprinkles if desired.
- Chill and Serve: Return the cake to the fridge for another 30 minutes before slicing and serving.
Pro Tips for the Best Results
Want to take your Jell-O poke cake to the next level? Try these expert tips:
- For extra flavor, brush a thin layer of sweetened condensed milk over the cake before adding the Jell-O.
- If the Jell-O mixture is too runny, let it cool for 5-10 minutes before pouring to prevent overflow.
- Use a piping bag to apply the whipped topping for a more polished presentation.
- For a sturdier cake, refrigerate overnight before serving to allow the Jell-O to fully set.
Variations and Substitutions
This recipe is incredibly versatile. Here are some creative twists to try:
- Flavor Combos: Mix and match Jell-O flavors with complementary cake bases, like lemon cake with raspberry Jell-O.
- Dietary Swaps: Use sugar-free Jell-O and a low-carb cake mix for a lighter version.
- Layered Poke Cake: Bake two thinner cake layers and add Jell-O to both for a double-dose of flavor.
- Tropical Twist: Top with toasted coconut and pineapple chunks for a beachy vibe.
What to Serve With It
This cake is delightful on its own, but pairing it with the right accompaniments can make it even better:
- A scoop of vanilla ice cream for a creamy contrast.
- Fresh berries or citrus slices to enhance the fruity notes.
- A glass of iced tea or lemonade for a refreshing balance.
How to Store and Reheat
To keep your Jell-O poke cake fresh:
- Refrigeration: Store covered in the fridge for up to 3 days.
- Freezing: Freeze individual slices wrapped in plastic for up to a month. Thaw in the fridge before serving.
- Reheating: This cake is best served cold, so no reheating is needed.
Frequently Asked Questions (FAQs)
Here are answers to common questions about Jell-O poke cake:
- Can I use homemade cake instead of a mix? Absolutely! Any vanilla or white cake recipe will work.
- Why is my Jell-O not soaking into the cake? Make sure the holes are deep enough and the cake is fully cooled before adding the Jell-O.
- Can I make this cake dairy-free? Yes, use a dairy-free whipped topping and check the cake mix ingredients.
- How far in advance can I prepare this cake? It can be made 1-2 days ahead, as the flavors meld beautifully over time.
Final Thoughts
There’s a reason Jell-O poke cake has stood the test of time—it’s simple, joyful, and downright delicious. Whether you’re serving it at a birthday party, a holiday gathering, or just as a sweet treat for yourself, this cake is sure to bring smiles. So grab your favorite Jell-O flavor and get ready to create a dessert that’s as fun to make as it is to eat. Happy baking!
PrintJell-O Poke Cake with Whipped Topping
Description
A fun and colorful dessert featuring a moist vanilla cake infused with vibrant Jell-O flavors, topped with fluffy whipped cream for a light and refreshing finish.
Ingredients
For the Crust:
- For the cake:
- 1 box (15.25 oz) vanilla cake mix
- 1 cup water
- 1/3 cup vegetable oil
- 3 large eggs
- For the Jell-O filling:
- 1 box (3 oz) Jell-O (any flavor)
- 1 cup boiling water
- 1/2 cup cold water
- For the topping:
- 2 cups heavy whipping cream
- 1/4 cup powdered sugar
- 1 tsp vanilla extract
- Optional garnish:
- Fresh berries or sprinkles
Instructions
1. Prepare the Crust:
- Preheat oven to 350°F (175°C). Grease a 9×13-inch baking pan.
- Prepare cake batter by mixing cake mix, water, oil, and eggs until smooth. Pour into prepared pan.
- Bake for 25-30 minutes or until a toothpick comes out clean. Let cool 20 minutes.
- Use the handle of a wooden spoon to poke holes all over the cake (about 1-inch apart).
- Dissolve Jell-O powder in boiling water, then stir in cold water. Slowly pour over cake, filling holes.
- Refrigerate cake for 3+ hours (or overnight) to set Jell-O.
- Before serving, whip cream with powdered sugar and vanilla until stiff peaks form. Spread over cake.
- Garnish if desired. Store refrigerated.
Notes
For best results, use contrasting Jell-O and topping colors (e.g., strawberry Jell-O with white cream). Cake absorbs Jell-O better when slightly warm.
