
Table of Contents
Chocolate Mousse Cups Recipe: The Only Recipe You’ll Ever Need
If you’re craving a decadent dessert that feels like a luxurious treat without the fuss, look no further than this Chocolate Mousse Cups Recipe. Imagine whipping up silky smooth, extra airy chocolate mousse cups in your own kitchen, perfect for impressing guests or satisfying a sweet tooth on a quiet evening. This Chocolate Mousse Cups Recipe stands out with its effortlessly light texture, achieved through a simple folding technique that creates an extra airy finish unlike any other. Drawing from classic methods, it’s a game-changer for home cooks seeking foolproof results with just a few high-quality ingredients.
The allure of this Chocolate Mousse Cups Recipe lies in its sensory delights—from the rich, velvety chocolate that melts on your tongue to the airy, cloud-like consistency that makes every bite feel indulgent. The aroma of high-quality dark chocolate as it melts fills the air, evoking a sense of warmth and anticipation. Paired with the subtle sweetness and creamy undertones, these mousse cups offer a perfect balance of flavors, where the deep cocoa notes shine through without overwhelming the palate. It’s a dessert that not only tastes divine but also provides that satisfying mouthfeel of lightness and creaminess.
What sets this Chocolate Mousse Cups Recipe from cookingwithemy.com apart is our dedication to making it the ultimate, trustworthy guide for home cooks. We’ve refined every detail based on real kitchen tests, ensuring your mousse turns out perfectly every time, thanks to our Chef’s Secret for achieving that extra airy texture. In this post, you’ll discover expert tips on ingredients, step-by-step instructions, and even adaptations for dietary needs, all designed to build your confidence and elevate your dessert game. Stick around for the full breakdown and make this your go-to chocolate mousse recipe.
Why This Chocolate Mousse Cups Recipe is a Game-Changer
The Chef’s Secret: The true magic of this Chocolate Mousse Cups Recipe lies in the extra airy texture, achieved by carefully folding whipped egg whites into the chocolate mixture. This technique incorporates air pockets that make the mousse exceptionally light and fluffy, setting it apart from denser versions. Unlike traditional methods that might result in a heavier dessert, our approach uses the egg whites’ glossy peaks to create a structure that’s reminiscent of professional patisseries, ensuring a melt-in-your-mouth experience that elevates homemade chocolate mousse to new heights.
Unbeatable Texture: Scientifically, the extra airy texture comes from the stabilization of air in the egg whites and whipped cream, which forms a stable foam when combined with the cooled melted chocolate. The high fat content in the dark chocolate and heavy cream helps emulsify the mixture, preventing separation and locking in that silky smoothness. This results in a mousse that’s not just creamy but also resilient, holding its shape while delivering a delightful contrast of lightness and richness.
Foolproof for a Reason: We’ve tested this Chocolate Mousse Cups Recipe multiple times in various home kitchens to guarantee success, even for beginners. The straightforward steps minimize errors, and by emphasizing precise folding, we ensure consistent results every time. It’s reliable, scalable, and adaptable, making it the best chocolate mousse recipe for anyone looking to impress without complication.
Ingredient Spotlight: Quality Makes the Difference
When it comes to crafting the perfect Chocolate Mousse Cups Recipe, selecting top-notch ingredients is key to achieving that extra airy, silky smooth texture. Let’s break down each main component and why it matters.
First, 200g high-quality dark chocolate (70% cocoa or more) serves as the foundation of flavor and structure. This ingredient provides the deep, intense chocolate taste that defines a superior mousse, with its high cocoa content contributing to a rich, velvety mouthfeel. Opt for brands without additives for the purest results—imitation chocolate can result in a waxy texture. If you’re out of dark chocolate, a good substitute is semi-sweet chocolate baking bars, but stick to at least 60% cocoa to maintain the recipe’s extra airy balance.
Next, 300ml heavy cream is essential for whipping into soft peaks, which adds the creamy body that makes this Chocolate Mousse Cups Recipe so irresistible. The fat content in heavy cream ensures stability and helps create that light, airy foam when folded. Always use fresh, full-fat cream for the best results; low-fat versions won’t whip properly. A tested substitution is coconut cream for a dairy-free option, which maintains the creaminess while adding a subtle tropical note.
Then, 3 large egg whites play a crucial role in achieving the extra airy texture by providing volume and lift when beaten with sugar. Fresh, room-temperature eggs whip up faster and incorporate more air, leading to a lighter mousse. Quality matters here because pasteurized eggs reduce the risk of foodborne illness. If you need to substitute, aquafaba (the liquid from canned chickpeas) works wonderfully for a vegan twist, mimicking the whipping properties without altering the final texture.
For 50g granulated sugar, this sweetens the egg whites and helps stabilize them into glossy peaks, contributing to the mousse’s structure. Use fine granulated sugar for even dissolution; alternatives like caster sugar can be swapped in for a finer grain. If you’re watching sugar intake, a one-to-one substitute like monk fruit sweetener maintains the recipe’s integrity while keeping it lower in calories.
Lastly, 1 tsp pure vanilla extract enhances the overall flavor profile, adding a warm, aromatic depth that complements the chocolate without overpowering it. Always choose pure extract for its authentic taste—imitation versions can taste artificial. A reliable substitute is vanilla bean paste for a more intense flavor, or almond extract for a nutty variation that pairs beautifully with the extra airy chocolate base.
Step-by-Step Instructions
Step 1: Melting the Dark Chocolate
Begin by melting 200g of high-quality dark chocolate using a double boiler or microwave until it’s completely smooth, then let it cool slightly for about 5 minutes. Place the chocolate in a heatproof bowl over simmering water, stirring constantly to avoid scorching, or microwave in 20-second intervals. This step ensures the chocolate is fluid and ready for incorporation without seizing up.
Pro Tip: Use a thermometer to monitor the chocolate’s temperature, aiming for around 90-100°F (32-38°C) before proceeding—this prevents the chocolate from hardening when mixed and helps achieve that extra airy texture in your Chocolate Mousse Cups Recipe.
Step 2: Whipping the Heavy Cream
In a chilled bowl, whip 300ml of heavy cream using an electric mixer on medium speed until soft peaks form, which should take about 2-3 minutes. This creates a stable base for the mousse, ensuring it holds its shape while remaining light and creamy.
Common Mistake to Avoid: Over-whipping the cream can turn it grainy, ruining the extra airy consistency. Stop as soon as soft peaks form; if it starts to stiffen, you’ve gone too far—add a splash of cold cream to salvage it.
Step 3: Beating the Egg Whites with Sugar
In a clean, dry bowl, beat 3 large egg whites with 50g granulated sugar using a mixer on high speed until glossy peaks form, about 4-5 minutes. This step incorporates air and stability into the mixture, which is vital for the mousse’s light texture.
Pro Tip: Ensure your bowl and beaters are completely free of any grease or yolk, as even a trace can prevent the egg whites from reaching full volume, compromising the extra airy quality of your Chocolate Mousse Cups Recipe.
Step 4: Folding the Mixtures Together
Gently fold the slightly cooled melted chocolate into the whipped heavy cream using a spatula, then carefully incorporate the beaten egg whites without deflating them. Stir in a figure-eight pattern to maintain as much air as possible, combining until just uniform.
Common Mistake to Avoid: Over-mixing at this stage can deflate the egg whites, leading to a dense mousse instead of the desired extra airy texture. Fold just until no streaks remain to preserve the lightness.
Step 5: Filling and Chilling the Cups
Spoon or pipe the mixture into serving cups, dividing it evenly among 4 portions. Refrigerate for at least 2 hours to set, allowing the flavors to meld and the texture to firm up slightly while retaining its extra airy feel.
Pro Tip: For the best results in your Chocolate Mousse Cups Recipe, chill the cups in the fridge beforehand—this helps the mousse set faster and enhances the overall silky smooth experience.
Serving & Presentation
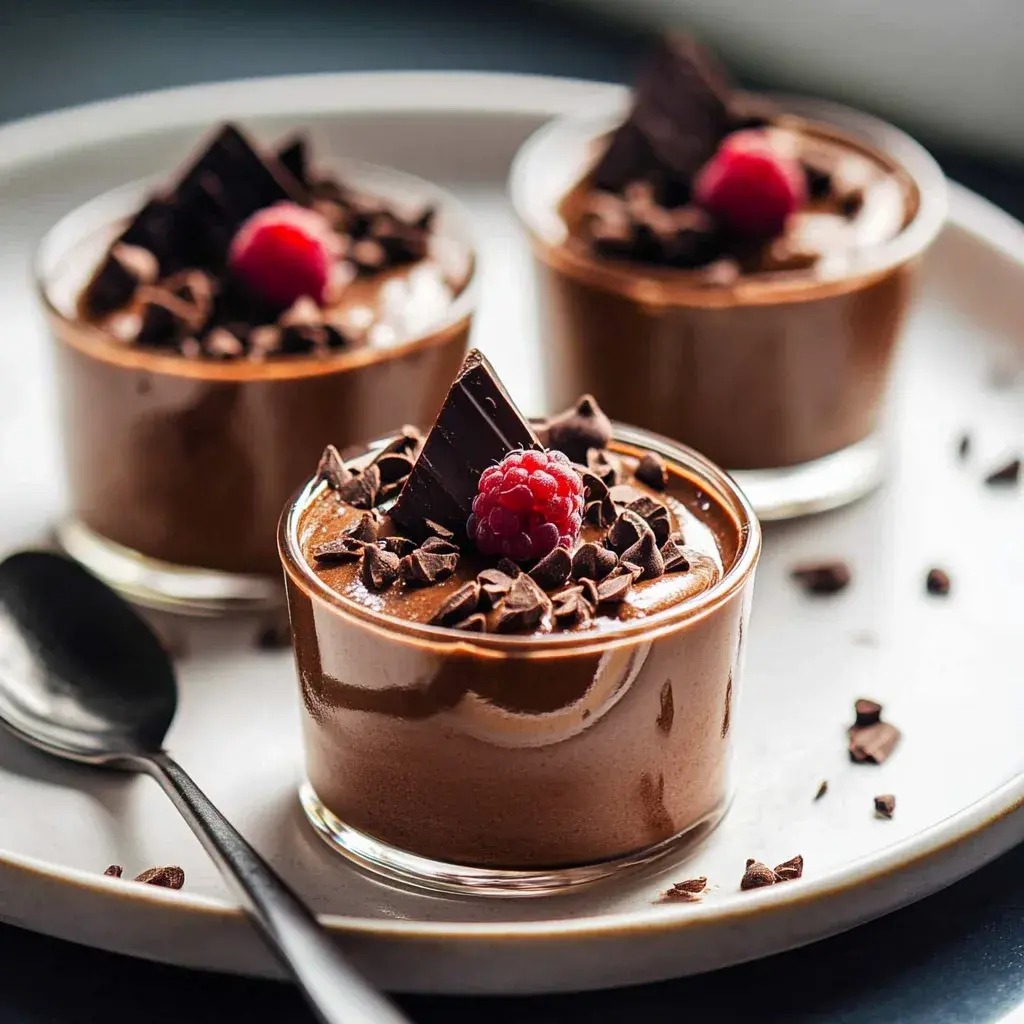
Elevate your Chocolate Mousse Cups Recipe with creative plating that turns a simple dessert into a showstopper. Layer the mousse in elegant glass cups or ramekins for a visually appealing effect, allowing the extra airy texture to shine through as it wobbles slightly. Garnish with fresh berries like raspberries or strawberries for a burst of tartness that contrasts the rich chocolate, or add chocolate shavings and a mint sprig for an Instagram-worthy touch. This not only enhances the presentation but also adds complementary flavors and textures.
For the best pairing, serve these mousse cups alongside a light main course like grilled chicken with vegetables, as the dessert’s lightness won’t overwhelm the palate. If you’re hosting a dinner party, pair it with coffee or a fruity wine to cleanse the taste buds, making it an ideal ending to a meal. The extra airy quality makes this recipe versatile for any occasion, ensuring it’s as delicious as it is beautiful.
Make-Ahead & Storage Solutions
Make-Ahead Strategy: Prepare the mousse mixture up to 24 hours in advance by following the steps through folding, then store it covered in the refrigerator. For components, whip the cream and beat the egg whites separately up to 3 days ahead, keeping them chilled in airtight containers to maintain freshness—just fold everything together right before serving to preserve the extra airy texture of your Chocolate Mousse Cups Recipe.
Storing Leftovers: To keep leftovers fresh, cover the mousse cups tightly with plastic wrap or transfer to an airtight container and refrigerate for up to 3 days. Avoid exposing them to air, as this can cause the texture to harden; for longer storage, freeze in freezer-safe containers for up to 1 month, though the extra airy quality may slightly diminish upon thawing.
The Best Way to Reheat: This mousse is best enjoyed cold, but if you need to soften it, let it sit at room temperature for 10-15 minutes. For frozen portions, thaw overnight in the fridge and avoid microwaving, as it can melt the structure and lose the signature extra airy feel—simply refresh with a quick chill if needed.
Frequently Asked Questions (FAQ)
How long does it take to prepare Chocolate Mousse Cups?
Preparing Chocolate Mousse Cups takes about 15 minutes of active time, with an additional 2 hours of chilling in the refrigerator. Unlike baked goods, this recipe doesn’t require oven time, making it a quick and easy chocolate mousse option for busy evenings. The extra airy texture develops during chilling, so patience is key for the best results.
Can I substitute butter for another ingredient in Chocolate Mousse Cups?
This recipe doesn’t use butter, but if you’re looking to adapt it, you might wonder about substitutions for the heavy cream. Heavy cream can be swapped with coconut cream for a dairy-free version, which maintains the extra airy texture while adding a subtle flavor. Always test substitutions in small batches to ensure the final consistency remains light and creamy in your Chocolate Mousse Cups.
What are some tips for making Chocolate Mousse Cups extra light and fluffy?
To achieve the extra airy texture in Chocolate Mousse Cups, focus on gentle folding techniques when combining the ingredients, and ensure your egg whites are beaten to stiff peaks without over-mixing. Use fresh, cold heavy cream for whipping, and chill your bowls beforehand. Additionally, letting the chocolate cool slightly before incorporating it prevents deflating the mixture, resulting in a flawless, homemade chocolate mousse.
How should I store homemade Chocolate Mousse Cups for maximum freshness?
Store homemade Chocolate Mousse Cups in the refrigerator in an airtight container for up to 3 days to maintain their extra airy texture and prevent absorption of odors. If freezing, wrap portions tightly and keep for up to a month, thawing in the fridge overnight. Always cover them to avoid any moisture buildup, ensuring they stay as fresh as when first made.
Can I make this recipe vegan or gluten-free?
Yes, you can easily adapt this Chocolate Mousse Cups Recipe to be vegan or gluten-free. For a vegan version, substitute the heavy cream with full-fat coconut cream and use aquafaba instead of egg whites, while opting for dairy-free dark chocolate. This keeps the extra airy texture intact. As for gluten-free, the recipe is naturally gluten-free since it contains no flour or wheat-based ingredients, so no changes are needed—just verify that your chocolate is certified gluten-free.
Tried This Recipe? Leave a Comment!
Did you make this Chocolate Mousse Cups Recipe? I’d love to hear how it turned out! Please leave a comment and a rating below. Your feedback helps other home cooks and supports cookingwithemy.
For more delicious inspiration, follow me on Pinterest!

Chocolate Mousse Cups Recipe
Description
Indulge in the luxurious experience of homemade Chocolate Mousse Cups, a dessert that effortlessly combines rich flavor and airy texture. Perfect for any occasion—be it a dinner party or a cozy night in—these delightful treats are sure to impress. With just a handful of simple ingredients, you can craft these creamy cups that are both visually stunning and utterly delicious. Each spoonful offers a velvety mouthfeel, making it hard to stop at just one!
Ingredients
- 200g high-quality dark chocolate (70% cocoa or more)
- 300ml heavy cream
- 3 large egg whites
- 50g granulated sugar
- 1 tsp pure vanilla extract
Instructions
- Melt the dark chocolate using a double boiler or microwave until smooth; let cool slightly.
- In a chilled bowl, whip the heavy cream until soft peaks form.
- In another clean bowl, beat egg whites with sugar until glossy peaks form.
- Fold melted chocolate into whipped cream, then gently incorporate egg whites without deflating.
- Spoon or pipe the mixture into serving cups and refrigerate for at least 2 hours before serving.
Notes
– Experiment with flavors by adding espresso powder or orange zest.– For an elegant touch, garnish with fresh berries or chocolate shavings.
Nutrition
- Calories: 250
- Fat: 18g
- Carbohydrates: 20g
- Protein: 4g
Conclusion
This delightful recipe brings together warm, comforting flavors that make it perfect for fall gatherings or a cozy night in. Its simple preparation highlights the natural sweetness and spices, creating a dish that’s both satisfying and easy to customize. For a fresh variation, try adding a sprinkle of cinnamon on top before serving. If you’re craving more seasonal treats, you might also enjoy the Easy No Bake Pumpkin Mini Cheesecakes or the Easy No-Bake Cream Cheese Peanut Butter Pie Recipe.
