Table of Contents
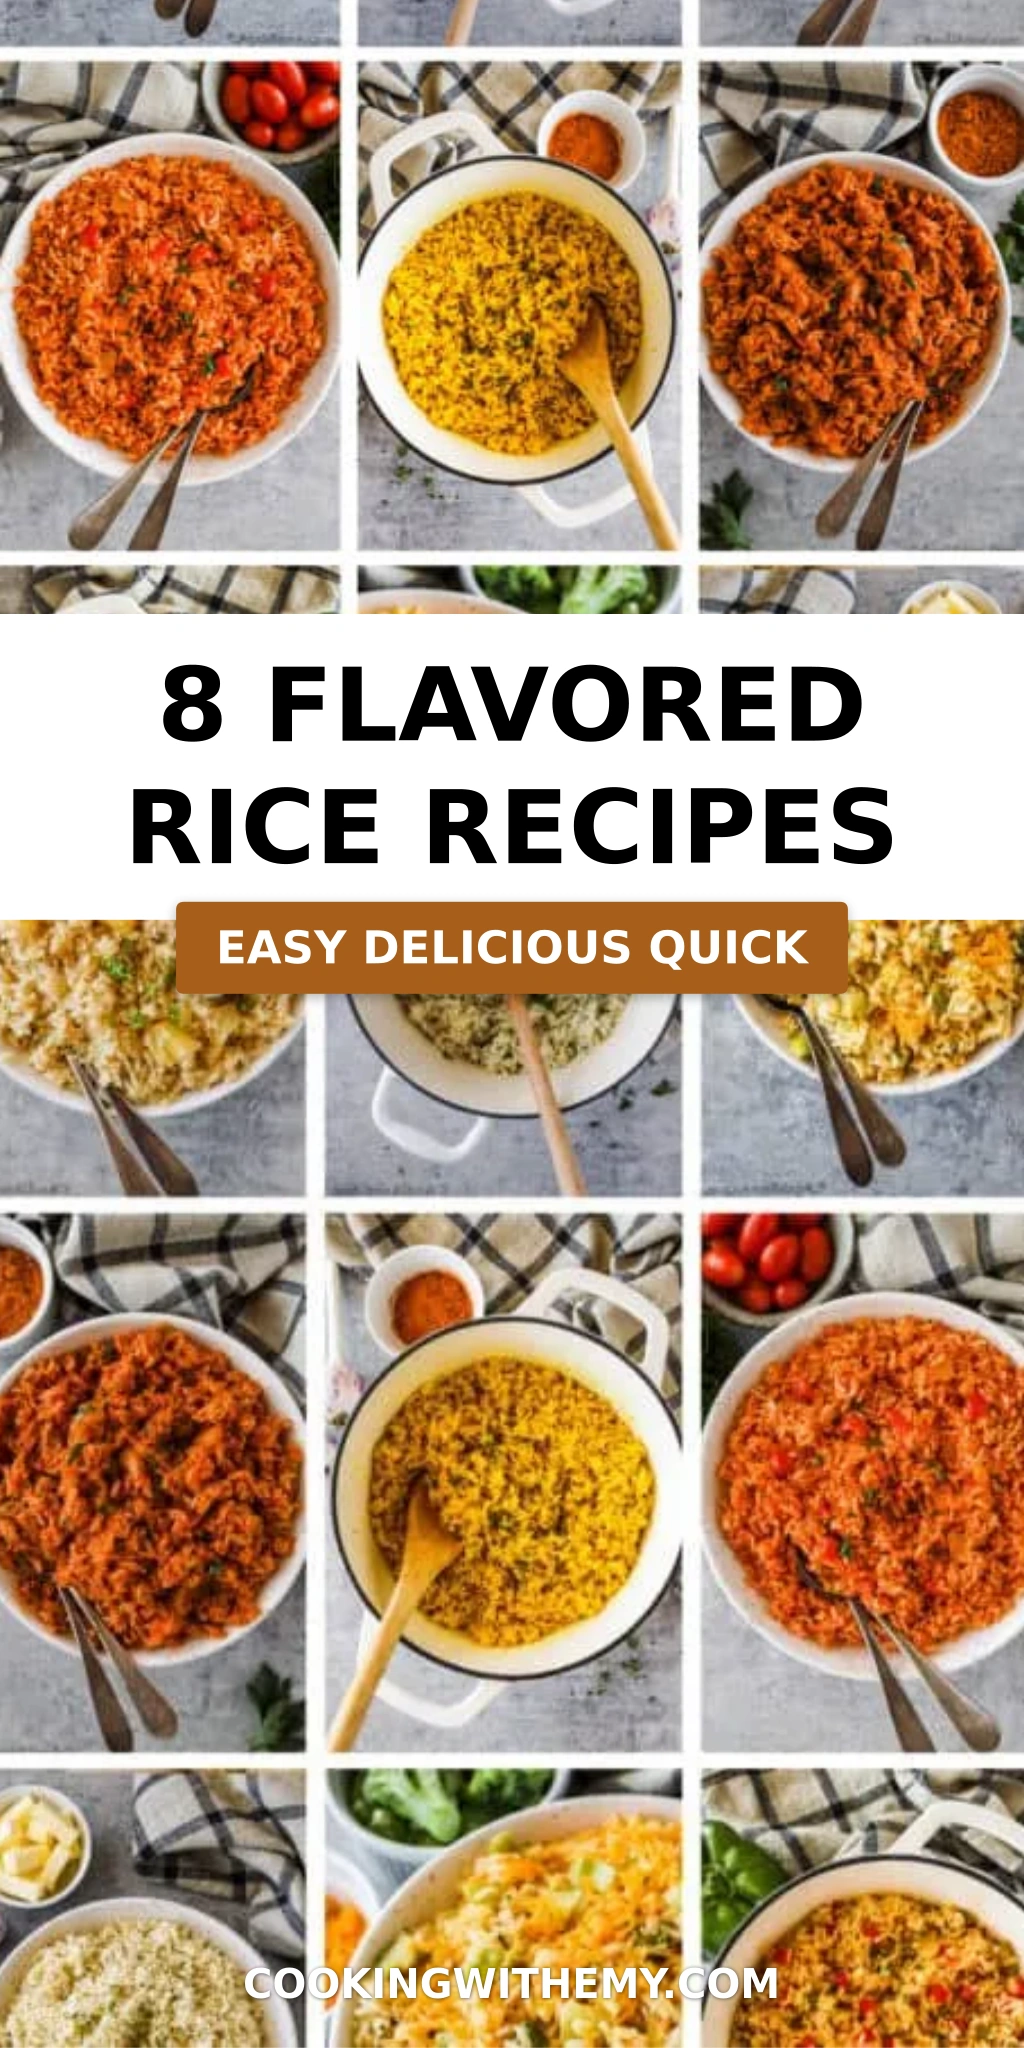
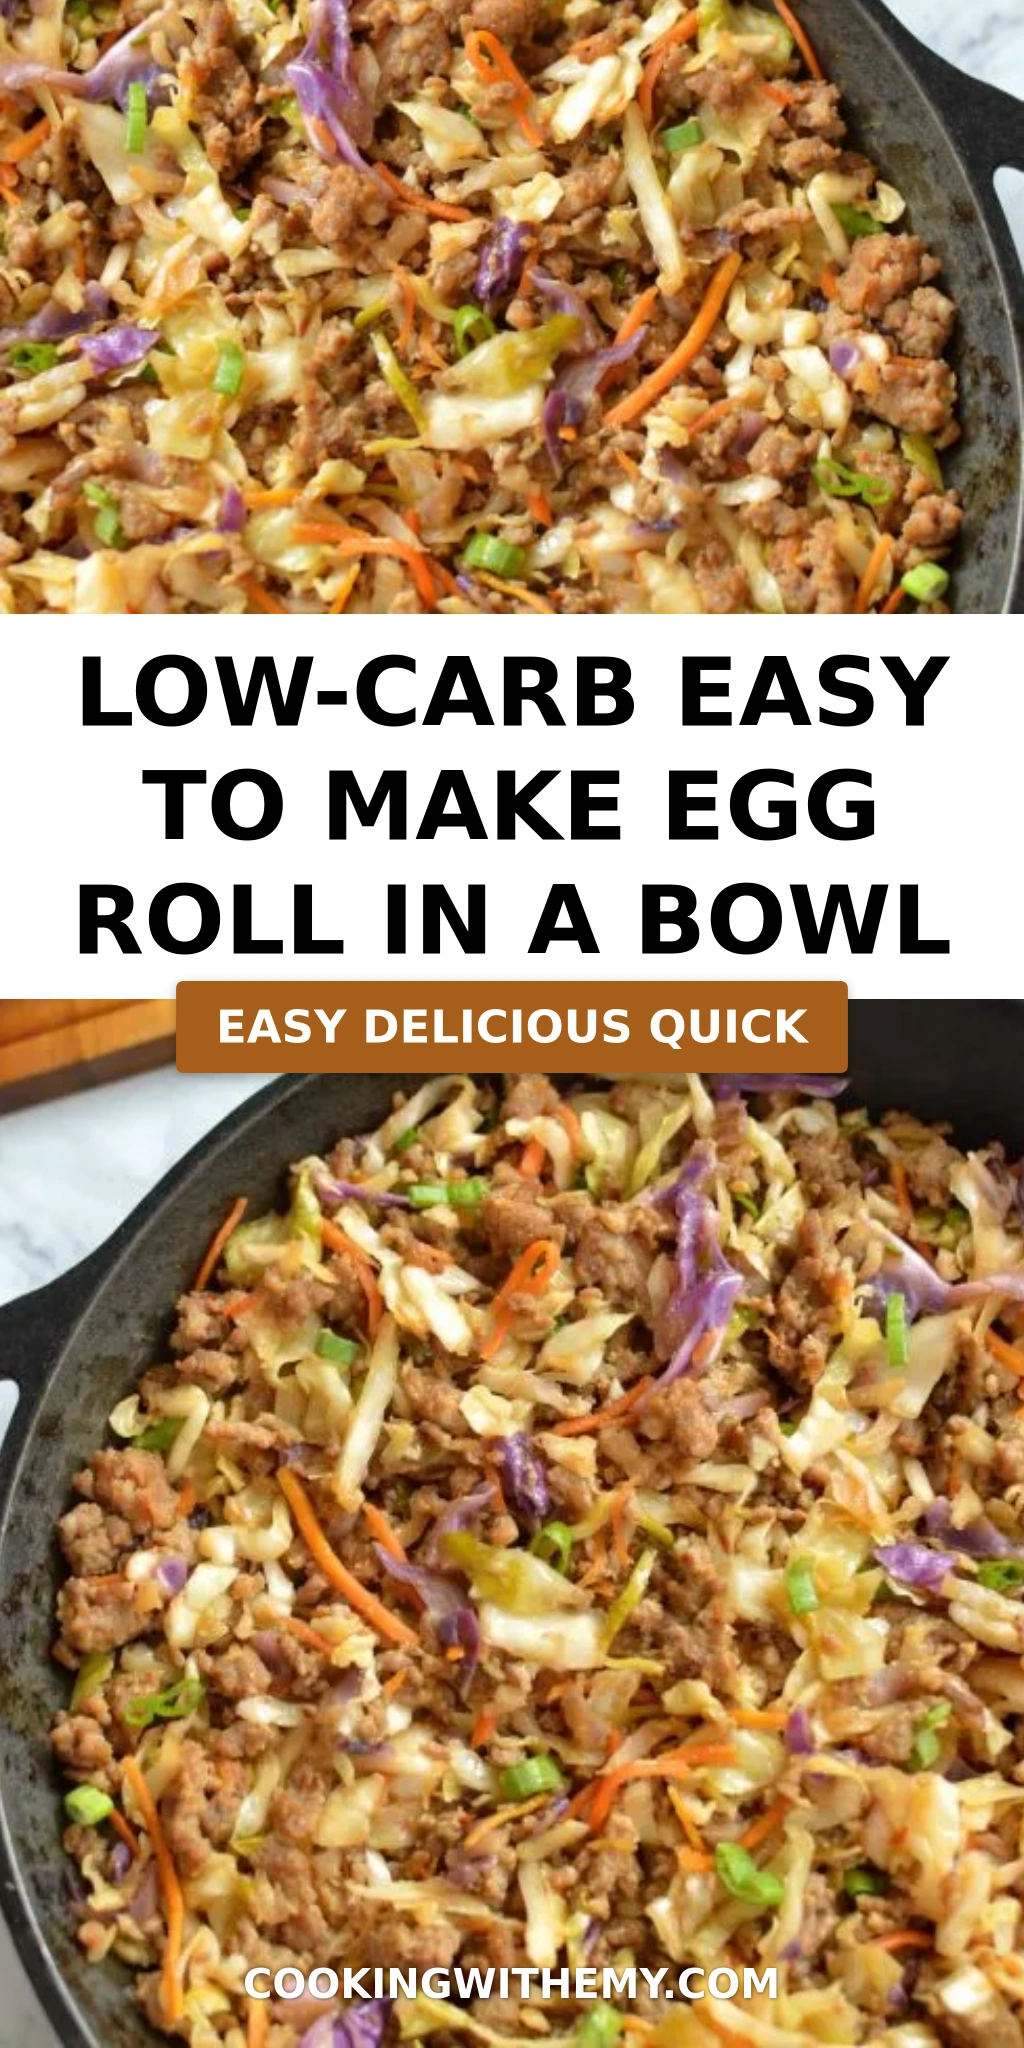
Low Carb Easy Egg Roll in a Bowl – Quick 15-Minute One-Pan Recipe
Growing up in Morocco, my mother would pack the most incredible stuffed vegetables and pastries—always with a little bundle of herbs and spices that made the kitchen smell like a souk. But it wasn’t until I trained at Le Cordon Bleu in Paris that I learned how to take those bold flavors and shrink them into a quick one-pan meal. This low carb egg roll in a bowl brings me right back: it’s a deconstructed egg roll with all the savory, gingery, garlicky crunch, but none of the wrappers and none of the fuss. And the best part? It takes only 15 minutes from start to finish. Yes – that’s the easy egg roll in a bowl recipe you’ve been searching for.
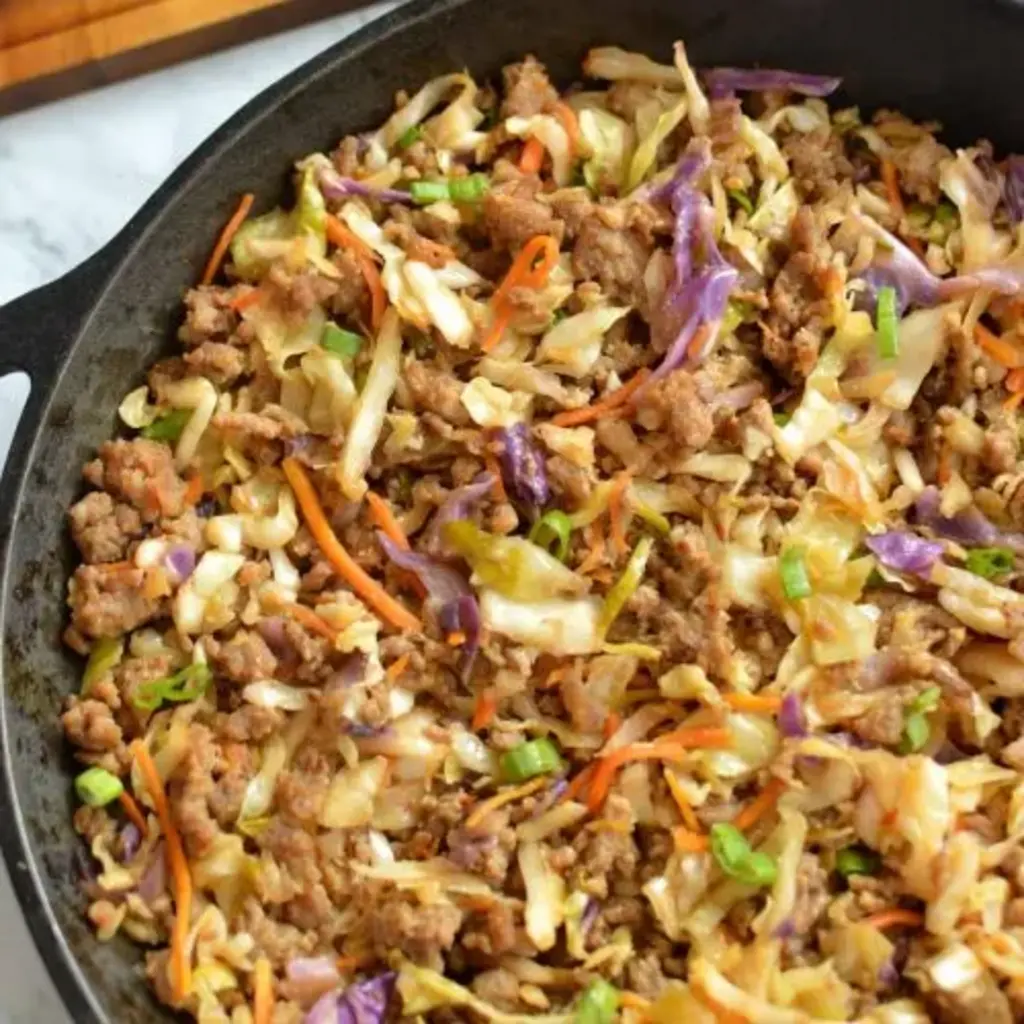
Imagine the sizzle of ground sausage hitting a hot pan, the scent of ginger and garlic blooming under your nose, and then the soft rustle of coleslaw mix as it folds into the meat. The result is a bowl full of warmth: tender, slightly spicy, with a subtle sweetness from the cabbage and a pop of red pepper flakes. You get the classic egg-roll experience without the fried shell – just pure, comforting, low-carb goodness. Even my father, who usually eyes any “healthy” dish with suspicion, cleaned his bowl and asked for seconds.
I’ve made this dish a staple in my NYC kitchen because it’s the perfect weeknight lifesaver. But here’s the secret: using a good-quality ground sausage (I love chicken or pork from the Union Square Greenmarket) gives you built-in seasoning and fat, so you don’t need a dozen extra ingredients. I’ll share my pro tip for keeping the bowl from getting watery, and a common mistake to avoid that many home cooks make. By the end, you’ll know exactly how to make this low carb egg roll bowl your own – whether you’re feeding a crowd or just meal-prepping for a busy week ahead.
Why This Low Carb Egg Roll Bowl Recipe Is the Best
The Flavor Secret. Growing up, my mother always said, “The soul of a dish is in the first layer of fat that hits the pan.” For this easy egg roll in a bowl recipe, I use a flavorful ground sausage rather than plain ground pork. The sausage brings aromatics like fennel, sage, and black pepper, which complement the ginger and soy sauce beautifully. It’s a trick I picked up in Paris: use a protein that already carries seasoning, and you skip three steps without sacrificing depth. Plus, the rendered fat helps the coleslaw wilt perfectly.
Perfected Texture. The biggest challenge with any deconstructed egg roll is avoiding a sad, soggy mess. My technique? Cook the sausage until it’s deeply browned and almost crispy on the edges. That browning creates flavor crystals (the Maillard reaction, as we call it in culinary school) and also releases enough fat to sauté the cabbage without added oil. Then, when you add the coleslaw mix, toss it quickly and cook for only 2–3 minutes – just until it’s wilted but still has a slight bite. This gives you that satisfying crunch that makes you forget the wrapper.
Foolproof & Fast. I’m a busy mom and a professional chef – I need recipes that work every single time without a list of exotic ingredients. This one uses seven simple items you probably already have in your fridge and pantry. The coleslaw mix is a huge time-saver (no shredding cabbage!), and the one-pan cleanup is a dream. Even if you’ve never cooked an egg roll in your life, you’ll nail this on the first try. It’s truly the keto egg roll in a bowl that beginners and pros alike can bank on.
Low Carb Egg Roll in a Bowl Ingredients
Every Saturday morning, I walk to the farmers market in Union Square and pick up the week’s produce. The coleslaw mix – a blend of shredded green cabbage, red cabbage, and carrots – is my shortcut to a classic egg-roll filling without the knife work. For the sausage, I grab a pack from a local pork farm (their fennel variety is incredible). But I know not everyone has that luxury, so I’ll tell you exactly what to look for in any supermarket.
Ingredients List
- 1 pound ground sausage (pork, chicken, or turkey)
- 7 cups coleslaw mix (or shredded cabbage + a bit of shredded carrot)
- 2 tablespoons low sodium soy sauce or coconut aminos
- 1 tablespoon freshly minced ginger (or 1 teaspoon ground ginger)
- 1 teaspoon garlic powder
- ½ cup sliced green onions (scallions)
- 1 tablespoon red pepper flakes (adjust to taste)
Ingredient Spotlight
Ground sausage: This is your main source of flavor. Look for a sausage with no added sugars or fillers – usually labeled “natural” or “uncured”. If you’re avoiding pork, chicken or turkey sausage works well, but choose one with a higher fat content (around 15-20%) to keep the dish juicy. In a pinch, you can use lean ground meat and add 1 tablespoon of olive oil plus 1 teaspoon of fennel seeds and a pinch of smoked paprika to mimic sausage seasoning.
Coleslaw mix: Pre-shredded coleslaw is a game-changer because it’s already thin and uniform, so it cooks evenly in minutes. If you buy whole cabbage, use a mandoline or a sharp knife to slice it into very fine shreds – about ⅛-inch thick. The carrots in the mix add a hint of sweetness that balances the heat from the red pepper flakes.
Low sodium soy sauce or coconut aminos: Soy sauce gives that savory umami punch, but coconut aminos has about half the sodium and no soy – perfect for anyone on a strict keto or paleo diet. I tested both side-by-side: coconut aminos is slightly sweeter and milder, so you may want to add a pinch of salt if you use it. For a soy-free option, tamari or liquid aminos also work.
Ginger and garlic powder: Fresh ginger is infinitely better – its peppery, citrusy zing wakes up the whole dish. I like to mince a 1-inch knob for that fresh punch. But if you only have ground ginger, use 1 teaspoon and add it with the garlic powder. Garlic powder is more consistent than fresh minced garlic here, because it disperses evenly without burning.
| Original Ingredient | Best Substitution | Flavor / Texture Impact |
|---|---|---|
| Ground sausage (pork) | Ground turkey + 1 tbsp olive oil + 1 tsp fennel seeds | Leaner, less rich; add extra salt & spices |
| Soy sauce | Coconut aminos | Sweeter, less salty; add ¼ tsp salt if needed |
| Fresh ginger | 1 tsp ground ginger + ½ tsp lemon zest | Less zing, more earthy; lemon adds brightness |
| Coleslaw mix | Thinly sliced napa cabbage + shredded carrot | Slightly crunchier; cook 1-2 min longer |
How to Make Low Carb Egg Roll in a Bowl – Step-by-Step
This is one of those recipes that comes together faster than you can set the table. Get your ingredients ready and a large skillet or wok – a 12-inch non-stick or cast-iron works best. Let’s go!
Step 1: Cook the Sausage
Heat your skillet over medium-high heat. Add the ground sausage, breaking it up with a wooden spoon. Cook, stirring frequently, until it’s deeply browned and cooked through, about 5-6 minutes. You want some crispy edges – that’s flavor. Do not drain the fat; you’ll need it for the cabbage.
💡 emy’s Pro Tip: Let the sausage sit undisturbed for 1 minute before you start breaking it up. This gives you those beautiful golden-brown crust bits. They add incredible texture to the final bowl.
Step 2: Add the Cabbage and Aromatics
Reduce heat to medium. Add the coleslaw mix, minced ginger, and garlic powder. Toss well to combine with the sausage and fat. Cook for 2-3 minutes, stirring often, until the cabbage is wilted but still has some crunch. Don’t overcook – you want it tender-crisp, not limp.
⚠️ Common Mistake to Avoid: Dumping all the coleslaw at once and overcrowding the pan. If your pan is too full, the cabbage steams instead of sautéing. Work in batches if needed, or use a very large skillet.
Step 3: Season and Finish
Pour the soy sauce or coconut aminos evenly over the mixture. Add red pepper flakes to taste. Stir everything together and cook for 1 more minute, until the sauce is absorbed. Taste and adjust seasoning – you may want a pinch of salt or a dash more soy. Remove from heat.
💡 emy’s Pro Tip: To avoid a watery bowl, make sure the pan is hot enough when you add the cabbage. The high heat evaporates the liquid quickly. Also, do not cover the pan – steam traps liquid and makes everything soggy.
Step 4: Top and Serve
Transfer to serving bowls. Garnish with sliced green onions and an extra drizzle of soy sauce or sweet chili sauce if you like. Serve immediately while hot. The green onions add a fresh, sharp contrast that cuts through the richness.
⚠️ Common Mistake to Avoid: Adding the green onions too early – they turn slimy. Always add them raw just before serving for that perfect crunch and color.
| Step | Action | Duration | Key Visual Cue |
|---|---|---|---|
| 1 | Brown sausage | 5-6 min | Deep golden-brown, crumbly |
| 2 | Add coleslaw and seasonings | 2-3 min | Cabbage wilted but still bright, pan almost dry |
| 3 | Add soy sauce and pepper flakes | 1 min | Sauce coats everything, no standing liquid |
| 4 | Garnish and serve | 1 min | Bright green onions on top, steam rising |
Serving & Presentation
When I serve this dish in my tiny NYC apartment, I love bringing a little of my Moroccan heritage to the table. A big bowl of this egg roll mixture feels like a deconstructed briouat – all the flavors without the folding. Pile it high in a shallow bowl or a wide plate. The colorful shreds of green cabbage and carrot against the dark sausage are gorgeous on their own.
For an extra pop, I sprinkle toasted sesame seeds and a few fresh cilantro leaves over the top. The sesame adds a nutty crunch and a visual contrast. Sometimes I serve it with a side of avocado slices – the creamy richness balances the spiciness beautifully. My husband likes to add a squeeze of lime to brighten everything up.
💡 emy’s Pro Tip: If you’re entertaining, set up a “build-your-own” bowl bar with toppings like sliced jalapeños, extra soy sauce, sriracha, and chopped peanuts. Everyone loves customizing their meal – and it’s a fun way to use this healthy egg roll in a bowl as a main with no extra cooking.
| Pairing Type | Suggestions | Why It Works |
|---|---|---|
| Side Dish | Cauliflower rice, sautéed bok choy, or simple steamed edamame | Keeps it low-carb; adds bulk without starch |
| Sauce / Dip | Sweet chili sauce, sriracha mayo, or extra soy sauce with chili oil | Adds heat and tang; each brings a different vibe |
| Beverage | Unsweetened iced green tea, or a crisp dry sake | Green tea cleanses palate; sake complements umami |
| Garnish | Toasted sesame seeds, sliced green onions, cilantro, jalapeños | Adds freshness, crunch, and color |
Make-Ahead, Storage & Reheating
In my busy NYC life, weekday dinners have to be efficient. This egg roll bowl is a dream for meal prep – it keeps beautifully and actually tastes even better the next day as the flavors meld. I often double the recipe and portion it out for lunches.
| Method | Container | Duration | Reheating Tip |
|---|---|---|---|
| Refrigerator | Airtight glass container | Up to 5 days | Reheat in a non-stick skillet over medium heat, adding a splash of water or soy sauce to restore moisture. |
| Freezer | Freezer-safe zip bag, squeeze out air | Up to 3 months | Thaw overnight in fridge, then reheat in a skillet; avoid microwave to keep texture. |
| Make-Ahead | Cook fully, cool quickly, then refrigerate | Up to 3 days in advance | Store green onions separately and add fresh after reheating for best flavor. |
I personally never freeze this dish with the green onions – they get mushy. Instead, I freeze the base and toss in fresh scallions after reheating. For a quick lunch, I spoon the reheated mixture over a bed of fresh spinach or riced cauliflower. The warm meat wilts the greens perfectly, giving you a whole new meal in under two minutes.
Variations & Easy Swaps
One of the things I love about this recipe is how easily it adapts. Whether you’re avoiding certain foods or just want to play with flavors, these variations are all tested and approved by my family.
| Variation | Key Change | Best For | Difficulty Impact |
|---|---|---|---|
| Spicy Thai-style | Add 1 tbsp fish sauce, 1 tsp sriracha, and Thai basil | Umami lovers | Easy |
| Vegetarian / Vegan | Use crumbled extra-firm tofu + 2 tbsp nutritional yeast | Plant-based | Medium |
| Korean Gochujang | Swap soy for gochujang + 1 tbsp rice vinegar | Spicy & savory | Easy |
Spicy Thai-style Variation
When I’m craving the heat of a Bangkok street stall, I add a tablespoon of fish sauce (skip the soy) and a teaspoon of sriracha along with the ginger. Fresh Thai basil leaves stirred in at the end give it an anise-like perfume that reminds me of the herb markets in Marrakech. Serve with a lime wedge and extra chili flakes.
Vegetarian / Vegan Variation
For my plant-based friends, I crumble one block of extra-firm tofu into the pan and cook until golden, just like the sausage. I add two tablespoons of nutritional yeast for a cheesy, umami depth. To keep it moist, I sauté the tofu in a little toasted sesame oil before adding the cabbage. This version is just as satisfying – my daughter actually prefers it!
Korean Gochujang Variation
A few years ago, I discovered gochujang at a Korean market in Manhattan, and now I keep a tub in my fridge. For this twist, I replace the soy sauce with one tablespoon of gochujang (fermented chili paste) and one tablespoon of rice vinegar. The result is a sweet, spicy, deeply savory bowl that pairs beautifully with a quick cucumber pickle on the side.
Frequently Asked Questions
What is the best way to substitute the soy sauce in an egg roll in a bowl to keep it low-carb?
The best substitute is coconut aminos. It’s made from fermented coconut sap and contains about half the sodium of soy sauce, with a slightly sweeter, milder flavor. It’s completely soy-free and keto-friendly (only about 2 grams of carbs per tablespoon, versus less than 1 gram for soy sauce – but still very low). If you don’t have coconut aminos, you can use tamari (gluten-free soy sauce) or liquid aminos. For a DIY version, combine 1 tablespoon of water with a pinch of salt, a dash of Worcestershire sauce (check carbs), and a drop of stevia. All these options will keep your dish low-carb and delicious.
How do you prevent the egg roll in a bowl from becoming too watery or soggy?
Wateriness happens when the cabbage releases too much moisture and it doesn’t evaporate quickly enough. To avoid that, first make sure your pan is hot (medium-high heat) before adding the coleslaw. High heat helps the liquid steam off rapidly. Second, do not cover the pan – trapping steam is the enemy of a crisp-tender bowl. Third, use a coleslaw mix that is not too wet; if your bag has excess moisture, pat it dry with a clean towel. Finally, cook the sausage until it’s well-browned – the rendered fat also helps coat the cabbage and prevents sogginess. Follow these steps and you’ll get a perfectly dry, flavorful bowl every time.
Can I use ground turkey or chicken instead of pork in a low-carb egg roll in a bowl?
Absolutely – ground turkey or chicken works wonderfully. However, because these meats are leaner (especially breast meat), they can dry out. To keep the dish juicy, choose ground turkey or chicken with at least 93% lean (7% fat), or add 1 tablespoon of olive oil or avocado oil when browning. You’ll also want to season more aggressively – poultry lacks the natural flavor of pork sausage. I recommend adding ½ teaspoon each of fennel seeds and smoked paprika, plus an extra pinch of salt. The recipe will still be low-carb, and the flavor profile will be a little lighter but equally delicious. My turkey version is a family favorite.
What are some good low-carb toppings or garnishes for an egg roll in a bowl?
There are so many ways to customize your bowl without adding carbs. My top picks are: sliced green onions (adds sharp freshness), toasted sesame seeds (nutty crunch), fresh cilantro or Thai basil (herbaceous), sliced avocado (creamy healthy fat), a drizzle of sriracha or chili oil (heat), a squeeze of lime (bright acidity), and chopped roasted peanuts or almonds (crunch – use sparingly if you watch macros). You can also sprinkle a little everything bagel seasoning or furikake (a Japanese seaweed sesame blend) for extra texture. All of these stay very low in carbs while elevating the dish to company-worthy status.
Can I make this egg roll in a bowl dairy-free and gluten-free?
Yes, this recipe is naturally dairy-free because it contains no cheese, cream, or butter – just meat and vegetables. To make it gluten-free, simply use tamari, coconut aminos, or liquid aminos instead of standard soy sauce, which contains wheat. Always check your sausages for gluten-based fillers; many brands are gluten-free, but look for a label that says “gluten-free” to be safe. Also, if you add any bottled sauces like sriracha or sweet chili sauce, make sure they are certified gluten-free. With these swaps, the dish remains full of flavor and completely free of gluten and dairy.
How many net carbs are in one serving of this low-carb egg roll in a bowl?
One serving (about 1.5 cups prepared) contains roughly 8-10 grams of net carbs, depending on your exact ingredients. The main sources of carbs are the coleslaw mix (cabbage and carrots) and the soy sauce (if using coconut aminos, add 2 extra carbs per serving). With 400 calories and plenty of protein and fat, this fits easily into a keto or low-carb lifestyle. To lower carbs further, you can reduce the amount of coleslaw mix to 5 cups and add extra greens like spinach or kale, which are very low in carbs. I always recommend tracking with your favorite app for precise numbers.
What kind of sausage works best for egg roll in a bowl?
I prefer a good-quality pork sausage with no added sugar – look for “pork breakfast sausage” or “Italian sausage” (mild or spicy). The natural seasonings like fennel, sage, and black pepper complement the ginger and soy sauce beautifully. You can also use chicken or turkey sausage, but choose one with a higher fat content (15-20% fat is ideal) to avoid dryness. For a healthier twist, I sometimes use a chicken apple sausage – the apple sweetness is subtle but adds a lovely layer. Avoid sausages with cheese or heavy fillers, as they can alter the texture and carb count.
Can I add extra vegetables to this egg roll bowl?
Absolutely – this recipe is a great base for adding more veggies. I often toss in sliced mushrooms, bell peppers, or broccoli slaw (shredded broccoli stems) along with the coleslaw mix. If you want to increase the greens, fold in a handful of baby spinach or kale during the last minute of cooking – it wilts instantly and adds nutrients without extra carbs. Just be mindful that adding more vegetables will increase the volume, so you may need a larger pan or cook in batches. Each addition will slightly change the cooking time, so use visual cues: mushrooms should release their liquid and then reabsorb it, greens should be bright and just wilted.
Share Your Version!
There’s nothing I love more than hearing how my recipes come to life in your kitchen. Did you make this low carb easy to make egg roll in a bowl? Did you add your own twist – maybe a spoonful of gochujang or a pile of crispy shallots? Let me know in the comments below! Your star rating and feedback help other home cooks find the courage to try something new.
And if you’re on Instagram or Pinterest, snap a photo of your beautiful bowl and tag me @cookingwithemy. I love seeing your colorful creations – it truly makes my day. Plus, I’m always looking for new ideas for variations, so if you tried something wild (like adding kimchi or using ground lamb), tell me all about it. Your next bowl could inspire thousands!
From my NYC kitchen to yours — I hope this recipe brings as much warmth to your table as it does to mine. — emy 🧡
Love This Recipe? Save It to Pinterest!
If you enjoyed this Low Carb Easy Egg Roll in a Bowl recipe, don’t let it get lost in your browser tabs! 😄 Pin it now so you can find it again anytime — and explore hundreds more tried-and-tested recipes waiting for you on my Pinterest boards.
👉 Follow emy on Pinterest @cookingwithemy
📌 Pin this recipe · 🔁 Re-pin your favorites · 💬 Tag me when you make it — I love seeing your creations!

LOW-CARB EASY TO MAKE EGG ROLL IN A BOWL
Description
This low carb easy to make egg roll in a bowl is an easy and delicious recipe to make on busy weeknights! Scroll down for the keto-friendly recipe that only takes 15 minutes to make!!
Ingredients
- 1 pound ground sausage
- 7 cups Coleslaw mix
- 2 tbsp low sodium soy sauce or coconut aminos
- 1 tbsp ginger
- 1 tsp garlic powder
- 1/2 cup green onions
- 1 tbsp Red pepper flakes
Instructions
- Cook sausage stirring and crumbling until cooked through.
- Stir in Coleslaw mix, garlic, ginger, soy sauce, and stir.
- Top with green onions and drizzle with more soy sauce (or coconut amino) or sweet and sour sauce.
Nutrition
- Calories: 400 kcal
Tried This Recipe? Leave a Comment!
Did you make this recipe? I’d love to hear how it turned out! Please leave a comment and a rating below. Your feedback helps other home cooks and supports cheerychop.com!
For more delicious inspiration, follow me on Pinterest!