Table of Contents
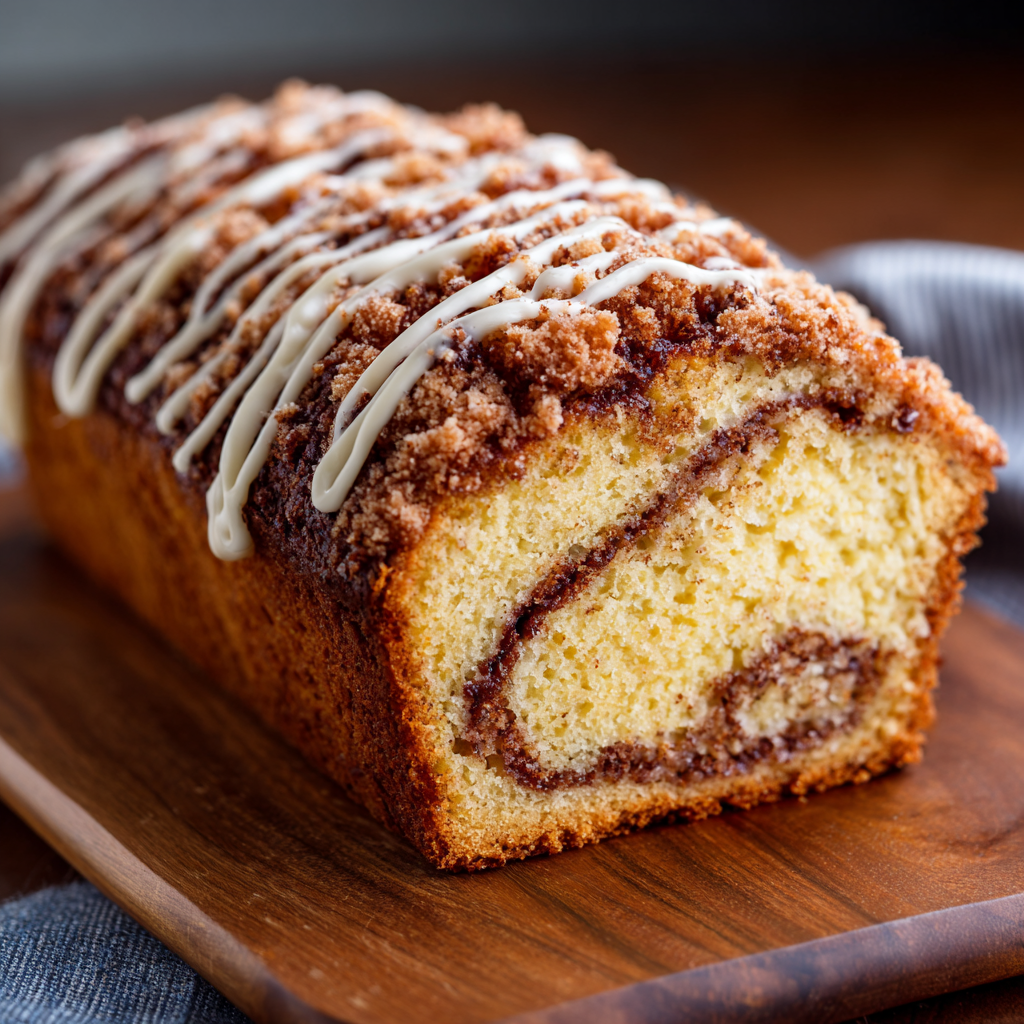
Sour Cream Coffee Cake Loaf with Crumb Topping – A Soft, Buttery Slice of Heaven
I still remember the first time I made a sour cream coffee cake loaf. I was standing in my tiny Paris apartment kitchen, the rain tapping against the window, and I had just pulled a golden, cinnamon-scented loaf from the oven. That moment — the warm, tender crumb, the crunchy streusel topping — it felt like a hug from home. Here in New York City, where I now live and cook, this sour cream coffee cake loaf has become my go-to for everything: Sunday brunches, cozy afternoon snacks, and even those late-night cravings when you just need something sweet. The sour cream is the real secret — it keeps the cake incredibly soft, moist, and tender for days.
Imagine biting into a slice: the top is a buttery, cinnamon crumble that shatters just a little, giving way to a cloud-soft, tangy-sweet cake underneath. The aroma of cinnamon and vanilla fills your kitchen, and every bite has that perfect balance of richness and lightness. It’s like a classic coffee cake but in a loaf form — easier to slice, wonderful to gift, and absolutely perfect with your morning coffee or tea. The sour cream does more than add moisture; it brings a subtle tang that cuts through the sweetness, making this loaf dangerously addictive.
This recipe is my own version, honed over years in professional kitchens. I trained in Paris, but my heart is in Morocco, where my mother taught me that the simplest ingredients — good butter, fresh eggs, a pinch of salt — are the foundation of any great dish. The unique twist here is how I handle the crumb topping: melting the butter before mixing it with the dry ingredients creates a clumpy, sandy texture that bakes into an even, crispy crust. Trust me, it’s a game-changer. I’ll also share my pro tip for getting that perfect rise every time, and the one mistake I’ve seen home bakers make that ruins a perfectly good coffee cake.
Why This Sour Cream Coffee Cake Loaf Recipe Is the Best
The Flavor Secret: The sour cream coffee cake loaf gets its incredible depth from two things: the tang of sour cream and the warmth of cinnamon. Growing up in Morocco, I learned early to appreciate layers of flavor — just like making a perfect tagine, every ingredient has a role. Here, sour cream isn’t just a moistener; it reacts with the baking soda to create a tender crumb, while providing a subtle acidity that balances the sweetness. French patisserie taught me to never underestimate the power of a good vanilla extract, and I use it generously.
Perfected Texture: The texture is what sets this loaf apart. My technique, honed during my time in Paris, ensures a velvety, even crumb. The key is creaming the butter and sugar until light and fluffy — this incorporates air, giving the cake lift. Then, alternating the dry ingredients with the sour cream keeps the batter from curdling and results in a silky-smooth mixture. The crumb topping, made with melted butter, bakes into a crisp, buttery crust that contrasts beautifully with the soft cake. It’s the best of both worlds in every slice.
Foolproof & Fast: This recipe is designed for everyone — from beginners to seasoned bakers. The instructions are straightforward, with clear visual cues like “until light and fluffy” and “a pick inserted into the center comes out clean.” The loaf pan method means no fussy layering, just one beautiful cake. I’ve tested it over and over in my NYC kitchen, and it works perfectly every time. Plus, the ingredients are all pantry staples you probably already have. It’s the kind of recipe you’ll come back to again and again.
Sour Cream Coffee Cake Loaf Ingredients
I source my ingredients from small, local markets around New York. The flour comes from a mill upstate, the butter from a creamery in Vermont, and the cinnamon — well, that reminds me of the souks in Marrakech, where the spice merchants pile cinnamon sticks into fragrant mountains. For this sour cream coffee cake loaf, you want the freshest, highest quality you can find. Every ingredient plays a role in creating that perfect loaf.
Ingredients List
- 1/3 cup firmly packed light or dark brown sugar
- 1/2 cup all-purpose flour
- 1 teaspoon ground cinnamon
- pinch salt
- 3 tablespoons unsalted butter (melted)
- 1 1/2 cups all-purpose flour
- 3/4 teaspoon baking powder
- 1/4 teaspoon baking soda
- 1/4 teaspoon salt
- 1/2 cup unsalted butter (softened)
- 1/2 cup granulated sugar
- 2 large eggs
- 1 teaspoon vanilla extract
- 1/2 cup sour cream
Ingredient Spotlight
Sour Cream: This is the star of the show. Sour cream adds moisture, tenderness, and a subtle tang that brightens the whole cake. In US grocery stores, look for full-fat sour cream for the best texture — low-fat or non-fat versions contain more water and less fat, which can make the cake drier. If you’re in a pinch, you can substitute with full-fat plain Greek yogurt; the texture will be similar, though slightly less rich.
Butter: I use unsalted butter to control the salt level. The butter is used twice: melted for the crumb topping and softened for the cake batter. For the cake, you want the butter at room temperature — soft to the touch but not melted. This is crucial for creaming properly with the sugar, which creates the airy structure. If you only have salted butter, reduce the added salt by 1/4 teaspoon.
Cinnamon: A good-quality cinnamon is key. I prefer Ceylon cinnamon for its delicate, floral sweetness, but Cassia cinnamon (the more common type in US stores) works beautifully too. The smell of cinnamon always takes me back to my mother’s kitchen in Morocco. A pinch of salt in the topping is non-negotiable — it prevents the crumb from tasting flat.
Baking Powder & Baking Soda: This combination ensures the perfect rise. The baking powder provides the main lift, while the baking soda reacts with the acidic sour cream to create a tender, even crumb. Make sure your baking powder is fresh — if it’s more than six months old, it may lose its potency. To test, drop a teaspoon into hot water; if it fizzes vigorously, it’s good to go.
| Original Ingredient | Best Substitution | Flavor / Texture Impact |
|---|---|---|
| Sour Cream | Full-fat plain Greek yogurt | Similar texture, slightly less rich, slightly more tangy |
| Unsalted butter (for cake) | Margarine or shortening | Less buttery flavor, may alter texture — best to stick with butter |
| All-purpose flour | Cake flour | Softer, more tender crumb; use 1 cup plus 2 tablespoons cake flour per cup all-purpose |
| Brown sugar | Coconut sugar | Less sweet, slightly caramel-like flavor; crumb may be less crisp |
| Vanilla extract | Vanilla bean paste or 1 vanilla bean, split | More intense vanilla flavor, visible vanilla seeds for a gourmet look |
How to Make Sour Cream Coffee Cake Loaf — Step-by-Step
Let me walk you through each step — I promise it’s simpler than it sounds. With a few pro tips from my kitchen, you’ll be pulling a perfect loaf out of the oven in no time.
Step 1: Make the Crumb Topping
In a small bowl, combine 1/3 cup firmly packed brown sugar, 1/2 cup flour, 1 teaspoon cinnamon, and a pinch of salt. Stir with a fork to break up any lumps. Pour in the 3 tablespoons of melted butter and mix until the mixture looks like coarse, damp sand. Some clumps are good — they’ll bake into crunchy pieces. Set aside while you prepare the batter.
💡 emy’s Pro Tip: Use your fingers to work the butter into the dry ingredients if the fork isn’t getting it clumpy enough. This creates those beautiful, buttery clusters that make the best streusel.
Step 2: Preheat and Prepare the Pan
Preheat your oven to 350°F (175°C). Line a 9″ x 5″ loaf pan with parchment paper, leaving about 2 inches of overhang on the long sides — this will be your handle for lifting the cake out later. Lightly grease the parchment paper with a bit of butter or non-stick spray. If you don’t have parchment, you can grease the pan directly, but parchment makes removal a breeze.
⚠️ Common Mistake to Avoid: Don’t skip greasing the parchment! Even non-stick parchment needs a light coating of fat to ensure the cake releases cleanly. I learned this the hard way when a beautiful loaf stuck to the paper.
Step 3: Mix Dry Ingredients
In a medium bowl, whisk together 1 1/2 cups flour, 3/4 teaspoon baking powder, 1/4 teaspoon baking soda, and 1/4 teaspoon salt. Set aside. Whisking aerates the mixture and ensures the leavening agents are evenly distributed throughout the flour, which prevents bitter spots and ensures an even rise.
💡 emy’s Pro Tip: If your flour has been sitting in the pantry for a while, consider sifting it. This adds even more air and helps create a lighter cake. I always sift when I’m using older flour.
Step 4: Cream Butter and Sugar
Using an electric mixer on medium speed, beat 1/2 cup softened unsalted butter and 1/2 cup granulated sugar together until light and fluffy — about 2-3 minutes. You’ll see the mixture turn pale and increase in volume. This is the most important step for texture: the air bubbles you create here will expand in the oven, giving the cake its lift.
⚠️ Common Mistake to Avoid: Don’t rush this step. The mixture should look pale, almost white, and fluffy. If you stop too early, the cake will be dense. Also, make sure your butter is truly at room temperature — if it’s too cold, it won’t cream properly.
Step 5: Add Eggs and Vanilla
Add the 2 large eggs, one at a time, mixing well after each addition until fully incorporated. Scrape down the sides of the bowl with a spatula as needed. Then mix in 1 teaspoon vanilla extract. The batter should be smooth and glossy. If it looks curdled at this point, don’t panic — just make sure your eggs are at room temperature to emulsify properly with the butter.
💡 emy’s Pro Tip: To get eggs to room temperature quickly, place them in a bowl of warm (not hot) water for 5 minutes before cracking. Cold eggs can cause the butter to seize up, creating a lumpy batter.
Step 6: Alternate Flour and Sour Cream
Reduce the mixer speed to low. Add the flour mixture in three portions, alternating with two portions of sour cream (1/2 cup total). Start and end with the flour. Mix just until combined after each addition — overmixing will develop gluten and make the cake tough. The final batter will be thick, creamy, and slightly shiny.
⚠️ Common Mistake to Avoid: Overmixing is the number one killer of tender cakes. As soon as you see the last streaks of flour disappear, stop the mixer. A few small lumps are fine — they’ll disappear during baking.
Step 7: Transfer to Pan and Topping
Transfer the batter to the prepared loaf pan and spread it evenly with a spatula or the back of a spoon. Sprinkle the reserved crumb topping evenly over the top. Don’t pack it down — let the crumbs sit on the surface. This will create that beautiful, crackly crust as the cake bakes.
💡 emy’s Pro Tip: Gently press some of the crumbs into the batter with your fingertips — this helps them adhere and creates a more integrated, buttery layer. But leave most of the crumbs loose for maximum crunch.
Step 8: Bake and Cool
Bake for 40 to 45 minutes, or until the cake is deeply golden brown and a toothpick or skewer inserted into the center comes out clean with just a few moist crumbs (not wet batter). The crumb topping should be caramelized and fragrant. Let the cake cool in the pan on a wire rack for 15 minutes. Then, use the parchment overhang to lift it out and transfer it directly to the rack to cool completely.
⚠️ Common Mistake to Avoid: Don’t let the cake cool completely in the pan — the trapped steam will make the bottom soggy and the crumb topping soft. The 15-minute rest is perfect for the structure to set, then get it out to let the air circulate.
| Step | Action | Duration | Key Visual Cue | |||||||||||||||||||||||||||||||||||||||||||||||||||||||||||||||||||||||||||||||||||||||||||||||||||||||||||||||||||||||||||||||||||||||||||||||||||||||||||||||||||||||||||||||||||||||||||||||||||||||||||||||||||||||||||||||||||||||||||||||||||||||||||||||||||||||||||||||||||||||||||||||||||||||||||||||||||||||||||||||||||||||||||||||||||||||||||||||||||||||||||||||||||||||||||||||||||||||||||||||||||||||||||||||||||||||||||||||||||||||||||||||||||||||||||||||||||||||||||||||||||||||||||
|---|---|---|---|---|---|---|---|---|---|---|---|---|---|---|---|---|---|---|---|---|---|---|---|---|---|---|---|---|---|---|---|---|---|---|---|---|---|---|---|---|---|---|---|---|---|---|---|---|---|---|---|---|---|---|---|---|---|---|---|---|---|---|---|---|---|---|---|---|---|---|---|---|---|---|---|---|---|---|---|---|---|---|---|---|---|---|---|---|---|---|---|---|---|---|---|---|---|---|---|---|---|---|---|---|---|---|---|---|---|---|---|---|---|---|---|---|---|---|---|---|---|---|---|---|---|---|---|---|---|---|---|---|---|---|---|---|---|---|---|---|---|---|---|---|---|---|---|---|---|---|---|---|---|---|---|---|---|---|---|---|---|---|---|---|---|---|---|---|---|---|---|---|---|---|---|---|---|---|---|---|---|---|---|---|---|---|---|---|---|---|---|---|---|---|---|---|---|---|---|---|---|---|---|---|---|---|---|---|---|---|---|---|---|---|---|---|---|---|---|---|---|---|---|---|---|---|---|---|---|---|---|---|---|---|---|---|---|---|---|---|---|---|---|---|---|---|---|---|---|---|---|---|---|---|---|---|---|---|---|---|---|---|---|---|---|---|---|---|---|---|---|---|---|---|---|---|---|---|---|---|---|---|---|---|---|---|---|---|---|---|---|---|---|---|---|---|---|---|---|---|---|---|---|---|---|---|---|---|---|---|---|---|---|---|---|---|---|---|---|---|---|---|---|---|---|---|---|---|---|---|---|---|---|---|---|---|---|---|---|---|---|---|---|---|---|---|---|---|---|---|---|---|---|---|---|---|---|---|---|---|---|---|---|---|---|---|---|---|---|---|---|---|---|---|---|---|---|---|---|---|---|---|---|---|---|---|---|---|---|---|---|---|---|---|---|---|---|---|---|---|---|---|---|---|---|---|---|---|---|---|---|---|---|---|---|---|---|---|---|---|---|---|---|---|---|---|---|---|---|---|---|---|---|---|---|---|---|---|---|---|---|---|---|---|---|---|---|---|---|---|---|---|---|---|---|---|---|---|---|---|---|---|---|---|---|---|---|---|---|---|---|---|---|---|---|---|---|---|---|---|---|---|---|---|---|---|---|---|---|---|---|---|---|---|
| 1 | Make crumb topping | 2 mins | Mixture looks like damp sand with clumps | |||||||||||||||||||||||||||||||||||||||||||||||||||||||||||||||||||||||||||||||||||||||||||||||||||||||||||||||||||||||||||||||||||||||||||||||||||||||||||||||||||||||||||||||||||||||||||||||||||||||||||||||||||||||||||||||||||||||||||||||||||||||||||||||||||||||||||||||||||||||||||||||||||||||||||||||||||||||||||||||||||||||||||||||||||||||||||||||||||||||||||||||||||||||||||||||||||||||||||||||||||||||||||||||||||||||||||||||||||||||||||||||||||||||||||||||||||||||||||||||||||||||||||
| 2 | Preheat and prepare pan | 5 mins | Parchment overhanging by 2 inches on long sides | |||||||||||||||||||||||||||||||||||||||||||||||||||||||||||||||||||||||||||||||||||||||||||||||||||||||||||||||||||||||||||||||||||||||||||||||||||||||||||||||||||||||||||||||||||||||||||||||||||||||||||||||||||||||||||||||||||||||||||||||||||||||||||||||||||||||||||||||||||||||||||||||||||||||||||||||||||||||||||||||||||||||||||||||||||||||||||||||||||||||||||||||||||||||||||||||||||||||||||||||||||||||||||||||||||||||||||||||||||||||||||||||||||||||||||||||||||||||||||||||||||||||||||
| 3 | Whisk dry ingredients | 1 min | Flour mixture is well-combined and slightly aerated | |||||||||||||||||||||||||||||||||||||||||||||||||||||||||||||||||||||||||||||||||||||||||||||||||||||||||||||||||||||||||||||||||||||||||||||||||||||||||||||||||||||||||||||||||||||||||||||||||||||||||||||||||||||||||||||||||||||||||||||||||||||||||||||||||||||||||||||||||||||||||||||||||||||||||||||||||||||||||||||||||||||||||||||||||||||||||||||||||||||||||||||||||||||||||||||||||||||||||||||||||||||||||||||||||||||||||||||||||||||||||||||||||||||||||||||||||||||||||||||||||||||||||||
| 4 | Cream butter and sugar | 2-3 mins | Pale, fluffy, almost white mixture | |||||||||||||||||||||||||||||||||||||||||||||||||||||||||||||||||||||||||||||||||||||||||||||||||||||||||||||||||||||||||||||||||||||||||||||||||||||||||||||||||||||||||||||||||||||||||||||||||||||||||||||||||||||||||||||||||||||||||||||||||||||||||||||||||||||||||||||||||||||||||||||||||||||||||||||||||||||||||||||||||||||||||||||||||||||||||||||||||||||||||||||||||||||||||||||||||||||||||||||||||||||||||||||||||||||||||||||||||||||||||||||||||||||||||||||||||||||||||||||||||||||||||||
| 5 | Add eggs and vanilla | 2 mins | Smooth, glossy, and well-emulsified | |||||||||||||||||||||||||||||||||||||||||||||||||||||||||||||||||||||||||||||||||||||||||||||||||||||||||||||||||||||||||||||||||||||||||||||||||||||||||||||||||||||||||||||||||||||||||||||||||||||||||||||||||||||||||||||||||||||||||||||||||||||||||||||||||||||||||||||||||||||||||||||||||||||||||||||||||||||||||||||||||||||||||||||||||||||||||||||||||||||||||||||||||||||||||||||||||||||||||||||||||||||||||||||||||||||||||||||||||||||||||||||||||||||||||||||||||||||||||||||||||||||||||||
| 6 | Alternate flour and sour cream | 2 mins | Thick, creamy batter, just combined | |||||||||||||||||||||||||||||||||||||||||||||||||||||||||||||||||||||||||||||||||||||||||||||||||||||||||||||||||||||||||||||||||||||||||||||||||||||||||||||||||||||||||||||||||||||||||||||||||||||||||||||||||||||||||||||||||||||||||||||||||||||||||||||||||||||||||||||||||||||||||||||||||||||||||||||||||||||||||||||||||||||||||||||||||||||||||||||||||||||||||||||||||||||||||||||||||||||||||||||||||||||||||||||||||||||||||||||||||||||||||||||||||||||||||||||||||||||||||||||||||||||||||||
| 7 | Transfer and top with crumbs |
Dalgona Coffee | Iced Latte Table of ContentsDalgona Coffee | Iced Latte – Whipped to Perfection: The Ultimate Summer Caffeine FixLet me take you back to the spring of 2020, when the world slowed down and kitchens became our sanctuaries. I was in my tiny NYC apartment, scrolling through social media, when I saw it: a cloud of whipped coffee floating on a sea of cold milk. It looked like a dream, and it tasted even better. That was my first encounter with Dalgona coffee, and I was instantly hooked. Growing up in Morocco, my mother always made thick, sweet coffee with a layer of foam, so this whipped coffee felt like a modern, globalized echo of my childhood. It’s no wonder this recipe, made with just a few pantry staples—instant coffee, sugar, and hot water—became a worldwide sensation. The unique angle here is the *technique*: whipping the mixture by hand until it forms stiff, glossy peaks, just like a French meringue. This Dalgona coffee is the perfect iced latte for anyone craving a creamy, sweet, and intensely flavorful caffeine fix in minutes. The magic of a perfect Dalgona coffee lies in its contrast. Picture this: a tall glass filled with ice-cubes and cold milk, topped with a thick, golden-brown coffee foam that is so velvety it almost doesn’t look real. The first sip is pure heaven—the cold milk sweeps over your tongue, followed by the intense, bittersweet punch of the whipped coffee. It’s like drinking a cloud. The aroma is intoxicating, a mix of freshly ground coffee and caramelized sugar. The texture is everything: the foam is airy but sturdy, holding its shape for minutes before it begins to slowly melt into the milk, creating a beautiful, marbled swirl. This is not just a drink; it’s a sensory experience that makes you slow down and savor every single sip. As a professional cook trained in Paris, I’ve spent years perfecting techniques that create airy emulsions. This Dalgona coffee recipe is a testament to how simple ingredients can yield extraordinary results when handled with a little know-how. My version emphasizes the importance of using the right ratio of instant coffee to sugar—crucial for achieving those stable, stiff peaks without any electric mixer. I also incorporate a little trick I learned in pastry school: whipping in a circular motion with a wrist flick for maximum aeration. The common mistake I see is undermixing, which leads to a runny foam. But don’t worry—I’ll walk you through every step. This is a foolproof recipe that will have you whipping up barista-worthy iced lattes in your own home. Why This Dalgona Coffee Recipe Is the BestThe Flavor Secret: The key to a wildly delicious Dalgona coffee is the balance of flavors. The instant coffee provides a deep, slightly bitter note that is perfectly counterbalanced by the sugar. My background in North African cooking taught me to layer flavors, and here, the simple combination of hot water, instant coffee, and sugar creates a complex, almost caramel-like symphony. I use a 1:1:1 ratio, which is the sweet spot for a foam that is both stable and not overly sweet. It’s a harmony born from simplicity, a lesson I carry from my mother’s kitchen in Morocco to my Parisian pastry training. Perfected Texture: Achieving the perfect silky, cloud-like texture is all about technique. From my time in Paris, I learned the importance of incorporating air gently but persistently. For Dalgona coffee, you don’t need an electric mixer—a simple whisk will do. The technique is all in the wrist: a fast, circular motion that folds air into the mixture continuously. You’ll know it’s ready when the foam is thick, glossy, and stands up in semi-stiff peaks. It should be light enough to float on the milk but dense enough to hold its shape for several minutes. This texture is what makes every sip feel luxurious and indulgent. Foolproof & Fast: Despite its dramatic look, this Dalgona coffee recipe is incredibly approachable for beginners. There’s no cooking, no complicated equipment, and you only need four basic ingredients. It comes together in under 10 minutes, making it a fantastic quick treat for a morning pick-me-up or an afternoon refreshment. Once you master the whipping motion, you’ll be able to whip up a batch in your sleep. This is the kind of recipe that builds confidence in the kitchen—simple, satisfying, and visually stunning every time. Whipped Coffee IngredientsI love gathering these simple ingredients. When I’m at the Union Square Greenmarket, I always look for fresh, local milk. My go-to for this recipe is low-fat milk, but I also love the richness of full-fat when I’m feeling indulgent. The instant coffee is the star—I always have a jar of good-quality instant coffee in my pantry, a staple I discovered in my Parisian apartment. Let’s get into the details. Ingredients List
Ingredient SpotlightInstant Coffee: This is non-negotiable for Dalgona coffee. The instant coffee is what dissolves and whips into a foam. I prefer a medium-roast instant coffee for a balanced flavor. If you’re sensitive to caffeine, decaf works perfectly and gives the same texture. Steer clear of regular ground coffee—it won’t dissolve and will result in a gritty mess. Sugar: Sugar is not just for sweetness; it’s what gives the foam its structure. It helps stabilize the air bubbles. Raw or cane sugar adds a subtle molasses note that I love, but plain white granulated sugar works just as well. Coconut sugar or brown sugar will change the color and flavor profile but can be used with good results. Milk: The milk is the canvas. I recommend using cold milk for the best iced latte experience. Low-fat milk provides a great base without being too heavy, but full-fat milk makes the drink incredibly creamy. For a dairy-free version, oat milk or barista-style almond milk are fantastic choices because they have a good mouthfeel and don’t curdle. Always remember to use cold milk for a refreshing final drink. Hot Water: The hot water is the medium that dissolves the coffee and sugar, allowing them to be whipped. It needs to be hot (just off the boil, about 200°F) to ensure the ingredients incorporate properly. If the water is not hot enough, the mixture will be difficult to whip to stiff peaks.
How to Make Dalgona Coffee — Step-by-StepMaking this whipped coffee is so easy—it’s one of my favorite quick kitchen projects. Here’s the foolproof method I use in my NYC kitchen. Step 1: Whip the Coffee MixIn a medium-sized mug or a bowl, add the hot water, instant coffee, and sugar. Using a whisk, start whipping the mixture in a fast, circular motion. Continue whisking vigorously for about 3 to 5 minutes, until the mixture becomes thick and light-brown in color, forming semi-stiff peaks. You’ll see it transform from a dark liquid into a pale, fluffy foam. 💡 emy’s Pro Tip: Use a bowl that is wider than your mug. The larger surface area helps incorporate more air, making the whipping process faster and easier. For an even quicker whip, use a hand-held electric mixer on medium speed for 1-2 minutes. Step 2: Assemble the Iced LatteFill a tall glass with about 1 cup of ice cubes and 1 cup of cold milk. Gently spoon half of the whipped coffee mixture on top of the milk. Do not stir it yet—the visual of the dark foam floating on the white milk is part of the magic. When you’re ready to drink, stir it well to combine the coffee foam with the milk. Adjust the quantity of milk or foam to your taste. ⚠️ Common Mistake to Avoid: Whipping the foam to stiff peaks makes it harder to stir into the milk and can result in a grainy texture. Aim for semi-stiff peaks, where the foam holds its shape but still has a soft, billowy consistency.
Serving & PresentationThis Dalgona coffee is a showstopper, so present it with flair! I love serving it in a clear highball glass so you can see the stunning layers—the ice and white milk at the bottom, crowned with the dark, whipped coffee foam. For a touch of elegance, dust the top with a little cocoa powder, cinnamon, or crushed chocolate-covered coffee beans. It’s a treat for the eyes before you even take a sip. Inspired by my NYC mornings, I often pair this iced latte with a simple, buttery croissant or a slice of banana bread. The sweetness of the coffee complements any pastry beautifully. For a more Moroccan-inspired pairing, serve it alongside a small plate of dates or a piece of kaab el ghazal (gazelle horns), a delicate almond-filled pastry. The sweet, nutty flavors are a delightful contrast to the rich coffee foam.
Make-Ahead, Storage & ReheatingI love how this recipe comes together instantly, but occasionally I want to prep ahead for a busy week. The beauty of Dalgona coffee is that it’s best enjoyed fresh, but you can absolutely make the whipped coffee foam ahead of time for a quick weekday treat. As a New Yorker, I always plan my mornings to be efficient.
If you need to store the foam, do so in the refrigerator, well-covered. It may lose some of its volume and become slightly more liquid, but a quick 30-second whisk will revive it to a beautiful, pourable consistency. I find it works best for a quick morning assembly: just add the foam to a fresh glass of milk and ice. It’s not quite as perfect as fresh, but it’s a lifesaver on a busy NYC morning. Variations & Easy SwapsThis recipe is a fantastic base for endless creativity! Here are a few of my favorite twists, from a vegan-friendly version to a taste of my Moroccan heritage. Healthy Greek Yogurt Blueberry Protein Muffins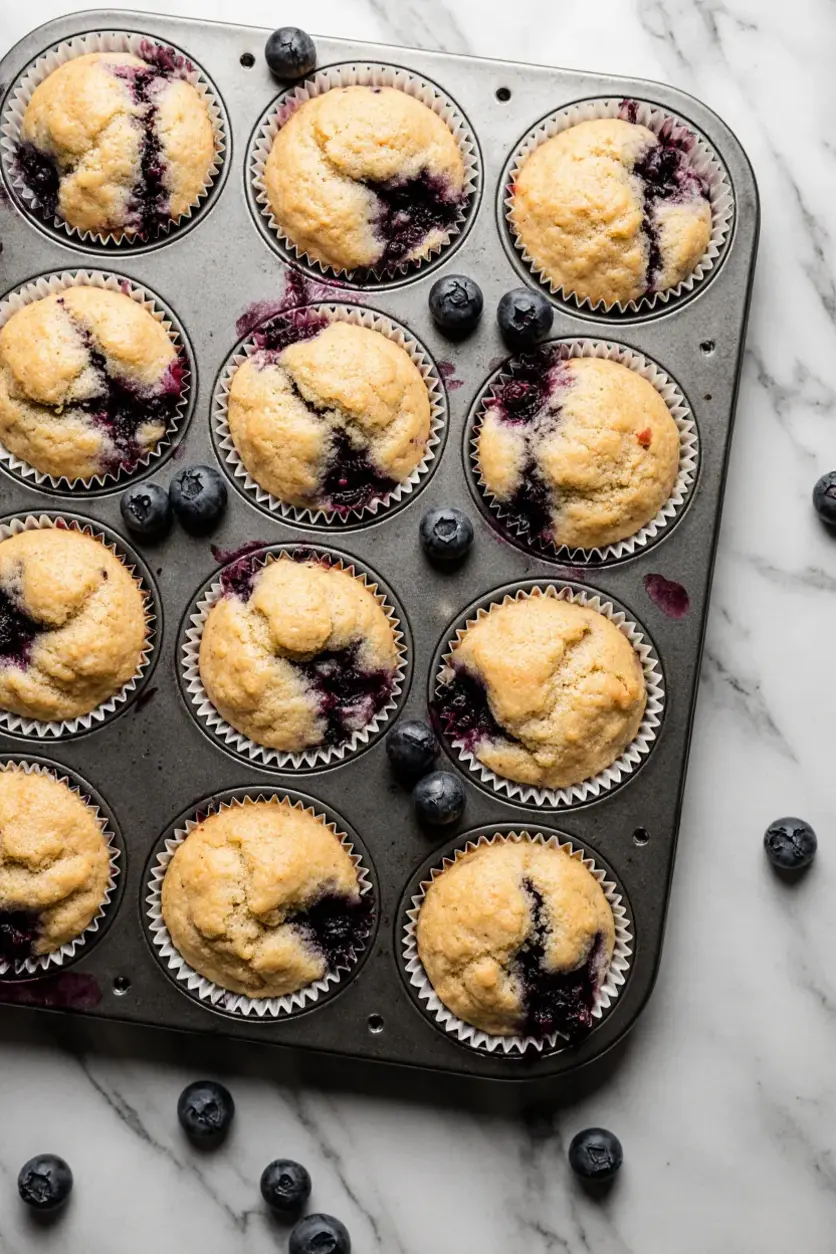 Table of ContentsHealthy Greek Yogurt Blueberry Protein Muffins – Protein-Packed with a Mediterranean Twist – A Sweet‑Savory Rocket of FlavorGrowing up in a bustling Moroccan kitchen, I learned early that a simple cup of yogurt can become a star. Fast forward to my day‑to‑day NYC life and that same principle takes flight in a sweet, protein‑packed Greek Yogurt Blueberry Muffin. These muffins punch sunshine into breakfast without the guilt—blending protein powder, Greek yogurt, and a splash of olive oil for pure Mediterranean flair. Imagine a moist crumb with a subtle almond crunch, each bite releasing a burst of fresh blueberries that cling like tiny ruby spears. There’s a whisper of vanilla, a touch of citrus zest from the vanilla‑flavored protein powder, and the gentle, buttery warmth of the olive oil. When baked, the tops darken to a golden‑brown hue that almost calls to “eat clean” while still feeling indulgent. It’s a recipe I refined over countless mornings on the Lower East Side, where grocery stalls overflow with locally sourced berries. With my background from a Parisian culinary school, I watched how a simple fraction of olive oil can moisturize and add depth, turning a routine muffin into a professional‑grade treat. Stay tuned for a pro tip that ensures the berries stay whole rather than mushy, and a common mistake I used to make—over‑mixing the batter with too much whisk! Why This Healthy Greek Yogurt Blueberry Protein Muffins Recipe Is the BestThe secret sauce? Lean protein tucked inside a soft, yogurt‑laden crumb, complemented by olive oil’s Mediterranean moisture. It gives a velvety texture that feels luxurious, yet it light enough for a quick New York breakfast. The protein powder from a French‑class kitchen adds a fine channeled flavor profile that balances the tartness of the blueberries. I optimize the batter by whisking the dry ingredients separately, then gently folding in the wet components—this avoids over‑development of gluten, keeping the muffins tender and airy. Think of the technique I honed in Paris when making croissants; the same principle of gentle folding but with a baking twist. Ready to make a hassle‑free component? The recipe is “fast‑track friendly”—you can toss the batter into a muffin tin and hit bake in under 20 minutes, which is perfect for a 9‑to‑5 New Yorker who still craves protein at dawn. Greek Yogurt Blueberry Muffins IngredientsI snag the blueberries from the morning farmers market on 5th Avenue, the flour from a specialty shop in Greenwich Village, and the yogurt from a small Mediterranean coop in Astoria. They’re the stars of this recipe, and together they blend together with a drizzle of olive oil to keep everything moist. Ingredients List
Ingredient SpotlightBlueberries – The fresher, the brighter the muffin. If you need a backup, frozen “–” yields a similar sweetness and can be tossed into the batter untreated for 2‑3 minutes to thaw. Greek Yogurt – Provides protein and keeps the crumb dense yet airy. Substituting with regular yogurt reduces protein by ~30% but still works; just add an extra teaspoon of protein powder. Extra‑Virgin Olive Oil – Adds subtle fruitiness and a silky mouthfeel. If you’re avoiding oil, swap for melted butter for a richer taste, but be aware the texture will shift slightly toward a denser crumb.
How to Make Healthy Greek Yogurt Blueberry Protein Muffins — Step-by-StepReady, set, bake! Let me walk you through each step so you can rock this recipe with confidence. Step 1: Preheat & PreparePreheat your oven to 375°F (190°C). Line a 12‑cavity muffin tin with paper liners or spray lightly with olive oil. This keeps the muffins from sticking and adds another hint of olive. 💡 emy’s Pro Tip: Lightly oil the baking tin before lining; a thin layer of olive oil keeps the crumb moist after baking. Step 2: Mix DryIn a large bowl, whisk together flour, protein powder, baking powder, and baking soda. Sifting for a couple of seconds ensures even distribution. ⚠️ Common Mistake to Avoid: Over‑mixing the dry ingredients with a whisking cycle will activate gluten and produce a tough crumb. Step 3: Add WetIn a second bowl, beat the egg, Greek yogurt, honey, vanilla extract, and olive oil until smooth. Gently fold the wet mixture into the dry bowl. The batter should be thick but pourable. 💡 emy’s Pro Tip: Fold slowly to keep air bubbles that create a fluffy texture. Step 4: Handle the BerriesGently toss blueberries with a light coating of flour; this prevents them from sinking during baking. Fold the berries into the batter one last time. ⚠️ Common Mistake to Avoid: Adding blueberries straight to batter without flour coating; they’ll sink to the bottom, making whole muffin look dull. Step 5: Fill MoldsDivide the batter evenly among the muffin cups, filling to about ¾ full. Place in the preheated oven. 💡 emy’s Pro Tip: Use a silicone spatula to level the tops; a slightly lumpy browning accentuates the blueberry peaks. Step 6: BakeBake for 18–20 minutes or until a toothpick inserted in the center comes out clean and the tops are lightly golden. ⚠️ Common Mistake to Avoid: Opening the oven too soon; you risk a gummy middle.
Serving & PresentationOnce out of the oven, let the muffins cool on a rack until fingers feel warm. Serve them with a dollop of extra Greek yogurt or a drizzle of honey for a touch of indulgence. A sprinkle of crushed pistachios or a dusting of powdered sugar adds a playful crunch and visual delight. If you’re craving a low‑carb pairing, top them with sliced avocado and a pinch of sea salt on the side. For a brunch vibe, line a plate with the muffins and top with fresh mint leaves or edible flowers you find at a Chelsea Market stall.
Make-Ahead, Storage & ReheatingI love having a batch ready for a busy NYC morning. Let these muffins sit at room temperature for up to 2 days; for longer storage keep them refrigerated.
When reheating, I prefer the low‑heat oven method so the crumb stays soft rather than crumbly. A quick 30‑second microwave works if you’re in a rush, but note the muffins can become slightly chewy. Variations & Easy Swaps
Keto‑Ready VariantReplace the all‑purpose flour with almond flour and reduce the protein powder by ¼ cup. The result is a low‑carb muffin that still boasts a velvety crumb and a prominent blueberry burst—perfect for a keto brunch. Gluten‑Free / Dairy‑Free SwapSubstitute oat flour and coconut yogurt. The texture becomes slightly denser, but the blueberry flavor is amplified, and the muffins stay moist. I’ve tested this combination; it’s a winner for dairy‑sensitive guests. Seasonal Spruce TwistIn late summer, I toss the batter with a handful of fresh basil or mint leaves. The herbal notes brighten the blueberry sweetness, bringing a Mediterranean garden vibe to your breakfast plate. Can I use frozen blueberries for this recipe?Yes, frozen blueberries work just as well as fresh ones. Give them a quick 2‑3 minute thaw at room temperature before adding them to the batter – this prevents them from releasing too much liquid that can make the muffins soggy or gummy. I’ve used frozen berries from the Supermarket in Queens and the texture remained wonderfully moist. Do I need to pinch the top of the batter before baking?Pinching the tops with your fingertips or a spoon can help create a slightly uneven surface that brightens up the muffins during baking. It also helps the blueberries stay on top, giving a more attractive look. It’s optional but a simple trick that I use daily. Can I replace plain yogurt with Greek yogurt?A head‑to‑head comparison: Greek yogurt is thicker, richer, and adds about 20% more protein per cup. Using it makes the muffins moister and gives them a tangy finish that I love. If you use plain yogurt instead, the texture will be lighter but slightly less dense; you may want to add an extra ½ cup of protein powder to maintain protein content. What’s the best way to store leftovers?Wrap each muffin in parchment or foil and place them in an airtight container or zip‑lock bag; keep them in the refrigerator for up to four days or freeze for up to two months. To reheat, pop them into a preheated oven (325°F) for ten minutes or microwave for 20‑30 seconds. They stay moist better when baked fresh than microwaved. Do I need to preheat the oven to 375°F?Yes, temperature is key to the proper rise and crust. A lower-temperature bake (say 350°F) can cause the muffins to spread and not rise, while too high a heat will burn the tops before the center finishes. 375°F is a sweet spot that gives a light golden top while keeping the interior soft. Is there a quick way to keep the muffins from drying out?Keep the muffins in a sealed container at room temperature for up to two days. Alternatively, store them in the fridge to slow water migration. Cover the top with a paper towel before sealing if you want extra dryness protection. When serving, offer a drizzle of honey or a spoonful of yogurt to reintroduce moisture. Can I add nuts to the batter?For a nutty crunch, fold in chopped walnuts, pecans, or pistachios after adding the berries. The nuts slightly soften during baking, adding texture. Be cautious not to add too many, as the volume can interfere with the rise. A ¼ cup works well on a batch of 12 muffins. What’s a good vegan substitution?Replace the egg with equal parts mashed banana or a tablespoon of flaxseed meal mixed with 3 tbsp water. Use a dairy‑free protein powder, coconut yogurt, and natural sweetener like maple syrup instead of honey. The dough will be a bit wetter, so reduce the protein powder by ¼ cup. The muffins keep the blueberry burst and stay moist. Can I make a larger batch?Doubling the quantities is straightforward; just scale everything proportionally. It will take slightly longer to bake—12 minutes instead of 18‑20—so keep an eye on the tops. If you’re using a larger tin, ensure it’s still lined and not overcrowded; this maintains even heat distribution. What if I want a crunchier muffin?You can mix in a tablespoon of rolled oats or cornmeal in place of a few tablespoons of flour. The extra grain adds a crunch to the crumb and allows the muffins to develop a slightly firmer base while still keeping the interior light. Adjust baking time by a minute or two if you prefer a darker crust. Share Your Version!If this recipe warms your heart and fuels your morning, let me know! Drop a star rating, comment, or post a photo on Instagram with the hashtag #cookingwithemi and tag @exorecipe. I’m always excited to hear how you tweak the blueberries or swap the protein powder. From my NYC kitchen to yours — I hope this recipe brings as much warmth to your table as it does to mine. — emy 🧡 📌
Love This Recipe? Save It to Pinterest!If you enjoyed this Healthy Greek Yogurt Blueberry Protein Muffins recipe, don’t let it get lost in your browser tabs! 😄 Pin it now so you can find it again anytime — and explore hundreds more tried-and-tested recipes waiting for you on my Pinterest boards. 👉 Follow emy on Pinterest @exorecipe 📌 Pin this recipe · 🔁 Re-pin your favorites · 💬 Tag me when you make it — I love seeing your creations! Have a question or need a swap? Drop a comment below — I’m just a message away. Also, hit the like button if this recipe was a hit and subscribe for more tasty revelations from 60‑minutes of kitchen science!
 Homemade Blueberry Protein MuffinsDescriptionFinding a protein-packed breakfast that actually tastes good can feel like searching for a needle in a haystack. Ingredients
Scale
InstructionsMaster Muffin Recipe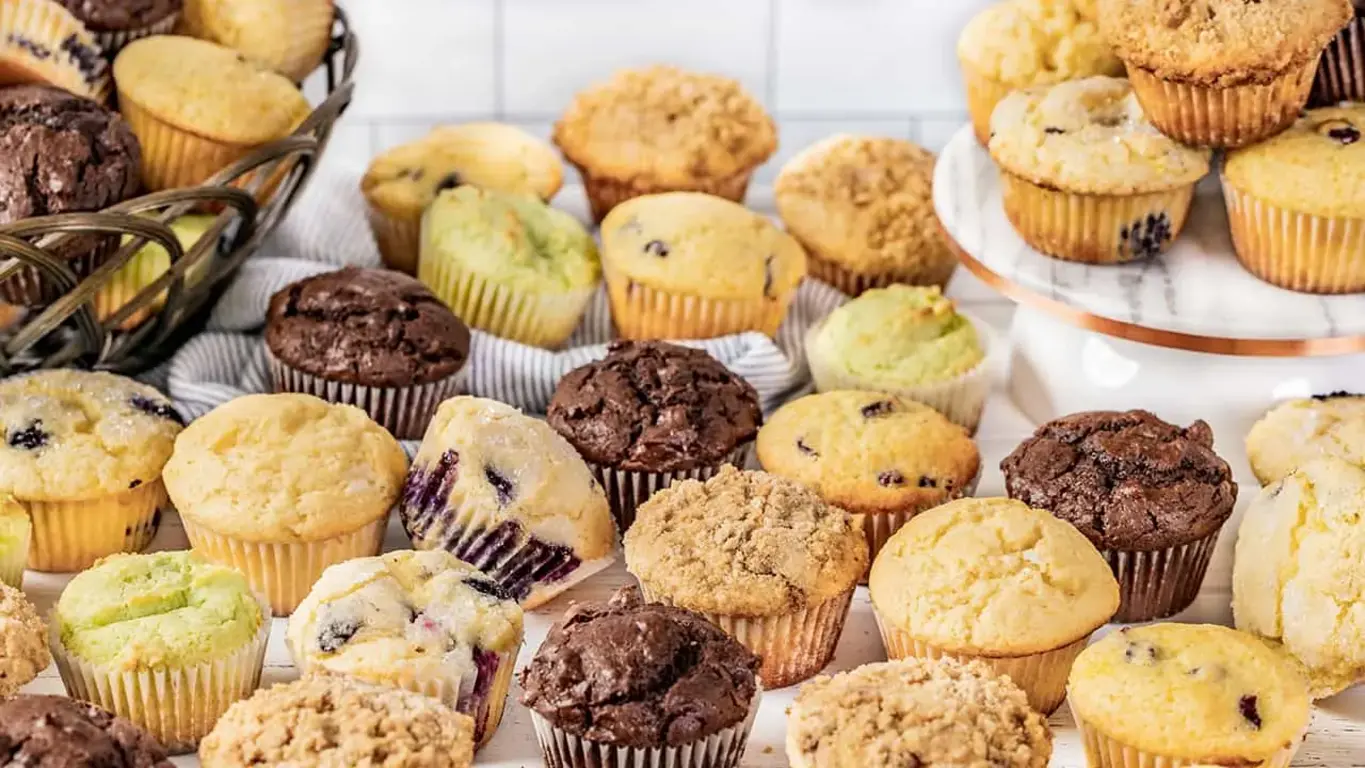 Table of ContentsMaster Muffin Recipe: The Ultimate Muffin Template – Endless Flavor StarterWhen I first made a batch of muffins at my grandmother’s home in Fez, the aroma of cinnamon and baked honey carried across the courtyard. Years later in a Brooklyn loft I took that same kitchen magic and blended it with my French pâtisserie training to create a single, universally adaptable base. The Master Muffin Recipe lets you slap any flavor you desire—berries, chocolate, tropical fruit, or savory herbs—into one dough, and every muffin erupts with that fresh, golden rise of a well‑balanced pastry. Feel the buttery crumb bite, a gentle sweetness from the sugar, and the delicate lift from baking powder that gives each muffin its signature plumpness. I love sprinkling a pinch of ground cumin into the batter for a subtle North African hint that mirrors my mom’s tagine seasonings, while a drizzle of maple syrup applied just before baking brings a caramel depth. The final result is airy, tender, and irresistibly fragrant—gray‑gold shells with a moist interior, ready to be glazed, topped, or eaten plain as a morning treat. I’ve refined this recipe over years of experimentation, and I’ll share a trio of pro tips: keep the butter at room temperature so it creams smoothly; fold add-ins gently to preserve airiness; and avoid overmixing the batter, which can create dense muffins. A common mistake I hear from first timers is turning the oven door open halfway through baking; keep it closed to prevent the muffins from sinking. Why This Master Muffin Recipe Is the BestThe flavor secret lies in the balanced ratios of butter, sugar, and flour—an algebraic equation I perfected during my pastry degree in Paris. This base pulls in any add‑in, from rainbow fruit to chocolate chips, while retaining that buttery softness. It’s the kind of recipe that collapses into any flavor profile with a single tweak. The texture is achieved by a precise, two‑step mixing: first, cream the butter and sugar until airy; second, fold the dry ingredients until just combined. This method, borrowed from modernist pastry chefs, traps air in the batter, giving the muffins a delicate rise without extra levity. For beginners, the recipe’s groove is the obvious division of steps—so much so that even beginners feel confident. Each step is written with specific timing and visual cues, releasing the typical nervousness of a novice attempting a high‑rise muffin. Master Muffin Recipe IngredientsI always source my ingredients from the fresh, artisanal produce aisle of Union Square Market in Manhattan. Here’s where I pick the softest butter and the freshest local blueberries for inspiration on that next sweet‑savory combo. Ingredients List
Ingredient SpotlightButter – the heart of the batter, it lends a silky mouthfeel. Look for European-style butter with 80% butterfat, or swap for clarified butter for a milder taste. It melts at 90°F, keeping the dough smooth throughout creaming. All-Purpose Flour – the neutral base that holds the structure. For a flourier crumb, replace with pastry flour (finer and lower protein). The trade‑off is a slightly less chewy bite. Baking Powder – the leavening agent. Use double‑acting powder for a steady rise. If using a single‑acting variant, add a dash of baking soda to balance the acidity of milk or buttermilk.
How to Make Master Muffin Recipe — Step-by-StepBaking a good muffin feels like a comforting conversation with yourself; each methodical step brings you closer to that golden crust you crave. Step 1: Line the Muffin TinLine a 12‑cup muffin tin with paper liners and lightly spray with nonstick spray so the muffins release effortlessly. Leaving a little space at the top helps them rise evenly. 💡 emy’s Pro Tip: Use parchment liners on both sides to avoid sticking and ensure uniform corners. Step 2: Cream Butter and SugarIn a large bowl, use a hand mixer to cream ½ cup softened butter with 1 cup granulated sugar until it’s light and fluffy, about 2 minutes. The batter should double in volume. ⚠️ Common Mistake to Avoid: Using cold butter; always let it soften to room temperature for a smooth mix. Step 3: Beat in Eggs and Dry MixAdd 2 eggs, one at a time, beating after each addition until fully blended. Stir in 2 teaspoons baking powder, ½ teaspoon salt, 1 teaspoon vanilla, then mix briefly to distribute. 💡 emy’s Pro Tip: Inspect the batter for a slightly glossy sheen—it signals the proteins are properly emulsified. Step 4: Incorporate Flour and MilkSift 1 cup flour into the bowl and fold gently until just combined. Add ½ cup milk, stir until batter is smooth; scrape the sides, then fold in the remaining 1 cup flour. Stop until the batter is cohesive but still dewy. Don’t overmix. ⚠️ Common Mistake to Avoid: Overmixing the batter, which compresses the gluten and yields dense muffins. Step 5: Fold in Add-InsGently fold in your chosen add‑ins—chocolate chips, berries, or nuts—using a rubber spatula to preserve the airy structure. 💡 emy’s Pro Tip: Swirl in a touch of lemon zest for a bright contrast against sweet chips. Step 6: Divide the BatterEvenly fill the paper liners, about ¾ full, then let the batter rest while the oven preheats. ⚠️ Common Mistake to Avoid: Filling the cups too high; it can cause overflow or uneven rise. Step 7: Preheat OvenPreheat your oven to 425°F (220°C). A hot oven ensures a quick rise before the heat is lowered. 💡 emy’s Pro Tip: Place a foil rack in the middle of the oven to keep the center temperature steady. Step 8: Bake and Then Reduce HeatBake at 425°F for 7 minutes. Keep the oven door closed. Reduce the heat to 350°F (175°C) and bake for an additional 13–15 minutes. Watch the muffins closely—they should be golden but not overdone. 💡 emy’s Pro Tip: Use a light dusting of semolina on the paper liners to reduce sticking and give a soft crust. Step 9: Cool MuffinsLet the muffins cool in the pan for 5 minutes, then transfer to a wire rack to cool completely before serving. ⚠️ Common Mistake to Avoid: Removing muffins too early; they can break and lose shape.
Serving & PresentationServe the muffins warm with a drizzle of honey or a dusting of powdered sugar for a classic Parisian touch. For a Moroccan flair, top them with a sprinkle of ground cinnamon and a few chopped pistachios, mirroring a street‑market jam. In New York, pair them with a buttery croissant roll for lunch, or with a robust espresso for an indulgent afternoon treat. For a fresh presentation, arrange the muffins on a slate platter, top each with a small dollop of lemon curd or a spoonful of caramel sauce. Garnish with a sprig of mint or a flourish of flaky sea salt. The contrast of earthy greens against golden muffins instantly elevates the visual appeal.
Make-Ahead, Storage & ReheatingI blast this batch of muffins into my busy week by freezing the uncooked batter and pre‑baking a smaller set for quick get‑to‑go breakfasts. The muffins keep their moisture and rise, whether cold or at room temperature.
When reheating for a hurried brunch, I pop the muffins straight from the fridge into a 350°F oven for about 5 minutes—they finish with a slightly crisp top while staying moist inside. For fresh batches, adding a splash of maple syrup before the final 5 minutes of bake can revive a slightly dry crumb. Variations & Easy Swaps
Chocolate Chip ClassicA timeless favorite, simply fold in one cup of high‑quality chocolate chips and a pinch of sea salt to balance sweetness. The result is a comforting, melty center that pairs beautifully with a vanilla latte or a glass of chilled white wine. Gluten‑FreeReplace the all‑purpose flour with a 2‑cup gluten‑free blend seasoned with a drop of xanthan gum. Maintain the same proportions; the batter will be slightly denser but still light and lacy, delivering a gluten‑free home‑baked aesthetic. Summer BerryDouse the batter with fresh blueberries, diced ripe peaches, and a touch of wild rosewater. This vibrant mixture yields a bright, aromatic muffin that captures the warm essence of an NYC farmer’s market in July. How long does it take to bake muffins?When baking muffins, timing is critical to achieve the perfect rise and golden crust. In this recipe, the initial 7 minutes at a high temperature ensures a quick puff, followed by 13–15 minutes at a lower temperature to set the structure without over‑browning. Adjusting oven temperature by ±10°F can help if your oven runs hot or cool. Typically, a total of 20 minutes yields cupcakes that are fresh, airy, and ready to enjoy. Can I freeze raw muffins?Yes—freezing raw muffin batter is a second‑level time‑saver. Spoon the batter into paper liners, freeze until solid, then bake straight from the freezer. This technique reduces prep time and still yields light, moist muffins. Just increase the baking time by a minute or two, and sprinkle a light dusting of flour on the liners to keep them from sticking. What substitutions can I make for dairy?To keep the batter dairy‑free, replace the butter with coconut oil or vegan butter, and swap the milk for oat, soy, or almond milk. These alternatives preserve the moisture and lightness of the muffins. Coconut oil adds a subtle tropical note while oat milk provides natural sweetness, but be sure to adjust the sugar accordingly to maintain balance. Do I need to preheat the muffin tins?Preheating the tin is not necessary; it would only small advantage in ensuring that the paper liners stay in place. Most bakers prefer to line the tins and then pour batter directly. The drink will bake evenly as the oven itself pre‑heats, maintaining uniform heat across the muffin bases. How can I prevent muffins from sinking?The key to preventing sink is to keep the batter just loose enough to hold air, but not so fluffy that it collapses. Use a combed flour that sifts well, keep the oven door closed, and watch the interior temperature; as soon as the tops are golden, remove the muffins to halt the cooking. This approach stabilizes the structure and keeps the muffins on their toes. What is the best way to store muffins?Store muffins in an airtight container at room temperature for up to 3 days. For longer storage, refrigerate them in zip‑lock bags, and reheat one minute in the microwave for a crisp bite. If you like the crunch from the crust, let the muffins dry at room temperature for an hour before reheating. Can I use a different type of sugar?Brown sugar or coconut sugar works wonderfully; each gives a different flavor profile. Brown sugar offers deeper molasses undertones, while coconut sugar adds a subtle caramel note. Keep an eye on baking time; if you add brown sugar, the batter may brown slightly faster, so reduce the final bake time a bit if needed. Should I add extra leavening?Generally, the amount of baking powder is adequate for a 12‑cup batch. Adding more leavening can cause the muffins to rise too fast and collapse when cooling. If you prefer a higher rise, reduce the batter volume by 10–15% and add a little more baking powder—just keep for the calibrated 425°F start. What toppings would complement a vanilla muffin?Vanilla muffins pair brilliantly with fresh berries, a dollop of whipped cream, and a drizzle of honey. A sprinkle of toasted coconut or chopped almonds adds crunch and tannic depth. For a savory twist, top with a teaspoon of truffle butter and a pinch of sea salt, creating a memorable contrast of sweet and umami. Can I add veggies to muffins?Absolutely—cheese and spinach, or shredded carrot and zucchini, meld well into muffin batter. Straw that out about 90% to keep moisture content stable, and use a teaspoon of grated cheese for moisture retention. Cook the muffins for a minute longer to ensure vegetables reach a soft pulp while preserving the lightness of the batter. Share Your Version!If these muffins bring a burst of flavor to your kitchen, star the recipe and drop a comment below. Share a photo of your creative variation on Instagram or Pinterest and tag @cookingwithemi. Tell me which flavor twist you loved most and how it made you feel like a bun‑by‑the‑fire chef at home. From my NYC kitchen to yours — I hope this recipe brings as much warmth to your table as it does to mine. — emy 🧡 📌
Love This Recipe? Save It to Pinterest!If you enjoyed this Master Muffin Recipe, don’t let it get lost in your browser tabs! 😄 Pin it now so you can find it again anytime — and explore hundreds more tried-and-tested recipes waiting for you on my Pinterest boards. 👉 Follow emy on Pinterest @chefrecipes2 📌 Pin this recipe · 🔁 Re‑pin your favorites · 💬 Tag me when you make it — I love seeing your creations! Drop a note below if you liked this recipe, and let me know your favorite 2026 snack idea! Follow me for more quick kitchen hacks.  Master Muffin RecipeDescriptionUse one recipe to create any flavor of muffin in any size with our Master Muffin Recipe, featuring endless mix-ins, toppings, and flavorings. Ingredients
Scale
Instructions
Healthy Banana Oatmeal Muffins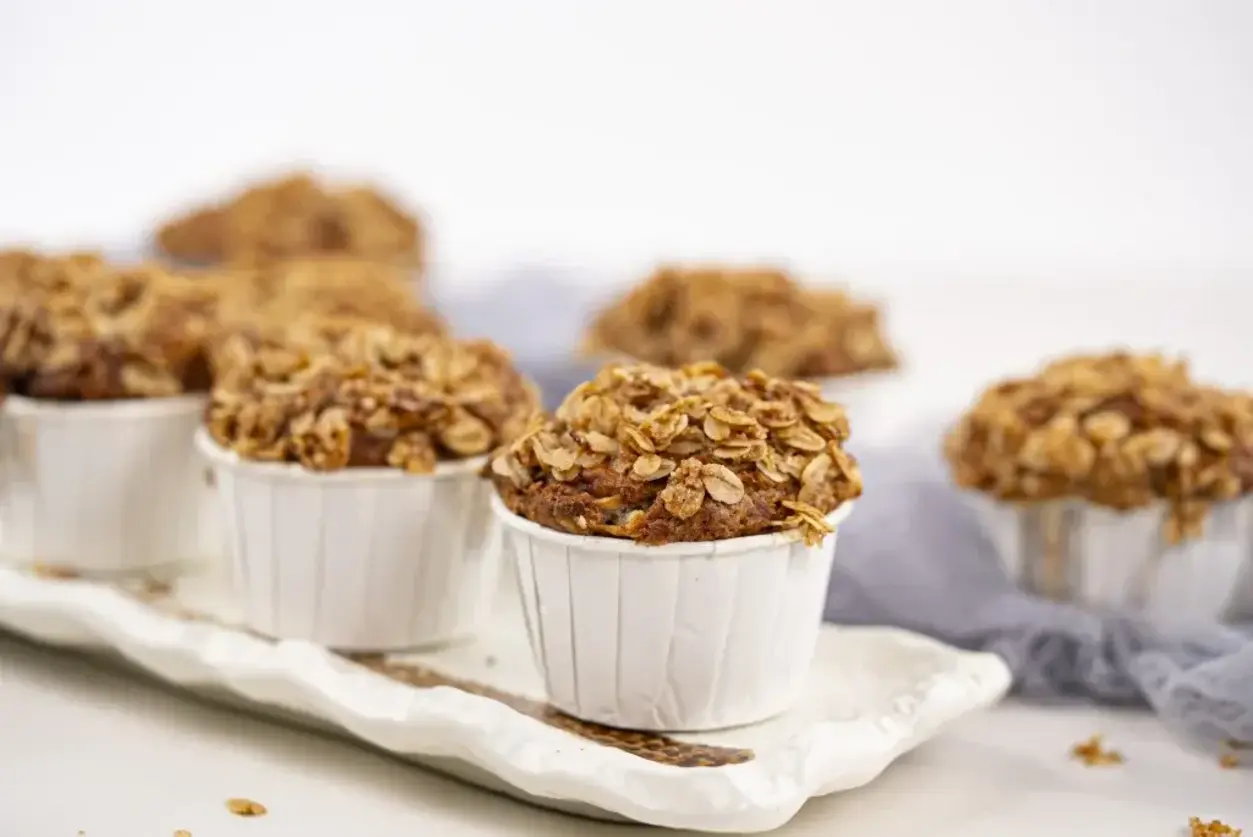 Table of ContentsHealthy Banana Oatmeal Muffins – One-Bowl MagicGrowing up under the low Moroccan sun, my mother taught me that a simple ripe banana could turn an ordinary morning into a celebration. In my early years in Paris, that same banana was often blended with old‑fashioned oats and a dash of cinnamon to create a portable snack that could be carried from a café terrace to a study on the Seine. Now in bustling New York City, I’ve streamlined that moment into a one‑bowl marvel—an effortless, wholesome treat that keeps the sweetness of Marrakech and the refinement of Paris alive, all while saving me precious NYC rush‑hour minutes. The first bite of these muffins is a gentle, syrupy rush of banana sweetness balanced by the comforting crunch of toasted oats. A hint of cinnamon and nutmeg tinge the batter with warm spices that echo my grandmother’s tagine, while a light dusting of brown sugar on top creates a subtle caramelized glow. Visually, the muffins rise to a golden crown, speckled with oat flakes that cling like fine sand on a Moroccan beach, and the interior stays moist and airy—like a cloud that whispers stories of late‑afternoon strolls through Union Square. What sets this version apart is the “one‑bowl” technique: all dry components mingle with wet in a single mixing vessel, cutting down cleanup while preserving the batter’s integrity. I’ll toss a quick pro tip later—how to fluff the muffins using a splash of yogurt for an extra tender crumb—and warn that the common mistake of over‑mixing can break the batter’s delicate structure, turning it from light to dense. This recipe keeps the magic alive and lets you enjoy the taste of home, no matter where you are. Why This Healthy Banana Oatmeal Muffins Recipe Is the BestThe flavor secret lies in the harmony of ripe banana and toasted oat. The smooth sweetness of banana meets the nutty, chewy oats, while a pinch of cinnamon and nutmeg add depth. I learned this balance fighting morning deadlines in NYC cafés, where a quick, wholesome snack can’t afford to be a flop. The perfected texture comes from mixing all elements in a single bowl—avoiding the over‑mixing that usually densifies muffin batter. After combining the wet and dry, folding the mashed bananas gently preserves air pockets, giving a soft yet slightly crisp top. The result is a moist crumb that feels like a warm nap in a bustling metropolis. Foolproof & Fast: The one‑bowl trick means you only whisk once, reduce prep time by 15 minutes, and the recipe scales easily for the whole office or a whole family. The simple flow of steps also sidesteps the common rookie pitfall of mis‑measuring dry ingredients; the step‑by‑step instructions keep you on track. Banana Oatmeal Muffins IngredientsI gather these ingredients every Monday at the Union Square Greenmarket, choosing the freshest organically grown bananas and locally roasted oats to bring that authentic taste of my mom’s kitchen to my city apartment. Ingredients List
Ingredient SpotlightRipe bananas: The naturally sweet fruit provides both moisture and flavor. Choose bananas that are a touch bruised for maximum sweetness. If you’re allergic or just want less sugar, swap for ½ cup unsweetened almond milk and keep the sweetness from the brown sugar. Oats: They add body and a chewy texture. A quick alternative is quick‑oats, which yield a softer crumb but lose that classic crunch. For a gluten‑free version, use certified gluten‑free rolled oats and ensure no cross‑contamination. Cinnamon: This spice gives an aromatic lift reminiscent of my Moroccan spice stalls. To pivot tone, use smoked paprika instead for a savory twist—good with dark chocolate chips for a bold snack.
How to Make Healthy Banana Oatmeal Muffins — Step-by-StepBegin with a clean breadboard and a trusty oven timer; the song of these muffins starts at 375°F. Step 1: Preheat OvenSet your oven to 375 °F (190 °C). While it warms, line a 12‑cup muffin tin with paper liners or lightly spray with non‑stick spray. 💡 emy’s Pro Tip: Warm the oven with a sheet of parchment to help muffins rise evenly. Step 2: Mix Dry IngredientsIn a large bowl, sieve together oats, flour, sugar, baking powder, baking soda, cinnamon, nutmeg, and salt. The dry mix should look like a loose, sandy texture. ⚠️ Common Mistake to Avoid: Mixing the dry ingredients too vigorously can release excess moisture. Step 3: Whisk Wet IngredientsIn a separate bowl, whisk the egg, oil, and vanilla until frothy. This creates a smooth base that marries easily with oats. 💡 emy’s Pro Tip: Use pasteurized eggs when baking at lower temperatures to keep the batter safe. Step 4: Combine MixPour the wet mixture into the dry bowl. Stir gently until just combined; the batter will feel slightly thick and speckled. Continue folding only until dry components are fully incorporated. ⚠️ Common Mistake to Avoid: Overmixing can cause gluten development and produce dense muffins. Step 5: Fold BananasAdd the mashed bananas to the batter, folding carefully to distribute them without deflating the batter. Aim for even pockets of banana throughout. 💡 emy’s Pro Tip: Add a splash of almond milk to lighten the batter if it’s unusually thick. Step 6: Assemble BatterDivide the batter among 12 muffin cups, filling each about ¾ full. This creates enough room for rise without overflowing. ⚠️ Common Mistake to Avoid: Filling cups too full makes muffins spill over during baking. Step 7: Make Top Perfectionly SugarMix ½ cup oats, ¼ tsp cinnamon, brown sugar, and melted butter. Sprinkle over each muffin; the butter melts quickly, forming a caramelized crust. 💡 emy’s Pro Tip: Use dark butter for richer flavor; keep the butter cold, then melt just before mixing. Step 8: Bake for Perfect CrustBake for 18–20 minutes or until a toothpick comes out clean. Let cool on a rack for 5 minutes before removing to complete the crumb. ⚠️ Common Mistake to Avoid: Removing muffins too early; they set at the sides first then the center.
Serving & PresentationPlate a handful of muffins on a rustic wooden board, drizzle a light honey vinaigrette on the side, and garnish with a dusting of toasted coconut flakes. The warm spices echo my mother’s tagine while the gentle oats reference my mornings in Alcazar Street cafés. Pair these muffins with a steaming cup of French press coffee or a chilled glass of rosé from the Brooklyn vineyards. The buttery, oat‑rich crumb contrasts beautifully with the acidic brightness of the beverage, creating a balanced bite that feels both European and East‑coastal. Pairing Guide Table
Make-Ahead, Storage & ReheatingWith my double‑story Manhattan loft, I batch these muffins every Saturday. I store them in an airtight container at room temperature for up to 4 days, ready to pop in a toaster in the bustle of a weekday commute.
Re‑heat a muffin in a toaster oven or on a skillet for a few moments; just enough to bring the crust back to life while keeping the interior moist. I find a splash of a little milk during reheating helps the crumb stay soft, especially after freezer storage. Variations & Easy Swaps
Chocolate Chip MuffinsSwapping in dark chocolate chips gives a decadent burst reminiscent of a Parisian café’s chocolate tart. The payoff is a chewy chocolate slab nestled in the oat batter, while the banana still brightens the crumb. Gluten‑Free / Dairy‑Free MuffinsUse 1 ¼ cups certified gluten‑free blend and ¼ cup oat milk in place of the oil. The texture remains airy, though the crumb is slightly denser. Substitute the melted butter topping with a drizzle of coconut oil for richness. Blueberry Swirled MuffinsFold in frozen blueberries, then swirl with honey or maple syrup before baking. The blue jewels scatter through the batter, creating a vibrant, fruit‑laden version perfect for spring afternoons in Greenwich Village. Can I make these muffins without an oven?Absolutely! While oven baking gives that classic golden crust, you can steam or microwave these muffins for a portion of a day. For steaming, place the muffin batter in a greased silicone mold, cover with foil, and steam a steamer basket for 12‑15 minutes; the result will be moist and tender, though not crunchy atop. Microwave method: microwave individual batches on high for 45‑60 seconds—watch carefully to prevent overcooking. Either option preserves the oat texture and banana flavor, letting you enjoy a late‑night snack while avoiding the oven altogether. What storage options preserve freshness?The best practice is to keep muffins in an airtight container at room temperature for up to four days. If you plan to keep them longer, freeze them in a vacuum‑sealed bag and then reheat with a short burst in the oven at 350°F for about 8 minutes. For instant reheats, a two‑minute toast in a toaster or pre‑heated pan will restore the crisp crust while keeping the inside moist, mirroring the original bake. Can I add extra wet ingredients like yogurt?Yes, swapping a portion of the oil with low‑fat yogurt can yield a lighter, tangier crumb. Replace a quarter cup of oil with an equal amount of plain yogurt—there will be slightly more moisture, so use an extra ¼ tsp of baking powder to balance it. The result will still honor the banana flavor while adding a subtle tart note reminiscent of a North African yogurt parfait. Can I use almond butter instead of butter?Replacing the melted butter with a tablespoon of almond butter will add a nutty depth to the topping while maintaining moisture. However, almond butter’s richer flavor may overpower the banana sweetness, so I recommend using a small amount—one tablespoon—to complement rather than dominate. It also lends a subtle earthy tone, citing those almond stalls on Merle‑French Island that I love. Can I use maple syrup for sweetness?Maple syrup can be an excellent natural sweetener, especially while still boasting a robust flavor. To incorporate, simply replace half of the white sugar with maple syrup and reduce the oil by ¼ cup to offset the added liquid. The maple will melt into the batter, producing a butter‑brown top and a lingering taste of fall, all while keeping the batter’s moisture intact. How much banana is ideal for flavor?You’ll want just enough banana to provide natural sweetness without drowning the oat structure; 1 ½ cups of mashed ripe bananas works well. Using fewer bananas or only mashed halves keeps the muffin lighter, whereas over‑mashing more than three bananas will produce a very moist, soft crumb that could be less airy. The trick is balancing ripe mashed fruit with the dry oats for a chewy yet tender bite. What’s the best way to test doneness?A quick toothpick test is the safest method; after about 18 minutes, insert a toothpick into the center of a muffin. If it comes out clean or with just a few crumbs, the muffins are ready. For a safer margin, let them cool for a few minutes on a rack before taking the toothpick. A soft, wet crumb and a golden top are visual cues that confirm doneness. Do I need to thaw the muffins before serving?Frozen muffins can be thawed at room temperature for 30‑45 minutes or reheated directly in the oven for 5‑7 minutes at 350°F, allowing the crust to crisp up again. If you prefer them slightly chilled, simply allow them to cool overnight in a sealed bag, then bring to room temperature just before serving. This keeps the interior soft while letting the exterior stay appetizingly crusty. Can I use whole wheat flour?Whole wheat flour lifts the nutrition profile and gives a subtle nutty background. To ensure they don’t become dense, replace half of the all‑purpose flour with whole wheat, or replace all flour with a gluten‑free whole‑grain blend. Adding a pinch more baking powder helps counteract the natural density of whole wheat, so the muffins rise nicely while retaining the oat’s chewy texture. What type of muffin cups work best?Silicone muffin cups are great for leak‑free, easy release, and they keep the muffins from sticking if you tack thin parchment between the batter and cup. Paper liners give a rustic look and produce a slight puff on the rim, while metal tins with non‑stick spray will give a crisp edges again. My personal preference leans towards parchment‑lined silicone cups during the late‑night NYC grind because they combine convenience with quality. Share Your Version!I’d love to hear how you kick this recipe into your own kitchen. Drop a brief rating and comment below—your feedback helps refine the crumb! If you dabble with a Florida hibiscus glaze or swap in almond‑milk yogurt, share a photo on Instagram or Pinterest and tag @cookingwithemi. Then tell me: what single ingredient change made your muffin the most memorable? I can’t wait to taste your creativity. From my NYC kitchen to yours — I hope this recipe brings as much warmth to your table as it does to mine. — emy 🧡 📌
Love This Recipe? Save It to Pinterest!If you enjoyed this Healthy Banana Oatmeal Muffins recipe, don’t let it get lost in your browser tabs! 😄 Pin it now so you can find it again anytime — and explore hundreds more tried-and-tested recipes waiting for you on my Pinterest boards. 👉 Follow emy on Pinterest @chefrecipes2 📌 Pin this recipe · 🔁 Re-pin your favorites · 💬 Tag me when you make it — I love seeing your creations! Have another kitchen hack to share, or a question about using almond crusts? Drop me a note— I’m always happy to brainstorm with fellow food lovers. Let’s keep the conversations tasty!  Healthy Banana Oatmeal MuffinsDescriptionThese banana oatmeal muffins are quick, healthy, and packed with natural sweetness from ripe bananas. With whole grain oats, optional sweeteners like maple syrup, and a one-bowl prep method, theyre the perfect grab-and-go breakfast or snack.Easy to customize with add-ins like chocolate chips or blueberries, these muffins are family-friendly, freezer-friendly, and ideal for meal prep. Ingredients
Scale
Instructions
Keto Egg Cups – 9 Delicious & Easy Low Carb Breakfast Recipes Low Carb Breakfast Egg Cups – 9 Ways – Life Made Keto  9 Keto Egg CupsDescription9 Keto Egg Cups are the perfect easy make-ahead breakfast for on the go. Best of all, they are packed with protein and so convenient for busy mornings, weekend or holiday brunch! Ingredients
Scale
Instructions
Keto Egg Cups – 9 Delicious & Easy Low Carb Breakfast Recipes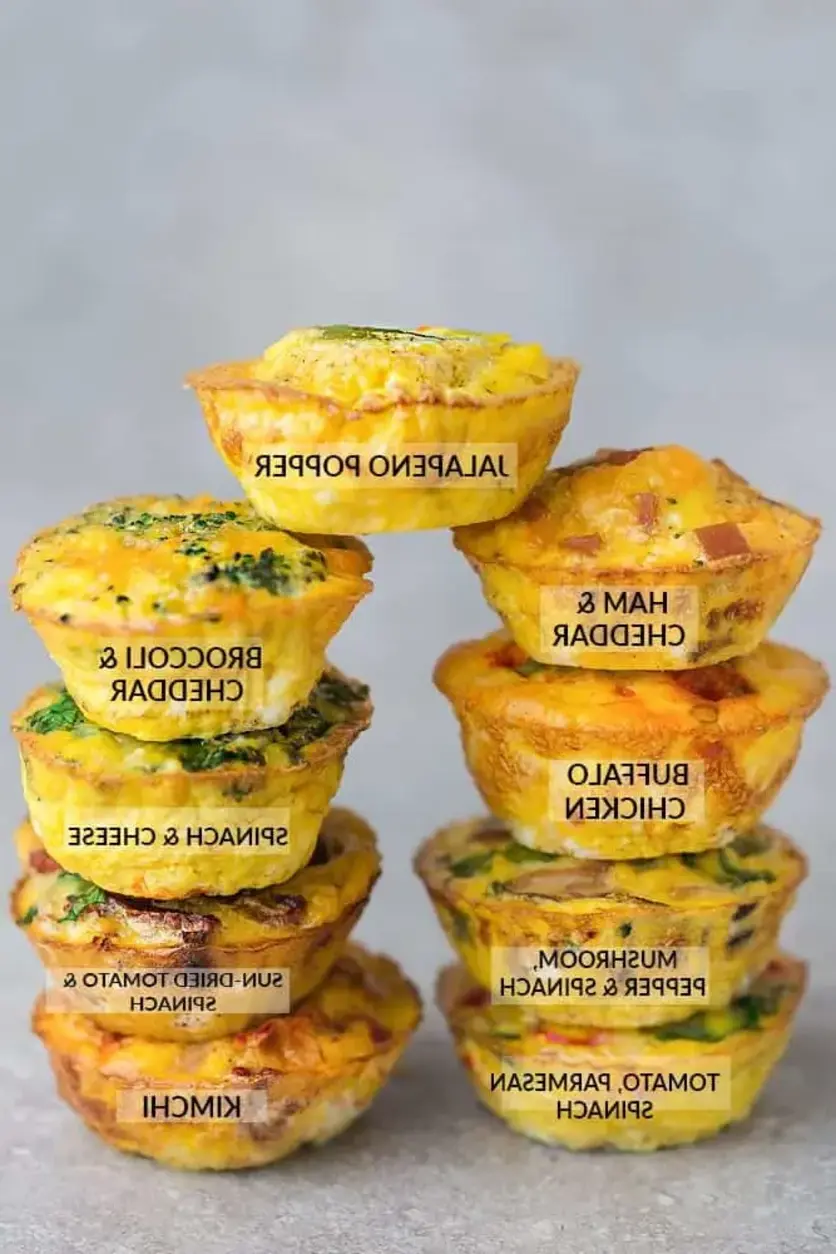 Low Carb Breakfast Egg Cups – 9 Ways – Life Made Keto  9 Keto Egg CupsDescription9 Keto Egg Cups are the perfect easy make-ahead breakfast for on the go. Best of all, they are packed with protein and so convenient for busy mornings, weekend or holiday brunch! Ingredients
Scale
Instructions
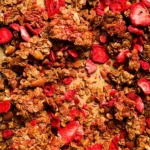
Simple Homemade Granola
Table of ContentsThe Ultimate Simple Homemade Granola: Your Pantry’s New Best FriendLet’s talk about a kitchen staple that has the power to transform your mornings, your snacks, and your desserts: simple homemade granola. If you’ve ever stood in the cereal aisle, overwhelmed by boxes of store-bought granola packed with added sugars, mysterious preservatives, and a price tag that makes you wince, this recipe is your liberation. Here at Cooking With Emy, we believe the best foods come from your own oven, and this granola is proof. It’s more than just oats and honey; it’s a crunchy, clustery, infinitely customizable base for a healthier, more delicious pantry.
This isn’t just another granola recipe. This is a foolproof formula for achieving that perfect balance of sweet and salty, crunchy and chewy, all while using ingredients you likely already have on hand. We’re moving beyond the basic to create a simple homemade granola that’s robust enough for yogurt parfaits, delightful as a cereal, and irresistible eaten by the handful straight from the jar. The aroma of oats, nuts, and cinnamon toasting in your oven is a form of culinary therapy, and the result is a versatile treasure you’ll be proud to have made yourself. Why This is the Best Simple Homemade Granola RecipeYou might be wondering what sets this granola apart from the hundreds of other recipes out there. The answer lies in its perfectly engineered simplicity. We’ve stripped away the complexity and focused on technique and ratio to guarantee success every single time. First, the clusters. The secret to those big, satisfying chunks of granola isn’t more fat or sugar—it’s a well-balanced wet-to-dry ingredient ratio and minimal stirring during baking. We’ll show you exactly how to press the mixture down on the pan to encourage clumping. Second, the flavor depth. By using a combination of pure maple syrup (or honey) and a touch of brown sugar, we create layers of sweetness that caramelize beautifully. A generous pinch of salt and a splash of vanilla elevate the entire batch from “good” to “can’t-stop-eating-it” good.
💡 The Kitchen Team’s Pro Tip: The key to crisp, not burnt, granola is low and slow baking. We bake at 300°F (150°C). This gentle heat allows the oats and nuts to toast evenly all the way through without the outside burning before the inside dries out.
Finally, this recipe is a master template. Once you master the basic formula of oats + nuts/seeds + sweetener + oil + seasoning, a world of variations opens up. It’s cost-effective, healthier than store-bought, and makes your kitchen smell incredible. This simple homemade granola is the confident, foundational recipe your breakfast routine has been waiting for. Ingredients for Your Simple Homemade GranolaThis recipe is built on pantry staples. Here’s what you’ll need to create the base batch, followed by a table of common substitutions.
How to Make Simple Homemade Granola: Step-by-StepFollow these detailed steps for perfect granola every time. The process is simple, but the details make all the difference. Step 1: Prep and PreheatPosition your oven rack in the middle of the oven and preheat to 300°F (150°C). This lower temperature is crucial for even toasting. Line a large, rimmed baking sheet with parchment paper. A rimmed sheet (like a half-sheet pan) prevents any spills and contains the granola. Step 2: Mix the Dry IngredientsIn a large mixing bowl, combine the 3 cups of rolled oats and 1 cup of your chosen raw nuts and/or seeds. If you’re using large nuts like pecans or walnuts, give them a rough chop first. Add the 1 teaspoon of cinnamon (if using) and the 1/2 teaspoon of salt. Use a spoon or your hands to toss everything together until evenly distributed. Step 3: Whisk the Wet IngredientsIn a separate medium bowl or large measuring cup, whisk together the 1/3 cup of maple syrup (or honey), 1/3 cup of neutral oil, 2 tablespoons of light brown sugar, and 1 teaspoon of vanilla extract. Whisk vigorously for about 30 seconds until the mixture is completely emulsified and smooth. The brown sugar may not fully dissolve, and that’s okay.
💡 The Kitchen Team’s Pro Tip: For extra binding power and bigger clusters, add one egg white to the wet mixture and whisk until frothy. The protein in the egg white creates a light, crispy web that holds the granola together beautifully.
Step 4: Combine Wet and DryPour the liquid mixture over the dry oat and nut mixture. Using a large silicone spatula or a wooden spoon, fold and stir until every single oat and nut piece is thoroughly coated. It will look shiny and feel slightly wet. This coating is what will crisp up in the oven. Step 5: Spread and Press for ClustersPour the mixture onto your prepared baking sheet. Use the spatula or your hands (lightly oiled if it’s sticky) to spread it into a fairly even layer. Now, here’s the cluster secret: firmly press down on the granola to compact it into the pan. Don’t smash it flat, but apply good pressure. This helps the granola bake into a sheet that you can later break into clusters. Step 6: Bake Low and SlowPlace the pan in the preheated oven. Bake for 15 minutes. Then, remove the pan and rotate it 180 degrees to ensure even browning. Do not stir. Place it back in the oven for another 10-15 minutes. The granola is done when it is fragrant and turns a light, golden brown color at the edges. It will still feel soft when hot but will crisp up as it cools. Step 7: The Crucial Cool DownThis is the most important step! Remove the pan from the oven and place it on a wire cooling rack. Let the granola cool completely on the pan without disturbing it—at least 45 minutes to an hour. As it cools, it hardens and forms that perfect crunch. Once it’s completely cool, break it into clusters of your desired size with your hands or a spatula. Step 8: Add the Final TouchesNow, and only now, stir in your 1/2 to 3/4 cup of dried fruit. Adding fruit before baking makes it tough and chewy. Transfer your beautiful, clustery simple homemade granola to an airtight container. Serving Your Simple Homemade GranolaYour granola is a versatile superstar. Here are our favorite ways to enjoy it:
How to Store Simple Homemade GranolaProper storage is key to maintaining that fresh-from-the-oven crunch. Store your completely cooled granola in an airtight container at room temperature, in a cool, dark pantry. It will stay perfectly crisp for 2-3 weeks. For longer storage, you can freeze it in a freezer-safe bag or container for up to 3 months. Simply let it come to room temperature before serving—no need to thaw.
💡 The Kitchen Team’s Pro Tip: To prevent any potential softening from humidity, you can place a single terracotta sugar saver (found in baking aisles) or a small piece of parchment paper with a tablespoon of uncooked rice in the bottom of your storage container to absorb any excess moisture.
Simple Homemade Granola Variations to LoveThe fun begins once you’ve mastered the base recipe. Use the following table as your inspiration guide.
Frequently Asked Questions (FAQ)Can I make this granola gluten-free?
Absolutely! Ensure you use certified gluten-free rolled oats. All other base ingredients are naturally gluten-free, but always check labels on add-ins like vanilla extract or dried fruit for processing warnings. My granola didn’t clump. What went wrong?
The most common reasons are over-stirring during baking or not pressing the mixture firmly enough onto the pan before baking. Also, ensure your wet-to-dry ratio is correct—if the mixture looks dry before baking, add an extra tablespoon of maple syrup or oil. The egg white trick mentioned in the pro tip is a guaranteed cluster-maker. Can I use quick oats instead of old-fashioned?
We don’t recommend it. Quick oats are cut smaller and will result in a powdery, less textured granola that burns more easily. Old-fashioned rolled oats provide the best structure and chew. Is this granola recipe vegan?
The base recipe is vegan if you use maple syrup (not honey) and a plant-based oil. Avoid the egg white pro-tip for a strictly vegan version. How can I make it less sweet?
You can reduce the maple syrup/honey to 1/4 cup and omit the brown sugar. The granola will be less clustery and more “loose,” but still delicious. The natural sweetness from any dried fruit you add later will compensate. Why did my granola burn?
Likely culprits: oven temperature too high (always use an oven thermometer to check), baking time too long, or using a dark-colored metal pan which absorbs more heat. Stick to a light-colored pan, parchment paper, and the 300°F temperature. Can I double this recipe?
Yes, but bake it on two separate sheet pans. Do not pile it all onto one pan, as the granola will steam instead of toast and bake unevenly. Switch the pan positions and rotate them halfway through baking. What’s the best nut to use for beginners?
We recommend sliced almonds or chopped pecans. They are widely available, toast evenly, and most people enjoy their flavor. Walnuts can sometimes become slightly bitter when toasted, so they are better for more experienced granola makers. We hope this guide empowers you to make the best simple homemade granola of your life! Once you taste the difference, you’ll never go back to the store-bought stuff. If you loved this recipe, please share it with a friend who needs a pantry upgrade! Happy Baking, Love This Recipe? Save It for Later!Pin the image below to your Pinterest boards to save this ultimate guide to Simple Homemade Granola. Don’t forget to follow @cookingwithemy on Pinterest for more delicious, foolproof recipes! [Image Placeholder: A beautiful, high-alt photo of the finished granola in a glass jar, with some spilled out next to a bowl of yogurt and berries.]
Simple Homemade Granola
Table of ContentsSimple Homemade Granola: The Foolproof Formula for Perfect Clusters Every Time
Forget the overpriced, sugar-laden bags from the store. Once you learn how to make this simple homemade granola, you’ll never go back. This recipe is the cornerstone of a mindful kitchen—a perfect blend of crunchy oats, nuts, a hint of natural sweetness, and warm spices that fills your home with an irresistible aroma. It’s more than just a breakfast cereal; it’s a versatile topping, a snack straight from the jar, and a testament to how easy and rewarding homemade pantry staples can be. At Cooking With Emy, we believe the best recipes are the ones you make again and again. This granola is exactly that. With a base formula that’s nearly impossible to mess up, it invites customization. Are you team chunky cluster? We’ve got a pro tip for that. Prefer it gluten-free or refined sugar-free? No problem. This guide will walk you through not just the “how,” but the “why,” empowering you to bake a batch of granola that’s perfectly tailored to your taste. Why This is the Best Simple Homemade Granola RecipeYou might wonder what sets this granola apart from the hundreds of recipes online. The answer lies in its balanced foundation and chef-driven techniques. Many recipes result in burnt nuts, soggy clusters, or an overly sweet product. We’ve solved those common pitfalls. First, our wet-to-dry ingredient ratio is meticulously tested. We use just enough binding liquid (oil and pure maple syrup) to coat every oat and nut without leaving them greasy or chewy. Second, we employ a moderate, even oven temperature and a crucial technique of not stirring for the first half of baking. This is the secret to those big, crave-able clusters. Finally, we add any delicate ingredients like dried fruit or seeds after baking, preserving their texture and nutrients. This isn’t just a recipe; it’s a reliable formula for granola success. Ingredients for Simple Homemade Granola & Smart SubstitutionsThis is your master blueprint. Every ingredient plays a specific role, and understanding that allows you to make confident swaps.
💡 The Kitchen Team’s Pro Tip: For the ultimate clumpy granola, press the mixture firmly and evenly into the baking sheet before it goes in the oven. This creates a “granola bark” that you’ll break into perfect clusters after cooling. Step-by-Step Instructions for Perfect GranolaFollow these steps closely, and you’ll achieve bakery-quality results on your first try. Step 1: Prep & PreheatPreheat your oven to 300°F (150°C). This lower temperature is key to even cooking without burning. Line a large, rimmed baking sheet with parchment paper. Do not grease the pan—the parchment prevents sticking and makes cleanup effortless. Step 2: Mix the Dry IngredientsIn a large mixing bowl, combine the 3 cups of rolled oats, 1 cup of chopped raw nuts, and 1/2 cup of shredded coconut (if using). Stir with a wooden spoon or spatula until evenly distributed. Step 3: Whisk the Wet IngredientsIn a separate medium bowl or large measuring cup, whisk together 1/3 cup of pure maple syrup, 1/3 cup of neutral oil, 1 teaspoon of vanilla extract, 1 teaspoon of cinnamon, and 1/2 teaspoon of fine sea salt. Whisk vigorously until the mixture is completely emulsified and smooth. Step 4: Combine & CoatPour the wet mixture over the dry ingredients. Using your spatula, fold and stir until every single oat and nut piece is thoroughly and glisteningly coated. This takes a minute or two of dedicated mixing. 💡 The Kitchen Team’s Pro Tip: For maximum cluster formation, let the mixed granola sit for 5-10 minutes before baking. This allows the oats to absorb some of the liquid, helping them stick together. Step 5: Bake for ClustersTransfer the granola mixture to your prepared baking sheet. Spread it into a fairly even layer, then use the back of your spatula or a measuring cup to press it down firmly and compactly. Bake on the middle rack for 15 minutes. DO NOT STIR. Step 6: Bake to FinishAfter 15 minutes, remove the pan from the oven. Using a large spatula, gently flip and break up large sections of the granola. This promotes even browning. Return to the oven for another 12-15 minutes, or until the granola is a uniform golden brown. It will continue to crisp as it cools. Step 7: Cool CompletelyThis is the most important step! Remove the pan from the oven and let the granola cool completely on the baking sheet, undisturbed, for at least 45 minutes to 1 hour. As it cools, it will harden into those perfect, snappy clusters. Now, stir in your 1/2 cup of dried fruit. Serving Suggestions: Beyond the BowlYour jar of simple homemade granola is a powerhouse of potential. Here’s how to enjoy it:
Storage & Shelf Life: Keeping It CrispProper storage is essential to maintain that just-baked crunch. Once completely cool, transfer your granola to an airtight container. A glass jar with a sealable lid or a large container with a tight-fitting lock is ideal. Store it in a cool, dry pantry or cupboard away from direct sunlight or heat sources. Properly stored, your simple homemade granola will stay fresh and delicious for up to 3 weeks. For longer storage, you can freeze it for up to 3 months in a freezer-safe bag or container. There’s no need to thaw; just grab a handful straight from the freezer. Delicious Variations to TryOnce you’ve mastered the base, the world is your oyster! Try these themed variations:
Frequently Asked Questions (FAQ)We’ve gathered the most common questions about making the perfect simple homemade granola. 1. Why is my granola not clumping into clusters? The main culprits are stirring too soon during baking or not using enough binding liquid. Press the mixture down firmly before baking and don’t touch it for the first 15 minutes. Also, ensure your wet-to-dry ratio is correct. 2. Can I make this granola without oil? Yes, but the texture will be different. You can substitute an equal amount of unsweetened applesauce, but the granola will be chewier and less crisp. For oil-free crispiness, it’s challenging to replicate the same result. 3. My granola burned! What happened? Your oven temperature is likely too high, or your baking sheet is too dark (which absorbs more heat). Always use a light-colored pan, parchment paper, and stick to 300°F. Ovens vary, so start checking at the 25-minute mark. 4. Is this granola recipe gluten-free? It is naturally gluten-free if you use certified gluten-free oats. Oats are often processed in facilities with wheat, so check the packaging if you have celiac disease or a severe sensitivity. 5. Can I use quick oats instead of old-fashioned? We don’t recommend it. Quick oats are cut smaller and will result in a powdery, less textured granola that burns more easily. Old-fashioned rolled oats provide the ideal structure and chew. 6. How can I make it less sweet? Reduce the maple syrup to 1/4 cup. The granola will be slightly less clumpy but still delicious. Do not eliminate it entirely, as it’s needed for binding and browning. 7. Can I double this recipe? Absolutely! Double all ingredients. You will need to bake it on two separate baking sheets, placed on two oven racks. Rotate the sheets top-to-bottom and front-to-back halfway through baking for even cooking. 8. Why add dried fruit after baking? Adding dried fruit before baking can cause it to become extremely hard, chewy, or even burn. Adding it after preserves its flavor, texture, and nutrients. Loved This Recipe? Share the Crunch!If this simple homemade granola has become your new pantry staple, please share it with friends and family! Pin the image below to your Pinterest boards to save it for later, and follow @cookingwithemy for more easy, foolproof recipes. 
Strawberry Almond Granola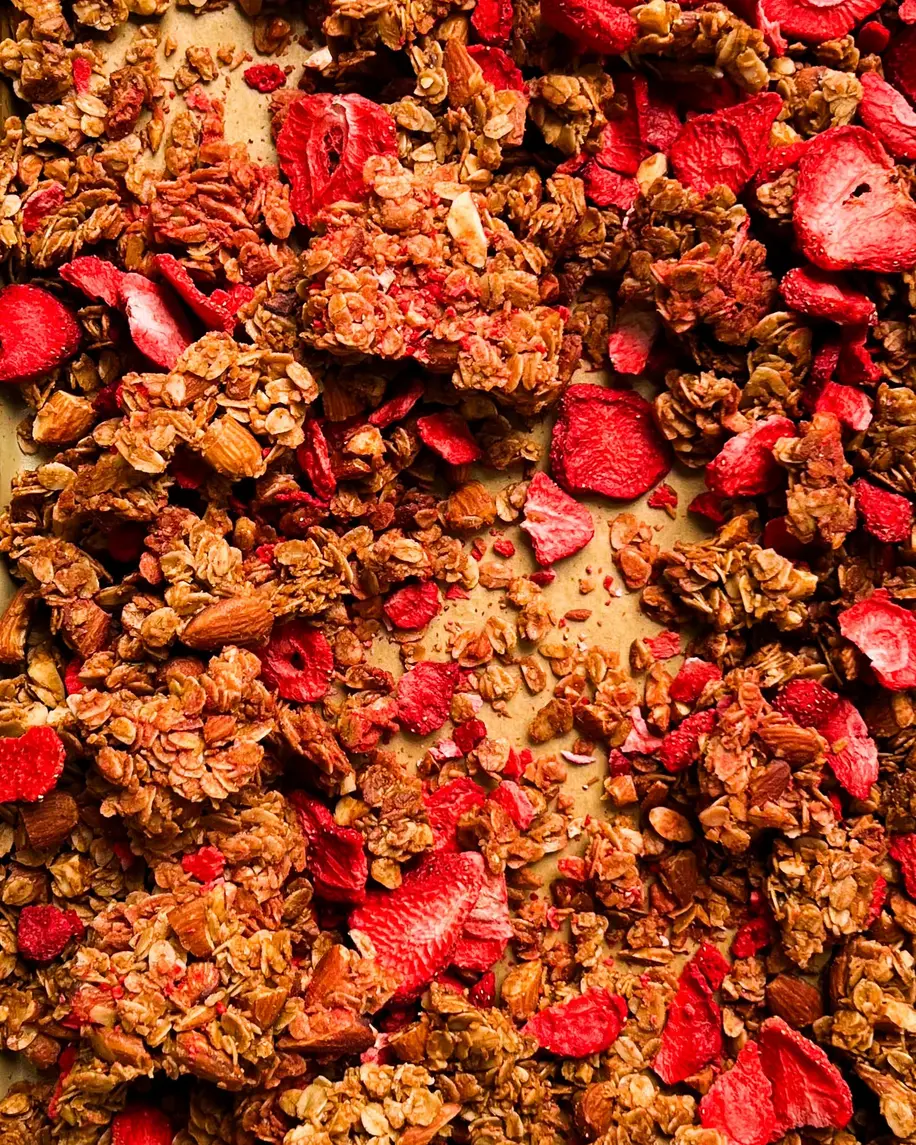
Table of ContentsThe Ultimate Crunchy & Sweet Strawberry Almond Granola RecipeThis Strawberry Almond Granola is the perfect homemade breakfast or snack, combining hearty oats, crunchy almonds, and sweet bursts of freeze-dried strawberry in a honey-vanilla glaze. It’s easy, customizable, and far better than anything from a box!
Why This Strawberry Almond Granola is a Game-ChangerLet’s be honest: store-bought granola is often a disappointment. It’s either too sweet, too hard, or filled with mysterious ingredients you can’t pronounce. That’s why we, The Kitchen Team, are passionate about creating homemade versions that put you in control. This Strawberry Almond Granola is our spring and summer anthem in a jar. It captures the essence of the season with its vibrant strawberry flavor, satisfying almond crunch, and the warm, comforting notes of vanilla and honey. This recipe isn’t just about mixing oats and baking them. It’s a carefully crafted method designed to create the perfect cluster—those delightful, crunchy chunks that make granola so irresistible. We use a simple syrup technique with almond butter and olive oil to coat every oat and nut evenly, resulting in a granola that bakes up golden, toasty, and full of texture. The freeze-dried strawberries are added after baking, preserving their intense berry flavor and delightful crispness. Whether you sprinkle it over yogurt, enjoy it with milk, or simply eat it by the handful, this granola will transform your morning routine. Why This is the Best Homemade Granola RecipeAfter testing countless granola formulas, we’ve landed on what we believe is the perfect balance. Here’s what sets this recipe apart: The Cluster Factor: The key to great granola is the cluster. Our method of pressing the granola into a compact layer after stirring halfway through baking encourages the oats and nuts to stick together, creating those perfect, snackable chunks. Flavor Synergy: The combination of almond butter and sliced almonds gives a double dose of rich, nutty flavor. The honey (or maple syrup) provides a floral sweetness that complements the tart strawberries, while a touch of vanilla bean paste adds a deep, aromatic complexity that extract alone can’t match. Smart Ingredient Choices: Using olive oil instead of a neutral oil adds a subtle, fruity background note that pairs wonderfully with the strawberries. Unsweetened shredded coconut toasts up beautifully for extra texture without overwhelming sweetness. Texture Mastery: By adding the freeze-dried strawberries after baking, we ensure they stay crisp and brightly flavored, providing a wonderful contrast to the toasted oats and nuts.
💡 The Kitchen Team’s Pro Tip: For the most intense strawberry flavor, look for freeze-dried strawberries that are unsweetened. They pack a powerful, natural berry punch that sweetened or dried strawberries simply can’t replicate.
Ingredients for Strawberry Almond Granola & Possible SubstitutionsHere’s everything you need to make this delicious granola. We’ve included a detailed table with weights (for accuracy) and cup measurements (for convenience), along with substitution ideas to make this recipe your own.
Step-by-Step Instructions for Perfect GranolaFollow these simple steps for foolproof, clumpy, perfectly toasted granola every single time. Step 1: Prep and Preheat. Preheat your oven to 325°F (165°C). Line a standard half-sheet pan (approximately 18″ x 13″) with parchment paper. No greasing is needed. Using the right-sized pan is crucial for an even layer that bakes properly. Step 2: Mix the Dry Ingredients. In a large mixing bowl, combine the rolled oats, chopped almonds, and shredded coconut. Stir until evenly distributed. This ensures the wet mixture will coat everything uniformly. Step 3: Create the Flavor Syrup. In a small saucepan, combine the almond butter, olive oil, honey, vanilla, and salt. Place the pot over medium heat. Cook, stirring constantly with a whisk or spatula, until the mixture is smooth, homogeneous, and just begins to bubble gently around the edges. This should only take 2-4 minutes. The goal is to warm it enough to thin it out and combine the ingredients—not to cook it vigorously. It should be warm to the touch, not scalding hot.
💡 The Kitchen Team’s Pro Tip: Warming the wet ingredients is the secret to easy mixing and perfect coating. Cold almond butter and honey won’t distribute evenly, leaving you with dry patches in your granola.
Step 4: Combine Wet and Dry. Pour the warm syrup mixture over the bowl of dry ingredients. Using a flexible spatula, fold and stir until every single oat and nut is thoroughly coated and glistening. This may take a minute or two of diligent mixing. Step 5: Bake for Clusters. Dump the granola mixture onto your prepared baking sheet. Spread it out into a fairly even layer, about 1/4 to 1/2-inch thick. Bake for 12 minutes. Remove the pan from the oven (close the door to keep heat in!). Using your spatula, stir and turn the granola, bringing the edges into the center and vice-versa. This prevents burning. Now, here’s the cluster magic: firmly press the stirred granola down into a compact, even layer with the back of your spatula. Return the pan to the oven. Step 6: Finish Baking and Cool Completely. Bake for another 13-15 minutes, or until the granola is golden brown and smells incredibly fragrant. It will still feel slightly soft when hot but will crisp up as it cools. Do not overbake! Remove the pan from the oven and place it on a wire rack. Let the granola cool completely on the pan, undisturbed, for 45-60 minutes. This cooling period is when the granola sets and hardens into those glorious clusters. Step 7: Add Strawberries and Break Apart. Once the granola is completely cool to the touch, sprinkle the freeze-dried strawberries over the top. Use your hands or a spoon to break the granola sheet into clusters of your desired size. Gently mix the strawberries into the clusters. Transfer to an airtight container. How to Serve Your Homemade GranolaThis Strawberry Almond Granola is incredibly versatile. Here are our favorite ways to enjoy it:
Storage & Freezing InstructionsProper storage is key to maintaining that perfect crunch. Room Temperature: Store the completely cooled granola in an airtight container at room temperature for up to 2 weeks. A mason jar with a tight lid works beautifully. Freezing for Long-Term Storage: This granola freezes exceptionally well! Place it in a freezer-safe bag or container, press out as much air as possible, and freeze for up to 3 months. Thaw at room temperature for about 30 minutes before serving. There’s no need to reheat.
💡 The Kitchen Team’s Pro Tip: To keep your granola extra fresh and prevent any potential softening, you can add a small desiccant packet (like the ones found in seaweed snacks or new purses) to your storage container. It will absorb any ambient moisture.
Delicious Recipe VariationsOnce you’ve mastered the base recipe, the flavor world is your oyster! Try these delicious twists:
Frequently Asked Questions (FAQ)Can I make this granola vegan? Absolutely! Simply substitute the honey with an equal amount of pure maple syrup. Ensure your almond butter and other ingredients are vegan-friendly (some brands may have trace additives). Why did my granola turn out soft and not crunchy? The most common reasons are underbaking or not letting it cool completely before breaking it apart. The granola must cool on the pan to crisp up. Also, ensure your oven temperature is accurate with an oven thermometer. Stirring too frequently or breaking it while warm can also prevent proper cluster formation. Can I use fresh or frozen strawberries instead of freeze-dried? We do not recommend it. Fresh or frozen strawberries contain too much moisture, which will make your granola soggy and cause it to spoil quickly. Freeze-dried fruit is essential for maintaining crunch and shelf-stability. My granola burned on the edges. What happened? This usually means your oven has hot spots or the granola was spread unevenly. Make sure to stir halfway through baking, moving the edges to the center. Using a light-colored metal pan (not dark) and the middle oven rack can also help prevent over-browning. Can I double this recipe? Yes, but you must use two baking sheets. Do not pile all the granola onto one sheet, as it will steam instead of toast and won’t cook evenly. Switch the sheet pan positions in the oven halfway through baking for even results. Is this granola gluten-free? It can be, provided you use certified gluten-free rolled oats. All other ingredients are naturally gluten-free, but always check labels for cross-contamination warnings if you have celiac disease or a severe sensitivity. Can I use a different nut butter? Yes! Creamy peanut butter, cashew butter, or even sunflower seed butter (for a nut-free version) will work perfectly. The flavor will change accordingly, but the method remains the same. How can I make bigger clusters? After stirring at the halfway point, press the granola down VERY firmly and do not stir again. The more compact the layer, the bigger the resulting clusters will be after cooling. You can also slightly increase the almond butter, as it acts as a binder. Made This Recipe?If you loved this Strawberry Almond Granola recipe, please share it with your friends and family! Tag us on social media @cookingwithemy so we can see your beautiful creations. Save This Recipe for Later!Pin the image below to your Breakfast Ideas or Healthy Snacks board on Pinterest to save this ultimate Strawberry Almond Granola recipe for the next time you need a delicious homemade treat. Follow us on Pinterest: @cookingwithemy for more inspired recipes. [Image: A beautiful glass jar filled with the finished Strawberry Almond Granola, next to a bowl of yogurt topped with the granola and fresh strawberries.] Click the “Pin It” button or drag the image to your Pinterest browser extension!
|