“`html
Table of Contents
- Baked Pears with Berries, Honey, Walnuts Blue Cheese: The Only Recipe You’ll Ever Need
- Why This Baked Pears with Berries, Honey, Walnuts Blue Cheese Recipe is a Game-Changer
- Ingredient Spotlight: Quality Makes the Difference
- Steps
- Serving & Presentation
- Make-Ahead & Storage Solutions
- Frequently Asked Questions (FAQ)
- How long do baked pears with berries and blue cheese typically take to cook?
- What are good substitutes for walnuts in baked pears with honey and blue cheese?
- Can I use other types of berries besides blueberries in this baked pear recipe?
- What’s the best way to serve baked pears with honey, walnuts, and blue cheese?
- Can I make this recipe vegan/gluten-free?
- What kind of pears are best for baking?
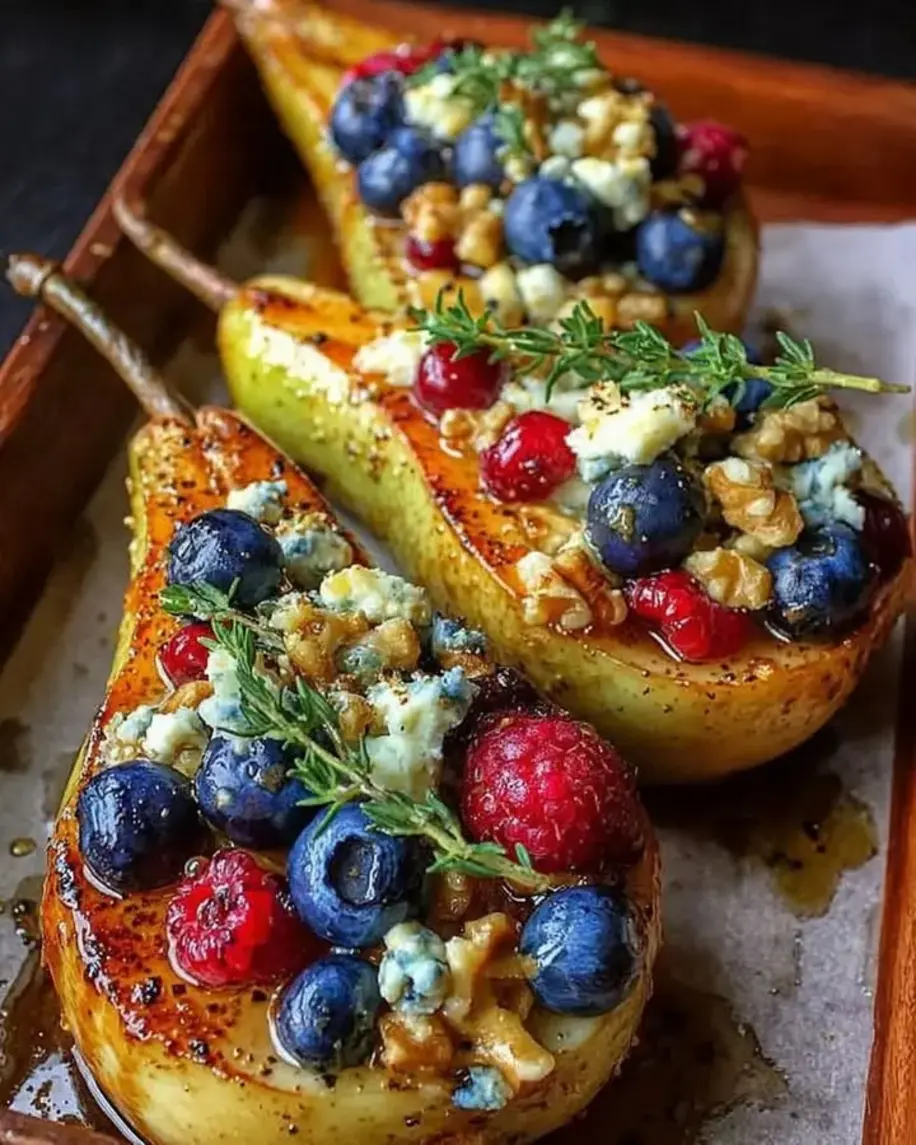
Baked Pears with Berries, Honey, Walnuts Blue Cheese: The Only Recipe You’ll Ever Need
Are you searching for a dessert that’s both simple to create and undeniably elegant? Look no further than this extraordinary Baked Pears with Berries, Honey, Walnuts Blue Cheese recipe. It’s the perfect solution for when you want to impress guests or treat yourself to something truly special without spending hours in the kitchen. This recipe transforms humble pears into a gourmet delight, marrying sweet and savory notes in a way that will have everyone asking for seconds. Forget complicated pastry or fussy techniques; this stuffed pears recipe is all about showcasing the natural beauty and flavor of its ingredients with minimal effort.
Imagine tender, yielding pears, baked to perfection, their natural sweetness intensified. They’re then embraced by a cascade of vibrant fresh berries, their tartness a delightful counterpoint. A drizzle of golden honey weaves everything together, while toasted walnuts add a satisfying crunch. The unexpected star? Crumbled blue cheese, melting slightly into the warm fruit, creating a complex, lip-smacking sweet and savory symphony that is utterly addictive. This dessert is a true sensory experience, a harmonious blend of soft, crisp, sweet, and tangy that dances on your palate.
At cookingwithemy.com, we believe that the best recipes are those that are reliable, delicious, and inspiring. This particular baked fruit dessert has been perfected to ensure you achieve restaurant-quality results every single time. We’ll guide you through each step, sharing the secrets that elevate simple baked pears with blue cheese into an unforgettable culinary moment. Get ready to discover why this pears with blue cheese recipe, with its delightful honey walnut pears combination, is destined to become a cherished favorite.
Why This Baked Pears with Berries, Honey, Walnuts Blue Cheese Recipe is a Game-Changer
The Chef’s Secret:
The magic in this stuffed pears recipe lies in the unexpected pairing of sweet fruit with the salty tang of blue cheese, amplified by the natural sweetness of honey and the earthy crunch of walnuts. The key to this dessert’s success isn’t a complicated technique, but rather the thoughtful balance of contrasting flavors and textures. We’re not overpowering the delicate pears; instead, we’re enhancing them. The chosen blue cheese should be one with a pronounced, but not overwhelming, flavor — think Gorgonzola Dolce or a mild Roquefort. This thoughtful ingredient selection creates a sophisticated interplay that makes this baked fruit dessert stand out.
Unbeatable Texture:
The baking process is crucial for achieving that perfect pear texture. Ripe yet firm pears are essential; overripe pears will become mushy, losing their structure. Baking them cut-side up allows the honey and juices to pool slightly, tenderizing the pear flesh from the inside out. The berries soften and release their juices,
Foolproof for a Reason:
We’ve tested this baked pears with berries and blue cheese recipe countless times to ensure it’s as straightforward as possible. The beauty of this dessert is its inherent simplicity. There’s no room for error when you’re essentially just preparing and baking fruit. The clear instructions and simple ingredient list mean even beginner cooks can achieve stunning results. It’s the perfect recipe for those evenings when you want a show-stopping dessert without the stress, guaranteeing a delicious outcome every time.
Ingredient Spotlight: Quality Makes the Difference
Pears:
The foundation of our dessert. For this recipe, it’s crucial to select pears that are ripe but still firm to the touch. Varieties like Bosc, Anjou, or Bartlett are excellent choices. They hold their shape well during baking and offer a pleasant, slightly grainy texture. Overripe pears will turn to applesauce, while underripe ones will remain too hard. The natural sweetness of the pear is key, so choosing fresh, unblemished fruit is important. If you can’t find them, firm apples like Honeycrisp or Fuji can be a good substitute, though they will offer a different flavor profile.
Fresh Mixed Berries:
These little jewels add a burst of freshness and a welcome tartness to cut through the sweetness of the pears and honey. Strawberries, blueberries, raspberries, and blackberries all work beautifully. If using larger strawberries, quartering or even halving them will help them distribute evenly and cook down slightly. For a consistent flavor, you can use a single type of berry, but the mix provides a beautiful visual appeal and a more complex fruity note. Frozen berries can be used in a pinch, but be sure to drain them well to avoid excess moisture.
Honey:
This liquid gold is more than just a sweetener; it infuses warmth and floral notes into the dish. The type of honey you use can subtly influence the final flavor. A mild clover honey is a classic choice, but a buckwheat honey will add a bolder, more robust flavor, while a lavender honey can introduce a perfumed aroma. The honey also helps to caramelize slightly in the oven, adding another layer of deliciousness. If you have severe allergies or simply don’t have honey on hand, maple syrup offers a similar consistency and a delightful richness, making it an excellent substitution.
Walnuts:
Toasted walnuts are essential for their satisfying crunch and earthy, slightly bitter notes that beautifully balance the sweetness of the pears and honey. Roughly chopped walnuts are ideal, as they provide texture without being too small to notice. Toasting them beforehand, even for a few minutes in a dry skillet or in the oven until fragrant, significantly deepens their flavor and improves their crispness. Pecans are a fantastic substitute, offering a buttery flavor and similar crunch. Almonds, roughly chopped, are also a good option, providing a more delicate nutty flavor.
Blue Cheese:
This is the unexpected hero of our dish, adding a sophisticated salty and tangy dimension that elevates the entire dessert. The key is to use a blue cheese that’s creamy and flavorful but not overwhelmingly sharp. Gorgonzola Dolce, a milder Italian blue cheese, is a fantastic choice. A good quality crumbled Danish Blue also works well. The blue cheese will melt slightly into the warm pear and berry mixture, creating delicious pockets of creamy, savory goodness. For a dairy-free or vegan option, a good quality vegan blue cheese alternative can be used, though the flavor will differ.
Step 1: Preparing the Pears
Begin by preheating your oven to 375°F (190°C). This ensures the pears have an optimal temperature to become tender. Next, take your ripe but firm pears and halve them lengthwise. Using a spoon or a melon baller, carefully scoop out the core and seeds from each half. This creates a perfect little well to hold the delicious toppings. Aim for clean hollows that will cradle the berries, honey, and cheese.
Pro Tip: If your pears are a bit wobbly, you can thinly slice off a tiny bit from the bottom of each pear half after coring. This creates a flat base, ensuring they sit steadily in your baking dish without tipping over.
Step 2: Building the Flavor Layers
Once your pears are prepped and ready in their baking dish, it’s time to add the flavor. Drizzle the honey evenly over the cut surface of each pear half. This sweet, golden liquid will not only add sweetness but also help caramelize beautifully as it bakes. Next, generously sprinkle the fresh mixed berries over the honey. Don’t be afraid to fill the hollows! Then, scatter the roughly chopped walnuts over the berries, adding that essential crunch. Finally, crumble the blue cheese over the entire concoction, letting the little crumbles fall into the nooks and crannies.
Common Mistake to Avoid: Don’t over-mush the blue cheese before crumbling. You want distinct pieces that will melt and distribute their flavor, rather than a uniform paste covering the pears. This allows for pockets of intense savory flavor.
Step 3: Baking to Perfection
Carefully place the baking dish into your preheated oven. Bake for 20 to 25 minutes. You’re looking for the pears to be tender when pierced with a fork, but not so soft that they fall apart. The berries should be softened and slightly juicy, the walnuts lightly toasted, and the blue cheese should be melted and beginning to turn golden in places. Keep an eye on them during the last few minutes to prevent burning, especially if your oven runs hot.
Pro Tip: If you notice the toppings browning too quickly, you an loosely tent the baking dish with aluminum foil for the remainder of the baking time.
Step 4: Resting and Serving
Once baked to perfection, carefully remove the baking dish from the oven. Let the pears cool slightly for about 5-10 minutes before serving. This allows the flavors to meld and prevents anyone from burning their tongues on hot fruit and cheese. The slight cooling also helps the dish set just a bit, making it easier to serve.
Common Mistake to Avoid: Serving immediately might seem tempting, but allowing a short resting period truly enhances the flavor and safety of this dessert.
Serving & Presentation
This exquisite baked fruit dessert is not only a delight to taste but also a feast for the eyes. For an elegant presentation, serve each warm pear half on a small dessert plate. A delicate dusting of powdered sugar can add a touch of sophistication, or a tiny sprig of fresh mint or thyme can provide a pop of color and an aromatic hint. The natural beauty of the berries, the glistening honey, and the melted blue cheese are presentation enough, but a small dollop of vanilla bean ice cream or a swirl of lightly whipped cream alongside the pear makes it truly indulgent. For a more savory leaning presentation, a drizzle of balsamic glaze can add a sophisticated tang that complements the blue cheese beautifully.
These baked pears with berries, honey, walnuts and blue cheese are incredibly versatile and pair wonderfully with a variety of main courses. They make a perfect end to a hearty steak dinner, a roasted chicken dish, or even a flavorful pork tenderloin. They also stand beautifully on their own as a lighter, yet satisfying, dessert. Consider serving them after a special holiday meal, a romantic dinner for two, or simply when you crave a comforting, elegant treat.
Make-Ahead & Storage Solutions
Make-Ahead Strategy: To get ahead of your dessert preparation, you can halve and core the pears a day in advance. Store them in an airtight container in the refrigerator, perhaps with a squeeze of lemon juice to prevent browning. You can also whisk together your honey and a little bit of chopped walnuts ahead of time and store separately. The blue cheese can be crumbled and stored in its own container. Assemble the pears just before baking for the freshest results.
Storing Leftovers: Leftover baked pears can be stored in an airtight container in the refrigerator for up to 2-3 days. While they are best enjoyed fresh, refrigeration prevents spoilage. The textures might soften slightly, and the walnuts may lose some of their crispness, but the flavor will remain delicious.
The Best Way to Reheat: For the best reheating experience, gently warm the leftover baked pears in a preheated oven at 300°F (150°C) for about 5-10 minutes, or until warmed through. This helps to restore some of their tenderness and warmth. Alternatively, you can microwave them on a lower power setting for short intervals, being careful not to overcook. Reheating on the stovetop in a covered skillet over low heat is also an option, though less ideal for maintaining the delicate texture of the fruit.
Frequently Asked Questions (FAQ)
How long do baked pears with berries and blue cheese typically take to cook?
This baked fruit dessert typically takes about 20-25 minutes to bake in a preheated oven at 375°F (190°C). The exact time can vary slightly depending on the ripeness and variety of pears you use, as well as your oven. You’ll know they’re ready when the pears are tender when pierced with a fork and the toppings are bubbling and lightly golden.
What are good substitutes for walnuts in baked pears with honey and blue cheese?
Excellent substitutes for walnuts in this stuffed pears recipe include pecans, almonds, or even hazelnuts. For a nut-free version, try substituting with toasted pumpkin seeds (pepitas) or sunflower seeds for a satisfying crunch. Ensure they are roughly chopped to ensure good distribution and texture within the dessert.
Can I use other types of berries besides blueberries in this baked pear recipe?
Absolutely! While blueberries are lovely, this recipe is very forgiving. Feel free to use a mix of your favorite berries such as raspberries, strawberries (quartered or halved), blackberries, or even cranberries for a tarter flavor. The key is to have a variety of colors and a balance of sweetness and tartness.
What’s the best way to serve baked pears with honey, walnuts, and blue cheese?
These stuffed pears are best served warm, shortly after baking. They are delicious on their own, but for an extra decadent treat, serve them with a scoop of vanilla bean ice cream, a dollop of crème fraîche, or a swirl of lightly whipped cream. A drizzle of balsamic glaze can also add a sophisticated touch that complements the blue cheese.
Can I make this recipe vegan/gluten-free?
To make this baked fruit dessert vegan, you’ll need to substitute the blue cheese with a plant-based blue cheese alternative. Ensure your honey is replaced with maple syrup or agave nectar. The rest of the ingredients (pears, berries, walnuts) are naturally vegan and gluten-free. This recipe is inherently gluten-free as written, making it an excellent option for those with gluten sensitivities.
What kind of pears are best for baking?
For baking, it’s best to choose pears that are ripe but still firm, as they hold their shape well during cooking. Varieties like Bosc, Anjou, or Bartlett are excellent choices. Avoid overripe pears, as they can become mushy, and underripe pears, which will remain hard even after baking.
Tried This Recipe? Leave a Comment!
Did you make this recipe? I’d love to hear how it turned out! Please leave a comment and a rating below. Your feedback helps other home cooks and supports cookingwithemy!
For more delicious inspiration, follow me on Pinterest!
“`
.
Print
Baked Pears with Berries, Honey, Walnuts and Blue Cheese
- Total Time: 35 minutes
- Yield: 4 1x
Description
A simple and elegant dessert featuring baked pears topped with fresh berries, honey, walnuts, and blue cheese for a sweet and savory flavor.
Ingredients
- 4 ripe pears, halved and cored
- 1 cup fresh mixed berries (such as strawberries and blueberries)
- 2 tablespoons honey
- 1/2 cup walnuts, roughly chopped
- 1/4 cup blue cheese, crumbled
Instructions
- Preheat the oven to 375°F (190°C).
- Place the pear halves cut side up in a baking dish.
- Drizzle the pears with honey.
- Sprinkle the berries, walnuts, and blue cheese evenly over the pears.
- Bake in the preheated oven for 20-25 minutes, or until the pears are tender.
- Remove from the oven and let cool slightly before serving.
Notes
For a vegan version, substitute blue cheese with a plant-based alternative. Serve warm with a scoop of vanilla ice cream for extra indulgence.
- Prep Time: 10 minutes
- Cook Time: 25 minutes
- Method: Dessert
- Cuisine: American
Nutrition
- Calories: 220
- Sugar: 18g
- Fat: 11g
- Carbohydrates: 28g
- Protein: 4g
