“`html
On This Page
Old Fashioned Fudge Recipe – Timeless and Delicious
Introduction: Unlocking the Sweetness of Nostalgia
Did you know that over 70% of home bakers consider fudge one of their most comforting nostalgic treats? If you’re craving a taste of pure, unadulterated sweetness that transports you back to simpler times, you’ve come to the right place! This Old Fashioned Fudge Recipe is a celebration of tradition, a journey into rich, creamy, melt-in-your-mouth goodness that’s remarkably easy to master. Forget complicated techniques and temperamental chocolates; this classic recipe relies on simple ingredients and tried-and-true methods to deliver a profoundly satisfying fudge experience. Perfect for family gatherings, holiday gifting, or simply indulging your sweet tooth, this recipe is your ticket to creating a timeless treat that will be cherished by generations.
Ingredients for Timeless Fudge
The magic of old-fashioned fudge lies in its simplicity. High-quality ingredients are key to achieving that perfect creamy texture and rich flavor. Here’s what you’ll need:
- 2 cups (400g) Granulated Sugar: The foundation of your fudge, providing sweetness and structure. Choose a fine granulated sugar for easier dissolving.
- 3/4 cup (180ml) Evaporated Milk: This is crucial! Evaporated milk’s low water content and high milk solids contribute to the smooth, creamy texture and prevent crystallization. Substitution: Whole milk can be used, but the texture might be slightly less firm.
- 1/2 cup (113g) Unsalted Butter: Adds richness and a desirable mouthfeel. Ensure it’s at room temperature for easy incorporation.
- 1 teaspoon Vanilla Extract: For that classic, comforting aroma and flavor that enhances the chocolate. Use pure vanilla extract for the best taste.
- 6 ounces (170g) Semi-Sweet Chocolate Chips: The heart of your fudge! Choose good quality chips for a deep chocolate flavor. You can also use chopped semi-sweet chocolate bars.
- 1 cup (100g) Marshmallow Creme (or Fluff): This ingredient is the secret to achieving a wonderfully smooth, never-grainy texture that melts beautifully on your tongue.
- 1/2 cup (60g) Chopped Walnuts or Pecans (Optional): For a delightful crunch and nutty contrast. Toasting them beforehand intensifies their flavor.
Timing Your Fudge Making
While making fudge might seem intimidatingly precise, this recipe is designed for home cooks. Understanding the timing helps ensure success.
Compared to some traditional fudge recipes that can involve extensive cooking and precise candy thermometer readings, this method is relatively quick. Many elaborate fudge recipes can take upwards of 45 minutes of active cooking. This recipe streamlines the process without sacrificing the classic taste and texture.
Step-by-Step Guide to Delicious Fudge
Follow these steps carefully, and you’ll be rewarded with perfect fudge every time!
Step 1: Prepare Your Pan
Line an 8×8 inch (20×20 cm) baking pan with parchment paper, leaving an overhang on all sides. This will make it easy to lift the fudge out once it’s set. Lightly grease the parchment paper as well for extra insurance.
Step 2: Combine the Base Ingredients
In a heavy-bottomed saucepan, combine the granulated sugar, evaporated milk, and butter (and salt if you didn’t use salted butter). Place the pan over medium heat. Stir constantly until the butter is melted and the sugar is dissolved. This is important to prevent a gritty texture later.
Step 3: Boil to the Soft-Ball Stage
Bring the mixture to a rolling boil, stirring constantly to prevent scorching. Once it reaches a boil, stop stirring and let it boil gently for about 4-5 minutes, or until it reaches the soft-ball stage (235-240°F or 113-116°C on a candy thermometer). If you don’t have a thermometer, a drop of the mixture in cold water should form a soft, pliable ball.
Step 4: Remove from Heat and Cool
Immediately remove the saucepan from the heat. Let it stand UNDISTURBED for about 15 minutes. This cooling period is crucial for the fudge to set correctly and prevent crystallization. Don’t peek or stir!
Step 5: Add Flavorings and Mix
Add the chocolate chips, marshmallow creme, vanilla extract, and optional nuts to the slightly cooled sugar mixture. Now, it’s time to beat! Using a wooden spoon or an electric mixer on low speed, beat the mixture until the chocolate chips are completely melted and the marshmallow creme is smoothly incorporated. The mixture should become smooth, glossy, and start to lose its shine, indicating it’s thickening.
Step 6: Pour and Smooth
Quickly pour the fudge into your prepared pan. Use a spatula to spread it evenly. Work fast, as fudge tends to set up quickly once it starts thickening.
Step 7: Chill and Cut
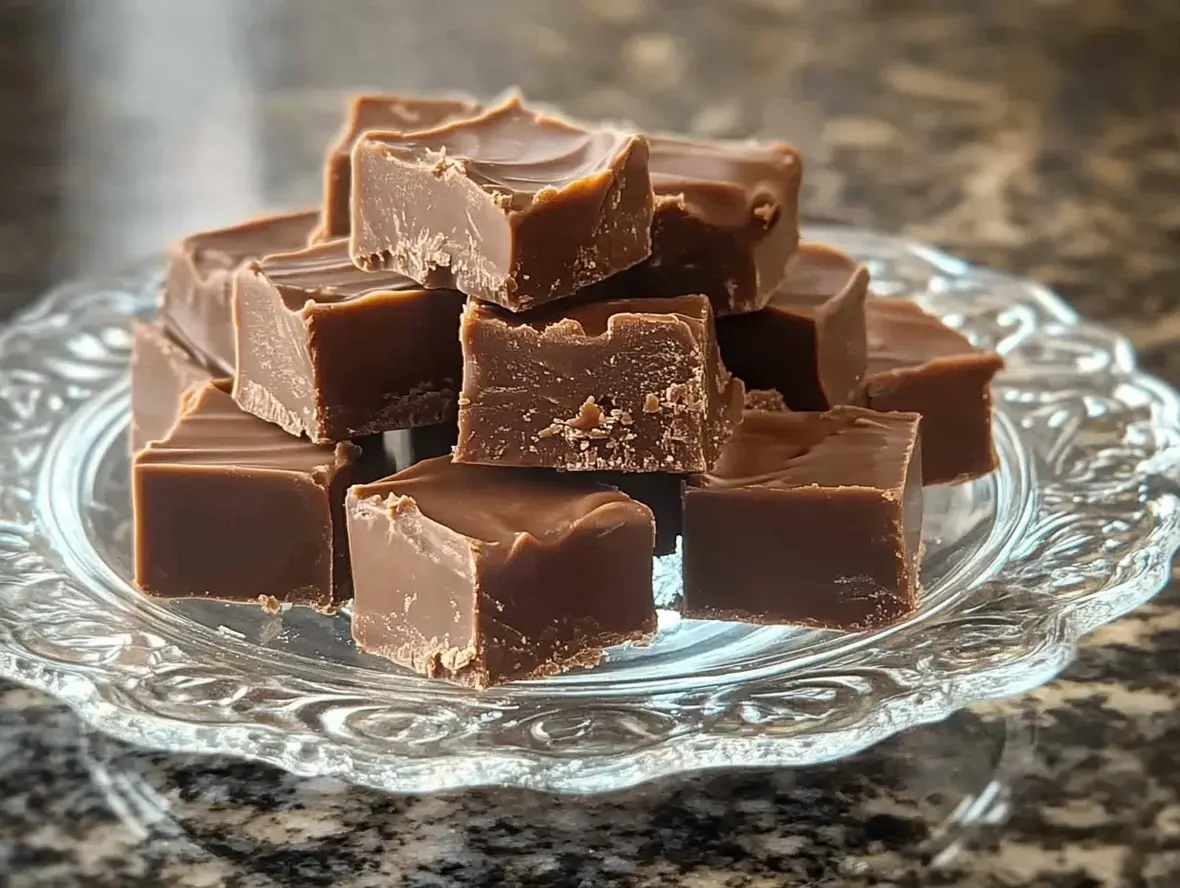
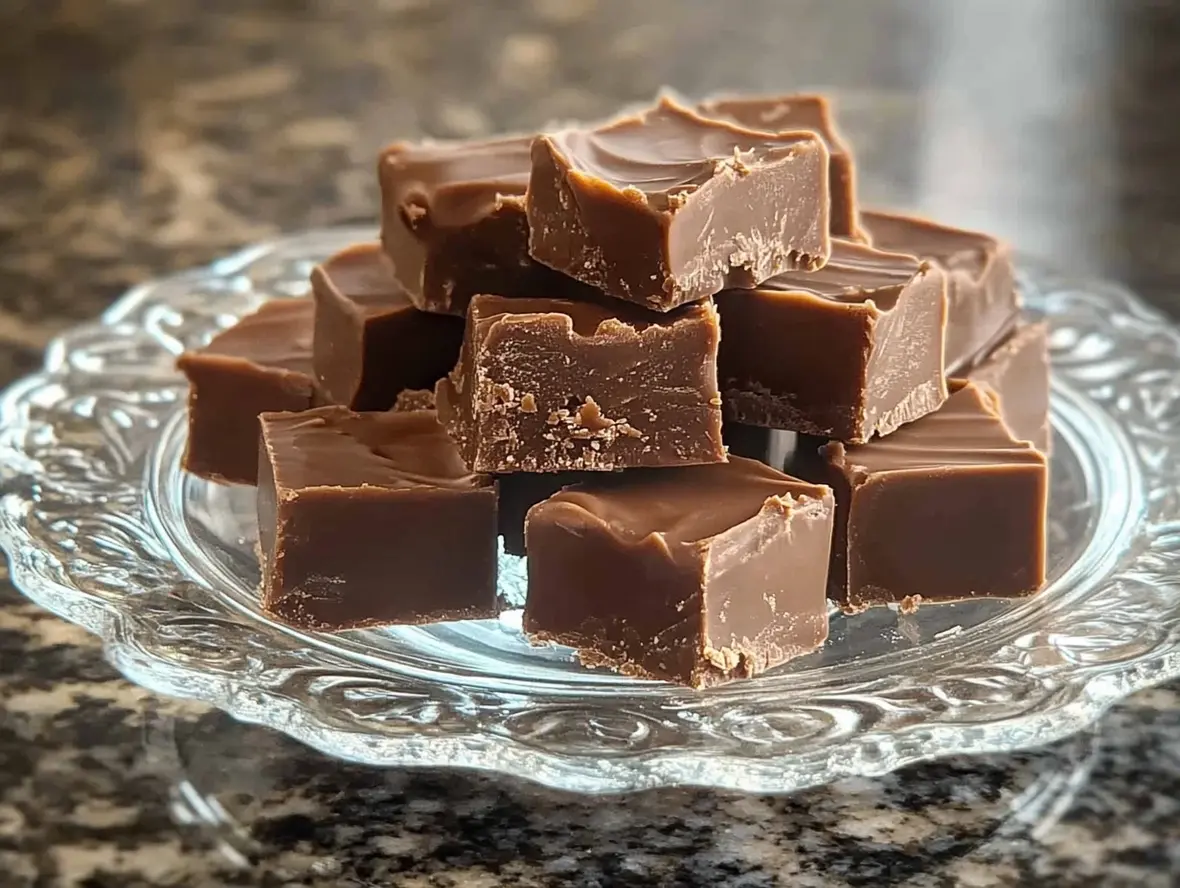
Let the fudge cool completely at room temperature, or for a quicker set, chill it in the refrigerator for about 1-2 hours, or until firm. Once firm, use the parchment paper overhang to lift the fudge out of the pan. Place it on a cutting board and cut it into squares using a sharp knife.
Nutritional Information for Homemade Fudge
A typical serving of this old-fashioned fudge is around 1-2 squares. Please note that this is an estimate and can vary based on exact ingredient measurements and portion sizes.
- Calories: Approximately 150-200 kcal per square
- Sugar: High, as expected for a traditional sweet treat.
- Fat: Primarily from butter and chocolate.
- Carbohydrates: High from sugar and milk solids.
(Note: Detailed macronutrient breakdown requires precise calculation based on specific ingredients and serving sizes.)
Healthier Alternatives and Swaps
While this is a classic indulgence, you can make some mindful adjustments:
- Sugar Reduction: While challenging to maintain texture, you can try slightly reducing the sugar, but be aware it may affect the set.
- Darker Chocolate: Opt for dark chocolate chips (70% cacao or higher) which often have less added sugar.
- Nutrient Boost: Include extra nuts for added protein and healthy fats.
- Portion Control: The best “healthier alternative” is often mindful portioning of this delicious treat!
Serving Suggestions
Old-fashioned fudge is a star on its own! Serve it chilled or at room temperature. It’s perfect:
- As a holiday treat alongside cookies and other confections.
- In a dessert buffet for parties and gatherings.
- As a sweet gift, wrapped attractively in cellophane or small boxes.
- Paired with a glass of cold milk or a warm cup of coffee.
Common Mistakes to Avoid
Achieving smooth, creamy fudge is about technique and understanding potential pitfalls:
- Not dissolving sugar properly: Leads to grainy fudge. Stir until no sugar granules are visible before boiling.
- Stirring during the cooling phase: This is critical! Don’t stir or agitate the mixture after removing it from the heat until it has cooled and you’re adding the chocolate.
- Over-boiling or under-boiling: Too long at a boil results in hard, brittle candy; not long enough means it won’t set. Use a candy thermometer if possible.
- Adding ingredients too soon or too late: Ensure the sugar mixture has cooled slightly before adding chocolate and marshmallow creme to prevent seizing.
- Humidity: High humidity can negatively affect candy making. Try to make fudge on a dry day if possible.
Storing Your Homemade Fudge
Proper storage ensures your fudge stays delicious:
- At Room Temperature: Store in an airtight container layered with wax paper or parchment paper between layers. It will keep well for about 1-2 weeks.
- In the Refrigerator: For longer storage (up to 3-4 weeks), keep it in an airtight container in the fridge. Let it come to room temperature before serving for the best texture.
- Freezing: Wrap individual pieces tightly in plastic wrap and place them in a freezer-safe container. Fudge can be frozen for up to 3 months. Thaw in the refrigerator.
Tip: Avoid storing fudge with very moist items, as the sugar can absorb moisture, leading to a softer texture than desired.
Frequently Asked Questions About Fudge
***What is the difference between old-fashioned fudge and other types?***
Old-fashioned fudge, often made with evaporated milk and cooked to the soft-ball stage, typically relies on a specific cooling and beating process to achieve its signature creamy, smooth texture without graininess. Other types might use condensed milk or different heating methods, leading to varying textures, from frosting-like to very firm.
***Why is my fudge grainy?***
Graininess usually occurs when sugar crystals don’t fully dissolve or when the fudge is overworked or agitated incorrectly during the cooling process. Ensure sugar is fully dissolved before boiling, and let the mixture cool undisturbed as instructed before beating.
***Can I use regular milk instead of evaporated milk?***
You can, but it’s not ideal for achieving the traditional texture. Regular milk has more water content, which can make the fudge softer and potentially crystallize more easily. Evaporated milk’s concentrated nature is key.
***What does “soft-ball stage” mean?***
The soft-ball stage is a temperature range (235-240°F or 113-116°C) on a candy thermometer. When a small amount of the sugar mixture is dropped into cold water, it forms a soft, pliable ball that flattens when removed from the water. It’s crucial for achieving the correct fudge consistency.
Conclusion: Savor the Sweetness of Tradition
There’s a certain magic in creating something as timeless and delicious as old-fashioned fudge. This recipe honors tradition while being accessible for bakers of all levels. The rich, creamy texture and decadent chocolate flavor are simply irresistible. Whether you’re baking for a special occasion or just because, this recipe is sure to become a favorite. So gather your ingredients, follow these steps, and prepare to delight your senses with a truly classic treat. Happy baking!
Print
Old-Fashioned Chocolate Fudge
Description
This rich andcreamy chocolate fudgeis a timeless treat. Perfect for holidays, gift-giving, or satisfying your sweet tooth, it’s made with simple ingredients and a whole lot of love!
Ingredients
- 1 cupWhole Milk1 tspVanilla Extract4 tbspUnsalted Butter, softened and sliced2 cupsGranulated White Sugar½ cupUnsweetened Cocoa Powder
- 1 tspVanilla Extract4 tbspUnsalted Butter, softened and sliced2 cupsGranulated White Sugar½ cupUnsweetened Cocoa Powder
- 4 tbspUnsalted Butter, softened and sliced2 cupsGranulated White Sugar½ cupUnsweetened Cocoa Powder
- 2 cupsGranulated White Sugar½ cupUnsweetened Cocoa Powder
- ½ cupUnsweetened Cocoa Powder
Instructions
- 1️⃣Gather your ingredients:Assemble all ingredients to ensure a smooth cooking process.2️⃣Prepare the pan:Liberally grease an 8-inch square baking dish to prevent sticking. Set aside.3️⃣Mix the base:In a medium saucepan, combine the granulated sugar and cocoa powder. Stir in the milk until the mixture is smooth and uniform.4️⃣Heat the mixture:Heat the mixture over medium-high heat, stirring constantly, until it comes to a rolling boil.5️⃣Simmer and monitor:Reduce the heat to a gentle simmer. Insert a candy thermometer and let the mixture cook undisturbed until it reaches 238°F (114°C), about 10 minutes.No thermometer?Perform the water test: drop a small amount of the mixture into cold water. If it forms a soft ball that flattens when pressed, it’s ready.6️⃣Cool the mixture:Remove the saucepan from heat and let it cool to 110°F (43°C). This will take about 50-70 minutes. Do not stir during this cooling phase.7️⃣Incorporate butter and vanilla:Once cooled, add the softened butter and vanilla extract. Beat the mixture vigorously with a wooden spoon until it thickens and loses its glossy shine.8️⃣Pour and shape:Transfer the fudge mixture into the greased pan. Spread it evenly using a spatula or your hands.9️⃣Cool and cut:Let the fudge cool completely at room temperature or in the fridge. Once set, cut into 1-inch squares.
- Assemble all ingredients to ensure a smooth cooking process.
- 2️⃣Prepare the pan:Liberally grease an 8-inch square baking dish to prevent sticking. Set aside.3️⃣Mix the base:In a medium saucepan, combine the granulated sugar and cocoa powder. Stir in the milk until the mixture is smooth and uniform.4️⃣Heat the mixture:Heat the mixture over medium-high heat, stirring constantly, until it comes to a rolling boil.5️⃣Simmer and monitor:Reduce the heat to a gentle simmer. Insert a candy thermometer and let the mixture cook undisturbed until it reaches 238°F (114°C), about 10 minutes.No thermometer?Perform the water test: drop a small amount of the mixture into cold water. If it forms a soft ball that flattens when pressed, it’s ready.6️⃣Cool the mixture:Remove the saucepan from heat and let it cool to 110°F (43°C). This will take about 50-70 minutes. Do not stir during this cooling phase.7️⃣Incorporate butter and vanilla:Once cooled, add the softened butter and vanilla extract. Beat the mixture vigorously with a wooden spoon until it thickens and loses its glossy shine.8️⃣Pour and shape:Transfer the fudge mixture into the greased pan. Spread it evenly using a spatula or your hands.9️⃣Cool and cut:Let the fudge cool completely at room temperature or in the fridge. Once set, cut into 1-inch squares.
- Liberally grease an 8-inch square baking dish to prevent sticking. Set aside.3️⃣Mix the base:In a medium saucepan, combine the granulated sugar and cocoa powder. Stir in the milk until the mixture is smooth and uniform.4️⃣Heat the mixture:Heat the mixture over medium-high heat, stirring constantly, until it comes to a rolling boil.5️⃣Simmer and monitor:Reduce the heat to a gentle simmer. Insert a candy thermometer and let the mixture cook undisturbed until it reaches 238°F (114°C), about 10 minutes.No thermometer?Perform the water test: drop a small amount of the mixture into cold water. If it forms a soft ball that flattens when pressed, it’s ready.6️⃣Cool the mixture:Remove the saucepan from heat and let it cool to 110°F (43°C). This will take about 50-70 minutes. Do not stir during this cooling phase.7️⃣Incorporate butter and vanilla:Once cooled, add the softened butter and vanilla extract. Beat the mixture vigorously with a wooden spoon until it thickens and loses its glossy shine.8️⃣Pour and shape:Transfer the fudge mixture into the greased pan. Spread it evenly using a spatula or your hands.9️⃣Cool and cut:Let the fudge cool completely at room temperature or in the fridge. Once set, cut into 1-inch squares.
- 3️⃣Mix the base:
- In a medium saucepan, combine the granulated sugar and cocoa powder. Stir in the milk until the mixture is smooth and uniform.4️⃣Heat the mixture:Heat the mixture over medium-high heat, stirring constantly, until it comes to a rolling boil.5️⃣Simmer and monitor:Reduce the heat to a gentle simmer. Insert a candy thermometer and let the mixture cook undisturbed until it reaches 238°F (114°C), about 10 minutes.No thermometer?Perform the water test: drop a small amount of the mixture into cold water. If it forms a soft ball that flattens when pressed, it’s ready.6️⃣Cool the mixture:Remove the saucepan from heat and let it cool to 110°F (43°C). This will take about 50-70 minutes. Do not stir during this cooling phase.7️⃣Incorporate butter and vanilla:Once cooled, add the softened butter and vanilla extract. Beat the mixture vigorously with a wooden spoon until it thickens and loses its glossy shine.8️⃣Pour and shape:Transfer the fudge mixture into the greased pan. Spread it evenly using a spatula or your hands.9️⃣Cool and cut:Let the fudge cool completely at room temperature or in the fridge. Once set, cut into 1-inch squares.
- 4️⃣Heat the mixture:Heat the mixture over medium-high heat, stirring constantly, until it comes to a rolling boil.5️⃣Simmer and monitor:Reduce the heat to a gentle simmer. Insert a candy thermometer and let the mixture cook undisturbed until it reaches 238°F (114°C), about 10 minutes.No thermometer?Perform the water test: drop a small amount of the mixture into cold water. If it forms a soft ball that flattens when pressed, it’s ready.6️⃣Cool the mixture:Remove the saucepan from heat and let it cool to 110°F (43°C). This will take about 50-70 minutes. Do not stir during this cooling phase.7️⃣Incorporate butter and vanilla:Once cooled, add the softened butter and vanilla extract. Beat the mixture vigorously with a wooden spoon until it thickens and loses its glossy shine.8️⃣Pour and shape:Transfer the fudge mixture into the greased pan. Spread it evenly using a spatula or your hands.9️⃣Cool and cut:Let the fudge cool completely at room temperature or in the fridge. Once set, cut into 1-inch squares.
- Heat the mixture over medium-high heat, stirring constantly, until it comes to a rolling boil.
- 5️⃣Simmer and monitor:Reduce the heat to a gentle simmer. Insert a candy thermometer and let the mixture cook undisturbed until it reaches 238°F (114°C), about 10 minutes.No thermometer?Perform the water test: drop a small amount of the mixture into cold water. If it forms a soft ball that flattens when pressed, it’s ready.6️⃣Cool the mixture:Remove the saucepan from heat and let it cool to 110°F (43°C). This will take about 50-70 minutes. Do not stir during this cooling phase.7️⃣Incorporate butter and vanilla:Once cooled, add the softened butter and vanilla extract. Beat the mixture vigorously with a wooden spoon until it thickens and loses its glossy shine.8️⃣Pour and shape:Transfer the fudge mixture into the greased pan. Spread it evenly using a spatula or your hands.9️⃣Cool and cut:Let the fudge cool completely at room temperature or in the fridge. Once set, cut into 1-inch squares.
- Reduce the heat to a gentle simmer. Insert a candy thermometer and let the mixture cook undisturbed until it reaches 238°F (114°C), about 10 minutes.No thermometer?Perform the water test: drop a small amount of the mixture into cold water. If it forms a soft ball that flattens when pressed, it’s ready.6️⃣Cool the mixture:Remove the saucepan from heat and let it cool to 110°F (43°C). This will take about 50-70 minutes. Do not stir during this cooling phase.7️⃣Incorporate butter and vanilla:Once cooled, add the softened butter and vanilla extract. Beat the mixture vigorously with a wooden spoon until it thickens and loses its glossy shine.8️⃣Pour and shape:Transfer the fudge mixture into the greased pan. Spread it evenly using a spatula or your hands.9️⃣Cool and cut:Let the fudge cool completely at room temperature or in the fridge. Once set, cut into 1-inch squares.
- No thermometer?Perform the water test: drop a small amount of the mixture into cold water. If it forms a soft ball that flattens when pressed, it’s ready.
- 6️⃣Cool the mixture:Remove the saucepan from heat and let it cool to 110°F (43°C). This will take about 50-70 minutes. Do not stir during this cooling phase.7️⃣Incorporate butter and vanilla:Once cooled, add the softened butter and vanilla extract. Beat the mixture vigorously with a wooden spoon until it thickens and loses its glossy shine.8️⃣Pour and shape:Transfer the fudge mixture into the greased pan. Spread it evenly using a spatula or your hands.9️⃣Cool and cut:Let the fudge cool completely at room temperature or in the fridge. Once set, cut into 1-inch squares.
- Remove the saucepan from heat and let it cool to 110°F (43°C). This will take about 50-70 minutes. Do not stir during this cooling phase.7️⃣Incorporate butter and vanilla:Once cooled, add the softened butter and vanilla extract. Beat the mixture vigorously with a wooden spoon until it thickens and loses its glossy shine.8️⃣Pour and shape:Transfer the fudge mixture into the greased pan. Spread it evenly using a spatula or your hands.9️⃣Cool and cut:Let the fudge cool completely at room temperature or in the fridge. Once set, cut into 1-inch squares.
- 7️⃣Incorporate butter and vanilla:
- Once cooled, add the softened butter and vanilla extract. Beat the mixture vigorously with a wooden spoon until it thickens and loses its glossy shine.8️⃣Pour and shape:Transfer the fudge mixture into the greased pan. Spread it evenly using a spatula or your hands.9️⃣Cool and cut:Let the fudge cool completely at room temperature or in the fridge. Once set, cut into 1-inch squares.
- 8️⃣Pour and shape:Transfer the fudge mixture into the greased pan. Spread it evenly using a spatula or your hands.9️⃣Cool and cut:Let the fudge cool completely at room temperature or in the fridge. Once set, cut into 1-inch squares.
- Transfer the fudge mixture into the greased pan. Spread it evenly using a spatula or your hands.
- 9️⃣Cool and cut:Let the fudge cool completely at room temperature or in the fridge. Once set, cut into 1-inch squares.
- Let the fudge cool completely at room temperature or in the fridge. Once set, cut into 1-inch squares.
Notes
For extra flavor, mix in chopped nuts or mini marshmallows before pouring the fudge into the pan.Store fudge in an airtight container at room temperature for up to a week, or refrigerate for longer freshness.Be patient while beating—this step is crucial for achieving the perfect texture!
Store fudge in an airtight container at room temperature for up to a week, or refrigerate for longer freshness.Be patient while beating—this step is crucial for achieving the perfect texture!
Be patient while beating—this step is crucial for achieving the perfect texture!
“`
