“`html
Table of Contents
- Introducing the Perfect Summer Treat
- Fresh Ingredients for Sublime Flavor
- Timing Your Ice Cream Adventure
- Crafting Your Masterpiece: Step-by-Step
- Nutritional Snapshot
- Healthier Alternatives for a Lighter Indulgence
- Serving Suggestions
- Common Mistakes to Avoid
- Storing Your Homemade Ice Cream
- Frequently Asked Questions
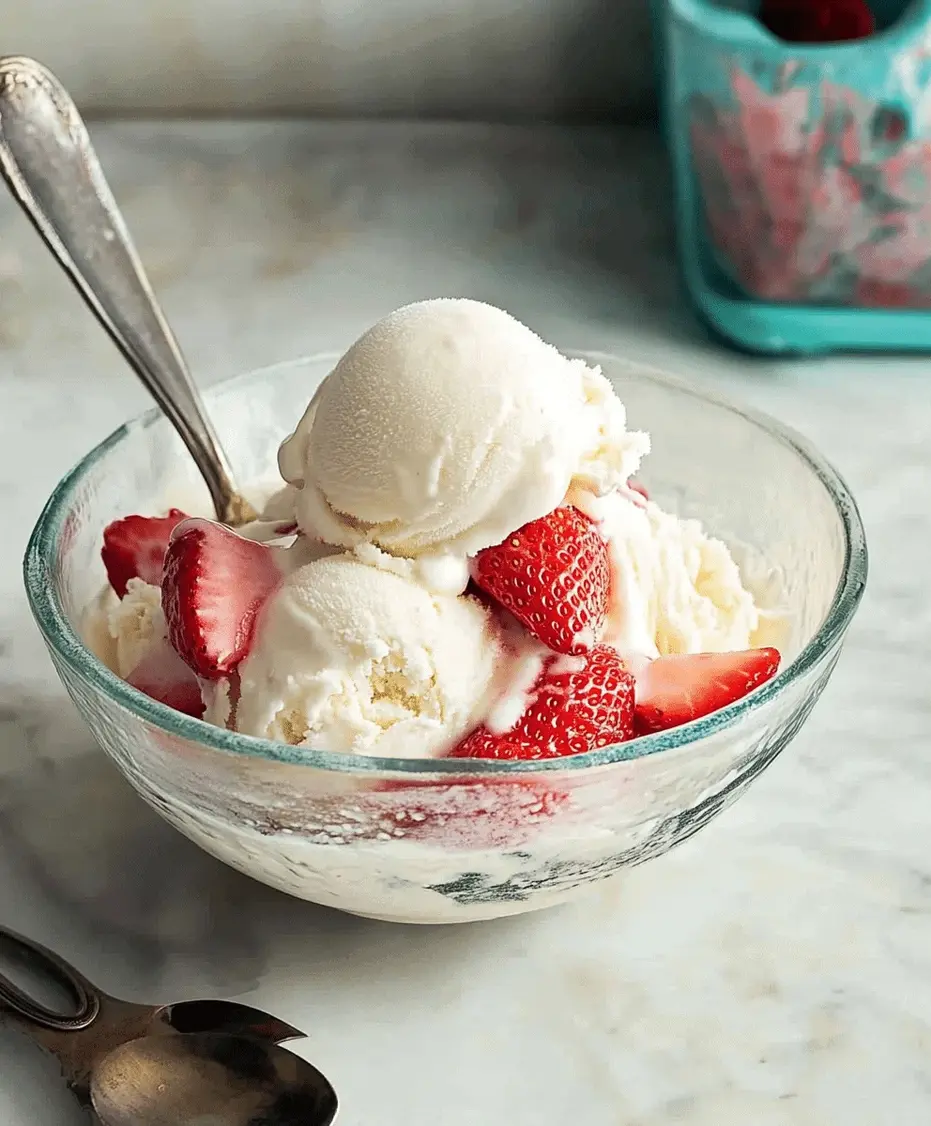
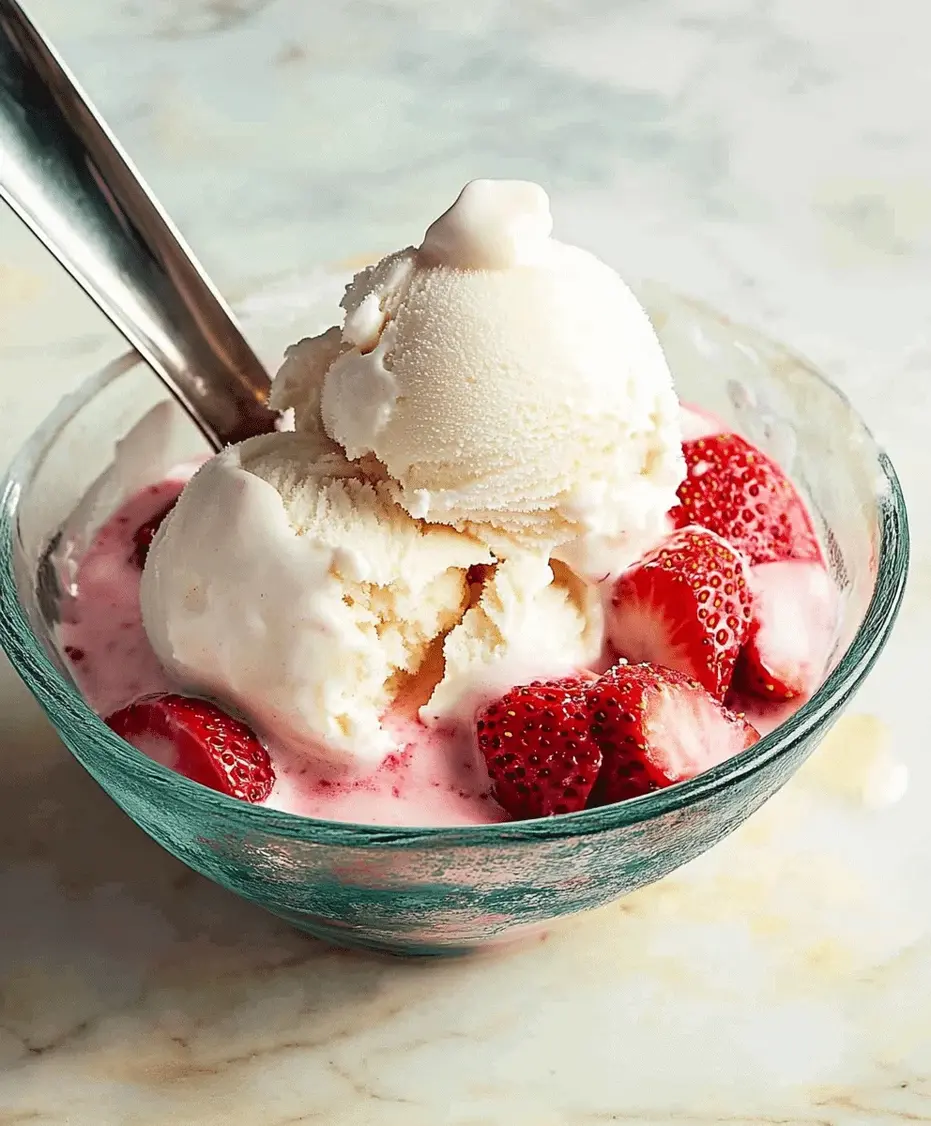
Homemade Strawberry Vanilla Bean Ice Cream Recipe
Introducing the Perfect Summer Treat
Did you know that homemade ice cream can be up to 30% richer and more flavorful than store-bought versions, thanks to the control you have over ingredients? If you’re craving a truly decadent and refreshing dessert this summer, look no further! This Homemade Strawberry Vanilla Bean Ice Cream recipe is a celebration of fresh, vibrant flavors and creamy, luxurious texture. Forget those artificial tasting frozen desserts; we’re diving into a world where ripe strawberries meet the warm, aromatic embrace of real vanilla bean. This is more than just ice cream; it’s a delightful experience, a nostalgic journey, and the ultimate way to beat the heat. Prepare to impress your friends and family, or simply treat yourself to the best homemade ice cream you’ve ever tasted!
Fresh Ingredients for Sublime Flavor
The magic of this ice cream lies in its simplicity and the quality of its ingredients. We’re focusing on fresh, natural flavors that sing. Here’s what you’ll need:
- Fresh Strawberries: About 2 cups, hulled and sliced. Opt for ripe, sweet strawberries for the best flavor. They should smell fragrantly sweet and have a deep red hue. If out of season, frozen strawberries can work in a pinch, though the fresh flavor is unparalleled.
- Heavy Cream: 2 cups. This is the backbone of our creamy texture. Look for cream with at least 36% milk fat. It provides richness and that irresistible silky mouthfeel.
- Whole Milk: 1 cup. While heavy cream brings richness, whole milk balances it out, preventing the ice cream from being too heavy.
- Granulated Sugar: ¾ cup (adjust to taste). The sweetness is key, but we don’t want it overpoweringly sweet. The sugar also helps with the ice cream’s texture, keeping it scoopable.
- Egg Yolks: 5 large. These are crucial for creating a rich, smooth, and stable custard base. They emulsify the fats and liquids, giving the ice cream its luxurious density.
- Vanilla Bean: 1 whole bean. This is where the true vanilla flavor comes from. A good vanilla bean will have a moist, pliable texture and a rich, intoxicating aroma. Scrape out the tiny, fragrant seeds.
- Lemon Juice (Optional): 1 tablespoon. A little acidity can brighten the strawberry flavor and balance the sweetness. It’s a subtle touch that makes a big difference.
Substitutions:
- Strawberries: Mixed berries or even pureed raspberries can be used.
- Vanilla Bean: If you absolutely can’t find a vanilla bean, use 2 teaspoons of pure vanilla extract, added at the end of the custard cooking process. However, the specks and nuanced flavor of a real bean are worth seeking out!
- Heavy Cream/Milk: A combination of half-and-half and heavy cream can be a good substitute if you want slightly less richness than pure heavy cream. For a dairy-free option, experiment with full-fat coconut milk and a neutral-flavored plant-based milk, though the texture will differ.
Timing Your Ice Cream Adventure
Making homemade ice cream requires a little patience, but the payoff is immense. Here’s a breakdown of the time commitment:
(Includes hulling and slicing strawberries, separating eggs, prepping vanilla bean)
(For making the custard base)
(Critical for a smooth ice cream texture)
(Depending on your ice cream maker)
(To firm up the churned ice cream)
(Significantly longer than average store-bought, but far superior in taste and quality!)
Crafting Your Masterpiece: Step-by-Step
Step 1: Prepare the Strawberries
Start by tossing your hulled and sliced strawberries with 1 tablespoon of sugar (optional, from the total measured) and the lemon juice, if using. Let them macerate at room temperature for about 15-30 minutes. This draws out their juices and intensifies their flavor. You can mash them slightly with a fork if you prefer smaller fruit pieces in your ice cream, or leave them in larger chunks for a more rustic feel. Set aside.
Step 2: Make the Custard Base
In a medium, heavy-bottomed saucepan, whisk together the heavy cream and whole milk. Heat this mixture over medium heat until it just begins to simmer around the edges. Do not let it boil! While the cream mixture heats, in a separate bowl, whisk the egg yolks and the remaining sugar until pale yellow and slightly thickened. This process is called tempering, and it’s crucial for preventing scrambled eggs.
Slowly ladle about ½ cup of the hot cream mixture into the egg yolk mixture, whisking constantly. Repeat this process with another ½ cup of the hot cream. This gradually warms the yolks. Now, pour the tempered yolk mixture back into the saucepan with the rest of the cream mixture, whisking continuously.
Step 3: Infuse with Vanilla
Cut the vanilla bean in half lengthwise. Using the back of a paring knife, scrape out the tiny, black seeds from both halves. Add both the scraped seeds and the bean pods to the saucepan with the custard base. Stir well to distribute the vanilla specks throughout.
Step 4: Chill the Base
Cook the custard over low to medium-low heat, stirring constantly with a wooden spoon or heatproof spatula, until it thickens enough to coat the back of the spoon. This usually takes about 5-8 minutes. Do not let it boil, or it will curdle. Once thickened, immediately remove the vanilla bean pods. Pour the custard through a fine-mesh sieve into a clean bowl. This catches any bits of cooked egg and ensures a silky smooth texture. Stir in your macerated strawberries. Cover the bowl tightly with plastic wrap, pressing it directly onto the surface of the custard to prevent a skin from forming. Refrigerate for at least 4 hours, but overnight is best to allow the flavors to meld and the base to get thoroughly chilled. A very cold base churns into a smoother ice cream.
Step 5: Churn the Ice Cream
Once your base is completely chilled, remove the vanilla bean pod pieces from the strawberries (if you left them in). Pour the chilled mixture into your ice cream maker and churn according to the manufacturer’s instructions. This typically takes 20-30 minutes, at which point the ice cream will be the consistency of soft-serve.
Step 6: Freeze to Harden
Transfer the churned ice cream to an airtight container. Press a piece of parchment paper or plastic wrap directly onto the surface to prevent ice crystals from forming. Cover and freeze for at least 4 hours, or until firm enough to scoop. For the best texture, let it ripen in the freezer for at least 24 hours.
Nutritional Snapshot
While homemade ice cream is a treat best enjoyed in moderation, understanding its nutritional profile can be helpful. The exact values will vary based on specific ingredient brands and portion sizes, but a typical serving (about ½ cup) of this Homemade Strawberry Vanilla Bean Ice Cream contains approximately:
- Calories: 300-400 kcal
- Fat: 20-30g
- Saturated Fat: 12-18g
- Carbohydrates: 25-35g
- Sugar: 20-30g
- Protein: 4-6g
- Cholesterol: 100-150mg
Please note: This is an estimated nutritional value and should not be considered a precise calculation.
Healthier Alternatives for a Lighter Indulgence
Craving this delightful flavor but looking for a lighter version? Here are a few swaps that maintain great taste:
- Reduce Sugar: Decrease the sugar by a quarter or a third. The strawberries will still provide natural sweetness. You can also use a sugar substitute like erythritol or xylitol, adjusting the amount as per the product’s instructions, though this can affect texture slightly.
- Lighter Dairy: Replace some of the heavy cream with half-and-half or even whole milk. Be aware this will result in a slightly less creamy, more icy texture, but it is still delicious.
- No-Cook Method (for a less rich result): Skip the egg yolks and the cooking. Blend strawberries, a lighter dairy base (like yogurt mixed with milk), and sweetener, then churn. This will be more like a sorbet or frozen yogurt.
- Dairy-Free: Use full-fat coconut milk and a neutral-flavored plant-based milk. The coconut flavor will be present, so consider that when pairing.
Serving Suggestions
This beautiful ice cream is wonderful on its own, but here are a few ideas to elevate your serving:
- Classic Cone: Serve in a waffle cone or sugar cone.
- Garnishes: Top with a fresh strawberry, a dollop of whipped cream, or a sprig of mint.
- Dessert Pairings: It’s excellent alongside a warm chocolate cake, brownies, or a slice of pound cake.
- Ice Cream Sundae: Drizzle with chocolate or strawberry sauce, add sprinkles, and a cherry on top.
Common Mistakes to Avoid
Even seasoned cooks can make a few missteps with ice cream. Here’s how to avoid them:
- Not Chilling the Base Enough: A warm base will melt your ice cream maker’s frozen bowl too quickly, resulting in a grainy texture. Chill thoroughly for at least 4 hours, ideally overnight.
- Overcooking the Custard: Boiling the custard will curdle the eggs, leading to an unpleasant texture and flavor. Cook gently until it coats the back of a spoon.
- Not Freezing the Ice Cream Maker Bowl: Ensure your ice cream maker’s bowl is completely frozen (usually 24 hours in advance) for optimal churning.
- Not Freezing Long Enough: The churned ice cream is soft-serve consistency. It needs additional freezing time to become firm and scoopable.
Storing Your Homemade Ice Cream
Homemade ice cream is best enjoyed fresh, but if you have leftovers, store them in an airtight container in the coldest part of your freezer. Pressing parchment paper or plastic wrap directly onto the surface before sealing the lid helps prevent ice crystals from forming, which can lead to a freezer-burned, icy texture over time. It will keep well for about 1-2 weeks, though its quality is best within the first week.
Frequently Asked Questions
Do I need an ice cream maker?
While an ice cream maker makes the process significantly easier and produces the best texture, you can make ice cream without one using a “no-churn” method. This typically involves whipping cream and condensed milk or making a base that you periodically whisk and freeze.
Why is my homemade ice cream icy?
Icy ice cream is usually due to too much water, not enough fat, or improper freezing. Ensure your base is well-chilled, and that your ice cream maker bowl is fully frozen. Using egg yolks and a good ratio of cream to milk helps add fat for smoothness. Freezing the churned ice cream properly in an airtight container also prevents ice crystals.
Can I make this without eggs?
Yes, you can omit the egg yolks. However, the texture will be less rich and creamy, as the yolks act as emulsifiers and add fat. You might want to increase the heavy cream slightly to compensate for the lost richness.
How long does homemade ice cream last?
Homemade ice cream is best consumed within 1-2 weeks. After that, the texture can start to degrade due to ice crystal formation, even with proper storage.
Ready to taste summer? This homemade strawberry vanilla bean ice cream is a labor of love that yields unparalleled rewards. Don’t hesitate to dive in and create this delightful treat! Share your creations with us in the comments below or tag us on social media! Your feedback makes our day.
Homemade Strawberry Vanilla Bean Ice Cream Recipe
Description
This homemade strawberry vanilla bean ice cream is rich, creamy, and packed with fresh strawberries and real vanilla bean flavor. Made with simple ingredients, it’s the perfect summer treat that’s both refreshing and indulgent.
Ingredients
- 2 cupsheavy cream
- 1 cupwhole milk
- ¾ cupgranulated sugar
- 1vanilla bean (or2 tspvanilla extract)
- 1 ½ cupsfresh strawberries, chopped
- 3large egg yolks
Instructions
Notes
For a smoother texture, strain the custard before chilling.
Use ripe, sweet strawberries for the best flavor.
Store in an airtight container in the freezer for up to 2 weeks.
Nutrition
- Calories: 280
- Sugar: 24g
“`
