“`html
Table of Contents
- Dreamy Beginnings: Introducing the White Chocolate Raspberry Dream Cake
- Ingredients for Your Dream Cake
- Timing is Everything: Prep, Cook, and Bake
- Crafting Your Dream Cake: Step-by-Step
- Step 1: Preheat and Prepare Your Pans
- Step 2: Whisk Together Dry Ingredients
- Step 3: Cream Butter and Sugar
- Step 4: Incorporate Eggs and Vanilla
- Step 5: Alternately Add Wet and Dry Ingredients
- Step 6: Bake the Cake Layers
- Step 7: Cool the Cake Layers
- Step 8: Prepare the Raspberry Filling
- Step 9: Make the White Chocolate Frosting
- Step 10: Assemble the Dream Cake
- Step 11: Frost and Decorate
- Nutritional Insights
- Healthier Twists on a Dreamy Classic
- Serving Suggestions to Elevate Your Cake
- Common Pitfalls and How to Avoid Them
- Storing Your Masterpiece
- Frequently Asked Questions
White Chocolate Raspberry Dream Cake Recipe
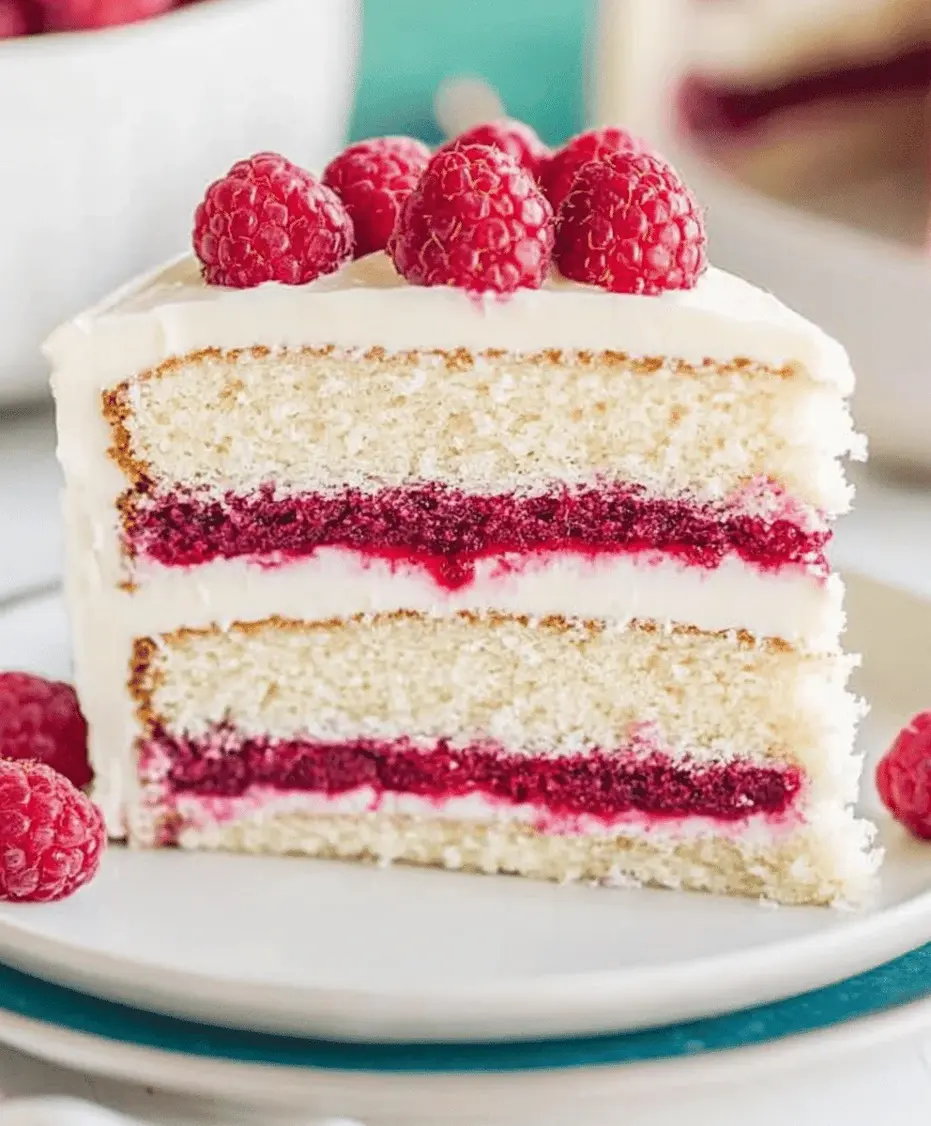
Dreamy Beginnings: Introducing the White Chocolate Raspberry Dream Cake
Are you searching for a dessert that perfectly balances rich, creamy decadence with a burst of bright, fruity tartness? In a world where cakes often lean too sweet or too bland, the quest for that “just right” treat can feel endless. But what if we told you that a cake exists that’s both incredibly indulgent and refreshingly balanced? The White Chocolate Raspberry Dream Cake recipe is precisely that elusive delight. It masterfully combines the luxurious sweetness of white chocolate with the zesty tang of fresh raspberries, creating a flavor profile that is simply irresistible. This isn’t just any cake; it’s a celebration waiting to happen, a perfect centerpiece for birthdays, weddings, anniversaries, or any occasion that calls for a touch of magic. Even if you’re new to baking or consider yourself a seasoned pro, this recipe is designed to guide you to a stunning, moist, and deeply flavorful dessert that will leave everyone asking for seconds. Prepare to bake a cake that’s not just made, but *dreamed* into existence.
Ingredients for Your Dream Cake
Gathering your ingredients is the first step to cake-making bliss. Here, we break down everything you’ll need to bring this White Chocolate Raspberry Dream Cake to life, with a few notes to ensure perfection.
For the White Chocolate Cake Layers
- 2 ¾ cups (344g) all-purpose flour: Room temperature flour integrates better into the batter for a smoother texture.
- 1 ½ cups (300g) granulated sugar: For that essential sweetness.
- ¾ cup (65g) white chocolate chunks or finely chopped white chocolate chips: The heart of our white chocolate flavor! Ensure it’s good quality for the best taste.
- 2 ½ teaspoons baking powder: Our leavening agent, crucial for a light cake.
- ½ teaspoon salt: Balances the sweetness and enhances flavors.
- 1 cup (227g) unsalted butter, softened: For richness and tenderness. Make sure it’s truly softened, not melted.
- 4 large eggs: Room temperature eggs emulsify more easily.
- 1 teaspoon vanilla extract: A flavor enhancer that complements both white chocolate and raspberry.
- 1 ¼ cups (300ml) buttermilk, room temperature: Adds moisture and a slight tang. (See substitutions below).
Buttermilk Substitution:
No buttermilk? No problem! Measure 1 ¼ cups of regular milk and stir in 1 tablespoon of white vinegar or lemon juice. Let it sit for 5-10 minutes until it curdles slightly.
For the Raspberry Filling
- 3 cups (450g) fresh or frozen raspberries: For a vibrant, tart filling. Frozen raspberries tend to break down more easily.
- ½ cup (100g) granulated sugar: Adjust to your desired sweetness and tartness.
- 2 tablespoons cornstarch: To thicken the filling to a jam-like consistency.
- 1 tablespoon lemon juice: Brightens the raspberry flavor.
For the White Chocolate Frosting
- 1 cup (227g) unsalted butter, softened: The base of a creamy frosting.
- 8 ounces (227g) good quality white chocolate, melted and slightly cooled: The star! Ensure it’s not too hot when you incorporate it.
- 3-4 cups (360-480g) powdered sugar, sifted: For sweetness and structure. Sifting avoids lumps.
- ¼ cup (60ml) heavy cream or milk: To achieve the perfect, spreadable consistency.
- 1 teaspoon vanilla extract: Enhances the overall flavor.
Timing is Everything: Prep, Cook, and Bake
45 Minutes
30-35 Minutes
2 Hours 15 Minutes (includes cooling & assembly)
Compared to many frosted cakes that can take upwards of 3-4 hours due to complex techniques or extensive chilling, this White Chocolate Raspberry Dream Cake is remarkably efficient. Its preparation is straightforward, and the cooling and assembly phase is relatively quick, making it an achievable yet impressive dessert even for a busy schedule. While the baking itself is standard, the magic lies in the balance of creating distinct components with manageable steps.
Crafting Your Dream Cake: Step-by-Step
Let’s get baking! Follow these detailed instructions for a truly dreamy cake experience.
Step 1: Preheat and Prepare Your Pans
Preheat your oven to 350°F (175°C). Grease and flour two 8-inch round cake pans. For extra insurance against sticking, you can also line the bottoms with parchment paper rounds.
Step 2: Whisk Together Dry Ingredients
In a large bowl, whisk together the all-purpose flour, granulated sugar, baking powder, and salt. This ensures even distribution of leavening agents and flavorings.
Step 3: Cream Butter and Sugar
In a separate large bowl (or the bowl of your stand mixer fitted with the paddle attachment), cream together the softened unsalted butter and the white chocolate chunks/chips until well combined and somewhat broken down. This isn’t about creaming like you would for a regular cake; we want the white chocolate incorporated but still visible in small pieces, which will melt during baking for pockets of intense flavor.
Step 4: Incorporate Eggs and Vanilla
Add the eggs one at a time, beating well after each addition until fully incorporated. Stir in the vanilla extract.
Step 5: Alternately Add Wet and Dry Ingredients
With the mixer on low speed, gradually add the dry ingredients to the wet ingredients, alternating with the buttermilk. Begin and end with the dry ingredients (e.g., add ⅓ of the dry ingredients, then ½ of the buttermilk, then ½ of the remaining dry, then the rest of the buttermilk, and finally the rest of the dry ingredients). Mix until just combined; be careful not to overmix. A few small lumps are okay.
Step 6: Bake the Cake Layers
Divide the batter evenly between the prepared cake pans. Bake for 30-35 minutes, or until a wooden skewer inserted into the center of the cakes comes out clean. The aroma of white chocolate will fill your kitchen!
Step 7: Cool the Cake Layers
Let the cakes cool in their pans for about 10-15 minutes before inverting them onto a wire rack to cool completely. Ensure they are fully cooled before frosting.
Step 8: Prepare the Raspberry Filling
While the cakes cool, combine raspberries, sugar, cornstarch, and lemon juice in a medium saucepan. Cook over medium heat, stirring frequently, until the raspberries break down and the mixture thickens to a jam-like consistency (about 10-15 minutes). If using frozen raspberries, it might take a few minutes longer. Remove from heat and let cool completely. This will be a vibrant, slightly tart counterpoint to the sweet cake.
Step 9: Make the White Chocolate Frosting
In a large bowl, beat the softened butter until smooth and creamy. Gradually beat in the melted and slightly cooled white chocolate until well combined. Gradually add the sifted powdered sugar, alternating with the heavy cream or milk, until the frosting reaches your desired consistency. Beat in the vanilla extract. You want a frosting that is smooth, spreadable, and tastes delightfully of white chocolate.
Step 10: Assemble the Dream Cake
Place one cooled cake layer on your serving plate or cake stand. Spread the cooled raspberry filling evenly over the top. Gently place the second cake layer on top of the filling.
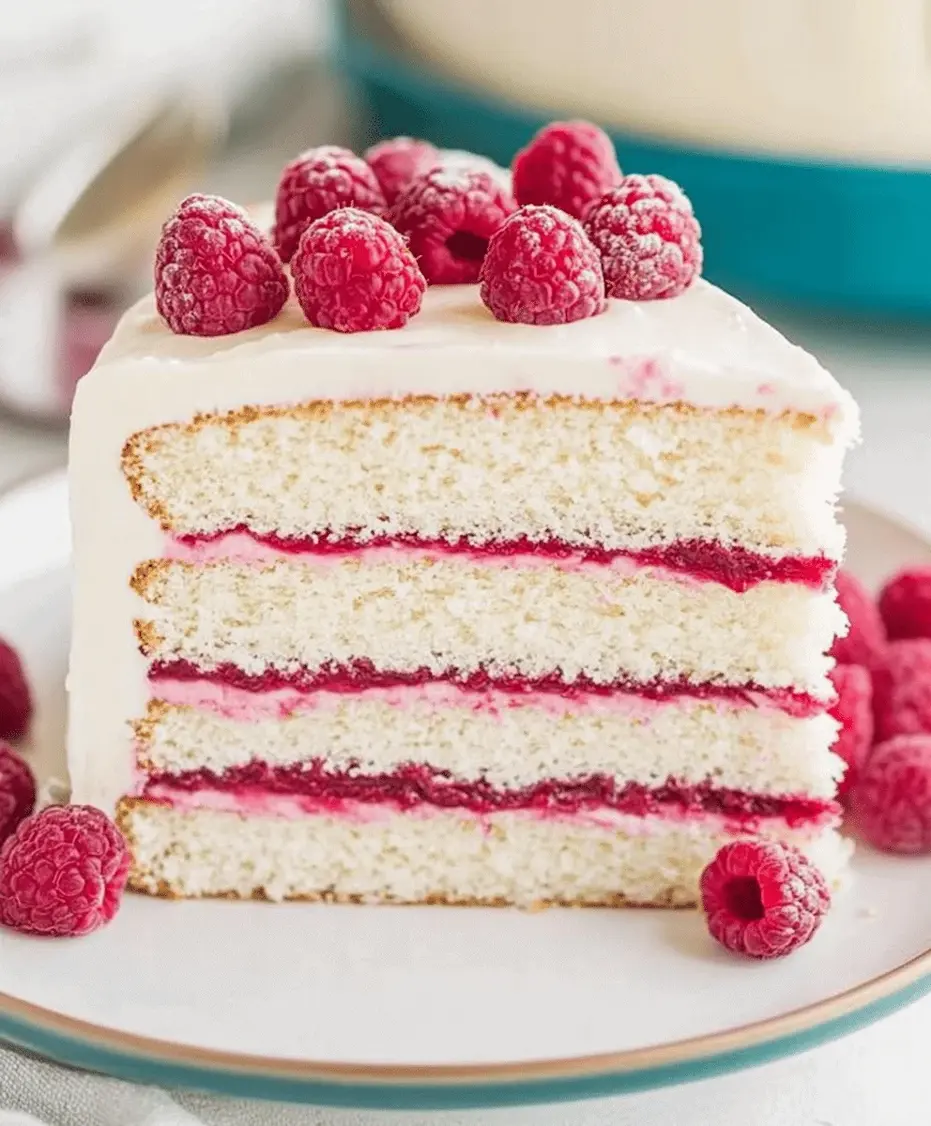
Step 11: Frost and Decorate
Apply a thin “crumb coat” of frosting all over the cake to trap any loose crumbs. Chill for about 20-30 minutes. Then, apply the remaining frosting generously, creating smooth or decorative swirls. Garnish with fresh raspberries, white chocolate shavings, or a dusting of powdered sugar for a final touch of elegance.
Nutritional Insights
While this cake is a decadent treat, here’s an approximate nutritional breakdown per serving (assuming 12 servings). Actual values may vary based on specific ingredients and portion sizes.
- Calories: ~550-600 kcal
- Macronutrients:
- Carbohydrates: ~70-75g
- Fat: ~30-35g
- Protein: ~7-9g
This information is an estimate and should not be considered a precise nutritional fact.
Healthier Twists on a Dreamy Classic
Looking to lighten up this delightful cake without sacrificing too much flavor? Here are some swaps:
- Flour: Substitute half of the all-purpose flour with whole wheat pastry flour or a gluten-free baking blend.
- Sugar: Reduce the sugar in the cake layers and frosting by ¼ cup each. You can also explore natural sweeteners like maple syrup in moderation for the raspberry filling.
- Butter: For the frosting, consider using a combination of butter and cream cheese for a tangier, lighter texture, or explore dairy-free butter alternatives.
- White Chocolate: If you’re sensitive to refined sugars or dairy, opt for a high-quality vegan white chocolate alternative.
- Raspberry Filling: Use a sugar-free sweetener or rely on the natural sweetness of perfectly ripe raspberries. Thicken with chia seeds for added fiber and omega-3s.
Serving Suggestions to Elevate Your Cake
Serve slices of this exquisite cake on their own for pure indulgence. For an extra special touch:
- Alongside a scoop of high-quality vanilla bean ice cream.
- Drizzled with a little extra raspberry coulis.
- With a dollop of fresh whipped cream, lightly sweetened.
- Garnished with mint leaves for a pop of color and freshness.
Common Pitfalls and How to Avoid Them
- Overmixing the Batter: This can lead to a tough cake. Mix until *just* combined.
- Using Cold Ingredients: Ensure butter, eggs, and buttermilk are at room temperature for proper emulsion.
- Undercooking or Overcooking: Use the toothpick test and oven thermometer. Cakes can dry out quickly if overbaked.
- Frosting a Warm Cake: This will result in a melted, messy situation. Patience is key; ensure cakes are completely cool.
- Using Low-Quality White Chocolate: It impacts both the flavor of the cake layers and the frosting.
Storing Your Masterpiece
Store any leftover cake in an airtight container at room temperature for up to 2 days, or in the refrigerator for up to 4-5 days. If refrigerated, allow slices to come to room temperature for about 20-30 minutes before serving for the best texture and flavor.
Frequently Asked Questions
***What kind of white chocolate is best for this recipe?***
Use a good quality white chocolate bar or chunks that you would enjoy eating on its own. Avoid white chocolate chips if possible, as they often contain stabilizers that prevent them from melting smoothly. If using chips, ensure they are specifically labeled as melting chips.
***Can I make the raspberry filling ahead of time?***
Yes, absolutely! The raspberry filling can be made 1-2 days in advance and stored in an airtight container in the refrigerator. Ensure it’s fully cooled before using it to assemble the cake.
***Do I have to use buttermilk?***
While buttermilk provides a wonderful moistness and tender crumb, you can substitute it with the milk + vinegar/lemon juice method as described in the ingredients section. Sour cream or plain yogurt thinned with a bit of milk also works well.
***How do I achieve smooth frosting?***
The key to smooth frosting is having well-softened butter, properly melted and cooled white chocolate, and ensuring your powdered sugar is sifted. Use an offset spatula and a turntable for best results. A light crumb coat and chilling the cake before the final frosting also make a huge difference.
***Can this cake be frozen?***
Yes, you can freeze the unfrosted cake layers or frosted cake. Wrap them tightly in plastic wrap, then in aluminum foil. Freeze for up to 2-3 months. Thaw overnight in the refrigerator.
Ready to bake your own slice of paradise? This White Chocolate Raspberry Dream Cake is more than just a dessert; it’s an experience. Share your creations with us and let us know how your dream cake turned out!
White Chocolate Raspberry Deam Cake Recipe
Description
This White Chocolate Raspberry Dream Cake recipe combines luscious white chocolate layers with tart raspberries for an irresistible dessert. Perfect for birthdays, weddings, or special gatherings, this cake is moist, flavorful, and truly dreamy. Whether you’re a seasoned baker or a beginner, this cake will impress every time.
Ingredients
- 2 ½ cupsall-purpose flour
- 2 ½ tspbaking powder
- ½ tspsalt
- ¾ cupunsalted butter, softened
- 1 ¾ cupsgranulated sugar
- 4large egg whites
- 1 tspvanilla extract
- ½ tspalmond extract
- 1 cupwhole milk
- ½ cupsour cream
- 1 cupwhite chocolate, melted and slightly cooled
- 1 ½ cupsfresh raspberries
- 2 tbspflour (for tossing raspberries)
- For the Frosting:
- 1 cupunsalted butter, softened
- 4 cupspowdered sugar
- ½ tspvanilla extract
- ½ tspalmond extract
- 3–4tablespoon heavy cream or milk
- ½ cupwhite chocolate, melted
- Optional: extra raspberries and white chocolate shavings for garnish
Instructions
Notes
Make sure raspberries are dry before folding into the batter.
Use high-quality white chocolate for best flavor.
Cake layers can be made ahead and frozen.
Nutrition
- Calories: 520
- Sugar: 46g
“`
