“`html
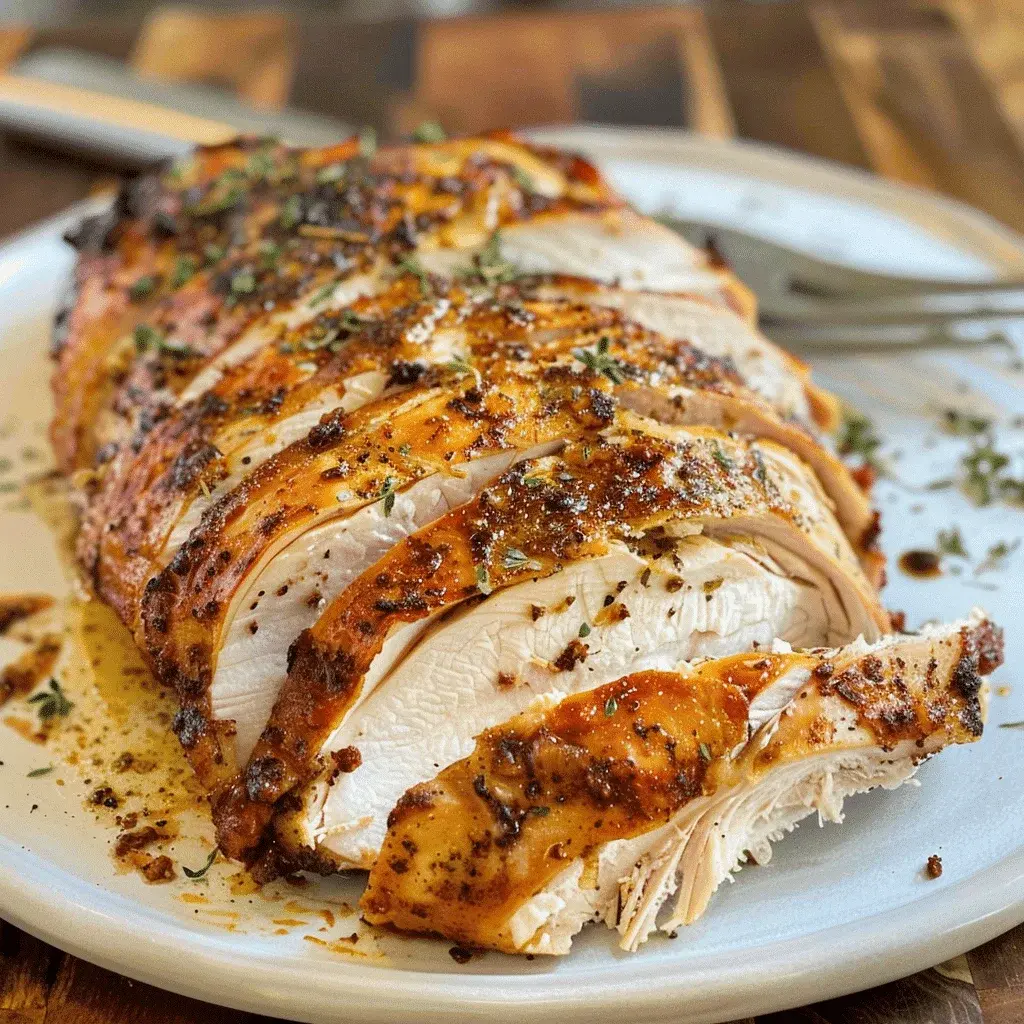
Air Fryer Turkey Breast Recipe
Table of Contents
Introduction
Did you know that using an air fryer can reduce the cooking time for a turkey breast by up to 50% compared to traditional oven roasting? If you’re looking for a way to enjoy a succulent, flavorful main course without spending hours in the kitchen, this air fryer turkey breast recipe is your perfect solution. Gone are the days of dry, overcooked turkey. The magic of the air fryer lies in its powerful convection system, which circulates hot air rapidly around the food, creating a beautifully golden, crispy exterior while locking in all the natural juices inside. This method is not just a time-saver; it’s a game-changer for achieving consistently tender results. Perfect for a Sunday family dinner, a holiday meal with a smaller gathering, or a high-protein meal prep staple, this recipe delivers maximum flavor with minimal effort. Let’s dive into how you can transform a simple turkey breast into a spectacular centerpiece.
Ingredients List
Gather these simple ingredients for a turkey breast that’s bursting with savory, aromatic flavor. Each component plays a key role in creating the perfect crust and juicy interior.
- 1 (2-3 lb) Boneless, Skin-On Turkey Breast: The star of the show. The skin is crucial for that irresistible crispy finish. Substitution: Skinless works but won’t get as crispy. A bone-in breast will add more flavor but may require a slightly longer cook time.
- 2 tbsp Extra Virgin Olive Oil: Acts as the glue for the seasoning and promotes gorgeous browning. Substitution: Avocado oil or melted ghee for a higher smoke point and rich, buttery notes.
- 1 tbsp Italian Seasoning: A fragrant blend of dried oregano, basil, thyme, and rosemary that provides a classic, herby aroma. Substitution: 1 tsp each of dried oregano and basil, plus ½ tsp each of dried thyme and rosemary.
- 1 tsp Smoked Paprika: The secret weapon! It imparts a deep, smoky-sweet flavor and a beautiful red hue to the skin. Substitution: Regular paprika or ½ tsp chipotle powder for a spicy kick.
- 1 tsp Kosher Salt: Enhances all the natural flavors of the turkey. Use less if using fine table salt.
- ½ tsp Freshly Cracked Black Pepper: Adds a sharp, pungent warmth that complements the other spices perfectly.
- Optional: 2-3 Garlic Cloves, minced, or 1 tsp garlic powder for an extra savory punch.
- Optional: Fresh herbs like thyme or rosemary sprigs to place under the breast for added aroma.
Timing
10 minutes
35-45 minutes
~55 minutes
This is where the air fryer turkey breast truly shines. A traditional oven-roasted turkey breast of similar size typically requires 60-90 minutes of cook time, plus preheating. Our air fryer method slashes that by nearly half, getting you from fridge to table in under an hour. The 10-minute prep is mostly hands-off seasoning, and the cook time is largely unattended, freeing you up to prepare sides or simply relax.
Step-by-Step Instructions
Step 1: Prepare the Turkey Breast
Remove the turkey breast from its packaging and pat it thoroughly dry with paper towels. This is the single most important step for achieving crispy skin. Moisture is the enemy of crispiness. Take a moment to check for any pin feathers and trim any excess skin or fat for a neat presentation. If your breast has a built-in pop-up timer, I recommend removing it, as it can create a steam vent and lead to drier meat.
Step 2: Create the Seasoning Rub
In a small bowl, combine the olive oil, Italian seasoning, smoked paprika, salt, and pepper (and garlic powder or minced garlic if using). Stir until it forms a fragrant, loose paste. Using your hands or a silicone brush, generously coat the entire surface of the turkey breast, making sure to get under the skin if possible and into all the nooks and crannies. Don’t be shy—this rub is your flavor armor.
Step 3: Preheat the Air Fryer
Preheat your air fryer to 360°F (182°C) for about 3-5 minutes. Preheating ensures the cooking process starts immediately for even results. While it heats, let the seasoned turkey breast sit at room temperature for a few minutes. This slight tempering helps it cook more evenly from edge to center.
Step 4: Cook to Perfection
Place the turkey breast in the air fryer basket, skin-side up. If you have fresh herb sprigs, tuck them underneath for an aromatic steam. Cook at 360°F for 30 minutes. Then, increase the temperature to 380°F (193°C) and cook for an additional 5-15 minutes. This two-stage method ensures the interior cooks through gently before giving the skin a final crisp. The turkey is done when a meat thermometer inserted into the thickest part reads 165°F (74°C). The skin should be deep golden brown and audibly crispy.
Step 5: Rest and Slice
This step is non-negotiable! Transfer the cooked turkey breast to a cutting board and tent it loosely with foil. Let it rest for at least 10 minutes. Resting allows the juices, which have been driven to the center by the heat, to redistribute throughout the entire breast. Slicing too soon will cause all those precious juices to run out, leaving you with drier meat. After resting, slice against the grain for the most tender bite.
Nutritional Information
The following estimates are for a 4-ounce (113g) serving of cooked, skin-on meat, based on a 3lb breast yielding approximately 12 servings.
- Calories: ~190 kcal
- Protein: 28g (An excellent source for muscle repair and satiety)
- Fat: 8g (Primarily from the skin and olive oil)
- Saturated Fat: 2g
- Carbohydrates: <1g (Nearly zero-carb)
- Sodium: ~350mg (Varies based on salt used)
Healthier Alternatives
You can easily adapt this air fryer turkey breast recipe to fit various dietary needs without sacrificing an ounce of flavor:
- Lower Fat/Oil: Use a high-quality non-stick cooking spray instead of olive oil. The seasoning will still adhere, though browning may be slightly less pronounced.
- Lower Sodium: Reduce the kosher salt to ½ tsp and lean on the other herbs and spices. A squeeze of fresh lemon juice after cooking can also brighten flavors without salt.
- Skinless Preference: If using skinless breast, brush lightly with oil and consider adding a tablespoon of Dijon mustard to the rub for extra flavor and moisture retention. Cook time may be reduced by 5-10 minutes.
- Herb-Focused: For a cleaner profile, use only fresh chopped herbs like rosemary, thyme, and sage with the olive oil, and omit the Italian seasoning blend.
Serving Suggestions
This versatile turkey breast pairs beautifully with countless sides. Here are a few winning combinations:
- Classic Holiday: Garlic mashed potatoes, green bean casserole, and cranberry sauce.
- Light & Fresh: A crisp arugula salad with shaved Parmesan and a lemon vinaigrette, alongside roasted asparagus.
- Comfort Food: Creamy mac and cheese and sautéed garlicky spinach.
- Meal Prep Power Bowl: Slice the turkey over quinoa or brown rice with steamed broccoli, a drizzle of tahini, and a sprinkle of pumpkin seeds.
Common Mistakes
- Not Drying the Skin: Skipping the pat-dry step results in steamed, rubbery skin instead of crispy skin.
- Skipping the Rest: Cutting immediately lets the juices escape, leading to a drier result.
- Overcrowding the Basket: Ensure the turkey breast isn’t touching the sides too much for optimal air circulation. If it’s very large, it’s okay if it’s snug, but don’t force it.
- Not Using a Thermometer: Guessing doneness often leads to overcooking. A simple instant-read thermometer is the best tool for perfect poultry.
- Using Cold Turkey Straight from the Fridge: This can cause uneven cooking. A brief 10-15 minute rest at room temperature after seasoning helps.
Storing Tips
- Refrigeration: Allow the turkey to cool completely. Store sliced or whole in an airtight container for up to 4 days.
- Freezing: For best quality, freeze within 2 days. Wrap slices or the whole breast tightly in plastic wrap and then in foil or place in a freezer bag, removing as much air as possible. Label and freeze for up to 3 months. Thaw overnight in the refrigerator.
- Reheating: To retain moisture, reheat slices in the air fryer at 325°F for 3-5 minutes, or in a covered skillet with a splash of broth. The microwave can work but may dry it out slightly.
