📖 Table of Contents
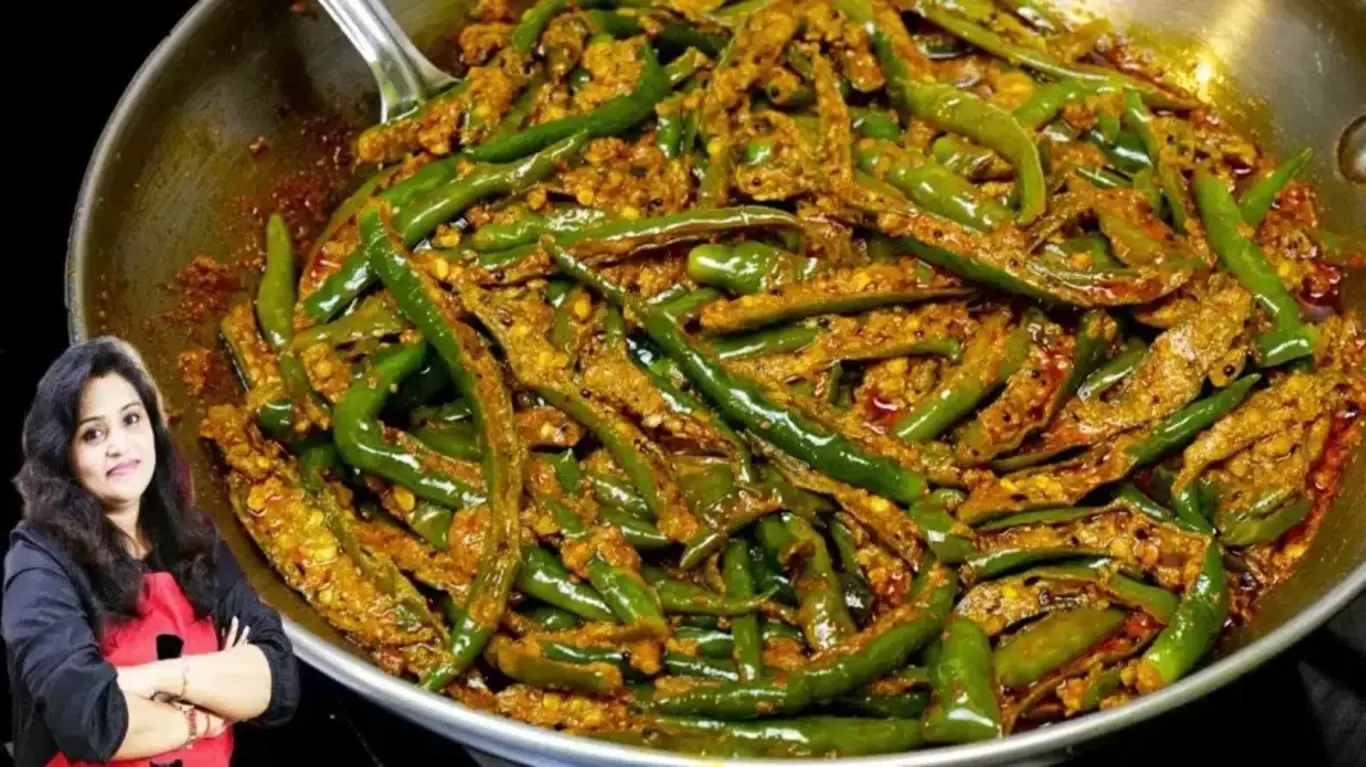
Delicious Dahi Mirchi Fry Recipe – A Spicy and Tangy Delight! 🔥🌶️
10 mins
15 mins
25 mins
4
Easy
Indian
🌶️ Introduction: Why You’ll Love This Dahi Mirchi Fry
Welcome to The Kitchen Team, where we bring you the most authentic and delicious Indian recipes right to your kitchen! Today, we’re excited to share our take on a classic Indian snack that’s taking the internet by storm – the Delicious Dahi Mirchi Fry Recipe – A Spicy and Tangy Delight!
Imagine this: crispy, golden-fried green chilies, marinated in a tangy yogurt mixture, bursting with aromatic spices that dance on your palate. That’s exactly what this recipe delivers! Whether you’re looking for a quick evening snack, a side dish for your dal-rice, or a show-stopping appetizer for your next dinner party, this Dahi Mirchi Fry checks all the boxes.
What makes this recipe truly special is the perfect balance of heat and tanginess. The yogurt marinade tames the fiery kick of green chilies while adding a creamy, tangy layer that complements the earthy spices beautifully. Plus, it’s incredibly easy to make with simple pantry ingredients!
At cookingwithemy.com, we believe that great food doesn’t have to be complicated. This recipe is a testament to that philosophy – using just a handful of ingredients and 25 minutes of your time, you can create something truly extraordinary. Let’s dive into the world of bold flavors and aromatic spices!
🌟 Why This Dahi Mirchi Fry Recipe Works Best
1. Perfectly Balanced Flavors
The combination of yogurt and spices creates a harmonious blend where no single flavor overpowers another. The tanginess of yogurt cuts through the heat of chilies, while the aromatic spices add depth and complexity.
2. Foolproof Technique
Our step-by-step method ensures that even beginners can achieve restaurant-quality results. From splitting the chilies to the perfect frying temperature, we’ve got you covered.
3. Versatile Serving Options
This dish works beautifully as a snack, side dish, or even a main course accompaniment. Pair it with roti, paratha, or enjoy it on its own with a cup of chai!
4. Healthier Alternative
Unlike deep-fried snacks, this recipe uses minimal oil while still delivering that satisfying crunch. The yogurt also adds probiotics, making it a gut-friendly option.
5. Budget-Friendly Ingredients
All ingredients are easily available in your local grocery store or Indian market. No exotic or expensive items required!
📋 Ingredients for Dahi Mirchi Fry
Here’s everything you need to make this delicious dish. All measurements are in US standard units.
| Ingredient | Quantity | Notes |
|---|---|---|
| Green Chilies | 250 gm (about 9 oz) | Fresh, firm, and medium-spicy |
| Mustard Oil | 2 tbsp | Can substitute with vegetable oil |
| Mustard Seeds | 1 tsp | For tempering |
| Cumin Seeds | ½ tsp | Adds earthy flavor |
| Fenugreek Seeds | ¼ tsp | Optional but recommended |
| Fennel Seeds | 1 tsp | Crushed slightly for more flavor |
| Asafoetida (Hing) | ½ tsp + ½ tsp | Divided use |
| Turmeric Powder | 1 tsp | For color and health benefits |
| Kashmiri Red Chili Powder | 1 tsp | For color without too much heat |
| Coriander Powder | 3 tsp | Freshly ground is best |
| Garam Masala | ½ tsp | Homemade or store-bought |
| Fennel Powder | 1 tsp | Adds sweetness |
| Plain Yogurt (Curd) | 3-4 tbsp | Thick and creamy |
| Salt | To taste | Approximately ½ tsp |
| Water | ¼ cup | For adjusting consistency |
👩🍳 Step-by-Step Instructions
Follow these detailed steps to create the perfect Dahi Mirchi Fry. Take your time and enjoy the process!
- Prepare the Green Chilies: Wash 250 gm of fresh green chilies thoroughly under running water. Pat them dry with a clean kitchen towel. Using a sharp knife, cut off the stems. Then, make a slit lengthwise down each chili, keeping the ends intact to create a pocket. If you prefer less heat, gently remove the seeds and white membranes.
- Heat the Oil: Place a heavy-bottomed pan or kadhai on medium heat. Add 2 tablespoons of mustard oil and heat until it reaches its smoking point. Mustard oil should be heated well to remove its pungent taste. If using regular oil, heat until it shimmers.
- Temper the Spices: Once the oil is hot, reduce the heat to low. Carefully add 1 tsp mustard seeds, ½ tsp cumin seeds, ¼ tsp fenugreek seeds, 1 tsp fennel seeds, and ½ tsp asafoetida. Let them crackle for about 30 seconds, being careful not to burn them. The aroma at this stage is incredible!
- Add the Green Chilies: Increase the heat to medium and add the prepared green chilies to the pan. Stir well to coat them with the tempered spices. Add salt to taste and 1 tsp turmeric powder. Roast the chilies for 2-3 minutes, stirring occasionally, until they start to soften and develop slight char marks.
- Add the Spice Powders: Sprinkle 1 tsp Kashmiri red chili powder, 3 tsp coriander powder, and ½ tsp garam masala over the chilies. Mix everything thoroughly, ensuring each chili is evenly coated with the spice mixture. Cook for another minute to allow the spices to bloom.
- Create the Gravy: Pour in ¼ cup of water and stir gently. Let the mixture simmer for 2-3 minutes, allowing the chilies to absorb the flavors and the gravy to thicken slightly. The water helps create a light sauce that coats the chilies beautifully.
- Add Yogurt and Fennel Powder: In a small bowl, whisk 3-4 tbsp of thick yogurt until smooth. Add this to the pan along with 1 tsp fennel powder and the remaining ½ tsp asafoetida. Stir gently to combine. Cook on low heat for 2-3 minutes, stirring occasionally. The yogurt will add creaminess and tanginess to the dish.
- Final Adjustments: Taste and adjust seasoning if needed. If the dish seems too dry, add a splash of water. If too watery, let it simmer uncovered for a minute or two. The final consistency should be slightly thick, coating the chilies nicely.
- Garnish and Serve: Turn off the heat. Garnish with a sprinkle of fresh coriander leaves or a pinch of chaat masala for extra flavor. Serve hot with roti, paratha, or as a side dish with your main meal.
🍽️ Serving Suggestions
This versatile dish can be enjoyed in numerous ways. Here are our favorite serving ideas:
Traditional Pairings
- With Roti or Paratha: Serve as a side dish with Indian flatbreads for a complete meal.
- With Dal and Rice: Add it to your dal-chawal combo for an extra kick of flavor.
- As a Snack: Enjoy it on its own with a cup of hot masala chai.
Creative Serving Ideas
- In Wraps: Use it as a filling for wraps or rolls with fresh veggies.
- On Toast: Top crusty bread with cream cheese and Dahi Mirchi Fry for an appetizer.
- With Rice Bowls: Add it to grain bowls for a spicy twist.
📦 Storage Tips
Proper storage ensures your Dahi Mirchi Fry stays fresh and delicious for longer.
Refrigeration
- Store in an airtight container in the refrigerator for up to 3-4 days.
- Allow the dish to cool completely before storing to prevent condensation.
- Reheat gently in a pan or microwave before serving.
Freezing
- This dish can be frozen for up to 1 month.
- Portion into freezer-safe containers or bags.
- Thaw overnight in the refrigerator before reheating.
🎨 Delicious Variations to Try
1. Vegan Dahi Mirchi Fry
Replace yogurt with thick coconut yogurt or cashew cream. Use coconut oil instead of mustard oil for a different flavor profile.
2. Stuffed Dahi Mirchi
Make a larger slit in the chilies and stuff them with a mixture of crumbled paneer, spices, and herbs before cooking.
3. Air Fryer Version
For a healthier twist, air fry the marinated chilies at 375°F for 8-10 minutes, shaking halfway through. Toss with the yogurt mixture after cooking.
4. Extra Spicy Version
Add 1-2 finely chopped green chilies or a teaspoon of green chili paste to the tempering for an extra kick.
5. Protein-Packed Version
Add boiled chickpeas or paneer cubes along with the chilies for a more substantial dish.
❓ Frequently Asked Questions
📌 Pin This Recipe for Later!
Save this Delicious Dahi Mirchi Fry Recipe to your favorite Pinterest board so you can find it easily when you’re ready to cook!
Visit our Pinterest profile for more mouthwatering recipes and cooking inspiration!
Dahi Mirchi Fry Recipe | How to make Dahi Mirchi Fry | Dahi Mirchi Ki Sabzi
Description
In this post, you will see an easy and step-by-step recipe to make the most tasty and perfect Dahi Mirchi Fry at home without any mistakes or difficulty.
Ingredients
Scale
- Green Chilli 250 gm
- Mustard Oil 2 tbsp
- Mustard 1 tsp
- Cumin Seed 1/2 tsp
- Fenugreek Seed 1/4 tsp
- Fennel Seed 1 tsp
- Asafoetida
- Salt as per taste
- Turmeric Powder 1 tsp
- Kashmiri Red Chilli Powder 1 tsp
- Coriander Powder 3 tsp
- Garam Masala 1/2 tsp
- Water 1/4 cup
- Fennel Powder 1 tsp
- Asafoetida 1/2 tsp
- Curd 3 to 4 tsp
Instructions
- To make the perfect Dahi Mirchi Fry, take 250 grams of green chili, wash well, and cut the stem.
- Now, split all the chilies into two parts, like in the following image.
- Now place a pan on the flame, add 2 tablespoons of mustard oil, and heat well.
- After the hot oil, add 1 tsp of mustard seeds, 1/2 tsp of cumin seeds, 1/2 tsp of kalonji, 1/4 tsp of fenugreek seed, 1 tsp of fennel seeds, and 1/2 tsp of asafoetida.
- Now add chopped green chillies, salt as per taste, one teaspoon of turmeric powder, and roast well.
- Now add 1 tsp of Kashmiri red chili powder, 3 tsp of coriander powder, and 1/2 tsp of garam masala, and mix everything well.
- After a minute, add 1/4 cup of water, 1 tsp of fennel powder, and 1/2 tsp of dry mango powder, and cook for a minute.
- After a minute, turn the flame to low, add 34 tablespoons of curd, and mix well.
- After 5 minutes, turn off the flame and serve your Dahi Mirchi Fry.
- Now your perfect Dahi Mirchi Fry is completely ready, and you can enjoy it.
