Table of Contents
The 30-Minute Miracle: Why This Is The Best Teriyaki Chicken Rice Bowl You’ll Ever Make
| Prep Time | Cook Time | Total Time | Servings | Difficulty |
|---|---|---|---|---|
| 10 minutes | 20 minutes | 30 minutes | 4 people | Easy |
Why This Teriyaki Bowl Beats Takeout Every Single Time
Let’s be honest: we’ve all been there. It’s 6 PM, the family is hungry, and the thought of another complicated dinner recipe makes you want to reach for the takeout menu. What if we told you that in the same time it takes for delivery to arrive, you could create a restaurant-quality, flavor-packed Teriyaki Chicken Rice Bowl that’s healthier, cheaper, and more satisfying than anything in a cardboard box? This isn’t just another quick chicken recipe. This is your new weeknight superhero—a 30-minute culinary escape that delivers the perfect balance of sweet, savory, and umami in every single bite.
At Cooking With Emy, we’ve tested countless teriyaki recipes. Many are too sweet, others are bland, and some have sauces that never quite thicken right. We’ve distilled all that testing into one flawless, fail-proof formula. Our homemade teriyaki sauce, with its clever use of pantry staples, clings beautifully to tender chicken cubes, creating a glossy, irresistible glaze. Paired with fluffy rice and crisp-tender vegetables, this bowl isn’t just a meal; it’s an experience. It’s the recipe that will have your kids asking for seconds and will make you feel like a weeknight cooking champion.
What Makes This The “Best” Teriyaki Chicken Rice Bowl?
The title “The Best” isn’t given lightly. This recipe earns it through a combination of speed, depth of flavor, and versatility that others lack. First, the sauce. While many recipes rely solely on soy sauce and sugar, ours builds complexity with rice vinegar for brightness, a hint of sesame oil for nutty depth, and honey for a floral sweetness that brown sugar alone can’t provide. The cornstarch is mixed directly into the cold sauce, preventing lumps and ensuring a smooth, restaurant-style glaze that thickens perfectly every time.
Second, the technique. Browning the chicken cubes first isn’t just about cooking them through; it’s about creating fond—those delicious browned bits at the bottom of the pan. When you add the sauce, it deglazes the pan, pulling all that savory flavor right into the glaze. Finally, the 30-minute promise is real. From the moment you pull out your cutting board to the time you garnish with green onions, you’re looking at a half-hour. It’s a streamlined process designed for real life, not a TV cooking show.
Ingredients & Why They Matter
Great recipes start with great ingredients, and understanding the role of each component is the first step to mastering this dish. Here’s exactly what you’ll need and why it’s non-negotiable for the best teriyaki chicken rice bowl.
| Ingredient | Quantity | Purpose & Notes |
|---|---|---|
| Boneless, Skinless Chicken Breasts | 4 (about 1.5 lbs) | Provides lean, quick-cooking protein. Cubing ensures fast, even cooking and maximum sauce coverage. |
| Olive Oil | 1 Tbsp | For browning. A neutral oil with a high smoke point. |
| Low-Sodium Soy Sauce | 1/2 cup | The salty, umami base. Using low-sodium allows you to control the salt level. |
| Water | 1/2 cup | Balances the intensity of the soy sauce and helps create the right sauce consistency. |
| Packed Light Brown Sugar | 3 Tbsp | Adds molasses-like sweetness and helps create a beautiful glaze. |
| Rice Vinegar | 2 Tbsp | The secret weapon! Adds a crucial bright, acidic note that cuts through the sweetness. |
| Toasted Sesame Oil (optional but recommended) | 1/2 tsp | Provides an authentic, nutty aroma. A little goes a very long way. |
| Ground Ginger | 1 tsp | Convenient and potent. Adds warm, spicy depth. |
| Minced Garlic | 2 tsp | For savory, aromatic punch. Fresh or jarred both work. |
| Honey | 2 Tbsp | Adds a floral, sticky sweetness that improves the sauce’s gloss. |
| Cornstarch | 3 tsp | The thickening agent. Mixed into the cold liquid to prevent clumping. |
| For Serving: | ||
| Cooked White or Brown Rice | 4 cups | The perfect base to soak up the delicious sauce. |
| Steamed Vegetables (e.g., broccoli, snap peas) | As desired | Adds color, texture, and nutrition. |
| Sesame Seeds & Chopped Green Onions | For garnish | Essential for visual appeal and a final flavor boost. |
Step-by-Step Cooking Instructions
Follow these detailed steps for a flawless result. We’ve broken it down to ensure even first-time cooks achieve teriyaki perfection.
| Step | Instructions | Visual Cue & Tips |
|---|---|---|
| 1. Prep & Brown Chicken | Pat the chicken breasts dry with paper towels, then cut into 1-inch cubes. Heat 1 Tbsp of olive oil in a large skillet or wok over medium-high heat. Once the oil is shimmering, add the chicken in a single layer. Let it cook undisturbed for 2-3 minutes to get a good sear, then toss and continue cooking for 5-7 minutes total until cooked through and no longer pink. | You should hear a steady sizzle. The chicken will develop golden-brown spots. Don’t crowd the pan—cook in batches if needed. |
| 2. Make the Sauce | While the chicken cooks, in a medium bowl, whisk together the 1/2 cup soy sauce, 1/2 cup water, 2 Tbsp honey, 3 Tbsp brown sugar, 2 Tbsp rice vinegar, 1/2 tsp sesame oil, 1 tsp ginger, 2 tsp garlic, and 3 tsp cornstarch. Whisk vigorously until the cornstarch is fully dissolved and no lumps remain. | The sauce will look thin and dark. This is normal—it will thicken dramatically when heated. |
| 3. Combine & Thicken | Once the chicken is fully cooked, give the sauce another quick whisk (the cornstarch can settle) and pour it directly over the chicken in the hot skillet. Reduce the heat to medium. Cook, stirring constantly, for 3-5 minutes. The sauce will bubble and begin to thicken into a shiny glaze that coats the back of a spoon. | The sauce is ready when you can drag a spatula through the center of the pan and the sauce doesn’t immediately rush back in to fill the space. |
| 4. Final Simmer | Once thickened, let the teriyaki chicken simmer gently for 1-2 more minutes. This allows the flavors to meld and the glaze to become perfectly sticky. | The chicken will be uniformly coated in a deep, caramel-colored glaze. |
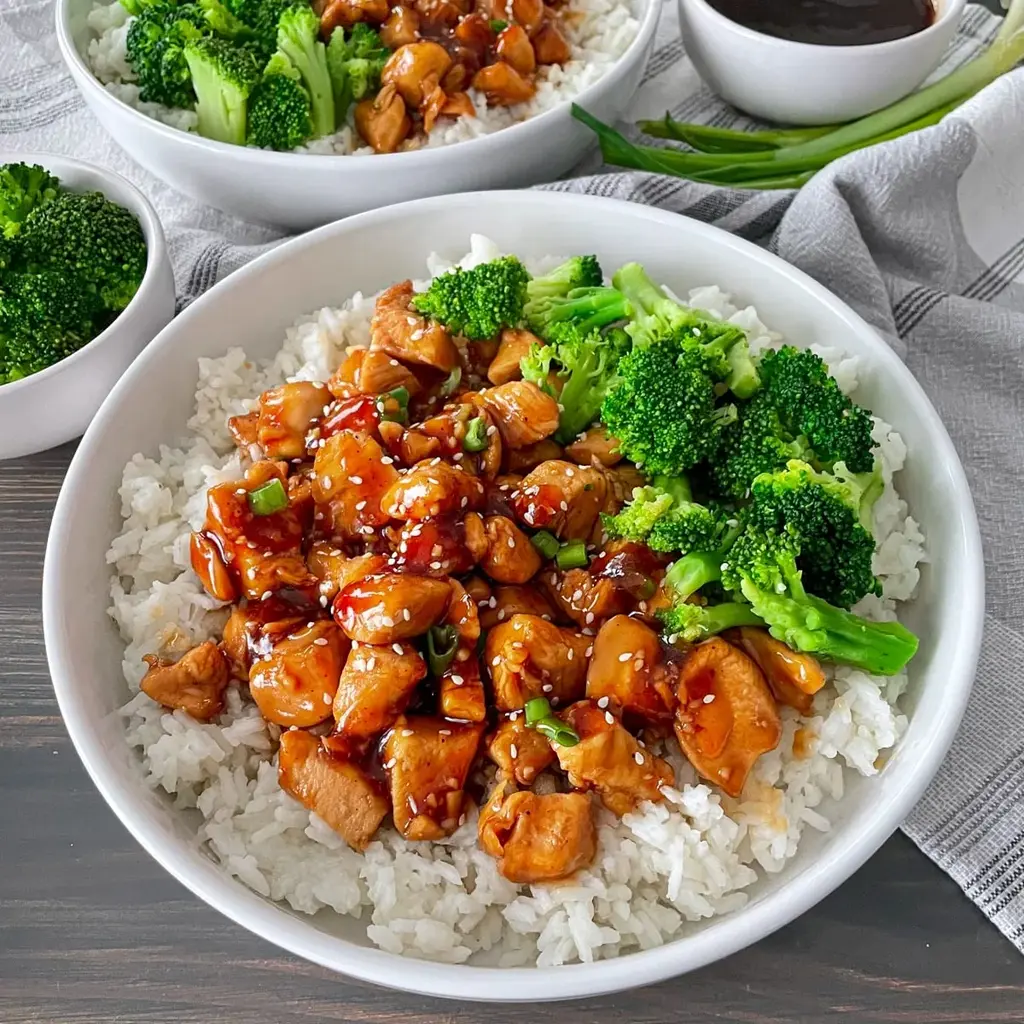
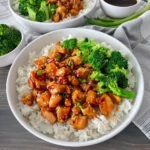
| 5. Serve | Immediately spoon the teriyaki chicken over bowls of hot cooked rice alongside your steamed vegetables. Garnish generously with a sprinkle of sesame seeds and chopped green onions. | Serve hot for the best texture and flavor experience. |
Serving Suggestions & Presentation
Presentation turns a simple bowl into a restaurant-worthy dish. Start with a base of fluffy, hot rice—short-grain white or jasmine rice works wonderfully. Create a well in the center of the rice and ladle in the glazed chicken and sauce, allowing it to pool enticingly. Arrange your steamed vegetables (broccoli florets, snap peas, and shredded carrots are a classic trio) brightly around the edges. The final flourish of white sesame seeds and vibrant green onions is non-negotiable; it adds texture, color, and a burst of fresh flavor. For a fun, interactive meal, serve the components separately and let everyone build their own bowl.
Storage, Reheating & Meal Prep
This recipe is a meal-prep dream. Let the cooked teriyaki chicken cool completely, then store it in an airtight container in the refrigerator for up to 4 days. The sauce may thicken further when chilled; this is normal. To reheat, add a splash of water or chicken broth to a skillet with the chicken and warm over medium-low heat, stirring gently, until hot. You can also reheat individual portions in the microwave with a damp paper towel over the top. We do not recommend freezing the fully assembled dish with sauce, as the texture of the chicken can become rubbery and the cornstarch-thickened sauce may separate upon thawing.
Creative Variations & Dietary Swaps
The beauty of this best teriyaki chicken rice bowl framework is its adaptability. Protein Swap: Use chicken thighs for a richer, juicier result, or try firm tofu (pressed and cubed) or shrimp. Low-Carb/Keto: Replace the brown sugar and honey with a keto-friendly sweetener like monk fruit or erythritol, and use coconut aminos instead of soy sauce. Serve over cauliflower rice. Gluten-Free: Ensure you use tamari or a certified gluten-free soy sauce. Spicy Kick: Add 1-2 tsp of sriracha or a pinch of red pepper flakes to the sauce. Pineapple Twist: Add 1 cup of fresh pineapple chunks to the skillet with the sauce for a sweet and tangy Hawaiian-style teriyaki.
Your Teriyaki Questions Answered (FAQ)
We’ve gathered the most common questions to ensure your cooking success.
Can I make this teriyaki sauce ahead of time?
Absolutely! Whisk the sauce ingredients (except the cornstarch) together and store in a jar in the fridge for up to a week. When ready to cook, shake the jar, whisk in the cornstarch, and proceed with the recipe.
My sauce isn’t thickening. What did I do wrong?
The most common issue is not bringing the sauce to a full simmer. Make sure your heat is high enough after adding the sauce to get a gentle bubble. Also, ensure your cornstarch was fully dissolved in the cold liquid before adding it to the hot pan.
Can I use frozen chicken?
We highly recommend thawing the chicken completely first. Cooking frozen cubes will release too much water, preventing proper browning and making the sauce watery.
What’s the best rice to use?
For an authentic feel, use short-grain Japanese rice or medium-grain Calrose rice. For everyday, jasmine or basmati rice works perfectly. Brown rice adds a nutty flavor and extra fiber.
Is the sesame oil really necessary?
While optional, it adds an authentic, deep nutty aroma that is signature to many Asian dishes. Just 1/2 tsp makes a noticeable difference. Don’t skip it if you have it!
How can I make this dish less sweet?
Reduce the brown sugar to 2 Tbsp and the honey to 1 Tbsp. You can also increase the rice vinegar by 1/2 Tbsp to balance the reduced sweetness with more acidity.
Can I bake the chicken instead of pan-frying?
Yes. Toss cubed chicken in 1 Tbsp oil, spread on a parchment-lined baking sheet, and bake at 400°F for 15-18 minutes. Meanwhile, make the sauce in a saucepan until thickened, then toss with the baked chicken.
What are the best vegetable pairings?
Broccoli, snap peas, bell peppers, shredded carrots, and bok choy are all excellent. Steam, sauté, or roast them separately to maintain their crisp-tender texture.
📌 Save This Recipe For Later!
Don’t lose this recipe! Pin the image below to your Dinner Ideas or Meal Prep board on Pinterest to always have it handy.
Follow us on Pinterest: @cookingwithemy for more easy, delicious recipes.
[A beautiful, vertical pin image titled “The Best 30-Minute Teriyaki Chicken Rice Bowl” would be displayed here]
Teriyaki Chicken Rice Bowl
Description
If you love quick, easy, and delicious dinner recipes for your busy week nights, then look no further!! This Teriyaki Chicken Rice Bowl is easy to make and will be ready in less than 30 minutes.
Ingredients
Scale
- 4 boneless skinless chicken breasts, cubed
- 1 Tbsp. olive oil
- 1/2 cup low sodium soy sauce
- 1/2 cup water
- 3 Tbsp. packed light brown sugar
- 2 Tbsp. rice vinegar
- 1/2 tsp. sesame oil (optional)
- 1 tsp. ground ginger
- 2 tsp. minced garlic
- 2 Tbsp. honey
- 3 tsp. cornstarch
- sesame seeds and chopped green onions for garnish
- rice for serving
- steamed veggies for serving
Instructions
- Heat oil in a large skillet on medium high heat.
- Add cubed chicken and brown chicken until cooked through and it is no longer pink.
- While Chicken is browning, prepare your teriyaki sauce! In a medium size mixing bowl whisk together soy sauce, water, honey, brown sugar, rice vinegar, sesame oil, ginger, garlic, and cornstarch.
- Once Chicken is browned and cooked through, add your homemade teriyaki sauce to your skillet and continue to cook stirring until the sauce has thickened.
- Serve immediately with white or brown rice and vegetables of your choice. Garnish with sesame seeds and green onion
