Table of Contents
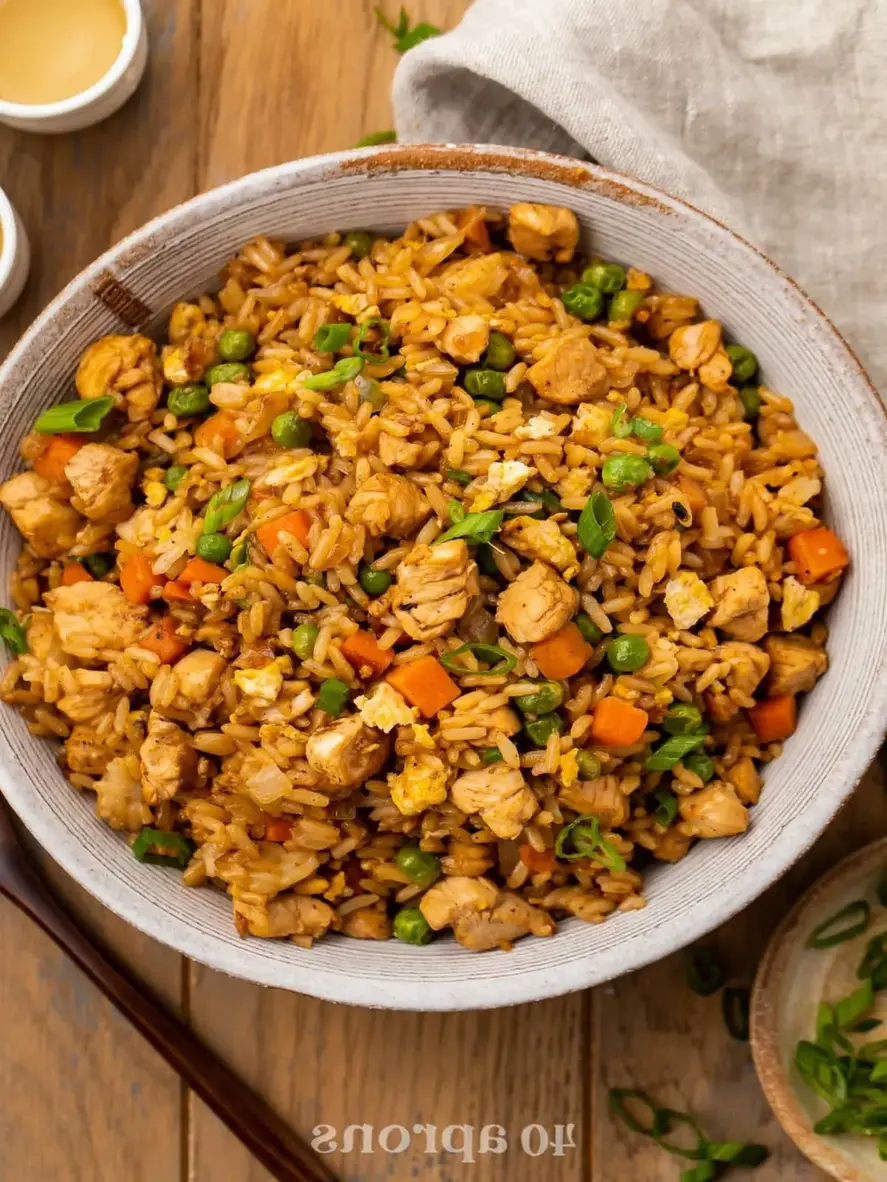
The 20-Minute Secret to Perfect Restaurant-Style Chicken Fried Rice
Unlock the authentic flavor of your favorite hibachi grill with this foolproof, family-friendly recipe that’s faster than delivery.
| Prep Time | Cook Time | Total Time | Servings | Difficulty |
|---|---|---|---|---|
| 10 minutes | 10 minutes | 20 minutes | 4 servings | Easy |
Why This Recipe Beats Takeout Every Single Time
Craving that irresistible, savory flavor of hibachi restaurant-style chicken fried rice but don’t want to leave home or pay premium prices? You’re in the right place. At Cooking With Emy, we’ve cracked the code. This isn’t just another fried rice recipe—it’s a direct translation of the techniques used on the sizzling hibachi grill, adapted for your home kitchen. The result? A dish that’s loaded with tender, juicy chicken, fluffy grains of rice, perfectly scrambled eggs, and crisp vegetables, all harmoniously tossed in a rich, buttery sauce with soy and a hint of sesame.
What makes this recipe truly special is its dual nature. It’s elegant and impressive enough to serve at a dinner party, yet it’s simple and quick enough to be your go-to weeknight lifesaver. In just about 20 minutes, you can have a complete, satisfying meal on the table that will have your family wondering if you secretly ordered takeout. The magic lies in a few key techniques and ingredient choices that we’ll unveil, ensuring your homemade version rivals—and often surpasses—what you get from restaurants.
The Secret to Hibachi Magic at Home
Most homemade fried rice falls short because it misses the high-heat “wok hei” (the breath of the wok) and the balanced seasoning of professional kitchens. We’ve solved that. This restaurant-style chicken fried rice recipe succeeds for three fundamental reasons:
1. The Rice Foundation: We insist on using day-old, cooled rice. This is non-negotiable. Freshly cooked rice is too moist and steamy, causing it to clump and become mushy when stir-fried. Day-old rice has dried out slightly, giving each grain structural integrity so it can fry up separately, achieving that desirable light and fluffy texture.
2. The Layered Cooking Method: Authentic fried rice isn’t a dump-and-stir affair. Each component—chicken, vegetables, eggs, rice—is cooked separately and then combined at the end. This ensures everything is cooked to perfection. The chicken gets a beautiful sear, the veggies stay crisp-tender, and the eggs remain soft and cloud-like.
3. The Flavor Trinity: The combination of butter, soy sauce, and sesame oil is the soul of this dish. The butter adds a rich, creamy, and nutty depth that oil alone cannot provide. Low-sodium soy sauce gives the necessary salty, umami punch without overpowering. Finally, a touch of toasted sesame oil added at the right moment provides the aromatic, nutty finish that makes the dish instantly recognizable.
Ingredient Breakdown & Shopping List
Using the right ingredients is just as important as the technique. Here’s your detailed guide to what you need and why each component matters for authentic restaurant-style chicken fried rice.
| Ingredient | Quantity | Notes & Why It Matters |
|---|---|---|
| Sesame Oil | 1 ½ teaspoons | Use toasted sesame oil for its intense aroma. It’s a finishing oil, not a cooking oil. |
| Neutral Oil (Avocado/Canola) | 4 teaspoons (divided) | High smoke point for searing. Divided use ensures proper cooking at each stage. |
| Chicken Breasts | ¾ pound | Cut into very small pieces (half bite-sized) for quick cooking and better sauce coverage. |
| Low-Sodium Soy Sauce | 5 tablespoons (divided) | Low-sodium allows you to control saltiness. Divided between chicken and rice for layered seasoning. |
| Unsalted Butter | 4 tablespoons (divided) | The secret to rich, “restaurant” flavor. Adds creaminess and helps rice grains separate. |
| Fresh Lemon Juice | 2 teaspoons | A bright, acidic note that cuts through richness and tenderizes the chicken slightly. |
| White Onion | ½ cup, diced | Provides a sweet, aromatic base. Dice uniformly for even cooking. |
| Frozen Mixed Vegetables | 1 cup (peas, carrots) | Convenient, nutritious, and adds color. No need to thaw—they cook quickly in the hot pan. |
| Large Eggs | 2 | Beaten. They create soft, fluffy ribbons throughout the rice. |
| Cooked White Rice | 4 cups (cooled) | DAY-OLD IS BEST. Jasmine or long-grain works perfectly. Cool to the touch. |
| Salt & Black Pepper | To taste | Season in layers. Always taste before adding final salt due to soy sauce. |
| Sesame Seeds (optional) | For garnish | Adds visual appeal and a subtle crunch. |
Step-by-Step Cooking Instructions
Follow these steps precisely for foolproof, restaurant-quality results every time. We recommend having all your ingredients measured, chopped, and within arm’s reach (this is called mise en place) before you turn on the heat.
Step 1: Cook the Chicken to Perfection
Place a large skillet or wok over medium-high heat. Add 1 ½ teaspoons of sesame oil and 1 tablespoon (3 teaspoons) of your neutral oil. Once the oils are hot and shimmering (about 60 seconds), carefully add the small chicken pieces in a single layer. Let them cook, UNDISTURBED, for 1 full minute. This creates a flavorful sear.
After a minute, add 2 tablespoons of soy sauce, 1 tablespoon of butter, the lemon juice, and a pinch of salt and pepper. Now, stir and cook until the chicken is just cooked through and no longer pink, about 1-3 more minutes. Resist the urge to stir constantly—one or two turns is enough for nice browning. Transfer the chicken and all its juices to a clean bowl and set aside.
Step 2: Sauté the Aromatics & Vegetables
Wipe out the skillet with a paper towel. Return it to medium-high heat and add the remaining 1 teaspoon of neutral oil. Add the diced onion and cook for 1-2 minutes until it begins to soften. Add the frozen mixed vegetables (straight from the freezer is fine) and cook for another 2-3 minutes, stirring occasionally, until they are heated through and crisp-tender. Transfer this veggie mixture to the bowl with the chicken.
Step 3: Scramble the Eggs
In the same skillet, reduce heat to medium. Add 1 tablespoon of butter. Once melted, pour in the beaten eggs. Let them set for about 15 seconds, then gently scramble and fold with a spatula until they are just set but still soft and slightly creamy. Immediately transfer them to the bowl with the chicken and veggies. Overcooked eggs become rubbery.
Step 4: The Grand Finale – Fry the Rice
Increase the heat back to medium-high. Add the final 2 tablespoons of butter to the skillet. Once melted and foamy, add all of the cooled rice. Use your spatula to break up any clumps. Stir-fry the rice for 2-3 minutes, letting some grains lightly toast in the butter.
Push the rice to one side of the skillet. Pour the remaining 3 tablespoons of soy sauce onto the hot, empty part of the skillet. It will sizzle and steam instantly—this “deglazes” the pan and caramelizes the soy slightly, deepening its flavor. Immediately toss the rice with the soy sauce to coat evenly.
Step 5: Combine and Serve
Add the entire contents of the bowl (chicken, veggies, eggs) back into the skillet with the rice. Gently toss and fold everything together until it’s uniformly mixed and heated through, about 1-2 minutes. Taste and adjust seasoning with a final pinch of pepper or salt if needed. Garnish with sesame seeds and serve immediately while hot and sizzling!
Serving Suggestions & Perfect Pairings
This restaurant-style chicken fried rice is incredibly versatile. As a main dish, it’s a complete meal with protein, veggies, and carbs. For a true hibachi steakhouse experience at home, pair it with our popular Hibachi Chicken or simple grilled shrimp. It also makes a phenomenal side dish for teriyaki salmon, Korean BBQ ribs, or miso-glazed eggplant.
Start your meal with a light, refreshing ginger salad with carrot-ginger dressing or a clear soup. For a quick weekday lunch, pack any leftovers (if you have them!) in a thermos—they reheat beautifully. A drizzle of sriracha, a side of yum yum sauce, or pickled ginger are all excellent condiments to have on the table for customizing each bite.
Storage, Reheating & Meal Prep Guide
This recipe is a meal-prepper’s dream. Proper storage ensures you enjoy the same great texture and flavor later.
Storage: Allow the fried rice to cool completely before transferring it to an airtight container. It will keep in the refrigerator for up to 4 days.
Freezing: We do not recommend freezing this fried rice, as the texture of the rice and vegetables can become mushy and watery upon thawing and reheating.
Reheating for Best Results: The microwave is convenient but can make rice soggy. For best results, reheat in a skillet or wok over medium heat with a tiny splash of water or broth. Cover for a minute to steam, then uncover and stir-fry to restore the texture. You can also use the microwave: place in a microwave-safe bowl, sprinkle with 1 teaspoon of water, cover loosely, and heat in 60-second intervals, fluffing with a fork between intervals.
Creative Recipe Variations
Once you’ve mastered the base recipe, the world of fried rice is your oyster! Here are some delicious twists:
| Variation | Ingredient Swap/Add | Flavor Profile |
|---|---|---|
| Pork Fried Rice | Substitute chicken with ¾ lb ground pork or diced pork loin. | Richer, savory, with a deeper umami flavor. |
| Shrimp Fried Rice | Use ¾ lb small shrimp. Add in the last 2 minutes of cooking to avoid rubberiness. | Sweet, briny, and classic. |
| Vegetarian Fried Rice | Omit chicken. Add 1 cup of extra-firm tofu (cubed and pan-fried) or edamame. | Light, plant-based, and protein-packed. |
| Pineapple Fried Rice | Add ¾ cup of fresh pineapple chunks with the veggies. Garnish with cilantro. | Sweet, tangy, and tropical. |
| Kimchi Fried Rice | Add ½ cup of chopped kimchi with the rice. Use kimchi juice in place of some soy sauce. | Spicy, fermented, and incredibly flavorful. |
Your Top Questions Answered (FAQ)
1. Can I use freshly cooked rice for restaurant-style chicken fried rice?
We strongly advise against it. Fresh rice contains too much moisture and will steam and clump together, resulting in a gummy, mushy texture. Day-old, refrigerated rice is drier, allowing each grain to fry separately and become fluffy. In a pinch, you can spread freshly cooked rice on a baking sheet and let it cool in the fridge for an hour to dry out.
2. What type of rice is best for fried rice?
Long-grain varieties like Jasmine or Basmati are ideal because they are less sticky and have a firm texture. Medium-grain rice can work if it’s thoroughly cooled. Avoid using short-grain or sushi rice, as they are too starchy and sticky.
3. Can I make this recipe gluten-free?
Absolutely! Simply replace the soy sauce with an equal amount of gluten-free tamari or a certified gluten-free soy sauce. All other ingredients in this recipe are naturally gluten-free.
4. My fried rice always sticks to the pan. What am I doing wrong?
Sticking is usually caused by insufficient oil/butter or a pan that’s not hot enough. Ensure your skillet is preheated over medium-high heat before adding oil. Also, using a well-seasoned carbon steel wok or a non-stick skillet can help immensely.
5. Can I use different vegetables?
Yes! This recipe is very flexible. Bell peppers, broccoli florets, snap peas, corn, or water chestnuts are all excellent additions. Just ensure they are diced small and added at the right time so everything finishes cooking together.
6. Why do you add butter? Isn’t oil traditional?
Butter is the “secret weapon” for that unmistakable hibachi restaurant flavor. It adds a rich, nutty, and creamy dimension that vegetable oil alone cannot provide. The combination of butter for flavor and oil for high-heat cooking is key to the authentic taste.
7. How can I make my fried rice less salty?
First, ensure you are using low-sodium soy sauce. Second, be mindful of adding extra salt during cooking—taste first. The soy sauce provides plenty of seasoning. You can also balance saltiness with a squeeze of fresh lime juice at the end.
8. Is there a way to make this recipe lower in fat?
You can reduce the butter by half and use a non-stick cooking spray for the pan. However, note that this will slightly alter the rich, authentic restaurant-style flavor and texture.
📌 Save This Recipe for Later!
Don’t lose this recipe! Pin it to your favorite Dinner Ideas or Asian Recipes board on Pinterest so you can always find it when the craving hits.
Follow us on Pinterest @cookingwithemy for more delicious inspiration!
Easy Chicken Fried Rice (Restaurant-Style)
Description
This is the best chicken fried rice recipe because it’s loaded with tender, savory chicken, fluffy rice, scrambled eggs, and crisp vegetables, all tossed together with butter, soy sauce, and sesame oil for that authentic hibachi flavor you crave!
Ingredients
Scale
- 1 ½ teaspoons sesame oil
- 4 teaspoons neutral oil (like avocado or canola; 1 tablespoon + 1 teaspoon, divided)
- ¾ pound chicken breasts (cut into very small pieces, roughly half of “bite-sized”)
- 5 tablespoons low-sodium soy sauce (divided)
- 4 tablespoons butter (divided)
- 2 teaspoons fresh lemon juice
- salt (to taste)
- pepper (to taste)
- ½ cup diced white onion
- 1 cup frozen mixed vegetables (peas, carrots)
- 2 large eggs
- 4 cups cooked rice (cool to touch, see Notes)
- sesame seeds (optional, for garnish)
Instructions
- In large skillet or wok over medium-high heat, warm 1 ½ teaspoons sesame oil and 1 tablespoon (3 teaspoons) neutral oil. Once oils are hot, add chicken pieces. Let chicken cook for 1 minute without stirring.
- Add 2 tablespoons soy sauce, 1 tablespoon butter, 2 teaspoons fresh lemon juice, salt, and pepper to skillet. Cook until chicken is no longer pink, approximately 1 to 3 minutes. Stir no more than once or twice so that chicken will brown nicely.
- Transfer cooked chicken to medium bowl and set aside. Wipe out skillet (or wok) to use again.
- Heat 1 teaspoon neutral oil in skillet over medium-high heat. Add diced onion and frozen vegetables. Sauté until onions are almost translucent, approximately 3 minutes.
- Move vegetables to one side of skillet. Crack eggs into skillet and scramble with spatula until cooked through.
- Add 4 cups cooked rice and 3 tablespoons butter to skillet. Stir frequently and cook 5 minutes, then stir in 3 tablespoons soy sauce and cook 1 additional minute.
- Stir in chicken, salt, and pepper. Cook until everything is well combined and warmed through, then portion into bowls, garnish with sesame seeds if desired, and serve warm.
