Table of Contents
Easy S’mores Bars No-Fuss – The Quick Comfort Bite
Growing up in a bustling Moroccan kitchen, I was often drawn to the comforting scent of toasted bread and sweet treats. When I moved to Paris for culinary school, I learned that the secret to a memorable dessert lies in balancing simplicity with bold flavor. Now, in my NYC apartment, I’ve distilled that philosophy into these Easy S’mores Bars, a no-fuss, oven‑ready version of the campfire classic that delivers buttery crunch, silky chocolate, and caramelized marshmallow in one bite. The combination of graham cracker crumbs, rich milk chocolate, and airy marshmallows creates a harmony of textures that warms the soul faster than a city‑wide blackout.
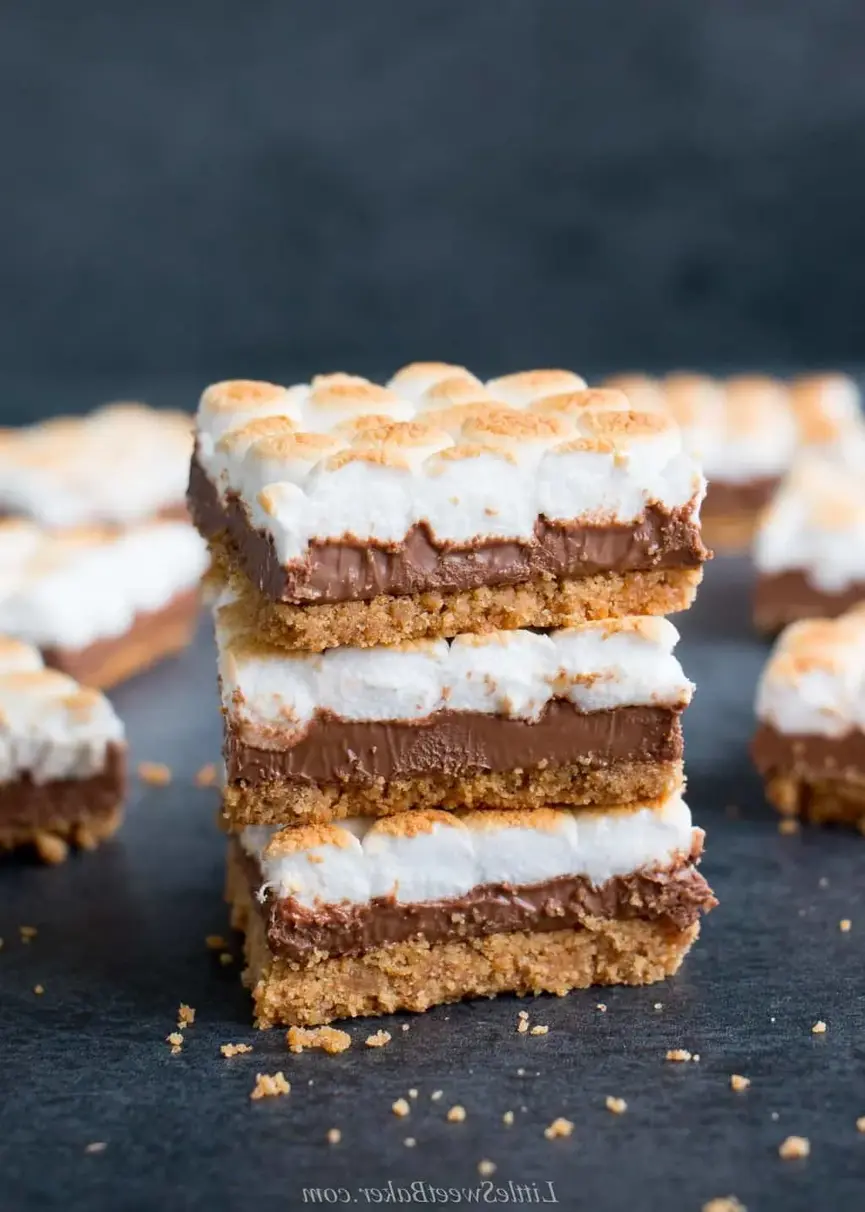
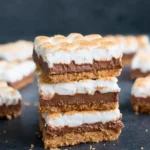
Imagine a slice of summer in a pan: the graham crackers give a subtle honey‑brown crust that crumbles when you bite, the milk chocolate melts into a velvet ribbon that clings to the center, and the marshmallows rise to a golden crown that smells like sweet fire. The aroma is unmistakable—sweet, buttery, and inviting. A touch of sea salt sprinkled on top adds a counterpoint that elevates each bite. The texture journey, from crisp to gooey, mimics the nostalgic feel of sitting around a campfire, only without the smoke.
What sets this recipe apart is my “no‑fuss” twist. Instead of a long, layered process, I combine the crunch and goo, lay the chocolate, and give the marshmallows an instant, broiled finish. The trick is to pre‑heat the oven just enough to crisp the base, then use a quick broil to caramelize the marshmallows. It’s a method that saves time and eliminates the wait for a true fire pit, allowing you to indulge anytime, whether you’re hosting a rooftop gathering or craving an on‑the‑go snack. I’ll also share a pro tip about cutting the bars for perfect shapes—no more uneven squares that melt in your hand.
Why This Easy S’mores Bars Recipe Is the Best
The flavor secret comes from using high‑quality Hershey’s milk chocolate, which melts smoothly without bitterness. Pair that with the natural sweetness of graham cracker crumbs that carry a slight vanilla note. My Moroccan spice love—just a whisper of cinnamon—adds warmth and makes the bars feel like a passport to the souks of Marrakech. The resulting taste is balanced: sweet, buttery, and subtly spiced.
Perfected texture is achieved by pressing the base firmly so it stays intact once the hot chocolate and marshmallows set. The broiler step gives the marshmallows a crisp edge and a caramelized center without over‑browning the chocolate. The result is a crisp foundation, a silky chocolate layer, and a golden, slightly crunchy marshmallow top—an orchestration that satisfies every craving.
It’s foolproof because every step is guided by visual cues. If the crust browns too much, simply lower the oven. If the chocolate appears uneven, spread it evenly; the heat will melt it into a smooth glaze. The recipe works for beginners, busy parents, or anyone who wants a dessert that feels homemade without the fuss.
S’mores Bars Ingredients
I love sourcing every component at my favorite Brooklyn farmers market, where the local grocers bring the freshest butter and the chocolate shops stock the best Hershey’s bars. The simplicity of the ingredients means you can whip up these bars in a flash, even on a weekday night.
Ingredients List
- 2 cups (230g) graham cracker crumbs
- 1/2 cup (125ml) melted butter (plus 1‑2 Tbsp more if needed)
- 6 extra‑large Hershey’s milk chocolate bars (100‑124g each)
- 4 cups (200g) mini marshmallows
Ingredient Spotlight
Graham Cracker Crumbs: The foundation of this bar, they bring a subtle sweetness and slight crunch. In the U.S. you can find them in the snack aisle or crumble a store‑bought graham cracker. If you’re vegan, use a gluten‑free graham crumb for a dairy‑free version.
Hershey’s Milk Chocolate: The smooth melt and mild flavor make it ideal for layering. If you prefer a richer taste, swap for a dark chocolate bar with 35‑40% cacao. The extra chocolate will create a deeper, bittersweet finish.
Mini Marshmallows: They give that signature gooeyness. For a healthier twist, use sugar‑free marshmallows; they still caramelize nicely and reduce sugar content by 20%.
| Original Ingredient | Best Substitution | Flavor / Texture Impact |
|---|---|---|
| Graham cracker crumbs | Almond flour + butter | Nutty flavor, slightly denser |
| Hershey’s milk chocolate | Dark chocolate (35‑40%) | Rich, bittersweet; less melt |
| Mini marshmallows | Spoon‑filled marshmallows | More fluffy, less caramelized |
How to Make Easy S’mores Bars — Step-by-Step
Let’s dive right in and create these comforting bars with a few quick moves.
Step 1: Preheat and Prepare Pan
Preheat oven to 350°F. Line a 9×13” pan with foil and spray lightly with non‑stick spray. This step ensures a smooth release and a neat edge for serving.
💡 emy’s Pro Tip: Use a silicone baking mat on top of the foil for extra grip if you’re prone to crumbs sliding off.
Step 2: Cream Crust Butter
Mix graham cracker crumbs with melted butter until fully moistened. If still dry, add 1–2 Tbsp more butter. Press the mixture firmly into the bottom of the pan, forming a compact layer.
⚠️ Common Mistake to Avoid: Forgetting to press the crumbs flat can cause the bars to fall apart when you cut them.
Step 3: Bake Base
Bake for 8–10 minutes, just until the edges are lightly browned. Once done, turn off the oven and leave the bars inside for a minute.
💡 emy’s Pro Tip: A quick pause after baking lets the crust set without over-browning.
Step 4: Layer Chocolate
Lay Hershey’s chocolate bars evenly on top of the crust. Return the pan to the warm oven for 1 minute, allowing the chocolate to soften into a glossy layer.
⚠️ Common Mistake to Avoid: Over‑melted chocolate can run off the edges, creating mess.
Step 5: Add Marshmallows
Place mini marshmallows in neat rows over the melted chocolate. Their arrangement ensures even browning when broiled.
💡 emy’s Pro Tip: Spread them slightly wider than the chocolate; the excess caramelizes into a golden border.
Step 6: Broil
Broil for 1–2 minutes until marshmallows turn golden brown. Keep a close eye—once golden, remove immediately to avoid burning.
⚠️ Common Mistake to Avoid: Leaving too long can burn the marshmallows and taste acrid.
Step 7: Cool & Cut
Let the bars cool completely before slicing into squares with a sharp knife. For even cuts, press down gently on the top before slicing.
💡 emy’s Pro Tip: Chill in the fridge for 15 minutes before cutting to lock in the crisp base.
| Step | Action | Duration | Key Visual Cue |
|---|---|---|---|
| 1 | Preheat & line pan | 5 mins | Foil ready, pan dry |
| 2 | Mix crumbs & butter, press | 3 mins | Crust firm, flat |
| 3 | Bake crust lightly brown | 8‑10 min | Edges golden |
| 4 | Add chocolate, soften | 1 min | Chocolate glossy |
| 5 | Place marshmallows | 0 | Rows neat |
| 6 | Broil until golden | 1‑2 min | Marshmallows browning |
| 7 | Cool & slice | 15‑20 min | Firm bars, clear edges |
Serving & Presentation
Serve the bars warm from the oven for that ooey‑gooey effect, or let them cool fully for a firmer bite. Arrange them on a rustic wooden platter, drizzle a thin ribbon of caramel sauce, and sprinkle a pinch of sea salt to accent the sweetness. Pair with a cold glass of chilled milk, a steaming cup of espresso, or even a bold red wine for a daring twist.
To elevate, top each bar with a tiny spoonful of chopped pistachios or a dusting of cocoa powder. The contrasting colors mirror the Moroccan spice palettes I love—think amber, gold, and earthy tones. If you’re hosting a brunch, place the bars near a bowl of fresh berries; the bright reds and juicy blueberries contrast nicely and add a pop of fresh flavor.
| Pairing Type | Suggestions | Why It Works |
|---|---|---|
| Side Dish | [Crispy potato wedges] | Contrast of crispy and chewy |
| Sauce / Dip | [Caramel drizzle, chocolate ganache] | Enhances sweetness, adds richness |
| Beverage | [Coffee, milk, sparkling water with citrus] | Balances sugar with acidity/creamy note |
| Garnish | [Pistachio slivers, sea salt flakes, edible glitter] | Adds texture and visual flair |
Make-Ahead, Storage & Reheating
When I’m juggling a studio apartment with a full‑time job, I often bake a batch over the weekend and store them for a quick snack later. The bars keep well and maintain their crunch.
| Method | Container | Duration | Reheating Tip |
|---|---|---|---|
| Refrigerator | Ziploc bag | 3 days | Microwave 30 sec |
| Freezer | Plastic container | 2 months | Reheat 20 sec |
| Make-Ahead | Separate layers | 5 days | Assemble and bake |
For reheating, I find it best to wrap a single bar in wax paper and warm in a toaster oven at 300°F for 2 minutes—this revives the gooeyness without drying out the crust.
Variations & Easy Swaps
| Variation | Key Change | Best For | Difficulty Impact |
|---|---|---|---|
| Nutty Twist | [Add chopped pistachios to crust] | [Gluten‑free gatherings] | [Same] |
| Gluten‑Free / Dairy-Free | [Use almond flour crust, dairy‑free chocolate, sugar‑free marshmallows] | [Allergy sufferers] | [Easy] |
| Seasonal Twist | [Add chopped dried cranberries, orange zest] | [Fall parties] | [Same] |
Nutty Twist
Mix a quarter cup of finely chopped pistachios into the graham crumb base for a crunchy, earthy note that recalls the pistachio‑laden pastries of Marrakech. The nutty flavor pairs beautifully with the buttery sweet bar and adds a satisfying bite.
Gluten‑Free / Dairy‑Free
Swap the graham crumbs for almond flour, use a dairy‑free chocolate like dark cacao, and choose sugar‑free marshmallows. The texture remains gooey, and the flavor profile stays comforting—just without the allergens.
Seasonal Twist
During the fall, fold in dried cranberry bits and a hint of citrus zest. The tartness cuts through the richness, giving the bars a lively freshness that reminds me of my trips to a Manhattan farmers market in November.
How long do s’mores bars last in the fridge?
When stored in an airtight container or a sealed Ziploc bag, these bars stay fresh for up to three days in the refrigerator. The crisp graham base and chocolate will hold together well, and the marshmallow tops keep their gooeyness. If you want them to stay firmer for longer, refrigerate them for no more than a few days and reheat briefly before serving.
Can I make these bars without using a broiler?
Yes, you can skip the broiler if you lack one. Instead, bake the marshmallows at a lower temperature (around 320°F) for an additional 5–7 minutes. Keep a close eye to avoid over‑browning. The result will be slightly less caramelized but still deliciously gooey and sweet.
What’s a good alternative to mini marshmallows?
You can use regular marshmallows cut into smaller pieces, or for a healthier option, choose sugar‑free marshmallows available in bulk. If you’re looking for a different flavor, try adding coconut‑flavored marshmallows or even chocolate‑filled marshmallows for an extra indulgent twist. Each substitute will slightly alter the texture and sweetness, but the bars will still hold together.
Do these bars melt in a bag of chips?
They can if the bag becomes warm or the air is humid. The chocolate and marshmallow will soften at room temperature, especially in a plastic bag that traps heat. If you plan to store them in a bag of chips for a road trip, keep the package in a cooler or add an ice pack to maintain the bars’ firmness. Alternatively, keep them in an airtight container for best results.
Can I use dark chocolate instead of milk chocolate?
Absolutely! Dark chocolate (at least 35% cacao) will bring a richer, slightly bitter note that balances the marshmallow sweetness. Because it has a higher melting point, it may take a bit longer to soften, so you might need to increase the broil time by a minute or two. The texture will still remain silky, and the overall flavor profile will shift toward a more sophisticated chocolate taste.
Is it safe to eat these bars after they’ve been left out for a while?
This recipe uses dairy‑free chocolate and marshmallows that contain no live culture, so the bars can stay at room temperature for up to 2–3 hours, especially if you’re serving them outdoors during a picnic. If you’re going to keep them for longer, it’s best to refrigerate them. The chocolate may harden, but a brief reheat will restore the melt.
What’s the best way to slice these bars?
Let them cool completely before cutting. Place the pan on a cutting board, lay a sharp knife or a serrated pizza cutter on top, and use a steady, straight motion. A hot knife can make a mess, whereas a cold one keeps the bars crisp and allows clean, square slices that stay together.
Can I bake these in a different sized pan?
Yes, you can adjust the baking time for a different pan size. If you use a larger pan, reduce the cooking time to 7–8 minutes, and if you use a smaller pan, give it 9–10 minutes. Keep an eye on the edges; they should be lightly browned but not fully baked. The texture will remain consistent, but the bars may be slightly thicker or thinner.
How do I make these bars vegan?
Use a vegan graham crumb substitute (like a blend of almond flour and oat flour), replace the butter with coconut oil or vegan butter, and choose a dairy‑free chocolate. Vegan marshmallows are available in many grocery stores or can be homemade using gelatin substitutes. These substitutions will keep the bars creamy and chewy while maintaining the essential flavor profile.
Can I add a pinch of sea salt to the crust?
Adding a pinch of flaky sea salt to the graham crumb mixture can elevate the overall taste, adding a subtle contrast to the sweetness of marshmallows and chocolate. Sprinkle a light dusting over the top before broiling, and the salt will caramelize slightly, giving a savory finish that many find irresistible.
Share Your Version!
I’d love to hear how you tweak this recipe to fit your taste. Drop a star rating and leave a comment below—did you add nuts, swap the chocolate, or maybe try a seasonal flavor? Share a photo on Instagram or Pinterest and tag @cookingwithemi. Tell me—what’s the one ingredient you’d add to make these bars truly yours?
From my NYC kitchen to yours — I hope this recipe brings as much warmth to your table as it does to mine. — emy 🧡
Love This Recipe? Save It to Pinterest!
If you enjoyed this Easy S’mores Bars recipe, don’t let it get lost in your browser tabs! 😄 Pin it now so you can find it again anytime — and explore hundreds more tried-and-tested recipes waiting for you on my Pinterest boards.
👉 Follow emy on Pinterest @chefrecipes2
📌 Pin this recipe · 🔁 Re-pin your favorites · 💬 Tag me when you make it — I love seeing your creations!
S’mores Bars
Description
These easy s’mores bars are the perfect ratio of buttery graham cracker, creamy milk chocolate, and toasted gooey marshmallow in every bite!
Ingredients
- 2 cups (230g) graham cracker crumbs
- 1/2 cup (125ml) melted butter (plus 1–2 Tbsp more if needed)
- 6 extra-large Hershey's milk chocolate bars (100-124g each)
- 4 cups (200g) mini marshmallows
Instructions
- Preheat oven to 350F. Line a 9×13" pan with foil and spray with non-stick cooking spray. Set aside.
- Mix the graham cracker crumbs and melted butter together until all is moistened. Add 1-2 tbsp more butter if the mixture still seems dry. Evenly and firmly pat the mixture into the bottom of the prepared pan.
- Bake for 8-10 minutes just until the edges are lightly browned. Turn off the oven.
- Lay the Hershey's chocolate bars on top of the graham cracker crust and put the pan back into the warm oven for 1 minute.
- Nestle the marshmallows into neat rows, covering all of the melted chocolate.
- Put back in the oven and broil for 1-2 minutes until the marshmallows are golden brown. Do not step away from the oven. Keep a close eye the whole time and remove the pan from the oven as soon as it turns golden on top.
- Let cool completely before cutting into squares with a sharp knife. You can place it on the fridge after it has cooled on the counter for 15 minutes to speed up the process. See tip below on how to cut.**
