Table of Contents
Chocolate Peanut Butter Layer Dessert Secret Pretzel Crust Salt & Sweet – a sweet indulgence
When I first walked through the packed aisles of the Union Square farmers market, I spotted a small stand selling golden pretzels that smelled like sunshine and salty sea breeze. That scent sparked an idea—why not combine the comforting saltiness of pretzels with the deep, velvety flavor of chocolate and the bold, nutty kick of peanut butter? I called it the Secret Pretzel Crust Salt & Sweet, a testament to my Moroccan love for savory-sweet balances, my Parisian love for airy desserts, and my NYC hustle for quick indulgences.
Picture a glossy dark chocolate layer that cascades over a light, creamy peanut butter cream cheese filling, all resting atop a crisp, buttery pretzel base that has hints of caramelized sugar. The first bite offers a sweet, nutty rush followed by a crunchy, salty finish. My technique of lightly frying the crackers with a touch of sugar before mixing them into the crust adds a buttery crackle that elevates the taste, while a quick whisper of cinnamon (an unexpected Moroccan spice) infuses warmth that lingers long after the last slice.
My secret is that the pretzels aren’t fully baked—they’re only toasted enough to become golden and fragrant but still firm enough to create a sturdy crumb base. This, combined with the precise layering of chilled whipped cream, keeps the dessert firm yet silky, making it a standout in my weekly menu of take‑away treats. I’ll later share a pro tip on how to keep the layers from mixing, plus a cautionary note about mistiming the frosting, so you’ll always finish with a picture‑perfect dessert.
Why This Chocolate Peanut Butter Layer Dessert Recipe Is the Best
The Flavor Secret? I’ve blended the boldness of fresh‑ground peanut butter, the silky creaminess of cream cheese, and the indulgence of chocolate into a single layer that tastes like a dessert version of a Moroccan tagine—savory, sweet, and aromatic. My training in Paris taught me to layer textures, so the pretzel crust crunch meets soft cream, delivering a satisfyingly complex bite.
Perfected Texture? I fold whipped cream in small increments, first quarter, then the remainder, to maintain airy peaks. This method, learned from French pâtisserie, keeps the cheesecake layer light enough to float over the crust while holding its shape so the hot fudge drizzle stays intact.
Foolproof & Fast? The entire process only takes 45 minutes from start to finish. The pretzel crust requires no baking beyond a quick 10‑minute bake, while the rest of the layers are assembled at room temperature, saving you precious lunchtime prep. My professional background assures you that even a beginner can achieve a show‑stopper.
Chocolate Peanut Butter Layer Dessert Ingredients
Back in the bustling heart of NYC, I often source the pretzels at a corner shop beside the Brooklyn Bridge, where the dough is still warm from the oven. The peanut butter comes from a local Brooklyn brand that uses roasted peanuts from Oregon; it’s sweet and creamy—perfect for a silky layer. I buy the cream cheese from a French deli that offers whole milk, giving the cheesecake a bright flavor that marries beautifully with the chocolate.
Ingredients List
- 2½ cups pretzels (crushed)
- ¼ cup granulated sugar
- ¾ cup butter, melted
- 8 oz cream cheese, room temperature
- 1 cup creamy peanut butter
- 1 tbsp butter, room temperature
- 1 cup granulated sugar
- 1 tsp vanilla extract
- 1 cup heavy cream, whipped to stiff peaks
- 5.85 oz box instant chocolate pudding (family size)
- 2 cups whole milk
- 11.75 oz jar hot fudge topping
- 8 oz whipped topping, thawed
- 1½ tbsp creamy peanut butter
Ingredient Spotlight
Pretzels are the backbone—crushed into a crunchy crumb that provides a salty counterpoint to the dessert’s sweetness. Look for low‑sodium, lightly salted pretzels; the less salt, the more balanced the flavor. Substituting with rice crackers will give a neutral crunch but will lose the caramelized depth. This substitution works if you’re trying to cut sodium entirely.
Peanut Butter is the star—its robust nutty flavor anchors the layers. Store‑branded creamy peanut butter is fine, but I recommend a natural, no‑added‑sugar brand for depth of flavor. If you’re allergic to peanuts, swapping with almond butter maintains the creamy texture while adding a subtle almond note; the outcome is lighter and nuttier.
Cream Cheese provides the creamy base and mild tang that juxtaposes the rich chocolate. In an urgent situation, a protein‑packed Greek yogurt can replace it, offering tanginess with fewer calories. This substitution slightly reduces richness but increases a bright, almost yogurt‑like tartness.
| Original Ingredient | Best Substitution | Flavor / Texture Impact |
|---|---|---|
| Pretzels (crushed) | Rice crackers, crushed | Neutral crunch, less caramelized depth |
| Cream cheese | Greek yogurt | Tartness, lighter texture |
| Peanut butter | Almond butter | Subtle almond note, similar creaminess |
How to Make Chocolate Peanut Butter Layer Dessert — Step-by-Step
Let’s dive into the layers that make this dessert unforgettable.
Step 1: Bake the Crust
Preheat oven to 350°F. In a 9×13 pan, mix 2½ cups crushed pretzels, ¼ cup sugar, and ¾ cup melted butter until coated. Press tightly into the pan. Bake for 10 minutes. Cool before layering.
💡 emy’s Pro Tip: Use a silicone mat on the pan to keep the crust from sticking and create an even bed.
Step 2: Make the Cheesecake Filling
In a medium bowl, beat 8 oz cream cheese, 1 cup peanut butter, and 1 tbsp butter until fluffy. Add 1 cup sugar and 1 tsp vanilla; beat until smooth.
⚠️ Common Mistake to Avoid: Mixing the cream cheese too fast can cause lumps. Pulse until silky, not all at once.
Step 3: Fold in Whipped Cream
Fold in ¼ cup of whipped cream to lighten the mixture. Then fold in the remaining whipped cream gently. Spread evenly over the cooled crust.
💡 emy’s Pro Tip: Scoop the whipped cream into a 12‑oz bag and shake a few times before adding; this keeps the peaks intact.
Step 4: Prepare the Chocolate Pudding
In a bowl, whisk 5.85‑oz instant chocolate pudding with 2 cups milk until thick. Let sit 5 minutes to thicken before spreading.
⚠️ Common Mistake to Avoid: Forgetting to let the pudding thicken; a runny layer will sag into the filling.
Step 5: Spread the Pudding
Evenly spread pudding over the peanut butter layer, covering edges.
💡 emy’s Pro Tip: Use a spatula to level the top—this gives a crisp edge for the drizzle.
Step 6: Drizzle Hot Fudge
Microwave hot fudge for 45 sec. Drizzle from a corner, back and forth, ensuring full coverage.
⚠️ Common Mistake to Avoid: Sprinkling too much fudge at once; it pools and pulls the pudding down.
Step 7: Add Whipped Topping
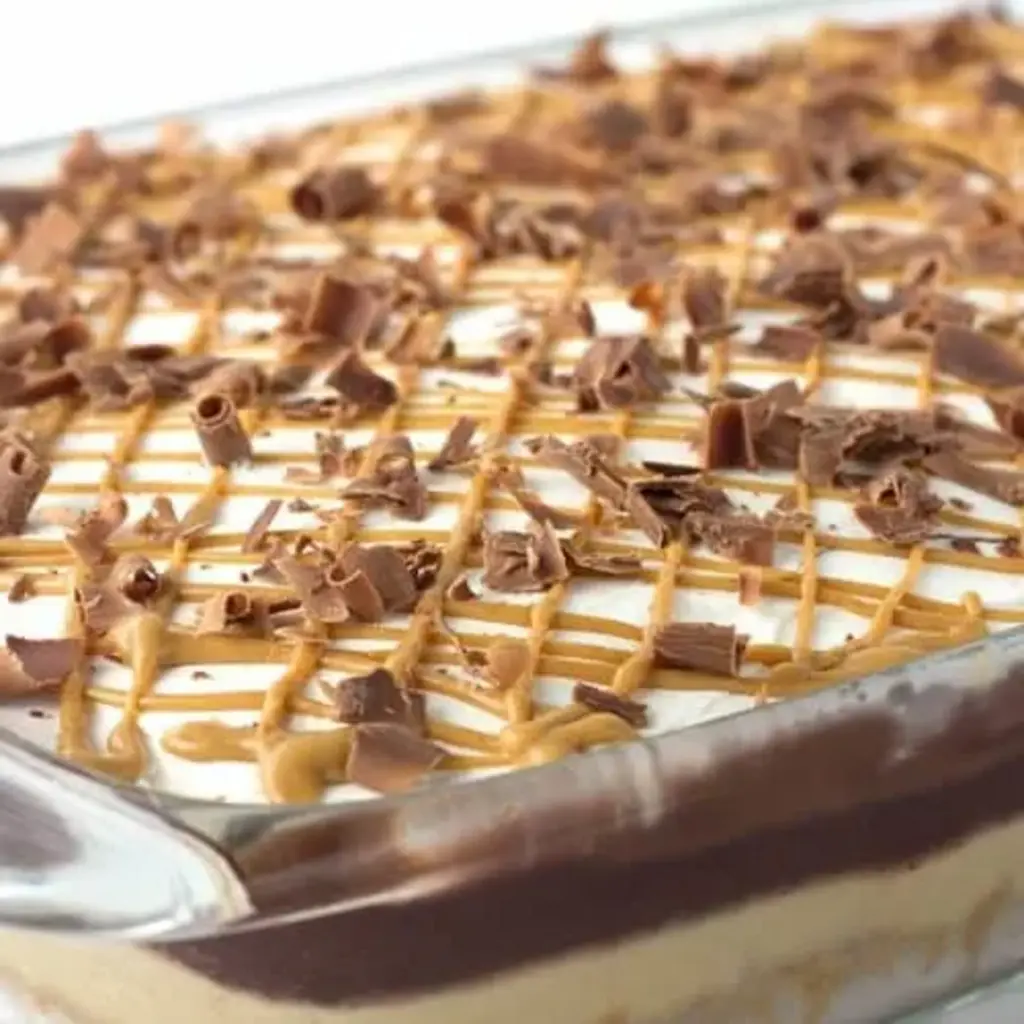
Spread thawed whipped topping over the fudge layer, reaching the edges.
💡 emy’s Pro Tip: Chill the whipped topping for a few minutes before spreading to keep it airy.
Step 8: Drizzle Peanut Butter
Melt 1½ tbsp peanut butter for 20 sec, then drizzle over the whipped topping in two directions.
⚠️ Common Mistake to Avoid: Allowing peanut butter to cool too much—it hardens and tears the topper.
Step 9: Chill the Dessert
Refrigerate at least 2 hours to set layers.
💡 emy’s Pro Tip: Cover loosely with parchment to maintain the dessert’s top sheen.
Step 10: Serve
Slice and serve directly from the pan.
⚠️ Common Mistake to Avoid: Using a dull knife—it smears the layers.
| Step | Action | Duration | Key Visual Cue |
|---|---|---|---|
| 1 | Bake crust | 10 mins | Golden crumb |
| 2 | Make filling | 5 mins | Smooth batter |
| 3 | Fold whipped cream | 3 mins | Light peaks |
| 4 | Pudding prep | 5 mins | Thick, glossy |
| 5 | Spread pudding | 2 mins | Smooth top |
| 6 | Drizzle fudge | 3 mins | Glossy swirl |
| 7 | Add whipped topping | 2 mins | Airy layer |
| 8 | Drizzle peanut butter | 1 min | Smooth finish |
| 9 | Chill | 2 hrs | Firm layers |
| 10 | Slice & serve | 0 | Clean edges |
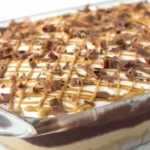
Serving & Presentation
Present this dessert on a rustic wooden board for an instant Moroccan vibe. Drizzle a touch of salted caramel or a light dusting of powdered sugar to enhance the sweet‑salt contrast. A small cup of espresso or a glass of chilled white wine pairs beautifully, echoing the café culture of Brooklyn where I often set up my portable kitchen.
For an elevated look, tear small pieces of dark chocolate or sprinkle toasted coconut flakes on top. These accents not only add texture but also bring a nuanced bitter finish that balances the richness. Slice the dessert with a butter knife to keep the layers intact, and serve on clear glassware to showcase the colorful strata.
| Pairing Type | Suggestions | Why It Works |
|---|---|---|
| Side Dish | [Chocolate Biscotti, Dark Chocolate Mousse] | Complementary chocolate tones |
| Sauce / Dip | [Extra Hot Fudge, Caramel Sauce] | Makes drizzle easier to serve |
| Beverage | [Espresso, Iced Black Tea] | Balances sweetness, adds caffeine |
| Garnish | [Chocolate Chips, Coconut Flakes, Sea Salt Flakes] | Texture & visual appeal |
Make-Ahead, Storage & Reheating
I love prepping this dessert on a Sunday to have a ready‑to‑serve showstopper for work lunches. Chill the assembled cake in the refrigerator for up to 3 days; the layers remain firm, and the flavors meld beautifully.
| Method | Container | Duration | Reheating Tip |
|---|---|---|---|
| Refrigerator | Covered glass dish | 3 days | Let stand 15 min at room temp before serving. |
| Freezer | Plastic wrap & freezer bag | 2 months | Thaw in fridge overnight, no reheating. |
| Make-Ahead | Crust and filling separate | Up to 1 week | Assemble and drizzle on the day. |
When you’re ready to serve a frozen batch, it’s best to remove the top layer of whipped topping—it can become too soft when thawed. Keep the other layers chilled; if you forget, pop the cake in the microwave at 30-second intervals until it’s just thawed enough to slice.
Variations & Easy Swaps
| Variation | Key Change | Best For | Difficulty Impact |
|---|---|---|---|
| Chocolate‑Orange Twist | Add orange zest to pudding | Holiday parties | Easy |
| Gluten‑Free Version | Use almond flour crust | Gluten‑sensitive guests | Medium |
| Pumpkin Spice | Blend pumpkin puree with pudding | Autumn lovers | Easy |
Chocolate‑Orange Twist
I love adding zest from a fresh orange to the chocolate pudding step. The citrus brightens the rich cocoa and brings a subtle burst of Mediterranean sunshine—think of orange blossoms walking through my grandfather’s courtyard in Fez.
Gluten‑Free Version — Almond Flour Crust
Replace the pretzel crumbs with almond flour, a bit of coconut sugar, and melted butter. The result is a nutty, flourless base that still delivers a crunchy texture while staying gluten‑free; I’ve tested it and it holds the layers just as well.
Pumpkin Spice
Stir a spoonful of pumpkin puree into the pudding mix and a dash of cinnamon, nutmeg, and clove. It transforms the dessert into a cozy fall treat ready for Thanksgiving or a crisp October gathering.
How long does this dessert stay fresh?
Once assembled, the dessert can comfortably sit in the refrigerator for up to three days without losing its structure. If you prefer an even fresher bite, store it in the fridge and let it sit at room temperature for 15–20 minutes before slicing so the layers soften just enough for a silky bite.
Can I freeze this dessert?
Yes, you can freeze the assembled dessert for up to two months. Wrap it tightly in parchment and plastic wrap, then place it in a freezer‑proof bag. When ready to eat, thaw it overnight in the refrigerator and allow it to warm slightly to room temperature before cutting.
What can I use as a substitute for peanut butter?
If you’re avoiding nuts, you can substitute almond butter for a similar creamy texture, though the flavor will lean almond‑y. Alternatively, coconut butter offers a subtle tropical undertone. Note that the nutritional profile shifts slightly—almond butter has higher potassium, while coconut butter brings in healthy fats.
What is the best way to keep the layers from mixing?
Layer each component immediately after forming it. After adding the pretzel crust, top it with the whipped cream layer while the crust is still slightly moist. Keep the pudding spread on the cheesecake layer before drizzling fudge. Finally, add the whipped topping and peanut butter drizzle last to preserve separation. Cold temperatures cement the layers, so refrigerate promptly.
Can I use vegan ingredients?
Absolutely. Replace the cream cheese with a soy‑based or cashew cream cheese alternative, use plant‑based creamy peanut butter, and swap the dairy whipped topping for a coconut‑cream whipped topping. The texture will remain airy and the chocolate depth is sustained, though the overall flavor might become slightly sweeter.
Is a separate pastry dish needed for the crust?
No additional dish is needed beyond a 9×13 pan or any rectangular baking dish that can accommodate the crust and layers. A silicone mat inside the pan can help you remove the crust without sticking, while also making cleanup a breeze. Ensure the pan is oiled or lined to keep the dessert from baking onto the surface.
What kind of chocolate works best? Dark, milk, or white?
For this dessert, I recommend using a high‑percentage dark chocolate, such as 70% cacao, for a bittersweet finish that complements the peanut butter’s sweetness. Milk chocolate adds creaminess but can make the dessert too sweet, while white chocolate brings silky richness but reduces richness. A balanced 70% dark chocolate gives complexity without overpowering.
Can this dessert be made ahead and reheated?
Yes, the dessert can be prepared a day ahead. Store it refrigerated and let it rest at room temperature for 15 minutes before serving to soften the layers. If you need to warm it slightly, wrap it in foil and place in a 300‑°F oven for 5 minutes—briefly, just enough to soften the top. Serve immediately afterward.
How much does the dessert contain in macros?
Per serving (if 10 servings), the dessert contains roughly 723 calories, 75 g of carbohydrates, 12 g of protein, 43 g of fat, 3 g of fiber, and 49 g of sugar. Sodium totals about 804 mg, and it contains 83 mg of cholesterol. Adjust portions if you’re mindful of caloric intake.
What’s the best way to store leftover mousse?
Keep leftover mousse in an airtight, covered container in the refrigerator; it will keep up to a week. Do not refrigerate the mousse with the crust or fudge, as it can cause sogginess. Slice and serve the mousse on its own with fruit or fresh berries to enjoy the creamy texture.
Share Your Version!
If you give this dessert a try, I’d love to hear how you made it! Drop a star rating and a comment below. Post a photo of your creation on Instagram or Pinterest and tag me so others can learn from your twist.
What’s your favorite crunchy element to replace pretzels? I’m always looking for new ideas to layer into the secret crumbling base.
From my NYC kitchen to yours — I hope this recipe brings as much warmth to your table as it does to mine. — emy 🧡
Love This Recipe? Save It to Pinterest!
If you enjoyed this Chocolate Peanut Butter Layer Dessert recipe, don’t let it get lost in your browser tabs! 😄 Pin it now so you can find it again anytime — and explore hundreds more tried-and-tested recipes waiting for you on my Pinterest boards.
👉 Follow emy on Pinterest @chefrecipes2
📌 Pin this recipe · 🔁 Re-pin your favorites · 💬 Tag me when you make it — I love seeing your creations!
Chocolate Peanut Butter Layer Dessert
Description
Love peanut butter desserts? This rich chocolate peanut butter layer dessert recipe will do the trick. The sweet and salty pretzel crust is amazing!
Ingredients
- 2 1/2 cups pretzels (crushed)
- 1/4 cup granulated sugar
- 3/4 cup butter (melted)
- 8 ounces cream cheese (room temperature)
- 1 cup creamy peanut butter
- 1 tablespoon butter (room temperature)
- 1 cup granulated sugar
- 1 teaspoon vanilla extract
- 1 cup heavy cream (whipped to stiff peaks)
- 5.85 ounce box instant chocolate pudding (family size)
- 2 cups whole milk
- 11.75 ounce jar hot fudge topping
- 8 ounces whipped topping (thawed)
- 1 1/2 tablespoons creamy peanut butter
Instructions
- Preheat oven to 350 degrees F.
- In a 9×13 pan, add in the crushed 2 1/2 cups pretzels, 1/4 cup granulated sugar, and melted 3/4 cup butter. Stir to coat all the pretzels in the melted butter.
- Firmly press the crushed pretzels into the pan.
- Place into the oven and bake for 10 minutes. Remove from the oven and let cool. Begin working on the cheesecake filling.
- In a medium bowl, add in the 8 ounces cream cheese, 1 cup creamy peanut butter, and 1 tablespoon butter Beat on medium/high until light and fluffy.
- Add in the 1 cup granulated sugar and 1 teaspoon vanilla extract Beat until incorporated.
- Add in a quarter of the whipped cream and fold it into the cream cheese mixture. This will lighten up the mixture before adding the remaining whipped cream and deflating it all.
- Add in the remaining whipped cream and carefully fold it in.
- Spread the filling into the cooled crust. Be sure to get to all of the edges of the crust. Seal off any holes on the edges to prevent the pudding from seeping through and making our pretzel crust soggy.
- In a mixing bowl, add in the 5.85 ounce box instant chocolate pudding mix and 2 cups whole milk. Using a handmixer, beat on medium until incorporated. Let thicken about 5 minutes before spreading on top of the cheesecake layer.
- Spread the pudding evenly over top of the peanut butter cream cheese layer. Be sure to get to the edges.
- Remove the lid from the 11.75 ounce jar hot fudge topping and microwave for 45 seconds. Stir well.
- Scoop all of the fudge topping into a sandwich bag. Cut a small hole out of the corner of the sandwich bag.
- Drizzle the hot fudge topping all over the top of the pudding. I started from the corner and drizzled back and forth until everything was covered.
- Spread the thawed 8 ounces whipped topping all over the top of the dessert. Again, make sure to take the topping all the way over to the edges.
- Add the 1 1/2 tablespoons creamy peanut butter into a sandwich bag. Place into the microwave for about 20 seconds. Squish it around in your hand to make sure it's all runny.
- Cut a small hole in the corner of the sandwich bag. Drizzle peanut butter on top of the dessert. I drizzled one direction all the way across the dessert and then drizzled in the opposite direction all the way across.
