Table of Contents
Chinese Beef and Broccoli Gluten-Free Adaptable – A Quick, Tender Takeout Classic
I still remember the first time I walked into my mother’s kitchen in Marrakech and the air was thick with cumin, garlic, and a baby oil splatter that made the ashtrays feel like tiny fireworks. A few years later in Paris I refined that scent with a buttered roux, and now, brimming in my little NYC apartment, I bring that same aroma to my stove.
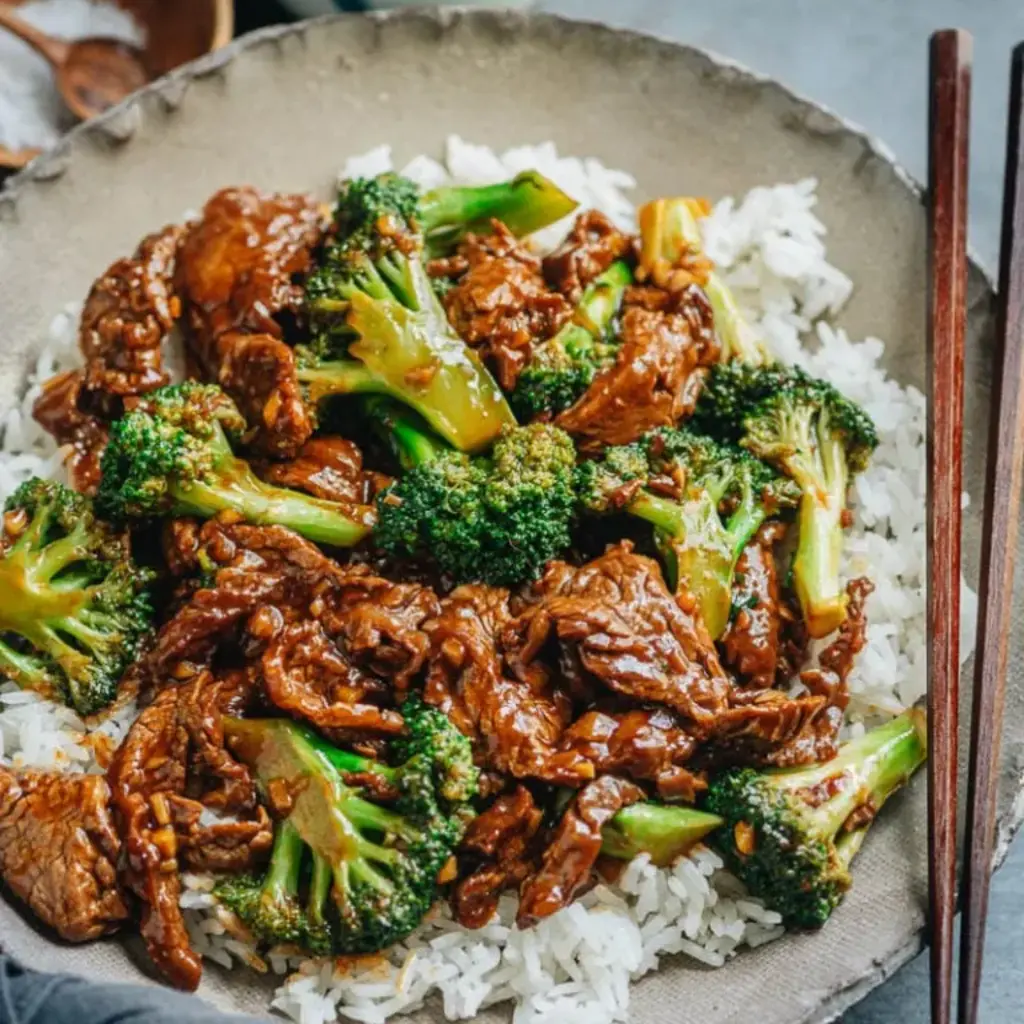
The glossy bruise of browned beef sliced against the bright green florets of a lunchtime stir–fry is a sensory dance. The meat’s juices mingle with the caramelized soy, a touch of sweetness from brown sugar, and a whisper of ginger’s peppery bite, all balanced by the crisp snap of the broccoli. It’s a dish that looks like a painting and tastes like comfort in a bite.
I’ve aimed to make this humble take‑out favorite healthier and gluten‑free without sacrificing flavor. If you’re looking to do it in under 30 minutes, you’ll love the single‑pan technique I’ll show. A quick trick: let the beef sit in sauce for just 10‑min; it’ll be tender in seconds. Distracting me from over‑cooking the broccoli is a common mistake and one I’ll point out later.
Why This Chinese Beef and Broccoli Recipe Is the Best
My mastery of sauce reduction from a Parisian chef’s kitchen means the sauce turns from thin to thick in 60‑seconds, locking in a sweet‑salty umami that I’ve balanced with a splash of dry sherry. It’s not just a quick dinner; it’s an experience that echoes the flavors of my Moroccan heritage and the brisk energy of the city.
The texture is achieved by searing the beef in a hot pan that leaves a nice char without overcooking, and steaming broccoli just long enough to keep that satisfying crunch. Together they play off each other, creating a dish that is both plated with confidence and served with a whisper of brushwork.
Even a kitchen novice can follow this recipe because every step is a step‑by‑step guide, with the times broken down and tips sprinkled throughout. The dish cooks in minutes, has a clear method for each ingredient, and stays vibrant—making it a go‑to for busy weekdays or relaxed weekends.
Chinese Beef and Broccoli Ingredients
I head to the West Village farmers market early on a Saturday and pick up the freshest vegetable stalls in the orange‑luminous dawn. The rest of everything comes from my favorite mom‑shop in Queens where the soy sauces sing and the pantry staples feel like family heirlooms.
Ingredients List
- 1 lb flank steak (or skirt steak or sirloin)
- 1 tablespoon soy sauce
- 1 tablespoon peanut oil (or vegetable oil)
- 1 tablespoon cornstarch
- 1/2 teaspoon baking soda (optional)
- 1/2 cup chicken stock (or beef stock)
- 2 tablespoons Shaoxing wine (or dry sherry)
- 2 tablespoons soy sauce
- 1 teaspoon dark soy sauce
- 2 teaspoons brown sugar (or white sugar)
- 1 tablespoon cornstarch
- 1 head broccoli, cut into bite‑size florets
- 1 tablespoon peanut oil (or vegetable oil)
- 3 garlic cloves, minced
- 2 teaspoons ginger, minced
Ingredient Spotlight
Flank steak delivers robust flavor and a tender chew when sliced thinly. Look for a cut with a faint marbling of fat for a richer bite. If you’re in a hurry, lean sirloin works fine, but it may need an extra splash of teriyaki for depth.
Broccoli is the star vegetable of the dish. Choose florets that are close, green, and firm. When you Steam them just once, they keep their bright color and satisfying snap.
Soy sauce balances sweetness and umami—stick with a full‑strength version unless you’re multisfin channeling a love of sodium. For a gluten‑free route, a splash of tamari gives the same savory punch without the wheat.
| Original Ingredient | Best Substitution | Flavor / Texture Impact |
|---|---|---|
| Flank steak | Sirloin | Slightly leaner, retains bright beefy flavor. |
| Broccoli | Cauliflower | Milder crunch, less green brightness. |
| Soy sauce | Tamari | Gluten‑free, same umami depth. |
How to Make Chinese Beef and Broccoli — Step-by-Step
Let’s get the skillet sizzling and the beef marinating at the same time—keeping the rhythm fast is the key to this dish’s magic.
Step 1: Marinate Beef
Slice the flank steak against the grain into 1/4‑inch thick pieces. Toss with 1 tbsp soy sauce, 1 tbsp peanut oil, and 1 tbsp cornstarch until coated. Set aside for 10 minutes while you prep the rest.
💡 emy’s Pro Tip: Coating the beef with cornstarch alone gives a nice crisp finish—they’ll brown beautifully when seared.
Step 2: Prepare Sauce
In a bowl mix 1/2 cup chicken stock, 2 tbsp Shaoxing wine, 2 tbsp soy sauce, 1 tsp dark soy sauce, 2 tsp brown sugar, and 1 tbsp cornstarch. Whisk until smooth; set aside.
⚠️ Common Mistake to Avoid: Drinking the sauce raw—it’s sweet and salty, so keep portion size in mind!
Step 3: Steam Broccoli
Heat 1/4 cup water in a nonstick skillet until it boils. Add broccoli, cover, and steam for about 1 minute until tender and the water evaporates. Transfer to a plate.
💡 emy’s Pro Tip: Use a lid to lock in steam quickly; that one minute is all you need to keep the florets bright.
Step 4: Cook Beef
Add 1 tbsp oil to the skillet, heat to medium‑high. Spread beef in a single layer, sear 30 seconds per side until browned and still pink inside.
⚠️ Common Mistake to Avoid: Crowding the pan and steaming the beef instead of searing.
Step 5: Add Aromatics
Push the beef to one side, add 3 minced garlic cloves and 2 tsp minced ginger. Sauté until fragrant, about 20 seconds.
💡 emy’s Pro Tip: Keep the aromatics moving so they don’t burn—burnt garlic gives a bitter bite.
Step 6: Finish with Sauce
Return broccoli to the pan. Stir the reserved sauce again to dissolve the cornstarch fully, pour in. Cook and stir until the sauce thickens, about 1 minute, then serve hot.
⚠️ Common Mistake to Avoid: Adding sauce too early and losing the glossy sheen.
| Step | Action | Duration | Key Visual Cue |
|---|---|---|---|
| 1 | Marinate Beef | 10 min | Beef coated in glossy sauce. |
| 2 | Prepare Sauce | 2 min | Smooth, no lumps. |
| 3 | Steam Broccoli | 1 min | Bright green, slightly translucent. |
| 4 | Cook Beef | 2 min | Beef seared, pink inside. |
| 5 | Add Aromatics | 20 sec | Garlic turns golden. |
| 6 | Finish with Sauce | 1 min | Sauce thick, glossy. |
Serving & Presentation
Serve the vibrant stir‑fry over a bed of steamed jasmine rice, the broth spilling to coat each grain like a fragrant veil. A dash of sesame seeds adds a subtle crunch, while a squeeze of fresh lime brightens the dish.
In my Bronx kitchen I’ve found that sprinkling a handful of toasted white sesame seeds or a few thinly sliced scallions lifts the whole plate to a restaurant‑level finish. The colors—deep gray‑green broccoli, midnight beef—are visual fireworks that feel like New York City skyline at dusk.
| Pairing Type | Suggestions | Why It Works |
|---|---|---|
| Side Dish | Steamed rice, steamed brown rice, or quinoa | Neutral base allows sauce flavors to shine. |
| Sauce / Dip | Asian aioli, chili garlic sauce, or a soy‑based dipping sauce | Provides contrast to sweet‑salty sauce. |
| Beverage | Ice‑cold jasmine tea, light white wine, or a crisp Riesling | Balances the savory depth with floral or fruity notes. |
| Garnish | Sesame seeds, sliced scallions, or chopped cilantro | Adds texture and botanical brightness. |
Make-Ahead, Storage & Reheating
I pre‑prep the marinated beef and the sauce earlier in the day, sealing them in plastic in the fridge. For a quick weekday dinner, I simply steam the broccoli, sear the beef, add aromatics, splash in the sauce, and let it finish in a minute.
| Method | Container | Duration | Reheating Tip |
|---|---|---|---|
| Refrigerator | Air‑tight ziplock | 2 days | Reheat in skillet with 30 sec water addition. |
| Freezer | Freezer bag | 2 months | Defrost in fridge; stir during reheating. |
| Make‑Ahead | Pre‑clean bowls | 7 days in advance | Keep sauce separate; combine when serving. |
When reheating, I remind myself to add a splash of water or broth to keep the sauce from drying out. A quick 30‑second stir in a hot pan and the dish feels fresh as if it was made that very instant.
Variations & Easy Swaps
| Variation | Key Change | Best For | Difficulty Impact |
|---|---|---|---|
| Gluten‑Free | Replace soy sauce with tamari, dry sherry for Shaoxing | Health‑conscious diners | Easy |
| Dairy‑Free & Vegan | Use coconut milk in sauce, skip peanuts | Vegans, lactose‑sensitive | Easy, swap ingredients |
| Seasonal Twist | Swap broccoli for snow peas plus a dash of sriracha | Summer & spring | Easy |
Gluten‑Free Sweet‑Sauvage
For a truly gluten‑free version I replace soy sauce with a generous splash of tamari and swap Shaoxing wine with a vinegar‑based dry sherry. The result is a tangier, perfectly balanced sauce that’s just as hearty.
Vegan Snow Peas & Sriracha
Using snow peas instead of broccoli adds a snap that charms the palate, and a small dose of sriracha gives the dish a spicy kiss from my favorite hot‑pot stalls in Queens.
Dairy‑Free Coconut Broth
Replacing beef broth with light coconut milk adds a sweet undertone, while peanut oil is swapped for a neutral grapeseed oil so the dish remains subtle.
How long does it take to cook Chinese Beef and Broccoli?
Preparing the dish usually takes about 25 minutes from start to finish—15 minutes to prep and marinate, 10 minutes to cook. The key is keeping the heat high and the ingredients well‑chopped so the beef stir‑sits and the broccoli crisps in a quick, flavorful flash.
What shop can I buy the best soy sauce for this recipe?
Look for a full‑strength, low sodium soy sauce from a reputable store such as Trader Joe’s or Whole Foods. A Chinese grocery market closer to the East Side will usually carry both light and dark varieties; dark soy is ideal for depth and color in sauces.
Can I use a different meat in this recipe?
Sure! Thin slices of pork tenderloin, chicken breast, or even firm tofu can replace the beef. The cooking time might shrink a bit—especially tofu, which needs only 2‑3 minutes of sear to keep a nice texture while incorporating sauce.
Is there a way to make this dish sweeter or spicier?
Absolutely. For sweetness, add an extra teaspoon of brown sugar or a splash of honey. To make it spicier, pepper in a handful of toasted red pepper flakes, a drizzle of Sriracha, or a small knob of fresh chilies for a Mediterranean kick that transports you back to the Couscous market.
What do I do with leftover sauce?
Reserve the sauce in an airtight container and it will keep in the refrigerator for up to 4 days. Reheat in a small pot with a splash of water and whisk until smooth—this works great if you want to toss a new batch of veggies or make an extra batch to marshal for tomorrow.
Can I use brown rice instead of jasmine rice?
Yes, brown rice makes a heartier meal and complements the sauce’s savoriness nicely. Be sure to cook it slightly less to avoid extra moisture; a little broth or water will keep the grains fluffy and not mushy.
What is the key to a crispy broccoli?
The secret lies in a bold, quick sear of the broccoli after it’s tender. Use high heat and a dash of oil so the florets blister slightly and retain their bright green hue—this gives a pleasant contrast to the silky sauce.
How do I store the cooked beef and broccoli for later use?
Let it cool to room temperature, then place the meat and broccoli in separate airtight containers. Store in the fridge for up to 2 days, or freeze for up to 2 months. Reheat in a wok over medium heat and stir occasionally until thoroughly heated.
Share Your Version!
I’d love to see how you tweak this classic. Have you added any extra veggies or swapped in a different protein? Drop a comment below, or rate the recipe with a star—your feedback keeps my kitchen humming. If you snap a photo of your plated dough, share it on Instagram or Pinterest and tag me @cookingwithemi. And tell me—what’s the one trick you’d add to my gluten‑free take on this dish?
From my NYC kitchen to yours — I hope this recipe brings as much warmth to your table as it does to mine. — emy 🧡
Love This Recipe? Save It to Pinterest!
If you enjoyed this Chinese Beef and Broccoli recipe, don’t let it get lost in your browser tabs! 😄 Pin it now so you can find it again anytime — and explore hundreds more tried‑and‑tested recipes waiting for you on my Pinterest boards.
👉 Follow emy on Pinterest @exorecipe
📌 Pin this recipe · 🔁 Re-pin your favorites · 💬 Tag me when you make it — I love seeing your creations!
Have you tried the gluten‑free version yet? Drop a comment above—let’s see what tweaks you add for extra flavor twist!

