
“`html
Table of Contents
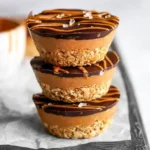
Peanut Butter Chocolate Oat Cups – No-Bake, Vegan & Gluten-Free Treat
I still remember the first time I made these Peanut Butter Chocolate Oat Cups in my tiny Paris apartment, craving something that tasted like the peanut butter treats my mother used to make in our kitchen in Morocco. She would layer peanuts with honey and oats, pressing them into little rounds by hand — no baking, just love and patience. This no-bake, vegan and gluten-free version is my grown-up tribute to those after-school bites, now made with creamy peanut butter, rich dark chocolate, and a pinch of salt that brings it all together. Every time I make these, I feel like I am back in Marrakech, with the warm sun streaming through the window and the smell of toasted oats in the air.
The magic of these cups is all about texture. The oat base is tender yet firm, thanks to maple syrup that binds everything without making it sticky. The middle layer is pure peanut butter whipped with just a touch more maple syrup — it stays soft and luscious against the firm chocolate cap on top. When you bite into one, you get that satisfying snap of dark chocolate, then the creamy peanut butter center, then the wholesome oat foundation. It is the kind of treat that feels indulgent but is made from simple, honest ingredients. I love how the salt cuts through the sweetness and makes every bite craveable.
What sets my version apart is the optional Biscoff drizzle on top — a little nod to the European street markets I used to visit in Paris, where speculoos cookies were everywhere. It adds a caramelized warmth that pairs beautifully with the dark chocolate. In this post, I will walk you through my tested method, share a crucial pro tip for getting the oat base to hold together perfectly, and point out the most common mistake people make with no-bake cups. Whether you are new to vegan desserts or a seasoned home cook, these Peanut Butter Chocolate Oat Cups are about to become your new favorite go-to.
Why This Peanut Butter Chocolate Oat Cups Recipe Is the Best
The Flavor Secret — I use a double layer of peanut butter: one mixed into the oat base and another spread as a creamy middle layer. This gives you peanut flavor in every single bite, not just in the center. The dark chocolate on top is rich and slightly bitter, which balances the sweetness of the maple syrup beautifully. It is the same principle I learned in pastry school in Paris — contrast makes flavors pop.
Perfected Texture — The key is pressing the oat mixture firmly into the silicone mold and giving it a full 15 minutes in the freezer before adding the next layer. That short chill sets the base so it does not crumble when you spread the peanut butter filling. I tested this method a dozen times in my NYC kitchen, adjusting the oat-to-moisture ratio until the base held together like a dream — no crumbling, no sogginess, just a perfect little cup every time.
Foolproof & Fast — With just seven main ingredients and three simple steps, this recipe is practically foolproof. You do not need any special equipment — just a bowl, a spoon, and a silicone muffin tray. Even if you have never made a no-bake dessert before, you will nail it on your first try. I have made these with my niece in Brooklyn and with friends who claim they cannot cook, and every single batch turned out beautifully.
Peanut Butter Chocolate Oat Cups Ingredients
When I shop for these ingredients at the Union Square Greenmarket in NYC, I always look for the good stuff — quality peanut butter, dark chocolate with a high cocoa content, and certified gluten-free oats if I am serving friends who need them. The ingredient list is short, so each one matters. Here is what you will need.
Ingredients List
- 70g rolled oats (use gluten-free if necessary)
- 2 tbsp smooth peanut butter (or nut butter of choice)
- 2 tbsp maple syrup
- Pinch of salt
- 100g smooth peanut butter (for the middle layer)
- 1 tbsp maple syrup (for the middle layer)
- 70g dark chocolate, melted
- Optional drizzle of melted Biscoff spread
Ingredient Spotlight
Rolled Oats — These are the foundation of the base. I use rolled oats, not quick oats, because they have more structure and give the cups a pleasant chew. In a pinch, you can use quick oats, but the texture will be softer. Gluten-free rolled oats work perfectly if needed.
Peanut Butter — Smooth peanut butter is essential for both the base and the middle layer. I use a natural drip peanut butter with no added sugar — just peanuts and salt. If you use a sweetened commercial brand, reduce the maple syrup by half a tablespoon to keep the sweetness balanced.
Dark Chocolate — Choose a chocolate with 60% to 70% cocoa content for the best balance of richness and sweetness. I love using a single-origin dark bar from a brand like Mast Brothers or Valrhona. If you only have milk chocolate on hand, the cups will be sweeter and softer — still delicious, but not as firm.
| Original Ingredient | Best Substitution | Flavor / Texture Impact |
|---|---|---|
| Rolled oats | Quick oats | Softer, less chewy base |
| Smooth peanut butter | Almond butter or sunflower seed butter | Milder nut flavor, slightly less rich |
| Maple syrup | Agave nectar or honey (not vegan) | Slightly different sweetness, honey adds floral notes |
| Dark chocolate (60-70%) | Milk chocolate or vegan white chocolate | Sweeter, softer top layer |
How to Make Peanut Butter Chocolate Oat Cups — Step-by-Step
Trust me — these Peanut Butter Chocolate Oat Cups could not be easier. If you can mix ingredients in a bowl and press them into a mold, you have got this. Here is exactly how I do it in my NYC kitchen.
Step 1: Prepare the Oat Base
In a mixing bowl, combine 70g rolled oats, 2 tablespoons smooth peanut butter, 2 tablespoons maple syrup, and a pinch of salt. Stir until the mixture is evenly combined and all the oats are coated. The mixture should be sticky but not wet. Divide it evenly among the 6 cups of a silicone muffin tray, pressing down firmly with the back of a spoon or your fingers. The base should be about 1/4 inch thick and compacted well. Place the tray in the freezer for 15 minutes.
💡 emy’s Pro Tip: Press the oat mixture firmly — this is the most important step! If the base is too loose, it will fall apart when you add the peanut butter layer. Use the bottom of a small glass or a measuring cup to really pack it down.
Step 2: Layer the Peanut Butter Filling
While the bases are chilling, make the middle layer. In a small bowl, mix 100g smooth peanut butter with 1 tablespoon maple syrup until smooth and well combined. After the 15 minutes are up, remove the tray from the freezer. Divide the peanut butter mixture evenly among the 6 cups, spreading it gently over the oat bases. Aim for an even layer that does not touch the edges of the silicone mold — this will help the chocolate seal the cup later.
⚠️ Common Mistake to Avoid: Do not spread the peanut butter all the way to the edge of the cup! Leave a tiny gap around the perimeter so the melted chocolate can flow down and create a complete seal. This keeps the peanut butter layer soft and prevents it from leaking out.
Step 3: Top with Chocolate and Chill
Melt 70g of dark chocolate in a heatproof bowl over simmering water or in the microwave in 20-second bursts, stirring after each, until completely smooth. Carefully spoon or drizzle the melted chocolate over the peanut butter layer in each cup, covering it completely. Tilt the tray gently if needed to help the chocolate spread evenly. If you are using the Biscoff drizzle, warm a spoonful of Biscoff spread and drizzle it over the chocolate before it sets. Refrigerate for at least 1 hour, or until the chocolate is fully hardened.
💡 emy’s Pro Tip: For a glossy, snap-worthy chocolate top, temper the chocolate by chopping it finely, melting two-thirds of it over low heat, then stirring in the remaining third until it melts. This gives you a professional-looking finish that stays firm at room temperature.
| Step | Action | Duration | Key Visual Cue |
|---|---|---|---|
| 1 | Mix base and press into mold | 5 min + 15 min freeze | Base is firm and compacted |
| 2 | Mix peanut butter filling and spread | 5 min | Smooth, even layer |
| 3 | Top with melted chocolate | 5 min + 1 hour chill | Chocolate is set and glossy |
Serving & Presentation
These Peanut Butter Chocolate Oat Cups are beautiful as they are, but I love to dress them up for company. Pop them out of the silicone molds just before serving — they release easily and look stunning on a simple white plate. A light sprinkle of flaky sea salt on top of the chocolate right after it sets adds a savory crunch that makes the flavors sing. In my Moroccan kitchen, we would serve these with a pot of hot mint tea on the side, but here in NYC, they disappear just as fast next to a cold oat milk latte.
For a brunch spread, I often arrange the cups on a wooden board alongside fresh berries, a bowl of coconut whip, and a few dates stuffed with almond butter. They also make a lovely homemade gift — tuck them into a pretty box lined with parchment and tie it with twine. I have brought these to dinner parties in Brooklyn more times than I can count, and they always get the same response: “Wait — these are vegan? No way.”
| Pairing Type | Suggestions | Why It Works |
|---|---|---|
| Side Dish | Fresh berries, sliced banana, coconut whip | Bright acidity cuts the richness |
| Sauce / Dip | Extra melted dark chocolate, warm Biscoff dip | Adds a decadent finishing touch |
| Beverage | Hot mint tea, oat milk latte, cold brew | The bitterness balances the sweetness |
| Garnish | Flaky sea salt, crushed peanuts, cacao nibs | Adds texture and a savory pop |
Make-Ahead, Storage & Reheating
Living in NYC means my schedule is always full, so I love recipes that let me get ahead. These Peanut Butter Chocolate Oat Cups are perfect for that — I often make a double batch on Sunday afternoon and stash them in the fridge for the week ahead. They are the perfect little treat to grab after a long day or to pack in a lunchbox for a midday pick-me-up.
| Method | Container | Duration | Reheating Tip |
|---|---|---|---|
| Refrigerator | Airtight container, layered with parchment | Up to 7 days | Enjoy straight from the fridge — no reheating needed |
| Freezer | Freezer-safe container or zip-top bag | Up to 3 months | Thaw in the fridge for 30 minutes before serving |
| Make-Ahead | Silicone mold in the fridge | Up to 3 days in advance | Keep in the mold until ready to serve for best shape |
If you freeze these cups, let them sit at room temperature for about 5 minutes before eating — it softens the peanut butter layer just enough to make it luscious again. I do not recommend microwaving them because the chocolate can seize and the peanut butter can get too runny. Trust me, straight from the fridge is the best way to enjoy them.
Variations & Easy Swaps
| Variation | Key Change | Best For | Difficulty Impact |
|---|---|---|---|
| Biscoff Drizzle | Add melted Biscoff on top | Holiday gifts, special occasions | Easy (no extra skill needed) |
| Gluten-Free & Nut-Free | Use certified GF oats + sunflower seed butter | Allergy-friendly snacking | Easy (simple swap) |
| Seasonal Flavor Twist | Add cinnamon + orange zest to base | Fall and winter holidays | Easy (just mix in spices) |
Biscoff Drizzle Variation
This is my favorite way to dress up the cups for company. After you pour the melted dark chocolate over the peanut butter layer, warm a spoonful of Biscoff spread in the microwave for 10 seconds and drizzle it in thin lines over the chocolate. Use a toothpick to swirl it gently for a marbled look. The Biscoff adds a caramelized, spiced flavor that reminds me of the cookie stalls I used to pass in Parisian train stations. It is a small touch that makes these feel extra special.
Gluten-Free & Nut-Free Variation
To make these cups friendly for nut-free kitchens, swap the peanut butter in both the base and the middle layer for sunflower seed butter. Sunflower seed butter has a similar creamy texture, though it is slightly less rich. I recommend adding an extra pinch of salt to compensate. Use certified gluten-free rolled oats to keep the recipe fully gluten-free. The texture will be a bit looser, so press the base extra firmly. My neighbor in Queens has a nut allergy, and she told me these are the best nut-free treats she has ever had.
Seasonal Flavor Twist
In the fall, I love adding 1/2 teaspoon of ground cinnamon and the finely grated zest of half an orange to the oat base mixture. The cinnamon warms up the flavor, and the orange zest brightens everything — it is a combination I picked up from a pastry chef I worked with in Paris. You can also swap the dark chocolate for white chocolate in this version for a sweeter, creamier finish. It is a beautiful way to make these cups feel cozy and festive for Thanksgiving or holiday gatherings.
Can I make Peanut Butter Chocolate Oat Cups without a silicone muffin tray?
Yes, you absolutely can. If you do not have a silicone muffin tray, you can use a regular metal or non-stick muffin pan lined with paper liners. The cups will still set perfectly. Just make sure to press the oat base firmly into the liners so they hold their shape. The only difference is that the cups may be slightly harder to unmold compared to a silicone tray, but the paper liners make it easy to peel away. I have tested both methods, and both work beautifully.
How long do these no-bake oat cups need to chill in the refrigerator?
I recommend at least 1 hour in the refrigerator for the chocolate to fully set. If you are in a hurry, you can speed things up by placing them in the freezer for 20 minutes instead — just keep an eye on them so the chocolate does not get too hard. For the best texture, I actually prefer to chill them in the fridge for 2 hours. The chocolate becomes perfectly snappy, the peanut butter layer stays creamy but firm, and the oat base holds together beautifully when you bite into it.
Can I use quick oats instead of rolled oats for the base?
Yes, you can use quick oats, but the texture will be noticeably different. Rolled oats give the base a hearty, chewy texture that provides a nice contrast to the creamy peanut butter and smooth chocolate. Quick oats are cut into smaller pieces, so they absorb moisture more quickly and create a softer, more uniform base. If you only have quick oats on hand, reduce the maple syrup by about half a tablespoon so the base does not get too sticky. The cups will still taste great.
Is this recipe truly vegan and gluten-free?
Yes, this recipe is naturally vegan and can easily be made gluten-free. The base is made from oats, peanut butter, and maple syrup — all plant-based. The middle layer is just peanut butter and maple syrup, and the top is dark chocolate. Just make sure to use certified gluten-free rolled oats if you are serving someone with celiac disease or a gluten sensitivity. Also, check the label on your dark chocolate — some brands add milk powder, so look for one labeled vegan or dairy-free if that matters to you.
What is the best way to melt dark chocolate for these oat cups?
I have tested several methods, and the easiest way is to chop the chocolate finely, place it in a heatproof bowl, and microwave it in 20-second bursts, stirring well after each burst. This prevents the chocolate from burning or seizing. Alternatively, you can use a double boiler — set the bowl over a pot of simmering water and stir until smooth. If you want a glossy, professional finish, try tempering the chocolate by melting two-thirds of it, then stirring in the remaining third until it melts. That extra step keeps the chocolate firm at room temperature.
Can I use crunchy peanut butter instead of smooth?
You can use crunchy peanut butter if you prefer extra texture, but keep in mind that the pieces of peanuts can make it harder to spread the middle layer evenly over the oat base. For the base itself, crunchy peanut butter works fine — just mix it thoroughly so the peanuts are distributed throughout. If you want a completely smooth middle layer but only have crunchy on hand, you can strain the peanut butter through a fine-mesh sieve to remove the peanut pieces. Honestly, I prefer smooth for both layers for a more cohesive cup.
How do I store Peanut Butter Chocolate Oat Cups so they stay fresh?
Store the cups in an airtight container in the refrigerator for up to 7 days. Layer them with parchment paper if you are stacking them so the chocolate does not get scratched. For longer storage, you can freeze them for up to 3 months — just wrap each cup individually in plastic wrap and place them in a freezer-safe bag. When you are ready to eat one, let it thaw in the fridge for about 30 minutes. I do not recommend leaving them at room temperature for more than a couple of hours, as the peanut butter layer can soften too much.
Can I add protein powder to the oat base for a post-workout snack?
Yes, you can add a scoop of your favorite protein powder to the oat base, but you will need to adjust the moisture. Protein powder absorbs liquid differently than oats, so the mixture may become too dry and crumbly. I recommend starting with 1 tablespoon of protein powder and adding an extra teaspoon of maple syrup or a splash of plant-based milk if the mixture feels dry. Chocolate or vanilla protein powder works best, as it complements the peanut butter and dark chocolate flavors.
What can I use instead of maple syrup to keep this recipe vegan?
Agave nectar is the best alternative to maple syrup for keeping this recipe vegan. It has a similar sweetness level and consistency, so you can use it in the same 1:1 ratio. Brown rice syrup also works, though it is thicker and less sweet, so you may want to add an extra half tablespoon. If you are not strictly vegan, honey is a delicious substitute — it adds a floral note that pairs beautifully with the peanut butter. Just keep in mind that honey will make the filling slightly thicker.
Why did my oat base fall apart when I tried to remove the cups from the mold?
This usually happens when the oat base was not pressed firmly enough into the mold or was not chilled long enough before the peanut butter layer was added. The base needs to be compacted well — I use the back of a measuring cup to really press it down. The 15-minute freeze is also essential because it gives the maple syrup time to firm up and act as a binder. If you skipped the freeze or rushed the pressing, the base will be crumbly. Silicone molds also help because they flex, making it easier to pop the cups out cleanly.
Share Your Version!
I truly hope you love these Peanut Butter Chocolate Oat Cups as much as I do. They are one of those recipes that prove simple ingredients can create something genuinely special. If you try them, please leave a star rating and a comment below — I read every single one and it means the world to me. Did you add the Biscoff drizzle? Did you try a different nut butter? I would love to hear how you made it your own.
Snap a photo of your creation and share it on Instagram or Pinterest — tag me @cookingwithemi so I can see your beautiful cups and feature them in my stories. And if you have a question about any step, just ask in the comments. I answer every question personally, because that is how we build a kitchen community — one recipe at a time. From my NYC kitchen to yours — I hope this recipe brings as much warmth to your table as it does to mine. — emy 🧡
Love This Recipe? Save It to Pinterest!
If you enjoyed this Peanut Butter Chocolate Oat Cups recipe, don’t let it get lost in your browser tabs! 😄 Pin it now so you can find it again anytime — and explore hundreds more tried-and-tested recipes waiting for you on my Pinterest boards.
👉 Follow emy on Pinterest @exorecipe
📌 Pin this recipe · 🔁 Re-pin your favorites · 💬 Tag me when you make it — I love seeing your creations!
“`
Print
Peanut Butter Chocolate Oat Cups
Description
A simple treat with a layer of peanut butter all topped with rich dark chocolate. No-bake, vegan AND gluten-free!
Ingredients
- 70g rolled oats (used gluten-free if necessary)
- 2 tbsp smooth peanut butter (or nut butter of choice)
- 2 tbsp maple syrup
- Pinch of salt
- 100g smooth peanut butter
- 1 tbsp maple syrup
- 70 g dark chocolate (melted)
- Optional drizzle of melted Biscoff spread
Instructions
- Mix all the base ingredients in a bowl, then press into a 6 cup silicon muffin tray. Freeze for 15 minutes.
- In the meantime mix the peanut butter and maple syrup in a small bowl to create the middle layer, then spread over the oat bases and top with the melted chocolate.
- Refrigerate until hardened. Enjoy!
