Table of Contents
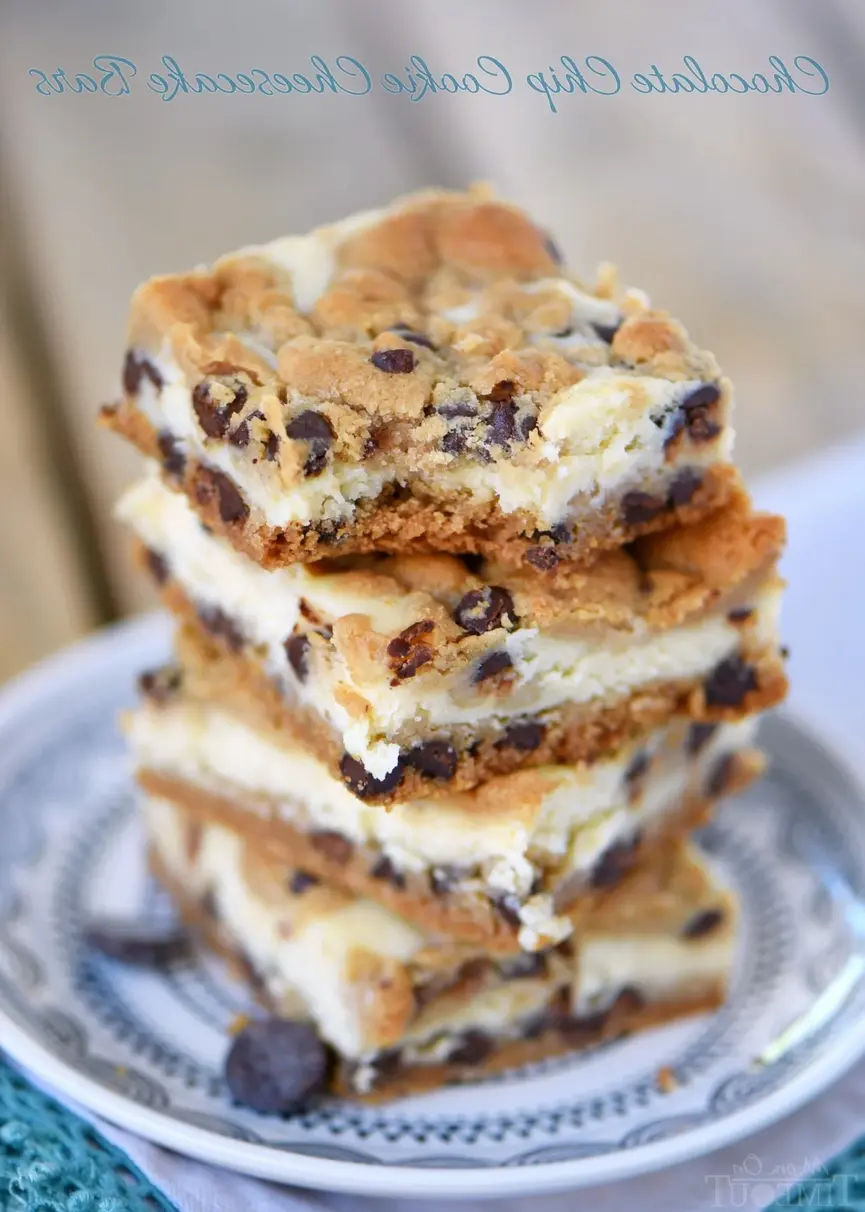
Chocolate Chip Cookie Cheesecake Bars – My Easy 5-Ingredient Recipe
I still remember the first time I made these Chocolate Chip Cookie Cheesecake Bars. It was a rainy Sunday afternoon in my tiny NYC apartment, and I was craving something that felt both nostalgic and indulgent — the kind of dessert that reminds you of your mom’s kitchen but with a little grown-up flair. Growing up in Morocco, my mother would make these simple semolina cookies with dates and honey, and while I loved them, my American friends always begged for “the really sweet stuff.” After years of training in Paris — where I learned the art of pastry precision at Le Cordon Bleu — I came back to New York determined to create a dessert that was both elegant and ridiculously easy. That’s when this 5-ingredient recipe for Chocolate Chip Cookie Cheesecake Bars was born. It’s the dessert that never lasts long in my fridge, and the one that gets the most “can you send me that recipe?” texts after dinner parties.
What I love most about these bars is that perfect contrast of textures. The bottom layer is a soft, chewy chocolate chip cookie crust — golden at the edges, tender in the center — while the top layer is a luscious, creamy cheesecake filling that’s tangy, sweet, and luxuriously smooth. When you cut into a bar, you get that clean, sharp line between the two layers, and then the crumble of cookie dough on top bakes into these little crisp, buttery clusters that add just the right amount of crunch. The aroma that fills your kitchen is absolutely intoxicating: warm vanilla, toasted butter, and that faint, addictive scent of melting chocolate. It’s the kind of dessert that makes you close your eyes with the first bite.
Here’s what sets my version apart: I use refrigerated cookie dough as a brilliant shortcut — a trick I learned from a busy pastry chef in Paris who always said, “Cooking is about working smarter, not harder.” With only five ingredients and less than 15 minutes of active prep, you get a dessert that tastes like it took hours. But there are a few secrets to getting it just right. In this post, I’ll share my tested technique for pressing the cookie dough into the pan so it bakes evenly, my pro tip for a silky-smooth cheesecake filling with no lumps, and the most common mistake people make that leads to a soggy crust. Trust me — by the end of this recipe, you’ll be making these bars on repeat.
Why This Chocolate Chip Cookie Cheesecake Bars Recipe Is the Best
The Flavor Secret. The beauty of this recipe lies in its simplicity. Using refrigerated chocolate chip cookie dough as the base and crumble topping means you get that classic, bakery-style cookie flavor without measuring flour, sugar, or butter. The cream cheese filling is lightly sweetened with just ½ cup of sugar and a whisper of vanilla, which lets the tang of the cream cheese shine through and perfectly balances the sweet cookie layers. This isn’t an overly rich, heavy cheesecake — it’s light, creamy, and perfectly in harmony with the cookie dough. In Morocco, we have a phrase — hna hna — meaning “here and there,” a little bit of this and that. That’s exactly how this recipe feels: a balanced, thoughtful pairing of two beloved desserts.
Perfected Texture. The trickiest part of any bar recipe is getting the layers to bake evenly without one overcooking the other. I’ve tested this recipe a dozen times in my NYC kitchen, and the winning technique is simple: press the bottom cookie layer firmly so it creates a solid, even crust, then pour the cheesecake filling on top while it’s still slightly warm from mixing. This allows the filling to settle gently without disturbing the dough. The crumbled topping bakes into golden, buttery clusters that stay crisp even after refrigeration. The key visual cue? The edges should be lightly golden and the center should have just a slight jiggle — like a gentle wobble, not a wave.
Foolproof & Fast. If you can scoop cookie dough and beat cream cheese with a hand mixer, you can make these bars. There’s no rolling pins, no fancy equipment, and no complicated water bath. The entire active prep takes under 15 minutes, which means you can whip up a showstopping dessert even on a busy weeknight. It’s the kind of recipe I make when I’m hosting friends for a casual dinner and want to spend time with them instead of slaving over a complex dessert. And because it uses only five ingredients that are all available at any US grocery store, it’s budget-friendly too. These bars are proof that you don’t need a long ingredient list to create something unforgettable.
Chocolate Chip Cookie Cheesecake Bars Ingredients
One of my favorite things about living in New York City is the access to incredible ingredients. I can walk to three different grocery stores in 15 minutes, each with its own personality. For this recipe, I usually grab my cream cheese from the bodega on the corner — the one where the owner knows everyone’s name — and the refrigerated cookie dough from the big supermarket on Broadway. It reminds me of my mother’s approach to cooking in Morocco: use what’s available, keep it simple, and let the quality of each ingredient speak for itself. Here’s everything you’ll need.
Ingredients List
- 1 (18 oz) roll refrigerated chocolate chip cookie dough
- 8 oz cream cheese (softened to room temperature)
- ½ cup granulated sugar
- 1 large egg (room temperature)
- ½ teaspoon vanilla extract
Ingredient Spotlight
Refrigerated Chocolate Chip Cookie Dough. This is your shortcut, and it’s a brilliant one. Look for a 16–18 oz roll in the refrigerated section of the grocery store — the kind you’d normally slice and bake. My go-to is the classic Toll House or store-brand version. The key is to let it sit at room temperature for 5–10 minutes before pressing so it’s pliable but not too soft. For a twist, try the “chocolate chunk” or “peanut butter” variety. Just avoid the “soft-bake” style that comes in a tub — it’s too sticky and won’t press evenly.
Cream Cheese. Use the full-fat block-style cream cheese (like Philadelphia) in the brick form, not the whipped tub version. The full-fat variety gives you that rich, velvety texture and stable structure that won’t crack during baking. Softening it to room temperature is crucial — cold cream cheese will leave lumps in your filling. Leave it on the counter for about 30 minutes before you start. For a slightly tangier flavor, you can use Neufchâtel cheese, which has about a third less fat and still works beautifully.
Egg. One large egg at room temperature helps the cheesecake filling set properly with a smooth, custard-like texture. A cold egg can seize the batter and make it grainy. If you forget to pull it out ahead of time, place it in a bowl of warm (not hot) water for 5 minutes before cracking. The egg also adds structure and helps the filling rise slightly as it bakes, then settle into a creamy layer as it cools.
| Original Ingredient | Best Substitution | Flavor / Texture Impact |
|---|---|---|
| Refrigerated chocolate chip cookie dough | Homemade cookie dough (your favorite recipe) | More control over sweetness; slightly more chewy texture. Use 2 cups of dough. |
| Full-fat block cream cheese | Neufchâtel cheese (⅓ less fat) | Slightly less rich and tangy; still creamy. Avoid fat-free — filling will be too thin. |
| Granulated sugar | Light brown sugar (packed) | Adds a hint of molasses and deeper caramel flavor. Filling may be slightly softer. |
| Vanilla extract | Almond extract (use ¼ tsp) | Adds a warm, nutty aroma. Use less — almond is stronger than vanilla. |
How to Make Chocolate Chip Cookie Cheesecake Bars — Step-by-Step
Trust me when I say this is one of the easiest desserts you’ll ever make. Follow these steps, and you’ll have a pan of gorgeous, crowd-pleasing bars in just over an hour from start to finish.
Step 1: Prepare the Pan and Oven
Preheat your oven to 350°F (175°C). Spray a 9-inch square baking dish lightly with nonstick cooking spray, then line it with a sheet of parchment paper or non-stick foil. I prefer parchment because it crisps up nicely, but foil works well too — just leave about 2 inches of overhang on two opposite sides so you can lift the bars out after baking.
💡 emy’s Pro Tip: Fold a long sheet of parchment so the crease sits flat in the corner of the pan. This prevents the paper from curling up and keeps your bars perfectly square.
Step 2: Layer the Cookie Dough Base
Unwrap the roll of refrigerated cookie dough and slice off about two-thirds of it (roughly 12 oz). Press this portion evenly onto the bottom of the prepared baking dish. Use your fingers or the flat bottom of a measuring cup to create a firm, smooth layer. The dough should reach all the way to the edges and be fairly uniform in thickness — about ¼ inch.
⚠️ Common Mistake to Avoid: Don’t press the dough too thin in the center or leave it thicker at the edges. An uneven base will cause the crust to bake inconsistently. Take an extra 30 seconds to press it evenly.
Step 3: Make the Cheesecake Filling
In a medium mixing bowl, beat the softened cream cheese with a hand mixer or stand mixer fitted with the paddle attachment on medium speed until it’s light and fluffy — about 2 minutes. Add the granulated sugar and continue beating until fully combined and smooth, scraping down the sides of the bowl with a spatula as needed. Add the egg and vanilla extract, then beat on low speed just until incorporated. Be careful not to overmix once the egg is added — that can incorporate too much air and cause the filling to crack as it bakes.
💡 emy’s Pro Tip: Room-temperature cream cheese is non-negotiable here. If it’s too cold, you’ll end up with lumpy filling. Let it sit out for at least 30 minutes, or microwave it in 10-second bursts on 30% power until softened but not hot.
Step 4: Assemble and Bake
Pour the cheesecake filling over the cookie dough base and spread it gently into an even layer with a spatula. Crumble the remaining cookie dough into small pea-sized pieces and scatter them evenly over the top. Don’t press the crumbles into the filling — let them rest on the surface so they bake into golden clusters. Bake for 30 to 35 minutes. The edges should be lightly golden, and the center should be set with a slight jiggle when you gently shake the pan.
⚠️ Common Mistake to Avoid: Don’t overbake! If the center looks completely firm with no movement at all, you’ve likely overbaked it, and the cheesecake will crack as it cools. The center should wobble just a little — it will continue to set as it cools.
Step 5: Cool and Cut
Remove the pan from the oven and place it on a wire rack. Cool completely at room temperature — this takes about 1 to 1½ hours. Once cooled, cover the pan with plastic wrap and refrigerate for at least 3 hours, or overnight. Chilling is essential for clean, sharp cuts. When you’re ready to serve, lift the bars out using the parchment overhang, place on a cutting board, and slice into 16 squares using a sharp knife. Wipe the knife clean between cuts for the neatest slices.
💡 emy’s Pro Tip: For the cleanest cuts, dip your knife in hot water and wipe it dry before each slice. The heat glides through the cheesecake layer without dragging or crumbling the edges.
| Step | Action | Duration | Key Visual Cue |
|---|---|---|---|
| 1 | Prep pan & oven | 5 mins | Pan lined with parchment overhang on 2 sides |
| 2 | Press cookie dough base | 3 mins | Even ¼-inch layer, edges meet pan sides |
| 3 | Make cheesecake filling | 4 mins | Smooth, lump-free, pale ivory color |
| 4 | Assemble & bake | 30–35 mins | Edges golden, center slightly jiggly |
| 5 | Cool, chill & cut | 4+ hours | Fully chilled, knife glides through cleanly |
Serving & Presentation
These Chocolate Chip Cookie Cheesecake Bars are stunning on their own, but I love to dress them up depending on the occasion. For a casual weekend treat, I simply arrange them on a rustic wooden board and let their golden, crumbly tops speak for themselves. When I’m hosting a dinner party in my NYC apartment, I’ll dust the tops with a light snowfall of powdered sugar and add a tiny sprig of fresh mint for color. It’s a trick I picked up in Paris — that touch of green makes the golden bars feel instantly more elegant.
For an extra-special finish, drizzle a little warm caramel sauce or melted chocolate over each bar just before serving. You can also serve them slightly warm — about 10 seconds in the microwave — topped with a scoop of vanilla bean ice cream. The combination of warm cookie crumble, cold ice cream, and creamy cheesecake is absolutely irresistible. My children love them straight from the fridge with a big glass of cold milk, and honestly, that’s still my favorite way to enjoy them too. It reminds me of the simple after-school snacks I’d share with my cousins in our courtyard in Marrakech — just pure, uncomplicated joy.
| Pairing Type | Suggestions | Why It Works |
|---|---|---|
| Side Dish | Fresh berries, sliced strawberries, apple slices | Bright acidity cuts through the richness of the cheesecake and cookie layers. |
| Sauce / Dip | Warm caramel sauce, chocolate ganache, raspberry coulis | Adds a complementary layer of flavor and makes the dessert feel restaurant-worthy. |
| Beverage | Cold milk, hot coffee, espresso, dark hot chocolate | Coffee and chocolate amplify the cocoa notes; milk provides a cool, neutral balance. |
| Garnish | Powdered sugar, mint sprigs, chocolate shavings, sea salt flakes | Adds visual appeal and a final layer of flavor — sweet, herbal, or savory. |
Make-Ahead, Storage & Reheating
Between my blog, cooking classes, and my family, life in NYC is a beautiful whirlwind. I’ve learned to lean on make-ahead desserts more than ever, and these Chocolate Chip Cookie Cheesecake Bars are one of my most reliable crowd-pleasers. They actually taste better after a day in the fridge — the flavors meld together and the texture firms up beautifully. Make them on a Sunday, and you have an impressive dessert ready to go all week long.
| Method | Container | Duration | Reheating Tip |
|---|---|---|---|
| Refrigerator | Airtight container (layers separated by parchment) | Up to 5 days | Enjoy cold, or microwave for 10 seconds to soften slightly. |
| Freezer | Freezer-safe container, wrapped individually in plastic | Up to 3 months | Thaw overnight in fridge. Rewarm at 300°F for 8 mins. |
| Make-Ahead | Wrap pan tightly with plastic wrap after cooling | 1–2 days in advance | Bake, cool completely, then refrigerate. Do not cut until ready to serve. |
A note on reheating: I actually prefer these bars cold or at room temperature. The cheesecake layer is at its creamiest when it’s well-chilled. But if you want that “fresh from the oven” experience, pop an individual bar on a microwave-safe plate and heat for about 10 seconds — just enough to soften the cookie crumble without warming the cheesecake layer through. For a crowd, you can place the whole pan (covered) in a 300°F oven for 10 to 12 minutes. Watch it carefully — you want the edges to just start to feel warm, not hot.
Variations & Easy Swaps
Part of the joy of this recipe is how easily it adapts to whatever you have on hand or whatever craving you’re trying to satisfy. Here are a few of my favorite variations — each one tested and loved in my own kitchen.
| Variation | Key Change | Best For | Difficulty Impact |
|---|---|---|---|
| Peanut Butter Swirl | Swirl ¼ cup warm peanut butter into the filling | Nutty, rich flavor combo | Easy (minimal extra step) |
| Dark Chocolate Mint | Use mint-chocolate cookie dough, add ¼ tsp mint extract to filling | Cool, refreshing dessert | Easy (swap extracts) |
| Gluten-Free | Use gluten-free refrigerated cookie dough (e.g., Sweet Loren’s) | Celiac-friendly option | Easy (ingredient swap) |
Peanut Butter Swirl Variation
This is my children’s absolute favorite. Warm ¼ cup of creamy peanut butter in the microwave for about 20 seconds, then drop spoonfuls over the cheesecake filling before adding the crumble topping. Use a butter knife to gently swirl it into the filling — just two or three figure-eight motions will create a beautiful marbled effect. The salty-nutty flavor of peanut butter is a natural partner for chocolate chips, and it adds a lovely richness that makes each bite even more indulgent.
Dark Chocolate Mint Variation
For a refreshing twist that feels especially festive around the holidays, swap the regular cookie dough for a mint-chocolate chip variety. Add ¼ teaspoon of mint extract to the cheesecake filling along with the vanilla. The cool, bright mint flavor contrasts beautifully with the dark chocolate chips in the dough. This variation reminds me of the fresh mint tea my mother would serve in Morocco — it’s unexpected but deeply satisfying. Garnish with crushed peppermint candies or a sprinkle of cacao nibs for added crunch.
Gluten-Free & Dairy-Free Variation
Yes, you can make these bars gluten-free and dairy-free without sacrificing flavor! Use a gluten-free refrigerated cookie dough — brands like Sweet Loren’s or Enjoy Life make excellent options that bake up soft and chewy. For the filling, substitute the cream cheese with a vegan cream cheese block (Miyoko’s or Violife work best) and use a flax egg (1 tablespoon ground flaxseed + 3 tablespoons water, rested for 5 minutes) in place of the egg. The texture will be slightly softer but still creamy and delicious. This version is a hit at my friends’ potlucks and always disappears quickly.
Can I use homemade cookie dough instead of refrigerated?
Absolutely! If you have a favorite chocolate chip cookie recipe, you can absolutely use it here. You’ll need about 2 cups of prepared cookie dough — use half for the base and half crumbled on top. Just keep in mind that homemade dough may spread differently than refrigerated roll dough. If your dough is very buttery, you might get a thinner, crispier crust. I recommend chilling the homemade dough for at least 30 minutes before pressing it into the pan so it holds its shape better during baking. The flavor will be even more personal and delicious.
How do I know when the cheesecake bars are done baking?
The best test is the jiggle test. Gently shake the pan — the center should wobble slightly, like a gentle wave, not a liquid slosh. The edges should be lightly golden and look set. If the center is completely firm with no movement, you’ve likely overbaked the bars, which can lead to cracking as they cool. I also recommend checking at 30 minutes (the lower end of the range) because ovens vary. A toothpick inserted near the center should come out with a few moist crumbs attached, not wet batter. Remember, the bars will continue to set as they cool at room temperature and then in the fridge.
Can I make these Chocolate Chip Cookie Cheesecake Bars gluten-free?
Yes, absolutely! The easiest way is to use a gluten-free refrigerated cookie dough. My go-to brand is Sweet Loren’s — it’s widely available in most US grocery stores and bakes up with a soft, chewy texture that works beautifully in this recipe. The cheesecake filling itself is naturally gluten-free, so you only need to swap the dough. Just be sure to check the label on your cream cheese and vanilla extract to confirm they are gluten-free (most are, but it’s always good to verify). The bars will taste and look just as decadent as the original version.
How should I store leftover cheesecake bars?
Store any leftover bars in an airtight container in the refrigerator for up to 5 days. I like to layer them with sheets of parchment or wax paper between each row so the crumble topping doesn’t stick or get crushed. Because these bars contain a cheesecake layer, they should always be kept refrigerated — not left at room temperature for more than 2 hours. If you’re taking them to a party or potluck, transport them in a cooler bag or on ice packs, and then return any leftovers to the fridge as soon as you get home. They stay creamy and fresh all week long.
Can I freeze Chocolate Chip Cookie Cheesecake Bars?
Yes, these bars freeze beautifully! After they have been fully cooled and chilled in the fridge, cut them into individual bars and wrap each one tightly in plastic wrap. Place the wrapped bars in a freezer-safe container or zip-top bag, and they will keep for up to 3 months. When you’re ready to enjoy one, thaw it overnight in the refrigerator — do not thaw at room temperature, as the texture can become watery. For the best experience, let the thawed bar sit at room temperature for about 10 minutes before serving so the cookie layer softens slightly. You can also reheat a frozen bar directly in a 300°F oven for 10 minutes for that”freshly baked” feel.
Why did my cheesecake filling crack?
Cracked cheesecake filling is usually caused by overbaking or a sudden temperature change. If the bars are baked too long, the moisture in the egg overcooks and creates fissures as the filling contracts during cooling. To avoid this, pull the pan out when the center still has a slight jiggle — it will continue to set as it cools. Another common culprit is overmixing the batter after adding the egg, which incorporates too much air that then expands and collapses unevenly. Finally, let the bars cool gradually on a wire rack at room temperature before moving them to the fridge. A rapid chill can also cause cracking. If cracks do happen, don’t worry — they still taste amazing, and you can always cover them with a dusting of powdered sugar or a drizzle of caramel.
Can I use a different flavor of cookie dough?
Absolutely! This recipe is very flexible when it comes to the cookie dough flavor. Try peanut butter cookie dough for a salty-sweet twist, sugar cookie dough for a milder, buttery base, or double chocolate chip dough for an ultra-chocolatey version. Each flavor creates a completely different dessert experience. If you use a dough that doesn’t already contain chocolate chips, you might want to sprinkle a handful of mini chocolate chips over the base before adding the filling — that way you still get chocolate in every bite. I’ve also used snickerdoodle dough (the kind with cinnamon sugar) and it was a huge hit with my family. Just make sure the dough comes in a roll or log shape that’s easy to press into the pan.
How do I get clean cuts when slicing the bars?
Clean cuts come down to two things: temperature and technique. First, the bars must be thoroughly chilled — at least 3 hours in the fridge, or ideally overnight. A warm or room-temperature bar will squish rather than slice cleanly. Second, use a sharp chef’s knife and wipe the blade clean with a damp paper towel between each cut. I also recommend dipping the knife in hot water and drying it off before each slice; the heat helps the blade glide through the cheesecake layer without dragging. Use a gentle sawing motion rather than pressing straight down. If you want perfectly square corners, trim about ¼ inch off each edge before cutting the full grid. And remember — even if the bars aren’t perfect, they’ll still taste incredible.
Can I add extra chocolate chips or mix-ins?
Yes, feel free to customize! Before pressing the cookie dough base into the pan, you can sprinkle an extra handful of mini chocolate chips over the dough for more chocolate in every bite. You can also fold mix-ins into the cheesecake filling — try mini chocolate chips, crushed Oreos, chopped nuts (walnuts or pecans work beautifully), or even a swirl of caramel sauce or raspberry jam. Just be careful not to overload the filling, as too many additions can weigh it down and affect how it sets. For the crumble topping, you can mix in some chopped pecans or shredded coconut for extra texture. I always keep the total additions to about ¼ to ⅓ cup so the balance of cookie to cheesecake stays intact.
What if I don’t have a 9-inch square baking dish?
If you don’t have a 9-inch square dish, you have a few good options. An 8-inch square dish will work — your bars will be slightly thicker and may need an extra 3 to 5 minutes of baking time. A 9-inch round cake pan will also work; the bars will have a slightly different shape, but the flavor and texture will be the same. If you use a round pan, just keep in mind that the crust-layers won’t reach the edges quite the same way, so trim as needed. For a 9×13 pan, you can double the recipe — use two rolls of cookie dough and double the filling ingredients, and bake for about 35 to 40 minutes. Whatever pan you use, line it with parchment for easy removal.
Share Your Version!
Now it’s your turn! I absolutely love hearing from you — every comment, every star rating, and every photo you share makes this little NYC kitchen of mine feel a whole lot bigger and warmer. If you try these Chocolate Chip Cookie Cheesecake Bars, please leave a star rating and a comment below to let me know how they turned out for you. Did you try one of the variations? Did you invent your own twist? I’d love to hear about it. And don’t forget to snap a picture of your beautiful creation — tag me @cookingwithemi on Instagram or Pinterest so I can see your handiwork and share it with our community.
Here’s one question I’d love for you to answer: which variation are you most excited to try — the peanut butter swirl, the mint chocolate, or something completely new? Your feedback helps me create recipes that truly work for real home cooks, and I read every single comment. From my NYC kitchen to yours — I hope this recipe brings as much warmth to your table as it does to mine. — emy 🧡
Love This Recipe? Save It to Pinterest!
If you enjoyed this Chocolate Chip Cookie Cheesecake Bars recipe, don’t let it get lost in your browser tabs! 😄 Pin it now so you can find it again anytime — and explore hundreds more tried-and-tested recipes waiting for you on my Pinterest boards.
👉 Follow emy on Pinterest @exorecipe
📌 Pin this recipe · 🔁 Re-pin your favorites · 💬 Tag me when you make it — I love seeing your creations!
💬 I’d Love to Hear From You!
Which variation will you try first? Drop a comment below, rate the recipe, and share your photo with @cookingwithemi. Your feedback makes this community so special!
Chocolate Chip Cookie Cheesecake Bars
Description
These easy Chocolate Chip Cookie Cheesecake Bars are made with just five ingredients! This easy dessert recipe will satisfy all your cravings!
Ingredients
- 1 18 oz roll refrigerated chocolate chip cookie dough
- 8 oz cream cheese (softened)
- 1/2 cup granulated sugar
- 1 egg (room temperature)
- 1/2 tsp vanilla extract
Instructions
- Preheat oven to 350 F.
- Line a 9-inch square baking dish with parchment paper or non-stick foil. Set aside.
- Spread a little more than half of the cookie dough onto the bottom of the baking dish and press down firmly creating an even layer.
- Using a stand mixer or hand held mixer, beat the cream cheese until light and fluffy.
- Add in the sugar and beat until combined.
- Beat in the egg and vanilla extract until smooth.
- Pour the cheesecake filling over the top of the cookie dough base.
- Crumble the remaining cookie dough over the top.
- Bake for 30 to 35 minutes.
- Let cool completely before cutting into bars.
- Store in an airtight container in the refrigerator.
