
Table of Contents
No-Bake Cookies – Ready in 15 Minutes, No Oven Needed!
I have to be honest with you — I’ve cooked in Michelin-starred kitchens in Paris, spent years mastering pastry techniques in France, and I now run a busy home kitchen here in New York City. But when someone asks me what my absolute favorite cookie is? It’s this one: No-Bake Cookies. The same recipe my mother made for us on warm afternoons in Morocco, when turning on the oven felt impossible and we needed something sweet, fast, and utterly satisfying. These No-Bake Cookies are made with just a handful of pantry staples — sugar, milk, butter, cocoa, oats, peanut butter, and vanilla — and they come together in about 15 minutes flat. No oven, no mixer, no complicated steps. Just pure, chewy, fudgy cookie joy.
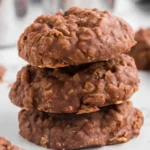
Let me describe what you’re aiming for: a perfectly glossy, deeply chocolatey cookie with a soft, chewy center and a slight resistance when you bite in — not crumbly, not dry, not rock-hard. The oats absorb just enough of the chocolate mixture to create a texture that feels substantial but tender. The peanut butter adds a velvety richness and a subtle saltiness that cuts through the sweetness. And the vanilla? It rounds everything out with a warm, almost floral note. When these cookies set on the parchment, they develop a slight sheen on top and a tender bite that reminds me of the best fudge you’ve ever had — but in cookie form. Every time I make them, my NYC apartment fills with that nostalgic, cozy aroma of chocolate and peanut butter, and suddenly everyone wanders into the kitchen.
What makes my version of No-Bake Cookies different? After years of testing (and eating more test batches than I’d like to admit), I’ve dialed in the exact boiling time and cooling technique to avoid the two most common pitfalls: cookies that never set, or cookies that turn into dry, crumbly hockey pucks. I’ll show you exactly how to get that glossy, perfectly chewy texture every time — including 💡 emy’s Pro Tip for the ideal one-minute boil, and one common mistake that even experienced home cooks make. Whether you’re a busy parent, a college student, or just someone who needs a chocolate fix right now, this recipe is about to become your new best friend.
Why These No-Bake Cookies Are the Best
The Flavor Secret
I trained in Paris under chefs who taught me that the best desserts are built on balance — sweet, salty, bitter, and umami all working together. In these No-Bake Cookies, the cocoa brings a deep, slightly bitter chocolate note, the sugar provides sweetness, and the peanut butter adds a savory-saltiness that makes every bite craveable. A full tablespoon of vanilla extract (yes, a whole tablespoon!) lifts the flavor and gives these cookies a warmth that feels almost like a hug. This is the same balance I learned in French pastry school, applied to a humble no-bake cookie — and it works brilliantly.
Perfected Texture
The texture of a No-Bake Cookie is everything — and it’s surprisingly easy to get wrong. After dozens of tests in my NYC kitchen, I found that the key is the one-minute boil (timed precisely) and using quick oats instead of old-fashioned oats. Quick oats absorb the liquid evenly and create a tender, cohesive cookie that holds its shape without being dry. Old-fashioned oats, on the other hand, can leave you with a crumbly mess. I also insist on creamy peanut butter — it blends into the mixture smoothly, creating a uniform, fudgy texture that crunchy peanut butter simply can’t match.
Foolproof & Fast
This is genuinely one of the most foolproof recipes I know. You don’t need a stand mixer, a food processor, or even a baking sheet. Just a large pot, a whisk, a spatula, and parchment paper. The entire active cooking time is about 5 minutes on the stove, and the cookies set in 15–30 minutes at room temperature. That means you can go from craving to cookie in under half an hour. I’ve made these with my kids, with friends who claim they can’t cook, and as a last-minute dessert for dinner parties — they never fail.
No-Bake Cookies Ingredients
I buy my quick oats from the farmers market in Union Square when I can, but a good old-fashioned canister from the supermarket works perfectly too. The peanut butter I use is the classic creamy kind — no fancy fresh-ground stuff here, because the uniformity matters. The cocoa powder? I prefer Dutch-process for a darker, more mellow chocolate flavor, but natural cocoa works beautifully too. Every time I measure out these ingredients, I’m transported back to my mother’s kitchen in Morocco, where she’d pull out the same simple staples and turn them into magic.
Ingredients List
- 2 cups granulated sugar
- 1/2 cup whole milk
- 1/2 cup unsalted butter (1 stick)
- 1/4 cup natural or Dutch-process cocoa powder
- 3 cups quick oats
- 1 cup creamy peanut butter
- 1 tablespoon pure vanilla extract
Ingredient Spotlight
Sugar — Granulated white sugar is the sweetener and structure-builder here. It dissolves into the milk and butter mixture, then helps the cookies set firmly as they cool. Don’t substitute with brown sugar, which adds too much moisture and can make the cookies sticky or soft. If you need a lower-sugar option, use a cup-for-cup granulated monk fruit sweetener, but note that the texture may be slightly less firm.
Unsalted Butter — Butter adds richness, a silky mouthfeel, and helps the cookies set with a tender bite. I always use unsalted butter to control the salt level. Salted butter will work, but reduce the added salt elsewhere. For a dairy-free version, use a high-quality vegan butter stick (not tub margarine, which has too much water).
Quick Oats — Quick oats are essential for the right texture. They’ve been rolled thinner and cut smaller, so they absorb the chocolate mixture evenly and create a tender, cohesive cookie. Old-fashioned oats can be used, but pulse them a few times in a food processor first to break them down — otherwise your cookies may be crumbly and dry.
Creamy Peanut Butter — The peanut butter does double duty: it adds rich, savory flavor and acts as a binder that helps the cookies hold together. Always use creamy, not crunchy, for the smoothest texture. Natural peanut butter (the kind that separates) can be used, but you must stir it very thoroughly to re-incorporate the oils, and your cookies may be slightly softer.
Vanilla Extract — A full tablespoon might seem like a lot, but this is 💡 emy’s Pro Tip: vanilla amplifies the chocolate flavor and rounds out the sweetness. Use pure vanilla extract, not imitation, for the best depth.
| Original Ingredient | Best Substitution | Flavor / Texture Impact |
|---|---|---|
| Granulated sugar | Cup-for-cup monk fruit sweetener | Slightly less firm set; mildly less sweet |
| Unsalted butter | Vegan butter stick (e.g. Earth Balance) | Slightly less rich; still firm set |
| Quick oats | Pulsed old-fashioned oats | Slightly chewier; may be less tender |
| Creamy peanut butter | Sunflower seed butter (for nut-free) | Slightly thinner texture; nut-free |
| Vanilla extract | Vanilla bean paste | Richer vanilla flavor with visible seeds |
How to Make No-Bake Cookies — Step-by-Step
Trust me when I say: if you can boil water and stir, you can make these No-Bake Cookies. Here’s exactly how to do it, with all the tiny chef details that make the difference between a good cookie and a great one.
Step 1: Boil the Sugar, Milk, Butter, and Cocoa
In a large pot (at least 4-quart — the mixture bubbles up!), combine the sugar, milk, butter, and cocoa powder. Set the heat to medium and whisk continuously as the butter melts and the sugar dissolves. Once the mixture reaches a full, rolling boil (bubbles across the entire surface, not just at the edges), set a timer for exactly one minute. Keep stirring gently — just a slow, steady whisk — for that full minute. Do not skip the timer, and do not stop whisking. This one-minute boil is what activates the sugar and allows the cookies to set properly.
💡 emy’s Pro Tip: The one-minute boil is non-negotiable. If you boil for less time, the cookies won’t set and will be a sticky, gooey mess. If you boil for too long (even 30 seconds extra), the sugar can over-caramelize and your cookies will turn out dry and crumbly. Set a timer, trust it, and don’t rely on guessing.
Step 2: Mix in Oats, Peanut Butter, and Vanilla
Remove the pot from heat completely. Add the quick oats and stir vigorously with a wooden spoon or silicone spatula until all the oats are evenly coated and no dry spots remain. The mixture will look glossy and thick. Next, add the creamy peanut butter and stir until it’s fully incorporated — the mixture should look uniform and smell incredible. Finally, stir in the vanilla extract. The dough will be thick, shiny, and slightly sticky, but it should hold together when pressed.
⚠️ Common Mistake to Avoid: Adding the peanut butter and vanilla while the pot is still on the heat. The residual heat can cause the peanut butter to separate or the vanilla to burn off. Always remove the pot from the burner before adding these ingredients.
Step 3: Shape and Set the Cookies
Lay out a long sheet of parchment paper on your countertop. Using a spring-loaded cookie scoop or two spoons, drop spoonfuls of the dough onto the parchment, shaping them into round cookies about 2 inches wide. Work quickly — the mixture firms up as it cools. Leave a little space between each cookie (they won’t spread much, but a bit of air flow helps them set evenly). Let the cookies sit at room temperature for 15–30 minutes, until they are firm to the touch and lift cleanly off the parchment. If you’re in a hurry, you can pop them in the refrigerator for 10 minutes.
💡 emy’s Pro Tip: If the dough starts to stiffen before you’ve finished shaping all the cookies, place the pot back on a very low heat for 10–15 seconds, stirring constantly, just to warm it slightly. This will make it spoonable again without damaging the texture.
| Step | Action | Duration | Key Visual Cue |
|---|---|---|---|
| 1 | Boil sugar, milk, butter, cocoa | 1 minute at rolling boil | Full, even bubbles across the entire surface |
| 2 | Mix in oats, peanut butter, vanilla | 2–3 minutes of stirring | Uniform, glossy, thick dough with no dry spots |
| 3 | Shape and set cookies | 15–30 minutes at room temp | Firm to touch, lifts cleanly off parchment |
Serving & Presentation
These No-Bake Cookies are wonderful as-is, but a few small touches make them truly special. I love to arrange them on a wooden board or a simple white platter — the dark, glossy cookies pop beautifully against a light surface. For a touch of Moroccan flair (a nod to my mother’s kitchen), I sometimes sprinkle a tiny pinch of flaky sea salt on top of each cookie right after shaping — the salt crystals catch the light and add a wonderful savory contrast. In the summer, I’ll serve them alongside a bowl of fresh berries or a scoop of vanilla bean ice cream. They’re also perfect crumbled over yogurt or layered into a quick icebox cake.
When I bring these to a dinner party here in NYC, I like to pair them with a cold glass of oat milk or a rich, dark roast coffee. The combination of chocolate, peanut butter, and coffee is absolutely divine. For the kids (or the kid in you), a tall glass of cold milk is the classic choice. And if you’re feeling extra indulgent, drizzle a little melted chocolate over the top and let it set — it takes these cookies from simple to stunning in seconds.
| Pairing Type | Suggestions | Why It Works |
|---|---|---|
| Side Dish | Fresh berries, sliced bananas, yogurt | Bright acidity and creaminess balance the rich chocolate |
| Sauce / Dip | Melted dark chocolate, caramel sauce, peanut butter drizzle | Enhances the chocolate and nut flavors |
| Beverage | Cold milk, oat milk latte, dark roast coffee | Milk cuts the sweetness; coffee complements chocolate |
| Garnish | Flaky sea salt, chopped peanuts, cocoa powder dusting | Adds texture, visual appeal, and flavor contrast |
Make-Ahead, Storage & Reheating
One of the best things about these No-Bake Cookies is how well they keep. I often make a double batch on Sunday afternoon and stash them for the week — perfect for lunchboxes, after-school snacks, or a quick treat when I’m editing blog posts late at night. Here’s exactly how to store them for maximum freshness.
| Method | Container | Duration | Reheating Tip |
|---|---|---|---|
| Refrigerator | Airtight container, layers separated by parchment | Up to 2 weeks | Serve cold or let sit 5–10 minutes at room temp |
| Freezer | Freezer-safe bag or container, parchment layers | Up to 3 months | Thaw at room temp 15 minutes — no microwave needed |
| Make-Ahead | Shape dough on parchment, refrigerate uncovered 1 hr, then wrap | Up to 3 days in advance | Shape first, then store — no need to reheat |
If you’re storing these cookies at room temperature (in a cool, dry place), they’ll keep for about 5 days in an airtight container. However, I find they stay fresher and firmer in the refrigerator. One thing I’ve learned the hard way: never microwave these cookies to soften them — the texture turns gummy and weird. If you want them softer, just let them sit at room temperature for a few minutes before eating.
Variations & Easy Swaps
Over the years, I’ve played around with this base recipe in all sorts of ways — some inspired by Moroccan flavors, some by what I find at the Union Square greenmarket, and some just from late-night kitchen curiosity. Here are my favorite variations.
| Variation | Key Change | Best For | Difficulty Impact |
|---|---|---|---|
| Classic Chocolate Peanut Butter | Add 1/2 cup mini chocolate chips after cooking | Extra chocolate flavor and texture | No change — same process |
| Gluten-Free Version | Use certified gluten-free quick oats | Gluten-free diet | No change — same process |
| Crunchy Nut Variation | Stir in 1/3 cup chopped toasted peanuts or pecans | Extra crunch and nutty depth | No change — same process |
Classic Chocolate Peanut Butter
This is the variation I make most often — it’s the one that gets requested at every party. After you’ve stirred in the vanilla, fold in 1/2 cup of mini chocolate chips. The residual heat will soften them just slightly, creating little pockets of melted chocolate throughout the cookie. It’s like a chocolate chip cookie and a no-bake cookie had a beautiful baby. I learned this trick from a pastry chef in Paris who always added a “surprise” element to even the simplest desserts.
Gluten-Free Version
Making this recipe gluten-free couldn’t be easier — simply swap in certified gluten-free quick oats. Oats themselves are naturally gluten-free, but they’re often processed in facilities that also process wheat, so look for a brand that’s certified gluten-free. The texture and flavor are identical to the original. This is one of the most requested recipes from my gluten-free readers, and it’s a staple in my NYC apartment when I have friends over who avoid gluten. 💡 emy’s Pro Tip: Make sure all your other ingredients (especially vanilla extract and peanut butter) are also certified gluten-free if you’re serving someone with celiac disease.
Crunchy Nut Variation
When I’m craving something with more texture, I stir in 1/3 cup of chopped toasted peanuts or pecans right at the end, along with the vanilla. The nuts add a wonderful crunch that contrasts with the soft, fudgy cookie. In the fall, I love using toasted pecans — they have a buttery, slightly sweet flavor that pairs beautifully with the chocolate. I find the best pecans at the Union Square farmers market in October, and I toast them in a dry pan until they’re fragrant, just like my mother taught me.
Share Your Version!
I absolutely love hearing how these No-Bake Cookies turn out in your kitchen. Did you add a special twist? Did you discover a new favorite variation? Did your kids devour them before they even set? Drop a star rating and a comment below — your feedback helps other home cooks know what to expect, and it honestly makes my day to read about your baking adventures.
And here’s a little request: snap a photo of your No-Bake Cookies and share it on Instagram or Pinterest, tagging me @cookingwithemi. I love seeing the creative ways you make this recipe your own. Did you try the flaky sea salt on top? The chocolate chip version? Or did you create something entirely new? Let me know in the comments — I read every single one. From my NYC kitchen to yours — I hope this recipe brings as much warmth to your table as it does to mine. — emy 🧡
Love This Recipe? Save It to Pinterest!
If you enjoyed this No-Bake Cookies recipe, don’t let it get lost in your browser tabs! 😄 Pin it now so you can find it again anytime — and explore hundreds more tried-and-tested recipes waiting for you on my Pinterest boards.
👉 Follow emy on Pinterest @exorecipe
📌 Pin this recipe · 🔁 Re-pin your favorites · 💬 Tag me when you make it — I love seeing your creations!
Why didn’t my no-bake cookies set?
This is the most common issue with no-bake cookies, and it almost always comes down to the boil time. If you didn’t bring the sugar, milk, butter, and cocoa mixture to a full rolling boil for a full minute, the sugar won’t reach the right temperature to set properly. Another possible culprit is humidity — on very humid days, the cookies may take longer to set or stay slightly softer. Finally, make sure you’re using quick oats, not old-fashioned oats, which absorb liquid differently. If your cookies didn’t set, try refrigerating them for 30 minutes — that often firms them up enough to enjoy.
Can I use old-fashioned oats instead of quick oats?
You can, but I don’t recommend it without a small adjustment. Old-fashioned oats are thicker and flatter than quick oats, so they don’t absorb the liquid mixture as evenly. The result can be a drier, crumbly cookie that doesn’t hold together well. If you only have old-fashioned oats, pulse them in a food processor 3–4 times to break them down into smaller pieces before using. This mimics the texture of quick oats and will give you a much better result. Quick oats are really the ideal choice for this recipe — they create a tender, cohesive cookie every time.
Can I use crunchy peanut butter instead of creamy?
Technically yes, but the texture won’t be as smooth and uniform. Creamy peanut butter blends completely into the mixture, creating a velvety, fudgy base that coats every oat evenly. Crunchy peanut butter has small pieces of nuts that can create uneven spots in the dough, and the cookie may be slightly more crumbly as a result. If you love the idea of extra crunch, I recommend using creamy peanut butter in the base and then stirring in 1/4 cup of chopped toasted peanuts at the end. That way you get a smooth texture with intentional pockets of crunch.
How long do no-bake cookies last?
No-bake cookies stay fresh for about 5 days at room temperature in an airtight container, and up to 2 weeks in the refrigerator. I actually prefer them cold from the fridge — they firm up nicely and have a wonderful fudge-like texture. They also freeze beautifully for up to 3 months. Just layer them between parchment paper in a freezer-safe container or bag, and thaw at room temperature for about 15 minutes before eating. One note: these cookies don’t do well in heat, so avoid leaving them in a warm car or near a sunny window.
Can I freeze no-bake cookies?
Absolutely! No-bake cookies freeze exceptionally well. Once they are fully set at room temperature, transfer them to a freezer-safe container or zip-top bag with parchment paper between the layers to prevent sticking. They’ll keep for up to 3 months in the freezer. To enjoy, simply take out as many as you want and let them sit at room temperature for about 15 minutes — they’ll be perfectly firm and chewy. I often freeze a double batch so I always have a quick treat on hand for unexpected guests or late-night cravings.
Can I use margarine instead of butter?
I don’t recommend using tub margarine because it has a higher water content than butter, which can make the cookies sticky and affect their ability to set properly. If you need a dairy-free option, use a high-quality vegan butter stick (like Earth Balance or Miyoko’s) — these have a similar fat-to-water ratio as butter and will work much better. Avoid using spreads or low-fat butter alternatives, as they contain too much water and will throw off the texture. Stick with unsalted butter or a firm vegan butter stick for the best results.
Why are my no-bake cookies dry and crumbly?
Dry and crumbly no-bake cookies usually mean the mixture was boiled too long. Even 30 seconds of extra boiling time can cause the sugar to over-caramelize and the mixture to become too thick, resulting in a dry cookie that doesn’t hold together. Another possibility is that you used old-fashioned oats instead of quick oats — the larger flakes don’t absorb the liquid as evenly, leaving dry spots. Finally, make sure you’re measuring your ingredients accurately. Too many oats or not enough peanut butter can also lead to a dry, crumbly texture. Set that timer for one minute exactly and use quick oats for the best results.
Can I add chocolate chips or other mix-ins?
Yes, and I highly recommend it! Mini chocolate chips are my favorite addition — stir in 1/2 cup after the vanilla, while the mixture is still warm, so they soften slightly but don’t fully melt. You can also add chopped toasted nuts, shredded coconut, dried cherries, or even a handful of mini marshmallows for a Rocky Road twist. Just keep in mind that any add-ins should be stirred in gently at the end to avoid over-mixing. If you’re adding something chunky, you may need to press the dough together a bit more firmly when shaping the cookies to help them hold.
What is the best cocoa powder for no-bake cookies?
I recommend using a good-quality Dutch-process cocoa powder for the deepest, most mellow chocolate flavor. Dutch-process cocoa is treated with an alkali to neutralize its acidity, which gives it a smoother, richer taste and a darker color. Natural cocoa powder (like Hershey’s) works perfectly well too — it will give the cookies a slightly more intense, slightly acidic chocolate flavor and a lighter brown color. Both work, so use what you have. My personal favorite is Valrhona or Guittard Dutch-process cocoa, but I’ve made this recipe with store-brand cocoa and it’s still delicious.
Can I make these no-bake cookies without peanut butter?
Yes, you can, but the texture and flavor will change significantly. The peanut butter acts as both a binder and a flavor enhancer in this recipe. For a nut-free version, you can substitute with sunflower seed butter (like SunButter) — use the same amount, and the cookies will have a similar texture but a slightly different flavor. Cookie butter (like Biscoff spread) is another delicious alternative that adds a warm, spiced sweetness. Just note that any substitution will change the flavor profile, so choose an option that sounds appealing to you. 💡 emy’s Pro Tip: If using sunflower seed butter, add 1/2 teaspoon of baking soda to neutralize any green discoloration that can occur from a natural chemical reaction.
🌟 I’d love to hear from you! 🌟
Have you tried this recipe? Share your thoughts in the comments, tag me on social media, or pin it for later. Your support keeps me cooking — merci beaucoup! 💛
No-Bake Cookies
Description
My all-time favorite cookie recipe! Just a few ingredients and no time in the oven for these delicious No-Bake Cookies. Yes, I cook and bake every day, but my favorite cookie is a No-Bake Cookie!
Ingredients
- 2 cups sugar
- 1/2 cup milk
- 1/2 cup unsalted butter
- 1/4 cup cocoa powder
- 3 cups quick oats
- 1 cup creamy peanut butter
- 1 tablespoon vanilla extract
Instructions
- In a large pot add sugar, milk, butter, and cocoa powder. Slowly bring to a boil while whisking. Once at a boil allow to boil for one minute (I set a timer and stopped the whisking).
- Remove from heat and add in oats. Mix well. Add in peanut butter, mix well. Last add in vanilla extract and mix well.
- Lay out parchment paper on the counter and spoon out the dough into cookie shapes. Allow to set for 15-30 minutes.
