Tie Dye Cookies: A Colorful Treat for Every Occasion
Tie Dye Cookies are not just a dessert; they are a vibrant experience that brings joy to baking enthusiasts and cookie lovers alike. With their stunning colors and delightful flavor, these cookies are perfect for parties, family gatherings, or simply as a fun treat to brighten your day. Imagine pulling these colorful, swirled cookies from the oven, their aroma wafting through the air; the sweet scent of vanilla and butter is simply irresistible. Each bite offers a burst of nostalgia, reminiscent of childhood art projects but with a scrumptious twist.
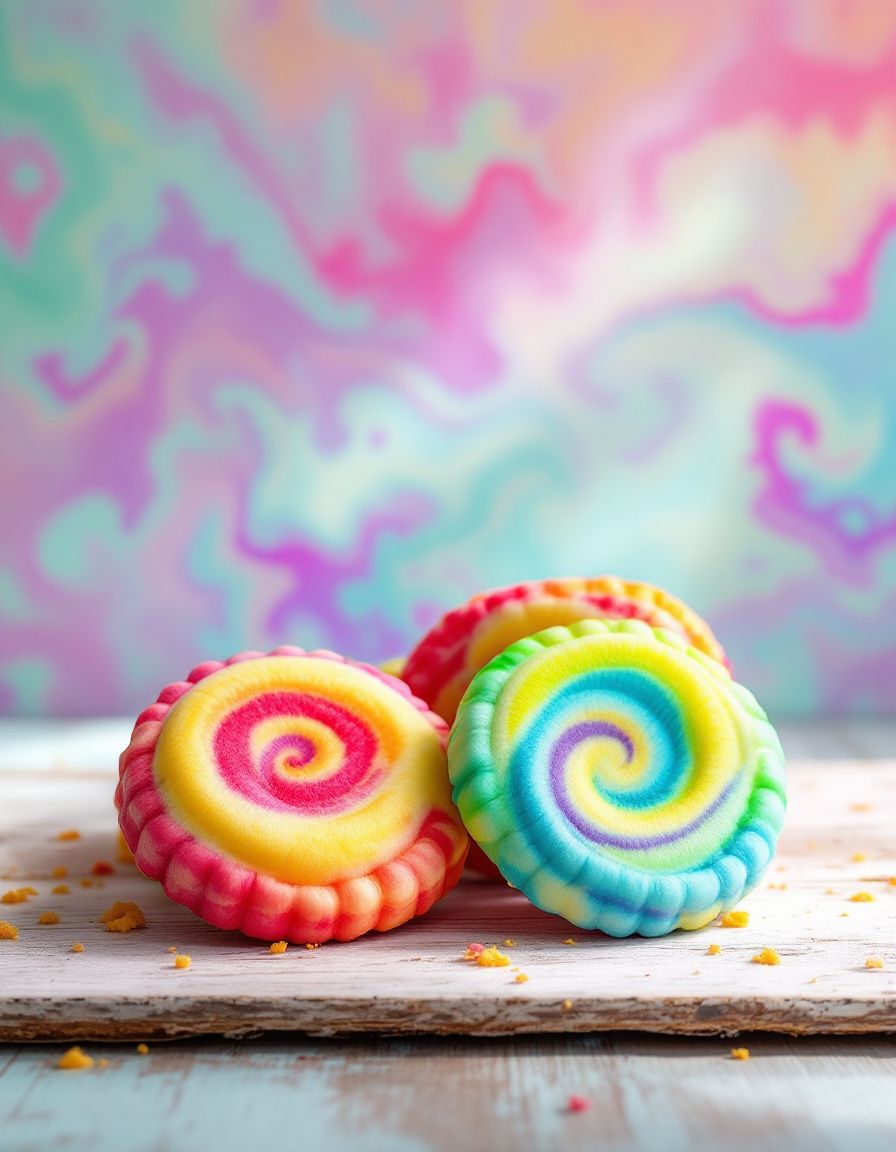
The sensory appeal of Tie Dye Cookies is unmatched. The soft, chewy center is complemented by slightly crispy edges, creating that perfect cookie texture we all crave. The colors dance together, making each cookie unique and visually striking – a feast for the eyes before they even reach your palate. These cookies are not only a delight to taste but also a canvas for creativity, allowing bakers to express their individuality through color combinations and designs.
Quick Recipe Highlights
- Flavor Profile: These cookies have a buttery, sweet flavor with hints of vanilla that perfectly balance their colorful design.
- Texture: Expect soft, chewy centers with crispy edges, making every bite a perfect mix of textures.
- Aroma: The cookies emit a warm, inviting aroma that combines sweet vanilla and a hint of coconut.
- Visual Appeal: The vibrant swirls of color make these cookies visually stunning, ensuring they stand out on any dessert table.
- Skill Level Needed: Baking these cookies is straightforward, making them ideal for bakers of all skill levels.
- Special Equipment: Basic kitchen tools like a mixing bowl, baking sheets, and a whisk are all you need!
Recipe Overview
- Difficulty Level: The Tie Dye Cookies recipe is categorized as easy, requiring minimal steps that are perfect for beginner bakers.
- Category: These cookies fit well into the dessert category and are ideal for any occasion.
- Cuisine: Inspired by American baking traditions, Tie Dye Cookies are a playful take on classic cookie recipes.
- Cost: You can expect a low cost for this recipe, as the ingredients are commonly found in most kitchens.
- Season: While delicious year-round, these cookies shine brightly during summer and festive seasons.
- Occasion: Whether it’s a birthday party, a holiday cookie swap, or just a family snack, these cookies are always a hit.
Why You’ll Love This Recipe
Tie Dye Cookies deliver a taste and texture appeal that is hard to resist. The sweet, buttery flavor combined with the chewy center creates a comforting treat. This recipe offers the chance to indulge in a delightful balance of sweetness, with vibrant colors enticing both kids and adults alike. Each cookie serves as both a dessert and a conversation starter, making them perfect for social gatherings.
The convenience of this recipe cannot be overstated, as it comes together quickly and easily. With simple steps and accessible ingredients, you can produce a batch of these cookies without spending hours in the kitchen. The dough can also be prepared ahead of time, allowing for spontaneous baking sessions whenever the mood strikes.
Each ingredient in the Tie Dye Cookies contributes nutritional advantages. The protein from eggs and the beneficial fats from butter make for a treat that fuels your energy throughout the day. Enjoying these cookies in moderation fits nicely into a balanced diet, making them a guilt-free delight.
These cookies are perfect for entertaining. Presenting a platter of Tie Dye Cookies at a gathering invites smiles and prompts compliments. Their colorful appearance makes them a great centerpiece, enhancing the festive atmosphere, while their delightful taste keeps guests returning for more.
Cost-effectiveness is another remarkable aspect of Tie Dye Cookies. Most ingredients are pantry staples, meaning you can create these colorful delights without incurring a large expense. Bake them together with children or friends for an enjoyable cooking experience everyone can take part in.
Historical Background and Cultural Significance
Tie Dye Cookies have captured the hearts of home bakers with their playful design and delightful taste. The origins of these cookies can be traced back to traditional American cookie recipes, reimagined to incorporate vibrant colors that resemble art and craft trends popular in the 1960s and 1970s. Their appearance alone evokes a sense of nostalgia, reminiscent of carefree days spent experimenting with colors and patterns.
Culturally, these cookies symbolize creativity and joy. Families often bake Tie Dye Cookies as a bonding activity, turning the kitchen into a space of laughter and shared memories. As an edible art project, these cookies invite bakers to express themselves through color combinations that reflect their individuality.
Over the years, the recipe has evolved, with variations sporadically introduced. Some bakers may use different flavors in the dough or unique add-ins like chocolate chips or nuts. This evolution demonstrates the adaptability of the cookie, catering to personal taste preferences while retaining its core charm.
Regional variations of Tie Dye Cookies can be found across the United States, often influenced by local flavors or seasonal ingredients. This adaptability enhances their popularity and allows bakers to customize them for various occasions and celebrations, making them a versatile favorite.
Ingredient Deep Dive
Butter serves as the fat base in this cookie, providing richness and flavor. It has a crucial role in achieving that tender and chewy texture we all adore. Beyond its culinary purpose, butter carries a rich history and has been a staple ingredient in countless recipes worldwide. When using butter for cookies, always opt for unsalted to maintain control over the final flavor profile.
Granulated sugar is vital for sweetness and contributes to the cookies’ structure. This classic ingredient has been used in baking for centuries, bringing joy in various forms. When selecting sugar, look for a pure, white variety for consistent results. Store granulated sugar in a cool, dry place to maintain freshness, and consider brown sugar for added moisture and a deeper flavor profile.
All-purpose flour provides the foundation for these cookies, giving them body and stability. Flour production has evolved from traditional milling processes to modern techniques, but its importance in baking remains unchanged. Opt for unbleached all-purpose flour for a more natural flavor. For longer shelf life, store flour in an airtight container to prevent moisture exposure.
Food coloring transforms the dough, turning it into a vibrant artistic opportunity. Color pigments have been a part of culinary history for centuries, evolving from natural sources to the vibrant hues we see today. When using food coloring, less is often more; start with small amounts and increase until the desired color is achieved with careful incorporation.
Eggs bring moisture and structure to the cookies, contributing to their soft, chewy texture. Historically, eggs have been a source of nutrition and versatility in baking. When selecting eggs, consider the size variant that matches your recipe; typically, large eggs are standard in baking. Store eggs in the refrigerator for best preservation and to ensure their freshness.
Common Mistakes to Avoid
- Not chilling the dough: Chilling the dough helps maintain the shape while baking, preventing spreading.
- Over-mixing the dough: Over-mixing can lead to tough cookies due to gluten development; mix just until combined.
- Skipping the parchment paper: This ensures easy cleanup and prevents the cookies from sticking to the baking sheet.
- Using cold ingredients: Always allow butter and eggs to reach room temperature for better emulsification.
- Not measuring ingredients accurately: Precision is crucial in baking; use measuring cups and spoons for the best results.
- Ignoring bake times: Ovens can vary; keep an eye on cookies to prevent burning.
- Too much or too little food coloring: Use food coloring judiciously; too much can affect the taste and texture.
- Not testing for doneness: Cookies will continue to cook on the baking pan after removing them from the oven; let them cool slightly.
- Using stale ingredients: Always check the freshness of items like baking powder, baking soda, and flour before baking.
- Not letting cookies cool: Allow cookies to cool on a wire rack to maintain their texture and prevent sogginess.
Essential Techniques
The creaming method is essential for incorporating air into the butter and sugar, which creates a light texture. To master it, start with softened butter and granulated sugar, mixing until light and fluffy. A common pitfall is not allowing the butter to soften adequately, leading to a dense texture.
Rolling dough helps achieve an even thickness, crucial for uniform baking. When rolling out dough, use flour on the surface to prevent sticking, and roll until an even thickness is achieved. However, avoid over-flouring, which can adversely affect texture, causing toughness.
Swirling colors into the cookie dough is where the fun starts. By combining various colored doughs, you create unique patterns. This process can be tricky—aim for a marble effect without over-mixing to maintain those vibrant swirls. The key is to fold gently to create impressive, visually appealing results.
Chilling the dough is vital for preventing spreading during baking. After preparing your dough, wrap it in plastic wrap and refrigerate for at least 30 minutes. Skipping this step can result in flat cookies, which is a common mistake. Proper chilling time allows the fats to solidify, promoting a better structure.
Correct baking temperatures and times ensure that cookies are perfectly baked without being burnt or undercooked. Always preheat your oven ahead of time and use an oven thermometer to check accuracy. The visual cue for doneness is typically a lightly golden edge, as the center may appear slightly soft.
Pro Tips for Perfect Tie Dye Cookies
To create perfectly vibrant Tie Dye Cookies, choose gel food coloring instead of liquid for more intense hues that won’t alter the dough’s consistency. When divvying the dough into portions for coloring, wear gloves to keep the colors from mixing on your hands.
When rolling colored dough pieces together, work quickly to prevent the dough from warming up too much. This will ensure that the colors hold their shape better during the baking process.
Using a scale to measure dough portions can help achieve uniform cookie sizes, resulting in evenly baked cookies. This attention to detail will elevate your presentation and overall cookie experience.
Make sure to bake your cookies on a parchment-lined baking sheet for easy release and consistent baking. Consider rotating the pans halfway through the bake time for even results, especially in a conventional oven.
If you’re making these cookies ahead of time, freeze the dough balls before baking for up to 3 months. This allows you to bake fresh cookies anytime! Just add a few minutes to the bake time if baking from frozen.
Experiment with flavorings such as almond extract or citrus zest to enhance the cookie’s profile. These additions can complement the colorful appearance without overpowering the classic cookie taste.
Variations and Adaptations
Regional variations of Tie Dye Cookies can incorporate local flavors, such as adding spices like cinnamon or nutmeg. Seasonal adaptations may include pumpkin spice for autumn or peppermint extract for winter, creating festive variations.
For dietary modifications, gluten-free options can easily be achieved by substituting all-purpose flour with almond or coconut flour. Similarly, to cater to vegan diets, use flaxseed meal instead of eggs and plant-based butter for a delicious alternative.
Flavor variations can introduce different extracts, such as coconut or hazelnut, giving these cookies a unique twist. You might even experiment with textures by adding chopped nuts or chocolate chips.
If looking to switch up the presentation, consider using cookie cutters to shape the cooled cookies after baking or icing them with a simple glaze for added flair.
Serving and Presentation Guide
Plating cookies involves more than just stacking them on a dish. Use vibrant platters that reflect the colors of the cookies or layer them on tiered stands for an impressive display. This showcases the beautiful tie dye effect in all its glory.
For garnishing, try adding a sprinkle of colored sugar or edible glitter to enhance their visual appeal. Pair with complementary treats, such as brownies or mini cupcakes, to create a dessert table that’s both colorful and enticing.
Presenting Tie Dye Cookies with a glass of milk or a flavorful beverage elevates the snack experience. By serving these alongside cold refreshments like lemonade or iced tea, you’ll update the classic cookie-and-milk combination.
Consider serving the cookies at room temperature, as this maintains their chewy texture. Proper portioning can lead to an enticing display, with small stacks of three to four cookies ideal for sharing.
If you’re feeling creative, consider using themed plates or napkins to match special occasion colors. This attention to detail transforms a simple cookie platter into a memorable experience for guests.
Wine and Beverage Pairing
When it comes to pairing beverages with Tie Dye Cookies, opt for sweet dessert wines such as Moscato or Riesling. The sweetness of these wines complements the cookies’ sugary profile, enhancing the overall taste experience.
For non-alcoholic alternatives, serve sparkling cider or fruit-infused lemonade to create a refreshing contrast. Both beverages are crowd-pleasers that beautifully align with the vibrant colors of the cookies.
Coffee, especially flavored varieties like vanilla or mocha, pairs well with these cookies, rounding out the dessert experience. For those who enjoy tea, consider serving with chamomile or a fruity blend, enhancing the sweet notes of the cookies.
Ensure that all beverages are served at optimal temperatures—cold drinks for summer and warm beverages during cooler months—for the best enjoyment. This consideration adds a layer of care to your dessert offerings.
Storage and Shelf Life
To store Tie Dye Cookies, place them in an airtight container at room temperature for up to a week. This method keeps them soft and fresh, ideal for daily snacking or dessert options.
For longer shelf life, consider freezing the cookies. Place them in a single layer in a freezer-safe bag or container for up to three months. Make sure to separate layers with parchment paper to prevent sticking.
Always check for signs of spoilage, such as changes in color or texture, to ensure the cookies remain safe to eat. If you notice them becoming stale or hard, consider reheating briefly in the microwave to restore a fresh texture.
Reheating cookies is simple; a few seconds in the microwave will help regain their softness. This option is particularly useful for frozen cookies, allowing you to enjoy them warm and fresh.
Make Ahead Strategies
When planning to make Tie Dye Cookies ahead, prepare the dough and shape it into discs before refrigerating. This not only saves time on baking day but also enhances flavors as they rest.
If you prefer baking on a different day, freeze the shaped cookies. Lay them flat on a baking sheet until frozen, then transfer them to a bag to save space in your freezer. This simple strategy allows you to enjoy fresh baked cookies whenever the craving strikes.
Consider prepping colored batches separately and store them in the fridge. This way, you can assemble and bake these vibrant cookies as desired, offering an option for spontaneous gatherings or celebrations.
Lastly, don’t forget about quality impact—letting the dough rest enhances its flavor and texture. Aim to chill the dough for at least 30 minutes to one hour, ensuring a better outcome every time.
Scaling Instructions
Scaling this Tie Dye Cookies recipe is easy and flexible! If you’d like to halve the recipe, simply divide each ingredient by two. This method works well, ensuring you stay within the intended flavor ratios.
To double or triple the recipe, maintain consistent ingredient proportions to guarantee flavor authenticity. Ensure that your mixing bowl is large enough to accommodate the increased dough quantity.
When adjusting for volume, keep an eye on your bake time, as larger batches may need slightly more time in the oven. Employing a cookie scoop can help achieve uniform sizes, leading to even baking.
Consider additional storage needs when scaling; a larger batch means needing more baking sheets or containers. Plan ahead to prevent last-minute scrambling for space!
Nutritional Deep Dive
Examining the macro breakdown of Tie Dye Cookies reveals a mix of carbohydrates, fats, and proteins that contribute to energy levels. Each cookie offers a balance that fuels creativity and activity.
Micronutrient analysis showcases the presence of vitamins such as vitamin A from the butter. Eggs offer several essential vitamins, which can be beneficial in contributing to daily nutritional needs.
It’s essential to recognize the health benefits of moderation. While these cookies provide sweetness and energy, enjoying them in controlled portions allows them to fit nicely into a balanced diet.
Consider dietary adjustments, particularly for those mindful of sugar intake—try making smaller-sized cookies to enjoy the taste without overindulging. This simple modification promotes better weight management.
For special diets, alternatives like coconut sugar or whole grain flours can enhance the nutritional profile, integrating seamlessly into the Tie Dye Cookies recipe while maintaining flavor.
Dietary Adaptations
Adapting Tie Dye Cookies to be gluten-free is straightforward – simply substitute regular flour with a gluten-free blend. This ensures that even those with dietary restrictions can enjoy these colorful delights.
Dairy-free alternatives can be achieved using plant-based butter and dairy-free chocolate chips, ensuring that vegans or lactose-intolerant individuals can partake in this enjoyable recipe.
For a low-carb version, consider substituting white flour with almond flour and adjusting the sugar with erythritol for a diet-friendly option. This adaptation changes the cookie’s texture slightly but retains the essential flavor.
If your focus is on keto or paleo, additional modifications can include using nut butter instead of regular butter, offering healthy fats while maintaining a delightful taste experience.
Lastly, options like low-FODMAP sugar settings can be easily achieved by choosing sweeteners that cater to dietary restrictions, making these cookies versatile for many lifestyles.
Troubleshooting Guide
If experiencing texture issues, such as cookies being too dense or too crumbly, check the ratios of wet to dry ingredients. A common solution is to ensure precise measurements during preparation.
Flavor balance may sometimes tilt on the sweet side; consider adding a pinch of salt or a dash of lemon juice into the dough to enhance the overall profile. Remember, balance is vital to achieving a holistic taste experience.
Temperature problems are common when baking; if cookies spread too thin, chilling the dough will help remedy this. For cookies that don’t spread, check that your baking powder or soda is fresh.
Equipment challenges, such as burnt bottoms, can occur from using dark pans. Opt for lighter-colored baking sheets to promote even cooking, preventing unwanted burnt edges.
For ingredient substitutions, such as butter, not all fats behave the same; liquid coconut oil may yield different results in texture and taste. Always research before boldly substituting fats in cookie recipes.
Timing concerns during baking can be tricky. If baking in bulk, plan to rotate trays halfway through for even results. Investing in an oven thermometer can aid in verifying temperature consistency.
Recipe Success Stories
Community feedback around Tie Dye Cookies is overwhelmingly positive, with many bakers praising the visually stunning results. The joyful experience of creating and enjoying these cookies leads to rave reviews among families and friends.
Variation successes often come from personal experimentation with flavors. Many users report delight after introducing different extracts, such as almond or lemon, which increased the flavor complexity and enhanced the visual appeal.
Adaptation stories reveal how thoughtful alterations ensure everyone can enjoy these cookies, including using plant-based ingredients or reducing sugar content. Such modifications have prompted families to share joy regardless of dietary preferences.
Readers commonly suggest photography tips for showcasing these colorful cookies on social media. When photographed under natural daylight, the vibrant colors are amplified, leading to visually striking images.
Lastly, engaging stories about family baking experiences with Tie Dye Cookies highlight the emotional connection food can create. Many users share how these colorful cookies sparked new traditions and joyful moments in their household kitchens.
Frequently Asked Questions
How do I make the colors more vibrant?
To make the colors of your Tie Dye Cookies more vibrant, use gel food coloring instead of liquid. Gel food coloring has a more concentrated hue, allowing you to achieve bolder shades without adjusting the dough’s consistency significantly.
Can I use a different type of flour?
Yes, you can use alternative flours like almond or coconut flour, but keep in mind that it may alter the taste and texture. For gluten-free options, choose a 1:1 gluten-free flour blend for the best results.
What should I do if my dough is too soft?
If your Tie Dye Cookies dough is too soft, try chilling it in the refrigerator for 20-30 minutes. This should help firm it up, making it easier to handle and formed into balls or shapes.
How long can I store Tie Dye Cookies?
These cookies can be stored in an airtight container at room temperature for up to one week. For longer shelf life, freeze the cookies for up to three months, ensuring they’re well-wrapped to prevent freezer burn.
Can I use flavored extracts?
Definitely! Feel free to experiment with different extracts like almond, coconut, or even citrus to enhance the cookies’ flavor. Just be cautious with the amounts, as some extracts can be more potent than vanilla.
Are Tie Dye Cookies suitable for freezing?
Yes, you can freeze the dough or baked cookies. If freezing the dough, shape it into balls and freeze them on a baking sheet before transferring to a freezer bag. Baked cookies can also be frozen and reheated as needed.
Can children help make these cookies?
Absolutely! Making Tie Dye Cookies is a fun and engaging activity for children. They can help with mixing, coloring the dough, and shaping the cookies—just supervise them in the kitchen to ensure safety!
Why are my cookies spreading too much?
Excessive spreading can occur if the dough is too warm or if insufficient flour is added. Ensure your butter is not too soft, and consider chilling the dough before baking to help retain shape.
What can I serve these cookies with?
For a delightful pairing, try serving Tie Dye Cookies with a glass of milk, hot cocoa, or even coffee. Their fun design and sweet flavors complement many beverages, making them a versatile treat!
Can I add mix-ins like chocolate chips?
Yes! You can add chocolate chips, nuts, or dried fruit to the dough for added texture and flavor. Just make sure to adjust the quantities accordingly to maintain the right dough consistency.
Additional Resources
For more delightful baking inspiration, explore related recipes that emphasize creativity, such as rainbow cupcakes or multicolored spritz cookies. Each offers a fun twist on seasonal delights, ensuring there’s always a reason to celebrate.
Consider reviewing technique guides that delve deeper into cookie baking fundamentals. Understanding proper mixing, shaping, and baking techniques can significantly enhance the outcomes for all cookies you undertake.
You might also find ingredient information helpful for expanding your baking knowledge—learn about the different types of flour or sugars you can experiment with, which may lead to exciting new recipes and variations in the future.
If you’re looking for equipment recommendations, investing in quality baking sheets and cookie scoops can make all the difference in achieving consistent results. This equipment can help streamline your baking process, enhancing your overall kitchen experience.
Lastly, seasonal variations based on what’s available can invigorate your baking repertoire, encouraging you to make the most of fresh, local ingredients and provide an extra flair during holidays or events.
Join the Conversation
Sharing your Tie Dye Cookies experience on social media can inspire others to join you in this colorful baking adventure. Using delicious photography that showcases the vibrant colors engages your audience and encourages them to bake.
Photography tips, like using natural light and interesting angles, help capture the beauty of your baked goods. Don’t hesitate to showcase your unique designs and colors, inviting others to recreate your mesmerizing cookies.
Recipe reviews are critical in creating a community around baking. Sharing your honest thoughts on how the cookies turned out can offer insights to fellow bakers, guiding them in their journeys.
Encouraging community engagement around Tie Dye Cookies can lead to sharing variations, tips, and stories about special memories attached to baking. This creates a sense of connection, enriching the experience for all involved.
Lastly, consider encouraging your followers to participate in friendly baking challenges or sharing their custom variations of Tie Dye Cookies, enriching the baking culture and inspiring creativity in others.
The Recipe
Tie Dye Cookies
Serves: 24 cookies
Prep Time: 30 mins
Cook Time: 10 mins
Total Time: 40 mins
Kitchen Equipment Needed
- Mixing bowl
- Baking sheets
- Parchment paper
- Whisk
- Measuring cups and spoons
- Cookie scoop (optional)
- Plastic wrap
Ingredients
- 1 cup unsalted butter, softened
- 1 cup granulated sugar
- 2 large eggs
- 1 teaspoon vanilla extract
- 3 cups all-purpose flour
- 1 teaspoon baking powder
- 1/2 teaspoon salt
- Food coloring (gel or liquid)
Directions
- Preheat your oven to 350°F (175°C) and line baking sheets with parchment paper.
- In a mixing bowl, cream together the softened butter and granulated sugar until light and fluffy.
- Add eggs one at a time, beating well after each addition. Stir in the vanilla extract.
- In another bowl, whisk together flour, baking powder, and salt.
- Gradually add the dry ingredients to the wet ingredients, mixing until just combined.
- Divide the dough into equal sections and color each section using food coloring to desired shades.
- Take small amounts of colored dough and gently roll together to create swirls, being careful not to over-mix.
- Drop rounded tablespoons of dough onto prepared baking sheets, spacing them apart.
- Bake for 9-11 minutes, or until the edges are lightly golden. Remove from the oven and let cool on the baking sheet for a few minutes before transferring to wire racks.
Recipe Notes
- For best results, chill the cookie dough for 30 minutes before baking.
- You can substitute butter with vegan alternatives for a dairy-free version.
- Feel free to experiment with different colors and patterns!
- Store cookies in an airtight container at room temperature for up to a week.
