Best Butter Cookies – Classic Homemade Recipe

best-butter-cookies-recipe

Introduction

Is there anything more comforting than the warm, inviting scent of butter and sugar wafting from your kitchen? For me, this aroma instantly conjures feelings of home and happiness. Furthermore, it promises a simple, delicious treat that never fails to delight. Today, we are making the ultimate classic: a batch of melt-in-your-mouth Butter Cookies. This recipe delivers that perfect, crumbly texture and rich, buttery flavor we all crave. Ultimately, it is a timeless joy that you can easily create and share with your loved ones.

Butter Cookies represent the very heart of simple baking. Essentially, these classic treats consist of a few staple ingredients like butter, sugar, flour, and often a touch of vanilla. Their magic, however, lies not in complexity but in technique and quality. The high butter content creates a dough that bakes into a wonderfully tender and crumbly cookie. Moreover, their simplicity makes them a fantastic canvas for creativity; you can pipe them into elegant shapes, press them with a fork, or even mix in zest or chocolate chips. This versatility is precisely why they matter so much. They fit every occasion, from a casual afternoon snack with coffee to a fancy holiday platter. Consequently, this recipe aligns perfectly with our blog’s tone of achieving fantastic, reliable results without any fuss. If you enjoy mastering fundamental recipes, you will absolutely love our guide on creating the Perfect French Macarons, another classic that rewards precision. Remember, great baking builds on these foundational skills. For instance, using a quality vanilla extract, much like the one we recommend in our Homemade Vanilla Extract post, can elevate your Butter Cookies from great to absolutely extraordinary.

Why I Love This Recipe

This recipe holds a special place in my heart because it was the first one I ever baked with my grandmother. I vividly remember standing on a stool in her kitchen, helping her cream the butter and sugar until it was perfectly pale and fluffy. She taught me how to press the dough with a fork, creating those iconic little ridges that I now find so charming. The smell of those Butter Cookies baking is my ultimate comfort scent, instantly transporting me back to those cherished childhood moments. Now, I love sharing this same recipe and tradition with my own kids, creating new memories and continuing a sweet family legacy.

Health and Nutrition

Why it’s good for your body

Butter cookies offer more than just a delicious taste; they also provide some surprising nutritional perks. For instance, the high-quality butter in these cookies delivers a significant dose of vitamins A and E, which actively support healthy vision and skin. Furthermore, this simple ingredient list often means you avoid the long list of artificial additives found in many processed snacks.

Additionally, the carbohydrates in Butter Cookies supply your body with a quick source of energy, making them a fantastic pick-me-up. Moreover, enjoying a treat you truly love can significantly boost your mood and reduce stress, which is an important part of overall wellness. Ultimately, mindful indulgence is a key component of a healthy relationship with food, and these cookies perfectly support that approach.

Consequently, when you choose a homemade batch of Butter Cookies, you control the ingredients, ensuring a purer snack. Therefore, you can feel good about sharing this classic treat with your family, knowing exactly what’s inside.

How it fits in a healthy lifestyle

Butter cookies can absolutely find a place in your balanced eating plan. The key, as with any delightful treat, is mindful enjoyment. Think of them as a occasional reward rather than an everyday staple. You can easily pair one or two cookies with a piece of fruit or a handful of nuts to create a more satisfying snack that balances simple carbs with fiber and protein.

For those with specific dietary needs, you can easily adapt the classic Butter Cookies recipe. You can swap in a 1:1 gluten-free flour blend to make them celiac-friendly, or explore using alternative sweeteners. If you’re looking for more inspiration on crafting treats that align with your wellness goals, our guide on healthy baking substitutes is a fantastic resource. Remember, a healthy lifestyle embraces all foods. Baking a batch yourself also allows you to practice mindful eating practices, turning the simple act of enjoying a cookie into a moment of genuine pleasure and presence.

How to Prepare This Dish

Steps and time-saving tips

First, gather all your ingredients and let your butter soften naturally on the counter. Meanwhile, preheat your oven to 350°F and line your baking sheets with parchment paper. Consequently, you will save time and ensure even baking. Use a stand mixer with a paddle attachment to cream the softened butter and sugar together until the mixture becomes light and fluffy. This crucial step incorporates air for the perfect Butter Cookies texture. Next, beat in the vanilla extract and a touch of almond extract for a wonderful depth of flavor. Gradually add your flour and salt, mixing just until the dough comes together. Importantly, avoid overmixing to prevent tough cookies. For a major time-saving tip, skip the rolling pin. Instead, scoop the dough with a small cookie scoop for uniformly sized treats. Alternatively, you can roll the dough into a log for slice-and-bake convenience. Finally, chill the dough for at least 30 minutes. This step prevents spreading and guarantees thick, bakery-style Butter Cookies. Bake them for 10-12 minutes until the edges are just golden. Let them cool on the sheet for five minutes before transferring them to a wire rack.

Mistakes I’ve made and learned from

I have definitely learned a few lessons the hard way with this Butter Cookies recipe. My biggest mistake was using cold, hard butter straight from the fridge. I thought I could just beat it longer, but it never incorporated properly, resulting in a greasy, crumbly dough that spread into sad, flat puddles in the oven. Now, I always plan ahead for softening. Another common error I made was eyeballing the flour instead of properly measuring it. Too much flour creates a dry, cakey cookie that nobody wants. I finally invested in a simple digital kitchen scale for perfect accuracy every single time. Trust me, it is a game-changer for all your baking, not just cookies. Also, never skip the chilling step! I was always too impatient and paid the price with misshapen cookies. If you are struggling with other baking fundamentals, my guide on common baking mistakes covers these pitfalls and more. Learning these simple fixes transformed my cookies from a mess into a masterpiece.

Cultural Connection and Variations

Where this recipe comes from

My love affair with these treats began in my grandmother’s kitchen, where a simple tin of Butter Cookies signaled the start of the holiday season. She would press the dough through a cookie press, creating delicate swirls and shapes that we’d then decorate with sparkling sugar. Consequently, the entire house would fill with that unmistakable, rich, buttery aroma. This tradition, however, stretches far beyond my family’s kitchen. In fact, many cultures have their own cherished version. The Danes have their småkager, often spiced with cardamom. Meanwhile, the French offer up their exquisite sable breton, which is delightfully sandy and crumbly. In Mexico, you might find polvorones, a version that often includes nuts and a generous dusting of cinnamon sugar. Ultimately, every culture that embraces the Butter Cookies recipe adds its own local flair, proving its universal appeal.

Furthermore, the basic formula travels beautifully. Some bakers add a hint of almond extract for depth. Others might roll the dough in chopped pecans before baking. My grandmother, for instance, always insisted on using European-style butter for its higher fat content. This small change created a more decadent and tender cookie. Regardless of the variation, the soul of the treat remains the same. It is a simple, elegant, and profoundly comforting creation. A perfect batch of Butter Cookies truly speaks a universal language of love and generosity.

How it fits in today’s cooking

This classic recipe absolutely maintains its relevance in modern kitchens. For many, baking a batch is a cherished holiday ritual, a way to connect with family heritage. However, its appeal is not limited to December. Nowadays, people enjoy these cookies year-round as a sophisticated treat with afternoon tea or as a sweet ending to a summer picnic. Contemporary bakers also love to adapt the recipe to fit various dietary needs. For example, they might use a gluten-free flour blend or a plant-based butter alternative. Additionally, the simple dough serves as a fantastic canvas for creative flavors. You can easily incorporate citrus zest, lavender, or even matcha powder. This versatility makes the process so much fun.

Moreover, these cookies pair wonderfully with so many other desserts. They make a perfect crust for a no-bake cheesecake or a crunchy topping for a parfait. Personally, I love serving them alongside a slice of my favorite vanilla cake for a truly decadent experience. Ultimately, their simplicity is their greatest strength. In our fast-paced world, the act of creaming butter and sugar by hand is a mindful and rewarding escape. Furthermore, a homemade cookie always feels more special than anything from a store. For another fantastic baking project that uses simple ingredients, try your hand at these classic chocolate chip cookies. Both recipes promise delicious results and a happy kitchen.

Taste and Texture

What makes it delicious

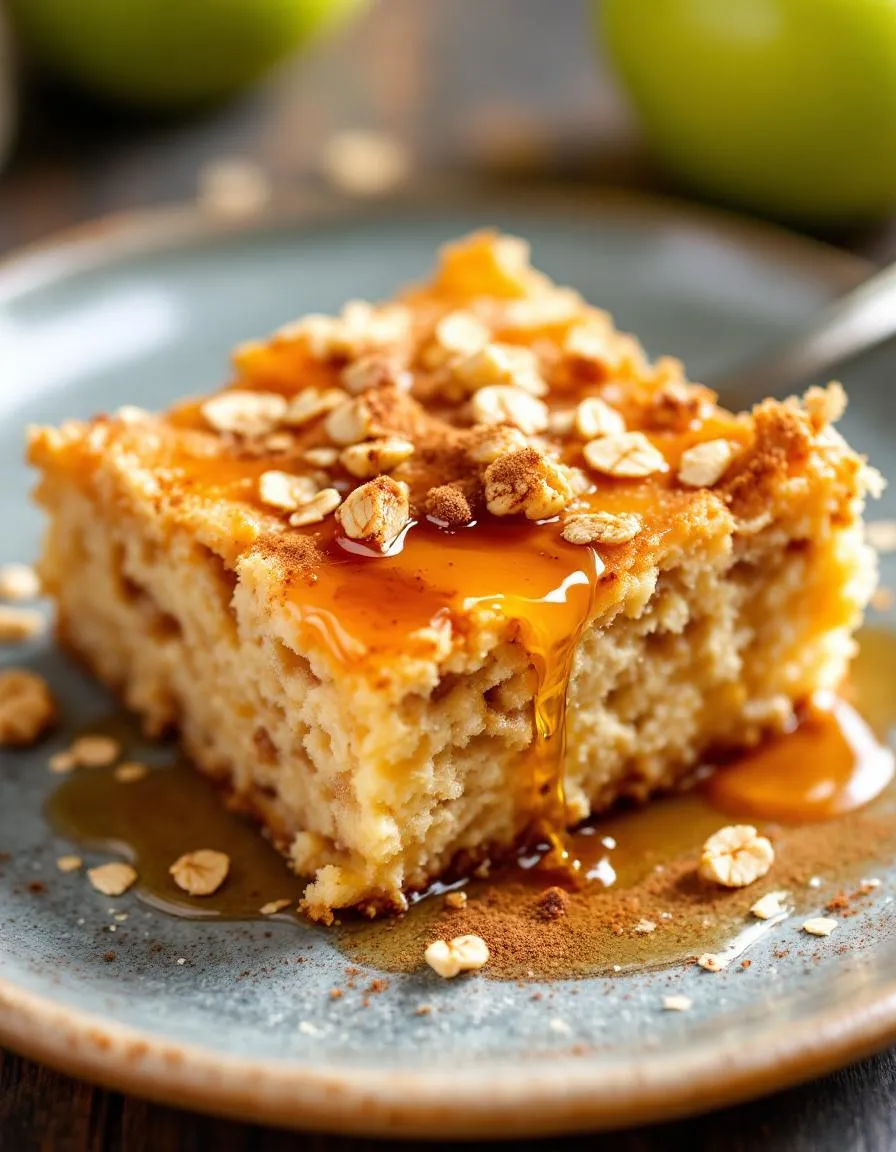
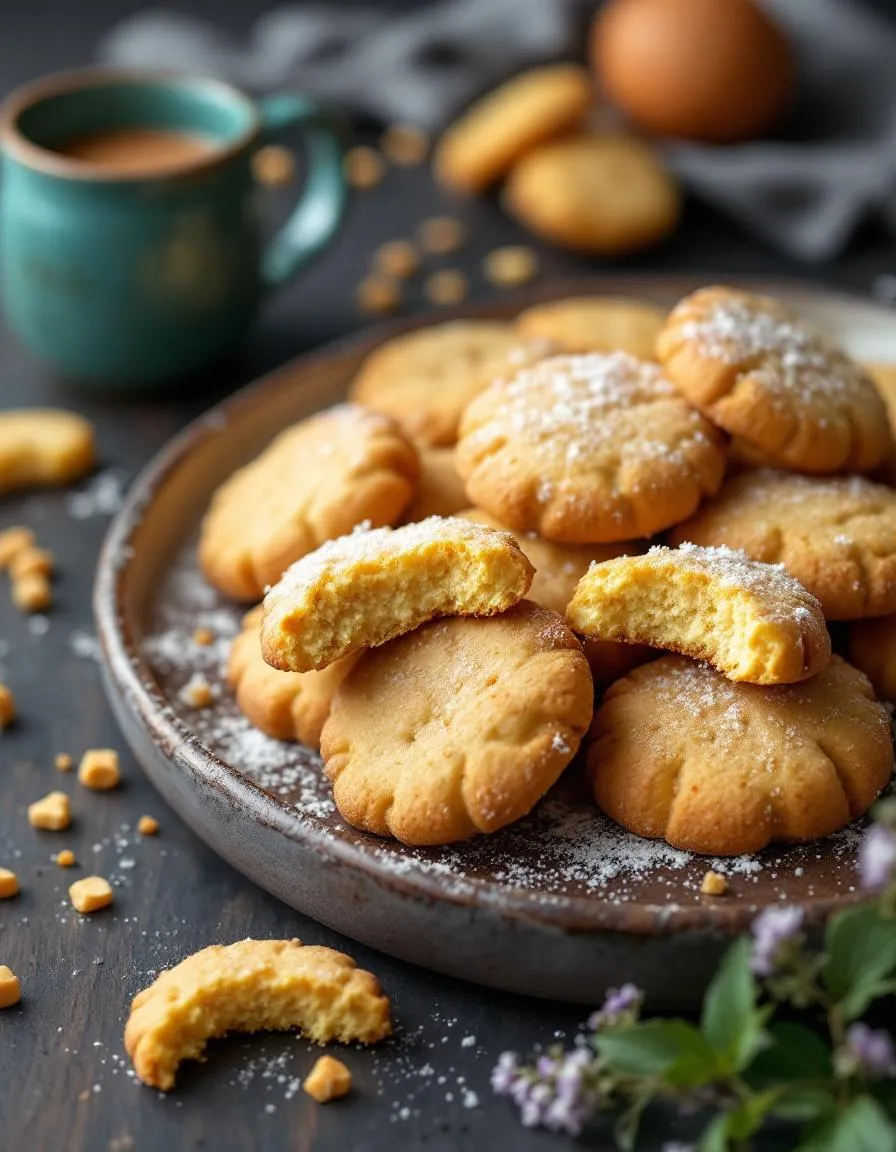
These Butter Cookies deliver a rich, buttery flavor that melts luxuriously on your tongue. Consequently, they offer a perfect crumbly texture that is both tender and satisfyingly crisp. Each bite releases a sweet, vanilla-kissed aroma, making the experience truly fragrant. Ultimately, the high-quality butter creates a creamy mouthfeel that defines these classic Butter Cookies.

Boosting the flavor

For an instant upgrade, simply roll your dough in coarse sparkling sugar before baking. Alternatively, you can fold in a handful of lemon zest to introduce a bright, citrusy note that cuts through the richness. Furthermore, consider serving your cookies with a side of homemade vanilla bean ice cream for a delightful temperature contrast. Similarly, a drizzle of our easy salted caramel sauce adds a wonderful salty-sweet complexity that everyone will love.

Tips for Success

Best practices for results

Always chill your dough thoroughly before baking, as this step prevents your Butter Cookies from spreading too thin. Furthermore, use parchment paper on your baking sheets for the best texture and easy cleanup. Moreover, cream your butter and sugar together until the mixture becomes light and fluffy for a wonderfully tender cookie. Finally, rotate your baking sheets halfway through the bake time to guarantee even browning on every single batch.

Mistakes to avoid

One common error is using butter that is either too warm or too cold, which consequently impacts the dough’s consistency. For perfect results, always use room temperature butter as detailed in our guide on how to cream butter and sugar. Additionally, avoid overmixing the dough once you add the flour, since this can lead to tough cookies. If your cookies spread too much, however, simply ensure your dough is properly chilled; our article on common baking mistakes offers more great solutions for this issue.

Serving and Pairing Suggestions

How to serve this dish

Showcase your beautiful Butter Cookies on a vintage ceramic platter for a charming, rustic feel. Alternatively, arrange them in a decorative tin for a delightful gift that everyone will adore. For special occasions, simply dust your Butter Cookies with a light snowfall of powdered sugar right before serving. This classic treat truly shines during holiday cookie exchanges, alongside afternoon tea, or as a sweet finale to any family dinner.

What goes well with it

A glass of cold milk perfectly complements the rich, buttery flavor of these cookies, creating a timeless and comforting pairing. For a warm beverage option, a cup of our spiced hot chocolate makes an indulgent partner, especially on a cozy evening. Furthermore, consider serving these Butter Cookies with a small bowl of fresh, vibrant berries for a refreshing contrast. They also pair wonderfully with a scoop of our creamy vanilla ice cream, transforming them into an instant dessert masterpiece.

What is the best flour for butter cookies?

All-purpose flour is the best choice for classic butter cookies because it provides the ideal structure and tender crumb. Using a lower-protein flour helps prevent the cookies from becoming too tough or cakey, allowing the rich, buttery flavor to truly shine through in every bite.

Why are my butter cookies flat?

Butter cookies often go flat if the dough is too warm before baking. Ensure your butter is cool, not melted, and chill the dough for at least 30 minutes before baking to help the cookies hold their shape and achieve that perfect, crisp texture.

Can you freeze butter cookie dough?

Absolutely! Freezing butter cookie dough is a great way to have ready-to-bake treats on hand. Simply form the dough into a log or portion it into balls, wrap it tightly in plastic wrap, and freeze for up to 3 months; bake from frozen, adding a minute or two to the baking time.

What is the difference between butter cookies and shortbread?

The main difference lies in the sugar content and texture. Butter cookies typically contain more sugar and sometimes egg, resulting in a sweeter, crisper cookie that can hold its shape for piping. Traditional shortbread has a simpler ratio of butter, flour, and sugar, creating a more crumbly and rich texture.

Print
clock clock iconcutlery cutlery iconflag flag iconfolder folder iconinstagram instagram iconpinterest pinterest iconfacebook facebook iconprint print iconsquares squares iconheart heart iconheart solid heart solid icon

Butter Cookies


  • Author: Chef Mia

Description

Classic, melt-in-your-mouth butter cookies with a rich, buttery flavor and delicate texture.
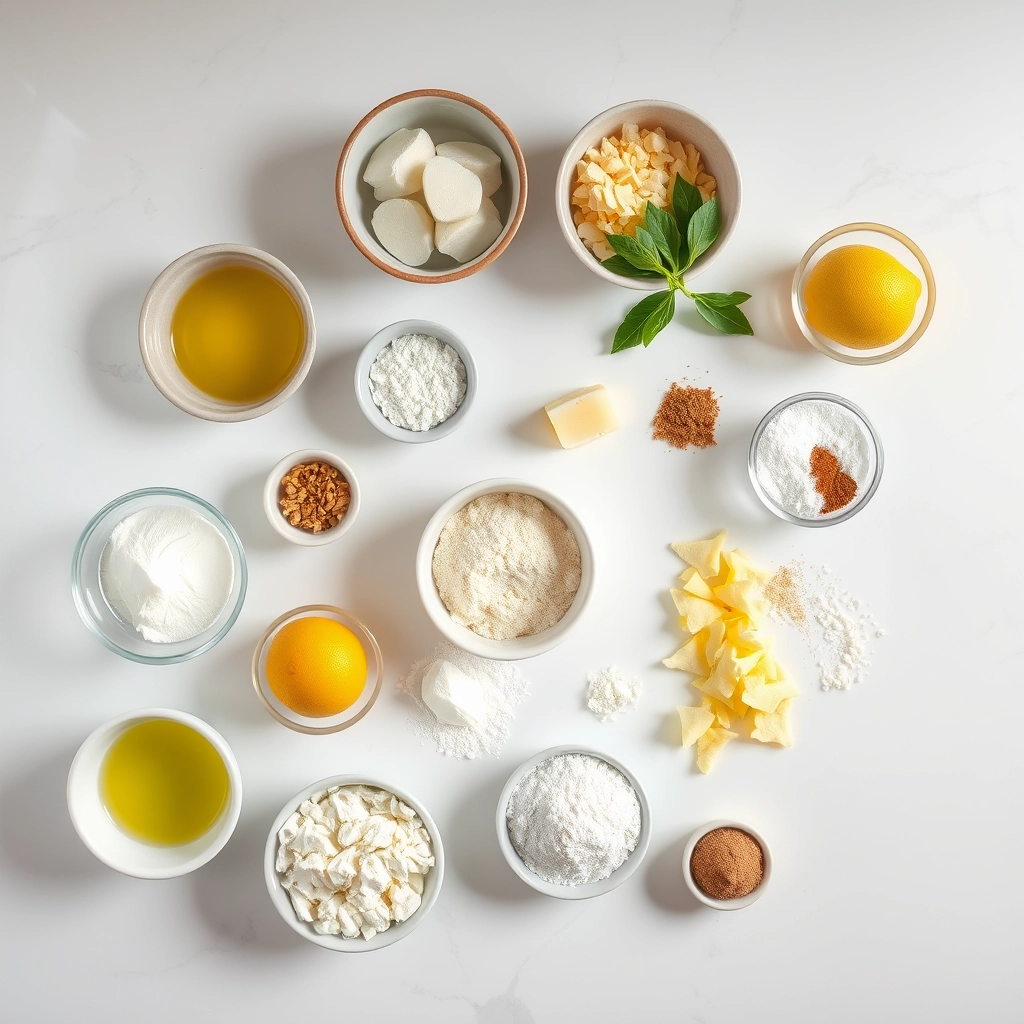
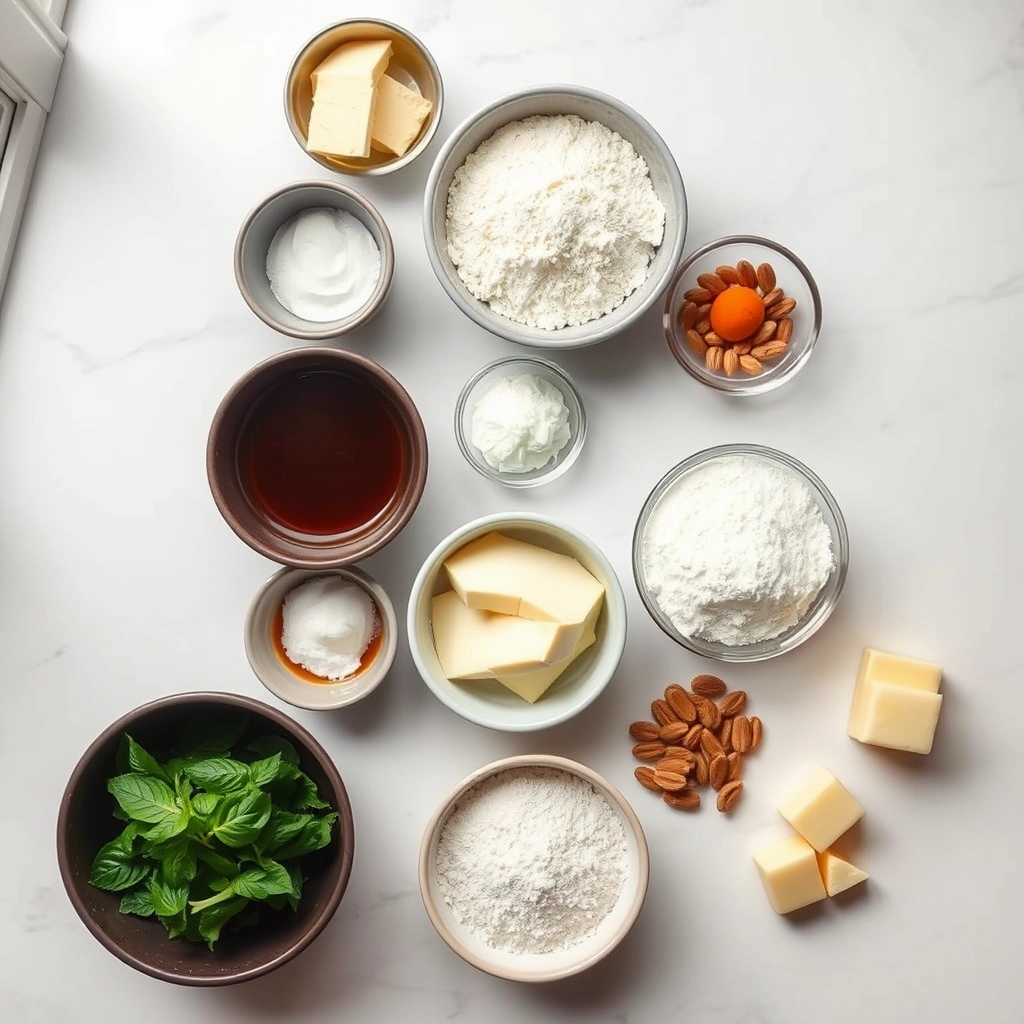

Ingredients

Scale

For the Crust:

  • 1 cup unsalted butter, softened
  • 2/3 cup granulated sugar
  • 1 large egg
  • 1 teaspoon vanilla extract
  • 2 1/4 cups all-purpose flour
  • 1/4 teaspoon salt

Instructions

1. Prepare the Crust:

  1. Preheat oven to 350°F (175°C). Line baking sheets with parchment paper.
  2. In a large bowl, cream together butter and sugar until light and fluffy. Beat in egg and vanilla.
  3. Gradually mix in flour and salt until just combined. Do not overmix.
  4. Drop by rounded teaspoonfuls onto prepared baking sheets, spacing about 2 inches apart.
  5. Bake for 10-12 minutes or until edges are lightly golden. Cool on wire racks.

Notes

You can customize the seasonings to taste.

Best Cranberry Orange Muffins – Easy Recipe

best-cranberry-orange-muffins-recipe

There is something truly special about the aroma of fresh Cranberry Orange Muffins filling your kitchen on a quiet morning. That moment when you break one open, steam rising from the tender crumb, and the vibrant, tart berries mingle with the sweet, sunny citrus is pure comfort. This recipe captures that perfect balance, offering a burst of flavor that feels both festive and familiar. Whether you are seeking a cozy weekend baking project or a guaranteed crowd-pleaser for your next brunch, these muffins promise to deliver a little slice of joy in every single bite.

About This Recipe

Cranberry Orange Muffins are a classic bakery treat that you can easily master at home. Essentially, they combine fresh or frozen cranberries with the bright zest and juice of oranges in a simple, tender muffin batter. The result is a beautifully moist muffin with pockets of tart fruit and a citrus-kissed crumb. This particular recipe matters because it consistently produces bakery-quality results without any fuss. Moreover, it fits perfectly with our blog’s philosophy of creating approachable, from-scratch recipes that actually work. For instance, the method is straightforward, making it ideal for bakers of any skill level. Additionally, the ingredients are simple and likely already in your pantry, aside from the fresh cranberries. If you enjoy this combination of fruit and citrus, you might also love our popular Lemon Blueberry Scones for another delightful breakfast option. Ultimately, these muffins are more than just a quick bread; they are a versatile staple. You can enjoy them for breakfast, as an afternoon snack, or even as a light dessert. Furthermore, understanding the basics of a great muffin batter opens the door to endless variations. Once you master this base, you can explore other recipes on our site, like our ultimate guide to Perfect Vanilla Cupcakes, which shares similar mixing techniques for perfect results every time.

Why I Love This Recipe

I have a deep personal connection to these Cranberry Orange Muffins because they remind me of my grandmother’s kitchen during the holidays. She always believed that the best conversations happened over something freshly baked, and these muffins were her favorite thing to pull from the oven when company arrived. I love that this recipe honors her tradition of from-scratch baking while being simple enough for any busy morning. The vibrant red cranberries and the cheerful orange zest never fail to brighten my day, and sharing them with my family continues to create those same warm, cherished memories she valued so much.

Health and Nutrition

Why it’s good for your body

These Cranberry Orange Muffins offer a delightful way to nourish your body. First, fresh cranberries pack a powerful antioxidant punch. Consequently, they help combat oxidative stress in your body. Moreover, the vibrant citrus from the orange zest provides a hefty dose of vitamin C. This essential vitamin actively supports your immune system and promotes healthy skin.

Additionally, if you use whole wheat flour, you significantly boost the fiber content. This dietary fiber aids digestion and helps you feel fuller longer. Furthermore, you can easily substitute ingredients like applesauce for oil to reduce fat without sacrificing moisture. Ultimately, enjoying a Cranberry Orange Muffin means you are treating yourself to a snack that fuels your body with beneficial nutrients. Finally, the natural tartness of the fruit often means you need less added sugar, making it a smarter choice.

How it fits in a healthy lifestyle

These muffins can absolutely play a part in your balanced eating plan. Consider them a perfect companion to your morning coffee or a satisfying afternoon snack that curbs cravings for less nutritious options. They fit beautifully into a heart-healthy lifestyle, especially if you use ingredients like oats and a touch of olive oil.

For those mornings when you need a quick and wholesome breakfast, pairing a muffin with a green detox smoothie creates a complete and energizing meal. If you are exploring specific dietary adjustments, you can easily adapt this recipe. For instance, check out our guide on gluten-free baking to make a version that suits your needs. Enjoying a Cranberry Orange Muffin is all about mindful indulgence within a varied and colorful diet.

Print
clock clock iconcutlery cutlery iconflag flag iconfolder folder iconinstagram instagram iconpinterest pinterest iconfacebook facebook iconprint print iconsquares squares iconheart heart iconheart solid heart solid icon

Cranberry Orange Muffins


  • Author: Chef Emy

Description

Moist and flavorful muffins with tart cranberries and zesty orange, perfect for breakfast or a snack.


Ingredients

Scale

For the Crust:

  • 2 cups all-purpose flour
  • 3/4 cup granulated sugar
  • 2 tsp baking powder
  • 1/2 tsp salt
  • 1 large egg
  • 1 cup milk
  • 1/4 cup vegetable oil
  • 1 tbsp orange zest
  • 1/2 cup fresh orange juice
  • 1 cup fresh or frozen cranberries, chopped

Instructions

1. Prepare the Crust:

  1. Preheat oven to 375°F (190°C) and line a muffin tin with paper liners.
  2. In a large bowl, whisk together flour, sugar, baking powder, and salt.
  3. In another bowl, beat the egg, then mix in milk, oil, orange zest, and orange juice.
  4. Pour wet ingredients into dry ingredients and stir until just combined. Fold in cranberries.
  5. Divide batter evenly among muffin cups. Bake for 20-25 minutes or until a toothpick comes out clean.

Notes

You can customize the seasonings to taste.

How to Prepare This Dish

Steps and time-saving tips

First, preheat your oven to 375°F and line a muffin tin with paper liners. Meanwhile, zest and juice your orange; this bright, fresh flavor is the heart of these Cranberry Orange Muffins. In a large bowl, whisk together the flour, baking powder, and salt. Next, in a separate bowl, whisk the milk with the orange juice, then add the sugar, egg, melted butter, and orange zest. Pour these wet ingredients into the dry flour mixture. Gently stir everything together until the batter is just combined; a few lumps are perfectly fine. Importantly, do not overmix! Now, fold in the fresh cranberries. This gentle technique ensures your muffins stay tender and light. Quickly divide the batter evenly among the muffin cups. For a beautiful finish and a delightful crunch, sprinkle the tops with coarse sugar before baking. Bake for 18-22 minutes, or until a toothpick inserted into the center comes out clean. Finally, let the muffins cool in the pan for a few minutes before transferring them to a wire rack.

Mistakes I’ve made and learned from

I have absolutely overmixed this batter in a rush, and it resulted in dense, tough Cranberry Orange Muffins that nobody wanted. I learned the hard way that a light hand is non-negotiable for a soft, bakery-style crumb. Another common error? Using rock-hard brown sugar straight from the pantry. Now, I always take a moment to soften my brown sugar properly, which guarantees a moist and perfectly sweet batter every single time. Also, forgetting to toss frozen cranberries in flour led to them all sinking to the bottom in one sad, soggy layer. Thankfully, a quick dusting in a tablespoon of flour from your measured amount solves that problem completely. For more brilliant fixes to common issues, my guide on fixing common baking mistakes has saved countless batches.

Cultural Connection and Variations

Where this recipe comes from

For many of us, the bright, tart aroma of Cranberry Orange Muffins baking instantly signals the holiday season. This classic pairing feels deeply American, yet its roots weave together a much older story. Settlers in New England adopted the native cranberry, while Spanish explorers likely brought sweet oranges to Florida. Consequently, these two ingredients from different worlds found a perfect harmony in our baking tins. My own grandmother always made a double batch around Christmas, claiming the cheerful color and vibrant flavor could brighten even the darkest winter morning.

Families and regions often put their own spin on this beloved treat. Some bakers add a handful of toasted walnuts or pecans for a satisfying crunch. Others might stir in warm spices like cinnamon or nutmeg to complement the fruit. In fact, you can find similar muffins across Canada, where they might use dried cranberries when fresh are out of season. No matter the variation, the goal remains the same: a moist, tender crumb that bursts with juicy berries and citrus zest. Ultimately, every baker seems to have a special secret for their perfect Cranberry Orange Muffins.

How it fits in today’s cooking

This recipe absolutely thrives in modern kitchens because it balances nostalgia with convenience. Busy home cooks appreciate that they can whip up a batch quickly for a satisfying breakfast or a lunchbox treat. Furthermore, the combination of tart and sweet feels both wholesome and indulgent, fitting right into our current desire for real, recognizable ingredients. Many bakers now experiment with alternative flours or natural sweeteners to suit their dietary needs, proving the recipe’s fantastic adaptability.

You can easily incorporate these muffins into your weekly meal prep for a grab-and-go option that beats any store-bought pastry. They also remain a cornerstone of holiday brunches and festive gatherings, often sharing the table with other classics like our Easy French Toast Casserole. For a truly special occasion, consider serving them alongside a sophisticated drink like our Vanilla Chai Latte. Ultimately, this humble muffin continues to earn its place in our routines, from quiet mornings to large celebrations.

Taste and Texture

What makes it delicious

These Cranberry Orange Muffins deliver a perfect balance of sweet and tart in every single bite. Initially, you experience the bright, citrusy aroma of fresh orange zest that makes your kitchen smell incredible. Then, your teeth sink into a wonderfully tender and moist crumb that practically melts in your mouth. Suddenly, you hit a pocket of juicy, tart cranberry that provides a vibrant burst of flavor and a slight, pleasant chew. Ultimately, the sweet orange glaze on top creates a delicate, crisp finish that ties everything together beautifully. This delightful contrast makes Cranberry Orange Muffins an unforgettable treat.

Boosting the flavor

Fortunately, you can easily elevate these muffins with a few clever tweaks. For a richer citrus flavor, try adding a teaspoon of lemon zest alongside the orange. Alternatively, a sprinkle of coarse sugar on top before baking creates a delightful crunchy texture. If you love warm spices, a half teaspoon of cardamom or cinnamon in the batter introduces a wonderfully cozy depth. Furthermore, consider serving them warm with a pat of honey butter or a simple vanilla glaze for extra indulgence. For another fantastic way to use similar flavors, this cranberry orange bread recipe offers more inspiration. Get creative and make these muffins your own.

Tips for Success

Best practices for results

Always use fresh cranberries for the best tart flavor and texture in your Cranberry Orange Muffins. Furthermore, zest your orange directly into the sugar and rub them together; this technique releases the citrus oils for a more intense flavor. Meanwhile, avoid overmixing the batter; simply fold the ingredients until they are just combined for a tender crumb. Finally, use a cookie scoop to evenly distribute the batter into the liners, which ensures your muffins bake uniformly.

Mistakes to avoid

A common mistake is using dried cranberries without rehydrating them, which can result in a chewy, overly sweet muffin. Instead, quickly plump them in some orange juice beforehand for a juicier burst of flavor. Additionally, many bakers overfill their muffin tins, causing the batter to spill over and create a mess. For perfect domes every time, fill each liner only two-thirds of the way full, a technique we detail in our guide on how to get domed muffin tops. Also, do not skip the important step of testing for doneness with a toothpick, as underbaked muffins will sink. If you are new to baking, our resource on common baking mistakes and fixes can help you troubleshoot other issues.

Serving and Pairing Suggestions

How to serve this dish

Present your freshly baked Cranberry Orange Muffins on a beautiful rustic wooden board for a charming, homespun feel. Alternatively, arrange them in a classic muffin basket lined with a crisp linen napkin. For a special touch, dust them with a light snowfall of powdered sugar just before your guests arrive. These muffins truly shine during holiday brunches or as a bright start to a weekend morning. Serve them warm to maximize the comforting aroma and the delightful contrast of the tart cranberries and sweet citrus. Finally, consider adding a simple garnish of fresh orange zest or a few whole cranberries on the side of the plate for a pop of color.

What goes well with it

A hot cup of coffee perfectly cuts through the sweetness of these Cranberry Orange Muffins, creating a classic and satisfying pairing. For a truly decadent brunch spread, serve them alongside a plate of our fluffy Classic French Toast. The creamy, custardy toast complements the muffin’s fruity zest. Moreover, a simple, tangy yogurt parfait offers a lighter, protein-rich side that balances the meal. If you prefer a tea party, these muffins also pair wonderfully with a pot of Earl Grey tea. For another fantastic brunch option, try our savory Hearty Breakfast Casserole to create a delightful balance of sweet and savory flavors on your table.

Can I use frozen cranberries for Cranberry Orange Muffins?

Yes, you can absolutely use frozen cranberries. There’s no need to thaw them first; simply toss the frozen cranberries in a little flour to prevent them from sinking to the bottom of the muffin batter. Using frozen cranberries helps keep them intact and prevents them from bleeding too much color into your batter.

What is a good glaze for Cranberry Orange Muffins?

A simple orange glaze is the perfect finishing touch for Cranberry Orange Muffins. Whisk together fresh orange juice and powdered sugar until you achieve a drizzle-able consistency. For an extra burst of flavor, add a teaspoon of orange zest to the glaze.

How do you keep muffins moist and fluffy?

The key to moist and fluffy muffins is to avoid overmixing the batter. Mix the wet and dry ingredients together just until they are combined, even if a few lumps remain. Overmixing develops gluten, which leads to a tough, dense texture instead of the light crumb you want in your Cranberry Orange Muffins.

Can you make Cranberry Orange Muffins ahead of time?

Yes, you can make these muffins ahead of time. They store beautifully in an airtight container at room temperature for 2-3 days. For longer storage, freeze the cooled muffins in a freezer-safe bag for up to 3 months; just thaw at room temperature when you’re ready to enjoy.

Best Pumpkin Muffins Recipe for Breakfast

best-pumpkin-muffins-breakfast-recipe

Is there anything cozier than the warm, spiced aroma of pumpkin muffins wafting through your kitchen on a crisp morning? That first tender, moist bite alongside your coffee feels like a hug from the inside, transforming a regular breakfast into a moment of pure comfort. We all crave those simple, soul-satisfying rituals, and today, I am thrilled to share what I genuinely believe is The Best Pumpkin Muffins Recipe for Breakfast. This isn’t just another recipe; it’s your new secret weapon for creating joyful mornings and filling your home with the quintessential scent of fall.

About This Recipe

So, what exactly makes this The Best Pumpkin Muffins Recipe for Breakfast? Fundamentally, it is a perfectly balanced formula that delivers a bakery-style muffin with a delightfully domed top and an incredibly soft, moist crumb. Importantly, we achieve this without any complicated steps or mysterious ingredients. Conversely, this recipe matters because it turns a mundane meal into a special occasion. Furthermore, a great breakfast muffin fuels your day with energy and warmth, making those early alarms slightly more bearable. Additionally, this recipe fits our blog’s tone perfectly because we champion approachable baking that delivers impressive, reliable results every single time. You will find that these muffins strike an ideal harmony of warm spices like cinnamon and nutmeg with the rich, earthy flavor of pure pumpkin. Moreover, they are incredibly versatile; you can enjoy them plain, add a handful of chocolate chips, or top them with a simple streusel for extra crunch. Ultimately, this recipe empowers you to create a homemade treat that far surpasses any dry, store-bought alternative. For more morning inspiration, explore our collection of easy breakfast pastries that are sure to please the whole family. Remember, the key to success lies in using quality ingredients, so be sure to check your pantry against our essential baking ingredients guide before you begin.

Why I Love This Recipe

I personally adore this recipe because it is deeply intertwined with my own family’s autumn traditions. Every year, as soon as the leaves begin to change, my daughter and I make a batch of these pumpkin muffins together. I truly love how the simple act of mixing the batter creates a space for us to connect and laugh amidst our busy schedules. The smell instantly transports me back to my grandmother’s kitchen, and now I get to pass that same feeling of warmth and nostalgia on to the next generation. This recipe consistently delivers perfection, and that reliability brings me so much joy and confidence in the kitchen.

Health and Nutrition

Why it’s good for your body

This Best Pumpkin Muffins Recipe for Breakfast offers a powerful nutritional punch to start your day. Primarily, pumpkin puree provides a fantastic dose of vitamin A, which actively supports healthy vision and a strong immune system. Furthermore, the warming spices like cinnamon and nutmeg do more than just add flavor; they also deliver potent antioxidants that fight inflammation.

Additionally, these muffins can provide a more sustained energy release compared to many sugary breakfast options. Consequently, you avoid the dreaded mid-morning crash and stay fuller for longer. Moreover, if you prepare The Best Pumpkin Muffins Recipe for Breakfast with whole wheat flour, you significantly increase the fiber content, which is excellent for digestive health.

Ultimately, choosing this recipe means you are treating your body to essential vitamins and minerals in a delicious package. You also benefit from the healthy fats, often from sources like coconut oil or nuts, which are crucial for brain function. Therefore, every bite of The Best Pumpkin Muffins Recipe for Breakfast actively contributes to your overall well-being.

How it fits in a healthy lifestyle

This pumpkin muffin recipe perfectly aligns with a balanced and mindful eating approach. You can easily tailor the ingredients to meet specific dietary needs, such as using a gluten-free flour blend for a celiac-friendly version or a sugar substitute for a lower-glycemic option. They are a fantastic make-ahead breakfast solution, ensuring you have a wholesome grab-and-go option on busy mornings that beats a processed pastry any day.

Enjoying one of these muffins with a side of Greek yogurt or a handful of nuts creates a complete meal that balances carbohydrates with protein and healthy fats. This combination is ideal for managing energy levels and keeping hunger at bay. For more inspiration on building a nutritious morning routine, explore our guide on healthy breakfast meal prep. Remember, a healthy lifestyle is all about inclusion, not exclusion. Baking a batch of these muffins allows you to enjoy a sweet treat while still nourishing your body. If you are looking for other ways to incorporate wholesome ingredients into your desserts, our baking with whole grains article offers great tips and recipes.

Print
clock clock iconcutlery cutlery iconflag flag iconfolder folder iconinstagram instagram iconpinterest pinterest iconfacebook facebook iconprint print iconsquares squares iconheart heart iconheart solid heart solid icon

The Best Pumpkin Muffins


  • Author: Chef Emy

Description

Moist and flavorful pumpkin muffins with warm spices, perfect for a cozy breakfast or snack.


Ingredients

Scale

For the Crust:

  • 1 3/4 cups all-purpose flour
  • 1 cup granulated sugar
  • 1/2 cup brown sugar
  • 1 teaspoon baking soda
  • 1/2 teaspoon salt
  • 2 teaspoons pumpkin pie spice
  • 2 large eggs
  • 1 cup canned pumpkin puree
  • 1/2 cup vegetable oil
  • 1/3 cup water
  • 1 teaspoon vanilla extract

Instructions

1. Prepare the Crust:

  1. Preheat oven to 350°F (175°C) and line a muffin tin with paper liners.
  2. In a large bowl, whisk together flour, granulated sugar, brown sugar, baking soda, salt, and pumpkin pie spice.
  3. In another bowl, beat eggs, then mix in pumpkin puree, vegetable oil, water, and vanilla extract.
  4. Pour wet ingredients into dry ingredients and stir until just combined (do not overmix).
  5. Divide batter evenly among muffin cups, filling each about 3/4 full.
  6. Bake for 20-25 minutes or until a toothpick inserted comes out clean. Cool in pan for 5 minutes before transferring to a wire rack.

Notes

You can customize the seasonings to taste.

How to Prepare This Dish

Steps and time-saving tips

First, preheat your oven to 375°F and line your muffin tin with papers. Meanwhile, whisk your wet ingredients. Grab a large bowl and vigorously mix the pumpkin puree, eggs, oil, and sugar until the mixture looks perfectly smooth and creamy. In a separate bowl, whisk the flour, baking soda, warm spices, and a pinch of salt. Next, gently fold the dry ingredients into the wet batter; however, be careful not to overmix. A few lumps are totally fine and will guarantee a tender crumb. For a quick upgrade, stir in a handful of chocolate chips or chopped pecans. Then, use an ice cream scoop to evenly divide the batter among the muffin cups. Consequently, this ensures they all bake at the same rate. Finally, pop them in the oven for about 20 minutes. You will know they are done when a toothpick inserted into the center comes out clean. Let them cool in the pan for just five minutes before moving them to a wire rack. Ultimately, this prevents them from getting soggy.

Mistakes I’ve made and learned from

I have definitely learned a few lessons the hard way with this recipe. Initially, I would overmix the batter in a rush, which resulted in dense, tough muffins instead of the light, fluffy texture we all love. Now, I mix by hand just until the flour disappears. Another common error was using outdated baking soda; my first batch barely rose, creating sad, flat muffins. I always check the freshness of my leavening agents now. Forgetting to properly measure my flour was another culprit. I used to scoop directly from the bag, which packs in too much flour and leads to dry muffins. I finally invested in a simple kitchen scale for accuracy, and the difference is incredible. For more on getting those measurements just right, check out my guide on baking ingredients conversions. And if you’re wondering what to serve alongside your perfect bake, my post on perfect coffee pairings has some fantastic ideas.

Cultural Connection and Variations

Where this recipe comes from

My quest for The Best Pumpkin Muffins Recipe for Breakfast began in my grandmother’s kitchen, where the scent of warming spices and roasted pumpkin meant autumn had truly arrived. She never used a can, instead roasting sugar pumpkins from her garden. This practice connects the dish to harvest traditions around the world. For instance, many European cultures bake dense, spiced pumpkin breads, while in Australia, pumpkin often finds its way into savory scones and damper bread.

Furthermore, families everywhere add their own signature twist. Some bakers fold in chocolate chips or nuts for texture. Others might swirl a cream cheese ribbon through the batter for a decadent touch. My aunt always adds a handful of old-fashioned oats to the streusel topping for extra crunch. Ultimately, this versatility makes the humble pumpkin muffin a global comfort food. Finding your own version of The Best Pumpkin Muffins Recipe for Breakfast becomes a personal autumn ritual.

How it fits in today’s cooking

This recipe absolutely thrives in modern kitchens. Busy home cooks appreciate that they can whip up a batch quickly for a wholesome, on-the-go breakfast. Moreover, these muffins fit perfectly into meal prep routines, freezing beautifully for a ready-made treat any day of the week. Their warm spices and cozy aroma also make them a non-negotiable part of many family’s holiday and seasonal gatherings.

Today, bakers often adapt the recipe to suit dietary needs, easily creating gluten-free or vegan versions without losing any flavor. They pair wonderfully with your morning coffee or can serve as a sweet ending to a fall dinner. If you love the cozy feeling these muffins bring, you might also enjoy our other seasonal favorites. For another delicious way to start your day, explore our popular collection of healthy breakfast ideas. And if you find yourself with extra pumpkin puree, consider baking a classic pumpkin pie to continue the autumn celebration.

Taste and Texture

What makes it delicious

These pumpkin muffins deliver a wonderfully moist and tender crumb that simply melts in your mouth. Warm baking spices like cinnamon and nutmeg create a fragrant, cozy aroma that fills your kitchen. Furthermore, the rich, earthy sweetness of pure pumpkin puree shines through in every bite. Consequently, you experience a symphony of autumnal flavors in The Best Pumpkin Muffins Recipe for Breakfast. Finally, a subtle textural surprise comes from the optional chocolate chips or nuts, adding a delightful contrast to the soft cake.

Boosting the flavor

You can easily amplify these muffins with a few creative twists. For instance, try swirling a creamy cheesecake filling into the batter before baking for a decadent surprise. Alternatively, a simple cinnamon streusel topping adds a delightful crunch and extra spice. Moreover, consider serving them warm with a dollop of our fluffy homemade whipped cream for a truly special treat. For another delicious pairing, a glass of our rich spiced hot chocolate complements the warm pumpkin flavors perfectly. Therefore, do not hesitate to get creative and make The Best Pumpkin Muffins Recipe for Breakfast uniquely yours.

Tips for Success

Best practices for results

First, always use room temperature ingredients for a smooth, even batter that bakes uniformly. Furthermore, do not overmix the batter; instead, gently fold the wet and dry ingredients until they just combine. For the best texture, use an ice cream scoop to fill the muffin liners evenly. Always check for doneness a minute or two before the timer goes off, as oven temperatures can vary. Ultimately, following these steps guarantees you will master The Best Pumpkin Muffins Recipe for Breakfast.

Mistakes to avoid

A common error is overfilling the muffin cups, which consequently causes messy overflow and uneven baking. Instead, fill each liner only two-thirds full for the perfect dome. Additionally, avoid packing your flour into the measuring cup, as this mistake leads to dense, dry muffins. For accurate results, always spoon and level your flour. Remember that opening the oven door too early can cause your muffins to collapse, so resist the urge until the end of the bake time. If you are unsure about your leavening agents, check their freshness since expired baking soda will prevent your muffins from rising properly. For more guidance on this, our guide on baking soda vs baking powder is a great resource. Moreover, do not skip lining your pan with papers, as this simple step prevents sticking and makes cleanup a breeze, a tip we also cover in our essential baking tools article.

Serving and Pairing Suggestions

How to serve this dish

Serve The Best Pumpkin Muffins Recipe for Breakfast warm for the ultimate cozy experience. Furthermore, arrange them on a beautiful wooden board or a vintage cake stand for a rustic, inviting look. A light dusting of powdered sugar or a simple drizzle of vanilla glaze instantly elevates them for a holiday brunch or special occasion. Finally, always offer a pat of softened butter or cream cheese on the side for your guests to slather on their fresh-from-the-oven muffin.

What goes well with it

A hot mug of coffee perfectly cuts through the warm spices in The Best Pumpkin Muffins Recipe for Breakfast. Alternatively, a cold glass of milk provides a classic, creamy contrast that everyone loves. For a complete morning feast, pair your muffin with a side of savory protein like our hearty Breakfast Casserole. Moreover, a simple fruit salad or a scoop of our Yogurt Parfait adds a fresh, light element that balances the richness beautifully.

Can I make pumpkin muffins the night before?

Absolutely! The Best Pumpkin Muffins Recipe for Breakfast is perfect for making ahead. Let the muffins cool completely on a wire rack, then store them in an airtight container at room temperature. They will stay moist and delicious, making your morning routine a breeze.

What can I use instead of eggs in pumpkin muffins?

For an egg-free version of The Best Pumpkin Muffins Recipe for Breakfast, you can use a flax egg (1 tbsp ground flaxseed mixed with 3 tbsp water per egg) or a quarter cup of unsweetened applesauce. These substitutes work well to bind the ingredients and maintain the muffins’ signature moist texture.

How do you keep pumpkin muffins from getting soggy?

The key to avoiding soggy muffins is to ensure you are not using too much pumpkin puree and to avoid overmixing the batter. This recipe uses the perfect balance of wet and dry ingredients to create a fluffy, not soggy, crumb. Always allow your muffins to cool completely in the pan on a wire rack so steam can escape.

Are pumpkin muffins healthy for breakfast?

When made with wholesome ingredients, pumpkin muffins can be a nutritious breakfast option. Pumpkin is rich in vitamins and fiber. This particular recipe can be easily adapted by reducing sugar slightly or using whole wheat flour for an even healthier start to your day.

Easy Pumpkin Baked Oatmeal Recipe

easy-pumpkin-baked-oatmeal

Is there anything cozier than the smell of pumpkin spice wafting from your oven on a crisp autumn morning? Honestly, I think not. This easy Pumpkin Baked Oatmeal recipe completely transforms your breakfast routine, turning simple ingredients into a warm, spiced, and incredibly satisfying dish. It feels like a hug in a bowl, offering a healthy yet decadent start to your day. Moreover, it fills your kitchen with an aroma that simply screams fall. Ultimately, this make-ahead wonder means you can enjoy a wholesome, delicious breakfast even on your busiest days, making those hectic mornings just a little bit brighter.

About This Recipe

Pumpkin Baked Oatmeal is essentially a cross between a bowl of classic stovetop oatmeal and a soft, cake-like breakfast bar. Instead of standing over a pot, you simply mix rolled oats with pumpkin puree, warm spices, milk, and a touch of maple syrup before baking it all into one hands-off pan. Consequently, the result is a hearty, nutrient-dense breakfast that you can slice and serve. This dish matters because it solves the perennial problem of wanting a healthy breakfast without the daily morning effort. Furthermore, it is incredibly versatile; you can meal-prep it on a Sunday and have breakfast ready for the entire week. Alternatively, it is impressive enough to serve for a weekend brunch with guests.

This recipe perfectly fits the tone of our blog because we champion food that is both nourishing and deeply comforting. We believe that healthy eating should never feel like a sacrifice, and this Pumpkin Baked Oatmeal is a prime example. It is packed with fiber from the oats and pumpkin, which helps keep you full and focused throughout the morning. Additionally, it is naturally sweetened, making it a fantastic choice for families. If you enjoy this make-ahead breakfast concept, you will absolutely adore our popular Banana Baked Oatmeal for another simple variation. For another seasonal favorite that uses similar warming spices, you must try our Pumpkin Chocolate Chip Cookies for a delightful treat.

Why I Love This Recipe

My connection to this Pumpkin Baked Oatmeal runs deep because it became a weekly ritual during a particularly busy fall. I needed something I could make quickly that would also give me sustained energy for long days of recipe testing and photography. This dish was my saving grace. I love that the process of making it is so therapeutic; mixing the spices into the pumpkin puree is one of my favorite small joys of the season. Most importantly, it reminds me of slow weekend mornings with my family, where we enjoy a big slice warm from the oven with a dollop of yogurt. It is more than just breakfast; it is a cherished part of our autumn tradition.

Health and Nutrition

Why it’s good for your body

This Pumpkin Baked Oatmeal truly nourishes your body from the inside out. First, it delivers a powerful dose of beta-carotene from the pumpkin puree. Your body then converts this into vitamin A, which consequently supports healthy vision and a strong immune system. Moreover, the hearty oats provide a fantastic source of soluble fiber. This fiber actively helps to lower cholesterol levels and also promotes stable blood sugar, keeping you full and satisfied for hours.

Additionally, the warming spices like cinnamon and nutmeg do more than just add flavor. In fact, they offer their own anti-inflammatory and antioxidant properties. Furthermore, eggs or a flax egg alternative contribute high-quality protein, which is essential for building and repairing tissues. Enjoying a serving of this Pumpkin Baked Oatmeal means you are starting your day with sustained energy rather than a sugar crash. Ultimately, this delicious dish combines whole food ingredients that work together to support your overall wellness seamlessly.

How it fits in a healthy lifestyle

This Pumpkin Baked Oatmeal fits perfectly into a balanced and mindful eating pattern. You can easily prepare it ahead of time for a quick, nutritious breakfast that supports busy mornings without resorting to less healthy options. It naturally aligns with a heart-healthy diet thanks to its fiber content and can be modified to be gluten-free by using certified gluten-free oats.

For those focusing on specific goals, this bake is a fantastic vehicle for added protein. Simply stir in a scoop of your favorite protein powder or serve it with a dollop of Greek yogurt. If you are looking for more make-ahead breakfast inspiration that simplifies your routine, explore our guide to easy meal prep breakfast ideas. Furthermore, the wholesome ingredients provide lasting energy, making it an ideal choice for active families. Discover more recipes that the whole crew will love in our collection of family-friendly breakfasts.

Print
clock clock iconcutlery cutlery iconflag flag iconfolder folder iconinstagram instagram iconpinterest pinterest iconfacebook facebook iconprint print iconsquares squares iconheart heart iconheart solid heart solid icon

Pumpkin Baked Oatmeal


  • Author: Chef Emy

Description

A warm and cozy baked oatmeal infused with pumpkin spice flavors, perfect for breakfast or brunch.


Ingredients

Scale

For the Crust:

  • 2 cups rolled oats
  • 1 teaspoon baking powder
  • 1 teaspoon pumpkin pie spice
  • 1/2 teaspoon salt
  • 1 cup pumpkin puree
  • 2 eggs
  • 1/3 cup maple syrup
  • 1 1/2 cups milk
  • 1 teaspoon vanilla extract
  • 1/2 cup chopped pecans

Instructions

1. Prepare the Crust:

  1. Preheat oven to 375°F and grease an 8×8 baking dish.
  2. In a large bowl, mix oats, baking powder, pumpkin pie spice, and salt.
  3. In another bowl, whisk together pumpkin puree, eggs, maple syrup, milk, and vanilla.
  4. Combine wet and dry ingredients, then fold in pecans.
  5. Pour into prepared dish and bake for 30-35 minutes until set.

Notes

You can customize the seasonings to taste.

How to Prepare This Dish

Steps and time-saving tips

First, preheat your oven to 375°F and generously grease your baking dish. This simple step prevents sticking and makes cleanup a breeze. Meanwhile, grab a large bowl and whisk together the pumpkin puree, milk, eggs, maple syrup, and vanilla until the mixture is perfectly smooth. Next, add all your dry ingredients—the oats, warming spices, baking powder, and a pinch of salt. Gently fold everything together until you see no more dry streaks. For a truly special treat, stir in a handful of chocolate chips or chopped pecans. Pour this beautiful batter into your prepared dish and spread it into an even layer. Finally, slide it into the oven and bake for 35 to 40 minutes. The top will turn a lovely golden brown and the edges will pull away slightly. Let your Pumpkin Baked Oatmeal rest for about ten minutes before slicing. This allows it to set beautifully. For a speedy morning, simply prepare the entire mixture the night before and refrigerate it. Then, just pop it in the oven when you wake up!

Mistakes I’ve made and learned from

I have absolutely overbaked this dish more times than I care to admit, turning my dreamy breakfast into a dry brick. I learned the hard way that the magic number is 40 minutes max; it continues to cook as it cools on the counter. Another rookie mistake was using quick oats instead of old-fashioned rolled oats, which resulted in a mushy texture that nobody loved. Now, I always reach for the heartier rolled oats for the perfect bite. Getting the spice balance right was also a journey. Initially, I was too heavy-handed with cloves, completely overpowering the other flavors. Through trial and error, I found that a balanced blend is key, much like the one I use in my favorite Pumpkin Bread recipe. And if you’re looking for another fantastic make-ahead breakfast that always turns out perfectly, my Overnight Oats are a foolproof option. Trust me, learning from these blunders means your Pumpkin Baked Oatmeal will be flawless on the first try.

Cultural Connection and Variations

Where this recipe comes from

Pumpkin Baked Oatmeal feels like a warm hug from autumn itself. Many cultures, however, have their own unique take on warming grain puddings. For instance, people in the UK often enjoy a simpler, less sweet version of baked oats. Meanwhile, German traditions might incorporate more spices like anise or cardamom into their morning dishes. My own family always made this dish for large holiday gatherings. Consequently, the kitchen would fill with the scent of cinnamon and nutmeg long before the sun came up. We always used canned pumpkin for convenience, but some families swear by roasting their own sugar pumpkins for a deeper, caramelized flavor. This simple act connects the dish directly to the harvest. Ultimately, every cook adds their own signature, whether it’s a handful of toasted pecans or a drizzle of maple syrup right before serving. This particular Pumpkin Baked Oatmeal recipe represents that beautiful blend of tradition and personal touch.

How it fits in today’s cooking

Today, this cozy bake fits perfectly into our modern routines. Many people now meal prep it on Sundays for quick, healthy breakfasts all week. Furthermore, it has become a star at holiday brunches and even as a lighter dessert option. Modern cooks love adapting the recipe to suit dietary needs, easily making it gluten-free or vegan. For a different seasonal twist, you might also love our Blueberry Baked Oatmeal during the summer months. This dish truly embodies the spirit of flexible, comforting cooking. It brings people together, much like our favorite Banana Bread Baked Oatmeal does. Therefore, it remains a timeless and versatile recipe for any home cook.

Taste and Texture

What makes it delicious

This Pumpkin Baked Oatmeal greets you with the warm, fragrant aroma of cinnamon and nutmeg. Each spoonful delivers a wonderfully soft and custardy texture, punctuated by the occasional chewy oat. Furthermore, the rich, earthy sweetness of pumpkin puree melds perfectly with the subtle caramel notes from the brown sugar. Ultimately, the dish feels incredibly comforting and satisfying in your mouth, much like a cross between a moist cake and a hearty porridge. You will love the cozy, spiced flavor profile of this Pumpkin Baked Oatmeal.

Boosting the flavor

For an even more decadent experience, immediately top your warm serving with a cold drizzle of our creamy vanilla Greek yogurt sauce. Alternatively, a handful of toasted pecans or walnuts introduces a delightful crunch that contrasts the soft bake. If you adore deeper spice notes, simply add a pinch of ginger or clove to the mix. Moreover, serving it alongside a scoop of freshly made whipped cream transforms it into a true dessert-for-breakfast treat. Finally, a sprinkle of coarse sea salt on top brilliantly enhances all the other flavors.

Tips for Success

Best practices for results

Always use pure pumpkin puree instead of pumpkin pie filling for the best flavor and texture in your Pumpkin Baked Oatmeal. Furthermore, make sure you thoroughly mix the wet and dry ingredients separately before combining them; this guarantees an even distribution of spices. For a perfectly set and sliceable result, let your Pumpkin Baked Oatmeal rest for at least ten minutes after baking. Consequently, you will find it much easier to serve neat portions.

Mistakes to avoid

Avoid overmixing the batter once you combine the wet and dry ingredients, as this can lead to a tough final texture. Instead, gently fold everything together until you just see no more dry streaks of flour. Additionally, do not forget to properly grease your baking dish to prevent the Pumpkin Baked Oatmeal from sticking. For more guidance on selecting the right pan, check out our essential baking pan conversion chart. Moreover, ensure your baking powder is fresh for proper rise; otherwise, your bake might turn out disappointingly dense. If you are unsure about your leavening agents, our guide on finding a baking soda substitute offers great troubleshooting advice.

Serving and Pairing Suggestions

How to serve this dish

For a beautiful presentation, slice your Pumpkin Baked Oatmeal into neat squares. Alternatively, scoop it warm into bowls for a cozy, rustic feel. Immediately top each serving with a dollop of whipped cream or a drizzle of maple syrup for a glossy finish. Furthermore, a sprinkle of toasted pecans or pepitas adds a delightful crunch and makes it look incredibly inviting. This dish truly shines at a holiday brunch or a festive weekend breakfast. Ultimately, its warm spices and comforting aroma make any morning feel special.

What goes well with it

A hot cup of coffee perfectly cuts through the sweetness of Pumpkin Baked Oatmeal. Alternatively, a cold glass of milk provides a classic, creamy contrast that everyone loves. For a complete breakfast spread, consider serving it alongside some savory items. For instance, our fluffy Classic Scrambled Eggs create a wonderful balance of flavors on the plate. Moreover, a side of crispy Air Fryer Bacon introduces a salty, smoky element that complements the warm pumpkin spices beautifully.

Is baked oatmeal good for meal prep?

Yes, Pumpkin Baked Oatmeal is an excellent meal prep option. It holds up well in the refrigerator for up to 5 days and reheats beautifully. You can enjoy a warm, satisfying breakfast all week with minimal morning effort.

Can you freeze baked oatmeal?

Absolutely, you can freeze Pumpkin Baked Oatmeal for up to 3 months. Simply cut the baked dish into individual portions, wrap them tightly in plastic wrap or place them in airtight containers, and thaw in the refrigerator overnight before reheating.

Can I use quick oats instead of old fashioned for baked oatmeal?

While old-fashioned rolled oats provide the best texture, you can use quick oats in a pinch for your Pumpkin Baked Oatmeal. The result may be slightly softer and less chewy, so consider reducing the baking time by a few minutes to prevent it from drying out.

Why is my baked oatmeal dry?

Dry Pumpkin Baked Oatmeal is often caused by overbaking or using too many oats relative to the wet ingredients. Ensure you accurately measure your ingredients and check for doneness a few minutes before the timer goes off—it’s ready when the center is just set.

Easy Pumpkin Pie Overnight Oats Recipe

easy-pumpkin-pie-overnight-oats

Do you ever wake up craving the warm, spiced comfort of pumpkin pie but know you simply don’t have the time to bake one? You are certainly not alone. Mornings are hectic, and yet, we all deserve a breakfast that feels like a cozy hug. Fortunately, this dream is completely achievable with a little prep the night before. These Pumpkin Pie Overnight Oats deliver that iconic dessert flavor in a wholesome, make-ahead jar. They transform your rushed morning into a moment of pure, autumnal bliss, proving that a healthy start can also be an indulgent treat.

About This Recipe

Pumpkin Pie Overnight Oats are a no-cook breakfast solution where rolled oats soak overnight in a creamy mixture of milk, pumpkin puree, and pumpkin pie spices. This process softens the oats beautifully, creating a pudding-like consistency that is both satisfying and delicious. Essentially, you prepare your entire breakfast in just a few minutes before bed, and by morning, it is perfectly chilled and ready to eat. This method matters immensely for anyone with a busy schedule because it eliminates morning decision fatigue and ensures you fuel your day with a nutritious choice. Furthermore, this recipe captures the essence of fall in a jar, making it a seasonal favorite that celebrates wholesome ingredients.

Our blog focuses on recipes that are both approachable and transformative, and this one fits that tone perfectly. It takes a classic flavor combination and reimagines it for a practical, modern lifestyle. You do not need any special equipment or advanced culinary skills. In fact, if you enjoy our popular Classic Overnight Oats, you will adore this seasonal twist. The beauty of this dish lies in its versatility; you can easily adjust the sweetness or spice level to match your personal preference. Ultimately, it is a testament to how simple ingredients can create something truly extraordinary, much like our beloved Vegan Pumpkin Bread.

Why I Love This Recipe

I have a deep personal connection to this particular jar of Pumpkin Pie Overnight Oats. It reminds me of crisp Saturday mornings when the entire house would smell like my grandmother’s baking. While I love the tradition, I rarely have hours to spend on a from-scratch pie. This recipe gives me that nostalgic taste of cinnamon, nutmeg, and pumpkin without any of the fuss. I love knowing that I am starting my day with real food that powers me through, and the joy of opening that jar never gets old. It feels like a small act of self-care that makes the whole day better.

Health and Nutrition

Why it’s good for your body

Starting your day with Pumpkin Pie Overnight Oats delivers a powerful nutritional punch. For instance, the pumpkin puree provides a hefty dose of vitamin A, which actively supports your immune system and vision. Moreover, the oats serve as an excellent source of soluble fiber, specifically beta-glucan. Consequently, this fiber helps to lower cholesterol levels and promotes a feeling of fullness that can curb mid-morning snacking.

Additionally, the warming spices like cinnamon and nutmeg do more than just add flavor. In fact, they offer their own anti-inflammatory and antioxidant properties. Therefore, this meal actively fights oxidative stress in your body. Furthermore, if you prepare your Pumpkin Pie Overnight Oats with Greek yogurt or a milk of your choice, you also get a satisfying protein boost for sustained energy. Ultimately, this delicious combination of complex carbs, fiber, and protein makes for a truly balanced and beneficial breakfast.

Finally, you can feel great about enjoying a dessert-like treat that genuinely nourishes you from within. Indeed, this particular recipe transforms classic fall flavors into a wholesome morning ritual. So, by choosing Pumpkin Pie Overnight Oats, you actively invest in your well-being without sacrificing an ounce of taste.

How it fits in a healthy lifestyle

This recipe seamlessly fits into a balanced and mindful eating pattern. It’s a fantastic make-ahead option for busy mornings, eliminating the temptation to grab a less healthy, processed breakfast on the go. You can easily tailor your Pumpkin Pie Overnight Oats to meet specific dietary needs; simply use certified gluten-free oats to make it celiac-friendly.

For those focused on heart health, the soluble fiber from the oats actively works to manage cholesterol. If you’re looking for more ways to incorporate wholesome ingredients into your routine, explore our guide to selecting the best healthy breakfast ingredients. The versatility of this dish means you can adjust the sweetness to your preference, supporting a goal of reducing added sugars. It’s a satisfying choice that provides long-lasting fuel, whether you’re heading to the office or fitting in a morning workout. For more inspiration on creating balanced meals that support an active life, check out our tips for efficient meal prep for busy weeks.

Print
clock clock iconcutlery cutlery iconflag flag iconfolder folder iconinstagram instagram iconpinterest pinterest iconfacebook facebook iconprint print iconsquares squares iconheart heart iconheart solid heart solid icon

Pumpkin Pie Overnight Oats


  • Author: Chef Emy

Description

A creamy, spiced pumpkin overnight oats recipe that tastes like dessert but makes a perfect healthy breakfast.


Ingredients

Scale

For the Crust:

  • 1/2 cup rolled oats
  • 1/2 cup milk of choice
  • 1/4 cup pumpkin puree
  • 1 tablespoon maple syrup
  • 1/2 teaspoon pumpkin pie spice
  • Pinch of salt
  • 1 tablespoon chia seeds
  • Optional toppings: whipped cream, pecans, extra cinnamon

Instructions

1. Prepare the Crust:

  1. Combine oats, milk, pumpkin puree, maple syrup, pumpkin pie spice, salt, and chia seeds in a jar or container.
  2. Stir well until all ingredients are fully combined and no dry spots remain.
  3. Cover and refrigerate for at least 4 hours or overnight. Stir before serving and add desired toppings.

Notes

You can customize the seasonings to taste.

How to Prepare This Dish

Steps and time-saving tips

First, grab a large mixing bowl and a sturdy whisk. Combine your rolled oats, pumpkin puree, milk, and maple syrup directly in the bowl. Whisk everything together until you achieve a perfectly smooth and uniform consistency. Next, sprinkle in your warm pumpkin pie spices like cinnamon, ginger, and a pinch of nutmeg. Stir the spices in thoroughly so they distribute evenly throughout the mixture. For the creamiest texture, I always recommend using full-fat canned coconut milk or whole milk. Meanwhile, divide your base mixture evenly between your jars or containers. Seal the containers tightly and immediately place them in the refrigerator. Let your Pumpkin Pie Overnight Oats chill for at least six hours, though overnight is truly best. In the morning, give the oats a good stir to fluff them up. Finally, top your creation with crunchy pecans, a dollop of Greek yogurt, or an extra drizzle of maple syrup for a fantastic breakfast.

Mistakes I’ve made and learned from

I have definitely learned a few lessons the hard way with this recipe. Initially, I used quick oats instead of old-fashioned rolled oats, and the result was a disappointingly mushy texture that lacked any satisfying bite. Now I know that using the right type of oat is non-negotiable for the perfect consistency. Another common error I made was not mixing the ingredients thoroughly enough. I would find little pockets of dry, clumpy spices the next morning, which was a real letdown. To avoid this, I whisk my liquid ingredients and spices together first before adding the oats, a technique I picked up from my quest for perfect oatmeal texture. Also, do not skip the salt! A tiny pinch truly makes all the warm flavors pop and prevents your Pumpkin Pie Overnight Oats from tasting flat. For more guidance on balancing flavors, my post on choosing the right natural sweetener was a total game-changer for me.

Cultural Connection and Variations

Where this recipe comes from

My grandmother always started her Thanksgiving baking days before the holiday. Consequently, her kitchen would fill with the warm, spiced aroma of pumpkin pie. However, she never had time for a proper breakfast. Honestly, we all just sampled pie filling straight from the bowl. This Pumpkin Pie Overnight Oats recipe channels that exact feeling of cozy, spiced comfort but in a form you can actually enjoy at sunrise. Meanwhile, across different regions, people interpret this concept uniquely. For instance, in the South, cooks might add a generous pinch of pecans for a praline twist. Alternatively, some Midwestern families stir in a dollop of apple butter for extra autumnal depth. My own version honors my grandma’s classic spice blend. Ultimately, this dish transforms a beloved dessert tradition into a nourishing morning ritual. This particular Pumpkin Pie Overnight Oats recipe feels like a hug in a jar, connecting generations through a single, familiar flavor.

How it fits in today’s cooking

This recipe perfectly suits our modern need for make-ahead, nutritious meals. Furthermore, it lets us carry cherished holiday flavors throughout the entire fall season. Busy home cooks now constantly adapt it for their dietary needs, often swapping dairy for almond or oat milk. You can easily find more inspiration for these healthy morning routines in our guide to meal prep breakfast ideas. Moreover, this dish fits seamlessly into everything from hectic weekday mornings to leisurely weekend brunches. It truly embodies the spirit of flexible, comfort cooking. For a different but equally delicious seasonal twist, many people also enjoy our popular apple cinnamon overnight oats. Ultimately, this simple jar of joy proves that tradition and convenience can deliciously coexist on your spoon.

Taste and Texture

What makes it delicious

This Pumpkin Pie Overnight Oats recipe delivers a creamy, spiced experience that feels like a decadent dessert. Each spoonful offers a velvety smooth texture from the soaked oats, punctuated by the gentle chew of plump raisins or a crunchy pecan topping. The warm fragrance of cinnamon and nutmeg instantly evokes cozy autumn mornings. Furthermore, the rich pumpkin puree provides a subtly sweet and earthy base that perfectly balances the warm spices. Ultimately, this combination creates a truly satisfying and delicious bowl of Pumpkin Pie Overnight Oats.

Boosting the flavor

For an even more indulgent experience, consider a few simple tweaks. First, swap the milk for canned coconut milk to introduce a luxurious, tropical richness that complements the pumpkin beautifully. Then, right before serving, drizzle a tablespoon of maple syrup or a dollop of our homemade whipped cream over the top. Additionally, a sprinkle of toasted coconut flakes or dark chocolate chips adds wonderful contrasting texture. If you love a stronger spice profile, a pinch of ginger or clove will deepen the warm flavors immensely. For another fantastic make-ahead breakfast that uses similar warming spices, our cinnamon chia pudding offers a great alternative. Finally, always taste your creation after it sets and adjust the sweetness to your personal preference.

Tips for Success

Best practices for results

First, always use pure pumpkin puree for your Pumpkin Pie Overnight Oats, not pumpkin pie filling, to control the sweetness perfectly. Furthermore, thoroughly whisk your wet ingredients together in a separate bowl before combining them with the oats; this crucial step ensures a silky, lump-free texture. For the most authentic spice flavor, consider toasting your spices gently in a dry pan before adding them. Finally, you must allow your mixture to chill for a full eight hours, as this time is essential for the oats to properly soften and absorb all the wonderful flavors.

Mistakes to avoid

A common error involves using quick-cook oats instead of old-fashioned rolled oats; consequently, your breakfast will turn out mushy. For the ideal creamy yet chewy texture, always choose old-fashioned oats. Additionally, do not skip the salt, as it is vital for balancing the sweetness and enhancing the warm spices in your Pumpkin Pie Overnight Oats. Many people also forget to give the mixture a good stir after taking it from the fridge; however, this simple action redistributes the moisture for a consistently delicious result. If you find your mixture too thick, simply stir in a splash of milk, a technique we also recommend for our Classic Overnight Oats. For more guidance on selecting the right base for your creations, explore our tips on Choosing the Best Yogurt.

Serving and Pairing Suggestions

How to serve this dish

Impress your family with beautiful presentations of Pumpkin Pie Overnight Oats. For instance, layer them in a clear glass or mason jar to showcase the creamy texture and festive colors. Furthermore, top each serving with a dollop of whipped cream, a sprinkle of cinnamon, and a few toasted pecans for a perfect holiday brunch centerpiece. Alternatively, serve these oats in small cups for a delightful and portable breakfast option during a busy autumn morning.

What goes well with it

A hot cup of coffee makes an ideal companion for Pumpkin Pie Overnight Oats. The robust bitterness of the brew beautifully cuts through the sweet, spiced creaminess of the oats. For a heartier brunch spread, consider adding a side of savory items. Specifically, our fluffy Classic Fluffy Pancakes create a wonderful sweet and savory balance on your plate. Finally, complete your autumn feast with a refreshing beverage. A glass of our freshly made Spiced Apple Cider complements the warm pumpkin pie spices perfectly.

Can you use canned pumpkin for overnight oats?

Yes, canned pumpkin puree is perfect for Pumpkin Pie Overnight Oats. It provides a smooth texture and concentrated flavor. Just make sure you use 100% pure pumpkin puree, not pumpkin pie filling, which has added sugars and spices.

How long do pumpkin overnight oats last?

Properly stored in an airtight container in the refrigerator, your Pumpkin Pie Overnight Oats will stay fresh for up to 4-5 days. This makes them an excellent option for preparing a healthy breakfast for the entire workweek ahead.

Do you eat overnight oats hot or cold?

Overnight oats are traditionally eaten cold straight from the fridge, as the name implies. However, if you prefer a warm breakfast, you can gently heat your Pumpkin Pie Overnight Oats in the microwave for 60-90 seconds, stirring halfway through.

What is the best liquid for overnight oats?

Dairy milk or unsweetened almond milk are the most popular choices, as they create a creamy base that complements the pumpkin and spices. For the richest and most authentic flavor in your Pumpkin Pie Overnight Oats, some recipes also incorporate a splash of canned coconut milk.

Best Tropical Pineapple Banana Smoothie Delight Recipe

best-pineapple-banana-smoothie-recipe

“`html

Introduction

There’s something magical about blending fresh fruit into a creamy, refreshing smoothie—especially when it tastes like a tropical vacation in a glass. If you’re craving a burst of sunshine, this Tropical Pineapple Banana Smoothie Delight is your ticket to paradise. Whether you need a quick breakfast, a post-workout refresher, or just a sweet escape from the everyday, this recipe delivers vibrant flavor and nourishing goodness in every sip. Plus, it’s so easy to make, you’ll wonder why you haven’t been blending it up all along. Let’s dive into what makes this smoothie so special and why it’s about to become your new favorite.

About This Recipe

The Tropical Pineapple Banana Smoothie Delight is a creamy, dreamy blend of ripe bananas, juicy pineapple, and a splash of coconut milk for that irresistible tropical twist. Not only does it taste like a dessert, but it also packs a nutritious punch with vitamins, fiber, and natural energy-boosting sugars. Perfect for busy mornings or lazy afternoons, this smoothie fits seamlessly into any routine. If you love easy, healthy recipes that don’t skimp on flavor, you’ll adore this one. For more inspiration, check out our healthy smoothie recipes or explore our quick breakfast ideas for more fast and delicious options.

What sets this smoothie apart is its versatility. You can customize it with add-ins like chia seeds, spinach, or protein powder without losing that tropical vibe. It’s also a fantastic way to use up overripe bananas—no more tossing them out. The blog’s tone is all about approachable, wholesome recipes that make healthy eating feel effortless, and this smoothie nails that balance. Whether you’re a smoothie pro or a first-time blender, you’ll find this recipe as simple as it is satisfying.

Why I Love This Recipe

This Tropical Pineapple Banana Smoothie Delight holds a special place in my heart because it reminds me of summer mornings with my family. My mom used to whip up a similar version when I was a kid, and the smell of fresh pineapple instantly transports me back to those lazy, sun-drenched days. Now, I make it for my own kids, and watching their faces light up with the first sip brings me so much joy. It’s more than just a recipe—it’s a little moment of happiness in a glass, and I hope it becomes a cherished part of your routine too.

“`

Health and Nutrition

Why it’s good for your body

Packed with vitamins and natural sweetness, Tropical Pineapple Banana Smoothie Delight offers a delicious way to fuel your body. First, pineapple delivers a hefty dose of vitamin C, which boosts immunity and supports skin health. Meanwhile, bananas provide potassium, a key nutrient for maintaining healthy blood pressure and muscle function. Together, these ingredients make Tropical Pineapple Banana Smoothie Delight a powerhouse of essential nutrients.

Additionally, this smoothie contains digestive-friendly enzymes like bromelain from pineapple. These enzymes help break down proteins and ease digestion, making Tropical Pineapple Banana Smoothie Delight a great post-workout or morning pick-me-up. Furthermore, the natural sugars in the fruit offer quick energy without the crash that comes from processed sweets. Whether you need a refreshing snack or a nutrient-dense breakfast, this smoothie delivers.

Finally, the combination of fiber from bananas and hydration from pineapple promotes gut health and keeps you feeling full longer. Because it’s rich in antioxidants, Tropical Pineapple Banana Smoothie Delight also helps combat inflammation. With every sip, you’re treating your body to a blend of flavors and benefits that support overall wellness.

How it fits in a healthy lifestyle

Tropical Pineapple Banana Smoothie Delight fits seamlessly into a balanced diet, whether you’re aiming for weight management or simply eating cleaner. Its natural ingredients align with gluten-free and dairy-free lifestyles, making it versatile for various dietary needs. For those focused on heart health, the potassium-rich bananas and anti-inflammatory pineapple work together to support cardiovascular wellness.

If you’re meal prepping or need a quick breakfast, this smoothie pairs perfectly with overnight oats for a fiber-packed start to your day. It’s also an excellent post-workout option when paired with a high-protein snack to refuel muscles. The simplicity of blending fresh fruit means you can enjoy Tropical Pineapple Banana Smoothie Delight even on busy mornings, keeping your nutrition goals on track without sacrificing flavor.

Print
clock clock iconcutlery cutlery iconflag flag iconfolder folder iconinstagram instagram iconpinterest pinterest iconfacebook facebook iconprint print iconsquares squares iconheart heart iconheart solid heart solid icon

Tropical Pineapple Banana Smoothie Delight


  • Author: Chef Emy

Description

A refreshing and creamy smoothie packed with tropical flavors of pineapple and banana, perfect for a quick breakfast or snack.


Ingredients

Scale

For the Crust:

  • 1 cup fresh pineapple chunks
  • 1 ripe banana
  • 1/2 cup Greek yogurt
  • 1/2 cup coconut milk
  • 1 tbsp honey
  • 1/2 cup ice cubes

Instructions

1. Prepare the Crust:

  1. Add pineapple chunks, banana, Greek yogurt, coconut milk, and honey to a blender.
  2. Blend on high speed until smooth and creamy.
  3. Add ice cubes and blend again until smooth. Serve immediately.

Notes

You can customize the seasonings to taste.

How to Prepare This Dish

Steps and time-saving tips

Start by gathering all your ingredients for the Tropical Pineapple Banana Smoothie Delight—fresh pineapple chunks, ripe bananas, Greek yogurt, coconut milk, and a handful of ice cubes. First, peel and slice the bananas into small pieces for easier blending. Next, toss the pineapple chunks into the blender, followed by the banana slices. Add a generous scoop of Greek yogurt for creaminess, then pour in the coconut milk for a tropical twist. Finally, drop in the ice cubes to chill the smoothie instantly. Blend everything on high speed until the mixture turns silky smooth, which usually takes about 30 seconds. If the consistency feels too thick, drizzle in a splash of coconut milk or water to thin it out. Pour the Tropical Pineapple Banana Smoothie Delight into tall glasses and serve immediately for the freshest taste. To save time, prep your pineapple and banana the night before and store them in the fridge. This way, you can whip up this refreshing drink in under five minutes.

Mistakes I’ve made and learned from

When I first made the Tropical Pineapple Banana Smoothie Delight, I underestimated the importance of ripe bananas. Using underripe ones left the smoothie bland and starchy instead of sweet and creamy. Now, I always check for bananas with plenty of brown spots—they blend better and add natural sweetness. Another mistake? Overloading the blender with ice, which watered down the flavors. I learned to start with just a few cubes and adjust as needed. If you’re new to smoothies, my guide on choosing the right blender can help avoid common blending pitfalls. Also, don’t skip the Greek yogurt—it adds protein and richness, as I discovered after testing alternatives in my smoothie texture experiments. Trust me, these small tweaks make a big difference!

Cultural Connection and Variations

Where this recipe comes from

The Tropical Pineapple Banana Smoothie Delight feels like a sip of sunshine, and its roots trace back to the vibrant flavors of the tropics. Originally inspired by Caribbean and Hawaiian fruit blends, this smoothie celebrates the natural sweetness of ripe pineapples and bananas, which grow abundantly in these regions. Locals often pair them with coconut milk or yogurt for extra creaminess, creating a refreshing treat perfect for hot days.

Meanwhile, in South America, you might find a similar smoothie with a twist—think a dash of lime juice or a sprinkle of chili powder for a tangy kick. Even in my own family, we’ve put our spin on the Tropical Pineapple Banana Smoothie Delight by adding a handful of spinach for a hidden veggie boost. Whether enjoyed poolside or as a post-workout refresher, this drink adapts effortlessly to different tastes and traditions.

How it fits in today’s cooking

Today, the Tropical Pineapple Banana Smoothie Delight remains a staple for busy mornings and healthy snacking. Modern cooks love how quickly it comes together, especially when using frozen fruit for a thicker texture. Some even blend it into smoothie bowls, topping it with granola or chia seeds for extra crunch. It’s also a hit during summer gatherings, offering a lighter alternative to sugary desserts.

For those exploring plant-based diets, swapping dairy for almond or oat milk keeps it vegan-friendly. And if you’re craving more tropical flavors, try pairing it with our Coconut Lime Energy Bites for a mini escape. Whether you’re meal-prepping or hosting brunch, this smoothie fits right in. Plus, it’s a great way to use overripe bananas—just like in our Banana Oat Pancakes, reducing food waste while treating your taste buds.

Taste and Texture

What makes it delicious

The Tropical Pineapple Banana Smoothie Delight bursts with vibrant, sun-kissed flavors that dance on your tongue. First, ripe bananas lend a velvety sweetness, while juicy pineapple adds a tangy brightness that wakes up your taste buds. Meanwhile, creamy coconut milk smooths everything into a luscious, silky sip. Each gulp feels like a tropical getaway, with fragrant vanilla and a hint of citrus tying it all together. Best of all, the Tropical Pineapple Banana Smoothie Delight stays refreshingly light, making it perfect for warm mornings or post-workout fuel.

Boosting the flavor

For an extra flavor kick, try blending in a spoonful of honey or a pinch of cinnamon to deepen the sweetness. Alternatively, toss in frozen mango chunks for a juicier twist. If you love texture, sprinkle toasted coconut flakes on top or drizzle with a swirl of homemade almond butter for richness. Pair it with a slice of vegan banana bread to turn your smoothie into a full, satisfying treat. With these tweaks, your Tropical Pineapple Banana Smoothie Delight becomes even more irresistible.

Tips for Success

Best practices for results

Always use ripe bananas for your Tropical Pineapple Banana Smoothie Delight, as they blend smoother and add natural sweetness. Meanwhile, freeze the pineapple chunks beforehand to create a thicker, frostier texture. For the creamiest results, opt for full-fat coconut milk or Greek yogurt, and blend everything on high for at least 30 seconds. Finally, taste the mixture before serving and adjust the sweetness with a touch of honey if needed.

Mistakes to avoid

Avoid overloading the blender with too many ingredients at once, as this can strain the motor and leave chunks in your Tropical Pineapple Banana Smoothie Delight. Instead, layer liquids first, then softer items, and finally frozen fruit. Also, skip adding ice cubes if you’ve already frozen your fruit—otherwise, the smoothie may become watery. For more blending tips, check out our guide on blender hacks. Another common mistake is using underripe pineapple, which lacks sweetness. If your fruit isn’t perfectly ripe, balance the flavor with a splash of orange juice, as explained in our fruit prep guide.

Serving and Pairing Suggestions

How to serve this dish

Serve your Tropical Pineapple Banana Smoothie Delight in a chilled glass to keep it refreshing. For a fun twist, rim the glass with shredded coconut or a sprinkle of cinnamon. Meanwhile, garnish with a pineapple wedge or a banana slice on the edge for a tropical vibe. This smoothie shines at brunch gatherings or as a poolside treat. If you want to elevate the presentation, layer it with yogurt for a stunning ombre effect. Kids and adults alike will love sipping this vibrant drink on warm mornings or as a midday pick-me-up.

What goes well with it

Pair your Tropical Pineapple Banana Smoothie Delight with fluffy blueberry pancakes for a balanced breakfast. The tartness of the blueberries contrasts beautifully with the smoothie’s sweetness. Alternatively, try it alongside a light Greek yogurt parfait for extra protein and crunch. For a savory option, crispy bacon or turkey sausage adds a satisfying contrast. Each pairing enhances the tropical flavors while keeping the meal satisfying and fresh.

What are the health benefits of a Tropical Pineapple Banana Smoothie Delight?

A Tropical Pineapple Banana Smoothie Delight is packed with vitamins, fiber, and antioxidants. Pineapple aids digestion, bananas provide potassium, and the combination offers a natural energy boost while tasting delicious.

Can I make a Tropical Pineapple Banana Smoothie Delight without dairy?

Absolutely! Substitute dairy milk with almond milk, coconut milk, or oat milk for a creamy, dairy-free Tropical Pineapple Banana Smoothie Delight. The tropical flavors still shine without compromising texture.

How can I thicken my Tropical Pineapple Banana Smoothie Delight?

Add frozen bananas, Greek yogurt, or a handful of oats to thicken your Tropical Pineapple Banana Smoothie Delight. For extra creaminess, blend in avocado or chia seeds.

Is a Tropical Pineapple Banana Smoothie Delight good for weight loss?

Yes! This smoothie is low in calories but high in fiber, keeping you full longer. Just avoid adding sugary extras to keep your Tropical Pineapple Banana Smoothie Delight weight-loss friendly.

Best Protein-Packed Overnight Oats Recipe

best-protein-overnight-oats

“`html

Introduction

Mornings can feel chaotic, but starting your day with a nutritious, no-fuss breakfast makes all the difference. That’s why I swear by Protein-Packed Overnight Oats—a creamy, satisfying meal that fuels your body while you sleep. Whether you’re rushing to work, hitting the gym, or just craving something delicious, this recipe delivers. Plus, it’s endlessly customizable, so you never get bored. If you’ve ever skipped breakfast because you were too busy, this is your game-changer. Trust me, once you try it, you’ll wonder how you ever survived without it.

About This Recipe

Protein-Packed Overnight Oats combines rolled oats, protein-rich ingredients like Greek yogurt or protein powder, and your favorite mix-ins for a balanced breakfast. Unlike traditional oatmeal, you prepare it the night before, letting the flavors meld into a creamy, dreamy texture. This dish matters because it solves two big problems: time and nutrition. Many people skip breakfast or grab unhealthy options, but this recipe ensures you get protein, fiber, and energy without the hassle. It’s perfect for meal prep, too—just make a batch for the week. If you love easy, healthy recipes, you’ll appreciate how this fits into a busy lifestyle.

Our blog focuses on simple, wholesome meals that don’t sacrifice flavor, and Protein-Packed Overnight Oats nails that balance. For more inspiration, check out our healthy breakfast ideas or explore meal prep tips to streamline your routine. Whether you’re a fitness enthusiast or just want a better morning, this recipe adapts to your needs. The best part? You can tweak it endlessly—add fruit, nuts, or even chocolate for a treat. It’s a versatile base that never gets old.

Why I Love This Recipe

Protein-Packed Overnight Oats became my lifeline during a hectic phase when I barely had time to breathe, let alone cook. One night, I whipped up a batch with peanut butter and bananas, and the next morning, I felt like I’d unlocked a secret. It kept me full for hours, tasted amazing, and took zero effort. Now, it’s my go-to for busy days, post-workout recovery, or even a late-night snack. There’s something comforting about knowing breakfast is ready when you wake up. It’s more than a recipe—it’s a little act of self-care that makes life easier.

“`

Health and Nutrition

Why it’s good for your body

Protein-Packed Overnight Oats deliver a powerhouse of nutrients to kickstart your day. First, they provide a steady release of energy thanks to the combination of complex carbs and high-quality protein. This balance keeps you full longer and prevents mid-morning crashes. Additionally, the oats supply a hearty dose of fiber, which supports digestion and gut health.

Moreover, Protein-Packed Overnight Oats often include ingredients like chia seeds or Greek yogurt, both of which boost the meal’s protein content. Protein helps repair muscles, making this an excellent choice for post-workout recovery or active lifestyles. Furthermore, the healthy fats from nuts or seeds promote brain function and heart health.

Finally, this meal is rich in vitamins and minerals like iron, magnesium, and B vitamins. These nutrients support everything from energy production to immune function. Whether you choose almond milk or dairy, Protein-Packed Overnight Oats adapt to your dietary needs while keeping nutrition front and center.

How it fits in a healthy lifestyle

Protein-Packed Overnight Oats seamlessly fit into a balanced diet, whether you’re focused on high-protein eating or simply need a quick, wholesome breakfast. They’re naturally gluten-free if you use certified oats, making them a safe choice for those with sensitivities. Plus, the customizable ingredients let you tailor the recipe to your goals, like adding berries for antioxidants or flaxseeds for omega-3s.

If you’re meal prepping, Protein-Packed Overnight Oats save time without sacrificing nutrition. Pair them with a nutrient-dense smoothie for a complete morning meal. For heart-healthy eaters, ingredients like walnuts and oats help maintain cholesterol levels. And if you’re exploring more high-protein options, check out these protein-packed pancake recipes to keep variety in your routine.

Ultimately, this recipe supports sustainable habits. It’s convenient, nutrient-dense, and adaptable—everything you need for a healthy lifestyle without the hassle.

Print
clock clock iconcutlery cutlery iconflag flag iconfolder folder iconinstagram instagram iconpinterest pinterest iconfacebook facebook iconprint print iconsquares squares iconheart heart iconheart solid heart solid icon

Protein-Packed Overnight Oats


  • Author: Chef Emy

Description

A quick and nutritious breakfast loaded with protein to keep you energized throughout the morning.


Ingredients

Scale

For the Crust:

  • 1/2 cup rolled oats
  • 1 cup almond milk
  • 1 scoop vanilla protein powder
  • 1 tbsp chia seeds
  • 1 tbsp honey
  • 1/4 tsp cinnamon
  • 1/4 cup Greek yogurt

Instructions

1. Prepare the Crust:

  1. In a mason jar or bowl, combine rolled oats, almond milk, and chia seeds.
  2. Stir in protein powder, honey, cinnamon, and Greek yogurt until well mixed.
  3. Cover and refrigerate overnight. Serve chilled with optional toppings like berries or nuts.

Notes

You can customize the seasonings to taste.

How to Prepare This Dish

Steps and time-saving tips

Start by gathering all your ingredients for Protein-Packed Overnight Oats to streamline the process. In a large mixing bowl, combine rolled oats, chia seeds, and your favorite protein powder. Whisk these dry ingredients together to ensure even distribution. Next, pour in almond milk or any milk of choice, stirring gently until the mixture thickens slightly. For extra creaminess, add a spoonful of Greek yogurt and fold it in until fully incorporated.

Now, drizzle a touch of honey or maple syrup for natural sweetness, then mix again. If you prefer a thicker consistency, let the mixture sit for five minutes before adjusting with more liquid. Divide the Protein-Packed Overnight Oats into individual jars or containers, leaving room at the top for toppings. Layer fresh berries, nuts, or a sprinkle of cinnamon for added flavor and texture. Seal the containers tightly and refrigerate overnight—or for at least four hours—to let the oats soften and the flavors meld.

In the morning, grab a jar straight from the fridge for a quick, nutritious breakfast. If you’re short on time, prep multiple jars at once to last several days. For a warm twist, heat the oats in the microwave for 30 seconds before eating. Either way, this Protein-Packed Overnight Oats recipe saves you time while keeping you fueled.

Mistakes I’ve made and learned from

When I first made Protein-Packed Overnight Oats, I used too much liquid, resulting in a soupy mess. After trial and error, I learned to start with less milk and adjust as needed—the oats absorb liquid over time. Another mistake? Skipping the chia seeds, which help thicken the mixture. Now, I never leave them out. If you’re new to meal prepping, check out my beginner’s guide to meal prepping for more tips. Also, if your protein powder clumps, try sifting it first or blending it with the milk before adding oats. For more protein-packed breakfast ideas, explore my high-protein breakfast recipes. Trust me, these small tweaks make all the difference!

Cultural Connection and Variations

Where this recipe comes from

Protein-Packed Overnight Oats might feel like a modern breakfast trend, but its roots stretch back centuries. People across Scandinavia and Northern Europe soaked oats in water or milk overnight to soften them before eating. This method saved time in the morning and made the grains easier to digest. Today, we’ve taken that humble tradition and supercharged it with protein-rich ingredients like Greek yogurt, nut butter, and chia seeds.

Around the world, cultures put their own spin on soaked oats. In Switzerland, they mix oats with bircher muesli, often adding grated apples and nuts. Meanwhile, in India, people prepare a similar dish called “oats kanji,” blending oats with spices like cumin and turmeric for a savory twist. Even in my family, Protein-Packed Overnight Oats became a staple during busy weeks—my mom always added a scoop of vanilla protein powder for extra staying power.

How it fits in today’s cooking

Protein-Packed Overnight Oats fits perfectly into today’s fast-paced, health-conscious lifestyles. Busy parents love it for quick school mornings, and fitness enthusiasts rely on it for a post-workout boost. Plus, it’s a fantastic make-ahead option for meal prep, just like our meal prep breakfast ideas.

Modern cooks keep reinventing this classic, too. Some swap dairy for almond milk or coconut yogurt, while others layer it with superfoods like goji berries. For a cozy twist, try pairing it with our healthy holiday treats during winter months. Whether you enjoy it chilled or warmed up, Protein-Packed Overnight Oats remains a versatile, nourishing choice for any season.

Taste and Texture

What makes it delicious

Protein-Packed Overnight Oats deliver a rich, satisfying experience with every bite. The creamy texture melts in your mouth, thanks to the overnight soak that softens the oats perfectly. Meanwhile, a hint of vanilla or cinnamon adds warmth, while nut butter swirls through for a decadent, velvety finish. Fresh berries burst with juiciness, contrasting the smooth base, and a drizzle of honey brings just the right touch of natural sweetness. Protein-Packed Overnight Oats strike the ideal balance between hearty and refreshing, making them a breakfast you’ll crave.

Boosting the flavor

Elevate your Protein-Packed Overnight Oats with creative twists that amplify their flavor. For a tropical twist, mix in coconut milk and top with mango chunks or toasted coconut flakes. Alternatively, stir in cocoa powder and layer with banana slices for a chocolatey treat. Spices like cardamom or nutmeg add depth, while a spoonful of chia seeds boosts texture. Craving more inspiration? Try our Healthy Breakfast Bowls for topping ideas or explore Homemade Nut Butters to customize your oats with rich, nutty flavors. The possibilities are endless!

Tips for Success

Best practices for results

Always use rolled oats for Protein-Packed Overnight Oats, as they soften perfectly without turning mushy. Meanwhile, measure your liquid carefully to maintain the ideal creamy texture. For maximum flavor, stir in protein powder before refrigerating so it blends evenly. Additionally, let the mixture chill for at least six hours, though overnight works best. Finally, top your Protein-Packed Overnight Oats with fresh fruit or nuts just before serving for added crunch.

Mistakes to avoid

Avoid overpacking your jar, as the oats expand while soaking and need room to absorb liquid. Instead, leave about an inch of space at the top. Also, skip quick oats—they turn gluey and lack the hearty texture of rolled oats. If you prefer a sweeter taste, check out our guide to natural sweeteners for balanced options. Finally, don’t forget to stir your Protein-Packed Overnight Oats before eating to redistribute flavors, just like we recommend in our meal prep basics.

Serving and Pairing Suggestions

How to serve this dish

Protein-Packed Overnight Oats shine when served in clear mason jars or elegant glass bowls to showcase their creamy layers. For a brunch gathering, top them with fresh berries, a drizzle of honey, and a sprinkle of chia seeds for a pop of color. Meanwhile, meal preppers can portion them into portable containers for an easy grab-and-go breakfast. If you want to impress guests during the holidays, serve Protein-Packed Overnight Oats in mini trifle dishes with festive garnishes like pomegranate arils or cinnamon sticks.

What goes well with it

Pair Protein-Packed Overnight Oats with a creamy homemade almond milk for a nutty, dairy-free twist that enhances the texture. Alternatively, serve them alongside a refreshing green smoothie for a balanced morning boost. If you crave something heartier, try pairing them with our vegan breakfast cookies for a satisfying combo of flavors and nutrients.

How much protein is in protein-packed overnight oats?

Protein-packed overnight oats typically contain 15–25 grams of protein per serving, depending on ingredients like Greek yogurt, protein powder, or nut butter. Adding chia seeds or hemp hearts boosts the protein content further, making it a great breakfast for muscle recovery and energy.

Can I make protein-packed overnight oats without protein powder?

Yes! You can skip protein powder and still create protein-packed overnight oats using Greek yogurt, cottage cheese, or milk alternatives like soy milk. Ingredients like nuts, seeds, and nut butter also add natural protein while keeping the recipe simple and wholesome.

Are protein-packed overnight oats good for weight loss?

Protein-packed overnight oats can support weight loss by keeping you full longer and stabilizing blood sugar. The high protein and fiber content helps curb cravings, but watch portion sizes and added sugars to keep it balanced.

How long do protein-packed overnight oats last in the fridge?

Protein-packed overnight oats stay fresh for up to 5 days when stored in an airtight container. For best texture, give them a stir before eating and add fresh toppings like fruit or nuts just before serving.

Best Apple Oatmeal Breakfast Cake – Easy Recipe

best-apple-oatmeal-breakfast-cake

“`html

Introduction

There’s something magical about starting your day with a warm, comforting slice of Apple Oatmeal Breakfast Cake Delight. Imagine the sweet aroma of cinnamon-spiced apples mingling with hearty oats, filling your kitchen with cozy vibes. Whether you need a quick weekday breakfast or a lazy weekend treat, this recipe delivers both nourishment and indulgence in every bite. Plus, it’s so easy to make, you’ll wonder why you haven’t tried it sooner. Trust me, once you taste this cake, it’ll become a staple in your morning routine.

About This Recipe

Apple Oatmeal Breakfast Cake Delight is the perfect fusion of wholesome ingredients and irresistible flavor. Packed with fresh apples, rolled oats, and warm spices, it’s a guilt-free way to satisfy your sweet tooth while fueling your day. Unlike sugary pastries, this cake keeps you full longer thanks to the fiber-rich oats and natural sweetness of fruit. It’s also incredibly versatile—serve it warm with a dollop of yogurt for breakfast or enjoy it as an afternoon snack with a cup of tea. If you love easy, crowd-pleasing recipes, you’ll adore this one.

This recipe aligns perfectly with our blog’s mission to share simple, delicious dishes that fit busy lifestyles. Whether you’re a seasoned baker or a beginner, you’ll find the steps straightforward and the results consistently amazing. For more breakfast inspiration, check out our Healthy Morning Bites collection. And if you’re curious about other ways to bake with oats, don’t miss our guide on Oatmeal Baking Tips.

Why I Love This Recipe

Apple Oatmeal Breakfast Cake Delight holds a special place in my heart because it reminds me of Sunday mornings growing up. My mom would bake a similar version, and the scent would wake me up before my alarm. Now, I make it for my own family, and it’s become our little tradition. What I love most is how it brings everyone together—my kids devour it, and even my picky eater asks for seconds. It’s more than just a recipe; it’s a way to create memories, one slice at a time.

“`

Health and Nutrition

Why it’s good for your body

Apple Oatmeal Breakfast Cake Delight packs a nutritious punch while satisfying your sweet tooth. First, it delivers a hearty dose of fiber from oats and apples, which keeps digestion smooth and hunger at bay. Additionally, the natural sugars in apples provide a quick energy boost without the crash of refined sugars. Moreover, this dish includes cinnamon, a spice known to help regulate blood sugar levels.

Beyond fiber, Apple Oatmeal Breakfast Cake Delight offers essential vitamins like vitamin C from apples and B vitamins from oats. These nutrients support immune function and energy production. Furthermore, oats contain beta-glucans, a type of soluble fiber that promotes heart health by lowering cholesterol. Meanwhile, the inclusion of nuts or seeds in the recipe adds healthy fats and protein, making it even more balanced.

Finally, Apple Oatmeal Breakfast Cake Delight avoids processed ingredients, ensuring you fuel your body with whole foods. Whether you enjoy it warm or cold, this dish keeps you full and energized for hours. With every bite, you get a mix of complex carbs, fiber, and natural sweetness—a winning combination for sustained vitality.

How it fits in a healthy lifestyle

Apple Oatmeal Breakfast Cake Delight fits effortlessly into a balanced diet, whether you’re aiming for heart health, weight management, or simply better eating habits. Its whole-food ingredients align with gluten-free diets when using certified gluten-free oats, and the fiber content supports digestive wellness. For those focused on protein intake, pairing it with Greek yogurt or a handful of almonds boosts its nutritional profile.

This recipe also works well for meal prep, saving time on busy mornings. If you love wholesome breakfasts, explore our guide to healthy morning routines for more ideas. Plus, its natural sweetness makes it a smart alternative to sugary cereals or pastries. For anyone tracking macros, Apple Oatmeal Breakfast Cake Delight offers a flexible base—adjust toppings like chia seeds or nut butter to meet your needs.

Looking for more heart-friendly recipes? Check out our heart-healthy snacks roundup to keep your diet on track. Whether you enjoy it as a post-workout refuel or a cozy weekend treat, this dish proves that eating well can be delicious and convenient.

Print
clock clock iconcutlery cutlery iconflag flag iconfolder folder iconinstagram instagram iconpinterest pinterest iconfacebook facebook iconprint print iconsquares squares iconheart heart iconheart solid heart solid icon

Apple Oatmeal Breakfast Cake Delight


  • Author: Chef Emy

Description

A wholesome and delicious breakfast cake packed with apples and oats, perfect for a cozy morning.


Ingredients

Scale

For the Crust:

  • 2 cups rolled oats
  • 1 cup all-purpose flour
  • 1/2 cup brown sugar
  • 1 tsp baking powder
  • 1 tsp cinnamon
  • 1/2 tsp salt
  • 1 cup milk
  • 1/4 cup melted butter
  • 1 egg
  • 1 tsp vanilla extract
  • 2 medium apples, peeled and diced

Instructions

1. Prepare the Crust:

  1. Preheat oven to 350°F (175°C) and grease a 9-inch baking dish.
  2. In a large bowl, mix oats, flour, brown sugar, baking powder, cinnamon, and salt.
  3. In another bowl, whisk together milk, melted butter, egg, and vanilla extract.
  4. Combine wet and dry ingredients, then fold in diced apples.
  5. Pour batter into the prepared baking dish and bake for 30 minutes or until golden and set.

Notes

You can customize the seasonings to taste.

“`html

How to Prepare This Dish

Steps and time-saving tips

Start by preheating your oven to 350°F and greasing a 9-inch baking pan. Meanwhile, whisk together the dry ingredients—flour, oats, baking powder, cinnamon, and a pinch of salt—in a large bowl. In another bowl, beat the eggs lightly before adding melted butter, brown sugar, and vanilla extract. Stir the wet mixture into the dry ingredients until just combined, then gently fold in diced apples for that perfect texture. Spread the batter evenly in the pan and bake for 30-35 minutes, or until a toothpick comes out clean. While the Apple Oatmeal Breakfast Cake Delight cools, whip up a quick glaze by mixing powdered sugar with a splash of milk and drizzle it over the top. For a time-saving twist, prep the dry ingredients the night before and store them in an airtight container. You can also use a food processor to chop the apples faster, but don’t overmix the batter—it keeps the cake tender.

Mistakes I’ve made and learned from

I once rushed the baking process and pulled my Apple Oatmeal Breakfast Cake Delight out too early, leaving the center undercooked. Now I always use an oven thermometer to ensure accuracy, and I wait until the edges pull away slightly from the pan. Another blunder? Overloading the batter with extra apples, which made it soggy. Stick to the recommended amount, or pat the diced apples dry first if they’re extra juicy. For more baking tips, check out my guide on common baking mistakes and how to avoid them. If you’re new to working with oats, my oat baking basics post breaks down the best techniques for fluffy results every time.

“`

Cultural Connection and Variations

Where this recipe comes from

Apple Oatmeal Breakfast Cake Delight feels like a warm hug on a chilly morning, and its roots stretch back to cozy kitchens across Europe and North America. Originally, home cooks baked this dish to use up seasonal apples and pantry staples like oats, creating a hearty breakfast that could feed a crowd. In Germany, families often layer it with cinnamon-spiced streusel, while in Scotland, they might swap the apples for pears and add a drizzle of whisky glaze for extra warmth.

My grandmother made her version of Apple Oatmeal Breakfast Cake Delight every fall, calling it “harvest cake” and topping it with a dollop of fresh cream. Meanwhile, in New England, bakers sometimes fold in cranberries for a tart twist, proving how versatile this recipe can be. Whether you enjoy it as a rustic treat or a dressed-up brunch centerpiece, its charm lies in how easily it adapts to local flavors and traditions.

How it fits in today’s cooking

Today, Apple Oatmeal Breakfast Cake Delight fits perfectly into our busy lives as a make-ahead breakfast or a wholesome dessert. Meal preppers love slicing it into squares for grab-and-go mornings, while food bloggers riff on it with gluten-free flour or dairy-free swaps. Its cozy, spiced aroma also makes it a star during holidays, especially when paired with spiced cider for a festive touch.

Modern cooks even reinvent it as a healthier snack by reducing sugar or adding nuts for crunch. Whether you bake it for a lazy Sunday or a potluck, this dish bridges nostalgia and convenience. After all, who can resist a recipe that tastes like home yet adapts to today’s tastes?

Taste and Texture

What makes it delicious

Apple Oatmeal Breakfast Cake Delight wraps you in warmth with its cozy, cinnamon-spiced aroma and tender crumb. Each bite delivers a perfect balance of sweet, juicy apples and hearty oats, creating a satisfying chewiness. The brown sugar caramelizes slightly, adding a subtle crunch to the edges while keeping the center moist and fluffy. Meanwhile, the vanilla and nutmeg deepen the flavor, making every forkful fragrant and comforting. Whether enjoyed fresh from the oven or reheated, Apple Oatmeal Breakfast Cake Delight feels like a hug in dessert form.

Boosting the flavor

For an extra layer of indulgence, drizzle warm caramel sauce over your Apple Oatmeal Breakfast Cake Delight or sprinkle toasted walnuts for a nutty contrast. If you love bold spices, try adding a pinch of cardamom or swapping half the cinnamon for pumpkin spice blend. Prefer a tangy twist? A dollop of Greek yogurt or a swirl of honey whipped cream brightens the richness. Experiment with different apple varieties, like tart Granny Smith or honey-sweet Fuji, to tailor the flavor to your taste.

Tips for Success

Best practices for results

First, always measure your ingredients precisely for the Apple Oatmeal Breakfast Cake Delight, especially the oats and flour, to ensure the perfect texture. Additionally, use room-temperature eggs and butter since they blend more smoothly into the batter. For even baking, rotate the pan halfway through the cook time, and let the cake cool completely before slicing. Finally, top each slice with a drizzle of honey or a sprinkle of cinnamon to enhance the flavors.

Mistakes to avoid

Avoid overmixing the batter, as this can make the Apple Oatmeal Breakfast Cake Delight dense instead of light and fluffy. Instead, gently fold the dry ingredients into the wet ones just until combined. Also, don’t skip greasing the pan properly, or the cake may stick. For more baking tips, check out our guide on perfect cake texture. Another common mistake is using underripe apples, which lack sweetness. Opt for crisp, sweet varieties like Honeycrisp or Fuji, and learn how to pick the best ones in our apple selection guide.

Serving and Pairing Suggestions

How to serve this dish

Serve Apple Oatmeal Breakfast Cake Delight warm for the best flavor and texture. For a cozy breakfast, slice it into generous squares and plate it with a dusting of powdered sugar or a drizzle of maple syrup. Alternatively, top each serving with a dollop of whipped cream or a scoop of vanilla yogurt for extra richness. If you’re hosting a brunch, arrange the cake on a rustic wooden board alongside fresh apple slices and a sprinkle of cinnamon. This dish also shines during holidays—simply add a caramel glaze and toasted walnuts for a festive touch.

What goes well with it

Pair Apple Oatmeal Breakfast Cake Delight with a steaming cup of spiced chai tea to enhance its warm, comforting flavors. For a refreshing contrast, try it with a glass of cold almond milk or a tangy citrus-infused iced tea. If you’re serving it as part of a larger spread, consider adding our Cinnamon Roll Muffins for a delightful breakfast duo. For a heartier meal, pair it with a savory side like our Sausage and Egg Casserole, which balances the sweetness perfectly.

How do you make Apple Oatmeal Breakfast Cake Delight moist?

To keep your Apple Oatmeal Breakfast Cake Delight moist, use grated apples and a bit of Greek yogurt or applesauce in the batter. These ingredients add natural moisture while enhancing the flavor. Avoid overbaking—check for doneness with a toothpick at the minimum recommended time.

Can I substitute steel-cut oats in Apple Oatmeal Breakfast Cake Delight?

Steel-cut oats won’t work well in Apple Oatmeal Breakfast Cake Delight because they’re too coarse. Stick with rolled oats for the best texture, or pulse quick oats briefly for a similar result. The softer texture blends perfectly with the apples and spices.

Is Apple Oatmeal Breakfast Cake Delight healthy?

Yes! Apple Oatmeal Breakfast Cake Delight packs fiber from oats and apples, plus protein if you add nuts or yogurt. For a healthier version, reduce sugar slightly or use maple syrup. It’s a balanced treat compared to traditional desserts.

Can I freeze Apple Oatmeal Breakfast Cake Delight?

Absolutely! Wrap slices of Apple Oatmeal Breakfast Cake Delight tightly in plastic or foil, then freeze for up to 3 months. Thaw overnight in the fridge or warm briefly in the microwave for a quick breakfast.

Best Fluffy Lemon Ricotta Pancakes Recipe

best-fluffy-lemon-ricotta-pancakes

Introduction

There’s something undeniably special about lazy weekend mornings when the sun peeks through the curtains and the scent of something delicious fills the air. That’s exactly why I’m thrilled to share my recipe for Fluffy Lemon Ricotta Pancakes with you today. Whether you’re craving a bright, citrusy twist on breakfast or simply want to treat your loved ones to a memorable meal, these pancakes deliver pure joy in every bite. Plus, they’re surprisingly easy to whip up, even if you’re not a morning person!

Fluffy Lemon Ricotta Pancakes are the perfect harmony of tangy lemon zest, creamy ricotta, and cloud-like texture. Unlike traditional pancakes, the ricotta adds richness while keeping them light, and the lemon brightens every forkful. This recipe matters because it transforms an ordinary breakfast into something extraordinary—ideal for slow weekends, brunch gatherings, or even a sweet surprise for someone special. At brekcakes.com, we celebrate recipes that balance simplicity with wow-factor flavors, and these pancakes fit right in. If you love citrus-infused treats, you’ll adore our Lemon Blueberry Scones, and for more fluffy inspiration, check out our Classic Buttermilk Pancakes.

Why I Love This Recipe

These Fluffy Lemon Ricotta Pancakes hold a special place in my heart because they remind me of sunny spring mornings at my grandmother’s house. She taught me how the zest of a lemon could lift any dish, and the ricotta trick was her secret for impossibly tender pancakes. Every time I make them, I feel that same warmth and connection. It’s more than just a recipe—it’s a little bite of happiness I get to share with you.

Health and Nutrition

Why it’s good for your body

Fluffy Lemon Ricotta Pancakes pack a nutritious punch while delighting your taste buds. First, ricotta cheese adds a boost of protein and calcium, which helps build strong muscles and bones. Meanwhile, the lemon zest delivers a dose of vitamin C, supporting your immune system and adding a refreshing tang. Together, these ingredients create a breakfast that satisfies without weighing you down.

Unlike traditional pancakes, Fluffy Lemon Ricotta Pancakes offer a lighter texture while keeping you full longer. The ricotta provides slow-digesting protein, stabilizing your energy levels throughout the morning. Additionally, the recipe uses minimal added sugar, relying on natural citrus brightness for flavor. As a result, you avoid the sugar crash that often follows sweeter breakfasts.

Finally, these pancakes include simple, wholesome ingredients like eggs and whole wheat flour for extra fiber. Fiber promotes healthy digestion and keeps cravings at bay. Whether you enjoy them as a weekend treat or a quick weekday meal, Fluffy Lemon Ricotta Pancakes give your body the fuel it needs to thrive.

How it fits in a healthy lifestyle

Fluffy Lemon Ricotta Pancakes fit seamlessly into a balanced diet. For a protein-packed twist, swap regular flour for almond flour, making them a great option for gluten-free eaters. Pair them with fresh berries or a drizzle of honey for extra antioxidants and natural sweetness.

If you focus on heart-healthy eating, ricotta’s lower fat content compared to cream cheese keeps these pancakes light. For more high-protein breakfast ideas, check out our high-protein breakfast recipes. You can also explore balanced meal prep tips to incorporate these pancakes into your weekly routine without hassle. Enjoy them guilt-free as part of a mindful, nourishing lifestyle.

Print

clock clock iconcutlery cutlery iconflag flag iconfolder folder iconinstagram instagram iconpinterest pinterest iconfacebook facebook iconprint print iconsquares squares iconheart heart iconheart solid heart solid icon

Fluffy Lemon Ricotta Pancakes


  • Author:
    Chef Emy

Description

Light and airy pancakes with a hint of lemon and creamy ricotta.


Ingredients


Scale

For the Crust:

  • 1 cup all-purpose flour
  • 2 tablespoons sugar
  • 1 teaspoon baking powder
  • 1/2 teaspoon baking soda
  • 1/4 teaspoon salt
  • 1 cup ricotta cheese
  • 2 large eggs
  • 1/2 cup milk
  • 1 tablespoon lemon zest
  • 2 tablespoons lemon juice
  • 1 teaspoon vanilla extract


Instructions

1. Prepare the Crust:

  1. In a large bowl, whisk together flour, sugar, baking powder, baking soda, and salt.
  2. In another bowl, mix ricotta, eggs, milk, lemon zest, lemon juice, and vanilla until smooth.
  3. Gently fold the wet ingredients into the dry ingredients until just combined.
  4. Heat a lightly greased griddle or skillet over medium heat.
  5. Pour 1/4 cup batter for each pancake and cook until bubbles form, then flip and cook until golden brown.

Notes

You can customize the seasonings to taste.


How to Prepare This Dish

Steps and time-saving tips

Start by whisking together the dry ingredients—flour, sugar, baking powder, and a pinch of salt—in a large bowl. In another bowl, lightly beat the eggs before adding ricotta, milk, lemon zest, and a splash of vanilla. Gently fold the wet mixture into the dry ingredients until just combined; overmixing will make your Fluffy Lemon Ricotta Pancakes dense. Meanwhile, heat a nonstick skillet or griddle over medium-low heat and lightly grease it with butter or oil. Pour ¼ cup of batter for each pancake, cooking until bubbles form on the surface, then flip and cook until golden. To save time, measure all ingredients the night before and store them in separate containers. If you’re serving a crowd, keep finished pancakes warm in a 200°F oven while you cook the rest. Drizzle with maple syrup or a quick lemon glaze for extra brightness.

Mistakes I’ve made and learned from

I once rushed the batter and overmixed it, resulting in tough Fluffy Lemon Ricotta Pancakes instead of the light, airy texture I wanted. Now, I stir just until the flour disappears, even if a few lumps remain. Another time, I cranked the heat too high, burning the outside while the center stayed raw. Medium-low heat is key—patience pays off! If your batter feels too thick, add a tablespoon of milk at a time until it flows smoothly. For more troubleshooting tips, check out my guide on fixing dense pancakes. And if you love citrus flavors, don’t miss my Lemon Blueberry Pancakes, which use a similar technique for maximum fluffiness.

Cultural Connection and Variations

Where this recipe comes from

Fluffy Lemon Ricotta Pancakes trace their roots to Italy, where ricotta cheese has long been a staple in both savory and sweet dishes. Italian cooks often fold ricotta into desserts like cannoli or cheesecake, but somewhere along the way, someone brilliant decided to add it to pancakes. The result? A lighter, creamier texture that feels indulgent yet effortless. Meanwhile, the lemon zest adds a bright, sunny note, making these pancakes perfect for spring brunches or lazy summer mornings.

Across the Mediterranean, you’ll find similar variations. In Greece, cooks might swap ricotta for mizithra cheese and drizzle pancakes with honey. In France, they could skip the lemon and serve them with a dollop of crème fraîche. Even in the U.S., regional twists pop up—some families add blueberries for a burst of sweetness, while others layer Fluffy Lemon Ricotta Pancakes with mascarpone for extra richness. No matter where you go, this dish adapts beautifully to local tastes.

How it fits in today’s cooking

Today, Fluffy Lemon Ricotta Pancakes shine as a versatile favorite. They fit seamlessly into weekend brunches, holiday spreads, or even as a cozy weeknight treat. Modern cooks love how easily they can tweak the recipe—whether by using gluten-free flour or topping them with seasonal fruit. For those who meal prep, these pancakes freeze wonderfully, making them a practical choice for busy households.

They also pair perfectly with other breakfast classics, like homemade waffles or French toast, for a full spread. Whether you’re hosting a crowd or treating yourself, Fluffy Lemon Ricotta Pancakes bring a touch of comfort and elegance to any table. Their timeless appeal lies in how effortlessly they bridge tradition and modern convenience.

Taste and Texture

What makes it delicious

Fluffy Lemon Ricotta Pancakes deliver a bright, citrusy burst with every bite, thanks to fresh lemon zest and juice. The ricotta cheese adds a subtle tang and creamy richness, while keeping the texture impossibly light and airy. As you cut into them, the golden edges offer a delicate crispness, contrasting the pillowy-soft center. Meanwhile, the aroma of vanilla and lemon mingles in the air, making your kitchen smell like a sunny brunch spot. Whether drizzled with syrup or enjoyed plain, Fluffy Lemon Ricotta Pancakes strike the perfect balance between refreshing and indulgent.

Boosting the flavor

For an extra flavor boost, try folding blueberries or raspberries into the batter—their natural sweetness pairs beautifully with the lemon. Alternatively, swap the vanilla extract for almond extract to add a nutty depth. A dollop of homemade whipped cream or a sprinkle of toasted coconut elevates the texture even further. If you love bold contrasts, serve these pancakes with a tangy berry compote to highlight their citrusy notes. Experimenting with toppings and mix-ins keeps every bite exciting.

Tips for Success

Best practices for results

First, always whisk the dry ingredients thoroughly to ensure your Fluffy Lemon Ricotta Pancakes rise evenly. Meanwhile, gently fold the ricotta into the wet ingredients to maintain a light texture. For extra fluffiness, let the batter rest for 5 minutes before cooking. Additionally, use a medium-low heat to prevent burning while allowing the pancakes to cook through. Finally, flip them only once when bubbles form on the surface for perfect golden results every time.

Mistakes to avoid

Avoid overmixing the batter, as this can make your Fluffy Lemon Ricotta Pancakes dense instead of light. Instead, stir just until the ingredients combine. Similarly, don’t skip draining excess liquid from the ricotta, or the batter may become too thin. For more troubleshooting tips, check out our guide on fixing soggy pancakes. Also, resist pressing down on the pancakes while cooking—this squeezes out air and ruins the fluffiness. Learn more about achieving the ideal texture in our pancake perfection article.

Serving and Pairing Suggestions

How to serve this dish

Fluffy Lemon Ricotta Pancakes deserve a presentation as bright as their flavor. Stack them high on a white plate for contrast, then drizzle with warm honey or dust lightly with powdered sugar. For a pop of color, add fresh berries or a twist of lemon zest on top. These pancakes shine at weekend brunches, but they also make holidays like Mother’s Day or Easter extra special. If you’re hosting a crowd, keep batches warm in the oven while you cook, then serve family-style with all the toppings in small bowls.

What goes well with it

Pair Fluffy Lemon Ricotta Pancakes with a frothy latte or a glass of cold-brewed iced tea for a refreshing balance. The citrus notes also love company—try our berry compote for a sweet-tart contrast or crispy bacon for a savory twist. For a full spread, add our fluffy scrambled eggs to keep the meal light yet satisfying. Whether you lean sweet or savory, these pairings let the pancakes’ airy texture and zesty flavor take center stage.

What makes Fluffy Lemon Ricotta Pancakes so light and airy?

The secret to Fluffy Lemon Ricotta Pancakes lies in the ricotta cheese, which adds moisture and a delicate texture, while whipped egg whites create airiness. The combination of baking powder and lemon juice also helps them rise perfectly, resulting in pancakes that are tender and cloud-like.

Can I make Fluffy Lemon Ricotta Pancakes without ricotta cheese?

Ricotta cheese is key for the signature texture of Fluffy Lemon Ricotta Pancakes, but you can substitute cottage cheese (blended smooth) or Greek yogurt in a pinch. Keep in mind the flavor and fluffiness may vary slightly from the original recipe.

How do you prevent Fluffy Lemon Ricotta Pancakes from sticking to the pan?

Use a well-seasoned nonstick skillet or griddle over medium-low heat, and lightly grease it with butter or oil before pouring the batter. Let the Fluffy Lemon Ricotta Pancakes cook undisturbed until bubbles form on the surface, then flip gently for even browning.

What toppings pair best with Fluffy Lemon Ricotta Pancakes?

Fresh berries, honey, or maple syrup complement the citrusy flavor of Fluffy Lemon Ricotta Pancakes beautifully. For extra indulgence, add a dollop of whipped cream or a sprinkle of powdered sugar to enhance their light, fluffy texture.

Best Pumpkin Chai Smoothie – Creamy & Spiced Recipe

best-pumpkin-chai-smoothie

Introduction

There’s something undeniably comforting about the flavors of fall, and nothing captures that cozy feeling quite like a Pumpkin Chai Smoothie. Whether you’re craving a morning boost or a soothing afternoon treat, this creamy, spiced blend wraps you in warmth with every sip. Plus, it’s packed with wholesome ingredients that make indulging feel guilt-free. Trust me, once you try it, you’ll want to savor this seasonal favorite all year long.

A Pumpkin Chai Smoothie is more than just a drink—it’s a celebration of autumn in a glass. Combining the earthy sweetness of pumpkin with the aromatic spices of chai, this smoothie delivers a rich, velvety texture that feels like a hug from the inside out. What makes it special? Unlike store-bought versions, you control the ingredients, ensuring every sip is free from artificial additives and loaded with real nutrition. For those who love my healthy smoothie recipes, this recipe fits perfectly into a balanced lifestyle. It’s also a fantastic way to use up leftover pumpkin puree, making it a practical choice for anyone who hates food waste. If you’re new to blending, don’t worry—this recipe is as simple as tossing everything into your blender and pressing start. And if you’re looking for more cozy inspiration, check out my fall baking ideas to complete your seasonal menu.

Why I Love This Recipe

This Pumpkin Chai Smoothie holds a special place in my heart because it reminds me of crisp mornings spent with my grandma, sipping spiced tea while she baked pumpkin pies. Recreating those flavors in a smoothie lets me enjoy that nostalgia in a healthier, modern way. Every time I make it, I’m transported back to her kitchen, where love and good food always went hand in hand. It’s my little way of keeping those memories alive while sharing something delicious with you.

Health and Nutrition

Why it’s good for your body

Pumpkin Chai Smoothie packs a powerful nutritional punch while tasting like a cozy treat. First, pumpkin delivers a hefty dose of vitamin A, which supports vision and immune health. Additionally, the warm chai spices like cinnamon and ginger add anti-inflammatory benefits, helping your body fight off everyday stress. Moreover, this smoothie naturally sweetens with ingredients like banana or dates, avoiding refined sugars.

Beyond vitamins, Pumpkin Chai Smoothie offers a balanced mix of fiber and healthy fats. The pumpkin puree keeps digestion steady, while ingredients like almond butter or chia seeds provide plant-based protein. Furthermore, the antioxidants in chai spices may boost metabolism and heart health over time. Whether you enjoy it for breakfast or a snack, this smoothie fuels your body without the crash of sugary alternatives.

Finally, Pumpkin Chai Smoothie adapts easily to dietary needs. For instance, you can swap dairy for coconut milk or boost protein with Greek yogurt. Either way, you get a creamy, satisfying drink that nourishes from the inside out. With every sip, you’re treating your body to wholesome ingredients that taste as good as they make you feel.

How it fits in a healthy lifestyle

Pumpkin Chai Smoothie fits seamlessly into a balanced diet, whether you’re gluten-free, plant-based, or just aiming for cleaner eating. Its natural ingredients make it a great alternative to processed snacks, and the fiber keeps you full longer. For a heart-healthy twist, try adding flaxseeds or walnuts, which complement the smoothie’s warming spices.

If you’re meal prepping, this smoothie stores well for busy mornings. Pair it with these high-protein breakfast ideas for a complete start to your day. Plus, it’s versatile enough to enjoy post-workout or as an afternoon pick-me-up. For more ways to incorporate nutritious drinks into your routine, explore these immune-boosting smoothie recipes. Pumpkin Chai Smoothie proves that healthy choices can be delicious and effortless.

Print

clock clock iconcutlery cutlery iconflag flag iconfolder folder iconinstagram instagram iconpinterest pinterest iconfacebook facebook iconprint print iconsquares squares iconheart heart iconheart solid heart solid icon

Pumpkin Chai Smoothie


  • Author:
    Chef Emy

Description

A creamy and spiced smoothie perfect for fall mornings, blending pumpkin puree with chai flavors.


Ingredients


Scale

For the Crust:

  • 1 cup pumpkin puree
  • 1 frozen banana
  • 1 cup almond milk
  • 1/2 tsp cinnamon
  • 1/4 tsp ginger
  • 1/4 tsp nutmeg
  • 1/4 tsp cloves
  • 1 tbsp maple syrup
  • 1/2 tsp vanilla extract
  • 1/2 cup ice cubes


Instructions

1. Prepare the Crust:

  1. Add all ingredients to a blender.
  2. Blend on high until smooth and creamy.
  3. Pour into glasses and serve immediately.

Notes

You can customize the seasonings to taste.


How to Prepare This Dish

Steps and time-saving tips

Start by gathering all your ingredients for the Pumpkin Chai Smoothie so everything is within reach. First, add the pumpkin puree, yogurt, and almond milk to your blender. Blend these ingredients for about 20 seconds until they form a smooth base. Next, toss in the chai spice blend, maple syrup, and a handful of ice cubes. Pulse the mixture again until the ice fully breaks down and the flavors meld together. If the consistency feels too thick, drizzle in a splash more almond milk and blend briefly. Pour the smoothie into a tall glass and top it with a sprinkle of extra chai spice for a warm, aromatic finish. For a creamier texture, freeze your banana slices beforehand or swap yogurt for frozen Greek yogurt. To save time, pre-measure your spices the night before or use a pre-made chai concentrate if you’re in a rush. Either way, this Pumpkin Chai Smoothie comes together in under five minutes.

Mistakes I’ve made and learned from

Early on, I underestimated how powerful the chai spices could be in my Pumpkin Chai Smoothie. Once, I added a full tablespoon instead of a teaspoon, and the flavor overwhelmed everything else. Now, I always measure carefully and taste as I go. Another mishap? Using watery pumpkin puree instead of the thick, concentrated kind—it diluted the smoothie into a sad, thin version of itself. I fixed it by straining excess liquid or opting for high-quality canned puree. If you’re new to blending, check out my guide on avoiding common smoothie mistakes for more troubleshooting. And if you love the chai flavor here, you’ll adore the twists in my chai-spiced baking recipes too. Trust me, a little patience with measurements makes all the difference.

Cultural Connection and Variations

Where this recipe comes from

Pumpkin Chai Smoothie blends two beloved traditions into one cozy drink. Chai, with its roots in South Asia, carries centuries of spice-infused warmth, while pumpkin connects to North American harvest celebrations. Together, they create a fusion that feels both familiar and exciting. In India, chai often steeps with bold spices like cardamom and ginger, but when paired with pumpkin, it takes on a creamy, autumnal twist.

Families adapt this recipe in playful ways. Some add a splash of coconut milk for tropical flair, while others toss in a spoonful of almond butter for extra richness. In Mexico, cooks might blend pumpkin with cinnamon and piloncillo for a deeper sweetness. Meanwhile, in the U.S., the Pumpkin Chai Smoothie often stars at fall gatherings, where it’s sipped alongside spiced desserts or even poured over oatmeal for a festive breakfast.

Personally, I love how this drink bridges cultures. Whether you’re savoring it after a morning yoga session or serving it at a Friendsgiving brunch, the Pumpkin Chai Smoothie feels like a hug in a glass. It’s a reminder that food—no matter where it starts—can evolve into something uniquely delicious.

How it fits in today’s cooking

Today, the Pumpkin Chai Smoothie fits seamlessly into modern routines. Busy home cooks whip it up as a quick breakfast, while wellness enthusiasts appreciate its nutrient-packed ingredients. Because it’s dairy-free and vegan-friendly, it aligns with today’s dietary preferences, much like the adaptable recipes in our vegan baking guide.

Seasonal menus also embrace this drink. Coffee shops feature it as a limited-time treat, and meal preppers batch-make it for cozy mornings. Some even blend it into smoothie bowls, topping it with granola for crunch. For those who love pairing flavors, our spiced dessert ideas complement the Pumpkin Chai Smoothie perfectly. Whether you’re sipping it solo or sharing it at a gathering, this drink proves that tradition and innovation can taste amazing together.

Taste and Texture

What makes it delicious

Every sip of Pumpkin Chai Smoothie wraps you in warm, spiced comfort. The creamy blend of pumpkin puree and yogurt melts on your tongue, while aromatic chai spices like cinnamon and cardamom dance on your palate. A hint of maple syrup adds just the right touch of sweetness, balancing the earthy depth of pumpkin. Meanwhile, the frothy texture feels luxuriously smooth, almost like a dessert in a glass. Whether you savor it cold or slightly chilled, Pumpkin Chai Smoothie delivers a cozy, fragrant experience that tastes like autumn in every sip.

Boosting the flavor

For an extra flavor kick, try swapping yogurt with coconut milk to add a tropical twist. A sprinkle of toasted pecans or granola on top introduces a satisfying crunch, while a drizzle of homemade caramel sauce deepens the sweetness. If you love bold spices, a pinch of extra ginger or nutmeg will amplify the warmth. Pair your Pumpkin Chai Smoothie with a spiced oatmeal cookie for a match made in flavor heaven. Small tweaks can transform this smoothie into your new seasonal obsession.

Tips for Success

Best practices for results

Always use chilled almond milk for a creamier Pumpkin Chai Smoothie, as it blends better with the spices. Meanwhile, measure the pumpkin puree precisely to avoid a overly thick or watery texture. For the best flavor, toast the chai spices lightly before blending to enhance their aroma. Additionally, blend the ingredients in stages, starting with liquids, to ensure a smooth consistency every time.

Mistakes to avoid

Avoid using room-temperature ingredients, as they can make the Pumpkin Chai Smoothie separate too quickly. Instead, chill everything beforehand for a refreshing result. Another common mistake is skipping the taste test—adjust the sweetness or spice levels before serving, especially if using homemade pumpkin puree. For more tips on balancing flavors, check out our guide on spice blends. Also, don’t overblend the smoothie, or it may become foamy. For ideal blending techniques, explore our kitchen tools recommendations.

Serving and Pairing Suggestions

How to serve this dish

Serve your Pumpkin Chai Smoothie in a cozy mug for a comforting breakfast or a festive holiday brunch. For a visually stunning touch, drizzle a swirl of coconut cream on top and sprinkle with cinnamon or crushed graham crackers. Alternatively, pour it into a chilled glass with a cinnamon stick garnish for an elegant afternoon pick-me-up. Since this smoothie blends warm spices with creamy pumpkin, it pairs perfectly with crisp fall mornings or as a dessert alternative after dinner.

What goes well with it

Pair your Pumpkin Chai Smoothie with a slice of gluten-free pumpkin bread for a wholesome breakfast. The earthy sweetness of the bread enhances the smoothie’s spiced notes. For a savory contrast, try it alongside a fluffy vegan omelette, which balances the smoothie’s richness. If you’re hosting a gathering, offer spiced apple cider as a complementary drink—its bright acidity cuts through the creaminess beautifully.

What ingredients are in a Pumpkin Chai Smoothie?

A classic Pumpkin Chai Smoothie typically includes pumpkin puree, chai tea or chai spices (like cinnamon, cardamom, and ginger), milk or a dairy-free alternative, a sweetener like honey or maple syrup, and ice. Some recipes add yogurt or protein powder for extra creaminess and nutrition. This blend creates a cozy, spiced flavor perfect for fall.

Can I make a Pumpkin Chai Smoothie without dairy?

Absolutely! A dairy-free Pumpkin Chai Smoothie is easy to make by swapping regular milk for almond milk, oat milk, or coconut milk. You can also use dairy-free yogurt or skip it altogether. The chai spices and pumpkin puree ensure the smoothie stays flavorful and creamy without dairy.

Is a Pumpkin Chai Smoothie healthy?

Yes, a Pumpkin Chai Smoothie can be a nutritious choice when made with wholesome ingredients. Pumpkin is rich in fiber and vitamins like A and C, while chai spices offer antioxidants. For a healthier version, use natural sweeteners and avoid excessive added sugars. It’s a great way to enjoy a seasonal treat with benefits.

How can I make my Pumpkin Chai Smoothie thicker?

To thicken your Pumpkin Chai Smoothie, try adding frozen banana, Greek yogurt, or a scoop of oats. Less liquid or extra ice can also help achieve a creamier texture. For a protein boost, blend in nut butter or protein powder, which enhances both thickness and flavor.