Delicious Strawberry Sheet Cake: The Perfect Summer Dessert
Indulge in the sweet, mouthwatering delight of Strawberry Sheet Cake, a quintessential summer dessert that perfectly captures the essence of sun-ripened strawberries. This vibrant cake not only looks stunning with its lively hue but also promises a burst of flavors in every slice. Its sweet, moist body pairs exquisitely with a light and fluffy frosting, making it a delightful offering at any gathering—from festive family celebrations to casual picnics in the park. Let your taste buds wander through this heavenly experience!
The beauty of this Strawberry Sheet Cake lies in its simplicity and versatility. It can be made in larger quantities, making it an ideal choice for potlucks or large family gatherings. Imagine serving a generous slice to your loved ones, garnished with fresh strawberries and perhaps a mint sprig, bringing together vibrant colors and striking flavors. This cake epitomizes the joy of summer, leaving everyone asking for a second piece while savoring the nostalgic flavors that remind them of leisurely days and cherished memories.
Quick Recipe Highlights
- Flavor Profile: This Strawberry Sheet Cake showcases delightful notes of fresh strawberries complemented by a creamy vanilla frosting.
- Texture: The texture is a wonderful balance of moistness from the cake and creaminess from the frosting, creating a delightful mouthfeel.
- Aroma: The cake emits a heavenly aroma of baked sweet vanilla and ripe strawberries, inviting everyone to take a bite.
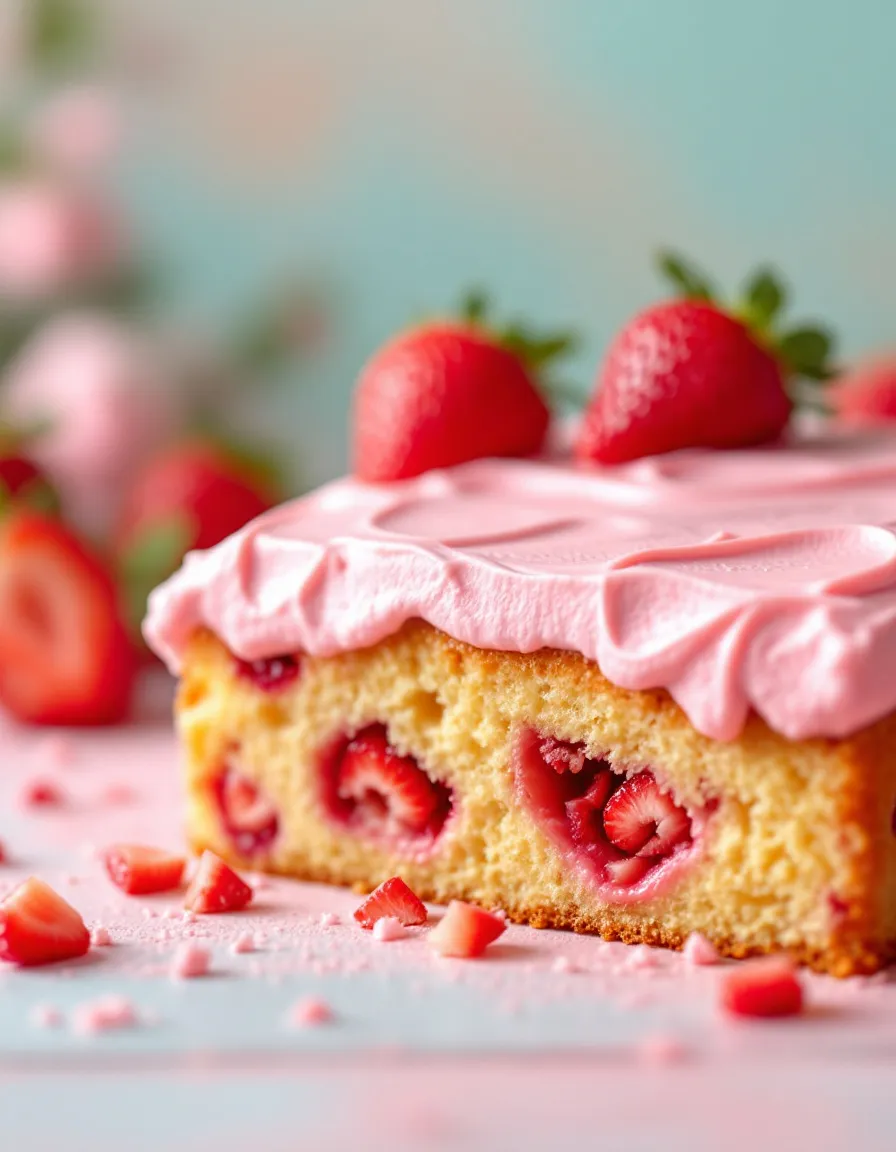
- Visual Appeal: Topped with decadent frosting and adorned with fresh strawberry slices, this cake is not only delicious but also visually stunning.
- Skill Level Needed: While this cake requires some baking skills, the steps are straightforward, making it perfect for home bakers of all levels.
- Special Equipment: A large baking sheet, mixing bowls, and an electric mixer are essential to achieve the perfect cake.
Recipe Overview
- Difficulty Level: This recipe is categorized as medium, suitable for those who are comfortable with basic baking techniques and measurements.
- Category: This is a dessert and can be served after meals, on special occasions, or simply as a delightful treat.
- Cuisine: This cake draws from American baking traditions, often enjoyed in summer gatherings and backyard barbecues.
- Cost: The ingredients are fairly inexpensive, making this a budget-friendly dessert option for any occasion.
- Season: Summer is the best season for this cake, coinciding with strawberry picking and peak freshness.
- Occasion: Perfect for birthdays, picnics, garden parties, or any festive event that calls for a crowd-pleasing dessert.
Why You’ll Love This Recipe
With its captivating flavor and inviting sweetness, the Strawberry Sheet Cake is bound to win over anyone who takes a bite. The rich yet delicate strawberry flavor, enhanced by a velvety frosting, creates an irresistible combination that beckons for more. Each mouthful melts in your mouth, leaving behind a delightful aftertaste that epitomizes summer’s bounty.
In addition to its wonderful taste, this cake is incredibly convenient to prepare. The straightforward mixing and baking methods allow even novice bakers to create this delectable dessert without stress. With just a few simple ingredients, it promises an impressive outcome that’s sure to impress friends and family.
Nutritionally speaking, strawberries are packed with vitamins, fiber, and antioxidants. They contribute to dietary health while also adding a natural sweetness to the cake. This makes it a relatively “healthier” dessert option compared to many others that may be packed with added sugars and unhealthy fats.
When it comes to entertaining, this cake shines as a show-stopping centerpiece. Its beautiful presentation, combined with a tantalizing flavor, makes it a fantastic conversation starter. Share slices among family and friends, and watch as the cake disappears, leaving behind laughter and satisfaction.
Finally, this dessert’s cost-effectiveness makes it an accessible choice for home bakers everywhere. With common baking ingredients and seasonal strawberries, this recipe provides an affordable way to make a joyful treat that showcases both skill and creativity.
Historical Background and Cultural Significance
The Strawberry Sheet Cake has its roots in American baking traditions, particularly in the southern regions where fresh strawberries are abundant. It’s often associated with summer gatherings, where the allure of sweet strawberries signifies warmth and celebration. This cake has evolved from simple family recipes passed down through generations to a beloved dessert featured in modern cookbooks.
Culturally, strawberries hold a special place in many communities, symbolizing the beauty of summer and seasonal abundance. They are commonly celebrated in fairs and festivals, reflecting the importance of agriculture and local produce. The Strawberry Sheet Cake serves as a reminder of these cultural roots, fostering connections during gatherings.
As this dessert became popular, various adaptations arose, with different regions incorporating their local flavors into the recipe. These evolutions highlight the diversity within American baking culture, where each family may add a unique twist, keeping traditions alive while embracing creativity.
Today, the Strawberry Sheet Cake remains a favorite across the country, showcasing the delightful combination of simplicity and deliciousness. Its presence in homes and gatherings exemplifies the joy of sharing food and creating lasting memories.
Ingredient Deep Dive
- Strawberries: Strawberries are more than just a delicious fruit; they are packed with antioxidants and vitamins, vital for maintaining good health. When selecting strawberries, look for bright red, plump berries without blemishes. Store them in the refrigerator to prolong freshness, and remember they can be substituted with other berries for a twist.
- Flour: The backbone of any cake, flour contributes to structure and texture. All-purpose flour is commonly used, but whole wheat flour can be a healthier option. Store flour in a cool, dry place and ensure you measure accurately to avoid dense cake. For gluten-free options, consider almond or coconut flour.
- Sugar: Sugar not only sweetens the cake but also affects its moisture and texture. Granulated sugar is preferred for a light cake, though alternatives like honey or maple syrup can add unique flavors. Keep sugar in an airtight container to maintain its quality.
- Butter: Butter enriches the cake with flavor and moisture. Use unsalted for better control over salt levels. When using butter, ensure it’s at room temperature for easier mixing. Substitute with plant-based margarine for a dairy-free version.
- Eggs: Eggs contribute to the cake’s structure and moisture. They are essential for binding ingredients and providing richness. Always use fresh eggs, and opt for organic if possible. Aquafaba can be used as an alternative for a vegan adaptation.
- Milk: Milk adds moisture and tenderness. Whole milk is ideal for richness, but nut milks can be substituted for dairy-free diets. Store milk in the fridge and use within the expiration date for best results.
Common Mistakes to Avoid
- Not measuring ingredients accurately can lead to imbalances in texture and flavor. Always use measuring cups and spoons for precision.
- Overmixing the batter might result in a tough cake. Mix just until combined to create a tender, light texture.
- Neglecting to preheat the oven can affect the baking time and overall rise of the cake. Always preheat for uniform cooking.
- Not sifting the flour can lead to lumps in the batter. This step is crucial for light, airy results.
- Using cold ingredients can result in a dense cake. Allow ingredients like butter and eggs to reach room temperature before mixing.
- Skipping the greasing of the pan may cause sticking. Ensure your baking sheet is properly greased or lined with parchment.
- Checking for doneness too early can result in undercooked cake. Use a toothpick to check; it should come out clean when the cake is done.
- Not allowing the cake to cool sufficiently before frosting can lead to melting frosting. Ensure it’s completely cooled for best results.
- Ignoring the suggested baking times can affect texture. Keep an eye on the time and make adjustments based on your oven.
- Underestimating the power of fresh ingredients, especially strawberries, can result in a less flavorful cake. Always use the freshest produce available.
Essential Techniques
- Mixing Batter: This is crucial for achieving the right cake texture. Make sure to blend ingredients until just combined, as overmixing can make the cake dense.
- Creaming Butter and Sugar: This step adds air to the batter, resulting in a fluffy texture. Aim for a light and pale mixture as a visual cue for success.
- Whipping Egg Whites: This technique creates a light and airy cake texture. Ensure there’s no yolk in the whites and whip until stiff peaks form for optimal fluffiness.
- Testing for Doneness: A toothpick inserted into the center of the cake should come out clean when fully baked. This visual check is essential for perfect results.
- Frosting Application: Allow the cake to cool entirely, and use a spatula to spread the frosting evenly for a smooth finish. Presentation matters, so take your time here for great results.
Pro Tips for Perfect Strawberry Sheet Cake
- For extra flavor, use pure vanilla extract instead of imitation vanillin. This enhances the cake’s overall aroma and taste.
- Incorporate a splash of lemon juice or zest into the batter for a bright, zesty twist that complements the strawberries beautifully.
- Consider adding chopped nuts for added texture. Walnuts or pecans can impart a pleasant crunch that contrasts with the soft cake.
- Freeze extra strawberries and blend them into the frosting for a fresh strawberry taste that improves the frosting’s flavor.
- Chill your frosting before application to ensure it spreads evenly and holds its shape on the cake.
- Adding a layer of strawberry preserves between the cake layers can enhance the flavor and provide additional moisture.
- For an elegant presentation, consider garnishing the cake with mint leaves or edible flowers for a vibrant touch.
- Allow the cake to sit for a few hours after frosting to absorb the flavors and achieve a moist final texture.
Variations and Adaptations
- For a gluten-free version, substitute regular flour with a gluten-free flour blend, ensuring the right texture and taste balance.
- Try adding different fruits such as blueberries or raspberries for seasonal variations that keep the recipe fresh and exciting.
- A vegan adaptation can be made using plant-based butter and replacing eggs with flaxseed meal mixed with water for binding.
- Swap the vanilla frosting for a chocolate or cream cheese frosting for a delightful flavor contrast.
- Add spices like cinnamon or nutmeg to the batter for a warm, autumnal twist that diversifies the traditional recipe.
- Use a flavored yogurt instead of milk in the batter for added richness and a hint of tang that works excellently with strawberries.
- Consider creating a layered cake by doubling the recipe and stacking two layers, enhancing the visual presentation and flavor intensity.
- Serve in individual portions by making mini sheet cakes in smaller pans, perfect for gatherings and parties.
Serving and Presentation Guide
- When plating the cake, use a serrated knife for clean, even slices to showcase the beautiful layers.
- Garnish the top with fresh strawberries and a dusting of powdered sugar for an elegant finish that’s visually appealing.
- Consider serving with a scoop of vanilla ice cream or whipped cream for additional indulgence and flavor contrast.
- For a rustic look, serve pieces on wooden boards or slate platters, which create a warm, inviting atmosphere.
- Pay attention to temperature: this cake is best served at room temperature after a short time out of the fridge, allowing flavors to shine.
- Portion control can be managed by slicing the cake into smaller squares, perfect for serving at parties and ensuring everyone gets a treat.
Wine and Beverage Pairing
- A light, fruity white wine like Sauvignon Blanc pairs beautifully with the freshness of the strawberries in this cake.
- For non-alcoholic options, consider sparkling water with a splash of lemon, which complements the sweetness of the cake nicely.
- A rich, creamy coffee can accentuate the dessert’s flavors, making for a lovely pairing with afternoon tea or coffee dates.
- For an iced beverage, a sweet strawberry lemonade can provide a refreshing contrast, enhancing the summer vibe.
- Chilled herbal teas can also work well, especially those infused with mint or citrus, balancing the sweetness of the cake.
Storage and Shelf Life
- Store the cake in an airtight container in the refrigerator for up to 5 days, ensuring it stays fresh and moist.
- If you prefer, freeze slices wrapped in plastic wrap followed by foil for up to 3 months—perfect for ready-to-eat desserts later.
- Signs of spoilage include a dry, crumbly texture or off-smelling frosting; discard if these signs appear.
- To reheat the cake, place slices in the microwave for 10-15 seconds, or thaw overnight in the refrigerator before serving.
- When moving cake to the fridge or freezer, allow it to cool completely to preserve texture and frosting quality.
Make Ahead Strategies
- Prepare the cake and frosting separately, then frost just before serving to maintain freshness.
- You can also freeze the unfrosted cake layers wrapped securely, then thaw and frost on the day of your gathering.
- Prep your ingredients the day before, measuring out flour, sugar, and other staples to save time.
- Always store the frosting in the refrigerator if preparing ahead, and whip again before spreading to restore texture.
- Keep cut fruit or garnishes fresh by storing them separately and adding them right before serving.
Scaling Instructions
- To halve the recipe, simply reduce all ingredients by half; this works effectively for making smaller batch desserts.
- For doubling or tripling, ensure you have adequate mixing capacity and adjust baking times as needed; larger cakes may require longer to bake.
- Increased batches might need larger pans or multiple sheets; consider using multiple oven racks for efficient baking.
- Adjust baking times based on your oven’s specifics, as well as the size of the pan used; larger cakes generally take longer to cook through.
- When storing leftovers, consider using smaller containers for easier access to individual portions.
Nutritional Deep Dive
- The macro breakdown of this cake offers a delightful balance of carbohydrates from sugar and flour, alongside protein from eggs and dairy.
- Strawberries contribute vital vitamins like vitamin C and antioxidants, promoting overall health and well-being.
- Health benefits include boosting immunity and heart health, thanks to the nutrients found in fresh strawberries and eggs.
- For dietary considerations, moderation is key; enjoy cake as an occasional treat rather than a staple in daily diets.
- Portion analysis indicates that a standard serving size strikes a balance between enjoyment and caloric intake, so consider serving slices accordingly.
- Weight management tips include pairing the cake with fruit or light accompaniments rather than heavier items, promoting a balanced dessert experience.
Dietary Adaptations
- Gluten-free options are easily achieved with the right flour substitute, providing the same delightful taste without gluten.
- Dairy-free variants can be created by swapping out butter and milk for plant-based alternatives while maintaining moisture and flavor.
- Vegan adaptations call for replacing eggs with flaxseed or chia seed mixtures, ensuring the structural integrity of the cake.
- Low-carb versions might utilize almond or coconut flour, along with natural sweeteners like erythritol for lower sugar content.
- Keto-friendly adaptations involve similar replacements while keeping the overall structures and flavors aligned.
- Paleo enthusiasts can make this recipe by omitting processed sugars, opting for honey or maple syrup, and using coconut flour.
- For low-FODMAP options, consider the quantities of each ingredient and pair with a low-FODMAP fruit for sensitive diets.
Troubleshooting Guide
- Texture issues often stem from overmixing; if the cake is dense, next time mix just until ingredients are combined.
- If the flavor balance seems off, consider adjusting the sugar content or adding a bit of salt to enhance flavors.
- Temperature problems may indicate incorrect oven settings; ensure your oven is calibrated correctly and preheated adequately.
- Equipment challenges may arise if you lack certain tools; be resourceful with items you have available, adapting as necessary.
- Ingredient substitutions can cause issues; always try similar ingredients to maintain flavor and texture integrity in results.
- Timing concerns often lead to under or overcooked cakes; use visual cues along with toothpick tests to determine doneness accurately.
Recipe Success Stories
- Readers frequently share their joy of creating variations that reflect personal tastes, inspiring community creativity in adaptations.
- Success stories often include delightful photographs of the cake, showcasing creative presentation styles and garnishes.
- The recipe has inspired families to create their family traditions around baking together, building lasting memories over this beloved dessert.
- Community feedback reveals how different variations have brought friends and family closer, providing a conversational focal point at gatherings.
- Many readers suggest fantastic tips, including local ingredient finds that elevate the flavor and make the recipe uniquely their own.
Frequently Asked Questions
Q1: Can I use frozen strawberries instead of fresh?
A1: Yes, frozen strawberries can be used, but be sure to thaw and drain excess moisture to maintain the cake’s consistency.
Q2: How do I know when the cake is done baking?
A2: Insert a toothpick into the center; if it comes out clean or with a few crumbs, the cake is done. Overbaking can dry it out.
Q3: What if my frosting is too thin?
A3: If the frosting is too thin, try chilling it in the fridge for a bit to thicken or add more powdered sugar to achieve the right consistency.
Q4: Can I make this cake gluten-free?
A4: Absolutely! Use a 1:1 gluten-free flour blend to replace the all-purpose flour for a delicious gluten-free variant.
Q5: How should I store leftover cake?
A5: Store leftover cake in an airtight container in the fridge for up to 5 days, or freeze individual slices for longer shelf life.
Q6: What’s the best way to frost the cake?
A6: Wait until the cake is completely cool, then use a spatula to spread a generous layer of frosting on top and around the sides smoothly.
Q7: Can I add other fruits to the cake?
A7: Definitely! You can mix in blueberries, raspberries, or even peaches to create new flavor profiles while keeping the base recipe intact.
Q8: Is it okay to make the batter ahead of time?
A8: It’s best to bake the batter immediately for the best texture and rise. If needed, prepare dry ingredients beforehand and mix wet ingredients just before baking.
Q9: How can I make the cake more citrusy?
A9: Add lemon zest or orange zest to your batter to enhance the freshness and add a delightful citrus component to the flavors.
Q10: What’s the difference between cake flour and all-purpose flour?
A10: Cake flour has a lower protein content than all-purpose flour, resulting in a more tender crumb for cakes. If using cake flour, reduce the amount slightly for the best results.
Additional Resources
- Explore our related recipes for more delightful desserts to complement your summer gatherings.
- Check out our technique guides for mastering baking skills, from mixing to frosting, crucial for perfect results.
- Learn more about the journey of strawberries from farm to table, enhancing your knowledge of this delicious ingredient.
- For perfect equipment choices, look into our recommendations ensuring you’re well-equipped for your baking adventures.
- Find ideas for seasonal variations which infuse your dessert table with fresh, vibrant flavors throughout the year.
Join the Conversation
You’re encouraged to share your Strawberry Sheet Cake creations on social media! Post your designs, variations, and any special touches you added to the recipe. Engage in our community by sharing reviews and providing tips based on your experiences. We relish seeing how our beloved recipes unite families and friends, bringing joy and sweet flavors to every table.
The Recipe
Strawberry Sheet Cake
Serves: 12
Prep Time: 30 mins
Cook Time: 25 mins
Total Time: 55 mins
Kitchen Equipment Needed
- Large baking sheet
- Mixing bowls
- Electric mixer
- Measuring cups and spoons
- Spatula
Ingredients
- 2 cups all-purpose flour
- 1 ½ cups granulated sugar
- 1 cup unsalted butter, softened
- 4 large eggs
- 1 cup milk
- 2 cups fresh strawberries, mashed
- 2 teaspoons baking powder
- 1 teaspoon vanilla extract
- Pinch of salt
Directions
- Preheat the oven to 350°F (175°C) and grease a large baking sheet.
- In a mixing bowl, cream the butter and sugar until light and fluffy.
- Add in the eggs one at a time, beating well after each addition.
- In another bowl, combine the flour, baking powder, and salt.
- Gradually add the dry ingredients to the wet mixture, alternating with the milk until well combined.
- Fold in the mashed strawberries and vanilla extract.
- Pour the batter into the prepared baking sheet and spread evenly.
- Bake for 20-25 minutes or until a toothpick comes out clean.
- Cool completely before frosting with your favorite icing.
Recipe Notes
- For a richer flavor, consider using a cream cheese frosting.
- Feel free to swap in other berries if strawberries are not available.
- This cake can be made in advance and frozen without frosting for up to 3 months.