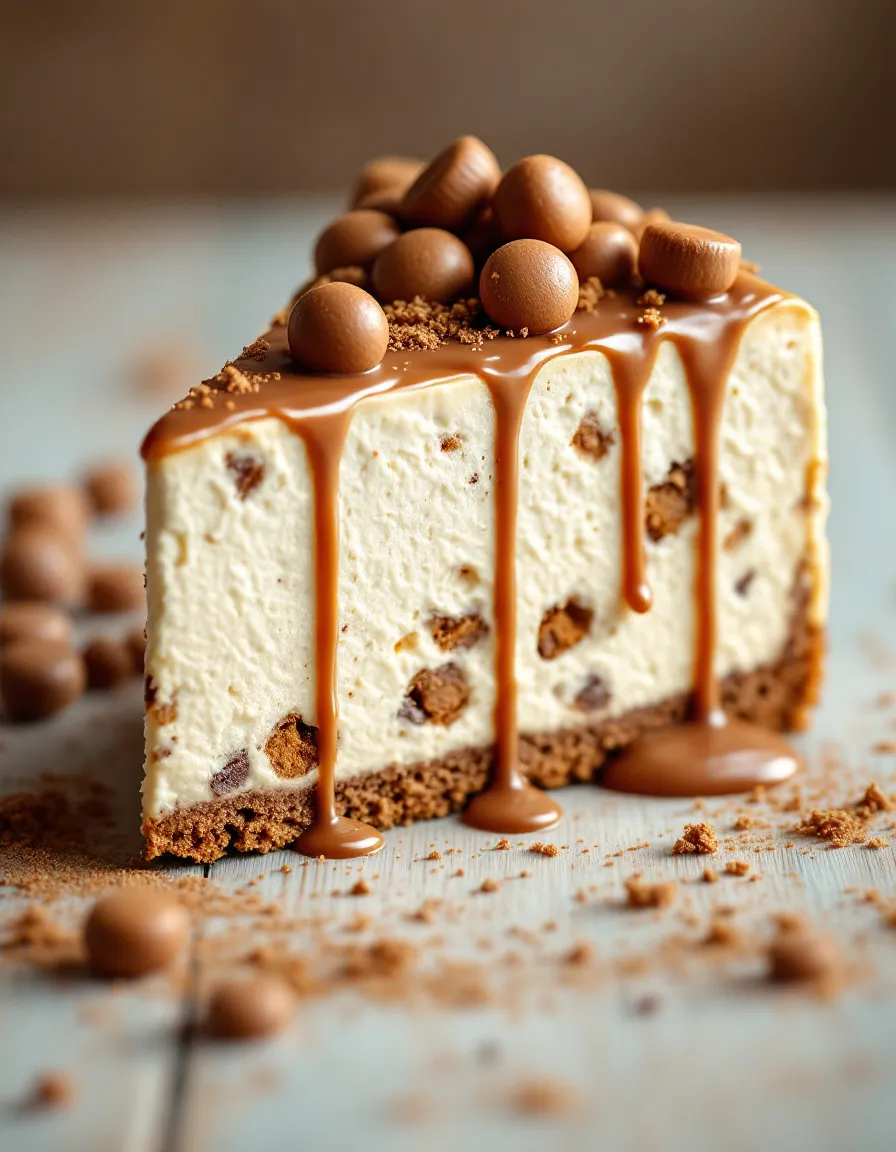
Decadent Malteser Cheesecake: A Delightful No-Bake Treat
If you’re looking for a deliciously easy dessert to impress your friends and family, look no further than this Malteser Cheesecake. Imagine sinking your spoon into a creamy and smooth cheesecake infused with the rich, malty flavor of Maltesers. The gentle sweetness, paired with a crunchy biscuit base, makes each bite an indulgent treat that is perfect for any occasion.
This no-bake Malteser Cheesecake is not only simple to prepare but also requires no baking, making it an ideal recipe for warm days or when you’re short on time. With a light and airy texture, the cream cheese filling is enhanced with crushed Maltesers and whipped cream, creating a dessert that balances sweetness and richness with every mouthful. Serve it chilled for an indulgent delight that everyone will love.
Quick Recipe Highlights
- Flavor Profile: This cheesecake features a delightful combination of sweet and malty flavors from the Maltesers and cream cheese.
- Texture: The creamy filling contrasts beautifully with the crunchy biscuit base and the added Malteser pieces, providing a unique mouthfeel.
- Aroma: The dessert delivers a sweet, inviting aroma that hints at its sugary goodness.
- Visual Appeal: The cheesecake is visually stunning, adorned with whole Maltesers and a glossy chocolate drizzle, making it a showstopper on any table.
- Skill Level Needed: This recipe is beginner-friendly, requiring no advanced techniques, just some creativity.
- Special Equipment: All you need is a springform pan, a mixing bowl, and an electric mixer.
Recipe Overview
- Difficulty Level: Easy to make, this Malteser Cheesecake is perfect for beginner bakers. There’s minimal cooking involved, making it accessible to everyone.
- Category: This dessert fits perfectly into the sweet course category, ideal for gatherings or as a family treat.
- Cuisine: Drawing inspiration from British dessert traditions, this cheesecake adds a playful twist with the beloved Malteser chocolate.
- Cost: The approximate cost for this recipe is around $15, making it budget-friendly.
- Season: It’s perfect for any season, but particularly delightful in summer when chilled desserts are sought after.
- Occasion: Great for parties, holiday celebrations, or as a treat just because; this cheesecake will always be a hit.
Why You’ll Love This Recipe
Malteser Cheesecake stands out for its delicious taste and appealing texture. The combination of a creamy, rich filling dotted with crushed Maltesers creates a delightful contrast to the crunchy biscuit base. Every bite is a harmonious blend of flavors, making it hard to resist going back for seconds.
This cheesecake is extremely convenient to prepare. With minimal cooking required, you can whip it up in just 30 minutes and allow it to set in the fridge while you focus on other tasks. This makes it a perfect dessert for busy weekdays or spontaneous gatherings.
Nutritionally, it offers a balance of indulgence and enjoyment. While it is a treat that is higher in calories, the cream cheese provides some calcium, and with portions controlled, it can be enjoyed guilt-free as part of a varied diet.
Socially, this dessert is a crowd-pleaser, inviting comments and conversations among friends and family. Sharing a slice is a wonderful way to connect, while the visual appeal makes it a centerpiece at any dessert table.
Finally, this cheesecake offers fantastic cost-effectiveness. With a few key ingredients and straightforward preparation, you can create a luxurious dessert that serves eight or more, proving that delightful treats don’t have to break the bank.
Historical Background and Cultural Significance
The cheesecake, in its many forms, has a rich history that dates back to ancient Greece, but the no-bake version gained popularity in the 20th century as refrigeration became common. The Malteser candy itself, developed in the UK in the 1930s, quickened the pace of dessert innovations, allowing sweet lovers to explore flavor combinations that pushed boundaries.
As a part of British culture, Maltesers have become synonymous with shared experiences—whether during movie nights or family gatherings, their inclusion in desserts like the Malteser Cheesecake adds a layer of nostalgia and warmth, resonating deeply with many individuals.
Malteser Cheesecake has evolved over time with various creative takes, often featuring other chocolate varieties, making it a versatile dessert that keeps up with changing tastes and trends. It symbolizes adaptability within the global culinary landscape.
Regional variations of this cheesecake exist, where local flavors can be incorporated. For instance, in Australia, adding Tim Tams instead of Maltesers creates an equally delightful twist on this beloved dessert.
Ingredient Deep Dive
Maltesers: These chocolate-covered malt balls have a rich history and are a staple in British sweets. Great for snacking, they also add a nostalgic flavor to desserts. Nutritionally, they are energy-dense and provide some minerals but should be consumed in moderation.
Cream Cheese: This ingredient is foundational to many cheesecakes, providing a creamy texture and tangy flavor. It’s rich in calcium and protein, contributing to bone health. When selecting cream cheese, check for freshness and aim for full-fat varieties for the best texture in your cheesecake.
Digestive Biscuits: These biscuits serve as the base for the cheesecake. Originating from the UK, they have a slightly sweet and crumbly texture that pairs beautifully with the creamy filling. Their whole grain component offers fiber, although they should again be eaten in moderation.
Whipped Cream: Adding lightness to the cheesecake, whipped cream enhances the flavor and gives it a delightful texture. It’s a source of calcium but should be used sparingly due to its fat content. When choosing whipped cream, opt for fresh over canned for best flavor.
Common Mistakes to Avoid
- Not properly softening cream cheese: Ensure your cream cheese is at room temperature for a smooth filling; otherwise, it will be lumpy.
- Using too much gelatin: If you decide to add gelatin to firm the cheesecake, remember that less is more to avoid a rubbery texture.
- Not letting the cheesecake chill long enough: For best results, allow the cheesecake to set for at least 4 hours, or overnight if possible.
- Skipping the biscuit base: The base adds structure and texture; don’t omit it.
- Not crushing the biscuits finely: For an even base that holds together well, crush the biscuits into fine crumbs.
- Over-mixing the filling: Mix just until combined to maintain a light, airy texture.
- Using flavored cream cheese: Stick with plain cream cheese to keep the authentic taste of the cheesecake.
- Serving while too warm: Ensure the cheesecake is well-chilled before serving for the best flavor and texture.
- Not adjusting sweetness: Taste the filling before setting it in the fridge, and adjust the sugar to your preference.
- Using stale biscuits: For the best taste, always use fresh digestive biscuits.
Essential Techniques
Mixing Ingredients: It’s essential to combine all ingredients evenly to maintain a harmonious flavor. Use an electric mixer and avoid over-beating to keep the filling light. Look for a creamy consistency for the perfect cheesecake filling.
Chilling: Proper chilling is crucial. Allowing the cheesecake to firm up in the refrigerator enhances the texture. Aim for a minimum of 4 hours of chill time to ensure the cheesecake is set and flavors meld together harmoniously.
Pro Tips for Perfect Malteser Cheesecake
1. Use high-quality Maltesers for richer flavor. The better the chocolate, the more delicious your cheesecake will be.
2. Consider adding a layer of melted chocolate on top for extra decadence – it pairs beautifully with the creamy filling.
3. Add an extra sprinkle of crushed Maltesers on top before serving for a beautiful presentation.
4. Ensure you’re using full-fat cream cheese for a creamy texture; low-fat versions can become grainy.
5. Don’t rush the chilling process – quality improves significantly with longer chill times.
6. For a fancy presentation, serve slices with fresh berries on the side.
7. Always taste the filling before pouring it into the crust to ensure it meets your sweetness preferences.
8. Store any leftovers covered in the fridge; it can last up to 3 days without losing flavor.
Variations and Adaptations
1. Swap Maltesers with your favorite chocolate candy bars for a unique twist tailored to your tastes.
2. For a fruitier option, mix in chopped strawberries or raspberries into the filling for added freshness.
3. Add a layer of caramel sauce on top for a delightful contrast against the chocolate flavor.
4. Try a cookie crust alternative, such as Oreos or graham crackers, for different flavor profiles.
5. Create a gluten-free version with gluten-free biscuits to cater to dietary restrictions.
6. Infuse the filling with flavors such as vanilla or orange zest for an aromatic upgrade.
7. For a lighter version, substitute half of the cream cheese with Greek yogurt.
8. Drizzle with a chocolate ganache for an elegant touch during special occasions.
Serving and Presentation Guide
Plating techniques can enhance the cheesecake’s visual appeal. Serve slices on clean plates with a drizzle of chocolate or caramel sauce around the edges for an elegant presentation. Fresh toppings, such as whipped cream or berries, can elevate the look and freshness of your cheesecake.
Garnishing ideas include a sprinkle of crushed Maltesers on top or fresh mint leaves for color contrast. Traditionally, this cheesecake pairs perfectly with a dollop of whipped cream, but modern favorites include serving it with a side of fruit coulis.
For temperature considerations, ensure the cheesecake is thoroughly chilled before serving. Cut clean slices with a warm knife for an immaculate look.
Lastly, being mindful of portion control can enhance the dining experience, serving smaller slices can help moderate indulgence while still satisfying the sweet tooth.
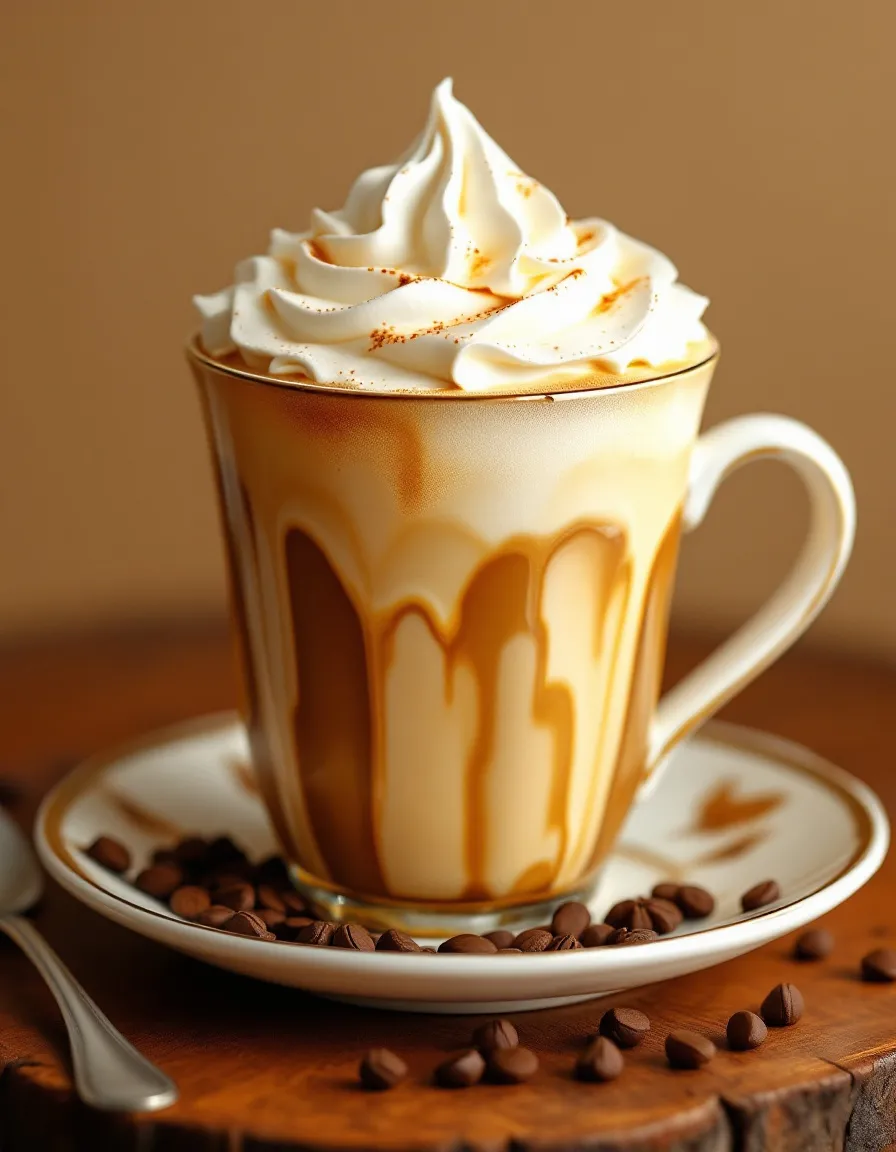
Wine and Beverage Pairing
For wine lovers, a rich dessert wine like a late harvest Riesling or a sweet Moscato pairs beautifully with the Malteser Cheesecake, as their sweetness complements the flavors of the cheesecake.
If you’re looking for non-alcoholic alternatives, consider serving a chilled raspberry or vanilla soda that mimics the hints of maltiness in the dessert.
Additionally, rich coffee or espresso can act as a lovely counterpoint to the sweet cheesecake. Always consider temperature; serve your coffee hot to contrast with the chilled dessert effectively.
Storage and Shelf Life
To maintain the cheesecake’s freshness, store it in an airtight container in the refrigerator. It can last for up to 3 days without losing its flavor or quality, although it’s best enjoyed freshly made.
The key to storage is temperature; make sure your fridge is set correctly to prevent spoilage. If freezing is needed, wrap the cheesecake tightly in plastic wrap and then foil to protect it — it can be frozen for up to 2 months.
When reheating, allow it to thaw overnight in the refrigerator before serving again. Avoid microwaving; instead, serve cool directly from the fridge for optimal texture.
Make Ahead Strategies
Preparing this Malteser Cheesecake ahead of time can save you effort when entertaining. You can make the cheesecake a day or two in advance, allowing it to chill and set properly in the fridge.
If you’re planning an event, prepare the biscuit base the night before for easy assembly. Keeping the filling and base separate until the day of serving can help maintain the texture and flavor.
For the best flavor, avoid adding any fresh garnishes until just before serving. This includes whipped cream and fresh fruits, which can wilt or lose their texture if prepped too far in advance.
Scaling Instructions
Should you wish to adjust the serving size, halving the ingredients will still yield a delicious cheesecake but be mindful to adjust chilling times as needed.
Doubling or tripling the recipe is also feasible; just ensure your mixing bowl is large enough to accommodate the increased volume. You may need to adjust the size of your baking equipment according to the yield.
When scaling, it’s crucial to maintain accurate measurement ratios. If you find your cheesecake coming out too firm or too soft, revisit your calculations for ingredient proportions.
Nutritional Deep Dive
When enjoying Malteser Cheesecake, each slice generally contains a moderate amount of calories primarily from sugar and fat. A single serving can provide 300-400 calories depending on the serving size and ingredient ratios.
This cheesecake is rich in carbohydrates, providing a quick energy boost, while cream cheese offers protein and some calcium, contributing to dietary needs.
For those monitoring their intake, consider serving smaller portions to still enjoy the flavors while regulating consumption. Pairing with fresh fruit can complement the dessert while adding fiber.
Dietary Adaptations
For a gluten-free Malteser Cheesecake, use gluten-free digestive biscuits or cereals in the base, ensuring all other ingredients are verified as gluten-free.
Dairy-free adaptations can involve using dairy-free cream cheese and alternatives to heavy cream, ensuring that all toppings are also non-dairy.
For vegan adaptations, opt for vegan cream cheese and coconut whipped cream, making sure that your Maltesers or similar candies align with vegan principles.
A low-carb or keto version can be formulated using almond flour for the crust and sugar substitutes for sweetness, while maintaining a custard-like consistency.
Troubleshooting Guide
Texture issues, such as a crumbly filling, can often arise from overmixing or not allowing ingredients to reach room temperature before combining. Aim for a smooth consistency when blending.
If flavor is unbalanced, consider adjusting sweetness levels during the mixing process, as the primary flavor profile often needs tweaking before chilling.
Temperature problems can affect texture; ensure your cheesecake sets fully in the refrigerator without being disturbed for a cohesive firmness.
If equipment challenges arise, like a difficult springform pan, be patient and consider lining it with parchment paper for easier serving.
Ingredient substitutions, like using flavored cream cheese, can drastically change the profile. Keeping it classic often yields the most successful result.
Recipe Success Stories
Many have shared their fond experiences with Malteser Cheesecake, celebrating successful parties where this dessert was the star. A simple recipe has helped home bakers create impressive dessert tables.
Variation successes abound, with readers substituting Maltesers with other candies and witnessing delightful outcomes that sparked creativity.
Readers often share suggestions for modifications, enriching the community with their unique takes and innovative twists on the traditional cheesecake.
Photography tips for aesthetic social media posts focusing on the rich chocolate and creamy texture have inspired many to document their culinary creations beautifully.
Frequently Asked Questions
Can I use other chocolates instead of Maltesers?
Absolutely! You can experiment with various chocolate candies like Snickers or M&Ms for a different flavor profile.
How long does the cheesecake last in the fridge?
If properly stored, the cheesecake can last for up to 3 days in the refrigerator, but it’s best enjoyed fresh.
Can I make this cheesecake vegan?
Yes, substitute dairy products with vegan alternatives, such as coconut whipped cream and vegan cream cheese, for a great outcome.
How do I know when the cheesecake is set properly?
The cheesecake should feel firm to the touch but still slightly jiggly in the center. A good rule of thumb is allowing at least four hours in the fridge.
Can I freeze the cheesecake?
Yes, you can freeze the cheesecake for up to 2 months. Just be sure to wrap it tightly in plastic wrap and foil.
What can I do if the filling is too dry?
If your filling feels too dry, try adding a bit of whipped cream or milk during mixing to restore moisture.
Can I use a different crust?
Yes! You can use cookie crusts or even a gluten-free option for those with dietary restrictions.
Is it necessary to use gelatin?
No, gelatin is not necessary for this recipe unless you want a firmer texture. The cheesecake can set beautifully without it.
Can I make a smaller version of this cheesecake?
Definitely! Just halve the ingredients for a smaller cheesecake, adjusting the chilling time accordingly.
How can I decorate the cheesecake?
You can decorate with fresh fruit, crushed Maltesers, or a drizzle of chocolate sauce for a beautiful finishing touch.
Additional Resources
Explore related recipes that complement your Malteser Cheesecake, including other no-bake treats and chilled desserts. Consider browsing our technique guides for tips on cheesecake making and ingredient information like chocolate varieties.
Check out equipment recommendations for essential baking tools that will enhance your culinary experience whether you’re a novice or a pro.
Seasonal variations are also worth exploring, making the most of fresh ingredients throughout the year to keep your cheesecakes exciting.
Join the Conversation
Share your Malteser Cheesecake creations on social media! We would love to see your interpretation and hear about your baking experiences. Engage with our community through recipe reviews and feedback, thus enriching our collective culinary journey.
Don’t forget to capture the beauty of your dessert; photography tips can help enhance your shots, featuring the delectable layers and textures of this stunning cheesecake.
The Recipe
Malteser Cheesecake
Serves: 8
Prep Time: 30 mins
Cook Time: 0 mins
Total Time: 30 mins
Kitchen Equipment Needed
- Springform pan
- Mixing bowl
- Electric mixer
- Spatula
- Measuring cups
Ingredients
- 200g Digestive biscuits
- 100g unsalted butter, melted
- 600g cream cheese, softened
- 200ml heavy whipping cream
- 150g powdered sugar
- 100g Maltesers, roughly crushed
- Additional Maltesers for topping
Directions
- Crush the digestive biscuits into fine crumbs and mix with melted butter.
- Press the mixture into the base of a springform pan to form the crust.
- In a mixing bowl, beat the softened cream cheese and powdered sugar until smooth and creamy.
- In another bowl, whip the heavy cream until soft peaks form, then fold into the cream cheese mixture.
- Gently fold in the crushed Maltesers until evenly distributed.
- Pour the filling over the crust and smooth the top.
- Chill in the refrigerator for at least 4 hours, or overnight, until set.
- Before serving, decorate the top with additional Maltesers and a drizzle of chocolate if desired.
Recipe Notes
- For a richer flavor, consider using a combination of milk and dark chocolate Maltesers.
- This cheesecake can be made a day in advance and stored in the fridge.
- Feel free to adjust sweetness by varying the amount of powdered sugar.