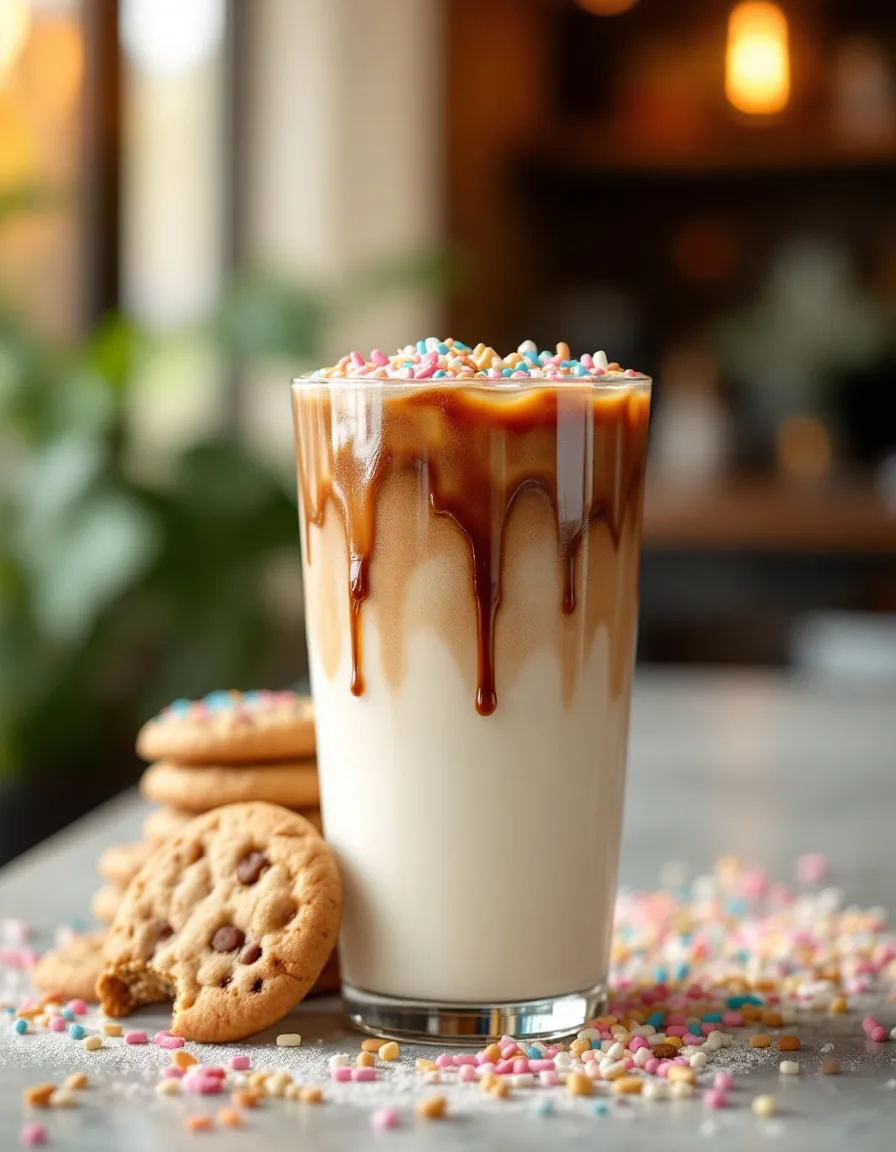
Starbucks’s Strawberry Matcha: The New Secret Menu Item TikTok Is Obsessed With
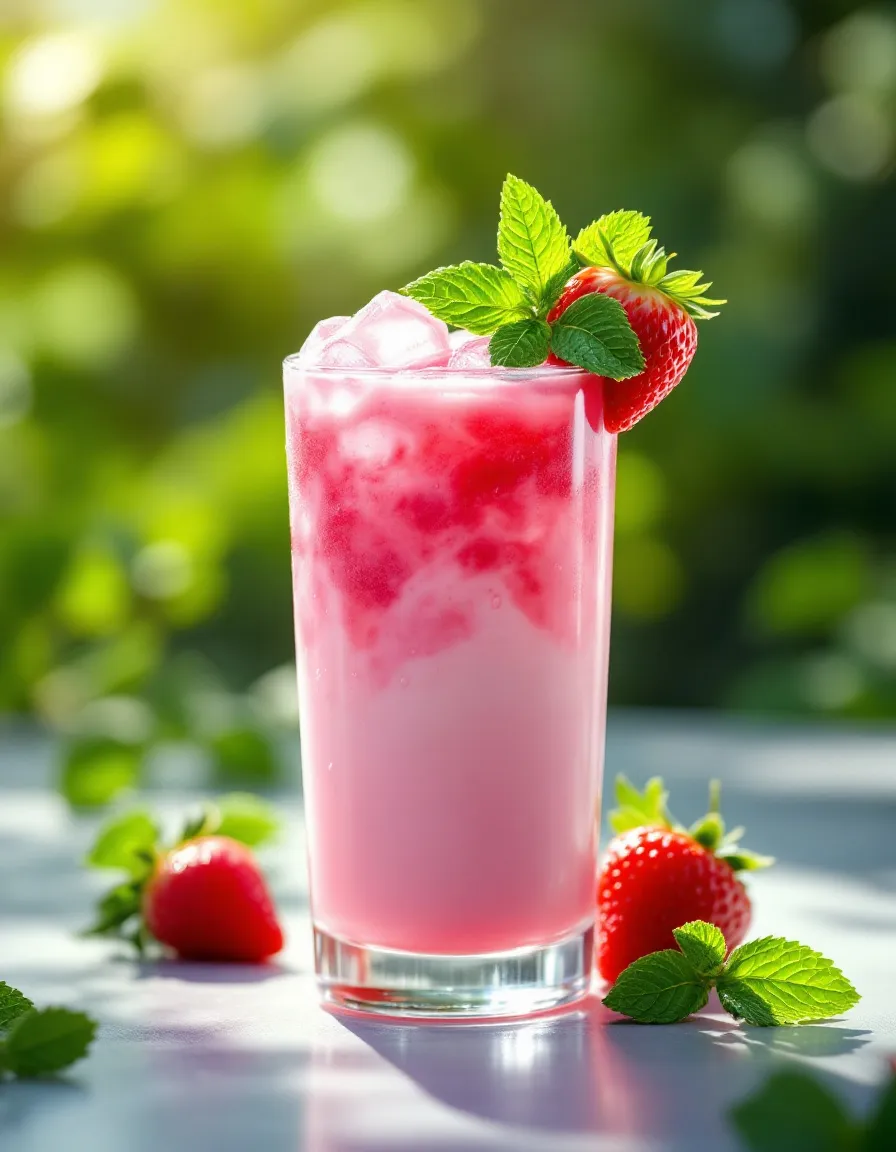
The buzz around Starbucks’s Strawberry Matcha has captured the hearts and taste buds of TikTok users everywhere. This vibrant drink fuses the earthiness of matcha with the sweetness of fresh strawberries, resulting in a refreshing, Instagram-worthy concoction that’s just as delightful to drink as it is to look at. Imagine a creamy and indulgent beverage that’s both energizing and soothing, perfect for warm afternoons or as a morning pick-me-up. The layers of green matcha contrasting with bright red strawberries make for a visual feast as you enjoy these delightful flavors.
One of the best aspects of this Strawberry Matcha drink is its adaptability. You can whip it up in just a few minutes, using fresh ingredients that not only taste fabulous but are also packed with nutrients. This drink balances the antioxidants from matcha with the vitamins in strawberries, making it a tasty treat that can also contribute to your daily wellness goals. Whether you’re sipping it on a sunny patio or sharing it with friends, this Strawberry Matcha will undoubtedly leave a lasting impression.
Quick Recipe Highlights
- Flavor Profile: This Strawberry Matcha boasts a delightful combination of earthy, slightly bitter matcha and sweet, succulent strawberries that harmoniously elevate each sip.
- Texture: Each mouthful offers a creamy and smooth texture, contrasting with the refreshing juiciness of the strawberries, providing a satisfying drinking experience.
- Aroma: You’ll enjoy the fresh scent of strawberries blended with the earthy notes of matcha, creating an aromatic profile that is both inviting and invigorating.
- Visual Appeal: The stunning contrast of vibrant green and red makes this drink not just delicious but also a feast for the eyes, sure to impress anyone you serve it to.
- Skill Level Needed: With a straightforward recipe that requires no special cooking techniques, this drink is accessible for anyone from novice to expert.
- Special Equipment: You’ll need a blender or mixer to combine the ingredients effectively, plus a nice glass for serving your Instagram-ready drink.
Recipe Overview
- Difficulty Level: Easy, suitable for those who may not have extensive cooking skills. The simplicity of execution makes it an approachable recipe.
- Category: This drink fits perfectly into the beverage category, ideal for breakfast, brunch, or a refreshing afternoon treat.
- Cuisine: Drawing from Japanese culinary traditions with matcha, this recipe also celebrates fresh fruits, making it a delightful fusion of flavors.
- Cost: Inexpensive to prepare, as matcha powder and strawberries are affordable and readily available at most grocery stores.
- Season: Best made during the warmer months when strawberries are in season, but delicious year-round with frozen options!
- Occasion: Perfect for brunches, casual gatherings, or a fun treat any day when you want to impress guests with little effort.
Why You’ll Love This Recipe
Using fresh, high-quality ingredients creates a taste sensation that captivates the palate, combining creamy matcha flavor with the sweet essence of strawberries. This Strawberry Matcha drink is not only visually appealing but also incredibly refreshing, providing an energizing boost without overwhelming sweetness. The bright green of the matcha ground powder is balanced perfectly by the luscious, ruby red strawberries, making it both a treat for the taste buds and a visual delight.
In addition to its exceptional taste, this recipe is effortlessly convenient. It requires minimal ingredients and can be whipped up in just five minutes. With only a blender or mixer needed, you can prepare this fabulous drink anytime, whether you’re at home or on the go. Simply blend or shake all the ingredients together, and your drink is ready to go, perfect for busy mornings or surprise visits from friends.
Another winning aspect of this Strawberry Matcha is its nutritional value. Matcha is known for its high levels of antioxidants, promoting overall health and wellness, while strawberries provide a good source of vitamin C and folate. This combination ensures that your refreshing drink is not only a treat but also contributes to a balanced diet, making you feel good while enjoying delicious flavors.
Socially, this Starbucks-inspired drink makes for a fantastic sharing experience. Its aesthetic appeal is perfect for social media snapshots, encouraging people to share their experiences along with variations they tried. Whether served at a brunch with friends or featured at a backyard barbecue, this drink fosters conversation and fun while elevating the gathering experience with its vibrant look and refreshing taste.
Finally, the cost-effectiveness of this recipe makes it even more enticing. With staple ingredients like strawberries and matcha powder being relatively inexpensive, you can recreate this popular Starbucks drink at home without breaking the bank. Plus, it lets you control the quality and source of your ingredients. Saving money while enjoying a trendy drink? It’s a win-win!
Historical Background and Cultural Significance
The origin of matcha dates back centuries to China, where powdered green tea was first introduced before making its way to Japan. It became an integral part of Japanese tea ceremonies, representing harmony and respect. The practice of drinking matcha evolved over time, gaining popularity due to its unique flavor and health benefits. Combining matcha with strawberries is a modern twist that symbolizes the fusion of traditional and contemporary tastes, appealing to the taste preferences of today’s consumers.
Culturally, tea plays a vital role in various societies, often associated with rituals and gatherings. In Japan, the tea ceremony is a profound cultural expression reflecting tranquility and mindfulness. Strawberry Matcha blends this rich cultural tradition with the contemporary love for creative, Instagram-ready beverages, effectively bridging the past and present while making it accessible to a wider audience.
The evolution of the Strawberry Matcha drink can be attributed to the rise of social media platforms like TikTok, where innovative and aesthetically pleasing food trends capture the public’s imagination. Users began experimenting with matcha and fruit combinations, leading to the creation of this visually stunning drink that appeals to younger generations who value both flavor and visual presentation.
Regional variations of this drink include using different fruits like mango or blueberries or even adjusting the sweetness levels according to personal preferences. As the trend continues to grow, we can expect to see even more exciting adaptations of the Strawberry Matcha, solidifying its place within modern beverage trends.
Ingredient Deep Dive
Matcha
Matcha, made from finely ground powdered green tea leaves, has its roots in ancient Chinese and Japanese history. Once a beverage reserved for emperors, it’s now widely celebrated for its numerous health benefits, including high antioxidant content that supports overall health. When selecting matcha, look for vibrant green colors, indicating freshness and quality; avoid dull or yellowish hues. Store matcha in a cool, dark place to maintain its flavor, and when not directly slotted for a recipe, it should be used within 2-4 weeks of opening to guarantee quality. Substituting matcha can be tricky, but a high-quality powdered green tea can offer a similar taste experience when needed.
Strawberries
Strawberries are not just delicious; they also have a rich cultural significance, often symbolizing love and passion. They are a fantastic source of essential vitamins, particularly vitamin C, which contributes to skin health and immune support. When selecting strawberries, look for those that are vibrant red with a fresh green stem. Store them in the fridge to prolong freshness, and they are best enjoyed within a few days after purchase. If fresh strawberries aren’t available, frozen strawberries can serve as a suitable substitution, maintaining flavor and texture in the final drink.
Common Mistakes to Avoid
- Not Using Fresh Ingredients: Ensure that your matcha and strawberries are fresh to achieve the best flavor. Old ingredients can diminish the drink’s taste.
- Overblending: Blend just until well combined; overdoing it can cause the matcha to become overly bitter.
- Incorrect Matcha Measurement: Use the right amount of matcha for balance—too much can overpower the strawberries, while too little may go unnoticed.
- Neglecting Temperature: Make sure to serve the drink chilled; using warm ingredients can affect the refreshing quality.
- Skimming on Sweetness: Adjust sweetness to your liking to ensure the flavor balance is right, especially if using unsweetened matcha.
- Skipping the Layering: For a beautiful presentation, avoid mixing the ingredients completely; leave some separation for the best visual effect.
- Improper Blending Technique: Use a high-speed blender to achieve a smooth consistency without chunky bits.
- Storing Incorrectly: Drink immediately for the best flavor; if left too long, the drink may separate and lose its appeal.
Essential Techniques
Blending
Blending is crucial for achieving a smooth consistency in the Strawberry Matcha drink. Start by adding the softer ingredients, like strawberries, into the blender first, followed by matcha and any liquids. This method ensures that the harder ingredients get smoothly blended without overdoing it. A common pitfall is blending too long, which can lead to inconsistencies, so blend until all components are well combined but still visually appealing.
Layering
Mastering layering is vital for achieving that stunning visual effect typical in drinks like the Strawberry Matcha. To accomplish this, pour your blended ingredients slowly, allowing them to settle in layers rather than fully incorporating them. Start with your matcha layer, followed by the strawberry puree to create a beautiful gradient effect. Pay attention to pouring speed; pouring too quickly can cause the layers to mix, negating the aesthetic appeal.
Pro Tips for Perfect Starbucks’s Strawberry Matcha
1. Choose high-quality ceremonial grade matcha for the best flavor profile; it will significantly elevate the drink’s taste.
2. For an indulgent touch, consider adding a splash of coconut milk or almond milk for a creamier consistency that complements the strawberries.
3. If you’re looking for a sweeter drink, opt for honey or agave syrup instead of granulated sugar, as it blends more smoothly with the liquids.
4. Prioritize ripe strawberries for the best sweetness; if they are too firm, consider letting them sit out for a day to ripen slightly.
5. If you want additional flavor, try adding a dash of vanilla extract for an unexpected twist that enhances the drink’s complexity.
6. Experiment with toppings like whipped cream or crushed nuts for added texture, flavor, and visual appeal.
7. For an ice-cold version, use frozen strawberries or ice cubes in place of some of the fruits to chill the drink without watering it down.
8. Serve in a clear glass to showcase the beautiful layers and colors, making it Instagram-ready for all your social media followers.
Variations and Adaptations
To keep your Strawberry Matcha drink exciting, consider incorporating seasonal variations. In autumn, you can swap strawberries for pumpkin puree for a fall-themed drink, or add a dash of pumpkin spice for a twist. Summer allows for the use of ripe peaches or melons, creating a refreshing summer vibe that’s perfect for hot days. Additionally, feel free to experiment with dairy alternatives, such as oat milk or almond milk, for a vegan-friendly version while still maintaining the creamy texture.
Flavor adaptations can also introduce other complementary fruits. Adding bananas creates a rich and mellow taste, while citrus zests, like lemon or lime, can provide an invigorating kick. For a more decadent treat, you can add a scoop of vanilla or strawberry ice cream for a dessert-like indulgence. Regarding presentation, try utilizing edible flowers or fresh mint leaves as garnishes to elevate your drink to a premium experience, further enhancing visual appeal.
Serving and Presentation Guide
When serving your Strawberry Matcha, consider the glassware. Clear, tall glasses showcase the stunning layers you’ve created. For plating, you might want to add a swirl of cream on top, or drizzle some extra strawberry puree over the drink for an artistic touch. Garnishing with a fresh strawberry on the rim or a sprig of mint can enhance not only the flavor but also the drink’s appeal.
For modern serving suggestions, consider utilizing colorful straws or a decorative glass full of ice, especially when serving to guests. Temperature control is vital; this drink is best served immediately after making to preserve freshness. If enjoying outside, chill the glass beforehand or keep it in an ice bucket for a delightful experience on hot days.
Portion control is also essential—consider serving in smaller glasses for tasting flights featuring different variations or flavors of Strawberry Matcha to share excitement during gatherings. This approach allows people to experience various flavors without committing to a full drink, making it a fun and engaging way to present your creations.
Wine and Beverage Pairing
When it comes to pairing beverages with your Strawberry Matcha, a light sparkling wine complements the fruity notes well, adding an element of sophistication to the drink. For those preferring non-alcoholic options, a refreshing herbal tea, like mint or chamomile, provides an excellent contrast, enhancing the matcha’s earthy tones.
If you want to explore more traditional options, matcha pairs nicely with high-quality green tea, which can amplify its flavors. Serve these drinks chilled or at room temperature to maintain balance without overpowering the drink’s refreshing character. Additionally, for coffee lovers, consider a light cold brew version on the side for those who enjoy a little caffeine kick mixed with fruity goodness.
Storage and Shelf Life
Proper storage methods for your Strawberry Matcha drink are essential for maintaining flavor and freshness. If you’ve prepared more than you can consume, store the drink in an airtight container in the refrigerator, where it can last for up to two days. However, for optimal freshness and texture, it’s recommended to consume it immediately after preparation, as separation can occur over time.
When reheating or consuming leftovers, be cautious. If you’ve added ice, it’s best to discard the ice and enjoy the drink cold to avoid dilution. If the drink has settled, gently stir it, but be mindful not to disrupt any beautiful layers you may have created. For long-term storage, consider freezing strawberry puree separately and blend it with matcha when you’re ready to enjoy this refreshing treat again.
Make Ahead Strategies
To make your Strawberry Matcha easier to prepare on busy days, consider prepping your ingredients ahead of time. You can wash and slice strawberries, then store them in an airtight container in the fridge. You might also prepare matcha in advance by measuring it out for easier mixing when you’re ready to make the drink.
Another strategy is creating pre-made strawberry puree. Blend strawberries and store the puree in the fridge; this can last for up to three days, making assembly a breeze. Quality can impact the final taste, so be sure to check everything before use. Assemble your drink shortly before serving to retain its texture and freshness so you can enjoy all the delightful flavors.
Scaling Instructions
If you want to adjust the recipe serving size, scaling it is straightforward. To halve the recipe, use a single serving of strawberries and adjust matcha and liquid accordingly. Doubling or tripling the recipe for a gathering simply requires adding more strawberries and increasing matcha proportions, though it’s wise to taste along the way to maintain desired flavor balance.
When scaling, ensure you have larger blending equipment if preparing for a crowd. A blender pitcher with more capacity can help combine larger quantities of ingredients effectively. Consider the timing adjustments; while prep time remains largely the same, making larger quantities may require a bit more time for assembly and blending, so plan accordingly. Store any extras properly to maintain freshness if not consumed immediately.
Nutritional Deep Dive
When analyzing the nutritional aspects of your Strawberry Matcha, consider its macro breakdown. Each serving typically contains moderate carbohydrates from strawberries and minimal protein; however, the role of matcha as a source of antioxidants adds significant health benefits. This drink also provides dietary fiber essential for digestion and supports the feeling of fullness.
Micronutrient analysis reveals that strawberries are a rich source of vitamin C and potassium, while matcha delivers vitamins A and K, along with some essential minerals. The health benefits of this drink are manifold, including improved metabolism from matcha and immune health support thanks to strawberries’ vitamin content. When enjoying this drink, consider portion analysis to balance your intake for broader healthy dietary practices.
For those managing weight, Strawberry Matcha can satisfy sweet cravings with natural flavors, providing a healthier alternative to traditional sugary drinks. Opting for unsweetened or lightly sweetened versions can help maintain your dietary goals while still indulging in a delightful treat. This recipe serves as a flavorful option that can seamlessly fit various dietary lifestyles when whipped up with mindful ingredients.
Dietary Adaptations
For those following a gluten-free diet, this Strawberry Matcha recipe is naturally gluten-free as it utilizes whole ingredients without any additives. Vegan versions can be achieved by using plant-based milk alternatives and ensuring you select sugar options, like agave, that meet vegan standards.
If someone is on a low-carb or keto diet, sugar can be substituted with low-carb sweeteners, and the calorie count can be adjusted by moderating the amount of strawberries used. Additionally, paleo followers can enjoy this recipe with whole foods, ensuring they use only fresh ingredients and proper sweeteners that align with paleo guidelines.
By recognizing dietary preferences, you can create adaptations that maintain flavor while often enriching the nutritional profiles across various eating habits, ensuring everyone can enjoy this Strawberry Matcha delight.
Troubleshooting Guide
Should you encounter texture issues, such as a gritty drink, ensure you’re using fine-quality matcha and blend well enough to incorporate all ingredients smoothly. If the flavor feels off, particularly if overly sweet, balancing flavors with a bit of additional matcha or acidity from citrus zest can lift the taste profile without overpowering sweetness.
In case of temperature problems, consider adjusting the method to chill your drink properly or adding ice cubes at the end to ensure it’s refreshingly cold. If any equipment challenges arise during preparation, double-check your appliance settings; some blenders might require different speeds for effective blending.
Ingredient substitutions may affect texture or taste, so it’s always best to modify with caution. Consider timing concerns as you prepare larger batches, as agitation and blending times will expand when increasing quantities, and ensure sufficient tasting along the process to perfect the final result.
Recipe Success Stories
Community feedback about the Strawberry Matcha has been overwhelmingly positive, with friends sharing their unique variations and adaptations. Many enjoy playing with ingredient ratios, sparking engaging conversations and delightful exchanges of ideas among food enthusiasts. Success stories highlight personal twists such as the use of different fruits for sourcing flavors that fit individual preferences.
Readers have suggested enhancing the drink visually using edible flowers or unique garnishing techniques, further inspired by its aesthetic appeal. The vibrant contrast of colors has encouraged photography tips, leading more enthusiasts to capture and share their experiences around creating this aesthetically stunning drink.
These shared efforts within the community create a welcoming space for experimentation, using personal preferences and feedback as drivers for finding new heights with this delicious Strawberry Matcha recipe. Each successful attempt serves as motivation for others to join in and explore their versions, showcasing the drink’s versatility in flavor and presentation.
Frequently Asked Questions
1. Can I make this recipe dairy-free?
Yes! You can easily make it dairy-free by using almond milk, coconut milk, or any other plant-based milk instead of regular milk. This keeps the flavor delightful while accommodating dietary preferences.
2. How do I store the Strawberry Matcha if I can’t finish it in one go?
Store any leftover Strawberry Matcha in an airtight container in the fridge for up to two days. Be sure to stir well before consuming, as separation may occur over time.
3. Is matcha good for health?
Absolutely! Matcha is packed with antioxidants, including EGCG, which can boost metabolism and offer various health benefits, including improved heart health and inflammation reduction.
4. Can I use frozen strawberries for this recipe?
Yes! Frozen strawberries can work just as well, especially if fresh strawberries are out of season. Just make sure to allow some time for thawing before blending for easier incorporation.
5. What is the best way to sweeten my drink?
You can sweeten your Strawberry Matcha with honey, agave syrup, or even stevia for a low-calorie option. Adjust the sweetness according to your taste preference.
6. Can I prepare the ingredients ahead of time?
Definitely! Pre-slicing strawberries and measuring out matcha in advance can save time when you’re ready to make your drink.
7. How long does matcha last after opening?
Matcha can last about 2-4 weeks after opening if stored in a cool, dark place. Make sure to seal it tightly to preserve freshness.
8. What if I want a richer flavor?
Adding a splash of coconut milk or a scoop of vanilla ice cream can introduce a richer, creamier mouthfeel, enhancing both the taste and texture of your drink.
9. Can I make this drink with other fruits?
Absolutely! You can substitute other fruits like bananas, peaches, or even citrus fruits to create new flavor combinations. Experimenting is encouraged!
10. What kind of equipment do I need to make the drink?
All you need is a blender or mixer to combine the ingredients effectively and a glass for serving. It’s quite simple and user-friendly!
Additional Resources
If you’re interested in more recipes inspired by popular coffee shop trends, check out similar beverages like Vietnamese Iced Coffee or Chai Tea Latte. For those new to matcha, look for guides on selecting high-quality matcha or other delicious matcha recipes available on our website. Utilizing the right kitchen tools, such as a matcha whisk, can enhance your overall experience, making the preparation process smoother and more enjoyable.
If seasonal variations appeal to you, consider checking different fruits and flavor profiles for refreshing summertime versions to ensure you can enjoy a versatile selection of options year-round.
Join the Conversation
We want to hear from you! Share your experiences making the Strawberry Matcha and any creative twists you’ve added to the original recipe. Don’t forget to tag us on social media with your beautiful creations or share your photography tips that might help others find inspiration. Providing your reviews or suggestions helps us improve our offerings and create a community where everyone feels welcome to share their recipe experiments.
We also encourage you to join in the discussion about dietary adaptations; your tips could inspire those looking for gluten-free, vegan, or low-carb alternatives. Join us in the conversation and help each other on culinary adventures!
The Recipe
Starbucks’s Strawberry Matcha
Serves: 1
Prep Time: 5 mins
Cook Time: 0 mins
Total Time: 5 mins
Kitchen Equipment Needed
- Blender or Mixer
- Measuring Cups
- Glass for Serving
Ingredients
- 1 tablespoon matcha powder
- 1 cup fresh strawberries, hulled
- 1 cup milk (dairy or non-dairy)
- 2 teaspoons sweetener of your choice (like honey or agave)
Directions
- In a blender, combine the matcha powder and milk. Blend until it’s smooth and fully incorporated.
- In a separate bowl, mash the strawberries with a fork or blend lightly until you achieve the desired consistency.
- Layer the matcha mixture into a glass, followed by the mashed strawberries, leaving some separation between the two layers for the perfect presentation.
- Optionally, garnish with fresh strawberries or mint leaves.
- Serve immediately and enjoy your refreshing drink!
Recipe Notes
- Ensure the matcha is finely sifted to avoid clumping.
- Adapt sweetness to your liking; taste after each addition.
- Fresh strawberries can be replaced with frozen ones for a similar flavor.