Iced Oatmeal Cookie Chai Latte: A Refreshing Twist on a Classic Favorite
Embrace the warm spices and creamy goodness of an Iced Oatmeal Cookie Chai Latte. This delightful drink captures the essence of your favorite oatmeal cookies and transforms it into a refreshing, iced beverage that’s perfect for any time of the day. The blend of rich black tea, aromatic spices, and creamy milk creates a soothing yet invigorating experience that will awaken your senses. Imagine sipping this luscious drink while relaxing on a sunny afternoon, making the world outside feel just a little more joyful.
This Iced Oatmeal Cookie Chai Latte not only satisfies your taste buds but also transports you to a cozy café with every sip. The combination of ground oats, brown sugar, and cinnamon mimics the flavors of freshly baked oatmeal cookies, while the chai spices offer a touch of exotic flair. This is the ultimate comfort drink that’s still light enough to enjoy as the days get warmer. So gather your ingredients and indulge yourself in a beverage that feels like a warm hug!
Quick Recipe Highlights
- Flavor Profile: A delightful blend of sweet, spicy, and creamy flavors that evoke the essence of freshly baked oatmeal cookies.
- Texture: A creamy, smooth mouthfeel joined by a slight grit from the oats, enhancing the overall sensory experience.
- Aroma: Aromatic notes of cinnamon, nutmeg, and ginger intermingle with the scent of sweet oats, creating an inviting fragrance.
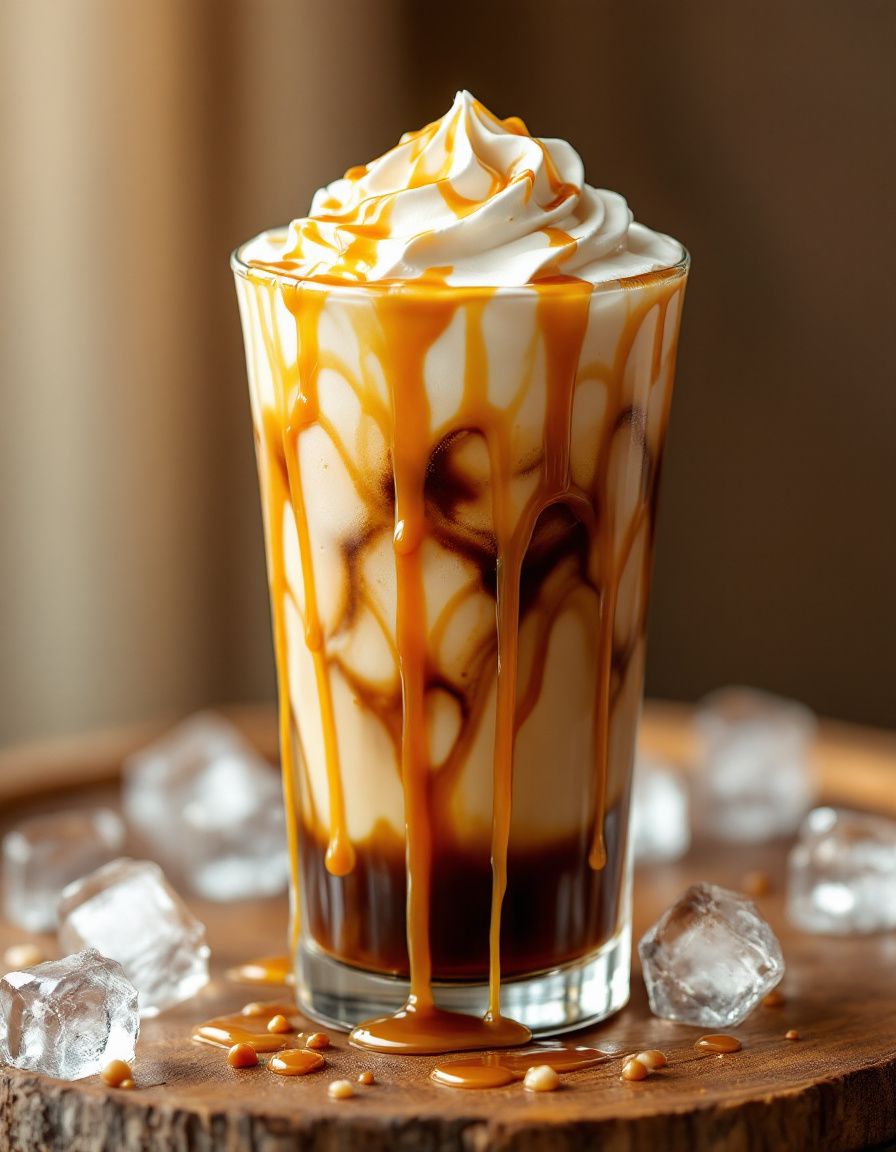
- Visual Appeal: A beautiful light brown hue topped with frothy milk, garnished with a sprinkle of cinnamon, making each glass look deliciously inviting.
- Skill Level Needed: This recipe is simple enough for beginners while offering enough allure for experienced cooks to appreciate.
- Special Equipment: Just a blender, saucepan, and a few glass cups are needed to whip up this extraordinary drink.
Recipe Overview
- Difficulty Level: This Iced Oatmeal Cookie Chai Latte is categorized as easy, making it an accessible option for anyone who enjoys experimenting with beverages.
- Category: Perfect for breakfast, brunch, or even as a sweet afternoon treat, this latte fits into multiple meal categories effortlessly.
- Cuisine: Drawing inspiration from traditional Indian chai combined with Western culinary delights, this recipe beautifully merges cultures in a delightful cup.
- Cost: With budget-friendly ingredients like oats, tea, and milk, this recipe is easy on the wallet while offering great flavor.
- Season: Enjoy this refreshing drink year-round, but it’s particularly delightful during warm summer months and cozy fall days.
- Occasion: Whether for a casual get-together or a relaxing afternoon alone, this creamy chai latte fits any occasion splendidly.
Why You’ll Love This Recipe
This Iced Oatmeal Cookie Chai Latte is a true indulgence for your taste buds. The unique combination of oats and spices creates a soothing yet invigorating drink that is rich in flavor while remaining light enough for a warm day. The creaminess offers comfort while still being refreshing, making it the perfect beverage to enjoy during brunch or as an afternoon pick-me-up. The thoughtful blend of ingredients not only satisfies your caffeine cravings but also provides a healthy twist that leaves you feeling good.
One of the best things about this recipe is its convenience. With a simple preparation process and quick assembly, you can whip up this latte in under 15 minutes. Whether you’re preparing it for yourself or for guests, it makes for an excellent beverage that doesn’t require extensive kitchen skills. It’s an opportunity to impress with minimal effort while enjoying homemade flavor in the comfort of your own home.
Nutritionally, this recipe is packed with elements that can benefit your health. Oats, for instance, are known for their high fiber content, which is excellent for digestion and can help maintain a feeling of fullness. When combined with the antioxidants from the tea and the vitamins in milk, you have a drink that not only tantalizes your taste buds but also supports your well-being.
Additionally, serving this luxury drink to friends and family can create cherished moments together. It acts as the perfect centerpiece for gatherings, invoking warm conversations and delightful memories. Picture a sunny patio brunch with good friends and this refreshing beverage as the star; it’s sure to encourage smiles and compliments!
Cost-effectiveness is another alluring quality of this Iced Oatmeal Cookie Chai Latte. With common household ingredients, you can recreate a café-quality drink at home without busting your budget. This economical aspect means you can indulge in luxurious drinks as often as you desire, turning every day into a special occasion.
Historical Background and Cultural Significance
The origins of chai can be traced back to India, where it has been enjoyed for centuries as a flavorful and aromatic beverage. Traditionally, chai is brewed from black tea leaves mixed with various spices, milk, and sugar, making it a warming drink cherished in the cold months. The addition of spices like ginger and cardamom not only enhances the flavor but also holds cultural significance, believed to provide health benefits and comfort.
As global culinary trends evolved, the Western world embraced chai, leading to the invention of numerous adaptations, including the popular chai latte. This amalgamation of flavors led to the concept of iced chai lattes, which maintain the essence of traditional chai but cater to modern taste preferences. The creative twist of incorporating oat flavors taps into the growing trend of exploring the versatility of oats and combining cultural influences.
Furthermore, the evolution of the Iced Oatmeal Cookie Chai Latte reflects society’s ongoing desire to merge comfort foods with refreshing drinks. The inspiration stems from classic baked goods, namely oatmeal cookies, that evoke feelings of nostalgia and warmth. By transforming these beloved flavors into a refreshing beverage, it serves as both a homage and a modern interpretation of cherished traditions.
Today, variations of the chai latte continue to surface, showcasing regional preferences and available ingredients. From dairy-free versions to rich, creamy alternatives, the adaptability and popularity of this beverage reflect its significance in culinary practices around the world.
Ingredient Deep Dive
Oats
Oats have a rich history of cultivation dating back thousands of years, originating in Europe and gradually spreading globally. They are revered for their versatility and nutritional benefits, being high in fiber, which can aid digestion and improve heart health. When selecting oats for this recipe, opt for quick oats for easier blending and smoother texture.
Store oats in a cool, dry place, preferably in an airtight container to ensure their freshness. Oats can be versatile in usage; they can be easily substituted with instant oats or even ground into flour for unique variations in texture. You may consider adding additional flavors during storage for enhanced taste, such as cinnamon or vanilla.
Chai Tea
The foundation of this drink, chai tea, blends various spices with black tea, creating a robust flavor. Historically, chai has been part of daily rituals in India, providing warmth and comfort. The combination of spices, such as cardamom, ginger, and cloves, offers both taste and health benefits, promoting digestive health and relaxation.
When choosing chai tea, select loose-leaf varieties for the best flavor infusion. Pre-packaged chai blends can also be convenient, but be cautious of their sugar content. Enjoying chai is an experience; store these blends in airtight containers away from light and heat to maintain their rich aroma and flavor. Chai tea can also be adjusted to personal taste by adding more spices or even floral notes for a unique touch.
Milk
Milk plays a crucial role in creating a creamy texture for the Iced Oatmeal Cookie Chai Latte while providing essential nutrients like calcium and vitamin D. Select your preferred type of milk, whether dairy, almond, oat, or coconut; each choice impacts the flavor and nutritional profile. Full-fat milk offers indulgence, while non-dairy options cater to lactose-free or vegan diets.
For better storage, keep milk in the refrigerator and check expiration dates frequently. When using non-dairy alternatives, be aware of potential added sugars and ingredients. To maintain freshness, prefer organic brands. Milk can also be frothed or heated separately to enhance the latte’s texture before it is added to the drink.
Spices
Ground spices such as cinnamon and nutmeg are integral to the Iced Oatmeal Cookie Chai Latte, adding rich flavor and aromatic appeal. Spices have a long history in culinary traditions, known for their medicinal properties and flavor enhancement in dishes worldwide. Cinnamon, for instance, has anti-inflammatory properties and adds sweetness without sugar.
When purchasing spices, opt for whole spices when possible for maximum flavor and freshness. Store spices in airtight containers away from light or heat sources to preserve potency. Feel free to customize the spice blend in this recipe; experimenting with different combinations can transform your drink experience and honor personal flavor preferences.
Common Mistakes to Avoid
- Not measuring spices accurately can lead to overpowering flavors; always follow the recipe for the ideal balance.
- Using hot tea can cause the milk to curdle, so ensure the steeped chai is cooled slightly before combining.
- Over-blending the oats can result in an unpleasant texture; blend just enough to achieve a smooth consistency.
- Skimping on the sweetener can dull the overall flavor; adjust sweetness to taste, focusing on flavor enhancement.
- Not allowing the chai to steep long enough can yield a weak flavor; ensure proper steeping time for maximum aroma.
- Using low-quality tea can negatively impact the beverage’s flavor; always choose good-quality chai leaves or bags.
- Failing to chill the latte before serving can alter the intended refreshment; serve over ice for the best experience.
- Ignoring flavor pairings might result in unbalanced tastes; consider flavors that complement and enhance the main ingredients.
Essential Techniques
Brewing Chai
Brewing chai correctly is key to unlocking its rich flavors. Start by boiling water and adding tea leaves along with spices, allowing them to steep for about 5-7 minutes. This technique ensures a full extraction of flavors and aromas. Avoid the common pitfall of overboiling the tea, which can lead to bitterness. Look for a deep amber color as a visual cue that your chai is properly brewed.
Blending Ingredients
Blending the oat mixture thoroughly can elevate your drink’s overall texture. Start with a small pulse to break down the oats before adding the chilled chai and milk to achieve a uniform consistency. One common mistake is blending on high speed, which may lead to excessive foam that alters the drink’s mouthfeel. The perfect blend is smooth without being overly frothy, ensuring a pleasant drinking experience.
Garnishing Your Latte
A great garnish can enhance your latte visually and add an extra flavor dimension. Consider grating fresh nutmeg or adding a cinnamon stick to the drink before serving, which adds an aesthetic touch. Avoid overwhelming the drink with too many garnishes, as this can distract from its primary flavor. Follow your visual cues and aim for a simple yet effective presentation.
Pro Tips for Perfect Iced Oatmeal Cookie Chai Latte
Choose high-quality chai tea: Always pick premium tea leaves or bags for the best flavor.
Chill your ingredients: Having cold milk and brewed chai ensures a refreshingly cool drink.
Experiment with milk alternatives: Try different types of milk like almond, oat, or coconut for varied tastes.
Customize sweetness levels: Adjust the amount of sweetener to suit your preferred taste.
Make it vegan: Substitute regular milk with a plant-based option and ensure your sweeteners align with vegan guidelines.
Enhance with toppings: Adding whipped cream or a sprinkle of cinnamon on top can elevate the presentation and flavor.
Consider flavored syrups: Vanilla or caramel syrups can add a fun twist and richer flavor.
Serve immediately: For the best experience, enjoy your latte fresh and over ice to maintain its refreshing quality.
Variations and Adaptations
Explore regional variations by incorporating local spices or flavors unique to your area; for instance, adding cardamom for a Middle Eastern twist. In fall, infuse with pumpkin spice to create a seasonal adaptation that’s reminiscent of autumn comfort foods. For dietary modifications, consider using sugar alternatives for a healthier version or reducing calories, while still enjoying the flavor fans adore.
Further flavor variations might include enhancing with chocolate or caramel syrup for a dessert-style indulgence. Texture modifications could involve thickening with more oats or using a creamy base, catering to different preferences and palates. Presentation alternatives like serving in unique glassware can add flair and excitement to the experience, enticing guests or elevating personal enjoyment.
Serving and Presentation Guide
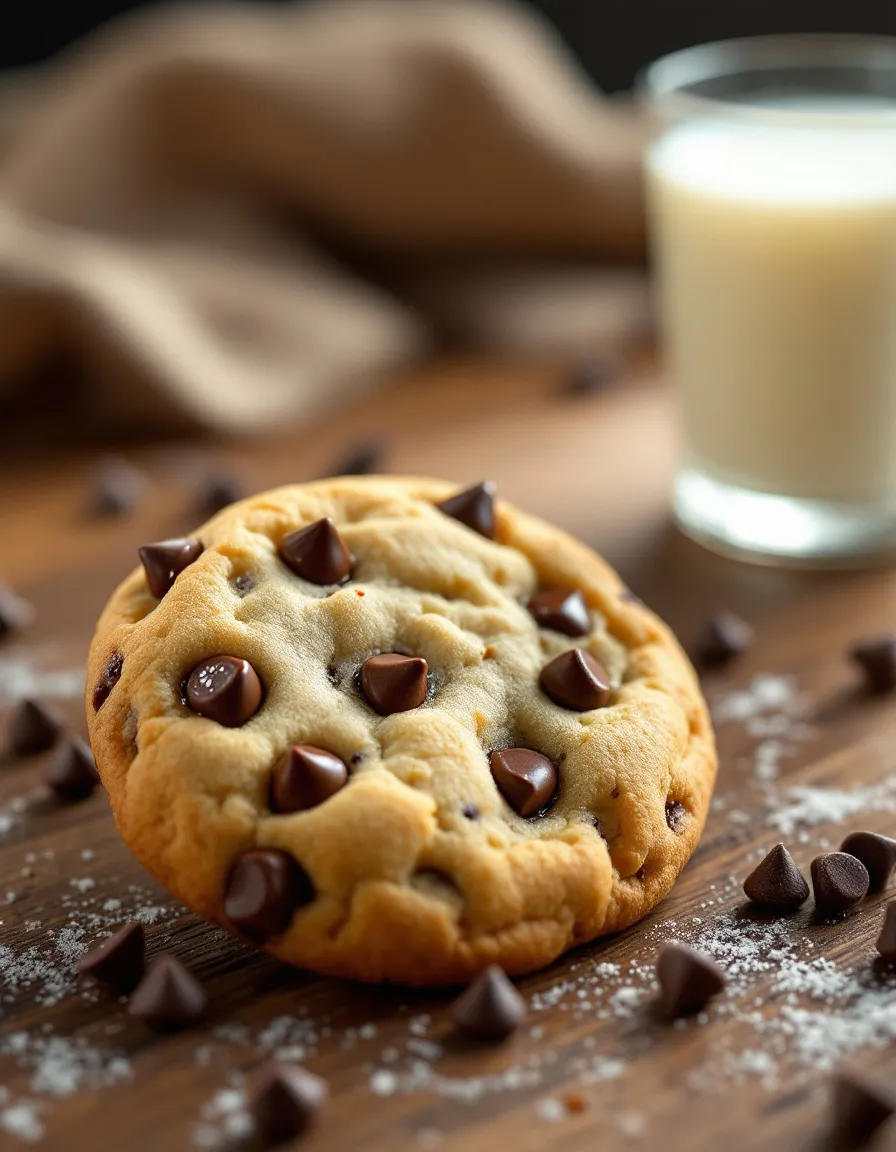
When serving this delightful latte, consider using tall glass cups to showcase its beautiful layering of flavors. A simple garnishing of cinnamon or a dusting of nutmeg creates an inviting appearance. Traditional accompaniments like light cookies or biscotti complement the drink perfectly; consider offering these alongside to enhance the experience. For modern presentations, adding colorful straws or fun drink stirrers can also elevate casual gatherings.
Temperature plays an essential role in serving; ensure the latte is chilled, and the ice remains intact for optimal refreshment. Aim for about ¾ full in glass cups to allow room for flavors and ice. Adequate portion control is significant as well; consider serving in smaller cups if presenting at events to allow for sampling other beverages.
Wine and Beverage Pairing
This Iced Oatmeal Cookie Chai Latte pairs beautifully with light dessert wines like Moscato, which complements the sweetness without overpowering the chai’s flavors. For non-alcoholic alternatives, iced herbal teas with fruity notes provide a lovely refreshment alongside the chai latte. If you prefer coffee, an iced Americano with a hint of vanilla can be an excellent accompaniment, while temperature-wise, matching chilled drinks creates a harmonious tasting experience.
Storage and Shelf Life
To store your Iced Oatmeal Cookie Chai Latte, keep any leftover drink in the refrigerator, ensuring it is consumed within 1-2 days to preserve quality. Use a sealed glass container to maintain freshness and prevent spoilage. Signs of spoilage include separation and off smells; discard if any such observation occurs. When reheating any components, warm them gently on the stove to retain flavor without compromising texture.
Make Ahead Strategies
If preparing in advance, consider brewing the chai and blending with oats ahead of time, storing them separately in the fridge for up to 2 days. Storing milk and sweeteners in airtight containers can also maintain flavor and freshness. When ready to enjoy, combine and pour over ice, maintaining texture and quality. Adding fresh toppings just before serving will ensure flavors pop and provide the best presentation.
Scaling Instructions
For scaling the recipe, halving the ingredients is straightforward; retain the same blending techniques for smaller batches. To double or triple the recipe, prepare in larger containers while monitoring the brewing time for the chai to ensure strong flavor. Always account for the increased prep time needed for blending in larger quantities, but the basic recipe proportions will remain constant regardless of the total yield.
Nutritional Deep Dive
This Iced Oatmeal Cookie Chai Latte offers an impressive nutritional profile. A single serving often contains approximately 250 calories, with moderate levels of carbs, healthy fats, and protein. The oats offer beneficial fiber and essential vitamins, promoting good digestion and heart health. Furthermore, chai is rich in antioxidants, enhancing the overall health benefits of this unique drink.
For those beginning a weight management journey, awareness of portion control within this recipe can help align it with their goals. Considering ingredients like sugar levels is vital; opt for less sweeteners or naturally sugar-free alternatives to enjoy the drink without feeling guilty. This adaptability makes it easy to cater to your personal dietary needs.
Dietary Adaptations
To transform this Iced Oatmeal Cookie Chai Latte into a gluten-free option, substitute oats with gluten-free oats while ensuring the chai blend is gluten-free as well. For a dairy-free version, using almond or oat milk aligns perfectly with the flavors while offering a lighter texture. Vegans can enjoy this drink by ensuring sweeteners are plant-based friendly and avoiding any animal-derived products.
Low-carb and keto audiences can find success by omitting sweeteners or using sugar substitutes like erythritol. Additionally, Paleo enthusiasts may savor this beverage by focusing on clean ingredients—fourth, avoiding processed sugars while ensuring flavors remain rich and enticing. Low-FODMAP dieters can use lactose-free milk to avoid gastrointestinal issues while still enjoying delightful flavor without discomfort.
Troubleshooting Guide
If your latte ends up too grainy, ensure your oats are finely blended; consider using quick oats or blending for longer. For overly sweet flavors, gradually adjust the sweetener to balance the overall taste without overpowering the chai essence. Common temperature issues, like serving too warm, can be remedied by proper chilling techniques, ensuring the drink is refreshing upon serving.
In case your liquid separates quickly, adding a small amount of a stabilizer like xanthan gum can prevent separation and maintain consistent texture. If struggling with flavor balance, consider adjusting spices rather than sweeteners for improved depth without losing that beloved chai profile. Lastly, ensure the intended ingredients are fresh, as expired items can lead to unwanted flavors or textures in your drink.
Recipe Success Stories
Community feedback on the Iced Oatmeal Cookie Chai Latte has been overwhelmingly positive, with many praising its delicious flavor and delightful aromas. Readers often share their unique adaptations, from ingredient substitutions to variations that reflect personal tastes. Many have taken to social media, sharing their success stories and incredible photographs of the final product, emphasizing the drink’s vibrant appearance and inviting appeal.
Some readers explore alternative flavor profiles, contributing their twists, such as adding chocolate milk for extra richness or experimenting with additional spices. The recipe has become a favorite among those seeking to replicate café-quality drinks at home, creating a sense of shared success within the community as individuals enjoy crafting this delightful beverage together.
Frequently Asked Questions
1. Can I make this recipe dairy-free?
Yes! Simply replace regular milk with your favorite dairy-free alternative such as almond, oat, or coconut milk.
2. How can I sweeten the chai latte naturally?
You can use honey or maple syrup as natural sweeteners, adjusting to your desired sweetness level throughout the preparation.
3. Is there a way to prepare it ahead of time?
The chai and oat mixture can be prepared in advance and stored separately; just combine and pour over ice when ready to enjoy.
4. What if my drink tastes too bitter?
This can result from over-steeping the chai; ensure you stick to the recommended steeping time for optimal flavor.
5. Can I make this recipe vegan?
Absolutely! Just ensure that your sweeteners and milk are completely plant-based.
6. What spices work well as a substitute?
You can replace common chai spices with pumpkin spice for a seasonal adaptation, creating a different yet delightful flavor.
7. Can I heat this chai latte instead?
Yes! For a warm version, simply heat the chai mixture and milk before serving while stirring until combined.
8. What is the best way to store leftovers?
Store any remaining chai latte in an airtight container in the refrigerator and consume within 1-2 days for best freshness.
9. How do I prevent separation?
Using a small stabilizer like xanthan gum or thoroughly blending your ingredients can keep everything combined and prevent separation.
10. What is the ideal cup size for serving?
Use tall glass cups that can hold a good amount of ice and liquid while showcasing the beverage’s beautiful layering.
Additional Resources
For those inspired by this Iced Oatmeal Cookie Chai Latte, exploring related recipes like classic chai, iced tea blends, or oatmeal cookie recipes can be a delightful journey in flavor. Technique guides on brewing tea and understanding blending methods add depth to your cooking and beverage-making skills. Ingredient information to familiarize yourself with the best oat varieties expands your culinary knowledge and enhances your cooking experience.
Considering equipment recommendations, investing in quality blenders and tea steepers can significantly improve your beverage outcomes. Seasonal variations can further inspire your culinary creativity, allowing you to adapt this latte for summer or fall flavors, catering to different tastes and occasions.
Join the Conversation
We’d love to hear your thoughts on the Iced Oatmeal Cookie Chai Latte! Share your experiences, variations, and photo successes by tagging us on social media or leaving a comment below. Engage with our community of fellow beverage enthusiasts, sharing tips and ideas to enhance our collective enjoyment of this delightful drink.
The Recipe
Iced Oatmeal Cookie Chai Latte
Serves: 2
Prep Time: 10 mins
Cook Time: 5 mins
Total Time: 15 mins
Kitchen Equipment Needed
- Blender
- Saucepan
- Measuring cups and spoons
- Glass cups for serving
Ingredients
- 2 cups water
- 2 tablespoons chai tea (loose or in tea bags)
- 1 cup quick oats
- 2 tablespoons brown sugar (adjust to taste)
- 2 cups milk of choice
- 1 teaspoon cinnamon (plus extra for garnish)
- Ice cubes, for serving
Directions
- In a saucepan, bring 2 cups of water to a boil. Add the chai tea and steep for 5-7 minutes (remove tea leaves or bags afterward).
- In a blender, combine the brewed chai, quick oats, brown sugar, milk, and cinnamon. Blend until smooth.
- Fill two glasses with ice cubes, and pour the blended chai oat mixture over the ice.
- Garnish with an extra sprinkle of cinnamon, and serve immediately.
Recipe Notes
- For a sweeter drink, adjust the brown sugar according to your taste preference.
- Feel free to use any milk alternative to cater to dietary restrictions.
- This recipe can be made ahead of time; simply store the blended mix in the fridge and serve over ice.
- For an extra indulgence, add whipped cream or flavored syrups for various taste experiences.