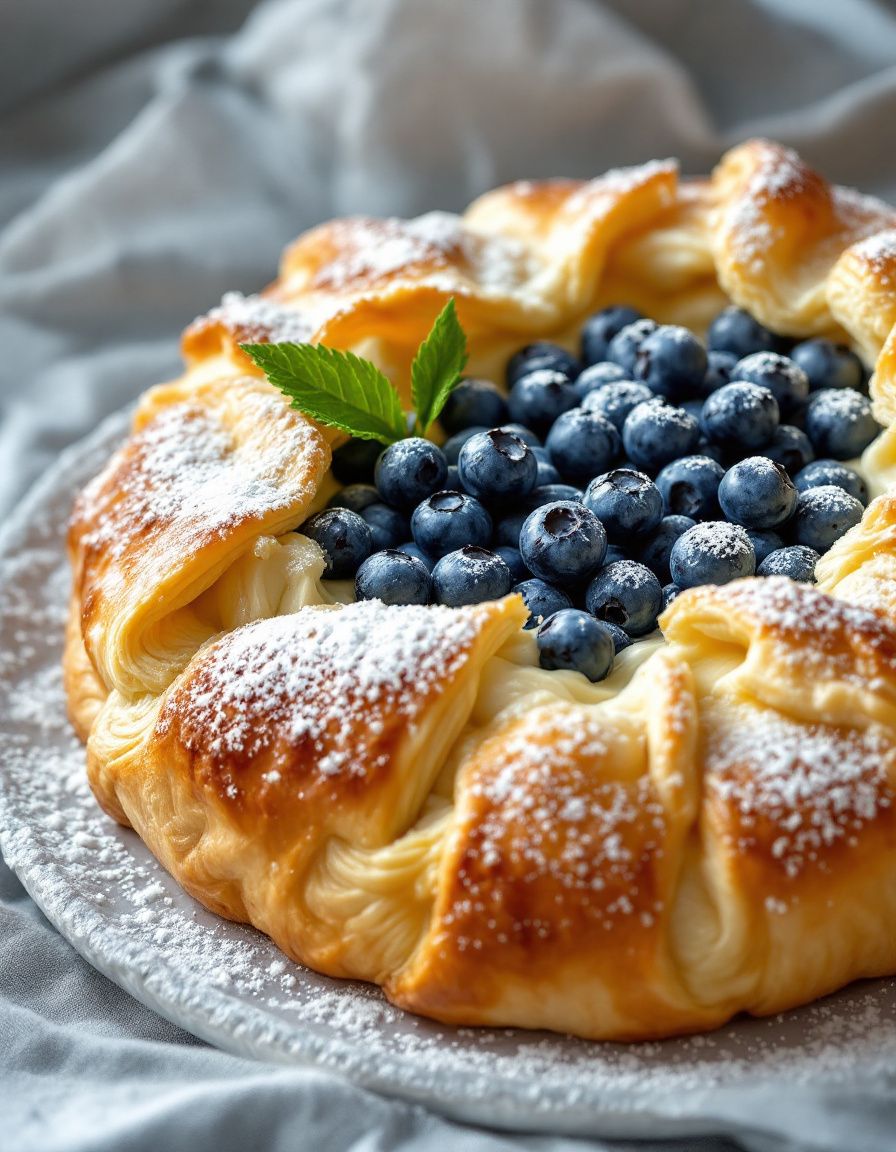
Easy No-Bake Oreo Mud Pie – Perfect for Any Occasion

No-Bake Oreo Mud Pie: The Ultimate Dessert Delight

⚖️
Difficulty
Easy

⏲️
Prep Time
20 mins

🕒
Cook Time
0 mins

⏱️
Total Time
20 mins

🍽️
Servings
8 servings

Indulge your sweet tooth with this delectable No-Bake Oreo Mud Pie, a dessert that combines the rich flavors of chocolate and creamy vanilla, layered over a crunchy Oreo crust. Perfect for any occasion, this pie is a crowd-pleaser that requires no baking, making it an ideal choice for quick gatherings or casual family dinners. Each slice presents a mouthwatering fusion of textures, with the smooth filling contrasting beautifully against the crispy crumb crust.

Imagine slicing through the dense layers of this pie, revealing a velvety chocolate mousse that oozes sweetness with every bite. The combination of Oreo cookies, whipped cream, and chocolate makes this dessert not only visually appealing but also irresistibly tasty. Whether served at a birthday party, holiday celebration, or simply as a weekend treat, this No-Bake Oreo Mud Pie promises to satisfy both your cravings and those of your guests.

Quick Recipe Highlights

  • Flavor Profile: Rich chocolate meets creamy vanilla in a balanced sweetness that is simply irresistible.
  • Texture: A delightful contrast of silky filling and a crunchy Oreo crust that melts in your mouth.
  • Aroma: The aromatic scent of chocolate harmonizes with the sweet fragrance of vanilla and cream.
  • Visual Appeal: Layered beautifully, the pie showcases a dark top with a light whipped cream finish, often garnished with crushed Oreos.
  • Skill Level Needed: Easy – perfect for beginner bakers who want to impress with minimal effort.
  • Special Equipment: A pie dish and an electric mixer for whipping the cream and mixing the filling.

Recipe Overview

  • Difficulty Level: This No-Bake Oreo Mud Pie is considered easy due to its straightforward assembly and minimal cooking techniques required.
  • Category: A dessert that fits best within the sweet treat category, ideal for ending a meal on a high note.
  • Cuisine: While inspired by classic American desserts, this pie also pays homage to European chocolate traditions.
  • Cost: The ingredients are affordable, making this dessert accessible without compromising on taste or quality.
  • Season: Perfect for all seasons, especially in warm months when baking might be undesirable.
  • Occasion: Suitable for birthdays, holidays, or even casual gatherings with friends and family.

Why You’ll Love This Recipe

This No-Bake Oreo Mud Pie is not just about its exquisite flavor; the pairing of rich chocolate and creamy vanilla provides a mouthwatering experience that is hard to resist. This dessert is designed to please even the pickiest eaters. It’s a luxurious treat that is suitable for sharing, making it great for gatherings. The combination of textures with a buttery crust and silky filling adds to its appeal, creating a sensory delight that will leave a lasting impression.

In terms of convenience, this No-Bake Oreo Mud Pie is quick to prepare. Within just 20 minutes, you can have this dessert ready to chill while you get on with the rest of your plans. It requires no baking, which means less mess and more time to enjoy with family and friends. From preparation to serving, this pie is a stress-free addition to your dessert repertoire.

Nutritionally, while this dessert is indulgent, it can be enjoyed in moderation. Using quality ingredients ensures that each serving delivers satisfaction without excessive guilt. For those who love to entertain, this pie serves as a great conversation starter, and its impressive appearance will surely earn you compliments.

Cost-effectiveness plays an important role as well, as this recipe uses readily available ingredients. With standard pantry staples like Oreos, cream cheese, and whipped topping, you won’t have to break the bank to create this dessert. It proves that delicious desserts can also be budget-friendly.

Lastly, this No-Bake Oreo Mud Pie is perfect for any occasion. Whether it’s a summer picnic or a holiday gathering, its versatility shines through. It invites creativity when serving, allowing you to customize garnishes and presentations according to your event, making it a delightful centerpiece for any dessert table.

Historical Background and Cultural Significance

The No-Bake Oreo Mud Pie is a modern classic that traces its roots back to the popularization of no-bake desserts. Originating in American kitchens, this style of pie became a go-to for those wanting rich, flavorful desserts without the need for baking. The use of Oreo cookies is a nod to an iconic American brand that has become synonymous with indulgence, stretching its influence beyond mere snacks to tasty dessert creations.

Its cultural importance lies in the communal aspect of sharing desserts. Recipes like this one are often passed down through generations, becoming staples at family gatherings, celebrations, and holidays. The pie embodies a sense of togetherness, making it a cherished dessert that friends and families look forward to.

As the decades rolled on, the recipe evolved with variations emerging to meet diverse dietary needs and flavor preferences. From adding different cream flavors to incorporating seasonal fruits, the adaptations of this Mud Pie testify to its enduring popularity and versatility in dessert-making.

Regionally, variations of the No-Bake Oreo Mud Pie can be found across the United States, with each region contributing its own flair. From tropical fruit toppings in coastal areas to richer chocolate versions in chocolate-loving states, this pie has found its place in the hearts—and stomachs—of many.

Ingredient Deep Dive

  • Oreo Cookies: These iconic chocolate sandwich cookies not only provide flavor but also serve as a sturdy base for the pie crust. Rich in history since their debut in 1912, Oreos symbolize indulgence and are a beloved treat across the globe. When selecting Oreos for this recipe, look for those that are intact and fresh for optimal crunch. Store them in a cool, dry place, and replacements can include any chocolate sandwich cookie variety.
  • Cream Cheese: This ingredient gives the pie its rich, creamy texture and tangy flavor. With origins dating back to the late 1800s, cream cheese adds a depth that balances the sweetness. Look for full-fat versions for the creamiest consistency. When storing, keep it refrigerated and sealed to prevent it from drying out. Low-fat alternatives may work but could affect the richness of the pie.
  • Whipped Topping: It’s key for bringing lightness and airiness to the filling. The history of whipped cream can be traced back to the 16th century, but modern whipped toppings offer convenience and stability. Choose a stabilized whipped topping for better texture. When selecting, check for freshness and enjoy it within a week of opening. Homemade whipped cream can also be used for those who prefer a less processed option.
  • Chocolate Pudding Mix: This adds extra chocolate flavor and creaminess to the pie. A staple in many households, chocolate pudding mixes have been enjoyed for generations. Ensure freshness by checking expiration dates, and for a twist, try flavored pudding mixes like white chocolate. Store in a cool, dry area to maintain its optimal flavor and texture.
  • Common Mistakes to Avoid

    • Using Stale Oreos: Ensure your Oreos are fresh for the best flavor and texture; stale cookies will result in a soggy crust.
    • Not Allowing for Chilling: Allow the pie to set in the fridge for at least 4 hours to achieve the right consistency; skipping this step will lead to a messy slice.
    • Overmixing the Filling: Mixing too much can lead to a grainy texture; mix until just combined.
    • Using Low-Quality Whipped Topping: Stick to name brands that provide a better stability and flavor.
    • Not Fine Crushing the Cookies: A coarse crumb will make it difficult to press the crust; ensure they are finely crushed for a firm base.
    • Inconsistent Layering: Pay attention to even layering for an attractive presentation.
    • Rushing Execution: Take your time during preparation to avoid mistakes; a rushed pie may result in uneven textures or flavors.
    • Skipping Taste Testing: Before assembly, always taste your filling for sweetness and flavor balance.

    Essential Techniques

  • Crust Preparation: It’s crucial for a sturdy base. To master it, crush your Oreos finely and combine them thoroughly with melted butter. Look for a moist and cohesive texture before pressing into the pie dish.
  • Whipping Cream: Whipping cream to soft peaks is vital for texture. Use chilled equipment and never overbeat, as this can turn cream into butter. Look for peaks that hold their shape without being dry.
  • Layering: Proper layering ensures even distribution of flavors. Take your time to pour and spread fillings gently to avoid air bubbles that disrupt the visual appeal.
  • Chilling: Adequate chilling allows flavors to meld. Aim for at least four hours, and check that the pie is set before serving, giving it a slight shake to gauge firmness.
  • Pro Tips for Perfect No-Bake Oreo Mud Pie

    1. Choose double-stuffed Oreos for an extra rich crust that amplifies the chocolate flavor.
    2. For a more intense flavor, add a tablespoon of coffee to the filling to enhance the chocolate notes.
    3. Use a springform pan for easy removal and neat presentation.
    4. Let the pie sit at room temperature for 10 minutes before slicing to make serving easier.
    5. Garnish with chocolate shavings or crushed Oreos just before serving for a professional touch.
    6. Consider adding layers of fruit like raspberries for a surprising tartness.
    7. If you love peanut butter, swirl some natural peanut butter into the filling for a tasty twist.
    8. Always keep a couple of extra Oreos on hand for garnishing or serving on the side.

    Variations and Adaptations

    This No-Bake Oreo Mud Pie lends itself beautifully to a variety of adaptations. For a seasonal twist, consider adding pumpkin puree and spices during the fall, leading to a spiced pumpkin Oreo pie. In the summer, integrating a layer of fresh strawberries or blueberries can lighten the dessert and give it a refreshing flavor. If you’re feeling adventurous, try incorporating a layer of ice cream for a fun, layered treat.

    For a chocolate lover’s dream, use chocolate Oreos instead of regular ones, bringing in double the chocolate flavor. Adjusting the base by using gluten-free cookies can cater to those with dietary restrictions. Additionally, consider making a vegan version by utilizing coconut whipped cream and dairy-free pudding mix, proving that delicious desserts can be enjoyed by everyone.

    Presentation can also be varied with themed decorations—a tropical theme could introduce toasted coconut and exotic fruit garnishes, while a more elegant setting could see the pie adorned with gold leaf and fresh mint.

    Serving and Presentation Guide

    Plating your No-Bake Oreo Mud Pie with care enhances its appeal. Start with a clean slice, using a hot knife for easier cutting. Consider serving each slice atop a drizzle of chocolate sauce or a scoop of vanilla ice cream. Garnishing with fresh mint or berries provides a color contrast that revitalizes the dessert.

    When it comes to temperature, serve the pie chilled but allow slices to warm slightly on the plate for improved flavor release. Different portion sizes can be cut for various occasions—small bites for a large gathering or generously sized slices for intimate family dinners.

    Consider using unique serving platters or individual serving cups for a more modern twist, making it visually stunning and easier for guests to enjoy.

    Wine and Beverage Pairing

    For a decadent experience, pair this No-Bake Oreo Mud Pie with a rich dessert wine, such as a late harvest Riesling or a Ruby Port, which complements the chocolate flavor beautifully. Alternatively, a glass of red wine like Merlot can also harmonize well with the dessert.

    If preferred, non-alcoholic options like cold brew coffee with a splash of cream can balance the sweetness while enhancing the chocolate notes. A rich black tea also works wonderfully if looking for a warm pairing.

    When serving these beverages, ensure they are at optimal temperatures; chilled wines and drinks elevate the overall dessert experience.

    Storage and Shelf Life

    To maintain the freshness of your No-Bake Oreo Mud Pie, store it in the refrigerator, covered with plastic wrap or aluminum foil. Ideally, enjoy it within 5 days for the best flavor and texture. If freezing, the pie should be wrapped tightly and can be stored for up to 2 months, but note that whipped toppings may affect the texture once thawed.

    Signs of spoilage include off smells, an unusual texture, or discoloration of the whipped topping. Reheat any portions gently in microwave or serve chilled directly from the fridge.

    Make Ahead Strategies

    One of the biggest appeals of this No-Bake Oreo Mud Pie is its suitability for make-ahead preparations. You can prepare the crust a day in advance and store it in the refrigerator, which also allows the flavors to meld. As for the filling, you can whip it up a few hours before serving and allow it to chill adequately.

    Regarding timing, allow a few extra hours for chilling, ensuring it’s fully set before serving. Fresh elements such as whipped cream toppings can be added just before presenting, keeping them light and airy.

    Scaling Instructions

    Scaling your No-Bake Oreo Mud Pie is simple. To halve the recipe, use a smaller pie dish and adjust ingredient amounts accordingly. Doubling or tripling the recipe is equally straightforward; use larger pans and be mindful of chilling time, as larger volumes may require additional chilling.

    Keep in mind that the crust may need to be more compact in larger forms, so adjust your cookie-to-butter ratio slightly if needed. Always ensure to check for even setting during the chilling phase regardless of the recipe scale.

    Nutritional Deep Dive

    This No-Bake Oreo Mud Pie offers balance in terms of macros, providing a decadent treat that is rich in carbohydrates and fats due to the creamy ingredients and cookie crust. While it’s indulgent, a moderate serving can fit into a balanced diet, offering enjoyment without excessive caloric load.

    Micronutrient analysis reveals key contributors like calcium from the cream and trace elements from the cookies. For those keeping a keen eye on dietary considerations, understanding serving sizes is crucial to weight management. Adjust portions according to your lifestyle choices while enjoying this dessert on occasion.

    Dietary Adaptations

    Dietary adaptations for this No-Bake Oreo Mud Pie are easy to implement. For a gluten-free version, utilize gluten-free chocolate sandwich cookies for the crust. A dairy-free variant can employ coconut cream and dairy-free pudding options, making it accessible for those with restrictions.

    If you’re interested in vegan options, using plant-based cream substitutes and refraining from gelatin ensures everyone can enjoy a slice without compromise. For those on low-carb diets, consider a crust made from nuts and low-carb sweeteners to create a satisfying alternative.

    The recipe can also be adapted for Paleo diets by sticking to natural sweeteners and whole food ingredients, allowing for creativity while addressing health goals.

    Troubleshooting Guide

    If you find your No-Bake Oreo Mud Pie too soft to hold its shape, it could be under-chilled; ensure at least four hours in the fridge to properly set. If it’s overly sweet, balance flavors with a pinch of salt or the addition of lemon juice in your cream mix for freshness.

    In case of texture issues, check that the cream is whipped correctly; under-whipped cream leads to a runny filling. If the crust crumbles when slicing, ensure your butter-to-cookie ratio is perfect, as a dry crust will not hold together well.

    Timing concerns during preparation can usually be solved by allowing your crust and filling to rest longer, enabling proper moisture absorption and cohesion.

    Recipe Success Stories

    Countless fans of the No-Bake Oreo Mud Pie have shared their delightful experiences, highlighting how this easy dessert turned an ordinary gathering into a memorable occasion. Many have adjusted the recipe for dietary preferences, successfully substituting ingredients while preserving the luscious flavors.

    Readers have expressed how this dessert not only pleases palates but also allows them to showcase creativity through presentation and garnishing. The step-by-step instructions combined with engaging imagery have enabled even novice bakers to produce stunning results.

    Photography sharing in online communities has inspired further variations, with unique flavor combinations becoming popular among home bakers looking to share their successful twists on this classic pie.

    Frequently Asked Questions

    Can I use homemade whipped cream instead of store-bought?

    Yes, homemade whipped cream is a great substitute! Just ensure it is whipped to soft peaks for the best results.

    How long should I chill the pie?

    For optimal results, chill the pie for at least four hours, or ideally overnight, to allow it to set properly.

    Can I freeze leftovers?

    Yes, you can freeze the pie for up to two months. Just be sure to wrap it tightly to prevent freezer burn.

    What if my filling is too runny?

    If your filling is too runny, check to see if the whipped cream was overmixed or if it wasn’t chilled long enough to set; both factors can affect texture.

    How do I make it gluten-free?

    Use gluten-free chocolate sandwich cookies instead of regular Oreos to make the pie entirely gluten-free while still keeping the same flavor profile.

    Can I add something extra to the filling?

    Absolutely! Feel free to incorporate peanut butter, crushed candy, or other flavor enhancers directly into the filling for a personalized touch.

    Is this recipe suitable for children to help with?

    Definitely! Kids can help with crushing the cookies and mixing the filling, making it a fun family activity.

    What can I use instead of chocolate pudding mix?

    You can substitute with vanilla pudding mix for a different flavor profile, but this will alter the overall chocolate intensity.

    Why is my crust too crumbly?

    A crumbly crust may mean there wasn’t enough butter; make sure the Oreo-to-butter ratio is balanced to hold it together while slicing.

    How do I make the pie more chocolatey?

    Incorporate melted chocolate into the filling for an added layer of richness that intensifies the chocolate flavor.

    Additional Resources

    For more delicious inspiration, consider exploring related recipes like No-Bake Cheesecake or Oreo Truffles, which also utilize Oreos in creative ways. Enhance your baking skills with technique guides that cover whipping cream and crafting the perfect pie crust. Understanding ingredient information, particularly the variety of chocolate used, can also enhance your baking experience. Investment in versatile kitchen equipment is crucial for achieving successful results in dessert-making, enabling you to whip up more no-bake treats with ease.

    Join the Conversation

    Engage with fellow dessert enthusiasts by sharing your No-Bake Oreo Mud Pie experiences on social media. Post your photography captures, showcasing your unique presentations and variations of the recipe. Your feedback and suggestions not only enrich the community but also inspire others to try their hand at this delightful dessert.

    Encourage others to share their adaptations and variations, fostering a creative dialogue within the baking community. This recipe is a canvas, inviting everyone to leave their mark, and each story adds richness to the culinary tapestry.

    The Recipe

    No-Bake Oreo Mud Pie

    Serves: 8 servings

    Prep Time: 20 mins

    Cook Time: 0 mins

    Total Time: 20 mins

    Kitchen Equipment Needed

    • 9-inch pie dish
    • Mixing bowls
    • Electric mixer
    • Measuring cups and spoons
    • Spatula

    Ingredients

    • 24 Oreo cookies, crushed
    • ½ cup unsalted butter, melted
    • 8 oz cream cheese, softened
    • 1 cup powdered sugar
    • 2 cups whipped topping
    • 1 package (3.9 oz) chocolate pudding mix
    • 2 cups milk
    • Additional Oreo cookies for garnish

    Directions

    1. In a medium bowl, combine the crushed Oreos and melted butter, and mix well.
    2. Press the Oreo mixture firmly into the bottom of a 9-inch pie dish to form the crust.
    3. In another bowl, beat together the softened cream cheese and powdered sugar until smooth.
    4. Gently fold in the whipped topping until well combined.
    5. In a separate bowl, whisk together the chocolate pudding mix and milk for 2 minutes until thickened.
    6. Add the chocolate pudding to the cream cheese mixture and blend until fully incorporated.
    7. Pour the filling into the prepared Oreo crust, smoothing the top with a spatula.
    8. Chill the pie in the refrigerator for at least 4 hours or until set.
    9. Before serving, garnish with additional crushed Oreos, if desired.

    Recipe Notes

    • For extra flavor, consider adding a layer of peanut butter or fruit to the filling.
    • Store leftovers covered in the refrigerator for up to 5 days.
    • This pie can be made a day in advance, making it perfect for gatherings.

    Easy Protein Cookies with 5 Ingredients

    Delicious Protein Cookies: The Ultimate Healthy Snack

    ⚖️
    Difficulty
    Easy

    ⏲️
    Prep Time
    10 mins

    🕒
    Cook Time
    15 mins

    ⏱️
    Total Time
    25 mins

    🍽️
    Servings
    12

    Protein cookies are not just an ordinary snack; they are a delicious way to fuel your body while satisfying your sweet tooth. Imagine biting into a warm, chewy cookie that bursts with chocolate flavor and is packed with protein goodness. Perfect for busy mornings, an afternoon pick-me-up, or even a post-workout treat, these protein cookies are as versatile as they are tasty, ensuring you never have to compromise health for flavor.

    The beauty of protein cookies lies in their rich and satisfying flavor profile, combining the sweetness of ripe bananas with the indulgent taste of chocolate chips. Each bite has a delightful texture, offering a satisfying chewiness that makes you crave more. As they bake, the sweet aroma wafts through your kitchen, instantly making it feel cozy and inviting. These cookies not only look appealing with their golden-brown hue and melty chocolate bits, but they also promise a fulfilling experience with every serving.

    Quick Recipe Highlights

    • Flavor Profile: The combination of ripe bananas and dark chocolate creates a rich and indulgent taste that is both satisfying and nutritious.
    • Texture: Each cookie features a chewy center with a slightly crispy edge, delivering a delightful contrast in every bite.
    • Aroma: The inviting smell of baked bananas paired with warm chocolate fills the air, making it hard to resist them fresh out of the oven.
    • Visual Appeal: Golden-brown cookies studded with chocolate chips are not only appetizing but also perfect for sharing with friends and family.
    • Skill Level Needed: This recipe is simple enough for beginners but satisfying enough for even seasoned home bakers.
    • Special Equipment: Basic kitchen tools, like a mixing bowl and baking sheet, make this recipe accessible for everyone.

    Recipe Overview

    • Difficulty Level: These protein cookies are easy to make, requiring minimal preparation and straightforward steps. With just a few ingredients, you’ll have a delightful treat ready in no time.
    • Category: These cookies fall into the snack category, suitable as a healthy treat or dessert to satisfy your cravings.
    • Cuisine: While cookies may be universally enjoyed, this particular recipe draws from healthy baking traditions, emphasizing nutritious ingredients without sacrificing taste.
    • Cost: Made with pantry staples, this recipe is budget-friendly, costing around $10 to make a dozen cookies.
    • Season: Protein cookies can be enjoyed year-round, making them perfect for any season, especially when you want a warm, cozy treat.
    • Occasion: These cookies are perfect for casual get-togethers, family snacks, or as a treat in lunchboxes.

    Why You’ll Love This Recipe

    Who doesn’t love a cookie that’s delicious and healthy? These protein cookies are not only rich in flavor but also provide an excellent source of energy, making them ideal for anyone with an active lifestyle. The harmonious blend of bananas and chocolate offers the taste of a decadent treat, while the protein content ensures you feel fuller longer. Whether you’re looking for a sweet ending to a meal or an afternoon snack, these cookies deliver satisfaction without the guilt.

    Convenience is another reason to embrace this recipe. The quick preparation and baking times mean you can whip up a batch in less than half an hour! Ideal for busy individuals or parents, having these cookies on hand can ease the stress of snack time. When craving something sweet, you can reach for a cookie that not only tastes great but also nourishes your body.

    Nutritionally, this recipe packs a punch. With protein from nut butter and the natural sweetness of bananas, these cookies are a great way to satisfy your sweet tooth while getting a health boost. Each cookie is rich in healthy fats, fiber, and essential vitamins, making them a smart choice compared to regular cookies.

    For those who enjoy social gatherings, these protein cookies serve as a fantastic conversation starter. Everyone loves to share stories around food, and these healthy treats are perfect for sharing in office potlucks or family gatherings. The cookies are not only appealing visually but also enticing in flavor, guaranteeing that they’ll be a hit among diverse audiences.

    Lastly, the cost-effectiveness of this recipe cannot be overlooked. Made from inexpensive and accessible ingredients that you likely already have in your pantry, these cookies allow you to indulge without breaking the bank. You can enjoy making them in larger batches without worrying about running out of ingredients.

    Historical Background and Cultural Significance

    The origins of cookies date back to the 7th century in Persia, making them one of the oldest treats known to humanity. With the introduction of sugar during the Middle Ages, cookies quickly spread across Europe, evolving in recipes and popularity. These protein cookies, while modern, bring together the traditional love for cookies with the health-conscious trends of today, creating a unique fusion of old and new.

    In contemporary culture, the rise of health-conscious eating has seen a surge in recipes that integrate protein into everyday foods, such as snacks and desserts. The demand for nutritious alternatives to classic treats has encouraged creativity in the kitchen. These protein cookies are a perfect example of how culinary traditions adapt to meet dietary needs, allowing everyone to enjoy a beloved snack while still supporting healthier lifestyles.

    Over time, cookie recipes have evolved significantly. The introduction of high-protein ingredients, such as nut butters and protein powders, merged the worlds of traditional baking with modern nutritional insights. This adaptation reflects the ongoing dialogue between food tradition and innovation, catering to contemporary dietary choices.

    In various regions, cookie adaptations have taken on unique local flavors, such as adding spices like cinnamon or incorporating dried fruits. These protein cookies allow for that same spirit of creativity while being a practical snack option for various diets and lifestyles, reinforcing their significance in a healthy eating strategy.

    Ingredient Deep Dive

    Bananas: Bananas are rich in potassium and essential vitamins, making them a great ingredient to use in baked goods. They not only provide natural sweetness but also moisture to the cookie dough. When choosing bananas for this recipe, opt for ripe ones with brown spots, as they are sweeter and mash easily. Store them at room temperature, but if you want to extend their life, you can refrigerate them, although their skin may darken.

    Nut Butter: Nut butters, such as almond or peanut butter, are essential in these cookies for providing protein and healthy fats. They contribute to a satisfying texture and rich flavor. Look for natural nut butters without added sugars or oils for the healthiest option. Store nut butter in a cool, dark place, and if it’s separated, simply stir before using. If you need a substitution, sunflower seed butter works great for nut-free diets.

    Common Mistakes to Avoid

    • Using unripe bananas can lead to cookies that lack sweetness and flavor. Always opt for fully ripe bananas for the best results.
    • Overmixing the dough can result in tough cookies. Blend the ingredients just until combined to preserve a light texture.
    • Not measuring the ingredients accurately can change the texture and taste. Using kitchen scales can help ensure precision.
    • Skipping the chilling time can lead to cookies spreading too much during baking. Chill the dough to help maintain shape.
    • Using too much flour can make the cookies dry. Measuring flour using the spoon and level method is recommended.
    • Not baking on a parchment-lined baking sheet can lead to sticking. Always line your baking sheets to ensure easy removal.
    • Overbaking can spoil the moisture. Keep a close eye on them during the last few minutes of baking.
    • Neglecting to cool the cookies on the baking sheet can cause them to break. Let them rest before moving to a wire rack.

    Essential Techniques

    Mashing Bananas: It’s important to mash bananas properly to achieve a smooth consistency in your cookie dough. Use a fork for a quick solution, ensuring no large lumps remain. This will help integrate the bananas throughout the dough, providing moisture and sweetness. The key is to mash them until they’re fully incorporated, allowing their natural sugars to enhance flavor.

    Chilling the Dough: Chilling your cookie dough is a crucial step that helps control how much the cookies spread while baking. It allows the fats in the dough to solidify, resulting in a thicker cookie that holds its shape. Aim for at least 30 minutes in the refrigerator before baking. Not only does chilling improve texture, but it can also enhance the flavor as the ingredients meld together.

    Pro Tips for Perfect Protein Cookies

    – For added flavor, incorporate a teaspoon of vanilla extract into the dough. It enhances the sweetness and ties all the flavors together.
    – Experiment with mix-ins such as nuts, seeds, or dried fruits to customize your cookies and add different nutritional benefits.
    – Bake a test cookie to check for doneness before removing the whole batch. This ensures all cookies have the perfect middle texture.
    – For a boost of flavor, sprinkle sea salt on top of the cookies before baking to create a sweet and salty balance.
    – Use an ice cream scoop to ensure uniformity in cookie sizes, which promotes even baking and presentation.
    – Store cookies in an airtight container to maintain freshness for up to a week. You can also freeze them for longer storage.
    – Substitute a portion of banana with unsweetened applesauce for a different flavor profile while keeping the cookie moist.
    – For a gluten-free version, use almond flour or coconut flour as a substitute for regular flour. Adjust the liquid content accordingly.

    Variations and Adaptations

    For those craving variety, experimenting with regional flavors can elevate these cookies. Try adding a pinch of cinnamon or nutmeg for a spiced version that evokes warmth, especially during colder months. Seasonal adaptations can also include swapping in pumpkin puree in the autumn, providing a unique twist to the flavor profile.

    Dietary modifications can be easily integrated into the recipe. For a vegan option, replace eggs with flax eggs and ensure to use plant-based protein powder. Alternatively, for a low-carb take, consider using protein powder designed for keto diets while monitoring the carbohydrate count of additional ingredients.

    If you prefer textures different from the traditional cookie, consider adding oats for a chewy aspect or grinding some nuts for a crunchy bite. Presentation alternatives, such as serving the cookies with yogurt or fruit, offer exciting combinations that enhance both flavor and nutrition.

    Serving and Presentation Guide

    When it comes to plating, consider arranging the cookies on a patterned plate for a visually appealing display. Triangle or circle formations can create an inviting presentation. For a decorative touch, dust the cookies with powdered sugar or drizzle melted dark chocolate on top just before serving.

    Garnishing ideas could include fresh fruits like strawberries or bananas as a colorful side, adding a refreshing contrast. Traditional accompaniments such as milk or a protein smoothie can complement the cookies, while modern serving suggestions invite pairing with herbal teas for a balanced snack break.

    Temperature plays a significant role in enjoyment; serving the cookies slightly warm enhances the melting chocolate experience. For portion control tips, consider serving them alongside some sliced fruit to balance out indulgence with fresh nutrients.

    Wine and Beverage Pairing

    These protein cookies pair surprisingly well with a bright white wine, such as a crisp Sauvignon Blanc, whose acidity can cut through the sweetness nicely. For those who prefer non-alcoholic options, a chilled glass of sparkling water with a splash of lemon can provide a refreshing compliment to your cookies.

    If you enjoy coffee, a light roast brewed to perfection can offer a delightful contrast, balancing the sweet flavors of the cookies. As with any cookie, the right temperature can enhance flavors; serving warm cookies will always invite compliments from your guests.

    Storage and Shelf Life

    To ensure your protein cookies stay fresh, store them in an airtight container at room temperature for up to a week. For longer-lasting enjoyment, consider freezing the cookies. Arrange them on a baking tray until solid, then transfer them to a resealable plastic bag for up to three months.

    When checking for spoilage, look for off odors or any visible signs of mold. For reheating, simply warm them in the microwave for about 10-15 seconds; this retains their softness and melty chocolate goodness. Avoid leaving cookies at room temperature for extended periods, especially in humid environments, to maintain quality.

    Make Ahead Strategies

    Preparing a batch of protein cookies ahead of time can streamline your week. Mix the dough and store it in the refrigerator for up to 2 days before baking. If you prefer, you can also freeze the dough in individual scoops, allowing for fresh cookies at a moment’s notice.

    Assessing the quality after assembly is essential, as freezing can sometimes alter texture. For the best results, allow the cookies to cool completely before packing away to preserve moisture. Lastly, consider adding nut butter or chocolate chips only before baking to maintain fresh flavors.

    Scaling Instructions

    Scaling this protein cookie recipe is straightforward. Halving the ingredients will allow for a smaller batch of delicious cookies, perfect for testing a new flavor combination. Conversely, if busy weeks are ahead, doubling or tripling the ingredients will provide a great supply to satisfy cravings.

    Be mindful of the adjustments to baking times when increasing batch sizes, as they might require additional cooling before serving. For equipment adjustments, make sure your baking sheets can accommodate the increased quantity without overcrowding. Finally, keep an eye on cookies during baking to ensure they cook evenly.

    Nutritional Deep Dive

    Breaking down the macros, these protein cookies are rich in healthy fats from nut butter, providing energy that sustains you throughout the day. The bananas contribute to a natural sweetness while delivering essential carbohydrates and dietary fiber. Expect a well-rounded profile that supports body functions effectively.

    In terms of micronutrients, each cookie provides a significant amount of potassium, vitamin C, and magnesium, thanks to the bananas and nut butter. These nutrients are essential for heart health, muscle function, and overall well-being, making these cookies not just enjoyable but also beneficial to your health.

    For anyone monitoring portion sizes, these cookies provide a good balance of protein and carbs, helping you manage energy levels throughout the day. This can be particularly advantageous for athletes or those on active regimens, reinforcing the idea that healthy snacking can be both satisfying and practical.

    Dietary Adaptations

    For individuals with gluten sensitivities, these protein cookies can easily be modified into a gluten-free treat by using oat flour or almond flour in place of all-purpose flour. Make sure to check ingredient labels for gluten-free certifications where applicable.

    Those following a dairy-free lifestyle can replace nut butter with seed butters, while avoiding any dairy chocolate chips. Vegan enthusiasts can use flaxseed meal mixed with water as an egg substitute, maintaining the binding properties while catering to dietary preferences.

    For keto dieters, swap the bananas with a lower-carb fruit like avocado, and use a sugar substitute to maintain sweetness. The versatility of these protein cookies allows them to accommodate various dietary needs without losing flavor or satisfaction.

    Troubleshooting Guide

    If you find that your cookies are coming out too dry, it is often a result of overbaking or using too much flour. Avoid this by ensuring you’re measuring correctly and checking the oven regularly. Conversely, if your cookies spread too much, chilling the dough prior to baking can help retain their shape.

    For flavor balance issues, consider incorporating spices like cinnamon or adjusting the amount of nut butter and chocolate to complement the sweetness of the bananas. In cases where cookies appear undercooked, they may continue to firm up upon cooling, ensuring they are slightly soft in the center when first out of the oven.

    If you’re struggling with texture, aim for a uniformly mixed dough to avoid clumpy bites. Additionally, using room-temperature ingredients helps with consistent blending and can improve the final product. Lastly, if you’re facing ingredient shortages, feel free to explore substitutions with similar flavors or textures.

    Recipe Success Stories

    The feedback from the community on protein cookies has been overwhelmingly positive. Many find joy in how flexible and customizable the recipe is, encouraging experimentation with various add-ins resulting in exciting new flavors. Successful variations have included peanut butter chocolate chip and even pumpkin spice for seasonal flair, showing the adaptability of the base recipe.

    Readers have shared their creative reads on social media, showcasing their beautiful cookie presentations alongside heartwarming stories of family traditions, where baking these cookies creates cherished moments together. Community suggestions have highlighted the importance of adjusting baking times for variations, ensuring every cookie achieves optimal texture.

    Readers have also discussed photography tips for showcasing these cookies, emphasizing natural lighting and minimalist backgrounds that pop against the cookie’s rich colors, further promoting engagement and sharing.

    Frequently Asked Questions

    Can I use frozen bananas in this recipe? Yes, frozen bananas work well; just ensure to thaw and drain excess moisture before mashing for optimal results.

    How do I know when the cookies are done? Look for a slight golden brown at the edges, while still appearing soft in the center, as they will firm up as they cool.

    Can I make these cookies nut-free? Absolutely! You can substitute nut butter with sunbutter or another seed butter to keep the recipe nut-free.

    Do these cookies require refrigeration? No, they can be stored at room temperature in an airtight container for about a week, or you can freeze them for longer storage.

    Can I add protein powder to this recipe? Yes, adding protein powder can enhance the protein content; just be cautious with the flour to maintain texture.

    What toppings can I add to these cookies? Feel free to get creative with toppings! Chopped nuts, seeds, or additional chocolate chips can make for a delightful finish.

    Are these cookies suitable for meal prep? Definitely! These protein cookies can be made ahead and stored for quick snacks throughout the week.

    Can I replace the almond butter with peanut butter? Yes, swapping almond butter for peanut butter is an easy substitution and adds a unique flavor.

    What’s the best way to freeze these cookies? Place them in a single layer on a baking sheet, then once frozen, transfer them to a freezer-safe bag. They’ll stay good for up to three months.

    Can I make these cookies vegan? Yes, you can make them vegan by replacing the eggs with flax eggs and ensuring that the chocolate chips used are dairy-free.

    Additional Resources

    If you’re looking to expand your baking repertoire, explore related recipes for healthy snacks and breakfast options. Consider diving into technique guides for mastering baking fundamentals, allowing you to confidently tackle any recipe. Understanding ingredient information can also enhance your culinary endeavors, as knowing flavors and functionalities can inspire new creations.

    Equipment recommendations can guide you towards tools that promote easy baking experiences, from quality measuring cups to non-stick baking sheets. For those with seasonal cravings, utilizing seasonal fruits in your recipes can further enhance your baking creativity while framing it within a dietary spectrum that suits your lifestyle.

    Join the Conversation

    We invite you to share your experiences with our protein cookies on social media! Snap a photo of your finished cookies and tag us, sharing your unique take on the recipe. Engage with fellow bakers by meeting in the comments, discussing what variations you’ve tried or sharing tips that have worked for you in this baking adventure.

    Feedback is invaluable, and we encourage you to leave a review of this recipe to help others in the community. As recipes evolve through collaborative input, your suggestions on ingredient substitutions, presentation ideas, and preparation shortcuts will surely spark new inspirations in fellow cookie lovers.

    The Recipe

    Protein Cookies

    Serves: 12

    Prep Time: 10 mins

    Cook Time: 15 mins

    Total Time: 25 mins

    Kitchen Equipment Needed

    • Baking sheet
    • Parchment paper
    • Mixing bowl
    • Fork for mashing
    • Measuring cups and spoons
    • Cooling rack

    Ingredients

    • 2 ripe bananas, mashed
    • 1 cup nut butter (almond or peanut)
    • 1/2 cup oats
    • 1/4 cup honey or maple syrup
    • 1/2 cup chocolate chips
    • 1 tsp vanilla extract
    • 1/2 tsp baking soda
    • Pinch of salt

    Directions

    1. Preheat your oven to 350°F (175°C) and line a baking sheet with parchment paper.
    2. In a mixing bowl, combine mashed bananas, nut butter, honey, and vanilla extract until smooth.
    3. Add oats, baking soda, and salt to the mixture and stir until well combined.
    4. Fold in chocolate chips gently.
    5. Using a tablespoon or cookie scoop, drop the dough onto the prepared baking sheet.
    6. Bake for 12-15 minutes, or until the edges are golden and the centers are set.
    7. Remove from the oven and let cool on the baking sheet for 5 minutes before transferring to a cooling rack.

    Recipe Notes

    • For a less sweet cookie, reduce the honey or maple syrup.
    • Store leftovers in an airtight container for up to one week.
    • Feel free to customize with your favorite add-ins like nuts or dried fruits.
    • If adding protein powder, adjust the flour and other wet ingredients accordingly.

    Best Butterfinger Caramel Crunch Cookies – Ready in 30 Minutes

    Delicious Butterfinger Caramel Crunch Cookies: A Sweet Treat for Everyone

    ⚖️
    Difficulty
    Easy

    ⏲️
    Prep Time
    15 mins

    🕒
    Cook Time
    10 mins

    ⏱️
    Total Time
    25 mins

    🍽️
    Servings
    24 cookies

    Butterfinger Caramel Crunch Cookies are the perfect blend of sweet, creamy, and crunchy, making them a delightful addition to any dessert table or as a special treat for your loved ones. These cookies are not only incredibly easy to make but also bring the irresistible flavors of Butterfinger and rich caramel together in one delicious bite. Imagine the soft, buttery cookie base paired with the crunchy toffee bits and a gooey caramel center—each bite is a dream come true for any cookie lover!

    The nostalgic flavor of Butterfinger, with its unique peanut butter and chocolate combination, takes these cookies to a whole new level. The addition of caramel adds a luxurious touch, ensuring that your taste buds are treated to a delightful explosion of flavor. Whether you’re baking for a special occasion or just wanting to enjoy a sweet treat at home, these cookies are sure to impress family and friends alike.

    Quick Recipe Highlights

    • Flavor Profile: A delightful mix of buttery and crunchy with the irresistible sweetness of Butterfinger and rich caramel notes.
    • Texture: Each cookie is soft and chewy with bursts of crunch from the candy pieces, creating a delightful contrast.
    • Aroma: The delicious aroma of freshly baked cookies mingled with the comforting scent of caramel wafts through your kitchen.
    • Visual Appeal: Golden-brown, chunky cookies studded with vibrant orange-yellow Butterfinger pieces create an inviting sight.
    • Skill Level Needed: Perfect for beginner bakers; simply mix, scoop, and bake for delicious results!
    • Special Equipment: Standard baking sheets and mixing bowls are all you need, making this recipe accessible to anyone.

    Recipe Overview

    • Difficulty Level: These Butterfinger Caramel Crunch Cookies are considered easy to make, requiring only basic baking skills and minimal effort, making them accessible for bakers of all levels.
    • Category: This recipe falls under cookies and desserts, perfect for snacks, gatherings, or special occasions.
    • Cuisine: While American in origin, the inspiration for these cookies can be traced back to classic candy and dessert combinations, showcasing the fusion of flavors.
    • Cost: Making these cookies is budget-friendly, requiring only a few simple ingredients and yielding a generous amount for sharing.
    • Season: These cookies are delightful year-round but can be especially enjoyable during holidays and celebrations when sweet treats are in demand.
    • Occasion: Ideal for birthdays, holiday parties, or simply as a weekend treat to indulge in the joys of baking.

    Why You’ll Love This Recipe

    Butterfinger Caramel Crunch Cookies are an experience for your palate, combining sweetness, richness, and a satisfying crunch in every bite. The creamy texture of the butter and wet ingredients meld perfectly with the decadent caramel and Butterfinger pieces, resulting in a treat that is both comforting and indulgent. Whether enjoyed warm out of the oven or slightly cooled, these cookies are a must-try for anyone with a sweet tooth.

    Convenience is another reason to fall in love with this butterfinger cookie recipe. With a minimal prep time of just 15 minutes and a quick bake time, you can have freshly baked cookies ready in no time. Perfect for last-minute gatherings or a spontaneous craving, these cookies provide satisfying rewards with little effort.

    Nutritionally, while indulgent, Butterfinger Caramel Crunch Cookies can be a source of enjoyment in moderation. The incorporation of butter provides energy, while the sugar offers an instant boost. Using quality ingredients ensures that you indulge in a treat made with love.

    Socially, these cookies are ideal for sharing and will definitely make you the star of any gathering. Bake a batch for a bake sale, bring them to a potluck, or surprise your coworkers with a homemade dessert. The joy of sharing delicious treats fosters connections and creates memorable moments.

    Finally, the cost-effectiveness of this recipe cannot be overlooked. With simple ingredients that are easy to find in any grocery store, you won’t have to break the bank to whip up a batch of delicious cookies. You can also modify the recipe according to what you have on hand, ensuring that everyone has a chance to enjoy these delightful treats.

    Historical Background and Cultural Significance

    The origins of cookies can be traced back to ancient civilizations, but the specific idea of combining peanut butter and chocolate into thrilling sweet treats began gaining popularity in the early 20th century. Butterfinger itself was first introduced in 1923, capturing the hearts of candy lovers across America with its uniquely crunchy texture.

    Culturally, candy bars, including Butterfinger, have held a festive place in American traditions, often featured during Halloween or as treats in school lunches. The integration of such beloved candies into baking connects generations by providing a nostalgic experience for those who grew up indulging in them.

    Over the years, recipes using Butterfinger have evolved, moving from simple no-bake desserts to baked treats like bars and cookies, which allows for creative exploration in the kitchen. Each adaptation showcases the versatility of the candy while offering delicious new ways to savor it.

    Regional variations of butter-themed and caramel-based desserts can be found in different cuisines, highlighting the universal love for sweet flavors encapsulated within this recipe. From chewy bars to crispy cookies, the Butterfinger has made its mark as an adaptable ingredient loved by many.

    Ingredient Deep Dive

    – Butter: This key ingredient not only adds richness but also moisture to the cookies. Historically significant in baking, butter enhances flavor while adding a tender texture. For better quality, choose unsalted butter and store it in a cool place, ideally wrapped tightly to maintain freshness.

    – Sugar: Sugar is essential for sweetness and helps achieve that golden-brown color. Using a mix of brown and granulated sugar contributes to a deeper flavor. Always keep sugar in a cool, dry container to prevent clumping, and opt for organic varieties if possible for a pure taste.

    – Eggs: Eggs bind the ingredients, providing stability and a soft texture. They’re an indispensable part of baking, and using room temperature eggs can enhance the mixing process. Always check for freshness through the float test before use.

    – Flour: The backbone of any cookie, flour provides structure. All-purpose flour is typically used, but for a tender cookie, cake flour can be substituted. Store flour in an airtight container to maintain its quality and freshness.

    – Butterfinger Bars: These bright orange candy bars provide taste and texture. Each bar adds a unique crunch, combined with chocolate and peanut butter flavors. When selecting bars, check the packaging for freshness, and opt for mini sizes for easier incorporation into the dough.

    Common Mistakes to Avoid

    • Overmixing the dough can lead to tough cookies. Mix just until combined for a soft texture.
    • Not chilling the dough can result in flat cookies. Allow the dough to chill for about 30 minutes for better shape.
    • Using cold ingredients can lead to inconsistent texture. Ensure that butter and eggs are at room temperature for optimal mixing.
    • Not measuring ingredients accurately can affect the balance of the cookies. Use kitchen scales or measuring cups designed for dry and wet ingredients.
    • Skipping parchment paper can lead to sticking. Always line your baking sheets for easy removal and cleanup.
    • Ignoring the baking time can result in overcooked cookies. Bake just until the edges are golden for the perfect chewy center.
    • Not preheating the oven can affect the spread and bake time of the cookies, leading to unexpected textures.
    • Using outdated ingredients can compromise flavor and texture. Always check expiry dates before baking.
    • Not allowing cookies to cool on the baking sheet can lead to a hard bottom. Let them sit briefly before transferring to a cooling rack.
    • Underestimating the power of flavor enhancement. Adding a pinch of salt can elevate the overall taste!

    Essential Techniques

    – Mixing: Proper mixing is crucial to ensure an even distribution of ingredients which leads to consistent texture and flavor. Start mixing wet ingredients separately before combining with dry to avoid lumps.

    – Chilling the Dough: Chilling the cookie dough helps improve texture and prevents them from spreading too much while baking. Aim for at least 30 minutes in the refrigerator to achieve the desired thickness.

    – Scooping: Use a cookie scoop for uniform cookie sizes, ensuring even baking. A consistent size not only looks better but also bakes at the same rate.

    – Baking: Always rotate your baking sheets halfway through baking for even browning. Each oven varies, so keep an eye on your cookies to avoid overbaking.

    Pro Tips for Perfect Butterfinger Caramel Crunch Cookies

    – Always use high-quality Butterfinger bars for maximum flavor impact and a satisfying crunch with each cookie bite.

    – Experiment with brown sugar variations, such as light or dark, to adjust the depth of sweetness in your cookies.

    – Consider adding a pinch of sea salt to the top of the cookies before baking for a sweet and salty contrast that’s irresistible.

    – For an extra indulgent experience, try melting some chocolate to drizzle over the cookies once they have cooled completely.

    – Store the cookies in an airtight container to keep them fresh and soft, and enjoy them within one week.

    – If you’re feeling adventurous, replace some of the Butterfinger with another candy bar or nuts for a unique flavor twist.

    – For fun presentations, shape the cookies into different forms and decorate them with colorful sprinkles on top before baking.

    – Make a mini cookie sandwich by filling them with whipped cream or ice cream for a delightful dessert experience!

    Variations and Adaptations

    – Regional Variations: You might find recipes that substitute Butterfinger with regional candies, which can change the taste profile while still maintaining a similar crunch factor.

    – Seasonal Adaptations: Incorporate seasonal flavors like pumpkin spice or peppermint during the respective holidays to create festive versions of these cookies.

    – Dietary Modifications: Substitute all-purpose flour with gluten-free alternatives for a gluten-free version without sacrificing flavor.

    – Flavor Variations: Experiment with different types of chocolate or candy bars, such as Crunch bars or Reese’s, for unique flavor combinations.

    – Texture Modifications: For a chewier cookie, slightly underbake them and let them set on the baking sheet to maintain moisture.

    – Presentation Alternatives: Add colorful frosting or drizzle chocolate on top for a unique visual appeal and enhance the flavor experience.

    Serving and Presentation Guide

    When serving Butterfinger Caramel Crunch Cookies, consider a family-style presentation on a tiered platter showcasing their golden-brown edges and vibrant candy pieces. Garnish the platter with mint leaves or dust with powdered sugar to elevate their visual appeal. Alternatively, place a stack of warm cookies in a rustic basket lined with parchment paper for a cozy, inviting look.

    For added flair, pair these cookies with a scoop of vanilla ice cream or whipped cream, creating a delightful dessert experience. Consider serving them alongside a glass of cold milk or espresso to complement the flavors as well.

    Temperature is key; cookies should be served slightly warm, as this allows the caramel to remain gooey and enhances the overall taste. When slicing into a cookie, the warm caramel center should flow, creating an enticing experience.

    Lastly, keep portion control in mind when presenting these cookies at gatherings or parties. Offer small plates where guests can take one or two at a time, ensuring they can savor the moment while also allowing everyone to enjoy multiple treats.

    Wine and Beverage Pairing

    When it comes to pairing drinks with Butterfinger Caramel Crunch Cookies, consider rich beverages that complement their sweetness. A full-bodied dessert wine like a Port or a late-harvest Riesling will beautifully marry the flavors of caramel and chocolate, while their sweetness enhances the cookie’s richness.

    For non-alcoholic options, a cold glass of milk is a classic pairing that never goes out of style, balancing the sweetness of the cookies perfectly. You might also enjoy herbal teas, like chai or peppermint, which bring warmth and a complex flavor profile that can enhance the cookie experience.

    If you want a little twist, a coffee with a splash of cream can create a lovely contrast to the sweetness of the cookies. Serve these cookies warm alongside your favorite beverage for an indulgent treat any time of day.

    Storage and Shelf Life

    To keep your Butterfinger Caramel Crunch Cookies fresh for as long as possible, store them in an airtight container at room temperature. This will help maintain their soft texture and keep them deliciously chewy. When kept this way, the cookies can last for up to one week.

    If you want to store the cookies for a longer time, freezing is an excellent option. Ensure they are completely cooled, then place them in a single layer within a freezer-safe bag or container, separating layers with parchment paper. Properly stored, they can last up to three months in the freezer.

    Signs of spoilage include off odors or visible mold, which can occur if cookies are stored improperly. When you’re ready to enjoy your frozen cookies, allow them to thaw at room temperature or warm them slightly in the oven to regain their delightful texture.

    Make Ahead Strategies

    To save time on baking day, consider making your cookie dough ahead of time. After mixing, form the dough into individual cookie balls and flash freeze them. Once hardened, transfer the balls into a freezer-safe container for up to three months. This allows you to bake fresh cookies whenever the craving hits by simply preheating your oven and placing frozen cookie dough on a baking sheet.

    Another strategy is to prepare the Butterfinger and caramel components in advance. Chop the candies and store them separately in airtight containers. You can also pre-measure your dry ingredients and combine them, facilitating a faster assembly on baking day.

    When ready to bake, mix the prepped ingredients together and add them directly to the dough. This not only saves time but also enhances convenience for spontaneous baking.

    Scaling Instructions

    Scaling Butterfinger Caramel Crunch Cookies is a straightforward process. For halving the recipe, simply divide the ingredients by two, ensuring to adjust baking times if you change the number of cookies baked at once.

    If you want to double or triple the recipe for larger gatherings, maintain ingredient proportions but consider using multiple baking sheets at one time, rotating them in the oven for even baking.

    When scaling, be mindful of your mixing equipment capacity; larger batches might require a stand mixer for ease. Check that you have enough baking sheets and storage facilities to accommodate your increased cookie yield.

    Lastly, when altering the quantity, watch your oven closely, as baking times may vary slightly based on the total number of cookies being prepared.

    Nutritional Deep Dive

    Butterfinger Caramel Crunch Cookies contain a range of macros that are essential for energy. Each cookie typically houses carbohydrates primarily from flour and sugars, providing a quick energy boost, while the butter adds healthy fats that enrich flavor.

    When analyzing micronutrients, ingredients like eggs contribute protein and essential vitamins like B12 and riboflavin, making a cookie not just a treat but a source of valuable nutrients.

    The inclusion of Butterfinger bars also provides a small boost of calcium and iron, while adding a moderate level of sugar. Enjoying these cookies in moderation can fit into a balanced diet, making them a fun indulgence for both children and adults.

    Weight management tips involving these cookies focus on controlling portion sizes. Consider enjoying one or two cookies alongside a balanced meal or as part of a dessert experience rather than consuming several at once.

    Dietary Adaptations

    For those following a gluten-free diet, you can easily substitute all-purpose flour with gluten-free flour blends designed for baking. This allows you to enjoy the same delicious flavors without concern.

    For dairy-free adaptations, opt for plant-based butter options and select dairy-free chocolate to ensure that no dairy products are used in the baking process.

    Vegans can substitute eggs with flaxseed or chia seed mixtures, creating a similar binding effect while keeping the cookie plant-based.

    Those on low-carb or keto diets might consider using almond or coconut flour paired with sugar alternatives, although results may vary in texture and flavor.

    For paleo followers, a combination of almond flour and coconut sugar provides a delicious alternative that remains true to the principles of the diet.

    Low-FODMAP dieters can also enjoy these cookies by selecting suitable ingredients and ensuring portion sizes are within recommended limits.

    Troubleshooting Guide

    If you’re experiencing texture issues, such as cookies being too dry, consider increasing the fat content slightly or checking your measuring accuracy. Add a tablespoon of water or milk if needed, and aim for a dough consistency that holds together but isn’t too sticky.

    Flavor balance can be adjusted by incorporating a pinch of salt, which enhances the overall sweetness without making cookies taste salty. If they end up too sweet, a little drizzle of dark chocolate on top can round out the flavors.

    Temperature problems often arise if your oven hasn’t been preheated thoroughly. Ensure it reaches the desired baking temperature before placing cookies inside to prevent uneven baking.

    Equipment challenges can usually be solved by ensuring your baking sheets are lined or greased appropriately to prevent sticking. If you’re using different bakeware, adjusting the baking time may be necessary.

    If you need to substitute an ingredient and are unfamiliar with ratios, do some quick research on suitable replacements to achieve similar results in texture and flavor.

    Timing concerns can be mitigated by keeping a close eye on your cookies while they bake. If they aren’t ready when the timer goes off, set shorter increments to avoid overcooking.

    Recipe Success Stories

    Countless bakers have fallen in love with these Butterfinger Caramel Crunch Cookies, sharing success across social media platforms that feature the irresistible moment of pulling the cookies from the oven. Many have commented on the delightful aroma that wafts through the kitchen, creating an anticipatory atmosphere.

    Variations have also been a huge hit, with readers experimenting by swapping Butterfinger for other candy favorites, reporting delicious outcomes and new household staples. Adaptation stories also highlight creativity, with sprinkles and other mix-ins making unique versions.

    Readers have provided tips, from freezing the dough to enhancing flavor profiles with different spices, showcasing the community spirit around this beloved recipe. Photography tips shared amongst bakers have led to stunning dessert displays, capturing the allure of these cookies perfectly.

    Ultimately, the culture surrounding these cookies continues to grow, uniting bakers in shared experiences and the joy of creating something special for both themselves and their loved ones.

    Frequently Asked Questions

    Can I use other candy bars in this recipe?

    Absolutely! Feel free to swap out Butterfinger for other candy bars like Snickers or Twix for distinct flavors. Each candy brings its own sweetness and textural elements that can wonderfully enhance the cookie experience.

    How can I make these cookies softer?

    To achieve softer cookies, slightly underbake them and let them rest on the baking sheet for a few minutes after baking. This allows for residual heat to continue cooking them gently.

    Is it necessary to chill the dough?

    Chilling the dough isn’t mandatory, but it does help prevent excessive spreading during baking, leading to thicker cookies. It also enhances flavors as the dough rests.

    How can I store leftover cookies?

    Store remaining cookies in an airtight container at room temperature. They will maintain their freshness for up to a week, or you can freeze them for up to three months.

    Can I freeze the cookie dough?

    Yes, you can freeze the cookie dough! Form them into balls, flash freeze them on a baking sheet, and then transfer them to a freezer-safe bag. Bake from frozen, but add a couple of minutes to the cooking time.

    What can I do if my cookies come out flat?

    Cookies may spread too much if there isn’t enough flour or if the butter was too soft. Make sure to measure your ingredients carefully and chill the dough before baking.

    What flour should I use for this recipe?

    All-purpose flour works best, but for a gluten-free option, try a gluten-free blend designed for baking purposes to achieve similar textures.

    Do I have to use Butterfinger bars?

    No, you can substitute Butterfinger bars for any other similar chocolate-candy bars you enjoy. Just remember that it will change the flavor of the cookie.

    Can I add nuts to this recipe?

    Of course! Adding chopped nuts like walnuts or pecans can give extra texture and flavor, enhancing your cookies even further.

    Is there a vegan version of these cookies?

    Yes! You can substitute eggs with a flaxseed meal or chia seed mixture, and use plant-based butter to make them vegan-friendly.

    Additional Resources

    Explore additional recipes that emphasize sweet treats, such as chocolate chip cookies or brownies, which can provide exciting alternatives while using similar techniques and flavors.

    Ingredient information can expand your knowledge about the items you are using, helping to understand the choices that lead to the best cookie outcomes and influences on taste.

    Technique guides on baking and mixing can significantly aid in mastering essential baking skills, ensuring your creations come out perfect every time.

    Consider equipment recommendations for baking that will streamline your cookie-making process, from high-quality mixing bowls to non-stick baking sheets designed for ease of use.

    Lastly, seasonal variations for baking provide a delightful way to adjust your recipes to incorporate each season’s best flavors, keeping your baking exciting year-round.

    Join the Conversation

    We’d love to hear your thoughts on these Butterfinger Caramel Crunch Cookies! Share your baking experiences on social media, showcasing your creations and any variations you’ve tried. Engaging with our community allows for recipe modifications and exciting new ideas.

    Photography tips are always welcome! Capture the delightful moments of your baking process and finished cookies to inspire others. Join our page and share your best shots for everyone to admire.

    Leave recipe reviews detailing your experiences; it helps fellow bakers know what to expect and adds to the community spirit surrounding this cookie favorite. Your suggestions for improvements or adaptations are invaluable to all.

    We’re eager to see how you personalize this recipe, so share your tales and try out others’ ideas in the quest for the best Butterfinger Caramel Crunch Cookie experience!

    The Recipe

    Butterfinger Caramel Crunch Cookies

    Serves: 24 cookies

    Prep Time: 15 mins

    Cook Time: 10 mins

    Total Time: 25 mins

    Kitchen Equipment Needed

    • Baking sheets
    • Mixing bowls
    • Cookie scoop
    • Whisk
    • Plastic wrap (for chilling)

    Ingredients

    • 1 cup unsalted butter, softened
    • 3/4 cup granulated sugar
    • 3/4 cup brown sugar, packed
    • 2 large eggs
    • 2 teaspoons vanilla extract
    • 2 1/2 cups all-purpose flour
    • 1 teaspoon baking soda
    • 1/2 teaspoon salt
    • 1 cup Butterfinger bars, chopped
    • 1/2 cup caramel bits

    Directions

    1. Preheat your oven to 350°F (175°C) and line baking sheets with parchment paper.
    2. In a large mixing bowl, cream together the softened butter, granulated sugar, and brown sugar until light and fluffy.
    3. Add in the eggs, one at a time, mixing well after each addition. Stir in the vanilla extract.
    4. In another bowl, whisk together the flour, baking soda, and salt.
    5. Gradually add the dry ingredients to the wet ingredients, mixing just until combined.
    6. Fold in the chopped Butterfinger bars and caramel bits until evenly distributed in the dough.
    7. Using a cookie scoop, drop rounded tablespoons of dough onto the prepared baking sheets, leaving space for spreading.
    8. Bake in the preheated oven for 10-12 minutes or until the edges are golden brown. The centers may appear slightly underbaked.
    9. Remove from oven and let cool for 5 minutes on the baking sheets before transferring to wire racks to cool completely.

    Recipe Notes

    • For best results, chill the dough for 30 minutes before baking to prevent excessive spreading.
    • Store cookies in an airtight container to preserve their freshness.
    • You can substitute caramel bits with homemade caramel for an extra touch of indulgence.
    • The dough can be frozen for up to three months, so you can enjoy fresh cookies whenever you desire!

    Easy Strawberry Cheesecake Dump Cake with 5 Ingredients

    Strawberry Cheesecake Dump Cake: A Sweet and Simple Delight

    ⚖️
    Difficulty
    Easy

    ⏲️
    Prep Time
    15 mins

    🕒
    Cook Time
    50 mins

    ⏱️
    Total Time
    65 mins

    🍽️
    Servings
    8 servings

    Strawberry Cheesecake Dump Cake is the epitome of indulgence and ease, combining the luscious flavors of cheesecake and freshly picked strawberries in a single, decadent dessert. Each bite offers a delightful burst of sweetness complemented by the creamy richness of cheesecake, creating a dessert that’s perfect for any occasion. Whether you’re hosting a gathering, celebrating a birthday, or simply treating yourself, this recipe guarantees a sensational response from family and friends alike.

    The beauty of this cake lies not just in its mouthwatering flavor, but also in its simplicity. With minimal preparation and just a few ingredients, it comes together in a breeze. The layers of strawberry filling, creamy cheesecake, and a buttery crumble topping create a harmony of textures that will leave your taste buds dancing. Imagine the aroma of baked strawberries and cream wafting through your kitchen—the perfect invitation to a cozy dessert night!

    Quick Recipe Highlights

    • Flavor Profile: This Strawberry Cheesecake Dump Cake features a delightful combination of sweet strawberries and creamy cheesecake, balanced with hints of buttery cake and rich cream cheese flavor.
    • Texture: The cake layer is soft and tender, while the strawberry filling adds a juicy element. The crumbled topping offers a satisfying crunch that perfectly complements the creaminess.
    • Aroma: The inviting scent of baked strawberries mingling with buttery vanilla notes makes this dump cake a sensory delight.
    • Visual Appeal: The vibrant red of the strawberries contrasts beautifully with the creamy cheesecake layer and golden crumble topping, making it a showstopper on any dessert table.
    • Skill Level Needed: This recipe is beginner-friendly, making it perfect for novice bakers who want to impress without the fuss of complex techniques.
    • Special Equipment: No special equipment is needed; a mixing bowl, baking dish, and basic kitchen tools are all you need for this recipe.

    Recipe Overview

    • Difficulty Level: This easy recipe is perfect for bakers of all skill levels. With straightforward steps and no need for complicated techniques, anyone can create this delightful dessert.
    • Category: This dish fits perfectly as a dessert or a sweet treat to serve at gatherings and family meals, making it versatile for any occasion.
    • Cuisine: Combining elements from American desserts, this cake reflects a popular trend of “dump cakes” that simplifies baking while maximizing flavor.
    • Cost: The ingredients for this Strawberry Cheesecake Dump Cake are affordable, with strawberries being the most significant cost, especially when in season.
    • Season: This cake shines in spring and summer when strawberries are at their peak ripeness, but it can also be made year-round with frozen fruit.
    • Occasion: Serve this cake at birthdays, barbeques, potlucks, or simply as a delightful everyday dessert to please any crowd.

    Why You’ll Love This Recipe

    The taste and texture of this Strawberry Cheesecake Dump Cake will captivate you from the first bite. The luscious creaminess of the cheesecake seamlessly blends with the tartness of the strawberries, creating a delightful contrast that’s perfectly balanced. The buttery crumble topping adds a lovely texture that complements the soft cake beneath. This dessert truly showcases the best flavors of summer with its fresh fruit components.

    One of the greatest benefits of this recipe is its incredible convenience. With quick prep and easy assembly, you can have this impressive dessert ready for any last-minute occasion or family dinner. The straightforward process eliminates the stress often associated with baking, letting you spend more quality time with your guests rather than slaving away in the kitchen.

    In addition to its taste and convenience, this dump cake is a nutritional win. Strawberries contain vital vitamins, antioxidants, and dietary fiber, making this dessert a delightful way to indulge without complete guilt. The cream cheese offers a source of calcium and protein, allowing you to enjoy dessert while also squeezing in some health benefits.

    This cake also shines when it comes to socializing and entertaining. The ease of serving allows you to cut and plate individual pieces simply, which is ideal for gatherings. Whether it’s a summer picnic or a cozy indoor celebration, this dessert will undoubtedly lift spirits and spark conversations among friends and family.

    Cost-effectiveness is another winning factor for this Strawberry Cheesecake Dump Cake. The ingredients are generally inexpensive and easy to find, making it a great choice for those on a budget. With this dessert, you can create a stunning and delicious cake without breaking the bank, providing delectable satisfaction for all.

    Historical Background and Cultural Significance

    The history of dump cakes can be traced to America during the mid-20th century. Originally born out of convenience, the idea was to create a cake that required minimal mixing, allowing home bakers to whip it up without numerous steps. This method appealed to a generation eager for quick and satisfying desserts.

    Strawberry cheesecake itself is a beloved dessert across various cultures, combining the richness of cheesecake with refreshing fruits. It symbolizes celebrations and gatherings, bringing communities together over shared delights. In the U.S., it has become a staple dessert during summer cookouts, where the ripe strawberries are at their peak.

    Over the years, the evolution of this recipe has led to countless adaptations. While the traditional cheesecake often involves laborious crust-making and extensive baking times, the dump cake method avoids many of these complexities while still delivering similar flavors. This evolution reflects a desire for simpler cooking techniques within modern kitchens, allowing desserts to remain accessible.

    Regional variations of strawberry cheesecake are as diverse as the country itself, with many regions incorporating local flavors. From the use of different fruits reflecting local produce to various crust options, the adaptability of this dessert ensures it remains a favorite across the nation, retaining cultural significance in many gatherings.

    Ingredient Deep Dive

    Strawberries are the star of this dessert, celebrated not only for their sweet flavor but also for their impressive nutritional benefits. Rich in vitamin C and antioxidants, strawberries are known for reducing inflammation and promoting heart health. When selecting strawberries, look for firm, bright red berries with fresh green tops, and store them in the refrigerator to retain their freshness. For this recipe, you can substitute fresh strawberries with frozen ones; just ensure they are thawed and drained well before use.

    Cream cheese serves as another core ingredient that embodies rich flavor and creamy texture. Originally a product of Pennsylvania, cream cheese has become integrated into countless American desserts. It symbolizes indulgence while providing a source of calcium and protein. When purchasing cream cheese, choose a block over spreadable varieties for a denser texture. Leftover cream cheese can be stored in its original packaging in the refrigerator for about 2-3 weeks, while it can also be safely frozen for longer storage.

    The cake layer provides the structure for this dessert. In dump cakes, a cake mix is often used for convenience. Preferably, choose a high-quality cake mix to enhance the overall flavor. When storing opened cake mix, it’s essential to keep it in a cool, dry place, sealing it tightly to maintain freshness. For those looking to modify the flavor, various cake mixes can be substituted, including chocolate or vanilla for contrasting flavors.

    Common Mistakes to Avoid

    • Overmixing the batter: This can lead to a dense texture instead of the desired lightness. Mix until just combined to maintain fluffiness.
    • Not measuring ingredients correctly: Precision is crucial for baking. Always use measuring cups for wet and dry ingredients to ensure the right ratios.
    • Skipping the soaking step for frozen strawberries: Not ensuring your frozen strawberries are properly thawed and drained can lead to an overly soggy cake.
    • Baking at the wrong temperature: Always double-check your oven temperature with a thermometer; baking at incorrect temperatures can hinder cake rising and browning.
    • Using a pan that is too small: Make sure to use the specified pan size to allow for proper cooking and prevent spillage in the oven.
    • Not allowing the cake to cool: Cutting a cake immediately can result in crumbly pieces; allowing it to sit helps it set properly.
    • Ignoring ingredient room temperature: Ingredients like cream cheese should be at room temperature for easier mixing, resulting in a smoother texture.
    • Forgetting to garnish: Adding a garnish like whipped cream or fresh strawberries after serving enhances presentation and flavor.
    • Not storing leftover cake correctly: Ensure leftovers are covered and refrigerated promptly to maintain freshness and prevent spoilage.
    • Using stale ingredients: Always check the expiration dates on ingredients, especially baking powder or cake mixes, to ensure a successful bake.

    Essential Techniques

    When preparing this Strawberry Cheesecake Dump Cake, mastering the art of mixing is crucial for a successful outcome. Proper mixing ensures that ingredients are combined evenly without overworking the flour, which can lead to denser baked goods. Aim for a gentle folding motion when combining dry and wet ingredients, and don’t hesitate to stop mixing when you no longer see dry flour.

    Understanding cake layer placement is another key technique. The order of layering ingredients in a dump cake significantly affects the overall outcome. Start by spreading the fruit filling on the bottom, followed by the cream cheese layer and topping with dry cake mix. This ensures even distribution and allows the cake mix to absorb the moisture from the layers, enabling it to cook evenly.

    Pro Tips for Perfect Strawberry Cheesecake Dump Cake

    To achieve the ultimate Strawberry Cheesecake Dump Cake, consider these pro tips. First, for enhanced flavor, try adding a splash of vanilla extract into your cream cheese mixture to amplify the taste. Second, use a mixture of fresh and frozen strawberries for a blend of textures and flavors; this ensures you have ripe, sweet fruit while keeping the cost manageable.

    Third, to heighten the crunch of the topping, melt a few tablespoons of butter instead of using it solid; this ensures even distribution across the cake mix and a more crisp finish. Fourth, chill the cheesecake layer for 15-20 minutes before adding the cake layer for better structure and texture.

    Fifth, for those who love a bit of tang, consider swirling in some lemon zest into the cream cheese mixture for a refreshing twist. Lastly, always allow the cake to rest for a bit before serving; this helps the layers to set and makes it easier to cut.

    Variations and Adaptations

    Making this Strawberry Cheesecake Dump Cake your own is simple! You can try substituting strawberries with other berries such as blueberries or raspberries for a delightful twist. Seasonal adaptations can include peaches or plums during the summer months, adding different flavors to enjoy.

    Consider dietary modifications to make this dessert more inclusive. For a gluten-free version, use gluten-free cake mix, and ensure all other ingredients are certified gluten-free. Additionally, vegan alternatives like plant-based cream cheese and butter can be used to cater to vegan diets.

    Texture modifications can also be implemented; if you prefer a softer top, decrease the baking time slightly or increase the amount of fruit filling. Presentation alternatives include serving the cake in individual cups with whipped cream and fresh strawberries on top, ensuring it looks just as good as it tastes.

    Serving and Presentation Guide

    When it comes to serving this delicious cake, presentation matters! For plating, consider using a generous slice that showcases the layers, complemented by a dollop of whipped cream. Garnish with fresh strawberries or a mint sprig for added visual appeal.

    Traditional accompaniments might include vanilla ice cream placed on the side for an extra indulgent treat. For modern serving suggestions, consider mini cups or jars that allow guests to self-serve, especially for events or gatherings.

    Temperature considerations are also essential; this dessert is best enjoyed warm or at room temperature. For portion control, aim for equal slices that make it easy to serve and share among guests, ensuring everyone gets to enjoy a piece of this delightful dessert.

    Wine and Beverage Pairing

    To enhance the experience of enjoying Strawberry Cheesecake Dump Cake, consider pairing it with a sweet dessert wine like a Riesling or a Moscato. Their fruity notes complement the strawberry flavors beautifully, heightening the dessert’s overall taste.

    For a non-alcoholic alternative, serve with sparkling water infused with fresh berries or lemon for a refreshing accompaniment that cleanses the palette. Additionally, a cup of freshly brewed chamomile tea brings warmth and adds a soothing contrast to the sweetness of the cake.

    If considering coffee pairings, opt for a milder roast like a blonde or medium roast that won’t overpower the dessert. Serve coffee at a warm temperature, enhancing the flavors of the cake while providing a comforting touch to the meal.

    Storage and Shelf Life

    Proper storage of your Strawberry Cheesecake Dump Cake is crucial to maintain its deliciousness. Keep the cake stored in an airtight container in the refrigerator, where it can last for up to 3 days. Cover the top with plastic wrap or foil if an airtight container isn’t available to prevent it from drying out.

    If you’d like to extend the life of this dessert further, consider freezing leftovers. Slice the cake and wrap individual servings in plastic wrap, followed by aluminum foil, then place them in a freezer-safe bag. Whenever you’re ready to enjoy more, allow a slice to thaw in the refrigerator overnight, then reheat in the microwave for a few seconds for the best flavor.

    Be sure to keep an eye out for signs of spoilage, such as changes in smell or mold. If you notice any off odors or discolorations, it’s best to err on the side of caution and discard it. For reheating, ensure it is warmed through but not overheated to avoid destroying the lovely textures you’ve created.

    Make Ahead Strategies

    Planning to make Strawberry Cheesecake Dump Cake ahead of time? To ensure the best results, prepare your ingredients a day in advance. Slice your strawberries and mix them with sugar to enhance their flavor, allowing them to sit overnight in the fridge to develop juices.

    You can assemble the cake up to a day ahead by placing the cake layers and cream cheese together, but hold off on baking it until you’re ready to serve. This allows the flavors to meld and develop, often resulting in an even tastier cake.

    When reheating, focus on gentle methods to preserve texture; consider warming individual portions in the microwave rather than baking the entire dish again, avoiding further drying out. This also enables you to serve fresh cake to your guests without the need for excessive preparation on the day of your gathering.

    Scaling Instructions

    Scaling your Strawberry Cheesecake Dump Cake is straightforward. If you want to halve the recipe, simply reduce each ingredient by half, and make sure to use an appropriately sized baking dish—for instance, an 8×8 inch dish instead of a 9×13 inch.

    When doubling or tripling, a larger dish is necessary, and you may need to extend baking times, ensuring that the center is fully cooked. Utilizing a toothpick or cake tester can help ensure the dessert is baked correctly.

    Bear in mind that ingredient adjustments might require taste modifications, particularly with sugar level. Monitor the cake closely as it bakes, as larger quantities may result in longer cooking times, but be careful not to overbake.

    Nutritional Deep Dive

    The Strawberry Cheesecake Dump Cake offers a delightful breakdown of macro and micronutrients. A typical serving provides a balanced dose of carbohydrates from the cake mix and sugars in the strawberries while delivering protein from cream cheese.

    Strawberries contribute essential vitamins like Vitamin C, which is vital for immune support, as well as fiber that aids digestion. The cream cheese introduces healthy fats, making it a well-rounded indulgence that serves both pleasure and nutrition.

    Being aware of portion sizes is also important; a serving can contain around 300-400 calories depending on serving size and specific ingredients used. For management of calorie intake, consider slicing smaller servings or pairing it with fresh fruit to enhance volume without added calories.

    Dietary Adaptations

    For those needing dietary adaptations, making a gluten-free version of this Strawberry Cheesecake Dump Cake is simple. Use a gluten-free cake mix and ensure all other components are certified gluten-free, making this dessert accessible for individuals with gluten sensitivities.

    If aiming for a dairy-free option, substitute cream cheese with cashew cream or a non-dairy cream cheese alternative. Also, replace butter with coconut oil for added richness without dairy ingredients.

    Vegan enthusiasts can create this cake by using plant-based substitutes—vegan cream cheese and a flax egg can provide similar texture and flavor without any animal products. Additionally, for those following a keto or low-carb diet, consider using almond flour or coconut flour combined with a sugar alternative for a low-sugar version of the cake.

    Troubleshooting Guide

    If your Strawberry Cheesecake Dump Cake doesn’t turn out as expected, don’t fret! For texture issues like a crumbly or dry cake, ensure you are accurately measuring your ingredients and not overbaking, as this can also contribute to dryness.

    If flavor seems off, consider evaluating the freshness of your strawberries. Overripe fruit can produce off-flavors. Also, be mindful of ingredient quality; opting for better quality cream cheese can drastically change the overall taste.

    For baking problems, if the center remains undercooked despite a browning top, consider rotating your pan halfway through baking, as ovens may have hot spots influencing cooking times. Using a toothpick to check the center will help determine if additional baking is necessary.

    Recipe Success Stories

    Community feedback around this Strawberry Cheesecake Dump Cake has been overwhelmingly positive. Readers rave about its ease and flavor, with many noting how quickly it disappears at gatherings. Variations, including personalized fruit combinations or alternative toppings, have led to numerous adaptations that add character and flair.

    Adaptation stories abound, with families sharing their unique twists on the traditional recipe by incorporating seasonal fruits or experimenting with different cake flavors. Such creativity not only keeps the recipe fresh but also fosters engagement within the community, encouraging everyone to explore their culinary skills.

    Photography tips for this dessert emphasize bright, natural lighting to capture the vibrant colors of strawberries. Showcasing the cake with fresh fruit and mint can add visual appeal, enticing viewers and inviting them to try the recipe themselves.

    Frequently Asked Questions

    Can I use frozen strawberries for this recipe?

    Yes, frozen strawberries can be used! Just ensure they are thawed completely and drained to avoid excess moisture in the cake.

    Is it necessary to chill the cheesecake layer before adding the cake layer?

    While it’s not strictly necessary, chilling the cheesecake layer for about 15-20 minutes helps it maintain its structure and offers a better texture when baked.

    How do I know when my dump cake is done?

    A toothpick inserted in the center should come out clean or with just a few moist crumbs. The top should be golden brown and bubbly.

    Can I make this dump cake ahead of time?

    Yes! You can prepare the layers and refrigerate them before baking. This allows the flavors to meld overnight, making the cake even more delicious.

    What is the best way to store leftover dump cake?

    Store leftover cake in an airtight container in the refrigerator for up to 3 days. You can also freeze individual slices for later enjoyment.

    Can I replace the cake mix with a homemade version?

    Absolutely! You can create a homemade cake mix using your preferred ingredients. Just ensure it has a similar composition to a standard cake mix for best results.

    Are there any good substitutions for cream cheese?

    Yes, for a dairy-free option, try using a vegan cream cheese alternative. For a lighter option, you can blend cottage cheese until smooth, although it will alter the flavor slightly.

    What size baking dish should I use?

    A 9×13 inch baking dish works best for this recipe, providing ample space for the layers to bake evenly.

    Is it possible to add more fruit to the cake?

    Indeed! You can mix in additional fruits like blueberries or raspberries for a delightful twist and added color.

    Can I make this cake gluten-free?

    Yes, by substituting with a gluten-free cake mix, you can easily make this a gluten-free dessert without sacrificing flavor or texture.

    Additional Resources

    For more delicious dessert options similar to Strawberry Cheesecake Dump Cake, explore related recipes like blueberry crumble, peach cobbler, or mixed berry galette. Each embodies flavors of comfort and home baking.

    If you’re interested in honing your baking techniques, check out technique guides focused on mixing methods, ingredient substitutions, and efficient baking tips to become a pro in the kitchen.

    Ingredient information on seasonal fruits will help enhance your cooking knowledge, providing insight on selecting the best produce throughout the year.

    For those considering equipment recommendations, investing in quality baking pans and mixers can elevate your home baking experience, yielding consistently great results across all your baked goods.

    Join the Conversation

    We’d love to hear from you! Share your experiences with this Strawberry Cheesecake Dump Cake by leaving a comment or sharing photos on social media. Engaging with other bakers can lead to discovering new variations and inspirations, enriching your culinary adventures.

    Don’t forget to tag us in your baking endeavors, particularly those involving creative presentations or adaptations of this recipe. Participating in recipe discussions can spark excitement and community connections, providing a delightful platform for sharing delicious moments.

    Do you have a unique twist on this dump cake? Share your suggestions and ideas in the comments, as we’re always excited to see how our readers make these recipes their own!

    The Recipe

    Strawberry Cheesecake Dump Cake

    Serves: 8 servings

    Prep Time: 15 mins

    Cook Time: 50 mins

    Total Time: 65 mins

    Kitchen Equipment Needed

    • 9×13 inch baking dish
    • Mixing bowls
    • Measuring cups and spoons
    • Spatula
    • Oven mitts

    Ingredients

    • 2 cups fresh strawberries, hulled and sliced
    • 1/2 cup sugar (for strawberries)
    • 8 oz cream cheese, softened
    • 1/2 cup sugar (for cream cheese layer)
    • 1 tsp vanilla extract
    • 1 box yellow cake mix
    • 1/2 cup butter, melted
    • 1 cup water

    Directions

    1. Preheat the oven to 350°F (175°C).
    2. In a bowl, toss sliced strawberries with 1/2 cup sugar and set aside to macerate.
    3. In another bowl, mix softened cream cheese with 1/2 cup sugar and vanilla extract until smooth and creamy.
    4. Spread the macerated strawberries at the bottom of the greased 9×13 inch baking dish.
    5. Spread the cream cheese mixture over the strawberries evenly.
    6. Sprinkle the dry cake mix uniformly over the cream cheese layer without stirring.
    7. Pour melted butter evenly over the cake mix, then drizzle 1 cup of water over everything.
    8. Bake in the preheated oven for about 50 minutes, until the top is golden brown and bubbly.
    9. Allow the cake to cool slightly before serving.

    Recipe Notes

    • This cake is best served warm, optionally topped with whipped cream or fresh strawberries for presentation.
    • Substitute other berries or fruits as desired, adjusting sugar content if needed.
    • For an extra kick, try adding lemon zest to the cream cheese mixture.

    Best Hawaiian Pineapple Carrot Cream Cake – Family Favorite Dessert

    Delicious Hawaiian Pineapple Carrot Cream Cake: A Tropical Delight

    ⚖️
    Difficulty
    Medium

    ⏲️
    Prep Time
    30 mins

    🕒
    Cook Time
    45 mins

    ⏱️
    Total Time
    1 hour 15 mins

    🍽️
    Servings
    12 servings

    The Hawaiian Pineapple Carrot Cream Cake is a delightful tropical treat that perfectly combines flavors and textures, making it a favorite for gatherings and celebrations. Featuring moist layers of carrot cake infused with sweet pineapple, every bite offers a burst of sunshine. Topped with a luscious cream cheese frosting, the cake is not only visually appealing but exceptionally inviting. Imagine hosting a summer party, and as your guests take their first bite of this cake, the tropical vibes instantly elevate the mood, setting off a wave of delicious smiles.

    This recipe is a delightful way to surprise your taste buds with its unique combination of sweet and savory, offering a balance that both adults and children will love. The freshness of the pineapple and the earthiness of the carrots come together splendidly, bringing a refreshing twist to the classic carrot cake. Rich in flavor and in nutrients, this cake doesn’t just satisfy your sweet cravings; it’s a wholesome indulgence!

    Quick Recipe Highlights

    • Flavor Profile: The cake offers a harmonious blend of sweet pineapple and savory carrot, finished with a tangy cream cheese frosting.
    • Texture: The crumb is incredibly moist and tender, contrasting beautifully with the creamy frosting.
    • Aroma: Expect a delightful aroma of freshly baked cake mingled with hints of tropical pineapple and warm spices.
    • Visual Appeal: Vibrant orange from the carrots and bright yellow from the pineapple make this dessert visually stunning.
    • Skill Level Needed: Suitable for home bakers with some experience; the steps are straightforward yet rewarding.
    • Special Equipment: A standard round cake pan, mixing bowls, and a hand mixer are necessary for this recipe.

    Recipe Overview

    • Difficulty Level: This Hawaiian Pineapple Carrot Cream Cake is rated as medium difficulty. With basic baking skills, most home bakers should feel comfortable tackling this recipe, although precision is key to achieving the perfect texture.
    • Category: This dessert fits perfectly into the cake category, specifically suited for birthdays, potlucks, or tropical-themed events.
    • Cuisine: Inspired by Hawaiian culinary traditions, this cake encapsulates the essence of tropical flavors and vibrant ingredients.
    • Cost: Ingredients are relatively affordable, with common items like carrots, pineapple, and basic baking staples ensuring that this cake won’t break the bank.
    • Season: Ideal for warm weather months, especially summer, when pineapple is at its peak sweetness.
    • Occasion: This cake shines at birthdays, summer parties, and Hawaiian luaus, providing a fun focal point for any dessert table.

    Why You’ll Love This Recipe

    The balance of taste and texture makes the Hawaiian Pineapple Carrot Cream Cake an unforgettable dessert. Each slice offers a rich, sweet flavor profile that dances on the palate, while the creamy frosting provides a silky finish that complements the cake’s moist crumb. This cake not only satisfies your sweet tooth but leaves you craving more due to its unique blend of tropical and earthy flavors. Additionally, the nutritional benefits of carrots and pineapple make it a more wholesome option compared to traditional sweets, allowing you to enjoy it guilt-free.

    In terms of convenience, this recipe is straightforward, making it perfect for bakers at all skill levels. The prep and cook times are manageable, allowing you to whip up this stunning cake in just over an hour. The ingredients are often staples found in your kitchen, and the simple steps mean you won’t get bogged down in complicated techniques. Whether you are a seasoned baker or a novice, you can successfully create this mouthwatering dessert.

    Another reason this cake stands out is its nutritional advantages. Carrots are a great source of vitamins and fiber, and pineapple offers digestive enzymes alongside its natural sweetness. This means that you can indulge without guilt, as this cake contributes valuable nutrients with every slice. Plus, it’s an excellent way to incorporate vegetables into dessert, making it appealing to both kids and adults alike.

    Socially, this Hawaiian Pineapple Carrot Cream Cake serves as a fantastic conversation starter and a delightful treat to share during gatherings. Whether it’s a birthday celebration, a picnic, or just a casual get-together, bringing this cake along is sure to impress your guests. With its vibrant colors and tropical taste, it’s a dessert that sparks joy and excitement, creating memorable moments while breaking bread together.

    Cost-effectiveness is also a highlight of this recipe. You can create a large, impressive cake without overspending, as the ingredients are basic and often economical. This accessibility encourages experimentation and enjoyment, making this cake a staple in your baking repertoire, and allows you to share the joy of baking without worrying about your budget.

    Historical Background and Cultural Significance

    The origins of the Hawaiian Pineapple Carrot Cream Cake can be traced back to the tropical influences of Hawaiian cuisine, which often integrates fresh fruits and vegetables into traditional recipes. Pineapple, once considered a symbol of hospitality and welcome, became a staple in many desserts across not just Hawaii but various regions as people sought to replicate the vibrant tastes associated with the islands. With its sunny flavor profile, pineapple brings warmth and joy, aligning perfectly with the essence of Hawaiian culture.

    Culturally, pineapple and carrot represent a bridge between healthful eating and indulgence. Carrots, revered for their nutritional benefits, often find their way into cakes, showcasing how vegetables can elevate sweets while keeping them moist. This cake celebrates the blend of savory and sweet in a dynamic way, embodying the spirit of aloha by sharing nourishment in its many forms.

    As people have come to appreciate the cake’s unique flavor combinations, the recipe has evolved over time. Ice cream variations and custard recipes have been inspired by this delightful flavor combination, maintaining its core attraction. Bakers began to play with the ratios of pineapple and carrot, adjusting frosting flavors and cake textures to personalize their versions, ensuring the cake continues to thrive in various households.

    Regional variations have emerged, showcasing the adaptability of this recipe. In some areas, bakers might incorporate macadamia nuts or coconut flakes to enhance the tropical feel, while others might opt for different spices like cinnamon or nutmeg to give the cake a seasonal twist. Each version adds depth and uniqueness, contributing to the ongoing legacy and love for this delightful cake.

    Ingredient Deep Dive

    Pineapple
    Pineapple has long been celebrated in various cultures for its sweet flavor and health benefits. Originating from South America and introduced to other parts of the world in the 15th century, the fruit is now synonymous with tropical delights. Nutritionally, pineapple is high in vitamin C and manganese, supporting immune health and metabolism. When selecting a pineapple, look for a firm fruit with a sweet aroma at the base. Keep whole pineapples at room temperature for a few days, or refrigerate once cut, to enjoy its freshness. In a pinch, use canned pineapple in juice for a moisture-rich alternative.

    Carrots
    Carrots are a versatile root vegetable with a history that dates back thousands of years. Originally cultivated for their medicinal properties, carrots have evolved into a widely loved ingredient in both savory and sweet dishes. They’re rich in beta-carotene, fiber, and antioxidants, making them a healthful addition to the Hawaiian Pineapple Carrot Cream Cake. When selecting carrots, opt for firm, smooth-skinned ones without blemishes. Store them in the refrigerator in a perforated bag to maintain freshness. For substitutions, grated zucchini can mimic the moisture and texture that carrots provide, though the flavor will differ slightly.

    Common Mistakes to Avoid

    • Overmixing the batter can lead to a dense texture rather than a light, fluffy cake. Mix just until the ingredients are combined to avoid this.
    • Not measuring ingredients accurately may skew the balance of flavors and textures in your cake. Use a digital scale for precision when possible.
    • Neglecting to prepare your pans properly can cause the cake to stick, making it difficult to remove. Be sure to grease and flour your cake pans thoroughly.
    • Baking at the incorrect temperature can result in underbaked or overbaked cakes. Always preheat the oven for accurate results.
    • Opening the oven door too early may cause the cake to sink in the middle. It’s best to wait until the minimum baking time has passed to check for doneness.
    • Ignoring the cooling time can affect the cake’s structure and flavor. Allow your cake to cool completely before frosting it.
    • Using old or expired baking powder can prevent your cake from rising. Ensure your leavening agents are fresh for the best results.
    • Not tasting the batter for sweetness can lead to an underwhelming final product. Adjust the sugar according to your preference.
    • Skipping the cream cheese frosting may leave the cake feeling incomplete. The frosting complements the flavors, enhancing the overall taste.
    • Not decorating properly might miss the opportunity to impress your guests visually. Take some time to arrange and garnish your cake attractively.

    Essential Techniques

    Mixing
    Mixing is a key step in baking that helps to integrate ingredients for a uniform texture. To master mixing, start with dry ingredients before adding wet ingredients to avoid clumping. A common pitfall is overmixing, which can lead to a tough cake; the right visual cue is to stop as soon as the batter is just blended.

    Baking
    Baking temperature and time are crucial for ensuring your cake rises and bakes evenly. Use an oven thermometer to check accuracy, and avoid frequent door openings. The top of the cake should spring back when gently touched, indicating it’s done. Master this process by always following your recipe closely and adjusting according to your oven’s quirks.

    Pro Tips for Perfect Hawaiian Pineapple Carrot Cream Cake

    1. Always use room-temperature ingredients, especially eggs and dairy, for a better emulsion and texture in your cake batter.
    2. Grate your carrots finely for a more pleasant mouthfeel, allowing them to blend seamlessly into the cake.
    3. For deeper flavor, consider adding a touch of ground cinnamon or nutmeg to the batter.
    4. Allow your cake layers to cool completely on wire racks to prevent sogginess.
    5. Prepare the cream cheese frosting while your cake is baking for a more efficient workflow.
    6. Refrigerate your frosting if it becomes too soft to spread smoothly on the cooled cake layers.
    7. Garnish with toasted coconut flake or crushed nuts for an extra layer of flavor and texture.
    8. If you want a layered look, consider slicing each cake layer in half to stack more layers with frosting in between.

    Variations and Adaptations

    For regional variations of the Hawaiian Pineapple Carrot Cream Cake, consider adding macadamia nuts for a delightful crunch and a taste of the islands. Seasonal adaptations could include the use of canned pumpkin during the fall to create a pumpkin-pineapple blend. Dietary modifications can be made by using gluten-free flour or sugar substitutes to cater to specific dietary needs without sacrificing taste.

    Flavor variations can also include adding banana puree for added moisture or a hint of tropical flair. For a different texture, you might swap the cream cheese frosting for a lighter whipped cream or a dairy-free alternative. Presentation can be enhanced with fresh pineapple slices or edible flowers, elevating this dessert for special occasions or finer dinner settings.

    Serving and Presentation Guide

    When serving your Hawaiian Pineapple Carrot Cream Cake, consider using a serrated knife to cut perfect slices without squishing the delicate layers. For garnishing, sprinkle toasted coconut flakes or finely chopped walnuts on top of the frosting for added texture. Traditional accompaniments like vanilla ice cream or whipped cream pairs beautifully with the cake’s flavors, providing a rewarding contrast.

    Modern serving suggestions could involve presenting individual slices on small dessert plates with a drizzle of caramel sauce. It’s important to consider temperature; serve the cake at room temperature to enjoy the full flavor. For portion control, aim for slices that are approximately 2 inches wide, allowing guests to indulge without overindulgence.

    Wine and Beverage Pairing

    For wine pairings, a sweet Riesling or Moscato enhances the tropical flavors of the cake beautifully. The fruit-forward notes in these wines complement both the pineapple and carrot, striking a delightful balance. If you prefer non-alcoholic options, tropical fruit-infused sparkling waters or coconut lemonade are refreshing alternatives. When pairing coffee, a light roast with fruity undertones harmonizes with the cake’s sweetness. Serve these beverages chilled to enhance the overall dining experience.

    Storage and Shelf Life

    To store your Hawaiian Pineapple Carrot Cream Cake, wrap it tightly in plastic wrap or place it in an airtight container. Proper storage can keep the cake fresh at room temperature for up to three days, while refrigeration can extend its shelf life to about a week. Signs of spoilage include unusual odors or changes in texture. When reheating, a brief exposure to the microwave can bring back the cake’s moistness. For longer storage, you might consider freezing layers separately, allowing for easy thawing when needed.

    Make Ahead Strategies

    Preparing the Hawaiian Pineapple Carrot Cream Cake ahead of time is a great way to manage busy schedules. You can bake the cake layers two days in advance and store them in the refrigerator wrapped in plastic wrap. Frosting can also be made and refrigerated, ensuring it’s ready when you are. When it comes time for assembly, just allow the frosting to come to room temperature before spreading it onto your cake. If needed, add fresh elements like pineapple slices right before serving to maintain their freshness.

    Scaling Instructions

    If you need to halve the recipe, simply divide all ingredients by two, ensuring you adjust baking times accordingly. To double or triple the recipe, be sure to use larger mixing bowls and baking pans. This may require additional baking time, so monitor the cake closely to avoid overbaking. Consider using your oven’s multiple racks strategically if preparing various layers at once. Finally, similar storage methods apply, even for larger batches, to maintain the cake’s quality.

    Nutritional Deep Dive

    In examining the macro breakdown of this Hawaiian Pineapple Carrot Cream Cake, you’ll find a balance of carbohydrates primarily from the cake base, with fats arising from the cream cheese frosting. The fiber content, derived mainly from carrots, contributes positively to digestive health. In terms of micronutrients, carrots pack substantial amounts of vitamin A, while pineapple provides vitamin C and manganese, enhancing the cake’s healthfulness in moderation.

    Considering health benefits, this cake is an excellent choice when sharing with loved ones, offering more vitamins and minerals than standard desserts while still satisfying a sweet craving. Portion management is key; keeping servings around 150-200 calories allows for enjoyment without straying from dietary goals.

    Dietary Adaptations

    For a gluten-free version of the Hawaiian Pineapple Carrot Cream Cake, substitute regular flour with gluten-free all-purpose flour blends, ensuring seamless texture and taste. For dairy-free adaptations, utilize coconut cream in place of traditional cream cheese and dairy milk alternatives for a similar flavor experience. Vegans may opt for flax eggs instead of regular eggs while keeping the remaining ingredients consistent.

    If following a low-carb or keto diet, consider using almond flour or coconut flour while introducing lower-sugar options to maintain sweetness without compromising too much on carbohydrates. A paleo approach can be embraced by sticking to whole, unprocessed ingredients. This cake has flexibility, allowing for various dietary considerations to be met without sacrificing enjoyable taste.

    Troubleshooting Guide

    Texture issues often stem from overmixing the batter, resulting in a dense cake rather than a light one. To remedy this, be sure to mix just until combined. Flavor balance can waver when too much sweetness is introduced, so always taste the batter and adjust as necessary.

    Temperature problems can arise if the oven is not adequately preheated. An oven thermometer may be useful for consistent baking conditions. If ingredient substitutions are made, it’s crucial to understand the impact on cake structure; changing key elements like flour may require adjustment in baking times. Timing concerns could lead to underbaked sections; always insert a toothpick to check for doneness.

    Recipe Success Stories

    Many community members have shared their love for the Hawaiian Pineapple Carrot Cream Cake, highlighting its perfect sweetness and rich flavor. From family celebrations to bake sales, this cake has been a standout success, with adaptations celebrated by all. Readers have reported back with impressive variations, including additional spices or even the addition of tropical fruits, proving its versatile nature.

    Bakers often rave about how the cake consistently impresses friends and family, earning a reputation for its moistness and incredible taste. Photography tips ensure that this visually striking cake is presented beautifully, prompting lot of social media sharing as proud bakers showcase their creations.

    Frequently Asked Questions

    Can I use canned pineapple instead of fresh?

    Yes, using canned pineapple can provide convenience and moisture. Ensure it’s packed in juice rather than syrup for a healthier choice. Drain it well to avoid adding excess liquid to your batter.

    How should I store leftover cake?

    Leftover cake should be wrapped tightly in plastic wrap or stored in an airtight container. It can last at room temperature for a couple of days or in the refrigerator for up to a week.

    Can I freeze this cake?

    Absolutely! The cake freezes well. Just wrap it tightly with plastic wrap and then foil to prevent freezer burn. Thaw in the refrigerator overnight before serving.

    How do I make it more forgiving for beginners?

    To simplify the process, pre-measure your ingredients and follow the steps closely. This creates a smoother baking experience and minimizes confusion during preparation.

    Is there a vegan version of the frosting?

    Yes, you can create a vegan frosting using coconut cream whipped until fluffy and sweetened with a bit of maple syrup or powdered sugar for sweetness and texture.

    What is the best way to top the cake?

    Consider garnishing with fresh pineapple slices or edible flowers for a beautiful presentation. Toasted coconut flakes also add an extra dimension of flavor on top of the frosting.

    Is this cake suitable for children?

    Yes, this cake is perfect for children, as it contains nutritious carrots and pineapple, and the flavors are appealing to young palates without being overly sweet.

    Can I adjust the sweetness of the cake?

    Absolutely! You can reduce the sugar in both the cake and frosting according to your preferences, but be mindful of the cake’s moisture levels as you adjust.

    What’s the best way to frost the cake?

    Use a spatula to evenly spread frosting between each layer first and then cover the tops and sides. For a smooth finish, have a small bowl of warm water nearby to dip your spatula for easy spreading.

    Can I add nuts or other ingredients to the batter?

    Yes! Add-ins like chopped walnuts or pecans can add textural contrast and enhanced flavor to the cake. Just be cautious not to add too much, as it may affect the cake’s ability to rise.

    Additional Resources

    For those inspired to keep baking, we offer a plethora of related recipes that accompany the Hawaiian Pineapple Carrot Cream Cake beautifully. Techniques on cake decorating or frosting mastering are available for aspiring bakers. Ingredient information provides insights into sourcing fresh, high-quality components to uplift your baking endeavors. Equipment recommendations help identify useful tools for your baking journey, while seasonal variations flourishes to inspire you with timely and festive adjustments for this delightful cake.

    Join the Conversation

    We encourage you to share your baking adventures with the Hawaiian Pineapple Carrot Cream Cake on social media. Your photography tips and presentation ideas can inspire fellow bakers, while recipe reviews help build a community of cake lovers. We invite you to engage in conversation, share your variations and successes, and connect with other baking enthusiasts. Your contribution enriches this joyful cooking journey, ensuring more delicious experiences in the future.

    The Recipe

    Hawaiian Pineapple Carrot Cream Cake

    Serves: 12 servings

    Prep Time: 30 mins

    Cook Time: 45 mins

    Total Time: 1 hour 15 mins

    Kitchen Equipment Needed

    • Standard round cake pans
    • Mixing bowls
    • Hand mixer
    • Measuring cups and spoons
    • Cooling racks
    • Serrated knife or cake leveler

    Ingredients

    • 2 cups all-purpose flour
    • 2 cups granulated sugar
    • 1 teaspoon baking powder
    • 1 teaspoon baking soda
    • ½ teaspoon salt
    • 1 teaspoon cinnamon
    • 4 large eggs
    • 1 cup vegetable oil
    • 2 cups grated carrots
    • 1 cup crushed pineapple, drained
    • 1 teaspoon vanilla extract
    • 8 ounces cream cheese, softened
    • ½ cup butter, softened
    • 4 cups powdered sugar
    • 2 tablespoons milk (or more for consistency)

    Directions

    1. Preheat your oven to 350°F (175°C) and grease two 9-inch round cake pans.
    2. In a large bowl, sift together flour, baking powder, baking soda, salt, and cinnamon.
    3. In another bowl, beat the eggs and gradually mix in the granulated sugar and vegetable oil until well combined.
    4. Slowly add the dry ingredients to the wet mixture until just combined.
    5. Fold in the grated carrots, crushed pineapple, and vanilla extract into the batter.
    6. Divide the batter evenly between the prepared cake pans and smooth the tops.
    7. Bake for 25-30 minutes or until a toothpick comes out clean.
    8. Allow the cakes to cool in the pans for 10 minutes, then transfer to wire racks to cool completely.
    9. For the frosting, beat together softened cream cheese and butter until creamy. Gradually add powdered sugar and milk, beating until smooth.
    10. Once the cakes are completely cooled, frost the top of one layer, place the second layer on top, and frost the top and sides of the entire cake.

    Recipe Notes

    • For enhanced flavor, add a pinch of nutmeg or toasted coconut to the batter.
    • Adjust frosting consistency by adding more milk for a thinner spread or more powdered sugar for a thicker frosting.
    • Refrigerate any leftovers to maintain freshness, and serve chilled or at room temperature.

    Best Red Velvet Rose Sandwich Cookies – Ready in 30 Minutes

    Red Velvet Rose Sandwich Cookies: A Delightful Dessert Experience

    ⚖️
    Difficulty
    Medium

    ⏲️
    Prep Time
    30 mins

    🕒
    Cook Time
    12 mins

    ⏱️
    Total Time
    42 mins

    🍽️
    Servings
    24 cookies

    Red Velvet Rose Sandwich Cookies are an exquisite dessert blending the rich, velvety flavors of red velvet with the sweetness of cream cheese frosting. These eye-catching cookies not only taste heavenly but also showcase a stunning rose motif. Ideal for special occasions or a delightful treat at home, every bite transports you to a whimsical bakery. The luscious cream cheese filling perfectly complements the soft, slightly crunchy sugar cookie texture, making this recipe an irresistible addition to your dessert repertoire.

    Bringing together vibrant red hues and delightful flavors, these cookies are not just desserts but also a visual masterpiece. The unique presentation will charm guests and spark conversations at any gathering. Whether you are celebrating a birthday, anniversary, or just want to bring some joy to your everyday life, Red Velvet Rose Sandwich Cookies provide the perfect indulgence.

    Quick Recipe Highlights

    • Flavor Profile: These cookies offer a delightful blend of cocoa and vanilla flavors, enhanced by the tangy cream cheese frosting.
    • Texture: The cookies have a soft, tender crumb with a slightly crisp edge, offering a pleasing mouthfeel.
    • Aroma: Notes of vanilla and cocoa fill the air, creating an inviting and warm ambiance.
    • Visual Appeal: The vibrant red color, adorned with a delicate rose design, makes these cookies a showstopper.
    • Skill Level Needed: While the technique is slightly advanced, the steps are manageable for bakers with some experience.
    • Special Equipment: A piping bag is essential for creating the intricate rose designs and for the cream cheese filling.

    Recipe Overview

    • Difficulty Level: This recipe is rated medium due to the precision required in creating the rose design and perfecting the cookie texture. It’s an excellent choice for those looking to enhance their baking skills.
    • Category: Red Velvet Rose Sandwich Cookies fall under the dessert category, ideal for sweet lovers and those celebrating special occasions.
    • Cuisine: Rooted in Southern American culinary traditions, red velvet is often associated with celebrations, while the sophisticated presentation elevates it to gourmet status.
    • Cost: The recipe is relatively economical with basic pantry staples required, making it an accessible treat without breaking the bank.
    • Season: These cookies shine best during the holidays and festive seasons, providing a splash of color and sweetness to any dessert table.
    • Occasion: Perfect for birthdays, bridal showers, or any gathering that calls for a visually stunning dessert.

    Why You’ll Love This Recipe

    The combination of sweet and slightly tangy cream cheese frosting freshens up the rich red velvet base, creating a delightful contrast that appeals to the palate. Each cookie provides a melt-in-your-mouth experience, inviting everyone to indulge without hesitation. In addition, the nostalgic flavors of red velvet evoke memories of family gatherings and celebrations, making these cookies not just a treat, but also a reminder of special moments.

    What’s more, the preparation process is both fun and rewarding, allowing bakers to gain confidence while crafting a breathtaking dessert. The unique rose design is an excellent opportunity to flex your creativity in the kitchen, ensuring that each cookie is as beautiful as it is delicious. Moreover, this recipe invites experimentation, whether in flavor variations or intricate designs, making it a timeless classic that can be revisited.

    The nutritional balance in these cookies can be enhanced by swapping classic ingredients for healthier alternatives without compromising taste. Red velvet, characterized by its cocoa content, offers the benefit of antioxidants while providing a rich flavor profile. The addition of cream cheese, albeit indulgent, introduces calcium and protein, making this treat a more nourishing option than conventional cookies.

    Socially, Red Velvet Rose Sandwich Cookies excel at gatherings. Their vibrant appearance ignites conversations, and sharing them creates lasting bonds. Their unique design invites compliments and sparks curiosity, making them a staple at socially significant events.

    Finally, their affordability makes these cookies a guilt-free indulgence. The simple and attainable ingredients mean you can enjoy a baking day without stressing about cost. The versatility of the recipe also allows for any necessary adjustments, ensuring that this delightful treat fits any budget or dietary preference.

    Historical Background and Cultural Significance

    The origins of red velvet cake date back to the 1920s in the United States, with roots tracing back to Southern kitchens where desserts were often lavishly flavored with cocoa, buttermilk, and cream. Over the years, the dessert has evolved, gaining popularity during the 1980s and becoming a hallmark of special occasions. Its vivid hues and rich flavors embody a celebratory spirit that has influenced various culinary traditions.

    Culturally, red velvet cake symbolizes romance, making it a popular choice for weddings and anniversaries. The striking color evokes feelings of love and passion, further solidifying its place in romantic celebrations. Similarly, its rise in popular culture—particularly through food blogs and social media—has allowed the dessert to garner new interpretations, such as these delightful sandwich cookies.

    The transformation of traditional red velvet into sandwich cookies is a contemporary adaptation, paving the way for innovative dessert presentations. By maintaining the essential flavor profile while inspiring creativity through culinary presentation, these cookies showcase the evolution of classic recipes. They embody a modern twist on a beloved treat, appealing to gourmands looking for something fresh.

    Regional variations exist where the traditional recipe may be infused with local ingredients, encompassing subtle changes that reflect the area’s culinary preferences. These adaptations reflect the communal nature of food, where families and communities put their own unique spin on classic recipes.

    Ingredient Deep Dive

    Cocoa Powder: This essential ingredient brings depth and a subtle bitterness that complements the sweetness of the cookie. It is derived from roasted cocoa beans, which have been ground into a fine powder. When choosing cocoa powder, opt for unsweetened varieties to maintain control over sugar levels in your cookies. Proper storage in a cool, dark place can extend its shelf life, while substitutions like carob powder can provide a different flavor profile if desired.

    Red Food Coloring: Primarily used for visual appeal, red food coloring enhances the striking appearance of red velvet cookies. Historically made from beet juice, modern-day options typically consist of synthetic dyes. When selecting food coloring, look for gel-based products for enriched color without altering the cookie’s texture. Always store food coloring in a cool place away from direct sunlight, and be mindful of the amount used, as too much may affect taste and consistency.

    Common Mistakes to Avoid

    • Overmixing the dough can lead to tough cookies; combine ingredients until just mixed.
    • Not chilling the dough sufficiently may result in cookies spreading too much during baking.
    • Ignoring oven temperature can result in underbaked or burnt cookies; always preheat your oven adequately.
    • Skipping the sifting of dry ingredients could leave lumps in the dough, affecting texture.
    • Using expired or low-quality cocoa powder can diminish the cookie’s flavor; always check freshness.
    • Not measuring ingredients accurately will lead to inconsistent results; use precise tools for best practices.
    • Neglecting to taste the cream cheese frosting can lead to an unbalanced flavor; adjust sugar levels according to preference.
    • Using the wrong type of food coloring can affect both the appearance and flavor; gel coloring is preferred for best outcomes.
    • Skipping the cooling stage after baking can result in cookies breaking apart; allow them to set on a wire rack.
    • Using cold ingredients can hinder the incorporation of flavors; bring ingredients to room temperature for better results.

    Essential Techniques

    Proper Mixing: Mixing the dough correctly ensures a tender texture in your cookies. Overmixing can lead to a dense cookie, so be sure to mix just until ingredients are combined. Look for a soft, cohesive dough as your cue to stop. Mastering this technique will elevate your baking skills significantly.

    Piping Roses: Piping intricate rose designs on your cookies creates a stunning visual effect. Practice with a piping bag and star tip to control pressure and achieve desired shapes. Use different colors to enhance the design. Watch for consistency in frosting; it should not be too runny or too stiff.

    Pro Tips for Perfect Red Velvet Rose Sandwich Cookies

    1. Ensure all ingredients are at room temperature for better mixing and overall volume.

    2. Use high-quality cream cheese for the frosting to ensure a rich taste.

    3. Experiment with different flavors by adding extracts like vanilla or almond to your dough.

    4. Consider toasting the cocoa powder beforehand to enhance its flavor profile.

    5. Roll out the dough between parchment paper for easier handling.

    6. For a fun twist, add mini chocolate chips to the dough for an added texture contrast.

    7. Refrigerate the finished cookies for at least 30 minutes to help flavors meld before serving.

    8. Always check doneness a minute or two before the timer goes off, as oven temperatures may vary.

    Variations and Adaptations

    Explore seasonal adaptations by infusing pumpkin spice during fall, transitioning the flavor profile to something both nostalgic and innovative. For winter festivities, consider adding peppermint extract for a refreshing twist. Dietary modifications also allow these cookies to be vegan by substituting eggs with flaxseed meal and dairy cream cheese with plant-based options. Playful flavor variations, such as adding espresso to the dough or mixing in white chocolate chips, can introduce delightful new experiences. You can switch out the traditional presentation by stacking them in a cookie tower with fresh flowers for an elegant display.

    Serving and Presentation Guide

    When plating Red Velvet Rose Sandwich Cookies, consider using a decorative cake stand to elevate the presentation. Garnish with fresh mint leaves or edible flowers for a pop of color and freshness. Traditional accompaniments like a side of vanilla ice cream can balance the flavors beautifully. For modern serving suggestions, consider placing the cookies in small boxes with ribbons for gifting. Temperature is key; these cookies are best served slightly chilled, allowing the frosting to set and flavors to develop. For portion control, cut the cookies into half or thirds if serving at a larger gathering.

    Wine and Beverage Pairing

    Pair these delightful cookies with a light-bodied red wine, such as a Pinot Noir, which complements the chocolate tones without overpowering the dessert. For non-alcoholic alternatives, consider serving with a rich hot cocoa or an aromatic vanilla chai. Coffee lovers may enjoy pairing these cookies with a strong espresso, where the bitter notes enhance the overall sweetness of the cookies. Remember to serve beverages slightly chilled or at room temperature to contrast against the sweetness of the cookies.

    Storage and Shelf Life

    Store Red Velvet Rose Sandwich Cookies in an airtight container to maintain freshness. Keeping them at room temperature is fine for about 3-5 days; however, they will last longer if refrigerated, up to a week. When freezing, place cookies in freezer-safe bags with layers of parchment paper between them to prevent sticking. Properly frozen, they can last up to three months. Signs of spoilage include a change in texture, off odor, or visible mold. When ready to eat, thaw at room temperature or microwave for a few seconds to bring back their softness.

    Make Ahead Strategies

    Prepare the dough a day in advance and refrigerate it to enhance flavors. Shape the cookies while cold, as it helps in maintaining their form during baking. Store the frosting separately in the fridge and pipe it onto cookies just before serving to prevent sogginess. Keeping cookies unaired as they cool aids in retaining their delicate textures. For special occasions, assemble the cookies together the night before, ensuring they meld flavors while maintaining a light texture for melting moments of bliss upon serving.

    Scaling Instructions

    To halve the recipe, simply divide all ingredients, ensuring precise measurements for success. When doubling, use larger mixing bowls and bakesheets to handle the increased yield without compromising space. It’s crucial to adjust baking times if you’re using multiple pans simultaneously. If you decide to triple the recipe, ensure you have enough room in your oven and stagger bake times if necessary. Additionally, consider portion sizes and the amount of storage space you will need to accommodate your finished products.

    Nutritional Deep Dive

    These cookies offer a delightful balance of macronutrients due to the creamy filling and cookie base. With a moderate amount of fats, carbohydrates, and proteins, they become a satisfying indulgence without being overly heavy. Micronutrient-rich ingredients like eggs and cream cheese contribute to calcium and vitamin B values, enhancing their nutritional appeal. While indulging occasionally is key, remember to keep portion sizes in check for balanced weight management.

    Dietary Adaptations

    These cookies can seamlessly transform to accommodate various dietary needs. For gluten-free versions, consider using almond flour and gluten-free all-purpose blends. Vegan adaptations can involve using substitutes like flax egg and vegan cream cheese to replicate traditional textures and flavors. Low-carb enthusiasts may venture into utilizing almond flour and powdered erythritol for a sugar-free experience. Each adaptation invites bakers to experiment while still indulging in this sweet treat, ensuring that everyone can enjoy the magic behind Red Velvet Rose Sandwich Cookies.

    Troubleshooting Guide

    If your cookies turn out hard, ensure not to overbake and check your oven’s temperature accuracy. Conversely, overly soft cookies may suggest you need to chill the dough longer before baking. Flavor imbalances might arise from too much cocoa; always taste the dough before baking and adjust sugar accordingly. If the frosting is too runny, adding powdered sugar could help thicken it up. Remember that varying oven altitude can affect texture; it may require adjusted ingredient ratios to achieve optimal results.

    Recipe Success Stories

    Readers have shared stories of their baking successes, discovering that each step meticulously followed led to their cookies becoming a hit at gatherings. Feedback highlighted the cookie’s soft texture and beautiful presentation receiving high praise from friends and family alike. Several bakers experimented with color variations, delighting in how small tweaks produced stunning aesthetics. Photography tips from our community members have also encouraged creativity in showcasing these beautiful cookies on social media, sparking inspiration amongst fellow bakers.

    Frequently Asked Questions

    Q: Can I use different food coloring? A: Yes, while red is traditional, feel free to experiment with other colors to match themes or occasions. Here, gel-based coloring is recommended for best results.

    Q: How can I make these cookies gluten-free? A: Substitute regular flour with a gluten-free flour blend; ensure you are using certified gluten-free products to avoid cross-contamination.

    Q: Can I freeze these cookies? A: Absolutely! They freeze well when stored in airtight containers, and you can thaw them at room temperature before serving.

    Q: How do I store leftover cookies? A: Store them in an airtight container at room temperature for up to 5 days or refrigerate for longer freshness.

    Q: What is the key to achieving the perfect cream cheese frosting? A: Ensure your cream cheese is softened and mix it with powdered sugar gradually, adjusting for taste and texture for a smooth finish.

    Q: Can these cookies be made vegan? A: Yes! You can replace eggs with flax eggs and cream cheese with plant-based alternatives to achieve a similar taste and texture.

    Q: How do I know when the cookies are done baking? A: The edges will slightly harden and the tops will set. A good rule of thumb is to remove them from the oven just before turning golden.

    Q: Can I add chocolate chips to the dough? A: Absolutely! Chunks of chocolate can add a delicious contrast to the soft cookie.

    Q: What makes red velvet unique in flavor? A: The combination of cocoa and buttermilk provides a distinctive taste profile that is both sweet and slightly tangy.

    Q: Can I make mini versions of these cookies? A: Yes! Just adjust the baking time and keep an eye on them to ensure they don’t overbake.

    Additional Resources

    If you loved making these Red Velvet Rose Sandwich Cookies, you might enjoy exploring related recipes like classic red velvet cake or red velvet cupcakes. Check out our technique guides for mastering cookie baking essentials and ingredient information to expand your culinary knowledge. For tools, consider a quality piping set for decoration enhancements. Seasonal variations could inspire you to create similar cookies featuring festive flavors like pumpkin spice or peppermint for the holidays, ensuring your baking remains exciting year-round.

    Join the Conversation

    We invite you to share your personal experiences with these cookies on social media. Don’t forget to snap a photo of your creations and tag us! Participate in recipe reviews and engage with fellow bakers within our community. Your feedback not only helps us improve but inspires others to try out new variations. Whether it’s delighting in our classic or putting your own spin on the recipe, we love to witness the creativity of our culinary friends!

    The Recipe

    Red Velvet Rose Sandwich Cookies

    Serves: 24 cookies

    Prep Time: 30 mins

    Cook Time: 12 mins

    Total Time: 42 mins

    Kitchen Equipment Needed

    • Mixing bowls
    • Piping bags with tips
    • Rolling pin
    • Baking sheets
    • Wire cooling racks

    Ingredients

    • 2 1/2 cups all-purpose flour
    • 1 cup granulated sugar
    • 1/2 cup cocoa powder
    • 1 tsp baking soda
    • 1/2 tsp salt
    • 1 cup unsalted butter, softened
    • 1 large egg
    • 1 tbsp red food coloring
    • 2 tsp vanilla extract
    • 1 cup cream cheese, softened
    • 2 cups powdered sugar
    • 1 tsp vanilla extract (for frosting)

    Directions

    1. Preheat your oven to 350°F (175°C) and line baking sheets with parchment paper.
    2. In a bowl, whisk together flour, cocoa powder, baking soda, and salt.
    3. In a separate bowl, cream together softened butter and sugar until light and fluffy.
    4. Add egg, food coloring, and vanilla extract to the sugar mixture; mix until well combined.
    5. Gradually add the dry ingredients to the wet ingredients, mixing until just combined.
    6. Chill the dough for at least 30 minutes before rolling out.
    7. Roll out the dough on a floured surface to about 1/4 inch thickness and cut with cookie cutters.
    8. Bake for 10-12 minutes, or until the edges are set; let cool completely on wire racks.
    9. For the frosting, beat together cream cheese, powdered sugar, and vanilla until smooth.
    10. Pipe the cream cheese frosting onto half of the cooled cookies and sandwich with the other half.

    Recipe Notes

    • For a more festive touch, try adding vanilla bean seeds to the frosting for added flavor and texture.
    • If you prefer a less sweet frosting, reduce the powdered sugar to taste.
    • Explore different flavorings by incorporating lemon or orange zest in the cookie dough.

    Perfect Strawberry Macarons – Fun & Easy for Beginners

    Delicious Strawberry Macarons: A Sweet Treat for Every Occasion

    ⚖️
    Difficulty
    Moderate

    ⏲️
    Prep Time
    30 mins

    🕒
    Cook Time
    15 mins

    ⏱️
    Total Time
    45 mins

    🍽️
    Servings
    24 macarons

    Strawberry macarons are not just a dessert; they are a delightful experience in every bite. The moment you take a bite into these delicate treats, you’re greeted with a crisp outer shell that gives way to a soft, chewy interior bursting with fresh strawberry flavor. The sweet and slightly tart filling perfectly complements the almond-flavored cookie, creating a balanced sweetness that is utterly irresistible. Whether you’re hosting a glamorous tea party or simply indulging yourself after a long day, these macarons are sure to impress and satisfy your sweet tooth.

    Creating strawberry macarons might seem daunting, but with a pinch of patience and practice, anyone can master the craft. The vibrant pink hue, reminiscent of fresh strawberries, makes them visually appealing, and the sweet aroma wafting through your kitchen will entice anyone nearby. Perfect for any celebration or simply as a sweet treat, these macarons are versatile, elegant, and delicious.

    Quick Recipe Highlights

    • Flavor Profile: Strawberry macarons combine the sweetness of strawberries with a hint of almond.
    • Texture: The contrast of a crunchy outer shell with a chewy center creates a delightful mouthfeel.
    • Aroma: The aroma of fresh strawberries and toasted almonds is captivating and inviting.
    • Visual Appeal: Their pastel pink color and smooth finish make them Instagram-worthy.
    • Skill Level Needed: While they require some technique, they are manageable for home bakers willing to learn.
    • Special Equipment: A stand mixer, piping bags, and silicone baking mats help achieve the perfect result.

    Recipe Overview

    • Difficulty Level: Although they require some precision and practice, making strawberry macarons is achievable for anyone with a determination to learn the techniques involved.
    • Category: These macarons fall under desserts and are perfect for tea parties, special occasions, or just as an indulgence.
    • Cuisine: Rooted in French culinary tradition, macarons are celebrated worldwide for their unique flavors and delicate nature.
    • Cost: The cost of making strawberry macarons can vary; however, basic ingredients such as eggs, sugar, and almond flour are generally affordable.
    • Season: While strawberry macarons can be enjoyed year-round, spring and summer, when strawberries are at their peak, enhance their fresh flavor.
    • Occasion: Ideal for birthday celebrations, bridal showers, or as an elegant homemade gift, strawberry macarons elevate any occasion with their charm.

    Why You’ll Love This Recipe

    The taste and texture of strawberry macarons are a delightful balance between sweet and slightly tangy. Each bite is an explosion of flavor, with the almond shell providing a nutty backdrop that enhances the freshness of the strawberries. The chewy interior creates a satisfying contrast to the delicate exterior, making it a treat for all senses. Not only do these macarons taste incredible, but they also provide a fun baking project that allows you to get creative in the kitchen.

    Preparing strawberry macarons allows you to impress your friends and family with minimal effort. After mastering a few key techniques, you’ll find that these treats come together surprisingly quickly. The joy of piping perfect rounds and watching them form their signature “feet” in the oven is incredibly rewarding. Plus, once you get the hang of it, you can experiment with various flavors and fillings!

    Beyond their deliciousness, strawberry macarons can be a healthier dessert option compared to many store-bought confections. Made primarily with almond flour, they are gluten-free and can be adapted to suit various dietary needs. Additionally, the use of fresh strawberries adds a fruity element that brings essential vitamins and nutrients into the mix.

    Whether enjoyed at a gathering or savored alone, these macarons bring people together. With their stunning presentation, they serve as a conversation starter and add a touch of elegance to any table setting. Sharing these treats with others creates special moments and lovely memories that last long after the last crumb is gone.

    Finally, strawberry macarons are budget-friendly, especially if you use seasonal fruit. Making them at home allows you to control the quality of ingredients, ensuring a fresher taste and often saving money compared to buying specialty desserts from a bakery. This makes them a perfect option for those looking to impress without breaking the bank.

    Historical Background and Cultural Significance

    The origin of macarons dates back to the 8th century when they were brought to France by Italian chefs. Initially just simple almond meringue cookies, they transformed into the iconic treat we know today through the influence of French culinary artistry. The addition of vibrant fillings and flavors, like strawberry, turned them into a luxurious dessert beloved worldwide.

    Strawberry macarons, in particular, symbolize the arrival of spring and are often associated with celebrations and gatherings. Their delicate beauty and flavorful filling make them a favorite at weddings, showers, and other special occasions, enhancing the festive atmosphere with their charm and elegance.

    Over time, the macaron has evolved, with countless variations now available, including fruit flavors that reflect seasonal ingredients. The rise of culinary media has also played a role in their popularity, inspiring home bakers to try their hand at creating these delightful treats in their kitchens.

    Regional variations of macarons have emerged, with different countries adding local flavors to the classic recipe. For instance, matcha macarons reflect Japanese tastes, while lavender flavors have become popular in Provence. Despite these adaptations, the core technique remains, showcasing the timeless appeal of the macaron.

    Ingredient Deep Dive

    Almond Flour: Almond flour is a key ingredient in macarons, providing a distinct flavor and texture. It is gluten-free, making it suitable for those with gluten sensitivities. When selecting almond flour, look for finely ground options for a smoother texture. Store in a cool, dry place to maintain freshness, and consider freezing for long-term storage. As an alternative, hazelnut flour can be used for a different nutty flavor.

    Egg Whites: Egg whites are essential for achieving the perfect meringue texture in macarons. They provide structure and stability, allowing the shells to rise and hold their shape. Fresh eggs produce more stable meringue, but those that have been aged slightly can also work well. When storing, ensure they are kept in a clean, non-greasy environment. If you’re looking for egg-free substitutions, aquafaba can be used effectively.

    Common Mistakes to Avoid

    • Not weighing ingredients: Accurate measurements are crucial in macaron preparation. Use a kitchen scale to ensure consistency.
    • Under or over-mixing: This can affect the macaron’s texture. Aim for a “lava-like” consistency when folding the batter.
    • Skipping aging the egg whites: Aging helps improve the meringue’s stability. Let them sit for a few hours or overnight in the refrigerator.
    • Improper oven temperature: Too hot or too cold will interfere with the baking process. Invest in an oven thermometer for accuracy.
    • Not letting macarons rest before baking: Allowing them to form a skin helps create the desirable “feet.” Aim for 30 minutes to 1 hour of resting time.
    • Overbaking or underbaking: Keep an eye on your macarons to ensure they achieve the right texture – crisp outside and soft inside.
    • Using outdated baking sheets: This can lead to uneven baking. Make sure your baking sheets are fresh and unwarped.
    • Not using parchment paper or silicone mats: These help prevent macarons from sticking and ensure even baking.
    • Piping too close together: Give macarons space to rise during baking; otherwise, they may merge.
    • Ignoring humidity: Baking in a humid environment can prevent macaron shells from forming their signature texture.

    Essential Techniques

    Meringue Making: Whipping egg whites into meringue is crucial for macarons. Use a clean, dry mixing bowl and ensure no egg yolks are present. Start at a low speed, gradually increasing to medium-high until stiff peaks form. This provides structure for your shells. Watch for over-whipping, which leads to grainy meringue.

    Folding the Batter: Properly folding the almond flour and powdered sugar into the meringue is important to avoid deflating it. Use a spatula and a gentle motion, rotating the bowl a quarter turn with each fold. Stop when the batter flows fluidly from the spatula, resembling molten lava. This technique ensures a smooth macaron with the right texture.

    Pro Tips for Perfect Strawberry Macarons

    1. Use fresh, high-quality ingredients, especially for the strawberries, to enhance flavor and overall quality.

    2. Keep your tools dry and clean to ensure successful meringue formation.

    3. Experiment with different fillings, like buttercream or ganache, to create a variety of flavor combinations.

    4. If you’re new to macarons, consider starting with a simple filling to focus on perfecting the cookie itself.

    5. Practice piping techniques on parchment paper before moving to the macaron batter.

    6. Allow the macarons to cool completely before filling to prevent the filling from melting.

    7. Experiment with food coloring for vibrant designs while ensuring the flavors are not compromised.

    8. Store filled macarons in the fridge for a few hours before serving for better flavor development.

    Variations and Adaptations

    Strawberry macarons can be enhanced with regional variations such as using locally sourced berries or creating unique flavor pairings like basil or lemon zest. For seasonal adaptations, consider incorporating autumn spices like cinnamon for a fall twist. Dietary modifications, including gluten-free or vegan options, can be achieved by substituting almond flour and using chickpea aquafaba instead of egg whites.

    Flavor variations may include experimenting with different fruits such as raspberry or blueberry to achieve similar textures with unique tastes. Texture modifications can be achieved by filling the macarons with crunchy elements like pistachio or hazelnut praline. Presentation alternatives could range from drizzling chocolate on top to using edible flowers for garnishing.

    Serving and Presentation Guide

    When plating strawberry macarons, consider using a clean white plate to enhance their pastel colors. Garnishing with fresh strawberries or whipped cream can elevate the dessert further. Serve the macarons at room temperature to highlight their texture, and consider offering them on tiered stands for an elegant display at special events.

    Temperature considerations are essential; serve macarons after allowing them to sit at room temperature for at least 15 minutes after removing them from the refrigerator for optimal flavor. For portion control, aim for one or two macarons per person, as their rich flavors and textures can satisfy even the biggest sweet tooth.

    Wine and Beverage Pairing

    For the perfect wine pairing with your strawberry macarons, consider a light, refreshing Moscato or a sparkling Rosé that complements the sweetness of the strawberries. The effervescence in sparkling wines balances the richness of the macarons beautifully. Non-alcoholic alternatives like sparkling lemonade or iced herbal tea can also provide a delightful pairing, tying in refreshing flavors with the dessert.

    If you’re serving coffee or tea, opt for a mild brew that doesn’t overpower the delicate flavors of the macarons. A lightly brewed green tea or a subtle floral herbal tea can elevate the tasting experience and create a harmonious balance with the sweetness of the strawberries. Serve chilled beverages at the appropriate temperature to ensure an enjoyable experience for guests.

    Storage and Shelf Life

    To maintain the freshness of your macarons, store them in an airtight container in the refrigerator. They can last for about a week when correctly stored. Ensure that they are separated with parchment paper to avoid sticking. If you want to extend their shelf life, consider freezing them; they can maintain their quality for up to three months when properly wrapped.

    When assessing spoilage, check for any changes in texture, such as becoming overly hard or sticky. Upon reheating, allow the macarons to come to room temperature to preserve their delicate texture. Proper storage is key to enjoying these treats at their best.

    Make Ahead Strategies

    Create a prep timeline by preparing the almond flour and meringue a day ahead for convenience. You can also pre-pipe the shells and freeze them for easy assembly later. Keep the shells stored in a sealed container to prevent them from absorbing moisture until you’re ready to fill them.

    When assembling, consider rehydrating any fruit fillings to maintain moisture and flavor. For the best quality, avoid refrigerating filled macarons for too long as they lose their delicate texture. Maintain freshness by adding any toppings or delicate elements right before serving.

    Scaling Instructions

    Halving the macaron recipe is feasible, just be sure to adjust all ingredients accordingly and maintain the correct ratios. Doubling or tripling the batches can be successfully executed while ensuring that your mixer and piping bags can handle the increased volume. Timing adjustments may be necessary, as larger batches may require more baking space and oven checks.

    When scaling, keep in mind that ingredient proportions should remain consistent for optimal texture and flavor. Store any excess macarons in the fridge, ensuring all layers are separated properly to prevent sticking.

    Nutritional Deep Dive

    In a serving of strawberry macarons, the macronutrient breakdown predominantly consists of carbohydrates from sugar and almond flour, while providing a moderate amount of protein from egg whites. With strawberries, you’ll gain additional vitamins, particularly Vitamin C, which is beneficial for your immune system.

    Health benefits of these macarons include the inclusion of healthy fats from almond flour, which can support heart health. Portion analysis reveals that even a small serving can satisfy dessert cravings while still allowing for a balanced diet.

    Dietary Adaptations

    Making gluten-free strawberry macarons is easily achievable with almond flour as the base, ensuring that they are suitable for those with gluten sensitivities. For a dairy-free adaptation, consider using a dairy-free butter substitute in fillings, ensuring that the entire recipe remains suitable for all dietary needs.

    If you cater to vegan diets, substitute eggs with aquafaba, a chickpea brine, to whip up a stable meringue. Low-carb and keto adaptations can be achieved by using erythritol or other sugar substitutes, keeping this delicious treat accessible to various dietary preferences.

    Troubleshooting Guide

    For texture issues like a cracked shell, ensure you’re properly mixing and folding the batter to avoid too much air. If macarons spread or lose shape during baking, adjust oven temperature settings and ensure the batter has rested sufficiently before going into the oven.

    If flavors are unbalanced, consider testing your ingredient quality or enhancing flavors with natural extracts or concentrated fruit purees. If equipment challenges arise, check for proper functioning of kitchen tools such as mixers or thermometers to maintain consistency.

    Recipe Success Stories

    Community feedback often highlights the joy of making macarons at home, with many bakers sharing their successes after multiple attempts. Readers frequently adapt flavors from traditional strawberry to more unique varieties like matcha or passion fruit.

    Successes in varying the recipes and personal touches make these treats special for many. Photography tips shared among bakers enhance the appeal of their creations, showcasing the beautiful outcome of their well-loved strawberry macarons.

    Frequently Asked Questions

    Can I make macarons without almond flour?

    While almond flour is traditional for macarons, you can experiment with other nut flours or even coconut flour. However, the texture and flavor may vary significantly.

    Why are my macarons hollow inside?

    Hollow macarons usually result from over-mixing or undercooking. Ensure you mix just until the batter flows and check your oven temperature for accuracy.

    How do I know when my macarons are done baking?

    You can tell macarons are done when they form a firm shell and do not shift when lightly touched. Look for the signature feet as a sign of a successful bake.

    Can I use fresh strawberries in the filling?

    Yes, but fresh strawberries may add excess moisture. It’s best to cook them down slightly or use them to flavor a buttercream or ganache filling.

    How can I fix cracked macarons?

    Cracked shells may result from overly hot ovens or under-mixed batter. Ensure to balance your oven temperature and techniques for best results.

    What’s the best way to store macarons?

    Store filled macarons in an airtight container in the refrigerator for up to a week or freeze them for long-term storage. Ensure layers are separated with parchment paper.

    Can I use a different filling for macarons?

    Absolutely! You can get creative with fillings such as buttercreams, ganaches, or even fruit jams, allowing for endless flavor possibilities.

    Do I need to age egg whites before using them for macarons?

    Aging egg whites is a common technique to improve meringue stability. It’s recommended but not strictly necessary for macarons, especially with fresh eggs.

    Is it possible to make macarons gluten-free?

    Yes, macarons are naturally gluten-free due to their almond flour base. This makes them an excellent treat for those avoiding gluten.

    How long does it take to make macarons from start to finish?

    From start to finish, including prep and bake time, expect to spend about 45 minutes to an hour making macarons. However, the entire process can take longer depending on ingredients and techniques used.

    Additional Resources

    For those eager to dive deeper into macarons, explore related recipes that incorporate various flavors and fillings. Technique guides can provide in-depth steps on meringue making and piping for aspiring bakers. Ingredient information can enhance understanding of the core components used in macarons, while equipment recommendations ensure kitchen success.

    Seasonal variations can inspire holiday-themed macarons, creating an exciting opportunity to celebrate different occasions with unique treats. Always keep experimenting and sharing your kitchen adventures as you find your perfect macaron recipe!

    Join the Conversation

    We encourage you to share your macaron-making journey on social media. Your photography and stories contribute to our vibrant baking community, inspiring others to try their hand at these tasty treats. Recipe reviews and comments help enhance our community engagement, so let us know how your strawberry macarons turn out and any variations you might try!

    The Recipe

    Strawberry Macarons

    Serves: 24 macarons

    Prep Time: 30 mins

    Cook Time: 15 mins

    Total Time: 45 mins

    Kitchen Equipment Needed

    • Stand mixer
    • Silicone spatula
    • Piping bags
    • Silicone baking mats or parchment paper
    • Oven thermometer

    Ingredients

    • 1 ½ cups almond flour
    • 1 ¾ cups powdered sugar
    • 4 large egg whites (aged if possible)
    • 1 cup granulated sugar
    • 1 teaspoon vanilla extract
    • ½ cup strawberry puree
    • Butter for the filling (optional)

    Directions

    1. Preheat your oven to 300°F (150°C) and line baking sheets with silicone mats or parchment paper.
    2. In a mixing bowl, sift almond flour and powdered sugar together to remove lumps.
    3. In a separate bowl, whip egg whites until foamy, then gradually add granulated sugar until stiff peaks form.
    4. Gently fold the almond flour mixture into the meringue using a spatula until incorporated.
    5. Add vanilla extract and strawberry puree, continuing to fold until the batter flows smoothly.
    6. Transfer the batter to a piping bag and pipe small rounds onto the prepared baking sheets.
    7. Let the macarons rest for 30 minutes to 1 hour, until they form a skin.
    8. Bake for 15 minutes, or until shells are firm, then cool completely on the baking sheet.
    9. Once cooled, fill with your desired filling and pair together to form a sandwich.
    10. Let macarons rest in the refrigerator for at least an hour for flavors to meld before serving.

    Recipe Notes

    • Ensure all tools and bowls are clean and dry for meringue success.
    • Experiment with flavors by incorporating different fruit purees into the filling.
    • Macarons can be frozen before filling; just be sure to store them properly.

    Easy Lemon Strawberry Cheesecake Cookies – Ready in 30 Minutes

    Lemon Strawberry Cheesecake Sandwich Cookies: A Delightful Summer Treat

    ⚖️
    Difficulty
    Medium

    ⏲️
    Prep Time
    30 mins

    🕒
    Cook Time
    15 mins

    ⏱️
    Total Time
    45 mins

    🍽️
    Servings
    24 cookies

    Lemon strawberry cheesecake sandwich cookies are the epitome of summer delight, blending the bright zest of lemon with the luscious sweetness of strawberries in delightful cookie form. Imagine biting into two soft, buttery cookies that cradle a smooth and creamy cheesecake filling, its flavors perfectly complemented by a hint of fresh lemon. Every bite is a symphony of flavors and textures, a playful balance between the tangy and the sweet that dances on your palate. The vibrant colors of the strawberry filling and the zesty lemon hues make these cookies a stunning addition to any dessert table.

    These cookies not only satisfy your sweet tooth but also bring a touch of nostalgia, reminiscent of sunny picnics and carefree summer days. They’re perfect for gatherings, a picnic treat, or simply to enjoy with a cup of tea. The combination of strawberries, lemon, and creamy cheesecake creates a dessert that is not just a delight to taste but also a feast for the eyes – making them an ideal choice for social occasions or family celebrations.

    Quick Recipe Highlights

    • Flavor Profile: The unmistakable tang of lemons paired harmoniously with the sweetness of strawberries creates a refreshing taste that is beloved by many.
    • Texture: The softness of the cookies contrasts beautifully against the smooth and creamy cheesecake filling, delivering a delightful mouthfeel.
    • Aroma: The fresh aroma of lemon zest is invigorating, while the sweet scent of strawberries adds an enticing fruity note.
    • Visual Appeal: The cookies are visually stunning with their bright colors, making them an eye-catching dessert for any occasion.
    • Skill Level Needed: While these cookies require some technique, they are approachable for home bakers with basic cookie-making experience.
    • Special Equipment: A mixer, baking sheets, and cookie cutters will be essential to achieve the perfect texture and shape.

    Recipe Overview

    • Difficulty Level: These lemon strawberry cheesecake sandwich cookies are moderately difficult, balancing multiple components and requiring attention to timing.
    • Category: This dessert fits perfectly in various meal categories including summer treats, picnic desserts, and lunchbox snacks.
    • Cuisine: Drawing from classic American dessert traditions, these cookies also incorporate the bright flavors often found in seasonal pastries.
    • Cost: The approximate cost is moderate, considering fresh strawberries and quality cream cheese but gives high returns in enjoyment.
    • Season: Spring and summer are the best seasons to make this dessert when strawberries are at their peak freshness.
    • Occasion: These cookies are ideal for summer gatherings like barbecues, birthday parties, or even as a refreshing treat in a picnic basket.

    Why You’ll Love This Recipe

    The delightful combination of flavors and textures in these lemon strawberry cheesecake sandwich cookies will leave you craving more. The tangy notes of fresh lemon perfectly balance the sweet juiciness of vibrant strawberries, creating a flavor that feels both indulgent and refreshing. Each cookie is soft yet firm, making for a textural balance that is truly satisfying.

    In addition to their fantastic taste, these cookies are easy to prepare and can be made ahead of time. You can whip them up for a weekend treat or store them for a busy week ahead. The filling can be made in advance, allowing you to simply assemble the cookies when you’re ready to indulge.

    Nutritionally, incorporating fresh fruits like strawberries provides antioxidants and essential vitamins. The cheesecake filling adds a rich, creamy element while keeping it light with the lemon. Sharing these cookies with friends and family will certainly make your gatherings more enjoyable, as everyone can savor the endless flavors in each bite.

    They are also cost-effective, allowing you to impress guests without breaking the bank. With a moderate amount of ingredients, you yield a substantial batch of cookies that are just as exquisite as any pastry from a specialty bakery.

    Finally, the vibrant and inviting appearance of these cookies adds charm to any dessert table or gathering. You can showcase them on a bed of fresh mint or alongside additional strawberries to enhance their allure.

    Historical Background and Cultural Significance

    The origins of cheesecake can be traced back to ancient Greece, where cheesecake was considered an energy-boosting snack. The modern versions of cheesecake have evolved over decades, incorporating various flavors and textures, including fruit elements like strawberries. Now, cheesecake is a popular choice in many cultures, celebrated for its versatility and rich flavor.

    Strawberries also hold historical significance, dating back to Roman times, where they were used both as food and medicine. Their vibrant color and sweet flavor make them a favorite in desserts. The marriage of strawberries with cheesecake results in a beloved classic that many have enjoyed for generations.

    As baking evolved, so did creativity in blending flavors, leading to innovative desserts such as the cheesecake sandwich cookie. The popularity of these cookies surged with the rise of social media, where beautiful food photography reigns supreme, inspiring many home bakers to experiment with this iconic pairing.

    Regional variations of cheesecake can be found globally, with differing bases and flavor combinations, but the incorporation of strawberries remains a consistent favorite. Today’s modern twist on this timeless dessert showcases how traditions can merge splendidly.

    Ingredient Deep Dive

    Lemon is a vital component in these cookies, providing bright acidity and flavor depth. It not only enhances the overall taste but also adds a fresh aroma. When selecting lemons, look for firm, smooth-skinned ones for the best flavor. Store them in a cool, dry place or in the refrigerator to extend their freshness. Substitutions can include lime for a different citrus flair.

    Strawberries are another highlight, celebrated for their sweetness and juicy texture. Fresh strawberries are always preferred for this recipe, ensuring vibrant flavor and color. When selecting strawberries, ensure they are plump and firm with a bright red hue. They should be stored in the refrigerator and consumed within a few days for the best taste. Frozen strawberries can be a viable alternative, especially out of season.

    Cream cheese is the backbone of the cheesecake filling, contributing an irresistible creaminess. Opt for full-fat cream cheese for the best texture and flavor. Always allow it to come to room temperature before mixing to achieve a smooth consistency. If cream cheese is unavailable, mascarpone can be used for a luscious alternative.

    Common Mistakes to Avoid

    • Using cold ingredients: Ensure all ingredients, especially cream cheese, are at room temperature to achieve a smooth filling. Cold ingredients result in a lumpy texture.
    • Overmixing the dough: Excessive mixing can lead to tough cookies. Mix just until combined to keep your cookies soft.
    • Not enough chilling time: Allow the cookies to cool completely before assembling. This prevents the filling from melting and sogginess.
    • Skipping the zest: Lemon zest is crucial for flavor. Don’t overlook this step as it adds essential brightness.
    • Incorrect baking time: Overbaking can dry out your cookies. Keep a close eye on them, as they should remain soft in the center even after cooling.
    • Ignoring ingredient quality: The quality of your ingredients greatly affects the outcome. Always choose fresh, high-quality produce and dairy.
    • Assembling too quickly: Let cookies cool to avoid melting the filling. Patience is key for desirable results.
    • Neglecting presentation: Give thought to your cookie arrangement for maximum visual impact, especially for social occasions.
    • Forgetting to taste: Always taste your filling before assembling; it allows you to adjust sweetness and tartness as needed.
    • Not using parchment paper: Baking on parchment ensures even cooking and easy removal, preventing cookies from breaking.

    Essential Techniques

    When baking cookies, the cream mixing technique is essential for achieving the right texture. Start with softened butter and cream it until light and fluffy, ensuring air is incorporated. This process helps create a tender cookie. Avoid over-mixing once the dry ingredients are added to maintain a delicate texture.

    Chilling the dough is also an important technique that improves cookie shapes during baking. It helps the cookies retain their form and prevents spreading, resulting in a more aesthetically pleasing final product. A minimum of 30 minutes in the fridge is advisable.

    Combining flavors is vital, particularly when making cheesecake fillings. Gradually blend in the sweetener while tasting to ensure perfect balance. Understanding how ingredients interact will help achieve a well-rounded flavor.

    Pro Tips for Perfect Lemon Strawberry Cheesecake Sandwich Cookies

    Use room temperature ingredients to ensure a smooth filling and dough consistency. This is particularly important for the cream cheese used in the cheesecake filling, as cold ingredients may clump.

    Make sure to accurately measure your ingredients. Use a scale for precision, especially with flour and sugar, as this can significantly impact the cookie texture.

    Experiment with adding a hint of vanilla to the filling for enhanced flavor. A teaspoon or two can elevate the overall taste profile without overpowering the lemon and strawberry.

    After baking, let the cookies cool completely on the baking sheet before transferring them to a wire rack. This prevents any cracking or breaking, ensuring they remain intact when assembling.

    To enhance the visual appeal of your cookies, consider drizzling some melted white chocolate over the assembled cookies. This adds elegance and extra flavor, making them more enticing for guests.

    If preparing ahead of time, store baked cookies separately from the filling. This prevents the cookies from becoming soggy before serving.

    Variations and Adaptations

    You can create regional variations by incorporating different fruits. For instance, peaches or raspberries can provide a unique twist while maintaining the essence of the cookies. Seasonal adaptations include using pumpkin or apple butter during the fall months for a flavorful rethink of the classic.

    Consider dietary modifications for those with specific needs. Gluten-free flour can substitute regular flour to accommodate gluten sensitivities, or coconut cream can replace cream cheese to create a dairy-free version that still maintains creamy richness.

    For flavor variations, try adding crushed mint leaves to the filling for a refreshing bite or experiment with different citrus like lime for a zesty change.

    In terms of texture modifications, you could incorporate chopped nuts for added crunch or use a crispy cookie base to contrast the creamy filling, introducing a new level of texture that adds to the eating experience.

    Keep presentation interesting by serving the sandwiches on a tiered platter, accompanied by fresh fruit garnishes, ensuring every detail stands out.

    Serving and Presentation Guide

    When plating these cookies, avoid stacking them too high, as this may cause them to collapse. Instead, display them on a cake stand or a decorative plate where their vibrant colors can be appreciated.

    Add garnishes such as fresh mint, lemon zest, or edible flowers for color contrast. Great presentation elevates the dessert and impresses guests, ensuring it stands out at any gathering.

    Consider serving these cookies slightly chilled to amplify their refreshing qualities during warm weather events. Pairing them with a scoop of ice cream or whipped cream can also create a delightful combination.

    Temperature plays a crucial role in the sensory experience; aim for the cookies to be served at room temperature or slightly chilled from the refrigerator for a refreshing effect.

    During portioning, consider smaller sizes for gatherings, allowing guests to enjoy multiple flavors without feeling overwhelmed. This technique encourages sampling and complements the social dining experience.

    Wine and Beverage Pairing

    For wine pairings, a light, crisp Sauvignon Blanc complements the tartness of lemon and sweet notes of strawberries, providing a refreshing balance. A sweet rosé can also enhance the fruity flavors and add a celebratory vibe.

    For non-alcoholic alternatives, sparkling lemonade or iced tea can be enjoyable choices. Their refreshing qualities make them wonderful complements to the rich cheesecake filling.

    If coffee or tea is preferred, consider serving these cookies with light teas or a cold brew. The smoothness of these beverages pairs well with the creamy cookies, enhancing the overall flavor experience.

    When serving beverages, ensure they are chilled, especially during hot weather or outdoor events, creating a refreshing contrast to the cookies’ sweetness.

    Storage and Shelf Life

    Store the assembled lemon strawberry cheesecake sandwich cookies in an airtight container to maintain freshness. They can typically last up to three days at room temperature, but refrigeration extends their shelf life to about a week.

    If freezing, ensure to place parchment paper between layers to prevent sticking. Properly sealed, they can last up to three months in the freezer, allowing for easy weeknight desserts.

    Before serving after freezing, let them thaw in the refrigerator. This ensures they maintain their texture and flavor without becoming soggy.

    Signs of spoilage include an off smell, discoloration in the filling or cookies, or a change in texture. Always check for these indicators before consumption to ensure safety.

    When reheating, do so gently in the microwave for a few seconds or in a preheated oven at a low temperature to preserve their softness.

    Make Ahead Strategies

    To streamline your baking process, consider preparing the cheesecake filling a day in advance. Store it in the refrigerator, allowing the flavors to meld beautifully overnight.

    You can also bake the cookies ahead of time and store them sealed at room temperature. Assemble them shortly before serving to ensure freshness and optimal texture.

    Review the prep timeline by scheduling baking times when you’ll have minimal interruptions. Efficient time management allows for focused preparation without rushed steps.

    While assembling, keep cookies and filling separate until just before serving. This prevents the cookies from getting soggy, ensuring they are perfectly crisp when enjoyed.

    Adding fresh elements like whipped cream or berries right before serving can elevate the final presentation and taste of your cookies.

    Scaling Instructions

    To halve the recipe for a smaller batch, simply divide all ingredient quantities by two. Adjust baking time accordingly, as smaller batches may bake faster.

    For doubling or tripling the recipe, always ensure you have adequate baking sheets and workspace to accommodate a larger volume. It’s also essential to keep an eye on the bake time, as more cookies may influence how evenly they cook.

    Some kitchen tools like mixers or ovens may require adjustments based on volume. Using multiple mixing bowls may be necessary for larger quantities.

    Pay close attention to ingredient ratios while scaling; slight adjustments can significantly impact the cookie’s taste and texture.

    Remember to account for storing considerations for larger cookies, providing ample space between layers to prevent sticking during storage.

    Nutritional Deep Dive

    Understanding the macro breakdown of these cookies highlights their delightful balance between proteins, carbohydrates, and fats. Cookies provide a mix of energy while offering a satisfying treat that doesn’t feel overly indulgent.

    Additionally, analyzing micronutrients showcases the health benefits of fresh ingredients. Strawberries provide valuable vitamin C and antioxidants, while lemons offer essential minerals such as potassium.

    These cookies can offer benefits for a balanced diet, especially when paired with other fruit-based elements. The use of whole foods enhances nutritional value.

    Portion management is key; enjoying these cookies in moderation allows for a satisfying treat without exceeding dietary limits. Mindful eating contributes positively to overall weight management.

    Weight management considerations can also involve using naturally sweetened alternatives or lighter ingredients to create a lower-calorie version of the sandwich cookies.

    Dietary Adaptations

    Creating a gluten-free version involves substituting regular flour with a gluten-free blend or almond flour while maintaining similar ratios. This way, you can enjoy the same delightful taste without gluten.

    For a dairy-free alternative, consider coconut cream in place of cream cheese and ensure other ingredients are dairy-free. This adaptation enables those with dietary restrictions to enjoy the cookies without compromise.

    Making these cookies vegan can include replacing eggs with flaxseed meal or applesauce and ensuring that vegan cream cheese is used for the filling.

    For low-carb or keto adaptations, substitute regular sugar with erythritol or stevia to reduce overall carb counts while still providing sweetness.

    Incorporating paleo-friendly ingredients can allow you to replace common baking components with options like almond butter or coconut flour, appealing to a broader audience.

    Troubleshooting Guide

    If your cookies come out too tough, it likely indicates overmixing the dough. To avoid this, ensure to mix only until ingredients are combined and no flour pockets remain; lightness is key.

    Flavor balance issues may arise from not tasting your filling and not adjusting for sweetness. Always taste your filling before assembling to ensure it meets your desired levels of sweetness and tartness.

    Temperature problems can occur if the oven is not accurately preheated. Invest in an oven thermometer to ensure proper baking conditions and consistent results.

    Equipment challenges often involve using improper baking sheets, which can affect how cookies bake. Stick to parchment-lined, non-stick sheets for optimal results.

    Ingredient substitutions can sometimes lead to unexpected outcomes if ratios aren’t adjusted correctly. Always research and test new ingredients before integrating them into critical components of your recipe.

    Timing concerns can be addressed by using a timer and frequently checking on your cookies while baking to avoid overbaking.

    Recipe Success Stories

    Community feedback often highlights the bright flavors of the lemon strawberry cheesecake sandwich cookies, with readers particularly noting how well-balanced the taste is. Many have expressed joy over their versatility for various occasions.

    Successes often come from experimenting with ingredient variations. Readers have shared stories of substituting fruits that yielded delightful results, encouraging adventurous cooking.

    Adaptation stories frequently involve personal tweaks such as adding chocolate chips or varying the filling flavors, showcasing the recipe’s flexibility to suit personal preferences.

    Photography tips from our readers emphasize capturing the vibrant colors of the cookies to highlight their appeal. Natural light tends to enhance their visual beauty effectively.

    Recipe reviews include delightful praise regarding how approachable this dessert is for all baking skill levels, encouraging those new to baking to give it a try.

    Frequently Asked Questions

    Q1: Can I make these cookies ahead of time?
    A: Absolutely! You can prepare the cookies and filling in advance. Just store them separately and assemble before serving to keep the cookies fresh.

    Q2: What can I substitute for cream cheese?
    A: If you’re looking for a cream cheese alternative, mascarpone works well. For a dairy-free alternative, coconut cream is a great option.

    Q3: How should I store leftover cookies?
    A: Store them in an airtight container at room temperature for up to three days or refrigerate for up to a week.

    Q4: Can I freeze these cookies?
    A: Yes, these cookies freeze well! Just ensure you store them in an airtight container and place parchment paper between layers.

    Q5: Is it necessary to chill the dough before baking?
    A: Chilling the dough helps prevent cookies from spreading too much during baking, resulting in a thicker cookie.

    Q6: Can I use frozen strawberries in this recipe?
    A: Yes, frozen strawberries can be used, just ensure to thaw and drain excess moisture before using them in the filling.

    Q7: How do I know when my cookies are done baking?
    A: When the edges are lightly golden and the centers appear set but soft, your cookies are done. They will firm up as they cool.

    Q8: Can I replace sugar with a sugar substitute?
    A: Yes, you can use sugar substitutes like stevia or erythritol; just follow the package instructions for equivalent sweetness.

    Q9: What if my filling is too runny?
    A: If your filling is too runny, try adding more cream cheese until the desired consistency is reached or chilling it briefly to help set.

    Q10: Are these cookies vegan-friendly?
    A: With a few substitutions like dairy-free cream cheese and flaxseed eggs, these cookies could indeed be made vegan-friendly.

    Additional Resources

    For more delicious recipes, consider exploring similar sweet treats like chocolate chip cookies or fruity tarts that showcase seasonal flavors. Experimenting with varying techniques can also enhance your baking skills, as mastering fundamentals opens doors to creative variations.

    Ingredient information is vital, especially when sourcing fresh produce. Opt for organic where possible, especially for strawberries and lemons, ensuring the best flavors enter your baking. For those interested in kitchen equipment, lookup essential tools for bakers that can simplify and improve your processes.

    During seasonal variations, you may find delightful adaptations of cookies or other desserts that incorporate festive flavors, ensuring you have options for every occasion and palate.

    Join the Conversation

    We invite you to share your own variations of these lemon strawberry cheesecake sandwich cookies or your tips and tricks in the comments. Engage with us on social media, sharing your beautifully crafted creations and inviting others to try this recipe.

    Photography tips always help enhance your presentation, making your desserts even more appealing for social sharing. Your suggestions on adaptations keep the culinary conversation alive and thriving within our community.

    With every recipe shared, we continue to learn and grow, forming a vibrant community of passionate bakers eager to support each other in the wonderful world of cooking and baking.

    The Recipe

    Lemon Strawberry Cheesecake Sandwich Cookies

    Serves: 24 cookies

    Prep Time: 30 mins

    Cook Time: 15 mins

    Total Time: 45 mins

    Kitchen Equipment Needed

    • Mixing bowls
    • Electric mixer
    • Baking sheets
    • Parchment paper
    • Cookie cutter
    • Wire rack

    Ingredients

    • 1 cup unsalted butter, softened
    • 1 cup sugar
    • 2 cups all-purpose flour
    • 1/2 cup cream cheese, softened
    • 1 cup powdered sugar
    • 1 cup fresh strawberries, pureed
    • 1 tablespoon fresh lemon juice
    • 1 teaspoon lemon zest

    Directions

    1. Preheat your oven to 350°F (175°C) and line baking sheets with parchment paper.
    2. In a mixing bowl, cream together the softened butter and sugar until light and fluffy.
    3. Add the flour gradually, mixing until just combined to form a soft dough.
    4. Chill the dough for about 30 minutes in the refrigerator.
    5. Roll out the dough on a floured surface and cut into cookies using a cookie cutter.
    6. Place the cookies on the prepared baking sheets and bake for 12-15 minutes or until the edges are lightly golden.
    7. While the cookies bake, prepare the cheesecake filling by combining cream cheese, powdered sugar, strawberry puree, lemon juice, and lemon zest in a bowl until smooth.
    8. Once the cookies are cooled, spread the cheesecake filling on the flat side of half the cookies and sandwich them with the remaining cookies.
    9. Chill the assembled cookies in the refrigerator for at least 30 minutes before serving.

    Recipe Notes

    • For best results, chill the cookies before serving.
    • Feel free to experiment with different fruit purees for the filling.
    • Store leftovers in an airtight container for up to three days.

    Easy Tie Dye Cookies – Fun & Ready in 30 Minutes

    Tie Dye Cookies: A Colorful Treat for Every Occasion

    ⚖️
    Difficulty
    Easy

    ⏲️
    Prep Time
    30 mins

    🕒
    Cook Time
    10 mins

    ⏱️
    Total Time
    40 mins

    🍽️
    Servings
    24 cookies

    Tie Dye Cookies are not just a dessert; they are a vibrant experience that brings joy to baking enthusiasts and cookie lovers alike. With their stunning colors and delightful flavor, these cookies are perfect for parties, family gatherings, or simply as a fun treat to brighten your day. Imagine pulling these colorful, swirled cookies from the oven, their aroma wafting through the air; the sweet scent of vanilla and butter is simply irresistible. Each bite offers a burst of nostalgia, reminiscent of childhood art projects but with a scrumptious twist.

    The sensory appeal of Tie Dye Cookies is unmatched. The soft, chewy center is complemented by slightly crispy edges, creating that perfect cookie texture we all crave. The colors dance together, making each cookie unique and visually striking – a feast for the eyes before they even reach your palate. These cookies are not only a delight to taste but also a canvas for creativity, allowing bakers to express their individuality through color combinations and designs.

    Quick Recipe Highlights

    • Flavor Profile: These cookies have a buttery, sweet flavor with hints of vanilla that perfectly balance their colorful design.
    • Texture: Expect soft, chewy centers with crispy edges, making every bite a perfect mix of textures.
    • Aroma: The cookies emit a warm, inviting aroma that combines sweet vanilla and a hint of coconut.
    • Visual Appeal: The vibrant swirls of color make these cookies visually stunning, ensuring they stand out on any dessert table.
    • Skill Level Needed: Baking these cookies is straightforward, making them ideal for bakers of all skill levels.
    • Special Equipment: Basic kitchen tools like a mixing bowl, baking sheets, and a whisk are all you need!

    Recipe Overview

    • Difficulty Level: The Tie Dye Cookies recipe is categorized as easy, requiring minimal steps that are perfect for beginner bakers.
    • Category: These cookies fit well into the dessert category and are ideal for any occasion.
    • Cuisine: Inspired by American baking traditions, Tie Dye Cookies are a playful take on classic cookie recipes.
    • Cost: You can expect a low cost for this recipe, as the ingredients are commonly found in most kitchens.
    • Season: While delicious year-round, these cookies shine brightly during summer and festive seasons.
    • Occasion: Whether it’s a birthday party, a holiday cookie swap, or just a family snack, these cookies are always a hit.

    Why You’ll Love This Recipe

    Tie Dye Cookies deliver a taste and texture appeal that is hard to resist. The sweet, buttery flavor combined with the chewy center creates a comforting treat. This recipe offers the chance to indulge in a delightful balance of sweetness, with vibrant colors enticing both kids and adults alike. Each cookie serves as both a dessert and a conversation starter, making them perfect for social gatherings.

    The convenience of this recipe cannot be overstated, as it comes together quickly and easily. With simple steps and accessible ingredients, you can produce a batch of these cookies without spending hours in the kitchen. The dough can also be prepared ahead of time, allowing for spontaneous baking sessions whenever the mood strikes.

    Each ingredient in the Tie Dye Cookies contributes nutritional advantages. The protein from eggs and the beneficial fats from butter make for a treat that fuels your energy throughout the day. Enjoying these cookies in moderation fits nicely into a balanced diet, making them a guilt-free delight.

    These cookies are perfect for entertaining. Presenting a platter of Tie Dye Cookies at a gathering invites smiles and prompts compliments. Their colorful appearance makes them a great centerpiece, enhancing the festive atmosphere, while their delightful taste keeps guests returning for more.

    Cost-effectiveness is another remarkable aspect of Tie Dye Cookies. Most ingredients are pantry staples, meaning you can create these colorful delights without incurring a large expense. Bake them together with children or friends for an enjoyable cooking experience everyone can take part in.

    Historical Background and Cultural Significance

    Tie Dye Cookies have captured the hearts of home bakers with their playful design and delightful taste. The origins of these cookies can be traced back to traditional American cookie recipes, reimagined to incorporate vibrant colors that resemble art and craft trends popular in the 1960s and 1970s. Their appearance alone evokes a sense of nostalgia, reminiscent of carefree days spent experimenting with colors and patterns.

    Culturally, these cookies symbolize creativity and joy. Families often bake Tie Dye Cookies as a bonding activity, turning the kitchen into a space of laughter and shared memories. As an edible art project, these cookies invite bakers to express themselves through color combinations that reflect their individuality.

    Over the years, the recipe has evolved, with variations sporadically introduced. Some bakers may use different flavors in the dough or unique add-ins like chocolate chips or nuts. This evolution demonstrates the adaptability of the cookie, catering to personal taste preferences while retaining its core charm.

    Regional variations of Tie Dye Cookies can be found across the United States, often influenced by local flavors or seasonal ingredients. This adaptability enhances their popularity and allows bakers to customize them for various occasions and celebrations, making them a versatile favorite.

    Ingredient Deep Dive

    Butter serves as the fat base in this cookie, providing richness and flavor. It has a crucial role in achieving that tender and chewy texture we all adore. Beyond its culinary purpose, butter carries a rich history and has been a staple ingredient in countless recipes worldwide. When using butter for cookies, always opt for unsalted to maintain control over the final flavor profile.

    Granulated sugar is vital for sweetness and contributes to the cookies’ structure. This classic ingredient has been used in baking for centuries, bringing joy in various forms. When selecting sugar, look for a pure, white variety for consistent results. Store granulated sugar in a cool, dry place to maintain freshness, and consider brown sugar for added moisture and a deeper flavor profile.

    All-purpose flour provides the foundation for these cookies, giving them body and stability. Flour production has evolved from traditional milling processes to modern techniques, but its importance in baking remains unchanged. Opt for unbleached all-purpose flour for a more natural flavor. For longer shelf life, store flour in an airtight container to prevent moisture exposure.

    Food coloring transforms the dough, turning it into a vibrant artistic opportunity. Color pigments have been a part of culinary history for centuries, evolving from natural sources to the vibrant hues we see today. When using food coloring, less is often more; start with small amounts and increase until the desired color is achieved with careful incorporation.

    Eggs bring moisture and structure to the cookies, contributing to their soft, chewy texture. Historically, eggs have been a source of nutrition and versatility in baking. When selecting eggs, consider the size variant that matches your recipe; typically, large eggs are standard in baking. Store eggs in the refrigerator for best preservation and to ensure their freshness.

    Common Mistakes to Avoid

    • Not chilling the dough: Chilling the dough helps maintain the shape while baking, preventing spreading.
    • Over-mixing the dough: Over-mixing can lead to tough cookies due to gluten development; mix just until combined.
    • Skipping the parchment paper: This ensures easy cleanup and prevents the cookies from sticking to the baking sheet.
    • Using cold ingredients: Always allow butter and eggs to reach room temperature for better emulsification.
    • Not measuring ingredients accurately: Precision is crucial in baking; use measuring cups and spoons for the best results.
    • Ignoring bake times: Ovens can vary; keep an eye on cookies to prevent burning.
    • Too much or too little food coloring: Use food coloring judiciously; too much can affect the taste and texture.
    • Not testing for doneness: Cookies will continue to cook on the baking pan after removing them from the oven; let them cool slightly.
    • Using stale ingredients: Always check the freshness of items like baking powder, baking soda, and flour before baking.
    • Not letting cookies cool: Allow cookies to cool on a wire rack to maintain their texture and prevent sogginess.

    Essential Techniques

    The creaming method is essential for incorporating air into the butter and sugar, which creates a light texture. To master it, start with softened butter and granulated sugar, mixing until light and fluffy. A common pitfall is not allowing the butter to soften adequately, leading to a dense texture.

    Rolling dough helps achieve an even thickness, crucial for uniform baking. When rolling out dough, use flour on the surface to prevent sticking, and roll until an even thickness is achieved. However, avoid over-flouring, which can adversely affect texture, causing toughness.

    Swirling colors into the cookie dough is where the fun starts. By combining various colored doughs, you create unique patterns. This process can be tricky—aim for a marble effect without over-mixing to maintain those vibrant swirls. The key is to fold gently to create impressive, visually appealing results.

    Chilling the dough is vital for preventing spreading during baking. After preparing your dough, wrap it in plastic wrap and refrigerate for at least 30 minutes. Skipping this step can result in flat cookies, which is a common mistake. Proper chilling time allows the fats to solidify, promoting a better structure.

    Correct baking temperatures and times ensure that cookies are perfectly baked without being burnt or undercooked. Always preheat your oven ahead of time and use an oven thermometer to check accuracy. The visual cue for doneness is typically a lightly golden edge, as the center may appear slightly soft.

    Pro Tips for Perfect Tie Dye Cookies

    To create perfectly vibrant Tie Dye Cookies, choose gel food coloring instead of liquid for more intense hues that won’t alter the dough’s consistency. When divvying the dough into portions for coloring, wear gloves to keep the colors from mixing on your hands.

    When rolling colored dough pieces together, work quickly to prevent the dough from warming up too much. This will ensure that the colors hold their shape better during the baking process.

    Using a scale to measure dough portions can help achieve uniform cookie sizes, resulting in evenly baked cookies. This attention to detail will elevate your presentation and overall cookie experience.

    Make sure to bake your cookies on a parchment-lined baking sheet for easy release and consistent baking. Consider rotating the pans halfway through the bake time for even results, especially in a conventional oven.

    If you’re making these cookies ahead of time, freeze the dough balls before baking for up to 3 months. This allows you to bake fresh cookies anytime! Just add a few minutes to the bake time if baking from frozen.

    Experiment with flavorings such as almond extract or citrus zest to enhance the cookie’s profile. These additions can complement the colorful appearance without overpowering the classic cookie taste.

    Variations and Adaptations

    Regional variations of Tie Dye Cookies can incorporate local flavors, such as adding spices like cinnamon or nutmeg. Seasonal adaptations may include pumpkin spice for autumn or peppermint extract for winter, creating festive variations.

    For dietary modifications, gluten-free options can easily be achieved by substituting all-purpose flour with almond or coconut flour. Similarly, to cater to vegan diets, use flaxseed meal instead of eggs and plant-based butter for a delicious alternative.

    Flavor variations can introduce different extracts, such as coconut or hazelnut, giving these cookies a unique twist. You might even experiment with textures by adding chopped nuts or chocolate chips.

    If looking to switch up the presentation, consider using cookie cutters to shape the cooled cookies after baking or icing them with a simple glaze for added flair.

    Serving and Presentation Guide

    Plating cookies involves more than just stacking them on a dish. Use vibrant platters that reflect the colors of the cookies or layer them on tiered stands for an impressive display. This showcases the beautiful tie dye effect in all its glory.

    For garnishing, try adding a sprinkle of colored sugar or edible glitter to enhance their visual appeal. Pair with complementary treats, such as brownies or mini cupcakes, to create a dessert table that’s both colorful and enticing.

    Presenting Tie Dye Cookies with a glass of milk or a flavorful beverage elevates the snack experience. By serving these alongside cold refreshments like lemonade or iced tea, you’ll update the classic cookie-and-milk combination.

    Consider serving the cookies at room temperature, as this maintains their chewy texture. Proper portioning can lead to an enticing display, with small stacks of three to four cookies ideal for sharing.

    If you’re feeling creative, consider using themed plates or napkins to match special occasion colors. This attention to detail transforms a simple cookie platter into a memorable experience for guests.

    Wine and Beverage Pairing

    When it comes to pairing beverages with Tie Dye Cookies, opt for sweet dessert wines such as Moscato or Riesling. The sweetness of these wines complements the cookies’ sugary profile, enhancing the overall taste experience.

    For non-alcoholic alternatives, serve sparkling cider or fruit-infused lemonade to create a refreshing contrast. Both beverages are crowd-pleasers that beautifully align with the vibrant colors of the cookies.

    Coffee, especially flavored varieties like vanilla or mocha, pairs well with these cookies, rounding out the dessert experience. For those who enjoy tea, consider serving with chamomile or a fruity blend, enhancing the sweet notes of the cookies.

    Ensure that all beverages are served at optimal temperatures—cold drinks for summer and warm beverages during cooler months—for the best enjoyment. This consideration adds a layer of care to your dessert offerings.

    Storage and Shelf Life

    To store Tie Dye Cookies, place them in an airtight container at room temperature for up to a week. This method keeps them soft and fresh, ideal for daily snacking or dessert options.

    For longer shelf life, consider freezing the cookies. Place them in a single layer in a freezer-safe bag or container for up to three months. Make sure to separate layers with parchment paper to prevent sticking.

    Always check for signs of spoilage, such as changes in color or texture, to ensure the cookies remain safe to eat. If you notice them becoming stale or hard, consider reheating briefly in the microwave to restore a fresh texture.

    Reheating cookies is simple; a few seconds in the microwave will help regain their softness. This option is particularly useful for frozen cookies, allowing you to enjoy them warm and fresh.

    Make Ahead Strategies

    When planning to make Tie Dye Cookies ahead, prepare the dough and shape it into discs before refrigerating. This not only saves time on baking day but also enhances flavors as they rest.

    If you prefer baking on a different day, freeze the shaped cookies. Lay them flat on a baking sheet until frozen, then transfer them to a bag to save space in your freezer. This simple strategy allows you to enjoy fresh baked cookies whenever the craving strikes.

    Consider prepping colored batches separately and store them in the fridge. This way, you can assemble and bake these vibrant cookies as desired, offering an option for spontaneous gatherings or celebrations.

    Lastly, don’t forget about quality impact—letting the dough rest enhances its flavor and texture. Aim to chill the dough for at least 30 minutes to one hour, ensuring a better outcome every time.

    Scaling Instructions

    Scaling this Tie Dye Cookies recipe is easy and flexible! If you’d like to halve the recipe, simply divide each ingredient by two. This method works well, ensuring you stay within the intended flavor ratios.

    To double or triple the recipe, maintain consistent ingredient proportions to guarantee flavor authenticity. Ensure that your mixing bowl is large enough to accommodate the increased dough quantity.

    When adjusting for volume, keep an eye on your bake time, as larger batches may need slightly more time in the oven. Employing a cookie scoop can help achieve uniform sizes, leading to even baking.

    Consider additional storage needs when scaling; a larger batch means needing more baking sheets or containers. Plan ahead to prevent last-minute scrambling for space!

    Nutritional Deep Dive

    Examining the macro breakdown of Tie Dye Cookies reveals a mix of carbohydrates, fats, and proteins that contribute to energy levels. Each cookie offers a balance that fuels creativity and activity.

    Micronutrient analysis showcases the presence of vitamins such as vitamin A from the butter. Eggs offer several essential vitamins, which can be beneficial in contributing to daily nutritional needs.

    It’s essential to recognize the health benefits of moderation. While these cookies provide sweetness and energy, enjoying them in controlled portions allows them to fit nicely into a balanced diet.

    Consider dietary adjustments, particularly for those mindful of sugar intake—try making smaller-sized cookies to enjoy the taste without overindulging. This simple modification promotes better weight management.

    For special diets, alternatives like coconut sugar or whole grain flours can enhance the nutritional profile, integrating seamlessly into the Tie Dye Cookies recipe while maintaining flavor.

    Dietary Adaptations

    Adapting Tie Dye Cookies to be gluten-free is straightforward – simply substitute regular flour with a gluten-free blend. This ensures that even those with dietary restrictions can enjoy these colorful delights.

    Dairy-free alternatives can be achieved using plant-based butter and dairy-free chocolate chips, ensuring that vegans or lactose-intolerant individuals can partake in this enjoyable recipe.

    For a low-carb version, consider substituting white flour with almond flour and adjusting the sugar with erythritol for a diet-friendly option. This adaptation changes the cookie’s texture slightly but retains the essential flavor.

    If your focus is on keto or paleo, additional modifications can include using nut butter instead of regular butter, offering healthy fats while maintaining a delightful taste experience.

    Lastly, options like low-FODMAP sugar settings can be easily achieved by choosing sweeteners that cater to dietary restrictions, making these cookies versatile for many lifestyles.

    Troubleshooting Guide

    If experiencing texture issues, such as cookies being too dense or too crumbly, check the ratios of wet to dry ingredients. A common solution is to ensure precise measurements during preparation.

    Flavor balance may sometimes tilt on the sweet side; consider adding a pinch of salt or a dash of lemon juice into the dough to enhance the overall profile. Remember, balance is vital to achieving a holistic taste experience.

    Temperature problems are common when baking; if cookies spread too thin, chilling the dough will help remedy this. For cookies that don’t spread, check that your baking powder or soda is fresh.

    Equipment challenges, such as burnt bottoms, can occur from using dark pans. Opt for lighter-colored baking sheets to promote even cooking, preventing unwanted burnt edges.

    For ingredient substitutions, such as butter, not all fats behave the same; liquid coconut oil may yield different results in texture and taste. Always research before boldly substituting fats in cookie recipes.

    Timing concerns during baking can be tricky. If baking in bulk, plan to rotate trays halfway through for even results. Investing in an oven thermometer can aid in verifying temperature consistency.

    Recipe Success Stories

    Community feedback around Tie Dye Cookies is overwhelmingly positive, with many bakers praising the visually stunning results. The joyful experience of creating and enjoying these cookies leads to rave reviews among families and friends.

    Variation successes often come from personal experimentation with flavors. Many users report delight after introducing different extracts, such as almond or lemon, which increased the flavor complexity and enhanced the visual appeal.

    Adaptation stories reveal how thoughtful alterations ensure everyone can enjoy these cookies, including using plant-based ingredients or reducing sugar content. Such modifications have prompted families to share joy regardless of dietary preferences.

    Readers commonly suggest photography tips for showcasing these colorful cookies on social media. When photographed under natural daylight, the vibrant colors are amplified, leading to visually striking images.

    Lastly, engaging stories about family baking experiences with Tie Dye Cookies highlight the emotional connection food can create. Many users share how these colorful cookies sparked new traditions and joyful moments in their household kitchens.

    Frequently Asked Questions

    How do I make the colors more vibrant?

    To make the colors of your Tie Dye Cookies more vibrant, use gel food coloring instead of liquid. Gel food coloring has a more concentrated hue, allowing you to achieve bolder shades without adjusting the dough’s consistency significantly.

    Can I use a different type of flour?

    Yes, you can use alternative flours like almond or coconut flour, but keep in mind that it may alter the taste and texture. For gluten-free options, choose a 1:1 gluten-free flour blend for the best results.

    What should I do if my dough is too soft?

    If your Tie Dye Cookies dough is too soft, try chilling it in the refrigerator for 20-30 minutes. This should help firm it up, making it easier to handle and formed into balls or shapes.

    How long can I store Tie Dye Cookies?

    These cookies can be stored in an airtight container at room temperature for up to one week. For longer shelf life, freeze the cookies for up to three months, ensuring they’re well-wrapped to prevent freezer burn.

    Can I use flavored extracts?

    Definitely! Feel free to experiment with different extracts like almond, coconut, or even citrus to enhance the cookies’ flavor. Just be cautious with the amounts, as some extracts can be more potent than vanilla.

    Are Tie Dye Cookies suitable for freezing?

    Yes, you can freeze the dough or baked cookies. If freezing the dough, shape it into balls and freeze them on a baking sheet before transferring to a freezer bag. Baked cookies can also be frozen and reheated as needed.

    Can children help make these cookies?

    Absolutely! Making Tie Dye Cookies is a fun and engaging activity for children. They can help with mixing, coloring the dough, and shaping the cookies—just supervise them in the kitchen to ensure safety!

    Why are my cookies spreading too much?

    Excessive spreading can occur if the dough is too warm or if insufficient flour is added. Ensure your butter is not too soft, and consider chilling the dough before baking to help retain shape.

    What can I serve these cookies with?

    For a delightful pairing, try serving Tie Dye Cookies with a glass of milk, hot cocoa, or even coffee. Their fun design and sweet flavors complement many beverages, making them a versatile treat!

    Can I add mix-ins like chocolate chips?

    Yes! You can add chocolate chips, nuts, or dried fruit to the dough for added texture and flavor. Just make sure to adjust the quantities accordingly to maintain the right dough consistency.

    Additional Resources

    For more delightful baking inspiration, explore related recipes that emphasize creativity, such as rainbow cupcakes or multicolored spritz cookies. Each offers a fun twist on seasonal delights, ensuring there’s always a reason to celebrate.

    Consider reviewing technique guides that delve deeper into cookie baking fundamentals. Understanding proper mixing, shaping, and baking techniques can significantly enhance the outcomes for all cookies you undertake.

    You might also find ingredient information helpful for expanding your baking knowledge—learn about the different types of flour or sugars you can experiment with, which may lead to exciting new recipes and variations in the future.

    If you’re looking for equipment recommendations, investing in quality baking sheets and cookie scoops can make all the difference in achieving consistent results. This equipment can help streamline your baking process, enhancing your overall kitchen experience.

    Lastly, seasonal variations based on what’s available can invigorate your baking repertoire, encouraging you to make the most of fresh, local ingredients and provide an extra flair during holidays or events.

    Join the Conversation

    Sharing your Tie Dye Cookies experience on social media can inspire others to join you in this colorful baking adventure. Using delicious photography that showcases the vibrant colors engages your audience and encourages them to bake.

    Photography tips, like using natural light and interesting angles, help capture the beauty of your baked goods. Don’t hesitate to showcase your unique designs and colors, inviting others to recreate your mesmerizing cookies.

    Recipe reviews are critical in creating a community around baking. Sharing your honest thoughts on how the cookies turned out can offer insights to fellow bakers, guiding them in their journeys.

    Encouraging community engagement around Tie Dye Cookies can lead to sharing variations, tips, and stories about special memories attached to baking. This creates a sense of connection, enriching the experience for all involved.

    Lastly, consider encouraging your followers to participate in friendly baking challenges or sharing their custom variations of Tie Dye Cookies, enriching the baking culture and inspiring creativity in others.

    The Recipe

    Tie Dye Cookies

    Serves: 24 cookies

    Prep Time: 30 mins

    Cook Time: 10 mins

    Total Time: 40 mins

    Kitchen Equipment Needed

    • Mixing bowl
    • Baking sheets
    • Parchment paper
    • Whisk
    • Measuring cups and spoons
    • Cookie scoop (optional)
    • Plastic wrap

    Ingredients

    • 1 cup unsalted butter, softened
    • 1 cup granulated sugar
    • 2 large eggs
    • 1 teaspoon vanilla extract
    • 3 cups all-purpose flour
    • 1 teaspoon baking powder
    • 1/2 teaspoon salt
    • Food coloring (gel or liquid)

    Directions

    1. Preheat your oven to 350°F (175°C) and line baking sheets with parchment paper.
    2. In a mixing bowl, cream together the softened butter and granulated sugar until light and fluffy.
    3. Add eggs one at a time, beating well after each addition. Stir in the vanilla extract.
    4. In another bowl, whisk together flour, baking powder, and salt.
    5. Gradually add the dry ingredients to the wet ingredients, mixing until just combined.
    6. Divide the dough into equal sections and color each section using food coloring to desired shades.
    7. Take small amounts of colored dough and gently roll together to create swirls, being careful not to over-mix.
    8. Drop rounded tablespoons of dough onto prepared baking sheets, spacing them apart.
    9. Bake for 9-11 minutes, or until the edges are lightly golden. Remove from the oven and let cool on the baking sheet for a few minutes before transferring to wire racks.

    Recipe Notes

    • For best results, chill the cookie dough for 30 minutes before baking.
    • You can substitute butter with vegan alternatives for a dairy-free version.
    • Feel free to experiment with different colors and patterns!
    • Store cookies in an airtight container at room temperature for up to a week.

    Best Chocolate Chip Cookie Dough Hearts (No-Bake Treat)

    Chocolate Chip Cookie Dough Hearts: A Sweet Treat for Your Loved Ones

    ⚖️
    Difficulty
    Easy

    ⏲️
    Prep Time
    15 mins

    🕒
    Cook Time
    25 mins

    ⏱️
    Total Time
    40 mins

    🍽️
    Servings
    8 hearts

    Chocolate Chip Cookie Dough Hearts are the perfect treat to express your love on special occasions, whether it’s Valentine’s Day, anniversaries, or just a delightful surprise for someone special. The combination of creamy chocolate chips with a rich, buttery dough creates an indulgent experience that is hard to resist. Shaped like hearts, these little delights not only taste amazing but also make for beautiful presentations that will charm anyone who lays their eyes—or tastebuds—on them.

    The moment you take a bite, the soft, slightly gooey texture of the cookie dough melts in your mouth, offering a burst of sweetness paired with the rich flavor of semi-sweet chocolate chips. Whether enjoyed alongside a cup of coffee or as a part of a dessert platter, these hearts encapsulate the warmth and comfort of home baking, making them an instant favorite.

    Quick Recipe Highlights

    • Flavor Profile: A harmonious blend of sweet vanilla and rich chocolate, these hearts offer a delectable taste that appeals to all.
    • Texture: With a soft doughy interior and a slight crisp exterior, these cookies provide a perfect contrast that delights the palate.
    • Aroma: The aroma of freshly baked cookies filled with melting chocolate offers a warm, inviting scent that fills your kitchen.
    • Visual Appeal: Their lovely heart shape and golden-brown color make these cookies as attractive as they are delicious.
    • Skill Level Needed: This easy recipe is great for beginner bakers looking to create a special treat.
    • Special Equipment: A heart-shaped cookie cutter is the only special tool needed to make these delightful cookies.

    Recipe Overview

    • Difficulty Level: Easy, perfect for bakers of all ages and skill levels who want to impress loved ones with minimal effort.
    • Category: Dessert, these sweet delights are perfect to end any meal on a high note.
    • Cuisine: Rooted in classic American baking traditions, cookie dough desserts have become a favorite across the globe.
    • Cost: Budget-friendly ingredients make this recipe accessible without compromising on taste.
    • Season: While perfect for any time of year, they shine bright during the festive seasons of love, such as Valentine’s Day.
    • Occasion: Ideal for celebrations, gatherings, or simply a cozy night in with family or friends.

    Why You’ll Love This Recipe

    The delicious taste and texture of Chocolate Chip Cookie Dough Hearts are simply irresistible. The creamy dough is enriched with the warmth of melted chocolate, creating a delightful experience that tickles your taste buds. With every bite, you’ll experience a perfect balance of sweetness and flavor that’s universally loved by people of all ages.

    Conveniently quick to prepare, this recipe allows you to create an impressive dessert with minimal fuss. Simply mix the ingredients, cut the shapes, and bake! It’s truly a celebration of bake and enjoy that takes very little time from start to finish, allowing you to indulge your sweet cravings anytime.

    In terms of nutrition, using high-quality ingredients like butter and semi-sweet chocolate not only enhances flavor but also introduces some nutritional benefits. Dark chocolate, for instance, is known for being rich in antioxidants, which adds a guilt-free edge to your indulgence.

    These cookies are not just for personal enjoyment; they provide excellent entertaining value as well. Serve them at parties or make them as gifts; everybody will surely appreciate this thoughtful and delicious treat. Their heart shape makes them especially suitable for romantic occasions.

    Cost-wise, this recipe is economical, allowing you to create an irresistible dessert without draining your wallet. The ingredients are standard pantry items, making them readily available for most people. Thus, you can bake these lovely heart-shaped cookies more often and share them with those you care about.

    Historical Background and Cultural Significance

    The origins of the chocolate chip cookie date back to the 1930s when Ruth Wakefield invented them at her Toll House Inn in Massachusetts. These treats quickly grew in popularity, becoming a staple in American households. The concept of incorporating cookie dough into desserts has evolved significantly since then, with variations like raw cookie dough ice cream becoming beloved worldwide.

    Chocolate Chip Cookie Dough Hearts pay homage to this culinary evolution by presenting a twist on a classic, suitable for many occasions. They embody sentiments of love, comfort, and joy, representing handmade care in a world of mass production.

    Over the years, the chocolate chip cookie has undergone numerous adaptations, leading to vibrant young cultures embracing it as a canvas for creativity. Heart-shaped cookies bring a touch of romance, making them a go-to for expressing affection during special occasions.

    In many regions, cookie dough desserts are popular, with localized variations featuring distinct flavors or presentation styles. This adaptability is a testament to their universal appeal, connecting people through the joy of sweet treats.

    Ingredient Deep Dive

    All-Purpose Flour: A versatile pantry staple, all-purpose flour serves as the backbone of our cookie dough. It provides structure, preventing the cookies from collapsing during baking. Rich in carbohydrates, it contributes to the energy-boosting qualities of the cookies. When choosing flour, opt for brands that guarantee freshness for best baking results, and store in an airtight container to preserve its quality.

    All-purpose flour can be substituted with gluten-free blends for those with gluten sensitivities, allowing everyone to enjoy these delicious hearts. Properly packaging and storing flour can help maintain its shelf life and baking integrity.

    Semi-Sweet Chocolate Chips: These chips add tantalizing moments of richness to every cookie. Offering a blend of sweetness and bitterness, they create a balanced flavor profile. Nutritionally, they are a source of antioxidants and can even help improve heart health in moderation. When purchasing, look for high-quality chocolate chips with minimal additives for the best flavor.

    For those wishing to explore variations, consider using dark chocolate or white chocolate chips for a unique twist. Properly store leftover chips in a cool, dry place to extend their shelf life, ensuring fresh flavors for future baking sessions.

    Common Mistakes to Avoid

    • Overmixing the dough can lead to tough cookies. Mix just until ingredients are combined.
    • Using cold ingredients can hinder proper blending. Ensure butter is at room temperature before starting.
    • Baking the cookies for too long can result in dryness. Keep an eye on them and pull them out when lightly golden.
    • Not chilling the dough leads to excess spreading during baking. Chill for at least 30 minutes for optimal results.
    • Inadequate measuring of ingredients can throw off the recipe. Use measuring cups and spoons for accuracy.
    • Ignoring room temperature conditions may affect cookie consistency. Aim for moderate temperature while baking.
    • Using a non-stick baking sheet might result in uneven browning; always line with parchment for better results.
    • Close monitoring of cookie color ensures even baking. Rotate the trays halfway through for consistent results.
    • Not letting cookies cool on the tray before transferring can cause them to break. Patience is key for perfect cookies.
    • Forgetting to preheat the oven will result in uneven baking. Always allow time for the oven to reach the desired temperature.

    Essential Techniques

    Measuring Ingredients: Accurate measuring is crucial for baking success. Use proper measuring cups for dry and liquid ingredients. For dry ingredients, fill the cup without packing down and level off the top. Liquid ingredients should be measured at eye level for precision.

    Chilling the Dough: Chilling cookie dough enhances flavor and prevents excessive spread. Aim to chill for at least 30 minutes; longer for more intense flavors. Watch for slight hardening to indicate it’s ready to bake, and avoid over-chilling which can make the dough too firm to mold.

    Pro Tips for Perfect Chocolate Chip Cookie Dough Hearts

    1. For extra flavor, add a pinch of sea salt to the dough just before baking; it enhances the sweetness of the chocolate.

    2. If possible, use high-quality butter for a rich flavor; unsalted varieties allow better control over sweetness.

    3. Experiment with different chocolate chips; mix dark and white for a striking visual appeal and flavor combination.

    4. Shape the cookies carefully to ensure they hold their heart shape during baking; use a light touch when pressing down.

    5. Ensure your baking sheets are cool before adding new cookies; this prevents them from spreading too quickly.

    6. Consider using flavored extracts, such as almond or hazelnut, for an intriguing twist on the classic taste.

    Variations and Adaptations

    For a burst of seasonal flavor, consider infusing the dough with festive spices like cinnamon or nutmeg, especially during the fall and winter months. These additions create a cozy warmth that elevates the overall experience.

    During festive holidays, adding colored sprinkles or themed decorations to the cookie tops can make them even more appealing for events like birthday parties or celebrations.

    Dialing down the sugar slightly might be ideal for those who appreciate less sweetness, making this adaptation equally delightful. Simply adjust granulated sugar while keeping other ingredients consistent.

    To add a nutritional twist, include oats or nuts for a satisfying, crunchy texture that enhances health benefits without losing the traditional cookie experience.

    Serving and Presentation Guide

    For a charming presentation, arrange the hearts on a beautiful platter surrounded by fresh fruits or decorative sweets. Garnishing with edible flowers or mint leaves can add a touch of elegance.

    Temperature matters; these cookies are best served warm and fresh to highlight their gooey interiors. For a modern touch, consider serving them alongside a scoop of vanilla ice cream.

    Portion control is key; using a cookie scoop helps ensure each heart is roughly the same size. This not only looks appealing but also guarantees uniform baking times across the board.

    Wine and Beverage Pairing

    A rich dessert like Chocolate Chip Cookie Dough Hearts pairs well with a luscious glass of late-harvest Riesling. Its natural sweetness complements the chocolate and offsets the buttery flavors beautifully.

    If you’re looking for non-alcoholic options, consider a warm vanilla chai tea that echoes the comforting elements of the cookies, providing a soothing accompaniment.

    For coffee lovers, a bold espresso brings out the cookie’s flavors while providing a delightful contrast that enhances their sweetness.

    And for all drinks, consider serving them slightly warm for the most enjoyable experience!

    Storage and Shelf Life

    Ensure your cookies are stored in an airtight container at room temperature for optimal freshness. Properly stored, they can last up to a week, but they’re unlikely to last that long! For longer storage, consider freezing them.

    To freeze, place completely cooled cookies in an airtight bag or container, separating layers with parchment paper to avoid sticking. They can last up to three months, maintaining their original flavor and texture.

    When reheating, place them in a preheated oven for a few minutes to regain that fresh-baked taste, or pop them in the microwave for a few seconds. This method can revive their warmth and soft texture.

    Make Ahead Strategies

    For a smooth baking experience, consider preparing the dough up to 24 hours in advance. Store it in the refrigerator until you’re ready to bake, which also enhances the flavors significantly.

    To keep things organized, you can pre-measure and bag the dry ingredients separately for easy assembly later. This technique saves time and allows for convenient baking whenever the mood strikes.

    When it comes to baking, you can roll and shape the cookies ahead of time, keep them in the refrigerator, and bake them fresh when needed. This maintains their texture while ensuring a delightful experience at serving.

    Scaling Instructions

    If you want to halve the recipe, simply divide each ingredient amount by two while keeping the baking time the same. This maintains the cookie’s integrity and taste.

    Conversely, doubling or tripling the recipe calls for slightly shorter baking times as more cookies are in the oven. Ensure even spacing on baking sheets to promote uniform baking.

    Adjust equipment based on quantity; larger batches may require staggered baking cycles depending on oven capacity. Always keep an eye on cookies, as they can quickly overbake in larger batches.

    Nutritional Deep Dive

    The macro breakdown of Chocolate Chip Cookie Dough Hearts reveals a delightful mix of carbohydrates, fats, and proteins. Each cookie balances these macros, making them a potential treat within a well-rounded diet.

    On the micronutrient side, chocolate provides some iron and magnesium, while using whole ingredients like butter adds vitamin A. Keep in mind, portion size plays a significant role in enjoying these cookies guilt-free while managing diet-related goals.

    For those focused on weight management, creating smaller cookies makes for a satisfying indulgence without compromising on taste. This strategy allows everyone to enjoy the cookies while staying mindful of portion sizes.

    Dietary Adaptations

    For gluten-free diets, swap the all-purpose flour with a gluten-free blend that includes xanthan gum to achieve similar textures.

    Dairy-free adaptations can be made using coconut oil or dairy-free butter, and substitute regular chocolate chips with dairy-free versions for an equally delightful experience.

    Vegan bakers can replace eggs with flaxseed meal or applesauce, ensuring all ingredients harmonize with plant-based principles.

    If low-carb or keto is your goal, consider using almond flour and sugar alternatives to reduce total carbohydrates while satisfying sweet cravings.

    Paleo dieters can also adapt this recipe by using coconut flour and honey, making it a versatile treat across various dietary needs!

    Troubleshooting Guide

    If your cookies are turning out too flat, check your butter temperature—you want it just softened, not melted. Cold dough often leads to less spread, so ensure chilling is done right.

    For overly dry cookies, double-check measurements for accuracy; too much flour can result in that dry, crumbly texture. Adding a bit extra butter or an extra egg might provide the moisture needed to create softer cookies.

    If the flavor appears unbalanced, consider adding a pinch of salt or an extra splash of vanilla to enhance the overall sweetness and bring harmony to the flavors.

    Should you find your cookies browning unevenly, rotating them halfway through baking will promote more consistent colors and prevent burning.

    And if you face issues with shaping the hearts, it’s okay to gently mold them by hand if the dough becomes too malleable; just ensure you chill it before cutting for best results.

    Recipe Success Stories

    Community feedback highlights that many bakers appreciate how easy and fun these Chocolate Chip Cookie Dough Hearts are to make. From stories of successful baking sessions with kids to couples that bond over baking, the joy behind these treats is truly infectious.

    Some home bakers have shared their variations, enhancing flavors with seasonal spices or colorful decorations that have transformed the cookies into unique gifts for friends and family. Adaptive ideas have led to delightful results that resonate with personal taste.

    Readers have suggested photographing freshly baked hearts on bright, colorful platters, showcasing their playful presentation. The compliments from loved ones certainly add to the fun of creating each batch!

    Frequently Asked Questions

    Can I freeze these cookies? Yes! Once baked and cooled, place them in an airtight container or bag, and they can last up to three months in the freezer without losing flavor!

    How long can I store chocolate chip cookie hearts? In an airtight container at room temperature, they can stay fresh for about a week, making them perfect for meal prep or planned gatherings.

    What can I substitute for butter? You can use margarine, coconut oil, or dairy-free butter for a similar effect in texture and taste.

    Do I have to chill the dough? Chilling helps to prevent spreading, resulting in thicker, fluffier cookies. However, if you’re in a hurry, you can skip it, but they will spread more.

    How can I tell if the cookies are done? Look for a light golden color and firm edges while the center remains soft; they will harden as they cool.

    What type of chocolate is best to use? Semi-sweet chocolate is ideal, but feel free to experiment with dark or white chocolate to suit your preferences.

    Can I make these cookies gluten-free? Absolutely! Use a gluten-free flour blend to maintain the texture and flavor without any gluten.

    Is there a way to make these cookies vegan? Yes! Substitute eggs with flaxseed meal mixed with water, or use applesauce, and choose dairy-free chocolate chips.

    What’s the best way to reheat cookies? To enjoy them warm, place them in a preheated oven for a few minutes or microwave them for just a few seconds.

    Can I add nuts to the recipe? Certainly! Chopped walnuts or pecans can add delightful flavor and texture contrast to your cookie hearts.

    Additional Resources

    For those looking to explore similar recipes, check out our collection of cookie variations, including oatmeal cookies and peanut butter blossoms. With a multitude of flavors to explore, the world of cookies is vast and tempting!

    If you’re interested in mastering technique, our detailed guides on baking basics and ingredient functions can enhance your baking prowess.

    Be sure to familiarize yourself with ingredient alternatives, especially if you’re handling dietary restrictions. Knowing how to swap ingredients effectively can open up a world of baking possibilities!

    Join the Conversation

    We invite you to share your experiences, tips, and modifications in the comments below. Your unique variations can inspire others to embark on their baking adventures. Connect with us on social media to keep the conversation going, showcasing your bakery masterpieces and engaging with our vibrant community.

    The Recipe

    Chocolate Chip Cookie Dough Hearts

    Serves: 8 hearts

    Prep Time: 15 mins

    Cook Time: 25 mins

    Total Time: 40 mins

    Kitchen Equipment Needed

    • Mixing bowls
    • Whisk
    • Spatula
    • Heart-shaped cookie cutter
    • Baking sheets
    • Parchment paper

    Ingredients

    • 1 cup all-purpose flour
    • 1/2 teaspoon baking soda
    • 1/4 teaspoon salt
    • 1/2 cup unsalted butter, softened
    • 1/2 cup brown sugar, packed
    • 1/4 cup granulated sugar
    • 1 teaspoon vanilla extract
    • 1/2 cup semi-sweet chocolate chips

    Directions

    1. Preheat the oven to 350°F (175°C) and line baking sheets with parchment paper.
    2. In a bowl, whisk together flour, baking soda, and salt. Set aside.
    3. In another bowl, cream the softened butter, brown sugar, and granulated sugar until light and fluffy.
    4. Add the vanilla extract and mix until incorporated.
    5. Gradually add the dry ingredients, mixing until just combined. Fold in chocolate chips.
    6. Chill the dough for at least 30 minutes in the refrigerator.
    7. Once chilled, roll the dough out on a lightly floured surface and cut out heart shapes with a cookie cutter.
    8. Transfer the hearts to the lined baking sheets, leaving space between each one.
    9. Bake for 10-12 minutes or until light golden brown around the edges.
    10. Allow the cookies to cool on the baking sheet for a few minutes before transferring to a wire rack to cool completely.

    Recipe Notes

    • For a saltier contrast, sprinkle a bit of sea salt on top of the cookies before baking.
    • Store leftover cookies in an airtight container at room temperature for up to a week.
    • To freeze the dough, form into hearts and freeze uncooked. Bake from frozen, adding a few extra minutes.