Ultimate Banana Cream Cheesecake with a Silky Smooth Filling

Delicious Banana Cream Cheesecake: A Decadent Dessert Delight

⚖️
Difficulty
Medium

⏲️
Prep Time
30 mins

🕒
Cook Time
60 mins

⏱️
Total Time
90 mins

🍽️
Servings
8

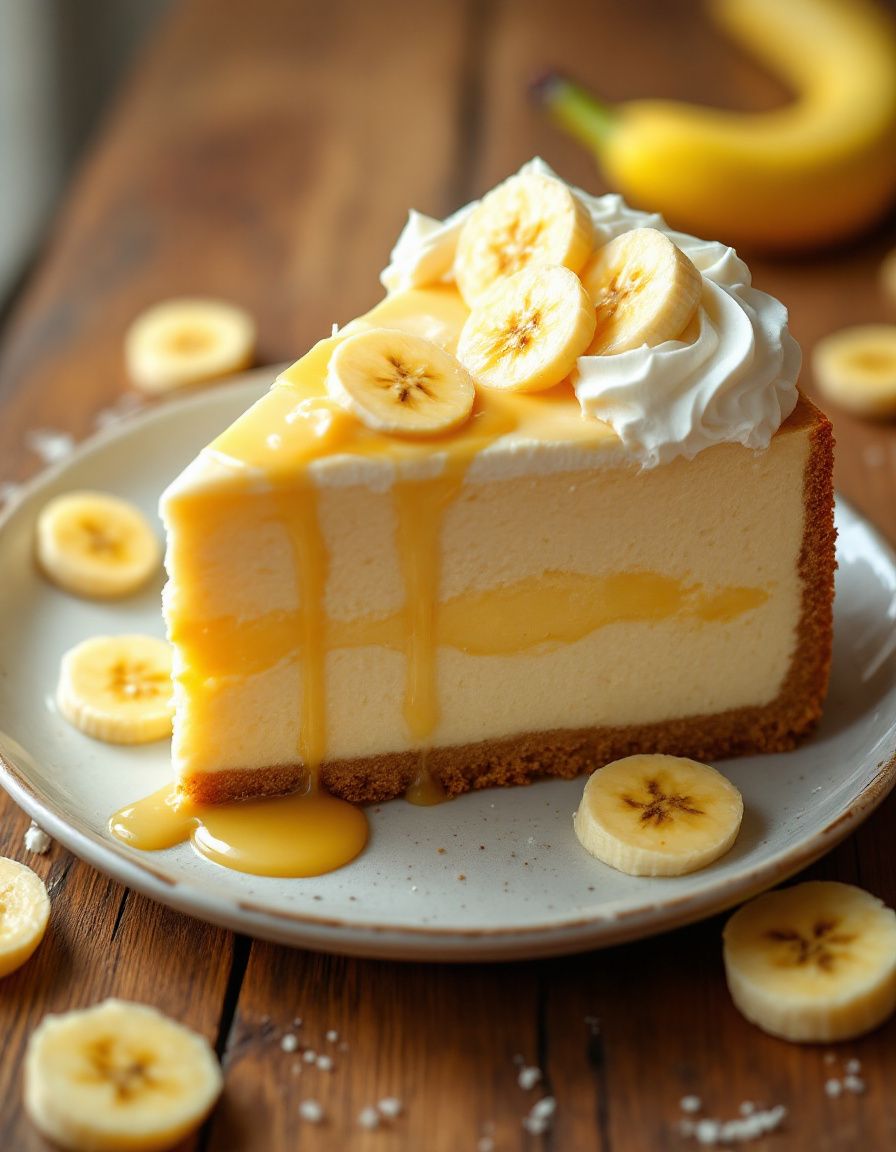
Indulge your senses with this exquisite **Banana Cream Cheesecake**, a dessert that combines the beloved flavors of banana and creamy cheesecake into a delightful experience. The rich, velvety texture of the cheesecake pairs perfectly with the sweet and slightly caramelized notes of ripe bananas. This cheesecake is not only a feast for the palate but also a visual treat, with layers of creamy filling and freshly sliced bananas creating a stunning presentation.

Whether you’re hosting a special occasion or simply want to satisfy a sweet craving, this Banana Cream Cheesecake is sure to impress your friends and family. The comforting aroma of baked cheesecake wafting through your kitchen will evoke feelings of nostalgia and joy, making it a go-to recipe for gatherings and celebrations.

Quick Recipe Highlights

  • Flavor Profile: A perfect blend of sweet bananas and rich cream cheese, with subtle hints of vanilla and a buttery crust.
  • Texture: Creamy and smooth with a slight crunch from the crust, creating a delightful mouthfeel.
  • Aroma: The inviting scent of freshly baked cheesecake mingled with the sweetness of caramelized bananas.
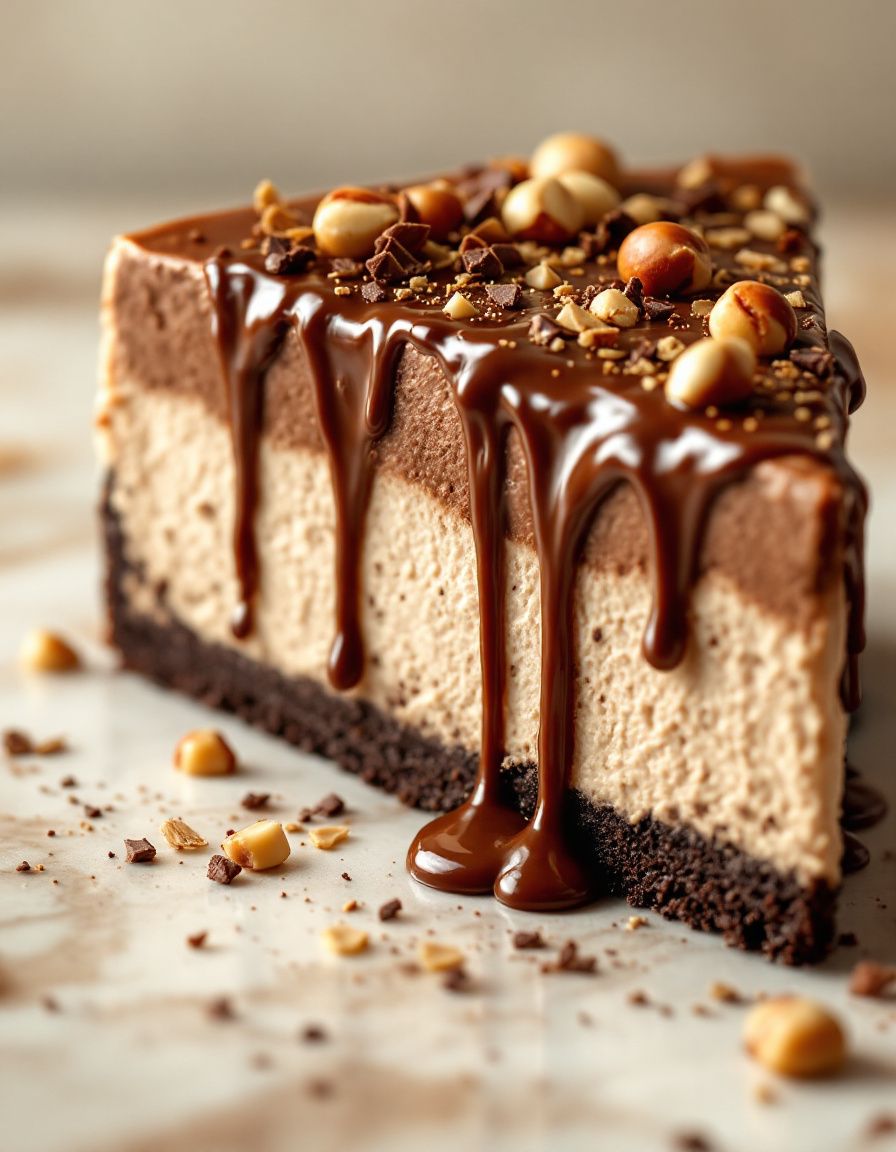
  • Visual Appeal: Layers of golden banana slices on a creamy yellow base set against a golden-brown crust make for an eye-catching dessert.
  • Skill Level Needed: An intermediate level of baking skills is recommended, especially for the crust and filling preparation.
  • Special Equipment: A springform pan is essential for easy removal and presentation of the cheesecake.

Recipe Overview

  • Difficulty Level: Although this cheesecake requires several steps, each is manageable, making it suitable for those with intermediate baking skills.
  • Category: This recipe falls under desserts, perfect for special occasions or family gatherings.
  • Cuisine: A fusion of American and classic dessert traditions, highlighting the decadent nature of cheesecakes.
  • Cost: Ingredients are relatively affordable, with the total cost averaging around $20-25.
  • Season: Ideal for any season, but particularly enjoyed in warmer months when bananas are in peak flavor.
  • Occasion: Perfect for birthday celebrations, holiday gatherings, or as a show-stopping dessert for dinner parties.

Why You’ll Love This Recipe

The taste and texture appeal of this Banana Cream Cheesecake is simply irresistible. With the creamy richness of the cheesecake filling melding with the soft slices of fresh bananas, every bite offers a harmonious blend of flavors. The buttery graham cracker crust adds a delightful crunch, rounding out the dessert beautifully.

Convenience also plays a significant role in the appeal of this cheesecake. The majority of the preparation can be done ahead of time, allowing you to enjoy the moments with your guests rather than spending all your time in the kitchen. The combination of ingredients is straightforward, ensuring a seamless baking experience.

Nutritionally, bananas provide potassium and dietary fiber, contributing to a healthier dessert option. While this cheesecake is certainly indulgent, it does contain some nutritional benefits, particularly when made with fresh and natural ingredients.

Additionally, this dessert brings social and entertaining value. A show-stopping cheesecake encourages conversations and provides a delightful centerpiece for any gathering. The smiles it brings as people take their first bite are priceless.

Finally, the cost-effectiveness of making your own cheesecake cannot be overlooked. For a fraction of the price compared to store-bought options, you get a dessert that is not only delicious but tailored to your preferences. Plus, the satisfaction of serving something homemade will leave you feeling accomplished.

Historical Background and Cultural Significance

The origin of cheesecake dates back to ancient Greece, where it was served to athletes at the first Olympic Games. Over the centuries, this dessert evolved through various cultures, each adding its unique twist. The addition of bananas to cheesecake likely stems from American culinary creativity, reflecting a culture that enjoys bold flavors and rich textures.

Culturally, cheesecakes hold a place of celebration, often featured at birthdays, weddings, and special gatherings. The combination of flavors and textures reflects a shared love for indulgence and social connection around food.

As cheesecake recipes spread globally, numerous variations arose, each showcasing local ingredients and traditions. The banana cream variation is particularly beloved in the United States, where fresh bananas are accessible and widely enjoyed.

Regional variations include adding flavors like chocolate, caramel, or even pumpkin, showcasing the versatility of the original recipe. This Banana Cream Cheesecake highlights the enduring appeal of cheesecakes across cultures and time.

Ingredient Deep Dive

Bananas are the star ingredient in this cheesecake, known for their natural sweetness and creamy texture. Botanically classified as berries, bananas hold cultural significance in many parts of the world, often associated with health and energy due to their potassium content. When selecting bananas for this recipe, choose ripe but firm fruits for optimal sweetness. They should be stored at room temperature and can be frozen for later use if overly ripe.

Cream cheese provides the base for the cheesecake filling, known for its rich and creamy flavor. Originating in the United States in the 19th century, cream cheese has become a staple in countless dessert recipes. When choosing cream cheese, opt for a full-fat version for the best texture. Store it in the refrigerator, and use it within a week or two of opening to maintain freshness.

Graham crackers create the crust, balancing the sweetness of the cheesecake with a satisfying crunch. Traditionally made from whole wheat flour, graham crackers have been popular in American desserts for generations. Look for high-quality graham crackers for the best results, and store any leftovers in an airtight container at room temperature.

Finally, sugar is an essential ingredient that sweetens the cheesecake while enhancing the overall flavor. Choose pure cane sugar for a clean taste, and remember to store it in a cool, dry place to maintain its quality.

Common Mistakes to Avoid

  • Using overripe bananas: While ripe bananas are best, overly mushy ones can negatively impact the texture of the cheesecake.
  • Not pre-baking the crust: Skipping this step can result in a soggy bottom, compromising the overall integrity of the cheesecake.
  • Incorporating too much air into the batter: Overmixing can lead to cracks in the cheesecake as it bakes, so mix just until combined.
  • Baking at too high a temperature: High temperatures can dry out the cheesecake and cause it to crack; always follow the recommended temperature.
  • Removing from the oven too soon: The cheesecake needs to cool down slowly; rushing this process can affect its consistency.
  • Not letting the cheesecake cool properly: It should be cooled in the oven with the door slightly ajar to prevent sudden temperature changes.
  • Skipping the chilling time: Patience is key; allowing the cheesecake to chill for at least four hours ensures the best flavor and texture.
  • Failing to prepare the pan: Greasing the springform pan ensures easy removal and prevents sticking.
  • Using low-fat ingredients: For the best results, use full-fat cream cheese and other ingredients to achieve the rich, creamy texture.
  • Not tasting before serving: Always taste test your cheesecake before serving to ensure it has the right balance of flavors.

Essential Techniques

To create the perfect banana cream cheesecake, mastering the crust technique is essential. The crust should be pre-baked until golden and fragrant, which adds texture and prevents sogginess. A common pitfall is not pressing the crust firmly enough into the pan, leading to crumbling when sliced. Aim for a solid layer that adheres well.

Another critical technique is achieving a smooth filling without incorporating too much air. Start with softened cream cheese for easy blending and mix just enough to combine ingredients fully without adding excess air. Look for visual cues, such as a smooth, uniform texture, which indicates it’s ready. Excess air can lead to cracks during baking, so this step is crucial.

Pro Tips for Perfect Banana Cream Cheesecake

1. Opt for fresh, ripe bananas for the best flavor and texture in your cheesecake, ensuring they enhance the overall taste.
2. Cool the cheesecake slowly; let it sit in the oven with the door ajar for at least an hour to avoid sudden temperature changes.
3. Use a water bath while baking to create a moist environment, minimizing the chances of cracks forming on the surface.
4. Allow the cheesecake to chill overnight for optimal texture and flavor development before serving.
5. For an added depth of flavor, consider adding a hint of cinnamon or nutmeg to the cheesecake filling.
6. To create an elegant presentation, pipe whipped cream on top and garnish with banana slices just before serving.
7. If making ahead, assemble and chill, but wait to add banana slices until just before serving to prevent browning.
8. Always use a sharp knife to cut clean slices, wiping it between cuts for a polished look.

Variations and Adaptations

Regional variations of the banana cream cheesecake are abundant, with many incorporating local flavors. For instance, some may add coconut for a tropical twist or chocolate for a richer taste. Seasonal adaptations can include using fresh berries in place of bananas during the summer months, adding a refreshing touch.

Dietary modifications, such as using gluten-free graham crackers for a gluten-free version, can cater to various dietary restrictions. You may also explore using plant-based substitutes like vegan cream cheese and dairy-free whipped topping for a vegan option.

Flavor variations are limitless; consider adding a layer of caramel or chocolate ganache for an indulgent treat. Textural modifications can include adding crushed nuts to the crust for added crunch, enhancing the overall experience.

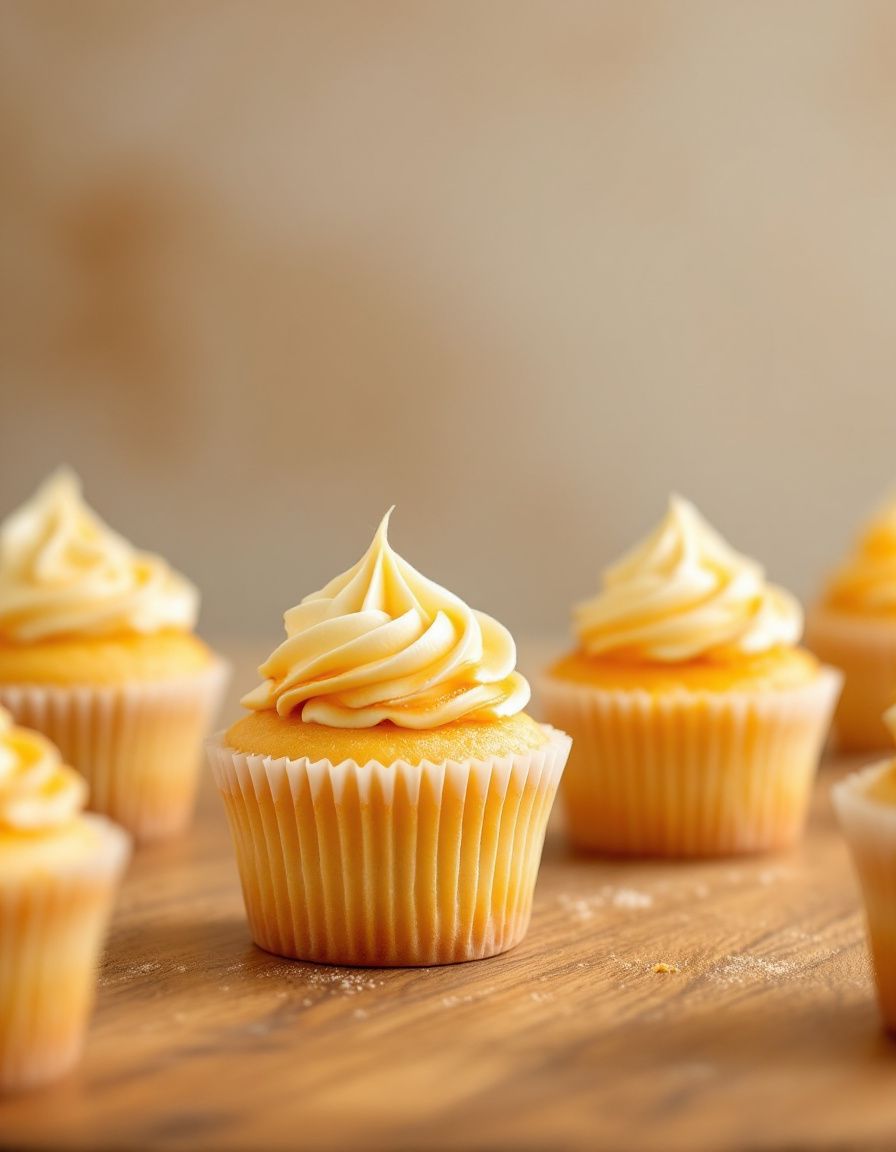
For a unique presentation, consider individual-sized cheesecakes baked in ramekins or jars, perfect for parties or picnics.

Serving and Presentation Guide

Presentation enhances the enjoyment of your Banana Cream Cheesecake. For a beautiful plating technique, serve slices on elegant dessert plates, drizzling with a homemade caramel sauce or chocolate syrup.

Garnish ideas include lightly toasted coconuts, fresh mint leaves, or a sprinkle of cocoa powder for an added visual appeal. Traditional accompaniments, such as a scoop of vanilla ice cream or whipped cream, pair beautifully with the cheesecake’s creamy texture.

Tempting individuals to indulge can be as simple as loading the top with fresh banana slices just before serving, maintaining their vibrant color while enhancing the banana flavor.

Consider temperature when serving; the cheesecake should be slightly chilled for the best flavor and texture. Finally, portion control tips suggest serving smaller slices, allowing guests to enjoy multiple desserts without overindulging.

Wine and Beverage Pairing

Pairing beverages with your Banana Cream Cheesecake creates a delightful dining experience. A sweet dessert wine, such as a late harvest Riesling or a Moscato, complements the cheesecake beautifully without overpowering the dish.

For a non-alcoholic option, consider iced tea infused with vanilla or a banana smoothie for a refreshing contrast. If coffee is your preference, a light roast helps balance the creaminess of the cheesecake while enhancing its flavors.

Temperature considerations are essential; desserts are usually best enjoyed at room temperature while wines should be served chilled. Be sure to serve your beverages in elegant glassware to elevate the overall experience.

Storage and Shelf Life

Proper storage of your Banana Cream Cheesecake ensures it stays fresh and delicious. It should be covered tightly with plastic wrap or securely placed in an airtight container to prevent drying out in the refrigerator. Consume leftover cheesecake within 5 days for optimal flavor.

Temperature requirements demand storing the cheesecake in the refrigerator, particularly if topped with bananas or whipped cream, to prevent spoilage. Signs of spoilage include visible mold or a sour smell, indicating it should not be consumed.

Reheating instructions suggest bringing the cheesecake to room temperature before serving, which enhances its texture and flavor. While cheesecakes freeze well, it’s best to freeze without toppings; wrap it tightly and enjoy within three months for the best quality.

Make Ahead Strategies

Making your Banana Cream Cheesecake in advance can streamline your baking schedule. Prepare the crust and filling a day or two ahead, then assemble and chill to allow flavors to meld.

For quality impact assessment, refrigerate individual components separately until ready to combine, preserving freshness. Assembly tips include ensuring the cheesecake is fully cooled before adding toppings or garnishes, preventing condensation from forming.

Reheating guidelines should be avoided, as cheesecakes are typically served chilled. However, fresh element additions like sliced bananas should wait until just before serving to maintain their integrity and appearance.

Scaling Instructions

Scaling recipes up or down can change the overall outcome, so follow these guidelines carefully. Halving the recipe is straightforward: split all ingredients evenly while maintaining the original mixing and baking methods.

Doubling or tripling the recipe requires ensuring you have sufficiently large mixing bowls and pans, as well as properly adjusting baking times. Always perform an internal check with a toothpick to determine doneness in larger quantities.

Timing modifications may also be necessary; the bake time might slightly increase or decrease based on how many cheesecakes you make. Lastly, remember to account for increased storage needs when scaling the recipe.

Nutritional Deep Dive

Analyzing the nutritional content of your Banana Cream Cheesecake reveals it’s a balance of flavors and health considerations. A typical cheesecake slice contains significant calories, primarily from fat and sugar, making portion control essential.

Understanding macro breakdown shows it typically contains high fat, moderate carbohydrates, and lower protein content, particularly if full-fat dairy products are used. Micronutrient analysis highlights potassium from bananas, calcium from dairy, and some vitamins which can be beneficial.

Health benefits primarily revolve around the natural nutrients found in bananas, providing dietary fiber and promoting digestive health, while indulgence is best enjoyed in moderation. Weight management tips include enjoying smaller portions, perhaps paired with fresh fruit or yogurt to enhance satisfaction.

Dietary Adaptations

Catering to various dietary restrictions, you can easily make this cheesecake gluten-free by substituting standard graham crackers for gluten-free varieties, ensuring all ingredients maintain compatibility.

For a dairy-free option, consider using cashew or soy cream cheese alongside plant-based whipping cream, designed to mimic traditional cream textures.

Vegan adaptations can include using flax eggs or applesauce in the filling for binding, while keeping other components plant-based.

Low-carb or keto variations can utilize almond flour for the crust and erythritol or stevia as sweetener alternatives, allowing those following specific diets to enjoy a similar dessert experience.

Paleo enthusiasts can swap traditional ingredients for whole, unprocessed options, like coconut flour for the crust while also enhancing flavors with natural sweeteners.

Troubleshooting Guide

Texture issues with your cheesecake often arise from overmixing, resulting in a dense or rubbery consistency. Always mix just until combined to avoid this pitfall. Serving a cheesecake that hasn’t set completely can lead to a thin or soupy texture; patience during the cooling phase is key.

Flavor balance can sometimes be off. If your cheesecake tastes overly sweet or bland, consider the quality of your ingredients; fresh, quality bananas are paramount.

Temperature problems during baking can lead to cracking; using a water bath creates a stable environment that helps prevent this issue.

Equipment challenges, like a leaking springform pan, can cause messes. To combat this, cover the bottom of the pan with aluminum foil before baking.

Ingredient substitutions may cause unexpected flavors; be aware of the implications especially when switching staple ingredients.

Finally, timing concerns, such as undercooking, can affect flavor and texture. Always use a toothpick to check for doneness and adjust baking time as necessary based on the size of your cheesecake.

Recipe Success Stories

Community feedback on this Banana Cream Cheesecake reveals nothing but praise, with readers sharing their personalized adaptations and successes. Comments often highlight how the balance of flavors has led to rave reviews at family gatherings or special events.

Many have shared variation successes, claiming adding a little cocoa powder to the crust or a layer of chocolate ganache has taken their cheesecakes to the next level.

Adaptation stories from the community showcase how certain dietary needs have been met, with several experimenting with gluten-free substitutions and sharing their delightful results.

Readers also offer photography tips, suggesting natural lighting for the best dessert shots, while featuring their finished cheesecakes on social media platforms, generating further excitement for this beloved dessert.

Frequently Asked Questions

Q: Can I use frozen bananas for this recipe?

A: Yes, frozen bananas can be used, but ensure they are thawed and excess moisture is removed to prevent a watery cheesecake.

Q: How do I store leftover cheesecake?

A: Store leftovers in the refrigerator, tightly covered with plastic wrap or in an airtight container for up to 5 days.

Q: Can I make this cheesecake ahead of time?

A: Absolutely! Prepare the cheesecake a day in advance and allow it to chill overnight for the best results.

Q: What can I do if my cheesecake cracks?

A: Cracks are often caused by overheating; to minimize this, bake using a water bath and avoid overmixing your filling.

Q: What can I substitute for cream cheese?

A: For a non-dairy option, use plant-based cream cheese or blended silken tofu for a similar creamy texture.

Q: How can I prevent bananas from browning on my cheesecake?

A: Consider brushing the banana slices with lemon juice before placing them on the cheesecake to slow browning.

Q: Is this cheesecake gluten-free?

A: It can be made gluten-free by using gluten-free graham crackers in the crust.

Q: What’s the best way to slice my cheesecake?

A: Use a sharp knife dipped in warm water and wiped clean between slices to ensure neat edges.

Q: Can I add other fruits to this cheesecake?

A: Yes, you can add mixed berries or a layer of chocolate ganache for added flavor and visual appeal.

Q: How do I know when my cheesecake is done?

A: The center should be slightly jiggly when you remove it from the oven; it will firm up as it cools.

Q: How long should I let the cheesecake cool before refrigerating?

A: Allow the cheesecake to cool in the oven with the door ajar for about an hour, then refrigerate it for at least four hours before serving.

Additional Resources

For those who love desserts, exploring similar recipes can enhance your culinary repertoire. Consider trying variations like chocolate mousse cake or fruit tarts that utilize similar techniques to achieve delicious results.

Techniques guides focusing on baking fundamentals can provide further insights into creating desserts from scratch, ensuring a reliable approach to achieving perfect outcomes.

Ingredient information ranging from types of bananas to different cream cheeses can help when choosing the best products for your baking needs, enhancing overall flavor and texture.

Equipment recommendations, such as high-quality springform pans and mixing tools, can elevate your cheesecake-making process, ensuring reliable results with each attempt.

For seasonal variations, delve into recipes that integrate seasonal fruits, keeping your dessert rotation fresh and exciting throughout the year.

Join the Conversation

Sharing your experiences with this Banana Cream Cheesecake can foster community engagement and inspire others. Use social media platforms to share your photography and plated desserts, encouraging others to try their hand at this delicious recipe.

Photography tips highlight the importance of natural light and using props to enhance visual appeal, inviting more engagement from your audience.

Participating in recipe reviews not only helps improve the dish but also creates a platform for sharing successes and challenges, leading to a meaningful exchange of ideas.

Encourage followers to share their unique variations, stirring up creative conversations that celebrate the versatility of this beloved cheesecake recipe.

The Recipe

Banana Cream Cheesecake

Serves: 8

Prep Time: 30 mins

Cook Time: 60 mins

Total Time: 90 mins

Kitchen Equipment Needed

  • Springform pan
  • Mixing bowls
  • Hand mixer or stand mixer
  • Rubber spatula
  • Baking sheets
  • Measuring cups and spoons

Ingredients

  • 1 ½ cups graham cracker crumbs
  • ½ cup unsalted butter, melted
  • 1 cup sugar
  • 2 (8 oz) packages cream cheese, softened
  • 1 teaspoon vanilla extract
  • 3 ripe bananas, mashed
  • 3 eggs
  • Whipped cream, for topping

Directions

  1. Preheat the oven to 325°F (165°C).
  2. In a mixing bowl, combine graham cracker crumbs and melted butter, then press the mixture into the bottom of a greased springform pan.
  3. In another bowl, beat cream cheese and sugar until smooth, then mix in mashed bananas and vanilla extract.
  4. Add eggs one at a time, mixing on low speed until just combined.
  5. Pour filling over the crust and spread evenly.
  6. Bake for 60 minutes, or until the center is slightly jiggly.
  7. Turn off the oven and leave the cheesecake in with the door ajar for 1 hour.
  8. Cool completely at room temperature, then chill in the refrigerator for at least 4 hours.
  9. Before serving, top with whipped cream and fresh banana slices.

Recipe Notes

  • For an extra layer of flavor, consider adding chocolate ganache or caramel sauce.
  • If making ahead, store without toppings to maintain freshness.
  • Leftover cheesecake can be enjoyed for up to 5 days when properly stored in the refrigerator.

Ultimate Nutella Cheesecake – Creamy and Decadent Dessert

Decadent Nutella Cheesecake: A Sweet Indulgence

⚖️
Difficulty
Easy

⏲️
Prep Time
20 mins

🕒
Cook Time
60 mins

⏱️
Total Time
80 mins

🍽️
Servings
8 servings

Indulge your senses with this luscious Nutella Cheesecake, a delightful dessert that beautifully combines the rich, nutty flavors of Nutella with the smooth, creamy texture of traditional cheesecake. Each bite reveals a perfect balance of sweetness and decadence, making it an irresistible treat for any occasion. Whether you’re celebrating a birthday, hosting a dinner party, or simply want to enjoy a slice of heaven at home, this Nutella Cheesecake will surely impress your family and friends.

This recipe is designed not only to satisfy your sweet tooth but also to create memorable moments around the dining table. The sophisticated yet approachable nature of this cheesecake makes it a go-to recipe for both novice and experienced bakers. The harmonious blend of flavors and textures is complemented by a buttery biscuit crust that adds the perfect crunch. Imagine serving this stunning dessert, topped with a drizzle of chocolate sauce or fresh fruit, and watch as everyone reaches for seconds!

Quick Recipe Highlights

  • Flavor Profile: The Nutella Cheesecake features a rich chocolate hazelnut flavor complemented by creamy cheese and slight tanginess, creating a well-rounded taste that enhances each layer.
  • Texture: Enjoy a creamy, smooth cheesecake filling with a crumbly and buttery crust, giving a delightful contrast in mouthfeel.
  • Aroma: The warm, inviting scent of chocolate and hazelnuts fills your kitchen, drawing everyone in with its alluring fragrance.
  • Visual Appeal: The cheesecake is elegantly presented with a glossy chocolate ganache topping, making it a stunning centerpiece on any dessert table.
  • Skill Level Needed: This Nutella Cheesecake is easy to prepare, making it perfect for beginners and those looking to impress without extensive baking skills.
  • Special Equipment: No special equipment is required; a mixing bowl, springform pan, and an electric mixer will do just fine.

Recipe Overview

  • Difficulty Level: The Nutella Cheesecake is designated as easy due to its straightforward process, requiring minimal active cooking time and only basic kitchen skills.
  • Category: This recipe falls under dessert, making it an ideal choice to satisfy your craving for something sweet after dinner.
  • Cuisine: Influenced by Italian culinary traditions, this cheesecake offers a unique twist by incorporating Nutella, showcasing the blend of European flavors.
  • Cost: The ingredients for this cheesecake are relatively affordable, making it a budget-friendly option without compromising on taste or quality.
  • Season: This dessert is perfect year-round, but its rich flavors make it particularly popular during holidays and celebrations.
  • Occasion: A versatile dessert that’s suitable for birthdays, anniversaries, or casual family gatherings, it’s sure to make any event memorable.

Why You’ll Love This Recipe

Treat your taste buds to an indulgent experience with Nutella Cheesecake. The combination of creamy cheesecake and the beloved flavor of Nutella creates an unparalleled dessert experience. Each slice offers an enticing balance of sweetness without being overwhelmingly rich, making it a perfect finale to any meal.

Convenience is key with Nutella Cheesecake; the preparation requires minimal effort which is perfect for busy bakers. With just a few simple ingredients and straightforward steps, you can create a stunning dessert that tastes like it came from a gourmet bakery.

Nutritionally, while this cheesecake is a bit indulgent, it can be enjoyed in moderation as part of a balanced diet. Crossing off many familiar ingredients allows you to savor the flavors without guilt and feel good about treating yourself and your family.

When entertaining guests, a Nutella Cheesecake serves as a fantastic conversation starter. Its luxurious appearance and decadent flavor will leave a lasting impression and offer a delightful experience for your friends and family.

In terms of affordability, this recipe utilizes easily accessible ingredients, and you can often make it without breaking the bank, allowing you to delight in an extraordinary treat without excessive costs.

Historical Background and Cultural Significance

Nutella, created in the 1940s in Italy, has a fascinating origin story beginning with bakery owner Pietro Ferrero, who sought to extend the availability of chocolate during times of scarcity. This innovative creation quickly evolved into the iconic hazelnut spread loved worldwide. Cheesecake itself boasts a history dating back to ancient Greece; it has since partnered with various flavors, leading to beloved interpretations in various cultures.

As dessert trends shifted in culinary circles, Nutella became a global sensation, inspiring countless recipes. The Nutella Cheesecake combines these two culinary delights, celebrating both the rich history of cheesecakes and the beloved taste of Nutella, which has become a staple in many households.

Over the years, this dessert has evolved in countless kitchens, adapting to different preferences and introducing variations that reflect local flavors. Cities around the world have crafted their own unique versions of Nutella Cheesecake, each displaying cultural nuances in preparation and presentation.

Regional variations add complexity to this already popular dessert, encouraging creative adaptations through different crusts, toppings, and even filling combinations. This regional creativity only adds to the cultural significance, making it a dish cherished in various ways across different communities.

Ingredient Deep Dive

– **Cream Cheese**: A key component of any cheesecake, cream cheese provides the signature creamy texture and a slight tang that balances the sweetness of the Nutella. When selecting cream cheese, opt for blocks over spreads, as they contain less moisture, ensuring a richer cheesecake. Proper storage is essential; keep it wrapped tightly in the refrigerator. If you’re looking for lower-fat alternatives, consider using Neufchâtel cheese but note that the texture may differ slightly.

– **Nutella**: This luxurious chocolate-hazelnut spread is not only beloved for its taste but also for its versatility in desserts. Nutella’s rich flavor profile enhances a variety of dishes, making it a perfect addition to cheesecakes. When buying Nutella, look for fresh jars without additional preservatives to enjoy its full flavor. Store it at room temperature for easy usage, and remember that it can be substituted with other chocolate spreads if you desire a different flavor.

– **Graham Cracker Crumbs**: The base for many cheesecakes, the graham cracker crust adds a buttery, slightly sweet crunch that pairs perfectly with the creamy filling. You can make homemade crumbs from whole crackers or purchase pre-packaged crumbs for convenience. If you’re looking for an alternative, try using digestive biscuits or gluten-free options for celiac-friendly variations. Store leftover crumbs in an airtight container to maintain freshness.

– **Sugar**: Essential for sweetening the cheesecake filling, sugar balances the flavors and contributes to the smooth texture. Granulated sugar is typically used, but brown sugar can add a deeper flavor. When measuring sugar, ensure that it’s leveled off properly to avoid any imbalance in sweetness. Store sugar in a cool, dry place, and it has a long shelf life but be mindful of moisture.

– **Eggs**: Eggs serve as a binding agent, adding structure to the cheesecake while ensuring it sets firmly. When selecting eggs, consider using organic or free-range options for the best flavor. Ensure they’re at room temperature before mixing; this helps them combine more easily with other ingredients. Storing eggs in the refrigerator is pivotal for maintaining their freshness.

Common Mistakes to Avoid

  • Overmixing the filling: This can introduce air and cause the cheesecake to crack during baking. Mix just until combined.
  • Using cold cream cheese: Ensure your cream cheese is soft to prevent lumps in the filling. Let it sit at room temperature for at least 30 minutes.
  • Skipping the water bath: A water bath prevents the cheesecake from drying out and promotes even baking. Don’t omit this step!
  • Not baking at the right temperature: Baking at too high of a temperature can lead to cracks; always follow the recommended temperature guidelines.
  • Opening the oven door: Avoid peeking until the cheesecake is set, as sudden temperature changes can cause it to sink.
  • Not cooling gradually: Allow the cheesecake to cool in the oven before refrigerating; this helps to prevent it from cracking.
  • Removing from the pan too soon: Let the cheesecake chill completely before trying to remove it from the springform pan to avoid breakage.
  • Neglecting to line the pan: Always line the bottom of your springform pan with parchment paper for easy removal.
  • Skipping flavor add-ins: Don’t forget the option to enhance your cheesecake with vanilla extract or other flavorings for added depth.
  • Not letting it set: Be patient and allow plenty of chilling time; the cheesecake needs to set properly for the best texture.

Essential Techniques

Creating the perfect Nutella Cheesecake requires a few key techniques.

– **Proper Mixing**: It’s crucial to mix your ingredients just enough to combine. Overmixing introduces air that can lead to cracks during baking. Use a mixer on low speed and scrape down the bowl as needed to get a smooth, creamy mixture.

– **Water Bath Method**: A water bath ensures even heating and retains moisture during baking. Wrap the outside of your springform pan in foil to prevent water from leaking in, and place it in a larger pan filled with hot water. This technique helps create a velvety texture.

– **Cooling Gradually**: After baking, allow the cheesecake to cool in the oven with the door slightly ajar. This gradual cooling helps prevent cracks caused by sudden temperature changes. Once cool, refrigerate for at least four hours or overnight for best results.

– **Remove with Care**: To avoid damaging the cheesecake, run a knife around the edges of the springform pan before releasing the sides. Make sure it is fully chilled, as this helps maintain its shape.

– **Garnishing**: When serving, think about how to elevate the presentation. Add fresh berries, a drizzle of chocolate sauce, or whipped cream on top. These not only add visual interest but also enhance the flavor profile.

Pro Tips for Perfect Nutella Cheesecake

1. Always use room temperature ingredients for the smoothest batter and the most consistent texture.
2. Consider experimenting with flavors by adding a splash of espresso or hazelnut extract for an extra dimension.
3. Baked cheesecakes can sometimes develop surface cracks; if this happens, a layer of whipped cream can perfectly cover it while adding delicious flavor.
4. If you’re a chocolate lover, consider adding a layer of melted chocolate ganache on top after chilling for an even richer experience.
5. For a crunchier base, bake the crust for a few minutes before adding the filling.
6. Invest in high-quality chocolate ingredients; the better the chocolate, the more indulgent your cheesecake will taste.
7. Adjust the sweetness by tasting the batter before you bake; you can easily add a little more sugar if needed.
8. Plan ahead; cheesecakes need time to cool and fully set, so make it a day in advance for best results.

Variations and Adaptations

The Nutella Cheesecake lends itself well to a variety of unique adaptations. For a healthier spin, consider substituting half of the cream cheese with Greek yogurt for a lighter texture without sacrificing flavor. Seasonal adaptations can also enhance the recipe—try incorporating pumpkin spice in the fall or fresh berries in the summer for a refreshing touch.

For dietary modifications, those following a gluten-free lifestyle can easily create a crust using crushed gluten-free cookies. If you want to explore flavors, try blending in peanut butter to create a Nutella-Peanut Butter Cheesecake that is equally delicious.

When it comes to texture, consider incorporating a smooth layer of whipped cream on top for added height. Alternatively, use a crumb topping for a lovely crunch. With presentation, serve the cheesecake on a colorful plate and garnish with mint leaves, or arrange fruit around the base for added color and appeal.

Serving and Presentation Guide

When presenting your Nutella Cheesecake, sleek and simple plating can enhance its rich appearance. Use a sharp knife to cut clean slices; warm the knife in hot water for smooth cuts. A layer of whipped cream or a dusting of cocoa powder complements the aesthetic beautifully.

Garnishing with fresh berries not only adds color but also provides a refreshing balance against the rich cheesecake. You can also drizzle caramel or chocolate sauce over each slice for an added indulgent touch.

Consider serving the cheesecake chilled for the best texture; this keeps the creaminess intact. Portion control is also essential; be mindful of slice sizes, encouraging everyone to savor their piece while leaving room for more dessert adventures.

Wine and Beverage Pairing

Pair your Nutella Cheesecake with a rich dessert wine like a Tawny Port or a Late Bottled Vintage (LBV) Port. Their sweet and nutty flavors will beautifully complement the chocolate hazelnut notes of the cheesecake.

If wine isn’t your preference, consider serving a rich cup of espresso or a dark roast coffee which pairs excellently with the cheesecake’s sweetness, enhancing the Nutella flavor profile.

For non-alcoholic options, a hot chocolate or a creamy latte will satisfy the craving for a rich beverage alongside this sumptuous dessert.

Storage and Shelf Life

To store your Nutella Cheesecake, refrigerate it wrapped in plastic wrap or in an airtight container to maintain freshness. It can last for about 5-7 days in the fridge.

If you want to extend its life, consider freezing individual slices. Place them in a freezer-safe container separated by layers of parchment paper, and they can last for up to 3 months. To thaw, transfer to the refrigerator overnight before serving.

Signs of spoilage include sour smells, discoloration, or any visible mold. If any of these appear, it’s best to discard the cheesecake to ensure your health and safety.

Reheat frozen slices by letting them thaw at room temperature or briefly warming them in the microwave, ensuring they’re smooth and creamy once again.

Make Ahead Strategies

One of the perks of Nutella Cheesecake is that it can be made ahead of time—perfect for stress-free entertaining. Allow ample time for the cheesecake to set and chill in the refrigerator for at least 4 hours, preferably overnight.

Between steps, cool it completely before covering it. You can also prepare the crust a day ahead and store it in the fridge to simplify the process. When ready to serve, simply whip up any toppings and garnish right before presenting.

If you want to incorporate fresh elements, consider adding in toppings like berries or whipped cream just before serving to ensure they stay fresh and vibrant.

Scaling Instructions

Scaling recipes up or down can help you cater to different group sizes with your Nutella Cheesecake. If you’re halving the recipe, it’s best to use a smaller springform pan for more even baking and set times.

To double or triple the recipe, ensure you use a larger pan while baking; consider using multiple pans if necessary. Keep an eye on the timing, as larger quantities may need slightly more time in the oven.

Always consider adjusting your baking time based on your oven’s quirks. Test doneness with a toothpick; if it comes out clean, your cheesecake is ready. Scaling can also affect storage requirements, so plan accordingly for leftovers!

Nutritional Deep Dive

When it comes to nutrition, Nutella Cheesecake is an indulgence but can be enjoyed as part of a balanced diet. A slice typically contains carbohydrates primarily from sugar and crust, fats from cream cheese and Nutella, and protein from the eggs and cheese.

The cream cheese provides calcium and vitamin A, while hazelnuts (in Nutella) are a good source of healthy fats and antioxidants. Consider the balance of these macronutrients when enjoying this dessert, especially if aiming for moderation in a healthy lifestyle.

Portion control is important; understanding serving sizes can help manage intake while still enjoying this sweet treat. When indulging, pair it with a lighter meal to balance out the day’s macros.

Dietary Adaptations

Nutella Cheesecake can be tailored to accommodate various dietary needs. For gluten-free variations, substitute the graham cracker crust with gluten-free cookies to create a delightful base.

For a dairy-free version, use cashew or coconut cream as a replacement for cream cheese, ensuring a similar creamy consistency. Vegan adaptations can be achieved using silken tofu blended with Nutella for a plant-based cheesecake option.

Additionally, for those following a low-carb or keto diet, consider using almond flour for the crust and adjusting sugar with a sugar alternative. By making these adjustments, you ensure that everyone can enjoy this delicious dessert.

Troubleshooting Guide

One common issue with cheesecakes is texture; if you encounter graininess, check for well-mixed cream cheese at room temperature. Mixing thoroughly helps achieve that smooth consistency.

If the flavor lacks balance, consider adjusting sweetness or adding a touch of salt to enhance chocolate and hazelnut flavors. Always taste the batter before baking to ensure it meets your preference.

Temperature can be a factor, too; ensure accurate oven settings. An oven thermometer can help confirm that it’s at the correct temperature. If your cheesecake rises unevenly, check if the oven is level for even baking across the pan.

If you find your cheesecake cracked after baking, don’t worry—this can happen! The best fix is garnishing with whipped cream or chocolate sauce to seamlessly cover any mishaps while adding delicious flavors to your dessert.

Recipe Success Stories

Community feedback on Nutella Cheesecake has been overwhelmingly positive, with many sharing their adaptations and successes. From adding extra layers of Nutella on top to creating fun seasonal flavors, home bakers have found joy in this dessert.

Several readers mention how easy and impressive this recipe has been, especially when hosting guests. Visuals play a role in this, as dessert photographers highlight the stunning presentation that comes with topping choices like fresh berries and chocolate shavings.

Sharing their experiences on social media, fun photography tips, and customization ideas has built a lively conversation around this dessert, showcasing its ability to adapt and fit into everyone’s kitchen.

Frequently Asked Questions

Can I freeze Nutella Cheesecake?

Yes, you can freeze Nutella Cheesecake. Cut it into slices and place in an airtight container for up to 3 months. Thaw completely in the refrigerator before serving for the best texture.

How can I tell when my cheesecake is done?

A cheesecake is done when the edges are set, but the center still has a slight jiggle. It will continue to set as it cools.

What can I use instead of Nutella?

If you want to change things up, try using any high-quality chocolate spread or even peanut butter for a different flavor.

How should I store my cheesecake?

Wrap the cheesecake tightly in plastic wrap and refrigerate it. It will keep for 5-7 days. Ensure it’s covered to maintain freshness.

Can I make this cheesecake dairy-free?

Yes, you can use dairy-free cream cheese alternatives and coconut cream instead of regular cream for a dairy-free version.

How long does it take for the cheesecake to set?

It’s best to let the cheesecake set in the refrigerator for at least 4 hours, but overnight is recommended for optimal firmness.

Why did my cheesecake crack?

Cracks can surface due to overmixing or sudden temperature changes. You can prevent this by mixing gently and cooling the cheesecake gradually.

What are some good toppings for Nutella Cheesecake?

Fresh berries, whipped cream, chocolate ganache, or even chopped hazelnuts work beautifully as toppings to elevate your cheesecake.

Can I use granulated sugar instead of powdered sugar?

Granulated sugar can be used, but powdered sugar often creates a smoother filling due to less texture. Consider your creaminess preference.

What kind of springform pan should I use?

A standard 9-inch springform pan is ideal; ensure it has a tight seal to prevent any leaks during the water bath process.

Additional Resources

This Nutella Cheesecake opens the door to a plethora of related recipes, inviting you to explore other delicious dessert options like classic cheesecakes, chocolate cakes, or even fruit tarts. Enhance your skills with technique guides that delve into baking fundamentals, cake decorating, and flavor balancing, allowing you to be more creative in the kitchen.

If you’re seeking equipment recommendations, consider investing in quality baking pans, measuring tools, or a stand mixer for efficient preparation. Seasonal variations, such as pumpkin spice in fall or lemon zest in the summer, can also breathe new life into this classic recipe, offering fresh exploration opportunities.

Join the Conversation

We invite you to share your Nutella Cheesecake experiences on social media! Tag us in your photos and join the community of bakers who love swapping tips, tricks, and variations. Your feedback is invaluable—tell us about your favorite adaptations or any special techniques that made your cheesecake a success.

Don’t forget to leave a review and connect with others who appreciate the joy of baking. We are excited to witness how you make this recipe your own, one slice at a time.

The Recipe

Nutella Cheesecake

Serves: 8 servings

Prep Time: 20 mins

Cook Time: 60 mins

Total Time: 80 mins

Kitchen Equipment Needed

  • 9-inch springform pan
  • Mixing bowls
  • Electric mixer
  • Parchment paper
  • Spatula
  • Measuring cups and spoons

Ingredients

  • 2 cups graham cracker crumbs
  • 1/2 cup sugar
  • 1/2 cup unsalted butter, melted
  • 24 oz cream cheese, softened
  • 1 cup Nutella
  • 1 cup sugar
  • 4 large eggs
  • 1 tsp vanilla extract

Directions

  1. Preheat the oven to 325°F (160°C).
  2. In a mixing bowl, combine graham cracker crumbs, sugar, and melted butter. Press this mixture into the bottom of a greased springform pan.
  3. In another bowl, beat the cream cheese until smooth. Gradually add Nutella and sugar, mixing until well blended.
  4. Add eggs one at a time, mixing gently after each addition. Stir in vanilla extract.
  5. Pour the filling over the crust. Place the springform pan into a larger pan and fill the outer pan with water to create a water bath.
  6. Bake for 60 minutes, or until the edges are set and the center remains slightly jiggly.
  7. Turn off the oven and let the cheesecake cool in the oven for an hour.
  8. Transfer to the refrigerator and chill for at least 4 hours before serving.

Recipe Notes

  • For added richness, consider topping with whipped cream or extra Nutella.
  • This cheesecake can be made a day in advance, allowing it to set overnight in the fridge.
  • Garnish with chopped hazelnuts or chocolate shavings for an exquisite finish.

Ultimate Creme Brûlée Cupcakes with a Crunchy Caramel Top

Crème Brûlée Cupcakes: A Decadent Fusion of Flavors

⚖️
Difficulty
Medium

⏲️
Prep Time
30 mins

🕒
Cook Time
20 mins

⏱️
Total Time
50 mins

🍽️
Servings
12 cupcakes

Indulge in the delightful experience of Crème Brûlée Cupcakes, a stunning dessert that perfectly combines the creamy flavors of classic crème brûlée with the soft, airy texture of cupcakes. Each bite reveals a luscious vanilla bean custard center, surrounded by a vanilla-infused cake, all topped off with a crisp caramelized sugar crust that provides the perfect contrast in texture. These cupcakes not only taste divine but also impress visually, making them ideal for special occasions or whenever you want to treat yourself.

The key to these cupcakes lies in their rich flavor profile and sophisticated appeal. The smooth vanilla flavor, complemented by the caramelized sugar topping, creates a sensory feast that is sure to please dessert lovers of all ages. They’re particularly perfect for gatherings, dinner parties, or as a sweet surprise for loved ones, blending a classic dessert’s richness with the fun and portability of cupcakes.

Quick Recipe Highlights

  • Flavor Profile: The cupcakes boast a rich vanilla flavor enhanced by notes of creamy custard and a sweet, crunchy topping, delivering a perfect balance of sweetness.
  • Texture: Each cupcake features a soft and moist crumb with a creamy custard center, finished with a satisfying crack of the caramelized sugar topping.
  • Aroma: The delightful fragrance of baked vanilla mingles with the caramel undertones, creating a mouth-watering aroma that fills your kitchen.
  • Visual Appeal: Topped with a glossy layer of caramelized sugar, these cupcakes are not only delicious but also a visual centerpiece for any dessert table.
  • Skill Level Needed: While the techniques involved might challenge novice bakers, the results are worth the effort, making it a rewarding experience for those willing to give it a try.
  • Special Equipment: A kitchen torch is essential for achieving that perfect caramelized topping, ensuring an authentic crème brûlée experience.

Recipe Overview

  • Difficulty Level: Medium. This recipe demands a bit of finesse, particularly in mastering the custard filling and the caramelization process, making it an exciting challenge for home bakers.
  • Category: Dessert. These Crème Brûlée Cupcakes fall into the dessert category, ideal for satisfying any sweet tooth.
  • Cuisine: French-inspired. Drawing from classic French pastry techniques, these cupcakes celebrate the elegance of traditional crème brûlée.
  • Cost: Approximately $15-$20, considering quality ingredients like pure vanilla extract and fresh eggs, making it a reasonable indulgence for a special treat.
  • Season: An excellent dessert year-round, their rich, comforting flavors particularly shine at gatherings and holidays.
  • Occasion: Perfect for birthdays, anniversaries, or any celebration where dessert takes center stage, captivating guests with their elegance.

Why You’ll Love This Recipe

The taste and texture appeal of these Crème Brûlée Cupcakes is simply irresistible. With their rich vanilla flavor and delightful contrast of textures, each cupcake is a mini masterpiece. The smooth custard-like center offers a luscious mouthfeel, while the crunchy sugar crust satisfies any craving for a little crunch. It’s a dessert that manages to deliver multiple sensations in every bite, keeping you coming back for more.

Convenience plays a significant role in making these cupcakes a favorite. Instead of the lengthy process of creating a traditional crème brûlée, you get all the flavor and elegance in a manageable cupcake form. This makes it feasible to whip up for any occasion, and their portability allows for easy sharing. Simply box them up and take them to your next gathering!

From a nutritional perspective, while these cupcakes do include sugar and cream, they also provide comforting satisfaction from high-quality ingredients that contribute to a rich dessert experience. Enjoying one of these can feel like a luxurious treat, affirming the idea that desserts can be indulgent yet thoughtful when crafted with care.

Socially, Crème Brûlée Cupcakes are a crowd-pleaser. Their unique fusion of two beloved desserts not only sparks interest and conversation but also elevates any event. Imagine the smiles on your friends’ and family’s faces as they bite into these delightful treats; your dessert will be the centerpiece of the evening, drawing everyone together.

Cost-effectiveness is another advantage of this recipe. While crafting a traditional crème brûlée can be time-consuming and require specialty equipment, these cupcakes simplify the process while keeping costs in check through manageable ingredient quantities. Thus, you can enjoy an elegant dessert without breaking the bank!

Historical Background and Cultural Significance

The origin of crème brûlée can be traced back to the late 17th century in France, where it was first referenced in a recipe book by Francois Massialot. The fundamental elements of crème brûlée—cream, sugar, and egg yolks—create a simple yet indulgent dessert that has captivated palates for centuries.

Culturally, crème brûlée represents French culinary expertise, particularly its mastery of custards and creamy desserts. The delicate crafting of the sugar topping, meant to evoke a sense of celebration and indulgence, holds a significant place in the heart of French cuisine. As such, this dessert frequently appears in upscale dining establishments, solidifying its position as a symbol of elegance and luxury.

Over the years, the recipe for crème brûlée has evolved, with various adaptations and flavors introduced. Culinary enthusiasts began incorporating seasonal fruits, chocolate, or even spices to enhance the classic version. This flexibility has allowed it to remain relevant and beloved across generations, ensuring its lasting appeal.

Regional variations exist, particularly within the United States, where flavors like pumpkin spice in the fall or berry-infused versions in summer provide new twists on the classic crème brûlée. Each variant showcases the global love for this dessert, taking elements from local cuisines and traditions, reflecting the diversity of flavors while maintaining its core identity.

Ingredient Deep Dive

Vanilla Beans: Vanilla has a rich history, once regarded as a luxury good, primarily sourced from Mexico. Today, its allure continues, with high-quality vanilla being a staple in gourmet kitchens. Nutritionally, vanilla is known for its antioxidant properties. When purchasing, opt for plump, moist beans that exude aroma. Store them in an airtight container at room temperature and consider substituting with vanilla extract if needed.

Granulated Sugar: As a ubiquitous ingredient, granulated sugar dates back to ancient civilizations, initially praised for its preservative qualities and later for culinary applications. Nutritionally, while it provides energy, moderation is key. When selecting, look for the purest form without additives. A cool, dry place is ideal for storage. The sugar can be replaced with alternatives like coconut sugar or brown sugar to vary the flavor.

Egg Yolks: These are a crucial component of crème brûlée, providing richness and flavor. Historically, eggs have been a significant part of numerous diets, particularly for their protein content. The nutrient density of yolks includes vitamins A, D, and E. When choosing, opt for fresh, high-quality eggs. They should be stored in the fridge and can be substituted with egg replacers for vegan adaptations.

Common Mistakes to Avoid

  • Overcooking the custard can lead to a grainy texture; always keep an eye on the baking time and temperature.
  • Under-whipping the cream may result in a lack of volume; ensure soft peaks are achieved before mixing.
  • Not allowing the cupcakes to cool adequately can cause the sugar topping to become soggy.
  • Using subpar vanilla or imitation extracts can diminish the flavor; prioritize pure vanilla for maximum impact.
  • Not straining the custard mixture can leave lumps; always strain for a smooth texture.
  • Skipping the resting period for the cupcakes can affect the heat distribution during caramelization.
  • Improper heat on the sugar may lead to uneven caramelization; use a steady flame for the best results.
  • Allowing the sugar crust to cool before serving can lead to a tough texture; serve immediately for ideal crunch.

Essential Techniques

Creming Ingredients: Properly creaming butter and sugar is essential for incorporating air into your batter, leading to light and fluffy cupcakes. Ensure your butter is at room temperature to achieve the best results. Look for a pale and fluffy consistency to validate the technique.

Caramelizing Sugar: Caramelization requires patience and a careful approach to heat. When utilizing a kitchen torch, keep it moving to prevent scorching. Aim for a golden-brown hue for perfect flavor; this ensures you achieve that delightful crack.

Pro Tips for Perfect Crème Brûlée Cupcakes

– Use fresh, high-quality vanilla beans to maximize flavor in your custard and cake batter.
– Make sure to strain your custard mixture to ensure a silky-smooth result.
– Keep the caramelizing torch at a consistent distance to achieve even browning without burning.
– Allow the cupcakes to cool completely before adding the sugar topping for better texture.
– For added flavor depth, consider adding a touch of sea salt to the caramel topping.
– Use a cupcake pan with the right size to ensure even baking and portion control.
– Experiment with different flavored extracts to customize your cupcakes, such as almond or hazelnut.
– Store the completed cupcakes in a cool place to preserve the integrity of the sugar topping.

Variations and Adaptations

One tasty variation to consider is adding seasonal flavors; for instance, infusing pumpkin puree and spices during the fall can create “pumpkin crème brûlée” cupcakes, while fresh berries can brighten them up in spring or summer.

For dietary adaptations, these cupcakes can be made gluten-free by using a gluten-free all-purpose flour blend that performs like regular flour. This allows those with gluten sensitivities to enjoy this delightful treat without missing out.

To enhance flavor, try incorporating different liqueurs into the custard mixture, such as Grand Marnier or Amaretto, adding a unique twist to the classic recipe.

If you’re aiming for a luxurious feel, consider topping your cupcakes with a dollop of whipped cream or crème fraiche just before serving, offering an extra layer of richness and decadence.

Bringing a twist in texture is possible by adding a layer of crunchy nuts or chocolate shavings on top of the sugar before caramelizing for a whimsical finish.

For presentation, opt for a slick serving platter or decorative cupcake liners that complement the dessert’s aesthetic, contributing to an enticing visual experience.

Serving and Presentation Guide

Plating techniques for Crème Brûlée Cupcakes can elevate their appeal significantly. Consider arranging them on a decorative platter with garnishes like mint leaves or fruit to add visual interest.

For garnishing ideas, a light dusting of powdered sugar over the tops or a thin drizzle of chocolate sauce can transform the look while complementing flavors.

Traditional accompaniments include fresh berries served on the side, which can enhance the richness of the cupcakes with a tart contrast.

Modern serving suggestions involve creative cupcake packaging, such as personalized boxes for party favors, making them not only tasty but also thoughtful gifts.

Temperature considerations are essential; serve these cupcakes chilled after baking to allow the filling to set properly but warm enough to enjoy the freshly caramelized topping.

Portion control tips include cutting each cupcake in half, presenting them alongside a scoop of ice cream for a balanced dessert experience.

Wine and Beverage Pairing

For wine pairings, consider a smooth dessert wine like Sauternes or a sparkling Moscato, which complements the richness of the cupcakes without overwhelming their delicate flavors.

Non-alcoholic alternatives like sparkling water with a dash of lemon can refresh the palate alongside the sweet, creamy cupcakes, providing a great balance.

Coffee or tea pairings can also enhance this dessert—an espresso or a creamy chai latte will contrast beautifully with the sweetness, adding warmth to the experience.

Always consider temperature; serving drinks slightly chilled or at room temperature will maximize taste and enjoyment alongside the cupcakes.

A serving suggestion would be to create a dessert table featuring both the cupcakes and the beverages for a visually appealing and interactive dessert experience for guests.

Storage and Shelf Life

These Crème Brûlée Cupcakes should be stored in an airtight container to maintain freshness, ideally in the refrigerator due to the custard filling.

Temperature requirements dictate that they should be kept chilled; however, the sugar topping will lose its crispness over time and is best caramelized right before serving.

For container recommendations, glass or plastic containers work well, provided they are securely sealed to prevent air exposure.

Signs of spoilage include an off smell or changes in texture, such as excessive moisture, suggesting they should not be consumed.

For reheating instructions, avoid the microwave to preserve texture—optionally, place them in the oven for a few minutes to increase warmth without melting the sugar crust.

Freezing guidelines entail storing the cupcakes without the sugar topping; reheat the cupcakes once thawed before adding a fresh layer of sugar and caramelizing.

Make Ahead Strategies

When making Crème Brûlée Cupcakes ahead of time, you can prepare the batter and bake the cupcakes the day before, ensuring they are cool before storing them in an airtight container.

To maintain the best quality, ensure the cupcakes are frost-free and winch fully cooled to preserve texture and flavor.

Quality impact assessment shows that while the sugar topping may not hold its texture, the cupcakes themselves can remain fresh for up to two days in the fridge.

Assembly tips include waiting to caramelize the sugar topping until just before serving for that signature crispy element.

Guidelines for reheating involve using the oven lightly to warm the cupcakes, preventing them from drying out while keeping the taste intact.

To add fresh elements, consider garnishing with berry compote or additional whipped cream just prior to serving, enhancing the aesthetic and flavor.

Scaling Instructions

For halving the recipe, simply reduce all ingredients by half, and maintain the original baking time, checking for doneness as needed.

When doubling or tripling the recipe, ensure your mixing bowl is large enough to accommodate the increased batter volume, and be mindful of potential increases in baking time based on your oven’s capacity.

Equipment adjustments may involve using multiple baking sheets or cupcake pans to ensure even cooking, avoiding overloading any single batch.

Timing modifications can be crucial; consider staggered baking if using smaller batches to maintain manageable cooking times.

Important storage considerations include making sure your ingredients are proportionate to maintain quality while scaling, particularly with delicate items like flour and sugar.

Nutritional Deep Dive

To analyze the macros, each cupcake generally has approximately 250 calories, consisting of about 10g of fat, 30g of carbohydrates, and 3g of protein.

Micronutrient analysis reveals that these cupcakes can provide trace amounts of calcium and vitamins through the inclusion of eggs and dairy, but portion control is key to managing intake.

Health benefits must be acknowledged; in moderation, the high-fat content can be satisfying, making it easier to enjoy a small dessert without overindulging in calories.

Dietary considerations advocate for balance—pair these rich cupcakes with healthier meal options throughout the day to ensure nutritional needs are met.

Portion analysis suggests that enjoying just one cupcake can satisfy sweet cravings without excessive consumption, making this dessert perfect for indulgent yet mindful eating.

Weight management tips would include alternating lighter meals on same-day dessert occasions to maintain balance and portion control, aiding in overall dietary goals.

Dietary Adaptations

For gluten-free options, swap standard flour with a gluten-free blend and ensure all other ingredients, especially the baking powder, are gluten-free.

To create a dairy-free version, substitute cow’s milk and cream with coconut milk or almond milk, ensuring flavor adjustments to maintain balance.

For a vegan adaptation, consider using flaxseed meal to replace eggs and plant-based cream for the custard, ensuring a suitable texture and flavor.

Low-carb bakers can experiment with almond flour, while utilizing erythritol or stevia to reduce sugar content while maintaining sweetness.

For those following a keto diet, keep the sugar replacements low-carb and be mindful of the portion sizes to maintain ketosis while enjoying these delightful cupcakes.

Paleo modifications usually involve avoiding refined sugars, opting for honey or maple syrup in place of granulated sugar whenever possible.

Low-FODMAP adjustments include using lactose-free cream and sugar alternatives to create a gentle dessert option for sensitive digestion.

Troubleshooting Guide

Texture issues can arise if the custard is overcooked, resulting in a grainy feel; to avoid this, watch closely and use gentle heat during the baking process.

Flavor balance problems often occur when using low-quality extracts; always ensure that high-quality ingredients are used to enhance flavor depth.

Temperature problems can result in improperly baked cupcakes; using a kitchen thermometer ensures accuracy and prevents overbaking.

For equipment challenges, such as inadequate heat distribution, consider rotating your pans halfway through baking for optimal results.

Ingredient substitutions might produce unexpected flavors; always conduct small tests when altering core components to ensure satisfactory results.

Timing concerns can involve misjudging baking times, often affected by the variation in oven performance; tracking time and testing often can enhance success rates.

Recipe Success Stories

Community feedback has highlighted the delicious fusion of flavors, with many claiming these cupcakes become a go-to dessert for gatherings.

Variation successes include readers who have adapted this recipe for different occasions, incorporating unique ingredients suited to personal taste.

Adaptation stories often showcase how fellow bakers have experimented with flavors, inspiring others to attempt their own variant versions at home.

Reader suggestions typically involve tips on optimizing texture and flavor rather than strict adherence to the original recipe—showing creativity is encouraged.

Photography tips from the community have produced stunning visuals, showcasing the cupcakes’ colorful finishes that captivate audience attention on social media.

Frequently Asked Questions

Q1: Can I make these cupcakes in advance?

Absolutely! You can bake the cupcakes a day ahead and store them in an airtight container. Just caramelize the sugar topping right before serving for optimal texture.

Q2: Can I freeze Crème Brûlée Cupcakes?

Yes, but it’s advisable to freeze the cupcakes without the sugar topping. Once thawed, you can reheat them in the oven and then add fresh caramelized sugar.

Q3: How do I know when the custard is set?

The custard should be gently set around the edges but slightly jiggly in the center. It will continue to firm up while cooling.

Q4: What can I use if I don’t have a kitchen torch?

If you lack a kitchen torch, you can place the cupcakes under the broiler for a few seconds, but watch carefully to avoid burning the sugar. Keep the top rack close to ensure even caramelization.

Q5: Are these cupcakes gluten-free friendly?

Yes, simply replace all-purpose flour with a gluten-free blend, and make sure other ingredients are gluten-free as well.

Q6: How can I adjust the sweetness of the cupcakes?

To reduce sweetness, consider using less sugar in the batter or replacing it with a sugar alternative. Just be cautious as it may affect texture.

Q7: Is there a way to enhance the vanilla flavor?

Enhanced vanilla flavor can be achieved by using both vanilla extract and real vanilla beans to infuse extra depth in your cupcakes.

Q8: Can I add a fruit filling or frosting?

Yes! Adding a fruit filling or a light frosting can enhance the overall flavor. Just ensure it complements the rich vanilla flavor.

Q9: How long do these cupcakes last?

Their freshness typically lasts up to three days in the fridge, but the sugar topping should be caramelized just before serving for best results.

Q10: Can I adapt this recipe for special diets?

Absolutely! Options exist for dairy-free, gluten-free, and vegan adaptations, ensuring everyone can enjoy these delectable treats.

Additional Resources

For those interested in related recipes, consider checking out our collection of luxurious desserts that can elevate your baking repertoire, including classic cheesecakes and panna cotta.

Technique guides focusing on cream custards can provide valuable insights for perfecting your skills in desserts beyond cupcakes, leading to a deeper understanding of pastry methods.

For ingredient information, our dedicated section highlights the nuances of baking essentials like vanilla, sugar types, and dairy products, equipping bakers with knowledge for better results.

Equipment recommendations often include must-have baking tools such as high-quality mixing bowls and cupcake pans that will serve you well for many recipes beyond just this one.

Lastly, exploring seasonal variations can inspire localized ingredient choices, ensuring that your baking remains fresh and relevant throughout the year.

Join the Conversation

We encourage you to share your experiences with Crème Brûlée Cupcakes on social media. Tag us in your posts to become part of our thriving community of cupcake lovers!

Photography tips are always welcome; share your best pictures of these delicious cupcakes, and connect with other bakers eager to learn and share ideas.

Recipe reviews can help refine our baking community’s knowledge and success stories; if you’ve tried this recipe, let us know how it turned out for you!

Community engagement is key; feel free to comment below with your suggestions, questions, or any modifications you’ve made to the original recipe that you found success with.

Lastly, sharing recipe variations will inspire others within our community to explore new flavors and ingredients, enhancing the overall enjoyment of baking for everyone.

The Recipe

Crème Brûlée Cupcakes

Serves: 12 cupcakes

Prep Time: 30 mins

Cook Time: 20 mins

Total Time: 50 mins

Kitchen Equipment Needed

  • Oven
  • Mixing bowl
  • Electric mixer
  • Kitchen torch
  • Cupcake pan
  • Measuring cups and spoons
  • Cooling rack

Ingredients

  • 1 cup all-purpose flour
  • 1/2 cup granulated sugar
  • 1/2 cup unsalted butter, softened
  • 2 large eggs
  • 1/2 cup heavy cream
  • 1/4 cup milk
  • 1 vanilla bean, split and seeded (or 1 tsp vanilla extract)
  • 1/4 cup granulated sugar (for topping)

Directions

  1. Preheat the oven to 350°F (175°C) and line a cupcake pan with liners.
  2. In a mixing bowl, cream together the butter and sugar until light and fluffy.
  3. Add eggs one at a time, mixing well after each addition.
  4. In a separate bowl, whisk together the flour, milk, and heavy cream until combined, then slowly add to the wet mixture.
  5. Fold in the vanilla bean seeds or extract, stirring gently to combine.
  6. Spoon the batter into prepared cupcake liners, filling each about 2/3 full.
  7. Bake for 18-20 minutes or until a toothpick inserted into the center comes out clean. Allow the cupcakes to cool completely.
  8. Once cooled, make a small indentation in each cupcake and fill with spices custard.
  9. Sprinkle a thin layer of granulated sugar on top of each cupcake.
  10. Using a kitchen torch, caramelize the sugar by holding the torch about 2 inches from the surface and moving it back and forth until the sugar is golden and melted.

Recipe Notes

  • Ensure the custard is allowed to cool before caramelizing the sugar for best results.
  • For a twist, consider adding different flavor extracts or liqueurs to the custard.
  • Adjust baking times as needed based on your oven’s performance.

Ultimate Baileys Chocolate Cupcakes – Perfect for Any Occasion

Decadent Baileys Chocolate Cupcakes: Indulgence in Every Bite

⚖️
Difficulty
Moderate

⏲️
Prep Time
20 mins

🕒
Cook Time
25 mins

⏱️
Total Time
45 mins

🍽️
Servings
12 cupcakes

Welcome to a delightful journey of flavors with these Baileys Chocolate Cupcakes! Each cupcake is a rich, chocolatey indulgence, perfectly enhanced by the smooth and creamy taste of Baileys Irish Cream. The combination of decadent chocolate cake with a hint of your favorite liqueur creates a treat that’s perfect for celebrations or a luxurious dessert. Whether you’re a chocolate lover or just looking for a sweet way to impress your guests, these cupcakes are sure to satisfy.

With a moist texture and a delightful frosting on top, these Baileys Chocolate Cupcakes are not just a feast for the taste buds, but also a visual delight. Their rich brown color, complemented by creamy white frosting, makes them irresistible. The aroma of fresh-baked chocolate and a hint of Baileys wafts through your kitchen, promising an unforgettable experience with every bite. Dive into the world of baking with these easy yet sophisticated treats, perfect for any occasion!

Quick Recipe Highlights

  • Flavor Profile: These cupcakes offer a luscious chocolate flavor with creamy notes of Baileys, making each bite a perfect blend of sweetness and richness.
  • Texture: Expect a soft and moist cake topped with velvety smooth frosting that melts in your mouth.
  • Aroma: The delightful scent of chocolate mingles beautifully with the aromatic hints of Irish cream, enhancing your baking experience.
  • Visual Appeal: The deep chocolate hue adorned with fluffy white frosting and chocolate shavings creates an enticing presentation.
  • Skill Level Needed: Perfect for intermediate bakers, this recipe guides you through creating exquisite cupcakes with ease.
  • Special Equipment: A standard muffin tin, mixing bowls, and a piping bag will make your baking process seamless.

Recipe Overview

  • Difficulty Level: The moderate difficulty of this recipe comes from the frosting technique and ensuring the cupcakes are baked to perfection.
  • Category: These cupcakes fall under desserts, perfect for after-meal indulgence or special occasions.
  • Cuisine: Inspired by Irish flavors, particularly the use of Baileys, this recipe adds a unique twist to classic chocolate cupcakes.
  • Cost: Generally budget-friendly, these cupcakes require common ingredients that can be used for multiple baking projects.
  • Season: Ideal for any season, especially enjoyable during celebrations like birthdays and holidays.
  • Occasion: Perfect for parties, intimate gatherings, or cozy nights at home with a sweet treat.

Why You’ll Love This Recipe

These Baileys Chocolate Cupcakes are not just a dessert; they are an experience. The intense chocolate flavor paired with the smooth, creamy Baileys enhances the taste profile beautifully, making each bite an absolute delight. The balance of sweetness from the frosting and the richness of the cake creates a perfect harmony, leaving you craving more. Whether enjoyed with a glass of milk or a cup of coffee, these treats elevate your dessert game to a whole new level.

Preparation is a breeze, with simple steps guiding you through the process. You can easily whip up a batch in less than an hour, making these cupcakes a perfect option for spontaneous gatherings or when you want to impress guests at the last minute. The versatile nature of Baileys allows you to play around with flavors, giving your cupcakes a personal touch while maintaining a delicious outcome every time.

Not only are these cupcakes delectable, but they also offer a unique spin on a traditional dessert that sparks joy in every bite. The festive nature of Baileys Irish Cream adds a celebratory aspect, making them perfect for birthdays and holiday gatherings. They also serve as a great conversation starter, as guests indulge in their rich flavor while sharing their love for dessert.

You’ll be thrilled to know that there are nutritional benefits associated with some of the ingredients used. Dark chocolate is known for its rich antioxidants, and the use of quality butter adds a creamy texture that elevates the flavor profile. Enjoying these cupcakes offers a chance to indulge without feeling too guilty when prepared in moderation.

Economically, making these cupcakes at home is a cost-effective alternative to purchasing gourmet desserts from a bakery. With basic pantry staple ingredients like flour, sugar, and cocoa powder, combined with the luxuriously indulgent addition of Baileys, you have a dessert that rivals those found in high-end restaurants at a fraction of the price. It’s an excellent way to treat yourself and your loved ones without breaking the bank!

Historical Background and Cultural Significance

The origins of Baileys Irish Cream trace back to 1974, when the first bottle of this beloved liqueur was produced in Dublin, Ireland. The idea was to create a rich and creamy drink that could be enjoyed on its own or as an addition to various recipes. Over the years, Baileys has secured its place in popular culture not only as a beverage but also as a key ingredient in baking and desserts.

Chocolate, on the other hand, has a rich history that dates back to ancient Mesoamerican cultures, where cacao beans were highly valued. The combination of chocolate and cream is timeless, and the indulgent mix creates a sense of luxury and celebration in many cultures. By combining these two elements, the Baileys Chocolate Cupcake becomes a cultural bridge, merging traditional ingredients with modern cooking.

As the recipe has evolved, variations incorporating different flavors such as espresso, mint, or seasonal ingredients have emerged. This versatility keeps the Baileys Chocolate Cupcake relevant and appreciated across generations, becoming a nostalgic favorite for many. Each edition offers a unique twist, showcasing the adaptability of the core recipe.

These cupcakes have also inspired numerous regional adaptations, with bakers worldwide incorporating local flavors and ingredients to make them their own. This shows how a simple recipe can transcend borders and traditions, bringing people together through the universal love of chocolate.

Ingredient Deep Dive

**Chocolate**: This beloved ingredient has been adored for centuries, often associated with celebrations and comfort. Rich in antioxidants, chocolate promotes heart health and boosts mood. When selecting chocolate for your cupcakes, opt for high-quality dark chocolate for the best results. Store it in a cool, dry place to keep it fresh, and consider using higher cocoa percentage chocolate for a richer flavor.

**Baileys Irish Cream**: Originating from Ireland, Baileys brings a creamy texture and flavor that enhances countless recipes. Its blend of rich cream and whiskey not only makes it a delightful drink but also an enriching baking ingredient. Store it in the refrigerator after opening for up to two years, ensuring it remains fresh for your baking needs. You can substitute it with a non-alcoholic Irish cream flavoring if preferred.

Common Mistakes to Avoid

  • Overmixing the batter can lead to tough cupcakes, so mix just until combined for a tender texture.
  • Not preheating the oven properly might result in uneven baking; always allow time for the oven to reach the desired temperature.
  • Using cold ingredients straight from the fridge can affect the batter’s texture. Let eggs, butter, and cream come to room temperature for best results.
  • Filling the cupcake liners too full can cause overflow; fill them about two-thirds for a perfect rise.
  • Neglecting to check doneness can lead to underbaked or overbaked cupcakes. Use a toothpick inserted in the center to check for doneness.
  • Skipping the cooling process entirely can ruin the texture; let your cupcakes cool completely before frosting.
  • Not using quality chocolate can impact the overall flavor, so choose premium brands when possible.
  • Frosting cupcakes when they are warm can lead to melted frosting, so always wait until they are completely cooled.

Essential Techniques

**Baking the Cupcakes**: It’s crucial to follow the recipe for correct oven temperature and baking time. Preheating the oven ensures even baking, and using an oven thermometer can help if you suspect your oven runs hot or cool.

**Frosting Application**: Applying frosting can be a fun but tricky technique. Use a piping bag for a professional look, and make sure cupcakes are completely cooled. To prevent runaway frosting, start at the center and swirl outward.

Pro Tips for Perfect Baileys Chocolate Cupcakes

1. Opt for high-quality dark chocolate for the best flavor. It truly makes a difference!

2. Incorporate espresso powder for an added depth of flavor that complements the chocolate perfectly.

3. Always measure ingredients accurately; baking is a science!

4. Experiment with different flavored extracts for the frosting, like vanilla or almond, to change up the taste.

5. For added crunch, top with crushed nuts or chocolate shavings.

6. Allow your cupcakes to cool completely on a wire rack to prevent sogginess.

7. Store frosted cupcakes in the fridge to prolong freshness, but allow them to come back to room temperature before serving for best flavor.

8. Have fun decorating! Use colorful sprinkles or edible glitter for a festive touch.

Variations and Adaptations

If you want to switch things up, consider adding a filling of ganache or raspberry jam in the center for a surprise element. For a seasonal twist, try adding pumpkin spice for fall-themed cupcakes or peppermint extract for holiday celebrations.

Additionally, if you prefer a gluten-free version, substitute regular flour with a gluten-free blend. For a lighter option, reduce the sugar slightly, or use coconut sugar for a healthier alternative.

Don’t forget about frosting alternatives! A whipped cream topping can replace traditional frosting for a lighter finish, while a tangy cream cheese frosting would complement the sweetness beautifully.

Lastly, you can change the presentation by placing the cupcakes in decorative liners or topping with fresh fruits like strawberries or raspberries for a vibrant look.

Serving and Presentation Guide

Presentation can elevate your Baileys Chocolate Cupcakes. Use vibrant cupcake liners or decorative plates to enhance their visual appeal. Garnish each cupcake with a sprinkle of cocoa powder, a drizzle of chocolate sauce, or a dusting of powdered sugar for an elegant touch.

Consider offering a small cup of extra Baileys on the side for an indulgent feel, or present each cupcake alongside a scoop of vanilla ice cream for a delightful pairing. For gatherings, arrange the cupcakes on tiered stands for a beautiful display.

Wine and Beverage Pairing

Pair your Baileys Chocolate Cupcakes with a rich, velvety red wine like a Cabernet Sauvignon or a sweet dessert wine such as Port to complement the chocolate notes. If you’re looking for non-alcoholic options, serve these cupcakes with a glass of cold milk or a warm cup of coffee to enhance the flavors.

You can also offer a creamy vanilla latte for a coffeehouse feel or a luxurious hot chocolate to top off the chocolate experience. Ensure that all beverages are served at appropriate temperatures to fully enjoy the flavors of both the cupcakes and the drinks.

Storage and Shelf Life

To store your delicious Baileys Chocolate Cupcakes, keep them in an airtight container at room temperature for up to three days. If you’d like to store them longer, refrigerate for up to a week. Be sure to allow them to come to room temperature before serving, as cold cupcakes can mask their flavors.

If freezing is necessary, freeze unfrosted cupcakes in a single layer, then transfer to an airtight container once solid. They’ll last up to three months. When ready to enjoy, let them thaw in the fridge before frosting and serving.

Make Ahead Strategies

For a stress-free baking experience, consider preparing the cupcake batter a day ahead of time and refrigerating it. Allow the batter to come to room temperature before baking. The cupcakes themselves can also be made ahead of time and stored, as mentioned, ensuring they are fresh when it’s time to serve.

You might also prepare your frosting in advance and store it in the refrigerator. Just make sure to bring it to room temperature before applying it to the cupcakes for easy spreading or piping. Planning these steps can save you time and effort, allowing you to enjoy the event more!

Scaling Instructions

If you want to make a smaller batch of these delightful cupcakes, simply halve all the ingredients and adjust your baking time accordingly, checking a few minutes earlier to make sure they don’t overbake.

To double or triple the recipe, consider using multiple muffin tins and larger mixing bowls. Remember that increasing the quantity may affect the baking time, so always keep an eye on them in the oven.

For gathering larger crowds, baking in multiple batches can also be beneficial, allowing for even baking and better control. Have fun scaling to make the most of these indulgent treats!

Nutritional Deep Dive

Each Baileys Chocolate Cupcake provides a satisfying blend of macronutrients, featuring carbs from the flour, fats from butter, and a bit of protein from eggs. The nutritional content can vary based on ingredient choices, such as using whole grain flour or lowering the sugar content.

Micronutrients such as iron and magnesium are present in the chocolate, while the Baileys Irish Cream brings in some calcium thanks to the dairy content. It’s wise to enjoy these cupcakes in moderation, but they do provide a unique blend of flavors and nutrients in a small, delicious package.

Dietary Adaptations

For those needing gluten-free options, simply swap out regular flour for a gluten-free blend that measures cup-for-cup. To create a dairy-free version, use coconut cream for frosting and replace butter with a dairy-free alternative.

If you want vegan cupcakes, replace eggs with flax eggs, and use almond or oat milk in place of dairy milk. For a low-carb or keto version, consider using almond flour and sugar substitutes while adjusting the baking time accordingly.

Each variation allows you to maintain a rich and satisfying flavor profile while catering to specific dietary preferences and needs, making these cupcakes versatile for any gathering.

Troubleshooting Guide

If your cupcakes come out too dense, it could be due to overmixing the batter or improper ingredient measurements. Make sure to mix just until combined and always check your measurements with care.

Flavor balance can sometimes be off; if your cupcakes taste too sweet, reducing sugar slightly can help bring out the richness in the chocolate.

If the texture of your frosting is too runny, ensure your butter is at room temperature and not melted. Chill the frosting briefly if needed to thicken it up. Likewise, if it’s too thick, add a splash of cream to adjust its consistency.

Baking problems may also arise if your oven temperature is not calibrated correctly. An oven thermometer can aid in identifying the perfect baking environment.

Recipe Success Stories

Many home bakers share success stories about their attempts at making Baileys Chocolate Cupcakes, highlighting their easy preparation and delicious outcome. Feedback often praises the balance of flavor and texture, making them a hit at parties.

Readers have also demonstrated creativity, like mixing in local flavors or trying different frostings, which add a personal touch to the cupcakes. These variations not only showcase individual flair but also inspire others to experiment with the recipe.

Photography tips from our community indicate that good lighting and showcasing the cupcakes with garnishes can significantly elevate the presentation, contributing to their appeal online and in personal collections.

Frequently Asked Questions

1. Can I use milk chocolate instead of dark chocolate?
No, for a more balanced flavor, we recommend using dark chocolate to enhance the richness of the cupcakes.

2. How can I make these cupcakes ahead of time?
You can prepare the cupcake batter or freeze the baked cupcakes without frosting. Thaw and decorate just before serving.

3. What if I don’t have Baileys?
You can substitute it with any Irish cream liqueur or use a non-alcoholic Irish cream flavoring for similar results.

4. What’s the best way to store baked cupcakes?
Keep them in an airtight container at room temperature for 3 days, or refrigerate them for up to a week.

5. Can I freeze the cupcakes?
Yes! Unfrosted cupcakes can be frozen for up to three months. Just wrap them tightly.

6. Are these cupcakes kid-friendly?
While the cupcakes contain Baileys, you can make a non-alcoholic variant suitable for kids.

7. What’s the difference between buttercream and frosting?
Buttercream is a type of frosting made primarily from butter and sugar, while frosting can be lighter and whipped.

8. How do I make the frosting fluffy?
Ensure your butter is at room temperature and beat it well before adding powdered sugar for a fluffy texture.

9. Can I add fruit to the cupcake batter?
Yes, adding diced fruits like strawberries or raspberries can introduce fresh flavors and moisture.

10. What’s a good temperature to serve the cupcakes?
For the best flavor, allow them to reach room temperature after being refrigerated and before serving.

Additional Resources

For more delicious recipe ideas, check out our site for related dessert recipes that include chocolate, cupcakes, and Baileys-inspired treats. We also provide guides on baking techniques and ingredient usage for successful outcomes every time.

Enhance your baking skills with our comprehensive technique guides that cover everything from understanding different types of flour to mastering the art of frosting, ensuring you feel confident in the kitchen.

Join the Conversation

We love hearing from our baking community! Share your Baileys Chocolate Cupcake creations on social media for a chance to be featured. Discuss your variations and let us know how you’ve made this recipe your own.

Don’t forget to leave reviews and feedback on your baking journey, as your experiences help other bakers with their culinary endeavors and inspire new adaptations!

The Recipe

Baileys Chocolate Cupcakes

Serves: 12 cupcakes

Prep Time: 20 mins

Cook Time: 25 mins

Total Time: 45 mins

Kitchen Equipment Needed

  • Muffin tin
  • Piping bag
  • Mixing bowls
  • Whisk
  • Cooling rack

Ingredients

  • 1 cup all-purpose flour
  • 1 cup sugar
  • 1/2 cup cocoa powder
  • 1/2 cup unsalted butter, softened
  • 2 large eggs
  • 1/2 cup Baileys Irish Cream
  • 1/2 cup buttermilk
  • 1 tsp baking powder
  • 1 tsp baking soda
  • 1/2 tsp salt
  • 1 tsp vanilla extract
  • 1/2 cup chocolate chips (optional)

Directions

  1. Preheat your oven to 350°F (175°C) and line muffin tins with cupcake liners.
  2. In a large bowl, whisk together flour, cocoa powder, baking powder, baking soda, and salt.
  3. In another bowl, cream the butter and sugar until light and fluffy. Add the eggs, one at a time, mixing well after each addition.
  4. Stir in the Baileys, buttermilk, and vanilla extract until smooth.
  5. Gradually fold the dry ingredients into the wet mixture until just combined, being careful not to overmix.
  6. Evenly distribute the batter into the cupcake liners, filling each two-thirds full. If using chocolate chips, sprinkle on top before baking.
  7. Bake for 20-25 minutes or until a toothpick inserted into the center comes out clean. Allow to cool on a wire rack.
  8. For the frosting, beat together softened butter and powdered sugar, adding a splash of Baileys until you achieve a smooth consistency.
  9. Frost cooled cupcakes and decorate as desired.

Recipe Notes

  • For a richer frosting, add melted chocolate to the buttercream.
  • Store cupcakes in an airtight container for freshness.
  • Feel free to experiment with different chocolate types or liqueurs!

Ultimate Mint Chocolate Cake – Perfect for Any Occasion

Decadent Mint Chocolate Cake: A Perfect Dessert Delight

⚖️
Difficulty
Medium

⏲️
Prep Time
30 mins

🕒
Cook Time
25 mins

⏱️
Total Time
55 mins

🍽️
Servings
8

Indulge in the rich and refreshing flavors of our Mint Chocolate Cake, a delightful dessert that combines the classic taste of chocolate with a hint of mint for a truly captivating experience. This irresistible cake offers a dense, moist texture complemented by the coolness of mint, making every slice a heavenly treat. Ideal for celebrations, holidays, or simply as an after-dinner delight, this cake shines with its vibrant flavors and luxurious presentation, leaving a lasting impression on your guests.

Baking this Mint Chocolate Cake not only satisfies your sweet tooth but also invites you to enjoy the art of creating a showstopper dessert. The layers of fluffy chocolate cake are thickly frosted with a creamy mint-infused frosting, creating a color contrast that is as pleasing to the eye as it is to the palate. Imagine slicing into a perfectly baked cake, the aroma of chocolate wafting through your kitchen as you unveil the minty green frosting and rich cocoa layers underneath—this is dessert done right, and it’s sure to bring joy to any gathering.

Quick Recipe Highlights

  • Flavor Profile: This Mint Chocolate Cake combines rich chocolate flavors with a refreshing mint essence, creating a perfectly balanced dessert that captivates your taste buds.
  • Texture: The cake is dense and moist, while the frosting is light and creamy, offering a delightful contrast that enhances the indulgent experience.
  • Aroma: Aromatic notes of rich cocoa and fresh mint fill the air, enticing everyone who enters the room.
  • Visual Appeal: The dark chocolate layers paired with a vibrant mint green frosting make for a stunning presentation that will wow your guests.
  • Skill Level Needed: This cake requires intermediate baking skills, including layering and frosting, perfect for those looking to challenge themselves.
  • Special Equipment: You will need basic baking tools such as cake pans, a mixing bowl, and a hand mixer for smooth frosting.

Recipe Overview

  • Difficulty Level: This Mint Chocolate Cake is rated medium on the difficulty scale, providing a satisfying challenge for home bakers who want to test their skills.
  • Category: This dessert falls into the category of cake and is particularly suited for birthdays, holidays, or any special occasions where a delicious treat is needed.
  • Cuisine: Rooted in traditional American baking, the Mint Chocolate Cake showcases a blend of classical techniques and modern flavor profiles, appealing to all dessert lovers.
  • Cost: This recipe is quite economical; with basic pantry staples like flour and cocoa, the total cost for an 8-serving cake is estimated to be around $15.
  • Season: Enjoy this cake year-round, particularly during the spring and winter months when mint flavors shine in fresh desserts.
  • Occasion: Perfect for birthday celebrations, holiday dinners, or any gathering where an indulgent dessert is desired to impress guests.

Why You’ll Love This Recipe

The Mint Chocolate Cake offers a symphony of taste and texture that truly tantalizes the senses. The rich chocolate flavor pairs beautifully with the cool, refreshing taste of mint, creating a harmony that enhances each bite. The luxurious frosting, made with real mint extract, adds a noticeable freshness that lifts the overall sweetness, making it an enjoyable dessert for both chocolate and mint lovers alike.

In addition to its delectable taste, this cake provides a convenient solution for home bakers looking to impress. With straightforward steps and readily available ingredients, the Mint Chocolate Cake allows you to create a stunning dessert without extensive preparation or specialized skills. Its straightforward layering and frosting method means you can focus more on the fun of baking and less on overcoming complex techniques.

Nutritionally, this cake incorporates standard baking ingredients, with the potential to swap in healthier alternatives if desired. For instance, using whole grain flour or reducing sugar can create a more wholesome version without compromising flavor. This flexibility ensures that the cake can cater to different dietary preferences while remaining irresistible.

Socially, Mint Chocolate Cake is a dessert that brings people together. Its rich flavors inspire warm conversations and celebrations, making it a centerpiece at gatherings. Whether it’s a birthday party or a holiday feast, this cake adds a special touch that encourages sharing and enjoying moments together.

Finally, cost-effectiveness makes this recipe appealing for both casual bakers and seasoned chefs. With a modest investment in ingredients, you can produce a cake that seems extravagant and gourmet, all while utilizing pantry staples. This accessibility means that anyone can create a delicious Mint Chocolate Cake without breaking the bank.

Historical Background and Cultural Significance

The Mint Chocolate Cake has roots in the broader tradition of chocolate cakes that began in the 19th century when chocolate became widely accessible. This cake variation emerged as perceptions of mint as a deliciously refreshing pairing with chocolate gained popularity, particularly in American households. The combination has since become synonymous with dessert indulgence, marking celebrations and special occasions.

Culturally, mint and chocolate have been celebrated for their refreshing qualities. Mint has long been a symbol of hospitality and freshness, often used in dishes around the globe. The association of mint chocolate as a treat highlights these cultural ties, as it bridges the gap between international flavors and local traditions, becoming a favorite flavor pairing in many communities.

Over the years, the Mint Chocolate Cake has evolved, as chefs and home bakers added their creative twists and flourishes. From the introduction of mint-flavored oils to the use of dark chocolate ganache, variations have rapidly developed. This evolution showcases the adaptability of the cake, allowing it to fit the tastes and trends of different eras and culinary practices.

Regionally, Mint Chocolate Cake has garnered popularity during specific seasons, particularly around holidays like St. Patrick’s Day, when mint is prominently featured. The association of green mint frostings has turned this cake into a symbol of celebration, resonating with folklore and traditional culinary festivities.

Ingredient Deep Dive

The primary ingredient in Mint Chocolate Cake is flour, a staple in baking that provides structure. Historically, flour has been made from a variety of grains; however, all-purpose flour is most commonly used today. Its role in this recipe is crucial, balancing moisture and ensuring the cake rises. For maximum freshness, look for unbleached flour, and store it in airtight containers.

Cocoa powder is another key ingredient contributing to the cake’s rich chocolate flavor. Grown primarily in tropical climates, cocoa has a long history of use in desserts dating back to ancient civilizations. Choose high-quality, unsweetened cocoa powder for deep flavor, and keep it in a cool, dark space to maintain its freshness.

Mint extract offers the cake its signature flavor. Mint has therapeutic properties and is celebrated in various culinary traditions for its cooling effect. Selecting pure mint extract will ensure a robust flavor in your cake, while proper storage in a cool area prolongs its potency. A useful substitution could be peppermint essential oil, though be cautious with the quantity due to its concentrated flavor.

Sugar is essential for sweetness and moisture. The use of granulated sugar is common in cakes to achieve the right balance, and it can be swapped with alternatives like coconut sugar or agave syrup. Store sugar in a sealed container to prevent clumping.

Eggs are crucial in binding the ingredients and adding moisture. Egg nutrition is vast, containing protein and healthy fats, making them a key component in not just flavor but structure. Always opt for fresh eggs and store them properly in the refrigerator.

Finally, the butter used in the frosting adds creaminess and flavor, bringing depth to the cake. Choosing unsalted butter allows you to control the salt level in your overall recipe. Softening the butter before mixing helps achieve a smooth frosting that holds peaks beautifully.

Common Mistakes to Avoid

  • Overmixing the batter can lead to tough cake rather than a light, fluffy texture. Mix just until combined and avoid excessive stirring.
  • Not leveling the flour accurately can result in a dry cake. Always spoon flour into your measuring cup and level it off with a knife.
  • Underbaking the cake might cause it to collapse after cooling. Use a toothpick inserted in the center; it should come out clean for doneness.
  • Ignoring the room temperature ingredients can affect the mixing process. Make sure butter, eggs, and any dairy ingredients are at room temperature before use.
  • Skipping the frosting chilling step can lead to a runny result. Always refrigerate the frosting briefly to achieve the desired consistency.
  • Not letting the cake cool thoroughly in the pan may result in sticking. Allow it to cool in the pans for about 10 minutes before inverting it on a wire rack.
  • Using low-quality cocoa or mint extracts may lead to a lackluster flavor. Invest in high-quality ingredients for the best results.
  • Frosting too soon can cause it to melt. Allow the cake layers to cool completely before applying frosting to ensure it holds its shape.
  • Forgetting to taste-test your frosting could result in an overly sweet or bland flavor. Adjust the sweetness of your frosting before spreading it on the cake.
  • Misjudging the servings can impact presentation. Always cut slices of dessert evenly to maintain a neat appearance.

Essential Techniques

Whipping eggs to a frothy texture is a key technique for getting your cake to rise properly. This step incorporates air, creating a lighter batter, which is crucial for a fluffy cake. To master this, use room-temperature eggs and a clean bowl to ensure maximum volume. Look for a foamy texture before adding other ingredients.

Properly frosting the cake is just as important as baking it. Start by applying a crumb coat—thinly spreading frosting over the surface to trap any loose crumbs, then chilling it before applying a thicker layer. This prevents crumbs from showing through your final frosting. Use a straight edge spatula or bench scraper for smooth finishes.

Knowing when to take a cake out of the oven can be tricky. Rely on visual cues such as a domed top and a slight pull away from the pan edges. Additionally, using the toothpick test can confirm its doneness; the inserted toothpick should come out clean, ensuring the center is fully baked.

Keeping track of ingredient temperatures influences the final outcome. Ingredients that are too cold may not blend properly, affecting texture and rise. A good practice is to allow items like butter and eggs to come to room temperature for a smooth batter.

Pro Tips for Perfect Mint Chocolate Cake

For an enhanced mint flavor, consider adding fresh mint leaves to the batter, finely chopped, just before pouring into the cake pans. It can elevate the freshness and add an aromatic quality to every slice.

Ensure your cake pans are well-greased and floured before pouring in the batter. This will help with easy release when it’s time to flip the cakes. The perfect non-stick coating can save frustration during the frosting step.

For greater moisture, consider soaking the cake layers with mint-flavored syrup after baking. The syrup adds not only sweetness but also enhances the mint profile, enriching every bite.

When frosting the cake, use an offset spatula to create smooth, swooping motions for a professional-looking finish. Precision here pays off when presenting your cake for a gathering.

Chilling the frosted cake for 30 minutes before serving helps the frosting set beautifully, making it easier to slice. This ensures that the first slice looks as good as the last.

Experiment with garnishes like chocolate shavings or fresh mint sprigs on top of the cake for added decoration and flavor contrast. These touches elevate the overall presentation, making it visually appealing.

If you’re serving the Mint Chocolate Cake on a warm day, consider slightly chilling the slices before serving. This can enhance the refreshing qualities of the mint and create a lovely contrast to the rich chocolate.

For a gluten-free version, substitute regular flour with a 1:1 gluten-free baking blend. This maintains texture without compromising flavor, allowing everyone to enjoy this delightful cake.

Variations and Adaptations

Mint Chocolate Cake can easily take on regional flavors by incorporating local ingredients, such as using honey from your area to sweeten frostings. You might also explore different types of chocolate, such as white chocolate, for an unexpected twist combined with vibrant mint.

When the seasons change, opt for fresh herbs like basil or even orange zest instead of mint. This seasonal adaptation can lend a unique flair, appealing to those adventurous eaters.

For dietary modifications, you can make a vegan version of Mint Chocolate Cake by substituting eggs with applesauce and replacing dairy butter with coconut oil. These swaps maintain the integrity of flavor while catering to specific dietary restrictions.

If you prefer a denser cake, consider baking it in a bundt pan to create a stunning shape. This not only alters the aesthetics but also allows for fun, creative drizzling of ganache or syrup on top.

You can incorporate fun flavors, such as raspberry or hazelnut, by layering fruit preserves or nut pastes in between cake layers. This addition contrasts beautifully with the mint and chocolate, introducing another element to delight diners.

For a different texture, try adding crushed mint candies to the frosting. They provide a delightful crunch, and the extra mintiness enhances the overall experience.

Bringing an exquisite touch to presentation can involve serving slices with a scoop of mint chocolate chip ice cream on the side. This creates an eye-catching plate and plays up the flavors beautifully.

Serving and Presentation Guide

When it comes to plating the Mint Chocolate Cake, consider a tiered approach for a beautiful stacked presentation. Serve slices on plates adorned with a drizzle of chocolate sauce or a dollop of whipped cream, giving guests an inviting experience.

Garnishing options are endless; mint leaves, cocoa powder, or chocolate curls can provide contrast and accentuate the mint chocolate theme. A sprinkle of powdered sugar can lend a festive look for any special occasion.

Traditional accompaniments can include a refreshing mint tea or a scoop of vanilla ice cream, which adds creaminess alongside the cake’s rich flavors, creating balance.

For modern serving suggestions, an elegant glass cake dome not only preserves freshness but also showcases the beauty of your creation, enticing guests before they’ve even taken a bite.

Temperature considerations are crucial; serve the Mint Chocolate Cake slightly chilled to enhance the freshness of the mint while offering a delightful contrast to the cake’s rich chocolate layers.

Practice portion control by slicing the cake into equal sections, ensuring everyone gets a fair share while maintaining the aesthetic of each slice. Properly plated portions also help in managing serving sizes during your gathering.

Wine and Beverage Pairing

Pairing your Mint Chocolate Cake with beverages can elevate the dessert experience significantly. A light-bodied red wine such as Pinot Noir works beautifully, as it complements the chocolate without overpowering the mint.

For non-alcoholic alternatives, a refreshing mint lemonade can contrast the rich chocolate flavors while enhancing the mint notes, creating an enjoyable balance.

Coffee lovers will appreciate a cup of bold espresso or a creamy mocha, which resonate with the chocolate essence of the cake. The warm beverage can heighten the dessert’s richness, making it a perfect pairing for an after-dinner treat.

If entertaining guests, consider serving mint-infused mocktails or herbal teas, perhaps blended with fresh fruits, to provide refreshing contrasts against the cake’s sweeter elements.

Always mind temperature considerations when serving. For whites, a chilled Sauvignon Blanc can cleanse the palate, ensuring the rich flavors of the Mint Chocolate Cake linger without becoming overwhelming.

A final serving suggestion includes pairing a slice with a scoop of mint chocolate chip ice cream, a delightful addition that binds the dessert flavors together cohesively and offers a memorable experience with every bite.

Storage and Shelf Life

Proper storage will keep your Mint Chocolate Cake fresh for several days. Wrap your cake in plastic wrap or aluminum foil and store it in an airtight container at room temperature for up to 3 days, perfect for quick access.

If you anticipate needing longer storage, refrigerating the cake can extend its life to about a week. Take care to separate the slices with parchment paper to prevent sticking and allow for easy serving later.

Freezing the Mint Chocolate Cake is another viable option. Wrap individual slices in plastic wrap and then in foil, labeling them with the date. Frozen cake will maintain quality for about 3 months, allowing you to enjoy delicious homemade cake anytime!

Signs of spoilage include an off smell, discolored frosting, or any mold growth. Always check the cake before serving and discard if any spoilage is detected.

Reheating instructions are straightforward; gently microwave slices for about 10-15 seconds to revive the cake’s moist texture, making it taste freshly baked again.

When reheating, avoid overheating, as it may cause the mint frosting to melt excessively. Keeping temperature low will preserve the integrity of the cake and its frosting.

Make Ahead Strategies

Preparing for a celebration? Consider making the Mint Chocolate Cake ahead of time to reduce the stress on the day of your event. You can bake the layers a day in advance, allowing them to cool completely before wrapping them and storing them overnight.

If you’re planning to frost the cake the next day, it may be beneficial to prepare the frosting ahead as well. Store it in an airtight container in the refrigerator and bring it back to room temperature before applying.

As you assemble, you can batch-prep additional garnishes like mint leaves or chocolate shavings a few hours before your guests arrive, ensuring everything is ready for a flawless presentation.

Quality impact is minimal when following these strategies since the cake and frosting recipe is intended to retain freshness. However, if freezing, avoid frost build-up by ensuring layers are well-wrapped.

When layering the cake, consider leaving out the frosting until just before serving. This ensures the cake is as fresh and delicious as possible, providing a quick assembly when it’s time to enjoy.

Fresh elements like fruit garnishes should be added at the last moment to maintain their vibrant appearance and texture, ensuring a delightful presentation that looks as good as it tastes.

Scaling Instructions

Scaling your Mint Chocolate Cake can be done easily to serve more guests. If you want to half the recipe, adjust the ingredients accordingly while monitoring baking time, as halved portions may cook quicker than larger batches.

Doubling or tripling the recipe calls for larger pans. Choose 9-inch or 11-inch cake pans for larger cakes, and bake accordingly. Keep an eye on the cakes, adjusting baking times as necessary to prevent over-baking.

Regarding equipment adjustments, as the batter volume increases, it may require mixing in batches to achieve the perfect consistency. A stand mixer can simplify this process.

Timing modifications should include an additional 5-10 minutes for each cake layer baked in larger pans, ensuring even cooking throughout. Testing for doneness with a toothpick becomes even more critical as you scale.

Storage considerations also change; larger cakes may take longer to cool. Allow adequate time for your cake layers to cool fully before removal from pans and frosting to ensure stability and prevent collapsing.

Always ensure you have enough frosting, adjusting the quantities as you scale your recipe up or down to ensure a consistent layer between your cakes, creating a seamless assembly for a beautifully layered Mint Chocolate Cake.

Nutritional Deep Dive

A Mint Chocolate Cake provides a delightful blend of ingredients that contribute to its overall nutritional profile. Each portion typically contains a balance of carbohydrates, fats, and proteins derived from flour, sugar, cocoa, and butter. Using standard recipes, a slice usually offers about 350-400 calories, highlighting the energy-dense nature of dessert.

On a micronutrient level, a slice of cake contains small amounts of iron from cocoa powder and various B vitamins from flour. However, supplemented with fresh mint and potentially fruit Garnish, your cake can offer additional vitamins and antioxidants that contribute positively to health.

Health benefits of this dessert stem partly from the essential properties of cocoa, known to release mood-enhancing compounds and provide heart-healthy antioxidants when enjoyed in moderation. Cocoa has also been linked with improved blood flow and reduced inflammation.

Dietary considerations should also be highlighted. Enjoying a slice of Mint Chocolate Cake can be part of a balanced diet, especially when combined with physical activity. It’s essential to savor these treats mindfully, celebrating special occasions while maintaining healthy moderation.

Portion analysis is key; consider serving smaller slice sizes for events, encouraging guests to indulge without overindulging. This practice allows everyone to enjoy a piece without feeling heavy after the meal.

For those conscious of weight management, choosing to savor Mint Chocolate Cake occasionally rather than as a daily indulgence helps maintain a healthy lifestyle while still enjoying delicious desserts.

Dietary Adaptations

Creating a gluten-free Mint Chocolate Cake can be accomplished by swapping all-purpose flour with a quality gluten-free blend. However, be sure to test baking times as gluten-free flours may yield varying results in texture and density.

For a dairy-free version, utilizing almond milk and coconut oil as substitutes for butter and milk provides flavor and moisture retention. Vegan frosting can be made using coconut cream or dairy-free alternatives to achieve creamy textures.

If you’re catering to vegan eaters, substituting eggs with applesauce or flaxseed eggs enhances your batter while providing necessary binding. These options help maintain the cake’s structural integrity while accommodating plant-based diets.

Low-carb adaptations can be achieved by employing almond flour and sealed sugar substitutes like erythritol or stevia in place of traditional baking ingredients. Adjustments in ingredient ratios are crucial for maintaining flavor and structure.

Keto-friendly versions can also use sugar-free chocolate chips in the frosting, ensuring everyone can consider enjoying this decadent dessert while adhering to tighter diet restrictions.

For those following a Paleo diet, the cake can be made with coconut flour and honey or maple syrup to provide natural sweetness. This alteration stays true to the clean eating principles of the Paleo lifestyle.

Low-FODMAP modifications are also viable, utilizing lactose-free ingredients and avoiding any high-FODMAP additions like certain sweeteners and excessive fruits for garnishing, ensuring a more inclusive dessert experience for all.

Troubleshooting Guide

When it comes to texture issues, a common problem is the cake being too dry. Ensure proper measuring techniques when adding flour and avoid overbaking, which can lead to a loss of moisture and texture.

If flavor balance seems off, consider adjusting the mint extract measurements; it can be overpowering if too much is added. A sour or unbalanced taste can stem from using poor-quality cocoa, so always choose high-quality chocolate or cocoa for the best results.

In terms of temperature problems, if the cake sinks in the middle, it may have been underbaked. Use proper cake testing methods, and if it does sink, a quick fix can be to serve with ice cream to hide the imperfection.

Equipment challenges often arise with mixers when overmixing leads to dense cakes. When mixing, always keep an eye on the batter’s consistency and stop when fully combined.

Ingredient substitutions can alter results significantly; for example, substituting baking soda for baking powder may not yield the same rise. Always follow substitutions with similar properties for baked goods.

Timing concerns often relate to cooling. A common misstep is frosting while still warm; this can cause the frosting to melt. Always allow the cake to cool completely for the best frosting results.

Additionally, when dealing with over-sweetened frosting, adding a pinch of salt can help to balance the overall sweetness, elevating flavors and making them more appealing.

Any visual indication of over-baking includes darkened edges compared to the rest of the cake. Use a timer to track baking times and adjust accordingly, especially when altering oven temperatures or when using different pans.

Recipe Success Stories

Community feedback on the Mint Chocolate Cake has been overwhelmingly positive, with many bakers praising its scrumptious taste and elegant appearance that impresses guests time and time again. Readers often share that it has become a favorite for family gatherings and special occasions.

Variation successes have emerged where bakers introduced unique ingredients, such as layers of fresh berries or even infused flavors like orange zest. These adaptations have inspired many to explore creative routes while following the original recipe as a foundation.

Adaptation stories frequently highlight bakers’ triumphs when trying new techniques, such as creating tiered cakes or experimenting with decorations that showcase the mint theme. Many are surprised at how approachable the recipe is for special occasions.

Readers frequently suggest pairing the cake with homemade mint chocolate ice cream or serving it at festive gatherings, elevating the overall dessert experience. Their creative plating suggestions inspire an impressive dining experience for friends and family alike.

Photography tips shared by the baking community illustrate that capturing the vibrant layers and lush frosting can entice social media followers. A simple touch of fresh mint leaves in photographs can enhance visual appeal, drawing attention to each mouthwatering slice.

Frequently Asked Questions

Q: Can I make the Mint Chocolate Cake ahead of time?

A: Absolutely! You can bake the cake a day in advance and store it. Just wait to frost it until the day of serving for the best results.

Q: How long will the Mint Chocolate Cake last?

A: Properly stored, the cake can last about 3 days at room temperature or up to a week in the refrigerator.

Q: Can I substitute cocoa powder for chocolate?

A: Yes, you can melt semi-sweet chocolate and use it in the place of cocoa powder; adjust sugar quantities accordingly to maintain sweetness.

Q: What can I use instead of mint extract?

A: You can use fresh mint leaves finely chopped or a mint syrup, though the flavor will differ slightly in intensity.

Q: Can this recipe be made gluten-free?

A: Yes, simply replace the all-purpose flour with a gluten-free flour blend to adapt this recipe for gluten sensitivity.

Q: Can I freeze Mint Chocolate Cake?

A: Yes! Wrap individual slices in plastic wrap, then foil, and they can be frozen for up to 3 months.

Q: Is there a way to make this cake healthier?

A: You can replace some of the sugar with applesauce and use whole wheat flour in place of regular flour for a healthier take.

Q: How can I avoid the cake sinking in the middle?

A: Ensure that the cake is fully cooked by using the toothpick test; also, be cautious not to open the oven door too early.

Q: What’s the best way to frost the cake?

A: Start with a crumb coat to trap crumbs, chill it, then proceed with the final layer of frosting for a smooth finish.

Q: Can I make a vegan version of this cake?

A: Yes! Use applesauce instead of eggs and coconut oil instead of butter to create a delicious vegan Mint Chocolate Cake.

Additional Resources

Explore related recipes that incorporate similar flavor profiles, such as Chocolate Mint Cookies or Mint Chocolate Chip Ice Cream, to create a curated dessert menu for any gathering.

Technique guides that focus on proper cake decoration and frosting techniques can help elevate your baking skills to create beautiful presentation cakes.

Delve into ingredient information detailing the benefits of cocoa and mint, as well as how they can positively impact health when included in moderation.

For equipment recommendations, consider investing in quality baking pans, mixers, and utensils essential for achieving great results in your baking endeavors.

Seasonal variations can inspire you to create themed desserts that fit within your holiday celebrations while utilizing seasonal ingredients for freshness and flavor.

Join the Conversation

Engage with fellow bakers on social media by sharing your Mint Chocolate Cake experiences and photos, showcasing your creations, and encouraging feedback from the community.

Capture the baking process with photography tips that highlight not only the finished cake but the journey leading up to it, delighting and encouraging new bakers to join in on the fun.

Don’t hesitate to leave recipe reviews to share the success of your Mint Chocolate Cake with others, providing inspiration for those considering undertaking this delightful treat.

Join in discussions about variations you have tried or unique adaptations you’ve made, contributing to an ongoing exchange of ideas within the baking community.

Always feel free to ask questions or seek advice regarding Mint Chocolate Cake or any other baking challenges you’re facing, as community engagement can lead to helpful insights and tips.

The Recipe

Mint Chocolate Cake

Serves: 8

Prep Time: 30 mins

Cook Time: 25 mins

Total Time: 55 mins

Kitchen Equipment Needed

  • 2 round cake pans (9-inch)
  • Mixing bowls
  • Stand mixer or hand mixer
  • Rubber spatula
  • Offset spatula for frosting
  • Cooling rack

Ingredients

  • 1 ¾ cups all-purpose flour
  • ¾ cup unsweetened cocoa powder
  • 2 cups granulated sugar
  • 1 ½ tsp baking powder
  • 1 ½ tsp baking soda
  • 1 tsp salt
  • 2 large eggs
  • 1 cup milk
  • ½ cup vegetable oil
  • 2 tsp vanilla extract
  • 1 cup boiling water
  • ½ cup mint extract
  • 8 oz unsalted butter (for frosting)
  • 3-4 cups powdered sugar (for frosting)
  • Additional mint for garnish

Directions

  1. Preheat your oven to 350°F (175°C) and grease both cake pans.
  2. In a large mixing bowl, combine flour, cocoa powder, sugar, baking powder, baking soda, and salt.
  3. Add eggs, milk, oil, and vanilla to the dry ingredients and mix until well combined.
  4. Slowly add boiling water to the batter, mixing until smooth. Divide the batter evenly between the prepared pans.
  5. Bake for 25-30 minutes or until a toothpick inserted into the center comes out clean.
  6. Remove from the oven and let the cakes cool in the pans for 10 minutes, then transfer to a cooling rack to cool completely.
  7. For the frosting, beat butter until creamy. Gradually add powdered sugar, mint extract, and a few tablespoons of milk until desired consistency is achieved.
  8. Once the cakes are cooled, place one layer on a serving plate and frost the top. Place the second layer on top and frost the entire cake.
  9. Garnish with fresh mint and serve chilled or at room temperature.

Recipe Notes

  • Feel free to adjust the mint frosting to taste by adding more or less mint extract.
  • This cake can also be made a day in advance; simply frost it right before serving for best results.
  • If desired, decorate with chocolate shavings or crushed mint candies on top of the frosting.

Ultimate Peanut Butter Chocolate Layer Cake for Any Occasion

Indulge in a Decadent Peanut Butter Chocolate Layer Cake: A Perfect Dessert!

⚖️
Difficulty
Medium

⏲️
Prep Time
30 mins

🕒
Cook Time
25 mins

⏱️
Total Time
55 mins

🍽️
Servings
12 servings

Indulge your taste buds with this incredible Peanut Butter Chocolate Layer Cake, a dessert that embodies the perfect balance of rich chocolate and creamy peanut butter. This layered cake brings a delightful combination of flavors that will have everyone asking for seconds. Each bite melts in your mouth, delivering a sweet and savory experience that tantalizes and delights. Whether for a birthday celebration or just a regular day that needs a lift, this cake adds a special touch to any occasion.

Imagine slicing through layers of moist chocolate cake, which is perfectly complemented by a smooth, velvety peanut butter frosting. The rich aroma of baked chocolate mingles with the unmistakable scent of roasted peanuts, making this treat irresistible. Not only does this cake look stunning when served, with its elegant layers and glossy frosting, but it also tastes divine, combining nostalgia and gourmet sophistication in every mouthful.

Quick Recipe Highlights

  • Flavor Profile: This cake features a luscious chocolate base paired with a creamy peanut butter frosting that creates a heavenly taste that is both satisfying and indulgent.
  • Texture: The moist layers of chocolate cake contrast beautifully with the fluffy, rich frosting, offering a delightful mouthfeel that keeps you coming back for more.
  • Aroma: The cake emits a wonderful aroma of sweet chocolate and nutty peanut butter, enticing anyone nearby to take a slice.
  • Visual Appeal: With its dark chocolate layers and a generous swirl of creamy, light-colored peanut butter frosting, this cake is both eye-catching and inviting.
  • Skill Level Needed: While slightly advanced, the cake is approachable for someone with basic baking skills, making it a great project for enthusiastic bakers.
  • Special Equipment: You’ll need two 9-inch cake pans and a stand mixer or electric mixer to achieve the perfect texture and consistency.

Recipe Overview

  • Difficulty Level: This Peanut Butter Chocolate Layer Cake is classified as medium difficulty, requiring patience and attention during baking and frosting to achieve optimal results.
  • Category: This dessert fits perfectly into special occasion sweets, ideal for birthdays, anniversaries, or family gatherings.
  • Cuisine: This cake draws inspiration from American classic desserts, showcasing the beloved combination of chocolate and peanut butter that has captured hearts across the nation.
  • Cost: The approximate cost for the ingredients is modest, making it affordable for many, especially given its crowd-pleasing nature.
  • Season: This cake is perfect year-round but shines particularly during fall and winter celebrations, as its richness complements festive vibes.
  • Occasion: It’s particularly well-suited for celebrations such as birthdays or holiday gatherings, offering a delightful treat that brings joy to any table.

Why You’ll Love This Recipe

The Peanut Butter Chocolate Layer Cake is not a mere dessert; it’s a celebration of flavors that delights your palate with its rich composition. The sweetness of the cake intertwines with the nutty tones of peanut butter, creating a perfect harmony that dances on your taste buds. Each slice is a balance of decadence and comfort, making it an ideal indulgence. You’ll find that the layers not only provide an aesthetic charm but also enhance every bite with distinct textures.

Convenience is another reason to cherish this recipe. Although it requires some steps, the process itself is straightforward, even for novice bakers. This cake can be made in advance, allowing you to focus on other aspects of your gathering without the stress of last-minute baking. The ingredients are commonly found, making it accessible and easy to whip up.

The nutritional aspects are often overlooked when it comes to desserts, but this cake includes wholesome ingredients such as eggs and peanut butter, which contribute protein and essential nutrients. While it is indulgent, sharing a slice can be a delightful treat without compromising your health goals when enjoyed in moderation.

This cake is a joy to serve at gatherings, functioning as a centerpiece that sparks conversation and delight among family and friends. The shared experience of enjoying a slice cultivates warmth and togetherness, making it an exceptional addition to your dessert repertoire.

Cost-effectiveness is an added bonus; this recipe allows you to create a rich, elaborate cake that can serve many without breaking the bank. It’s an inviting choice for bakers aiming to impress their guests without resorting to expensive store-bought cakes.

Historical Background and Cultural Significance

The origins of the Peanut Butter Chocolate Layer Cake can be traced back to an American culinary tradition that celebrates the combination of chocolate and peanut butter. This classic pairing has roots in early American history, with peanut butter becoming widely popular in the early 20th century. As desserts evolved, the combination found its way into various recipes, becoming a favorite choice for many home bakers. The cake represents a fusion of flavors that resonates deeply within American culture.

Culturally, this cake signifies comfort and celebration. Many families have their own versions, passed down through generations, often serving as a centerpiece during birthdays and holidays. The enticing flavors invoke nostalgic memories of joyful gatherings, where friends and family unite over shared sweets, deepening the cake’s significance.

Through the years, the recipe for this cake has evolved, with various adaptations appearing, such as gluten-free or vegan versions, as dietary preferences and health consciousness have grown. Its flexibility keeps it relevant, appealing to current culinary trends while retaining its traditional charm.

Regional variations often introduce local flavors or additional ingredients, resulting in an exciting range of adaptations to suit different palates and enhance the delightful experience of this beloved dessert. Whether prepared with different types of chocolate or embellishments like nuts and caramel, the fundamental appeal of the Peanut Butter Chocolate Layer Cake endures.

Ingredient Deep Dive

  • Flour: Essential for structure, all-purpose flour provides the base of the cake. It has a long history in baking and contributes to the cake’s lightness. When selecting flour, opt for high-quality brands with consistent performance. Store in a cool, dry place, and it can last several months. For gluten-free baking, alternatives like almond or coconut flour can provide different textures.
  • Cocoa Powder: Used for its rich chocolate flavor, cocoa powder enhances both the taste and color of the cake. It has roots in ancient civilizations that first cultivated cacao. When selecting cocoa powder, look for unsweetened and use it within six months of opening for the best flavor. Storage is simple—keep it in a cool environment. Dutch-processed cocoa can be a substitute for a milder taste.
  • Granulated Sugar: This ingredient is critical for sweetness and moisture retention. Sugar has a prominent place in baking and is used worldwide. It’s best to use white or caster sugar for cakes, as they dissolve easily. Store it in an airtight container to avoid clumping. For alternatives, brown sugar adds moisture while giving a different flavor profile.
  • Peanut Butter: The star of this recipe, peanut butter contributes both flavor and creaminess, creating a delectable frosting. Its history traces back over a century in the U.S. For the best flavor, choose natural peanut butter without added sugars or preservatives. It can be stored at room temperature if usages are frequent. Alternatives include almond butter or Nutella for a nutty twist.
  • Eggs: They are essential for binding and provide moisture, richness, and flavor. Eggs play a significant role in baking and have been used for centuries. Look for fresh eggs with intact shells. They can be stored in the refrigerator for several weeks. If an alternative is needed, use flaxseed meal mixed with water as a binder.
  • Butter: Used in the cake and frosting for richness, butter creates a delightful texture. It has been integral to desserts for centuries. Use unsalted butter for better control over the cake’s overall taste; it can be stored in the fridge for up to four months. For a lighter alternative, consider using vegetable oil, which can yield a different texture.

Common Mistakes to Avoid

  • Not checking the freshness of ingredients can lead to baking failures; always verify the expiration dates on your ingredients, especially baking powder and flour for optimal results.
  • Overmixing batter results in a dense cake; mix just until combined to ensure a light and airy texture.
  • Underbaking can leave the cake gooey in the center; always test doneness with a toothpick inserted in the center, which should come out clean.
  • Inaccurate measuring can alter the cake; always use proper measuring cups for dry and wet ingredients to maintain balance.
  • Skipping the cooling time can lead to structural failure; allow the cake layers to cool properly before frosting to prevent melting or sliding.
  • Using cold ingredients can affect the batter’s texture; make sure butter and eggs are at room temperature for smoother mixing.
  • Ignoring oven temperature discrepancies may cause poor results; invest in an oven thermometer to ensure proper baking conditions.
  • Not leveling the cake layers may create an uneven stack; use a serrated knife to trim the tops of the layers for a more polished finish.
  • Skipping taste testing the frosting can make for a bland finish; ensure the peanut butter frosting is balanced in sweetness and peanut flavor for the best outcome.

Essential Techniques

– **Creaming Butter and Sugar**: This technique is essential for incorporating air into the batter, which helps achieve a light cake texture. To master it, ensure your butter is softened, and beat until fluffy and pale. Avoid overmixing, and look for a creamy consistency as a visual cue.

– **Folding Ingredients**: When incorporating dry and wet ingredients or adding whipped eggs, folding helps retain air without deflating the mixture. Practice a gentle scooping motion, turning the bowl as you go. If the batter remains light and airy, you’ve mastered the technique.

– **Layering the Cake**: When assembling your cake, use a turntable for even frosting and stacking. Start with a cooled bottom layer and spread frosting evenly. Use a bench scraper for smooth edges, and visually check for symmetry as you layer.

– **Storing Leftovers**: Properly storing leftover cake is key to maintaining taste and texture. Use an airtight container or wrap slices tightly in plastic wrap, ensuring freshness. Look for signs of spoilage, such as mold or off-smells, before consuming.

Pro Tips for Perfect Peanut Butter Chocolate Layer Cake

– Always use room temperature ingredients for a smoother batter; this ensures even mixing and better consistency.
– Chill your peanut butter frosting before spreading for an easier application that achieves a clean finish.
– Add an extra layer of chocolate ganache for additional richness and an elegant finish.
– Use high-quality cocoa powder for the best chocolate flavor; it can significantly impact the cake’s overall taste.
– Test your oven for hot spots by baking a small batch of cookies; this helps ensure even baking for your cake layers.
– Consider toasting your flour briefly in the oven before use; this can deepen the flavor profile of your cake.

Variations and Adaptations

– **Regional Variations**: In the South, adding a layer of banana-flavored filling between the cakes can add a unique twist and introduce a delightful sweetness that complements the peanut butter.
– **Seasonal Adaptations**: In the fall, incorporating spices like cinnamon and nutmeg into the cake batter can provide a warm, comforting flavor that aligns beautifully with the season.
– **Dietary Modifications**: For a gluten-free version, substitute all-purpose flour with almond flour, ensuring that the proportions are adjusted for density.
– **Flavor Variations**: Add complimentary flavors like a hint of coffee in the chocolate cake for enhanced depth and richness.
– **Texture Modifications**: For added crunch, sprinkle chopped peanuts between the layers for added texture and flavor contrast.
– **Presentation Alternatives**: For a modern touch, consider a drip cake design with melted chocolate running down the sides for a stunning visual impact.

Serving and Presentation Guide

Serving your Peanut Butter Chocolate Layer Cake can be both a delightful and visual experience. Begin by placing the cake on a decorative plate that accentuates its rich colors. Use a serrated knife to slice through the layers cleanly, ensuring your portions are even. Garnishing with a dusting of cocoa powder or chocolate shavings creates an inviting appeal.

For garnishing, consider using fresh berries or mint leaves on the side, adding a pop of color and freshness that contrasts with the richness of the cake. Traditionally, a dollop of whipped cream can enhance servings, providing a lightness to balance the flavors. Serve at room temperature for the optimal taste experience, as this allows for the frosting’s creaminess to shine.

Temperature considerations are vital—cool cakes hold their shape better. Avoid layering warm cakes, as the frosting may melt. As for portion control, consider cutting smaller slices that can entice guests to enjoy a second helping without feeling overindulged.

Wine and Beverage Pairing

When pairing beverages with your Peanut Butter Chocolate Layer Cake, consider rich, bold flavors that can stand up to the dessert. A full-bodied red wine, such as a Cabernet Sauvignon or a Zinfandel, complements the chocolate beautifully. The tannins in red wine enhance the cake’s richness while mellowing the sweetness.

For non-alcoholic pairings, a rich, dark hot chocolate could provide a deliciously decadent experience. Alternatively, coffee lovers will appreciate a robust espresso, offering a lovely balance with the cake’s flavors. It’s also recommended to serve chilled beverages, such as iced coffee or sweet tea, which can provide a refreshing contrast.

When serving wine, ensure it is slightly below room temperature to highlight the flavors without overwhelming the palate. Provide options that best suit your audience, giving them the freedom to explore combinations with each slice of cake.

Storage and Shelf Life

To keep your Peanut Butter Chocolate Layer Cake fresh, store it in an airtight container at room temperature for up to three days. If you’d like to extend its shelf life, refrigeration is an option, but be aware it may cause the frosting to harden; consider letting it return to room temperature before serving.

For long-term storage, this cake can be frozen. Wrap well in plastic wrap and then in aluminum foil. It can be stored in the freezer for up to three months, ensuring your cake stays fresh. Always label your storage containers to keep track of dates and contents.

As for signs of spoilage, check for unusual smells or signs of mold. During reheating, consider warming individual slices in the microwave for a few seconds to renew their soft texture. If stored properly and monitored regularly, enjoying your cake days later can still yield a delightful experience.

Make Ahead Strategies

To streamline your baking process, consider preparing your Peanut Butter Chocolate Layer Cake in stages. A suggested prep timeline includes baking the cake layers one or two days in advance. Store them tightly wrapped to retain moisture, making assembly on the day of serving a breeze.

When it comes to frosting, you can prepare the peanut butter mixture ahead of time. Chilling the frosting enhances its spreadability, allowing for easier application. A great quality control measure is to make sure all components are adequately cooled before assembly, which ensures a clean look.

Quality impact assessment shows that cakes can sometimes taste even better the day after they are assembled, as flavors meld together beautifully. Reheating guidelines state that if refrigerated, letting your cake sit at room temperature for about a half-hour will improve the frosting’s consistency.

You may also consider adding fresh elements, such as whipped cream or a fresh fruit garnish, right before serving to retain a fresh flavor and texture contrast.

Scaling Instructions

When scaling your Peanut Butter Chocolate Layer Cake, halving the recipe is straightforward; simply divide each ingredient by two while maintaining the same baking temperature. Doubling or tripling requires careful adjustment; for example, increase the baking time slightly while monitoring the center for doneness.

Equipment adjustments may be necessary as well. For larger batches, ensure your mixing bowl can accommodate all ingredients without overflow, and consider using multiple pans. Timing modifications are crucial; keep a close eye on cakes, especially as size increases, requiring slightly longer baking times.

For storage considerations, larger cakes may not fit in standard-sized containers; ensure you have ample space or use cake boxes for safekeeping. Documenting ingredient adjustments and any notable changes during the baking process can aid future scaling success.

Nutritional Deep Dive

Understanding the nutritional breakdown of your Peanut Butter Chocolate Layer Cake is essential for making informed choices. A standard slice contains a reasonable amount of carbohydrates from sugar and flour, offering a quick source of energy. In terms of fats, healthy fats from peanut butter provide a satisfying component.

A micronutrient analysis reveals that the peanut butter offers protein, magnesium, and vitamin E, adding beneficial qualities to the dessert. When considering dietary considerations, it’s important to enjoy this cake in moderation because of its higher calorie content, especially in larger servings.

Portion analysis indicates that a standard serving is about one-twelfth of the cake, which helps keep calorie intake reasonable while still allowing for enjoyment. Weight management tips suggest balancing sweet treats with whole foods in other meals to maintain a healthy lifestyle.

Dietary Adaptations

For gluten-free dessert lovers, consider using high-quality gluten-free flour blends; they can effectively replace regular flour while maintaining a similar texture. To create a dairy-free version, substitute butter with coconut oil and use almond milk instead of regular milk in the batter.

Vegan adaptations can replace eggs with flaxseed meal or applesauce, and ensure the peanut butter frosting is free from dairy-based ingredients. Furthermore, for those following low-carb or keto diets, a sugar substitute like erythritol and an almond flour base can make this cake an option.

Other specific diets, such as paleo, can easily be addressed by using natural sweeteners like honey or maple syrup. Be sure to keep an eye on portion sizes, no matter what adaptation you choose.

Troubleshooting Guide

If texture issues arise, such as a dense cake, it may be due to overmixing. Ensure your batter is mixed just enough to combine, avoiding excess agitation. If flavors seem off, consider that you may have added too much salt or under-measured the sugar; adjusting them in future batches will enhance the flavor.

Temperature problems can often be traced back to improper oven calibration. If your cake is cooking unevenly, invest in an oven thermometer to monitor actual temperatures. For equipment challenges, remember that every oven bakes differently; adjusting the rack position can ensure even cooking.

If ingredient substitutions lead to unanticipated results, keep detailed notes on adjustments made, so you can learn what works best for your alterations. Timing concerns during baking might arise if layers are too thick or too thin; always check for doneness with a toothpick to avoid surprises.

Recipe Success Stories

Community feedback on the Peanut Butter Chocolate Layer Cake often reflects a theme of joy and satisfaction. Many bakers have reported back with glowing reviews, praising its reliable outcome and delicious flavor. Readers have shared their own adaptations and variations, such as adding crushed cookies in the frosting for a delightful crunch.

These success stories illustrate the versatility of the cake, with modifications that range from adding spices to experimenting with different frosting techniques. Photography tips often highlight the importance of good lighting to ensure the cake’s beautiful layers and rich frosting are well captured. This encourages more bakers to join in on the fun, sharing their delightful experiences and beautiful cakes.

Social media buzz also surrounds this recipe, with community members posting their own twists and serving suggestions. The sharing of photography alongside the cake results in a vibrant exchange of ideas and creativity within the kitchen.

Frequently Asked Questions

Can I make this cake gluten-free?

Absolutely! You can substitute the all-purpose flour for a gluten-free flour blend. Ensure that the blend contains a binding agent, such as xanthan gum, which can mimic the texture of gluten in baking.

How do I prevent my cake from sinking in the middle?

Sinking often occurs when cakes are underbaked or if the oven temperature is too low. Always ensure that your cake is fully cooked by using a toothpick or cake tester to check for doneness before removing it from the oven.

Can I freeze the cake after baking?

Yes, you can freeze the cake layers individually by wrapping them tightly in plastic wrap and aluminum foil. This keeps them fresh for up to three months, allowing for future enjoyment at a later time.

What’s the best way to store leftovers?

Store leftover cake in an airtight container at room temperature for up to three days. If you plan to keep it longer, refrigerate it to ensure freshness, though the texture may change slightly.

Can I substitute the peanut butter for another nut butter?

Definitely! You can replace peanut butter with almond butter, cashew butter, or sunflower seed butter. Just be aware that this may result in a different flavor and texture.

How can I make the frosting less sweet?

If you find the frosting too sweet, consider adding a pinch of salt or incorporating a bit of cream cheese, which can balance the sweetness without overpowering the peanut butter flavor.

What is the best way to frost the cake?

Start with a crumb coat to seal in any loose crumbs, chill the cake briefly, then apply your final layer of frosting evenly with a spatula for a polished look. A turntable can help achieve even frosting.

Is it okay to use natural peanut butter?

Yes, natural peanut butter works well, but it may be a tad runnier than traditional varieties. Just ensure it’s well-stirred before measuring to ensure consistency in your frosting.

Can I add additional flavors to the cake?

Yes, you can easily add flavorings like vanilla extract or espresso powder to enhance the chocolate flavor. Just be mindful to adjust ingredient ratios for balance.

What if I overbake the cake?

If the cake is overbaked, it may turn dry or crumbly. Monitor baking times closely and use a toothpick to avoid this issue, taking it out of the oven as soon as it comes clean.

How do I get even layers for my cake?

Using a scale to measure batter helps ensure that each layer has the same amount. Level off the tops with a serrated knife if they dome to aid in stacking for a straight finish.

Additional Resources

For those who want to dive deeper into baking, consider exploring related recipes that complement this Peanut Butter Chocolate Layer Cake, such as classic chocolate cupcakes or peanut butter cookies. Technique guides on layering cakes or mastering frostings can further enhance your dessert baking skills.

Ingredient-specific information on chocolate varieties and nut butters can provide insights into how to pick the best products for your creations. Equipment recommendations sold in baking supplies can also make a significant difference in your baking experience, from proper mixers to high-performing bakeware.

Seasonal variations can inspire your baking creativity throughout the year, helping you adapt this rich cake to each festive occasion. Discover how to switch flavors with strawberries in the spring or pumpkin in the fall as you become more adventurous in your baking journey.

Join the Conversation

We’d love for you to share your thoughts on this Peanut Butter Chocolate Layer Cake! Engage with us on social media by posting your success stories and delectable photographs. Your reviews help other bakers make informed decisions and inspire new creations while connecting with a community of like-minded dessert lovers.

Photography tips, like natural lighting and various angles, can make a significant difference in showcasing your finished cake. Whether you add unique twists or stick to the classic recipe, we invite you to share how this cake became a part of your culinary experience. Let’s celebrate the joy of baking together!

The Recipe

Peanut Butter Chocolate Layer Cake

Serves: 12 servings

Prep Time: 30 mins

Cook Time: 25 mins

Total Time: 55 mins

Kitchen Equipment Needed

  • Two 9-inch round cake pans
  • Mixing bowls
  • Electric mixer or stand mixer
  • Measuring cups and spoons
  • Spatula
  • Cooling rack

Ingredients

  • 2 cups all-purpose flour
  • 1 ¾ cups granulated sugar
  • ¾ cup unsweetened cocoa powder
  • 1 ½ tsp baking powder
  • 1 ½ tsp baking soda
  • 1 tsp salt
  • 2 large eggs
  • 1 cup whole milk
  • ½ cup vegetable oil
  • 2 tsp vanilla extract
  • 1 cup boiling water
  • 1 cup creamy peanut butter
  • ½ cup unsalted butter, softened
  • 2 cups powdered sugar
  • ¼ cup milk (for frosting)

Directions

  1. Preheat your oven to 350°F (175°C) and grease the cake pans.
  2. In a large bowl, mix flour, sugar, cocoa powder, baking powder, baking soda, and salt.
  3. Add eggs, milk, oil, and vanilla, and mix until well combined.
  4. Gradually add boiling water, stirring until smooth.
  5. Pour the batter evenly into the prepared pans and bake for 25-30 minutes.
  6. Once baked, allow the cakes to cool in the pans for 10 minutes before transferring them to a cooling rack.
  7. For the frosting, beat peanut butter and softened butter until creamy. Gradually add powdered sugar and milk, mixing until smooth.
  8. Once the cakes are completely cool, spread a layer of frosting between the layers, and cover the top and sides of the cake.
  9. Decorate as desired and serve to delighted guests!

Recipe Notes

  • The cake layers can be made ahead and stored in the fridge for up to three days before frosting.
  • For a richer chocolate experience, consider adding chocolate chips to the batter.
  • Feel free to freeze any leftovers, ensuring it’s well-wrapped to maintain freshness.

Ultimate S’mores Cake with Gooey Chocolate and Marshmallows

S’mores Cake: A Decadent Twist on a Classic Treat

⚖️
Difficulty
Moderate

⏲️
Prep Time
30 mins

🕒
Cook Time
45 mins

⏱️
Total Time
1 hr 15 mins

🍽️
Servings
12 slices

S’mores Cake is a delightful representation of summer campfire nostalgia, reimagined into an irresistible dessert. Imagine biting into fluffy layers of chocolate cake, rich creamy frosting, and gooey marshmallows that bring the classic s’mores experience to your table. The combination of flavors—from the deep richness of chocolate to the sweet notes of toasted marshmallow—creates a symphony of taste that is sure to please the palate. This cake isn’t just a treat; it’s a sensory experience that invokes memories of joyful gatherings around the fire, shared with friends and family.

As you dig into this S’mores Cake, you’ll notice the delectable textures that come together beautifully. The cake itself is moist and tender, providing the perfect contrast to the crispy graham cracker crumbs and melty chocolate layers. Each slice is not just a feast for the taste buds but also a feast for the eyes, adorned with luscious chocolate drizzle and fluffy meringue peaks. Whether it’s a birthday party or a simple weekend celebration, this cake will undoubtedly be the star of the show, captivating everyone with its alluring presentation and delicious flavor.

Quick Recipe Highlights

  • Flavor Profile: A perfect balance of rich chocolate and sweet, toasted marshmallow layers.
  • Texture: Moist chocolate cake juxtaposed with crunchy graham crackers and fluffy marshmallow frosting.
  • Aroma: The inviting scent of baked chocolate mingled with toasted marshmallows.
  • Visual Appeal: Striking layers of chocolate and creative toppings make for an eye-catching dessert.
  • Skill Level Needed: Moderate baking skills are ideal, though beginners can follow simple steps to achieve great results.
  • Special Equipment: Standard baking tools, including cake pans and a stand mixer, are recommended.

Recipe Overview

  • Difficulty Level: This S’mores Cake requires moderate baking skills, with multiple components that need to be prepared. However, the steps are straightforward and easy to follow, making it accessible to both novice bakers and experienced ones.
  • Category: A delightful dessert, this cake fits perfectly within the realm of cakes for celebrations, potlucks, or simply as a sweet treat after dinner.
  • Cuisine: While S’mores are rooted in American campfire tradition, this cake brings together classic culinary elements, combining chocolate, graham crackers, and marshmallows in a refined way.
  • Cost: The ingredients for this cake are generally affordable, averaging around $15-20, depending on quality and region.
  • Season: Ideal for summer but can be enjoyed year-round, bringing a splash of warmth and nostalgia no matter the season.
  • Occasion: Perfect for birthdays, picnics, or any festive gathering where chocolate is celebrated.

Why You’ll Love This Recipe

The combination of flavors in this S’mores Cake is nothing short of spectacular. Each bite offers a delightful mix of textures and tastes, from the rich density of chocolate cake to the lightness of the fluffy marshmallow frosting. The graham cracker topping adds a perfect crunch, not only enhancing the flavor but also bringing the traditional s’mores experience into each slice. Your taste buds will dance with joy every time you take a bite.

Convenience is another reason to love this recipe. While it may seem complex, the steps are manageable and result in a cake that can easily be made in advance. You can prepare the layers a day ahead, saving time on the day of your celebration. Furthermore, this S’mores Cake keeps well, meaning you can enjoy the indulgence over several days without losing quality.

In terms of nutrition, this cake can be you an indulgent dessert with options for making it slightly lighter. By incorporating alternative ingredients, such as lower sugar options or using whole grain flour, you can create a S’mores Cake that still satisfies your cravings while being a tad friendlier on the body.

Not only is this cake a fantastic treat, but it also shines in social scenarios. When you serve this dessert at parties, it becomes a centerpiece that sparks conversation and compliments. This S’mores Cake is great for bringing people together, evoking memories of roasting marshmallows and telling stories around a fire.

Finally, the cost-effectiveness of this recipe makes it accessible to many home bakers. With basic ingredients and minimal preparation time, you can present a stunning dessert that feels indulgent and special without breaking the bank. It proves that a little creativity and basic baking skills can elevate simple ingredients into something extraordinary.

Historical Background and Cultural Significance

The origins of s’mores trace back to the early 20th century, where they were first mentioned in a Girl Scouts publication, showcasing a simple recipe for campfire treats. This delightful dessert quickly became a fixture in outdoor gatherings, specifically during camping trips, further solidifying its place in American food culture. The concept of bringing together chocolate, marshmallows, and graham crackers has evolved over the decades into various forms, including our decadent S’mores Cake.

S’mores hold a significant cultural importance as they embody the essence of camping and outdoor adventures in America. The tradition of sharing these treats around a campfire fosters a sense of community, evoking laughter and storytelling, which play critical roles in many cherished memories. Incorporating this nostalgia into cake form serves as a delightful reminder of the simpler joys in life.

Over time, the evolution of s’mores has led to numerous adaptations. From gourmet interpretations showcasing high-end chocolate and artisanal graham crackers to the introduction of alternate flavorings such as peanut butter and seasonal fruits, this classic treat continues to inspire creativity among bakers. Our S’mores Cake is a product of this evolution, maintaining the spirit of the original dessert while offering a more sophisticated option.

Regional variations exist, particularly in how certain ingredients are used or combined. In the Southwest, for example, you might find variations that include spicy chocolate, while other areas may favor a more traditional approach. Each adaptation reflects the local culture and ingredients available, ensuring that S’mores remain a beloved treat despite regional differences.

Ingredient Deep Dive

Chocolate

Chocolate has an extensive history, tracing back to the ancient civilizations of Mesoamerica. It is revered not only for its rich taste but also for its various health benefits, including antioxidant properties. When selecting chocolate for your S’mores Cake, look for high-quality selections with at least 60% cacao for the richest flavor. Proper storage involves keeping it in a cool, dry place away from strong odors, which can affect its taste.

Graham Crackers

Graham crackers originated in the early 1800s as a health food, promoted by Sylvester Graham. Today, they are a staple in many dessert recipes, offering a distinct crunch. Nutritionally, they provide a source of fiber. Choose whole grain options for a healthier choice, and store them in an airtight container to keep them fresh. If you’re seeking substitution, consider using digestive biscuits or a homemade version.

Marshmallows

Marshmallows have been enjoyed since ancient Egyptian times, where they were made from the mallow plant. Modern marshmallows bring delightful sweetness and fluffy texture to desserts. When purchasing, look for those that are gelatin-based for better structure. They can be stored indefinitely in a cool, dry place, but make sure to seal them well. If you’re feeling adventurous, consider making homemade marshmallows for an upgraded flavor.

Common Mistakes to Avoid

  • Not properly measuring ingredients can lead to an imbalanced cake structure.
  • Overmixing the batter can result in a dense and tough cake. Mix just until combined.
  • Not letting the cake layers cool completely before stacking may lead to a melting mess.
  • Skipping the chilling step for the frosting can result in a runny consistency.
  • Using low-quality chocolate can diminish the overall flavor of the cake.
  • Neglecting to line your cake pans can cause sticking, ruining the presentation.
  • Not preheating the oven properly can lead to uneven baking.
  • Ignoring the freshness of the ingredients, especially the marshmallows, can affect texture.
  • Forgetting that every oven is different; adjust baking times as needed.
  • Underestimating the importance of allowing the cake to set before slicing can ruin the layers.

Essential Techniques

The two vital techniques for mastering this S’mores Cake are cake layering and frosting application. Building layered cakes is an art; make sure to use a serrated knife to gently level the cake layers for a stable structure. When frosting, use a spatula to create smooth surfaces or artful designs, ensuring that the flavors meld together harmoniously without overwhelming sweetness.

To avoid common pitfalls, ensure that your frosting is at room temperature for easy spreading and avoid overwhipping the buttercream to keep it fluffy yet stable. Visual cues such as a glossy finish or a smooth surface will signal success. Remember to chill the cake once frosted, allowing it to set and develop deeper flavors.

Pro Tips for Perfect S’mores Cake

– Use high-quality chocolate for both the cake and frosting to elevate flavors significantly.
– Experiment with different extracts, such as vanilla or almond, to enhance the cake’s complexity.
– Allow each layer of the cake to cool completely before stacking to avoid melting frosting.
– For added texture, incorporate crushed graham crackers into the frosting mix for a crunchy surprise.
– Chill the assembled cake for at least one hour before slicing; this helps it hold its shape.
– Decorate the top of the cake with toasted mini marshmallows for a visually stunning finish.
– Store leftovers in an airtight container to maintain freshness for several days.
– Use a cake turntable for easy and uniform frosting around the cake.

Variations and Adaptations

For those looking to mix it up, consider creating a peanut butter S’mores Cake by incorporating peanut butter in the frosting. You can also make seasonal adaptations, such as adding pumpkin spice during the fall or peppermint extract for a festive winter twist.

Dietary modifications can include gluten-free graham crackers and almond flour for a gluten-free version of this cake. Alternatively, use dairy-free chocolate and marshmallows to create a vegan-friendly dessert. For flavor, try infusing the cake with orange zest or espresso powder for a richer experience. Texture modifications may involve adding layers of thinly sliced strawberries or bananas, providing a fruity contrast. Present your S’mores Cake in various ways; consider using individual jars for stunning single-serve desserts.

Serving and Presentation Guide

When it comes to plating S’mores Cake, consider layering slices on a decorative cake stand to highlight its height. A simple dusting of cocoa powder or crushed graham crackers adds a lovely touch. Use fresh mint leaves for a pop of color and aroma that complements the cake.

Modern serving suggestions may include pairing the cake with a scoop of vanilla ice cream, drizzled chocolate sauce, or fresh fruit. You should also consider temperature; serving the cake at room temperature enhances flavors and allows for a smoother texture. For portion control, consider slicing using a warm knife for cleaner, more accurate pieces.

Wine and Beverage Pairing

When it comes to pairing wine with S’mores Cake, consider a rich red wine, such as a Cabernet Sauvignon or Merlot; this will complement the chocolate beautifully. Alternatively, a sweet dessert wine, such as a Port or even a light Prosecco, can balance the sweetness of the cake wonderfully.

For non-alcoholic alternatives, vanilla-flavored cream soda or iced coffee serve as delightful options that mesh well with the cake’s rich flavors. If you prefer tea, a nice chai latte can provide a spicy contrast that enhances the overall tasting experience. Temperature is important; serve each drink chilled to enhance refreshment alongside the rich dessert.

Storage and Shelf Life

Proper storage is key to maintaining the quality of your S’mores Cake. Ensure that it is kept in an airtight container at room temperature if consumed within a few days. For longer storage, you can refrigerate it, but this may slightly alter the texture.

For best results, freeze assembled pieces of S’mores Cake wrapped tightly in plastic wrap and stored in a freezer-safe container. Cake should last up to three months in the freezer. When reheating, allow it to thaw in the refrigerator overnight and bring it back to room temperature before serving. Check for signs of spoilage, such as unusual odors or visible mold, especially when it includes dairy-based frostings.

Make Ahead Strategies

You can easily prep the components of the S’mores Cake ahead of time. Bake the chocolate cake layers a day in advance, wrap them in plastic, and store them in the refrigerator. This not only makes assembly smoother but helps the flavors meld better overnight.

When you’re ready to serve, prepare the frosting and assemble the layers. This makes the cake fresher and more delectable. If you’re short on time, consider preparing fruit toppings or decorations ahead to save yourself some hassle. For the best experience, always add fresh elements like berries or mint just before serving to maintain their vibrant flavors.

Scaling Instructions

If you want to scale this recipe, doubling it is straightforward. Ensure you have adequate cake pans on hand to accommodate the larger quantity. Adjust baking times according to your oven’s efficiency and check for doneness with a toothpick.

For halving the recipe, simply use smaller cake pans and adjust the servings accordingly. You might need to use a different mixing bowl size based on the amount. When scaling, remember that portion sizes should still adhere to the recommended serving size.

Nutritional Deep Dive

When analyzing the nutritional content of S’mores Cake, it’s essential to consider the macro breakdown. One slice typically consists of a substantial amount of carbohydrates, proteins, and fats. Monitoring these will help manage daily intake while indulging in delicious treats.

Regarding micronutrients, focus on obtaining essential vitamins and minerals from the ingredients you use. For instance, high-quality dark chocolate will add iron and magnesium, contributing to the cake’s overall health profile. Understanding portion control plays a vital role; eat small slices to savor the rich flavors while maintaining a balanced diet.

Dietary Adaptations

For a gluten-free version of S’mores Cake, swap out regular flour for a gluten-free blend that’s meant for baking. Ensure that graham crackers are also gluten-free. For those with lactose intolerance, opt for dairy-free alternatives for both the chocolate and frosting.

Making the cake vegan is entirely possible by using egg substitutes like applesauce or flaxseed meals and selecting dairy-free chocolate and marshmallows. Adjustments can also be made for low-carb diets by using almond flour and sugar substitutes for a keto-friendly dessert. With each variation, maintain the same attention to detail and flavor balancing for best results.

Troubleshooting Guide

If your S’mores Cake appears dense, it might be due to overmixing the batter. To correct this, combine ingredients just until moistened. For flavor balance, if the cake is overly sweet, consider incorporating a pinch of salt or using high-quality cocoa powder to enhance the chocolate flavor.

Temperature problems can occur if the cake is underbaked; use a toothpick to test for doneness. If you encounter challenges with ingredient substitutions, such as needing an alternative to Marshmallows, try using whipped coconut cream instead. Timing concerns often arise when icing; allow the cake to cool thoroughly to avoid melting your frosting.

Recipe Success Stories

Community feedback is overwhelmingly positive for this S’mores Cake, with many sharing their adaptations. Some readers have successfully used alternative flours, while others have praised the marshmallow topping as a showstopper. Success stories include family gatherings where this cake became the highlight, leading to requests for the recipe.

Variations such as adding layers of fruit or different flavoring extracts have been particularly well-received, showcasing the recipe’s versatility. Readers encourage newer bakers to embrace their creativity in the kitchen, experimenting with the base recipe to create something uniquely theirs.

Frequently Asked Questions

Q: Can I make this S’mores Cake ahead of time?

A: Yes! You can bake the cake layers and prepare the frosting a day or two in advance. Assemble the cake shortly before serving to enjoy its optimal freshness.

Q: How do I store leftover cake?

A: Store any leftover S’mores Cake in an airtight container at room temperature for 2-3 days. For longer storage, refrigerate or freeze it wrapped tightly.

Q: Can I use store-bought frosting?

A: Absolutely! If you’re short on time, a store-bought chocolate frosting can work well. However, homemade frosting typically tastes richer and fresher.

Q: Is this cake suitable for special dietary requirements?

A: Yes! The recipe can easily be adapted for gluten-free, vegan, or dairy-free diets by substituting the respective ingredients. Check the labels carefully when selecting alternatives.

Q: Can I use other types of chocolate?

A: Yes! Feel free to experiment with different chocolate varieties like milk, dark, or white chocolate to create your unique flavor profile.

Q: What is the best way to serve this cake?

A: The cake is best enjoyed at room temperature. Slice and serve with ice cream or fresh fruit for an extra indulgence.

Q: What can I do if my frosting is too runny?

A: If your frosting is too runny, chill it in the refrigerator for a bit to stiffen or add a bit more powdered sugar to reach the desired consistency.

Q: Can I use other fillings in this cake?

A: Yes! Consider adding layers of caramel sauce, fruit preserves, or peanut butter between the layers for an added twist.

Q: How do I prevent the layers from cracking?

A: Ensure that you do not overbake the cake, and allow it to cool fully before removing it from the pan to avoid cracks.

Q: Can I make mini S’mores cakes?

A: Absolutely! For mini versions, use muffin tins or small cake pans, adjusting the baking time as necessary based on their size.

Additional Resources

If you enjoyed this S’mores Cake, you may want to explore other delicious recipes that incorporate the flavors of s’mores, such as S’mores Bars or a S’mores Sundae. Additionally, numerous technique guides can help you perfect your baking skills, whether it be cake decorating or frosting techniques.

For anyone interested in ingredient information, check out resources on finding high-quality chocolate or the benefits of whole grain versus standard graham crackers. Investing in good kitchen equipment, like a reliable stand mixer or cake pans, can make the process easier and improve results.

Join the Conversation

We’d love to hear about your experiences making this S’mores Cake! Share your photographs, adaptations, and suggestions on social media. Engaging with our community can provide new insights and creative ideas while also inspiring others to try their hand at this delectable dessert.

Join our conversation around baking by using our hashtag or tagging us in your posts. Share tips on making S’mores variations or highlight your unique creations based on this recipe’s format. Let’s celebrate baking together!

The Recipe

S’mores Cake

Serves: 12 slices

Prep Time: 30 mins

Cook Time: 45 mins

Total Time: 1 hr 15 mins

Kitchen Equipment Needed

  • 2 round cake pans (9-inch)
  • Mixing bowls
  • Electric mixer
  • Spatula
  • Cooling rack
  • Measuring cups and spoons
  • Toaster oven or kitchen torch (optional for toasted marshmallows)

Ingredients

  • 1 and 3/4 cups all-purpose flour
  • 1 and 1/2 cups granulated sugar
  • 3/4 cup unsweetened cocoa powder
  • 1 and 1/2 teaspoons baking powder
  • 1 and 1/2 teaspoons baking soda
  • 1 teaspoon salt
  • 2 large eggs
  • 1 cup whole milk
  • 1/2 cup vegetable oil
  • 2 teaspoons vanilla extract
  • 1 cup boiling water
  • 1 cup marshmallows (mini or regular)
  • 1 cup chocolate frosting
  • 1 cup crushed graham crackers

Directions

  1. Preheat the oven to 350°F (175°C). Grease and flour the cake pans.
  2. In a mixing bowl, combine flour, sugar, cocoa powder, baking powder, baking soda, and salt.
  3. Add eggs, milk, vegetable oil, and vanilla extract to the bowl, mixing until well combined.
  4. Slowly add boiling water to the mixture, stirring until the batter is smooth.
  5. Pour the batter evenly into prepared cake pans and bake for 30-35 minutes or until a toothpick inserted comes out clean.
  6. Allow cakes to cool in pans for 10 minutes before transferring to a cooling rack.
  7. Once cooled, place one layer on a serving plate. Spread a layer of chocolate frosting on top, then add half of the marshmallows.
  8. Position the second cake layer on top and frost the entire cake with chocolate frosting.
  9. Top with remaining marshmallows and crushed graham crackers.
  10. For extra toastiness, use a kitchen torch to lightly toast the marshmallows (optional).

Recipe Notes

  • Ensure all ingredients are at room temperature for the best results.
  • Feel free to substitute gluten-free flour for a gluten-free option.
  • This cake can be stored in an airtight container for up to 3 days.
  • Add your favorite chocolate chips to the batter for an extra chocolate kick!

Easy No Bake Mini Oreo Cheesecakes – Perfect for Parties

No Bake Mini Oreo Cheesecakes: The Ultimate Dessert Treat

⚖️
Difficulty
Easy

⏲️
Prep Time
20 mins

🕒
Cook Time
0 mins

⏱️
Total Time
20 mins

🍽️
Servings
12 mini cheesecakes

If you’re looking for a delightful dessert that doesn’t require baking, look no further than these No Bake Mini Oreo Cheesecakes. These individual treats combine the beloved flavors of classic Oreo cookies with a creamy cheesecake filling, making them an irresistible dessert option for any occasion. With their rich chocolate sandwich crust, tangy yet sweet filling, and a signature Oreo topping, these mini cheesecakes are bound to become a favorite among your family and friends.

Imagine sinking your spoon into these luscious cheesecakes as they melt in your mouth. The velvety texture and the familiar crunch of Oreos create a perfect balance that excites the senses. Ideal for summer gatherings or whenever you crave something sweet, these cheesecakes are easy to prepare and can be made ahead of time to save you stress during busy occasions.

Quick Recipe Highlights

  • Flavor Profile: Rich and creamy with a delightful chocolate crunch.
  • Texture: Silky cheesecake filling on a crunchy Oreo base.
  • Aroma: Sweet, chocolatey notes that evoke nostalgia.
  • Visual Appeal: Beautiful layered mini desserts, topped with crushed Oreos.
  • Skill Level Needed: Beginner-friendly with simple steps.
  • Special Equipment: Muffin tin and cupcake liners.

Recipe Overview

  • Difficulty Level: This recipe is easy, making it suitable even for novice bakers. It requires no special skills and involves mixing and assembling.
  • Category: Desserts are often perfect for celebrations, parties, or a sweet treat after dinner.
  • Cuisine: This recipe draws from American cuisine, reflecting the popularity of no-bake desserts in modern cooking.
  • Cost: The overall cost is budget-friendly, with simple ingredients commonly found at grocery stores.
  • Season: These cheesecakes are ideal year-round, though summer gatherings make them particularly refreshing.
  • Occasion: Perfect for birthdays, holidays, picnics, or as a delightful treat after a family meal.

Why You’ll Love This Recipe

The No Bake Mini Oreo Cheesecakes are not only delicious, but they also provide an incredible taste and texture that you and your guests will love. The combination of crunchy Oreo crust and creamy filling creates a delightful mouthfeel that balances sweet and rich flavors seamlessly. You’ll cherish every bite of these heavenly mini desserts.

One of the biggest advantages is their convenience. With no baking required, you can whip these up in less than 30 minutes, leaving more time for socializing or enjoying your day. They can be assembled quickly and stored in the refrigerator, making them an easy dessert choice for any occasion.

Nutritionally, this cheesecake provides a delightful combination of flavors without the guilt. While it’s still a dessert, moderation is key, and these mini delights can satisfy your sweet tooth with a smaller portion size. Additionally, Oreos, while indulgent, offer a familiar taste that enhances this dessert’s overall appeal.

Socially, these cheesecakes are a great way to impress friends and family. Serving them in mini portions not only adds an elegant touch but also encourages sharing and conversation around the dessert table. Treat your guests to these adorable cakes, and they will surely be the highlight of your gathering.

Lastly, cost-effectiveness is another reason to fall in love with this recipe. With simple, accessible ingredients like cream cheese, whipped cream, and Oreos, these cheesecakes offer an impressive dessert experience without breaking the bank.

Historical Background and Cultural Significance

The no-bake cheesecake is a beloved twist on the classic baked version, popularized in America in the late 20th century. Using readily accessible ingredients such as cream cheese and cookies, this alternative allows dessert lovers to enjoy cheesecake without the complexities of baking.

In many households, no-bake desserts have become a staple during hot summer months, thanks to their refreshing nature. The use of Oreos, a quintessential American cookie, symbolizes indulgence and comfort, making them a beloved inclusion in various recipes.

Over time, the recipe has evolved, with countless adaptations emerging, including seasonal flavors and dietary variations. This recipe’s simplistic charm continues to enchant bakers, proving that you don’t need to be a professional chef to create delightful desserts.

In various regional areas, mini cheesecakes have gained popularity as party treats, often being served during birthday celebrations, bridal showers, and of course, holiday gatherings. The delightful taste combined with an eye-catching presentation helps cement their status as a go-to dessert option.

Ingredient Deep Dive

Oreos: Initially introduced in 1912, Oreos have a rich history, becoming America’s favorite cookie. They are symbolic of comfort and indulgence, providing a crunchy base for desserts. When selecting Oreos for this recipe, ensure they are fresh for the best taste. Store them in a cool, dry place, and they can also be substituted with gluten-free cookies if desired.

Cream Cheese: A key player in the cheesecake-making process, cream cheese adds richness and creaminess to the filling. It originated in the United States in the 19th century and now serves as a staple in many dessert recipes. Opt for full-fat cream cheese to achieve the best creamy texture. Store it in the refrigerator, and if you’re looking for lighter options, consider using low-fat cream cheese.

Common Mistakes to Avoid

  • Using cold cream cheese: Always allow it to come to room temperature to achieve a smooth consistency.
  • Overmixing: Aggressive mixing can lead to a dense texture; mix until just combined.
  • Not chilling enough: Allowing the cheesecakes to chill adequately is crucial for a firm structure.
  • Skipping the crust: Ensure you have enough crust for each cheesecake; it provides flavor and stability.
  • Using stale ingredients: Fresh ingredients yield the best taste; check expiry dates.
  • Pouring too much filling: Maintain balance with the crust; excess filling can overflow.
  • Rushing the assembly: Give yourself ample time between steps for the best results.
  • Not measuring ingredients: Precision is key; measuring helps maintain consistency.
  • Ignoring garnishes: Topping with crushed Oreos enhances presentation and flavor.
  • Not tasting: Always taste your filling before setting; adjust sweetness if necessary.

Essential Techniques

Mixing the filling: This step is essential for achieving the creamy texture expected from cheesecakes. Mix the ingredients on low speed to ensure you don’t incorporate too much air, which can create an undesired texture. Look for a smooth and cohesive mixture as a sign of success.

Preparing the crust: To master the crust, crush Oreos into fine crumbs using a food processor or by placing them in a zip-top bag and crushing with a rolling pin. Press the crumbs firmly into each cupcake liner to create a solid base, ensuring they hold together when served. A well-pressed crust leads to a satisfying crunch with the filling.

Pro Tips for Perfect No Bake Mini Oreo Cheesecakes

For best results, use room temperature cream cheese for a smooth filling without lumps. Always crush Oreos finely for a uniform crust and better texture. Once combined, allow the filling to chill thoroughly before serving for the best taste and texture. Opt for mini cupcake liners for easy removal and presentation. For added flavor, experiment with different toppings, such as chocolate drizzle or fresh berries. Remember to taste your mix before chilling; if it needs sweetness, add a little sugar accordingly.

Variations and Adaptations

You can create regional variations by incorporating local flavors such as peanut butter or caramel for a different taste. Seasonal adaptations include using pumpkin puree in fall or fresh berries in the summer for a refreshing twist. For dietary modifications, consider using gluten-free Oreos and low-fat cream cheese for a lighter option. If you want to enhance flavors, add a splash of vanilla or chocolate extract to the filling for added depth. Change texture by layering different types of crumbs or nuts within the crust. Presenting the cheesecakes in elegant jars can also provide a modern touch.

Serving and Presentation Guide

When serving your No Bake Mini Oreo Cheesecakes, consider using clear plastic dessert cups for a beautiful presentation that showcases the layers. Decorate with a dollop of whipped cream and a sprinkle of crushed Oreos on top. Traditional accompaniments include fresh fruits or a chocolate sauce drizzle for added flavor. Serve chilled, as the cool temperature enhances the cheesecake experience. For portion control, aim for a scoop size that fits within the cupcake liners to keep servings consistent.

Wine and Beverage Pairing

Pair your No Bake Mini Oreo Cheesecakes with dessert wines like late-harvest Rieslings or Moscato for a sweet complement. For a non-alcoholic alternative, consider pairing with iced coffee or hot chocolate. If opting for tea, a light peppermint tea can refresh the palette after sweet indulgence. Ensure beverages are served cold for optimal enjoyment, creating a balance with the rich flavors of the cheesecake.

Storage and Shelf Life

To store your No Bake Mini Oreo Cheesecakes, keep them in an airtight container in the refrigerator, where they will last for up to five days. Make sure they are fully chilled before covering, as this prevents condensation that can affect texture. For longer storage, you can freeze them for up to three months; however, it’s best to consume them fresh for optimal flavor. Thaw them in the refrigerator overnight before serving. If you notice any changes in texture or smell, discard them immediately.

Make Ahead Strategies

To streamline your dessert preparations, combine the crust and cheesecake filling a day before serving. Store the components separately in the refrigerator until ready to assemble. This not only saves time but helps meld flavors. For optimal quality, whip the filling just before assembly, as this maintains its light texture. If you wish to add fresh toppings, such as fruit or whipped cream, do so just before serving for added freshness without compromising texture.

Scaling Instructions

To halve the recipe, simply divide all ingredient amounts by two, ensuring you still prepare the crust and filling with precision. Doubling the recipe is easy; just multiply each amount to make 24 mini cheesecakes, and adjust your mixing bowl size accordingly. Keep an eye on your chilling times; larger batches may take a bit longer to set. If using a different size of dessert cups, you may need to adjust the amount of filling to match.

Nutritional Deep Dive

This No Bake Mini Oreo Cheesecake provides a delicious indulgence while still respecting portion control. Typically, each mini cheesecake contains rich sources of fat, primarily from cream cheese. The cookies introduce sugars and carbohydrates, contributing to a balanced dessert experience. Understanding macronutrient proportions helps you enjoy these treats while considering dietary goals. For those watching calorie intake, appreciate these mini desserts in moderation and explore lower-calorie ingredients where possible.

Dietary Adaptations

For a gluten-free version, substitute standard Oreos with gluten-free cookies to ensure everyone can enjoy them. If you’re looking for a dairy-free option, use cashew cream or vegan cream cheese in place of traditional cream cheese. Those adhering to a low-carb or keto diet may opt for sugar-free Oreo alternatives combined with a suitable low-carb cream cheese. These adaptations maintain the taste and texture while accommodating specific dietary needs.

Troubleshooting Guide

If your cheesecakes are falling apart, ensure the crust is firmly pressed into the base. If they taste too sweet, consider balancing with a touch of lemon juice to cut the richness. Texture issues may arise if the filling isn’t whipped enough; ensure you mix just until combined to prevent overmixing. If flavor feels lackluster, always taste and adjust during the mixing process—tiny adjustments can greatly enhance the final result. Lastly, ensure chilling times are adhered to; these desserts need adequate time to firm up.

Recipe Success Stories

Frequently Asked Questions

Can I use a different cookie for the crust?

Absolutely! While Oreos are a classic choice, you can substitute with any cookie you like, such as chocolate wafers or graham crackers, to create different flavors.

How long do these cheesecakes need to chill?

For optimal texture and firmness, it is recommended to chill the mini cheesecakes for at least 4 hours, or overnight if possible.

Can I freeze these cheesecakes?

Yes, these cheesecakes freeze well for up to three months. Make sure to wrap them tightly in plastic wrap and place them in an airtight container before freezing.

What can I use instead of cream cheese?

If you’re looking for a dairy-free option, you can substitute cream cheese with cashew cream, or for a lighter version, try using Greek yogurt.

How do I prevent the filling from being lumpy?

Ensure your cream cheese is at room temperature before mixing. This helps to achieve a smoother consistency without lumps.

Can I make these mini cheesecakes in advance?

Yes, they can be made in advance. It’s best to prepare and chill them a day before your event to save you time and stress.

What toppings do you recommend?

Top these mini cheesecakes with whipped cream, crushed Oreos, chocolate syrup, or fresh berries for a colorful and delicious finish.

How many servings does this recipe make?

This recipe yields about 12 mini cheesecakes, perfect for sharing at gatherings or enjoying over a few days at home.

Are there gluten-free options available?

Yes! You can use gluten-free Oreos or other gluten-free cookies as a substitute to make this dessert approachable for those with dietary restrictions.

What should I do if my crust crumbles easily?

If your crust crumbles, ensure you thoroughly mix the cookie crumbs with melted butter and press it down firmly into the liners to create a solid base.

Additional Resources

For more delightful dessert recipes, check out our collection of other no-bake treats. Techniques such as mastering whipped cream and tips for ingredient substitutions can enhance your overall baking experience. As you experiment, gather suggestions for seasonal variations to keep your dessert choices fresh and exciting!

Join the Conversation

We invite you to share your experiences with our No Bake Mini Oreo Cheesecakes. Snap a photo and tag us on social media, or leave a comment on this post with your thoughts and variations. Your feedback enriches our community, and we love to see how you personalize the recipes to fit your style!

The Recipe

No Bake Mini Oreo Cheesecakes

Serves: 12

Prep Time: 20 mins

Cook Time: 0 mins

Total Time: 20 mins

Kitchen Equipment Needed

  • Muffin tin
  • Cupcake liners
  • Mixing bowl
  • Whisk or electric mixer
  • Measuring cups and spoons
  • Food processor or rolling pin

Ingredients

  • 24 Oreos (for crust)
  • 1/4 cup unsalted butter, melted
  • 2 cups cream cheese, softened
  • 1/2 cup powdered sugar
  • 1/2 cup whipped cream
  • 12 mini Oreos, for topping

Directions

  1. Preheat your oven (not needed).
  2. Crush the Oreos in a food processor until they are fine crumbs.
  3. In a mixing bowl, combine the Oreo crumbs with melted butter. Mix until combined.
  4. Press the Oreo mixture firmly into the bottom of cupcake liners in a muffin tin.
  5. In another bowl, beat the cream cheese with powdered sugar until smooth.
  6. Fold in the whipped cream gently until fully incorporated.
  7. Evenly distribute the cheesecake filling on top of the Oreo crusts.
  8. Cover and refrigerate for at least 4 hours or until set.
  9. Top each cheesecake with a mini Oreo just before serving.

Recipe Notes

  • Feel free to experiment with different toppings such as chocolate sauce or fresh fruit.
  • This recipe can easily be doubled or halved based on your needs.
  • Crush the Oreos with a rolling pin in a zip bag as an alternative to using a food processor.

Best Mini Blackberry Lavender Cheesecakes for Any Occasion

Mini Blackberry Lavender Cheesecakes: A Delightful Dessert Experience

⚖️
Difficulty
Intermediate

⏲️
Prep Time
25 mins

🕒
Cook Time
20 mins

⏱️
Total Time
45 mins

🍽️
Servings
12 Mini Cheesecakes

Indulge in the delightful experience of Mini Blackberry Lavender Cheesecakes, where creamy decadence meets aromatic floral notes. These bite-sized cheesecakes not only satisfy your sweet tooth but also elevate any gathering with their stunning presentation and unique flavor profile. Infused with fresh blackberries and a hint of lavender, these mini desserts offer a refreshing twist on traditional cheesecake, making them a perfect choice for brunch, tea parties, or a cozy night in.

The rich, velvety texture combined with the tartness of blackberries creates a harmonious balance that is simply unforgettable. Each cheesecake is topped with a luscious blackberry compote, bringing a pop of color and flavor that is both visually appealing and mouthwatering. With their delicate size, they’re perfect for serving at gatherings, allowing guests to indulge without feeling too guilty.

Quick Recipe Highlights

  • Flavor Profile: This dessert boasts a beautiful blend of sweet and tart flavors, with blackberries’ natural sweetness complementing the creamy cheesecake base while the lavender adds a subtle floral element.
  • Texture: The cream cheese provides a smooth and creamy texture, while the buttery crust adds a satisfying crunch to each mini cheesecake.
  • Aroma: The fragrant notes of lavender combined with the sweet aroma of baked berries create a warm and inviting atmosphere in your kitchen.
  • Visual Appeal: The deep purple of the blackberry topping against the pale cheesecake and the crumbly crust creates a striking visual contrast, perfect for impressing guests.
  • Skill Level Needed: While this recipe requires some attention to detail, bakers with an intermediate skill level will find it manageable and rewarding.
  • Special Equipment: A muffin tin for the mini cheesecakes, a mixing bowl, and an electric mixer are essential for this recipe.

Recipe Overview

  • Difficulty Level: This intermediate-level recipe requires some patience and careful preparation but is achievable for anyone who enjoys baking.
  • Category: Desserts; these mini cheesecakes perfectly fit within the dessert category and are ideal for numerous occasions.
  • Cuisine: This recipe draws inspiration from traditional American desserts that incorporate unique ingredients like lavender and local fruits like blackberries.
  • Cost: The ingredients are relatively affordable, with the more expensive items being the cream cheese and organic lavender, bringing the total cost to approximately $15 for 12 servings.
  • Season: Perfect for spring and summer gatherings, these cheesecakes celebrate fresh seasonal berries and floral flavors, making them a go-to seasonal treat.
  • Occasion: Ideal for events such as weddings, baby showers, or even casual family gatherings, these mini cheesecakes are designed to impress.

Why You’ll Love This Recipe

The unique combination of blackberry and lavender elevates these mini cheesecakes from simple to extraordinary, offering a taste experience that is both refreshing and indulgent. The smooth, creamy filling pairs beautifully with the tartness of the berries, creating an explosion of flavor that captivates the palate. The floral notes of lavender add an unexpected twist that delights the senses, making each bite a joyful discovery.

Not only are they delicious, but their convenience also makes them a favorite. With a prep time of just 25 minutes, these cheesecakes come together quickly, allowing you to spend more time enjoying the company of your guests. They can also be made ahead of time, ensuring stress-free hosting so you can focus on creating memorable moments.

From a nutritional perspective, this treat does incorporate some beneficial elements. The fresh blackberries are a great source of vitamins and antioxidants, promoting overall health, while the dairy ingredients provide protein and calcium. Balancing indulgence with health is a signature feature of this recipe, making it a guilt-free dessert option.

The social aspect of serving Mini Blackberry Lavender Cheesecakes is another reason to love this recipe. Their bite-sized portions encourage sharing and conversation, making them a perfect addition to any gathering where guests can mingle and enjoy delightful treats.

Finally, the cost-effectiveness of this recipe is a noteworthy benefit. With easily sourced ingredients and a low cost per serving, you can impress your friends and family without spending a fortune. The aesthetic appeal of these cheesecakes allows you to present a beautiful dessert that rivals those found in upscale bakeries, all from the comfort of your own kitchen.

Historical Background and Cultural Significance

The history of cheesecake can be traced back to ancient Greece, where a similar dessert was served to athletes during the first Olympic Games. While the base remained relatively consistent, variations began to emerge, influenced by local ingredients and culinary traditions. The incorporation of fruits and floral flavors became increasingly popular in America during the late 19th century, paving the way for the modern cheesecake.

Blackberries, native to Europe and North America, have been cherished for their unique flavor and nutritional benefits. They are often associated with summer, representing a time of bounty and a celebration of the harvest. Lavender, too, has rich historical roots, originally used in cooking, perfumery, and herbal remedies. The pairing of blackberry and lavender in desserts signifies a blend of traditional and innovative flavors that reflect a growing trend toward creative merging in modern gastronomy.

Over the years, cheesecake recipes have evolved as chefs and home bakers alike experiment with tastes, textures, and presentations. Today, mini cheesecakes are becoming a staple at celebrations, appreciated for their convenience and ability to cater to individual servings.

Regional variations also speak to the adaptability of cheesecake recipes, where different parts of the world offer unique spins. From the tangy sour cream cheesecakes of the Midwest to the no-bake versions popular in the South, the enduring popularity of cheesecake showcases its versatility and widespread love.

Ingredient Deep Dive

Cream Cheese

The foundation of any good cheesecake, cream cheese provides the rich and creamy base for our mini cheesecakes. Historically, it emerged in the United States in the 1870s and quickly garnered popularity. Cream cheese is low in carbohydrates and high in calcium, making it a deliciously indulgent yet relatively healthy ingredient. When selecting cream cheese, opt for full-fat versions for optimal texture. Store it in the refrigerator and use within a month for the best quality. Alternatively, Neufchâtel cheese offers a lighter option that can be substituted for cream cheese with a slightly lower fat content.

Blackberries

Blackberries are not only delicious but packed with antioxidants, vitamins, and dietary fiber. They have a rich history in both culinary outlets and traditional medicines, often used as a natural remedy for various ailments due to their anti-inflammatory properties. When selecting blackberries, look for shiny, plump berries without any signs of mold. They can be stored in the refrigerator for about 5-7 days and are best consumed fresh, but freezing is an excellent option for longer storage. If blackberries are unavailable, raspberries or blueberries can be excellent substitutes.

Lavender

Lavender, known for its stunning purple hues and aromatic qualities, has been used for centuries in culinary traditions as well as for its calming properties. It offers a unique floral flavor that’s not only delightful but also packed with antioxidants. When cooking with lavender, make sure to use culinary-grade lavender to avoid any pesticides or chemicals. Store it in a cool, dry place away from direct sunlight. If fresh lavender is unavailable, dried lavender can be used at half the amount, offering a similar flavor profile.

Common Mistakes to Avoid

  • Overmixing the filling: Overmixing can lead to a dense texture rather than the desired creamy consistency. Start mixing on low speed and only mix until combined to maintain fluffiness.
  • Not using room temperature ingredients: Cold cream cheese will result in lumps, so ensure all dairy components, especially cream cheese, are at room temperature before starting.
  • Skipping the crust: The crust not only provides flavor and texture but also holds the cheesecake together. Ensure you press it firmly into the bottom of the muffin tin for the best results.
  • Baking at too high a temperature: A high temperature can cause the cheesecakes to crack. Bake at a moderate temperature to allow even cooking without overbaking.
  • Not cooling properly: Allow cheesecakes to cool gradually in the oven with the door slightly ajar to prevent sudden temperature changes that can cause cracks.
  • Forgetting the water bath: Baking mini cheesecakes in a water bath helps regulate temperature and moisture, preventing cracks and promoting even baking.
  • Serving too soon: Allowing the cheesecakes to chill in the refrigerator for at least a couple of hours enhances their flavor and texture. Resist the urge to serve them straight away.
  • Ignoring flavor depth: When adding lavender, start with a small amount, as its flavor can be overpowering. Gradually adjust to your taste for a balanced profile.
  • Not garnishing: The visual appeal can sometimes be neglected. Always consider a tasteful garnish, like fresh berries or a lavender sprig, to enhance your presentation.
  • Using expired ingredients: Always check the expiration dates of fresh ingredients, particularly dairy and fruits, to ensure the best flavor and safety.

Essential Techniques

Mixing

Proper mixing speaks to the overall quality of the mini cheesecakes. Start mixing on low speed to prevent incorporating excessive air, which can lead to cracks. Aim for a smooth texture without lumps. Visual cues include a homogenous batter that’s creamy and slightly thick, ensuring it holds its shape while baking.

Baking in a Water Bath

Baking in a water bath, or “bain-marie,” is crucial for achieving a smooth cheesecake. The water bath moderates the baking temperature, preventing overcooking and ensuring even heat distribution. To master this technique, use a larger pan filled with hot water placed in the oven with the cheesecakes. Watch for any leaks by wrapping the pans with foil to avoid sogginess.

Cooling Gradually

To avoid cracks, it’s essential to cool the cheesecakes gradually. After baking, let the mini cheesecakes cool in the turned-off oven for around 30 minutes, allowing them to stabilize. Then transfer to the refrigerator for chilling. Proper cooling helps to maintain that desirable creamy texture without compromising appearance.

Pro Tips for Perfect Mini Blackberry Lavender Cheesecakes

1. Use fresh, high-quality ingredients for the best flavor and texture. Organic blackberries and culinary-grade lavender can significantly elevate the dish.
2. Experiment with different types of cheese, like mascarpone, for a unique twist on the classic flavor.
3. Consider using a food processor to make your crust evenly crumbly and mixed for perfect texture.
4. For a no-bake version, substitute gelatin and adjust cooking times accordingly while keeping the proportions the same.
5. Prepare an extra batch of the blackberry topping to serve as a sauce alongside the cheesecakes for guests who love extra flavor.
6. Keep an eye on baking time; mini cheesecakes will bake faster than traditional-sized ones, so set your timer accordingly.
7. If you’re short on time, opt for store-bought graham cracker crusts for quick assembly.
8. Let your mini cheesecakes chill in the fridge overnight for a firmer texture, enhancing the overall flavor profile.

Variations and Adaptations

If you want to explore exciting variations, consider incorporating lemon zest alongside the blackberries for a citrusy kick. In autumn, spiced apple topping can replace the berry compote to switch things up seasonally. For those needing dietary modifications, a dairy-free cream cheese alternative can create a similar texture while catering to vegan diets. You can also try swapping blackberries for seasonal fruits like strawberries or peaches for a fresh twist. For a more indulgent dessert, adding a chocolate drizzle could cater to chocolate lovers while keeping the flavor profile unique.

Serving and Presentation Guide

When it comes to presentation, use delicate cupcake liners to elevate the look of your mini cheesecakes. Consider drizzling with a homemade berry compote or a sprig of lavender to add a visual and aromatic touch. Serving them on a decorative platter or slate board can enhance the overall experience. To complement the cheesecake, consider pairing it with a scoop of vanilla ice cream or whipped cream for a decadent dessert option. Lastly, serve them chilled for the best flavor and texture.

Wine and Beverage Pairing

When pairing beverages with your Mini Blackberry Lavender Cheesecakes, a light-bodied wine, such as a Riesling or Sauvignon Blanc, complements the fruity flavors beautifully. For a non-alcoholic option, consider sparkling water with a splash of lime juice to cleanse the palate. Additionally, pairing these cheesecakes with a mild herbal tea, such as chamomile, can enhance the floral notes of the lavender, creating a harmonious dining experience.

Storage and Shelf Life

To ensure the longevity of your Mini Blackberry Lavender Cheesecakes, store them in an airtight container in the refrigerator for up to 5 days. If you want to keep them longer, consider freezing them; just wrap each mini cheesecake tightly in plastic wrap and place them in a freezer-safe bag or container. They can last for up to three months in the freezer. When reheating, allow them to thaw in the refrigerator overnight and serve cold for optimal taste.

Make Ahead Strategies

These mini cheesecakes are excellent for make-ahead strategies. You can prepare them a day or two in advance, allowing them to set and chill thoroughly. Simply follow the recipe through to baking, then let them cool and store them in the fridge. When ready to serve, add the blackberry topping and any additional garnishes for freshness. If making the crust ahead of time, consider assembling it right before baking to maintain a crisp texture.

Scaling Instructions

Scaling this recipe can be a breeze! If you’re looking to halve the recipe, simply divide all ingredient amounts by two for outstanding results. For doubling or tripling, ensure you have appropriate size muffin tins, and adjust the baking time as needed. Keep in mind that larger batches may require slightly more time in the oven. Also, ensure to store any extras following the appropriate guidelines mentioned earlier.

Nutritional Deep Dive

A nutritional analysis of Mini Blackberry Lavender Cheesecakes reveals a balanced macro breakdown; each mini cheesecake contains approximately 150 calories, with a significant contribution from healthy fats and carbohydrates from the crust and berries. Blackberries provide health benefits, like increased fiber and antioxidant levels, contributing positively to heart health and digestion. Moderation is key, especially for those managing caloric intake, but with nutritious ingredients, they can fit into a balanced diet nicely.

Dietary Adaptations

For gluten-free adaptations, swap out the traditional graham cracker crust for gluten-free options. If you’re looking for a vegan version, substitute dairy ingredients with plant-based alternatives, such as almond cream cheese or coconut yogurt. For low-carb or keto followers, use almond flour as a crust base and reduce sugar by opting for natural sweeteners like erythritol. Furthermore, these mini cheesecakes can cater to the paleo community by using coconut milk and honey for a natural sweetening alternative.

Troubleshooting Guide

If you find your cheesecake isn’t setting properly, check oven temperature accuracy and make sure you’re using the correct ingredients and measurements. For texture issues, overmixing can lead to a grainy consistency; use gentle folding methods while preparing your filling. If your cheesecakes crack during baking, cooling them gradually in the oven can help prevent this issue. Lastly, for flavor balance, remember that both lavender and berries can be potent; adjust these ingredients finely to suit your palate.

Recipe Success Stories

Community feedback on this Mini Blackberry Lavender Cheesecake recipe has been overwhelmingly positive, with many bakers praising its ease and impressive results. Readers have shared their unique variations, including using other berries, and the response has been delightful. One user noted how the lavender provided a sophisticated elementary profile that amazed their guests at a recent family gathering. Photography tips shared by the community highlight the importance of natural light and careful composition, noting that these desserts photograph beautifully.

Frequently Asked Questions

Can I use frozen blackberries instead of fresh?

Yes, frozen blackberries can be used in this recipe, though they may have a slightly softer texture. Thaw them before use and drain any excess moisture.

Can these cheesecakes be made dairy-free?

Absolutely! You can substitute regular cream cheese with dairy-free alternatives like cashew cream or almond-based cream cheese for a vegan-friendly option.

How should I store leftover cheesecakes?

Store leftovers in an airtight container in the refrigerator for up to 5 days or freeze for up to 3 months. Thaw in the fridge before serving.

What can I use as a substitute for lavender?

If you’re not a fan of lavender, consider using vanilla extract or citrus zest to provide flavor without floral notes.

Can I make this recipe without the crust?

While the crust adds flavor and texture, you can make a crustless version by simply cooking the filling in greased muffin tins for a gluten-free variation.

How do I know when my cheesecakes are done?

Mini cheesecakes are done when the edges are set and the center has a slight jiggle. They will continue to set while cooling.

Is there a way to make these cheesecakes keto-friendly?

For a keto version, use a nut-based crust, like almond flour and butter, and substitute the sugar with erythritol or stevia.

What toppings pair well with these cheesecakes?

Besides the blackberry compote, consider using whipped cream, fresh mint leaves, or shaved chocolate to enhance the presentation and flavor.

Can I prepare the cheesecake batter in advance?

Yes, you can prepare the cheesecake filling in advance and store it in the refrigerator. Fill the crusts right before baking for the best results.

Are there any seasonal variations I can try?

Yes! In the fall, consider adding pumpkin puree and spices for a seasonal twist, while in winter, pomegranate seeds lend a festive touch.

Additional Resources

For more delightful dessert recipes, check out our collection of cheesecake variations that can inspire you in the kitchen. Explore technique guides on making graham cracker crusts or flour alternatives for gluten-free baking. Ingredient information about seasonal fruits and their benefits can help elevate your baking, while equipment recommendations ensure you have the right tools for perfect results. Seasonal variations for your favorite dishes can inspire creativity in your culinary adventures.

Join the Conversation

Share your Mini Blackberry Lavender Cheesecake creations on social media and tag us! We love seeing your photography and hearing your feedback. Join our community by leaving comments about your experience and any variations you’ve made to the recipe. Share your unique tips for keeping the cheesecakes fresh and how they’ve dazzled your guests at gatherings. Together, let’s celebrate the joy of baking!

The Recipe

Mini Blackberry Lavender Cheesecakes

Serves: 12 Mini Cheesecakes

Prep Time: 25 mins

Cook Time: 20 mins

Total Time: 45 mins

Kitchen Equipment Needed

  • Muffin tin
  • Mixing bowls
  • Electric mixer
  • Rubber spatula
  • Measuring cups and spoons

Ingredients

  • 1 cup graham cracker crumbs
  • 1/4 cup melted butter
  • 2 cups cream cheese, softened
  • 1/2 cup sugar
  • 1 teaspoon vanilla extract
  • 2 large eggs
  • 1 cup fresh blackberries (plus extra for topping)
  • 1 tablespoon culinary lavender
  • 1 tablespoon lemon juice

Directions

  1. Preheat your oven to 325°F (160°C).
  2. In a mixing bowl, combine the graham cracker crumbs and melted butter, then press the mixture into the bottom of each muffin tin cup.
  3. In another bowl, beat together the cream cheese and sugar until smooth and creamy.
  4. Add the vanilla extract, eggs, lemon juice, and culinary lavender, mixing until just combined.
  5. Gently fold in the fresh blackberries.
  6. Pour the cheesecake mixture over the crust in each muffin cup, filling them about three-quarters full.
  7. Bake in the preheated oven for 15-20 minutes or until the edges are set but the centers still jiggle.
  8. Turn off the oven and let the cheesecakes cool inside for an additional 30 minutes with the oven door slightly ajar.
  9. Chill in the refrigerator for at least 2 hours before serving. Top with additional blackberries and a sprinkle of lavender as a garnish.

Recipe Notes

  • For a thicker crust, increase graham cracker crumbs to 1.5 cups.
  • Adapt the amount of lavender to suit your taste; start with less for a milder flavor.
  • These mini cheesecakes freeze beautifully; wrap each cheesecake in plastic wrap before storing in an airtight container.

Best Mini Blackberry Lavender Cheesecakes for Parties

Mini Blackberry Lavender Cheesecakes: A Delightful Dessert Experience

⚖️
Difficulty
Medium

⏲️
Prep Time
20 mins

🕒
Cook Time
25 mins

⏱️
Total Time
45 mins

🍽️
Servings
12 mini cheesecakes

Indulge in the delicate flavors of these Mini Blackberry Lavender Cheesecakes, a perfect blend of creamy cheesecake, aromatic lavender, and tart blackberries. Each mini cheesecake is a bite-sized delight that boasts a velvety texture and a colorful presentation, making them an excellent dessert choice for any occasion. The combination of lavender’s unique floral notes and the rich tanginess of cream cheese creates a symphony of flavors that will please your palate and impress your guests.

Whether it’s a cozy dinner party, a special celebration, or simply a personal treat, these cheesecakes deliver both decadence and charm. The mini size allows you to savor every bite without feeling overwhelmed, while the fresh blackberries add a pop of color and freshness. Enjoy the delightful aroma that fills your kitchen as these little treats bake, promising a memorable ending to any meal.

Quick Recipe Highlights

  • Flavor Profile: These cheesecakes offer a unique and balanced flavor profile, merging sweet and tart blackberries with subtle hints of floral lavender, creating an elegant dessert that’s simply unforgettable.
  • Texture: Experience a smooth and creamy filling atop a crumbly graham cracker crust, resulting in a delightful contrast that melts in your mouth.
  • Aroma: The fragrant aroma of baked lavender blossoms as the cheesecakes cook, enhancing the overall sensory experience of this dessert.
  • Visual Appeal: The vibrant purple of the blackberry topping, combined with the understated cream of the cheesecake, makes for an inviting dessert that’s a feast for the eyes.
  • Skill Level Needed: This recipe is suitable for home bakers with a basic understanding of cheesecake preparation, perfect for those ready to elevate their dessert game.
  • Special Equipment: A muffin tin, mixing bowls, and an electric mixer are the main tools needed for this delightful dessert.

Recipe Overview

  • Difficulty Level: With a moderate difficulty level, these Mini Blackberry Lavender Cheesecakes require some attention to detail, making them a fun challenge for intermediate bakers.
  • Category: This recipe falls under the dessert category, ideal for brunches, dinner parties, or as a sweet treat on a casual day.
  • Cuisine: Rooted in American baking traditions, these cheesecakes are inspired by French culinary nuances that bring elegance to a comfort food favorite.
  • Cost: The approximate cost for this recipe is quite reasonable, with ingredients mainly being staples like cream cheese and graham crackers.
  • Season: These cheesecakes shine particularly in late summer when blackberries are in season, offering the freshest fruit flavor.
  • Occasion: Perfect for celebrations, picnics, or even a sweet addition to a holiday meal, these cheesecakes are versatile enough for any ambiance.

Why You’ll Love This Recipe

One of the standout features of the Mini Blackberry Lavender Cheesecakes is their delightful taste and texture. The smooth, creamy filling provides a luxurious mouthfeel complemented by the vibrant burst of fresh blackberries atop each mini cheesecake. The addition of lavender elevates the traditional cheesecake experience, transforming it into a sophisticated dessert that excites the palate. This unique flavor combination is both refreshing and satisfying, making every bite a memorable experience.

Convenience plays a significant role in the appeal of this recipe. The mini size allows for quick preparation and easy serving, making these cheesecakes an excellent choice for gatherings or personal treats. Additionally, they can be made ahead of time and stored, freeing you up on the day of your event. Simply prepare, chill, and serve when you’re ready, providing the ultimate hassle-free dessert solution.

Beyond being delicious, Mini Blackberry Lavender Cheesecakes also pack several nutritional advantages. Blackberries are rich in vitamins, fiber, and antioxidants, contributing to a healthier dessert option. While indulgent, the portion-controlled mini format encourages moderation without sacrificing flavor, allowing you to enjoy a treat while being mindful of your dietary choices.

These mini cheesecakes also shine when it comes to social occasions. Their small size not only makes for beautiful presentation but also encourages sharing, drawing people together over delicious bites. They invite conversation and can be enjoyed by all ages, making them the perfect addition to any gathering, whether a summer soirée or a family birthday celebration.

Cost-effective and accessible, this recipe uses common ingredients readily available at most grocery stores. This makes it easy for anyone to create these delightful desserts without breaking the bank. The balance of flavor and indulgence offers a luxurious experience that feels special yet remains within reach for everyday bakers.

Historical Background and Cultural Significance

Cheesecake has a rich history that dates back to ancient Greece, where it was served to athletes during the first Olympic Games. The original recipes have evolved over the centuries, transitioning through various cultures, including the Romans who enjoyed their baked versions. The American cheesecake we know today likely took shape in the 19th century, primarily influenced by European settlers who adapted their recipes using available local ingredients.

The inclusion of lavender in cheesecake is a relatively modern twist, drawing inspiration from the French culinary tradition. Lavender has long been celebrated in various dishes and desserts for its aromatic qualities and potential health benefits. It adds a distinctive flavor that was often overshadowed in classic recipes, but today it brings a refreshing finish that elevates traditional desserts into gourmet territory.

Over time, cheesecake recipes have significantly evolved, with countless variations and adaptations overwhelming the dessert landscape. Miniature versions have gained popularity, allowing for elegant presentations suitable for modern dining aesthetics. These size variations cater to contemporary social dining trends, where lighter, more manageable desserts are preferred, especially for events with multiple courses.

Regional variations also emerge in the cheesecake world, with many cultures adding their unique touch. From New York-style cheesecakes renowned for their dense creaminess to lighter Italian versions using ricotta, the possibilities are endless. This Mini Blackberry Lavender version beautifully marries these influences, resulting in a dessert that embodies both comfort and sophistication.

Ingredient Deep Dive

Blackberries: These delicious berries are not just packed with flavor; they also boast several health benefits, including high vitamin C content and antioxidants. When selecting blackberries, look for plump, shiny, and deep-colored fruits with no signs of mold. Store them in the fridge but consume them within a few days for the best freshness.

For a delightful twist, consider substituting blackberries with blueberries or raspberries, keeping in mind the flavor and sweetness levels may vary slightly. Use fresh berries whenever possible to enhance the overall taste of your cheesecakes.

Lavender: Often associated with beauty and aroma, culinary lavender adds a unique flavor to desserts. This herb has been used in various traditional dishes worldwide, particularly in French cuisine. When using lavender, be sure to choose culinary-grade varieties, as not all lavender is suitable for consumption. Store dried lavender in a cool, dark place, and be cautious with quantities as its flavor can be potent.

Lavender pairs wonderfully with various flavors, especially citrus, making it easier to customize this recipe according to your preference. If lavender isn’t easily accessible, you can replace it with lemon zest for a citrusy touch.

Cream Cheese: This versatile ingredient is the base of the cheesecake, offering a creamy consistency and delicious tang. Cream cheese is a staple in desserts and can be found in most grocery stores. Ensure to use full-fat cream cheese for the best results, as low-fat versions may alter the texture and flavor of your cheesecake.

While traditional cream cheese is preferred, you could explore alternatives such as mascarpone or ricotta for a different texture. Be cautious when substituting to ensure your cheesecakes maintain their creamy richness.

Common Mistakes to Avoid

  • Overmixing the Cheesecake Mixture: Mixing too much can introduce air, leading to cracks during baking. Aim for a smooth texture without excessive mixing.
  • Skipping the Resting Time: Allow the cheesecake to rest in the fridge after baking. This helps to set properly and develop flavors, improving overall enjoyment.
  • Underbaking: Resist the urge to take mini cheesecakes out too early. They should be set but slightly jiggly in the center before cooling, ensuring the perfect creamy texture.
  • Using Cold Ingredients: Ensure all your ingredients are at room temperature before mixing. This helps achieve a smooth and well-combined mixture.
  • Not Greasing the Muffin Tin: Prevent sticking by greasing your muffin tin properly, ensuring an easy release for the mini cheesecakes.
  • Forgetting to Preheat: Always preheat your oven before baking; not doing so can result in uneven cooking.
  • Rushing Cooling Time: Cooling should be gradual. Rushing this step can lead to cracks and affect the texture.
  • Improper Storage: Ensure mini cheesecakes are well-wrapped or covered to avoid freezer burn if storing in the freezer. This protects quality and flavor.
  • Using Low-Fat Ingredients: Using non-full-fat ingredients can alter the dessert’s texture and flavor, compromising its luxurious feel.
  • Not Tapping Out Air Bubbles: Before baking, gently tap your muffin tin on the counter to release any air bubbles trapped in the filling.

Essential Techniques

Achieving the Right Texture: It’s crucial to strike the perfect balance between preparing a creamy filling and limiting air incorporation. Begin by mixing gradually, and stop as soon as all ingredients are combined. Look for a creamy consistency without any lumps, but avoid over-mixing to keep the texture smooth.

Baking in a Water Bath: Using a water bath for baking helps moderate the temperature around the cheesecakes, ensuring they bake evenly without developing cracks. To master this technique, wrap your muffin tin with aluminum foil to prevent water from seeping in. Place it in a larger pan and fill it with water before baking.

Pro Tips for Perfect Mini Blackberry Lavender Cheesecakes

1. Always chill the cheesecakes overnight for improved texture and flavor development.

2. Add a touch of lemon juice to the cheesecake mixture for enhanced freshness.

3. Use a quality cream cheese for the best taste; brands differ significantly in flavor and texture.

4. Decorate with fresh blackberries and a sprig of lavender on top for an elegant presentation.

5. If you want extra flavor, consider using infused oils or extracts to enhance the cheesecakes.

6. Use a food processor for making graham cracker crust for a finely ground mixture.

7. If you want to reduce sweetness, adjust the sugar levels gradually, tasting along the way.

8. Finally, serve these desserts in decorative mini cups for an appealing party treat!

Variations and Adaptations

For those who enjoy regional variations, consider incorporating other berries such as raspberries or strawberries in place of blackberries. Each berry offers a unique flavor profile that marries beautifully with lavender.

Seasonal adaptations can include swapping lavender with warm spices like cinnamon or ginger, giving a cozy twist to these cheesecakes during fall or winter gatherings.

Dietary modifications are easily achievable; for a gluten-free version, use gluten-free graham crackers for the crust. Likewise, a dairy-free version can be made using nut-based cream cheese alternatives.

Flavor variations can encompass using different extracts like almond or vanilla to complement the cheesecake base. For added texture, consider folding in crushed cookies or nuts into the filling.

For presentation alternatives, serve your cheesecakes in mini jars or cups, allowing for creative garnishing and easy serving options. Each mini garnish enhances both visual and taste appeal!

Serving and Presentation Guide

When plating your Mini Blackberry Lavender Cheesecakes, serve them on a colorful plate or platter to enhance their visual appeal. Garnishing with fresh blackberries on top and a sprinkle of edible flowers can create an elegant dessert display.

For added flair, drizzle a lavender simple syrup or berry coulis around the plate, enhancing the aesthetic while adding a complementary flavor burst. Don’t forget to consider temperature; chill your cheesecakes to enhance their creamy texture and flavor before serving.

Controlling portion sizes is crucial for light desserts; serve one mini cheesecake per person for a satisfying yet not overwhelming treat. Consider offering a selection of mini desserts for an enticing dessert table during parties or gatherings.

Wine and Beverage Pairing

When it comes to wine pairings, a sparkling Prosecco or a light Rosé enhances the floral notes and berry flavors of the cheesecakes beautifully. Their refreshing characteristics complement the dessert, offering a fabulous balance.

If you’re looking for non-alcoholic alternatives, consider pairing with iced hibiscus tea, which echoes the floral essence of lavender, or a berry-infused lemonade that harmonizes well with the cheesecake’s flavors.

For coffee or tea lovers, a cup of light Earl Grey, with its subtle citrus and bergamot notes, pairs wonderfully with the lavender notes in the cheesecake. Serving it at a slightly warmer temperature creates a soothing finish to the meal.

Storage and Shelf Life

Proper storage of Mini Blackberry Lavender Cheesecakes is crucial for maintaining their quality. Store them in an airtight container in the refrigerator, where they will stay fresh for up to five days. Make sure to keep them well-covered to prevent them from absorbing odors.

For longer storage, these cheesecakes can be frozen. Wrap each cheesecake individually in plastic wrap and then place them in a freezer-safe container. They will last about two months in the freezer. When ready to enjoy, thaw them overnight in the refrigerator.

Signs of spoilage include a change in texture or unusual odors, so always inspect your cheesecakes before consuming. Reheating is generally not recommended, as it can alter the smooth texture of the cheesecake.

Make Ahead Strategies

For those planning ahead, the Mini Blackberry Lavender Cheesecakes can be prepared up to two days in advance. After baking, cool them completely before wrapping each one in plastic wrap and refrigerating.

While assembling, consider making graham cracker crusts ahead of time and storing them in the refrigerator. This approach streamlines the preparation process on the day of serving, allowing you to focus on the cheesecake filling.

Adding fresh elements like blackberries or a drizzle of sauce should be done right before serving, ensuring optimal freshness and visual appeal to your cheesecakes.

Scaling Instructions

When it comes to scaling this Mini Blackberry Lavender Cheesecake recipe, you can easily halve or double the ingredients to suit your service needs. For halving, keep track of measurements accurately to maintain the flavor balance.

For doubling or tripling, ensure you have the right size of muffin tins or baking pans to accommodate the increased volume. Adjust baking times as needed, monitoring the cheesecakes closely to prevent overcooking.

Take note of any adjustments in timing for cooling and serving based on the total number of cheesecakes prepared, ensuring you maintain the desired temperature and texture for optimal enjoyment.

Nutritional Deep Dive

This recipe offers a balanced breakdown of macros, with a significant portion of healthy fats coming from cream cheese and nutritional benefits from blackberries. The inclusion of blackberries contributes fiber, vitamin C, and antioxidants beneficial for overall health.

Micronutrient analysis ensures that while this dessert is a treat, the ingredients also provide essential vitamins and minerals. It’s an excellent option that allows for indulgence without a complete disregard for nutritional content.

Considering dietary benefits, moderation is key. Understanding portion sizes can help maintain a healthy diet while indulging in this succulent dessert. Each mini cheesecake provides just enough satisfaction along with the delightful fresh fruit.

Dietary Adaptations

If you’re looking for gluten-free variations, simply replace the graham crackers with gluten-free alternatives, which are widely available. This keeps the delicious taste while accommodating specific dietary needs.

For a dairy-free adaptation, there are several cream cheese alternatives on the market made from nuts or soy that work equally well, allowing lactose-intolerant individuals to enjoy this dessert.

Vegans can achieve similar results by using plant-based cream cheese and a plant-based crust, making these cheesecakes suitable for various dietary restrictions and preferences.

These cheesecakes can also cater to low-carb or keto diets; substitute regular sugar with low-carb sweeteners and use almond flour for the crust, maintaining flavor while reducing carbohydrates.

Troubleshooting Guide

Texture issues can arise if over-mixing or underbaking occurs. If your cheesecakes are too dense, ensure you’re mixing until just combined rather than whipping air into the filling. If they’re too airy, consider checking your baking temperatures and times.

Flavor balance can be adjusted after baking; if too sweet, consider topping them with tart fruit compote or a drizzle of yogurt to enhance flavors. In the opposite case, add sweetness through topped honey or a simple syrup drizzle.

Temperature problems stem largely from baking or cooling conditions. Ensure your oven is calibrated properly and allow your cheesecakes to cool gradually to avoid cracks from sudden temperature changes.

Recipe Success Stories

Readers have shared numerous positive experiences creating these delightful cheesecakes, many celebrating successful flavor variations. Some have opted for additional fruits or spices, receiving rave reviews from friends and family.

Photography tips have been beneficial for those looking to showcase their creations online. A sprinkle of powdered sugar and strategic placement of fresh berries leads to Instagram-worthy results.

Adaptation stories highlight the versatility of this recipe, with individuals modifying ingredients based on personal preferences while successfully keeping the essence of the dessert intact.

Frequently Asked Questions

Can I substitute the blackberries with other fruits?

Yes, you can easily swap blackberries for raspberries, blueberries, or strawberries based on your preference or seasonal availability. Each fruit brings its flavor profile, complementing the lavender beautifully.

How should I store leftover mini cheesecakes?

Store them in an airtight container in the refrigerator to maintain freshness for up to five days. If you want to keep them longer, consider freezing them for up to two months.

Can I make these cheesecakes dairy-free?

Absolutely! You can use plant-based cream cheese alternatives and ensure your crust is also dairy-free or gluten-free, depending on your dietary preferences.

What can I do if my cheesecakes crack?

Cracks usually occur due to rapid temperature changes. To prevent this, ensure your cooling is gradual. Additionally, using a water bath during baking helps regulate temperature and minimizes cracks.

Can I prepare these in advance for a party?

Yes, you can prepare these mini cheesecakes up to two days in advance. Just ensure they are well covered in the refrigerator until you’re ready to serve them.

What’s the best way to garnish these cheesecakes?

Apt garnishing options include fresh berries, a sprinkle of edible flowers, or a drizzle of lavender-infused syrup to showcase their delightful flavors and create an appealing presentation.

What equipment do I need for this recipe?

You’ll need a muffin tin, mixing bowls, an electric mixer, and basic measuring tools. A food processor can also be handy for making the crust.

How do I know when my cheesecakes are done baking?

Look for the edges to be set while the centers still jiggle slightly, which indicates they’re ready to cool and will firm up as they chill.

Can I use fresh lavender in the cheesecake?

While fresh lavender can be used, it has a more potent flavor than dried. Use sparingly and ensure it’s culinary-grade to avoid any harmful varieties.

What if I don’t have a muffin tin?

If a muffin tin isn’t available, you can use a baking dish with parchment paper cut to fit or mini ramekins for adorable individual servings.

Additional Resources

For more delightful recipes, consider exploring themed dessert collections or seasonal baking guides that can inspire your next culinary adventure. Various technique guides on baking, decorating, and ingredient substitutions provide helpful insights for mastering your baking skills.

Additionally, ingredient information on unusual cooking components, like lavender or specific fruits, can enhance your understanding and appreciation of what goes into your food. Recommendations for baking tools and equipment can also elevate your kitchen experience.

Seasonal variations can guide you through adapting this recipe based on what’s freshest at the market, ensuring that you can make the most of your cooking endeavors year-round.

Join the Conversation

Sharing your Mini Blackberry Lavender Cheesecake creations on social media can help inspire others and spread the joy of baking. Tagging your posts with unique hashtags could help gather a community of dessert lovers.

Photography tips for showcasing your dishes encourage creativity in your presentation, always making the process more enjoyable. Engage with others through comments and tips; sharing your experiences enriches the community.

Recipe reviews and feedback allow bakers to share their unique modifications or successful attempts, highlighting the versatility of this dish. Contributing to the conversation can spark new ideas, encouraging a dynamic cooking experience for everyone.

The Recipe

Mini Blackberry Lavender Cheesecakes

Serves: 12 mini cheesecakes

Prep Time: 20 mins

Cook Time: 25 mins

Total Time: 45 mins

Kitchen Equipment Needed

  • Muffin tin
  • Electric mixer
  • Mixing bowls
  • Measuring cups and spoons
  • Food processor (optional)

Ingredients

  • 1 cup graham cracker crumbs
  • 1/4 cup unsalted butter, melted
  • 2 tablespoons sugar
  • 2 (8 oz) packages cream cheese, softened
  • 1 cup sugar
  • 1 teaspoon vanilla extract
  • 2 large eggs
  • 2 tablespoons lavender, dried and culinary-grade
  • 1 cup blackberries, fresh

Directions

  1. Preheat your oven to 325°F (160°C). Line a muffin tin with cupcake liners.
  2. In a bowl, combine graham cracker crumbs, melted butter, and sugar. Mix until well combined.
  3. Press the crumb mixture into the bottom of each cupcake liner. Bake for 10 minutes and let cool.
  4. In a mixing bowl, beat the softened cream cheese with sugar until smooth. Add vanilla and mix well.
  5. Incorporate eggs one at a time, mixing well after each addition. Then gently fold in dried lavender.
  6. Distribute the cheesecake batter over the cooled crusts, filling each about 2/3 full.
  7. Bake for 25 minutes, until set but still slightly jiggly in the center. Let cool completely.
  8. Top each cheesecake with fresh blackberries before serving or drizzling a lavender syrup to enhance flavors.

Recipe Notes

  • For added flavor, consider switching the blackberries with other berries!
  • Store any leftover cheesecakes in an airtight container in the refrigerator for up to five days.
  • These cheesecakes can be made a day ahead for easy party preparation!