Delicious Butterfinger Caramel Crunch Cookies: A Sweet Treat for Everyone
Butterfinger Caramel Crunch Cookies are the perfect blend of sweet, creamy, and crunchy, making them a delightful addition to any dessert table or as a special treat for your loved ones. These cookies are not only incredibly easy to make but also bring the irresistible flavors of Butterfinger and rich caramel together in one delicious bite. Imagine the soft, buttery cookie base paired with the crunchy toffee bits and a gooey caramel center—each bite is a dream come true for any cookie lover!
The nostalgic flavor of Butterfinger, with its unique peanut butter and chocolate combination, takes these cookies to a whole new level. The addition of caramel adds a luxurious touch, ensuring that your taste buds are treated to a delightful explosion of flavor. Whether you’re baking for a special occasion or just wanting to enjoy a sweet treat at home, these cookies are sure to impress family and friends alike.
Quick Recipe Highlights
- Flavor Profile: A delightful mix of buttery and crunchy with the irresistible sweetness of Butterfinger and rich caramel notes.
- Texture: Each cookie is soft and chewy with bursts of crunch from the candy pieces, creating a delightful contrast.
- Aroma: The delicious aroma of freshly baked cookies mingled with the comforting scent of caramel wafts through your kitchen.
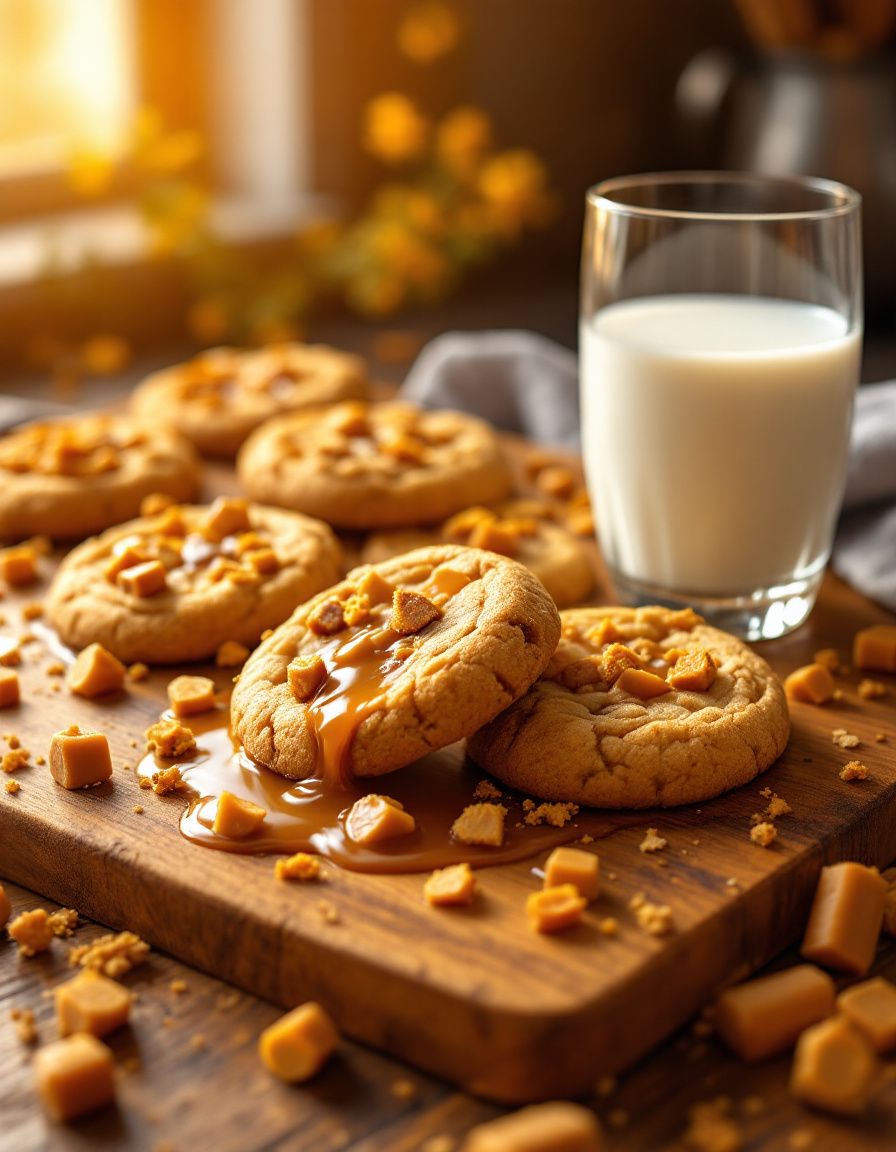
- Visual Appeal: Golden-brown, chunky cookies studded with vibrant orange-yellow Butterfinger pieces create an inviting sight.
- Skill Level Needed: Perfect for beginner bakers; simply mix, scoop, and bake for delicious results!
- Special Equipment: Standard baking sheets and mixing bowls are all you need, making this recipe accessible to anyone.
Recipe Overview
- Difficulty Level: These Butterfinger Caramel Crunch Cookies are considered easy to make, requiring only basic baking skills and minimal effort, making them accessible for bakers of all levels.
- Category: This recipe falls under cookies and desserts, perfect for snacks, gatherings, or special occasions.
- Cuisine: While American in origin, the inspiration for these cookies can be traced back to classic candy and dessert combinations, showcasing the fusion of flavors.
- Cost: Making these cookies is budget-friendly, requiring only a few simple ingredients and yielding a generous amount for sharing.
- Season: These cookies are delightful year-round but can be especially enjoyable during holidays and celebrations when sweet treats are in demand.
- Occasion: Ideal for birthdays, holiday parties, or simply as a weekend treat to indulge in the joys of baking.
Why You’ll Love This Recipe
Butterfinger Caramel Crunch Cookies are an experience for your palate, combining sweetness, richness, and a satisfying crunch in every bite. The creamy texture of the butter and wet ingredients meld perfectly with the decadent caramel and Butterfinger pieces, resulting in a treat that is both comforting and indulgent. Whether enjoyed warm out of the oven or slightly cooled, these cookies are a must-try for anyone with a sweet tooth.
Convenience is another reason to fall in love with this butterfinger cookie recipe. With a minimal prep time of just 15 minutes and a quick bake time, you can have freshly baked cookies ready in no time. Perfect for last-minute gatherings or a spontaneous craving, these cookies provide satisfying rewards with little effort.
Nutritionally, while indulgent, Butterfinger Caramel Crunch Cookies can be a source of enjoyment in moderation. The incorporation of butter provides energy, while the sugar offers an instant boost. Using quality ingredients ensures that you indulge in a treat made with love.
Socially, these cookies are ideal for sharing and will definitely make you the star of any gathering. Bake a batch for a bake sale, bring them to a potluck, or surprise your coworkers with a homemade dessert. The joy of sharing delicious treats fosters connections and creates memorable moments.
Finally, the cost-effectiveness of this recipe cannot be overlooked. With simple ingredients that are easy to find in any grocery store, you won’t have to break the bank to whip up a batch of delicious cookies. You can also modify the recipe according to what you have on hand, ensuring that everyone has a chance to enjoy these delightful treats.
Historical Background and Cultural Significance
The origins of cookies can be traced back to ancient civilizations, but the specific idea of combining peanut butter and chocolate into thrilling sweet treats began gaining popularity in the early 20th century. Butterfinger itself was first introduced in 1923, capturing the hearts of candy lovers across America with its uniquely crunchy texture.
Culturally, candy bars, including Butterfinger, have held a festive place in American traditions, often featured during Halloween or as treats in school lunches. The integration of such beloved candies into baking connects generations by providing a nostalgic experience for those who grew up indulging in them.
Over the years, recipes using Butterfinger have evolved, moving from simple no-bake desserts to baked treats like bars and cookies, which allows for creative exploration in the kitchen. Each adaptation showcases the versatility of the candy while offering delicious new ways to savor it.
Regional variations of butter-themed and caramel-based desserts can be found in different cuisines, highlighting the universal love for sweet flavors encapsulated within this recipe. From chewy bars to crispy cookies, the Butterfinger has made its mark as an adaptable ingredient loved by many.
Ingredient Deep Dive
– Butter: This key ingredient not only adds richness but also moisture to the cookies. Historically significant in baking, butter enhances flavor while adding a tender texture. For better quality, choose unsalted butter and store it in a cool place, ideally wrapped tightly to maintain freshness.
– Sugar: Sugar is essential for sweetness and helps achieve that golden-brown color. Using a mix of brown and granulated sugar contributes to a deeper flavor. Always keep sugar in a cool, dry container to prevent clumping, and opt for organic varieties if possible for a pure taste.
– Eggs: Eggs bind the ingredients, providing stability and a soft texture. They’re an indispensable part of baking, and using room temperature eggs can enhance the mixing process. Always check for freshness through the float test before use.
– Flour: The backbone of any cookie, flour provides structure. All-purpose flour is typically used, but for a tender cookie, cake flour can be substituted. Store flour in an airtight container to maintain its quality and freshness.
– Butterfinger Bars: These bright orange candy bars provide taste and texture. Each bar adds a unique crunch, combined with chocolate and peanut butter flavors. When selecting bars, check the packaging for freshness, and opt for mini sizes for easier incorporation into the dough.
Common Mistakes to Avoid
- Overmixing the dough can lead to tough cookies. Mix just until combined for a soft texture.
- Not chilling the dough can result in flat cookies. Allow the dough to chill for about 30 minutes for better shape.
- Using cold ingredients can lead to inconsistent texture. Ensure that butter and eggs are at room temperature for optimal mixing.
- Not measuring ingredients accurately can affect the balance of the cookies. Use kitchen scales or measuring cups designed for dry and wet ingredients.
- Skipping parchment paper can lead to sticking. Always line your baking sheets for easy removal and cleanup.
- Ignoring the baking time can result in overcooked cookies. Bake just until the edges are golden for the perfect chewy center.
- Not preheating the oven can affect the spread and bake time of the cookies, leading to unexpected textures.
- Using outdated ingredients can compromise flavor and texture. Always check expiry dates before baking.
- Not allowing cookies to cool on the baking sheet can lead to a hard bottom. Let them sit briefly before transferring to a cooling rack.
- Underestimating the power of flavor enhancement. Adding a pinch of salt can elevate the overall taste!
Essential Techniques
– Mixing: Proper mixing is crucial to ensure an even distribution of ingredients which leads to consistent texture and flavor. Start mixing wet ingredients separately before combining with dry to avoid lumps.
– Chilling the Dough: Chilling the cookie dough helps improve texture and prevents them from spreading too much while baking. Aim for at least 30 minutes in the refrigerator to achieve the desired thickness.
– Scooping: Use a cookie scoop for uniform cookie sizes, ensuring even baking. A consistent size not only looks better but also bakes at the same rate.
– Baking: Always rotate your baking sheets halfway through baking for even browning. Each oven varies, so keep an eye on your cookies to avoid overbaking.
Pro Tips for Perfect Butterfinger Caramel Crunch Cookies
– Always use high-quality Butterfinger bars for maximum flavor impact and a satisfying crunch with each cookie bite.
– Experiment with brown sugar variations, such as light or dark, to adjust the depth of sweetness in your cookies.
– Consider adding a pinch of sea salt to the top of the cookies before baking for a sweet and salty contrast that’s irresistible.
– For an extra indulgent experience, try melting some chocolate to drizzle over the cookies once they have cooled completely.
– Store the cookies in an airtight container to keep them fresh and soft, and enjoy them within one week.
– If you’re feeling adventurous, replace some of the Butterfinger with another candy bar or nuts for a unique flavor twist.
– For fun presentations, shape the cookies into different forms and decorate them with colorful sprinkles on top before baking.
– Make a mini cookie sandwich by filling them with whipped cream or ice cream for a delightful dessert experience!
Variations and Adaptations
– Regional Variations: You might find recipes that substitute Butterfinger with regional candies, which can change the taste profile while still maintaining a similar crunch factor.
– Seasonal Adaptations: Incorporate seasonal flavors like pumpkin spice or peppermint during the respective holidays to create festive versions of these cookies.
– Dietary Modifications: Substitute all-purpose flour with gluten-free alternatives for a gluten-free version without sacrificing flavor.
– Flavor Variations: Experiment with different types of chocolate or candy bars, such as Crunch bars or Reese’s, for unique flavor combinations.
– Texture Modifications: For a chewier cookie, slightly underbake them and let them set on the baking sheet to maintain moisture.
– Presentation Alternatives: Add colorful frosting or drizzle chocolate on top for a unique visual appeal and enhance the flavor experience.
Serving and Presentation Guide
When serving Butterfinger Caramel Crunch Cookies, consider a family-style presentation on a tiered platter showcasing their golden-brown edges and vibrant candy pieces. Garnish the platter with mint leaves or dust with powdered sugar to elevate their visual appeal. Alternatively, place a stack of warm cookies in a rustic basket lined with parchment paper for a cozy, inviting look.
For added flair, pair these cookies with a scoop of vanilla ice cream or whipped cream, creating a delightful dessert experience. Consider serving them alongside a glass of cold milk or espresso to complement the flavors as well.
Temperature is key; cookies should be served slightly warm, as this allows the caramel to remain gooey and enhances the overall taste. When slicing into a cookie, the warm caramel center should flow, creating an enticing experience.
Lastly, keep portion control in mind when presenting these cookies at gatherings or parties. Offer small plates where guests can take one or two at a time, ensuring they can savor the moment while also allowing everyone to enjoy multiple treats.
Wine and Beverage Pairing
When it comes to pairing drinks with Butterfinger Caramel Crunch Cookies, consider rich beverages that complement their sweetness. A full-bodied dessert wine like a Port or a late-harvest Riesling will beautifully marry the flavors of caramel and chocolate, while their sweetness enhances the cookie’s richness.
For non-alcoholic options, a cold glass of milk is a classic pairing that never goes out of style, balancing the sweetness of the cookies perfectly. You might also enjoy herbal teas, like chai or peppermint, which bring warmth and a complex flavor profile that can enhance the cookie experience.
If you want a little twist, a coffee with a splash of cream can create a lovely contrast to the sweetness of the cookies. Serve these cookies warm alongside your favorite beverage for an indulgent treat any time of day.
Storage and Shelf Life
To keep your Butterfinger Caramel Crunch Cookies fresh for as long as possible, store them in an airtight container at room temperature. This will help maintain their soft texture and keep them deliciously chewy. When kept this way, the cookies can last for up to one week.
If you want to store the cookies for a longer time, freezing is an excellent option. Ensure they are completely cooled, then place them in a single layer within a freezer-safe bag or container, separating layers with parchment paper. Properly stored, they can last up to three months in the freezer.
Signs of spoilage include off odors or visible mold, which can occur if cookies are stored improperly. When you’re ready to enjoy your frozen cookies, allow them to thaw at room temperature or warm them slightly in the oven to regain their delightful texture.
Make Ahead Strategies
To save time on baking day, consider making your cookie dough ahead of time. After mixing, form the dough into individual cookie balls and flash freeze them. Once hardened, transfer the balls into a freezer-safe container for up to three months. This allows you to bake fresh cookies whenever the craving hits by simply preheating your oven and placing frozen cookie dough on a baking sheet.
Another strategy is to prepare the Butterfinger and caramel components in advance. Chop the candies and store them separately in airtight containers. You can also pre-measure your dry ingredients and combine them, facilitating a faster assembly on baking day.
When ready to bake, mix the prepped ingredients together and add them directly to the dough. This not only saves time but also enhances convenience for spontaneous baking.
Scaling Instructions
Scaling Butterfinger Caramel Crunch Cookies is a straightforward process. For halving the recipe, simply divide the ingredients by two, ensuring to adjust baking times if you change the number of cookies baked at once.
If you want to double or triple the recipe for larger gatherings, maintain ingredient proportions but consider using multiple baking sheets at one time, rotating them in the oven for even baking.
When scaling, be mindful of your mixing equipment capacity; larger batches might require a stand mixer for ease. Check that you have enough baking sheets and storage facilities to accommodate your increased cookie yield.
Lastly, when altering the quantity, watch your oven closely, as baking times may vary slightly based on the total number of cookies being prepared.
Nutritional Deep Dive
Butterfinger Caramel Crunch Cookies contain a range of macros that are essential for energy. Each cookie typically houses carbohydrates primarily from flour and sugars, providing a quick energy boost, while the butter adds healthy fats that enrich flavor.
When analyzing micronutrients, ingredients like eggs contribute protein and essential vitamins like B12 and riboflavin, making a cookie not just a treat but a source of valuable nutrients.
The inclusion of Butterfinger bars also provides a small boost of calcium and iron, while adding a moderate level of sugar. Enjoying these cookies in moderation can fit into a balanced diet, making them a fun indulgence for both children and adults.
Weight management tips involving these cookies focus on controlling portion sizes. Consider enjoying one or two cookies alongside a balanced meal or as part of a dessert experience rather than consuming several at once.
Dietary Adaptations
For those following a gluten-free diet, you can easily substitute all-purpose flour with gluten-free flour blends designed for baking. This allows you to enjoy the same delicious flavors without concern.
For dairy-free adaptations, opt for plant-based butter options and select dairy-free chocolate to ensure that no dairy products are used in the baking process.
Vegans can substitute eggs with flaxseed or chia seed mixtures, creating a similar binding effect while keeping the cookie plant-based.
Those on low-carb or keto diets might consider using almond or coconut flour paired with sugar alternatives, although results may vary in texture and flavor.
For paleo followers, a combination of almond flour and coconut sugar provides a delicious alternative that remains true to the principles of the diet.
Low-FODMAP dieters can also enjoy these cookies by selecting suitable ingredients and ensuring portion sizes are within recommended limits.
Troubleshooting Guide
If you’re experiencing texture issues, such as cookies being too dry, consider increasing the fat content slightly or checking your measuring accuracy. Add a tablespoon of water or milk if needed, and aim for a dough consistency that holds together but isn’t too sticky.
Flavor balance can be adjusted by incorporating a pinch of salt, which enhances the overall sweetness without making cookies taste salty. If they end up too sweet, a little drizzle of dark chocolate on top can round out the flavors.
Temperature problems often arise if your oven hasn’t been preheated thoroughly. Ensure it reaches the desired baking temperature before placing cookies inside to prevent uneven baking.
Equipment challenges can usually be solved by ensuring your baking sheets are lined or greased appropriately to prevent sticking. If you’re using different bakeware, adjusting the baking time may be necessary.
If you need to substitute an ingredient and are unfamiliar with ratios, do some quick research on suitable replacements to achieve similar results in texture and flavor.
Timing concerns can be mitigated by keeping a close eye on your cookies while they bake. If they aren’t ready when the timer goes off, set shorter increments to avoid overcooking.
Recipe Success Stories
Countless bakers have fallen in love with these Butterfinger Caramel Crunch Cookies, sharing success across social media platforms that feature the irresistible moment of pulling the cookies from the oven. Many have commented on the delightful aroma that wafts through the kitchen, creating an anticipatory atmosphere.
Variations have also been a huge hit, with readers experimenting by swapping Butterfinger for other candy favorites, reporting delicious outcomes and new household staples. Adaptation stories also highlight creativity, with sprinkles and other mix-ins making unique versions.
Readers have provided tips, from freezing the dough to enhancing flavor profiles with different spices, showcasing the community spirit around this beloved recipe. Photography tips shared amongst bakers have led to stunning dessert displays, capturing the allure of these cookies perfectly.
Ultimately, the culture surrounding these cookies continues to grow, uniting bakers in shared experiences and the joy of creating something special for both themselves and their loved ones.
Frequently Asked Questions
Can I use other candy bars in this recipe?
Absolutely! Feel free to swap out Butterfinger for other candy bars like Snickers or Twix for distinct flavors. Each candy brings its own sweetness and textural elements that can wonderfully enhance the cookie experience.
How can I make these cookies softer?
To achieve softer cookies, slightly underbake them and let them rest on the baking sheet for a few minutes after baking. This allows for residual heat to continue cooking them gently.
Is it necessary to chill the dough?
Chilling the dough isn’t mandatory, but it does help prevent excessive spreading during baking, leading to thicker cookies. It also enhances flavors as the dough rests.
How can I store leftover cookies?
Store remaining cookies in an airtight container at room temperature. They will maintain their freshness for up to a week, or you can freeze them for up to three months.
Can I freeze the cookie dough?
Yes, you can freeze the cookie dough! Form them into balls, flash freeze them on a baking sheet, and then transfer them to a freezer-safe bag. Bake from frozen, but add a couple of minutes to the cooking time.
What can I do if my cookies come out flat?
Cookies may spread too much if there isn’t enough flour or if the butter was too soft. Make sure to measure your ingredients carefully and chill the dough before baking.
What flour should I use for this recipe?
All-purpose flour works best, but for a gluten-free option, try a gluten-free blend designed for baking purposes to achieve similar textures.
Do I have to use Butterfinger bars?
No, you can substitute Butterfinger bars for any other similar chocolate-candy bars you enjoy. Just remember that it will change the flavor of the cookie.
Can I add nuts to this recipe?
Of course! Adding chopped nuts like walnuts or pecans can give extra texture and flavor, enhancing your cookies even further.
Is there a vegan version of these cookies?
Yes! You can substitute eggs with a flaxseed meal or chia seed mixture, and use plant-based butter to make them vegan-friendly.
Additional Resources
Explore additional recipes that emphasize sweet treats, such as chocolate chip cookies or brownies, which can provide exciting alternatives while using similar techniques and flavors.
Ingredient information can expand your knowledge about the items you are using, helping to understand the choices that lead to the best cookie outcomes and influences on taste.
Technique guides on baking and mixing can significantly aid in mastering essential baking skills, ensuring your creations come out perfect every time.
Consider equipment recommendations for baking that will streamline your cookie-making process, from high-quality mixing bowls to non-stick baking sheets designed for ease of use.
Lastly, seasonal variations for baking provide a delightful way to adjust your recipes to incorporate each season’s best flavors, keeping your baking exciting year-round.
Join the Conversation
We’d love to hear your thoughts on these Butterfinger Caramel Crunch Cookies! Share your baking experiences on social media, showcasing your creations and any variations you’ve tried. Engaging with our community allows for recipe modifications and exciting new ideas.
Photography tips are always welcome! Capture the delightful moments of your baking process and finished cookies to inspire others. Join our page and share your best shots for everyone to admire.
Leave recipe reviews detailing your experiences; it helps fellow bakers know what to expect and adds to the community spirit surrounding this cookie favorite. Your suggestions for improvements or adaptations are invaluable to all.
We’re eager to see how you personalize this recipe, so share your tales and try out others’ ideas in the quest for the best Butterfinger Caramel Crunch Cookie experience!
The Recipe
Butterfinger Caramel Crunch Cookies
Serves: 24 cookies
Prep Time: 15 mins
Cook Time: 10 mins
Total Time: 25 mins
Kitchen Equipment Needed
- Baking sheets
- Mixing bowls
- Cookie scoop
- Whisk
- Plastic wrap (for chilling)
Ingredients
- 1 cup unsalted butter, softened
- 3/4 cup granulated sugar
- 3/4 cup brown sugar, packed
- 2 large eggs
- 2 teaspoons vanilla extract
- 2 1/2 cups all-purpose flour
- 1 teaspoon baking soda
- 1/2 teaspoon salt
- 1 cup Butterfinger bars, chopped
- 1/2 cup caramel bits
Directions
- Preheat your oven to 350°F (175°C) and line baking sheets with parchment paper.
- In a large mixing bowl, cream together the softened butter, granulated sugar, and brown sugar until light and fluffy.
- Add in the eggs, one at a time, mixing well after each addition. Stir in the vanilla extract.
- In another bowl, whisk together the flour, baking soda, and salt.
- Gradually add the dry ingredients to the wet ingredients, mixing just until combined.
- Fold in the chopped Butterfinger bars and caramel bits until evenly distributed in the dough.
- Using a cookie scoop, drop rounded tablespoons of dough onto the prepared baking sheets, leaving space for spreading.
- Bake in the preheated oven for 10-12 minutes or until the edges are golden brown. The centers may appear slightly underbaked.
- Remove from oven and let cool for 5 minutes on the baking sheets before transferring to wire racks to cool completely.
Recipe Notes
- For best results, chill the dough for 30 minutes before baking to prevent excessive spreading.
- Store cookies in an airtight container to preserve their freshness.
- You can substitute caramel bits with homemade caramel for an extra touch of indulgence.
- The dough can be frozen for up to three months, so you can enjoy fresh cookies whenever you desire!