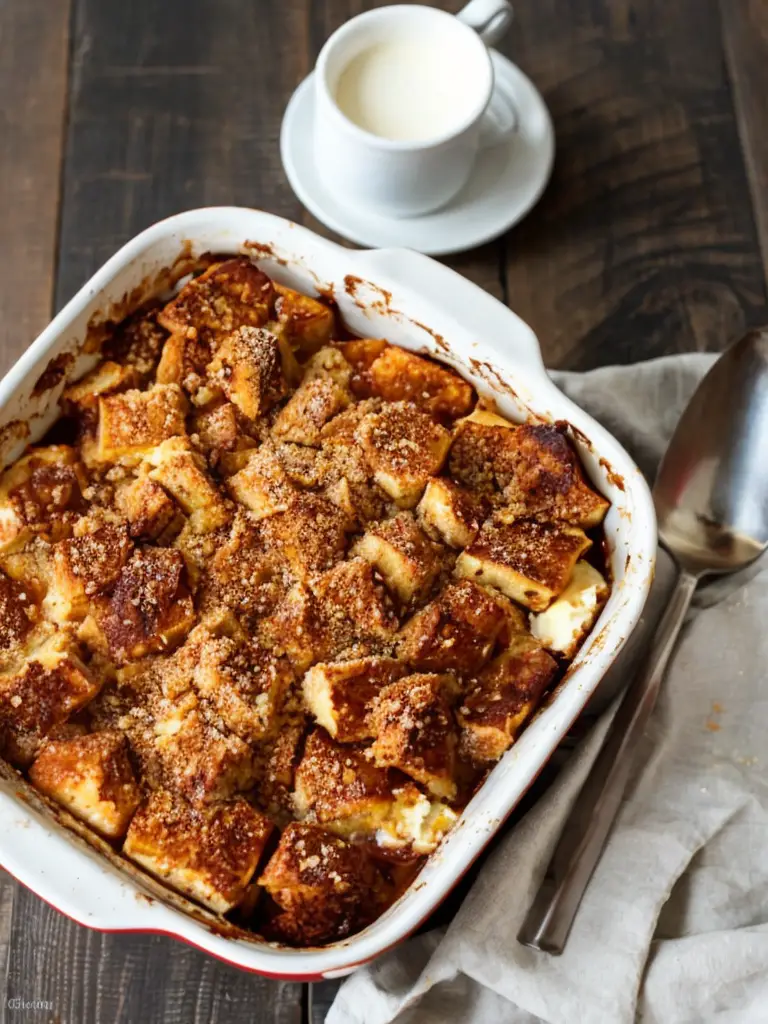
Delicious Avocado Toast with Cherry Tomatoes, Feta, and Walnuts

Avocado Toast with Cherry Tomatoes, Feta, and Walnuts: A Flavorful Breakfast Delight

⚖️
Difficulty
Easy

⏲️
Prep Time
10 mins

🕒
Cook Time
5 mins

⏱️
Total Time
15 mins

🍽️
Servings
2

Avocado toast has taken the culinary world by storm, and for good reason! This Avocado Toast with Cherry Tomatoes, Feta, and Walnuts is not only visually appealing but also a delightful explosion of flavors. The creamy richness of ripe avocado pairs exceptionally well with the burst of sweetness from juicy cherry tomatoes, tangy feta cheese, and crunchy walnuts, creating a symphony of taste in every bite. Whether you’re kickstarting your day with breakfast or enjoying a light lunch, this recipe delivers satisfaction and nutrition.

Imagine the aroma of toasted bread caramelizing in the oven as you prepare your toppings. The colors on this dish are vibrant and inviting: the lush green of the avocado, bright red tomatoes, and white feta crumbles create a feast for the eyes. Not only is this recipe quick to whip up, but it’s also packed with healthy fats, proteins, and essential nutrients, making it a well-rounded meal to fuel your day.

Quick Recipe Highlights

  • Flavor Profile: The interplay of creamy avocado, zesty tomatoes, and salty feta creates a balanced flavor that is both refreshing and satisfying.
  • Texture: Each bite offers a combination of creamy avocado, crispy bread, juicy tomatoes, and crunchy walnuts, enhancing the overall experience.
  • Aroma: The dish emits an enticing aroma of toasted bread coupled with fresh, earthy notes from the nuts and herbs.
  • Visual Appeal: The colorful ingredients layered on toasted bread make this dish a stunning centerpiece for any meal.
  • Skill Level Needed: This recipe requires minimal cooking skills, perfect for beginners and experienced cooks alike.
  • Special Equipment: You will need a toaster or oven for the bread, a cutting board, and a sharp knife for preparation.

Recipe Overview

  • Difficulty Level: This easy recipe is suitable for any cooking skill level, making it an accessible option for everyone.
  • Category: This recipe falls under breakfast or brunch, but it makes an excellent light lunch option as well.
  • Cuisine: Inspired by Mediterranean flavors, this dish highlights healthy, fresh ingredients commonly found in that region.
  • Cost: The ingredients are affordable and sourced easily, making this a budget-friendly meal.
  • Season: Fresh tomatoes are abundant during summer, but this recipe can be enjoyed year-round with proper ingredient selection.
  • Occasion: Ideal for casual weekends, brunch gatherings, or when you need a quick meal after a busy day.

Why You’ll Love This Recipe

Every bite of this avocado toast brings an exciting adventure of taste and texture. The creamy avocado acts as the perfect base, providing a satisfying mouthfeel that is complemented by the crunch of walnuts and freshness of tomatoes. This hearty, yet light dish caters to both simplicity and indulgence, making it a versatile option any time of the day.

Furthermore, preparation is a breeze! With just a few simple steps, you can enjoy a meal in under 15 minutes. This convenience makes it ideal for busy mornings when you need a nutritious breakfast without toiling in the kitchen. Mix and match ingredients to suit your palate, and enjoy personalized versions tailored to your taste preference.

Nutritionally, this avocado toast is a powerhouse meal. Avocados are rich in healthy monounsaturated fats, fiber, and essential vitamins like E and K. Pairing them with calcium-rich feta, and proteins from walnuts ensures this dish supports a balanced diet, likely contributing positively to heart health and weight management.

Socially, this dish offers great value, especially during brunch with friends. Its vibrant colors and pleasing presentation are bound to impress, encouraging lively conversation around the table. This recipe not only nourishes the body but also enriches social connections while enjoying a healthy meal.

Cost-effectiveness is another reason you will love this recipe! Using affordable, fresh ingredients, you can make this gourmet-style meal at home without breaking the bank. The simplicity of the dish, combined with its accessibility, makes it a great option for anyone looking to incorporate healthy eating habits into their lifestyle.

Historical Background and Cultural Significance

Avocado toast has its roots in the culinary traditions of various cultures that feature bread and spreads or toppings. The original essence stems from the Mediterranean, where the combination of bread with fresh produce is commonplace. Over the years, this simple pairing has evolved into a staple in many breakfast venues worldwide.

Culturally, avocado toast embodies a celebration of health and simplicity. Its rise to popularity has coincided with the global shift towards healthier eating habits. As people look for ways to incorporate more fresh ingredients into their diets, avocado toast stands as a symbol of wholesome, guilt-free eating and has fostered a large following on social media platforms, with countless variations celebrated.

The evolution of avocado toast is fascinating, moving from a simple breakfast item to a trendy dish that can be found in high-end cafes. Its journey has led it to the tables of food lovers, setting a trend that encourages the use of fresh, local ingredients, and sustainable food practices.

Regional variations of avocado toast are not uncommon. In various parts of the world, different toppings have surfaced, such as poached eggs in Australia or smoked salmon in Nordic countries. Each regional spin not only enhances the dish but celebrates local flavors and traditions.

Ingredient Deep Dive

Avocado

Avocados are celebrated not just for their rich, creamy texture but also for their nutritional value. They are a source of healthy monounsaturated fats, vitamins E, C, B6, and K. When selecting avocados, look for ones that yield slightly to pressure yet still have some firmness. Proper storage involves keeping them at room temperature until ripe, and once cut, they should be kept in an airtight container to prevent browning.

Cherry Tomatoes

Cherry tomatoes are often praised for their sweetness and are a versatile ingredient in many dishes. Nutritionally, they are low in calories but high in vitamins A, C, and K. When choosing cherry tomatoes, opt for those with vibrant colors and a firm texture. Store them at room temperature for optimal flavor, and if you have leftovers, keep them in the refrigerator, but consume them quickly to maintain freshness.

Feta Cheese

Feta cheese adds a salty tang and creamy texture to dishes, anchoring the flavor profile of this avocado toast. Its origins stem from Greek culinary traditions. Nutritionally, feta is lower in fat compared to many cheeses and provides a good source of calcium and protein. When selecting feta, look for fresh cheese with a clean taste. Store it in brine to maintain moisture and flavor. If you’re looking for alternatives, consider goat cheese or ricotta for similar textures and flavors.

Walnuts

Walnuts are not only essential for adding crunch to your toast but also boast a plethora of health benefits, including omega-3 fatty acids and antioxidants. When purchasing walnuts, select pieces that are plump and free of any rancid odor. To store, keep them in a cool, dry place, and consider refrigerating or freezing them for long-term use. If walnuts are not available, pecans or almonds serve as great substitutes in this recipe.

Common Mistakes to Avoid

  • Using overripe avocados: Ensure your avocado is ripe but not too mushy to maintain the perfect texture on your toast.
  • Under-seasoning: Don’t skip seasoning your avocado with salt and pepper to enhance its natural flavor.
  • Not toasting bread properly: Aim for a golden-brown toast; it adds a necessary crunch to balance the creaminess of the toppings.
  • Skipping the acid: A sprinkle of lemon juicebrightens the flavors, so don’t overlook this step.
  • Choosing stale bread: Fresh bread makes a significant difference in taste and texture—opt for a good quality loaf.
  • Piling on too many toppings: Keep the balance right; don’t overwhelm the avocado’s delicate flavor with excess ingredients.
  • Forgetting about presentation: Take the time to arrange the toppings thoughtfully for an appealing visual look.
  • Using generic oils: Invest in a good quality olive oil to drizzle on top for added richness and flavor.
  • Not adjusting texture: If you find the avocado too dense, consider mashing it with a fork or blending it for a smoother spread.
  • Serving at the wrong temperature: Enjoy your avocado toast immediately after preparation for optimal taste and texture.

Essential Techniques

Mashing Avocado

Mashing avocado is a crucial step if you prefer a creamy spread on your toast. To master this technique, use a fork to mash until smooth, adding a touch of lemon juice to prevent browning and enhance flavor. Avoid over-mashing to keep some chunks intact for texture. Visual cues for perfect mashed avocado include a vibrant green color without browning and a smooth, spreadable consistency.

Toasting Bread

Toasting is vital as it provides a crunchy base for the toppings. Use a toaster or oven, and aim for that perfect golden brown without burning. Keep an eye on it as toasting times can vary based on the thickness of the bread. The right toast should be crisp and able to hold up the toppings without becoming soggy.

Balancing Flavors

Creating a balance of flavors will elevate your avocado toast. Always season the avocado and be mindful of the saltiness from feta. Incorporate acidity with lemon juice or balsamic glaze for extra brightness. Taste as you go to ensure each component complements the others harmoniously.

Layering Ingredients

The order of layering can affect the final experience of your dish. Start with the avocado spread, follow with your toppings like feta and tomatoes, and finish with walnuts for a textural contrast. Visually appealing layers make the dish inviting while ensuring flavor distribution in every bite.

Pro Tips for Perfect Avocado Toast

– Choose the right bread: Sourdough or whole grain always yields the best texture and flavor.
– Season generously: Don’t shy away from salt and pepper; they enhance the taste of avocado tremendously.
– Experiment with spices: Adding a pinch of smoked paprika or chili flakes can elevate the flavor profile further.
– Use fresh herbs: Chopped basil or cilantro can give a fresh aroma that complements the other ingredients.
– Add a touch of sweetness: Drizzling honey can create a delightful contrast with the feta’s saltiness.
– Use quality olive oil: A sprinkle of high-quality olive oil right before serving enriches flavor and adds a luxurious touch.
– Serve immediately: Enjoying your avocado toast fresh ensures the best taste and texture experience.
– Try different nut toppings: Swapping walnuts for almonds or pecans can add varied flavors and textures to the dish.

Variations and Adaptations

For a regional twist, consider using diced red onion or jalapeños for a Southeast Asian influence, or try adding an egg on top for extra protein. Seasonal adaptations are easy too; in autumn, top with roasted pumpkin seeds or cranberries for a festive touch. Dietary modifications cater to specific needs—vegan options can exclude cheese or replace it with a dairy-free alternative. Flavor adaptations might mean adding local spices or a splash of hot sauce for those who love heat. Textural modifications can be achieved by using different bread types, such as rye or gluten-free options, while presentation can be enhanced with colorful garnishes or additional herb sprigs.

Serving and Presentation Guide

For a polished presentation, serve your avocado toast on a rustic wooden board, showcasing its colors. Drizzle with olive oil and sprinkle with sesame seeds for an added touch. Garnish with microgreens or edible flowers for sophistication, or serve it alongside a bright salad for a contrast in textures. Temperature is key; serve toasted bread warm, and consider pairing it with a chilled beverage for a refreshing combination. To control portions, cut the toast into halves or quarters, making it more shareable during gatherings.

Wine and Beverage Pairing

A crisp Sauvignon Blanc pairs wonderfully with the fresh flavors of your avocado toast, accentuating the dish’s brightness. For those who prefer non-alcoholic options, a bright iced tea or sparkling water with lemon can balance out the dish’s richness. If coffee is your drink of choice, consider a smooth cold brew that complements rather than overwhelms the flavors, making for a refreshing brunch experience. Ensure the wine is chilled, enhancing the enjoyment of the meal.

Storage and Shelf Life

To store leftover avocado toast properly, keep all elements separately when possible. The bread can be stored in an airtight container at room temperature, while toppings should be kept in the fridge. Avocados will brown quickly, so consider wrapping any leftover spread tightly in plastic wrap, pressing out air to minimize oxidation. When reheating toast, use a toaster to restore crispiness, rather than a microwave which can make it soggy. Enjoy leftover toppings within a day or two for optimal freshness.

Make Ahead Strategies

Prepping elements of this dish in advance can save time. Mash your avocado and store it in the fridge with a layer of plastic wrap pressed against the surface. You can also pre-chop your tomatoes and walnuts, storing them in airtight containers. Assemble everything right before serving to maintain freshness. If you plan to reheat, toast the bread fresh and layer right away for the best texture. Consider adding any fresh herbs just before serving to maximize flavor impact.

Scaling Instructions

Halving the recipe is as simple as cutting ingredients in half, ideal for those cooking for one. Doubling or tripling may require using larger baking sheets or pans for batching, particularly when toasting bread. Timing may slightly vary, so check for doneness of bread and the freshness of toppings. For storage, ensure airtight containers are used for any leftovers, and make adjustments to ingredient proportions as needed to maintain balance.

Nutritional Deep Dive

This avocado toast provides a balanced macro breakdown with healthy fats from avocado and walnuts contributing to heart health. High in fiber, it supports digestion while offering essential vitamins and minerals from tomatoes and feta. Micronutrient analysis highlights a good source of vitamin K, folate, and potassium, contributing to overall wellness. For weight management, adjust portions according to your dietary goals, ensuring to savor the rich flavors while maintaining balance.

Dietary Adaptations

For a gluten-free option, use gluten-free bread or lettuce wraps. Switching to dairy-free cheese alternatives makes this recipe suitable for those avoiding dairy. A vegan version can be achieved by omitting feta entirely or using a plant-based feta option. Low-carb dieters may enjoy the dish with a thicker slice of eggplant or zucchini instead of bread. Meanwhile, paleo enthusiasts can skip the cheese for a clean-eating approach.

Troubleshooting Guide

If your avocado toast turns out bland, revisit the seasoning and incorporate more salt, pepper, or spices. For texture issues, any over-mashing should be avoided to keep that lovely creaminess. If burning is a concern, adjust your toasting time or lower the heat. Mistakes with ingredient substitutes may lead to unbalanced flavors—always test proportions and cooking methods beforehand to prevent disastrous combinations. Lastly, timing is crucial; if the dish gets soggy, serve promptly and avoid pre-assembling all ingredients beforehand.

Recipe Success Stories

Community feedback has highlighted how versatile this recipe is, with numerous readers sharing personal twists. One user showcased their smoked salmon variation, elevating the simple toast into a gourmet dish. Others have mentioned how this dish has become their go-to for easy brunch gatherings, successfully impressing guests with minimal effort. Photography tips shared within the community suggest utilizing natural light for stunning results, showcasing the vibrant colors of the toast.

Frequently Asked Questions

Can I prepare the toast in advance?

It’s best to assemble the avocado toast just before serving to keep the bread crisp and the toppings fresh. However, you can prep your toppings and avocado spread a few hours in advance.

How do I choose a ripe avocado?

Look for avocados that yield slightly to gentle pressure but are not overly soft. A dark green skin often indicates ripeness.

What’s the best way to store leftover avocado?

To store leftover mashed avocado, place it in an airtight container and press plastic wrap directly on the surface to minimize air exposure and browning.

Can I use other types of cheese?

Absolutely! Goat cheese or dairy-free varieties can be used as alternatives to feta if desired.

What bread works best for this recipe?

For the best taste and texture, consider using sourdough or whole-grain bread. However, any bread you enjoy can work.

How can I make it more filling?

Adding a poached egg on top will not only make it more filling but also add a delicious richness.

Is this recipe suitable for meal prepping?

While the assembled toast is best enjoyed fresh, you can prepare the components ahead of time for easier assembly later.

What herbs can I add for more flavor?

Fresh herbs like cilantro, basil, or even dill can enhance the freshness and flavor profile of your avocado toast.

Can I freeze this dish?

Freezing is not recommended due to the texture changes in avocado. However, you can freeze the bread and layer fresh toppings when ready to eat.

What should I pair with my avocado toast?

This dish pairs wonderfully with a side salad, fresh fruit, or enjoy it alongside a refreshing beverage like mint lemonade or iced coffee.

Additional Resources

If you’re inspired by this Avocado Toast recipe, check out our related recipes like Classic Hummus, Greek Salad, and open-faced sandwiches. These dishes not only align with the healthy theme but also offer versatility in preparation methods. Explore our technique guides on selecting the best avocados or mastering the perfect poached egg for added culinary skills. Seasonal variations can bring fresh surprises, so keep an eye on local produce for exciting ingredient swaps!

Join the Conversation

We want to hear from you! Share your photos and versions of your avocado toast creations on social media using our hashtag. Join our community for recipe reviews and suggestions, allowing others to experience your unique twists! Engage in discussions on our blogs to help each other improve cooking techniques and inspire creativity around this beloved dish.

The Recipe

Avocado Toast with Cherry Tomatoes, Feta, and Walnuts

Serves: 2

Prep Time: 10 mins

Cook Time: 5 mins

Total Time: 15 mins

Kitchen Equipment Needed

  • Toaster or oven
  • Cutting board
  • Sharp knife
  • Fork for mashing

Ingredients

  • 2 slices of whole grain or sourdough bread
  • 1 ripe avocado
  • 1 cup cherry tomatoes, halved
  • 1/4 cup crumbled feta cheese
  • 1/4 cup walnuts, chopped
  • Salt and pepper to taste
  • Juice of half a lemon
  • Olive oil for drizzling

Directions

  1. Toast the slices of bread until golden brown and crisp.
  2. While the bread is toasting, mash the avocado in a bowl with a fork, adding lemon juice, salt, and pepper.
  3. Spread the mashed avocado generously over each slice of toast.
  4. Top with halved cherry tomatoes and sprinkle crumbled feta cheese evenly.
  5. Add chopped walnuts on top and finish with a drizzle of olive oil.
  6. Serve immediately and enjoy your delicious avocado toast!

Recipe Notes

  • Feel free to customize with your favorite seeds or herbs!
  • This recipe can easily be doubled for larger servings.
  • Store any leftover toppings in the refrigerator for up to two days.

Delicious Baked French Toast Casserole for Perfect Brunch Delight

Baked French Toast Casserole – Best Brunch Recipe 🍞😋

⚖️
Difficulty
Easy

⏲️
Prep Time
15 mins

🕒
Cook Time
45 mins

⏱️
Total Time
60 mins

🍽️
Servings
8 servings

Discover the ultimate brunch experience with our Baked French Toast Casserole. This delightful casserole features layers of soft bread soaked in a sweet, creamy mixture of eggs, milk, and a hint of cinnamon, baked to golden perfection. Whether you’re hosting a family gathering, celebrating a holiday, or simply enjoying a lazy weekend morning, this dish will impress every palate and satisfy your cravings. Imagine slicing into a warm, flavorful piece, crowned with fresh fruits and a drizzle of maple syrup. It’s truly a feast for the senses!

The beauty of this Baked French Toast Casserole lies in its rich flavors and irresistibly comforting texture. Each bite melts in your mouth, combining sweet hints of vanilla with the warmth of cinnamon. The aroma wafting through your kitchen while it bakes is nothing short of heavenly, inviting everyone to gather around the table. With minimal prep time and the ability to be made ahead, this recipe transforms a traditional breakfast into a memorable occasion, allowing you to enjoy quality moments with loved ones.

Quick Recipe Highlights

  • Flavor Profile: Rich, buttery, and sweet with hints of cinnamon and vanilla.
  • Texture: Soft and custardy interior with a light, crispy topping.
  • Aroma: Sweet notes of cinnamon and vanilla waft through your kitchen during baking.
  • Visual Appeal: Generously topped with fresh berries and a dusting of powdered sugar for a colorful presentation.
  • Skill Level Needed: Beginner-friendly; anyone can master this with basic kitchen skills.
  • Special Equipment: A 9×13 inch baking dish and a whisk for mixing are all you need.

Recipe Overview

  • Difficulty Level: This Baked French Toast Casserole is easy enough for beginner cooks, requiring just simple layering and baking.
  • Category: Ideal for breakfast or brunch and perfect for family gatherings.
  • Cuisine: This dish draws inspiration from classic French breakfast traditions, presented in a contemporary casserole style.
  • Cost: With budget-friendly ingredients like bread, eggs, and milk, it’s an economical choice for any meal.
  • Season: Great year-round, but particularly enjoyed during fall and winter gatherings due to its comfort factor.
  • Occasion: Perfect for holidays, family brunches, and special occasions, bringing everyone together in a delicious way.

Why You’ll Love This Recipe

This Baked French Toast Casserole is a real crowd-pleaser with its balanced combination of taste and texture. The sweetness of the baking custard pairs beautifully with the sponge-like bread, creating a delightful experience with each bite. It’s the perfect treat to wake up to, offering a comforting start to any day. The contrasting texture of a lightly crispy top layer against the custardy middle ensures a brilliant mouthfeel that will have you going back for seconds.

The convenience factor is another major win for this brunch staple. By assembling the casserole the night before and allowing it to sit in the fridge, you can save precious time in the morning. Pop it into the oven while you prepare coffee or fresh juice, and by the time you gather everyone at the table, breakfast is ready and waiting. This simple make-ahead strategy allows maximum socializing time, encouraging conversations rather than kitchen chaos.

On the nutritional front, this dish offers the comfort of carbohydrates from the bread along with protein from the eggs and dairy. For families looking to enjoy a delicious meal while still being mindful of health, this casserole can be a heart-healthy option when made with whole grain bread and reduced-fat dairy products. Furthermore, it can be easily adapted for dietary needs, allowing everyone to indulge guilt-free.

Socially, Baked French Toast Casserole has become a staple for entertaining. It invites everyone to gather around and share good food, making it ideal for celebrations and relaxed Sunday brunches. The ability to serve a crowd with one pan simplifies entertaining, and the shared experience of enjoying a homemade meal adds to the joy of the occasion.

Finally, it’s an accessible dish that won’t break the bank. Ingredients are typically ones you already have on hand or can easily find at your local grocery store. Because of its affordability and generous servings, this casserole is perfect for families or large gatherings, ensuring all tastes are catered to while also remaining budget-friendly.

Historical Background and Cultural Significance

The origins of French toast can be traced back to ancient Rome, where the dish was made with stale bread and a mixture of milk and eggs. This economical meal allowed people to make the most out of leftover bread, avoiding waste and ensuring nourishment during tough times. As centuries went by, this frugal recipe evolved and spread across various cultures, adapting to local tastes and traditions.

In culinary cultures around the world, this type of dish is often associated with comfort and family gatherings. In America, French toast gained popularity as an indulgent breakfast option, particularly in diners where slices of bread were dipped in egg mixtures and cooked to order. Adding the casserole aspect to this traditional recipe introduces an element of convenience without sacrificing the heartwarming flavors.

Over time, Baked French Toast Casserole has experienced modern adaptations that incorporate a variety of ingredients and flavors such as fruit, spices, and even different types of bread. These innovations not only provide delicious variations but also invite creativity, allowing cooks to personalize the dish according to seasonal availability or dietary restrictions.

Regional variations further enhance this recipe’s significance in the culinary world. From using brioche in France to the classic challah in Jewish homes, each culture brings its own flair to the table. The Baked French Toast Casserole joins these traditions, embodying the spirit of sharing food and bringing people together.

Ingredient Deep Dive

Bread: The cornerstone of any French toast, bread provides the structure and texture. Typically, challah, brioche, or thick slices of white bread are preferred for their ability to absorb the egg mixture without falling apart. Bread selection is essential; artisanal or homemade varieties often yield the best results due to their freshness. Storing leftover bread in a cool, dry place can help maintain its quality, and it can be frozen for later use as well.

Eggs: Eggs are crucial for binding the ingredients and adding richness. They contribute protein and healthy fats, making the dish more filling and nutritious. Fresh eggs are best for flavor and texture, so choosing organic or farm-fresh when possible can enhance the dish. Proper storage in the refrigerator will keep them fresh longer, while egg substitutes can be used for those with dietary restrictions.

Milk: Milk adds moisture and creaminess to the egg mixture, creating the custard-like base. Whole milk or half-and-half can be used for a richer taste, while non-dairy alternatives are great for those avoiding animal products. Freshness is key, so always check for expiration dates. If you run out of milk, alternatives like yogurt or sour cream can also work well in a pinch.

Cinnamon: This warm spice is not only aromatic but also adds a comforting flavor typical in French toast recipes. Cinnamon has a long history of use in desserts and breakfast dishes, celebrated for its distinctive taste. Ground cinnamon is best used fresh, but it must be stored in a cool, dark place. You can also experiment with cardamom or nutmeg for a unique twist.

Common Mistakes to Avoid

  • Not letting the bread dry out: Ensure the bread is a bit stale before use; fresh bread can become mushy during baking.
  • Skipping the overnight soak: Allowing the casserole to sit enables the bread to properly absorb the egg mixture, enhancing flavor and texture.
  • Using too much liquid: Balance is key; if the mixture is too runny, the casserole can become soggy, ruining the dish.
  • Forgetting to grease the pan: Prevent sticking by greasing your baking dish adequately before adding the mixture.
  • Baking at the wrong temperature: A too-hot oven can cause the casserole to brown too quickly while remaining uncooked inside.
  • Overbaking: Keep an eye on the casserole; it’s best when still slightly soft in the center.
  • Not adding toppings: Don’t overlook garnishing with fresh fruits, nuts, or syrups, which greatly enhance the overall flavor and presentation.
  • Serving it cold: This dish is best served warm, so ensure to reheat properly if not served immediately.
  • Not covering while baking: If the top browns too quickly, cover with foil to ensure even cooking without burning.
  • Poring syrup too early: Wait until serving to avoid making the casserole soggy.

Essential Techniques

Soaking the Bread: This is crucial for achieving the desired custard-like texture. To master this, ensure that the bread pieces are fully submerged in the egg mixture. Allow the mixture to rest for at least an hour, or preferably overnight, which helps intensify the flavors. Common pitfalls include not using enough liquid or not letting it soak long enough. Visual cues for success include the bread appearing softer and slightly swollen.

Layering: Proper layering of ingredients can enhance flavor distribution throughout the casserole. Start with bread at the bottom, followed by the egg mixture, and then repeat. Avoid compacting the layers, as air circulation is essential for even cooking. The mix should feel airy yet cohesive when done right. Look for a slightly puffy and golden result as an indication of success.

Pro Tips for Perfect Baked French Toast Casserole

1. Choose day-old bread for best absorbency. This will prevent the casserole from becoming too soggy.
2. Experiment with different types of milk for a unique flavor. Almond, coconut, or oat milk can add interesting notes.
3. Add a splash of orange juice or zest to the egg mixture for a refreshing twist.
4. For an extra kick, consider adding a teaspoon of vanilla extract or maple extract to the mix.
5. Let the casserole cool slightly before serving; this helps it set and makes for easier slicing.
6. Serve with a variety of toppings, from fresh berries to whipped cream, to delight every palate.
7. For a slightly crunchier top, sprinkle with a mixture of brown sugar and oats before baking.
8. Customize this dish by mixing in spices that you enjoy, like nutmeg or allspice for added warmth.

Variations and Adaptations

One popular variation of the Baked French Toast Casserole is incorporating seasonal fruits like diced apples, pears, or berries. This not only adds flavor but also enhances the nutritional profile, making it a healthier option. In terms of seasonal adaptations, you can utilize pumpkin puree in the fall to create a comforting pumpkin spice french toast.

Dietary modifications also allow for gluten-free or dairy-free options. By using gluten-free bread and nondairy milk, you can cater to those with dietary restrictions while still enjoying this breakfast favorite. Vegan versions can be created through using flaxseed or chia seeds as an egg substitute, maintaining the dish’s hearty consistency.

Flavors can also be adjusted, such as introducing caramel sauce swirls or chocolate chips for an indulgent dessert-like treat. On the texture front, adding nuts can provide a delightful crunch, contrasting with the soft interior. Presentation alternatives such as serving in individual ramekins or using a muffin tin can add a unique touch, making it a fun option for gatherings.

Serving and Presentation Guide

For a beautifully plated Baked French Toast Casserole, consider cutting the casserole into squares or wedges, allowing each piece to showcase its golden crust and soft center. A light dusting of powdered sugar on top adds elegance while hinting at sweetness. Garnishing with fresh fruits like sliced strawberries, blueberries, or banana enhances visual appeal and freshness.

Traditional accompaniments such as maple syrup or whipped cream can be served on the side to allow guests to customize their dish to taste. Modern serving suggestions include scooping portions into individual bowls for a casual yet charming presentation. Ensure the casserole is served warm for optimal enjoyment, as hot drinks like coffee or tea complement it perfectly.

Pay attention to portion control; cut moderate slices to ensure everyone gets enough to satisfy their morning cravings without overwhelming them. The combination of flavors and textures in cada bite will surely be a highlight of the meal.

Wine and Beverage Pairing

While traditional pairing for breakfast dishes like this is typically non-alcoholic, consider serving a light sparkling wine or mimosa for a celebratory brunch. The refreshing taste of sparkling wine complements the sweetness of the casserole wonderfully, adding a festive touch to the meal.

For non-alcoholic options, fresh fruit juices such as orange or apple juice work beautifully with the flavors of the casserole. Additionally, a rich cup of coffee can elevate the experience, offering a lovely contrast to the sweetness of the dish. If opting for tea, a light herbal or floral blend pairs well without overwhelming flavors.

Always serve beverages at a suitable temperature—chilled juices and beverages should be served dry and cold, while hot drinks should be served steaming to enhance the overall brunch experience.

Storage and Shelf Life

To store leftover Baked French Toast Casserole, allow it to cool completely, then cover tightly with plastic wrap or aluminum foil and place it in the refrigerator. It can be stored for up to 3-4 days without significant loss of flavor. When reheating, ensure it is warmed through to at least 165°F.

For longer storage, consider freezing the casserole before baking. Slice it into portions, wrap each in plastic, and then place in a freezer-safe container. When ready to indulge, simply thaw overnight in the refrigerator and bake until heated through. Always check for signs of spoilage before consumption, such as appearance changes or off smells.

To reheat, preheat the oven to 350°F, cover the casserole with foil to prevent over-browning, and warm for 20-30 minutes. For a quicker option, individual portions can be reheated in the microwave for 1-2 minutes.

Make Ahead Strategies

Preparing your Baked French Toast Casserole in advance can significantly enhance your brunch experience. Begin by assembling the entire casserole the night before, ensuring the bread has ample time to soak overnight. Store it covered in the refrigerator; this allows the flavors to meld beautifully.

If you’re short on time, you can also prepare the egg mixture ahead of time and keep it in the fridge for later use. Simply pour it over the bread in the morning, then bake for a fresh, warm dish in less than an hour.

To ensure the quality doesn’t suffer, avoid adding toppings until just before baking. This will maintain their freshness and prevent browning. Finally, remember that freshly added elements like whipped cream or syrup should always be served separately to keep the main dish perfect.

Scaling Instructions

If you’re looking to adjust the servings of your Baked French Toast Casserole, scaling is straightforward. For halving the recipe, simply reduce each ingredient by half, and adjust the baking dish size accordingly, preferably using an 8×8 inch or similar-sized dish.

Doubling or tripling the recipe can easily be achieved by using a larger dish and extending baking time as necessary. Keep an eye on the casserole to ensure it sets properly, checking with a toothpick for doneness in the center.

Remember that baking times might change depending on the size of your baking dish—larger dishes may require additional time. Always use the visual cues for doneness, ensuring the center isn’t overly soft before removing from the oven.

Nutritional Deep Dive

In terms of macros, a typical serving of Baked French Toast Casserole includes carbohydrates primarily from the bread, protein from the eggs and dairy, and fats, depending on the milk and butter used. This balance makes for a filling breakfast that can kick-start your morning effectively.

Micronutrient analysis reveals that, depending on the ingredients used, the dish can provide vitamins and minerals such as calcium from dairy, vitamin B from bread, and even Vitamin C if fruits are included as toppings.

Health benefits of this dish include its ability to offer sustained energy through complex carbohydrates and protein, making it particularly suited for active mornings. Mindful portioning, especially if you’re watching your weight, can keep indulgence in check while providing satisfaction.

For those interested in dietary considerations, adaptations can optimize nutrient content. Whole grain or seed bread can enhance fiber content, supporting digestive health while managing blood sugar spikes. Enjoying this dish in moderation allows for balance in your overall diet without missing out on flavor.

Dietary Adaptations

For those following a gluten-free diet, selecting gluten-free bread varieties or using gluten-free flour can create an equally delicious version of Baked French Toast Casserole. Be mindful of any added sugars or preservatives in gluten-free bread.

If you’re looking for a dairy-free option, substitute regular milk with almond, soy, or coconut milk and use dairy-free butter. Silken tofu or non-dairy cream can act as effective replacements for eggs, allowing for an equally satisfying casserole that fits your dietary needs.

Vegan adaptations can be made using flaxseed meal combined with water as an egg alternative. Switching to plant-based milks and butters ensures that all dietary restrictions are honored while maintaining delightful flavor.

For those adhering to low-carb or keto diets, a fantastic alternative can include using low-carb bread options or even cauliflower as a substitute for bread, creating a unique twist while keeping it within dietary guidelines.

Troubleshooting Guide

If you’re facing texture issues, such as a soggy casserole, it’s likely due to over-soaking the bread or using 100% fresh bread instead of stale. Use a combination of stale and fresh for the best results in texture.

If the flavors seem off, ensure proper seasoning; a pinch of salt is essential to elevate the sweetness and balance flavors. If it’s too sweet, consider reducing any added sugars in the egg mixture.

Temperature problems can arise if the oven is not properly calibrated. Always use an oven thermometer to ensure your cooking environment is accurate, as undercooked casseroles may yield a runny center while overbaking can dry it out.

Should you run into equipment challenges, ensure your baking dish is suitable for the expected temperature and size, as glass or ceramic dishes often perform better than standard metal pans for even baking.

For ingredient substitutions, consider using equivalent amounts of additional ingredients to maintain texture and flavor, such as almond milk instead of regular milk or chia seeds in place of eggs in vegan recipes.

Timing concerns can be resolved by preparing in advance, allowing ample time for baking. Ensure to add an extra few minutes if doubling the recipe for larger dishes.

Recipe Success Stories

Community feedback around this recipe has been overwhelmingly positive. Many have praised the Baked French Toast Casserole for its simplicity and the ability to impress guests without exhausting effort. The ease of preparation has received particular note, making it a popular choice for both novice and experienced cooks alike.

Readers have shared variations including seasonal fruits, nuts, and different bread choices that resulted in unique versions of this classic dish. Such stories not only inspire adaptations but also enrich the community’s overall recipe experience.

Suggested photography tips for this casserole focus on capturing its golden crust and colorful fruit toppings. Natural lighting during the day complements the dish’s warm tones, appealing to potential recipe followers.

Lastly, we’ve collected numerous adaptations shared by users, demonstrating how Baked French Toast Casserole can serve countless tastes and dietary needs, proving its versatility in culinary settings.

Frequently Asked Questions

Q1: Can I use any type of bread?
Yes, you can use various bread types. Challah, brioche, or even whole wheat bread works well for this recipe. Each type will provide a different texture and flavor, so feel free to experiment.

Q2: How can I make this dish gluten-free?
To make a gluten-free version, simply choose gluten-free bread and ensure all other ingredients are gluten-free. Many grocery stores offer a variety of gluten-free options that work well in casseroles.

Q3: Can I prepare this casserole in advance?
Absolutely! You can prepare the casserole the night before and let it sit in the refrigerator. Just pop it in the oven the next morning for a hassle-free breakfast.

Q4: What toppings can I add?
Toppings can include fresh fruits, powdered sugar, maple syrup, or whipped cream. Choose any combination that suits your taste for a delicious finish!

Q5: How do I store leftovers?
Store any leftovers in an airtight container in the refrigerator for up to 3-4 days. You can heat slices in the microwave or oven before serving.

Q6: Can I freeze this casserole?
Yes, you can freeze it before baking or after it’s cooked. For best results, cover it tightly with foil or plastic wrap and store in the freezer for up to 2 months.

Q7: How do I reheat the casserole?
To reheat, simply bake at 350°F (175°C) until warmed through, or use the microwave for individual portions. Ensure it reaches an internal temperature of 165°F (74°C).

Q8: Is it possible to make this vegan?
Yes, swap the eggs for a flaxseed meal or chia seed mix (1 tablespoon of flaxseed or chia seeds with 2.5 tablespoons of water per egg) and use a dairy-free milk alternative.

Q9: Can I add chocolate or nuts to the mixture?
Absolutely! Incorporating chocolate chips, nuts, or even caramel into the mix adds a delightful twist. Just remember to adjust sweetness levels accordingly.

Q10: What should I serve with this casserole?
It pairs well with breakfast meats like bacon or sausage, fresh fruit, and of course, coffee or juice to complete your meal.

Additional Resources

Explore more related recipes like overnight oats, breakfast burritos, or quiches to diversify your brunch menu! Technique guides on mastering egg dishes and baking tips can further enhance your kitchen skills.

Learn about ingredient substitutions for dairy or gluten needs in your baking endeavors, ensuring all guests can enjoy the meal. Additionally, find recommended kitchen equipment to make your culinary experience more enjoyable and efficient.

Finally, embrace seasonal variations by incorporating ingredients based on the time of year, providing freshness and a homey touch to every dish.

Join the Conversation

Engaging with us on social media and sharing your take on this Baked French Toast Casserole can inspire others and build a supportive cooking community. Please feel free to post your photos, variations, and experiences in preparing this delightful dish.

Your feedback is invaluable; we love hearing about your successes or any adaptations you’ve made to fit your family’s tastes. Together, let’s explore the endless possibilities this recipe can bring to your brunch table!

The Recipe

Baked French Toast Casserole

Serves: 8 servings

Prep Time: 15 mins

Cook Time: 45 mins

Total Time: 60 mins

Kitchen Equipment Needed

  • 9×13 inch baking dish
  • Mixing bowl
  • Whisk
  • Measuring cups and spoons
  • Spatula

Ingredients

  • 1 loaf of french bread or challah, cut into cubes
  • 8 large eggs
  • 2 cups milk
  • 1/2 cup heavy cream
  • 1/2 cup sugar
  • 2 teaspoons vanilla extract
  • 2 teaspoons cinnamon
  • 1/4 teaspoon salt
  • 1/2 cup maple syrup (optional for serving)
  • Fresh fruits for garnish (optional)

Directions

  1. Preheat your oven to 350°F (175°C).
  2. In a large mixing bowl, whisk together the eggs, milk, cream, sugar, vanilla, cinnamon, and salt until fully combined.
  3. Add the cubed bread to the bowl, stirring gently until all pieces are coated. Let this soak for about 10-15 minutes.
  4. Transfer the mixture to a greased 9×13 inch baking dish, spreading it evenly.
  5. Bake in the preheated oven for 45 minutes, or until the top is golden brown and a knife inserted in the center comes out clean.
  6. Remove from the oven and let cool for a few minutes before slicing. Serve warm with maple syrup and fresh fruit.

Recipe Notes

  • This casserole can be prepared the night before and refrigerated for up to 12 hours before baking.
  • For added texture, sprinkle some oats or nuts on top before baking.
  • You can substitute the milk with almond or coconut milk for a dairy-free version.
  • Feel free to get creative and add chocolate chips or seasonal fruits to the mixture.

Deliciously Quick Veggie Pancake Scramble for Healthy Breakfasts

Veggie Pancake Scramble: Quick & Nutritious!

⚖️
Difficulty
Easy

⏲️
Prep Time
10 mins

🕒
Cook Time
15 mins

⏱️
Total Time
25 mins

🍽️
Servings
4

Veggie Pancake Scramble is the perfect quick and nutritious meal to kick-start your day! Packed with vibrant vegetables and wholesome ingredients, this dish delivers a delightful mix of flavors and textures that will excite your palate. Imagine a hearty breakfast that is not only easy to prepare but also bursting with colors, from the rich orange of the carrots to the bright green of the spinach. This scramble brings everything you need in one pan, making it an excellent choice for busy mornings or lazy brunches.

As you take your first bite of this veggie pancake scramble, you’ll be greeted with a satisfying blend of fluffy pancake pieces scrambled with flavorful veggies. The crispy edges and soft centers create a complex mouthfeel that is both comforting and appetizing. The layers of flavor come together to make this dish a wholesome treat for the senses, filling you up while also nourishing your body.

Quick Recipe Highlights

  • Flavor Profile: The mix of bell peppers, onions, and herbs with fluffy pancake pieces creates a savory taste that’s perfectly balanced.
  • Texture: The soft pancake contrasts wonderfully with the slight crunch of the sautéed vegetables.
  • Aroma: As it cooks, the comforting scents of sautéed onions and fresh herbs waft through the kitchen, promising a delicious meal.
  • Visual Appeal: The colorful array of vegetables nestled in the golden pancake pieces not only looks inviting but also makes you eager to dig in.
  • Skill Level Needed: This recipe is beginner-friendly, perfect for those who want to whip up a nutritious breakfast without complex techniques.
  • Special Equipment: All you need is a non-stick skillet and a spatula to effortlessly make this delightful dish.

Recipe Overview

  • Difficulty Level: This veggie pancake scramble is classified as easy, making it suitable for cooks of all skill levels. Even if you’re new to cooking, you’ll find this recipe straightforward and quick.
  • Category: Ideal for breakfast or brunch, this recipe can be enjoyed any time of the day, making it both versatile and satisfying.
  • Cuisine: This dish draws inspiration from American breakfast traditions, particularly combining elements from pancakes and vegetable scrambles.
  • Cost: Economically priced, most ingredients are pantry staples, resulting in a dish that is budget-friendly without sacrificing flavor.
  • Season: Enjoy this meal year-round, as it allows for seasonal variations with fresh veggies available in each season.
  • Occasion: Perfect for a family breakfast, brunch gatherings, or even a quick weeknight dinner.

Why You’ll Love This Recipe

The taste and texture of the Veggie Pancake Scramble make it an irresistible choice for any meal. The combination of fluffy pancake pieces and tender vegetables gives a satisfying mouthfeel while tickling your taste buds. Whether you’re a fan of sweet or savory, this dish bridges the gap by being hearty and wholesome, yet light enough to leave you feeling energized.

Convenience is key, and the preparation of this recipe is a breeze. The simple ingredients come together quickly, making it perfect for those rushed mornings or simple weekday dinners. In just 25 minutes, you can have a delicious and nutritious meal ready to enjoy.

Nutritionally, this scramble is packed with vitamins and minerals thanks to the abundance of vegetables. With ingredients rich in fiber, this meal helps maintain digestive health while offering essential nutrients like Vitamin A and C. It’s a great way to incorporate more vegetables into your diet effortlessly.

Socially, the Veggie Pancake Scramble excels as an entertaining dish. It allows for personalization, encouraging friends and family to create their own versions. Set out an array of toppings and watch as everyone crafts their unique meal, fostering a fun communal experience.

Moreover, the affordability of this dish can’t be overstated. Utilizing leftover veggies or pantry staples, it delivers on health and flavor without breaking the bank. It’s a perfect budget recipe that doesn’t compromise on nutrition or enjoyment.

Historical Background and Cultural Significance

The origins of pancakes date back thousands of years, with variations found in cultures worldwide. Pancakes have morphed through the ages, adapting to regional ingredients and preferences. The Veggie Pancake Scramble draws from these time-honored traditions while incorporating fresh, local produce to create a modern version suitable for health-conscious eaters.

In many cultures, breakfast has always been an important meal, and the addition of nutritious vegetables to traditional pancake recipes reflects a growing awareness of health and wellness. This dish promotes a message of balance, showcasing how traditional recipes can evolve to meet contemporary nutritional demands.

Over time, pancakes have transitioned from being considered merely a sweet indulgence to a canvas for creativity, allowing cooks to experiment with various flavors. The Veggie Pancake Scramble exemplifies this evolution, providing a savory twist that is gaining popularity among health-conscious individuals.

Regional variations exist as families add their special touches, whether through specific spices, herbs, or seasonal vegetables. This adaptability offers a glimpse into local culinary traditions, making each cook’s version unique.

Ingredient Deep Dive

Vegetables: Vegetables play a crucial role in the Veggie Pancake Scramble, enhancing both nutrition and flavor. Loaded with vitamins, minerals, and fiber, veggies such as bell peppers and spinach contribute to overall health. When selecting fresh produce, look for bright, firm vegetables without blemishes. Roasting or sautéing these ingredients maximizes their flavor, making them essential to the success of this dish.

Flour: The foundation of the pancake comes from flour, a source of carbohydrates that provides energy. Whole wheat or gluten-free options can easily be substituted based on dietary preferences. It’s advisable to store flour in a cool, dry place to maintain its freshness. Be mindful of expiration dates, and remember that different types of flour can alter both taste and texture.

Common Mistakes to Avoid

  • Not preheating the skillet: Ensure the pan is adequately heated to get golden-brown pancakes that won’t stick.
  • Overmixing the batter: Mix until just combined; too much mixing can lead to tough pancakes.
  • Using the wrong pan: A non-stick skillet ensures easy flipping and cooking without burnt pieces.
  • Neglecting seasoning: Don’t forget to season your batter and veggies with salt and pepper for enhanced flavor.
  • Adding too much liquid: Adjusting for moisture is crucial; the batter should be thick enough to hold its shape.
  • Skipping resting time: Letting the batter rest allows for a better texture and fluffiness in the final product.
  • Using old produce: Freshness matters; wilted or aging vegetables compromise taste and nutrition.
  • Ignoring cooking temps: A medium heat setting ensures proper cooking without burning the pancakes.

Essential Techniques

To achieve perfectly fluffy pancakes, start by understanding the importance of ingredient proportions. Mastering pancake techniques ensures that your batter has the right consistency. Use the “just combine” rule while mixing to avoid overdevelopment of gluten.

Another key technique is the flipping process. Timing is critical; wait until bubbles form on the surface before flipping to ensure they cook evenly. If done correctly, they’ll puff beautifully, giving you that desired light and airy texture.

Pro Tips for Perfect Veggie Pancake Scramble

Use a variety of vegetables to enhance the flavor and nutritional value of your dish. Personalize your fluffy pancakes with seasonal veggies for freshness. Experiment with spices such as smoked paprika or garlic powder to elevate your flavor profile. For added protein, consider including scrambled eggs or tofu. Adjust the thickness of the batter according to your preference for denser or lighter pancakes. Always ensure to lightly oil your pan to avoid sticking while frying. Add fresh herbs at the last minute for a burst of flavor.

Variations and Adaptations

For a sweet variation, add shredded carrots or mashed bananas for a more dessert-like pancake. Season your sweetness with cinnamon or vanilla extract for extra depth of flavor.

Seasonal adaptations can be made to incorporate available produce like zucchini in the summer or pumpkin puree in the fall. For a low-carb approach, swap flour for almond or coconut flour, and serve with a creamy avocado sauce.

Introduce bold flavors by trying different herbs such as dill or cilantro in your mix. Texture modifications can be achieved by adding cooked quinoa or oats into your pancake batter. Finally, experiment with presentation styles; serve with a vibrant salsa or topped with poached eggs for visual appeal.

Serving and Presentation Guide

Plating techniques can play a big role in enhancing the dish’s appeal. Arrange your pancake scramble in a circular shape on the plate, allowing the colorful vegetables to show through. Garnish with fresh herbs or a drizzle of olive oil to add a finishing touch.

Consider accompanying your veggie pancake scramble with traditional sides like crispy bacon or a green salad for a balanced meal. Serve at a warm temperature to enhance the flavors, and keep portion control in mind by serving smaller amounts for a family style presentation.

Wine and Beverage Pairing

For wine pairing, a crisp Sauvignon Blanc complements the fresh flavors, while mimosa adds a delightful brunch touch. Non-alcoholic alternatives include invigorating herbal teas or sparkling water with lemon for a refreshing contrast.

If you’re enjoying this dish for breakfast, light coffee or a mildly scented tea can elevate your morning experience. Please pay attention to serving temperatures for beverages; portions should be chilled for refreshment.

Storage and Shelf Life

To store leftovers, keep your Veggie Pancake Scramble in an airtight container in the refrigerator for up to three days. For longer preservation, freezing is an option; simply store in a freezer-friendly bag for up to a month.

When reheating, ensure it is done consistently, either by using a microwave or skillet on low heat to avoid drying out. Check for signs of spoilage like unpleasant odors or changes in texture before consuming.

Make Ahead Strategies

Prep vegetables and batter the night before for easy assembly in the morning. Store them separately for optimal freshness, and combine them just before cooking.

Freezing individual portions can be handy; simply thaw and reheat when ready. Consider keeping additional garnishes on hand, like fresh herbs or avocado, to elevate the final dish just before serving.

Scaling Instructions

To halve the recipe, simply divide the ingredients in half, ensuring you adjust cooking times appropriately. For larger gatherings, consider doubling or tripling the recipe while also ensuring to use a larger pan or batch cooking method.

When scaling, ensure that your utensil sizes can accommodate increased quantities, such as larger mixing bowls for the batter. Keep in mind that cooking times may vary based on the volume of ingredients used.

Nutritional Deep Dive

A macro breakdown reveals a well-balanced dish providing protein from eggs (if added), fiber from vegetables, and carbohydrates from the pancake base. This balance contributes to sustained energy levels throughout your day.

Micronutrient analysis shows a rich offering of vitamins A and C, especially when using fresh vegetables, benefiting your immune system and eyesight. It’s a nutritious choice for those looking for healthy breakfast or lunch options.

Dietary considerations are important; this dish appeals to a wide audience including vegetarians and those looking to add more vegetables to their meals. Portion analysis indicates 4 servings, making it ideal for family or friend gatherings while being conducive to portion control.

Dietary Adaptations

For gluten-free options, substitute traditional flour with almond or rice flour. This maintains texture while accommodating dietary restrictions.

Dairy-free versions can easily replace milk with plant-based alternatives like almond milk or oat milk. For a vegan approach, swap eggs with a flaxseed mixture or omit them entirely.

Low-carb eaters can enjoy by using a lower-carb flour and focusing on veggie ratios, while those following paleo or keto diets can opt for ingredient adjustments that suit their specific requirements.

Troubleshooting Guide

Texture issues may arise; if pancakes are too dense, consider adding more liquid to the batter. For a flat pancake, ensure your baking powder is fresh to help lift the batter during cooking.

Flavor balance can be fixed by adjusting seasonings; if it tastes bland, a pinch more salt or fresh herbs can brighten the dish.

Temperature problems can be resolved by ensuring the skillet is sufficiently preheated before adding the batter to avoid soggy pancakes. If your pancakes are burning, lower your heat and monitor closely to prevent this while still achieving a golden finish.

Recipe Success Stories

Community feedback has shown this recipe to be a favorite among families. Readers often share their variations, such as adding unique spices or alternative vegetables to personalize their scramble.

Photography tips have encouraged others to showcase their versions, emphasizing the vibrant colors of the dish. These successes demonstrate the versatility and charm of the Veggie Pancake Scramble, making it a popular choice for conscious eaters.

Frequently Asked Questions

Can I freeze the Veggie Pancake Scramble?

Yes, you can freeze the pancake scramble for up to a month. Ensure it is stored in a freezer-friendly container and reheat thoroughly before serving.

What are the best vegetables to use?

Some great options include bell peppers, spinach, onions, zucchini, and tomatoes. Feel free to experiment based on your personal preferences.

How do I prevent the pancakes from sticking to the pan?

Make sure to use a non-stick skillet and heat it properly before adding the batter. A light coating of cooking spray or oil can also help.

Can I make this recipe vegan?

Absolutely! Substitute eggs with a flaxseed mixture or simply omit them for a delicious vegan-friendly scramble.

Is it possible to use leftover pancakes?

Yes! Chopped leftover pancakes can be incorporated into the scramble for a quick and easy meal with minimal waste.

How can I increase the protein content?

You can add scrambled eggs, tofu, or cooked beans to your Veggie Pancake Scramble to boost the protein content significantly.

What kitchen equipment do I need for this recipe?

A non-stick skillet and a spatula are essential for making this dish. You may also want measuring cups and spoons for accurate ingredient measurements.

Can I use different types of flour?

Yes! You can customize your pancakes using whole wheat flour, almond flour, or other gluten-free alternatives according to your dietary needs.

How do I store leftover Veggie Pancake Scramble?

Store leftovers in an airtight container in the refrigerator for up to three days or freeze them in single servings for longer shelf life.

What are some great toppings for this scramble?

Consider toppings such as avocado, salsa, fresh herbs, or a dollop of yogurt to enhance your Veggie Pancake Scramble experience.

Additional Resources

For those interested in expanding their cooking repertoire, consider exploring related recipes that incorporate similar principles, such as veggie fritters or breakfast wraps. Technique guides on flipping pancakes or basic veggie preparation can also enhance your culinary skills.

Ingredient recommendations might include tips on sourcing organic produce or trying seasonal varieties for the freshest flavor. Equipment recommendations can inspire confidence in choosing the right tools for successful meal preparation. Finally, explore seasonal variations to keep your meals exciting throughout the year.

Join the Conversation

We’d love to hear from you! Share your personal experiences and variations of the Veggie Pancake Scramble on social media platforms. Capture mouth-watering photographs of your dish and tag us to inspire others in the community.

Read through recipe reviews and consider contributing your own feedback—your suggestions could help others discover the joy of this delicious scramble! Engage with fellow cooking enthusiasts, and don’t hesitate to share your culinary journey and creativity.

The Recipe

Veggie Pancake Scramble

Serves: 4

Prep Time: 10 mins

Cook Time: 15 mins

Total Time: 25 mins

Kitchen Equipment Needed

  • Non-stick skillet
  • Spatula
  • Mixing bowl
  • Measuring cups and spoons

Ingredients

  • 1 cup all-purpose flour
  • 1 cup milk (or dairy-free alternative)
  • 2 large eggs
  • 1 cup mixed chopped vegetables (bell peppers, spinach, onions)
  • 2 tablespoons olive oil
  • 1 teaspoon baking powder
  • Salt and pepper to taste

Directions

  1. In a mixing bowl, combine flour, baking powder, salt, and pepper.
  2. Add milk and eggs, whisking until just combined.
  3. Stir in the chopped vegetables.
  4. Heat olive oil in a non-stick skillet over medium heat.
  5. Scoop batter into the skillet, forming pancakes based on desired size.
  6. Cook until bubbles form, then flip and cook until golden brown.
  7. Remove from heat and serve warm with your favorite toppings.

Recipe Notes

  • Feel free to replace vegetables based on your preferences or what is in season.
  • For a vegan version, consider using flax eggs and plant-based milk.
  • Adding cheese gives extra creaminess; feel free to sprinkle shredded cheese before flipping.

Delicious Banana Peanut Butter French Toast Roll-Ups Recipe

Delicious Banana Peanut Butter French Toast Roll-Ups: A Breakfast Delight

⚖️
Difficulty
Easy

⏲️
Prep Time
10 mins

🕒
Cook Time
15 mins

⏱️
Total Time
25 mins

🍽️
Servings
4

If you’re looking for a delightful addition to your breakfast routine, these Banana Peanut Butter French Toast Roll-Ups are the perfect choice. This recipe features soft, sweet bananas and creamy peanut butter wrapped in crispy, golden-brown bread, all enhanced with a hint of cinnamon. Each bite is a heavenly combination of flavors that will satisfy your morning cravings while providing a nutritious boost to your day.

Not only are these roll-ups incredibly delicious, but they are also quick to prepare, making them an ideal option for busy mornings or leisurely brunches. The fun, roll-up format adds a playful twist to traditional French toast, appealing to both kids and adults alike. Serve them drizzled with warm maple syrup or topped with fresh fruits and whipped cream for a breakfast that feels indulgent but is easy to make.

Quick Recipe Highlights

  • Flavor Profile: Sweet bananas and nutty peanut butter create a perfect balance with a hint of cinnamon.
  • Texture: The crispy exterior contrasts beautifully with the creamy filling, making each bite satisfying.
  • Aroma: The warm, inviting scent of cinnamon and toasted bread fills the kitchen, creating a welcoming atmosphere.
  • Visual Appeal: These roll-ups are golden, inviting, and can be beautifully garnished with fresh fruit.
  • Skill Level Needed: Perfect for beginners, as well as seasoned cooks looking for a quick and fun dish.
  • Special Equipment: You will need a non-stick skillet and a rolling pin for easy assembly.

Recipe Overview

  • Difficulty Level: This recipe is simple and straightforward, requiring minimal techniques and ingredients. It’s perfect for anyone who is new to cooking.
  • Category: Ideal for breakfast or brunch, these roll-ups can also serve as a sweet snack or dessert option.
  • Cuisine: Inspired by American breakfast traditions, this recipe incorporates classic flavors in a creative format.
  • Cost: The ingredients used are economical, making this a budget-friendly option for families and individuals.
  • Season: These roll-ups can be enjoyed year-round, especially when bananas are in season.
  • Occasion: Perfect for casual family breakfasts, festive brunches, or even sleepover treats.

Why You’ll Love This Recipe

First and foremost, the taste and texture of Banana Peanut Butter French Toast Roll-Ups will impress anyone. The rich creaminess of the peanut butter pairs exquisitely with the sweet, soft bananas, all enveloped in the comforting embrace of lightly toasted bread. This combination not only satisfies your taste buds but also fills your belly, making it a wholesome start to any day.

Convenience is another advantage of this recipe. It takes just minutes to whip together all the ingredients and prepare these delectable roll-ups. Perfect for those who are short on time yet still want to enjoy a homemade breakfast, you can even prep them the night before!

Nutrition is not forgotten in this recipe. Bananas provide essential vitamins and minerals, while peanut butter is rich in healthy fats and protein. This makes the roll-ups not only a tasty treat but a nutritionally beneficial option as well.

Whether you are serving them to family or friends, these roll-ups have a social appeal that ignites conversation and joy around the breakfast table. They not only make a beautiful presentation on the plate but also invite everyone to dig in and share their favorite toppings and variations.

Finally, this recipe demonstrates cost-effectiveness. With simple ingredients that are readily available in most household pantries, you can create an impressive breakfast without breaking the bank.

Historical Background and Cultural Significance

The origins of French toast can be traced back to ancient times when people found ways to reuse stale bread. As cultures evolved, so did the recipes, and it became a popular breakfast option across various countries. The introduction of peanut butter, primarily in the United States in the 20th century, transformed many dessert and snack recipes, making it a staple in American kitchens.

In many cultures, breakfast is no mere meal; it’s a ritual that sets the tone for the day. In the U.S., combining peanut butter with familiar breakfast staples like bananas symbolizes comfort and homeliness, making these roll-ups not just food but a nostalgic experience.

This recipe reflects the evolution of breakfast dishes, showcasing how traditional elements can be reimagined to create something fun and new. By wrapping a classic French toast into a portable roll-up, it brings a fun twist to a beloved dish.

Regional variations of French toast exist worldwide, with each country typically adding its own local flavors and techniques. This recipe draws on the American preference for nut spreads, creating a fusion that speaks volumes about adaptability and creativity in cooking.

Ingredient Deep Dive

Bananas: Rich in potassium and dietary fiber, bananas have a tropical sweetness that many people love. They are versatile and can be used in baking, smoothies, or eaten fresh. When selecting bananas for this recipe, opt for those that are ripe but not overly soft to prevent them from turning too mushy.

Additionally, bananas can be stored at room temperature until ripe, after which they can be refrigerated to prolong freshness. If you have overripe bananas, consider using them in baking or smoothies as a delicious alternative.

Peanut Butter: This ingredient is a fantastic source of protein and healthy fats. Originating in the U.S., peanut butter has become a globally enjoyed pantry staple. When choosing peanut butter, look for natural brands that contain minimal additives and preservatives. Smooth peanut butter replicates a creamier texture, but chunky can add a delightful crunch.

Store peanut butter in a cool, dry place, and if you want to extend its life, refrigeration can be a good option. If you prefer, almond or sunflower seed butter can be excellent alternatives for those with nut allergies.

Common Mistakes to Avoid

  • Over-soaking the bread, which can lead to soggy roll-ups with a mushy texture. Use the egg mixture sparingly to avoid this issue.
  • Choosing overly ripe bananas; while they should be soft, extremely overripe fruit can lead to a messy filling.
  • Cooking on too high a heat can burn the exterior while the inside remains uncooked. Opt for medium heat to ensure even cooking.
  • Not allowing the skillet to heat sufficiently before adding the roll-ups, which may cause them to stick.
  • Skipping the cinnamon, which adds essential flavor—it’s a crucial part of the French toast experience!
  • Neglecting to chill the mixture, which may lead to uneven spreads of peanut butter and banana.
  • Using stale or dry bread. Fresh bread that can hold moisture works best to create a soft interior.
  • Not pressing the roll-ups firmly while cooking can cause them to unravel—ensure a gentle but firm grip when flipping.
  • Serving them cold; a warm roll-up is delightful and helps revive the flavors.
  • Overloading the filling can cause overflow during cooking, so keep it modest for best results.

Essential Techniques

Master the art of rolling by keeping the filling centralized. This prevents spillage and ensures even cooking. Gently flatten the bread with a rolling pin before assembling to create a thinner layer that rolls up more easily.

Another key technique is proper heat management. Start with medium heat and adjust as needed to ensure the exterior crisps without burning. Use a non-stick skillet or lightly greased pan to aid in the flawless flipping of your roll-ups.

Pro Tips for Perfect Banana Peanut Butter French Toast Roll-Ups

1. Use different types of bread for unique flavors, such as brioche or wraps, to add a delightful twist.

2. Experiment with flavored peanut butter like chocolate or honey for additional taste layers.

3. For added indulgence, drizzle melted chocolate or Nutella on top before serving.

4. Make extra roll-ups and freeze for a quick breakfast option later on!

5. Consider adding a sprinkle of nuts or granola in the filling for extra crunch and nutrition.

6. Pair with a protein like scrambled eggs to balance the sweetness and create a fuller meal.

7. Garnish with seasonal fruits like berries or kiwi for a colorful presentation.

8. Serve with a side of yogurt to enhance flavor and nutritional value.

Variations and Adaptations

For a chocolate lover’s delight, include a few chocolate chips along with the banana and peanut butter. This can transform your roll-ups into a dessert-like morning treat that feels indulgent yet comforting.

Seasonal adaptations can mean adding spiced apples or pumpkin puree in the autumn for a comforting fall variant that embraces the season’s flavors. Also, consider switching in almond or sunflower butter for those with nut allergies, providing a similar texture and flavor profile.

For a lighter option, try a low-carb bread or even zucchini-based wraps to keep the same filling while maintaining a low-carb approach. Additionally, gluten-free bread can ensure this recipe aligns with gluten-free dietary needs without sacrificing taste.

Lastly, consider serving these roll-ups with a light dusting of powdered sugar or a drizzle of maple syrup to enhance presentation, making them even more inviting!

Serving and Presentation Guide

When plating Banana Peanut Butter French Toast Roll-Ups, consider a simple, elegant arrangement that enhances their appeal. Stack them neatly in a pyramid or arrange them in a line, garnished with fresh fruits for a pop of color.

Drizzle with honey or maple syrup just before serving for an eye-catching finish, and a light sprinkle of cinnamon or powdered sugar can further elevate the presentation. Use vibrant berries or mint leaves as garnish for added freshness, ensuring an artistic and delicious showcase.

For added interest, serve the roll-ups alongside a small bowl of yogurt for dipping or drizzling. This not only offers a complementary flavor but also introduces a delightful contrast to the rich peanut butter.

Wine and Beverage Pairing

While these roll-ups are often enjoyed as a standalone breakfast treat, pairing them with the right beverages can elevate the experience. A light, fruity sparkling wine pairs beautifully with the sweetness of the roll-ups, making for an inviting brunch option.

For non-alcoholic alternatives, a freshly squeezed orange juice adds a refreshing citrusy note that balances the richness of the peanut butter. An iced coffee or chai latte can also complement this breakfast, enhancing the flavor profile while providing an energizing boost to your morning routine.

Storage and Shelf Life

To store leftover Banana Peanut Butter French Toast Roll-Ups, place them in an airtight container in the refrigerator for up to 3 days. When reheating, opt for an oven or skillet to maintain the crispiness of the exterior.

If you want to extend their lifespan, these roll-ups can be frozen. Wrap them individually in plastic wrap and place them in a freezer-safe bag for up to 2 months. To reheat, allow them to thaw in the refrigerator overnight before warming them in the oven.

Make Ahead Strategies

These delicious roll-ups are not only quick to make but also suitable for meal prep. Assemble the roll-ups and store them in the fridge for up to 24 hours before cooking. This allows the flavors to meld, making for an even tastier breakfast option.

For those in need of speed in the morning, you can cook them ahead of time and reheat in the skillet or microwave, adding a quick drizzle of syrup before serving for a fresh touch.

Scaling Instructions

To halve this recipe, simply use two pieces of bread and one banana instead of four slices and two bananas. Adjust the peanut butter accordingly for balanced flavor. For larger gatherings, feel free to double or triple the recipe by ensuring a larger cooking surface to accommodate all roll-ups simultaneously.

Take note of cooking times, as they may vary with larger batches, so always ensure even cooking by flipping regularly. Store any extras carefully, following the same guidelines for immediate and future consumption.

Nutritional Deep Dive

Each serving of Banana Peanut Butter French Toast Roll-Ups provides a balanced macro breakdown. The combination of carbohydrates from the bread, fats from the peanut butter, and proteins from eggs creates a satisfying meal that fuels your day.

This recipe also boasts a good supply of micronutrients, including potassium from bananas and vitamin E from peanut butter. A comprehensive analysis will reveal that these roll-ups support energy levels, muscle function, and overall health.

Dietary Adaptations

For a gluten-free version of these roll-ups, swap regular bread for gluten-free bread options available in most stores. Ensure that all additional ingredients, particularly sauces and condiments, are also gluten-free.

Going dairy-free? Just choose a non-dairy milk substitute in the egg mixture, and enjoy the loves of this delicious breakfast item. A vegan approach can be realized using a plant-based alternative to eggs and nut butters that comply with vegetarian lifestyles.

Troubleshooting Guide

If your roll-ups turn out too soggy, ensure you’re not over-soaking the bread. Use enough egg mixture to coat but not saturate the slices. If the filling spills out while cooking, reduce the amount you place inside each roll to prevent overflow.

Should you encounter burning on the outside while the inside remains cold, check your heat settings; cooking them on lower heat for a longer time ensures an even cook. Adjust the cooking times based on thickness of the bread you’re using to avoid uneven results.

Recipe Success Stories

Community feedback has shown that many families love to make this recipe together, creating cherished moments over breakfast. Readers frequently share their adaptations, such as using flavored nut butters or adding chocolate chips, highlighting the recipe’s versatility.

Many have reported success in creating this dish not just for breakfast but also for dessert, showcasing its adaptability in different mealtimes. The ease of preparation has encouraged readers to make this a staple for when guests come to visit.

Frequently Asked Questions

Can I use other fruits instead of bananas?

Absolutely! Berries, peaches, or apples can be great substitutes. Just ensure they are cut into small pieces for easier rolling.

What type of bread is best to use?

White sandwich bread, whole grain, or even brioche work great. Choose a bread that you enjoy and stays fresh for optimal results.

Can I make these roll-ups ahead of time?

Yes, you can assemble them the night before and store in the fridge. Just cook them fresh in the morning for the best texture.

What other spreads can I use instead of peanut butter?

You can substitute with almond butter, Nutella, or even a yogurt spread for a different flavor profile.

Are these roll-ups suitable for freezing?

Yes, they freeze well! Wrap individually and store in a freezer-safe container or bag. Reheat when ready to enjoy!

Can I omit the cinnamon?

While cinnamon adds warmth and flavor, you can omit it if you prefer. You may also choose to substitute with nutmeg for a different aromatic experience.

How do I know when they are done cooking?

They should be golden brown and crispy on the outside. The filling should be warm without any cold spots inside.

What can I top them with?

Options are endless! Consider fresh fruit, whipped cream, syrup, or even a dusting of powdered sugar for added sweetness and flair.

Can I make these roll-ups vegan?

Yes! Use plant-based egg substitutes and coconut or almond milk for the batter; other than that, follow the recipe as directed.

Is this recipe kid-friendly?

Absolutely! Kids love rolling their own and can help choose fillings, making it a fun family activity.

Additional Resources

For more delightful breakfast ideas, check out our other recipes featuring family favorites. Explore technique guides that delve into mastering the art of breakfast and ingredient information that highlights the nutritional benefits of classic ingredients. Don’t forget to browse equipment recommendations to make your cooking experience even easier.

Join the Conversation

We’d love to hear your thoughts about these Banana Peanut Butter French Toast Roll-Ups. Share your photos on social media and tag us for a chance to be featured! Join our community by leaving a review of your experience, and let us know about your unique variations. Together, let’s celebrate the joys of cooking and create delicious memories through food.

The Recipe

Banana Peanut Butter French Toast Roll-Ups

Serves: 4

Prep Time: 10 mins

Cook Time: 15 mins

Total Time: 25 mins

Kitchen Equipment Needed

  • Non-stick skillet
  • Rolling pin
  • Mixing bowl
  • Spatula
  • Measuring cups and spoons

Ingredients

  • 4 slices of bread
  • 1 large banana, sliced
  • 1/4 cup peanut butter
  • 2 eggs
  • 1/4 cup milk (or plant-based alternative)
  • 1 teaspoon cinnamon
  • Butter or oil for frying
  • Maple syrup for serving

Directions

  1. In a mixing bowl, whisk together eggs, milk, and cinnamon.
  2. Flatten each slice of bread using a rolling pin. Spread peanut butter evenly, followed by a line of banana slices.
  3. Roll each slice tightly and secure with a toothpick if necessary.
  4. Heat a non-stick skillet over medium heat and add butter or oil.
  5. Dip each roll-up into the egg mixture, coating thoroughly, then place in the skillet seam side down.
  6. Cook until golden brown and crispy, 3-4 minutes on each side.
  7. Remove toothpicks if used, and serve warm with maple syrup.

Recipe Notes

  • For added flavor, consider incorporating a pinch of nutmeg into the egg mixture.
  • These roll-ups can be customized with different nut butters or additional fillings like chocolate chips or nuts.
  • Leftovers can be stored in the refrigerator and reheated for convenience.

Delicious Easy Breakfast Cheese Danish Recipe for Busy Mornings

Easy Breakfast Cheese Danish: A Delightful Morning Treat

⚖️
Difficulty
Easy

⏲️
Prep Time
15 mins

🕒
Cook Time
20 mins

⏱️
Total Time
35 mins

🍽️
Servings
8

The Easy Breakfast Cheese Danish is a delicious way to start your day, combining creamy cheese filling with flaky pastry. This recipe is not just about simplicity; it captures the essence of a classic Danish pastry without the hassle of traditional methods. Imagine biting into a warm, buttery pastry that cradles a sweetened cream cheese filling, each bite melting in your mouth. As the first rays of the morning sun peek through your window, this comforting treat becomes a perfect companion with your morning coffee.

With just a few basic ingredients, you can create a bakery-quality breakfast at home. The balance of sweet and savory flavors with a hint of vanilla and lemon zest satisfies any craving. This Easy Breakfast Cheese Danish is sure to impress family and friends alike, whether you serve it on a relaxing Sunday morning or at a gathering. Prepare to treat yourself and your loved ones to a delightful breakfast experience!

Quick Recipe Highlights

  • Flavor Profile: This Easy Breakfast Cheese Danish features a sweetened cream cheese filling, enhanced with vanilla and a slight citrus kick from lemon zest.
  • Texture: The outer pastry is flaky, buttery, and light, while the filling is creamy and smooth, creating a delightful contrast.
  • Aroma: Baked to perfection, this Danish emits an inviting aroma of warm pastry and sweet cream cheese, making it hard to resist.
  • Visual Appeal: Golden-brown with a glossy finish, the Danish is topped with a dusting of powdered sugar, making it a feast for the eyes.
  • Skill Level Needed: This recipe is easy enough for beginners, making it a perfect choice for those looking to hone their baking skills.
  • Special Equipment: You will need a baking sheet, parchment paper, and basic kitchen tools.

Recipe Overview

  • Difficulty Level: This Easy Breakfast Cheese Danish is incredibly simple, requiring minimal hands-on time to prepare and comes together effortlessly.
  • Category: This recipe falls under breakfast and brunch, making it an ideal choice for leisurely mornings.
  • Cuisine: Traditional Danish pastry with a modern twist, this recipe maintains the beloved elements while simplifying the process for home bakers.
  • Cost: With affordable ingredients such as cream cheese, pastry dough, and sugar, this breakfast treat is economical for most households.
  • Season: Perfect for any season, this Danish is a wonderful addition to holiday breakfast spreads or casual gatherings.
  • Occasion: Ideal for brunches, holidays, or an everyday indulgence, this pastry can elevate any meal.

Why You’ll Love This Recipe

Every bite of the Easy Breakfast Cheese Danish offers a delightful fusion of creamy and flaky textures. The sweetness of the cream cheese filling perfectly balances the light, buttery pastry, creating a satisfying experience that will brighten your mornings. Moreover, the versatility of this recipe allows it to cater to various palates.

Convenience is at the forefront with this recipe, as it requires straightforward steps and minimal preparation. You can whip up the filling while the pastry bakes, making it easy to multitask. The use of store-bought pastry dough further saves time, making breakfast a breeze.

From a nutritional standpoint, the inclusion of cream cheese adds a dose of calcium and protein, ensuring that your breakfast keeps you energized throughout the morning. You can also opt for lower-fat cream cheese for a lighter alternative without sacrificing flavor.

Socially, the Easy Breakfast Cheese Danish serves as a conversation starter at gatherings, inviting friends and family to share their experiences while enjoying a delightful treat. Whether served at a casual brunch or a holiday celebration, it encourages connection and savoring the moment.

Lastly, this recipe stands out for its cost-effectiveness. With simple ingredients readily available at most grocery stores, you can treat yourself and your family to a delightful pastry without breaking the bank. Putting quality food on the table while keeping it budget-friendly is a win for any home cook.

Historical Background and Cultural Significance

The roots of Danish pastry can be traced back to Austria, where it was first developed. Brought to Denmark by bakers in the 19th century, it underwent a transformation to incorporate local Nordic flavors. The pastry evolved over time, blending techniques from various cultures, ultimately leading to the creation of the flaky, delicious Danish we know today.

In Denmark, this pastry isn’t merely a treat; it’s a cultural icon often enjoyed during celebrations and alongside coffee in social settings. The Danish love for pastries has made them a staple in cafes and homes alike, showcasing their culinary heritage.

As the recipe has evolved, so have the variations, leading to countless adaptations featuring fruits, nuts, and even savory fillings. The Easy Breakfast Cheese Danish is a modern iteration, making this beloved classic accessible and easy to prepare.

Regionally, variations of the Danish pastry are celebrated throughout Europe, each with unique fillings and techniques. The ubiquity of the Danish pastry in bakeries worldwide has solidified its status as a beloved breakfast option, infusing homes and gatherings with warmth and tradition.

Ingredient Deep Dive

Cream Cheese:
Cream cheese is known for its smooth, creamy texture and its role in desserts and breakfast dishes. Originating in the United States in the 19th century, it has since become a staple in many recipes. Nutritionally, cream cheese provides a good source of calcium and fat, contributing significantly to flavor and richness in recipes like our Easy Breakfast Cheese Danish. When selecting cream cheese, choose blocks over spreads for better consistency. Store it wrapped tightly in the refrigerator, and it can last for a couple of weeks. For substitutions, consider ricotta or mascarpone for a different flavor profile.

Puff

Delicious Parmesan Zucchini Potato Muffins for Healthy Snacking

Parmesan Zucchini Potato Muffins: A Savory Delight for All

⚖️
Difficulty
Easy

⏲️
Prep Time
15 mins

🕒
Cook Time
25 mins

⏱️
Total Time
40 mins

🍽️
Servings
12 muffins

Parmesan Zucchini Potato Muffins are a delightful combination of savory flavors and nutritious vegetables. The rich, nutty taste of Parmesan cheese melds perfectly with the moisture of zucchini and the earthiness of potatoes, creating a muffin that’s not only delicious but also satisfying. Each bite delivers a hearty texture, making these muffins a wonderful choice for breakfast, a snack, or even as a side dish to complement your meals.

These muffins are perfect for those who are looking to enjoy wholesome ingredients packed into a tasty format. With their appealing golden-brown crust and tender center, Parmesan Zucchini Potato Muffins not only taste amazing but also look tempting on the table. The aroma of baked Parmesan and fresh vegetables fills the kitchen, inviting everyone to enjoy them right out of the oven.

Quick Recipe Highlights

  • Flavor Profile: A scrumptious blend of cheesy, savory, and subtly herbaceous notes from the zucchini and potatoes, balanced with the richness of Parmesan.
  • Texture: Each muffin has a soft, moist interior with a slightly crispy exterior, providing a satisfying contrast.
  • Aroma: The delightful scent of baked cheese and fresh herbs wafts through the air, elevating your dining experience.
  • Visual Appeal: These muffins present beautifully with their golden tops, flecks of green zucchini, and inviting overall look.
  • Skill Level Needed: An easy recipe for all skill levels, perfect for beginner cooks looking to impress.
  • Special Equipment: Just a muffin tin and a mixing bowl, making this recipe accessible and convenient.

Recipe Overview

  • Difficulty Level: This recipe is categorized as easy due to straightforward steps and minimal ingredients. It’s ideal for beginners who want to create something delicious without getting overwhelmed.
  • Category: These muffins can serve as breakfast items, snacks, or side dishes, making them versatile for any meal of the day.
  • Cuisine: While not traditionally tied to a specific cuisine, this recipe draws influences from Mediterranean flavors through the use of Parmesan cheese and fresh vegetables.
  • Cost: With affordable ingredients like potatoes and zucchini, these muffins offer a budget-friendly option for satisfying your savory cravings.
  • Season: Zucchini is commonly available in summer but can be found year-round, making this recipe adaptable to various seasons.
  • Occasion: Perfect for brunch gatherings, potlucks, or family breakfasts. These muffins are sure to become a crowd favorite.

Why You’ll Love This Recipe

These Parmesan Zucchini Potato Muffins are not only delicious but also incredibly appealing in terms of taste and texture. The savory blend of ingredients creates a muffin that is rich and satisfying, while the addition of zucchini keeps them moist and tender, ensuring you can enjoy them for any meal. Whether paired with a salad or enjoyed alone, these muffins provide a delightful burst of flavor.

For busy individuals and families, the convenience of this recipe is a major plus. The muffins can be made in advance and stored for later meals, making them an excellent solution for quick breakfasts on hectic mornings. They are easy to grab on the go, providing a wholesome option without sacrificing flavor.

Nutritionally, these muffins shine due to the inclusion of zucchini and potatoes, both of which are packed with vitamins and minerals. Zucchini is a low-calorie vegetable that adds fiber and helps keep you feeling full, while potatoes provide a good source of carbohydrates, making these muffins an excellent energy booster.

When it comes to entertaining, these muffins serve well for guests, proving to be a hit at gatherings. Whether serving them at a brunch or a picnic, they are easy to share and encourage conversation around the table. People will love to know your secret for making such delightful muffins!

Additionally, the cost-effectiveness of this recipe cannot be ignored. With affordable ingredients and the option to freeze leftovers, these muffins are an accessible and practical option for anyone looking to enjoy delicious food without breaking the bank.

Historical Background and Cultural Significance

The origins of zucchini muffins can be traced back to regions where zucchini is a staple vegetable, particularly in Mediterranean cuisines. These regions have historically embraced the use of seasonal produce in their cooking, often incorporating what was fresh into versatile dishes such as muffins. Over time, the integration of cheese, particularly Parmesan, has made these muffins even more flavorful and appealing.

Culturally, such savory baked goods represent a trend towards healthier eating, focusing on incorporating vegetables into everyday meals. In many cultures, including Italian, the emphasis on using fresh ingredients and minimizing waste aligns with the philosophy behind these muffins. The goal is to create something delicious that makes the most of seasonal produce.

The evolution of this recipe has led to various adaptations, with some preferring additional spices or herbs to elevate the flavor. The basic concept of combining grains, vegetables, and cheese has remained popular due to its simplicity and adaptability for different palates.

Regional variations are seen in the way these muffins are prepared, as some areas may use local cheeses or experiment with additional ingredients. This adaptability has allowed the concept of cheesy vegetable muffins to transcend boundaries and capture the hearts of food lovers everywhere.

Ingredient Deep Dive

Zucchini: Zucchini is a versatile vegetable that has its roots in Southern Italy, where it thrives in warm climates. It is an excellent source of hydration thanks to its high water content and provides dietary fiber essential for digestive health. When selecting zucchini, look for firm specimens without soft spots, and store them in a cool place to maintain freshness.

Potatoes: Potatoes have a long history as a dietary staple around the world, originating from ancient Peru. Their carbohydrate content makes them a valuable source of energy, and they are rich in vitamins C and B6. Choose potatoes that are unblemished and firm, and store them in a dark, cool place to prevent sprouting.

Parmesan Cheese: Parmesan cheese, with its nutty flavor and granular texture, has been cherished in Italian cuisine for centuries. It is a rich source of calcium and protein that enhances various dishes. Use freshly grated Parmesan for the best flavor, and store it in an airtight container in the refrigerator to maintain its quality.

Common Mistakes to Avoid

  • Over-mixing the batter: Mixing too much can lead to dense muffins; stir just until combined.
  • Using overly wet zucchini: Squeeze out excess moisture from zucchini for better texture.
  • Inaccurate ingredient measurements: Use a kitchen scale or measuring cups for precise amounts.
  • Underbaking the muffins: Always check doneness with a toothpick; it should come out clean.
  • Skipping the muffin liners or greasing the pan: This can cause muffins to stick; line or grease the pan properly.
  • Not preheating the oven: Proper oven temperature is essential for the right rise and texture.
  • Crowding the muffin tin: Leave space between muffins for even baking.
  • Not allowing muffins to cool: Letting them cool in the pan can cause sogginess; transfer to a wire rack.
  • Using low-quality cheese: Aged Parmesan adds depth; avoid pre-grated cheese for the best flavor.
  • Ignoring ingredient freshness: Use fresh vegetables and cheese for optimal taste and nutrition.

Essential Techniques

Understanding how to combine dry and wet ingredients properly is crucial for perfect muffins. Begin by incorporating your dry ingredients into a separate bowl before gradually blending them with your wet mixture. This process not only enhances the aeration of the batter but also ensures that the muffins rise evenly, creating a pleasing texture.

Another important technique is to prepare your vegetables correctly. For zucchini, make sure to grate it finely and, if necessary, squeeze out excess water to prevent the muffins from becoming soggy. These simple steps enhance your muffins’ flavors and contributed texture, resulting in a delightful finished product.

Pro Tips for Perfect Parmesan Zucchini Potato Muffins

– Ensure the oven is fully preheated for even baking, as starting in a cold oven can lead to unevenly cooked muffins.
– Experiment with herbs: Adding fresh or dried herbs like thyme or oregano can elevate the flavor profile significantly.
– Use a mix of potato types for enhanced flavor and texture; for a gourmet touch, try mixing in sweet potatoes.
– For a unique twist, incorporate ingredients like sun-dried tomatoes or olives to give your muffins a Mediterranean flair.
– Allow the muffins to cool completely before storing to maintain freshness and prevent moisture build-up.
– Consider a dash of cayenne pepper for heat; it pairs surprisingly well with the richness of the cheese.
– For extra richness, swap half of the zucchini with grated carrots for a colorful twist.
– Freeze your muffins for long-term storage. They are a fantastic grab-and-go snack when you need something quick.

Variations and Adaptations

For a seasonal adaptation, consider incorporating diced bell peppers or corn in the summer for a fresh bite. In autumn, using pumpkin puree instead of some potato would add a lovely flavor while still keeping your muffins moist and flavorful.

When aiming for dietary modifications, simply substitute regular flour with almond or coconut flour for gluten-free options. For those avoiding dairy, consider using nutritional yeast and a dairy-free cheese alternative to flavor the muffins.

Flavor variations can also be achieved by adding spices such as smoked paprika or Italian seasoning, giving an unexpected twist to the classic recipe. Different cheese options, like feta or goat cheese, can also transform the overall flavor, allowing you to tailor the dish to your preferences.

Serving and Presentation Guide

For plating, arrange your muffins on a wooden board or platter to create a rustic feel. Garnishing with chopped herbs, such as parsley or basil, can add a splash of color and freshness to your presentation. Serve with a light dipping sauce or olive oil for a gourmet touch, enhancing the overall tasting experience.

Temperature plays a significant role in serving; muffins can be enjoyed warm or at room temperature, making them flexible for various meal settings. Consider pairing your muffins with scrambled eggs or a mixed green salad for a balanced meal, and keep portion sizes in check for a healthy approach.

Wine and Beverage Pairing

For wine pairings, a crisp Sauvignon Blanc complements the savory notes of the muffins beautifully, enhancing the overall dining experience. Alternatively, a fruity Chardonnay would also pair nicely, offering a creamy contrast to the texture.

If you’re seeking non-alcoholic alternatives, a refreshing herbal iced tea or sparkling lemonade can provide a delightful contrast to the savory flavors of the muffins. For those who enjoy coffee or tea, a light roast coffee would not overpower the flavor while providing a pleasant accompaniment.

Storage and Shelf Life

Proper storage is essential for keeping these muffins fresh. Store them in an airtight container at room temperature for up to three days. If you need to keep them longer, consider refrigerating them, where they will last for about a week.

Signs of spoilage include an off smell or unusual texture; always check before consuming stale muffins. When reheating, a quick microwave session or a brief time in a toaster oven will revive their original taste and texture.

For long-term storage, you can freeze the muffins. Place them in a freezer-safe bag, and they will keep for up to three months. To enjoy, simply thaw them in the refrigerator overnight or enjoy them directly from the freezer for a chilled treat.

Make Ahead Strategies

To make your life easier, prepare the batter the night before and store it in the refrigerator. This way, you can simply fill the muffin tins in the morning and bake them fresh. Alternatively, fully bake the muffins in advance and cool them completely before storage.

You can store batter between steps by chilling any prepared ingredients separately, ensuring freshness while maintaining the quality for baking later. Given that the muffins will still rise during baking, this strategy helps preserve flavor.

Finally, for the best quality, consider adding fresh elements such as a dollop of pesto or a sprinkle of fresh herbs right before serving, enhancing both flavor and presentation.

Scaling Instructions

If you’re planning to halve the recipe, ensure you adjust the baking time accordingly; smaller batches typically bake faster. Always keep an eye on the muffins and perform the toothpick test for doneness.

When doubling or tripling the recipe, consider using multiple muffin tins to speed up the process. You may also choose to bake them in batches or adjust the oven racks to accommodate larger quantities.

Timing is crucial when scaling; larger batches could have different baking times, so always plan for additional minutes as needed. Additionally, ensure that your mixing bowl and muffin tins are large enough to handle the increased volume without causing spillovers.

Nutritional Deep Dive

Understanding the nutritional benefits of your ingredients will enhance your appreciation of these muffins. The base of zucchini and potatoes provides essential vitamins and minerals, contributing to overall health. Zucchini is particularly low in calories yet high in antioxidants, making it a great addition to any diet.

Parmesan cheese contributes protein and calcium but can also be higher in sodium. Balancing the muffin’s ingredients helps control this while maximizing nutrient intake.

A typical muffin offers a balanced macros profile, giving you energy from complex carbohydrates while providing fiber from the zucchini. Portion control is essential, especially if mindful of caloric intake, so enjoy these muffins while staying within your dietary goals.

Dietary Adaptations

For gluten-free options, substitute regular flour with a gluten-free blend or almond flour—a great way to ensure everyone can enjoy these muffins.

Those who are dairy-free can replace Parmesan with nutritional yeast and a dairy-free cheese alternative, ensuring that flavour is still vibrant and cheesy without the dairy. This adaptation retains the delicious essence of the original recipe.

Vegans can easily swap out the eggs for flax eggs or applesauce, making them not only egg-free but also suitable for those following plant-based diets. Exploring low-carb variations by using cauliflower rice instead of potato can be another great alternative.

Troubleshooting Guide

If you encounter texture issues, such as overly dense muffins, check if you may have over-mixed the batter or added excess moisture. Allowing the batter to rest for a few minutes can also yield a lighter texture.

Flavor balance problems can often be attributed to under-seasoning—make sure to taste the batter before baking, and don’t shy away from extra seasoning as needed.

For temperature-related challenges, ensure that the muffins are baked at the correct temperature, as ovens can vary. Adjusting the rack position can also affect results; lower racks often yield more even baking.

If substitutions have led to unexpected results, revisit the proportions you’ve used, as some ingredients may not provide the same structure or flavor. Lastly, maintain proper timing to ensure everything is baked to chewy perfection.

Recipe Success Stories

Many readers have shared their delightful experiences with Parmesan Zucchini Potato Muffins, praising their flavor and ease of preparation. Community feedback often highlights how families enjoy these muffins for brunch or even as part of school lunches.

Variations have also captured attention, with readers experimenting with different cheeses and vegetables to elevate the recipe. Adjusting the spices has become a favored method for many, creating personal touches that resonate with individual palates.

Adaptation stories often involve making these muffins healthier by swapping ingredients, showing that innovation keeps the recipe fresh while maintaining the original spirit. Tips for photography have also emerged, with readers showcasing their beautiful creations on social media, inspiring others to recreate the dish at home.

Frequently Asked Questions

Can I freeze Parmesan Zucchini Potato Muffins?

Yes, these muffins freeze well! Store them in an airtight container or freezer bag, and they will maintain their flavor for up to three months. Thaw them overnight in the refrigerator for the best results.

How do I know when my muffins are done?

Perform the toothpick test: insert a toothpick in the center of a muffin, and if it comes out clean or with a few crumbly bits, they are ready. If wet batter clings to the toothpick, bake for a few more minutes.

Can I substitute zucchini with other vegetables?

Absolutely! You can use finely grated carrots, yellow squash, or even finely chopped spinach as substitutions. Just ensure that you adjust moisture content as needed.

How long do these muffins stay fresh?

When stored in an airtight container at room temperature, they can last for up to three days. Refrigeration extends their life to about a week.

Can I make a mini version of these muffins?

Yes, you can use a mini muffin tin! Bake for about 15-20 minutes, checking for doneness with a toothpick for proper cooking times.

What can I serve with these muffins?

They pair excellently with yogurt, fresh fruit, or a side salad for a complete meal. Enjoy them with scrambled eggs for a hearty breakfast.

Are these muffins suitable for kids?

Yes, they are great for kids due to their bite-sized nature and healthy ingredients. You can also adjust the seasonings to suit their tastes.

Can I use store-bought shredded zucchini?

While you can, homemade shredded zucchini will yield better flavor and freshness. Store-bought options can sometimes be wetter, affecting the texture of your muffins.

What other cheeses work well in this recipe?

Feta, cheddar, or mozzarella can also be wonderful substitutes if you want to vary the flavors. Each cheese will add its unique taste and texture.

How can I make these muffins healthier?

Consider reducing the cheese amount, using whole-grain flour, or adding more vegetables to increase fiber content while keeping it wholesome and delicious.

Additional Resources

If you’re looking to explore more recipes like these Parmesan Zucchini Potato Muffins, check out our selection of vegetable muffins that incorporate seasonal produce. We also offer unique tips for mastering muffin-making techniques, including proper mixing and baking strategies.

Additionally, learn more about ingredient nutrition, which can help you customize your dishes to suit dietary preferences. Our kitchen equipment guides will assist you in choosing the best tools to elevate your cooking. Finally, seasonal variations can keep your meals exciting throughout the year, ensuring that every recipe feels fresh and delicious.

Join the Conversation

We love hearing from our readers! Share your experiences with Parmesan Zucchini Potato Muffins on social media by tagging us. Share your photos and variations as a source of inspiration for others looking to try this delicious recipe. We encourage you to leave reviews, impart advice, and engage with the community, creating a delicious dialogue around food and cooking!

The Recipe

Parmesan Zucchini Potato Muffins

Serves: 12 muffins

Prep Time: 15 mins

Cook Time: 25 mins

Total Time: 40 mins

Kitchen Equipment Needed

  • Muffin tin
  • Mixing bowl
  • Grater for zucchini
  • Measuring cups and spoons
  • Whisk or spoon for mixing

Ingredients

  • 1 cup grated zucchini, excess moisture squeezed out
  • 1 cup mashed potatoes
  • 1 cup all-purpose flour
  • 1 cup grated Parmesan cheese
  • 2 large eggs
  • 1 teaspoon baking powder
  • Salt and pepper to taste
  • 1 teaspoon garlic powder (optional)
  • 2 tablespoons chopped fresh herbs (parsley, thyme, or basil)

Directions

  1. Preheat your oven to 375°F (190°C) and grease your muffin tin or line it with paper liners.
  2. In a large bowl, combine the grated zucchini, mashed potatoes, and beaten eggs.
  3. Add in the flour, Parmesan cheese, baking powder, and seasonings. Stir just until combined; do not over-mix.
  4. Fold in the fresh herbs for added flavor.
  5. Evenly distribute the batter into the muffin tin, filling each cup about 3/4 full.
  6. Bake for 20-25 minutes, or until the tops are golden brown and a toothpick inserted comes out clean.
  7. Let them cool slightly before removing from the tin. Serve warm or at room temperature.

Recipe Notes

  • Feel free to experiment with different cheese types for varied flavors.
  • These muffins can be made ahead of time and stored in the fridge or freezer.
  • Adjust seasoning according to your preference; add more herbs for an intensified flavor.

Delicious Keto Ham and Egg Cups Recipe for Low-Carb Meals

Keto Ham and Egg Cups: A Delicious Low-Carb Breakfast Delight

⚖️
Difficulty
Easy

⏲️
Prep Time
10 mins

🕒
Cook Time
20 mins

⏱️
Total Time
30 mins

🍽️
Servings
6 cups

Start your day off right with these Keto Ham and Egg Cups, a breakfast that packs a flavorful punch while keeping your carb count low. Perfect for those following a ketogenic lifestyle, these little cups are loaded with protein and rich, savory flavors that will keep you satisfied until lunchtime. Imagine biting into a delicate, fluffy egg cloud encased in crispy ham—it’s a delightful combination that can be enjoyed any time of the day, not just breakfast.

These keto-friendly egg cups are not only easy to make, but they are also incredibly versatile. You can customize them with your favorite ingredients—add in some colorful veggies or top with your favorite dairy-free cheese for an added dimension of taste. Whip them up over the weekend and store them in the fridge for a quick grab-and-go breakfast during the busy workweek. The smell of baked eggs and ham will have your mouth watering and your family asking for more!

Quick Recipe Highlights

  • Flavor Profile: Each bite offers a bursts of salty ham combined with the creamy richness of eggs and the freshness of any added vegetables.
  • Texture: The ham provides a satisfying crunch that perfectly contrasts the fluffy, tender eggs.
  • Aroma: The savory scent of baked ham mingling with fresh herbs will fill your kitchen, tempting everyone to the breakfast table.
  • Visual Appeal: With their golden tops and vibrant colors from any added veggies, these cups are not only delicious but also visually stunning.
  • Skill Level Needed: This recipe is beginner-friendly and requires no advanced cooking techniques.
  • Special Equipment: A muffin tin is essential for shaping and baking these delightful cups.

Recipe Overview

  • Difficulty Level: Easy. This recipe is straightforward and perfect for cooks of any skill level.
  • Category: Breakfast. Ideal for starting your day on a high note or for brunch gatherings.
  • Cuisine: American with a keto twist, making this recipe suitable for modern dietary preferences.
  • Cost: An economical recipe, utilizing affordable ingredients like eggs and ham.
  • Season: Perfect for any season, but especially great for spring and summer when fresh vegetables are in abundance.
  • Occasion: Great for weekday breakfasts or festive brunches with family and friends.

Why You’ll Love This Recipe

Keto Ham and Egg Cups are a taste sensation that’s hard to beat. The combination of salty, savory ham and rich, creamy eggs creates a delightful experience for your palate. Each cup brings a burst of flavor that is nourished and hearty, perfect for those looking for a satisfying low-carb meal. Whether you’re in a rush or have the time to relax, these cups cater to all breakfast scenarios.

Convenience is another great advantage of this recipe. With just a few simple ingredients, you can whip these cups together in under thirty minutes. They can be prepped ahead of time and eaten throughout the week, saving you many chaotic mornings. Just pop them in the microwave for a quick and easy meal that still feels indulgent.

Nutritionally speaking, these egg cups are a powerhouse. Eggs are loaded with high-quality protein and essential nutrients, while the absence of bread or high-carb components helps keep your carb intake low. These cups can provide your body with energy and the necessary fuels without derailing your diet.

Socially, they’re a fantastic option for brunches and gatherings, allowing guests to serve themselves while enjoying a unique twist on traditional dishes. You can easily double or triple the recipe, making them a crowd-pleasing option that is also easy to prepare and present.

Cost-effectiveness is also a notable perk. Most ingredients are pantry staples or easily available at your local grocery store, allowing you to enjoy a gourmet-feeling meal without the price tag. This recipe truly hits all the right notes for a satisfying breakfast, making it a must-try in your keto repertoire.

Historical Background and Cultural Significance

The origins of egg-based dishes stretch back to ancient times, with diverse cultures utilizing eggs as a staple ingredient in their cuisines. In American kitchens, egg cups have become increasingly popular as a trendy, easy breakfast option suited to busy lifestyles. However, variations exist worldwide, from Spanish frittatas to Japanese tamagoyaki, each celebrating the humble egg. The keto movement has reinvented this concept by removing carb-heavy ingredients while focusing on wholesome ingredients, aligning with health trends.

Culturally, breakfast has long been considered an important meal to start the day. Across various countries, egg dishes symbolize nourishment and vitality, making them staples on breakfast tables. With the modern twist of keto dieting, the humble egg takes center stage, showcasing its versatility as a protein-rich option stripped of excess carbs.

Over the years, many adaptations of baked egg dishes have evolved. From simple scrambled eggs to extravagant quiches, each recipe reflects cultural influences and regional tastes. This recipe will continue the legacy, inviting others to explore keto-friendly variations that still promise satisfaction.

Regional variations of this dish can be found in different parts of the world, revealing how common ingredients like eggs and ham are celebrated. In Italy, frittatas brim with seasonal vegetables, while in Mexico, breakfast tacos incorporate eggs alongside traditional spices. The keto ham and egg cups stand out as an accessible, easy-to-make option that embraces these influences while adhering to low-carb guidelines.

Ingredient Deep Dive

Eggs

Eggs are one of the most versatile food items, offering nutrients that support overall health, including a high-quality protein source. Historically significant across cultures, eggs symbolize fertility and life, often featured during celebrations. Nutritionally, they provide essential vitamins and minerals, such as vitamin D and B12. When selecting eggs, look for organic or free-range options for better quality. Store them in the refrigerator for optimal freshness, and consider alternatives like egg substitutes for various dietary needs.

Ham

Ham is a beloved protein choice globally, often associated with festive occasions, especially in Western cuisines. Historically, it has been a way for people to preserve pork for long periods, serving as a hearty source of nutrients. Ham offers various nutritional benefits, including protein and essential minerals like iron and zinc. When choosing ham, opt for nitrate-free or uncured options whenever possible. Store leftover ham properly in an airtight container to maintain its flavor and quality.

Common Mistakes to Avoid

  • Not preheating the oven: Ensure your oven is hot before baking the cups to achieve the right texture.
  • Using low-quality ham: Invest in good ham, as flavor significantly impacts the final dish.
  • Cooking at the wrong temperature: Baking at too low a temperature can make the cups cook unevenly.
  • Skipping the greasing step: Always grease your muffin tin to prevent sticking.
  • Overfilling the cups: Overfilling can lead to overflow during cooking, resulting in a messy oven.
  • Using cold ingredients: Allow eggs and other refrigerated ingredients to reach room temperature for better mixing.
  • Ignoring cooking time: Keep an eye on baking time to avoid overcooking or drying out the eggs.
  • Not tasting the mixture: Always sample your egg mixture for seasoning before baking.
  • Failing to allow cooling time: Let the cups cool for a few minutes before removing them from the tin for a proper shape.
  • Not adding a variety of ingredients: Be creative with fillings to enhance flavor and nutrition.

Essential Techniques

Greasing the Muffin Tin

This technique is fundamental to ensure your ham and egg cups don’t stick to the pan. Use a non-stick spray or brush with oil to coat the tin. The key to mastering this technique is ensuring even coverage without excess fat. Watch for sticking as a sign that your technique needs adjustment.

Mixing Ingredients

Properly mixing the ingredients ensures even distribution of flavors. Whisk the eggs until blended, incorporating air, which helps achieve fluffy cups. Avoid overmixing, which can toughen the texture; stop when just combined.

Pro Tips for Perfect Keto Ham and Egg Cups

1. Experiment with spices to elevate flavor, such as adding smoked paprika for a subtle kick.
2. Use silicone muffin liners for easy removal and fun colors.
3. Preheat your oven to ensure even cooking and prevent sogginess.
4. Try different cured meats like turkey bacon or prosciutto for unique flavor variations.
5. Add cheese just before baking for a gooey, melty bite.
6. Customize with seasonal vegetables for added nutritional benefits.
7. Allow the cups to cool in the tin slightly before transferring to a wire rack for optimal texture.
8. Store in an airtight container to keep fresh in the fridge for up to a week.

Variations and Adaptations

Feel free to personalize your Keto Ham and Egg Cups. You might consider adding vegetables like spinach, bell peppers, or mushrooms to increase nutritional content and flavor complexity. For seasonal adaptations, think about incorporating ingredients like pumpkin in fall or asparagus in spring.

Additionally, you could swap out the ham for other proteins, like cooked chicken or sausage, to create entirely new flavor profiles. If you’re looking to modify textures, consider blending the eggs with cream for a richer taste or adding shredded cheese for creaminess.

In terms of presentation, the cups can be garnished with fresh herbs such as chives or parsley, adding freshness and a pop of color to your dish. Don’t hesitate to serve them with salsa or avocado on the side for added flavor and nutrition.

Serving and Presentation Guide

Plating these egg cups can be simple yet elegant. Place them in the center of a colorful plate, and consider using a vibrant garnish of fresh herbs around them. Drizzle with a bit of homemade mayo or hot sauce for a gourmet finish.

For modern serving suggestions, present them on a wooden board with small bowls of assorted toppings like hot sauce, cheese, or sautéed veggies. Serve while warm to ensure that the texture remains fluffy, and consider storing them in warmers if serving at a brunch buffet.

Portion control is easy with these cups. Each one serves as an ideal breakfast portion, allowing guests to enjoy a guilt-free indulgence. Keeping a few sides on hand, like sliced fruit or low-carb muffins, can round out the meal beautifully.

Wine and Beverage Pairing

For a casual brunch vibe, consider pairing your Keto Ham and Egg Cups with a refreshing mimosa made with sugar-free orange soda for a low-carb twist. If you’re considering wine, a light Chardonnay works nicely, as its acidity complements the savory flavors of the ham and eggs.

For a non-alcoholic option, consider serving freshly brewed herbal tea or a low-carb coffee with cream. These choices help balance the richness of the cups while maintaining a refreshing complement.

Temperature plays a crucial role in beverage pairings; serving drinks chilled against the warm egg cups creates a pleasurable dining experience.

Storage and Shelf Life

To maximize freshness, store your Keto Ham and Egg Cups in an airtight container in the refrigerator. Properly stored, they can last for up to a week. Be sure to keep any extra components or sauces separate to maintain the best texture when reheating.

If you want to extend shelf life, consider freezing the cups. Place them in a single layer on a baking sheet, freeze, and then transfer to an airtight container or freezer bags. This method prevents squishing during storage and allows you to enjoy them for up to two months.

When reheating, warm them in the microwave for short intervals to prevent overcooking. Aim for a warm internal temperature without cooking through again, which can toughen the eggs.

Make Ahead Strategies

For those busy mornings, take advantage of the making-ahead potential of Keto Ham and Egg Cups. Prepare the mixture and fill the muffin tins the night before, and all you’ll need to do in the morning is bake them.

Alternatively, batch cook multiple trays and store them in the fridge or freezer, ensuring you have breakfasts ready to go. Inspect the flavor and quality when reheating, aiming for that perfect fluffy texture.

Consider adding fresh elements, such as avocado or salsa, just before serving to keep those ingredients fresh and vibrant, enhancing your meal experience.

Scaling Instructions

Scaling your Keto Ham and Egg Cups is a breeze. To halve the recipe, reduce the ingredients while paying attention to cooking time, which may decrease slightly. To double or triple the recipe, utilize multiple muffin tins or bake in batches.

Adjusting cooking times is essential when increasing the quantity; ensure that each cup is cooked evenly. When scaling, consider adjusting your oven temperature based on the number of cups being prepared, ensuring everything is cooked to perfection.

Finally, make sure to account for how your refrigerator or freezer can accommodate extra batches, ensuring optimal freshness during storage.

Nutritional Deep Dive

Each Keto Ham and Egg Cup delivers a fulfilling mix of macronutrients, primarily driven by the protein from eggs and ham. A typical cup might contain approximately 150 calories, depending on the ingredients used. With minimal carbohydrates, this recipe supports a ketogenic dietary approach that many seek for weight management.

Micronutrients also shine in this recipe, as eggs provide vitamin D, B12, and selenium, while selecting high-quality ham ensures a good source of zinc. Each cup also aligns well with dietary considerations that stress lower carbohydrate intake without sacrificing essential nutrients.

Additionally, this recipe can aid in weight management. Packed with protein, they will keep you satiated longer without the temptation to snack, helping maintain balanced blood sugar levels throughout your day.

Dietary Adaptations

For those following specific dietary requirements, consider making the Keto Ham and Egg Cups gluten-free by ensuring all ingredient labels are free from gluten-containing elements. For dairy-free options, simply replace cheese with nutritional yeast or omit it entirely for a still-tasty dish.

Vegans can adapt this recipe by using flaxseed meal mixed with water as an egg substitute, however, the overall texture will differ from traditional egg cups. Low-carb and keto-friendly modifications are at the heart of this dish, so feel free to experiment with non-meat protein alternatives, like tofu or tempeh.

Moreover, for a paleo-friendly version, ensure all processed ingredients are organic and grass-fed, capturing that clean eating essence while enjoying an utterly flavorful experience.

Troubleshooting Guide

If your cups turn out dry, double-check baking times. Eggs can overcook quickly, lose moisture, and become rubbery if left too long. For balancing flavor, taste the mixture before baking; under-salting is a common mistake.

When handling ingredient substitutions, be mindful of moisture levels, as adding eggs from cooked ingredients can change the baking dynamics.

If your cups stick to the pan, consider using a more robust grease method next time or using silicone molds. Lastly, monitor ingredient freshness; old eggs or ham could affect texture and flavor.

Recipe Success Stories

The community has embraced these Keto Ham and Egg Cups. Many fans rave about easy adaptations they’ve made, incorporating various herbs and spices to make the recipe their own. Additionally, some have shared feedback highlighting how they’ve become a staple for quick, satisfying breakfasts.

Adaptation stories add to the recipe’s allure, with readers experimenting with seasonal vegetables. Others have provided photography tips, demonstrating the visual appeal with vibrant presentations. Each success story adds depth to this simple yet impactful dish, showcasing the recipe’s incredible versatility.

Frequently Asked Questions

1. Can I freeze Keto Ham and Egg Cups?
Yes, you can freeze them! Simply place the cooled cups in an airtight container or freezer bag. They can last for up to two months. When reheating, thaw in the fridge overnight and warm in the oven or microwave.
2. How long do these egg cups last in the refrigerator?
Keto Ham and Egg Cups can be stored in the refrigerator for up to one week in an airtight container, making them a great make-ahead meal.
3. Can I use something other than ham?
Absolutely! You can use turkey bacon, sausage, or even vegetables like zucchini for a meatless option. Get creative with your ingredients!
4. Are these breakfast cups suitable for meal prep?
Yes, they are perfect for meal prep! Bake a large batch on the weekend and enjoy them throughout the week.
5. Can I add cheese to the recipe?
Yes, cheese is a great addition! Try shredded cheese placed on top before baking for a deliciously gooey texture.
6. What can I serve with these cups?
They pair well with avocado, salsa, or a refreshing salad. Consider serving with a side of low-carb bread for a fuller meal.
7. Can I add veggies to the mixture?
Definitely! Chopped vegetables like bell peppers, onions, or spinach can be added to enhance flavor and nutrition.
8. How do I reheat them properly?
You can reheat them in the microwave for about 30 seconds, or in a preheated oven at 350°F (175°C) for about 10-15 minutes until warmed through.
9. What type of ham should I use?
Opt for nitrate-free ham or organic options if possible. This choice promotes better quality and flavor.
10. Is this recipe suitable for other diets?
Yes! They can be easily adapted for gluten-free, dairy-free, and paleo diets, depending on the specific ingredient choices.

Additional Resources

Explore related recipes that suit a low-carb lifestyle, including other egg-based breakfasts, savory muffins, and keto snacks that keep you full and satisfied. For further technique guides, learn about sous vide egg cooking or how to make creamy sauces without carbs.

Ingredient information is vital; familiarize yourself with low-carb options for bulk meals and engage with your local butcher for quality meats. Additionally, check for seasonal variations in produce to enhance your dishes year-round.

Join the Conversation

We encourage you to share your thoughts and experiences with the Keto Ham and Egg Cups! Engage with us on social media, share your adaptations or favorite tips. Photograph your successful creations and provide feedback for others in our community.

Whether you prefer vibrant garnishes or imaginative variations, we hope to foster a lively discussion around this delightful recipe!

The Recipe

Keto Ham and Egg Cups

Serves: 6 cups

Prep Time: 10 mins

Cook Time: 20 mins

Total Time: 30 mins

Kitchen Equipment Needed

  • Muffin tin
  • Mixing bowl
  • Whisk
  • Baking spray or oil

Ingredients

  • 6 large eggs
  • 1 cup diced ham
  • 1/4 cup shredded cheese (optional)
  • 1/4 cup chopped vegetables (optional)
  • Salt and pepper to taste
  • Fresh herbs (optional)

Directions

  1. Preheat your oven to 350°F (175°C) and grease the muffin tin.
  2. In a mixing bowl, whisk together the eggs, salt, and pepper until well combined.
  3. Add the diced ham and any optional ingredients like cheese or vegetables. Stir until evenly distributed.
  4. Pour the egg mixture into the prepared muffin tin, filling each cup about 3/4 full.
  5. Bake for 20 minutes or until the cups are set and slightly golden on top.
  6. Remove from the oven and allow to cool slightly before serving.
  7. Garnish with fresh herbs if desired and enjoy!

Recipe Notes

  • These cups can be stored in the fridge for up to a week or frozen for later use.
  • Feel free to experiment with different proteins and veggies to suit your taste.
  • Adjust seasonings according to preference for enhanced flavors.

Delicious Keto Chocolate Chip Muffins for Guilt-Free Indulgence

Keto Chocolate Chip Muffins: Indulge in Guilt-Free Bliss

⚖️
Difficulty
Easy

⏲️
Prep Time
10 mins

🕒
Cook Time
20 mins

⏱️
Total Time
30 mins

🍽️
Servings
12 muffins

Welcome to the world of Keto Chocolate Chip Muffins! These scrumptious treats satisfy your sweet tooth while keeping your carb intake low, making them the perfect guilt-free breakfast or snack. Imagine biting into a warm, moist muffin filled with pockets of rich, melty chocolate. The aroma wafting from the oven as they bake is irresistible, drawing everyone into the kitchen. Whether you’re on a ketogenic diet or simply looking to indulge in a healthier option, these muffins will delight your taste buds without the guilt.

What makes our Keto Chocolate Chip Muffins truly special is their combination of wholesome ingredients that provide both flavor and nutrition. We use almond flour for a nutty base that’s low in carbs yet high in healthy fats, blended with sugar-free chocolate chips and natural sweeteners. Each bite offers a delightful balance of sweetness and richness that leaves you wanting more, yet without compromising on your dietary goals.

Quick Recipe Highlights

  • Flavor Profile: These muffins boast a delightful sweetness complemented by the rich taste of dark chocolate, perfect for satisfying cravings.
  • Texture: Expect a soft and fluffy interior that’s pleasantly contrasted by the slight crunch of the chocolate chips.
  • Aroma: The warm scent of vanilla and baked chocolate fills the air, creating an inviting atmosphere.
  • Visual Appeal: Golden brown muffins studded with luscious chocolate chips create a visually tempting treat.
  • Skill Level Needed: This recipe is straightforward and perfect for beginner bakers, requiring minimal skills for maximum deliciousness.
  • Special Equipment: All you need is a muffin tin, mixing bowls, and basic kitchen utensils!

Recipe Overview

  • Difficulty Level: Easy to make, the Keto Chocolate Chip Muffins require basic baking techniques, making them suitable for cooks of all levels.
  • Category: Perfect for breakfast, brunch, or as a snack, these muffins fit seamlessly into various meal times.
  • Cuisine: While inspired by traditional American muffins, this recipe embraces keto principles to cater to modern dietary preferences.
  • Cost: Affordable ingredients make this recipe cost-effective, allowing you to whip up a batch without breaking the bank.
  • Season: Ideal for any season, especially enjoyable during fall when warm, comforting flavors are most appreciated.
  • Occasion: These muffins are fitting for casual gatherings, coffee dates, or even meal prep for the busy week ahead.

Why You’ll Love This Recipe

The taste and texture of these Keto Chocolate Chip Muffins will transport you back to the beloved bakery treats of your childhood. Their moistness and the richness of dark chocolate combined with almond flour’s hearty flavor create a satisfying mouthful that nourishes the soul. This easy recipe allows you to indulge in a delicious snack without derailing your health goals, making it a win-win situation.

Convenience is at the forefront with this recipe; the muffins come together quickly, making them a great choice for busy mornings. Their simple preparation means you can enjoy a freshly baked treat any day of the week, even if time is short. Just mix, pour, and bake, and you’ll have a delightful healthy option ready in about 30 minutes.

Nutritionally, these muffins are a powerhouse. They offer a low-carb option rich in healthy fats from almond flour and sugar-free chocolate chips. Perfect for maintaining energy levels and keeping you full longer, they are a great choice for anyone following a ketogenic lifestyle. You can indulge in these muffins knowing they align with your dietary choices.

Socially, these muffins are an impressive addition to any gathering. Whether at a brunch or potluck, they will surely invite compliments and requests for the recipe. Sharing these muffins can open conversations about healthy eating choices while spreading the joy of delicious treats.

Additionally, the cost effectiveness of this recipe can’t be overlooked. The use of pantry staples results in minimal expense while providing satisfying servings. Grocery lists remain manageable, allowing you to enjoy baking with ease and without financial strain.

Historical Background and Cultural Significance

The history of muffins dates back to the 18th century, evolving from simple bread-like baked goods to what we recognize today. Initially, muffins were more akin to flatbreads cooked on a griddle, a stark contrast to our fluffy modern versions. With the advent of baking powder, where muffins became lighter and fluffier than ever, they gained immense popularity across the United States.

Keto diets, gaining momentum in the last decade, have led to many adaptations of classic recipes traditionally deemed unhealthy. Muffins, often packed with sugar and refined flour, had to evolve. The rise of almond flour and sugar alternatives has allowed for a revived appreciation of these treats, making them accessible to health-conscious individuals while retaining their delightful qualities.

This recipe represents a modern take on a classic favorite, showcasing how culinary traditions can adapt to help promote healthier living without sacrificing flavor. The cultural significance of muffins remains strong, embracing both heritage and modern dietary needs.

Regional variations of muffins exist, from New England’s corn muffins to the sweeter Southern-style versions, demonstrating the versatility of this beloved baked item. The Keto Chocolate Chip Muffins reflect an intersection of these traditions, paving the way for a new cultural signature in healthy baking.

Ingredient Deep Dive

Almond Flour: Almond flour has a long history, frequently used in Mediterranean and Middle Eastern cuisines. Its nutritional benefits are substantial, offering good fats, protein, and fiber while being gluten-free. When selecting, look for finely milled varieties for best results. Store it in a cool place to maintain freshness, and it’s a great substitute for traditional flour in many recipes.

Dark Chocolate Chips: Chocolate has been cherished for centuries, originating from the ancient Mesoamerican cultures. Rich in antioxidants, dark chocolate is known for its health benefits, including improved heart health. When choosing chocolate chips for this recipe, opt for those with at least 70% cocoa content for health benefits. Store them in a cool, dark place to keep them fresh, and feel free to experiment with different levels of sweetness by adjusting the chocolaty content.

Common Mistakes to Avoid

  • Overmixing the batter: This can lead to dense muffins. Mix just until ingredients are combined.
  • Using the wrong flour: Stick to almond or coconut flour; using all-purpose will alter texture and nutrition.
  • Not measuring ingredients properly: Accurate measurements are vital for consistent results. Use a kitchen scale if needed.
  • Skipping the cooling time: Letting muffins cool helps them set properly and enhances flavor.
  • Choosing low-quality chocolate: This can result in an inferior taste. Invest in good quality sugar-free chocolate.
  • Not preheating the oven: Always preheat to ensure even baking and proper texture.
  • Ignoring cooking times: Every oven is different. Check muffins a few minutes before the end of the baking time.
  • Failing to grease the muffin tin: This may result in sticking muffins. Use liners or a good cooking spray.
  • Storing improperly: Store in an airtight container to maintain freshness.
  • Assuming all muffins rise evenly: Oven hot spots can lead to uneven baking, so rotate your muffin tin halfway through if needed.

Essential Techniques

Muffin Mixing Method: This technique involves combining dry and wet ingredients separately before mixing them together. This helps to prevent overworking the batter, which can express gluten and lead to tough muffins. Master this method by ensuring you gently fold the wet and dry mixtures until just combined.

Baking Times: Understanding the importance of monitoring baking time for muffins is crucial. Overbaking can lead to dry, crumbly muffins, while underbaking can result in a gooey center. Use a toothpick to check for doneness; it should come out clean or with a few crumbs clinging to it for perfect results.

Pro Tips for Perfect Keto Chocolate Chip Muffins

1. Ensure all ingredients are at room temperature for better mixing and a more uniform texture.

2. Consider adding nuts or fruit for extra texture and flavor variations.

3. If using homemade almond flour, ensure it’s ground finely to prevent grainy muffins.

4. Experiment with spices like cinnamon or nutmeg for added depth in flavor.

5. For an extra sweet touch, sprinkle a few additional chocolate chips on top before baking.

6. Rotate the muffin tin halfway through baking to ensure even cooking for all the muffins.

7. Tightly wrap leftover muffins in plastic wrap to maintain moisture.

8. Serve slightly warm for a gooey chocolate experience!

Variations and Adaptations

For a seasonal twist, try adding pumpkin puree in the fall for a pumpkin spice version of these Keto Chocolate Chip Muffins. You can also introduce dried cranberries during the holiday season for a festive touch.

For those sensitive to nuts, consider using sunflower seed flour instead of almond flour. It will still yield deliciously moist results while being safe for nut-free diets.

Vegan adaptations can be made by substituting flax eggs for regular eggs, ensuring everyone can enjoy these muffins. Also, low-carb sweeteners can replace traditional ones for those counting carbs.

Texturally, you might experiment with various sweeteners like erythritol or monk fruit for subtle flavor differences without added calories.

When it comes to presentation, consider drizzling melted chocolate over the cooled muffins for a more decadent look, and serve them on a platter garnished with fresh berries.

Serving and Presentation Guide

For plating, arrange the muffins on a beautiful cake stand to heighten their visual appeal. Garnish with a dusting of powdered erythritol for that added touch of elegance. Pair the muffins with an accompaniment of cream cheese frosting for a luxurious experience.

When serving, consider offering spreads like almond butter or sugar-free jam on the side for a delightful pairing. These additions elevate the muffin experience while providing guests with various flavors to enjoy.

Presenting muffins at room temperature ensures optimal flavor, while warm muffins offer gooey chocolatey magic. For gatherings, keep portion sizes in mind; one muffin is usually more than enough, given its rich texture.

Wine and Beverage Pairing

When it comes to wine pairings, a robust red or dessert wine works beautifully, complementing the rich flavors of chocolate. Consider a Pinot Noir or a sweet wine like Ruby Port for an elevated experience.

If you prefer non-alcoholic alternatives, a strong brewed coffee or espresso pairs remarkably well with the muffins, enhancing the chocolate experience.

For tea lovers, a rich black tea or even a chai can add an extra layer of warmth and spice, making for a comforting pairing.

Be mindful of serving temperatures; muffins are best enjoyed slightly warm to maintain their gooeyness, while beverages should be served fresh to enhance flavors.

Storage and Shelf Life

Proper storage is key to maintaining the freshness of your Keto Chocolate Chip Muffins. Store them in an airtight container at room temperature for up to 4 days, or in the fridge for up to a week.

For longer-term storage, consider freezing your muffins. Wrap each muffin tightly and place them in a freezer bag. They can keep for up to 3 months. When you’re ready to enjoy, simply thaw them at room temperature or microwave for a few seconds.

Signs of spoilage include an off smell or visible mold. If a muffin appears to be dry or crumbly, it may simply be overbaked rather than spoiled.

Reheating is easy; just pop them in a microwave for about 15-20 seconds or warm them in an oven for a crisp exterior.

Make Ahead Strategies

If you’re looking to enjoy these muffins throughout the week, consider baking them ahead of time. They freeze exceptionally well, allowing you to prep them in bulk and enjoy them fresh all week long.

While making the batter, you can also portion it out into muffin tins and freeze until solid. Afterward, wrap the filled tins with plastic and freeze them. When you’re ready to bake, simply pop them in the oven from frozen—just add a few extra minutes to the baking time.

Consider adding fresh items like sliced bananas or a dash of coconut whipped topping right before serving to maintain freshness and add a delightful twist.

Scaling Instructions

Scaling this recipe is simple. To halve the recipe, reduce each ingredient’s measures accordingly, keeping track of cooking times for the smaller quantity.

Doubling or tripling the recipe requires ensuring you have enough space in your oven. Adjust the baking time slightly; larger batches may require a bit more time.

When adjusting the quantity, ensure your mixing bowls and baking sheets can accommodate the increased volume. Also, keep in mind that ovens can vary; you may need to check for doneness a little earlier or later than the recommended time.

Nutritional Deep Dive

In terms of macronutritional breakdown, these Keto Chocolate Chip Muffins are excellent for those following a ketogenic diet. Each muffin is low in carbs while high in fat and protein, making them a filling, energizing snack.

Micronutrient analysis shows a healthy dose of vitamin E, magnesium, and antioxidants from the dark chocolate. These nutrients support overall health and wellbeing, showcasing the muffin’s nutritional advantages.

Health benefits include improved blood sugar regulation due to low carbohydrate levels. The almond flour provides necessary nutrients without spiking blood sugar levels, making these muffins a good choice for diabetics and health-conscious individuals alike.

For those managing weight, these muffins’ hearty nature means they keep you satisfied longer, reducing the likelihood of snacking between meals.

Dietary Adaptations

For gluten-free diets, this recipe is already a fantastic choice, as it naturally omits wheat flour by utilizing almond flour.

Dairy-free options are possible by substituting dairy butter with coconut oil or a plant-based butter alternative, allowing those with lactose intolerance to enjoy these treats.

Vegan modifications can be made using egg substitutes like mashed bananas or flaxseed gel instead of regular eggs, ensuring plant-based eaters enjoy delicious muffins too.

Low-carb and keto dieters will delight in how these muffins fit neatly into their meal plans, helping them stay on track without sacrificing taste.

Troubleshooting Guide

Common texture issues like dryness could arise from overbaking or insufficient ingredients like eggs. Be sure to monitor baking time closely and adjust according to your oven.

Flavor balance can sometimes be skewed by the quality of chocolate used. Investing in good-quality sweeteners and chocolate can make all the difference in the final product.

In cases of temperature problems, make sure to preheat your oven properly—a hot oven is crucial for baking success.

If you encounter equipment challenges, like a muffin tin sticking, consider using silicone muffin liners, which can help eliminate this issue.

For ingredient substitutions, adjustments may be necessary in measurements. Always use exact replacements as suggested in the notes to maintain integrity.

Timing concerns also require careful attention; if you’re unsure if the muffins are done, check them with a toothpick as a reliable doneness method.

Recipe Success Stories

Community feedback around these Keto Chocolate Chip Muffins has been overwhelmingly positive. Many readers report their families thoroughly enjoy the taste, delighting even non-keto eaters!

Variation successes come from different substitutions readers have tried, showcasing how adaptable and versatile this muffin recipe can be.

Adaptation stories share how readers have successfully created low-carb muffins for special occasions, ensuring no one feels deprived during family gatherings.

Photography tips often garner attention, with readers sharing tips on how to capture the muffins’ appetizing appearance in images that showcase their texture and richness.

Frequently Asked Questions

Can these muffins be made in advance? Absolutely! The muffins can be made ahead of time and stored in an airtight container for up to a week or frozen for future enjoyment.

Are there substitutes for almond flour? Yes, you can use coconut flour, but remember to adjust the amount as coconut flour is more absorbent. Typically, you’d use about one-quarter of the amount of almond flour.

How do I store leftover muffins? Place them in an airtight container at room temperature for up to four days or refrigerate them for up to a week.

Can I freeze these muffins? Certainly! Wrap each muffin tightly and freeze them in a freezer bag, where they will keep well for up to three months.

What chocolate chips should I use? Look for high-quality, sugar-free chocolate chips that are keto-friendly, with at least 70% cocoa content for the best flavor.

Can I use regular sugar instead of a sugar substitute? Yes, you can, but it will affect the overall carb count and may negate the benefits of a keto diet.

Why are my muffins dense? Dense muffins can result from overmixing the batter or adding too many liquid ingredients, so be mindful when mixing.

What can I add for flavor variations? You can add nuts, cinnamon, or even a dash of espresso powder for a myriad of flavors to explore.

Are these muffins suitable for children? Yes! These muffins are a healthier alternative to traditional muffins, appealing to kids and parents alike.

How do I know when they are done? Use a toothpick; it should come out clean or with a few crumbs when the muffins are fully baked.

Additional Resources

Explore related recipes on our blog, featuring other keto-friendly baked goods that will complement your healthy eating journey.

Technique guides offer insights into perfecting your baking skills, providing you with the know-how to create more delightful treats.

Ingredient information helps you understand the benefits of each component used in your recipes, promoting informed cooking decisions.

Your kitchen arsenal can be enriched with our equipment recommendations, ensuring you have all the tools needed for successful baking.

Keep an eye on seasonal variations in produce to inspire your flavors and keep your baking fresh and exciting!

Join the Conversation

We encourage you to share your creations on social media with the hashtag #KetoMuffinMagic! Your photography tips and reviews not only inspire fellow bakers but also create a community of keto enthusiasts eager to swap stories and variations.

Don’t hesitate to engage in our community forums where you can share feedback and suggestions to improve this recipe or other ones alike.

Prompt discussion on how you’ve adapted this recipe to suit your taste can provide valuable insights to others looking to embark on their baking journey.

We love seeing your unique takes on our recipes and encourage readers to share their thoughts and variations for everyone to enjoy!

The Recipe

Keto Chocolate Chip Muffins

Serves: 12 muffins

Prep Time: 10 mins

Cook Time: 20 mins

Total Time: 30 mins

Kitchen Equipment Needed

  • Muffin tin
  • Mixing bowls
  • Whisk
  • Measuring cups and spoons
  • Spatula

Ingredients

  • 2 cups almond flour
  • 1/2 cup sugar-free chocolate chips
  • 1/4 cup erythritol or another low-carb sweetener
  • 1 teaspoon baking powder
  • 1/2 teaspoon baking soda
  • 1/2 teaspoon salt
  • 3 large eggs
  • 1/2 cup unsweetened almond milk
  • 1/4 cup melted coconut oil or butter
  • 1 teaspoon vanilla extract

Directions

  1. Preheat your oven to 350°F (175°C) and grease the muffin tin or place liners.
  2. In a mixing bowl, combine the dry ingredients: almond flour, erythritol, chocolate chips, baking powder, baking soda, and salt.
  3. In another bowl, whisk together the eggs, almond milk, melted coconut oil, and vanilla extract until smooth.
  4. Pour the wet ingredients into the dry ingredients and mix until just combined. Be careful not to overmix.
  5. Evenly distribute the batter into the muffin tin, filling each cup about 3/4 full.
  6. Bake for 18-20 minutes or until a toothpick inserted comes out clean. Allow muffins to cool in the tin for 5 minutes before transferring to a wire rack.

Recipe Notes

  • For a sweeter muffin, feel free to add more sweetener to taste.
  • Store any leftovers in an airtight container for up to 4 days or freeze for longer storage.

Delicious Homemade Cinnamon Donut Bread for an Easy Sweet Breakfast

Homemade Cinnamon Donut Bread Recipe | Easy Sweet Breakfast

⚖️
Difficulty
Easy

⏲️
Prep Time
10 mins

🕒
Cook Time
30 mins

⏱️
Total Time
40 mins

🍽️
Servings
8 servings

Indulge in the delightful sweetness of our Homemade Cinnamon Donut Bread, a perfect treat to brighten your breakfast table. This easy sweet breakfast recipe combines the classic flavors of cinnamon donuts into a luscious bread, making it an unbeatable morning companion. Whether you’re enjoying it with your morning coffee or serving it as a special treat for guests, each slice offers a cozy hug of warmth and nostalgia. The irresistible cinnamon sugar topping adds a sweet crunch, perfectly balanced with the soft, fluffy texture of the bread.

The beauty of this Cinnamon Donut Bread lies not only in its taste but also in its simplicity. Perfect for weekend brunches or a sweet pick-me-up on weekday mornings, this recipe showcases the charm of homemade goodness with minimal effort. Imagine pulling a warm loaf from the oven, its sweet aroma wafting through your kitchen, as you slice through its golden crust. Each bite is a reminder of childhood breakfasts filled with joy and comfort, making it a recipe you’ll return to time and again.

Quick Recipe Highlights

  • Flavor Profile: Sweet and spiced with notes of cinnamon and sugar, reminiscent of classic donuts.
  • Texture: Soft and fluffy with a crumb that melts in your mouth, complemented by a crispy, sugary topping.
  • Aroma: Warm, inviting scents of baked cinnamon and sugar will fill your kitchen.
  • Visual Appeal: Gorgeous golden brown crust topped with glistening cinnamon sugar makes for a stunning presentation.
  • Skill Level Needed: This recipe is beginner-friendly, ideal for those who may not have extensive baking experience.
  • Special Equipment: All you need is a mixing bowl, loaf pan, and basic baking tools.

Recipe Overview

  • Difficulty Level: With straightforward steps and easily manageable ingredients, this recipe is great for beginners and seasoned bakers alike.
  • Category: This Homemade Cinnamon Donut Bread fits perfectly into breakfast, brunch, or even a sweet snack category.
  • Cuisine: Rooted in American baking traditions, it draws on classic donut flavors and transforms them into a loaf.
  • Cost: The ingredients are affordable and commonly found in most kitchens, making it a budget-friendly option.
  • Season: Perfect for any season, this bread can be a delightful centerpiece for holiday gatherings or cozy winter mornings.
  • Occasion: Ideal for birthday brunches, casual get-togethers, or simply enjoying a slice during a quiet coffee break.

Why You’ll Love This Recipe

This Homemade Cinnamon Donut Bread combines the perfect balance of sweet and spice, delivering a flavor that is comforting and nostalgic. Each slice is bursting with cinnamon goodness that warms the soul. The texture is incredibly soft, yet the crunchy topping provides a satisfying contrast, making it impossible to eat just one piece. Not only does it taste fantastic, but it also fills your home with an irresistible aroma while it bakes, creating an inviting atmosphere for family and friends.

The convenience of this recipe can’t be beaten. It requires minimal prep time and can be baked in just one bowl, simplifying the process and making cleanup a breeze. You can easily whip this up in the morning or prep it the night before, allowing you to enjoy a freshly baked loaf any day of the week. Furthermore, the ease of slicing means you can serve portions effortlessly, making it perfect for gatherings or lazy Sunday breakfasts.

Nutritionally, this bread boasts simple ingredients that provide comfort without excessive guilt. You can incorporate whole grain flour for added fiber or reduce sugar for a healthier twist while maintaining its delectable taste. It’s a delightful balance of indulgence and nourishment, ensuring you won’t feel weighed down after enjoying a slice.

This recipe shines during social occasions; it’s an ideal centerpiece for brunch tables and potlucks. Your guests will be enthralled with its delightful flavors and textures, making it a memorable treat. The sweet cinnamon hint captures the essence of a friendly gathering, fostering connections and conversations around the breakfast table.

Finally, Homemade Cinnamon Donut Bread is incredibly cost-effective. With basic pantry staples and minimal ingredients, you can create an impressive dish for a fraction of the price of store-bought options. Its accessibility encourages everyone to embrace their inner baker—bringing the amazing flavors of traditional donuts into the comfort of their homes.

Historical Background and Cultural Significance

The origin of cinnamon bread can be traced back to the rich baking traditions of Europe, where sweet breads were often enhanced with spices such as cinnamon, nutmeg, and cloves. With time, various regional interpretations emerged, blending local traditions into delightful baked goods. This bread pays homage to those age-old recipes while creating something uniquely comforting.

Cinnamon itself holds a special place in culinary history; once considered a luxury item, it was worth its weight in gold. Its warmth and flavor have long been celebrated and are closely tied to festive and familial gatherings. The emergence of donut-inspired treats, such as this bread, showcases how cultural influences and culinary traditions meld to create something exquisite.

As seasons passed, this recipe evolved, becoming more mainstream. The twist of turning classic donut flavors into a bread format allows for versatility; whether enjoyed fresh from the oven or toasted and slathered with butter, the options are endless. This evolution caters to present-day preferences for convenience and flavor.

Regional variations also exist, with some incorporating chocolate chips or toasted nuts to enhance flavor profiles. The adaptability of this recipe symbolizes how exchanging culinary ideas can lead to delicious innovations while retaining the essence of cherished traditions.

Ingredient Deep Dive

Cinnamon, a key ingredient in our Homemade Cinnamon Donut Bread, has a rich history that dates back thousands of years, revered for both its flavor and medicinal properties. This fragrant spice is derived from the bark of cinnamon trees, commonly used in many cultures for its ability to enhance both sweet and savory dishes. When it comes to nutritional benefits, cinnamon is known for its antioxidant properties and potential to help regulate blood sugar levels.

Selecting fresh, high-quality cinnamon is vital for the best flavor; look for sticks with a strong aroma and a brittle texture. Ground cinnamon should be stored in a cool, dark place to maintain its potency, and if desired, can be substituted with nutmeg for a different flavor profile.

Flour serves as the backbone of this recipe. All-purpose flour brings a light texture to the bread, making it fluffy and tender. Whole wheat or even gluten-free flour can be utilized for those looking for healthier options. Store flour in a sealed container in a cool, dry area, and make sure to check expiration dates for freshness.

Sugar provides sweetness to the bread, elevating the overall flavor. Granulated sugar is commonly used, but you can easily swap in brown sugar for a deeper, molasses-like taste. Be sure to keep an eye on the amount used, as it also affects texture; adjusting it can yield delightful variations, like adding maple syrup for a unique twist.

Eggs not only enhance flavor but also contribute to the bread’s structural integrity. They provide moisture, richness, and act as a binding agent, ensuring high-quality texture. Consider using flaxseed meal for a vegan alternative, or yogurt for a protein-packed option that complements the recipe beautifully.

Lastly, milk adds moisture. Any dairy or non-dairy milk can be used here—almond milk and oat milk are great substitutes. Always check dietary preferences when choosing your milk to accommodate all guests.

Common Mistakes to Avoid

  • Using stale ingredients. Always check the freshness of your baking powder and cinnamon to ensure the best flavor.
  • Overmixing the batter, which can create a dense bread instead of a light and fluffy loaf.
  • Baking at the wrong temperature can lead to uneven cooking. Use an oven thermometer to confirm accuracy.
  • Not measuring ingredients accurately; using weights or specific measuring cups can greatly improve results.
  • Skipping the resting time after mixing; allowing the batter to sit helps create a better texture.
  • Not greasing the loaf pan sufficiently, leading to stuck bread. Always use parchment paper as an additional measure.
  • Ignoring oven placement; ensure that the bread is centered in the oven for even baking.
  • Not letting the bread cool properly before slicing; this helps set the texture and flavor.
  • Storing the bread improperly can lead to quick spoilage. Use an airtight container or wrap tightly.
  • Using too much cinnamon sugar mixture can overpower the bread; balance is key.

Essential Techniques

One important technique in this recipe is proper mixing. It’s essential to combine ingredients until just incorporated to ensure the bread remains tender and airy. Overmixing leads to gluten development, resulting in a denser loaf. Visual cues for success include a slightly lumpy batter that does not have dry flour pockets.

Another essential technique is precise baking. Always preheat the oven until it reaches the specified temperature before adding your bread. This ensures even cooking and optimal rise. A toothpick inserted into the center should come out clean when the bread is done.

Incorporating the cinnamon sugar topping can also be a pivotal moment. For even coverage, sprinkle it generously while the bread is still warm to allow for optimal adhesion. Remember, balance is key; too much can overshadow the lovely flavor of the bread itself.

Finally, cooling the bread is vital. Allow your loaf to cool in the pan for a short time before transferring it to a wire rack. Cooling helps maintain moisture and prevents sogginess, ensuring each slice is beautifully fluffy.

Pro Tips for Perfect Homemade Cinnamon Donut Bread

1. Use fresh spices whenever possible to achieve the most vibrant flavor in your bread.
2. Experiment with adding a layer of cream cheese frosting for an extra decadent treat.
3. Allow the bread to rest for at least 10 minutes before slicing for the best texture.
4. For a warm bread experience, reheat slices in the microwave for a few seconds before serving.
5. Consider toasting slices of the bread lightly before serving to enhance flavor complexity.
6. Create a healthier version by substituting some flour for oats, adding a nutty flavor profile.
7. Try enhancing the recipe with nuts or chocolate chips for a delightful twist.
8. Always store leftover bread tightly wrapped to prolong freshness.

Variations and Adaptations

This enticing Homemade Cinnamon Donut Bread can be tailored to suit a variety of preferences. To cater to different taste buds, consider adding nuts such as pecans or walnuts for added crunch and flavor. Seasonal adaptations like pumpkin or apple puree work wonderfully, adding moisture and complementing the cinnamon notes beautifully.

Vegan modifications can easily be made by replacing eggs with flax eggs and using almond or oat milk. For those seeking gluten-free options, swapping in a gluten-free flour blend can yield a delicious loaf that everyone can enjoy.

Flavor variations are also a fantastic way to experiment. Consider using brown sugar instead of granulated sugar for richer flavor, or infuse the batter with citrus zest for a refreshing twist. Adding vanilla extract elevates the overall aroma and sweetness as well.

Individuals focused on dietary modifications may experiment with sugar alternatives, ensuring that everyone can enjoy this bread without guilt.

Finally, think about presentation alternatives. Serve slices warm with a drizzle of honey or maple syrup or pair it with cream cheese spread for an indulgent treat.

Serving and Presentation Guide

When it comes to presenting your Homemade Cinnamon Donut Bread, the key is simplicity and allure. Warm, freshly baked slices should be elegantly arranged on a rustic wooden board or cake stand, inviting guests to partake. A light dusting of powdered sugar over the top can add a visually stunning touch.

For garnishing, fresh fruit such as strawberries or blueberries sprinkled around the edges can enhance visual appeal and introduce a fresh flavor contrast. Elegant serving suggestions could include a side of whipped cream or flavored butter to complement the rich sweetness of the bread.

Temperature considerations are essential for maintaining the best flavor, so serve your bread slightly warm. This not only enhances the aroma but allows for a soft, melt-in-your-mouth experience.

Portion control can be handled by pre-slicing the loaf; this encourages guests to take their desired portions while also showcasing the beautiful interior of the bread, filled with delightful cinnamon goodness.

Wine and Beverage Pairing

When it comes to the perfect beverage pairing with your Homemade Cinnamon Donut Bread, consider options that highlight its sweetness and spices. A light, fruity white wine such as a Riesling or Moscato can accentuate its flavors beautifully. Both wines offer subtle sweetness that complements the cinnamon without overwhelming it.

For non-alcoholic alternatives, a hot cup of freshly brewed coffee or spiced chai latte can enhance the cozy feel of breakfast. The richness of the coffee pairs seamlessly with the sweetness of the bread, creating a comforting morning experience.

Herbal teas, like chamomile or peppermint, also work well; they provide a cooling effect on the palate after indulging in the bread’s sweetness.

Temperature matters with your beverages too; serving them warm will enhance the overall dining experience. A frothy cappuccino or latte can provide a lovely accompaniment, mirroring the bread’s delightful texture.

Storage and Shelf Life

Storing your Homemade Cinnamon Donut Bread properly is crucial for maintaining freshness and taste. Allow the bread to cool to room temperature completely before wrapping it tightly in plastic wrap or aluminum foil to preserve moisture. Alternatively, you can store it in an airtight container.

It’s best to keep the bread in a cool, dry place for short-term storage. If you’d like to extend its shelf life, consider freezing portions. To freeze, slice the bread, wrap each slice individually, and then place them in a freezer bag for easy access.

Always label your storage bags with the date; when stored properly, this bread can last up to three months in the freezer. When ready to enjoy, simply thaw at room temperature or pop slices into the microwave for a few seconds to warm.

Signs of spoilage include a sour smell or discoloration; if you notice these changes, it’s time to discard it. Reheating instructions suggest to microwave briefly or warm in an oven at low heat to refresh its flavor and texture.

Make Ahead Strategies

To streamline your breakfast routine, consider making your Homemade Cinnamon Donut Bread ahead of time. You can prepare the batter the night before and store it in the refrigerator—simply give it a gentle stir before baking in the morning. This allows for a delightful fresh-baked experience without the morning rush.

Another strategy is to bake the bread in advance. Once cooled, wrap it tightly and store it in the fridge for up to five days. You can slice and toast pieces as needed; this method ensures you have fresh bread ready to go any day of the week while maintaining great flavor.

Evaluate the quality impacts when preparing components ahead; while the bread may lose some moisture over two to three days, a warm slice can easily revive its delightful texture.

If you plan to create variations, consider adding the toppings just before serving to preserve freshness. This simple planning lets you enjoy delicious homemade bread whenever the craving strikes.

Scaling Instructions

If you’re looking to adjust the quantity of your Homemade Cinnamon Donut Bread, halving or doubling the recipe is an easy task. For smaller quantities, simply use half of each ingredient, ensuring the ratios remain consistent and accurate.

When doubling or tripling the recipe, consider using a larger mixing bowl to accommodate the increased volume. Keep in mind that baking times may vary; check for doneness a few minutes earlier to ensure the exterior doesn’t over-bake while the interior remains perfectly tender.

Equipment adjustments should also be made. If you are scaling up significantly, you might need multiple loaf pans or a larger-capacity mixer depending on your kitchen equipment.

For timing modifications, watch for visual cues such as color and texture rather than solely relying on time. Bread made in larger batches may require slightly longer to bake thoroughly, so testing with a toothpick is advisable.

Lastly, ensure you have adequate storage solutions for any leftovers; scaled recipes produce more bread, so having extra containers on hand is a smart strategy.

Nutritional Deep Dive

With each slice of Homemade Cinnamon Donut Bread, you can indulge without excessive guilt. This bread provides moderate macronutrients, featuring carbohydrates primarily from the flour. It’s vital to balance carbohydrates with protein and healthy fats during breakfast for sustained energy.

A micronutrient analysis reveals that cinnamon adds a unique antioxidant profile, while eggs contribute essential amino acids and some vitamins. Adjusting the recipe for whole grain options can boost fiber intake, aiding in digestion and promoting a feeling of fullness.

Consider dietary considerations; while this bread serves as a delightful treat, monitoring portion sizes is essential to managing caloric intake. If you’re mindful of sugar consumption, experiment with using alternatives to achieve a satisfying result.

Weight management benefits can be achieved by embracing moderation; enjoy a slice of this delightful bread as part of a balanced breakfast when paired with protein-rich foods like yogurt or eggs.

When tracking calories, keep in mind that the ingredients you choose could significantly influence the final nutritional content, making this recipe adaptable to various lifestyle preferences.

Dietary Adaptations

This Homemade Cinnamon Donut Bread recipe is highly adaptable to accommodate various dietary needs. For those needing gluten-free options, simply swap out regular flour for a gluten-free blend. Ensure you check for cross-contamination if you are highly sensitive to gluten.

Dairy-free diets can embrace this recipe by employing substitutes like almond or coconut milk, allowing for a delicious result. Flax eggs serve as an excellent vegan alternative for binding, ensuring the bread maintains its delicious quality.

If you’re following low-carb or keto diets, consider using almond or coconut flour instead of regular flour. You may also wish to reduce sugar significantly or utilize sugar alternatives to maintain flavor while achieving dietary goals.

Paleo enthusiasts can still enjoy this delicious bread by using honey or maple syrup as a natural sweetener, along with coconut flour. Ensure the ingredients stay true to the paleo principles for an authentic experience.

Other specific diets, such as low-FODMAP, can adapt this recipe similarly by ensuring any additional ingredients used are compliant, allowing many individuals to enjoy this sweet breakfast treat.

Troubleshooting Guide

Texture issues can arise if the bread is under- or overbaked; if it’s too wet, continue baking in 5-minute increments until a toothpick comes out clean. If it becomes dense or tough, it may have been overmixed.

Flavor balance can be adjusted by incorporating additional spices like nutmeg or cardamom for a richer taste. Sweetness can be modified by varying the sugar used, with natural alternatives offering a new flavor dimension.

Temperature problems usually stem from an inaccurate oven; keep an oven thermometer handy to confirm that the baking temperature is correct for even results.

Equipment challenges are common when experimenting; if your loaf pan is too large or small, this can cause impacts on baking time and texture. Consider investing in quality bakeware for consistent results.

Ingredient substitutions can alter the final product outcome; sticking close to the original ingredient list will yield the intended flavors. When trying different ingredients, test small batches first.

Timing concerns must also be handled accurately; ensure to keep a close eye on the bread for the perfect timing or risk undercooking or overbaking during the process.

Recipe Success Stories

Our readers have shared fantastic feedback, emphasizing the versatility and delightful nature of this Homemade Cinnamon Donut Bread. Many have adapted the recipe by incorporating their twists, from adding chocolate chips to different spices, leading to delightful variations that have become crowd favorites.

Success stories often highlight how easy it is to bake and share this bread during family gatherings or brunch events, captivating guests with its lovely aroma and warmth. Testimonials mention how it’s become a staple in their homes, enjoyed both fresh and toasted.

Readers have also reported impressive outcomes when experimenting with the recipe in different sized pans; success with mini loaves has been a popular adaptation to gift or share.

Photography submissions from our community show stunning presentations, inspiring others to get creative with their plating methods. Such engagement emphasizes how this recipe fosters community connections through shared experiences in the kitchen.

Moreover, the simplicity of the recipe has encouraged many novice bakers to take their first baking steps, making for wonderful stories of triumph and newfound confidence.

Frequently Asked Questions

Can I make this bread gluten-free?

Absolutely! You can use a gluten-free flour blend to make this recipe celiac-friendly. Just ensure your baking powder is also gluten-free. You may notice a slight change in texture, but it will still be delicious!

How do I store leftover cinnamon bread?

Store your leftover Homemade Cinnamon Donut Bread in an airtight container at room temperature for up to 3-4 days. For longer storage, you can freeze it for up to 3 months. Just make sure to slice it before freezing for easy access!

Can I add nuts or chocolate chips to the batter?

Yes! Adding nuts or chocolate chips is a great way to customize the flavor. Consider folding in 1/2 cup of your favorite nuts or chocolate chips before pouring the batter into the loaf pan for added texture and taste.

What should I do if my bread is too dense?

If your bread turns out dense, it could be overmixed or cooked for too long. Ensure you mix just until the ingredients are combined and check for doneness a few minutes before the recommended baking time.

Can I make this recipe vegan?

Yes! Replace the eggs with flaxseed meal (1 tablespoon per egg) and use plant-based milk to create a delightful vegan version of this bread. It will still be just as delicious!

How can I adjust the sweetness of the bread?

If you prefer a less sweet bread, reduce the amount of sugar in the recipe. You can also substitute sugar with natural alternatives like honey or maple syrup while ensuring the consistency remains intact.

Can I make mini loaves with this recipe?

Yes! This batter is perfect for mini loaf pans. Adjust the baking time to approximately 20-25 minutes, checking closely for doneness with a toothpick.

What can I serve with this bread?

This cinnamon bread pairs well with coffee, tea, or milk. You could also serve it with whipped cream or a dollop of yogurt for a delightful breakfast treat.

Can I freeze the dough before baking?

Yes! You can freeze the dough after mixing it. Just let it thaw overnight in the refrigerator before baking. This preparation method makes it easy to enjoy fresh-baked bread anytime.

How long does this bread take to bake?

Your Homemade Cinnamon Donut Bread typically takes about 30 minutes to bake. Make sure to check for doneness using a toothpick inserted into the center, which should come out clean.

Additional Resources

Be sure to explore other related recipes that complement your Homemade Cinnamon Donut Bread, such as fluffy pancakes or fruit-filled muffins to elevate your breakfast spread. Additionally, dive into technique guides on baking basics to sharpen your skills in the kitchen.

Learn more about various ingredients like the nutritional benefits of cinnamon and explore its cultural significance throughout culinary history. Discover kitchen equipment recommendations that may enhance your baking experience, such as quality bakeware or measuring tools.

Finally, for seasonal variations, keep an eye out for festive adaptations of this bread, incorporating seasonal spices and ingredients to make your gatherings even more special.

Join the Conversation

We’d love to hear your thoughts on our Homemade Cinnamon Donut Bread! Share your experiences on social media, and don’t forget to tag us in your stunning photos for a chance to be featured. If you’ve made any modifications or tried new flavor variations, please share those tips with our community.

Read through the recipe reviews to connect with fellow bakers and gain inspiration from their variations, anecdotes, and ideas. Engage in collaborative dialogue around this beloved recipe—perhaps it could inspire your next baking adventure!

Your wonderful success stories and feedback not only encourage us but help fellow baking enthusiasts discover this delightful recipe. Together, let’s build a community filled with creativity and passion for baking delicious treats!

The Recipe

Homemade Cinnamon Donut Bread

Serves: 8 servings

Prep Time: 10 mins

Cook Time: 30 mins

Total Time: 40 mins

Kitchen Equipment Needed

  • Mixing bowl
  • Loaf pan
  • Whisk
  • Measuring cups
  • Measuring spoons
  • Spatula

Ingredients

  • 2 cups all-purpose flour
  • 1 cup granulated sugar
  • 2 teaspoons baking powder
  • 1 teaspoon ground cinnamon
  • 1/2 teaspoon salt
  • 1/2 cup unsalted butter, melted
  • 2 large eggs
  • 1 cup milk
  • 1 teaspoon vanilla extract
  • 1/4 cup sugar, for topping
  • 2 tablespoons ground cinnamon, for topping

Directions

  1. Preheat your oven to 350°F (175°C) and grease your loaf pan.
  2. In a mixing bowl, combine flour, sugar, baking powder, cinnamon, and salt.
  3. In another bowl, whisk together melted butter, eggs, milk, and vanilla extract.
  4. Pour the wet ingredients into the dry ingredients and mix until just combined.
  5. Pour the batter into the greased loaf pan, smoothing the top with a spatula.
  6. In a small bowl, mix the topping sugar and cinnamon together, then sprinkle evenly over the batter.
  7. Bake for 30-35 minutes or until a toothpick comes out clean when inserted in the center.
  8. Let the bread cool in the pan for 10 minutes, then transfer to a wire rack to cool completely.

Recipe Notes

  • You can substitute half the flour with whole wheat for a healthier option.
  • Feel free to experiment with adding nuts or chocolate chips into the batter.
  • This bread is best enjoyed fresh but can be stored sealed for a few days or frozen for later.
  • For a festive twist, incorporate pumpkin puree instead of some liquid for a seasonal treat.

Delicious Strawberry Cheesecake Stuffed French Toast Recipe to Try

Strawberry Cheesecake Stuffed French Toast: A Deliciously Sweet Breakfast Treat

⚖️
Difficulty
Medium

⏲️
Prep Time
15 mins

🕒
Cook Time
10 mins

⏱️
Total Time
25 mins

🍽️
Servings
4

Indulge in the delightful experience of Strawberry Cheesecake Stuffed French Toast, a sweet breakfast creation that perfectly marries the lusciousness of strawberries with the creaminess of cheesecake. This recipe is more than a breakfast; it’s a celebration of flavors that will elevate your morning routine. Imagine sinking your fork into soft, golden-brown French toast bites filled with a rich, creamy cheesecake mixture, bursting with fresh strawberry goodness.

As you cook, the aroma of vanilla, cinnamon, and buttery toast fills your kitchen, creating an inviting atmosphere that’s perfect for family gatherings or a cozy brunch with friends. Each bite offers a delightful contrast of crispy exterior and creamy interior, making it a sure-fire crowd-pleaser. With only a few ingredients and simple steps, you’ll have a show-stopping dish that’s as beautiful as it is delicious.

Quick Recipe Highlights

  • Flavor Profile: The combination of sweet strawberries and creamy cheesecake brings a delightful sweetness balanced by the lightly toasted bread.
  • Texture: The crunch of the French toast exterior contrasts beautifully with the smooth, creamy filling—creating a heavenly mouthfeel.
  • Aroma: The enticing scent of vanilla and cinnamon as the bread toasts fills the air, making your kitchen feel warm and welcoming.
  • Visual Appeal: Vibrant red strawberries peek out from the golden French toast, making this dish visually stunning for any table.
  • Skill Level Needed: This dish requires basic kitchen skills, making it suitable for beginner cooks and experienced chefs alike.
  • Special Equipment: A good non-stick skillet or griddle is essential for perfecting the French toast.

Recipe Overview

  • Difficulty Level: Although a bit more elaborate than traditional French toast, this recipe is still accessible to all skill levels, allowing you to impress without overwhelming yourself.
  • Category: This dish fits perfectly into the breakfast or brunch category, making it versatile for any time of day.
  • Cuisine: Influenced by classic French cooking methods, the comfort of this recipe blends beautifully into American breakfast culture.
  • Cost: With a few fresh ingredients, this lovely meal is budget-friendly, making it an affordable delight for any occasion.
  • Season: Fresh strawberries make this dish ideal for late spring and summer, but they can bring joy year-round with frozen strawberries as a substitute.
  • Occasion: Perfect for weekend brunches, holiday breakfasts, or any gathering that deserves a touch of sweetness.

Why You’ll Love This Recipe

The combination of sweet and savory flavors in Strawberry Cheesecake Stuffed French Toast makes it an irresistible dish. When you take that first bite, the rich, creamy cheesecake filling mingles with the sweet burst of strawberries, all enveloped in perfectly golden and crispy bread. It’s a treat that’s not just delicious; it’s an indulgence that feels special. This delightful meal is great for not just breakfast, but it can easily be a standout dish during brunch gatherings, making every bite an event to savor.

Convenience is another highlight—this recipe requires minimal prep time and kitchen tools, allowing you to whip up something incredible without spending hours in the kitchen. The simplicity of the steps means you can focus more on enjoying your meal and less on the logistics of cooking. Plus, the ingredients are readily available at any grocery store, making it simple to gather what you need.

On the nutritional front, this recipe can offer wholesome benefits depending on the ingredients you choose. Using whole-grain bread not only adds fiber but also promotes a heart-healthy breakfast. Strawberries are rich in antioxidants and vitamins, contributing to your overall health in a delicious way. Furthermore, the balance of protein from the cream cheese helps to fuel your morning.

Socially, serving this dish can elevate any breakfast or brunch experience. The visual appeal alone will draw everyone to the table, and sharing this beautifully presented dish can be a great conversation starter. It invites your loved ones to partake in the joy of food, creating lasting memories over shared meals.

Cost is always a consideration, and this recipe shines in its affordability. Using basic ingredients while allowing for seasonal fruit variations helps maintain a low budget without sacrificing flavor. Each serving of this indulgent breakfast won’t break the bank while providing satisfaction for the whole family.

Historical Background and Cultural Significance

French toast, often referred to as “eggy bread,” has a rich history that dates back to ancient Greece and Rome; they soaked stale bread in a mixture of milk and eggs to avoid waste. This innovation over the years has transformed into an array of variations, showcasing how culinary traditions evolve with cultural influences. The idea of stuffing French toast with fillings, derived from several different cuisines, adds a delightful twist to this classic dish.

Cheesecake itself is known to have centuries-old origins, with recipes dating back to ancient Greece, where it was made with cheese and honey. As the concept traveled through various cultures, it became a popular dessert in many countries. Combining cheesecake with French toast is a modern twist that speaks to the creativity and flexibility of recipes today.

The evolution of stuffed French toast reflects changing culinary trends, where breakfast dishes continually embrace sweeter and more decadent palates. By incorporating ingredients like strawberries and sweetened cream cheese, this recipe connects traditional breakfast elements with contemporary dessert-inspired indulgences, showing how dishes can transform and adapt.

Regional variations of French toast can be found across the globe, from the Puerto Rican “tembleque” style to various cinnamon-infused versions in Europe. By adding strawberries and cheesecake to the mix, this recipe intentionally blends flavors and traditions, making it a delicious representation of fusion cooking in its own right.

Ingredient Deep Dive

Strawberries: These vibrant berries are not just visually appealing; they are packed with nutrients, including vitamin C and potassium, which contribute to a healthy diet. Rich in antioxidants, strawberries can help reduce the risk of chronic diseases. To select the best strawberries, look for vibrant colors and firm consistency. Store fresh strawberries in the fridge, but consume them within a few days for optimal freshness. Frozen strawberries can serve as a convenient substitute if fresh ones are out of season.

Eggs: A staple in many kitchens, eggs contribute essential proteins and nutrients, including B vitamins and healthy fats. The freshness of your eggs can greatly impact the flavor and texture of your dish. When selecting eggs, consider free-range or organic options for better taste and ethical farming practices. Keep eggs refrigerated, but they can last for several weeks if stored properly. For those avoiding eggs, suitable substitutes include flaxseed meal or silken tofu for binding.

cream cheese: This rich and creamy cheese is a fundamental element of cheesecake flavor, providing texture and taste that balances the sweetness of the strawberries. Low-fat options are available, which can still provide that essential creaminess without added calories. Ensure your cream cheese is at room temperature to make it easier to blend. Store any leftovers in the fridge and use them in other recipes, such as cheesecakes or bagels.

Bread: The choice of bread can elevate your French toast; brioche, challah, or whole grain are excellent options for this recipe. Whole grain bread adds nutrition and fiber, while brioche provides a soft, airy texture. Always look for fresh bread for best results. Store it in a cool, dry place or in the freezer for long-term use. If dairy or gluten are an issue, almond or gluten-free bread can be wonderful alternatives.

Common Mistakes to Avoid

  • Using stale bread: Fresh bread absorbs the egg mixture better and yields a fluffier texture, while stale bread can result in a dry outcome.
  • Not allowing the bread to soak long enough: Ensuring each piece has time to soak up the mixture enhances the creamy texture within the toast.
  • Overcrowding the skillet: Cooking batches separately prevents steaming and ensures even browning.
  • Underestimating the heat: Too high of a temperature can burn the outside before the inside sets appropriately, so find the right balance.
  • Skipping toppings: While the stuffed French toast is delicious on its own, failing to add toppings like powdered sugar or whipped cream misses a chance for extra flavor.
  • Inconsistent filling: Ensuring even distribution of the filling keeps each bite delicious and satisfying.
  • Using a too-thin filling: A thick mixture works best; a runny one can ooze out during cooking.
  • Not adjusting cooking time: Different breads may cook at different rates, so stay attentive while cooking.
  • Not using a non-stick surface: This can lead to sticking and mishap during flipping. Always utilize non-stick spray or a suitable cooking surface.
  • Skipping the resting step: Allowing the cooked French toast to sit for a minute helps flavors meld and makes plating easier.

Essential Techniques

Soaking Bread: Soaking the bread in the egg mixture allows it to absorb flavors. To master this technique, ensure the bread is fully submerged, allowing it to soak through, but not overly so that it becomes mushy. A common pitfall is to rush this step; allow enough time for absorption.

Cooking Uniformity: Finding the right skillet temperature is crucial for even cooking. Mastery includes testing the pan; it should sizzle when the batter hits. If the edges burn, lower the heat if necessary for a perfect golden exterior. Visually, the toast should be evenly colored without burnt spots.

Pro Tips for Perfect Strawberry Cheesecake Stuffed French Toast

1. Always use a good non-stick skillet to prevent sticking and ensure seamless flipping.
2. Whisk your egg mixture thoroughly to incorporate air, creating a fluffier texture.
3. Let the cream cheese mixture come to room temperature to ensure smooth mixing.
4. Experiment with different fruit fillings like blueberries or raspberries for variety.
5. For an extra touch, add a splash of vanilla to the egg batter for added flavor.
6. Serve immediately for the best texture; reheating can cause sogginess.
7. Top with fresh whipped cream or additional berries for a festive presentation.
8. For heat control, lower temperatures are better than high; this allows the inside to cook without burning the outside.

Variations and Adaptations

For a regional twist, try using peaches or plums instead of strawberries during the summer months. Seasonal adaptations like using pumpkin pie spice in fall can turn this into a delightful autumn treat. For dietary modifications, consider gluten-free bread, almond milk instead of cow’s milk, or non-dairy cream cheese for a vegan-friendly option. Changing up the flavor can involve adding lemon zest to the filling or cocoa powder for a chocolatey indulgence. When it comes to texture modifications, adding chopped nuts may deliver a delightful crunch. Experimenting with presentation can be as simple as a sprinkle of cinnamon or serving with a side of syrup for a delightful finishing touch.

Serving and Presentation Guide

Plating your Strawberry Cheesecake Stuffed French Toast can enhance the experience. For an elegant look, stack the toast neatly on a plate and drizzle with syrup or fruit compote. Garnish with fresh mint leaves to add a touch of color. Traditional accompaniments such as bacon or sausage provide a savory contrast that balances the sweetness. For modern servings, consider presenting the dish in a glass as a breakfast parfait with layers of syrup and fruit. The optimal serving temperature is warm, allowing the creamy filling to shine without being too hot to handle. For portion control, aim for each serving to be two slices—enough to satisfy without overwhelming.

Wine and Beverage Pairing

Pairing beverages with Strawberry Cheesecake Stuffed French Toast can elevate the meal. A sweet Champagne or Prosecco complements the dish beautifully, enhancing the fruity notes. For a non-alcoholic alternative, try iced tea with a hint of lemon for a refreshing contrast. If coffee is your preference, serve a medium-roast brew that balances out the sweet flavors. Always serve beverages chilled or hot according to your offering for the best taste profile. This aligns the drink’s temperature with the dish, enhancing overall enjoyment and ensuring a cohesive dining experience.

Storage and Shelf Life

Store any leftovers in airtight containers in the refrigerator for up to 3 days. Using glass containers often provides better preservation of flavors. To recognize signs of spoilage, watch for changes in texture or an off smell. For reheating, a quick zap in the microwave can suffice, but for best results, reheat in a skillet over medium heat to maintain that crispy exterior. If you want to preserve the dish longer, freezing is an option; allow it to cool completely before wrapping tightly. When freezing, ensure to consume within 2 months for best quality.

Make Ahead Strategies

To ensure meal prep efficiency, consider assembling the stuffed French toast a day prior. Prepare the filling and layer it between slices of bread, then store it in the fridge overnight. The next morning, simply dip it into the egg mixture and cook as directed. Create a timeline to manage your cooking flow, reducing stress and allowing time for a leisurely breakfast. If you assemble in advance, be mindful of potential sogginess and absorb extra moisture between steps by using thicker bread. Fresh elements, such as berries or whipped cream, can enhance the presentation at serving time.

Scaling Instructions

Scaling this recipe is straightforward. Halving the recipe can be done by adjusting the ingredients accordingly; just be sure to use a smaller pan. When doubling or tripling the recipe, consider cooking in batches rather than overcrowding the skillet for optimal results. Be prepared to adjust cooking times slightly, as larger quantities may take longer to cook evenly. It’s essential to maintain the same ratio of bread to filling even when scaling up, ensuring a balanced flavor. Storing leftovers should always be accounted for, especially if preparing in bulk for gatherings.

Nutritional Deep Dive

Analyzing the nutritional aspects, each serving of Strawberry Cheesecake Stuffed French Toast provides a balanced mix of carbohydrates, proteins, and fatty acids essential for energy. The strawberry and cream cheese combination offers a healthy dose of vitamins and minerals. Weighing serving sizes is crucial; maintaining portion control is key to managing calorie intake. Substituting ingredients like low-fat cream cheese or whole-grain bread can significantly alter the nutritional profile for the healthier option. Understanding caloric density and fiber contribution helps guide healthier indulgence.

Dietary Adaptations

For gluten-free versions, swap regular bread for gluten-free options like almond flour bread or rice cakes. If dairy is an issue, use non-dairy cream cheese alternatives and your choice of plant-based milk. Vegan adaptations are achievable with tofu and plant-based milk instead of eggs and dairy. For lower carbohydrate needs, consider using low-carb bread and watching portion sizes. Catering to diets like keto or paleo can involve careful ingredient selection to ensure compliance while preserving flavor. Creating a low-FODMAP variation is also possible by monitoring ingredient selection such as avoiding excess fruits or opting for lactose-free alternatives.

Troubleshooting Guide

If your French toast ends up too dry, this could be a result of insufficient soaking. Ensure each piece fully absorbs the egg mixture before cooking. If the flavors are imbalanced, consider including more spices or vanilla to enhance the sweetness. Should future attempts yield burnt edges or an uncooked center, it is essential to manage your skillet’s temperature well; too high can lead to unevenly cooked toast. If ingredient substitutions seem off, always remember to test small batches before preparing larger quantities. Timing is crucial; allow adequate time for all components to shine through without rushing.

Recipe Success Stories

Community feedback on this dish is overwhelmingly positive, with various adaptations shared among family and friends. Readers have found joy in experimenting with different fillings, showcasing personal favorite fruits alongside the strawberries. Many have shared their photography tips for capturing the vibrant colors of this dish, which has ignited creativity in the kitchen. Personal success stories highlight how this breakfast gem has become a family tradition, often repeated for special occasions or holiday gatherings. The joy of creating memories through food shines through in every story shared.

Frequently Asked Questions

Can I prepare this dish the night before? Yes! Assembling the filling ahead of time and storing it separately will save you time in the morning.

What can I use instead of strawberries? You can replace strawberries with any other preferred fruit such as blueberries, raspberries, or bananas for delicious variations.

Is it possible to freeze the stuffed French toast? Absolutely! Once cooked, allow it to cool, then freeze in airtight containers, reheating as needed.

How do I keep the French toast from getting soggy? Ensure the bread is thick enough and do not over-soak it in the egg mixture.

Can I make this gluten-free? Yes, substitute regular bread with gluten-free alternatives such as almond flour bread or rice cakes.

What are some great toppings for serving? Fresh whipped cream, maple syrup, and additional berries make fantastic toppings that enhance the flavor experience.

How long can I store leftovers? Leftovers can be refrigerated for up to three days and should be properly covered to maintain freshness.

Is there a vegan version of this recipe? Certainly! Use almond milk, mashed bananas, or tofu as a substitute for eggs and dairy.

What’s the best way to reheat leftovers? The recommended way is to reheat in a skillet over medium heat to retain crispness.

Can these be made mini-sized for kids? Yes! Cut the French toast to smaller portions for bite-sized treats perfect for kids.

Does this recipe require special equipment? A non-stick skillet or griddle is ideal for easy cooking and browning.

Additional Resources

For those looking to enhance their culinary skills, explore related recipes like Classic French Toast and Blueberry Muffins. Delve into technique guides for mastering whipped cream or creating fruit compotes that can elevate your breakfasts. Ingredient information regarding seasonal produce and its benefits can help guide your choices when cooking. Consider checking out equipment recommendations for the best pans or kitchen gadgets to streamline your cooking process. Embracing seasonal variations can also inspire new recipe ideas as fruits and ingredients change with the seasons.

Join the Conversation

Join our vibrant community by sharing your variations of this Strawberry Cheesecake Stuffed French Toast recipe on social media. Photography tips and tricks can enhance your food pictures, while reader reviews and comments provide inspiration for future attempts. Engage in discussions regarding modifications or different topping ideas that can make this already fantastic dish even better. Your contributions can help create a collective resource bank for fellow food lovers and chefs alike!

The Recipe

Strawberry Cheesecake Stuffed French Toast

Serves: 4

Prep Time: 15 mins

Cook Time: 10 mins

Total Time: 25 mins

Kitchen Equipment Needed

  • Non-stick skillet or griddle
  • Mixing bowls
  • Whisk
  • Spatula
  • Measuring cups and spoons

Ingredients

  • 8 slices of bread (preferably brioche or challah)
  • 4 ounces cream cheese, softened
  • 1 cup fresh strawberries, sliced
  • 2 large eggs
  • 1 cup milk (or alternative)
  • 1 teaspoon vanilla extract
  • 1 teaspoon cinnamon
  • Butter for cooking
  • Maple syrup, for serving
  • Powdered sugar, for garnish (optional)

Directions

  1. In a mixing bowl, combine cream cheese with sliced strawberries, mixing until smooth.
  2. In another bowl, whisk together eggs, milk, vanilla extract, and cinnamon until well combined.
  3. Spread a generous amount of the cream cheese mixture onto one side of each slice of bread and top with another slice to create a sandwich.
  4. Heat a non-stick skillet over medium heat and melt a small amount of butter.
  5. Dip each sandwich in the egg mixture, allowing it to soak briefly, then place in the skillet.
  6. Cook until golden brown on both sides, approximately 3-4 minutes per side.
  7. Remove from the skillet and keep warm while you cook the remaining sandwiches.
  8. Serve immediately topped with maple syrup and powdered sugar, if desired.

Recipe Notes

  • For added sweetness, consider mixing a bit of sugar into the cream cheese filling.
  • This recipe can easily be scaled up or down depending on the number of servings needed.
  • Feel free to substitute other fruits like blueberries or raspberries for variety.