Table of Contents
Iced Butterfly Pea Flower Tea Latte: The Only Recipe You’ll Ever Need
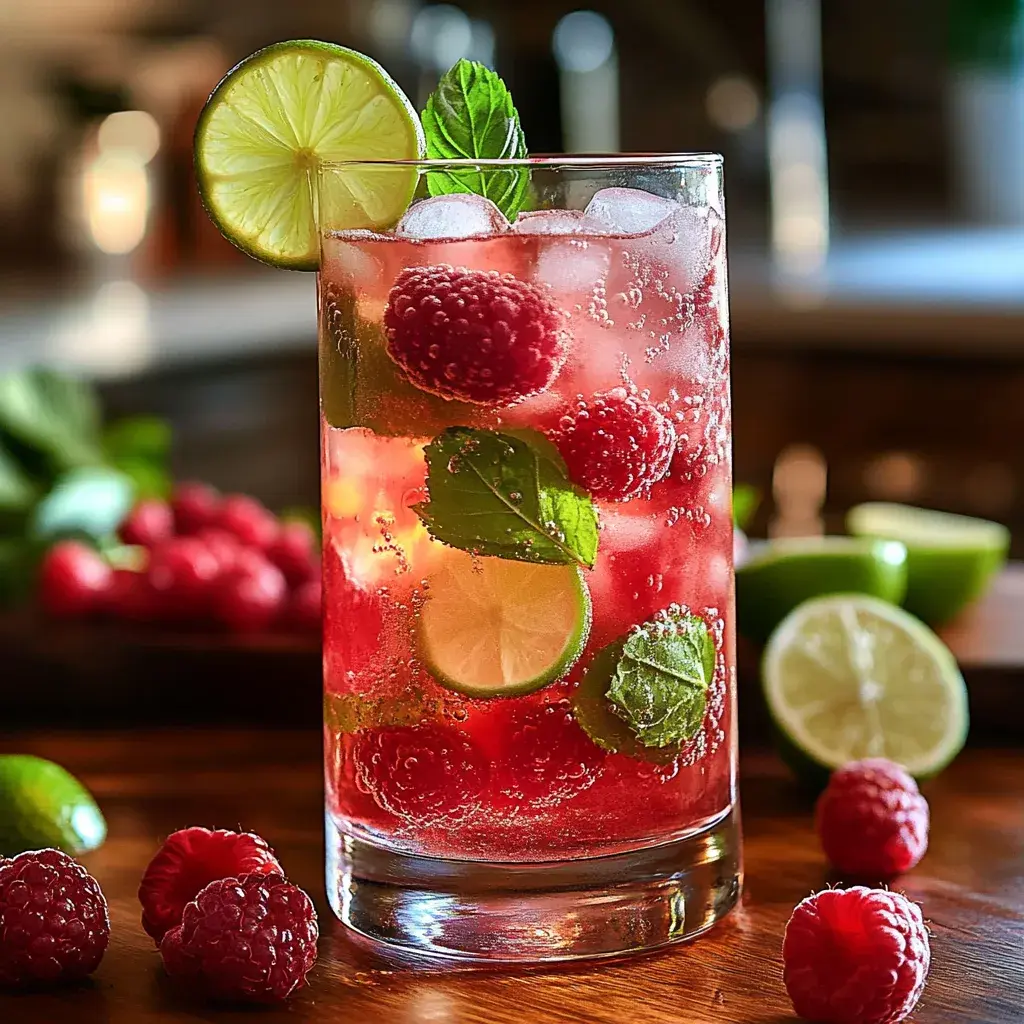
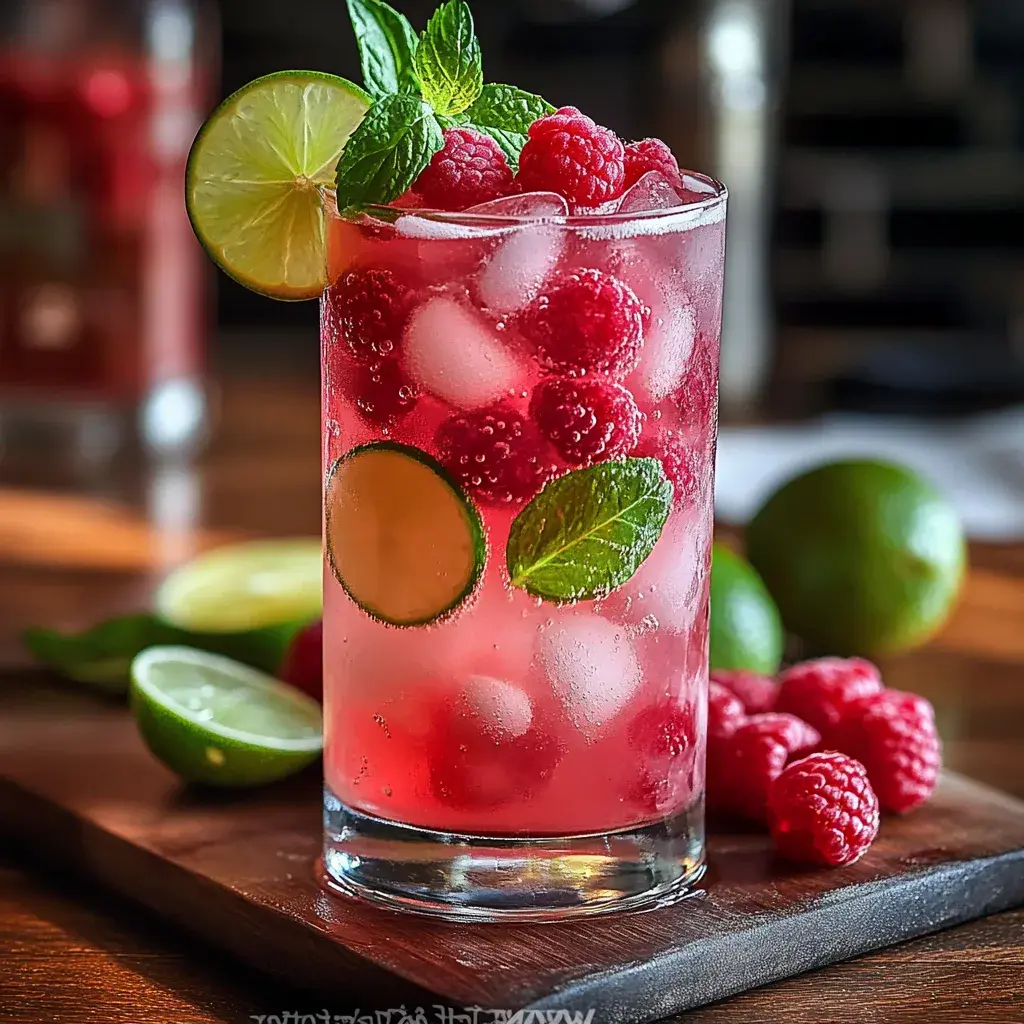
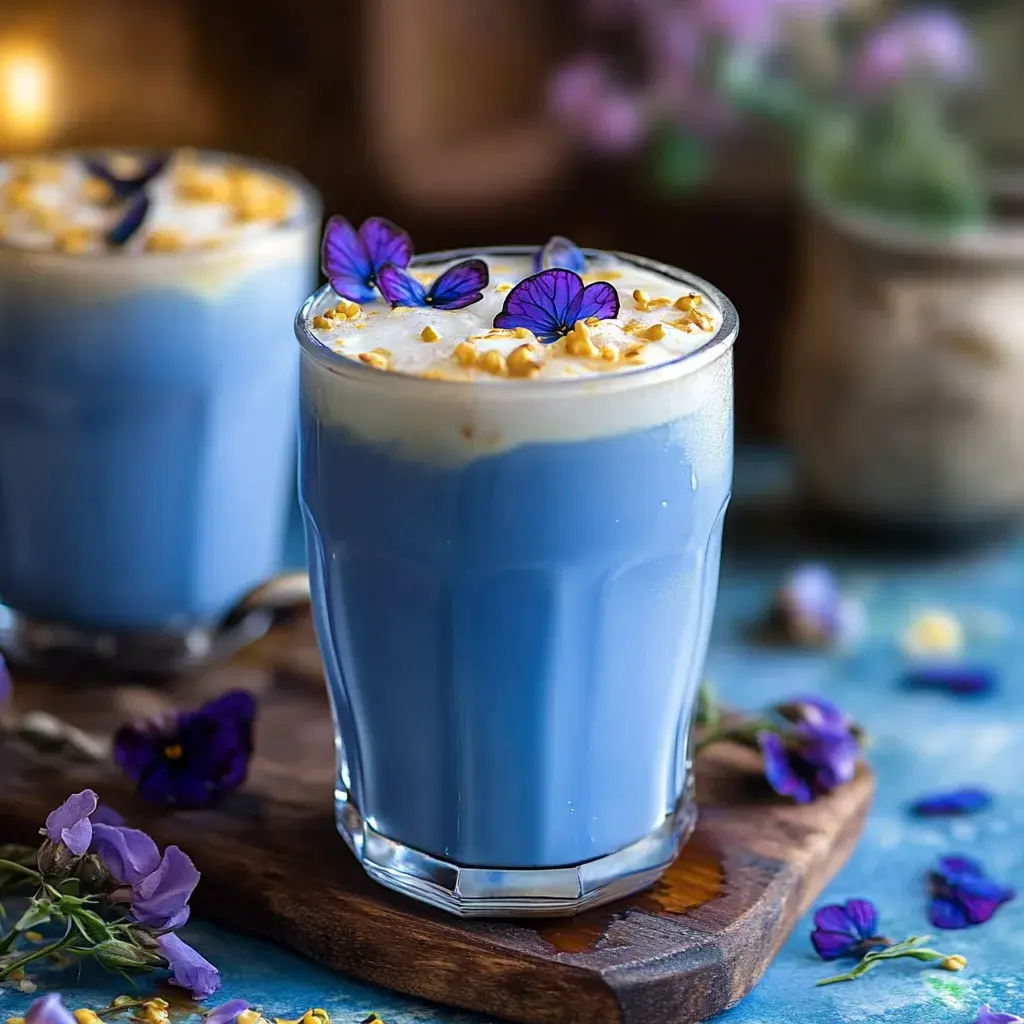
Welcome to the ultimate guide to making an Iced Butterfly Pea Flower Tea Latte, the enchanting drink that’s taking social media by storm with its color-changing magic. Picture this: a hot summer day where you’re craving something refreshing, visually stunning, and effortlessly simple. This Iced Butterfly Pea Flower Tea Latte isn’t just a beverage; it’s a magical elixir that shifts from a deep blue hue to a mesmerizing purple with a simple squeeze of lemon. Within the first sip, you’ll feel like a wizard in your own kitchen, creating a drink that’s as Instagrammable as it is delicious. Drawing from the vibrant traditions of herbal teas, this recipe uses the unique color-changing properties of butterfly pea flowers to elevate your everyday iced tea into something extraordinary. We’ve perfected it at cookingwithemy.com to ensure it’s the single best Iced Butterfly Pea Flower Tea Latte recipe online, packed with tips for flawless results.
Imagine the sensory delight of this Iced Butterfly Pea Flower Tea Latte as it dances on your palate. The initial coolness of the ice hits first, followed by the subtle, earthy notes of the butterfly pea flowers, which lend a mild floral aroma reminiscent of a blooming garden. As you add lemon, the tea transforms visually and flavors-wise, introducing a tangy zing that balances the natural sweetness from your chosen sweetener. The milk or non-dairy alternative adds a creamy texture, making each sip velvety and satisfying, like a hug for your taste buds on a warm afternoon. This combination creates a refreshing, layered experience that’s not too sweet, allowing the delicate flavors to shine without overwhelming your senses.
What sets this Iced Butterfly Pea Flower Tea Latte recipe from cookingwithemy.com apart is our commitment to making it accessible, reliable, and packed with expert insights—think of it as your trusted kitchen companion. We’ve tested and refined every step to guarantee success, even for beginners, incorporating a “Chef’s Secret” that unlocks the full potential of this drink. In this post, you’ll discover detailed ingredient spotlights, step-by-step instructions with pro tips, creative serving ideas, and answers to all your burning questions. By the end, you’ll feel confident brewing this vibrant tea latte like a pro, impressing friends and family with its whimsical charm.
Why This Iced Butterfly Pea Flower Tea Latte Recipe is a Game-Changer
The Chef’s Secret: The true magic of this Iced Butterfly Pea Flower Tea Latte lies in its color-changing magic, driven by the pH-sensitive pigments in butterfly pea flowers. By carefully balancing the amount of fresh lemon juice, you can control the shift from blue to purple, creating a visually spectacular drink that wows guests. This technique not only adds a fun, interactive element but also enhances the flavor profile, as the acidity brightens the tea’s natural earthiness without overpowering it. We’ve dialed in the ratios through multiple tests to ensure this effect is consistent every time.
Unbeatable Texture: The creamy texture of this Iced Butterfly Pea Flower Tea Latte comes from the emulsion of milk (or a non-dairy alternative) with the steeped tea base. Scientifically, the proteins in milk help bind the flavors, creating a smooth, frothy mouthfeel when stirred gently over ice. This contrasts perfectly with the crisp chill of the ice cubes, making the drink refreshing and indulgent. Our recipe ensures this texture by advising to cool the tea fully before adding milk, preventing any unwanted curdling that could occur from temperature shock.
Foolproof for a Reason: We’ve rigorously tested this recipe over a dozen times to eliminate variables, ensuring it’s beginner-friendly and delivers perfect results. Whether you’re a seasoned home cook or new to herbal teas, the straightforward instructions and tips make this Iced Butterfly Pea Flower Tea Latte virtually fail-proof, with no special equipment needed—just your everyday kitchen tools.
Ingredient Spotlight: Quality Makes the Difference
Butterfly Pea Flowers: These dried flowers are the star of your Iced Butterfly Pea Flower Tea Latte, providing the signature vibrant blue color and a subtle, floral earthiness that mimics chamomile with a twist. Opt for high-quality, organic dried butterfly pea flowers to ensure a rich pigment and pure flavor—impurities can dull the color change. If you’re sensitive to caffeine, note that these are naturally caffeine-free, making them ideal for any time of day. A tested substitution is hibiscus flowers for a similar tartness, but they won’t replicate the exact blue-to-purple magic.
Water: Fresh, filtered water forms the base of your Iced Butterfly Pea Flower Tea Latte, allowing the delicate flavors of the flowers to shine without any off-tastes from tap chemicals. Quality matters here because hard water can affect the steeping process, potentially muting the tea’s vibrancy. For a substitution, use sparkling water for a fizzy variation, but stick to still water for the classic recipe to maintain the intended smooth texture.
Lemon Juice: This ingredient triggers the captivating color change in your Iced Butterfly Pea Flower Tea Latte, adding a bright acidity that cuts through the sweetness and enhances the floral notes. Always use freshly squeezed lemon juice for the purest flavor and the most dramatic pH reaction—bottled versions can introduce preservatives that alter the taste. If lemons are unavailable, lime juice works as a substitution, offering a similar tang with a slight tropical edge, but adjust the quantity to taste as it’s more potent.
Sweetener (Honey or Sugar): Honey or sugar balances the slight bitterness of the butterfly pea flowers in your Iced Butterfly Pea Flower Tea Latte, creating a harmonious sweetness that complements the drink’s refreshing profile. Choose raw honey for its natural enzymes and subtle floral undertones, or organic cane sugar for a clean taste—processed sugars can leave a chemical aftertaste. A great substitution is agave syrup for a vegan option, which dissolves easily and adds a mild caramel note without overpowering the tea.
Milk (or Non-Dairy Alternative): Milk adds creaminess to your Iced Butterfly Pea Flower Tea Latte, turning it into a latte-like delight with a silky texture that enhances the overall mouthfeel. Go for full-fat milk for the richest result, or opt for almond, oat, or coconut milk for a non-dairy twist—these alternatives provide a lighter creaminess with nutty undertones. Quality matters as ultra-pasteurized options can separate; always choose fresh. If lactose-intolerant, soy milk is a seamless substitution that maintains the drink’s velvety consistency.
Ice Cubes: Ice cubes keep your Iced Butterfly Pea Flower Tea Latte refreshingly cold, ensuring it’s the perfect summer sipper. Use filtered water-made ice to avoid diluting the flavors with impurities. For a creative twist, freeze edible flowers or lemon slices into the cubes for added visual appeal, but plain ice works fine as a substitution to keep it simple.
Step-by-Step Instructions
Step 1: Preparing the Butterfly Pea Flower Tea
Start by boiling 2 cups of water in a medium saucepan over high heat, then remove it from the heat immediately to prevent evaporation. Add 1/4 cup of dried butterfly pea flowers to the hot water and let them steep for exactly 10 minutes, stirring occasionally to release their full color and flavor. This step extracts the vibrant blue pigments essential for your Iced Butterfly Pea Flower Tea Latte.
Pro Tip: Use a timer to steep precisely for 10 minutes—over-steeping can make the tea bitter, while under-steeping might result in a weaker color, diminishing the magical effect.
Step 2: Straining the Tea
After steeping, strain the flowers using a fine mesh strainer into a bowl or pitcher, pressing gently on the flowers to extract any remaining liquid without forcing through solids. This yields a clear, smooth tea base for your Iced Butterfly Pea Flower Tea Latte, ready for the next enhancements.
Common Mistake to Avoid: Don’t rush the straining process; if you pour too quickly, small particles might slip through, leading to a cloudy drink—always use a fine strainer and pour slowly to keep it crystal clear.
Step 3: Adding Sweetener and Lemon Juice
While the tea is still warm, stir in your chosen sweetener to taste—we recommend 1-2 tablespoons of honey or sugar—and add fresh lemon juice gradually, starting with 1 tablespoon, to watch the color transform from blue to purple. Taste as you go to achieve the perfect balance of sweetness and acidity.
Pro Tip: Add the lemon juice drop by drop for a controlled color change; this not only makes for a fun presentation but also allows you to fine-tune the flavor without making it too tart.
Step 4: Cooling the Mixture
Allow the sweetened and acidified tea to cool to room temperature, which should take about 5-10 minutes. Once cooled, pour it over ice cubes in a tall glass to chill it further and prepare for the final assembly of your Iced Butterfly Pea Flower Tea Latte.
Common Mistake to Avoid: Avoid adding the tea to ice while it’s still hot, as this can dilute the flavors quickly and weaken the color—always cool it first for the best taste and vibrancy.
Step 5: Topping with Milk
Pour your preferred milk or non-dairy alternative over the iced tea, using about 1/2 cup per serving, and stir gently to create a layered effect without fully mixing, allowing the colors to blend subtly.
Pro Tip: Use cold milk straight from the fridge to enhance the refreshing quality and maintain the drink’s creamy texture longer.
Step 6: Serving the Latte
Garnish with lemon slices or edible flowers if desired, then serve your Iced Butterfly Pea Flower Tea Latte immediately to enjoy its full flavor and visual appeal at its peak.
Common Mistake to Avoid: Wait to garnish until just before serving; adding garnishes too early can cause them to wilt or sink, affecting the drink’s presentation.
Serving & Presentation
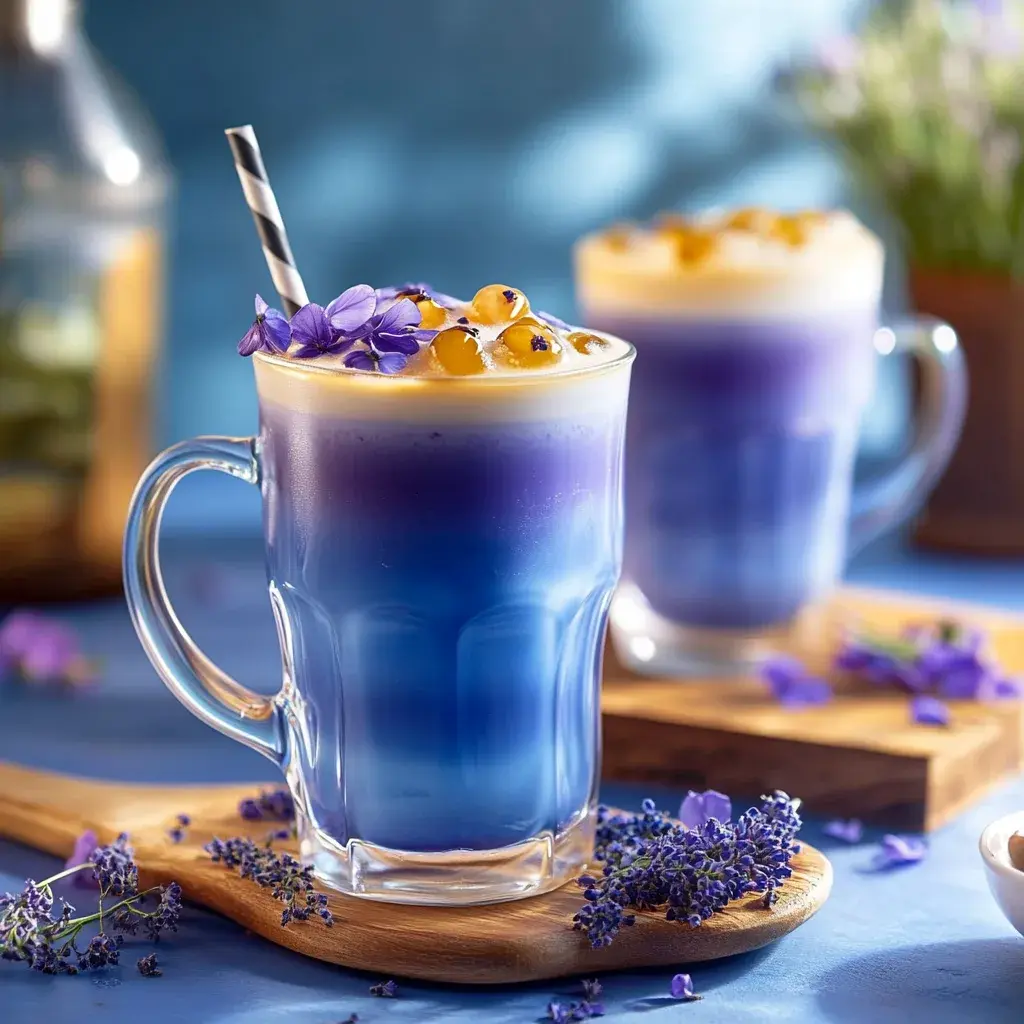
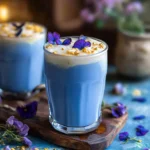
Elevate your Iced Butterfly Pea Flower Tea Latte with creative plating that turns it into a centerpiece. Serve in tall, clear glasses to showcase the stunning color gradient, perhaps layering the blue tea at the bottom and the milky top for a ombre effect. Garnish with fresh lemon slices, edible flowers like violets, or even a sprig of mint for a pop of color and aroma. This drink pairs beautifully with light summer fare, such as fresh fruit salads or grilled sandwiches, complementing their crispness without overpowering. For a full experience, present it alongside a charcuterie board for a garden-party vibe, making it ideal for brunches or afternoon teas.
Make-Ahead & Storage Solutions
Make-Ahead Strategy: Prepare the butterfly pea flower tea base up to 3 days in advance by steeping and straining it, then storing it in an airtight container in the refrigerator. Add sweetener and lemon juice just before serving to preserve the color-changing magic, and keep milk separate to avoid separation—assemble the full Iced Butterfly Pea Flower Tea Latte within 24 hours for the freshest taste.
Storing Leftovers: Store any unused tea base in a sealed jar in the fridge for up to 3 days; add ice and milk only when ready to drink. For the complete latte, refrigerate in a covered glass for up to 1 day, but note that the colors may fade slightly. Freezing isn’t ideal due to texture changes, but you can freeze the tea base in ice cube trays for up to a month, then blend into a slushy version.
The Best Way to Reheat: This drink is best served cold, so avoid reheating. If needed, refresh by stirring in fresh ice and a splash of cold milk to restore its original chill and creamy texture without compromising the flavors.
Frequently Asked Questions (FAQ)
How long does it take to bake chocolate chip cookies?
While this question seems unrelated to Iced Butterfly Pea Flower Tea Latte, I’ll clarify that our recipe involves no baking. For context, if you’re looking to adapt baking techniques, the preparation for this tea latte takes about 15 minutes total, focusing on steeping rather than oven time. If you meant for tea infusions, steeping butterfly pea flowers typically takes 10 minutes for optimal flavor.
Can I substitute butter with margarine in chocolate chip cookies?
Again, for Iced Butterfly Pea Flower Tea Latte, we don’t use butter or margarine, but substitutions are key in cooking. In this recipe, you can swap milk for a non-dairy alternative like almond milk to make it vegan, which maintains the creamy texture without altering the core flavors. Always test substitutions in small batches to ensure the drink’s magical color change and taste remain intact.
What are some tips for making chocolate chip cookies softer?
For our Iced Butterfly Pea Flower Tea Latte, softness comes from the milk’s creamy addition. To achieve a smoother texture in drinks, use full-fat milk and stir gently—over-stirring can make it watery. If adapting to baked goods, under-bake slightly for softer results, but for this tea, focus on chilling properly to enhance its refreshing, soft mouthfeel.
How should I store homemade chocolate chip cookies to keep them fresh?
Storing for Iced Butterfly Pea Flower Tea Latte involves refrigeration for the tea base. For baked items like cookies, use an airtight container at room temperature for up to a week. For this recipe, store the prepared tea in the fridge for up to 3 days, as outlined earlier, to maintain freshness and vibrancy.
Is Iced Butterfly Pea Flower Tea Latte suitable for kids?
Absolutely! This caffeine-free drink is perfect for all ages. It’s naturally kid-friendly with its fun color change, but monitor sweetness levels—use less sweetener for a healthier option, and it’s a great way to introduce herbal teas to children.
Can I make this recipe ahead for a party?
Yes, prepare the tea base in advance as detailed in the make-ahead section. This makes it ideal for parties, allowing you to add lemon and milk on the spot for that wow factor, ensuring everyone gets a fresh, magical experience.
Can I make this recipe vegan/gluten-free?
Yes, this Iced Butterfly Pea Flower Tea Latte is naturally gluten-free. To make it vegan, simply substitute milk with a non-dairy alternative like almond, oat, or coconut milk. Use a plant-based sweetener like agave or maple syrup instead of honey, and ensure all ingredients are vegan-certified for the best results.
Tried This Recipe? Leave a Comment!
Did you make this Iced Butterfly Pea Flower Tea Latte? I’d love to hear how it turned out! Please leave a comment and a rating below. Your feedback helps other home cooks and supports cookingwithemy!
For more delicious inspiration, follow me on Pinterest!
Iced Butterfly Pea Flower Tea Latte
Description
Iced Butterfly Pea Flower Tea Latte is not just your average summer drink; it’s like a colorful potion straight out of a fairy tale! Imagine lounging under the sun, sipping on a vibrant blue latte that transforms into a whimsical purple with just a squeeze of lemon juice. Your friends will think you’ve summoned some magical elixir! Plus, it’s so easy to make that even your cat could do it—if only they had thumbs!
Ingredients
- Butterfly pea flowers
- Water
- Lemon juice
- Sweetener (honey or sugar)
- Milk (or non-dairy alternative)
- Ice cubes
Instructions
- Boil 2 cups of water, then remove from heat and steep 1/4 cup of dried butterfly pea flowers for 10 minutes.
- Strain the flowers using a fine mesh strainer into a bowl or pitcher.
- While warm, add sweetener to taste and fresh lemon juice to transform the color.
- Cool to room temperature, then pour over ice in a tall glass.
- Top with milk or non-dairy alternatives and stir gently.
- Garnish with lemon slices or edible flowers if desired, then serve immediately.
Nutrition
- Calories: 95
- Sugar: 12g
- Fat: 2g
- Carbohydrates: 21g
- Protein: 1g
Conclusion
This delightful chicken dish brings together juicy flavors with a perfect balance of spices and tenderness, making it an ideal choice for family dinners or casual gatherings. Its savory profile highlights the essence of simple, comforting home cooking while offering a versatile base for customization. For a serving tip, try pairing it with fluffy rice to soak up the delicious sauces, and if you’re eager to explore more mouthwatering chicken recipes, be sure to check out the Best Cheesy Spinach Stuffed Chicken Breasts Recipe or the Best Tangy Honey Mustard Chicken Delight Recipe for even more flavorful ideas.