Irresistible Strawberry Cheesecake Cookie Cups: The Perfect Easy Christmas Dessert
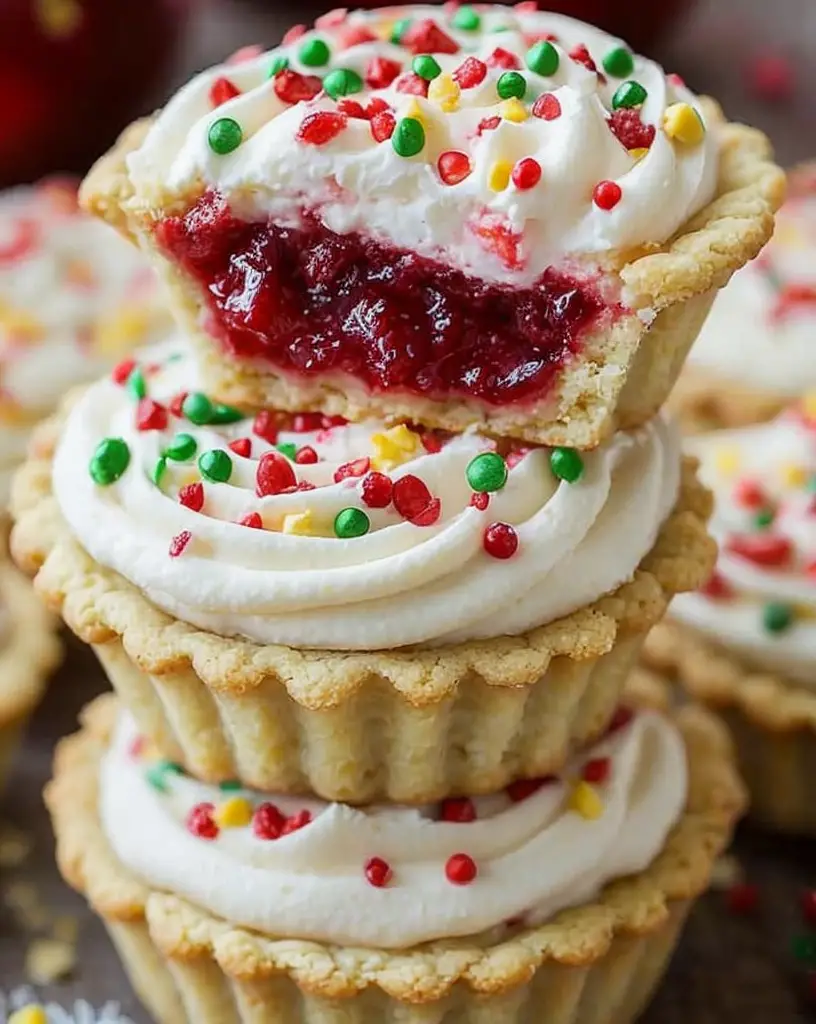
Strawberry Cheesecake Cookie Cups are the quintessential festive dessert that can brighten up any gathering. As you bite into these delightful cookie cups, the sweet and creamy cheesecake filling perfectly complements the tangy burst of fresh strawberries, creating a harmonious flavor profile that is irresistible. Perfectly sized as single servings, these cookie cups not only satisfy your sweet cravings but also provide a visual treat with their vibrant colors and delightful textures.
There’s something undeniably comforting about homemade desserts, especially during the holiday season. With their buttery cookie base and luscious cheesecake filling, these cookie cups are remarkably simple to prepare yet yield impressive results. Whether you’re entertaining guests or simply seeking a cozy treat at home, these cookies will undoubtedly bring joy and festivity to your table.
Quick Recipe Highlights
- Flavor Profile: Sweet, creamy cheesecake paired with fresh strawberries makes each bite a delightful experience.
- Texture: A perfect balance of soft cookie and creamy filling gives a delightful mouthfeel.
- Aroma: The scent of baked sugar cookies mingled with fresh strawberries creates a warm and inviting aroma.
- Visual Appeal: The red strawberries atop the creamy white filling make for an eye-catching presentation.
- Skill Level Needed: This recipe requires basic baking skills, making it perfect for beginners and seasoned bakers alike.
- Special Equipment: You will need a muffin tin and mixing bowls to create these delicious treats.
Recipe Overview
- Difficulty Level: These Irresistible Strawberry Cheesecake Cookie Cups are classified as easy to make, making them accessible for all levels of bakers.
- Category: They fit perfectly into the dessert category, ideal for serving at parties, family gatherings, or as a holiday treat.
- Cuisine: This dessert draws inspiration from classic cheesecake recipes, blending traditional techniques with modern flair.
- Cost: Approximately $15 to make 12 cookie cups, depending on ingredient quality and local prices.
- Season: The best time to enjoy these delicious cookie cups is during holidays and summer, when strawberries are at their peak.
- Occasion: Perfect for Christmas gatherings, birthday celebrations, or any festive occasion that calls for delightful sweets.
Why You’ll Love This Recipe
The combination of taste and texture in these Strawberry Cheesecake Cookie Cups is simply enchanting. Each bite presents a wonderful mix of the soft cookie base and the smooth, rich cheesecake filling, contrasted by the freshness of the strawberries. This layered experience not only captivates the palate but also leaves a lasting impression on dessert lovers.
Convenience is another great aspect of this recipe. It can be prepared in under an hour, allowing you to whip up a beautiful dessert even on a busy day. The simplicity of the preparation means you can enjoy more time with your loved ones during festive gatherings, rather than being stuck in the kitchen.
Nutritionally, these cookie cups can be enjoyed in moderation as part of a balanced diet. Strawberry Cheesecake Cookie Cups contain a source of calcium from the cream cheese and fresh vitamin C from strawberries, making them a delightful treat with some health benefits.
Socially and entertaining-wise, these cookie cups serve as a fantastic conversation starter at any gathering. Guests will be thrilled by the vibrant colors and elegant presentation, making them eager to taste these adorable desserts.
Finally, the cost-effectiveness of this dessert is hard to beat. With simple, accessible ingredients, you can create an attractive and delicious treat that’s sure to impress without breaking the bank. These cookie cups prove that great desserts don’t have to be complicated or expensive.
Historical Background and Cultural Significance
The cookie cup concept merges the beloved traditional cheesecake with a modern twist, making it a fun and portable version of the classic dessert. Cheesecake itself has a rich history dating back to Ancient Greece, where it was served to athletes during the first Olympic Games. Over centuries, various cultures have put their spin on cheesecake, leading us to the many variations we enjoy today.
Culturally, desserts often bring people together, celebrating both everyday moments and special occasions. The Strawberry Cheesecake Cookie Cup is no exception—it has become a favorite among families during holiday celebrations, particularly in American culture, where both strawberries and cream cheese are widely embraced.
As for the recipe’s evolution, it has transformed from classic cheesecake slices into creative forms like these cookie cups. This innovative approach allows for easier serving and enjoyment at events, reinforcing that desserts can be both practical and delightful.
Regional variations often appear with this dessert, incorporating different fruits such as blueberries or raspberries, depending on local preferences and seasonal availability. These variations allow bakers to personalize their creations and engage with their local heritage.
Ingredient Deep Dive
Strawberries: Strawberries are a symbol of summer and celebration, often featured in various global cuisines. They offer numerous health benefits, including high levels of vitamin C, antioxidants, and dietary fiber. When selecting strawberries, look for bright red, firm fruit without blemishes. Store them in the refrigerator and consume them within a few days for the best flavor—frozen strawberries can also be used as a substitute.
Cream Cheese: Cream cheese serves as the heart of the cheesecake filling, bringing a rich, velvety texture. Originating in the United States in the late 19th century, cream cheese has since become a staple in many desserts. Nutritionally, it provides essential fats and calcium. Choose full-fat cream cheese for the best results, and keep it refrigerated until needed. If you’re looking for a lighter alternative, consider using Greek yogurt, though the texture will differ slightly.
Granulated Sugar: As a foundational sweetener, granulated sugar enhances the flavors of every ingredient in the cookie cups while promoting a lovely caramelization. Use sugar with caution, balancing sweetness with other flavors. Store sugar in a cool, dry place, and consider alternatives like honey or maple syrup in moderation if you’re experimenting with different flavors.
Unsalted Butter: Butter is vital for creating a flaky cookie base. It brings richness and moisture, making every bite satisfying. Unsalted butter is preferred to control salt levels in baking. Look for high-quality butter for the best taste. Store butter in the fridge and allow it to soften before use. Coconut oil can be an interesting dairy-free substitute in some recipes.
Common Mistakes to Avoid
- Overmixing the Dough: Overworking the batter can lead to tough cookie cups. Mix just until combined to keep the texture soft.
- Underbaking: If you remove the cookie cups too early, they may collapse. Look for a golden edge to ensure proper baking.
- Skipping Chilling Time: Not chilling the dough can make it difficult to shape. Chill for proper consistency and easier handling.
- Using Cold Ingredients: Cold cream cheese can create lumps in the filling. Let it sit at room temperature to soften before mixing.
- Overfilling the Cups: Filling too much can lead to overflowing during baking. Stick to the recommended amount for perfect results.
- Using Old Ingredients: Ensure everything, especially baking powder and dairy, is fresh; expired ingredients can ruin the taste.
- Neglecting To Adjust Oven Temperatures: Each oven behaves differently; using an oven thermometer can help get the right temperature.
- Rushing the Cooling Process: Allowing the cookie cups to cool properly before serving will ensure they hold their shape and flavor.
- Inconsistent Sizing: Use a cookie scoop for even sizing; this will help ensure all cookie cups bake uniformly.
- Ignoring Flavorings: Adding vanilla extract or lemon zest can enhance the flavor—don’t skip on flavor enhancers!
Essential Techniques
Preparing Cookie Cups: Creating the perfect cookie cup shape is essential for holding the filling. Start by greasing the muffin tin well, then press the dough evenly into the bottom and sides of the cups. This technique ensures even baking and easy release from the pan. Watch for a golden brown color to indicate doneness.
Making the Cheesecake Filling: Combine cream cheese, sugar, and flavorings gently. It’s important to cream these ingredients until smooth, but don’t overmix as it can incorporate too much air, causing cracks during baking. Look for a creamy consistency without lumps for the best texture.
Pro Tips for Perfect Irresistible Strawberry Cheesecake Cookie Cups
1. Use fresh strawberries for the best flavor, or consider macerating them in a little sugar to enhance their sweetness.
2. Let the cream cheese sit out before mixing; a softer texture will help prevent lumps in the filling.
3. For an added twist, consider using a graham cracker crust base instead of a cookie dough for a true cheesecake effect.
4. Refrigerate the cookie cups after baking to help them set properly and enhance their texture before serving.
5. Top the assembled cups with whipped cream for an elegant finishing touch that adds extra flavor and visual appeal.
6. Experiment with flavored extracts—like almond or lemon— for unique takes on the classic filling.
7. Store any leftovers in an airtight container in the refrigerator for freshness.
8. Consider adding a touch of vanilla extract to the cookie dough for enhanced flavor throughout.
Variations and Adaptations
One popular regional variation of the Strawberry Cheesecake Cookie Cups is to incorporate different seasonal fruits—like blueberries, raspberries, or even peaches—creating a delightful medley of flavors. Alternatively, adding chocolate chips to the cookie base brings a rich and decadent twist.
For seasonal adaptations, try spicing up the filling during the fall with pumpkin puree or ginger spices for a seasonal flavor enhancement. Those with dietary restrictions can also modify the cookie base to be gluten-free using almond flour or coconut flour while ensuring all ingredients align with their dietary needs.
If you’re looking for creative presentation alternatives, consider placing individual cookie cups in decorative cupcake liners or serving them on a tiered cake stand for visually stunning arrangements at gatherings.
Serving and Presentation Guide
Plating techniques for these cookie cups can be simple yet elegant. Consider arranging the cookie cups on a beautiful platter garnished with fresh strawberries and mint leaves to contrast with the vibrant colors of the dessert.
To elevate the experience, you might garnish the tops with a dollop of whipped cream or a drizzle of chocolate sauce. Simple decorations like powdered sugar or crushed nuts can also add an attractive touch.
Traditionally, these cookie cups are perfect as standalone desserts; however, pairing them with a side of vanilla ice cream or a fruit coulis can add a delightful twist. For temperature considerations, serve the cups chilled, allowing the cheesecake filling to hold its shape while indulging in every heavenly bite.
Wine and Beverage Pairing
Pairing these Strawberry Cheesecake Cookie Cups with a sweet dessert wine like Moscato can enhance the overall experience, bringing out the fruity notes in the strawberries while balancing the creamy texture of the cheesecake. Alternatively, a light sparkling rosé can provide refreshing contrasts.
For non-alcoholic options, consider serving with iced tea garnished with lemon. A strawberry lemonade can also complement the flavors beautifully, providing a refreshing balance to the richness of the cookie cups.
If you enjoy coffee or tea, a cup of smooth cappuccino or a chai latte can enhance the dessert experience, providing warmth and depth to the sweet and tangy flavors.
Storage and Shelf Life
These Strawberry Cheesecake Cookie Cups are best stored in an airtight container in the refrigerator, where they will stay fresh for up to 3-4 days. To prevent the cookie base from getting soggy, place parchment paper between layers if stacking.
When reheating them, use a microwave in short intervals to avoid melting the cheesecake filling completely. The cookie cups can also be frozen for up to a month; wrap them tightly in plastic wrap or use freezer-safe containers for longer storage.
Be mindful of signs of spoilage, such as off-odors or changes in texture. If there are any uncertainties around freshness, it’s better to err on the side of caution and discard them.
Make Ahead Strategies
To make these Strawberry Cheesecake Cookie Cups ahead of time, prepare the cookie dough and store it in the refrigerator for up to 24 hours before baking. The cheesecake filling can also be made a day in advance and stored separately.
For optimal freshness, consider freezing the assembled cookie cups, placing them in the freezer right after baking. Allow them to thaw in the refrigerator before serving. This method will help maintain texture while providing convenience on the day of your event.
When assembling, add fresh strawberries just before serving to retain their color and freshness, enhancing the overall presentation and flavor.
Scaling Instructions
Scaling these Strawberry Cheesecake Cookie Cups is easy; simply double or triple the ingredient amounts according to your desired servings. Keep in mind that batch sizes should fit within your available mixing and baking equipment.
For halving the recipe, keep an eye on the baking time as smaller batches may require less time in the oven. Additionally, if you choose to utilize multiple pans, make sure to rotate them during cooking for consistent results.
When adjusting portions, be sure to calculate any necessary changes in baking times while ensuring the proper working temperature for ingredients. Extra care should be taken if you’re using a larger pan to accommodate more cookie cups.
Nutritional Deep Dive
The nutritional breakdown of each Strawberry Cheesecake Cookie Cup offers a delightful treat that still contains essential nutrients. Each cookie cup typically includes carbohydrates from the cookie base, fats from the cream cheese, and proteins that lend themselves to a balanced dessert in moderation.
A serving provides a good source of calcium and vitamins, particularly if you incorporate fresh strawberries, which contribute antioxidants that fight inflammation and boost the immune system. Balancing dessert intake with a nutrient-rich diet is key for maintaining health and wellness.
While enjoying these delicious treats, keep portion sizes in mind to manage calorie intake effectively. Remember, desserts can fit into a healthy lifestyle when enjoyed in moderation and balanced with nutritious foods.
Dietary Adaptations
Accommodating various dietary needs is possible with Strawberry Cheesecake Cookie Cups. For a gluten-free version, substitute all-purpose flour with almond flour or gluten-free flour blends, keeping consistency in mind.
Dairy-free options can be achieved using vegan cream cheese and dairy-free butter, offering a similar flavor and texture. For those on vegan diets, ensure all ingredients align, including the sugar used.
For low-carb or keto adaptations, switching to almond flour and using a sugar substitute like erythritol will allow compliance without sacrificing flavor. Each adaptation ensures that everyone can enjoy these delightful cookie cups.
Troubleshooting Guide
Should texture issues arise, check the cookie base for overmixing, which can create a dense product. Incorporate just enough until the ingredients are combined to maintain softness.
If flavor balance seems off, ensure to sample during preparation—adding more vanilla or sugar can often help achieve a delightful equilibrium.
Temperature problems can typically be solved with an accurate oven thermometer to ensure the right baking temperature. If ingredients aren’t at room temperature when combining, this could affect the cookie and filling’s consistency.
If facing equipment challenges, like sticky cookie dough, lightly flour your hands or work surface to help manage it better. Prepare for any adjustments that your specific tools may require.
Timing concerns can be managed with a well-prepared baking timeline, checking cookies regularly to ensure they aren’t under or overbaked.
Recipe Success Stories
Bakers from across our community have shared their success with these delightful Strawberry Cheesecake Cookie Cups. Many reported impressing guests at holiday celebrations, where the cookie cups not only tasted delicious but also added vibrant color to dessert tables.
Readers have enjoyed adapting the recipe, substituting strawberries with alternatives like peaches or blueberries, yielding incredible results and rave reviews from family members. The versatility of this recipe proves that small changes can lead to delightful discoveries in flavor combinations.
Photographers capturing these cookie cups have highlighted the visual aspect, noting how the red strawberries pop against the creamy filling, inspiring others to share their own creations online. Positive feedback reinforces that these cookie cups are a household favorite.
Frequently Asked Questions
Absolutely! These cookie cups can be frozen for up to a month. Just ensure they are wrapped tightly and stored in an airtight container. Allow them to thaw in the refrigerator when you’re ready to enjoy them.
How do I know when the cookie cups are done?
Look for a golden brown color on the edges of the cups. The centers might still look slightly soft, but they will firm up as they cool.
Can I use other fruits?
Yes, this recipe is quite adaptable! You can replace strawberries with your choice of fruits like blueberries, raspberries, or even seasonal fruits like peaches. Adjust the sweetness as needed.
What do I do if my cheesecake filling is lumpy?
If your filling is lumpy, it may be due to cold cream cheese. Ensure your cream cheese is at room temperature before mixing. If lumps persist, you can blend it briefly until smooth.
Is there a way to make them gluten-free?
Absolutely! Simply substitute all-purpose flour with a gluten-free blend, almond flour, or oat flour to keep the recipe gluten-free and still delicious.
Can I make these cookie cups ahead of time?
Yes! You can prepare the cookie dough and filling a day ahead. Store them separately until you’re ready to assemble and bake.
What other toppings can I use?
Consider topping them with whipped cream, chocolate drizzle, or sprinkle crushed nuts for an added crunch. You can even use a berry compote for a berry-rich experience!
How should I store leftover cookie cups?
Keep the cookie cups in an airtight container in the refrigerator for 3-4 days. Consider layering parchment paper if stacking to avoid sogginess.
Can I substitute sugar with a sugar alternative?
Yes, feel free to use sugar replacements like stevia or erythritol in equal portions according to your preference for reduced sugar options.
Will these cookie cups hold their shape when baked?
Yes! If the dough is well-made and pressed evenly in the muffin tin, they will hold their shape wonderfully during baking.
Additional Resources
For more delightful dessert recipes that complement these Strawberry Cheesecake Cookie Cups, check out our guides on making classic cheesecakes, exploring seasonal fruit-infused desserts, or crafting simple cookie bases. You may also find tips on the best kitchen tools to streamline your baking process, alongside insights into seasonal dessert trends.
Join the Conversation
We encourage you to share your experiences and variations of the Strawberry Cheesecake Cookie Cups on social media. Tag us in your baking photos, share tips, or leave feedback on how your cookie cups turned out. Engaging with our community allows everyone to learn new ideas and celebrate their creative efforts!
The Recipe
Irresistible Strawberry Cheesecake Cookie Cups
Serves: 12 Cookie Cups
Prep Time: 20 mins
Cook Time: 15 mins
Total Time: 35 mins
Kitchen Equipment Needed
- Muffin tin
- Mixing bowls
- Electric mixer
- Spoon or cookie scoop
- Parchment paper (optional)
Ingredients
- 1 cup all-purpose flour
- 1/2 cup granulated sugar
- 1/2 cup unsalted butter, softened
- 1 cream cheese (8 oz), softened
- 1/4 cup granulated sugar for filling
- 1 egg
- 1 teaspoon vanilla extract
- 12 fresh strawberries, cut in half
- Pinch of salt
Directions
- Preheat the oven to 350°F (175°C) and grease the muffin tin.
- In a mixing bowl, cream together the butter and sugar until light and fluffy.
- Add the flour and salt, mixing until just combined.
- Press the cookie dough evenly into the muffin cups to form a base.
- Bake for 10-12 minutes, or until golden brown.
- In another bowl, beat together cream cheese, sugar, egg, and vanilla until smooth.
- Once cookie cups are baked, pour the cheesecake filling into each cup.
- Top each with a half strawberry, pressing lightly into the filling.
- Bake for an additional 10-12 minutes until the filling is set.
- Let cool completely before removing from the tin; serve chilled or at room temperature.
Recipe Notes
- Feel free to use different fruits for topping based on your seasonal preferences.
- These cookie cups can be made ahead of time and stored in an airtight container for freshness.
- Substitute sugar with a sweetener of your choice for a healthier alternative.