Best Heaven On Earth Cake – Easy Dessert Recipe

best-heaven-earth-cake-recipe

Introduction

Hi there! I’m Emily, the heart and soul behind brekcakes.com. From my earliest memories, the kitchen has always been a place of warmth and creativity. It’s where I discovered the magic of turning simple ingredients into extraordinary meals and learned that the best dishes are often made with love as the main ingredient.

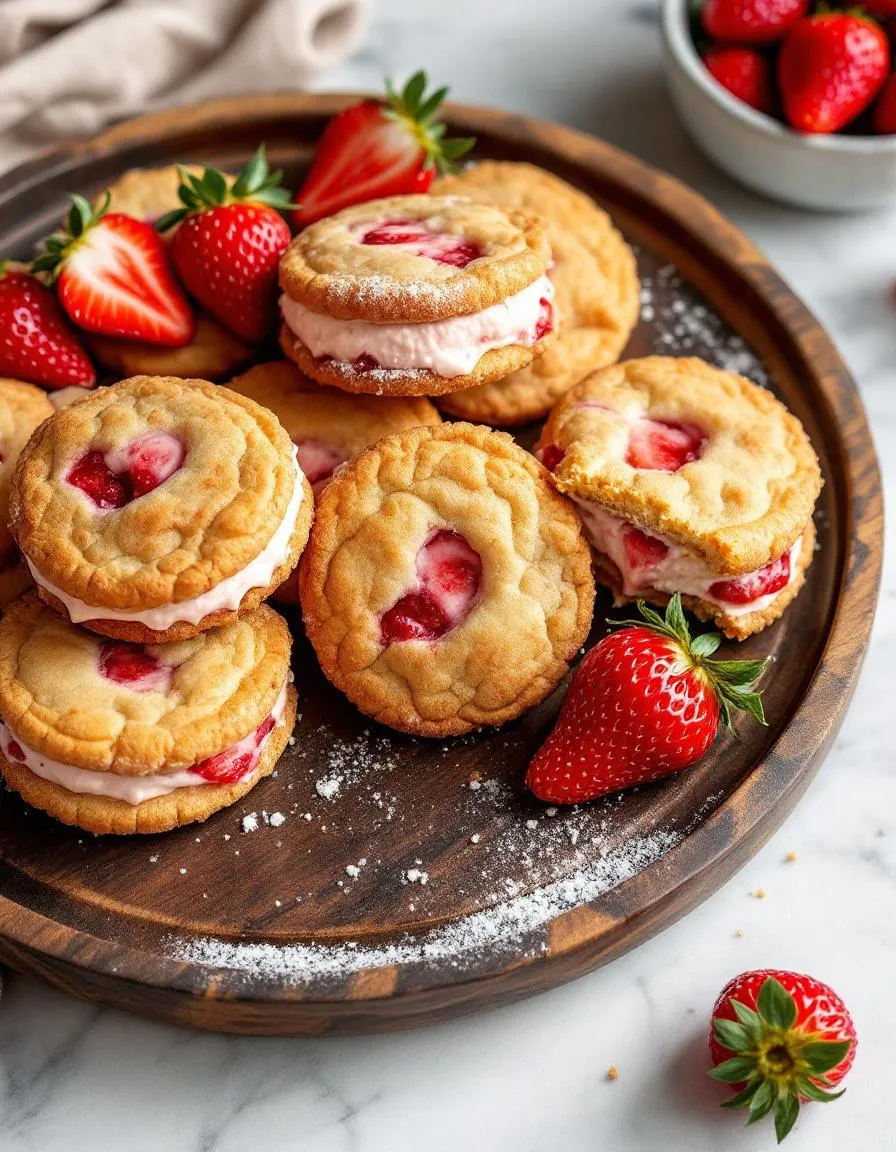
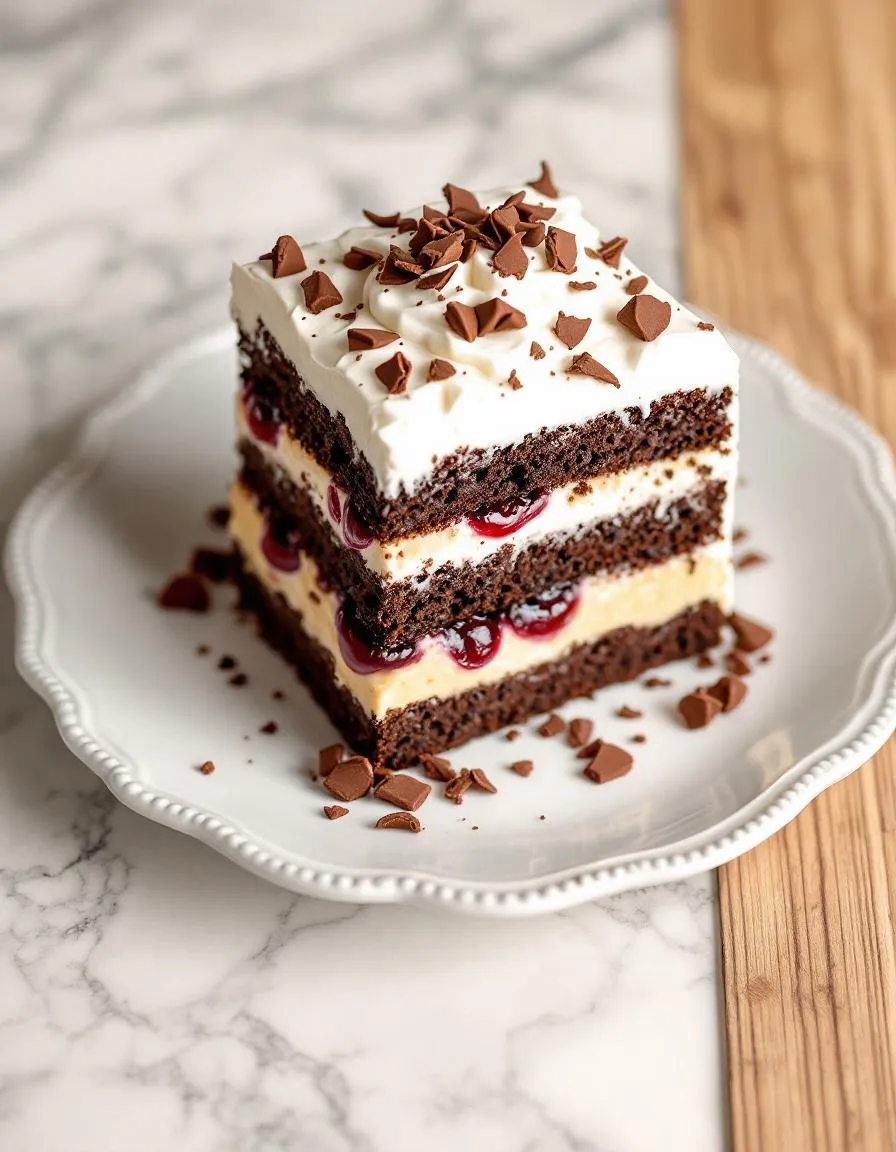
If you’ve ever craved a dessert that feels like a sweet embrace, you’re in the right place. Today, I’m sharing my all-time favorite indulgence—the Heaven On Earth Cake. This dreamy treat combines layers of fluffy cake, creamy filling, and fruity goodness, creating a bite that truly lives up to its name. Whether you’re celebrating a special occasion or simply treating yourself, this recipe promises pure bliss with every forkful.

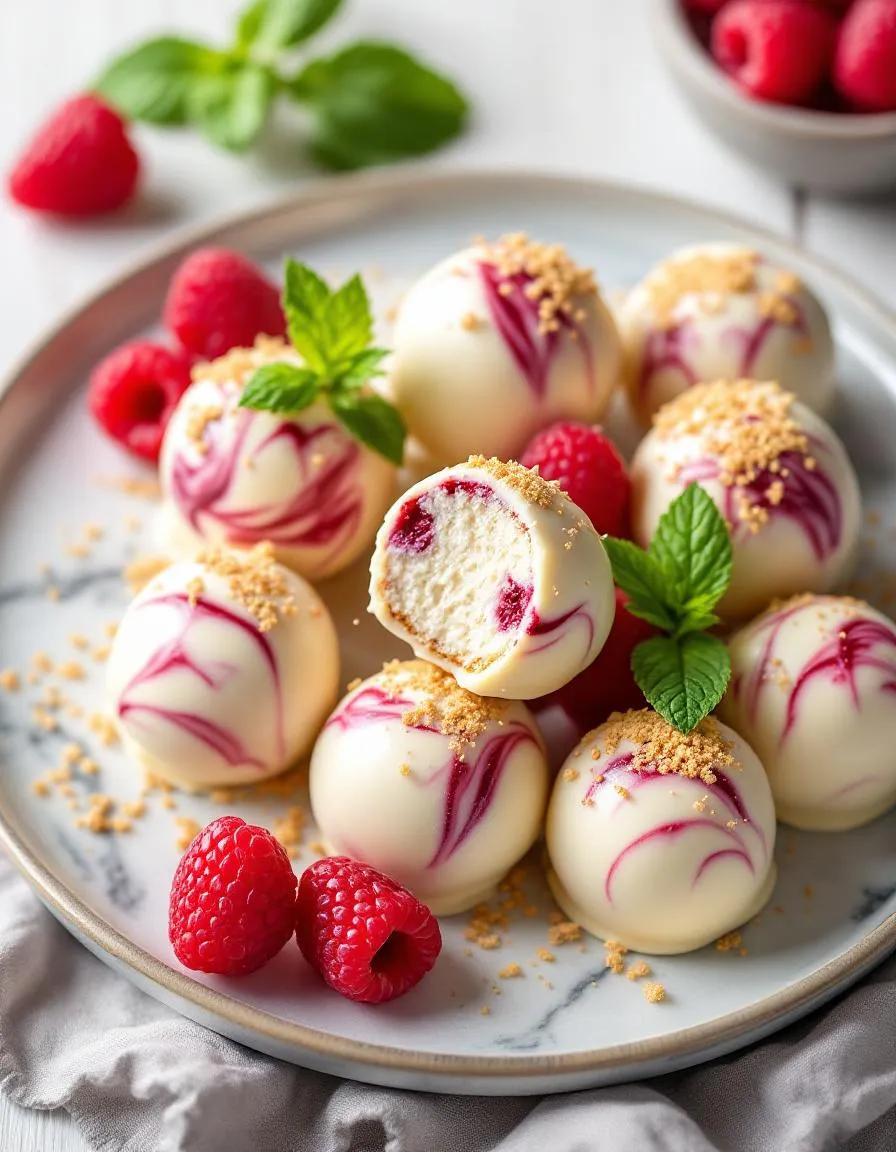
The Heaven On Earth Cake isn’t just another dessert—it’s a celebration of textures and flavors. Picture this: tender cake layers mingling with velvety pudding, whipped cream, and a burst of cherry goodness. What makes it stand out? First, it’s incredibly versatile. You can customize it with different fruits or even chocolate for a twist. Second, it’s surprisingly easy to make, yet it looks and tastes like something from a fancy bakery. At brekcakes.com, we believe desserts should be both approachable and extraordinary, and this recipe perfectly embodies that philosophy. If you love crowd-pleasing treats, you’ll also adore our Decadent Chocolate Mousse Cake or the refreshing Lemon Blueberry Cheesecake Bars. Trust me, once you try this cake, it’ll earn a permanent spot in your recipe rotation.

Why I Love This Recipe

This cake holds a special place in my heart because it reminds me of Sunday dinners at my grandma’s house. She’d always serve it with a wink, saying, “Life’s too short for mediocre desserts.” The way her face lit up as we took our first bites made me realize how food connects us. Now, whenever I bake this Heaven On Earth Cake, I feel that same joy—and I hope it brings a little slice of happiness to your table too.

Health and Nutrition

Why it’s good for your body

Heaven On Earth Cake offers more than just incredible flavor. First, it provides a satisfying treat without excessive sugar, especially if you opt for natural sweeteners. Additionally, the creamy layers often include dairy, which delivers calcium and protein for stronger bones and muscles. Meanwhile, the fruit components, like cherries or berries, add antioxidants that fight inflammation.

Another benefit of Heaven On Earth Cake is its versatility. For instance, you can easily adapt it to include whole-grain crusts or nut-based layers for extra fiber and healthy fats. Furthermore, the dessert’s light texture makes it a refreshing alternative to heavier options, so you can indulge without feeling weighed down. Finally, because it balances sweetness with wholesome ingredients, you get a dessert that satisfies cravings while still contributing to your daily nutrient intake.

How it fits in a healthy lifestyle

Heaven On Earth Cake fits perfectly into a balanced diet when enjoyed mindfully. For example, pairing a small slice with a protein-rich snack, like Greek yogurt, helps stabilize blood sugar levels. If you’re exploring gluten-free options, you can modify the recipe with almond flour or gluten-free graham crackers, similar to our gluten-free dessert ideas.

For those focused on heart health, reducing saturated fats by using low-fat cream cheese or coconut milk works beautifully. You can also incorporate more fresh fruit toppings for added vitamins, just like we suggest in our healthy ingredient swaps guide. By making small adjustments, Heaven On Earth Cake becomes a guilt-free pleasure that aligns with your wellness goals.

Print
clock clock iconcutlery cutlery iconflag flag iconfolder folder iconinstagram instagram iconpinterest pinterest iconfacebook facebook iconprint print iconsquares squares iconheart heart iconheart solid heart solid icon

Heaven On Earth Cake


  • Author: Chef Emy

Description

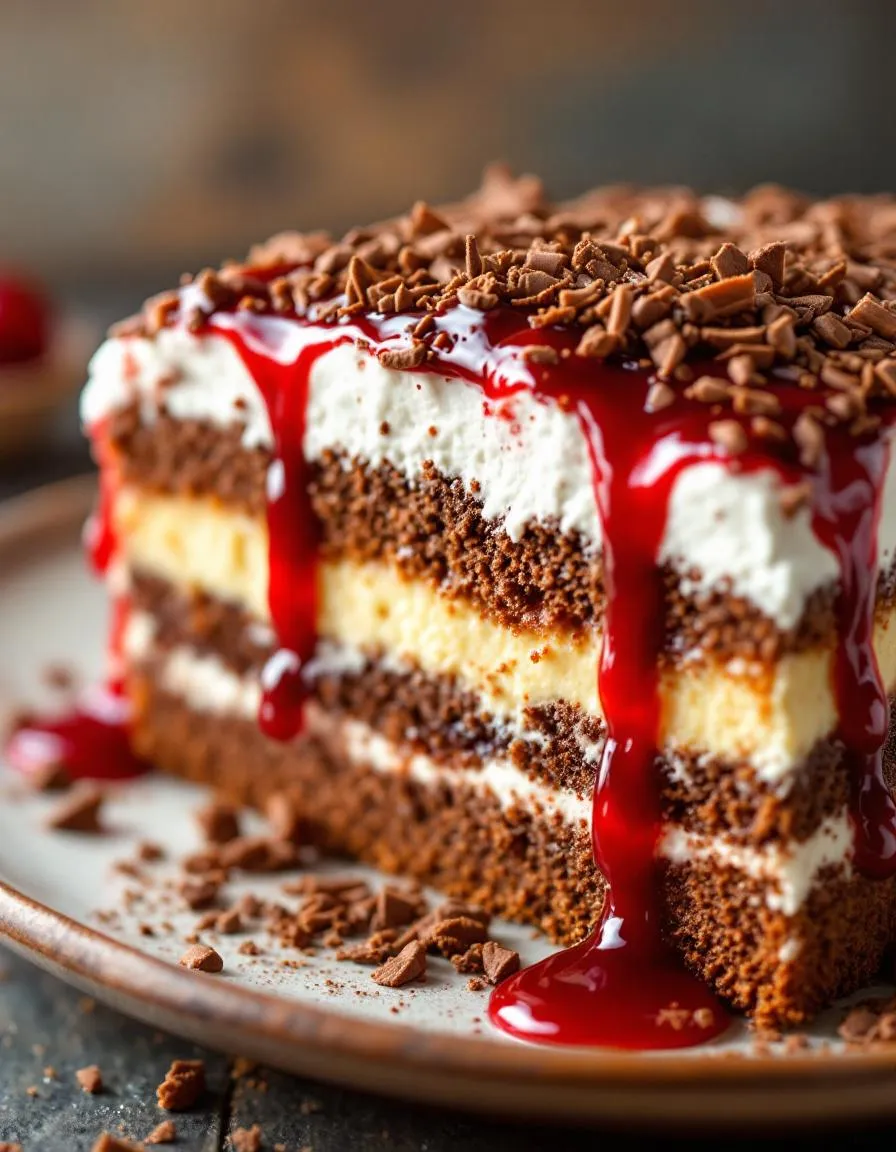
A decadent layered cake with creamy pudding, whipped topping, and cherry pie filling for a heavenly dessert experience.
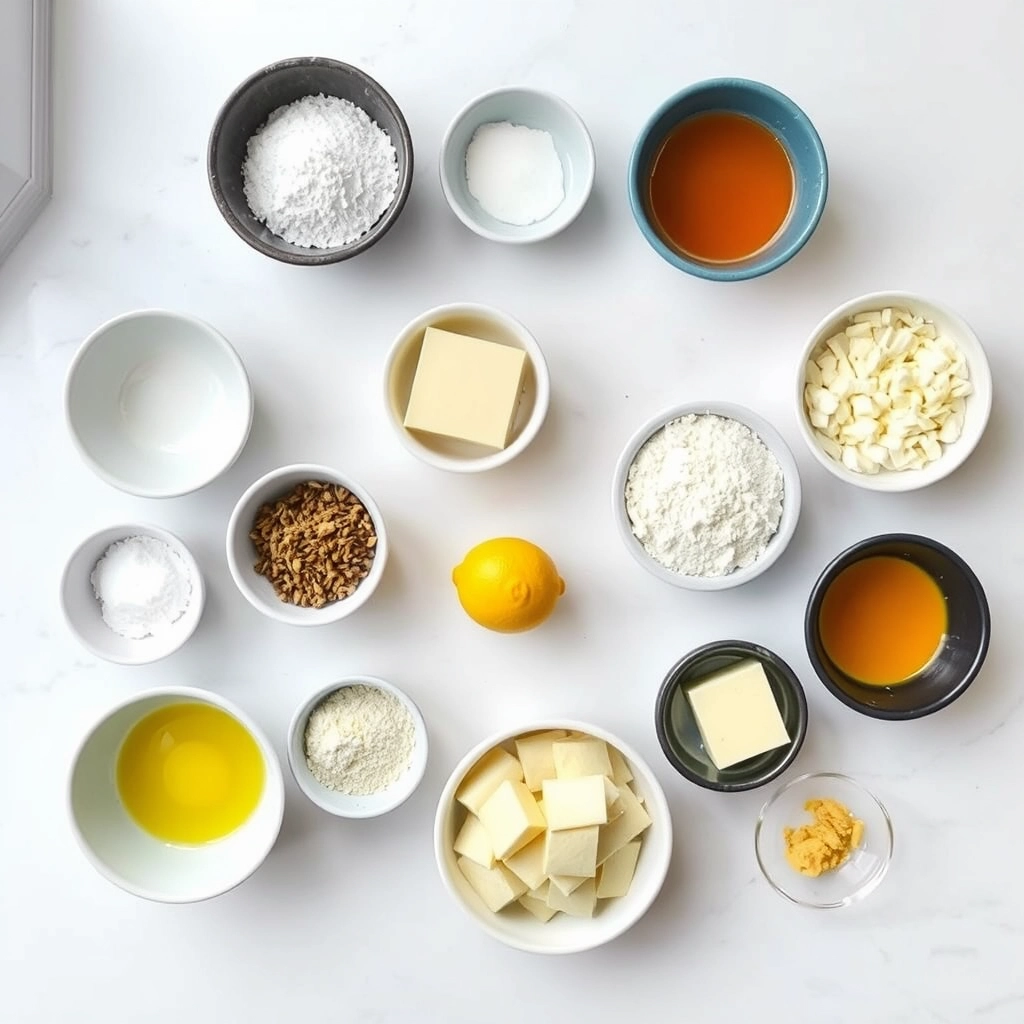
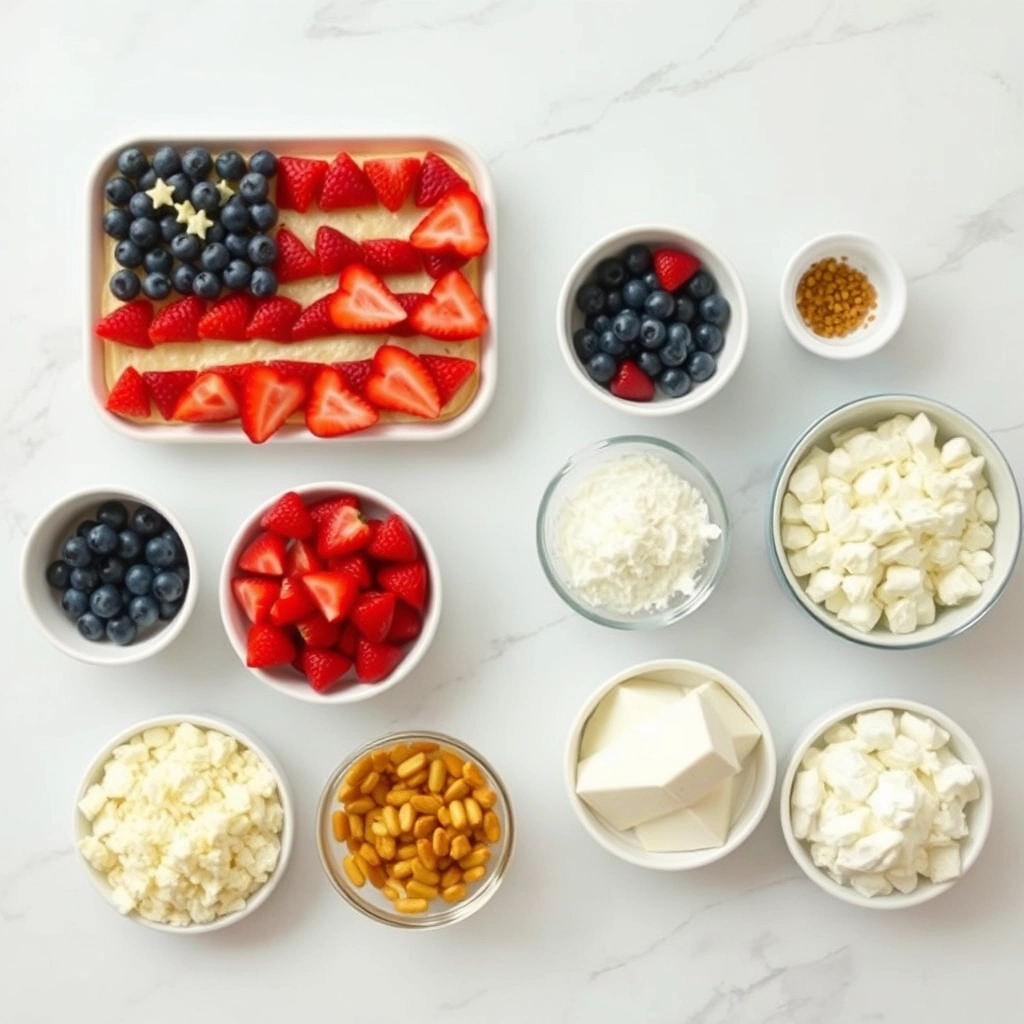
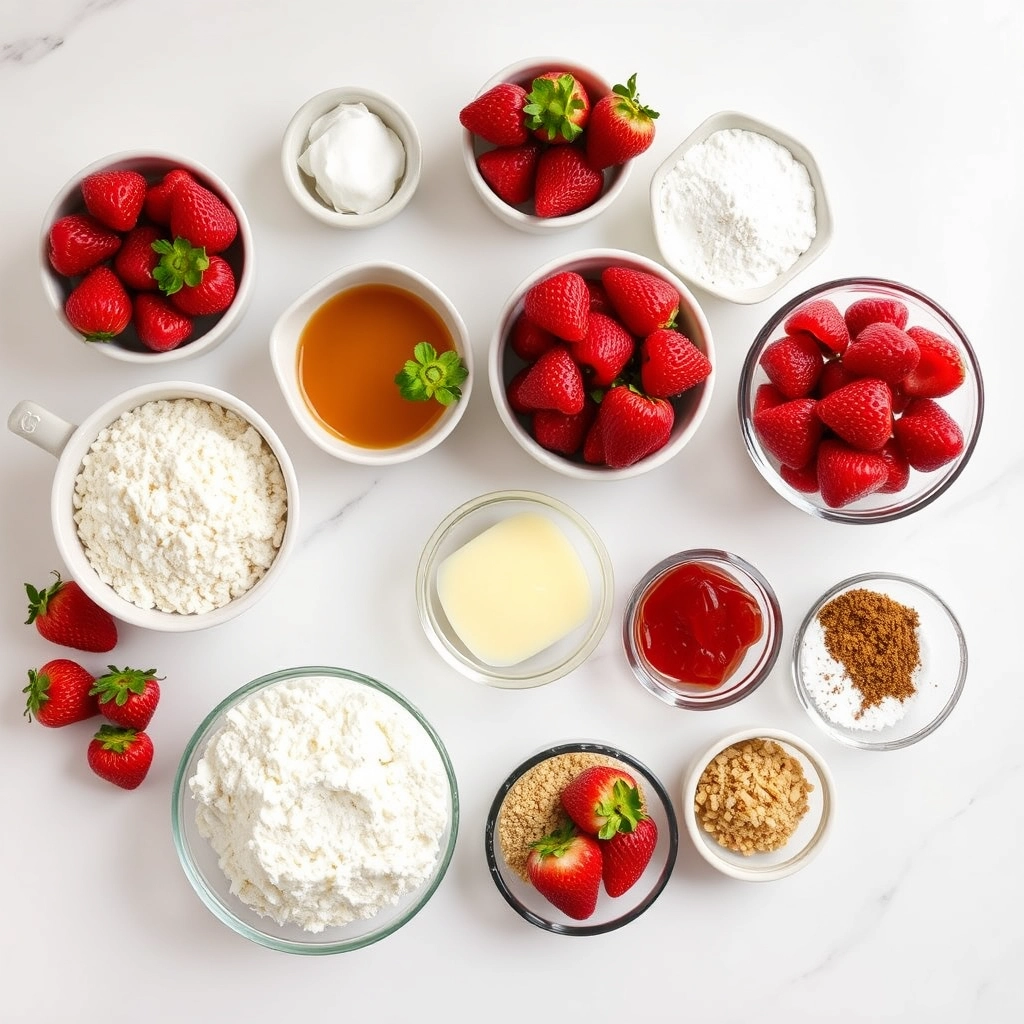
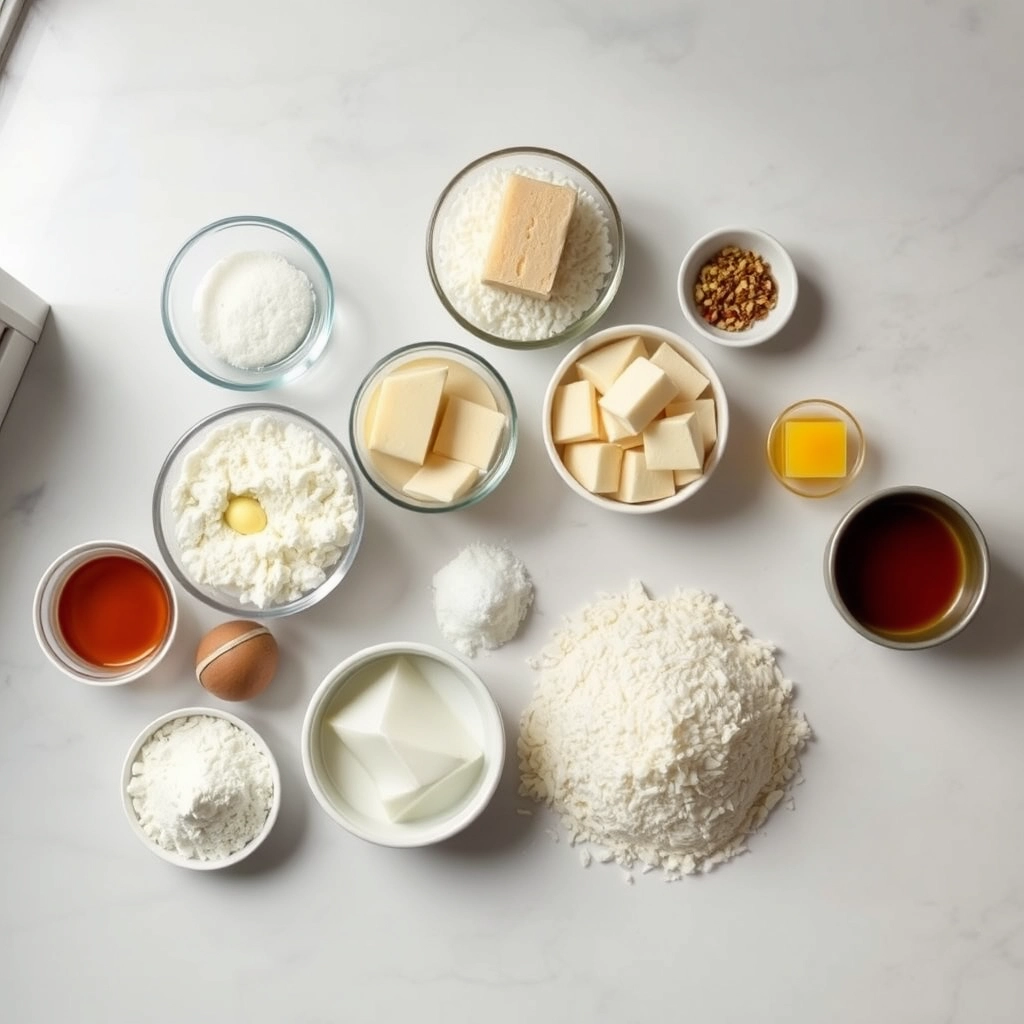

Ingredients

Scale

For the Crust:

  • 1 box chocolate cake mix
  • 1 (3.4 oz) package instant chocolate pudding mix
  • 2 cups cold milk
  • 1 (8 oz) container frozen whipped topping, thawed
  • 1 (21 oz) can cherry pie filling
  • 1/2 cup chocolate shavings (optional)

Instructions

1. Prepare the Crust:

  1. Prepare chocolate cake according to package directions in a 9×13-inch baking pan. Allow to cool completely.
  2. In a medium bowl, whisk pudding mix with cold milk until thickened. Fold in half of the whipped topping.
  3. Spread pudding mixture evenly over the cooled cake. Top with remaining whipped topping.
  4. Spoon cherry pie filling over the whipped topping layer. Sprinkle with chocolate shavings if desired.
  5. Refrigerate for at least 2 hours before serving to allow flavors to meld.

Notes

You can customize the seasonings to taste.

“`html

How to Prepare This Dish

Steps and time-saving tips

Start by preheating your oven to 350°F and greasing a 9×13-inch baking pan. Meanwhile, whisk together the cake mix, eggs, oil, and water in a large bowl until smooth. Pour the batter into the pan and bake for 25-30 minutes, or until a toothpick comes out clean. While the cake cools slightly, mix the instant pudding with cold milk until thickened, then gently fold in the whipped topping for a fluffy texture. Poke holes across the warm cake with a fork, then drizzle the sweetened condensed milk evenly over the top. Next, spread the pudding mixture in an even layer, followed by a generous sprinkle of crushed graham crackers. Finally, chill the Heaven On Earth Cake for at least 4 hours to let the flavors meld. For a time-saving hack, prepare the pudding layer ahead and store it in the fridge. If you’re short on time, freeze the cake for 2 hours instead of chilling overnight.

Mistakes I’ve made and learned from

I once rushed the chilling step and served the Heaven On Earth Cake too soon—it was delicious but fell apart when sliced. Now I always plan ahead for that crucial 4-hour set time. Another blunder? Overmixing the pudding layer, which made it dense instead of light. A gentle fold preserves the airy texture, just like with my no-bake cheesecake. And if your cake seems dry, don’t skip the condensed milk drizzle—it’s the secret to that melt-in-your-mouth quality, similar to the trick in my moist cake guide. Trust me, patience and precision turn this dessert into true heaven.

“`

Cultural Connection and Variations

Where this recipe comes from

Heaven On Earth Cake carries a rich history, blending comfort and indulgence into one irresistible dessert. Many trace its roots to mid-20th century American potlucks, where home cooks layered angel food cake, pudding, and fruit to create a showstopper. However, others argue it evolved from European trifles, adapting to local tastes with lighter textures and brighter flavors. Either way, this cake earned its heavenly name for a reason—each bite feels like a sweet escape.

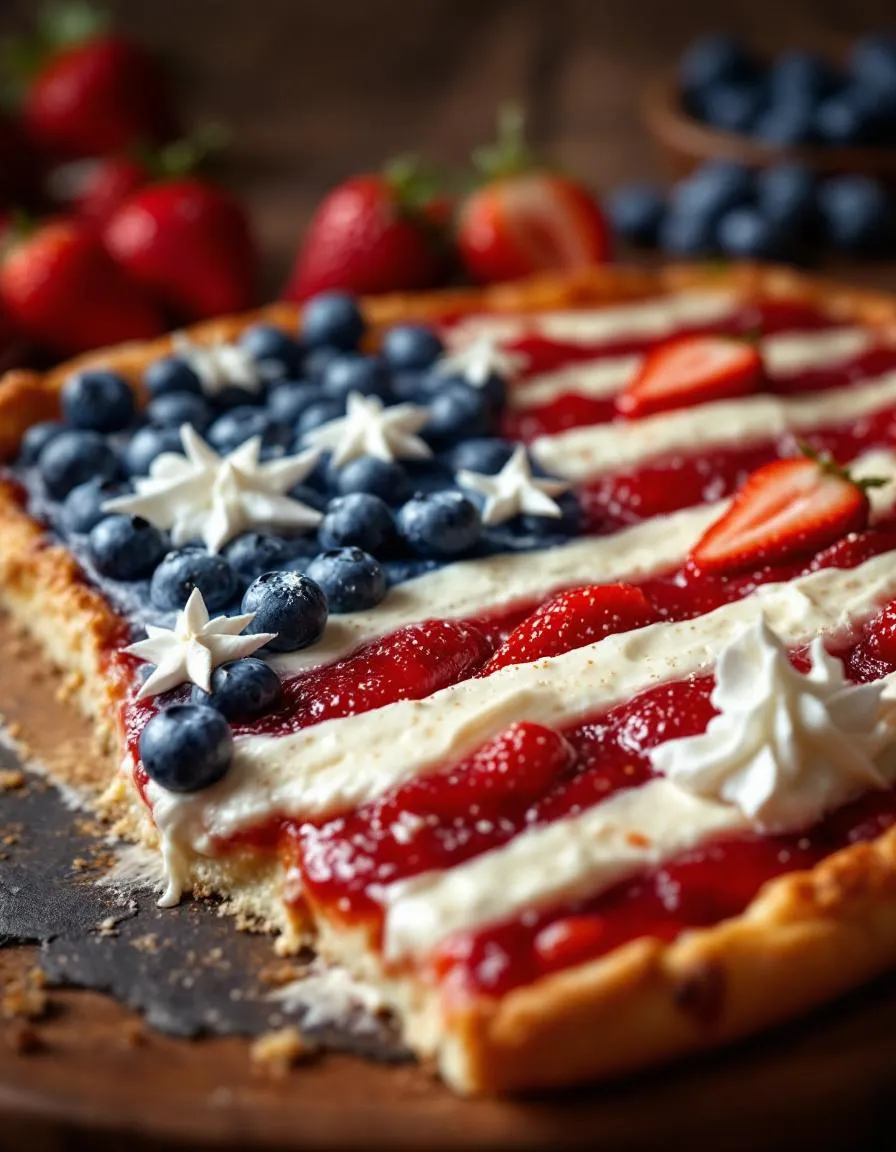
Across regions, bakers put their own spin on Heaven On Earth Cake. In the South, you might find a version with pecans and bourbon-soaked cherries, while coastal areas often add tropical fruits like pineapple or mango. Some families swear by a chocolate twist, swapping vanilla pudding for rich cocoa layers. Meanwhile, in my grandmother’s kitchen, she always crowned hers with fresh strawberries and a dollop of whipped cream, turning it into a summer staple. No matter the variation, the magic lies in how effortlessly it brings people together.

How it fits in today’s cooking

Today, Heaven On Earth Cake remains a beloved treat for its versatility and nostalgia. Modern cooks embrace it for everything from holiday gatherings to weeknight desserts, proving some classics never fade. For instance, busy bakers often use store-bought angel food cake to save time, while others opt for gluten-free or vegan tweaks to suit dietary needs. Its no-bake layers also make it a star for warm-weather entertaining, especially alongside refreshing drinks like homemade iced tea.

Social media has revived interest too, with food bloggers reinventing the cake as a trendy parfait or individual trifle cups. Whether you serve it at a backyard BBQ or as a comforting finale to a cozy dinner, Heaven On Earth Cake fits seamlessly into modern routines. After all, who can resist a dessert that feels like a hug on a plate?
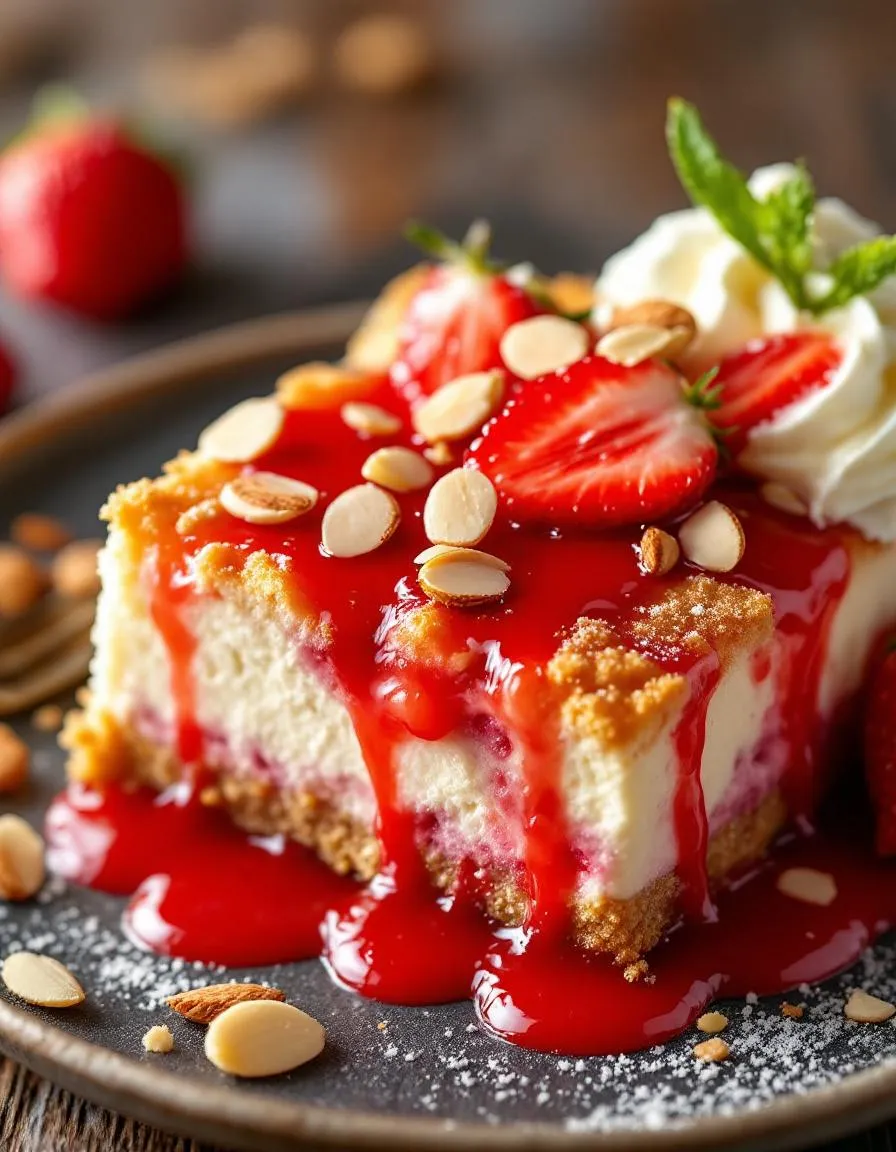
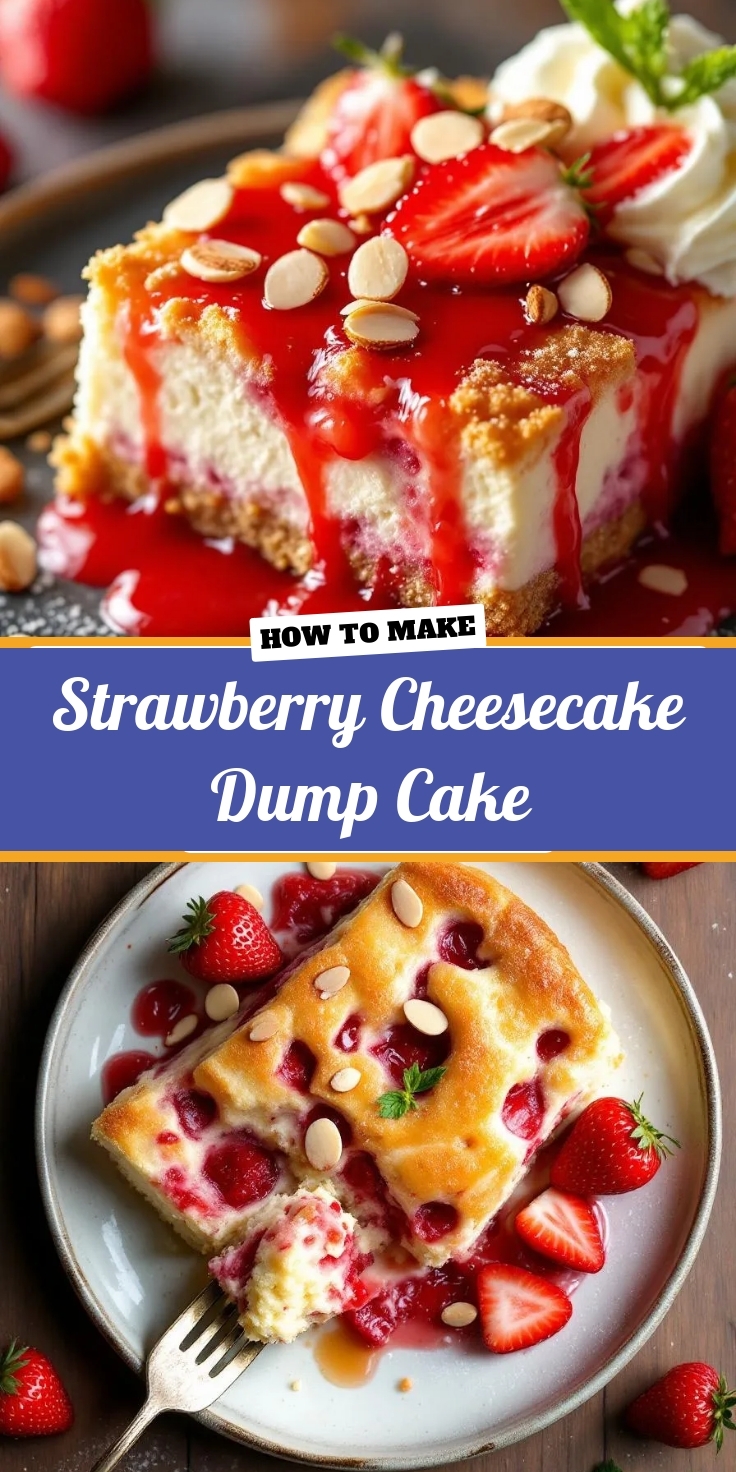
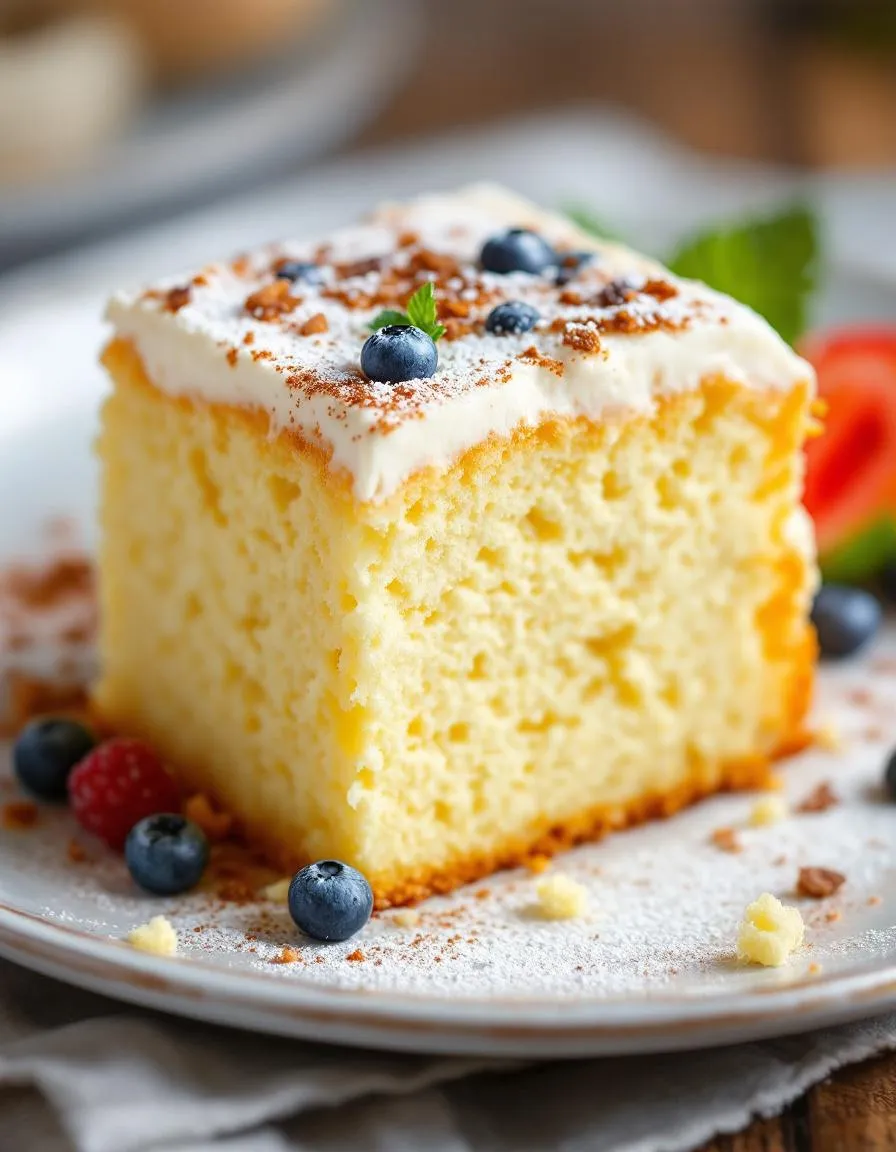
Taste and Texture

What makes it delicious

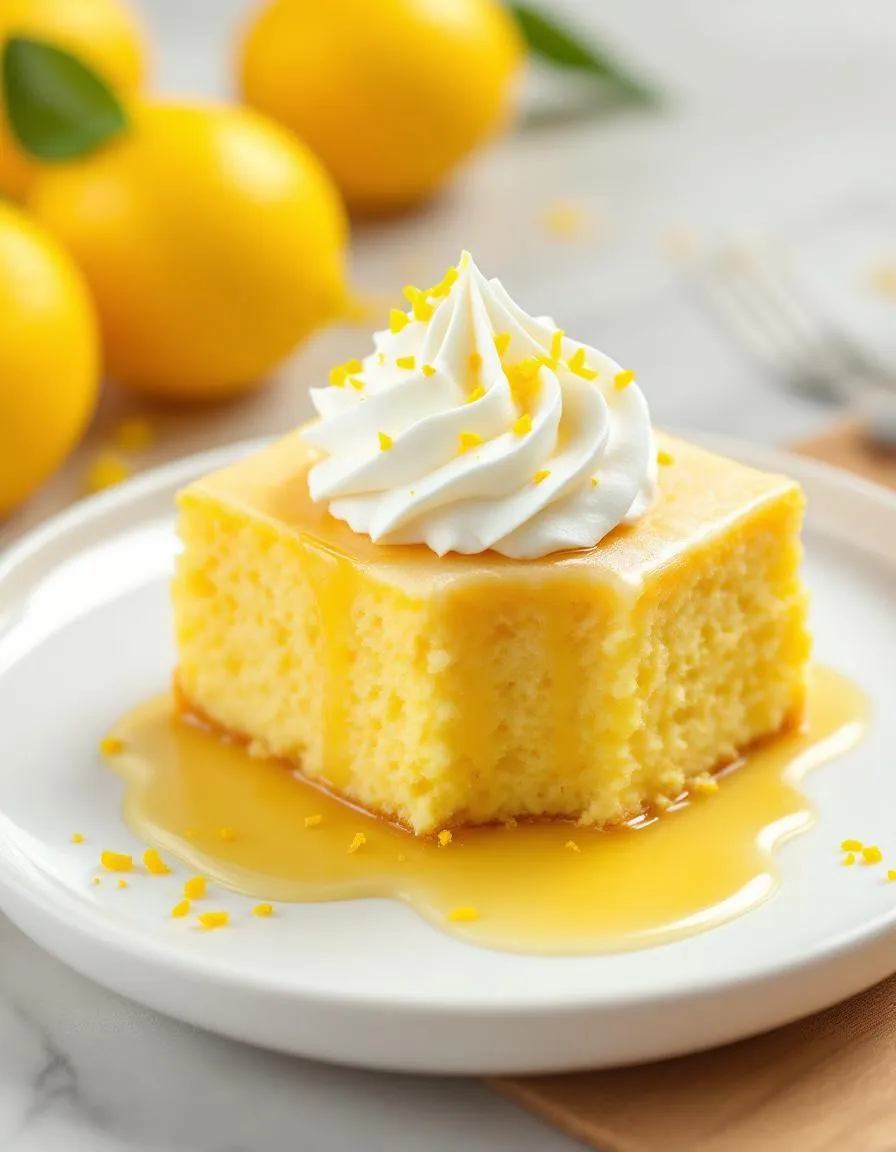
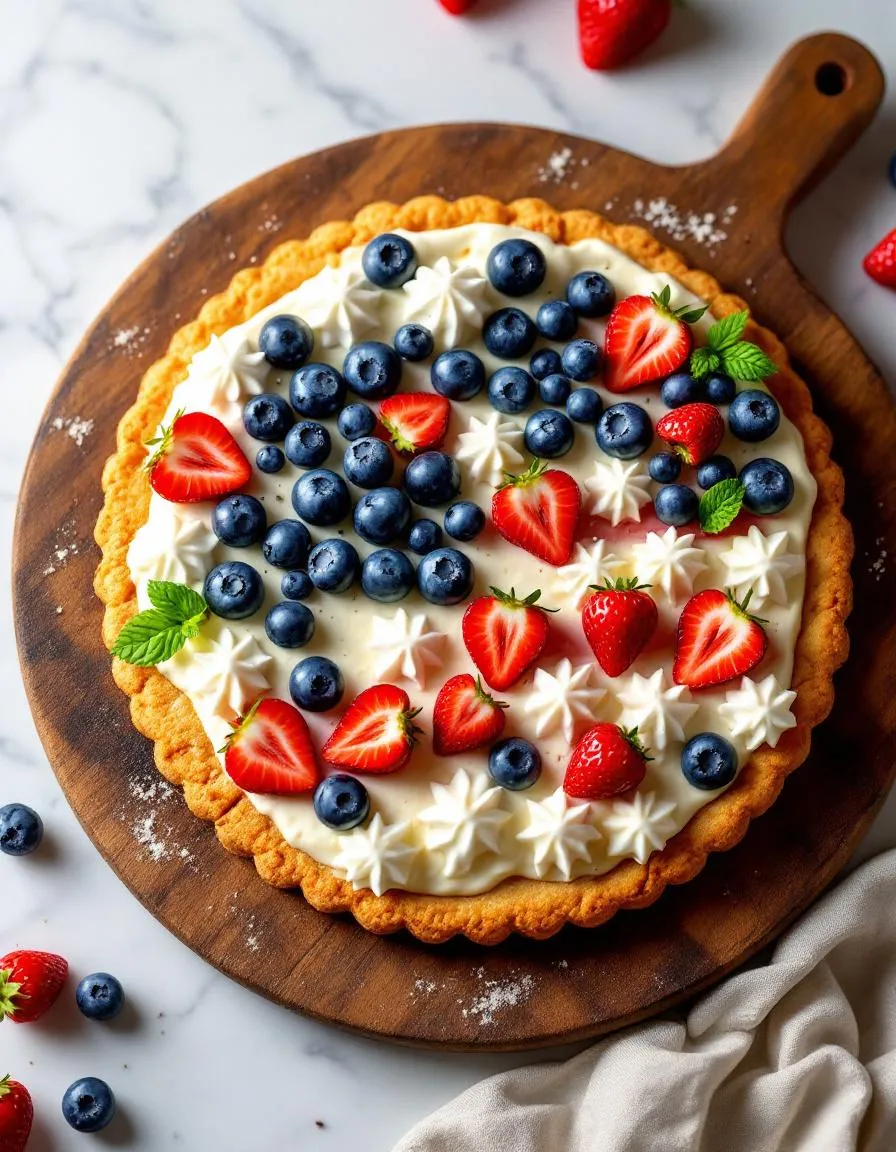
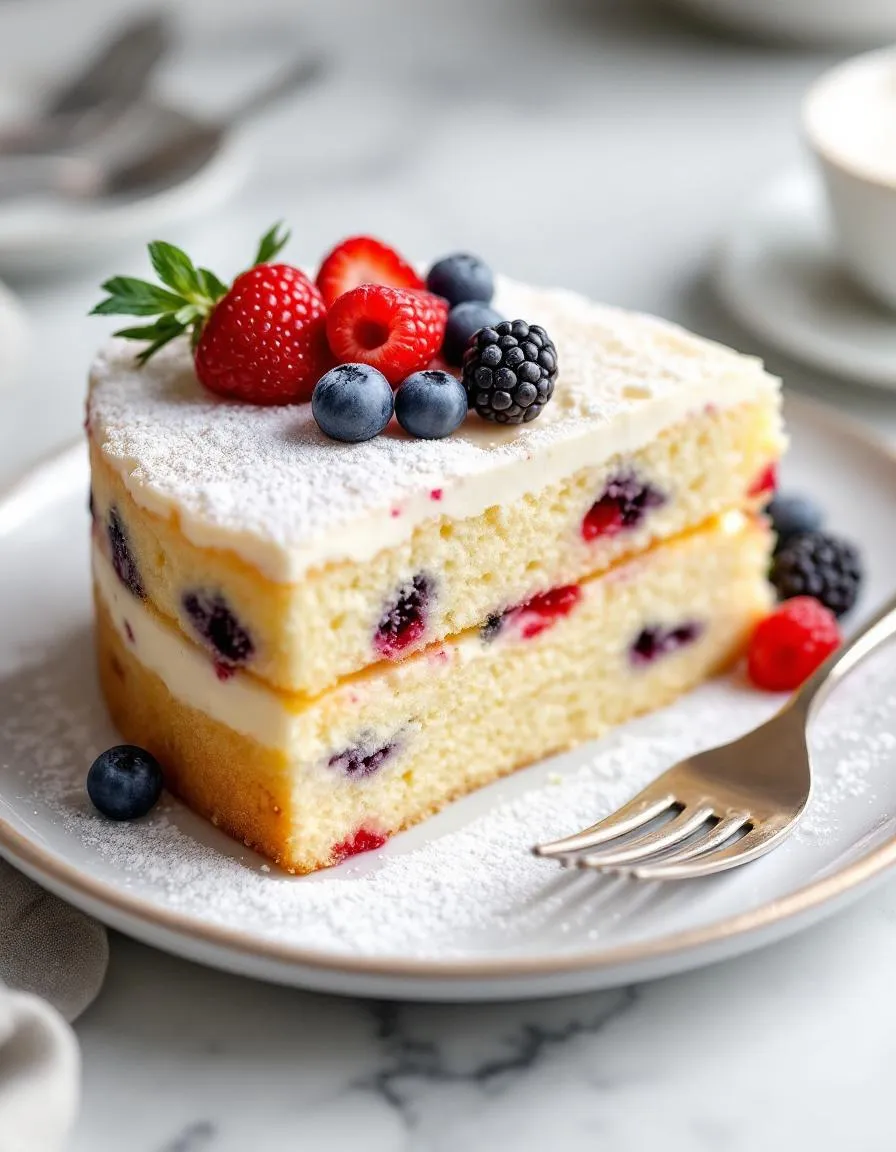
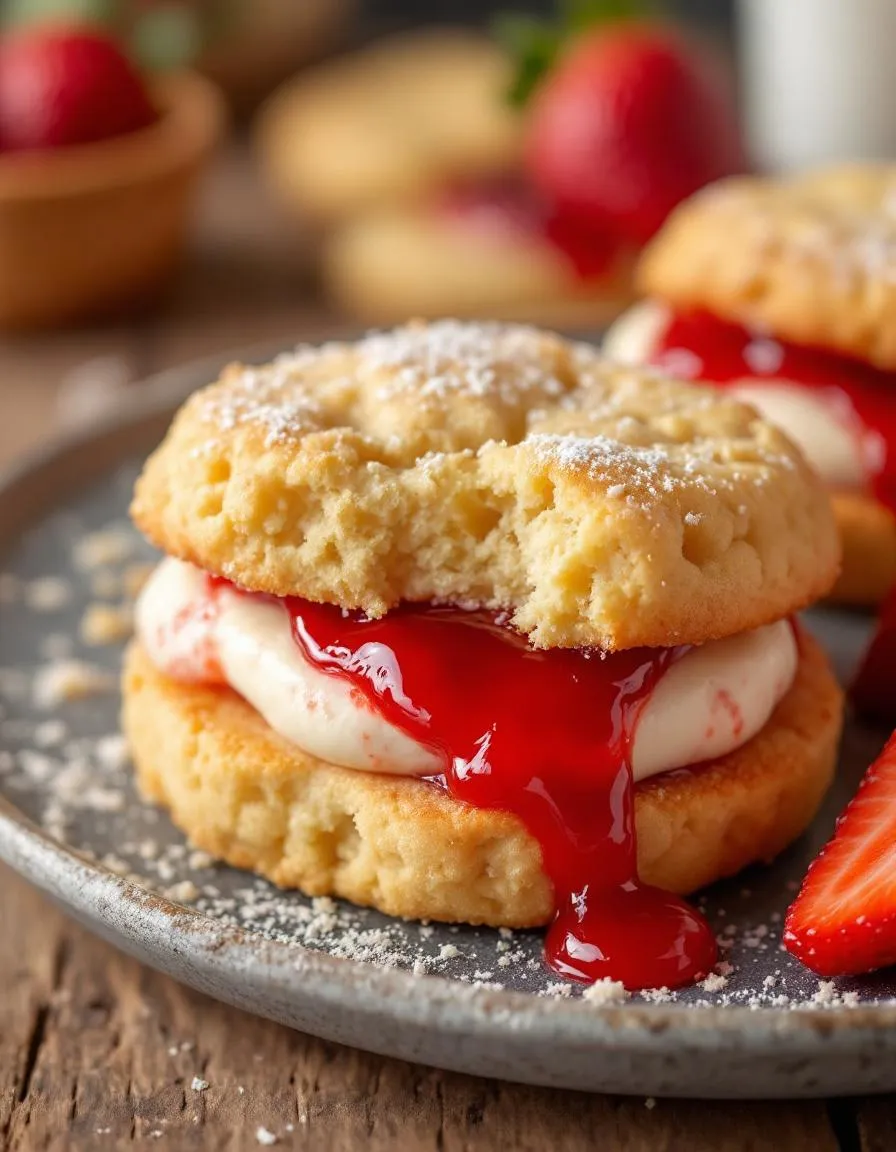
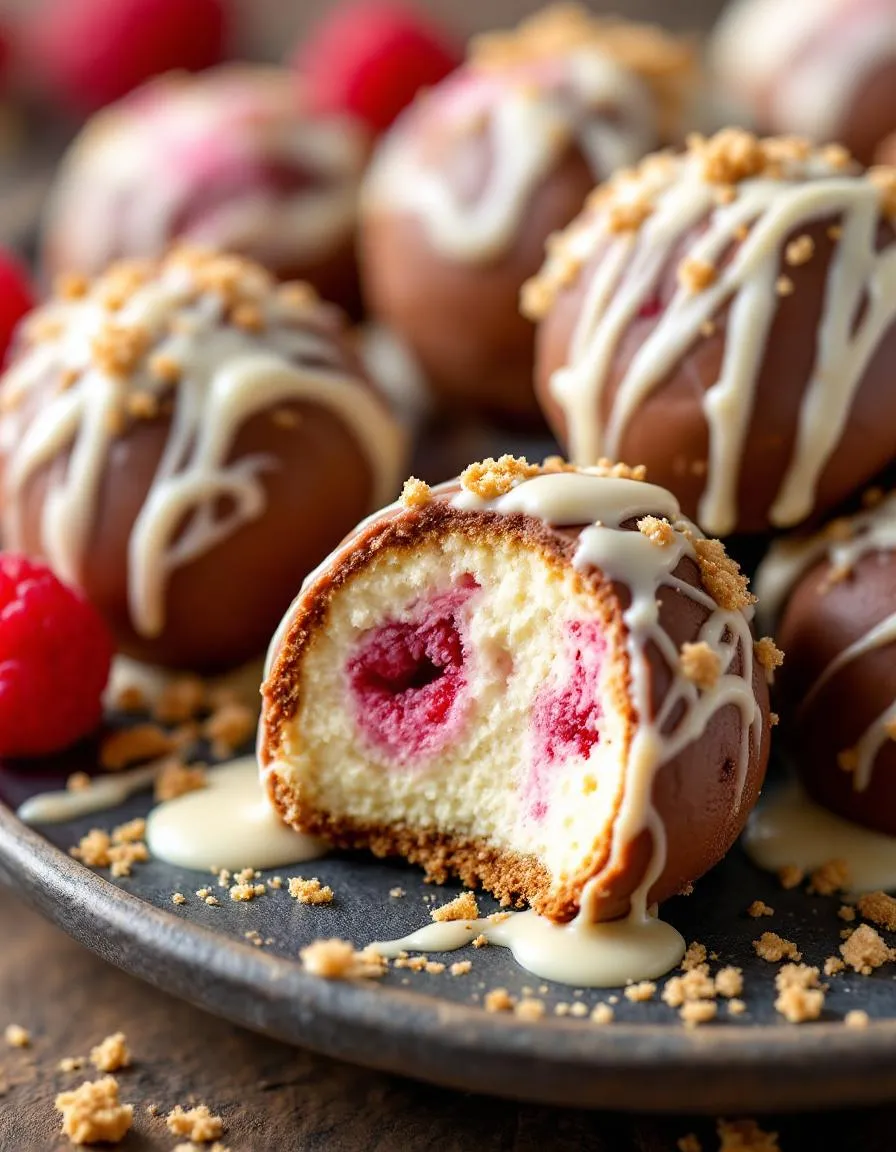
Heaven On Earth Cake delivers a dreamy, melt-in-your-mouth experience with every bite. The light, airy layers of angel food cake soak up a luscious cream filling, creating a velvety texture that contrasts perfectly with the juicy bursts of cherry or pineapple. Meanwhile, the whipped topping adds a cloud-like finish, making each forkful irresistibly smooth. Fragrant vanilla and tropical fruit notes dance on your tongue, while the subtle tang of cream cheese balances the sweetness. Whether you serve it chilled or slightly softened, Heaven On Earth Cake feels like a decadent escape.

Boosting the flavor

Elevate your Heaven On Earth Cake with a drizzle of homemade caramel sauce or a sprinkle of toasted coconut for extra richness and crunch. For a citrusy twist, fold lemon zest into the cream filling or layer fresh berries between the cake slices. If you love bold flavors, try swapping the traditional fruit topping for a spiced cherry compote, like the one in our cherry compote recipe. Another pro tip? Pair each slice with a dollop of vanilla whipped cream to amplify the creamy, luxurious finish.

Tips for Success

Best practices for results

Always use room-temperature cream cheese for the filling to prevent lumps in your Heaven On Earth Cake. Meanwhile, gently fold the whipped cream into the pudding mixture to maintain a light, airy texture. For best results, chill the cake for at least four hours before serving so the layers set perfectly. Additionally, use a springform pan for easy removal and clean slices every time.

Mistakes to avoid

Avoid overmixing the cake batter, as this can make the texture dense instead of tender. Instead, mix just until the ingredients combine for the ideal crumb. Many bakers also skip greasing the pan, which can cause sticking. For a foolproof release, follow our guide on how to grease a pan properly. Finally, don’t rush the chilling time. If the Heaven On Earth Cake feels too soft, check out our tips for fixing runny frosting to troubleshoot.

Serving and Pairing Suggestions

How to serve this dish

Serve Heaven On Earth Cake as the star of any dessert table by layering it in a clear glass trifle dish to showcase its creamy layers. For a festive touch, top it with fresh berries or a dusting of powdered sugar. Meanwhile, individual slices look elegant on cake stands for special occasions like birthdays or holidays. If you’re hosting a brunch, pair it with coffee for a delightful mid-morning treat. No matter how you present it, this cake always impresses.

What goes well with it

A hot cup of coffee balances the sweetness of Heaven On Earth Cake, making it perfect for afternoon gatherings. Alternatively, try a scoop of vanilla ice cream for a cool contrast to its rich texture. For a refreshing twist, serve it alongside our berry compote or drizzle it with caramel sauce to enhance its flavors. Each pairing elevates the cake’s heavenly taste.

What is Heaven On Earth Cake made of?

Heaven On Earth Cake typically consists of layers of angel food cake, creamy custard or pudding, whipped cream, and fresh berries. Some variations include coconut, chocolate shavings, or a drizzle of fruit syrup to enhance the flavor. This dessert earns its name by combining light, fluffy textures with rich, decadent layers.

Why is it called Heaven On Earth Cake?

The name “Heaven On Earth Cake” comes from its heavenly taste and texture, which many describe as light, airy, and utterly delicious. The combination of fluffy cake, creamy filling, and fresh toppings creates a dessert so satisfying it feels like a bite of paradise.

Can I make Heaven On Earth Cake ahead of time?

Yes! Heaven On Earth Cake is perfect for making ahead because the flavors meld together as it chills. Assemble it a day in advance and store it in the refrigerator—just add fresh toppings like berries or whipped cream right before serving.

How do you store Heaven On Earth Cake?

Store Heaven On Earth Cake covered in the refrigerator for up to 3–4 days. Keep it in an airtight container to prevent the cake from drying out or absorbing other fridge odors. For best results, add any perishable toppings just before serving.

Easy Lemon Poke Cake – Moist and Tangy Dessert

easy-lemon-poke-cake

Introduction

Hi there! I’m Emily, the heart and soul behind brekcakes.com. From my earliest memories, the kitchen has always been a place of warmth and creativity. It’s where I discovered the magic of turning simple ingredients into extraordinary meals and learned that the best dishes are often made with love as the main ingredient.

If you’ve ever craved a dessert that’s both refreshing and indulgent, you’re in the right place. Today, I’m sharing my all-time favorite Lemon Poke Cake—a sunny, zesty treat that never fails to brighten my day. Whether you’re hosting a summer gathering or simply treating yourself, this cake delivers a burst of citrusy joy in every bite. Plus, it’s incredibly easy to make, even if you’re new to baking. Trust me, one slice will have you hooked!

The Lemon Poke Cake is a moist, tender sponge soaked with vibrant lemon syrup, creating pockets of tangy sweetness. Topped with a fluffy whipped frosting, it strikes the perfect balance between light and decadent. What makes it special? Unlike fussy desserts, this cake embraces simplicity without sacrificing flavor. It’s the kind of recipe that turns ordinary moments into celebrations, much like my Easy Vanilla Cupcakes or the crowd-pleasing Chocolate Chip Cookies. Here at brekcakes.com, we believe food should be approachable, fun, and deeply satisfying—just like this Lemon Poke Cake.

Why I Love This Recipe

This cake holds a special place in my heart because it reminds me of lazy Sunday afternoons with my grandmother. She’d whisk together the batter while I zest lemons, filling the kitchen with that unmistakable citrus aroma. Even now, every time I bake this Lemon Poke Cake, I feel her presence—and that’s the magic of recipes. They’re not just about taste; they’re about the memories we create and the people we cherish along the way.

Health and Nutrition

Why it’s good for your body

Lemon Poke Cake delivers a refreshing burst of citrus flavor while offering some surprising health perks. First, lemons pack a punch of vitamin C, which supports immune function and skin health. When you enjoy Lemon Poke Cake, you get a hint of this antioxidant boost alongside its tangy sweetness. Additionally, the bright lemon flavor can satisfy cravings without overwhelming richness, making it a lighter dessert option.

Moreover, Lemon Poke Cake often uses yogurt or buttermilk in the batter, which adds probiotics and calcium. These ingredients promote gut health and strong bones. The cake’s moist texture also means you can reduce excess butter or oil without sacrificing taste. Finally, the zesty lemon glaze provides natural flavor intensity, so you need less added sugar compared to heavier frostings.

Of course, moderation is key, but Lemon Poke Cake balances indulgence with thoughtful ingredients. Whether you serve it at gatherings or enjoy a slice as an afternoon treat, it brings both joy and nutritional benefits to the table.

How it fits in a healthy lifestyle

Lemon Poke Cake fits seamlessly into a balanced diet when enjoyed mindfully. For those watching sugar intake, try pairing a small portion with fresh berries or a dollop of Greek yogurt to add protein. If you prefer gluten-free options, swap the flour for a blend like almond or oat flour—just like our gluten-free baking guide recommends.

Heart-healthy eaters can lighten the recipe by using olive oil instead of butter and reducing the glaze slightly. The citrus flavor still shines through. For busy households, Lemon Poke Cake stores well, so you can savor it over several days without reaching for less nutritious snacks. Explore our meal-prep desserts for more make-ahead ideas that keep your goals on track.

At the end of the day, Lemon Poke Cake proves that treats can be part of a wholesome routine. Its bright taste and adaptable recipe make it a smart choice for any occasion.

Print
clock clock iconcutlery cutlery iconflag flag iconfolder folder iconinstagram instagram iconpinterest pinterest iconfacebook facebook iconprint print iconsquares squares iconheart heart iconheart solid heart solid icon

Lemon Poke Cake


  • Author: Chef Emy

Description

A moist and tangy lemon cake soaked with sweet lemon syrup, topped with fluffy whipped cream.


Ingredients

Scale

For the Crust:

  • 1 box lemon cake mix
  • 3 large eggs
  • 1/2 cup vegetable oil
  • 1 cup water
  • 1 cup granulated sugar
  • 1/2 cup lemon juice
  • 2 cups whipped cream
  • 1 tbsp lemon zest (optional)

Instructions

1. Prepare the Crust:

  1. Preheat oven to 350°F (175°C) and grease a 9×13-inch baking pan.
  2. In a large bowl, mix cake mix, eggs, oil, and water until smooth. Pour into the prepared pan and bake for 25-30 minutes or until a toothpick comes out clean.
  3. While the cake bakes, combine sugar and lemon juice in a small saucepan. Heat over low until sugar dissolves, then set aside.
  4. Once the cake is done, use a fork to poke holes all over the surface. Pour the lemon syrup evenly over the cake, allowing it to soak in.
  5. Let the cake cool completely, then spread whipped cream over the top. Garnish with lemon zest if desired.
  6. Refrigerate for at least 2 hours before serving.

Notes

You can customize the seasonings to taste.

How to Prepare This Dish

Steps and time-saving tips

Start by preheating your oven to 350°F and greasing a 9×13-inch baking pan. Next, mix the boxed lemon cake batter according to the package instructions, but add a teaspoon of lemon zest for extra flavor. Pour the batter into the pan and bake for 25-30 minutes until a toothpick comes out clean. While the cake bakes, whisk together sweetened condensed milk, lemon juice, and a splash of vanilla extract for the poke mixture. Once the cake cools slightly, use the handle of a wooden spoon to poke even holes across the surface. Then, slowly drizzle the lemon mixture over the warm cake, letting it soak into the holes. Chill the cake for at least two hours to set. Meanwhile, whip heavy cream with powdered sugar until stiff peaks form, then spread it over the chilled cake. For a time-saving hack, use store-bought whipped topping instead. Finally, garnish with lemon slices or zest for a fresh finish. The result is a moist, tangy Lemon Poke Cake that’s perfect for any occasion.

Mistakes I’ve made and learned from

I once rushed the cooling step and poured the poke mixture too soon, causing the cake to crumble. Now, I let it cool for 15 minutes before poking holes—patience makes all the difference. Another time, I overmixed the whipped cream, turning it grainy. A light hand and stopping at stiff peaks solved that. If you’re new to baking, check out my guide to common cake mistakes to avoid similar pitfalls. Also, if your cake turns out too dense, try sifting the dry ingredients first, as I explain in my fluffy cake secrets post. Trust me, learning from errors makes this Lemon Poke Cake even more rewarding.

Cultural Connection and Variations

Where this recipe comes from

Lemon Poke Cake carries a bright, sunny legacy that stretches back to mid-century American potlucks and family gatherings. Originally, home bakers created it as a quick yet impressive dessert, using boxed cake mix and lemon Jell-O for convenience. Over time, however, the recipe evolved into a beloved classic, especially in the South and Midwest, where citrus flavors shine during spring and summer celebrations.

Interestingly, some families add a twist by swapping lemon pudding for the traditional glaze or layering fresh berries between the sponge. In coastal regions, you might even find a version with coconut milk in the batter for a tropical flair. Meanwhile, European bakers often skip the boxed mix altogether, opting for a from-scratch sponge and tart lemon curd. No matter the variation, Lemon Poke Cake always delivers that irresistible balance of tangy and sweet.

My grandma used to make it for Easter brunch, topping it with whipped cream and edible flowers. To this day, the smell of lemon zest takes me back to those lazy afternoons. Whether you grew up with it or discovered it later, Lemon Poke Cake has a way of feeling like home.

How it fits in today’s cooking

Today, Lemon Poke Cake holds its own as a versatile crowd-pleaser. Busy parents love it for birthday parties, while food bloggers dress it up with mascarpone frosting for bridal showers. Its simplicity also makes it a star for easy desserts for beginners, proving you don’t need fancy skills to impress.

Modern twists include gluten-free flour swaps or dairy-free toppings, catering to dietary needs without sacrificing flavor. Some even repurpose it as a summer dessert idea, serving it chilled with grilled peaches. Whether you stick to tradition or experiment, Lemon Poke Cake adapts effortlessly to today’s kitchens—and that’s why it’s here to stay.

Taste and Texture

What makes it delicious

Lemon Poke Cake bursts with bright, tangy flavor and a melt-in-your-mouth texture that keeps you reaching for another bite. The moist vanilla cake soaks up a zesty lemon syrup, creating pockets of citrusy sweetness in every forkful. Meanwhile, the fluffy whipped topping adds a creamy contrast, balancing the cake’s vibrant punch. Fresh lemon zest elevates the aroma, making each slice smell as refreshing as it tastes. Whether served chilled or at room temperature, Lemon Poke Cake delivers a perfect harmony of soft, spongy cake and luscious, velvety filling.

Boosting the flavor

For an extra flavor boost, try folding lemon curd into the whipped topping for a richer, more decadent finish. Alternatively, sprinkle toasted coconut flakes on top to add a subtle crunch and tropical twist. If you love bold citrus notes, a drizzle of lemon glaze enhances the cake’s tanginess beautifully. For a playful variation, layer fresh berries between the cake and topping—their natural sweetness pairs wonderfully with the lemon. Explore more ways to customize your dessert with our guide to creative cake toppings that elevate any bake.

Tips for Success

Best practices for results

First, always use room-temperature ingredients for your Lemon Poke Cake batter to ensure even mixing and a smooth texture. Additionally, poke the cake while it’s still warm so the lemon glaze absorbs evenly. For the best flavor, let the cake chill for at least two hours before serving. Finally, garnish with fresh lemon zest to brighten each slice.

Mistakes to avoid

Avoid overbaking the cake, as this can make it dry and prevent the glaze from soaking in properly. Instead, check for doneness a few minutes early using a toothpick. Another common mistake is skipping the chilling step, which helps the Lemon Poke Cake set perfectly. For more baking tips, explore our guide on cake baking basics. Also, if your glaze seems too thick, thin it with a teaspoon of lemon juice—our glaze consistency tutorial explains how to adjust it easily.

Serving and Pairing Suggestions

How to serve this dish

Brighten any occasion with a beautifully presented Lemon Poke Cake. For a stunning finish, dust the top with powdered sugar or add thin lemon slices and fresh mint leaves as garnish. Meanwhile, if you’re serving it at a summer gathering, try layering it with whipped cream and berries for extra color. This cake also shines at brunches or holiday parties, especially when sliced into elegant squares and arranged on a tiered stand. No matter how you serve it, the tangy sweetness of Lemon Poke Cake always delights.

What goes well with it

Pair your Lemon Poke Cake with a refreshing iced tea or a crisp sparkling lemonade to highlight its citrusy flavors. Alternatively, a scoop of vanilla bean ice cream adds a creamy contrast that balances the cake’s zesty notes. For a brunch spread, consider serving it alongside our Berry Chia Pudding or Cinnamon Roll Bites to create a sweet and satisfying menu. Each pairing enhances the light, vibrant taste of Lemon Poke Cake while keeping the meal balanced.

What is a Lemon Poke Cake?

A Lemon Poke Cake is a moist, flavorful dessert made by poking holes in a baked cake and pouring lemon-flavored liquid (like Jell-O or syrup) over it. The liquid seeps into the cake, creating a burst of citrus flavor in every bite. It’s often topped with whipped cream or frosting for extra richness.

How do you keep Lemon Poke Cake from getting soggy?

To prevent sogginess, let the cake cool completely before poking holes and adding the lemon mixture. Use a fork or skewer to create small, even holes—large holes can oversaturate the cake. Refrigerate the Lemon Poke Cake for at least 2 hours to set the texture perfectly.

Can you make Lemon Poke Cake ahead of time?

Yes! Lemon Poke Cake actually tastes better when made a day ahead, as the flavors meld together. Store it covered in the refrigerator for up to 3 days. The lemon infusion becomes more pronounced, making it an ideal make-ahead dessert for parties.

What can I use instead of Jell-O in Lemon Poke Cake?

For a natural alternative, mix lemon juice, zest, and sugar with a little water or coconut milk for moisture. You can also use lemon curd thinned with simple syrup. These swaps work beautifully in Lemon Poke Cake while avoiding artificial ingredients.

Best Almond Torte – Classic Italian Dessert Recipe

best-almond-torte-italian-dessert

Introduction

Hi there! I’m Emily, the heart and soul behind brekcakes.com. From my earliest memories, the kitchen has always been a place of warmth and creativity. It’s where I discovered the magic of turning simple ingredients into extraordinary meals and learned that the best dishes are often made with love as the main ingredient.

If you’ve ever craved a dessert that feels both elegant and comforting, you’re in the right place. Today, I want to share my Almond Torte—a recipe that holds a special spot in my baking journey. Whether you’re celebrating a milestone or simply treating yourself, this cake delivers rich flavor and tender texture in every bite. Plus, it’s surprisingly simple to make, even if you’re new to baking.

Almond Torte is a classic European-inspired dessert that highlights the nutty sweetness of almonds in a moist, buttery cake. Unlike overly sugary treats, it strikes a perfect balance with its delicate crumb and subtle richness. What makes it stand out? First, almond flour gives it a luxurious depth, while a hint of citrus or vanilla brightens the flavor. Second, it’s versatile: serve it with fresh berries for a light finish or drizzle it with glaze for extra indulgence. At brekcakes.com, we celebrate recipes that feel both timeless and approachable, and this torte fits right in. If you love almond desserts, you’ll adore our flaky almond croissants or Italian almond cookies too.

Why I Love This Recipe

This Almond Torte reminds me of Sunday afternoons at my grandmother’s house, where the scent of toasted almonds filled the air. She taught me that baking isn’t just about following steps—it’s about creating moments. Now, every time I make this cake, I feel that same joy. It’s a recipe that never fails to impress, yet it never demands perfection. Whether I’m sharing it with friends or savoring a slice with coffee, it always feels like a little celebration.

Health and Nutrition

Why it’s good for your body

Almond Torte packs a nutritious punch while satisfying your sweet tooth. First, almonds provide heart-healthy monounsaturated fats, which help lower bad cholesterol. Additionally, they deliver a steady energy boost thanks to their protein and fiber content. Unlike refined desserts, Almond Torte keeps blood sugar levels stable because of its low glycemic impact.

Moreover, almonds are rich in vitamin E, a powerful antioxidant that supports skin health and immune function. Every slice of Almond Torte also offers magnesium, which aids muscle recovery and reduces stress. Since almonds are naturally gluten-free, this dessert suits those with sensitivities while still tasting indulgent.

Finally, Almond Torte contains minimal processed sugar, especially if you opt for natural sweeteners like honey or maple syrup. The combination of wholesome ingredients makes it a smarter choice than traditional cakes. Whether you enjoy it as an occasional treat or a post-workout snack, Almond Torte nourishes your body without compromise.

How it fits in a healthy lifestyle

Almond Torte fits seamlessly into balanced eating habits. For gluten-free diets, it’s a delicious alternative to wheat-based desserts, and its high protein content helps keep you full longer. If you’re focused on heart health, the unsaturated fats in almonds support cardiovascular wellness.

Pair Almond Torte with fresh berries or a dollop of Greek yogurt for extra nutrients. It also works well as part of a mindful eating plan, since portion control is easy with its rich flavor. For more gluten-free dessert ideas, check out our guide to gluten-free treats.

Planning meals ahead? Almond Torte stores well, making it a convenient option for busy weeks. If you’re exploring other nutrient-dense desserts, our protein-packed sweets roundup offers more inspiration. Enjoy it guilt-free as part of a varied, wholesome diet.

Print
clock clock iconcutlery cutlery iconflag flag iconfolder folder iconinstagram instagram iconpinterest pinterest iconfacebook facebook iconprint print iconsquares squares iconheart heart iconheart solid heart solid icon

Almond Torte


  • Author: Chef Emy

Description

A rich and moist almond cake with a delicate texture, perfect for any occasion.


Ingredients

Scale

For the Crust:

  • 1 1/2 cups almond flour
  • 1/2 cup all-purpose flour
  • 1 cup granulated sugar
  • 1/2 cup unsalted butter, softened
  • 3 large eggs
  • 1 tsp almond extract
  • 1/2 tsp baking powder
  • 1/4 tsp salt
  • 1/4 cup sliced almonds for topping
  • Powdered sugar for dusting

Instructions

1. Prepare the Crust:

  1. Preheat oven to 350°F (175°C). Grease and flour a 9-inch round cake pan.
  2. In a bowl, whisk together almond flour, all-purpose flour, baking powder, and salt.
  3. In a separate bowl, cream butter and sugar until light and fluffy. Beat in eggs one at a time, then stir in almond extract.
  4. Gradually mix in the dry ingredients until just combined. Pour batter into the prepared pan.
  5. Sprinkle sliced almonds evenly over the top of the batter.
  6. Bake for 30-35 minutes, or until a toothpick inserted into the center comes out clean.
  7. Allow to cool in the pan for 10 minutes, then transfer to a wire rack to cool completely.
  8. Dust with powdered sugar before serving.

Notes

You can customize the seasonings to taste.

How to Prepare This Dish

Steps and time-saving tips

Start by preheating your oven to 350°F and lightly greasing a 9-inch springform pan. Meanwhile, toast the almonds in a dry skillet over medium heat for 3-4 minutes until fragrant, then let them cool before grinding. Next, whisk together the flour, baking powder, and salt in a bowl. In a separate large bowl, beat the butter and sugar until fluffy, then add the eggs one at a time, mixing well after each. Fold in the dry ingredients gently, followed by the ground almonds and a splash of vanilla extract. Pour the batter into the pan and smooth the top with a spatula. Bake for 30-35 minutes until golden and a toothpick comes out clean. Let the Almond Torte cool slightly before removing it from the pan. For a time-saving hack, grind the almonds in a food processor while the oven preheats. If you’re short on time, skip toasting the almonds, but know it adds depth to the flavor. Serve warm with a dusting of powdered sugar or a dollop of whipped cream.

Mistakes I’ve made and learned from

I once overmixed the batter, which made my Almond Torte dense instead of light. Now, I fold the dry ingredients just until combined, and it turns out perfectly every time. Another blunder? Not letting the almonds cool before grinding—they turned into a paste instead of a fine crumb. Lesson learned! If you’re new to baking with nuts, check out my guide on how to grind nuts perfectly for foolproof tips. Also, I used to underbake the torte, mistaking a slightly wobbly center for doneness. Now, I rely on the toothpick test and a timer. For more baking timing tricks, my post on common baking mistakes covers how to avoid under- or overbaking. Trust me, these small adjustments make all the difference!

Cultural Connection and Variations

Where this recipe comes from

Almond Torte traces its roots to the sun-drenched hills of Italy, where bakers have long celebrated the nutty richness of almonds in desserts. Originally, families prepared it for special occasions, like weddings or harvest festivals, blending ground almonds with citrus zest for a fragrant, tender crumb. Over time, the recipe traveled across Europe, adapting to local tastes. In Austria, for instance, bakers often layer it with apricot jam, while in Spain, they might infuse it with orange blossom water for a floral twist.

My grandmother made her version of Almond Torte every Christmas, swapping traditional flour for almond meal to keep it gluten-free long before it became trendy. She’d joke that the secret was “toasting the almonds just enough to sing, not shout.” Today, some bakers add chocolate swirls or top it with fresh berries, proving how versatile this dessert can be. Whether served with a dollop of whipped cream or a dusting of powdered sugar, Almond Torte always feels like a warm hug from the past.

How it fits in today’s cooking

Almond Torte still shines in modern kitchens, especially for those craving gluten-free or nut-forward treats. Many home cooks now streamline the process using food processors, as seen in our guide to kitchen hacks, to grind almonds effortlessly. It’s also a star at holiday gatherings, bridging tradition and convenience—no one guesses how simple it is to whip up!

Beyond desserts, creative bakers repurpose Almond Torte as a base for layered cakes or even breakfast slices paired with coffee. For inspiration, check out our tips on baking trends to see how others reinvent classics. Whether you stick to the traditional recipe or experiment with modern twists, Almond Torte proves that some flavors never go out of style.

Taste and Texture

What makes it delicious

The Almond Torte delivers a rich, nutty sweetness with every bite, thanks to its finely ground almonds and buttery undertones. Its crumb is tender yet slightly dense, offering a satisfying melt-in-your-mouth feel. Meanwhile, the golden-brown crust adds a delicate crispness that contrasts beautifully with the moist interior. Fragrant vanilla and a hint of citrus zest brighten the flavor, making this Almond Torte both comforting and sophisticated. Whether served warm or at room temperature, its aroma alone—toasty, buttery, and subtly floral—will draw everyone to the table.

Boosting the flavor

For an extra layer of indulgence, drizzle the Almond Torte with a warm homemade caramel sauce, which deepens its nutty richness. Alternatively, a dusting of powdered sugar or a dollop of vanilla-infused whipped cream adds lightness and elegance. If you love bold contrasts, try folding dark chocolate chunks into the batter or serving slices with fresh berries for a tart counterpoint. A pinch of cinnamon or cardamom also enhances the warmth of the almonds, making each bite even more memorable.

Tips for Success

Best practices for results

Always measure your almond flour precisely for the perfect Almond Torte texture. Additionally, use room-temperature eggs to ensure a smooth, even batter. For best results, line your pan with parchment paper to prevent sticking and promote even baking. Meanwhile, avoid overmixing the batter, as this can make the torte dense. Finally, let the Almond Torte cool completely before slicing to maintain its delicate structure.

Mistakes to avoid

One common error is baking the Almond Torte at too high a temperature, which can cause the edges to burn before the center sets. Instead, use an oven thermometer to verify accuracy, as explained in our oven temperature guide. Another mistake is skipping the almond flour sifting step, which leads to clumpy batter. For a flawless finish, follow our almond flour baking tips to achieve a light, airy crumb every time.

Serving and Pairing Suggestions

How to serve this dish

For an elegant presentation, dust your Almond Torte with powdered sugar just before serving. Alternatively, top it with fresh berries or a drizzle of honey for a touch of color and sweetness. This dessert shines at brunch gatherings or holiday celebrations, especially when paired with a dollop of whipped cream. To make it extra special, serve warm slices with a scoop of vanilla ice cream for a delightful contrast in textures.

What goes well with it

Pair your Almond Torte with a cup of freshly brewed coffee to highlight its nutty richness. For a lighter option, try it alongside our Iced Lavender Latte, which adds a floral note that complements the almonds perfectly. If you prefer something indulgent, serve it with a side of our Salted Caramel Sauce for a decadent twist. Either way, these pairings will elevate your dessert experience.

What is the difference between almond torte and regular cake?

Almond torte is denser and richer than a regular cake because it uses ground almonds or almond flour as the primary flour substitute. Unlike traditional cakes, almond torte often has a moist, slightly chewy texture and a pronounced nutty flavor. This makes almond torte a favorite for those who prefer a less sugary, more sophisticated dessert.

Can I make almond torte gluten-free?

Yes! Almond torte is naturally gluten-free when made with almond flour instead of wheat flour. Just ensure all other ingredients, like baking powder or flavorings, are certified gluten-free. This makes almond torte a great option for those with gluten sensitivities or celiac disease.

How do I store almond torte to keep it fresh?

Store almond torte in an airtight container at room temperature for up to 3 days or refrigerate for up to a week. For longer storage, wrap slices tightly and freeze for up to 3 months. Almond torte retains its moisture well, making it a great make-ahead dessert.

What are the best toppings for almond torte?

Almond torte pairs beautifully with whipped cream, fresh berries, or a dusting of powdered sugar. For a richer option, drizzle with chocolate ganache or caramel sauce. These toppings complement the nutty flavor of almond torte without overpowering it.

Best Bunny Bait – Sweet and Crunchy Snack Mix

best-bunny-bait-snack-mix

Introduction

Hi there! I’m Emily, the heart and soul behind brekcakes.com. From my earliest memories, the kitchen has always been a place of warmth and creativity. It’s where I discovered the magic of turning simple ingredients into extraordinary meals and learned that the best dishes are often made with love as the main ingredient.

If you’re looking for a treat that’s as fun to make as it is to eat, Bunny Bait is your answer. Whether you’re prepping for a spring gathering or just craving something sweet, this playful snack mix brings joy to every bite. Plus, it’s perfect for sharing—because let’s be honest, the best memories often start with a bowl of something delicious. Trust me, once you try Bunny Bait, you’ll understand why it’s a staple in my kitchen and a hit with everyone who tries it.

Bunny Bait is a whimsical snack mix that combines crunchy pretzels, sweet white chocolate, and colorful sprinkles into an irresistible treat. Often tied to Easter celebrations, it’s a versatile recipe that works year-round for parties, movie nights, or even as a homemade gift. What makes Bunny Bait special isn’t just its vibrant look or addictive taste—it’s the way it brings people together. On brekcakes.com, we celebrate recipes that are approachable, nostalgic, and full of personality, and this one checks all the boxes. If you love easy desserts with big flavor, you’ll adore our no-bake cookies or crave-worthy homemade granola. But today, let’s focus on the magic of Bunny Bait.

Why I Love This Recipe

Bunny Bait holds a special place in my heart because it reminds me of baking with my nieces and nephews. Their eyes light up when we toss the ingredients together, and their laughter fills the kitchen as they sneak bites before it’s even set. It’s more than a recipe—it’s a tradition that creates moments of pure happiness. Every time I make it, I’m reminded that the simplest treats often carry the sweetest memories.

Health and Nutrition

Why it’s good for your body

Bunny Bait packs a nutritious punch while satisfying your sweet cravings. First, it combines whole-grain cereals with protein-rich nuts, giving you lasting energy without the crash. Additionally, the dark chocolate drizzle offers antioxidants, which support heart health and reduce inflammation. Plus, Bunny Bait includes dried fruit for natural sweetness and fiber, aiding digestion and keeping you full longer.

Moreover, Bunny Bait delivers essential vitamins and minerals. For instance, nuts provide healthy fats and magnesium, which help regulate blood pressure. Meanwhile, the cereal base often contains iron and B vitamins, boosting energy levels. Even better, you can customize Bunny Bait with seeds or coconut for extra nutrients like omega-3s or manganese.

Finally, Bunny Bait strikes a balance between indulgence and nourishment. Unlike processed snacks, it avoids artificial additives while still tasting delicious. Whether you need a midday pick-me-up or a post-workout treat, Bunny Bait fuels your body smartly. With every bite, you get flavor and nutrition in one satisfying mix.

How it fits in a healthy lifestyle

Bunny Bait fits perfectly into a balanced diet because it’s versatile and nutrient-dense. For example, if you follow a gluten-free lifestyle, simply swap the cereal for a gluten-free option. Likewise, those focusing on heart health can prioritize unsalted nuts and dark chocolate, which promote better circulation. Even better, Bunny Bait works as a portion-controlled snack when divided into small bags for on-the-go energy.

If you’re meal prepping, pair Bunny Bait with other wholesome snacks like energy balls for variety. It also complements active lifestyles—eat a handful before a workout for quick carbs or after for recovery. For more ideas on balancing treats with nutrition, check out our guide to smart snacking. With simple tweaks, Bunny Bait becomes a guilt-free part of your everyday routine.

Print
clock clock iconcutlery cutlery iconflag flag iconfolder folder iconinstagram instagram iconpinterest pinterest iconfacebook facebook iconprint print iconsquares squares iconheart heart iconheart solid heart solid icon

Bunny Bait


  • Author: Chef Emy

Description

A sweet and crunchy Easter-themed snack mix perfect for parties or treats.


Ingredients

Scale

For the Crust:

  • 8 cups popped popcorn
  • 2 cups pretzel sticks
  • 1 cup pastel-colored M&M’s
  • 1 cup white chocolate chips
  • 1 tablespoon coconut oil
  • 1/2 cup sprinkles (pastel colors)

Instructions

1. Prepare the Crust:

  1. Line a baking sheet with parchment paper.
  2. In a large bowl, combine popcorn, pretzel sticks, and M&M’s.
  3. In a microwave-safe bowl, melt white chocolate chips and coconut oil in 30-second intervals, stirring until smooth.
  4. Pour melted chocolate over the popcorn mixture and gently toss to coat evenly.
  5. Spread the mixture onto the prepared baking sheet and immediately top with sprinkles.
  6. Allow to cool completely before breaking into pieces and serving.

Notes

You can customize the seasonings to taste.

How to Prepare This Dish

Steps and time-saving tips

Start by preheating your oven to 250°F and lining a baking sheet with parchment paper. Meanwhile, melt the white chocolate in a microwave-safe bowl, stirring every 30 seconds to avoid scorching. While the chocolate melts, toss the popcorn, pretzels, and cereal in a large mixing bowl. Once the chocolate is smooth, drizzle it over the dry ingredients and gently fold everything together until evenly coated. Spread the mixture onto the baking sheet in a single layer, then bake for 15 minutes to set the chocolate. While the Bunny Bait cools, melt the pastel candy melts separately and drizzle them on top for a festive touch. Let it harden completely before breaking it into clusters. For a quicker version, skip the baking step and let the chocolate set at room temperature—just note the texture will be slightly softer. If you’re short on time, use pre-popped popcorn and store-bought pretzel sticks to cut prep work in half.

Mistakes I’ve made and learned from

My first batch of Bunny Bait turned into a sticky mess because I rushed the chocolate melting process. Instead of microwaving in short bursts, I zapped it too long, which caused the chocolate to seize. Now I always melt it slowly and keep a splash of coconut oil nearby to smooth it out if needed. Another lesson? Don’t skip the parchment paper! I once poured the mixture directly onto the tray, and it took me forever to scrape off the hardened chocolate. For more foolproof candy-making tips, check out my guide on avoiding common candy mistakes. Also, if your toppings sink to the bottom, try dusting them with a bit of powdered sugar first—it helps everything stick better. For extra inspiration, see how I fixed a similar issue with my holiday treat hacks.

Cultural Connection and Variations

Where this recipe comes from

Bunny Bait traces its roots to playful Easter traditions in the American Midwest, where families whipped up sweet snack mixes to celebrate spring. Originally, it combined popcorn, pretzels, and candy-coated chocolates—a cheerful treat meant to mimic the excitement of hunting for Easter eggs. Over time, however, Bunny Bait evolved into a versatile snack enjoyed year-round, with regional twists adding local flair.

In the South, for instance, some cooks toss in pecans or drizzle caramel for extra richness. Meanwhile, coastal communities might swap in saltwater taffy or dried fruit for a lighter twist. Even globally, similar concepts pop up—like Japan’s “kawaii” snack mixes or Germany’s sweet-and-salty party nibbles. No matter the variation, Bunny Bait always brings people together, whether it’s for holidays, potlucks, or just a cozy movie night.

In my family, we make Bunny Bait with a spicy kick, adding chili powder to balance the sweetness. It’s become a quirky tradition, just like our annual Easter scavenger hunt. Whether you stick to the classic recipe or experiment with bold flavors, Bunny Bait adapts to every taste and occasion.

How it fits in today’s cooking

Today, Bunny Bait remains a staple for holiday gatherings, but it’s also found a place in modern snack culture. Busy parents love it for lunchbox treats, while influencers jazz it up with gourmet ingredients like dark chocolate or matcha. Its simplicity makes it perfect for last-minute parties, and its customizable nature ensures everyone—from kids to keto dieters—can enjoy a version.

Many home cooks now pair Bunny Bait with other easy recipes, like no-bake desserts, for stress-free entertaining. Others use it as a creative topping for homemade ice cream, blending nostalgia with innovation. Whether you’re keeping traditions alive or reinventing them, Bunny Bait proves that some recipes never go out of style.

Taste and Texture

What makes it delicious

Bunny Bait delivers a playful mix of sweet, salty, and crunchy textures that make every bite irresistible. The creamy white chocolate coating melts on your tongue, while the crisp pretzels and chewy popcorn add a satisfying contrast. Fragrant vanilla and a hint of sea salt balance the sweetness, creating a flavor that’s rich but never overwhelming. Best of all, Bunny Bait packs a burst of color and fun with pastel M&M’s or sprinkles, making it as delightful to look at as it is to eat.

Boosting the flavor

For an extra flavor kick, try drizzling melted dark chocolate over your Bunny Bait to add depth and a slight bitterness that cuts through the sweetness. Alternatively, swap the vanilla extract for almond or coconut extract to introduce a subtle nutty twist. If you love a bit of heat, a pinch of cinnamon or cayenne pepper will give it a warm, spicy finish. For more inspiration, check out our guides on chocolate pairings or sweet and savory combos to elevate your snack game.

Tips for Success

Best practices for results

Always chill the dough before shaping your Bunny Bait, as this prevents sticking and ensures even baking. Use parchment paper for the best texture, since it keeps the treats from spreading too thin. For extra crunch, toast the cereal lightly before mixing it into the recipe. Additionally, measure your ingredients precisely to maintain the perfect balance of sweet and salty flavors in every bite of Bunny Bait.

Mistakes to avoid

Avoid overmixing the coating, or you might end up with clumpy Bunny Bait instead of a smooth finish. If the mixture seems too thick, simply warm it slightly for easier handling. Also, don’t skip the cooling step, as rushing this can make the treats too soft. For more troubleshooting tips, check out our guides on fixing sticky dough and achieving the perfect coating consistency.

Serving and Pairing Suggestions

How to serve this dish

Serve Bunny Bait in a festive bowl or mason jar for a charming touch. For holidays like Easter, sprinkle pastel-colored sprinkles on top to match the theme. Alternatively, package it in clear cellophane bags tied with ribbon for adorable party favors. If you’re hosting a brunch, display Bunny Bait alongside other treats on a tiered stand for a picture-perfect spread. Always keep extra napkins handy—this snackable mix disappears fast.

What goes well with it

Pair Bunny Bait with a creamy vanilla milkshake for a sweet contrast to its crunchy texture. For a refreshing option, try it with iced chai tea, which balances the mix’s playful sweetness. If you’re serving it as part of a dessert spread, add our Funfetti Cupcakes or Salted Caramel Brownies to create a crowd-pleasing trio. The combination of flavors and textures will delight every guest.

What is Bunny Bait made of?

Bunny Bait is a sweet snack mix typically made with popcorn, pretzels, white chocolate, and colorful Easter candy like M&M’s or sprinkles. This festive treat gets its name from its irresistible appeal, just like bait for bunnies. It’s perfect for Easter gatherings or spring parties.

How do you store Bunny Bait?

Store Bunny Bait in an airtight container at room temperature for up to 1 week. Avoid refrigeration as moisture can make the chocolate coating sticky. For longer freshness, separate layers with parchment paper to prevent clumping.

Can you make Bunny Bait gluten-free?

Yes! Use gluten-free pretzels and ensure all other ingredients, like candy coatings, are certified gluten-free. Bunny Bait is easily adaptable for dietary needs while keeping its delicious crunch and festive look.

Why is it called Bunny Bait?

The name Bunny Bait comes from its colorful, candy-coated appearance that’s as enticing to people as bait is to rabbits. This playful Easter treat mimics the idea of luring bunnies with sweet, crunchy goodness.

Best American Flag Fruit Pizza – Easy Patriotic Dessert

best-american-flag-fruit-pizza

Introduction

Hi there! I’m Emily, the heart and soul behind brekcakes.com. From my earliest memories, the kitchen has always been a place of warmth and creativity. It’s where I discovered the magic of turning simple ingredients into extraordinary meals and learned that the best dishes are often made with love as the main ingredient.

There’s something undeniably special about desserts that bring people together, especially when they celebrate a moment as meaningful as the Fourth of July. That’s why I adore making this American Flag Fruit Pizza—it’s not just a treat but a edible tribute to summer, family, and patriotism. Whether you’re hosting a backyard barbecue or simply craving a festive dessert, this recipe delivers vibrant flavors and a showstopping presentation that’ll have everyone reaching for seconds.

The American Flag Fruit Pizza transforms a classic sugar cookie crust into a canvas of creamy frosting and fresh berries arranged like the stars and stripes. It’s a dessert that balances simplicity with creativity, making it perfect for bakers of all levels. Plus, it’s versatile—swap fruits based on what’s in season or add a drizzle of honey for extra sweetness. On brekcakes.com, we celebrate recipes that blend tradition with a personal twist, and this dish embodies that spirit. If you love crowd-pleasing desserts, you’ll also enjoy our Berry Cheesecake Bars or Patriotic Poke Cake, which share the same festive charm.

Why I Love This Recipe

This American Flag Fruit Pizza holds a special place in my heart because it reminds me of my grandmother’s Fourth of July parties. She’d let me arrange the berries just so, turning dessert into a playful activity. Now, I love recreating that joy with my own family—watching their faces light up when I bring out the finished flag never gets old. It’s more than a recipe; it’s a sweet tradition that ties generations together.

Health and Nutrition

Why it’s good for your body

American Flag Fruit Pizza packs a nutritious punch while satisfying your sweet tooth. First, the fresh berries—like strawberries, blueberries, and raspberries—deliver antioxidants that fight inflammation and support heart health. Meanwhile, the creamy yogurt or light cream cheese base adds protein and probiotics for gut health. Together, these ingredients make American Flag Fruit Pizza a smarter dessert choice.

Additionally, the natural sugars from the fruit provide quick energy without the crash of refined sugars. Since American Flag Fruit Pizza skips heavy dough and excessive sweeteners, it keeps calories in check. Plus, the vibrant colors signal a variety of vitamins, like vitamin C from strawberries and fiber from blueberries. Whether you serve it at a party or enjoy it as a snack, this treat nourishes your body.

Finally, the dish encourages mindful eating. Because American Flag Fruit Pizza balances sweetness with nutrients, you can indulge without guilt. The combination of fruit, protein, and wholesome toppings makes it a crowd-pleaser for both health-conscious adults and kids. Next time you crave dessert, this colorful option keeps your wellness goals on track.

How it fits in a healthy lifestyle

American Flag Fruit Pizza fits seamlessly into balanced eating habits. For gluten-free diets, simply swap the traditional crust for a nut or oat base, keeping it light and digestible. If you prioritize heart health, the berries’ flavonoids and yogurt’s probiotics work together to support circulation and cholesterol levels.

This dessert also aligns with meal prep strategies. You can assemble it ahead for quick, portion-controlled snacks, avoiding last-minute sugary temptations. Pair it with a protein-packed smoothie bowl for a filling breakfast or enjoy it post-workout for natural energy. Even better, it’s a fun way to get kids excited about healthy snacks without artificial additives.

Whether you’re hosting a gathering or need a refreshing summer treat, American Flag Fruit Pizza proves that nutritious choices can still feel festive. With simple swaps and fresh ingredients, it’s a versatile addition to any wellness-focused kitchen.

Print
clock clock iconcutlery cutlery iconflag flag iconfolder folder iconinstagram instagram iconpinterest pinterest iconfacebook facebook iconprint print iconsquares squares iconheart heart iconheart solid heart solid icon

American Flag Fruit Pizza


  • Author: Chef Emy

Description

A festive and delicious fruit pizza decorated like the American flag, perfect for patriotic holidays.


Ingredients

Scale

For the Crust:

  • 1 roll refrigerated sugar cookie dough
  • 8 oz cream cheese, softened
  • 1/3 cup granulated sugar
  • 1/2 tsp vanilla extract
  • 1 cup strawberries, sliced
  • 1 cup blueberries
  • 1 banana, sliced
  • 1/2 cup whipped cream

Instructions

1. Prepare the Crust:

  1. Preheat oven to 350°F (175°C). Press cookie dough into a greased rectangular baking pan to form the crust. Bake for 12-15 minutes until golden. Let cool completely.
  2. In a bowl, mix cream cheese, sugar, and vanilla until smooth. Spread evenly over the cooled cookie crust.
  3. Arrange blueberries in the top left corner to form the ‘stars’ of the flag. Place sliced strawberries in horizontal rows for the ‘stripes’, leaving space between for the ‘white stripes’ (cream cheese layer). Add banana slices if desired for additional color.
  4. Refrigerate for at least 1 hour before serving. Add dollops of whipped cream for clouds if desired.

Notes

You can customize the seasonings to taste.

How to Prepare This Dish

Steps and time-saving tips

Start by preheating your oven to 350°F so it’s ready when you finish the crust. While it heats, cream together softened butter and sugar until fluffy, then mix in flour and a pinch of salt for the perfect cookie base. Press the dough evenly into a greased pizza pan—using parchment paper saves cleanup time later. Bake for 12-15 minutes until golden, then let it cool completely. Meanwhile, whip cream cheese, sugar, and vanilla into a smooth frosting. Spread it over the cooled crust, leaving a small border for a clean edge. Now, layer sliced strawberries in stripes for the flag’s red lines, then arrange blueberries in the top left corner for stars. For extra freshness, add kiwi or banana slices between the berries. Chill the American Flag Fruit Pizza for at least an hour before slicing—this helps the frosting set and makes cutting easier. If you’re short on time, use pre-sliced fruit or a store-bought sugar cookie crust. Just remember, the homemade version always tastes better!

Mistakes I’ve made and learned from

I once rushed the crust and didn’t let it cool before adding the frosting—big mistake! The heat melted the cream cheese layer, turning my American Flag Fruit Pizza into a messy swirl. Now, I set a timer and walk away. Another time, I overloaded the fruit, making it slide off when sliced. Lesson learned: pat berries dry and layer them gently. If your fruit sinks, try my favorite frosting tricks to stabilize it. Also, don’t skip chilling—I learned the hard way that room-temperature pizza falls apart. For more dessert-saving tips, check out my cookie crust guide. Trust me, a little patience makes all the difference!

Cultural Connection and Variations

Where this recipe comes from

The American Flag Fruit Pizza bursts with patriotic pride, making it a star at Fourth of July gatherings. While its exact origins are fuzzy, many trace it back to mid-20th century potlucks where home cooks embraced colorful, easy-to-serve desserts. Today, families across the U.S. put their own spin on it, swapping fruits like blueberries and strawberries for whatever’s seasonal or locally loved.

In the South, you might find a cream cheese frosting base with a hint of bourbon, while Midwest versions often lean on cool whip for extra fluffiness. Some bakers even use sugar cookie dough instead of traditional crusts. Internationally, similar fruit-topped treats pop up—like Italy’s crostata or France’s tarte aux fruits—but none quite capture the red-white-and-blue charm of American Flag Fruit Pizza.

My grandma always made hers with a sprinkle of lemon zest, claiming it brightened the flavors. Whether you stick to the classic or improvise, this dessert never fails to spark joy and nostalgia. After all, nothing says summer like slicing into a vibrant American Flag Fruit Pizza under fireworks.

How it fits in today’s cooking

American Flag Fruit Pizza still shines as a crowd-pleaser, especially for holidays like Memorial Day or Labor Day. Modern cooks love its versatility—dietary tweaks, like gluten-free crusts or dairy-free frosting, keep it inclusive. Some even turn it into bite-sized dessert cups for picnics, proving tradition can adapt.

Beyond patriotism, it’s a gateway for getting kids involved in the kitchen. Arranging the fruit “flag” becomes a fun, edible art project. For busy hosts, shortcuts like pre-made dough or quick frosting hacks save time without sacrificing flair. Whether you’re honoring family recipes or experimenting, American Flag Fruit Pizza remains a sweet slice of Americana.

Taste and Texture

What makes it delicious

American Flag Fruit Pizza delights the senses with a perfect balance of sweet, tangy, and creamy flavors. The buttery sugar cookie crust offers a crisp yet tender bite, while the luscious cream cheese frosting adds a smooth, velvety richness. Juicy strawberries and plump blueberries burst with freshness, creating a vibrant contrast to the creamy base. Meanwhile, the subtle vanilla aroma from the crust mingles with the bright, fruity fragrance of the toppings. Every slice of American Flag Fruit Pizza delivers a refreshing, satisfying mouthfeel—cool, creamy, and slightly crunchy all at once.

Boosting the flavor

For an extra flavor boost, try swapping the cream cheese frosting with a tangy lemon cream cheese spread—it adds a zesty twist that pairs beautifully with the berries. Alternatively, drizzle a light honey glaze over the fruit for a touch of floral sweetness. If you love texture, sprinkle toasted coconut flakes or chopped nuts for a satisfying crunch. For more inspiration, explore our berry dessert recipes or experiment with toppings from our summer fruit combinations guide. With these simple tweaks, your American Flag Fruit Pizza will shine even brighter.

Tips for Success

Best practices for results

Always chill the dough before rolling it out for your American Flag Fruit Pizza, as this prevents shrinking during baking. Use parchment paper under the crust to ensure even browning and an easy transfer to your serving platter. For the freshest presentation, arrange the berries just before serving so they stay vibrant and juicy. Meanwhile, lightly pat the fruit dry with a paper towel to help the cream cheese layer adhere better. Finally, slice your American Flag Fruit Pizza with a sharp knife dipped in warm water for clean, picture-perfect portions every time.

Mistakes to avoid

Avoid overmixing the crust dough, which can make it tough instead of tender. Instead, mix just until the ingredients combine for the perfect texture. Many bakers also skip draining excess moisture from the fruit, which can cause the cream cheese layer to slide. For a stable base, check out our guide to preventing soggy desserts. Additionally, don’t spread the cream cheese mixture too thick, or it may overwhelm the fruit. For balanced flavors, follow our tips on frosting-to-fruit ratios when assembling your American Flag Fruit Pizza.

Serving and Pairing Suggestions

How to serve this dish

Showcase your American Flag Fruit Pizza as the star of any summer gathering. For a festive touch, arrange it on a large wooden board or a red, white, and blue platter to highlight the patriotic theme. Meanwhile, fresh mint leaves or a light dusting of powdered sugar add a finishing touch that elevates the presentation. Serve it chilled at backyard barbecues, Fourth of July parties, or even as a bright addition to brunch spreads. If you want to make it extra special, let guests customize their slices with a drizzle of honey or a dollop of whipped cream.

What goes well with it

Pair your American Flag Fruit Pizza with a refreshing glass of homemade lemonade or iced tea for a classic summer combo. The citrusy notes balance the sweetness of the fruit, making each bite even more delightful. For a heartier spread, serve it alongside our crowd-pleasing Berry Cheesecake Bars or light and fluffy Vanilla Chiffon Cake. These desserts share similar fresh flavors while offering contrasting textures. Finally, a scoop of vanilla bean ice cream turns this treat into an indulgent finale for any meal.

What fruits are best for an American Flag Fruit Pizza?

For a vibrant American Flag Fruit Pizza, use strawberries for the red stripes, blueberries for the star section, and bananas or whipped cream for the white stripes. These fruits hold up well and create the classic flag colors. You can also add kiwi or green grapes for extra decoration.

How do you make the crust for American Flag Fruit Pizza?

The crust for American Flag Fruit Pizza is typically a sugar cookie or shortbread base. Bake it until golden, let it cool, then spread a layer of cream cheese or yogurt frosting. This sturdy base supports the fruit toppings while adding a sweet contrast to the fresh flavors.

Can you make American Flag Fruit Pizza ahead of time?

Yes, you can prepare American Flag Fruit Pizza a few hours in advance. Assemble the crust and frosting ahead, but add the fruit just before serving to prevent sogginess. Store it covered in the fridge to keep it fresh for your patriotic celebration.

What’s a healthy alternative for American Flag Fruit Pizza frosting?

For a lighter American Flag Fruit Pizza, swap traditional cream cheese frosting with Greek yogurt sweetened with honey or vanilla. This adds protein and reduces sugar while still providing a creamy base. The fruit toppings will keep it festive and flavorful.

Easy Strawberry Cheesecake Dump Cake Recipe

easy-strawberry-cheesecake-dump-cake

Introduction

Hi there! I’m Emily, the heart and soul behind brekcakes.com. From my earliest memories, the kitchen has always been a place of warmth and creativity. It’s where I discovered the magic of turning simple ingredients into extraordinary meals and learned that the best dishes are often made with love as the main ingredient.

If you’ve ever craved a dessert that’s both indulgent and effortless, you’re in the right place. Today, I’m sharing my Strawberry Cheesecake Dump Cake—a recipe that captures the joy of baking without the fuss. Whether you’re hosting a last-minute gathering or simply treating yourself, this dessert delivers creamy cheesecake flavor, juicy strawberries, and a golden crumble topping in every bite. Trust me, one taste and you’ll understand why it’s become a reader favorite.

Strawberry Cheesecake Dump Cake is the ultimate no-fuss dessert, combining the richness of cheesecake with the convenience of a dump-and-bake method. Unlike traditional recipes that require precise layering or chilling, this version lets you pile ingredients into a dish and let the oven work its magic. The result? A luscious, gooey center with a buttery crust that’s perfect for potlucks, weeknight cravings, or even holiday desserts. It’s a testament to how simplicity can still feel special—something I champion in all my recipes, like this easy peach cobbler. Plus, the vibrant strawberries add a fresh twist, making it a year-round crowd-pleaser.

Why I Love This Recipe

This Strawberry Cheesecake Dump Cake holds a special place in my heart because it reminds me of summer evenings with my grandmother. She taught me that desserts don’t need to be complicated to be memorable. Every time I pull this cake out of the oven, the aroma of warm strawberries and vanilla takes me back to her kitchen. It’s the kind of recipe that turns strangers into friends and busy days into sweet moments—exactly what baking should be about.

Health and Nutrition

Why it’s good for your body

Strawberry Cheesecake Dump Cake packs a surprising mix of nutrients while satisfying your sweet tooth. First, fresh strawberries deliver a boost of vitamin C, which strengthens your immune system and supports healthy skin. Additionally, the creamy cheesecake layer provides a decent amount of calcium and protein, helping to keep your bones strong and your muscles fueled. Even better, this dessert contains natural fruit sugars, so you can enjoy a sweet treat without relying solely on refined sugars.

Moreover, Strawberry Cheesecake Dump Cake includes wholesome ingredients like oats or almond flour in some variations, adding fiber to aid digestion. The antioxidants in strawberries also fight inflammation, making this dessert a smarter choice than heavily processed alternatives. While it’s still an indulgent dish, the balance of flavors and nutrients means you can savor every bite guilt-free. Finally, the simplicity of Strawberry Cheesecake Dump Cake means you avoid unnecessary additives, keeping it closer to whole-food goodness.

How it fits in a healthy lifestyle

Strawberry Cheesecake Dump Cake fits perfectly into a balanced diet when enjoyed mindfully. For instance, pairing a small portion with a protein-rich snack like Greek yogurt can stabilize blood sugar levels. If you’re watching your gluten intake, simply swap traditional flour for a gluten-free alternative to keep it celiac-friendly. The dessert’s fruit content also makes it a great way to satisfy cravings while still getting some vitamins.

For those focused on heart health, the strawberries in Strawberry Cheesecake Dump Cake contribute potassium and fiber, which support cardiovascular wellness. You can even lighten it up by using reduced-fat cream cheese or a sugar substitute to align with your dietary goals. By treating it as an occasional delight rather than an everyday habit, you can enjoy this dessert without derailing your nutrition plan. After all, balance is key to a sustainable, healthy lifestyle.

Print
clock clock iconcutlery cutlery iconflag flag iconfolder folder iconinstagram instagram iconpinterest pinterest iconfacebook facebook iconprint print iconsquares squares iconheart heart iconheart solid heart solid icon

Strawberry Cheesecake Dump Cake


  • Author: Chef Emy

Description

A simple and delicious no-fuss dessert with layers of strawberry, cheesecake, and cake mix for a sweet treat.


Ingredients

Scale

For the Crust:

  • 1 (21 oz) can strawberry pie filling
  • 1 (8 oz) package cream cheese, softened
  • 1/2 cup granulated sugar
  • 1 teaspoon vanilla extract
  • 1 (15.25 oz) box yellow cake mix
  • 1/2 cup unsalted butter, melted
  • 1/4 cup sliced almonds (optional)

Instructions

1. Prepare the Crust:

  1. Preheat oven to 350°F (175°C). Grease a 9×13-inch baking dish.
  2. Spread the strawberry pie filling evenly in the bottom of the prepared dish.
  3. In a medium bowl, beat the cream cheese, sugar, and vanilla until smooth. Drop spoonfuls of the mixture over the strawberry layer.
  4. Sprinkle the dry cake mix evenly over the cream cheese layer. Drizzle the melted butter on top, covering as much of the cake mix as possible.
  5. If using, sprinkle sliced almonds over the top for added crunch.
  6. Bake for 30-35 minutes, or until the top is golden brown and the edges are bubbly. Let cool slightly before serving.

Notes

You can customize the seasonings to taste.

“`html

How to Prepare This Dish

Steps and time-saving tips

First, preheat your oven to 350°F and grab a 9×13-inch baking dish. Lightly grease the dish with butter or nonstick spray to prevent sticking. Next, spread the canned strawberry pie filling evenly across the bottom—no need to stir or fuss, just dump it in. Sprinkle the dry cake mix over the strawberries in an even layer, but don’t mix it. Instead, slice cold butter into thin pats and arrange them on top of the cake mix, covering as much surface area as possible. This creates a golden, crumbly crust as it bakes. For extra cheesecake flavor, dollop spoonfuls of softened cream cheese over the butter layer. Finally, bake for 45-50 minutes until the top turns golden and the edges bubble. Let it cool slightly before serving, or chill it for a firmer texture. To save time, use a store-bought cake mix and pre-sliced butter. If you prefer a gooey center, pull the Strawberry Cheesecake Dump Cake out a few minutes early.

Mistakes I’ve made and learned from

Early on, I rushed the butter step and ended up with uneven clumps of dry mix in my Strawberry Cheesecake Dump Cake. Now, I take an extra minute to space the butter evenly, which helps the cake mix melt into a perfect crust. Another blunder? Overbaking. I once left it in too long, and the edges hardened like candy. A toothpick test saved me—now I pull it out when the center is just set. For more dessert troubleshooting, check out my guide on fixing soggy cakes. Also, if you love shortcuts, my 5-ingredient desserts post has more easy wins. Trust me, a little patience with the butter and bake time makes all the difference.

“`

Cultural Connection and Variations

Where this recipe comes from

Strawberry Cheesecake Dump Cake feels like a love letter to simplicity and nostalgia. While dump cakes trace their roots to mid-20th century America, this version marries the ease of a one-pan dessert with the timeless appeal of cheesecake and fresh strawberries. Southern home cooks often credit the recipe as a Depression-era hack, but today, it’s a celebration of summer harvests and potluck camaraderie.

Across the globe, bakers put their own spin on it. In Japan, matcha powder might replace the cake mix for a earthy twist. Meanwhile, Mexican kitchens sometimes layer in dulce de leche or cinnamon. My grandma, however, swore by tossing in extra strawberries and a splash of vanilla—because, as she said, “Why skimp on joy?” Whether you serve it warm with ice cream or chilled like a classic cheesecake, Strawberry Cheesecake Dump Cake adapts to any table.

How it fits in today’s cooking

Strawberry Cheesecake Dump Cake thrives in modern kitchens because it’s fast, forgiving, and endlessly customizable. Busy parents love it for last-minute school bake sales, while meal preppers stash slices for weekday treats. During holidays, it’s a star at Easter brunches or Fourth of July barbecues—pair it with our Berry Blast Smoothie Bowl for a fresh contrast.

Today’s cooks also lighten it up with Greek yogurt or gluten-free mixes, proving tradition can bend without breaking. For a cozy twist, try serving it alongside our Cinnamon Apple Baked Oatmeal during fall gatherings. Whether you’re a novice or a pro, this dessert bridges generations and cravings without fuss.

Taste and Texture

What makes it delicious

Strawberry Cheesecake Dump Cake delivers a dreamy mix of sweet, tangy, and buttery flavors in every bite. The juicy strawberries burst with natural sweetness, while the creamy cheesecake layer adds a rich, velvety contrast. Meanwhile, the golden cake topping bakes into a crisp, crumbly crust that melts in your mouth. Warm vanilla and fruity aromas fill the air as it bakes, making it irresistible right out of the oven. Thanks to the tender strawberries and luscious cream cheese, Strawberry Cheesecake Dump Cake balances freshness with indulgence for a dessert that’s both comforting and vibrant.

Boosting the flavor

For an extra flavor boost, try swirling in a spoonful of lemon zest or a dash of cinnamon to brighten the strawberries. A drizzle of homemade caramel sauce adds a decadent touch, while toasted almond slices bring a satisfying crunch. If you love tangy desserts, mix in a layer of raspberry compote for a berry-packed twist. Whether you serve it warm with ice cream or enjoy it chilled, these easy tweaks make Strawberry Cheesecake Dump Cake even more memorable.

Tips for Success

Best practices for results

Always spread the cream cheese evenly over the cake mix to ensure a smooth, creamy texture in your Strawberry Cheesecake Dump Cake. Meanwhile, use fresh strawberries for the best flavor, and gently press them into the batter to distribute them evenly. Additionally, bake the cake until the top turns golden brown, as this guarantees a perfectly crisp finish. Finally, let the cake cool for at least 15 minutes before serving to allow the layers to set properly.

Mistakes to avoid

Avoid overmixing the batter, as this can make the Strawberry Cheesecake Dump Cake dense instead of light and fluffy. Instead, stir just until the ingredients combine. Also, don’t skip greasing the baking dish, or the cake may stick. For more baking tips, check out our guide on how to prevent cakes from sticking. Another common mistake is using frozen strawberries without thawing them first, which can make the cake soggy. If you prefer frozen fruit, learn the right way to incorporate it in our using frozen fruit in baking article.

Serving and Pairing Suggestions

How to serve this dish

For a stunning presentation, slice your Strawberry Cheesecake Dump Cake into generous squares and plate them with a dollop of whipped cream. Alternatively, drizzle warm strawberry sauce over each serving for extra flair. Since this dessert shines at gatherings, consider serving it at summer picnics or holiday brunches. To elevate the visual appeal, garnish with fresh mint leaves or a sprinkle of powdered sugar. Whether you serve it warm or chilled, Strawberry Cheesecake Dump Cake always delights with its creamy texture and fruity sweetness.

What goes well with it

Pair Strawberry Cheesecake Dump Cake with a scoop of vanilla ice cream for a classic combo—the cool creaminess balances the rich flavors perfectly. If you prefer drinks, try a hot cup of spiced chai tea latte to contrast the dessert’s sweetness. For a lighter option, serve it alongside fresh berries or a tangy lemon blueberry loaf to add a refreshing twist. Each pairing enhances the indulgent experience of this easy-to-make treat.

What is a Strawberry Cheesecake Dump Cake?

A Strawberry Cheesecake Dump Cake is an easy dessert made by layering strawberry pie filling, cheesecake-flavored ingredients, and cake mix before baking. Unlike traditional cheesecake, this dump cake version requires no crust preparation and bakes into a gooey, fruity treat. It’s perfect for quick potlucks or weeknight cravings.

Can I use fresh strawberries instead of pie filling for Strawberry Cheesecake Dump Cake?

Yes, you can substitute fresh strawberries by slicing 2 cups of berries and tossing them with ¼ cup sugar and 1 tbsp cornstarch to mimic pie filling texture. However, Strawberry Cheesecake Dump Cake works best with pie filling for consistent moisture and sweetness throughout the bake.

How do you prevent Strawberry Cheesecake Dump Cake from being too soggy?

To avoid sogginess, evenly sprinkle the dry cake mix over your strawberry and cream cheese layers without stirring. Add pats of butter across the top to help crisp the crust. Proper baking time (usually 45-50 minutes) ensures your Strawberry Cheesecake Dump Cake sets with a golden crumble topping.

Can Strawberry Cheesecake Dump Cake be made ahead of time?

While best served warm, Strawberry Cheesecake Dump Cake can be refrigerated for up to 3 days. Reheat individual portions in the microwave for 20 seconds or cover with foil and warm in a 300°F oven. The flavors actually deepen after chilling, making it great for meal prep.

Best Yogurt Cloud Cake – Light & Fluffy Recipe

best-yogurt-cloud-cake-recipe

Introduction

Hi there! I’m Emily, the heart and soul behind brekcakes.com. From my earliest memories, the kitchen has always been a place of warmth and creativity. It’s where I discovered the magic of turning simple ingredients into extraordinary meals and learned that the best dishes are often made with love as the main ingredient.

If you’ve ever craved a dessert that feels like biting into a sweet, airy dream, you’re in the right place. Today, I’m sharing my Light & Fluffy Yogurt Cloud Cake—a recipe that’s as delightful to make as it is to eat. Whether you’re celebrating a special occasion or simply treating yourself, this cake promises to bring joy with every melt-in-your-mouth bite. Trust me, once you try it, you’ll understand why it’s become a favorite in my home.

The Light & Fluffy Yogurt Cloud Cake is a heavenly twist on classic sponge cakes, combining the tangy richness of yogurt with an impossibly light texture. Unlike dense or overly sweet desserts, this cake strikes the perfect balance, making it ideal for any time of day. Plus, it’s incredibly versatile. Serve it plain for a subtle treat, or dress it up with fresh berries and a dusting of powdered sugar for an elegant finish. If you love effortless baking with stunning results, this recipe fits right into your routine. For more inspiration, check out my easy baking hacks or explore other quick dessert ideas to pair with it.

Why I Love This Recipe

This Light & Fluffy Yogurt Cloud Cake holds a special place in my heart because it reminds me of lazy Sunday afternoons baking with my grandmother. She taught me that simplicity often yields the most memorable flavors, and this cake proves just that. Every time I whisk the batter and watch it rise into a golden cloud, I feel that same childlike wonder. It’s a recipe that never fails to bring smiles, whether I’m sharing it with friends or savoring a quiet slice with my morning coffee.

Health and Nutrition

Why it’s good for your body

Light & Fluffy Yogurt Cloud Cake packs a surprising nutritional punch while tasting indulgent. First, yogurt adds probiotics that support gut health, which can boost digestion and immunity. Additionally, the cake’s airy texture comes from whipped egg whites, providing a protein-rich base without heavy fats. Unlike dense desserts, Light & Fluffy Yogurt Cloud Cake keeps calories moderate, so you can enjoy a slice without guilt.

Moreover, the recipe often includes fresh fruit or a drizzle of honey, adding natural sweetness and antioxidants. For instance, berries on top contribute vitamin C and fiber, enhancing the cake’s benefits. Meanwhile, yogurt delivers calcium for strong bones and protein to keep you full longer. Because it’s lighter than traditional cakes, Light & Fluffy Yogurt Cloud Cake satisfies cravings without spiking blood sugar as sharply.

Finally, the simplicity of the ingredients means fewer processed additives. Whether you choose Greek yogurt for extra protein or a low-fat version, you control the nutritional profile. With every bite, Light & Fluffy Yogurt Cloud Cake proves that treats can be both delicious and nourishing.

How it fits in a healthy lifestyle

Light & Fluffy Yogurt Cloud Cake fits seamlessly into balanced eating habits. For gluten-free diets, swap regular flour for almond or oat flour—it’s just as tender. If you’re watching your heart health, the minimal saturated fat makes it a smarter choice than butter-heavy desserts. Plus, the protein from yogurt and eggs helps stabilize energy levels, making it a great afternoon snack.

Pair a slice with a superfood smoothie bowl for a nutrient-packed breakfast or enjoy it after a quick workout to refuel. Because it’s light yet satisfying, you won’t feel weighed down. Whether you’re meal prepping or hosting friends, this cake proves that healthy eating doesn’t mean skipping dessert.

Print
clock clock iconcutlery cutlery iconflag flag iconfolder folder iconinstagram instagram iconpinterest pinterest iconfacebook facebook iconprint print iconsquares squares iconheart heart iconheart solid heart solid icon

Light & Fluffy Yogurt Cloud Cake


  • Author: Chef Emy

Description

A delicate and airy cake made with yogurt for a moist and fluffy texture.


Ingredients

Scale

For the Crust:

  • 1 1/2 cups all-purpose flour
  • 1 cup plain yogurt
  • 3 large eggs
  • 3/4 cup granulated sugar
  • 1/2 cup vegetable oil
  • 1 tsp vanilla extract
  • 2 tsp baking powder
  • 1/4 tsp salt

Instructions

1. Prepare the Crust:

  1. Preheat oven to 350°F (175°C). Grease and flour a 9-inch round cake pan.
  2. In a large bowl, whisk together eggs and sugar until light and fluffy.
  3. Add yogurt, oil, and vanilla extract. Mix until well combined.
  4. Sift in flour, baking powder, and salt. Gently fold until just combined.
  5. Pour batter into prepared pan and bake for 30 minutes or until a toothpick inserted comes out clean.
  6. Let cool in pan for 10 minutes, then transfer to a wire rack to cool completely.

Notes

You can customize the seasonings to taste.

How to Prepare This Dish

Steps and time-saving tips

Start by preheating your oven to 325°F and lightly greasing a 9-inch springform pan. In a large bowl, whisk together the yogurt, sugar, and vanilla until smooth. Next, sift in the flour and baking powder to avoid lumps, then gently fold them into the wet ingredients. Meanwhile, separate the egg whites and beat them in a clean bowl until stiff peaks form. Carefully fold the whipped egg whites into the batter in thirds to keep the mixture airy. Pour the batter into the pan and bake for 35-40 minutes, or until the top springs back when touched. Let the Light & Fluffy Yogurt Cloud Cake cool completely before removing it from the pan to prevent crumbling. For a time-saving hack, measure all your ingredients ahead and use room-temperature yogurt for easier mixing. If you’re short on time, chill the cake for 20 minutes before serving to speed up the setting process.

Mistakes I’ve made and learned from

I once rushed the egg-white folding step and ended up with a dense, flat cake instead of the Light & Fluffy Yogurt Cloud Cake I envisioned. Now, I take my time and use a spatula to fold in gentle, sweeping motions to preserve the airiness. Another mishap? Overbaking. I learned the hard way that even an extra five minutes can dry out this delicate dessert. To avoid this, I set a timer and test for doneness early. If you’re new to baking with yogurt, check out my guide on yogurt baking tips for foolproof moisture control. And if your cake ever sinks in the middle, don’t panic—my troubleshooting post on fixing sunken cakes has saved many of my desserts!

Cultural Connection and Variations

Where this recipe comes from

The Light & Fluffy Yogurt Cloud Cake whispers stories of simplicity and comfort across cultures. While its exact origins blur, many trace its roots to Mediterranean and Middle Eastern kitchens, where yogurt has long been a staple. Families in Greece might sweeten it with honey and top it with nuts, while in Turkey, they often infuse it with citrus zest for a brighter twist. Meanwhile, my grandmother added a dash of cardamom, turning it into a fragrant treat for special occasions.

In Japan, bakers sometimes fold in matcha for a earthy, vibrant version, while French patisseries might layer it with fresh berries and crème fraîche. No matter the variation, the Light & Fluffy Yogurt Cloud Cake always carries a sense of celebration. Whether served at a summer gathering or a cozy winter tea, it bridges traditions and tastes. Even today, I love how a single bite can transport me to my aunt’s kitchen, where she’d dust it with powdered sugar “just because.”

How it fits in today’s cooking

Modern cooks adore the Light & Fluffy Yogurt Cloud Cake for its versatility. It fits seamlessly into brunch spreads, holiday desserts, or even as a light afternoon snack. Many now swap traditional sugar for maple syrup or coconut sugar, keeping it wholesome without sacrificing flavor. Others layer it with seasonal fruits, like the strawberries in our Summer Berry Sponge, for a fresh twist.

Busy home bakers also appreciate how easily it adapts to gluten-free or dairy-free diets. For instance, pairing it with a dollop of coconut yogurt mirrors the texture of our Vegan Chocolate Delight. Whether you’re honoring old traditions or creating new ones, this cake remains a timeless favorite. It’s proof that some recipes don’t just survive—they thrive, one fluffy bite at a time.

Taste and Texture

What makes it delicious

The Light & Fluffy Yogurt Cloud Cake delivers a dreamy bite with its airy, melt-in-your-mouth texture. Each forkful feels like a sweet, pillowy cloud, thanks to the whipped yogurt and egg whites that create its signature lightness. The tangy yogurt balances the subtle sweetness, while a hint of vanilla adds warmth. Meanwhile, the golden-brown crust offers a delicate crispness that contrasts beautifully with the tender interior. Whether served warm or chilled, the Light & Fluffy Yogurt Cloud Cake leaves a refreshing, creamy finish that lingers just long enough to make you reach for another slice.

Boosting the flavor

For an extra burst of flavor, try drizzling honey or a citrus glaze over the Light & Fluffy Yogurt Cloud Cake—it enhances the yogurt’s natural tang while adding a glossy finish. Alternatively, fold in lemon zest or a sprinkle of cinnamon for a fragrant twist. If you love fruity notes, top it with fresh berries or a dollop of homemade berry compote for a juicy contrast. For a richer experience, pair it with a scoop of vanilla bean ice cream, letting the cool creaminess elevate every bite. With these simple tweaks, you can customize the cake to suit any craving.

Tips for Success

Best practices for results

Always measure your ingredients precisely for the Light & Fluffy Yogurt Cloud Cake, especially the yogurt and flour, to maintain the perfect balance of moisture and structure. Meanwhile, gently fold the egg whites into the batter to preserve the airy texture that makes this cake so special. Additionally, preheat your oven fully before baking to ensure even cooking and a consistent rise. For best results, let the cake cool completely before slicing, as this helps it set properly.

Mistakes to avoid

Avoid overmixing the batter, which can deflate the egg whites and make the Light & Fluffy Yogurt Cloud Cake dense instead of light. Instead, use a spatula and fold gently until just combined. Also, don’t skip greasing the pan properly, or the cake might stick. For more baking tips, check out our guide on how to prevent cakes from sticking. Finally, resist opening the oven door too early, as sudden temperature changes can cause the cake to collapse. If you’re unsure about doneness, learn the signs of a perfectly baked cake with our cake doneness test.

Serving and Pairing Suggestions

How to serve this dish

Light & Fluffy Yogurt Cloud Cake shines as a centerpiece for any occasion. For a stunning presentation, dust the top with powdered sugar or drizzle it with honey for a touch of elegance. Alternatively, garnish with fresh berries or edible flowers to add color and freshness. Serve it at brunch alongside other sweet treats, or make it the star of your holiday dessert table. Since the cake is naturally airy, slice it gently and plate it with a dollop of whipped cream for extra indulgence.

What goes well with it

Pair Light & Fluffy Yogurt Cloud Cake with a cup of lightly brewed Earl Grey tea to enhance its delicate flavors. The citrusy notes in the tea complement the cake’s lightness perfectly. For a refreshing contrast, try serving it with a scoop of our Homemade Lemon Sorbet, which adds a tangy twist. If you prefer something richer, our Vanilla Bean Whipped Cream adds a creamy texture that balances the cake’s airy crumb.

What makes Light & Fluffy Yogurt Cloud Cake so airy?

The Light & Fluffy Yogurt Cloud Cake gets its airy texture from whipped egg whites folded into the batter, along with the natural lightness of yogurt. The combination creates a delicate, cloud-like crumb that melts in your mouth.

Can I use Greek yogurt instead of regular yogurt in Light & Fluffy Yogurt Cloud Cake?

Yes, Greek yogurt works well in Light & Fluffy Yogurt Cloud Cake, but you may need to thin it slightly with milk or water to match regular yogurt’s consistency. The cake will still be light but may have a slightly denser texture.

How do I prevent Light & Fluffy Yogurt Cloud Cake from collapsing?

To prevent collapse, avoid overmixing the batter and gently fold in the egg whites. Let the Light & Fluffy Yogurt Cloud Cake cool upside down in the pan to help maintain its height and structure as it sets.

What toppings pair best with Light & Fluffy Yogurt Cloud Cake?

Fresh berries, whipped cream, or a light dusting of powdered sugar complement the Light & Fluffy Yogurt Cloud Cake perfectly. For extra flavor, drizzle with honey or a citrus glaze to enhance the yogurt’s tanginess.

Best Fruity Pebbles Cheesecake Tacos Recipe

best-fruity-pebbles-cheesecake-tacos

Introduction

Hi there! I’m Emily, the heart and soul behind brekcakes.com. From my earliest memories, the kitchen has always been a place of warmth and creativity. It’s where I discovered the magic of turning simple ingredients into extraordinary meals and learned that the best dishes are often made with love as the main ingredient.

Do you ever crave a dessert that’s playful, nostalgic, and downright delicious? If so, you’re in the right place. Today, I’m sharing my Fruity Pebbles Cheesecake Tacos—a whimsical twist on classic flavors that brings joy to every bite. Whether you’re hosting a party or simply treating yourself, this recipe promises to spark smiles and satisfy your sweet tooth. Plus, it’s a fantastic way to get creative in the kitchen without spending hours on complicated techniques.

Fruity Pebbles Cheesecake Tacos combine creamy cheesecake filling with crispy, colorful cereal-coated shells for a dessert that’s as fun to make as it is to eat. The contrast of textures—crunchy on the outside, smooth on the inside—creates a delightful experience. What makes this recipe special is its ability to transport you back to childhood while still feeling fresh and exciting. Perfect for birthdays, potlucks, or even a midweek pick-me-up, these tacos fit right into the breezy, approachable vibe of brekcakes.com. If you love playful desserts like my Rainbow Cake or crave easy crowd-pleasers like Chocolate Chip Cookies, you’ll adore this recipe too.

Why I Love This Recipe

Fruity Pebbles Cheesecake Tacos hold a special place in my heart because they remind me of baking with my nieces and nephews. Their eyes light up when they see the vibrant colors, and their giggles as they assemble their own tacos make every moment worth it. Beyond the nostalgia, I love how versatile this recipe is—you can swap fillings, toppings, or even the cereal to match any occasion. Most importantly, it proves that desserts don’t need to be fussy to be unforgettable.

Health and Nutrition

Why it’s good for your body

Fruity Pebbles Cheesecake Tacos bring a fun twist to dessert while offering some surprising nutritional perks. First, the creamy cheesecake filling provides a good source of calcium and protein, which support strong bones and muscle health. Additionally, the colorful Fruity Pebbles cereal adds a light crunch and delivers fortified vitamins like iron and B vitamins, helping boost energy levels.

Moreover, Fruity Pebbles Cheesecake Tacos include wholesome ingredients like cream cheese and fresh fruit toppings when customized. For example, adding strawberries or blueberries introduces antioxidants that fight inflammation. Meanwhile, the taco shell, often made from a crispy tortilla or waffle cone, offers a satisfying texture without excessive sugar.

Finally, this dessert balances indulgence with moderation. While Fruity Pebbles Cheesecake Tacos are a treat, their portion-controlled size helps manage calorie intake. Plus, the playful presentation makes them a hit for both kids and adults, encouraging mindful enjoyment without overeating.

How it fits in a healthy lifestyle

Fruity Pebbles Cheesecake Tacos can fit into a balanced diet when enjoyed thoughtfully. For those watching sugar intake, swapping in a low-sugar tortilla or Greek yogurt-based filling keeps the flavors vibrant while reducing added sugars. If you’re following a gluten-free diet, opt for gluten-free cereal or shells to make this dessert celiac-friendly.

Pairing Fruity Pebbles Cheesecake Tacos with protein-rich snacks, like nuts or a smoothie, helps stabilize blood sugar levels. For more inspiration on healthier dessert swaps, check out our guide to healthy dessert alternatives. Alternatively, if you’re meal prepping for the week, these tacos make a fun weekend reward after sticking to nutritious meals—just like our tips in meal prep for busy families.

Ultimately, moderation is key. Enjoying Fruity Pebbles Cheesecake Tacos as an occasional treat keeps them special while supporting long-term wellness goals.

Print
clock clock iconcutlery cutlery iconflag flag iconfolder folder iconinstagram instagram iconpinterest pinterest iconfacebook facebook iconprint print iconsquares squares iconheart heart iconheart solid heart solid icon

Fruity Pebbles Cheesecake Tacos


  • Author: Chef Emy

Description

A fun and colorful dessert combining creamy cheesecake filling with crunchy Fruity Pebbles cereal in a taco shell.


Ingredients

Scale

For the Crust:

  • 8 small flour tortillas
  • 1 cup Fruity Pebbles cereal
  • 8 oz cream cheese, softened
  • 1/4 cup powdered sugar
  • 1 tsp vanilla extract
  • 1/2 cup whipped topping
  • 2 tbsp butter, melted
  • 1 tbsp cinnamon sugar

Instructions

1. Prepare the Crust:

  1. Preheat oven to 375°F. Brush tortillas with melted butter and sprinkle with cinnamon sugar.
  2. Drape tortillas over oven rack bars to form taco shapes. Bake for 8-10 minutes until crisp.
  3. Beat cream cheese, powdered sugar, and vanilla until smooth. Fold in whipped topping.
  4. Gently fold in 3/4 cup Fruity Pebbles into the cheesecake mixture.
  5. Spoon filling into cooled taco shells and top with remaining Fruity Pebbles.
  6. Chill for 30 minutes before serving.

Notes

You can customize the seasonings to taste.

“`html

How to Prepare This Dish

Steps and time-saving tips

Start by gathering all your ingredients for Fruity Pebbles Cheesecake Tacos to streamline the process. First, crush the Fruity Pebbles into fine crumbs using a food processor or a rolling pin. Meanwhile, soften the cream cheese to room temperature so it blends smoothly. Combine the crushed cereal with melted butter and a touch of sugar, then press the mixture into small taco-shaped molds. Bake these shells for just 8-10 minutes until crisp, then let them cool completely.

While the shells cool, whip the cream cheese, powdered sugar, and vanilla until fluffy. Fold in whipped cream for a lighter texture, then gently stir in mini marshmallows for extra fun. Spoon the cheesecake filling into the cooled shells, but don’t overfill—they’re delicate. Top with a sprinkle of Fruity Pebbles and a drizzle of melted white chocolate for color and crunch. Chill the tacos for at least an hour to set, though overnight works even better.

To save time, prep the shells a day ahead and store them in an airtight container. If you’re short on time, skip the molds and shape the shells freehand on a baking sheet. For a quicker filling, use store-bought whipped topping instead of homemade, but add a splash of vanilla for depth. These Fruity Pebbles Cheesecake Tacos come together fast with a little planning, and the vibrant results are worth every minute.

Mistakes I’ve made and learned from

My first attempt at Fruity Pebbles Cheesecake Tacos was a mess—literally. I overfilled the shells, and they cracked under the weight of the filling. Now, I use a piping bag for precision and leave a little room at the edges. Another blunder? Not chilling the shells long enough. They fell apart when handled, so I learned patience is key. For more on avoiding dessert disasters, check out my guide to fixing cracked cheesecakes.

I also once used cold cream cheese straight from the fridge, which left lumps in the filling. Letting it soften first makes all the difference. If you’re new to no-bake desserts, my no-bake dessert tips can help you sidestep these pitfalls. Trust me, these small tweaks turn Fruity Pebbles Cheesecake Tacos from frustrating to foolproof.

“`

Cultural Connection and Variations

Where this recipe comes from

Fruity Pebbles Cheesecake Tacos might sound like a modern invention, but they actually blend nostalgic flavors with playful creativity. The dish takes inspiration from classic American breakfast cereals and Mexican dessert traditions, merging them into a fun, shareable treat. While cheesecake fillings have roots in Europe, the addition of Fruity Pebbles gives it a distinctly American twist—think childhood memories in every bite.

Different regions put their own spin on similar desserts. In Mexico, you might find fried tortillas stuffed with cajeta (caramel) or fresh fruit. Meanwhile, in the U.S., some families swap Fruity Pebbles for other colorful cereals, like Cap’n Crunch or Lucky Charms. My aunt, for example, adds a drizzle of chocolate to hers, turning Fruity Pebbles Cheesecake Tacos into a sweet-and-crunchy masterpiece. Whether served at birthday parties or summer picnics, this dish always brings smiles.

How it fits in today’s cooking

Fruity Pebbles Cheesecake Tacos fit perfectly into today’s trend of whimsical, Instagram-worthy desserts. They’re a hit at potlucks, kids’ parties, or even as a late-night snack. Modern cooks love how easy they are to customize—swap the cereal, change the filling, or even make them gluten-free with a few tweaks. For more creative dessert ideas, check out our fun dessert recipes collection.

They also shine during holidays. Imagine serving them at Easter with pastel-colored toppings or as a Fourth of July treat with red, white, and blue sprinkles. Plus, they’re a great way to use up leftover cereal, making them practical for everyday cooking. If you’re looking for more ways to reinvent classic flavors, our retro desserts guide has plenty of inspiration. No matter the occasion, Fruity Pebbles Cheesecake Tacos keep the fun in food.

Taste and Texture

What makes it delicious

Fruity Pebbles Cheesecake Tacos deliver a burst of playful sweetness with every bite. The creamy cheesecake filling melts luxuriously on your tongue, while the crunchy Fruity Pebbles cereal adds a satisfying contrast. Each taco explodes with vibrant fruity flavors—think tangy citrus, juicy berry, and tropical hints—all wrapped in a crisp, golden tortilla shell. Meanwhile, the subtle vanilla undertones from the cheesecake balance the cereal’s bold sweetness, creating a harmony that feels indulgent yet light. The aroma alone, with its sugary, nostalgic cereal scent, will have you reaching for seconds before you finish your first.

Boosting the flavor

For an extra flavor boost, drizzle melted white chocolate over your Fruity Pebbles Cheesecake Tacos to amplify their richness. Alternatively, swap the classic cheesecake filling for a strawberry swirl variation to add a fruity tang. If you love texture, sprinkle crushed freeze-dried raspberries on top for a tart crunch. For a fun twist, serve them with a side of homemade whipped cream to balance the sweetness. A pinch of flaky sea salt on the finished tacos can also elevate all the flavors beautifully.

Tips for Success

Best practices for results

Always chill your cream cheese before mixing it for the Fruity Pebbles Cheesecake Tacos filling, as this helps prevent a runny texture. Meanwhile, lightly toast the taco shells for just a few seconds to keep them crisp without burning. For the best crunch, press the Fruity Pebbles into the cheesecake filling immediately after mixing so they stick evenly. Additionally, let the assembled tacos set in the fridge for at least 30 minutes before serving to ensure they hold their shape.

Mistakes to avoid

Avoid overfilling the taco shells, or they may crack when you try to fold them. Instead, use a piping bag for precise control, just like when making no-bake desserts. Also, don’t skip the step of draining excess liquid from the yogurt or whipped topping, as too much moisture can make the filling soggy. If you’re new to working with cereal toppings, check out our guide on cereal treats for extra tips on keeping them fresh and crunchy.

Serving and Pairing Suggestions

How to serve this dish

Fruity Pebbles Cheesecake Tacos bring a burst of color and fun to any table. For a playful presentation, arrange them on a vibrant platter with extra Fruity Pebbles sprinkled around the edges. Meanwhile, drizzle melted white chocolate over the top for a glossy finish. These tacos shine at birthday parties, summer picnics, or even as a festive holiday dessert. If you want to elevate the experience, serve them with mini forks or colorful napkins to match the cereal’s cheerful vibe.

What goes well with it

A cold glass of strawberry milk makes the perfect partner for Fruity Pebbles Cheesecake Tacos, balancing the creamy filling with a fruity twist. Alternatively, try pairing them with a scoop of vanilla bean ice cream for extra indulgence. If you love creative desserts, our Rainbow Cookie Cups or Berry Chia Pudding add a refreshing contrast to the rich cheesecake filling. Each pairing enhances the tacos’ sweet, crunchy texture without overpowering their playful flavor.

What are Fruity Pebbles Cheesecake Tacos made of?

Fruity Pebbles Cheesecake Tacos combine crispy taco shells with a creamy cheesecake filling and colorful Fruity Pebbles cereal. The dessert tacos often include whipped cream, sprinkles, or extra cereal for added crunch and sweetness.

How do you keep Fruity Pebbles Cheesecake Tacos from getting soggy?

To prevent sogginess, assemble Fruity Pebbles Cheesecake Tacos just before serving. You can also lightly coat the taco shells with melted chocolate or candy melts to create a moisture barrier against the creamy filling.

Can you make Fruity Pebbles Cheesecake Tacos ahead of time?

While best served fresh, you can prep components separately—store the cheesecake filling chilled and cereal in an airtight container. Assemble Fruity Pebbles Cheesecake Tacos within 1-2 hours of serving for optimal texture.

What’s the best way to serve Fruity Pebbles Cheesecake Tacos at a party?

Display Fruity Pebbles Cheesecake Tacos on a colorful platter with toppings like rainbow sprinkles or extra cereal for DIY customization. Keep them chilled on ice until serving to maintain the perfect cheesecake consistency.

Best Strawberry Cheesecake Stuffed Cookies Recipe

best-strawberry-cheesecake-cookies

Introduction

Hi there! I’m Emily, the heart and soul behind brekcakes.com. From my earliest memories, the kitchen has always been a place of warmth and creativity. It’s where I discovered the magic of turning simple ingredients into extraordinary meals and learned that the best dishes are often made with love as the main ingredient.

There’s something undeniably special about biting into a cookie and discovering a surprise inside. That’s exactly why I adore these Strawberry Cheesecake Stuffed Cookies—they’re playful, indulgent, and packed with nostalgia. Whether you’re baking for a special occasion or just treating yourself, these cookies promise to bring joy with every gooey, creamy bite. Plus, they combine two beloved desserts into one unforgettable treat, making them perfect for anyone who loves a little extra sweetness in life.

Strawberry Cheesecake Stuffed Cookies are exactly what they sound like: soft, buttery cookies hiding a luscious strawberry cheesecake filling. The contrast between the crisp edges and the velvety center creates a texture that’s downright addictive. What makes them even better? They’re surprisingly easy to make, yet impressive enough to wow guests. If you’ve ever tried my Classic Cheesecake, you’ll recognize the creamy filling, but here it’s tucked inside a cookie for a fun twist. This recipe fits perfectly with brekcakes.com’s mission to share approachable yet extraordinary desserts. After all, who wouldn’t want a bite of cheesecake wrapped in a cookie? For more inspiration, check out my Strawberry Desserts collection, where fruity flavors take center stage.

Why I Love This Recipe

These Strawberry Cheesecake Stuffed Cookies hold a special place in my heart because they remind me of summer picnics with my family. My grandma always made strawberry jam from scratch, and the first time I paired it with cheesecake filling, I knew I had to turn it into a cookie. Every time I bake them, the smell of fresh strawberries and vanilla takes me right back to those sunny afternoons. More than just a dessert, these cookies are a little bite of happiness—and I can’t wait for you to experience that too.

Health and Nutrition

Why it’s good for your body

Strawberry Cheesecake Stuffed Cookies deliver a surprising mix of nutrients alongside their indulgent flavor. First, fresh strawberries pack vitamin C, which supports immune health and skin vitality. Additionally, the cream cheese filling provides a dose of calcium and protein, helping to keep bones strong and muscles fueled. Even better, these cookies use real fruit, so you get natural sweetness without relying solely on refined sugars.

Moreover, Strawberry Cheesecake Stuffed Cookies balance richness with wholesome ingredients. For instance, oats or whole wheat flour in the cookie base add fiber, which aids digestion and keeps you satisfied longer. Meanwhile, the strawberries contribute antioxidants that fight inflammation. As a result, you enjoy a treat that satisfies cravings while offering more than empty calories.

Finally, these cookies make a smarter dessert choice compared to heavily processed alternatives. By combining real fruit, dairy, and whole grains, Strawberry Cheesecake Stuffed Cookies provide a more nutrient-dense option. Whether you need a post-workout snack or a sweet pick-me-up, they deliver flavor and function in every bite.

How it fits in a healthy lifestyle

Strawberry Cheesecake Stuffed Cookies fit seamlessly into a balanced diet when enjoyed mindfully. Pair one with a protein-rich snack like Greek yogurt or nuts to create a satisfying mini-meal. They also work well as a portion-controlled dessert after a nutrient-packed dinner, like our grilled salmon with avocado salsa.

For those with dietary preferences, simple swaps can make these cookies gluten-free or lower in sugar. Try almond flour or a sugar substitute to tailor them to your needs. If you love balancing treats with wholesome meals, explore our meal prep ideas for busy weeks to keep your routine on track. With a little planning, Strawberry Cheesecake Stuffed Cookies can be part of a vibrant, health-conscious lifestyle.

Print
clock clock iconcutlery cutlery iconflag flag iconfolder folder iconinstagram instagram iconpinterest pinterest iconfacebook facebook iconprint print iconsquares squares iconheart heart iconheart solid heart solid icon

Strawberry Cheesecake Stuffed Cookies


  • Author: Chef Emy

Description

Deliciously soft cookies stuffed with a creamy strawberry cheesecake filling.


Ingredients

Scale

For the Crust:

  • 1 cup unsalted butter, softened
  • 1 cup granulated sugar
  • 1 cup brown sugar
  • 2 large eggs
  • 1 teaspoon vanilla extract
  • 3 cups all-purpose flour
  • 1 teaspoon baking soda
  • 1/2 teaspoon salt
  • 4 oz cream cheese, softened
  • 1/4 cup powdered sugar
  • 1/2 cup strawberry jam
  • 1/2 cup fresh strawberries, diced

Instructions

1. Prepare the Crust:

  1. Preheat oven to 350°F (175°C) and line baking sheets with parchment paper.
  2. In a large bowl, cream together butter, granulated sugar, and brown sugar until light and fluffy.
  3. Beat in eggs one at a time, then stir in vanilla extract.
  4. In a separate bowl, whisk together flour, baking soda, and salt. Gradually add to the wet ingredients, mixing until combined.
  5. In another bowl, mix cream cheese, powdered sugar, strawberry jam, and diced strawberries until smooth.
  6. Take a tablespoon of cookie dough, flatten it, and place a teaspoon of the cheesecake filling in the center. Cover with another tablespoon of dough, sealing the edges.
  7. Place cookies on the prepared baking sheets and bake for 12-15 minutes, or until edges are golden brown.
  8. Let cool on the baking sheet for 5 minutes before transferring to a wire rack to cool completely.

Notes

You can customize the seasonings to taste.

How to Prepare This Dish

Steps and time-saving tips

Start by preheating your oven to 350°F and lining a baking sheet with parchment paper. In a large bowl, cream together softened butter and sugar until light and fluffy. Then, whisk in an egg and vanilla extract until smooth. Gradually fold in the dry ingredients—flour, baking powder, and salt—just until combined. Overmixing can make the cookies tough, so stop as soon as the dough comes together. Meanwhile, prepare the strawberry cheesecake filling by blending cream cheese, powdered sugar, and chopped strawberries until creamy. Scoop tablespoon-sized portions of cookie dough, flatten them slightly, and place a dollop of filling in the center. Carefully wrap the dough around the filling, sealing the edges to prevent leaks. Bake for 12-14 minutes until the edges turn golden but the centers stay soft. Let them cool on the sheet for 5 minutes before transferring to a wire rack. For a time-saving hack, chill the dough for 15 minutes before baking to reduce spreading. If you’re short on time, use store-bought strawberry jam instead of fresh strawberries—just mix it with the cream cheese for a quicker filling.

Mistakes I’ve made and learned from

My first batch of Strawberry Cheesecake Stuffed Cookies turned into flat, messy puddles because I skipped chilling the dough. Cold dough holds its shape better, so now I always refrigerate it, even if just for a few minutes. Another blunder? Overstuffing the cookies. Too much filling causes them to burst open while baking. I learned to use just a teaspoon per cookie, and they now bake perfectly every time. If you’re new to stuffed cookies, check out my baking tips for beginners to avoid common pitfalls. Also, if your filling feels too runny, thicken it with a bit of cornstarch—this trick saved me after a strawberry overload. For more dessert inspiration, explore my favorite cheesecake recipes, which pair wonderfully with these cookies.

Cultural Connection and Variations

Where this recipe comes from

Strawberry Cheesecake Stuffed Cookies feel like a love letter to two classic desserts. While no one knows exactly who first stuffed cheesecake filling into a cookie, the idea likely sprang from the American obsession with mashup desserts. After all, why choose between a creamy cheesecake and a chewy cookie when you can have both? Some bakers trace the concept to Brooklyn bakeries in the early 2000s, where inventive treats ruled. Others swear it evolved from stuffed cookie trends in the Midwest.

Across the globe, bakers put their own spin on Strawberry Cheesecake Stuffed Cookies. In Japan, matcha-infused versions with white chocolate filling pop up in trendy Tokyo cafes. Italian home cooks might swap strawberries for figs and add a hint of rosemary. My grandma’s version? She folded crushed graham crackers into the dough for extra nostalgia. No matter where you go, the magic lies in that surprise center—like finding hidden treasure in every bite.

How it fits in today’s cooking

Today, Strawberry Cheesecake Stuffed Cookies bridge generations. They’re perfect for summer picnics, yet cozy enough for holiday cookie swaps. Modern cooks love how adaptable they are—swap in dairy-free cream cheese or gluten-free flour without missing the magic. Some even turn them into bite-sized desserts for parties, proving creativity never stops.

Social media fuels new twists, too. Bakers might swirl in raspberry jam or top them with edible glitter. For busy families, they’re a fun weekend project—kids love stuffing the dough just as much as eating the results. Whether you’re baking them for a special occasion or just because, these cookies remind us that joy often comes in handheld packages.

Taste and Texture

What makes it delicious

Strawberry Cheesecake Stuffed Cookies deliver a mouthwatering blend of sweet, tangy, and creamy flavors. The soft, buttery cookie base hugs a luscious strawberry cheesecake filling, creating a perfect contrast between chewy and velvety textures. Each bite bursts with juicy strawberry notes, balanced by the rich, slightly tangy cream cheese. Meanwhile, the golden edges add a subtle crispness, while the center stays gloriously gooey. The aroma alone—a mix of warm vanilla, ripe strawberries, and toasted sugar—will have you reaching for seconds. Whether enjoyed fresh from the oven or at room temperature, Strawberry Cheesecake Stuffed Cookies offer a dessert experience that’s both nostalgic and indulgent.

Boosting the flavor

Elevate your Strawberry Cheesecake Stuffed Cookies with a few easy tweaks. For extra fruity depth, fold in freeze-dried strawberry powder or swirl in a spoonful of homemade strawberry compote before baking. A sprinkle of lemon zest brightens the cream cheese filling, while a drizzle of vanilla glaze adds a glossy, sweet finish. If you love texture, press crushed graham crackers into the dough for a playful nod to classic cheesecake crust. Experiment with warm spices like cinnamon or cardamom to add a cozy twist. With these small touches, every batch becomes even more irresistible.

Tips for Success

Best practices for results

Always chill the dough for at least 30 minutes before baking to prevent spreading. Use room-temperature cream cheese for smooth filling, and measure your flour correctly to avoid dense Strawberry Cheesecake Stuffed Cookies. Additionally, line your baking sheets with parchment paper for even browning and easy removal. For the best texture, slightly underbake the cookies and let them cool on the tray for 5 minutes before transferring.

Mistakes to avoid

Avoid overmixing the dough, as this can make your Strawberry Cheesecake Stuffed Cookies tough instead of tender. Instead, gently fold ingredients until just combined. Also, don’t skip sealing the edges of the cheesecake filling inside the dough—otherwise, the filling may leak during baking. For more troubleshooting tips, check out our guides on common cookie mistakes and perfect cheesecake filling.

Serving and Pairing Suggestions

How to serve this dish

For a stunning presentation, arrange your Strawberry Cheesecake Stuffed Cookies on a rustic wooden board or a pastel-colored platter. Meanwhile, dust them lightly with powdered sugar or drizzle melted white chocolate for an extra touch of elegance. These cookies shine at brunch gatherings, holiday dessert tables, or even as a sweet surprise in lunchboxes. If you want to elevate the experience, serve them slightly warm with a scoop of vanilla ice cream for a gooey, indulgent treat.

What goes well with it

Pair Strawberry Cheesecake Stuffed Cookies with a chilled glass of homemade strawberry lemonade for a refreshing contrast to their rich flavor. Alternatively, enjoy them alongside a creamy latte or a cup of Earl Grey tea to balance the sweetness. For a dessert spread, try serving them with our Classic Vanilla Cupcakes or a tangy Mixed Berry Compote to enhance the fruity cheesecake filling. Each pairing highlights the cookies’ decadent texture and bright strawberry notes.

How do you keep strawberry cheesecake stuffed cookies from falling apart?

Chill the dough for at least 30 minutes before baking to help the cookies hold their shape. Also, ensure the cheesecake filling is thick and cold—this prevents it from leaking out while the Strawberry Cheesecake Stuffed Cookies bake.

Can you freeze strawberry cheesecake stuffed cookies?

Yes! Strawberry Cheesecake Stuffed Cookies freeze well for up to 3 months. Store them in an airtight container with parchment paper between layers to prevent sticking, then thaw at room temperature before serving.

What’s the best way to add strawberry flavor to cheesecake stuffed cookies?

Use freeze-dried strawberry powder in both the cookie dough and cheesecake filling for intense flavor. Fresh strawberry pieces can make the filling too watery, so opt for concentrated options to keep your Strawberry Cheesecake Stuffed Cookies perfectly textured.

Why are my cheesecake stuffed cookies soggy in the middle?

Sogginess usually means underbaking—extend bake time by 2-3 minutes until edges are golden. Also, avoid overloading the cheesecake filling; a teaspoon per Strawberry Cheesecake Stuffed Cookie is enough to prevent excess moisture.

Best White Chocolate Raspberry Cheesecake Balls Recipe

best-white-chocolate-raspberry-cheesecake

Introduction

Hi there! I’m Emily, the heart and soul behind brekcakes.com. From my earliest memories, the kitchen has always been a place of warmth and creativity. It’s where I discovered the magic of turning simple ingredients into extraordinary meals and learned that the best dishes are often made with love as the main ingredient.

If you’re craving a dessert that feels indulgent yet effortless, you’ve come to the right place. Today, I’m sharing my recipe for White Chocolate Raspberry Cheesecake Balls—a bite-sized treat that combines creamy cheesecake, tart raspberry jam, and rich white chocolate in every bite. Whether you’re hosting a party or simply treating yourself, these little delights promise to bring joy to any occasion. Plus, they’re surprisingly easy to make, even if you’re new to no-bake desserts.

White Chocolate Raspberry Cheesecake Balls are a decadent twist on classic cheesecake, perfect for those who love a balance of sweet and tangy flavors. Unlike traditional cheesecakes, these no-bake bites require minimal effort and no oven time, making them ideal for busy bakers or last-minute gatherings. The creamy cheesecake center, swirled with raspberry jam, gets coated in smooth white chocolate for a luxurious finish. They’re also incredibly versatile—serve them as elegant party favors, holiday treats, or a sweet ending to a cozy night in. If you enjoy easy yet impressive desserts like my No-Bake Cookie Dough Truffles, you’ll adore these too. And for more raspberry-inspired goodness, check out my Raspberry Lemonade Cupcakes.

Why I Love This Recipe

White Chocolate Raspberry Cheesecake Balls hold a special place in my heart because they remind me of my grandmother’s raspberry jam thumbprint cookies—only richer and more indulgent. Every time I make them, I remember how she taught me to appreciate the harmony of flavors in desserts. The tangy raspberry cuts through the sweetness of the white chocolate, creating a perfect bite that never fails to impress. Best of all, they’re a recipe I can share with friends and family, spreading the same joy my grandmother once shared with me.

Health and Nutrition

Why it’s good for your body

White Chocolate Raspberry Cheesecake Balls offer a delightful way to enjoy a treat while still benefiting from key nutrients. First, the raspberries provide a natural source of antioxidants, which help combat oxidative stress in the body. Additionally, the creamy cheesecake filling delivers a dose of calcium and protein, supporting bone health and muscle function. Even the white chocolate contributes small amounts of magnesium, which aids in nerve and muscle performance.

Moreover, these bite-sized delights pack flavor without overwhelming your system with excessive sugar. Because they are portion-controlled, White Chocolate Raspberry Cheesecake Balls help you indulge mindfully. Furthermore, the combination of tart raspberries and sweet white chocolate creates a balanced taste that satisfies cravings without relying on artificial additives.

Finally, the energy-boosting qualities of White Chocolate Raspberry Cheesecake Balls make them a smart pick-me-up. Whether you need a post-workout snack or a midday treat, they provide quick energy while keeping portion sizes in check. With their mix of nutrients and satisfying texture, they’re a guilt-free way to enjoy dessert.

How it fits in a healthy lifestyle

White Chocolate Raspberry Cheesecake Balls fit seamlessly into a balanced diet when enjoyed in moderation. Their small size makes portion control effortless, so you can satisfy your sweet tooth without derailing your goals. If you follow a gluten-free lifestyle, these treats can be a great option when made with gluten-free graham crackers or alternative binders.

For those focused on heart health, the raspberries’ fiber content supports digestion and may help maintain healthy cholesterol levels. Pair them with a source of protein, like Greek yogurt, for a more balanced snack. If you’re looking for more dessert ideas that align with wellness, check out our guide to healthy dessert swaps or explore gluten-free treats for additional inspiration. By incorporating these bites into a varied diet, you can enjoy flavor and nutrition without compromise.

Print
clock clock iconcutlery cutlery iconflag flag iconfolder folder iconinstagram instagram iconpinterest pinterest iconfacebook facebook iconprint print iconsquares squares iconheart heart iconheart solid heart solid icon

White Chocolate Raspberry Cheesecake Balls


  • Author: Chef Emy

Description

Delicious bite-sized cheesecake balls with a tangy raspberry swirl and coated in creamy white chocolate.


Ingredients

Scale

For the Crust:

  • 8 oz cream cheese, softened
  • 1/2 cup powdered sugar
  • 1 tsp vanilla extract
  • 1/2 cup graham cracker crumbs
  • 1/4 cup raspberry preserves
  • 8 oz white chocolate, melted
  • 1 tsp coconut oil

Instructions

1. Prepare the Crust:

  1. In a mixing bowl, beat the cream cheese, powdered sugar, and vanilla until smooth.
  2. Fold in the graham cracker crumbs until well combined.
  3. Gently swirl in the raspberry preserves for a marbled effect.
  4. Roll the mixture into 1-inch balls and place on a parchment-lined tray. Freeze for 30 minutes.
  5. Melt the white chocolate with coconut oil in a microwave-safe bowl, stirring every 30 seconds until smooth.
  6. Dip each cheesecake ball into the melted white chocolate, coating evenly. Place back on the tray and let set.

Notes

You can customize the seasonings to taste.

“`html

How to Prepare This Dish

Steps and time-saving tips

Start by crushing graham crackers into fine crumbs using a food processor or a zip-top bag and rolling pin. Meanwhile, soften the cream cheese in the microwave for 15-second intervals until it’s easy to stir. Combine the crumbs, cream cheese, powdered sugar, and raspberry jam in a large bowl, then mix until smooth. For even faster prep, use store-bought raspberry jam instead of homemade. Roll the mixture into tablespoon-sized balls and place them on a parchment-lined baking sheet. Chill them in the freezer for 20 minutes to firm up. While they set, melt the white chocolate in a microwave-safe bowl, stirring every 30 seconds to prevent burning. Dip each chilled ball into the melted chocolate using a fork, letting excess drip off. Return them to the baking sheet and drizzle with remaining chocolate for a decorative touch. If you’re short on time, skip the drizzle and simply roll the balls in sprinkles or crushed freeze-dried raspberries for instant color. Refrigerate the White Chocolate Raspberry Cheesecake Balls for at least an hour before serving. For a make-ahead option, freeze them for up to a month and thaw overnight in the fridge.

Mistakes I’ve made and learned from

My first batch of White Chocolate Raspberry Cheesecake Balls turned into a sticky mess because I didn’t chill the mixture long enough. Now I always freeze the balls for a full 20 minutes—no shortcuts! Another time, I overheated the white chocolate, causing it to seize. The fix? Low heat and patience, just like I use for my chocolate truffles. If your chocolate thickens too much, stir in a teaspoon of coconut oil to smooth it out. Also, don’t skip the parchment paper unless you enjoy scraping hardened chocolate off pans. Trust me, I learned that the hard way after ruining a baking sheet. For more foolproof dessert tips, check out my guide to no-bake desserts, which saved me during a summer heatwave when my kitchen felt like an oven.

“`

Cultural Connection and Variations

Where this recipe comes from

White Chocolate Raspberry Cheesecake Balls blend the creamy luxury of cheesecake with the bright tang of raspberries, creating a treat that feels both indulgent and refreshing. While cheesecake itself traces back to ancient Greece, this modern twist likely emerged in American kitchens, where bakers love experimenting with no-bake desserts. Some say the recipe gained popularity in the Midwest, where potlucks and holiday gatherings call for easy, shareable sweets.

Around the world, similar treats take different forms. In France, you might find raspberry-studded ganache truffles, while Italian cooks often fold mascarpone into their dessert balls for a silkier texture. My family, however, always adds a splash of almond extract to our White Chocolate Raspberry Cheesecake Balls, giving them a subtle nutty depth. Whether rolled in crushed nuts, coconut, or even cocoa powder, these little bites adapt beautifully to personal tastes and regional flavors.

How it fits in today’s cooking

Today, White Chocolate Raspberry Cheesecake Balls remain a favorite for their versatility. They fit perfectly into holiday cookie swaps, yet they’re simple enough for a weeknight dessert. Modern cooks often tweak the recipe—swapping in dairy-free cream cheese or using freeze-dried raspberries for a more intense flavor. Some even turn them into cake pops for parties, proving how adaptable this treat can be.

Seasonal variations keep the recipe fresh year-round. In summer, fresh raspberries add juiciness, while winter bakers might drizzle them with dark chocolate for a richer finish. Whether you’re making them for a special occasion or just because, these cheesecake balls pair wonderfully with a cup of coffee or a glass of dessert wine. No matter how you serve them, they’re a delicious nod to both tradition and creativity.

Taste and Texture

What makes it delicious

White Chocolate Raspberry Cheesecake Balls deliver a luxurious bite that balances rich, creamy sweetness with a bright, fruity tang. The velvety cheesecake center melts in your mouth, while the crushed graham cracker crumbs add a delicate crunch. Fresh raspberries infuse every bite with a juicy burst of tartness, perfectly complementing the smooth white chocolate coating. Meanwhile, the subtle vanilla undertones and buttery crust create a fragrant, irresistible aroma. Whether chilled or at room temperature, White Chocolate Raspberry Cheesecake Balls offer a dessert experience that feels indulgent yet refreshingly light.

Boosting the flavor

For an extra layer of decadence, drizzle melted dark chocolate over the finished White Chocolate Raspberry Cheesecake Balls to contrast the sweetness with a deep, bittersweet note. Alternatively, roll them in toasted coconut flakes or finely chopped nuts for added texture. A pinch of citrus zest, like lemon or orange, can brighten the raspberry flavor even further. If you love experimenting with flavors, try swapping the graham crackers for chocolate wafer crumbs or adding a splash of raspberry liqueur to the cheesecake filling. These small tweaks make each bite even more memorable.

Tips for Success

Best practices for results

Always chill your cream cheese mixture for at least 30 minutes before rolling the White Chocolate Raspberry Cheesecake Balls. This step prevents sticky dough and ensures smooth shaping. Meanwhile, use high-quality white chocolate for coating, as cheaper brands may seize or clump. For even more flavor, gently fold fresh raspberry puree into the cheesecake filling instead of relying solely on extracts. Finally, keep a baking sheet lined with parchment paper ready so your finished treats set perfectly without sticking.

Mistakes to avoid

One common error is overmixing the cheesecake filling, which makes it too soft to hold its shape. Instead, blend just until combined for firm yet creamy White Chocolate Raspberry Cheesecake Balls. Another issue is rushing the coating process—if the chocolate is too warm, it will slide right off. For a flawless finish, temper your chocolate or follow our guide on how to melt chocolate perfectly. Also, avoid skipping the freeze step before dipping; 15 minutes in the freezer helps the balls stay round. If you struggle with cracking, check out our tips for fixing cracked cheesecake to troubleshoot the issue.

Serving and Pairing Suggestions

How to serve this dish

White Chocolate Raspberry Cheesecake Balls shine as a delightful treat for any occasion. For a festive touch, arrange them on a tiered dessert stand with fresh raspberries and mint leaves. Alternatively, drizzle melted white chocolate over the top for an elegant finish. These bite-sized delights work perfectly at holiday gatherings, bridal showers, or even as a sweet ending to a brunch spread. To make them extra special, serve them in mini cupcake liners or on a chilled platter to keep them firm.

What goes well with it

Pair White Chocolate Raspberry Cheesecake Balls with a cup of freshly brewed coffee to balance their creamy sweetness. If you prefer something cooler, try a glass of sparkling rosé for a refreshing contrast. For a full dessert spread, serve them alongside our Classic Vanilla Bean Cheesecake or Decadent Chocolate Truffles to create a variety of flavors. Each pairing enhances the rich, fruity notes of the cheesecake balls while keeping the experience light and satisfying.

How do you make White Chocolate Raspberry Cheesecake Balls from scratch?

To make White Chocolate Raspberry Cheesecake Balls, mix cream cheese, crushed graham crackers, powdered sugar, and raspberry jam. Roll the mixture into balls, chill, then dip them in melted white chocolate for a creamy, fruity treat.

Can you freeze White Chocolate Raspberry Cheesecake Balls?

Yes, White Chocolate Raspberry Cheesecake Balls freeze well for up to 2 months. Place them on a parchment-lined tray to freeze solid, then transfer to an airtight container. Thaw in the fridge before serving.

What’s the best way to melt white chocolate for dipping cheesecake balls?

For smooth dipping, melt white chocolate in a double boiler or microwave at 50% power in 30-second intervals. Stir frequently to prevent burning—this ensures your White Chocolate Raspberry Cheesecake Balls have a glossy, even coating.

Can I use fresh raspberries instead of jam in cheesecake balls?

Fresh raspberries add excess moisture, so jam works better for White Chocolate Raspberry Cheesecake Balls. If using fresh fruit, reduce liquid by blending and straining, or mix with a thickener like cornstarch.