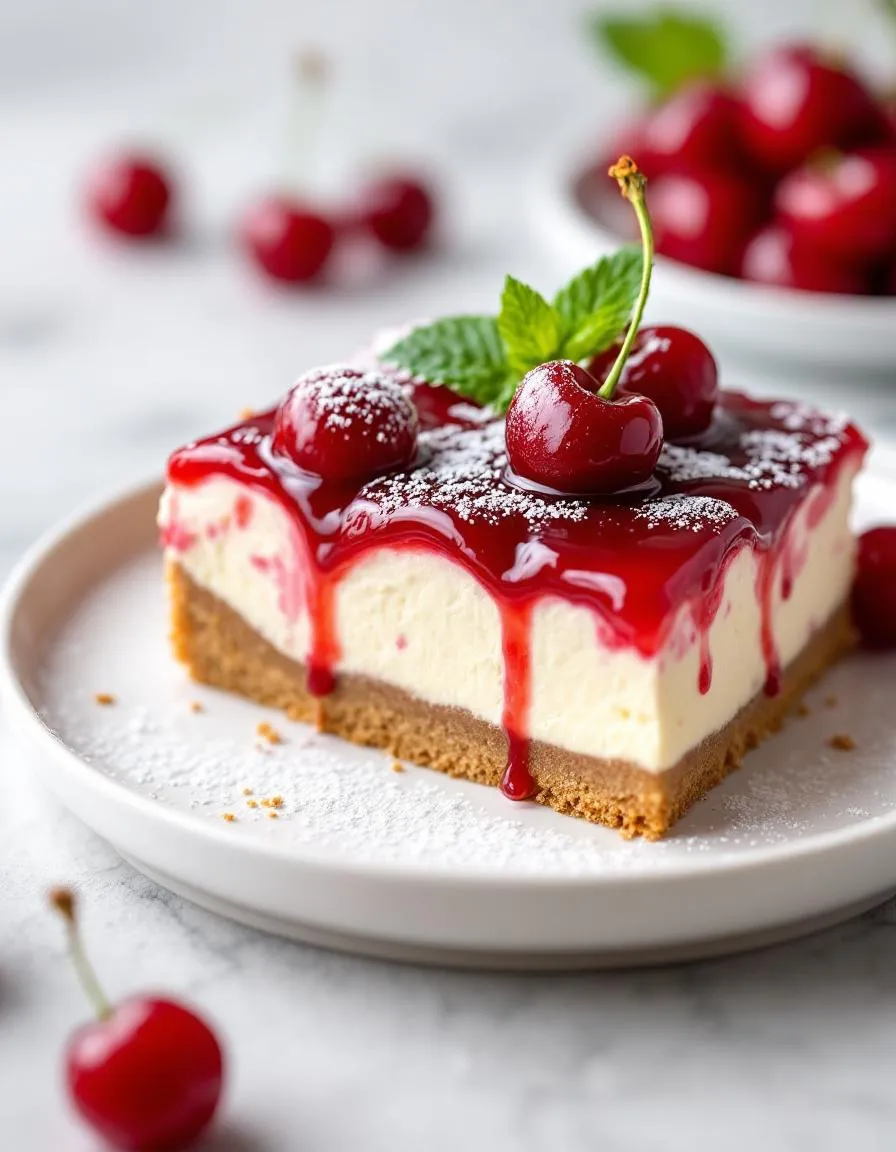
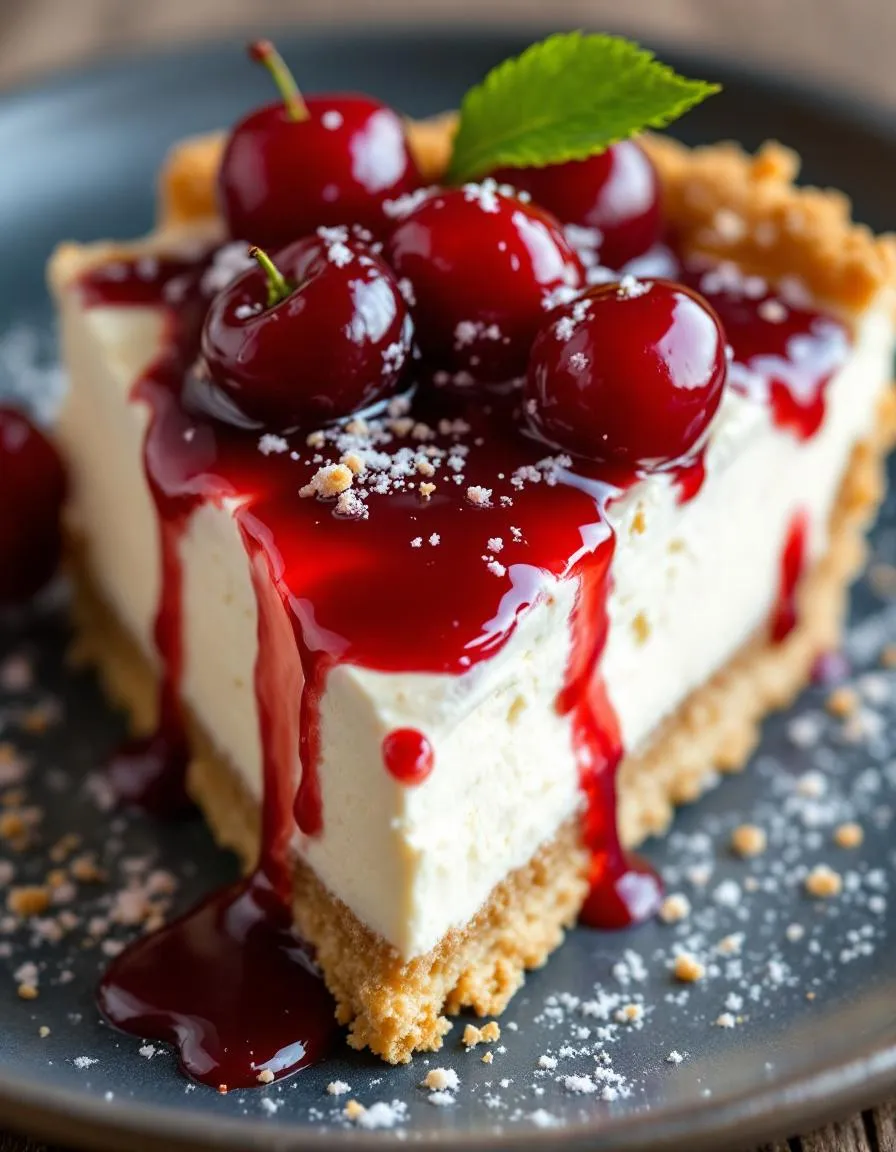
Best Pistachio Raspberry Cake – Moist & Flavorful

best-pistachio-raspberry-cake

Introduction

Hi there! I’m Emily, the heart and soul behind brekcakes.com. From my earliest memories, the kitchen has always been a place of warmth and creativity. It’s where I discovered the magic of turning simple ingredients into extraordinary meals and learned that the best dishes are often made with love as the main ingredient.

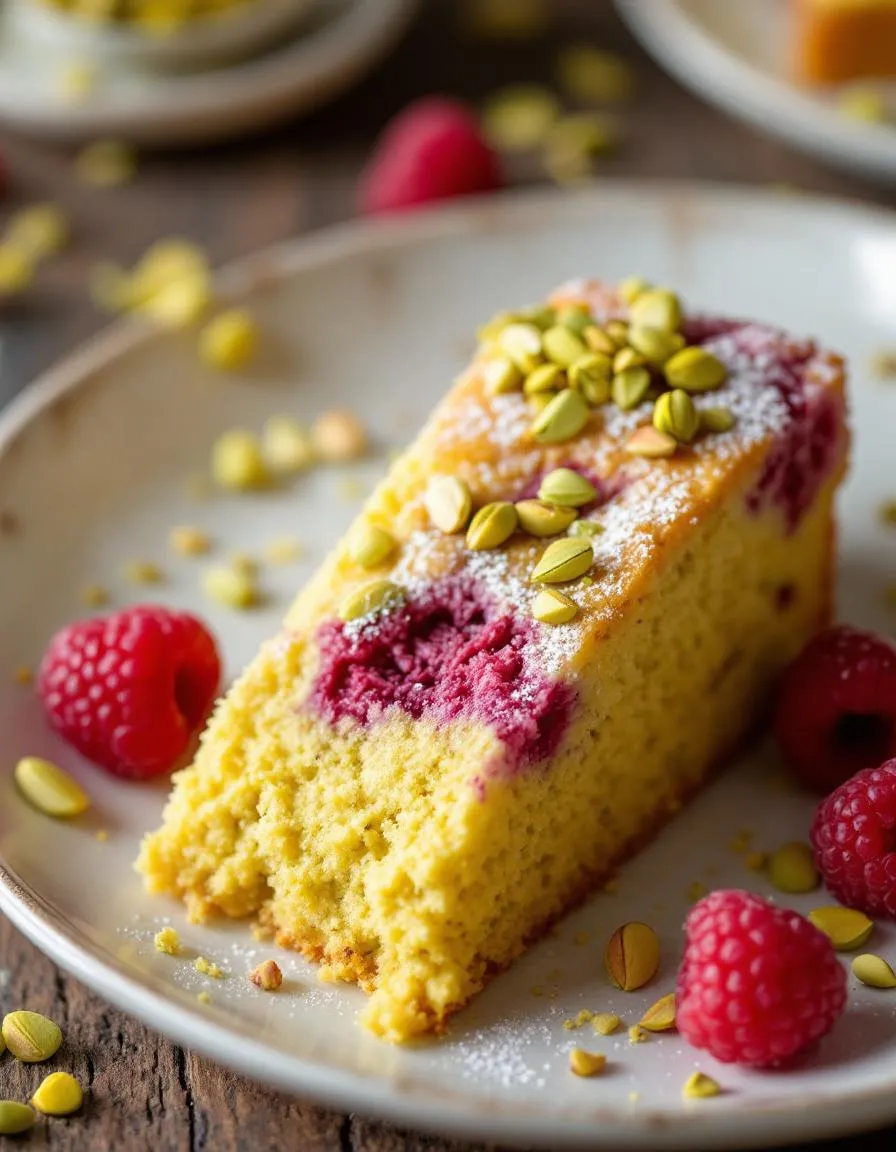
There’s something undeniably special about baking a cake that feels like a celebration in every bite. That’s exactly why I adore this Pistachio Raspberry Cake—it’s a symphony of nutty richness and bright, fruity tang that instantly lifts your mood. Whether you’re baking for a special occasion or simply treating yourself, this recipe promises to deliver joy in every slice. Plus, the vibrant colors make it as stunning as it is delicious.

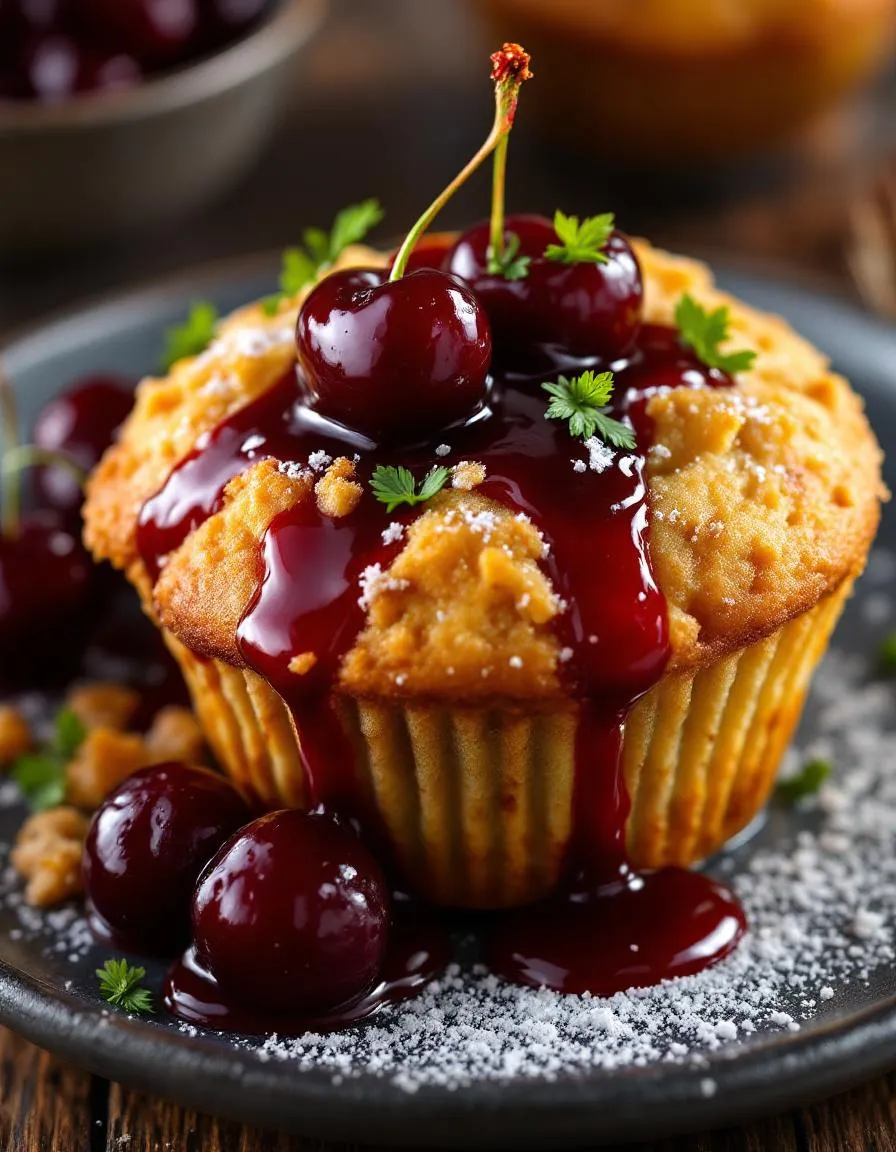
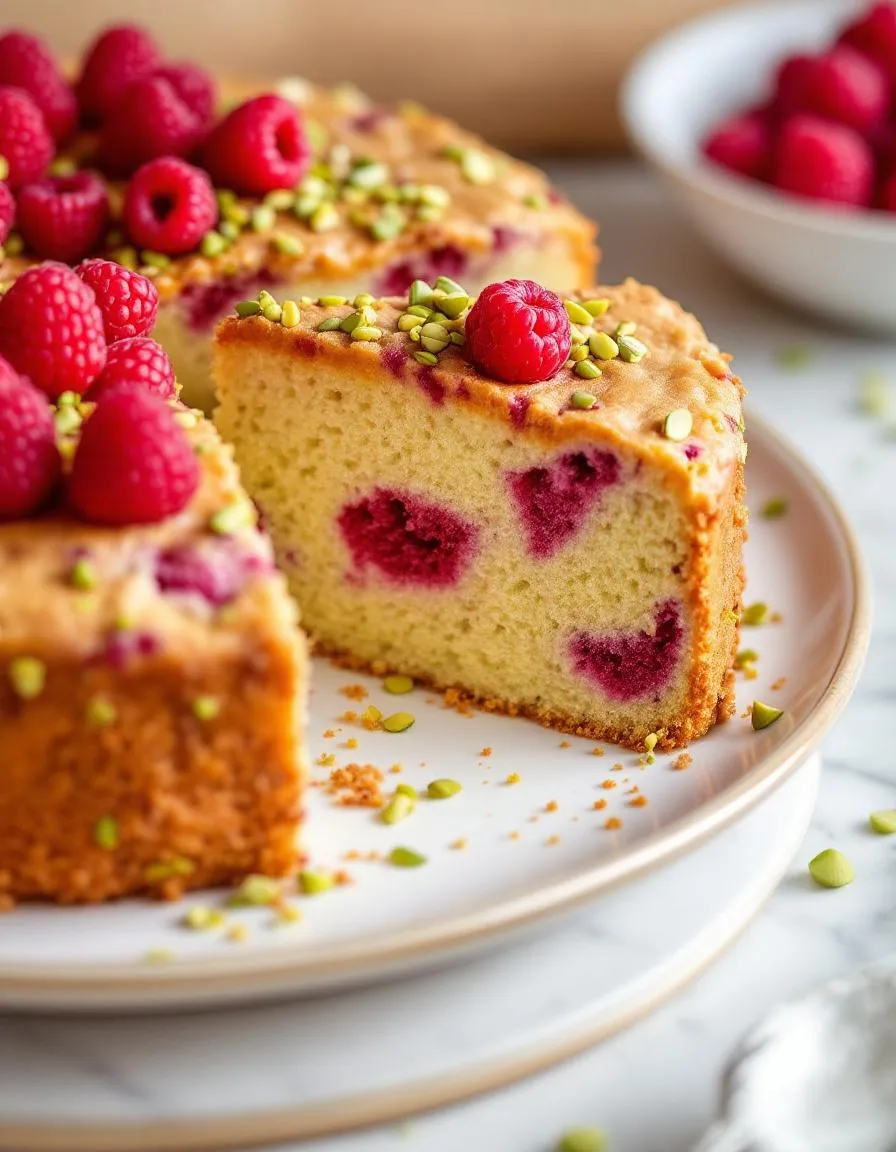
Pistachio Raspberry Cake combines the earthy depth of finely ground pistachios with the zesty sweetness of fresh raspberries, creating a balance that’s both sophisticated and comforting. The tender crumb, layered with silky buttercream and jewel-like raspberry filling, makes it a showstopper for birthdays, anniversaries, or even just a weekend indulgence. At brekcakes.com, we believe desserts should be as memorable as the moments they celebrate, and this cake perfectly embodies that philosophy. If you love unique flavor pairings, you’ll also enjoy our Lavender Honey Cake, which offers a similarly elegant twist. And for more tips on achieving flawless layers, check out our guide on how to bake perfect cake layers every time.

Why I Love This Recipe

This Pistachio Raspberry Cake holds a special place in my heart because it reminds me of summer picnics with my grandmother. She always paired pistachios with fresh berries, and the first time I recreated her flavor combination in cake form, I knew I had to share it. The way the raspberries cut through the richness of the pistachio batter feels like a little masterpiece—one that never fails to bring smiles to the table.

Health and Nutrition

Why it’s good for your body

Pistachio Raspberry Cake packs a delicious punch while offering surprising health benefits. First, pistachios deliver heart-healthy fats and plant-based protein, which help keep you full and energized. Meanwhile, raspberries add a burst of antioxidants that fight inflammation and support immune health. Together, these ingredients make Pistachio Raspberry Cake a smarter indulgence than traditional desserts.

Additionally, this cake contains natural sweetness from raspberries, reducing the need for excessive refined sugar. The fiber in both pistachios and raspberries also aids digestion and promotes steady blood sugar levels. Because of this, you can enjoy Pistachio Raspberry Cake without the usual energy crash. Plus, pistachios provide essential nutrients like vitamin B6 and potassium, which support brain function and muscle health.

Finally, the vibrant colors of Pistachio Raspberry Cake aren’t just eye-catching—they signal a wealth of phytonutrients. These compounds protect your cells and may even boost skin health. Whether you savor it as a treat or a post-workout snack, this cake delivers flavor and nourishment in every bite.

How it fits in a healthy lifestyle

Pistachio Raspberry Cake fits seamlessly into balanced eating habits, especially if you prioritize nutrient-dense ingredients. For gluten-free diets, simply swap traditional flour with almond or oat flour—it’s an easy adjustment that keeps the cake just as delicious. If you’re focused on heart health, the unsaturated fats in pistachios align perfectly with your goals.

This cake also works well for meal prepping or mindful snacking. Pair a small slice with a protein-packed smoothie bowl for a satisfying breakfast, or enjoy it as an afternoon pick-me-up with a calming herbal tea. Because it’s rich in wholesome ingredients, Pistachio Raspberry Cake helps you indulge without derailing your wellness routine. Moderation is key, but with this dessert, every bite brings both joy and nourishment.

Print
clock clock iconcutlery cutlery iconflag flag iconfolder folder iconinstagram instagram iconpinterest pinterest iconfacebook facebook iconprint print iconsquares squares iconheart heart iconheart solid heart solid icon

Pistachio Raspberry Cake


  • Author: Chef Emy

Description

A moist and flavorful cake with the nutty taste of pistachios and the tart sweetness of raspberries.
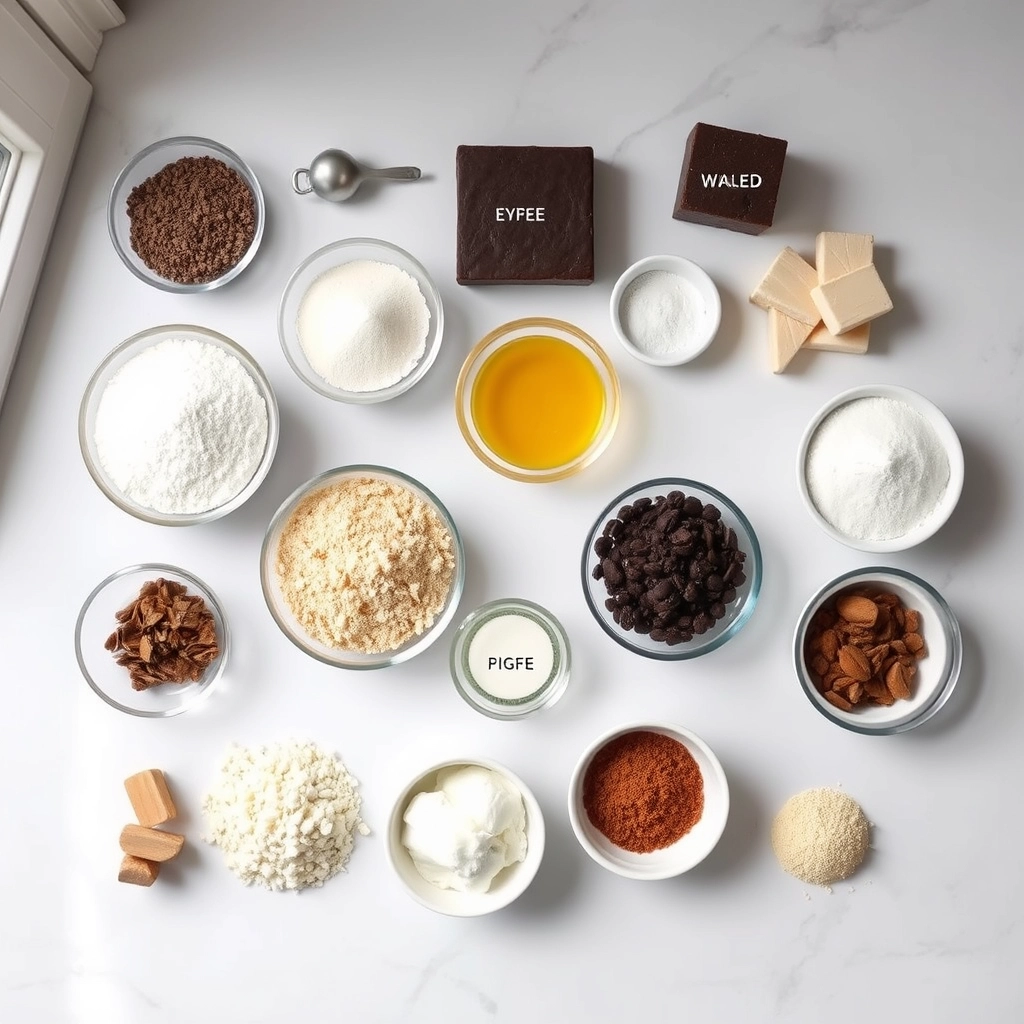
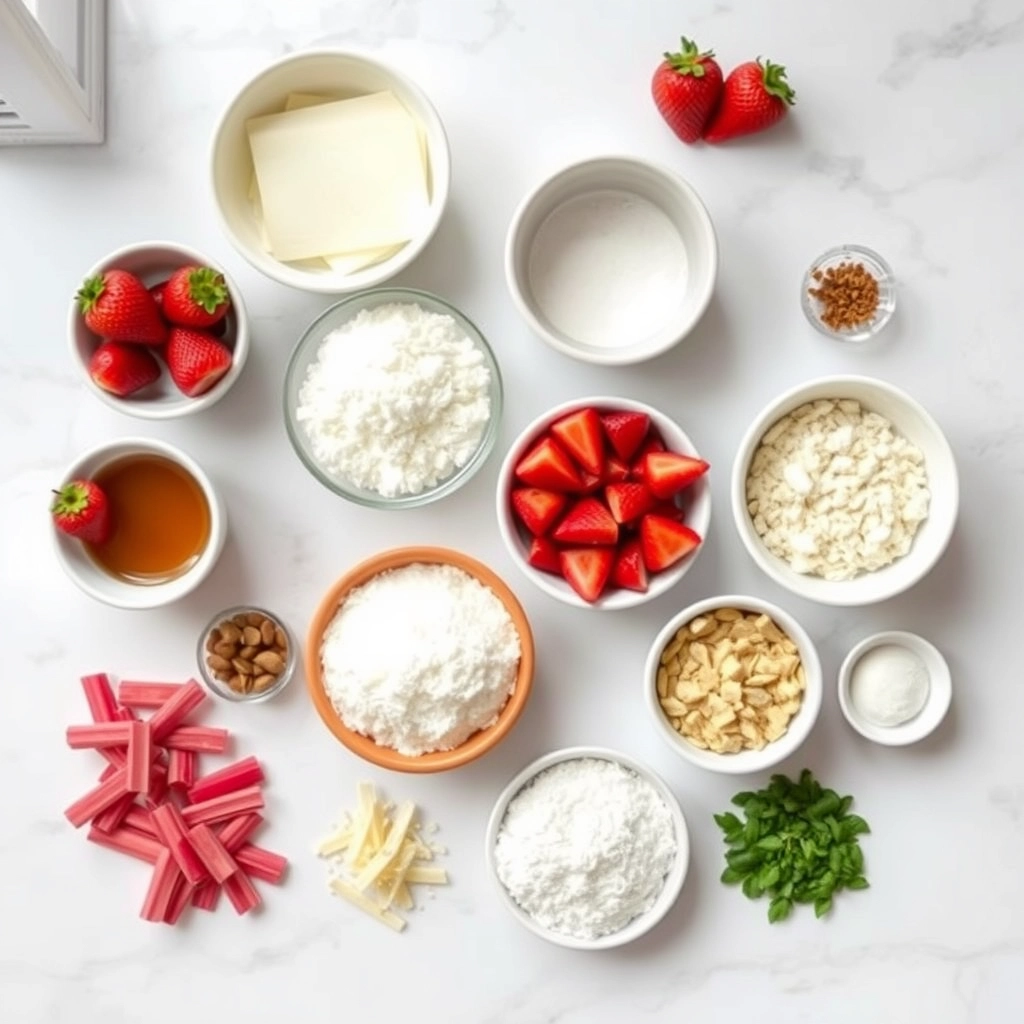
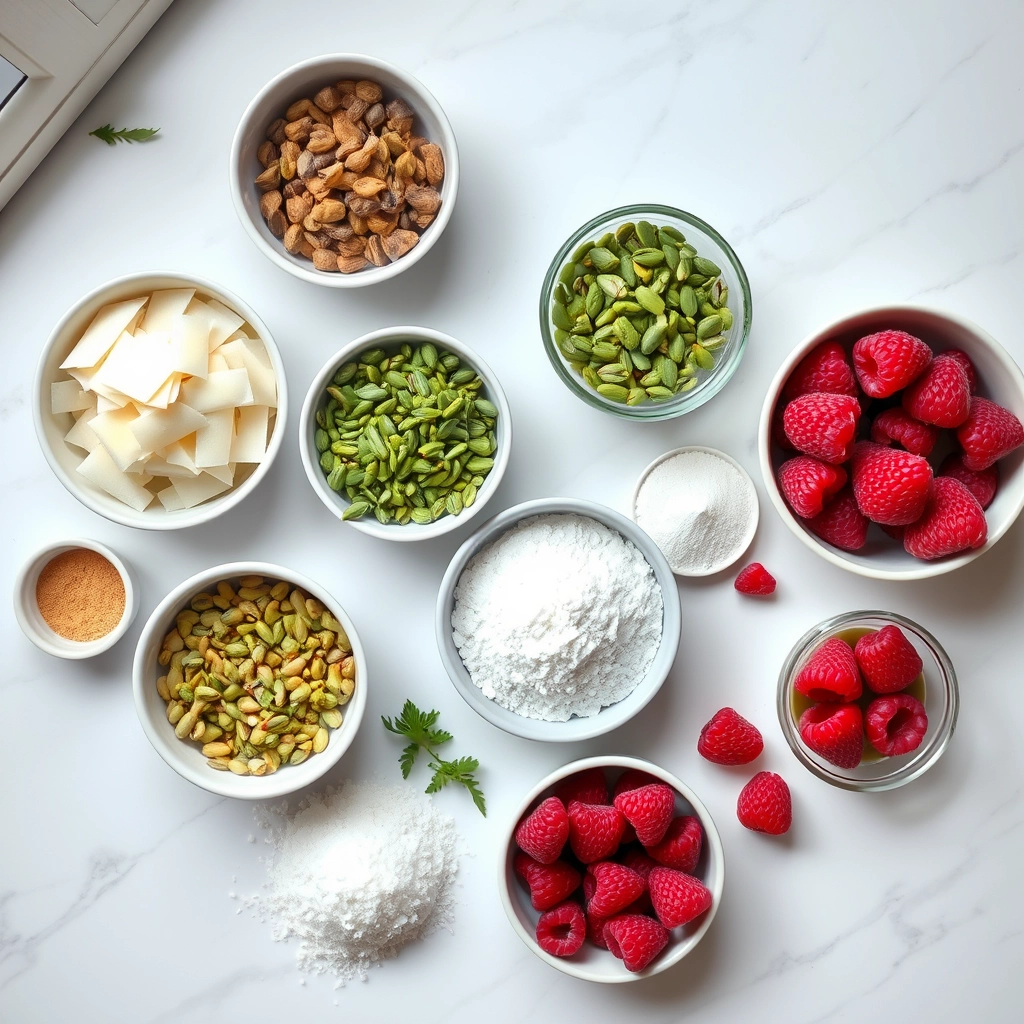

Ingredients

Scale

For the Crust:

  • 1 1/2 cups all-purpose flour
  • 1/2 cup ground pistachios
  • 1 cup granulated sugar
  • 1/2 cup unsalted butter, softened
  • 2 large eggs
  • 1/2 cup milk
  • 1 tsp vanilla extract
  • 1 1/2 tsp baking powder
  • 1/4 tsp salt
  • 1 cup fresh raspberries
  • 1/4 cup chopped pistachios for garnish

Instructions

1. Prepare the Crust:

  1. Preheat oven to 350°F (175°C). Grease and flour a 9-inch round cake pan.
  2. In a bowl, whisk together flour, ground pistachios, baking powder, and salt.
  3. In a separate bowl, cream butter and sugar until light and fluffy. Beat in eggs one at a time, then stir in vanilla.
  4. Alternately add the flour mixture and milk to the butter mixture, beginning and ending with the flour mixture.
  5. Gently fold in raspberries. Pour batter into the prepared pan.
  6. Bake for 30-35 minutes or until a toothpick inserted in the center comes out clean.
  7. Cool in the pan for 10 minutes, then transfer to a wire rack to cool completely.
  8. Sprinkle with chopped pistachios before serving.

Notes

You can customize the seasonings to taste.

How to Prepare This Dish

Steps and time-saving tips

Start by preheating your oven to 350°F and greasing two 8-inch cake pans. Meanwhile, whisk together the dry ingredients—flour, ground pistachios, baking powder, and salt—in a large bowl. In another bowl, cream the butter and sugar until fluffy, then beat in the eggs one at a time. Alternate adding the dry mix and buttermilk to the wet ingredients, mixing just until combined. Fold in the raspberries gently to avoid crushing them. Divide the batter evenly between the pans and bake for 25-30 minutes, or until a toothpick comes out clean. Let the cakes cool completely before frosting.

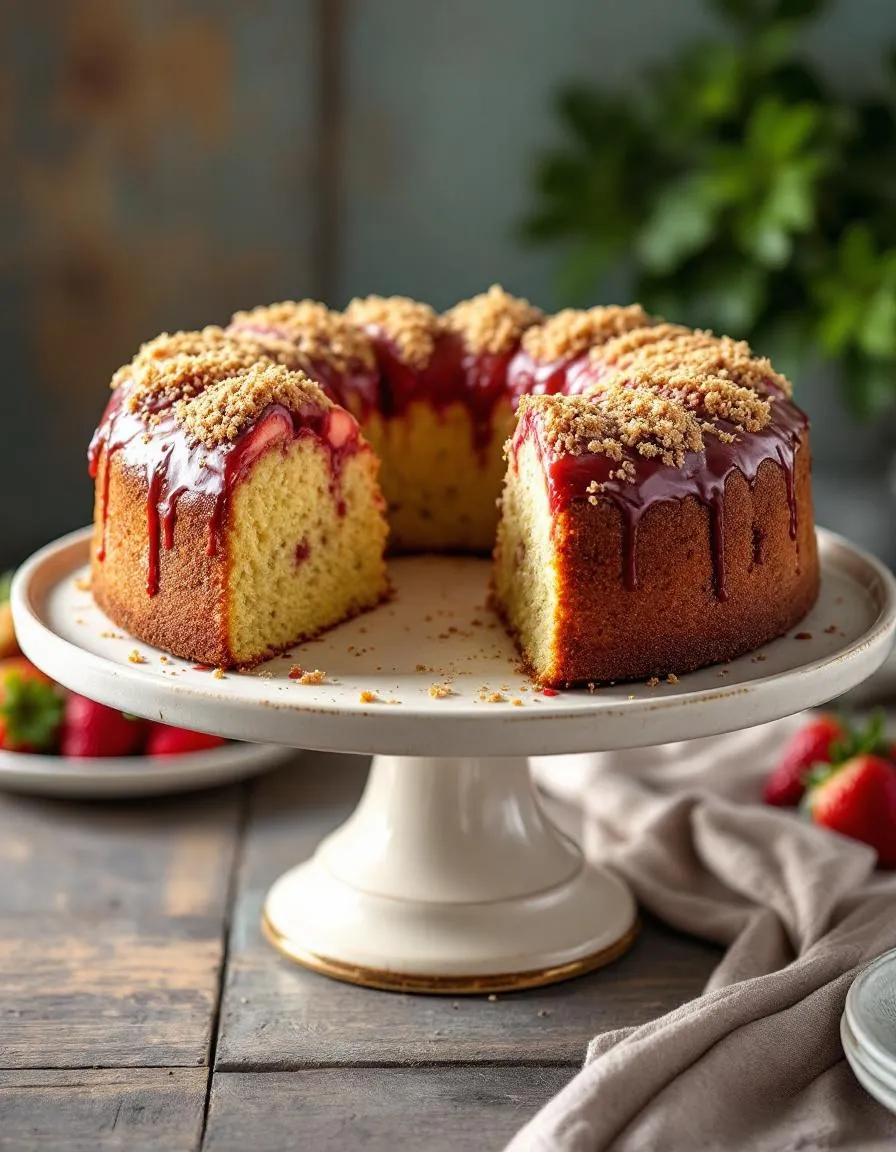
For the frosting, whip the cream cheese and butter until smooth, then gradually add powdered sugar and a splash of vanilla. Stir in finely chopped pistachios for extra crunch. To save time, you can bake the cakes a day ahead and store them wrapped in the fridge. When assembling, spread a generous layer of frosting between the cakes, then cover the top and sides. Garnish with fresh raspberries and a drizzle of pistachio crumble. Chill the Pistachio Raspberry Cake for at least an hour before serving to let the flavors meld.

Mistakes I’ve made and learned from

Early on, I overmixed the batter after adding the raspberries, which turned them into mush and made the cake dense. Now, I fold them in at the very end with just a few strokes. Another blunder? Not letting the cakes cool fully before frosting—the heat melted the layers into a slippery mess. If you’re short on time, pop them in the freezer for 15 minutes. For more cake troubleshooting, check out my guide on common baking mistakes. Also, if your frosting feels too thin, my frosting consistency tips will help you nail the perfect texture every time.

Cultural Connection and Variations

Where this recipe comes from

The Pistachio Raspberry Cake we know today blends Middle Eastern and European influences into one irresistible dessert. Pistachios, a staple in Persian and Turkish sweets, bring their rich, nutty flavor, while raspberries add a tart brightness popular in French patisserie. Together, they create a cake that feels both luxurious and familiar. In Iran, bakers often layer ground pistachios into dense, syrup-soaked cakes, while Italian bakers might fold them into light sponge layers with fresh berries. My grandmother, however, always added a splash of rosewater to her Pistachio Raspberry Cake, giving it a floral twist that made it unforgettable.

Around the world, variations pop up based on local tastes and ingredients. Some bakers swap raspberries for pomegranate arils in the fall, while others drizzle the cake with honey instead of frosting. In my family, we serve it at spring gatherings, symbolizing renewal with its vibrant green and pink hues. Whether you enjoy it as a tea-time treat or a showstopper at celebrations, Pistachio Raspberry Cake carries a story in every slice.

How it fits in today’s cooking

Today, Pistachio Raspberry Cake shines as a versatile dessert that fits both casual brunches and elegant dinners. Modern cooks love it for its balance of textures and flavors, making it a favorite for everything from birthday celebrations to wedding receptions. Many bakers now experiment with gluten-free or vegan versions, using almond flour or coconut yogurt to keep it inclusive. Its seasonal flexibility also helps—think fresh raspberries in summer or frozen ones for a cozy winter bake.

Social media has given this cake a second life, with food bloggers showcasing it as a centerpiece for holidays or a stylish weekend project. Whether you stick to the classic recipe or add your own twist, Pistachio Raspberry Cake remains a timeless crowd-pleaser. After all, who can resist a dessert that’s as photogenic as it is delicious?

Taste and Texture

What makes it delicious

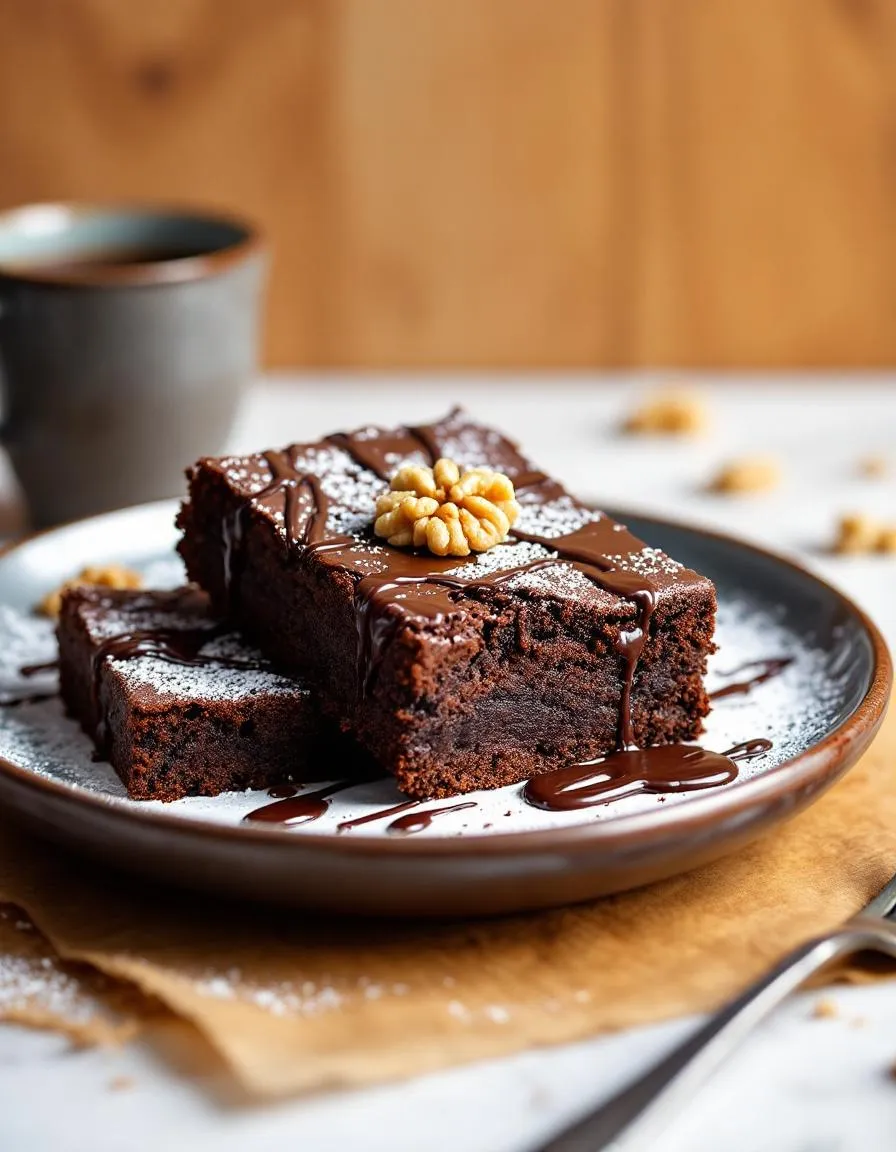
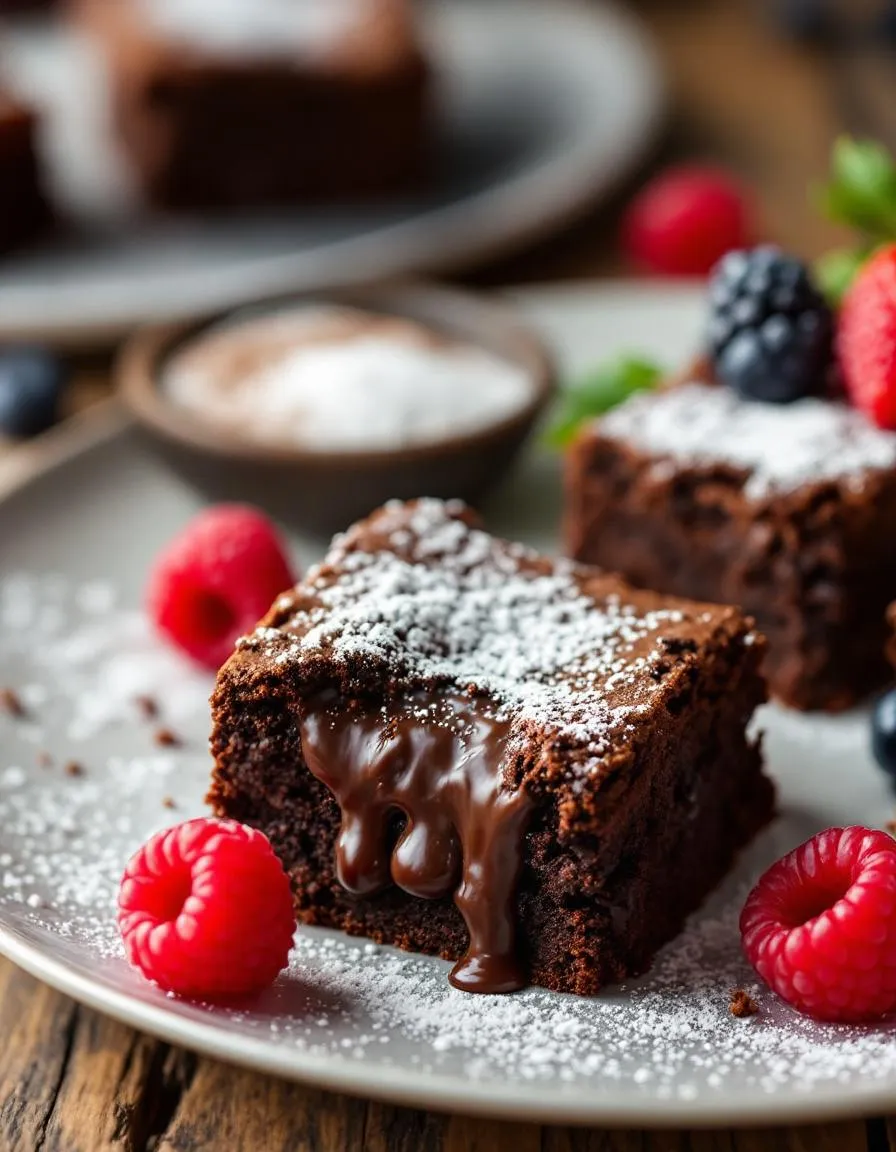
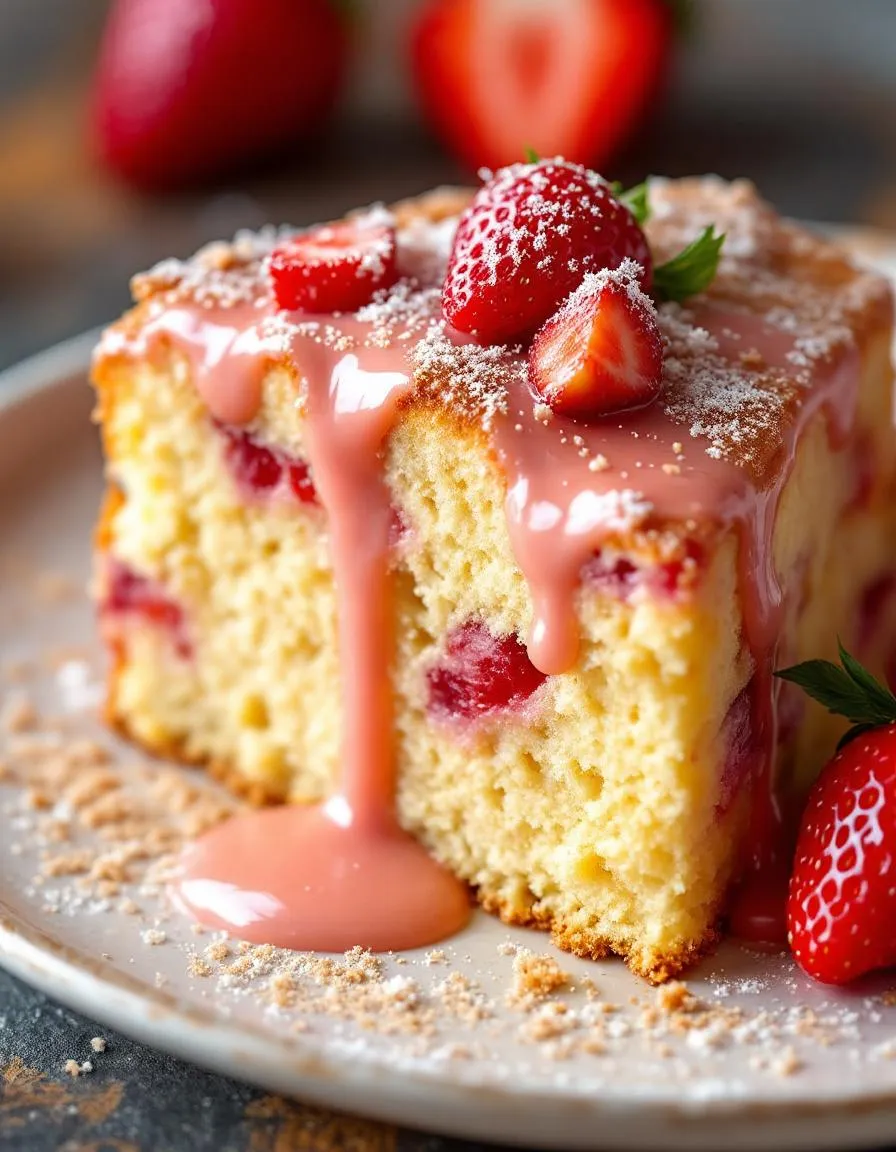
The Pistachio Raspberry Cake is a dreamy balance of nutty richness and bright fruity tang. Each bite delivers a buttery, moist crumb infused with earthy pistachio flavor, while juicy raspberries burst with a sweet-tart contrast. The aroma alone is irresistible—warm vanilla and toasted nuts mingle with the fresh, floral scent of berries. Meanwhile, the texture plays with contrasts: silky cream cheese frosting melts against the cake’s tender layers, and crushed pistachios add a satisfying crunch. Whether served chilled or at room temperature, Pistachio Raspberry Cake feels indulgent yet refreshing, making it a standout dessert for any occasion.

Boosting the flavor

Elevate your Pistachio Raspberry Cake with a few easy tweaks. For extra depth, fold a pinch of cardamom into the batter—its citrusy warmth complements the pistachios beautifully. Alternatively, drizzle each slice with a quick raspberry coulis for a glossy, vibrant finish. If you love texture, sprinkle toasted coconut flakes or dark chocolate shavings on top. For a nuttier twist, try swapping half the pistachios with almond flour, as shown in this pistachio baking guide. Whether you keep it simple or experiment, these small upgrades make every bite even more memorable.

Tips for Success

Best practices for results

For the best Pistachio Raspberry Cake, always measure your ingredients precisely, especially the flour and baking powder. Additionally, make sure your butter and eggs reach room temperature before mixing, as this creates a smoother batter. To enhance the flavor, lightly toast the pistachios before folding them into the batter. Finally, let the cake cool completely before adding any toppings to prevent sogginess.

Mistakes to avoid

Avoid overmixing the batter, as this can make your Pistachio Raspberry Cake dense instead of light and fluffy. Similarly, don’t skip lining your pan with parchment paper, or the cake might stick. If your raspberries sink to the bottom, toss them in flour first—this trick keeps them evenly distributed. For more baking tips, check out our guides on perfect cake texture and ingredient substitutions to troubleshoot any issues.

Serving and Pairing Suggestions

How to serve this dish

Showcase your Pistachio Raspberry Cake by slicing it into elegant wedges and arranging them on a vintage cake stand. For a pop of color, garnish each plate with fresh raspberries and a sprinkle of crushed pistachios. Alternatively, serve individual mini cakes for a charming twist at brunch or afternoon tea. This dessert shines during holidays like Easter or Mother’s Day, but its vibrant flavors also make it a showstopper at summer gatherings. To elevate the presentation, dust the top with powdered sugar just before serving.

What goes well with it

Pair your Pistachio Raspberry Cake with a warm cup of Earl Grey tea for a classic combination—the bergamot notes beautifully balance the tart raspberries. For a richer experience, try it alongside our homemade vanilla ice cream, which melts into the cake’s moist layers. If you prefer something bubbly, a glass of Prosecco adds a festive touch and cuts through the sweetness. For another delightful pairing, explore our lemon lavender cookies, which share the same floral undertones as the pistachios.

What makes Pistachio Raspberry Cake so flavorful?

Pistachio Raspberry Cake gets its rich flavor from the nutty taste of ground pistachios combined with the tangy sweetness of fresh raspberries. The contrast between the earthy pistachio and bright raspberry creates a balanced, decadent dessert that stands out.

Can I use frozen raspberries for Pistachio Raspberry Cake?

Yes, frozen raspberries work well in Pistachio Raspberry Cake, but thaw and drain them first to avoid excess moisture. Fresh raspberries give a brighter flavor, but frozen are a convenient alternative when fresh aren’t available.

How do I prevent my Pistachio Raspberry Cake from drying out?

To keep your Pistachio Raspberry Cake moist, avoid overbaking and brush the layers with simple syrup before assembling. Store the cake in an airtight container and serve it at room temperature for the best texture.

What frosting pairs best with Pistachio Raspberry Cake?

Cream cheese frosting or whipped mascarpone complements Pistachio Raspberry Cake perfectly, balancing the tartness of the raspberries. For a lighter option, try a vanilla buttercream to let the pistachio and raspberry flavors shine.

Best Brownies with No Cocoa Powder – Easy Recipe

best-brownies-no-cocoa-powder

Introduction

Hi there! I’m Emily, the heart and soul behind brekcakes.com. From my earliest memories, the kitchen has always been a place of warmth and creativity. It’s where I discovered the magic of turning simple ingredients into extraordinary meals and learned that the best dishes are often made with love as the main ingredient.

Craving rich, fudgy brownies but don’t have cocoa powder on hand? Trust me, I’ve been there too. Whether you’re mid-baking and realize you’re out or simply prefer a smoother, melt-in-your-mouth texture, these Brownies with No Cocoa Powder deliver all the decadence without the hassle. Plus, they’re perfect for those days when you need a quick chocolate fix but want to keep things simple.

Brownies with No Cocoa Powder might sound unconventional, but they’re a game-changer for bakers who want deep chocolate flavor without relying on cocoa. Instead, we use high-quality chocolate bars or chips, which melt into a velvety batter for an ultra-rich result. This approach not only simplifies the process but also creates a denser, more indulgent treat. If you’ve ever struggled with dry or crumbly brownies, this method ensures a fudgy consistency every time. On brekcakes.com, we celebrate recipes that balance ease and excellence, just like our Easy Fudgy Brownies. Whether you’re a beginner or a seasoned baker, these brownies fit seamlessly into our philosophy of stress-free, crowd-pleasing desserts. And if you love creative twists, you’ll adore our Flourless Chocolate Cake, another cocoa-free favorite.

Why I Love This Recipe

These brownies hold a special place in my heart because they remind me of my college days, when cocoa powder was a luxury but chocolate bars were always within reach. I’d whip up a batch to share with friends during late-night study sessions, and the simplicity of the recipe never failed to impress. Even now, they’re my go-to when I want a dessert that feels gourmet without demanding extra effort. There’s something deeply satisfying about transforming basic ingredients into something extraordinary, and that’s exactly what these Brownies with No Cocoa Powder do.

Health and Nutrition

Why it’s good for your body

Brownies with No Cocoa Powder offer a unique twist on the classic treat while still delivering satisfying flavor. Since they skip cocoa powder, they often rely on ingredients like nut butters or dates for richness, which add natural sweetness and healthy fats. Additionally, many recipes for Brownies with No Cocoa Powder use whole-grain flours or almond flour, boosting fiber and protein content.

Moreover, these brownies can be easier on sensitive stomachs. Without cocoa powder, they avoid potential digestive discomfort for those sensitive to caffeine or tannins. Instead, ingredients like bananas or applesauce often provide moisture, contributing potassium and vitamin C. Transitioning to this version means you still enjoy a decadent dessert while prioritizing gut-friendly choices.

Finally, Brownies with No Cocoa Powder often accommodate dietary preferences effortlessly. Many recipes are naturally gluten-free or dairy-free, making them inclusive for various needs. Whether you use dark chocolate chunks or tahini for depth, you’re incorporating antioxidants or heart-healthy fats. Ultimately, this treat proves you don’t need cocoa powder to enjoy a nutrient-dense indulgence.

How it fits in a healthy lifestyle

Brownies with No Cocoa Powder fit seamlessly into balanced eating habits. They work well as a post-workout snack when packed with protein-rich ingredients like almond butter or chickpeas. For those managing sugar intake, recipes with natural sweeteners like maple syrup or dates offer a smarter alternative to refined sugars.

If you follow a gluten-free diet, these brownies often use almond or oat flour, aligning perfectly with your needs. Pair them with a gluten-free baking guide to explore more adaptable recipes. They also support heart health when made with unsaturated fats from nuts or seeds instead of butter.

For everyday enjoyment, portion control is simple since these brownies tend to be denser and more satisfying. Keep them in your rotation alongside wholesome snack ideas to maintain energy levels without guilt. Whether you prioritize protein, fiber, or allergen-friendly options, this dessert proves that indulgence and nutrition can coexist.

Print
clock clock iconcutlery cutlery iconflag flag iconfolder folder iconinstagram instagram iconpinterest pinterest iconfacebook facebook iconprint print iconsquares squares iconheart heart iconheart solid heart solid icon

Brownies with No Cocoa Powder


  • Author: Chef Emy

Description

Rich and fudgy brownies made without cocoa powder, using melted chocolate for deep flavor.


Ingredients

Scale

For the Crust:

  • 1 cup unsalted butter
  • 8 oz semi-sweet chocolate, chopped
  • 1 1/2 cups granulated sugar
  • 4 large eggs
  • 1 tsp vanilla extract
  • 1 cup all-purpose flour
  • 1/2 tsp salt
  • 1/2 cup chopped walnuts (optional)

Instructions

1. Prepare the Crust:

  1. Preheat oven to 350°F (175°C). Grease a 9×13-inch baking pan.
  2. Melt butter and chocolate together in a double boiler or microwave, stirring until smooth.
  3. Whisk in sugar, then eggs one at a time. Stir in vanilla.
  4. Fold in flour and salt until just combined. Add walnuts if using.
  5. Spread batter evenly in prepared pan. Bake for 25-30 minutes until set but still slightly soft.
  6. Cool completely before cutting into squares.

Notes

You can customize the seasonings to taste.

How to Prepare This Dish

Steps and time-saving tips

Start by preheating your oven to 350°F and greasing an 8×8 baking pan. Meanwhile, melt the butter in a microwave-safe bowl, then whisk in the sugar until smooth. Crack the eggs one at a time into the mixture, blending well after each addition. Stir in the vanilla extract for that rich depth of flavor. Next, gently fold in the flour and salt, mixing just until combined—overworking the batter can make your brownies with no cocoa powder dense. For extra fudgy results, toss in chocolate chips or chunks before spreading the batter evenly into the pan. Bake for 20-25 minutes, checking for doneness with a toothpick. Let them cool slightly before slicing, as this prevents crumbling. To save time, measure all your ingredients beforehand and use a stand mixer for effortless blending. If you’re short on butter, try substituting half with oil for equally moist brownies.

Mistakes I’ve made and learned from

Early on, I rushed the melting process and ended up with grainy brownies because the sugar didn’t dissolve properly. Now, I always whisk the butter and sugar thoroughly until glossy. Another blunder? Overbaking. I once left them in just five minutes too long, and they turned cakey instead of fudgy. A trick I learned from my baking troubleshooting guide is to pull them out when the edges are set but the center still jiggles slightly. Also, skipping the cooling step led to messy slices—patience pays off! For more foolproof tips, my perfect brownie texture post breaks down the science behind chewiness versus crispness. Trust me, a few tweaks make all the difference.

Cultural Connection and Variations

Where this recipe comes from

Brownies with No Cocoa Powder have a surprisingly rich history, tracing back to early 20th-century American kitchens. Bakers often relied on melted chocolate instead of cocoa powder, creating a fudgier, denser texture. Meanwhile, some families passed down their own versions, swapping ingredients based on what they had. For example, my grandmother used dark chocolate bars during wartime shortages, making her Brownies with No Cocoa Powder a cherished treat.

Around the world, variations pop up in unexpected places. In Mexico, some cooks add cinnamon or chili for a spicy kick. French patisseries might fold in nutty praline or hazelnut paste. Even within the U.S., regional twists shine—think brown sugar in the South or espresso powder in Seattle. No matter the version, Brownies with No Cocoa Powder always deliver that unmistakable richness.

How it fits in today’s cooking

Today, Brownies with No Cocoa Powder still win hearts as a versatile dessert. Busy home cooks love them for quick potlucks, while bakers elevate them with gourmet chocolate. They also fit seamlessly into modern diets—gluten-free flours or plant-based butter work just as well. Plus, they’re a staple for holidays, especially when paired with festive treats like peppermint mocha cupcakes.

Meal preppers even bake them ahead for weeknight sweet cravings. And with trends like salted caramel desserts on the rise, creative twists keep this classic fresh. Whether you’re a nostalgic baker or a trendsetter, Brownies with No Cocoa Powder adapt to every kitchen and occasion.

Taste and Texture

What makes it delicious

Brownies with No Cocoa Powder surprise the palate with a rich, buttery depth that melts on the tongue. Instead of relying on cocoa, these treats get their decadent flavor from dark chocolate chunks, which create pockets of gooey sweetness in every bite. The texture strikes a perfect balance—chewy at the edges yet irresistibly fudgy in the center. Meanwhile, a hint of vanilla and a touch of brown sugar add warm, caramel-like notes that make each square feel like a cozy indulgence. Best of all, the aroma of melted chocolate and toasted nuts (if you add them) fills the kitchen, promising pure comfort.

Boosting the flavor

For an extra flavor boost, try folding in a handful of toasted walnuts or pecans to add crunch and earthy depth. Alternatively, a sprinkle of flaky sea salt right after baking heightens the sweetness of Brownies with No Cocoa Powder. If you love bold contrasts, swirl in a ribbon of peanut butter before baking or serve warm with a drizzle of salted caramel sauce. A dash of espresso powder or cinnamon can also deepen the chocolatey richness without overpowering the dessert. The possibilities are endless!

Tips for Success

Best practices for results

For perfect Brownies with No Cocoa Powder every time, always measure your ingredients precisely. Use room-temperature eggs and butter to ensure a smooth batter. Additionally, line your baking pan with parchment paper for easy removal and clean edges. Bake just until a toothpick comes out with a few moist crumbs—overbaking makes them dry. Finally, let the brownies cool completely before slicing to keep them fudgy and intact.

Mistakes to avoid

Avoid overmixing the batter, as this can make your Brownies with No Cocoa Powder dense instead of tender. Instead, gently fold the ingredients until just combined. Also, don’t skip greasing the parchment paper—this extra step prevents sticking. If you’re unsure about substitutions, check our guide on baking substitutions for safe swaps. Finally, resist cutting warm brownies; for clean slices, follow our tips for cutting desserts neatly every time.

Serving and Pairing Suggestions

How to serve this dish

Brownies with No Cocoa Powder shine when served warm with a dusting of powdered sugar or a drizzle of caramel. For a festive touch, top them with fresh berries or a scoop of vanilla ice cream. Meanwhile, if you’re hosting a brunch, cut them into bite-sized squares and arrange them on a tiered stand for easy sharing. Additionally, these brownies make a delightful holiday gift when wrapped in parchment paper and tied with a ribbon. Their rich, fudgy texture pairs perfectly with a cozy afternoon tea or a casual dessert spread.

What goes well with it

First, try pairing Brownies with No Cocoa Powder with a cold glass of milk or a creamy latte for a classic combo. The smooth dairy cuts through the richness, balancing each bite. Alternatively, serve them alongside a tangy fruit compote, like our berry compote, to add a refreshing contrast. Finally, for an indulgent twist, warm the brownies and top them with a scoop of our homemade vanilla ice cream. The melty ice cream enhances their gooey texture, making every spoonful irresistible.

Can you make brownies without cocoa powder?

Yes, you can make delicious brownies without cocoa powder by using melted chocolate or chocolate chips instead. Brownies with no cocoa powder still achieve a rich, fudgy texture with the right balance of ingredients like butter, sugar, and flour.

What can I substitute for cocoa powder in brownies?

For brownies with no cocoa powder, substitute melted dark or semi-sweet chocolate (1 oz per 3 tbsp of cocoa powder). Alternatively, use carob powder or black cocoa powder for a different flavor profile while maintaining the classic brownie texture.

Do no-cocoa brownies taste different?

Brownies with no cocoa powder often taste richer and smoother because melted chocolate provides a deeper, creamier flavor. The texture may also be slightly denser compared to cocoa-based recipes, which some bakers prefer.

How do you keep no-cocoa brownies from being too sweet?

Balance the sweetness in brownies with no cocoa powder by using bittersweet chocolate (70% cacao or higher) and reducing granulated sugar by 1-2 tablespoons. Adding a pinch of salt or espresso powder also enhances depth without overpowering the chocolate flavor.

Easy Churro Bites – Crispy Cinnamon Sugar Treats

easy-churro-bites-cinnamon-sugar

Introduction

Hi there! I’m Emily, the heart and soul behind brekcakes.com. From my earliest memories, the kitchen has always been a place of warmth and creativity. It’s where I discovered the magic of turning simple ingredients into extraordinary meals and learned that the best dishes are often made with love as the main ingredient.

There’s something undeniably comforting about the aroma of cinnamon and sugar wafting through the air, especially when it comes from freshly fried Churro Bites. Whether you’re hosting a cozy gathering or simply craving a sweet treat, these bite-sized delights bring joy to every occasion. Moreover, they’re incredibly easy to make, so you can enjoy that irresistible churro flavor without the hassle of shaping long sticks. Trust me, once you try them, you’ll understand why they’ve become a staple in my kitchen.

Churro Bites are the perfect fusion of crispy, golden exteriors and soft, doughy centers, all coated in a generous layer of cinnamon sugar. Unlike traditional churros, their small size makes them ideal for sharing (or not—no judgment here). They’re also incredibly versatile, whether you’re serving them as a party snack, a dessert, or even a fun breakfast surprise. At brekcakes.com, we celebrate recipes that balance simplicity and indulgence, and these Churro Bites fit right in. If you love easy yet impressive treats, you’ll adore our Cinnamon Roll Bites or our Homemade Donut Holes—both share that same irresistible charm.

Why I Love This Recipe

Churro Bites hold a special place in my heart because they remind me of lazy Sunday mornings with my family. My dad used to whip up a batch while my siblings and I eagerly waited, plates in hand. Now, I recreate that same magic for my own kids, and their faces light up just like mine did. It’s more than a recipe—it’s a little bite of nostalgia, and I hope it becomes a cherished tradition in your home too.

Health and Nutrition

Why it’s good for your body

Churro Bites pack more than just irresistible flavor. First, they offer a quick energy boost thanks to their carbohydrate content, making them a great pick-me-up during busy days. Additionally, when prepared with wholesome ingredients like cinnamon and minimal oil, they provide antioxidants that support overall wellness. Cinnamon, for instance, may help regulate blood sugar levels, which adds a surprising health perk to these sweet treats.

Moreover, Churro Bites can be a smarter indulgence compared to heavily processed desserts. By baking instead of deep-frying, you reduce excess fat without sacrificing crunch. Furthermore, if you opt for whole-grain flour or almond flour, you increase fiber and protein content. This small tweak makes Churro Bites more satisfying and nourishing.

Finally, sharing Churro Bites with loved ones adds a mental health benefit. Joyful eating experiences foster connection, and mindful enjoyment prevents overindulgence. So whether you savor them solo or share, these bites bring both flavor and balance.

How it fits in a healthy lifestyle

Churro Bites fit seamlessly into a balanced diet when enjoyed mindfully. Pair them with protein-rich foods like Greek yogurt or nuts to stabilize blood sugar and keep cravings in check. For gluten-free diets, simply swap traditional flour for almond or oat flour—our gluten-free baking guide makes this easy.

If you’re watching sugar intake, try reducing the coating or using natural sweeteners like coconut sugar. Churro Bites also work well as a post-workout snack when paired with a protein shake. For more heart-healthy dessert ideas, explore our low-sugar treats collection. Remember, moderation is key, and these bites prove that tasty and nutritious can go hand in hand.

Print
clock clock iconcutlery cutlery iconflag flag iconfolder folder iconinstagram instagram iconpinterest pinterest iconfacebook facebook iconprint print iconsquares squares iconheart heart iconheart solid heart solid icon

Churro Bites


  • Author: Chef Emy

Description

Crispy, cinnamon-sugar coated churro bites perfect for snacking.


Ingredients

Scale

For the Crust:

  • 1 cup water
  • 2 1/2 tbsp sugar
  • 1/2 tsp salt
  • 2 tbsp vegetable oil
  • 1 cup all-purpose flour
  • 1/2 cup sugar
  • 1 tsp ground cinnamon
  • Vegetable oil for frying

Instructions

1. Prepare the Crust:

  1. In a saucepan, combine water, 2 1/2 tbsp sugar, salt, and 2 tbsp vegetable oil. Bring to a boil.
  2. Remove from heat and stir in flour until a dough forms.
  3. Heat oil in a deep fryer or large pot to 375°F (190°C).
  4. Transfer dough to a piping bag with a star tip and pipe 1-inch pieces into the hot oil. Fry until golden brown.
  5. Drain on paper towels, then toss in cinnamon-sugar mixture while still warm.

Notes

You can customize the seasonings to taste.

How to Prepare This Dish

Steps and time-saving tips

Start by heating oil in a deep pot to 350°F—use a candy thermometer to avoid guesswork. While the oil heats, whisk together flour, sugar, and a pinch of salt in a bowl. In a separate saucepan, bring water, butter, and vanilla to a boil, then quickly stir it into the dry mix until smooth. Let the dough cool slightly before piping it into 2-inch strips directly into the hot oil. Fry the Churro Bites in small batches for even cooking, turning them once until golden brown. Drain them on paper towels, then toss in cinnamon sugar while still warm. For a time-saving hack, prep the dough ahead and refrigerate it for up to an hour—just let it soften slightly before piping. If you’re short on time, skip the piping bag and roll teaspoon-sized portions by hand for rustic, bite-sized treats. Serve immediately with chocolate sauce or dulce de leche for dipping, and watch them disappear.

Mistakes I’ve made and learned from

My first batch of Churro Bites turned out soggy because I overcrowded the pot—lesson learned! Frying in small batches keeps the oil temperature steady for crisp results. Another blunder? Skipping the dough’s cooling time, which made piping a sticky mess. Now, I let it rest for 5 minutes, and it handles like a dream. If your dough feels too thick, add a splash of warm water, but avoid overmixing. For more troubleshooting tips, check out my guide on perfect frying temperatures. And if you love these, you’ll adore my cinnamon twists, which use a similar dough but bake instead of fry. Trust me, practice makes perfect—even my flops tasted delicious!

Cultural Connection and Variations

Where this recipe comes from

Churro Bites trace their roots back to Spain, where street vendors first fried dough sticks and dusted them with cinnamon sugar. Legend says Portuguese sailors brought the concept from China, but Spanish cooks made it their own by piping the dough into star shapes and serving it with thick hot chocolate. Nowadays, you’ll find Churro Bites everywhere from Mexican ferias to American food trucks, each with a twist. In Madrid, they keep it classic with a crisp shell and soft center. Meanwhile, in Mexico, they often fill them with dulce de leche or roll them in spicy chili powder for a sweet-heat kick.

My abuela put her own spin on Churro Bites by adding a pinch of nutmeg to the dough and frying them in small, bite-sized pieces—perfect for sharing during family gatherings. Some bakers even swap the traditional wheat flour for gluten-free blends or bake instead of fry for a lighter version. No matter how you make them, Churro Bites carry that irresistible crunch and warmth that feels like a hug from generations past.

How it fits in today’s cooking

Churro Bites still steal the spotlight at festivals and cozy nights in, proving some treats never go out of style. Modern cooks love them because they’re quick to whip up yet feel special—whether as a dessert for dinner parties or a fun project for kids. Some even sneak them into brunch menus alongside coffee cake muffins, pairing the cinnamon notes perfectly.

Thanks to air fryers and healthier ingredient swaps, Churro Bites fit into today’s flexible cooking routines. Food bloggers experiment with vegan butter or coconut sugar, while meal preppers freeze batches for last-minute cravings. Whether you stick to tradition or play with variations, one thing’s clear: Churro Bites bridge the gap between heritage and modern convenience, one crispy bite at a time.

Taste and Texture

What makes it delicious

Churro Bites deliver a warm, cinnamon-sugar hug with every bite. The crispy golden exterior shatters to reveal a soft, pillowy center, while the fragrant blend of cinnamon and vanilla lingers in the air. Each piece offers a satisfying crunch followed by a melt-in-your-mouth tenderness, thanks to the perfect fry and light dusting of sugar. The buttery undertones and subtle warmth from the cinnamon make Churro Bites irresistible, especially when served fresh. Whether you dip them in chocolate or enjoy them plain, their cozy, comforting flavor keeps you reaching for more.

Boosting the flavor

Elevate your Churro Bites by experimenting with bold twists. Try rolling them in a mix of cocoa powder and sugar for a rich chocolatey kick, or drizzle them with homemade caramel sauce for a buttery contrast. For a spicy twist, add a pinch of cayenne to the cinnamon sugar—it’s a game-changer. Pair them with a scoop of vanilla bean ice cream to balance the warmth with cool creaminess. The options are endless, so don’t hesitate to get creative!

Tips for Success

Best practices for results

Always chill the dough for at least 30 minutes before piping your Churro Bites. This step prevents spreading and helps them hold their shape. Use a sturdy piping bag with a star tip for those classic ridges, and fry in small batches to maintain consistent oil temperature. For extra crispiness, toss the warm Churro Bites in cinnamon sugar immediately after frying. Finally, serve them fresh for the best texture and flavor.

Mistakes to avoid

Avoid overcrowding the frying pan, as this lowers the oil temperature and leads to greasy Churro Bites. Instead, fry in small batches for even cooking. Also, don’t skip the dough chilling step—warm dough spreads too much and loses its shape. If you’re new to frying, check out our guide on perfect frying temperatures for foolproof results. For more troubleshooting tips, explore our article on common dough mistakes to ensure your Churro Bites turn out light and crispy every time.

Serving and Pairing Suggestions

How to serve this dish

Serve Churro Bites warm for the ultimate crispy-on-the-outside, fluffy-on-the-inside experience. For a festive touch, arrange them on a wooden board or in mini paper cones for easy grabbing at parties. Meanwhile, dust them generously with cinnamon sugar and drizzle with melted chocolate or caramel for extra indulgence. These bite-sized treats shine at brunch gatherings, holiday celebrations, or even as a fun dessert after taco night. To elevate the presentation, add a sprinkle of powdered sugar or fresh berries on the side for a pop of color.

What goes well with it

Pair Churro Bites with a creamy dip like homemade dulce de leche for a rich, caramelized contrast. Alternatively, a side of vanilla ice cream turns them into an irresistible dessert. For drinks, try a frothy Mexican hot chocolate, as its warm spices perfectly complement the cinnamon sugar coating. Finally, a cold glass of horchata balances the sweetness with its refreshing, creamy finish.

What are Churro Bites made of?

Churro Bites are typically made from a simple dough of flour, water, butter, sugar, and eggs, rolled in cinnamon sugar for that classic sweet crunch. These bite-sized treats capture the same delicious flavor as traditional churros but in a more snackable form. You can also find variations with fillings like chocolate or dulce de leche.

How do you keep Churro Bites crispy?

To keep Churro Bites crispy, store them in an airtight container at room temperature for up to 2 days. Avoid refrigeration, as moisture makes them soggy. For longer freshness, freeze them and reheat in the oven to restore their crunch.

Can you bake Churro Bites instead of frying?

Yes! Baking Churro Bites is a healthier alternative to frying. Brush the dough pieces with melted butter before baking to help them crisp up, then roll them in cinnamon sugar while still warm. While baked Churro Bites are slightly less crunchy, they’re just as tasty.

What dips go well with Churro Bites?

Churro Bites pair perfectly with chocolate ganache, caramel sauce, or whipped cream for dipping. For a fun twist, try fruit-based dips like strawberry puree or dulce de leche. The bite-sized format makes them ideal for sharing with multiple dipping options.

Easy Mini Lemon Drop Cakes – Perfect Bite-Sized Treats

easy-mini-lemon-drop-cakes

Introduction

Hi there! I’m Emily, the heart and soul behind brekcakes.com. From my earliest memories, the kitchen has always been a place of warmth and creativity. It’s where I discovered the magic of turning simple ingredients into extraordinary meals and learned that the best dishes are often made with love as the main ingredient.

There’s something undeniably special about bite-sized desserts that bring instant joy. Whether you’re hosting a brunch, celebrating a milestone, or simply treating yourself, Mini Lemon Drop Cakes deliver a burst of sunshine in every bite. These delicate treats balance tangy lemon zest with sweet, fluffy cake, making them perfect for any occasion. Plus, their petite size means you can savor the flavor without overindulging—though I won’t judge if you reach for seconds!

Mini Lemon Drop Cakes are more than just a dessert—they’re a little slice of happiness. Imagine tender cake infused with fresh lemon juice, topped with a glossy glaze that adds just the right amount of sweetness. What makes them stand out is their versatility. They work equally well as an elegant party dessert or a cozy afternoon pick-me-up. If you love citrusy flavors, you’ll adore how these cakes brighten your day. For more inspiration, check out my citrus dessert collection, or explore tips for perfecting baking techniques to elevate your creations.

Why I Love This Recipe

Mini Lemon Drop Cakes hold a special place in my heart because they remind me of summer picnics with my grandmother. She always kept a tin of lemon cookies in her pantry, and the first time I recreated that zesty flavor in cake form, I knew I had to share it. These cakes capture that same nostalgic warmth while feeling fresh and modern. Every time I bake them, I’m transported back to those sunny afternoons—and now, I hope they’ll become part of your cherished memories too.

Health and Nutrition

Why it’s good for your body

Mini Lemon Drop Cakes pack a bright, citrusy punch while offering surprising health perks. First, the lemon zest and juice provide a hefty dose of vitamin C, which boosts immunity and supports glowing skin. Additionally, these mini cakes often use Greek yogurt or buttermilk, adding protein and gut-friendly probiotics. Unlike heavy desserts, Mini Lemon Drop Cakes feel light yet satisfying, making them a smarter indulgence.

Moreover, the natural acidity of lemons helps balance blood sugar levels, preventing energy crashes. When you bake with whole-grain flour or almond flour, Mini Lemon Drop Cakes gain extra fiber for better digestion. Finally, the small portion size encourages mindful eating, so you savor every bite without overdoing it. Whether you enjoy them as a snack or dessert, these treats deliver flavor and nutrition in every bite.

How it fits in a healthy lifestyle

Mini Lemon Drop Cakes fit seamlessly into balanced eating habits. For gluten-free diets, swap regular flour with almond or coconut flour—they still turn out moist and tender. If you’re watching sugar intake, reduce the sweetener slightly and let the natural lemon flavor shine. These cakes also pair well with fresh berries or a dollop of whipped cream for extra nutrients.

For heart-healthy choices, use olive oil instead of butter to keep saturated fats low. Prepping a batch ahead ensures you have portion-controlled treats ready, so you avoid less nutritious options. Craving more wholesome dessert ideas? Try our healthy dessert swaps for guilt-free sweetness. With Mini Lemon Drop Cakes, you enjoy a delightful treat that aligns with your wellness goals.

Print
clock clock iconcutlery cutlery iconflag flag iconfolder folder iconinstagram instagram iconpinterest pinterest iconfacebook facebook iconprint print iconsquares squares iconheart heart iconheart solid heart solid icon

Mini Lemon Drop Cakes


  • Author: Chef Emy

Description

Delightful bite-sized lemon cakes with a zesty glaze, perfect for tea time or dessert.


Ingredients

Scale

For the Crust:

  • 1 1/2 cups all-purpose flour
  • 1/2 cup granulated sugar
  • 1/4 cup unsalted butter, softened
  • 1/4 cup milk
  • 1 large egg
  • 1 tbsp lemon zest
  • 2 tbsp fresh lemon juice
  • 1 tsp baking powder
  • 1/4 tsp salt
  • 1 cup powdered sugar (for glaze)
  • 2 tbsp fresh lemon juice (for glaze)

Instructions

1. Prepare the Crust:

  1. Preheat oven to 350°F (175°C) and grease a mini muffin tin.
  2. In a bowl, whisk together flour, baking powder, and salt.
  3. In another bowl, cream butter and sugar until light. Add egg, milk, lemon zest, and lemon juice. Mix well.
  4. Gradually fold dry ingredients into wet ingredients until just combined.
  5. Spoon batter into mini muffin cups, filling each 2/3 full. Bake for 12-15 minutes or until a toothpick comes out clean.
  6. Cool cakes for 5 minutes in the tin, then transfer to a wire rack.
  7. Whisk powdered sugar and lemon juice for glaze. Drizzle over cooled cakes.

Notes

You can customize the seasonings to taste.

“`html

How to Prepare This Dish

Steps and time-saving tips

Start by preheating your oven to 350°F and lining a mini muffin tin with paper liners. Whisk together flour, baking powder, and salt in a medium bowl, then set it aside. In a large bowl, cream softened butter and sugar until light and fluffy, which takes about 3 minutes. Beat in eggs one at a time, followed by fresh lemon zest and juice for that bright citrus flavor. Gradually fold the dry ingredients into the wet mixture, alternating with buttermilk to keep the batter smooth. Spoon the batter into the prepared tin, filling each cup two-thirds full. Bake for 12-15 minutes until the edges turn golden and a toothpick comes out clean. Meanwhile, whip up a simple lemon glaze by whisking powdered sugar with more lemon juice until it reaches a drizzle-friendly consistency. Let the Mini Lemon Drop Cakes cool slightly before topping them with the glaze. For a time-saving trick, prepare the batter the night before and refrigerate it—just give it a quick stir before baking. If you’re short on time, skip the glaze and dust with powdered sugar instead.

Mistakes I’ve made and learned from

Early on, I overmixed the batter, which made my Mini Lemon Drop Cakes dense instead of light. Now, I stop folding as soon as the flour streaks disappear. Another blunder? Using cold butter straight from the fridge—it never creams properly. Softening it first makes all the difference, as I learned from my guide to common baking mistakes. Once, I also overbaked them by forgetting to set a timer, turning those tender cakes into dry bites. A kitchen timer is your best friend here. If you’re new to zesting, avoid the bitter white pith—something I wish I’d known before my first batch. For more citrus tips, check out my lemon baking deep dive. Trust me, these small tweaks save frustration and guarantee better results every time.

“`

Cultural Connection and Variations

Where this recipe comes from

Mini Lemon Drop Cakes trace their roots to the sunny Mediterranean, where lemons grow in abundance and citrus flavors brighten countless desserts. Originally inspired by Italian lemon pound cakes and French madeleines, these bite-sized treats evolved into a modern favorite. In Sicily, bakers often drizzle them with limoncello syrup, while in Greece, they might add a sprinkle of crushed pistachios for extra crunch. Meanwhile, my grandmother’s version included a dash of vanilla—her secret twist that made them unforgettable.

Across the U.S., Mini Lemon Drop Cakes take on regional personalities. In the South, bakers might swap butter for buttermilk to add tang, while coastal New Englanders sometimes fold in fresh blueberries for a summery vibe. During holidays, families from Poland to Portugal adapt them with spices like cardamom or saffron, proving how versatile these little cakes can be. Whether served at tea parties or as a lunchbox surprise, they carry a legacy of sunshine and simplicity.

How it fits in today’s cooking

Today, Mini Lemon Drop Cakes thrive as a cross between nostalgia and convenience. Busy home cooks love them for their quick bake time, and food bloggers rave about their Instagram-worthy charm. They’ve become a staple for spring brunches, often paired with berry chia pudding for a balanced spread. Even gluten-free bakers embrace them, using almond flour to keep the zesty flavor intact.

Modern twists keep the recipe fresh. Some bakers infuse the batter with lavender or top them with edible flowers, while others layer them into vegan trifles for a showstopping dessert. Whether you’re reviving family traditions or experimenting with new flavors, Mini Lemon Drop Cakes fit seamlessly into today’s kitchens—one bright, lemony bite at a time.

Taste and Texture

What makes it delicious

Mini Lemon Drop Cakes burst with bright, zesty flavor, thanks to fresh lemon zest and juice that infuse every bite. The tender crumb melts in your mouth, while a delicate glaze adds a sweet-tart finish that lingers pleasantly. Each cake carries a fragrant citrus aroma, making them irresistible even before the first bite. Meanwhile, a hint of vanilla in the batter balances the tanginess, creating a harmonious flavor profile. Mini Lemon Drop Cakes also boast a light, airy texture, with just enough density to feel satisfying without being heavy. Whether enjoyed warm or at room temperature, they deliver a refreshing yet indulgent experience.

Boosting the flavor

For an extra flavor boost, try swapping the vanilla extract with almond extract, which adds a subtle nutty depth that pairs beautifully with lemon. Alternatively, drizzle a berry compote over the cakes for a fruity contrast. A sprinkle of finely grated ginger or a pinch of cardamom in the batter can also elevate the citrus notes. If you love texture, top them with candied lemon slices for a crisp, sugary bite. These small tweaks keep the recipe simple while unlocking new layers of taste.

Tips for Success

Best practices for results

For the best Mini Lemon Drop Cakes, always use room-temperature butter to ensure a smooth batter. Additionally, zest your lemons finely to distribute flavor evenly without overpowering the cakes. Measure your flour correctly by spooning it into the cup and leveling it off—this prevents dense results. Finally, let the cakes cool completely before glazing so the lemon drizzle sets perfectly every time.

Mistakes to avoid

Avoid overmixing the batter, as this can make Mini Lemon Drop Cakes tough instead of tender. Instead, gently fold ingredients until just combined. Also, don’t skip greasing the pan, even if it’s nonstick—this ensures easy removal. For more baking tips, check out our guide on perfect baking temperatures. If your glaze is too thick, thin it with a teaspoon of milk at a time until it reaches the right consistency. Learn more about troubleshooting glazes in our frosting fixes post.

Serving and Pairing Suggestions

How to serve this dish

For a stunning presentation, arrange Mini Lemon Drop Cakes on a tiered dessert stand with fresh lemon slices and edible flowers. Alternatively, place them on individual plates with a dusting of powdered sugar for a simple yet elegant touch. These bite-sized treats shine at brunches, baby showers, or summer parties, where their bright flavor and petite size make them irresistible. To enhance their visual appeal, drizzle them with a light lemon glaze or top them with a dollop of whipped cream.

What goes well with it

Pair Mini Lemon Drop Cakes with a refreshing glass of iced lavender tea for a floral contrast that balances their tangy sweetness. If you prefer something richer, try them alongside our creamy vanilla bean panna cotta for a delightful dessert duo. For a brunch-friendly option, serve them with a side of fresh berries or our zesty mixed berry compote, which adds a juicy burst of flavor to every bite.

What are Mini Lemon Drop Cakes made of?

Mini Lemon Drop Cakes typically include flour, sugar, eggs, butter, fresh lemon juice, and zest for a bright citrus flavor. Some recipes add a lemon glaze or powdered sugar dusting for extra sweetness. These bite-sized treats are perfect for parties or a light dessert.

How do you keep Mini Lemon Drop Cakes moist?

To keep Mini Lemon Drop Cakes moist, avoid overbaking and store them in an airtight container with a slice of bread. The bread releases moisture, preventing the cakes from drying out. Adding a simple syrup or extra lemon glaze also helps retain freshness.

Can you freeze Mini Lemon Drop Cakes?

Yes, Mini Lemon Drop Cakes freeze well for up to 3 months. Wrap them tightly in plastic wrap or place them in a freezer-safe container. Thaw at room temperature and refresh with a light glaze before serving.

What’s the best way to serve Mini Lemon Drop Cakes?

Serve Mini Lemon Drop Cakes at room temperature with a dusting of powdered sugar or a drizzle of lemon glaze. They pair wonderfully with tea, coffee, or a scoop of vanilla ice cream for a refreshing dessert.

Best Banana Bread Mini Muffins – Easy Bite-Sized Treats

best-banana-bread-mini-muffins

Introduction

Hi there! I’m Emily, the heart and soul behind brekcakes.com. From my earliest memories, the kitchen has always been a place of warmth and creativity. It’s where I discovered the magic of turning simple ingredients into extraordinary meals and learned that the best dishes are often made with love as the main ingredient.

There’s something undeniably comforting about the aroma of freshly baked goods filling your home. Whether you’re a seasoned baker or just starting out, Banana Bread Mini Muffins bring that cozy feeling to life in bite-sized perfection. These little treats pack all the nostalgia of classic banana bread but with a fun, portable twist. Plus, they’re perfect for sharing—or keeping all to yourself. If you’ve ever stared at overripe bananas and wondered what to do, this recipe is your answer.

Banana Bread Mini Muffins are more than just a quick snack; they’re a celebration of simplicity and flavor. Unlike traditional loaves, these mini muffins bake faster, ensuring a tender crumb and golden edges every time. They’re ideal for busy mornings, lunchboxes, or even as a sweet ending to dinner. What makes them special is their versatility—add chocolate chips, nuts, or a sprinkle of cinnamon to make them your own. At brekcakes.com, we believe baking should be joyful and approachable, and this recipe embodies that spirit. If you love easy, crowd-pleasing treats, you’ll also adore our Classic Blueberry Muffins or Cinnamon Roll Bites for more bite-sized inspiration.

Why I Love This Recipe

Banana Bread Mini Muffins hold a special place in my heart because they remind me of weekend baking sessions with my mom. She always had a way of turning simple ingredients into something magical, and these muffins capture that same warmth. Even now, the smell of bananas and cinnamon takes me back to those moments. What I love most is how they bring people together—whether it’s my kids sneaking them fresh from the oven or friends raving about them at brunch. They’re little bites of happiness, and I hope they become a staple in your kitchen too.

Health and Nutrition

Why it’s good for your body

Banana Bread Mini Muffins pack a nutritious punch while satisfying your sweet tooth. First, ripe bananas provide natural sweetness, reducing the need for added sugar. Additionally, they deliver potassium, which supports heart health and muscle function. Because they’re mini, you can enjoy portion control without feeling deprived.

Moreover, Banana Bread Mini Muffins often include whole wheat flour or oats for extra fiber. Fiber keeps you full longer and aids digestion. If you add nuts or seeds, you’ll boost healthy fats and protein. These nutrients help stabilize energy levels, making them a smart snack choice.

Furthermore, bananas contain antioxidants like dopamine, which may support mood and brain health. When you bake Banana Bread Mini Muffins at home, you control the ingredients, avoiding processed additives. Whether as a breakfast bite or afternoon pick-me-up, these muffins offer both flavor and nourishment.

How it fits in a healthy lifestyle

Banana Bread Mini Muffins fit seamlessly into a balanced diet. For gluten-free diets, swap regular flour for almond or oat flour. If you’re watching sugar intake, use mashed bananas or a touch of honey instead of refined sugar. These small tweaks make them a versatile treat for various dietary needs.

Pair them with Greek yogurt or a handful of nuts for a protein-rich snack. They also work well as a pre-workout energy boost. For more healthy baking ideas, check out our guide to gluten-free baking tips. If you’re meal prepping, freeze a batch for quick, wholesome snacks anytime. Explore our meal prep breakfast ideas to keep your mornings nutritious and effortless.

Print
clock clock iconcutlery cutlery iconflag flag iconfolder folder iconinstagram instagram iconpinterest pinterest iconfacebook facebook iconprint print iconsquares squares iconheart heart iconheart solid heart solid icon

Banana Bread Mini Muffins


  • Author: Chef Emy

Description

Delicious bite-sized banana bread muffins, perfect for a quick snack or breakfast on the go.


Ingredients

Scale

For the Crust:

  • 2 ripe bananas, mashed
  • 1/3 cup melted butter
  • 1/2 cup sugar
  • 1 egg, beaten
  • 1 tsp vanilla extract
  • 1 tsp baking soda
  • 1 pinch salt
  • 1 1/2 cups all-purpose flour

Instructions

1. Prepare the Crust:

  1. Preheat oven to 350°F (175°C) and grease a mini muffin tin or line with mini muffin cups.
  2. In a large bowl, mix mashed bananas and melted butter. Stir in sugar, egg, and vanilla extract.
  3. Sprinkle baking soda and salt over the mixture and stir. Add flour and mix until just combined.
  4. Spoon batter into prepared mini muffin tin, filling each cup about 3/4 full.
  5. Bake for 12-15 minutes or until a toothpick inserted comes out clean.

Notes

You can customize the seasonings to taste.

How to Prepare This Dish

Steps and time-saving tips

Start by preheating your oven to 350°F and lightly greasing a mini muffin tin or lining it with paper liners. In a large bowl, whisk together the mashed bananas, melted butter, sugar, egg, and vanilla until smooth. Meanwhile, in another bowl, mix the flour, baking soda, salt, and cinnamon. Gradually fold the dry ingredients into the wet mixture, stirring just until combined—overmixing can make your Banana Bread Mini Muffins dense. For extra flavor, gently fold in chopped nuts or chocolate chips if desired. Spoon the batter into the muffin cups, filling each about two-thirds full. Bake for 12-15 minutes or until a toothpick comes out clean. To save time, mash ripe bananas ahead and store them in the fridge, or use a cookie scoop for evenly portioned batter. Let the muffins cool slightly before serving warm with a drizzle of honey or a sprinkle of powdered sugar.

Mistakes I’ve made and learned from

Early on, I rushed the mixing process and ended up with tough Banana Bread Mini Muffins—now I know gentle folding is key. Another time, I overfilled the muffin cups, causing messy spills in the oven. A handy trick is to use a measuring cup or piping bag for precise filling. If your muffins stick, check out my guide on essential baking tools for the best non-stick solutions. Also, don’t skip the toothpick test; underbaked centers are a common issue. For more troubleshooting, my post on common baking mistakes covers how to fix soggy or dry textures. Learning these lessons made my mini muffins consistently soft and delicious.

Cultural Connection and Variations

Where this recipe comes from

Banana bread has deep roots in American home baking, especially during the Great Depression when frugal cooks refused to waste overripe bananas. Over time, this humble loaf evolved into Banana Bread Mini Muffins, a bite-sized twist that’s perfect for snacking and sharing. In the Caribbean, bakers often add rum-soaked raisins or coconut for a tropical flair, while in Australia, you might find a handful of macadamia nuts folded into the batter. My grandma, however, swore by a dash of cinnamon and a sprinkle of brown sugar on top, turning these mini muffins into a cozy family favorite.

Interestingly, Banana Bread Mini Muffins also pop up in modern Korean bakeries, where they sometimes pair them with sweet red bean paste or matcha glaze. Whether you enjoy them plain, studded with chocolate chips, or spiced with cardamom like in some Middle Eastern kitchens, these little treats carry a world of flavor in every bite. No matter the variation, one thing stays the same: they’re a delicious way to rescue spotty bananas from the compost bin.

How it fits in today’s cooking

Today, Banana Bread Mini Muffins fit seamlessly into busy lifestyles. Meal preppers bake them ahead for quick breakfasts, while parents tuck them into lunchboxes for a wholesome snack. They’ve also become a star at brunch gatherings, especially when paired with a creamy cream cheese frosting or drizzled with honey. During the holidays, bakers add festive touches like cranberries or pumpkin spice, proving this recipe’s versatility year-round.

Modern twists keep the tradition alive, too. Health-conscious cooks swap in almond flour or sneak in chia seeds, while others turn them into gluten-free delights. For a fun twist, try our vegan banana bread version—it’s just as moist and flavorful. Whether you stick to the classics or experiment with new flavors, Banana Bread Mini Muffins remain a timeless comfort food that bridges generations and cuisines.

Taste and Texture

What makes it delicious

Banana Bread Mini Muffins deliver a cozy, irresistible experience with every bite. The moist, tender crumb melts in your mouth, while the golden-brown edges add a subtle crispness. Ripe bananas infuse each muffin with natural sweetness and a fragrant, caramel-like aroma. Meanwhile, warm hints of cinnamon and vanilla deepen the flavor, creating a comforting balance. Whether enjoyed fresh from the oven or at room temperature, Banana Bread Mini Muffins offer a satisfying texture—soft yet hearty—with pockets of gooey chocolate chips or crunchy walnuts if you add them.

Boosting the flavor

Elevate your Banana Bread Mini Muffins with easy tweaks that pack a punch. For extra richness, swirl in a spoonful of peanut butter glaze before baking, or drizzle it on top after cooling. A dash of nutmeg or cardamom alongside cinnamon enhances the spice profile without overpowering the banana. Alternatively, fold in toasted coconut flakes for a tropical twist. If you love texture contrasts, try pairing these muffins with a scoop of cinnamon whipped cream for a creamy, spiced finish. Small changes make a big difference!

Tips for Success

Best practices for results

For perfect Banana Bread Mini Muffins every time, always measure your ingredients accurately, especially the flour. Overpacking it can make the muffins dense. Additionally, use ripe bananas with brown spots for natural sweetness and moisture. Meanwhile, preheat your oven fully before baking to ensure even cooking. Finally, let the muffins cool in the pan for 5 minutes before transferring them to a wire rack. This prevents sticking and keeps their tender texture intact.

Mistakes to avoid

Avoid overmixing the batter, as this can lead to tough Banana Bread Mini Muffins. Instead, gently fold the ingredients until just combined. Similarly, don’t skip greasing the muffin tin or using liners, or the muffins may stick. For more baking tips, check out our guide on achieving the perfect muffin texture. Also, resist opening the oven door too early, as sudden temperature drops can cause uneven baking. Learn more about oven temperature control to master this step.

Serving and Pairing Suggestions

How to serve this dish

Banana Bread Mini Muffins shine when served warm, straight from the oven. For a cozy breakfast, arrange them on a rustic wooden board with a drizzle of honey or a dusting of powdered sugar. Alternatively, stack them in a charming tiered stand for an elegant brunch spread. During the holidays, tie a few muffins with twine and gift them in a festive box for a heartfelt homemade touch. To make them extra inviting, add a sprinkle of chopped walnuts or a light smear of cream cheese on top.

What goes well with it

Pair Banana Bread Mini Muffins with a steaming cup of spiced chai latte for a comforting morning treat. The warm spices in the latte enhance the muffins’ natural sweetness. For a refreshing contrast, serve them alongside a tangy fruit salad or a scoop of vanilla bean ice cream. If you love baking, try pairing them with our Pumpkin Spice Latte Cupcakes for a fall-inspired dessert spread. For a savory balance, enjoy them with a creamy Cinnamon Whipped Cream dip to add a delightful twist.

How do you keep banana bread mini muffins moist?

To keep Banana Bread Mini Muffins moist, use ripe bananas and add ingredients like yogurt, sour cream, or applesauce to the batter. Store them in an airtight container at room temperature for up to 3 days or freeze them for longer freshness.

Can you freeze banana bread mini muffins?

Yes, Banana Bread Mini Muffins freeze well! Let them cool completely, then place them in a freezer-safe bag or container. They’ll stay fresh for up to 3 months—just thaw at room temperature or warm them in the microwave for a quick treat.

What’s the best way to make banana bread mini muffins without eggs?

For egg-free Banana Bread Mini Muffins, substitute each egg with ¼ cup of applesauce, mashed banana, or flaxseed meal mixed with water. These alternatives keep the muffins tender and flavorful while maintaining the classic banana bread taste.

How long should you bake banana bread mini muffins?

Banana Bread Mini Muffins typically bake for 10–14 minutes at 350°F (175°C). Check for doneness by inserting a toothpick—if it comes out clean, they’re ready. Mini muffins bake faster than regular-sized ones, so keep an eye on them to avoid overbaking.

Best Strawberry Rhubarb Cake – Easy Homemade Recipe

best-strawberry-rhubarb-cake-recipe

Introduction

Hi there! I’m Emily, the heart and soul behind brekcakes.com. From my earliest memories, the kitchen has always been a place of warmth and creativity. It’s where I discovered the magic of turning simple ingredients into extraordinary meals and learned that the best dishes are often made with love as the main ingredient.

There’s something undeniably special about a dessert that balances sweet and tart flavors perfectly. That’s exactly why I adore Strawberry Rhubarb Cake—it’s a nostalgic treat that brings back memories of sunny afternoons and family gatherings. Whether you’re a seasoned baker or just starting out, this recipe promises to deliver a slice of comfort with every bite. Plus, it’s a fantastic way to celebrate seasonal produce while creating something truly unforgettable.

Strawberry Rhubarb Cake is a classic dessert that combines juicy strawberries and tangy rhubarb in a tender, buttery cake. The vibrant red hues and irresistible aroma make it a showstopper at any table. What makes this cake so special is its versatility. You can serve it warm with a scoop of vanilla ice cream for a cozy treat or enjoy it as an elegant afternoon snack with tea. At brekcakes.com, we celebrate recipes that feel both timeless and fresh, and this one fits perfectly. If you’re looking for more inspiration, check out our guide to seasonal baking tips or explore our collection of comfort food classics.

Why I Love This Recipe

This Strawberry Rhubarb Cake holds a special place in my heart because it reminds me of my grandmother’s kitchen. She used to grow rhubarb in her garden, and every summer, we’d bake this cake together. The way the strawberries caramelize slightly while the rhubarb keeps its bright tang always feels like a little celebration of the season. Even now, every time I make it, I’m transported back to those warm, sugar-dusted memories—and I hope it brings you just as much joy.

Health and Nutrition

Why it’s good for your body

Strawberry Rhubarb Cake packs a surprising nutritional punch while satisfying your sweet tooth. First, strawberries bring a hefty dose of vitamin C, which boosts immunity and supports glowing skin. Meanwhile, rhubarb delivers fiber to aid digestion and keep you feeling full longer. Together, these ingredients create a dessert that balances indulgence with real health perks.

Additionally, Strawberry Rhubarb Cake often includes whole grains or almond flour in its base, adding protein and healthy fats. These elements stabilize blood sugar, so you avoid the energy crash of overly sugary treats. Plus, the natural tartness of rhubarb means you can reduce added sugars without sacrificing flavor.

Finally, this cake offers antioxidants from both strawberries and rhubarb. These compounds fight inflammation and may even support heart health. Whether you enjoy it as an occasional treat or a weekend dessert, Strawberry Rhubarb Cake proves that delicious can also be nutritious.

How it fits in a healthy lifestyle

Strawberry Rhubarb Cake fits seamlessly into balanced eating when enjoyed mindfully. For gluten-free diets, simply swap traditional flour for almond or oat flour—it’s just as tender and flavorful. If you’re watching sugar intake, the natural sweetness of strawberries means you can cut back on refined sugars without missing out.

Pair a slice with protein-rich Greek yogurt or a handful of nuts to make it a satisfying snack. For more ideas on balancing treats with nutrition, explore our guide to healthy dessert swaps. And if you love fruit-forward desserts, try our seasonal fruit bakes for more ways to enjoy nature’s sweetness year-round.

Moderation is key, but Strawberry Rhubarb Cake proves you don’t need to skip dessert to stay on track. Its wholesome ingredients and adaptable recipe make it a smart choice for any health-conscious food lover.

Print
clock clock iconcutlery cutlery iconflag flag iconfolder folder iconinstagram instagram iconpinterest pinterest iconfacebook facebook iconprint print iconsquares squares iconheart heart iconheart solid heart solid icon

Strawberry Rhubarb Cake


  • Author: Chef Emy

Description

A delightful and tangy strawberry rhubarb cake that’s perfect for spring and summer gatherings.


Ingredients

Scale

For the Crust:

  • 1 1/2 cups all-purpose flour
  • 1 1/2 teaspoons baking powder
  • 1/2 teaspoon salt
  • 1/2 cup unsalted butter, softened
  • 1 cup granulated sugar
  • 2 large eggs
  • 1 teaspoon vanilla extract
  • 1/2 cup milk
  • 1 1/2 cups chopped rhubarb
  • 1 1/2 cups chopped strawberries
  • 2 tablespoons turbinado sugar (for topping)

Instructions

1. Prepare the Crust:

  1. Preheat oven to 350°F (175°C). Grease a 9-inch round cake pan and line the bottom with parchment paper.
  2. In a medium bowl, whisk together flour, baking powder, and salt. Set aside.
  3. In a large bowl, cream together butter and sugar until light and fluffy. Beat in eggs one at a time, then stir in vanilla extract.
  4. Alternately add the flour mixture and milk to the butter mixture, beginning and ending with the flour mixture. Mix until just combined.
  5. Gently fold in the chopped rhubarb and strawberries. Pour the batter into the prepared cake pan and sprinkle with turbinado sugar.
  6. Bake for 45-50 minutes, or until a toothpick inserted into the center comes out clean. Allow to cool in the pan for 10 minutes before transferring to a wire rack to cool completely.

Notes

You can customize the seasonings to taste.

“`html

How to Prepare This Dish

Steps and time-saving tips

Start by preheating your oven to 350°F and greasing a 9-inch cake pan. While the oven heats, whisk together the dry ingredients—flour, sugar, baking powder, and a pinch of salt—in a large bowl. In another bowl, beat the eggs lightly before adding melted butter, vanilla extract, and a splash of milk. Pour the wet mixture into the dry ingredients and stir just until combined. Overmixing can make the Strawberry Rhubarb Cake dense, so stop as soon as you see no streaks of flour.

Next, fold in diced rhubarb and sliced strawberries gently. The fruit will release moisture as it bakes, so don’t worry if the batter seems thick. Spread the batter evenly in the pan and bake for 40-45 minutes. To save time, prep the fruit while the oven preheats or use frozen rhubarb if fresh isn’t available. A toothpick test ensures perfection—insert it into the center; if it comes out clean, your cake is ready. Let it cool for 15 minutes before serving to avoid crumbling.

Mistakes I’ve made and learned from

I once rushed the prep and didn’t dice the rhubarb small enough, which left stringy bits in every bite. Now I chop it into half-inch pieces for even texture. Another time, I overbaked the Strawberry Rhubarb Cake because I skipped the toothpick test—lesson learned! For foolproof baking, I rely on my essential baking tools like an oven thermometer. If your cake turns out too dry, try brushing it with a simple syrup glaze. For more troubleshooting tips, check out my guide on common cake mistakes. Trust me, a little patience goes a long way!

“`

Cultural Connection and Variations

Where this recipe comes from

Strawberry Rhubarb Cake carries the cozy charm of early summer, blending tart rhubarb with sweet strawberries in a way that feels like a hug from grandma’s kitchen. Originally rooted in European and North American traditions, this dessert gained popularity as a way to use up garden-fresh rhubarb, which thrives in cooler climates. In Germany, bakers often layer it into streusel-topped cakes, while British versions might lean into a simpler sponge base. Meanwhile, in the American Midwest, you’ll find it piled high at potlucks, sometimes with a scoop of vanilla ice cream melting on top.

My family’s twist? A dash of cardamom in the batter—a nod to Scandinavian baking. But no matter where you go, Strawberry Rhubarb Cake always sparks nostalgia. Some cooks swap strawberries for raspberries, while others add a citrusy zing with orange zest. The beauty lies in its flexibility. Whether served warm from the oven or chilled with a dollop of whipped cream, it’s a timeless treat that adapts to any table.

How it fits in today’s cooking

Today, Strawberry Rhubarb Cake bridges old-school comfort and modern convenience. Busy bakers streamline the process with no-fuss baking hacks, like prepping the fruit ahead or using gluten-free flour blends. It’s also a star of seasonal menus, showing up at spring brunches and Fourth of July barbecues. Plus, with the rise of farm-to-table trends, home cooks love spotlighting local strawberries and rhubarb—just like in this summer fruit desserts roundup.

Beyond tradition, this cake fits effortlessly into today’s laid-back entertaining. Picture it sliced into squares for a picnic or dressed up with edible flowers for a dinner party. Some even bake it into muffins for grab-and-go sweetness. However you serve it, Strawberry Rhubarb Cake remains a delicious reminder that some flavors never go out of style.

Taste and Texture

What makes it delicious

Strawberry Rhubarb Cake delights with a perfect balance of sweet and tangy flavors. Juicy strawberries bring a burst of fruity brightness, while rhubarb adds a pleasantly sharp contrast. The tender crumb melts in your mouth, and a hint of vanilla warms each bite. Meanwhile, the golden-brown crust offers a subtle crispness that gives way to a moist, buttery interior. As it bakes, the aroma of caramelized sugar and ripe berries fills the kitchen, making it irresistible. Whether served warm or at room temperature, Strawberry Rhubarb Cake delivers a comforting yet vibrant dessert experience.

Boosting the flavor

For an extra layer of richness, swirl in a spoonful of homemade vanilla extract into the batter. Alternatively, top slices with a dollop of whipped cream or a drizzle of salted caramel sauce to highlight the cake’s natural sweetness. A pinch of cinnamon or cardamom can also deepen the flavor profile without overpowering the strawberries and rhubarb. For a textural twist, sprinkle toasted almond slivers over the frosting. These small tweaks make Strawberry Rhubarb Cake even more memorable.

Tips for Success

Best practices for results

For the best Strawberry Rhubarb Cake, always use fresh rhubarb and ripe strawberries. Their natural sweetness and tartness balance perfectly when they’re in season. Meanwhile, make sure to drain any excess juice from the fruit to prevent a soggy cake. Additionally, chill the batter for 20 minutes before baking to help the cake hold its shape. Finally, use room-temperature butter for a lighter crumb and even mixing.

Mistakes to avoid

Avoid overmixing the batter, as this can make your Strawberry Rhubarb Cake dense instead of fluffy. Instead, gently fold the dry ingredients into the wet ones until just combined. Furthermore, don’t skip lining your pan with parchment paper—it ensures easy removal and even baking. For more baking tips, check out our guide on perfect cake texture. Also, resist the urge to overbake; pull the cake out as soon as a toothpick comes out clean. If you’re unsure about doneness, our baking time guide can help you nail the timing every time.

Serving and Pairing Suggestions

How to serve this dish

For a stunning presentation, slice your Strawberry Rhubarb Cake into generous wedges and plate them on pastel-colored dessert dishes. Meanwhile, a dusting of powdered sugar or a dollop of whipped cream adds an elegant touch. Alternatively, serve it warm with a scoop of vanilla ice cream for a cozy dessert. Since this cake shines at brunches or summer gatherings, consider pairing it with fresh berries for a vibrant, seasonal spread. Finally, garnish with mint leaves or edible flowers to make it Instagram-worthy.

What goes well with it

A hot cup of Earl Grey tea balances the tangy sweetness of Strawberry Rhubarb Cake, while a chilled glass of sparkling rosé elevates it for festive occasions. If you prefer something creamy, try our homemade vanilla ice cream for a classic pairing. For a lighter option, serve it with a refreshing berry salad to highlight the fruity flavors. Each pairing enhances the cake’s bright, comforting notes without overpowering them.

What is the best way to prepare rhubarb for Strawberry Rhubarb Cake?

To prepare rhubarb for Strawberry Rhubarb Cake, wash and trim the stalks, then cut them into small, even pieces. If the rhubarb is particularly fibrous, peel the outer layer. Tossing the chopped rhubarb with a little sugar before baking helps balance its tartness and enhances the flavor of the cake.

Can I use frozen strawberries in Strawberry Rhubarb Cake?

Yes, you can use frozen strawberries in Strawberry Rhubarb Cake, but thaw and drain them first to avoid excess moisture. Pat them dry with a paper towel to prevent the cake from becoming soggy. Fresh strawberries work best, but frozen are a convenient alternative when out of season.

How do I store Strawberry Rhubarb Cake to keep it fresh?

Store Strawberry Rhubarb Cake in an airtight container at room temperature for up to 2 days or refrigerate for up to 5 days. For longer storage, wrap individual slices tightly and freeze for up to 3 months. Bring the cake to room temperature before serving for the best texture.

What can I substitute for rhubarb in Strawberry Rhubarb Cake?

If rhubarb isn’t available, try tart green apples or cranberries as substitutes in Strawberry Rhubarb Cake. Both options provide a similar tangy contrast to the sweet strawberries. Adjust the sugar slightly to balance the flavors, as these substitutes may vary in tartness.

Best Cookie Dough Bites – Easy No-Bake Recipe

best-cookie-dough-bites-no-bake

Introduction

Hi there! I’m Emily, the heart and soul behind brekcakes.com. From my earliest memories, the kitchen has always been a place of warmth and creativity. It’s where I discovered the magic of turning simple ingredients into extraordinary meals and learned that the best dishes are often made with love as the main ingredient.

There’s something undeniably comforting about cookie dough—its rich flavor, its nostalgic charm, and the way it makes you feel like a kid again. That’s why I created these Cookie Dough Bites, a treat that captures all that joy without the guilt. Whether you need a quick snack, a sweet gift, or just a little pick-me-up, these bites deliver happiness in every bite. Plus, they’re so easy to make, you’ll wonder why you haven’t tried them sooner.

Cookie Dough Bites are bite-sized delights that blend the classic taste of chocolate chip cookie dough with a safe-to-eat, no-bake twist. Unlike traditional raw dough, these little gems skip the eggs and use heat-treated flour, so you can indulge worry-free. They’re perfect for parties, lunchboxes, or those late-night cravings when you need something sweet but don’t want to fuss with baking. What makes them special is their versatility—you can customize them with mix-ins like nuts, sprinkles, or even a drizzle of melted chocolate. If you love easy, no-fuss desserts, you’ll adore my no-bake dessert collection, which features more simple yet irresistible treats. And if you’re curious about the science behind perfect cookie textures, check out my guide on essential baking tips to elevate your skills.

Why I Love This Recipe

These Cookie Dough Bites hold a special place in my heart because they remind me of baking with my mom. She always let me sneak a spoonful of dough while we made cookies, and these bites capture that same joy—without the scolding! Now, I love sharing them with my own family, watching their faces light up with each bite. It’s a recipe that feels like a hug, and I hope it brings you the same warmth and happiness.

Health and Nutrition

Why it’s good for your body

Cookie Dough Bites pack a surprising nutritional punch while satisfying your sweet tooth. First, they often contain wholesome ingredients like almond flour or oats, which provide fiber to support digestion. Additionally, many recipes use natural sweeteners like honey or maple syrup, so you avoid refined sugars. Because of this, Cookie Dough Bites deliver energy without the crash that comes with processed treats.

Moreover, these bites frequently include healthy fats from nuts or seeds, which help keep you full longer. For example, almond butter or chia seeds add protein and omega-3s, promoting heart health. Even better, Cookie Dough Bites can be customized with superfoods like flaxseed or dark chocolate for an antioxidant boost. As a result, you get a guilt-free snack that fuels your body.

Finally, Cookie Dough Bites offer portion control, making it easier to enjoy treats mindfully. Unlike traditional cookie dough, these bites come in small, satisfying servings. Therefore, you curb cravings without overindulging. Whether you need a post-workout snack or a midday pick-me-up, Cookie Dough Bites balance flavor and nutrition effortlessly.

How it fits in a healthy lifestyle

Cookie Dough Bites fit seamlessly into a balanced diet, whether you follow gluten-free, vegan, or high-protein eating plans. For gluten-free options, almond flour or oat flour keeps the bites light and digestible. If you prioritize plant-based eating, swaps like coconut oil and nut butter make them entirely dairy-free. You can even boost protein by adding collagen powder or pea protein for an extra nutrient kick.

These bites also align with heart-healthy habits when made with ingredients like walnuts or dark chocolate. For more ideas on smart snacking, check out our guide to healthy dessert swaps. Plus, their grab-and-go convenience makes them perfect for busy days. Pair them with a smoothie or yogurt for a balanced snack, or try our meal prep tips to keep them ready anytime. With simple tweaks, Cookie Dough Bites become a versatile part of your wellness routine.

Print
clock clock iconcutlery cutlery iconflag flag iconfolder folder iconinstagram instagram iconpinterest pinterest iconfacebook facebook iconprint print iconsquares squares iconheart heart iconheart solid heart solid icon

Cookie Dough Bites


  • Author: Chef Emy

Description

Delicious, edible cookie dough bites that are safe to eat and perfect for a sweet treat.


Ingredients

Scale

For the Crust:

  • 1 cup all-purpose flour
  • 1/2 cup unsalted butter, softened
  • 1/2 cup brown sugar
  • 1/4 cup granulated sugar
  • 1 teaspoon vanilla extract
  • 1/4 teaspoon salt
  • 2 tablespoons milk
  • 1/2 cup mini chocolate chips

Instructions

1. Prepare the Crust:

  1. Heat-treat the flour by microwaving it in a bowl for 1 minute, stirring every 15 seconds, until it reaches 165°F (74°C). Let it cool.
  2. In a mixing bowl, cream together the softened butter, brown sugar, and granulated sugar until smooth.
  3. Add the vanilla extract, salt, and milk to the butter mixture and mix well.
  4. Gradually stir in the heat-treated flour until fully incorporated.
  5. Fold in the mini chocolate chips.
  6. Roll the dough into small balls (about 1 inch in diameter) and place them on a parchment-lined tray.
  7. Refrigerate for at least 30 minutes before serving.

Notes

You can customize the seasonings to taste.

“`html

How to Prepare This Dish

Steps and time-saving tips

Start by gathering all your ingredients for the Cookie Dough Bites so everything is within reach. First, cream together softened butter and brown sugar in a large bowl until fluffy. Then, whisk in vanilla extract and a splash of milk for extra richness. Next, gradually fold in flour and a pinch of salt, mixing just until combined. For the best texture, avoid overworking the dough. Stir in mini chocolate chips by hand for even distribution. Roll the dough into small, bite-sized balls and place them on a parchment-lined tray. If the dough feels too sticky, chill it for 10 minutes to make handling easier. For a quicker alternative, use a small cookie scoop to portion the dough evenly. Finally, refrigerate the bites for at least 30 minutes to firm up before serving. If you’re short on time, pop them in the freezer for 15 minutes instead. These Cookie Dough Bites taste even better when dipped in melted chocolate, so drizzle some over the top if you’re feeling indulgent.

Mistakes I’ve made and learned from

When I first made Cookie Dough Bites, I used cold butter straight from the fridge, which made the dough crumbly and hard to roll. Now, I always let the butter soften at room temperature for 30 minutes—it makes all the difference. Another time, I skipped chilling the dough, and the bites lost their shape. Lesson learned: patience pays off. If you’re new to no-bake treats, check out my guide on perfect no-bake desserts for more foolproof tips. I also once added too much flour, resulting in dry bites. To avoid this, measure your flour correctly by spooning it into the cup and leveling it off. For more baking basics, my post on common baking mistakes covers these pitfalls in detail. Trust me, these small tweaks will save you from the same headaches I faced!

“`

Cultural Connection and Variations

Where this recipe comes from

Cookie Dough Bites trace their roots back to the irresistible allure of raw cookie dough, a guilty pleasure many of us sneak from the mixing bowl. While no one knows exactly who first decided to turn dough into bite-sized treats, food historians believe the concept evolved from classic American chocolate chip cookies. After all, who can resist that buttery, vanilla-kissed flavor?

Across the globe, variations of Cookie Dough Bites pop up in different forms. In Japan, mochi-inspired versions blend chewy textures with sweet dough, while in Italy, some bakers add a hint of espresso for depth. Families often put their own spin on the recipe too. Some swap chocolate chips for sprinkles, others mix in crushed pretzels for salty contrast. Personally, I love adding a dash of cinnamon to mine—it reminds me of holiday baking with my grandma.

Seasonally, Cookie Dough Bites shine at summer picnics and winter gatherings alike. They’re the perfect no-bake treat when you crave something sweet but don’t want to turn on the oven. Plus, their portable size makes them ideal for sharing, whether at bake sales or birthday parties.

How it fits in today’s cooking

Today, Cookie Dough Bites remain a staple for modern cooks who value convenience without sacrificing flavor. Meal preppers stash them in the freezer for quick desserts, while health-conscious bakers experiment with chickpea or oat flour bases. They’ve even become a popular addition to vegan dessert spreads, proving their versatility.

Social media fuels their popularity too. Instagram feeds overflow with creative twists, from matcha-infused dough to decadent chocolate-dipped versions. Meanwhile, busy parents appreciate how easily kids can help roll the bites—making them a fun, family-friendly activity. Whether you enjoy them as an after-school snack or a late-night indulgence, Cookie Dough Bites fit seamlessly into today’s fast-paced lifestyles.

Taste and Texture

What makes it delicious

Cookie Dough Bites deliver a dreamy, nostalgic bite with their rich, buttery sweetness and velvety texture. Each morsel melts slightly on your tongue, offering a creamy, indulgent experience reminiscent of sneaking spoonfuls of raw cookie dough. The deep vanilla aroma mingles with hints of brown sugar, while tiny chocolate chips add bursts of bittersweet contrast. Meanwhile, a subtle saltiness balances the sweetness, making Cookie Dough Bites irresistibly craveable. The soft yet slightly chewy texture keeps you reaching for just one more.

Boosting the flavor

Elevate your Cookie Dough Bites by rolling them in crushed toasted nuts for a crunchy finish or drizzling them with warm caramel for extra decadence. For a cozy twist, try blending in a pinch of cinnamon or espresso powder to deepen the flavor. If you love mix-ins, fold in mini M&Ms or shredded coconut for playful variety. Craving more inspiration? Explore our guide to easy dessert upgrades or discover how to pair treats with coffee and tea for the ultimate snack moment.

Tips for Success

Best practices for results

Always chill the dough for at least 30 minutes before shaping your Cookie Dough Bites. This step prevents sticking and makes rolling easier. Use parchment paper when placing the bites on a tray to maintain their perfect texture. For extra flavor, lightly toast the flour beforehand to enhance the richness. Additionally, measure ingredients precisely to ensure your Cookie Dough Bites hold their shape without crumbling.

Mistakes to avoid

Avoid overmixing the dough, as this can make your Cookie Dough Bites dense instead of tender. If the mixture feels too sticky, refrigerate it longer rather than adding excess flour. Many bakers skip toasting the flour, but doing so removes raw flour taste and improves safety. For more tips on handling sticky dough, check out our guide on perfecting dough consistency. Also, resist the urge to skip chilling—properly cold dough ensures the best results, as explained in our chilling dough breakdown.

Serving and Pairing Suggestions

How to serve this dish

Serve Cookie Dough Bites as a fun and irresistible treat at any gathering. For a playful touch, arrange them on a colorful platter with mini dessert forks or skewers. Alternatively, stack them in a clear glass jar for a charming DIY dessert station. These bites shine at parties, especially during holidays or birthday celebrations. To elevate the presentation, drizzle them with melted chocolate or sprinkle crushed nuts on top. Meanwhile, for a cozy night in, pair them with a warm drink and enjoy straight from the tray.

What goes well with it

Pair Cookie Dough Bites with a cold glass of milk for a classic combo that never disappoints. The creamy texture balances the rich, sweet flavor perfectly. If you prefer something bolder, try them with a scoop of homemade vanilla ice cream for an indulgent dessert. For a festive twist, serve them alongside a warm mug of spiced hot chocolate, which adds a cozy depth of flavor. Whether you choose a drink or another sweet treat, these pairings will make every bite even more memorable.

Are Cookie Dough Bites safe to eat raw?

Yes, Cookie Dough Bites are designed to be eaten raw because they use heat-treated flour and pasteurized eggs (or egg substitutes) to eliminate bacteria. These tasty treats give you the classic cookie dough flavor without the risks of traditional raw dough. Enjoy Cookie Dough Bites straight from the package or as a topping for desserts.

How do you store homemade Cookie Dough Bites?

Store homemade Cookie Dough Bites in an airtight container in the refrigerator for up to 1 week or freeze them for up to 3 months. For best texture, let refrigerated bites sit at room temperature for 5 minutes before eating. Freezing Cookie Dough Bites helps maintain their chewy texture and prevents spoilage.

Can you bake Cookie Dough Bites into cookies?

While Cookie Dough Bites are meant to be eaten raw, you can bake them into small cookies at 350°F for 8-10 minutes. The result will be thicker, softer cookies compared to traditional cookie dough. For best results, slightly flatten the Cookie Dough Bites before baking to ensure even cooking.

What’s the difference between Cookie Dough Bites and regular cookie dough?

Cookie Dough Bites are specifically formulated for safe raw consumption, using treated ingredients, while regular cookie dough contains raw flour and eggs that may carry foodborne pathogens. Cookie Dough Bites also often have a firmer, bite-sized texture perfect for snacking, whereas regular dough is typically softer and meant for baking.

Easy Cherry Cobbler Muffins – Perfect Dessert Recipe

easy-cherry-cobbler-muffins-recipe

Introduction

Hi there! I’m Emily, the heart and soul behind brekcakes.com. From my earliest memories, the kitchen has always been a place of warmth and creativity. It’s where I discovered the magic of turning simple ingredients into extraordinary meals and learned that the best dishes are often made with love as the main ingredient.

There’s something undeniably comforting about the aroma of baked goods filling the air, especially when it’s the sweet, nostalgic scent of Cherry Cobbler Muffins. Whether you’re craving a cozy breakfast treat or a dessert that feels like a hug, these muffins deliver. Plus, they’re incredibly easy to whip up, making them perfect for busy mornings or last-minute gatherings. Trust me, one bite will transport you straight to your happiest kitchen memories.

Cherry Cobbler Muffins combine the best of two worlds: the tender crumb of a classic muffin and the juicy, caramelized goodness of a cherry cobbler. The tart cherries burst with flavor, while the buttery streusel topping adds just the right amount of crunch. What makes this recipe special is its versatility. You can serve them warm with a scoop of vanilla ice cream for dessert or enjoy them as a quick grab-and-go snack. If you love recipes that balance simplicity and indulgence, you’ll adore these muffins as much as I do. For more inspiration, check out my easy baking hacks or explore other comfort food recipes that bring joy to every bite.

Why I Love This Recipe

Cherry Cobbler Muffins hold a special place in my heart because they remind me of summer vacations at my grandma’s house. She used to bake them fresh every Sunday, and the whole family would gather around the table, laughing and savoring every crumb. Now, whenever I make them, I feel that same warmth and connection. It’s more than just a recipe—it’s a way to create moments that matter. I hope these muffins become a cherished part of your story too.

Health and Nutrition

Why it’s good for your body

Cherry Cobbler Muffins pack a nutritious punch while satisfying your sweet tooth. First, cherries deliver antioxidants like anthocyanins, which fight inflammation and support heart health. Additionally, these muffins often include whole grains or oats, providing fiber to keep you full and aid digestion. Moreover, the natural sweetness of cherries means you can cut back on added sugars without sacrificing flavor.

Another benefit of Cherry Cobbler Muffins is their versatility. For instance, you can easily tweak the recipe to boost protein by adding Greek yogurt or almond flour. Meanwhile, the cherries contribute vitamin C and potassium, which help maintain immune function and muscle health. Furthermore, baking them at home lets you control ingredients, avoiding unnecessary preservatives found in store-bought treats.

Finally, Cherry Cobbler Muffins offer a balanced indulgence. Unlike overly processed desserts, they combine wholesome ingredients with mindful portions. Whether enjoyed as a breakfast treat or an afternoon snack, they provide energy without the crash. So next time you crave something sweet, remember these muffins deliver both taste and nourishment.

How it fits in a healthy lifestyle

Cherry Cobbler Muffins fit seamlessly into a balanced diet when enjoyed in moderation. For a heart-healthy twist, try using olive oil instead of butter and opting for low-fat dairy. If you follow a gluten-free diet, simply swap regular flour for a blend like almond or oat flour—just like our gluten-free baking guide recommends.

These muffins also pair well with protein-rich snacks, such as a handful of nuts or a yogurt parfait, to create a satisfying meal. For those watching sugar intake, reducing the sweetener or using natural alternatives like honey aligns with our healthy dessert swaps. By making small adjustments, Cherry Cobbler Muffins become a guilt-free part of your routine, proving that delicious and nutritious can go hand in hand.

Print
clock clock iconcutlery cutlery iconflag flag iconfolder folder iconinstagram instagram iconpinterest pinterest iconfacebook facebook iconprint print iconsquares squares iconheart heart iconheart solid heart solid icon

Cherry Cobbler Muffins


  • Author: Chef Emy

Description

Delicious muffins with a cherry cobbler twist, perfect for breakfast or dessert.


Ingredients

Scale

For the Crust:

  • 1 1/2 cups all-purpose flour
  • 1/2 cup granulated sugar
  • 2 teaspoons baking powder
  • 1/2 teaspoon salt
  • 1/2 cup milk
  • 1/4 cup unsalted butter, melted
  • 1 large egg
  • 1 teaspoon vanilla extract
  • 1 1/2 cups fresh or frozen cherries, pitted and halved
  • 2 tablespoons brown sugar (for topping)

Instructions

1. Prepare the Crust:

  1. Preheat oven to 375°F (190°C) and line a muffin tin with paper liners.
  2. In a large bowl, whisk together flour, granulated sugar, baking powder, and salt.
  3. In another bowl, mix milk, melted butter, egg, and vanilla extract.
  4. Pour the wet ingredients into the dry ingredients and stir until just combined.
  5. Gently fold in the cherries.
  6. Divide the batter evenly among the muffin cups and sprinkle brown sugar on top.
  7. Bake for 20-25 minutes or until a toothpick inserted comes out clean.
  8. Let cool for 5 minutes before serving.

Notes

You can customize the seasonings to taste.

How to Prepare This Dish

Steps and time-saving tips

Start by preheating your oven to 375°F and lining a muffin tin with paper liners or greasing it lightly. In a large bowl, whisk together the dry ingredients—flour, sugar, baking powder, and a pinch of salt—until well combined. Next, melt the butter and let it cool slightly before mixing it with milk, vanilla extract, and an egg in a separate bowl. Pour the wet ingredients into the dry mixture and stir gently until just combined; overmixing will make your Cherry Cobbler Muffins dense. Fold in the fresh or frozen cherries, reserving a handful for topping. Spoon the batter evenly into the muffin cups, filling each about two-thirds full. Sprinkle the reserved cherries on top, then bake for 18-22 minutes until golden and a toothpick comes out clean. For a time-saving hack, use canned cherry pie filling instead of fresh fruit, but drain excess syrup to avoid soggy muffins. Let them cool for 5 minutes before transferring to a wire rack. Serve warm with a drizzle of vanilla glaze or a scoop of ice cream for extra indulgence.

Mistakes I’ve made and learned from

When I first made Cherry Cobbler Muffins, I overmixed the batter, resulting in tough, dry muffins. Now, I stir just until the ingredients come together, and the texture is perfect every time. Another mistake? Using frozen cherries without thawing them first—they released too much moisture and made the muffins gummy. Now, I toss frozen cherries in a bit of flour first, a trick I picked up from my guide to baking with frozen fruit. Also, I once skipped lining the muffin tin, assuming a light grease would suffice, but the muffins stuck stubbornly. Lesson learned: always use liners or check out my tips for perfect muffin release. These small adjustments transformed my Cherry Cobbler Muffins from hit-or-miss to foolproof.

Cultural Connection and Variations

Where this recipe comes from

Cherry Cobbler Muffins blend the cozy charm of Southern cobbler with the convenience of handheld muffins. Originally, cobblers emerged as a rustic dessert during pioneer days, when cooks topped fruit fillings with whatever dough they had on hand. Over time, bakers tweaked the concept, transforming it into individual portions like these muffins. In the South, you might find them bursting with fresh, tart cherries during summer harvests, while Midwestern versions often use canned cherries for year-round comfort.

Across the globe, similar treats take different forms. In England, a cherry scone might steal the spotlight, while in France, clafoutis bakes whole cherries into a custardy batter. Some families add a dash of almond extract to their Cherry Cobbler Muffins for extra depth, while others swear by a buttermilk batter for tang. No matter the twist, these muffins carry the spirit of resourcefulness and warmth—just like the cobblers that inspired them.

How it fits in today’s cooking

Today, Cherry Cobbler Muffins bridge nostalgia and modern convenience. Busy bakers love them for breakfast meal prep, while dessert fans serve them warm with vanilla ice cream for a quick crowd-pleaser. They’re especially popular during cherry season, but thanks to frozen or jarred cherries, you can enjoy them anytime. Many cooks also lighten them up with whole wheat flour or swap in other fruits like peaches—just like these peach muffin variations.

Social media has given the recipe new life too, with bakers sharing their takes using gluten-free blends or adding streusel toppings for crunch. Whether you’re reviving a family tradition or trying something new, Cherry Cobbler Muffins fit right into today’s flexible cooking style. For more inspiration, check out these easy baking hacks to make them your own.

Taste and Texture

What makes it delicious

Cherry Cobbler Muffins deliver a burst of sweet-tart flavor with every bite, thanks to juicy cherries folded into the batter. The tender crumb melts in your mouth, while the buttery streusel topping adds a delightful crunch. Warm cinnamon and vanilla weave through the muffins, creating a cozy, fragrant aroma that fills the kitchen. Each bite balances the bright acidity of cherries with a rich, caramelized sweetness, making Cherry Cobbler Muffins irresistible. The contrast between the soft interior and crispy edges mimics the comforting feel of classic cobbler—but in handheld form.

Boosting the flavor

For an extra layer of indulgence, drizzle warm vanilla glaze over your Cherry Cobbler Muffins or serve them with a scoop of homemade vanilla ice cream. If you love bold flavors, swap the cherries for a mix of berries or add a pinch of cardamom to the streusel. A dollop of fresh whipped cream also elevates the muffins, enhancing their dessert-like appeal. Experiment with almond extract in the batter for a nutty depth, or sprinkle coarse sugar on top before baking for a sparkling finish. These small tweaks keep the recipe exciting while honoring its cozy roots.

Tips for Success

Best practices for results

Always measure your flour correctly by spooning it into the cup and leveling it off—this ensures your Cherry Cobbler Muffins stay light and fluffy. Meanwhile, use room-temperature butter for even mixing, and gently fold the cherries into the batter to prevent overmixing. For extra flavor, toss the cherries in a bit of sugar before adding them. Finally, let the muffins cool in the pan for 5 minutes before transferring them to a wire rack—this helps them set without becoming soggy.

Mistakes to avoid

Avoid overfilling the muffin cups, as this can cause uneven baking and spillage. Instead, fill them only two-thirds full for perfectly domed Cherry Cobbler Muffins. Also, don’t skip lining the pan with parchment or cupcake liners—otherwise, the muffins may stick. If your batter seems too thick, check out our guide to fixing dense muffin batter for quick solutions. Finally, resist opening the oven door too early, as temperature fluctuations can lead to collapsed muffins. For more troubleshooting, explore our muffin baking tips to perfect your technique.

Serving and Pairing Suggestions

How to serve this dish

Serve Cherry Cobbler Muffins warm for the best flavor and texture. For a cozy breakfast, arrange them on a rustic wooden tray with a dusting of powdered sugar. Alternatively, drizzle them with a simple vanilla glaze to highlight their sweet-tart cherry filling. These muffins also shine at holiday gatherings—place them on a tiered stand for an eye-catching dessert display. If you love a touch of indulgence, top each muffin with a scoop of vanilla ice cream while they’re still slightly warm.

What goes well with it

Pair Cherry Cobbler Muffins with a hot cup of coffee or tea to balance their sweetness. For a refreshing contrast, try them alongside a chilled glass of homemade lemonade. If you’re serving them as part of a brunch spread, they pair beautifully with savory dishes like our fluffy scrambled eggs or crispy bacon. The tangy cherries in the muffins also complement creamy desserts, such as our no-churn vanilla bean ice cream, for an irresistible treat.

How do you make cherry cobbler muffins from scratch?

To make cherry cobbler muffins, combine flour, sugar, and baking powder, then mix in wet ingredients like milk and eggs. Fold in fresh or canned cherries and top with a crumbly streusel before baking for a dessert-inspired breakfast treat.

Can I use frozen cherries for cherry cobbler muffins?

Yes, frozen cherries work well—just thaw and drain them to avoid excess moisture. Pat them dry before folding into the batter to keep your cherry cobbler muffins perfectly textured.

What’s the best topping for cherry cobbler muffins?

A buttery streusel or crumb topping mimics classic cobbler texture, but a simple powdered sugar glaze also enhances cherry cobbler muffins. For extra crunch, sprinkle coarse sugar before baking.

How long do cherry cobbler muffins stay fresh?

Store cherry cobbler muffins in an airtight container at room temperature for 2–3 days. For longer freshness, freeze them for up to 3 months and reheat before serving.

Classic Pineapple Upside Down Cake – Easy Homemade Recipe

classic-pineapple-upside-down-cake

Introduction

Hi there! I’m Emily, the heart and soul behind brekcakes.com. From my earliest memories, the kitchen has always been a place of warmth and creativity. It’s where I discovered the magic of turning simple ingredients into extraordinary meals and learned that the best dishes are often made with love as the main ingredient.

There’s something undeniably comforting about a classic dessert that brings people together, and Pineapple Upside Down Cake does exactly that. Whether you’re reminiscing about family gatherings or simply craving a sweet escape, this timeless treat delivers nostalgia in every bite. With its caramelized pineapple rings and buttery cake base, it’s a dessert that feels both familiar and special. Plus, it’s surprisingly easy to make, even if you’re new to baking. If you’ve ever wondered how to perfect this retro favorite, you’re in the right place.

Pineapple Upside Down Cake is a vintage gem that never goes out of style. Originating in the early 20th century, it gained popularity thanks to its striking presentation and irresistible flavor. The cake features juicy pineapple rings nestled in a caramel-like glaze, topped with a tender vanilla sponge that soaks up all the syrupy goodness. What makes it so beloved? For starters, it’s a crowd-pleaser that balances sweetness and tanginess perfectly. Moreover, it’s versatile—equally at home on a weeknight table or a holiday spread. At brekcakes.com, we celebrate recipes that blend simplicity with heart, and this cake embodies that philosophy. If you’re looking for more inspiration, check out our guide to easy baking tips or explore our collection of classic desserts.

Why I Love This Recipe

Pineapple Upside Down Cake holds a special place in my heart because it reminds me of my grandmother’s kitchen. She used to make it for birthdays, and the smell of caramelizing fruit would fill the entire house. Even now, every time I bake it, I feel that same warmth and joy. It’s more than just a dessert—it’s a little slice of happiness, one that I’m thrilled to share with you.

Health and Nutrition

Why it’s good for your body

Pineapple Upside Down Cake packs more than just nostalgic flavor. First, the star ingredient—pineapple—delivers a hefty dose of vitamin C, which boosts immunity and supports collagen production. Additionally, the fruit contains bromelain, an enzyme that aids digestion and reduces inflammation. While dessert isn’t typically a health food, this cake offers a smarter indulgence.

Moreover, Pineapple Upside Down Cake includes antioxidant-rich cherries, which combat oxidative stress. The caramelized pineapple topping also provides natural sweetness, reducing the need for excessive refined sugar. When you bake with whole ingredients, like fresh pineapple and real butter, you avoid processed additives found in many store-bought desserts.

Finally, enjoying Pineapple Upside Down Cake in moderation can satisfy cravings without derailing wellness goals. The combination of fiber from fruit and balanced macronutrients makes it a more mindful treat. Plus, sharing a slice with loved ones adds emotional benefits, proving comfort food can nourish body and soul.

How it fits in a healthy lifestyle

Pineapple Upside Down Cake fits into balanced eating when you prioritize portion control and quality ingredients. For gluten-free diets, simply swap traditional flour for almond or oat flour, as shown in our gluten-free baking guide. The natural sugars in pineapple also mean you can cut back on added sweeteners without sacrificing taste.

If you’re mindful of heart health, use coconut oil instead of butter and top with unsweetened coconut flakes. Pairing a small slice with protein-rich Greek yogurt balances blood sugar spikes. For more tips on smarter dessert choices, explore our healthy dessert swaps. Remember, treats like Pineapple Upside Down Cake belong in a varied diet—enjoy them as part of an overall nutritious lifestyle.

Print
clock clock iconcutlery cutlery iconflag flag iconfolder folder iconinstagram instagram iconpinterest pinterest iconfacebook facebook iconprint print iconsquares squares iconheart heart iconheart solid heart solid icon

Pineapple Upside Down Cake


  • Author: Chef Emy

Description

A classic dessert featuring caramelized pineapple and cherries atop a moist vanilla cake.


Ingredients

Scale

For the Crust:

  • 1/4 cup unsalted butter
  • 3/4 cup packed brown sugar
  • 1 can (20 oz) pineapple slices, drained
  • Maraschino cherries, for garnish
  • 1 1/2 cups all-purpose flour
  • 2 teaspoons baking powder
  • 1/4 teaspoon salt
  • 1/2 cup unsalted butter, softened
  • 3/4 cup granulated sugar
  • 2 large eggs
  • 1 teaspoon vanilla extract
  • 1/2 cup milk

Instructions

1. Prepare the Crust:

  1. Preheat oven to 350°F (175°C). Melt 1/4 cup butter in a 9-inch round cake pan, then sprinkle brown sugar evenly over the melted butter.
  2. Arrange pineapple slices on top of the sugar mixture and place cherries in the center of each slice.
  3. In a bowl, whisk together flour, baking powder, and salt. In another bowl, cream together 1/2 cup butter and granulated sugar until light and fluffy.
  4. Beat in eggs one at a time, then stir in vanilla. Alternately add flour mixture and milk, mixing just until combined.
  5. Pour batter over the pineapple layer and spread evenly. Bake for 30-35 minutes or until a toothpick inserted comes out clean.
  6. Cool in pan for 10 minutes, then invert onto a serving plate. Serve warm or at room temperature.

Notes

You can customize the seasonings to taste.

How to Prepare This Dish

Steps and time-saving tips

Start by preheating your oven to 350°F so it’s ready when you need it. Meanwhile, melt butter in a small saucepan and drizzle it evenly into a 9-inch round cake pan. Sprinkle brown sugar over the butter, then arrange pineapple slices in a single layer. Add maraschino cherries in the center of each ring for that classic Pineapple Upside Down Cake look. In a large bowl, whisk together flour, baking powder, and salt to ensure your dry ingredients blend smoothly. In another bowl, beat softened butter and sugar until fluffy, then mix in eggs one at a time. Alternate adding the dry mixture and milk, stirring just until combined. Carefully pour the batter over the pineapple layer, smoothing the top with a spatula. Bake for 40-45 minutes or until a toothpick comes out clean. Let the cake cool for 10 minutes before flipping it onto a serving plate. For a time-saving hack, use canned pineapple rings and pre-measured dry ingredients to speed up prep.

Mistakes I’ve made and learned from

One of my biggest Pineapple Upside Down Cake blunders was flipping it too soon, causing the topping to stick to the pan. Now, I always wait at least 10 minutes to let the caramelized layer set. Another lesson? Overmixing the batter made my cake dense instead of light. I learned to gently fold ingredients just until combined, which you can also apply to other cakes like my Perfect Vanilla Cake. Oh, and don’t skip greasing the pan edges—trust me, it’s worth the extra minute. For more troubleshooting, check out my guide on common cake-baking mistakes. These small tweaks transformed my results from messy to magazine-worthy.

Cultural Connection and Variations

Where this recipe comes from

Pineapple Upside Down Cake carries a nostalgic charm that stretches back to early 20th-century America, when canned pineapple became a pantry staple. Home cooks loved how the caramelized fruit topping transformed into a glossy, golden crown once flipped. Interestingly, some trace its roots to skillet cakes from the 1800s, where cast-iron pans helped create that signature sticky-sweet base.

Around the world, bakers put their own spin on this classic. In the Caribbean, they might add rum-soaked cherries or coconut flakes for extra tropical flair. Meanwhile, in the American South, some families swear by using fresh pineapple or even swapping in pecans for maraschino cherries. My grandma, for instance, always made her Pineapple Upside Down Cake with extra brown sugar—because “more gooey is more good,” as she’d say.

How it fits in today’s cooking

Today, Pineapple Upside Down Cake still shines as a retro dessert with modern appeal. It’s a star at potlucks and holiday gatherings, especially when paired with summer barbecues or festive winter menus. Many bakers now experiment with gluten-free flours or plant-based butter, proving this treat adapts to any diet.

Busy home cooks also love how effortlessly it fits into weekly routines. Whether you’re baking it in a single skillet for easy cleanup or prepping mini versions for parties, the cake stays timeless. After all, who can resist that caramelized pineapple magic?

Taste and Texture

What makes it delicious

Pineapple Upside Down Cake delivers a mouthwatering blend of sweet, tangy, and buttery flavors. The caramelized pineapple rings melt into a sticky, golden-brown glaze, while the cherries add bursts of fruity brightness. Each bite offers a tender, moist crumb that contrasts perfectly with the slightly crisp edges. The warm vanilla undertones mingle with the tropical aroma of baked pineapple, making every slice irresistible. Whether served warm or at room temperature, Pineapple Upside Down Cake feels like a cozy hug with its rich, comforting texture and vibrant taste.

Boosting the flavor

For an extra layer of depth, try brushing the cake with a spiced rum glaze right after baking—it amplifies the caramel notes beautifully. Alternatively, swap the maraschino cherries for fresh raspberries or a drizzle of homemade caramel sauce to elevate the dessert. A pinch of cinnamon or nutmeg in the batter also adds warmth without overpowering the pineapple. If you love contrasting textures, serve it with a scoop of vanilla bean ice cream for a cool, creamy finish. With these tweaks, your Pineapple Upside Down Cake will shine even brighter.

Tips for Success

Best practices for results

Always use fresh pineapple for your Pineapple Upside Down Cake, as canned pineapple often releases too much liquid. Meanwhile, generously grease the pan to prevent sticking and ensure a smooth flip. For even baking, place the cake in the center of the oven and rotate it halfway through. Additionally, let the cake cool for 10 minutes before inverting it—this helps the caramelized topping set perfectly. Finally, serve the Pineapple Upside Down Cake warm for the best flavor and texture.

Mistakes to avoid

Avoid overmixing the batter, as this can make the cake dense instead of light and fluffy. Instead, gently fold the ingredients until just combined. Another common mistake is skipping the parchment paper liner, which can cause the cake to stick. For more baking tips, check out our guide on how to prevent cakes from sticking. Also, don’t rush the cooling step—flipping the Pineapple Upside Down Cake too soon can cause the topping to slide off. For perfect timing, refer to our cake cooling tips.

Serving and Pairing Suggestions

How to serve this dish

For a stunning presentation, serve Pineapple Upside Down Cake warm with the caramelized pineapple rings facing up. Meanwhile, drizzle extra syrup from the pan over each slice for added shine. If you want to elevate it further, top with a dollop of whipped cream or a scoop of vanilla ice cream. Additionally, fresh mint leaves or a sprinkle of toasted coconut make perfect garnishes. This cake shines at summer barbecues, holiday gatherings, or even as a sweet finish to brunch.

What goes well with it

Pair Pineapple Upside Down Cake with a creamy coconut latte for a tropical twist. The rich coffee balances the cake’s sweetness, while the coconut echoes its fruity notes. Alternatively, try it alongside a light fruit salad with berries and citrus for a refreshing contrast. If you love decadent desserts, serve it with our easy caramel sauce or a side of homemade vanilla bean ice cream. For more pairing inspiration, explore our guide to perfect dessert combinations or discover how to master classic cake flavors.

What is the origin of Pineapple Upside Down Cake?

Pineapple Upside Down Cake became popular in the early 1900s after Dole sponsored a recipe contest featuring canned pineapple. The cake’s signature caramelized fruit topping and moist vanilla base made it a classic American dessert, especially in mid-century home baking.

Can you make Pineapple Upside Down Cake without maraschino cherries?

Yes! While traditional Pineapple Upside Down Cake uses cherries for color, you can substitute fresh raspberries, cranberries, or even skip the extra fruit altogether. The caramelized pineapple rings still create a stunning presentation and delicious flavor.

Why did my Pineapple Upside Down Cake stick to the pan?

Sticking usually happens when the caramel layer cools too much before adding batter. Always pour your Pineapple Upside Down Cake batter into a warm, buttered pan right after making the caramel. Running a knife around the edges before flipping also helps release the cake cleanly.

How do you store Pineapple Upside Down Cake to keep it moist?

Store Pineapple Upside Down Cake at room temperature under a cake dome or loosely covered with foil for up to 3 days. The fruit topping helps retain moisture, but refrigerating can dry out the cake. For longer storage, freeze individual slices wrapped in plastic.

Easy Cherry Yum Yum – Classic No-Bake Dessert

easy-cherry-yum-yum-dessert

Introduction

Hi there! I’m Emily, the heart and soul behind brekcakes.com. From my earliest memories, the kitchen has always been a place of warmth and creativity. It’s where I discovered the magic of turning simple ingredients into extraordinary meals and learned that the best dishes are often made with love as the main ingredient.

If you’ve ever craved a dessert that feels like a hug in every bite, you’re in the right place. Today, I’m sharing my all-time favorite comfort treat: Cherry Yum Yum. Whether you’re hosting a summer gathering or simply treating yourself after a long day, this creamy, dreamy dessert delivers nostalgia and joy in every spoonful. Plus, it’s incredibly easy to make, so you can focus on savoring the moment—and the cherries.

Cherry Yum Yum is a classic no-bake dessert that combines a buttery graham cracker crust with layers of fluffy cream cheese filling and sweet cherry topping. Unlike complicated pastries, this recipe celebrates simplicity without sacrificing flavor. It’s the kind of dish that brings people together, whether at potlucks, family reunions, or cozy weeknight dinners. Over the years, I’ve tweaked my version to strike the perfect balance between rich and refreshing, making it a standout among my easy dessert recipes. And because it requires minimal effort, you’ll have more time to enjoy the smiles it inspires. If you love crowd-pleasing sweets, you’ll also adore my classic cheesecake bars, which share the same effortless charm.

Why I Love This Recipe

Cherry Yum Yum holds a special place in my heart because it reminds me of my grandmother’s kitchen. She used to make it for every holiday, and the moment I took my first bite, I knew it was magic. Now, whenever I whip up a batch, I feel that same childlike wonder—and I love passing that joy on to others. There’s something truly magical about how a simple dessert can create such lasting memories, and I hope this recipe becomes a staple in your home too.

Health and Nutrition

Why it’s good for your body

Cherry Yum Yum packs a surprising nutritional punch while satisfying your sweet tooth. First, cherries bring antioxidants like anthocyanins, which help reduce inflammation and support heart health. Additionally, the natural sweetness of cherries means you can enjoy Cherry Yum Yum with less added sugar than many desserts. Plus, the creamy layers often include dairy or dairy alternatives, offering a dose of calcium or protein.

Moreover, Cherry Yum Yum balances indulgence with wholesome ingredients. For example, many recipes incorporate whole grains or nuts for extra fiber and healthy fats. These nutrients keep you fuller longer and stabilize blood sugar levels. Even better, cherries contain melatonin, which may promote better sleep when enjoyed in moderation.

Finally, Cherry Yum Yum fits perfectly into a mindful eating approach. Because it combines fruit, dairy, and whole ingredients, it delivers more nutrients than processed treats. Whether you savor it as an occasional dessert or a sweet snack, Cherry Yum Yum proves that delicious can also be nourishing.

How it fits in a healthy lifestyle

Cherry Yum Yum works well in a balanced diet when enjoyed thoughtfully. For gluten-free eaters, simply swap the crust for almond flour or oats, making it a safe treat. If you focus on heart health, the cherries’ antioxidants and nuts’ unsaturated fats align perfectly with your goals. Even better, pairing it with protein-rich toppings like Greek yogurt turns it into a satisfying snack.

For those tracking macros, Cherry Yum Yum can fit into flexible eating plans. Try our balanced dessert ideas for portion-friendly twists. And if you love meal prepping, make a lighter version ahead using our healthy snack hacks. With small tweaks, this dessert becomes a guilt-free part of your routine.

Print
clock clock iconcutlery cutlery iconflag flag iconfolder folder iconinstagram instagram iconpinterest pinterest iconfacebook facebook iconprint print iconsquares squares iconheart heart iconheart solid heart solid icon

Cherry Yum Yum


  • Author: Chef Emy

Description

A creamy, no-bake dessert with layers of graham cracker crust, sweet cream cheese filling, and cherry pie topping.


Ingredients

Scale

For the Crust:

  • 2 cups graham cracker crumbs
  • 1/2 cup melted butter
  • 1/4 cup granulated sugar
  • 8 oz cream cheese, softened
  • 1 cup powdered sugar
  • 1 tsp vanilla extract
  • 8 oz whipped topping
  • 1 can cherry pie filling

Instructions

1. Prepare the Crust:

  1. In a bowl, mix graham cracker crumbs, melted butter, and granulated sugar until combined.
  2. Press the mixture into the bottom of a 9×13-inch dish to form the crust. Chill for 10 minutes.
  3. In another bowl, beat cream cheese, powdered sugar, and vanilla until smooth.
  4. Fold in whipped topping until fully incorporated.
  5. Spread the cream cheese mixture evenly over the chilled crust.
  6. Top with cherry pie filling.
  7. Refrigerate for at least 2 hours before serving.

Notes

You can customize the seasonings to taste.

“`html

How to Prepare This Dish

Steps and time-saving tips

Start by preheating your oven to 350°F to save time later. While it heats, mix the crust ingredients in a large bowl until they form a crumbly texture. Press this mixture firmly into a greased baking dish, making sure to cover the bottom evenly. Bake the crust for 10 minutes until it turns golden, then let it cool completely. Meanwhile, whip the cream cheese and powdered sugar together until smooth, which takes about 3 minutes with an electric mixer. Fold in the whipped topping gently to keep the filling light and fluffy. Spread this creamy layer over the cooled crust, smoothing it with a spatula. Next, spoon the cherry pie filling on top, distributing it evenly for a beautiful finish. Chill the Cherry Yum Yum for at least 4 hours, though overnight works even better for firm slices. For a quicker set, pop it in the freezer for 90 minutes. Slice with a warm knife for cleaner edges, and serve chilled.

Mistakes I’ve made and learned from

I once rushed the cooling step and ended up with a melted filling—patience truly is key with Cherry Yum Yum. Now I set a timer and walk away. Another time, I overmixed the cream cheese layer, which made it dense instead of airy. A light hand makes all the difference, just like with my no-bake cheesecake. Also, skipping the crust pre-bake led to a soggy bottom, so I never cut that corner anymore. If your cherries sink, try thickening the pie filling with a cornstarch slurry first, a trick I picked up from this fruit pie guide. Trust me, these small adjustments save big disappointment later.

“`

Cultural Connection and Variations

Where this recipe comes from

Cherry Yum Yum traces its roots to the American South, where no-bake desserts reign supreme during scorching summers. Church potlucks and family reunions often feature this creamy, cherry-topped treat, blending convenience with nostalgia. Some say it evolved from classic cheesecake bars, while others credit mid-century home cooks for simplifying recipes with pantry staples like graham crackers and canned fruit.

Across regions, Cherry Yum Yum wears many hats. In the Midwest, families might swap cherries for blueberries or strawberries, depending on what’s in season. Meanwhile, Southern bakers sometimes add a splash of bourbon to the cream cheese layer for grown-up gatherings. My grandmother always made hers with a thick coconut crust, claiming it balanced the tartness of the cherries perfectly. No matter the twist, the joy of slicing into a chilled Cherry Yum Yum stays the same—a sweet reward for minimal effort.

How it fits in today’s cooking

Today, Cherry Yum Yum thrives as both a retro revival and a modern shortcut. Busy parents love it for quick desserts that feel special, while food bloggers reinvent it with gluten-free crusts or Greek yogurt swaps. It’s a star at summer barbecues, yet equally welcome on holiday tables beside festive treats like peppermint bark.

What keeps it relevant? Versatility. You’ll find Cherry Yum Yum at picnics in July, potlucks in December, and even as a stress-free weeknight indulgence. Some cooks now layer it in mason jars for portable portions, while others drizzle it with dark chocolate for extra flair. However you serve it, this dessert bridges generations—one creamy, cherry-filled bite at a time.

Taste and Texture

What makes it delicious

Cherry Yum Yum delights with a perfect balance of sweet and tangy flavors, thanks to juicy cherries layered over a creamy, velvety filling. The buttery graham cracker crust adds a satisfying crunch, while the whipped topping melts luxuriously in your mouth. Each bite bursts with bright cherry notes, complemented by a hint of vanilla. Meanwhile, the chilled texture feels refreshing yet indulgent, making Cherry Yum Yum an irresistible treat for any occasion.

Boosting the flavor

For an extra flavor boost, try swapping the canned cherry filling for homemade cherry compote, which deepens the fruitiness with a touch of cinnamon. Alternatively, drizzle warm vanilla sauce over each slice to enhance the dessert’s richness. A sprinkle of toasted almond slivers or a dollop of citrus-infused whipped cream can also add delightful contrast. With these tweaks, Cherry Yum Yum becomes even more unforgettable.

Tips for Success

Best practices for results

Always chill the cream cheese filling for at least 30 minutes before assembling your Cherry Yum Yum. This step ensures a firm, sliceable texture. Meanwhile, use room-temperature butter for the crust so it blends smoothly without overworking the dough. For the best flavor, opt for high-quality cherry pie filling or fresh cherries when in season. Additionally, press the crust firmly into the pan to prevent crumbling when serving.

Mistakes to avoid

Avoid overmixing the cream cheese layer, as this can make your Cherry Yum Yum dense instead of light and fluffy. Instead, gently fold the ingredients until just combined. Many bakers also skip the chilling step, but this causes the dessert to slump when sliced. For more tips on perfect no-bake desserts, check out our guide to no-bake treats. Finally, don’t substitute low-fat cream cheese—it alters the texture. Learn more about ingredient swaps in our baking substitutions article.

Serving and Pairing Suggestions

How to serve this dish

Serve Cherry Yum Yum chilled for the best texture and flavor. For a stunning presentation, layer it in clear dessert glasses or a trifle bowl to showcase the vibrant cherry layers. Top each serving with a dollop of whipped cream and fresh mint leaves for a pop of color. Alternatively, garnish with a few extra cherries or a drizzle of chocolate sauce for extra indulgence. This dessert shines at holiday gatherings, potlucks, or even as a sweet finale to a summer barbecue. If you want to elevate it further, pair individual portions with a delicate cookie or shortbread wedge on the side.

What goes well with it

A cup of hot coffee or tea balances the sweetness of Cherry Yum Yum perfectly, especially if you prefer a contrast to its creamy richness. For a festive twist, try serving it with a glass of sparkling rosé or a cherry-infused mocktail. If you’re planning a full dessert spread, consider pairing it with our Classic Vanilla Bean Cheesecake for a delightful variety of textures. Another great match is our Homemade Whipped Cream, which adds a light, airy touch to each bite. Whether you keep it simple or go all out, these pairings will make your Cherry Yum Yum even more memorable.

What is Cherry Yum Yum made of?

Cherry Yum Yum typically consists of a graham cracker crust, a creamy filling made with cream cheese and whipped topping, and a cherry pie filling topping. This no-bake dessert is known for its sweet, tangy flavors and easy preparation, making it a crowd-pleaser.

Can I use fresh cherries instead of pie filling for Cherry Yum Yum?

Yes, you can use fresh cherries, but you’ll need to cook them down with sugar and thickener to create a syrup-like consistency similar to canned pie filling. Cherry Yum Yum traditionally uses pie filling for convenience and its thick, jammy texture.

How long does Cherry Yum Yum need to chill before serving?

Cherry Yum Yum should chill for at least 4 hours, though overnight is ideal to let the layers set properly. This chilling time helps the creamy layer firm up and makes slicing easier while enhancing the flavors.

Is Cherry Yum Yum the same as cherry cheesecake?

While similar, Cherry Yum Yum differs from traditional cheesecake—it’s lighter with a whipped cream cheese layer instead of dense baked filling. Both feature cherries, but Cherry Yum Yum is typically simpler to make with no baking required.