There is something deeply comforting about walking into a home filled with the rich, savory aroma of a slow-cooked meal. It feels like a warm hug, a promise of a hearty dinner that brings everyone to the table. For many of us, this feeling is synonymous with a timeless dish that has graced family tables for generations. This ultimate comfort food, a Classic Pot Roast, transforms a simple cut of beef and humble vegetables into a tender, flavorful masterpiece with minimal effort. It is the perfect centerpiece for a Sunday supper or any day that calls for a nourishing, soul-satisfying meal.
What Is Classic Pot Roast
Fundamentally, a Classic Pot Roast is a method of slow-cooking a large, tough cut of beef until it becomes incredibly tender. We typically use a braising liquid, such as broth or wine, which creates a steamy environment inside the pot. Consequently, the connective tissues in the meat break down over several hours, resulting in a roast that practically falls apart with a fork. Moreover, we cook vegetables like carrots, potatoes, and onions alongside the beef. These vegetables not only create a complete meal but also absorb the incredible flavors from the meat and herbs, becoming a star in their own right. This cooking process guarantees a deeply flavorful and satisfying dinner.
This dish matters because it represents more than just food. It embodies tradition, comfort, and the simple joy of a home-cooked meal. In today’s fast-paced world, taking the time to prepare a Classic Pot Roast is a deliberate act of creating connection and nostalgia. It fits perfectly with a blog that celebrates approachable, from-scratch cooking that delivers both fantastic flavor and a sense of accomplishment. For instance, if you enjoy the process of making a dish like our Homemade Chicken Pot Pie, you will absolutely adore the similar comforting vibes of this pot roast. Ultimately, mastering this recipe provides a foundational skill that builds confidence in the kitchen. Furthermore, the leftovers are fantastic for creating entirely new meals, much like the versatile Best Banana Bread that you can enjoy for days.
Why I Love This Recipe
This Classic Pot Roast recipe holds a special place in my heart because it was the first real meal I ever confidently cooked for my entire family. I remember the nervous excitement of searing the meat and the overwhelming pride when everyone raved about how tender and flavorful it turned out. It taught me that the most impressive dishes are often the simplest, relying on time and technique rather than a long list of complicated ingredients. Now, I make it whenever I need to deliver a sense of warmth and care, and it never fails to create a moment of shared happiness around the dinner table.
Health and Nutrition
Why it’s good for your body
Classic Pot Roast delivers a powerful nutritional punch that truly satisfies your body. First, this hearty meal provides a fantastic source of high-quality protein from the slow-cooked chuck roast. Consequently, this protein helps build and repair muscle tissue, keeping you strong. Moreover, the cooking process breaks down tough collagen, making the nutrients highly bioavailable.
Additionally, the vegetables in Classic Pot Roast contribute essential vitamins and minerals. For example, carrots offer a wealth of beta-carotene, which your body converts to vitamin A for healthy vision and immunity. Similarly, onions and garlic provide potent antioxidants and anti-inflammatory compounds. Therefore, every serving supports your overall cellular health.
Furthermore, this comforting dish offers a great source of iron and zinc. As a result, it helps maintain healthy energy levels and a robust immune system. Ultimately, enjoying a well-prepared Classic Pot Roast nourishes your body from the inside out with every delicious bite.
How it fits in a healthy lifestyle
Classic Pot Roast fits beautifully into a balanced and mindful eating plan. It naturally aligns with a high-protein diet, helping you feel full and satisfied for hours, which can support healthy weight management goals. This makes it an excellent choice for a nourishing family dinner.
For those following specific eating styles, this dish is inherently gluten-free when you use a certified gluten-free broth or stock. You can also easily tailor the recipe to be lower in sodium by controlling the salt you add. Pair your pot roast with a light, crisp side salad to round out the meal perfectly. Discover more ideas for balancing your plate with our guide to creating a balanced plate.
Preparing a Classic Pot Roast ahead of time also makes for fantastic healthy leftovers, simplifying your weekly meal prep. This practice supports consistent healthy eating habits throughout your busy week. For more inspiration on planning your nutritious meals, explore our tips for easy meal prep ideas that the whole family will love.
PrintClassic Pot Roast
Description
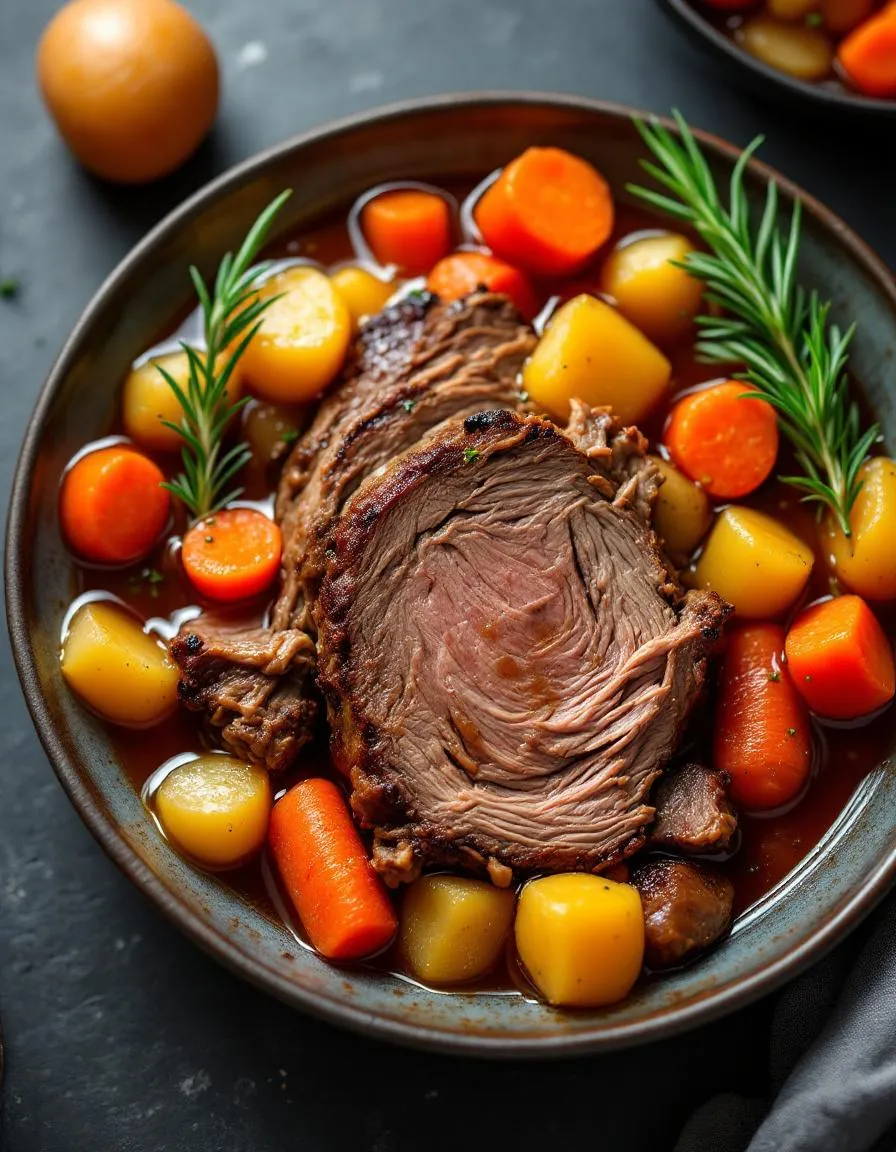
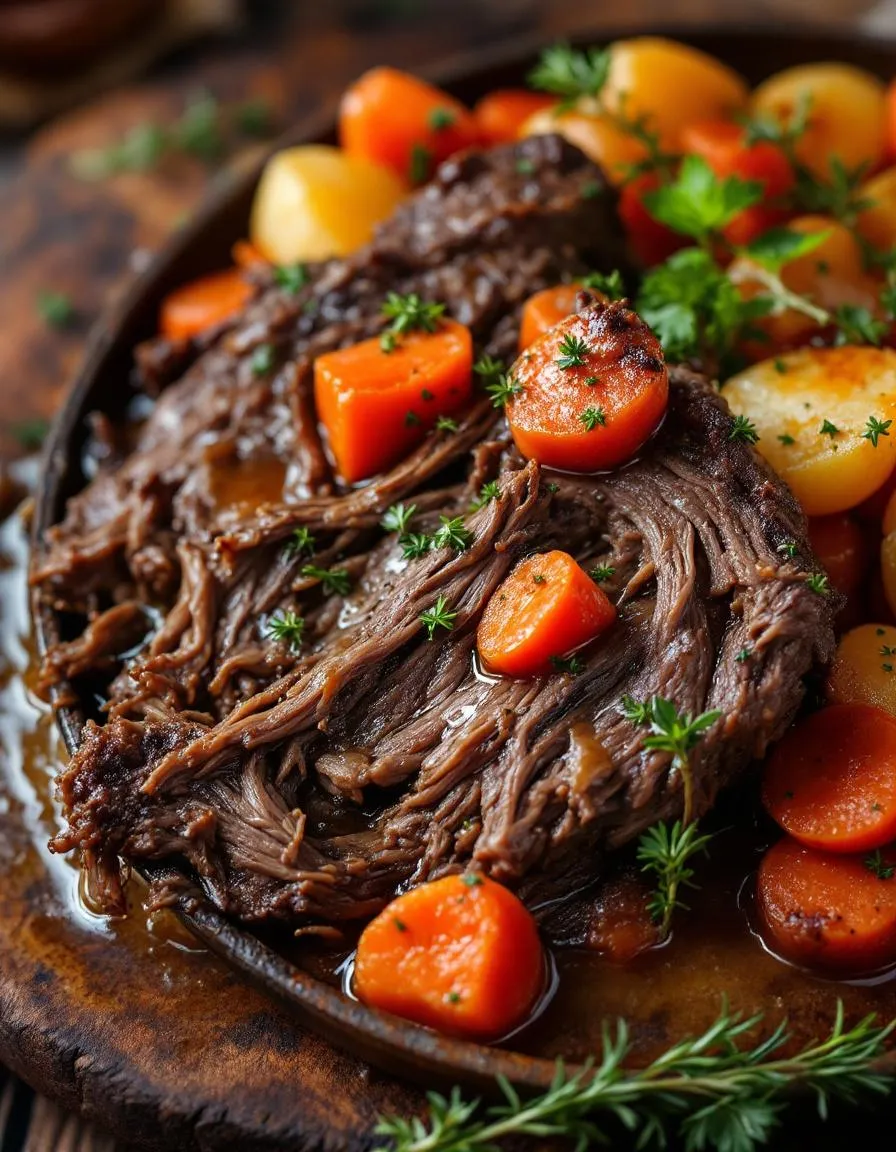
A tender, slow-cooked pot roast with vegetables in a rich gravy, perfect for a comforting family meal.
Ingredients
For the Crust:
- 3–4 lb chuck roast
- 2 tbsp olive oil
- 1 large onion, chopped
- 4 carrots, peeled and cut into chunks
- 4 potatoes, peeled and quartered
- 2 cloves garlic, minced
- 2 cups beef broth
- 1 tbsp Worcestershire sauce
- 1 tsp dried thyme
- Salt and pepper to taste
Instructions
1. Prepare the Crust:
- Preheat oven to 325°F (165°C). Season the chuck roast generously with salt and pepper.
- Heat olive oil in a large Dutch oven over medium-high heat. Sear the roast on all sides until browned, about 4-5 minutes per side. Remove and set aside.
- Add onion and garlic to the pot and sauté until fragrant, about 2 minutes. Pour in beef broth and Worcestershire sauce, scraping up any browned bits.
- Return the roast to the pot. Add carrots, potatoes, and thyme around the roast. Bring to a simmer.
- Cover and transfer to the preheated oven. Cook for 3-4 hours, until the meat is fork-tender.
- Remove from oven, let rest for 10 minutes before slicing. Serve with vegetables and gravy.
Notes
You can customize the seasonings to taste.

How to Prepare This Dish
Steps and time-saving tips
First, generously season your Classic Pot Roast all over with salt and pepper. Meanwhile, heat a couple tablespoons of oil in a large Dutch oven over medium-high heat. Next, carefully sear the roast until a beautiful brown crust forms on all sides; this step builds incredible flavor, so do not rush it. Then, remove the meat and sauté your chopped onions, carrots, and celery in the same pot for a few minutes. After that, stir in some tomato paste and let it cook for a minute until it deepens in color. Now, pour in your beef broth and a good glug of red wine to deglaze the pot, scraping up all those tasty browned bits from the bottom. Return the Classic Pot Roast to the pot and add herbs like thyme and a couple of bay leaves. Finally, bring the liquid to a simmer, cover tightly, and transfer it to a preheated 300°F oven. Let it braise low and slow for about 3 to 4 hours until the meat is fall-apart tender. For a great time-saving tip, you can chop all your vegetables the night before and store them in an airtight container in the fridge. Moreover, this dish tastes even better the next day, making it a perfect make-ahead meal for busy weeks.
Mistakes I’ve made and learned from
I used to always rush the searing process, which resulted in a pale and less flavorful Classic Pot Roast. I learned the hard way that patience is key; you really need to get a deep, dark crust on every side for the best results. Another common mistake was using a cut that was too lean, which led to a dry and tough outcome. Now, I always choose a well-marbled chuck roast because all that connective tissue melts into the most succulent, tender meat. I also once added potatoes way too early, and they completely disintegrated into the gravy. For perfect potatoes every time, I follow the guidance from my guide on how to boil potatoes to par-cook them before adding them to the pot for the final hour of braising. And speaking of gravy, getting the consistency right was another hurdle; my article on how to thicken stew saved dinner more than once with its simple roux method. Trust me, learning from these blunders will make your pot roast perfect every single time.
Cultural Connection and Variations
Where this recipe comes from
My grandmother always called her Classic Pot Roast a “Sunday hug.” She would slide the heavy Dutch oven into the stove early, filling the entire house with an aroma that promised comfort. This dish truly roots itself in humble American tradition, born from the need to transform tougher, affordable cuts of beef into something extraordinarily tender and flavorful through slow, patient cooking. Families across the country have their own signature version, often passed down through generations like a precious heirloom.
Meanwhile, various cultures embrace this same concept with their own beautiful twists. In France, they create a similar slow-braised masterpiece called Pot-au-Feu, often featuring broth served separately from the meat and vegetables. Jewish cooks might prepare a brisket for holidays, braising it with sweet onions and maybe a touch of tomato paste. The heart of the Classic Pot Roast, however, always remains the same: transforming simple ingredients into a deeply nourishing meal that gathers everyone around the table.
How it fits in today’s cooking
Thankfully, this timeless dish fits perfectly into our modern lives. It remains a superstar for Sunday dinners and holiday gatherings, offering a sense of tradition and warmth that few other meals can match. Furthermore, it’s a fantastic make-ahead option for busy weeknights; the flavors often improve after a day in the fridge.
Today’s cooks brilliantly adapt the method for convenience without sacrificing soul. Many utilize slow cookers for a true “fix it and forget it” experience, while others harness the power of pressure cookers like the Instant Pot to achieve fall-apart tenderness in a fraction of the time. Naturally, this method for creating tender, flavorful meat pairs wonderfully with other comfort food classics. For instance, you can easily shred any leftovers to make the most incredible Easy Beef Barbacoa Tacos the next night. Moreover, the rich, savory cooking liquid makes a phenomenal base for a quick soup or a gravy for another family favorite, like our Herb Roasted Chicken Thighs. Ultimately, Classic Pot Roast continues to earn its place in our kitchens by being both timeless and incredibly adaptable.
Taste and Texture
What makes it delicious
This Classic Pot Roast delivers a deeply savory and comforting flavor profile. Tender, slow-cooked beef simply melts in your mouth, while the vegetables soak up the rich, herb-infused juices. Aromatic garlic and onions create a fragrant base that fills your kitchen with an irresistible smell. Ultimately, each forkful of this Classic Pot Roast offers a perfect, hearty balance of soft meat and velvety vegetables.
Boosting the flavor
For an even richer experience, consider searing your roast until it develops a dark crust before braising. Additionally, a splash of red wine or a tablespoon of tomato paste can deepen the savory notes of the cooking liquid. Furthermore, serving it with a bright, acidic side cuts through the richness beautifully; our Easy Homemade Horseradish Sauce provides a fantastic zesty kick. Finally, if you want to explore another comforting dish with similar principles, our Hearty Beef Stew Recipe offers more inspiration for slow-cooked meals.
Tips for Success
Best practices for results
First, always sear your Classic Pot Roast on all sides to create a flavorful crust. Furthermore, use a heavy, oven-safe pot with a tight-fitting lid to lock in moisture and heat. For the most tender result, cook your Classic Pot Roast low and slow until the meat easily falls apart. Additionally, let the roast rest for at least fifteen minutes before slicing against the grain.
Mistakes to avoid
A common mistake is using a lean cut of meat, which often results in a dry and tough roast. Instead, choose a well-marbled chuck roast for the best Classic Pot Roast. Another error is rushing the cooking process with high heat; consequently, the connective tissues won’t break down properly. For more guidance, our guide on choosing the right beef cut is very helpful. Also, avoid lifting the lid too often to check, as this releases essential steam and heat. If you are unsure about your oven’s temperature accuracy, our article on oven temperature tips can ensure perfect cooking every time.
Serving and Pairing Suggestions
How to serve this dish
Present your Classic Pot Roast family-style for a truly inviting tablescape. Consequently, transfer the entire roast and vegetables to a large, rustic platter. Generously ladle the rich cooking juices over the top for a glistening finish. For a special touch, garnish with a handful of fresh chopped parsley or thyme. This comforting Classic Pot Roast truly shines as the centerpiece of a holiday meal or a cozy Sunday supper.
What goes well with it
First, a side of our incredibly fluffy Easy Mashed Potatoes is practically mandatory. They create the perfect canvas for that delicious pot roast gravy. Alternatively, a bright, tangy side cuts through the richness beautifully. For instance, our simple Classic Caesar Salad offers a crisp, refreshing contrast. Finally, a robust red wine like a Cabernet Sauvignon complements the deep, savory flavors of your Classic Pot Roast perfectly.

The best cuts for a Classic Pot Roast are tough, well-marbled cuts that become tender and flavorful through slow cooking. Chuck roast is the top choice because its fat and connective tissue break down beautifully. Other excellent options include brisket or bottom round for your perfect Classic Pot Roast.
Yes, searing the meat before slow cooking is a crucial step for developing deep flavor. Browning the roast on all sides creates a delicious caramelized crust through the Maillard reaction. This step adds a rich, complex flavor base that enhances the entire Classic Pot Roast.
At 325°F, a typical 3 to 4-pound Classic Pot Roast will take approximately 3 to 4 hours to become perfectly tender. The cooking time can vary based on the size and shape of the roast. The roast is done when it easily shreds with a fork.
While it’s difficult to truly “overcook” a pot roast in the same way as a steak, you can cook it for so long that it becomes dry and stringy. The goal is to cook it just until it becomes fork-tender. If you cook a Classic Pot Roast far beyond this point, the muscle fibers can tighten and expel too much moisture.