“`html
Introduction
There’s something magical about coming home to a warm, comforting bowl of soup after a long day—especially when it practically cooks itself. That’s exactly what you get with this Cozy Slow Cooker Creamy Tortellini Soup, a dish that wraps you in comfort with every spoonful. Whether you’re battling a chilly evening or just craving a hearty, no-fuss meal, this recipe delivers rich flavors, creamy textures, and the kind of simplicity that makes weeknight cooking a joy. Plus, the slow cooker does most of the work, so you can focus on what really matters: savoring the moment.
About This Recipe
If you’ve ever wondered how to turn a handful of pantry staples into a restaurant-worthy meal, this Cozy Slow Cooker Creamy Tortellini Soup is your answer. Packed with cheesy tortellini, tender vegetables, and a velvety broth, it’s the ultimate comfort food that feels indulgent without requiring hours in the kitchen. What makes it special? First, the slow cooker melds the flavors beautifully, so every bite tastes like it simmered all day. Second, it’s incredibly versatile—swap in your favorite veggies or protein, and it still turns out delicious. Finally, it fits perfectly with our blog’s mission: sharing recipes that are both approachable and unforgettable. For more cozy inspiration, check out our Easy Weeknight Dinners or explore our Comfort Food Classics for dishes that hit all the right notes.
Why I Love This Recipe
This soup holds a special place in my heart because it’s the dish I turn to when life gets hectic. I remember the first time I made it—I was exhausted after a busy day, and the idea of cooking felt overwhelming. But tossing everything into the slow cooker gave me the gift of time, and the result was so satisfying that it became an instant favorite. Now, it’s my go-to for potlucks, family gatherings, and even those nights when I just need a little extra comfort. The Cozy Slow Cooker Creamy Tortellini Soup isn’t just a recipe; it’s a reminder that good food doesn’t have to be complicated to feel like a hug in a bowl.
“`
Health and Nutrition
Why it’s good for your body
Cozy Slow Cooker Creamy Tortellini Soup packs a nutritious punch while delivering rich, comforting flavors. First, the cheese-filled tortellini provides a solid source of protein and calcium, which helps maintain muscle health and strong bones. Additionally, the creamy broth often includes ingredients like spinach or kale, adding a boost of fiber and essential vitamins like A and K.
Moreover, this soup balances indulgence with nourishment. For example, using low-sodium broth keeps the dish heart-friendly while still delivering deep, savory notes. The slow cooker method also preserves nutrients better than high-heat cooking, ensuring you get the most from every ingredient. Whether you choose a tomato-based or dairy-rich version, Cozy Slow Cooker Creamy Tortellini Soup offers versatility to suit different dietary preferences.
Finally, the warmth and richness of this soup can support digestion and hydration, especially during colder months. By incorporating vegetables and lean proteins, it becomes a satisfying meal that fuels your body without weighing you down. With each spoonful, Cozy Slow Cooker Creamy Tortellini Soup proves that comfort food can also be wholesome.
How it fits in a healthy lifestyle
Cozy Slow Cooker Creamy Tortellini Soup fits seamlessly into a balanced diet, whether you’re meal-prepping or craving a cozy dinner. For those watching their gluten intake, simply swap regular tortellini for a gluten-free version—the creamy broth and veggies will still shine. If you’re prioritizing heart health, opt for low-fat dairy or a plant-based cream alternative to keep saturated fats in check.
This soup also pairs well with other nutrient-dense dishes, like a crisp chopped salad or a slice of whole-grain bread. Plus, the slow cooker does most of the work, making it easier to stick to healthy eating habits even on busy days. For more ideas on balancing comfort and nutrition, explore our guide to simple meal prep strategies. Whether you’re fueling up post-workout or winding down for the evening, this soup keeps your goals on track without sacrificing flavor.
PrintCozy Slow Cooker Creamy Tortellini Soup
Description
A comforting and creamy soup packed with cheesy tortellini, vegetables, and a rich broth, perfect for chilly days.
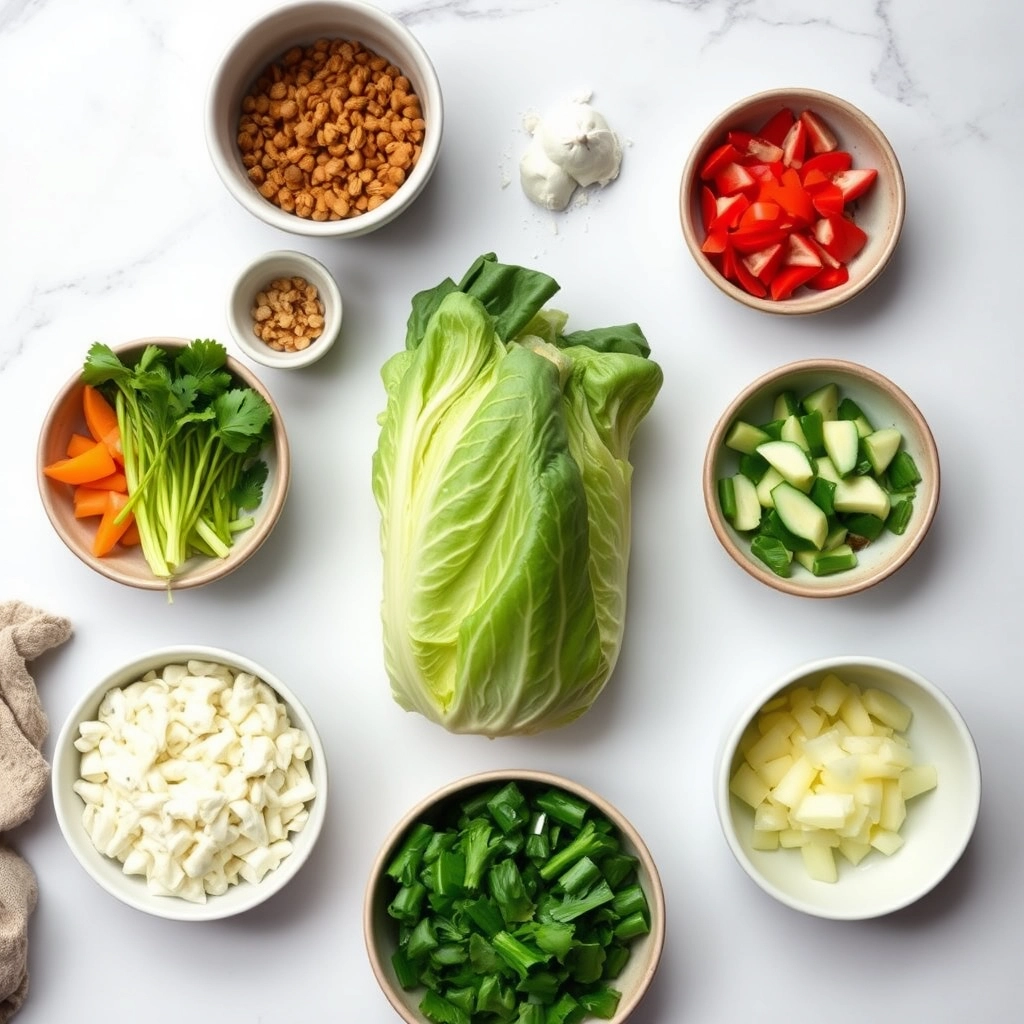
Ingredients
For the Crust:
- 1 (20 oz) package refrigerated cheese tortellini
- 1 (32 oz) carton chicken broth
- 1 (14.5 oz) can diced tomatoes, undrained
- 1 cup heavy cream
- 1 cup fresh spinach, chopped
- 1 small onion, diced
- 2 cloves garlic, minced
- 1 tsp dried basil
- 1/2 tsp dried oregano
- Salt and pepper to taste
- 1/2 cup grated Parmesan cheese
Instructions
1. Prepare the Crust:
- In a slow cooker, combine chicken broth, diced tomatoes, onion, garlic, basil, oregano, salt, and pepper.
- Cover and cook on low for 4-5 hours or high for 2-3 hours.
- Stir in tortellini, heavy cream, and spinach. Cover and cook for an additional 15-20 minutes or until tortellini is tender.
- Stir in Parmesan cheese just before serving.
- Serve warm with extra Parmesan if desired.
Notes
You can customize the seasonings to taste.
How to Prepare This Dish
Steps and time-saving tips
Start by heating olive oil in a skillet over medium heat, then sauté diced onions, minced garlic, and sliced carrots until they soften. Next, transfer the veggies to your slow cooker and add vegetable broth, diced tomatoes, and Italian seasoning. Stir everything well to combine the flavors. For a creamy twist, whisk in heavy cream and grated Parmesan cheese once the broth simmers. Then, gently fold in fresh or frozen tortellini, making sure they’re fully submerged. Cover and cook on low for 4-5 hours or high for 2-3 hours. Meanwhile, prep a quick side salad or garlic bread to round out the meal. If you’re short on time, use pre-chopped veggies or store-bought tortellini to speed things up. Just before serving, sprinkle fresh parsley and extra Parmesan on top for a vibrant finish.
Mistakes I’ve made and learned from
I once rushed the sautéing step and ended up with crunchy onions in my Cozy Slow Cooker Creamy Tortellini Soup—not ideal! Now I take an extra minute to soften them properly for a smoother texture. Another blunder? Adding the tortellini too early, which turned them mushy. Lesson learned: fold them in during the last hour of cooking. If you’re new to slow cooking, check out my guide on slow cooker basics to avoid common pitfalls. And if you love creamy soups, my creamy soup hacks will help you nail the perfect consistency every time.

Cultural Connection and Variations
Where this recipe comes from
Cozy Slow Cooker Creamy Tortellini Soup feels like a warm hug from Italian grandmothers and busy parents alike. While tortellini itself hails from Emilia-Romagna, where chefs stuff the delicate pasta with rich cheeses or meats, this soup version embraces the American love for hearty, one-pot meals. In Italy, you might find tortellini served in brodo, a clear broth, but here we swirl in creamy tomato sauce for extra comfort.
Families often tweak the recipe to match their tastes. Some add spinach for a pop of color, while others toss in spicy sausage for a bolder flavor. My aunt swears by a dash of nutmeg, a nod to Northern Italian traditions. Meanwhile, in the Midwest, cooks might stir in extra veggies like carrots or celery, turning Cozy Slow Cooker Creamy Tortellini Soup into a full meal. No matter the variation, the dish always brings people together—whether at weeknight dinners or holiday gatherings.
How it fits in today’s cooking
Today, this soup shines as a go-to for busy cooks. The slow cooker does the heavy lifting, making it perfect for meal prep or cozy nights in. Many modern twists keep it fresh, like using plant-based cream or gluten-free tortellini. It’s also a star during fall and winter, pairing perfectly with crusty bread or a crisp salad.
You’ll often spot Cozy Slow Cooker Creamy Tortellini Soup at potlucks or family reunions, proving its timeless appeal. For more easy comfort food, try our One-Pot Chicken and Rice or explore other slow cooker favorites. Whether you stick to the classic or experiment with new flavors, this soup stays a beloved staple in today’s kitchens.
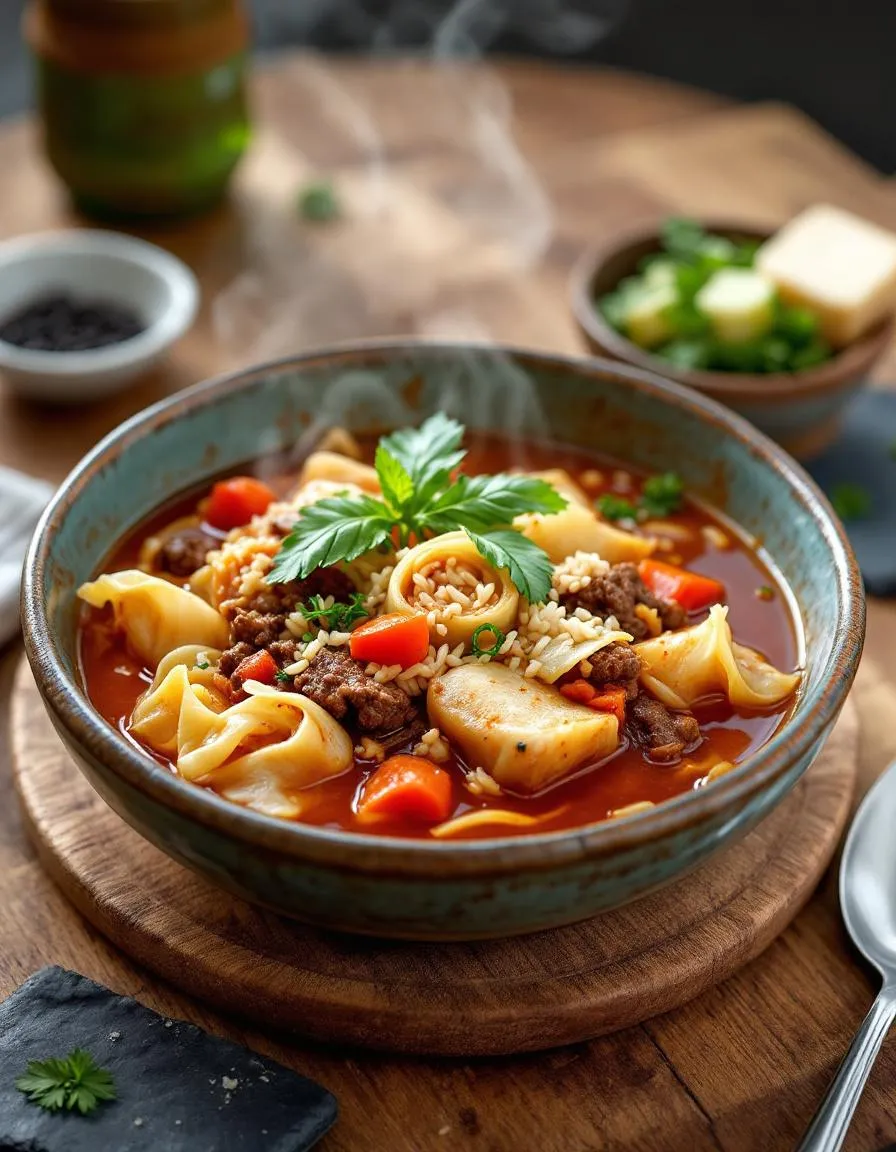
Taste and Texture
What makes it delicious
Cozy Slow Cooker Creamy Tortellini Soup wraps you in warmth with its rich, velvety broth and tender cheese-filled tortellini. Each spoonful delivers a luscious, creamy texture that melts on your tongue, while the savory notes of garlic and Parmesan deepen the flavor. Fragrant herbs like thyme and rosemary weave through the soup, adding earthy brightness. Meanwhile, the slight chewiness of the tortellini contrasts perfectly with the silky broth, creating a satisfying bite. Whether you catch the tang of sun-dried tomatoes or the subtle sweetness of sautéed onions, every ingredient in Cozy Slow Cooker Creamy Tortellini Soup works together to create a comforting, layered dish.
Boosting the flavor
For an extra flavor kick, try stirring in a spoonful of pesto or a sprinkle of red pepper flakes to add a herby or spicy punch. If you love bold textures, top your bowl with crispy bacon bits or toasted pine nuts for crunch. You can also swap the Parmesan for aged Pecorino Romano to intensify the umami depth. For more inspiration, check out our guide to easy herb pairings or explore ways to elevate soup toppings. A splash of lemon juice or a drizzle of high-quality olive oil just before serving brightens the entire dish, making each bite even more memorable.

Tips for Success
Best practices for results
Always use fresh tortellini for the best texture in your Cozy Slow Cooker Creamy Tortellini Soup, as frozen varieties can turn mushy. Stir the cream in during the last 30 minutes to prevent curdling, and for extra flavor, sauté the onions and garlic before adding them to the slow cooker. Additionally, keep the heat on low to let the flavors meld perfectly without overcooking the pasta.
Mistakes to avoid
Avoid adding the tortellini too early, or they’ll break down before serving. Instead, add them in the last hour of cooking for ideal tenderness. Also, don’t skip deglazing the pot after browning the meat—this step locks in flavor. For more slow cooker tricks, check out our slow cooker hacks guide. Finally, resist the urge to over-stir the soup, as this can make it gluey. For perfectly cooked pasta every time, review our pasta perfection tips.
Serving and Pairing Suggestions
How to serve this dish
Serve Cozy Slow Cooker Creamy Tortellini Soup in deep bowls to keep it warm and highlight its rich texture. For a cozy touch, top it with freshly grated Parmesan, a sprinkle of chopped parsley, or a drizzle of olive oil. Meanwhile, crusty bread on the side makes it perfect for dipping. This dish shines at family dinners, holiday gatherings, or even as a comforting weeknight meal. To elevate the presentation, use colorful bowls and garnish with a few extra tortellini on top.
What goes well with it
A crisp green salad balances the creaminess of Cozy Slow Cooker Creamy Tortellini Soup beautifully. Try pairing it with our Easy Avocado Salad for a refreshing contrast. For drinks, a light white wine like Pinot Grigio or a sparkling lemonade enhances the flavors without overpowering them. Additionally, warm garlic knots or our Homemade Focaccia add a delightful crunch to every bite. Each pairing brings out the best in this hearty soup.

Yes, frozen tortellini works well in Cozy Slow Cooker Creamy Tortellini Soup. Add it during the last 30 minutes of cooking to prevent it from becoming mushy. Fresh or refrigerated tortellini also works, but adjust cooking times accordingly.
To thicken the soup, mix 1-2 tablespoons of cornstarch with cold water and stir it in during the last 30 minutes of cooking. Alternatively, blend a small portion of the soup and mix it back in for a creamier texture without altering the flavor.
For a lighter option, use half-and-half or whole milk mixed with a tablespoon of butter. Coconut milk or evaporated milk also works for a dairy-free version of Cozy Slow Cooker Creamy Tortellini Soup.
Absolutely! Use vegetable broth instead of chicken broth and opt for cheese-filled tortellini. Add mushrooms or spinach for extra flavor and texture in your vegetarian Cozy Slow Cooker Creamy Tortellini Soup.