Best Hearty Vegan Stew – Comforting & Flavorful

best-hearty-vegan-stew

Introduction

There’s something deeply comforting about a bowl of Hearty Vegan Stew, especially when the weather turns chilly or life feels a little overwhelming. Whether you’re a longtime plant-based eater or just exploring meatless meals, this stew wraps you in warmth and satisfaction. Plus, it’s packed with wholesome ingredients that nourish both body and soul. Trust me, one bite and you’ll understand why this dish holds a special place in my kitchen—and hopefully yours too.

Hearty Vegan Stew is more than just a meal; it’s a celebration of simplicity and flavor. Bursting with tender vegetables, protein-rich beans, and a savory broth, it proves that plant-based eating can be both satisfying and delicious. Unlike many recipes that rely on heavy creams or processed substitutes, this stew gets its richness from natural ingredients like tomatoes, herbs, and a touch of smoked paprika. It’s also incredibly versatile—perfect for meal prep, cozy family dinners, or even impressing guests at your next gathering. If you’re looking for more ways to enjoy plant-based comfort food, check out my vegan comfort food roundup. And if you love stews but want something quicker, my 30-minute vegan meals collection has plenty of options.

Why I Love This Recipe

This Hearty Vegan Stew reminds me of Sunday dinners at my grandma’s house, where the stove always simmered with something delicious. Back then, her version wasn’t vegan, but today, I’ve recreated that same soul-warming goodness without any animal products. Every time I make it, the aroma fills my kitchen with nostalgia, and the first spoonful feels like a hug. It’s also the recipe that convinced my skeptical friends that vegan food could be just as comforting as the classics—proof that plant-based cooking can win over even the biggest meat lovers.

Health and Nutrition

Why it’s good for your body

Hearty Vegan Stew packs a powerful nutritional punch while keeping your taste buds happy. First, it’s loaded with fiber-rich vegetables like carrots, potatoes, and kale, which support digestion and keep you full longer. Additionally, the legumes in this stew provide plant-based protein, helping to maintain muscle health without relying on animal products. Because it’s entirely plant-based, Hearty Vegan Stew also naturally lowers cholesterol levels, making it a heart-smart choice.

Moreover, the antioxidant-packed ingredients fight inflammation and boost immunity. Turmeric and garlic, for example, add more than just flavor—they deliver anti-inflammatory benefits. Meanwhile, the tomatoes and leafy greens contribute essential vitamins like C and K. Since Hearty Vegan Stew avoids processed ingredients, you get pure, wholesome nutrition in every bite. Whether you’re fueling up after a workout or simply craving comfort food, this stew nourishes your body without compromise.

Finally, the slow-cooked method preserves nutrients better than quick frying or boiling. As a result, you absorb more vitamins and minerals with each serving. Whether you prioritize gut health, heart health, or overall wellness, Hearty Vegan Stew checks all the boxes.

How it fits in a healthy lifestyle

Hearty Vegan Stew fits seamlessly into a balanced diet, whether you’re gluten-free, focused on heart health, or just aiming for more plant-based meals. Its high fiber content helps stabilize blood sugar, making it a great option for those managing energy levels throughout the day. Plus, the stew’s protein-rich beans and lentils make it a satisfying meal prep staple for busy weeks.

If you’re exploring more plant-based recipes, check out our guide to easy vegan meal prep for time-saving tips. For those watching sodium intake, simply adjust the broth or seasoning to keep it heart-healthy. And if you love pairing nutritious meals with wholesome snacks, our healthy snack ideas round out a day of clean eating. Hearty Vegan Stew proves that comfort food can be both delicious and nourishing.

Print

clock clock iconcutlery cutlery iconflag flag iconfolder folder iconinstagram instagram iconpinterest pinterest iconfacebook facebook iconprint print iconsquares squares iconheart heart iconheart solid heart solid icon

Hearty Vegan Stew


  • Author:
    Chef Emy

Description

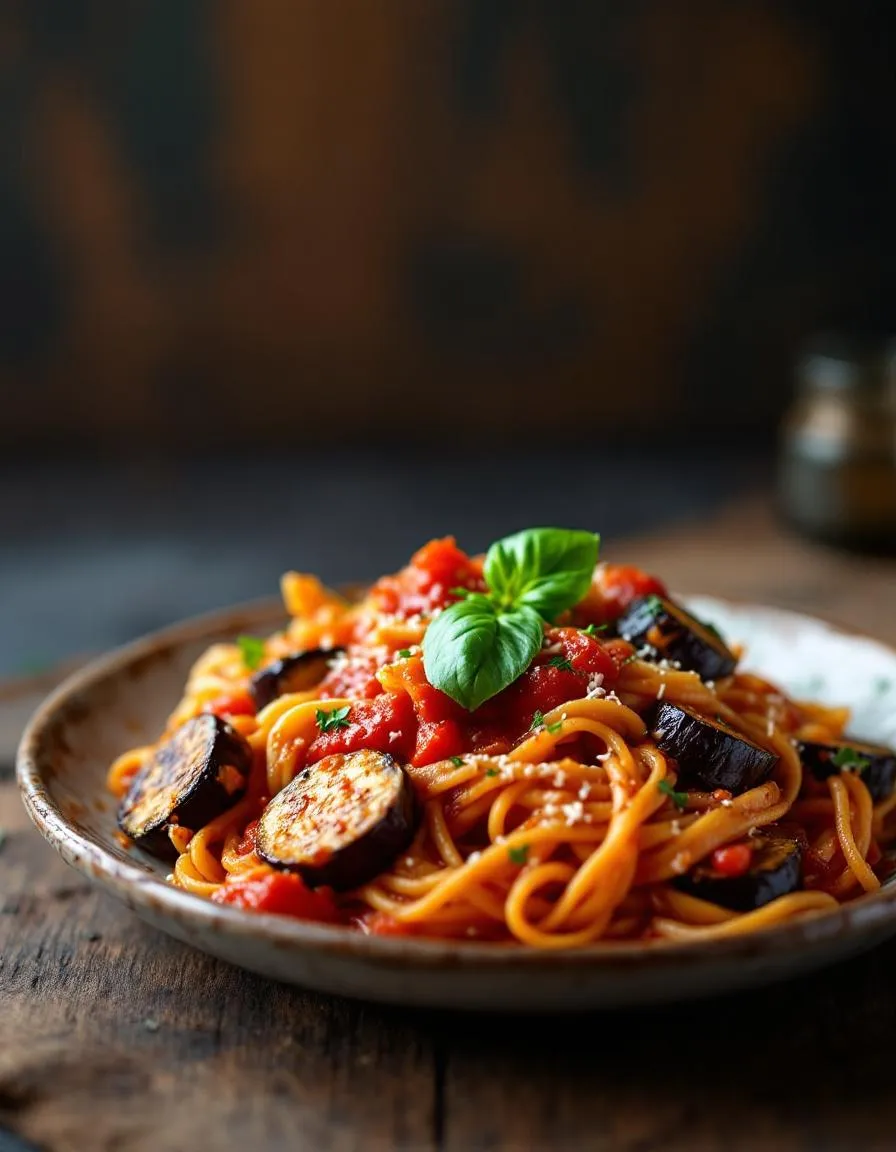
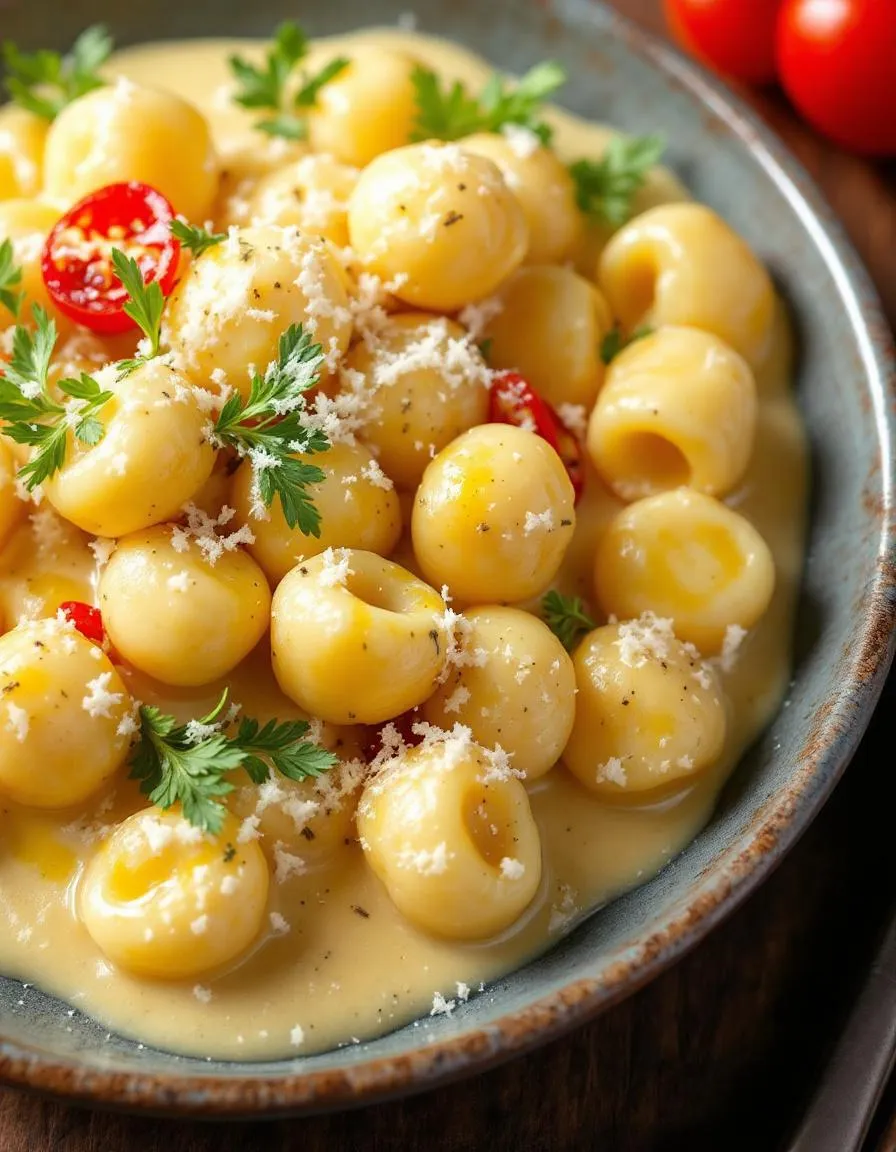
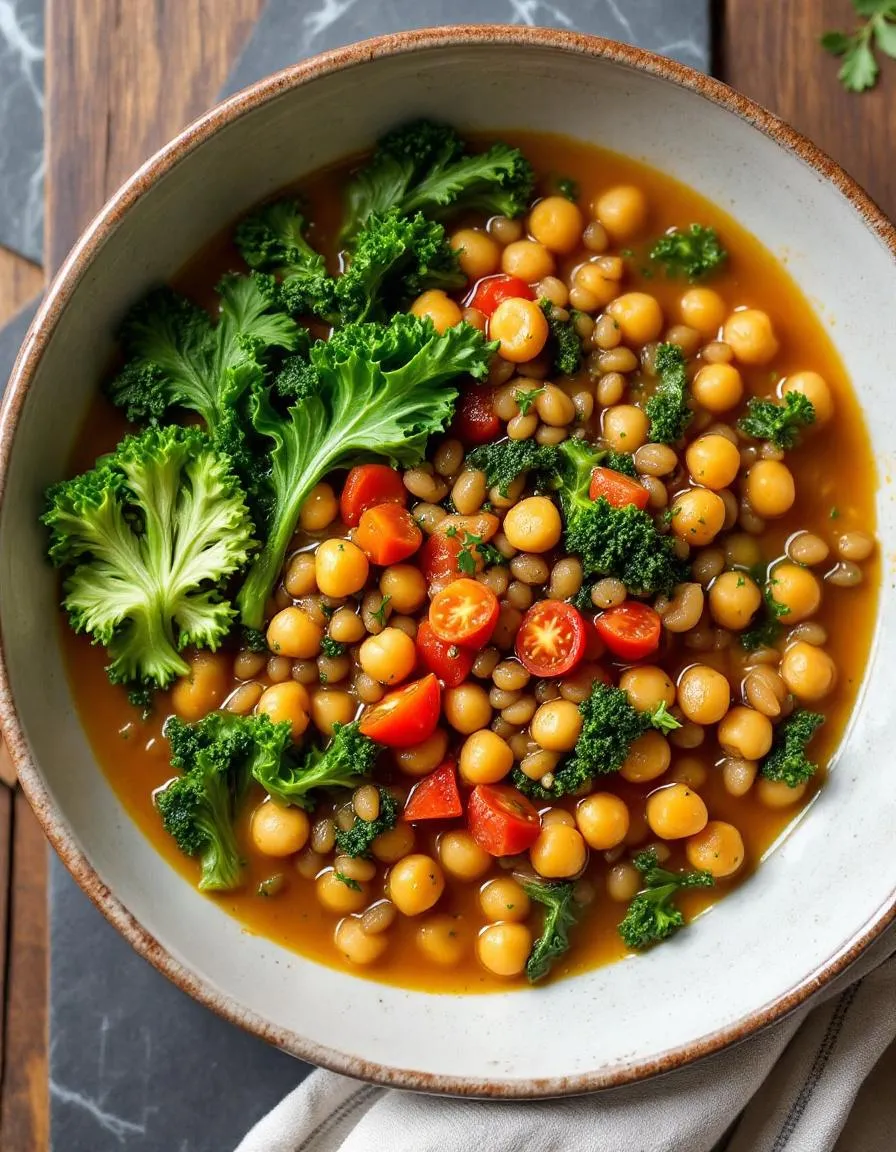
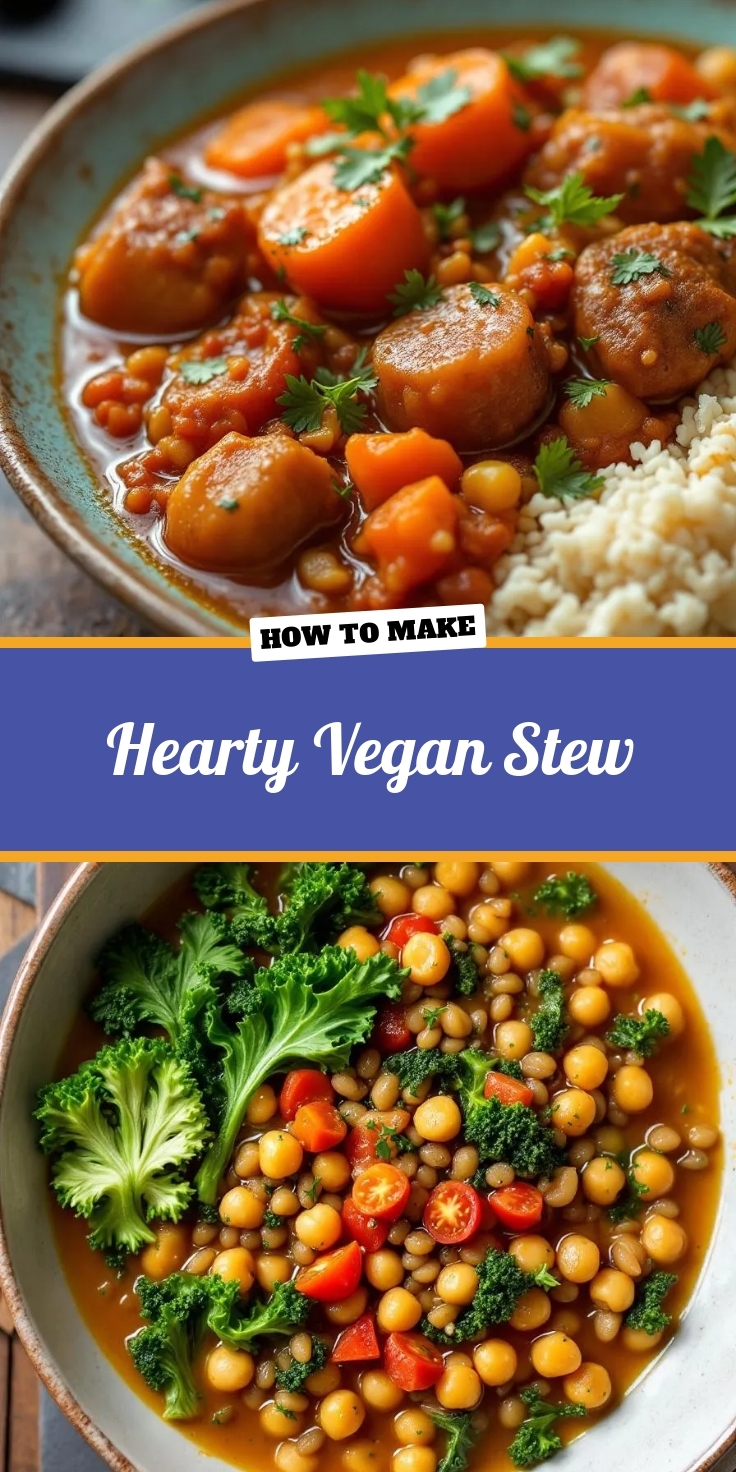
A rich and comforting stew packed with vegetables and plant-based protein.
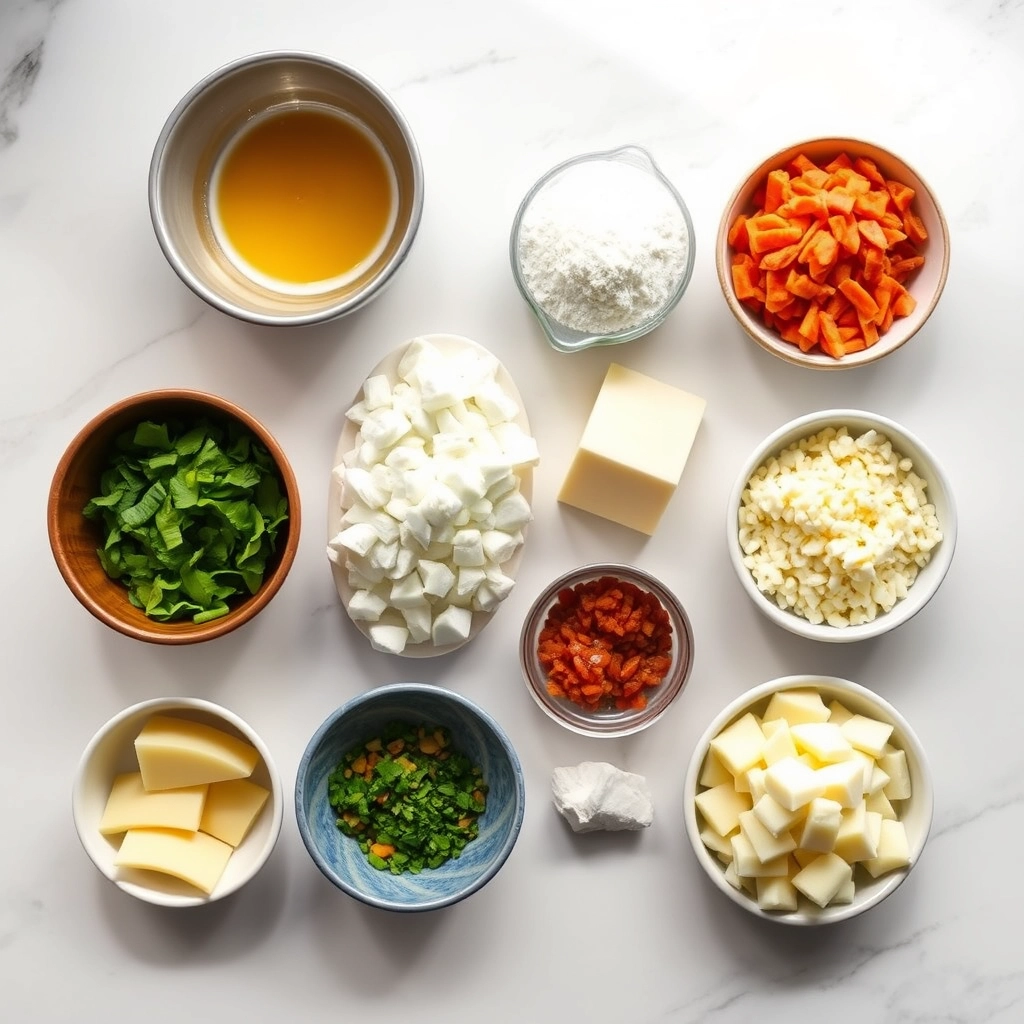
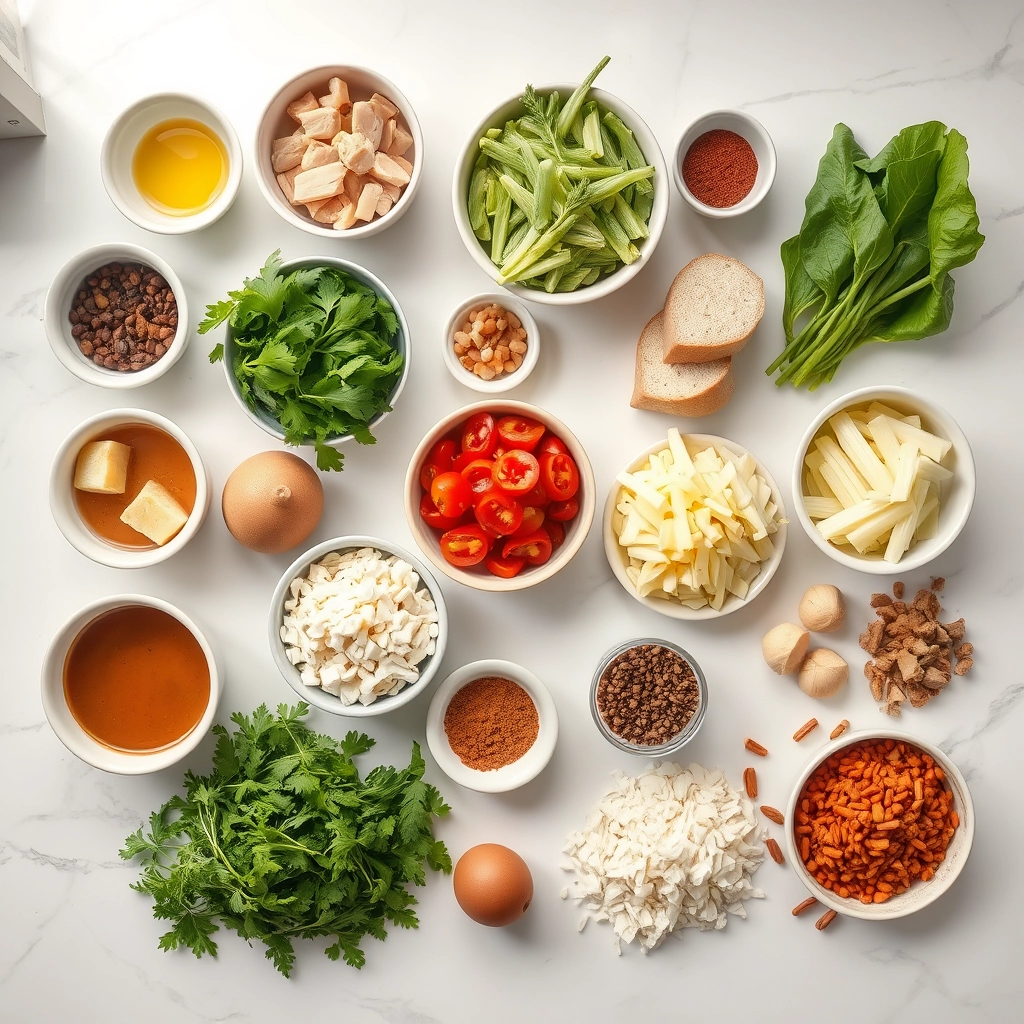
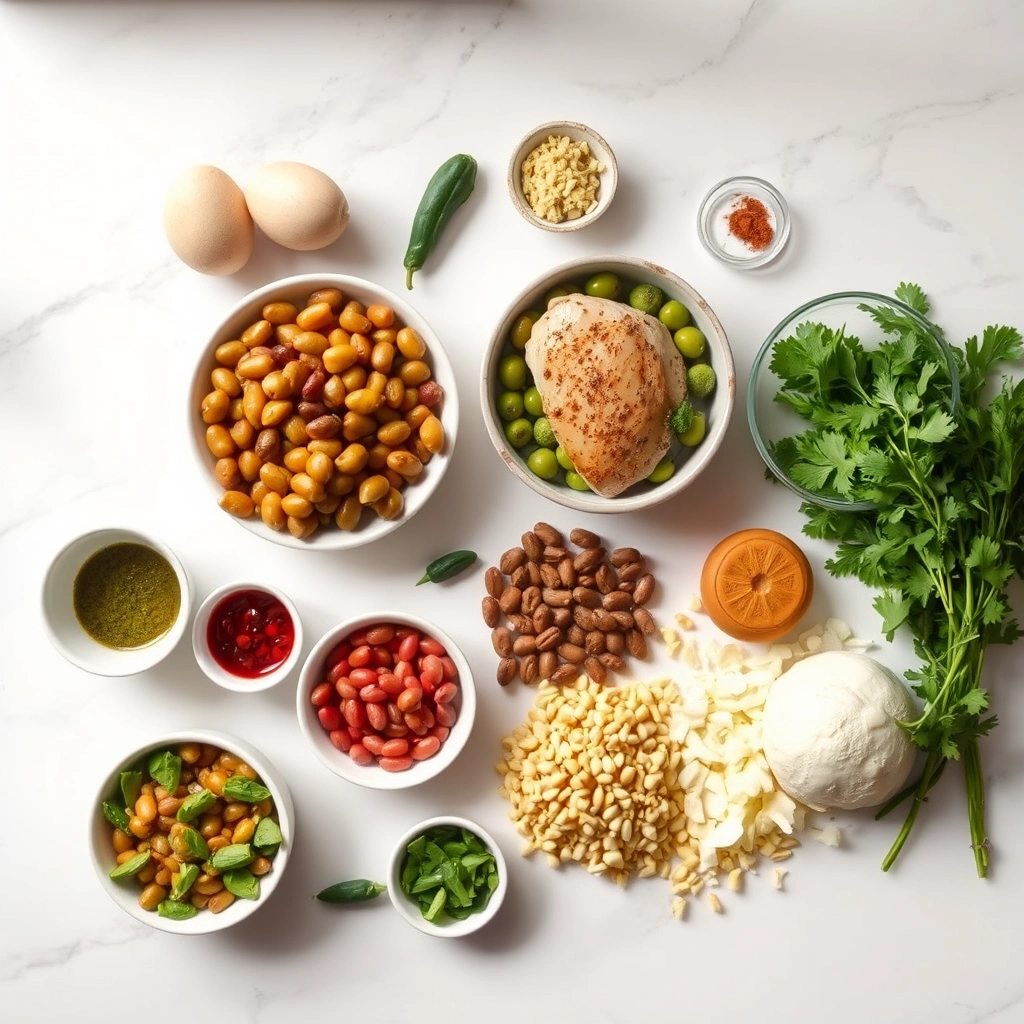
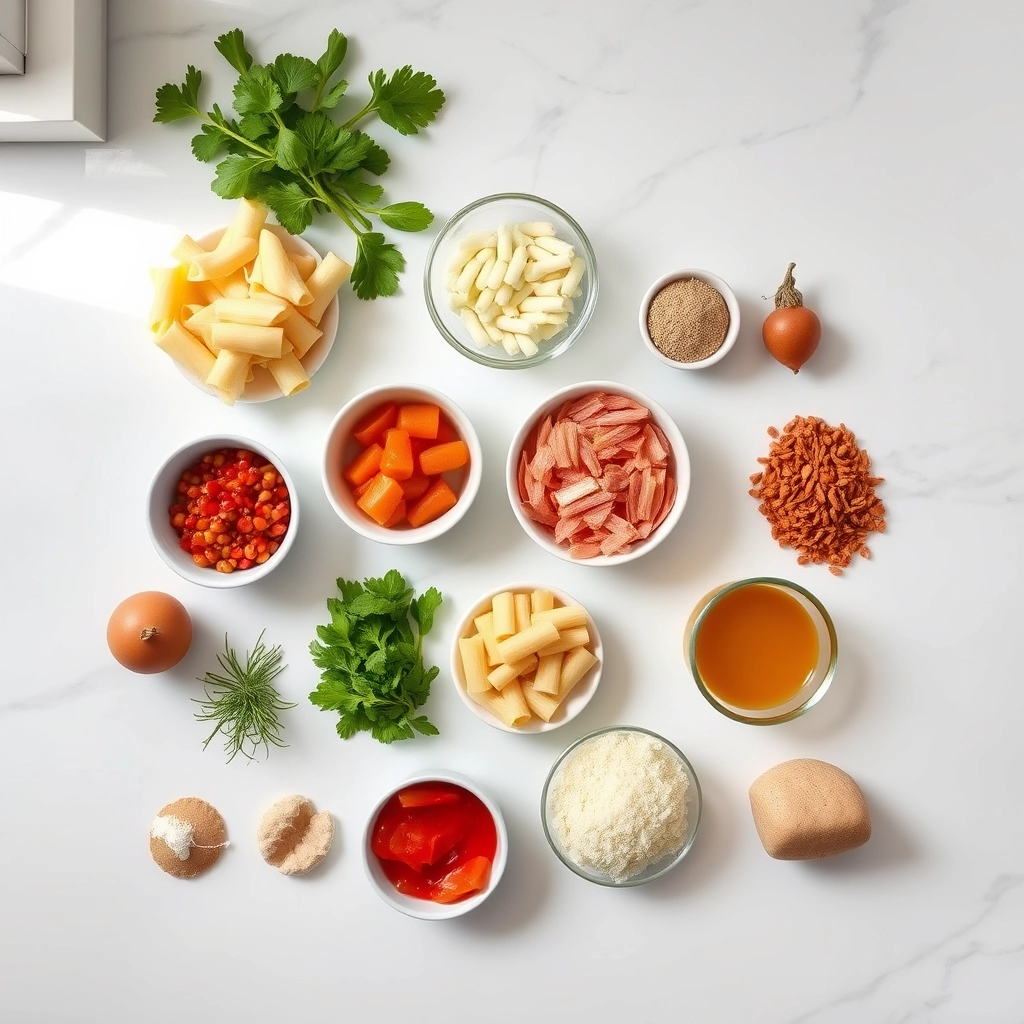
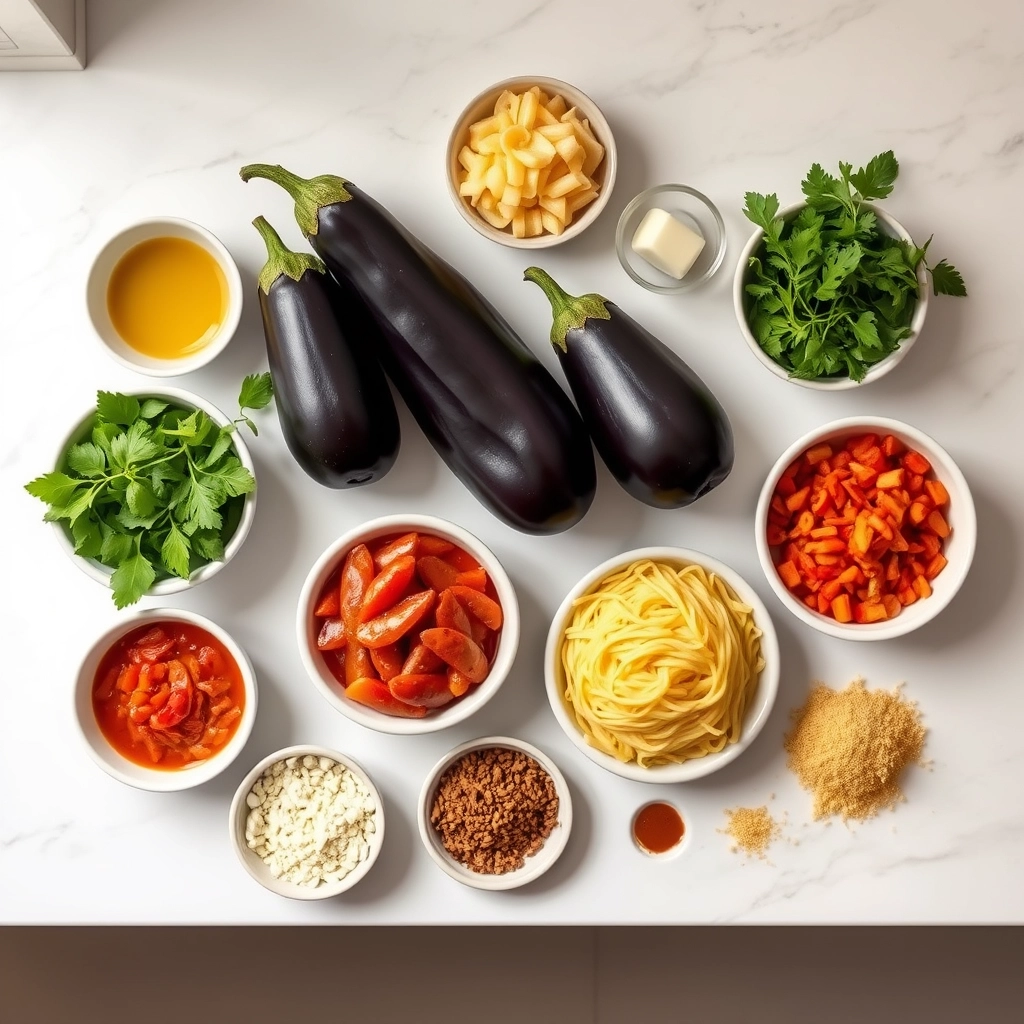
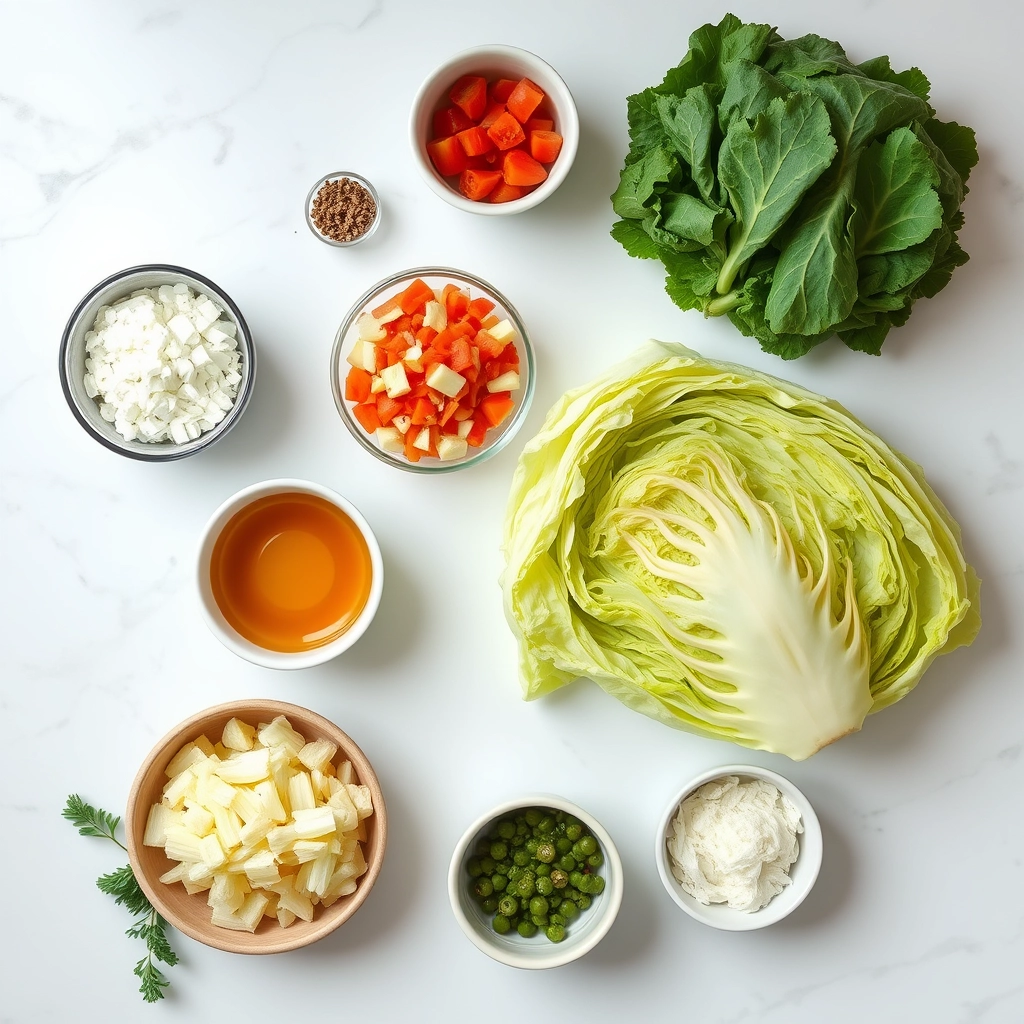
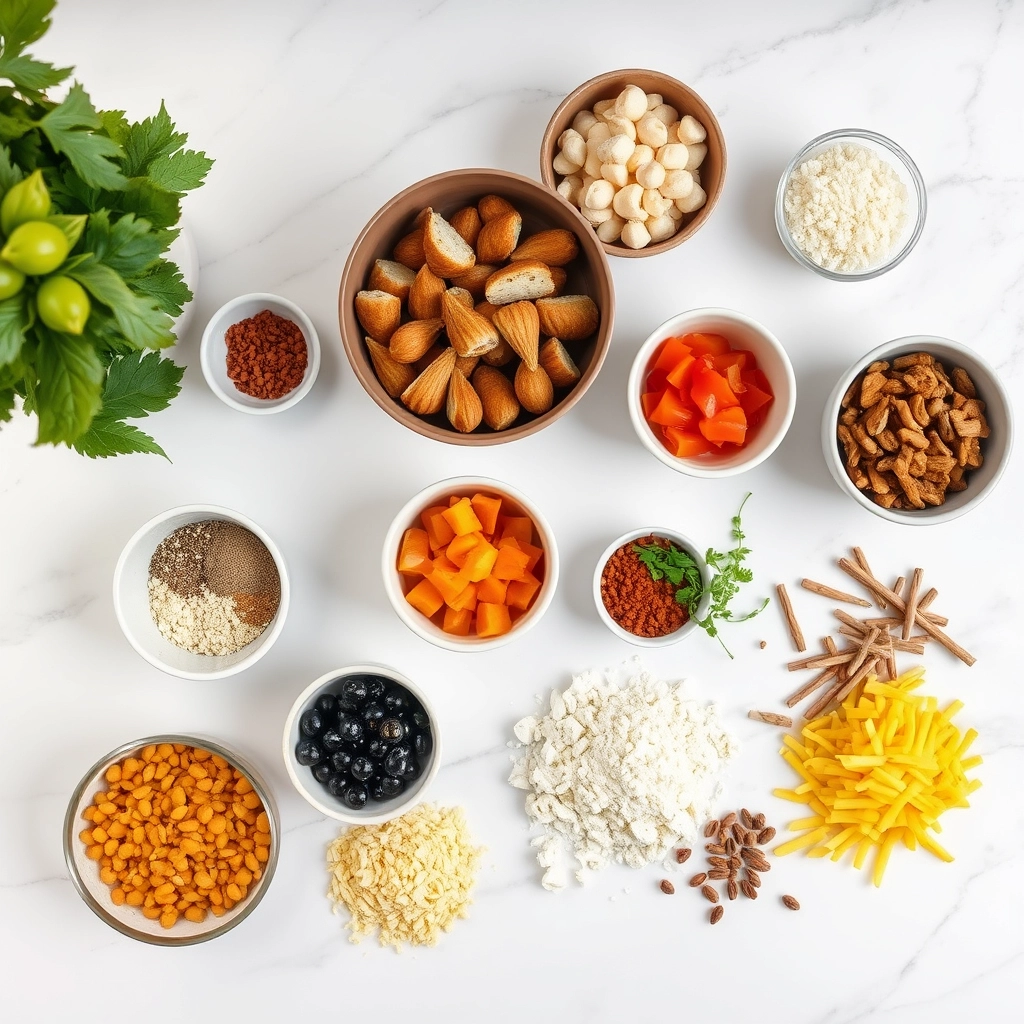

Ingredients


Scale

For the Crust:

  • 2 tbsp olive oil
  • 1 onion, diced
  • 3 garlic cloves, minced
  • 2 carrots, chopped
  • 2 celery stalks, chopped
  • 1 bell pepper, diced
  • 1 can (15 oz) diced tomatoes
  • 4 cups vegetable broth
  • 1 can (15 oz) chickpeas, drained
  • 1 cup green lentils
  • 1 tsp smoked paprika
  • 1 tsp cumin
  • Salt and pepper to taste
  • 2 cups chopped kale


Instructions

1. Prepare the Crust:

  1. Heat olive oil in a large pot over medium heat. Add onion and garlic, sauté until fragrant.
  2. Add carrots, celery, and bell pepper. Cook for 5 minutes until vegetables soften.
  3. Stir in diced tomatoes, vegetable broth, chickpeas, lentils, smoked paprika, and cumin. Bring to a boil.
  4. Reduce heat to low, cover, and simmer for 25 minutes or until lentils are tender.
  5. Add chopped kale and cook for an additional 5 minutes. Season with salt and pepper to taste.
  6. Serve hot and enjoy.

Notes

You can customize the seasonings to taste.


How to Prepare This Dish

Steps and time-saving tips

Start by heating a large pot over medium heat and drizzling in a tablespoon of olive oil. Once the oil shimmers, toss in diced onions, carrots, and celery, stirring frequently until they soften—about 5 minutes. Add minced garlic and cook for another 30 seconds until fragrant. Next, pour in vegetable broth, diced tomatoes, and your choice of hearty vegetables like potatoes, sweet potatoes, or butternut squash. Stir well, then bring the mixture to a gentle boil. Reduce the heat to low, cover the pot, and let the Hearty Vegan Stew simmer for 20 minutes. Meanwhile, rinse and drain a can of chickpeas or lentils, then fold them into the stew for extra protein. For depth of flavor, whisk in a tablespoon of tomato paste and a pinch of smoked paprika. Finally, season with salt and pepper to taste, then let the stew cook uncovered for another 10 minutes to thicken. To save time, chop all your veggies in advance or use pre-cut frozen ones. If you’re short on stove space, try a slow cooker—just layer everything in and set it on low for 6 hours.

Mistakes I’ve made and learned from

I once rushed the sautéing step and ended up with undercooked onions that made the Hearty Vegan Stew taste bitter. Now I patiently let them turn golden before adding other ingredients. Another time, I skipped tasting as I went and over-salted the broth—fixing it required doubling the recipe (which, thankfully, froze well). If you’re new to plant-based cooking, don’t forget to balance flavors with acidity, like a splash of lemon juice or apple cider vinegar. For more tips on avoiding blandness, check out my guide on boosting flavor in vegan meals. And if you’ve ever wondered whether to soak beans or use canned, I break down the pros and cons in my beans 101 for busy cooks post. Trust me, a little extra prep pays off!

Cultural Connection and Variations

Where this recipe comes from

Hearty Vegan Stew carries the warmth of generations, blending humble ingredients into a dish that feels like home. While its roots stretch across cultures, many trace its origins to rustic European kitchens, where cooks relied on seasonal vegetables and legumes to create nourishing meals. In France, for instance, a similar stew might feature white beans and herbs de Provence, while in Morocco, cooks often add warming spices like cumin and cinnamon for depth. Meanwhile, my grandmother’s version always included extra potatoes and a splash of apple cider vinegar for tang.

Today, Hearty Vegan Stew adapts to local flavors wherever it lands. In the American South, you might find it with smoky paprika and collard greens, while in Japan, miso and root vegetables give it a unique umami twist. No matter the variation, the essence remains the same—a comforting, plant-based meal that brings people together. Whether served at a family gathering or a cozy winter dinner, this stew always feels like a hug in a bowl.

How it fits in today’s cooking

Hearty Vegan Stew fits perfectly into modern kitchens, where convenience and nutrition matter just as much as flavor. Busy cooks love it because they can prep it in one pot, and it freezes beautifully for quick weeknight meals. Plus, it’s a star during holidays, especially when paired with vegan holiday desserts for a fully plant-based feast. Even meal-preppers swear by it, packing it with quinoa or brown rice for a balanced lunch.

What makes this stew timeless is its flexibility. Some add lentils for extra protein, while others toss in seasonal veggies like butternut squash or kale. And if you’re craving more global flavors, try pairing it with international vegan recipes for a themed dinner night. Whether you’re cooking for one or feeding a crowd, Hearty Vegan Stew proves that comfort food can be both wholesome and deeply satisfying.

Taste and Texture

What makes it delicious

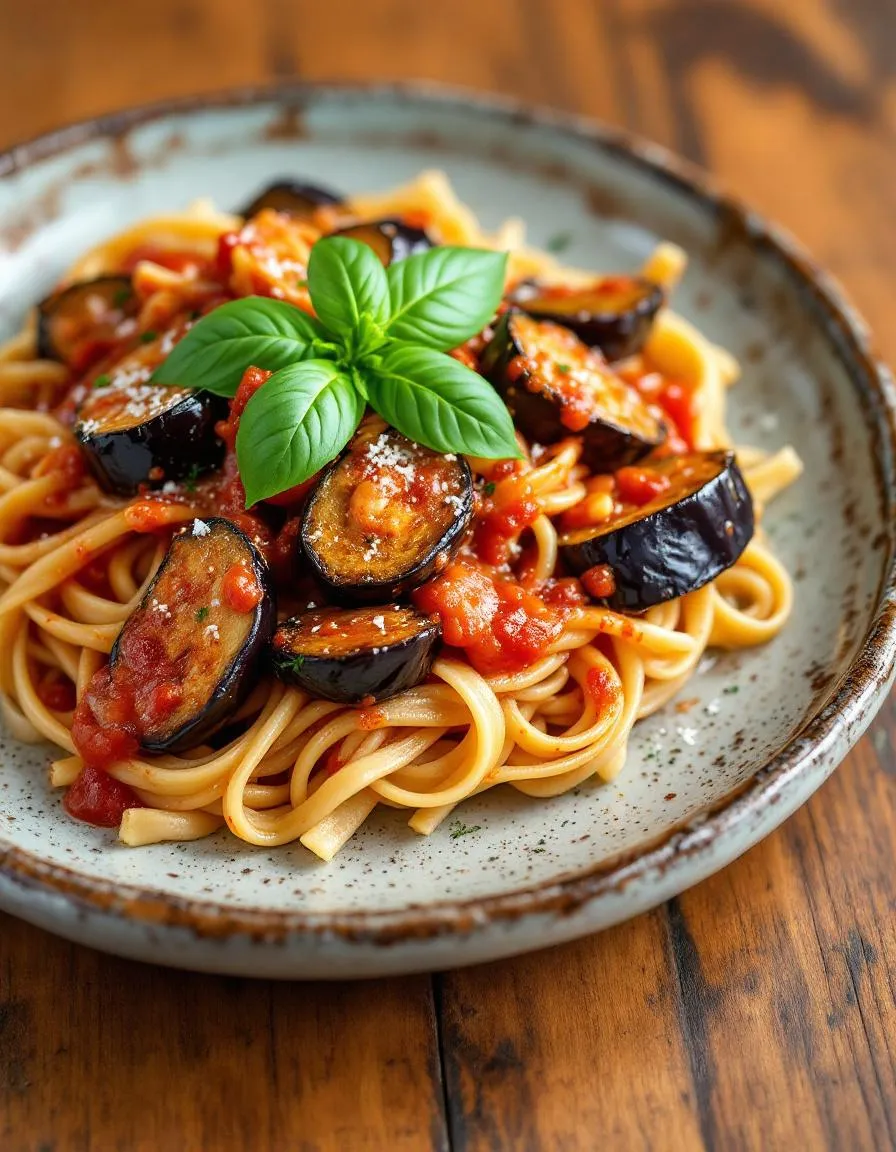
Hearty Vegan Stew wraps you in warmth with its rich, savory depth and earthy aroma. Tender chunks of carrots and potatoes melt in your mouth, while meaty mushrooms add a satisfying chew. Garlic and thyme weave through every spoonful, creating a fragrant, umami-packed broth. Meanwhile, a touch of tomato paste brightens the flavor, balancing the stew’s comforting richness. Hearty Vegan Stew isn’t just filling—it’s a symphony of textures, from velvety beans to crisp-tender celery, making each bite exciting.

Boosting the flavor

For an extra flavor kick, stir in a spoonful of miso paste or a dash of smoked paprika to deepen the stew’s savoriness. Top it with crunchy vegan garlic croutons or a drizzle of creamy cashew dressing for contrasting texture and richness. If you love heat, a pinch of red pepper flakes or a swirl of harissa will add a spicy punch. Experiment with fresh herbs like rosemary or parsley just before serving to elevate the aroma. Hearty Vegan Stew adapts beautifully to bold tweaks, so don’t hesitate to make it your own.

Tips for Success

Best practices for results

For the best Hearty Vegan Stew, always sauté your onions and garlic first to build deep flavor. Additionally, use low-sodium vegetable broth so you can control the saltiness. Stir the stew occasionally while simmering to prevent sticking, and let it cook uncovered for the last 10 minutes to thicken properly. Finally, taste and adjust the seasoning just before serving for a perfectly balanced dish.

Mistakes to avoid

One common mistake is overcrowding the pot with vegetables, which can lead to uneven cooking. Instead, chop everything into uniform sizes, as explained in our guide to vegetable prep. Another issue is skipping the deglazing step after sautéing—always add a splash of broth or wine to lift those flavorful bits from the pan. For more on building layers of flavor, check out our flavor-building techniques. Remember, patience is key with Hearty Vegan Stew; rushing the simmer time will leave you with underdeveloped flavors.

Serving and Pairing Suggestions

How to serve this dish

Bring warmth to the table by serving Hearty Vegan Stew in deep, rustic bowls that highlight its rich texture. For a cozy touch, garnish each portion with fresh parsley or a swirl of coconut cream. Meanwhile, this dish shines at casual gatherings, especially on chilly evenings or holiday potlucks. To elevate the presentation, pair it with crusty bread on the side or serve it over a bed of fluffy quinoa for extra heartiness.

What goes well with it

Complement the robust flavors of Hearty Vegan Stew with a crisp, citrusy salad like our Lemony Kale Salad, which adds a refreshing contrast. Alternatively, a glass of chilled apple cider or a light red wine balances the stew’s depth beautifully. For a heartier meal, try pairing it with our Garlic Herb Focaccia, perfect for soaking up every last drop of the savory broth.

What are the best vegetables to use in a hearty vegan stew?

Root vegetables like carrots, potatoes, and parsnips work wonderfully in a hearty vegan stew, as they hold their shape during cooking. Adding mushrooms, celery, and kale boosts both flavor and nutrition, making the stew even more satisfying.

How can I thicken my hearty vegan stew without flour?

For a gluten-free option, mash some of the cooked potatoes or blend a portion of the stew to create a natural thickener. Alternatively, adding lentils or a spoonful of tomato paste can enhance the texture of your hearty vegan stew.

Can I make hearty vegan stew in a slow cooker?

Absolutely! A slow cooker is perfect for hearty vegan stew, as it allows flavors to meld over low heat. Just add all ingredients and cook on low for 6-8 hours or high for 3-4 hours.

What protein sources work best in a hearty vegan stew?

Beans (like kidney or chickpeas), lentils, and tofu are excellent protein additions to hearty vegan stew. For a meaty texture, try tempeh or seitan, which absorb flavors well while keeping the dish plant-based.

Best Instant Pot Mashed Potatoes – Creamy & Easy

best-instant-pot-mashed-potatoes

Introduction

Hi there! I’m Emily, the heart and soul behind brekcakes.com. From my earliest memories, the kitchen has always been a place of warmth and creativity. It’s where I discovered the magic of turning simple ingredients into extraordinary meals and learned that the best dishes are often made with love as the main ingredient.

There’s something deeply comforting about a bowl of creamy, buttery mashed potatoes. Whether you’re hosting a holiday feast or simply craving a cozy weeknight side, Instant Pot Mashed Potatoes deliver perfection every time. Not only do they save you precious minutes in the kitchen, but they also come out flawlessly smooth and flavorful. Plus, this recipe eliminates the guesswork, so you can focus on what truly matters—enjoying the meal with the people you love.

Instant Pot Mashed Potatoes are a game-changer for busy home cooks. Unlike traditional methods that require constant attention, the Instant Pot locks in flavor and cooks the potatoes evenly in a fraction of the time. This dish embodies the simplicity and heartiness that define my approach to cooking—just like my favorite easy dinner recipes, it’s designed to be both practical and delicious. Whether you’re a seasoned Instant Pot pro or a first-time user, this recipe guarantees creamy, dreamy results without the fuss. And if you love stress-free cooking as much as I do, you’ll appreciate how it pairs perfectly with other comfort food classics for a satisfying meal.

Why I Love This Recipe

Instant Pot Mashed Potatoes hold a special place in my heart because they remind me of Sunday dinners at my grandma’s house. She always insisted on hand-mashing her potatoes, but I know she would’ve adored the convenience of the Instant Pot. Now, whenever I make this recipe, I get to enjoy that same nostalgic flavor without spending hours in the kitchen. It’s my little secret for keeping traditions alive while embracing modern shortcuts—because sometimes, the best memories come from the simplest dishes.

Health and Nutrition

Why it’s good for your body

Instant Pot Mashed Potatoes deliver comfort without compromising nutrition. First, potatoes provide a solid dose of potassium, which helps regulate blood pressure and supports muscle function. Additionally, they offer vitamin C, an antioxidant that boosts immunity and promotes healthy skin. Since you cook them in the Instant Pot, you retain more nutrients compared to boiling, which can leach vitamins into the water.

Moreover, Instant Pot Mashed Potatoes are naturally gluten-free, making them a safe choice for those with sensitivities. When you use ingredients like Greek yogurt or olive oil instead of heavy cream, you add protein and healthy fats. These swaps also keep the dish lighter while maintaining its creamy texture. Furthermore, the fiber in potatoes aids digestion and helps you feel full longer, preventing overeating.

Finally, the convenience of the Instant Pot means you spend less time cooking and more time enjoying a wholesome meal. Whether you pair them with roasted vegetables or lean protein, Instant Pot Mashed Potatoes fit seamlessly into a nutrient-rich diet. With the right tweaks, they can even suit low-calorie or heart-healthy eating plans.

How it fits in a healthy lifestyle

Instant Pot Mashed Potatoes adapt easily to various dietary needs. For a gluten-free or dairy-free version, swap butter for avocado oil and use almond milk. This keeps the dish inclusive without sacrificing flavor. If you follow a heart-healthy diet, limit added salt and opt for herbs like rosemary or garlic for extra taste.

These mashed potatoes also pair well with balanced meals. Serve them alongside grilled chicken or salmon for a protein-packed dinner. For plant-based eaters, try pairing them with our hearty vegan lentil stew to boost fiber and protein intake. Even busy weeknights benefit from this dish since the Instant Pot cuts cooking time in half.

Planning ahead? Make a batch for meal prep and reheat portions throughout the week. Check out our easy meal prep guide for more time-saving ideas. With simple adjustments, Instant Pot Mashed Potatoes become a versatile staple in any healthy routine.

Print
clock clock iconcutlery cutlery iconflag flag iconfolder folder iconinstagram instagram iconpinterest pinterest iconfacebook facebook iconprint print iconsquares squares iconheart heart iconheart solid heart solid icon

Instant Pot Mashed Potatoes


  • Author: Chef Emy

Description

Creamy, fluffy mashed potatoes made quickly in the Instant Pot.


Ingredients

Scale

For the Crust:

  • 2 lbs Yukon Gold potatoes, peeled and quartered
  • 1 cup water
  • 1/2 cup heavy cream
  • 4 tbsp unsalted butter
  • 1 tsp salt
  • 1/2 tsp black pepper

Instructions

1. Prepare the Crust:

  1. Add potatoes and water to Instant Pot. Secure lid and set to Manual High Pressure for 10 minutes.
  2. Quick release pressure when done. Drain any remaining water.
  3. Add butter, cream, salt, and pepper to potatoes. Mash until smooth and creamy.
  4. Adjust seasoning to taste and serve warm.

Notes

You can customize the seasonings to taste.

“`html

How to Prepare This Dish

Steps and time-saving tips

Start by peeling and cubing your potatoes into even chunks so they cook uniformly in the Instant Pot. Add them to the pot with a cup of water, then seal the lid and set it to high pressure for 10 minutes. While the potatoes cook, warm your milk and butter in a small saucepan to save time later. Once the Instant Pot beeps, carefully release the pressure and drain any excess water. Toss the potatoes back into the pot and mash them with a potato masher or hand mixer until smooth. Gradually stir in the warm milk mixture, then fold in sour cream, salt, and pepper for extra creaminess. For a lighter texture, whisk the potatoes vigorously for a minute. If you’re short on time, skip peeling the potatoes—just scrub them well and mash with the skins on for a rustic twist. Keep the mashed potatoes warm in the Instant Pot on the “Keep Warm” setting until serving.

Mistakes I’ve made and learned from

Early on, I rushed the mashing step and ended up with lumpy Instant Pot Mashed Potatoes—now I take an extra minute to mash thoroughly before adding liquids. Another blunder? Overcooking the potatoes, which made them gluey. I fixed this by setting a timer and using the quick-release method right after cooking. And if you’ve ever added cold milk straight from the fridge (guilty!), you’ll know it cools the dish too fast. Warming it first, like I do for my signature creamy sides, makes all the difference. Trust me, these small tweaks turn good mashed potatoes into greatness.

“`

Cultural Connection and Variations

Where this recipe comes from

Mashed potatoes have deep roots in comfort food traditions, but Instant Pot Mashed Potatoes bring a modern twist to this classic dish. Originally, mashed potatoes trace back to 18th-century England and Ireland, where cooks boiled and mashed spuds with butter and milk. Over time, families across the globe put their own spin on it. For example, the French whip in copious amounts of butter for pommes purée, while Scandinavians often fold in nutmeg or leeks for extra warmth.

In my family, Instant Pot Mashed Potatoes became a game-changer during hectic weeknights. My grandmother used to spend hours peeling and boiling potatoes, but now, the Instant Pot cuts the work in half. Some Southern cooks add cream cheese or garlic for richness, while others keep it simple with just salt and pepper. No matter the variation, this dish always feels like home.

Around the world, cooks adapt mashed potatoes to local tastes. In India, they might blend in turmeric or ghee, while Italian versions could include rosemary and Parmesan. Instant Pot Mashed Potatoes make it easy to experiment with these global flavors without sacrificing that creamy, comforting texture we all love.

How it fits in today’s cooking

Instant Pot Mashed Potatoes remain a staple because they fit seamlessly into modern life. Busy home cooks love how the Instant Pot delivers perfect results in minutes, making it ideal for weeknight dinners or last-minute holiday feasts. Whether you’re pairing them with a juicy Instant Pot roast beef or serving them alongside a garlic butter salmon, this dish adapts to any menu.

Today’s cooks also get creative with add-ins like roasted garlic, sour cream, or even vegan butter for dairy-free versions. Meal preppers often make a big batch on Sundays, knowing these spuds reheat beautifully. Plus, Instant Pot Mashed Potatoes shine during Thanksgiving or Christmas, carrying forward traditions while saving time for what really matters—gathering around the table.

Taste and Texture

What makes it delicious

Instant Pot Mashed Potatoes deliver a luxuriously creamy texture that melts in your mouth with every bite. The buttery richness blends perfectly with the earthy, slightly sweet flavor of Yukon Gold or Russet potatoes. Warm, garlicky aromas waft from the bowl, while a touch of cream cheese or sour cream adds a subtle tang. Whether you prefer them ultra-smooth or lightly rustic, Instant Pot Mashed Potatoes offer a comforting, velvety consistency that pairs beautifully with gravy or stands alone as a star side dish.

Boosting the flavor

Elevate your Instant Pot Mashed Potatoes by stirring in roasted garlic for a deep, caramelized sweetness or folding in sharp cheddar for a savory punch. For a fresh twist, top them with crispy air-fryer bacon bits or a drizzle of truffle oil. If you love herbs, try mixing in chives or rosemary for a fragrant finish. Pair them with a side of creamy mushroom sauce to add an extra layer of umami depth. A pinch of smoked paprika or white pepper can also bring warmth and complexity to each spoonful.

Tips for Success

Best practices for results

First, cut your potatoes into even chunks so they cook uniformly in the Instant Pot. Next, always use the trivet and one cup of water to prevent burning while pressure cooking. For extra creamy Instant Pot Mashed Potatoes, warm your milk or cream before mixing it in. Additionally, mash the potatoes right after draining them for the smoothest texture. Finally, season generously with salt and butter, tasting as you go for perfect flavor.

Mistakes to avoid

Avoid overfilling the Instant Pot, as this can lead to uneven cooking or pressure issues. Instead, stick to the recommended capacity for best results. Also, don’t skip the step of draining the potatoes thoroughly, or your Instant Pot Mashed Potatoes may turn out watery. For more troubleshooting tips, check out our guide on fixing watery mashed potatoes. Another common mistake is using cold dairy, which can make the potatoes gluey. For creamy alternatives, explore our dairy-free mashed potatoes recipe.

Serving and Pairing Suggestions

How to serve this dish

Instant Pot Mashed Potatoes shine when served warm and creamy, so transfer them to a stylish bowl or platter right after cooking. For a festive touch, swirl the top with a spoon and drizzle melted butter or olive oil over them. Sprinkle fresh chives, parsley, or crispy bacon bits for color and texture. These mashed potatoes make a perfect holiday side, but they also elevate weeknight dinners or casual gatherings. If you’re hosting a brunch, pair them with a savory gravy or serve them alongside scrambled eggs for a comforting twist.

What goes well with it

Instant Pot Mashed Potatoes pair beautifully with roasted meats like garlic herb chicken or slow-cooked pot roast. The creamy texture balances the richness of these dishes, creating a satisfying meal. For a lighter option, try them with a crisp green salad or steamed vegetables. If you love dipping sauces, a tangy homemade ranch dressing adds a refreshing contrast. Finally, a glass of chilled white wine or sparkling cider complements the buttery flavors, especially when serving Instant Pot Mashed Potatoes at dinner parties. For dessert, consider a slice of classic carrot cake to round out the meal.

How long does it take to make mashed potatoes in an Instant Pot?

Instant Pot Mashed Potatoes take about 20-25 minutes total, including 10 minutes of pressure cooking time and 5-10 minutes for natural release. The hands-on prep is minimal, making it faster than traditional stovetop methods while delivering creamy, fluffy results.

Can you make mashed potatoes in an Instant Pot without milk?

Yes! Instant Pot Mashed Potatoes can be made dairy-free by substituting milk with broth, plant-based milk, or even reserved potato cooking water. For richness, add butter alternatives or olive oil—the pressure cooker ensures the potatoes stay tender and flavorful.

Why are my Instant Pot mashed potatoes gluey?

Gluey Instant Pot Mashed Potatoes usually result from overmixing, which releases too much starch. To fix this, gently mash with a potato ricer or hand masher, and avoid using a blender. Also, ensure you’re using starchy potatoes like Russets for the best texture.

Can I freeze Instant Pot mashed potatoes?

Absolutely! Instant Pot Mashed Potatoes freeze well for up to 2 months. Store them in airtight containers with a thin layer of butter or broth on top to prevent drying. Thaw overnight in the fridge and reheat with a splash of milk for freshness.

Best Chicken Cabbage Savory Pirog Recipe

best-chicken-cabbage-pirog-recipe

Introduction

Hi there! I’m Emily, the heart and soul behind brekcakes.com. From my earliest memories, the kitchen has always been a place of warmth and creativity. It’s where I discovered the magic of turning simple ingredients into extraordinary meals and learned that the best dishes are often made with love as the main ingredient.

If you’ve ever craved comfort food that feels like a warm hug, you’re in the right place. Today, I’m sharing my beloved Chicken Cabbage Savory Pirog—a dish that brings together tender chicken, sweet caramelized cabbage, and flaky pastry in every bite. Whether you grew up with Eastern European flavors or are just discovering them, this recipe promises to delight your taste buds and fill your home with irresistible aromas. Plus, it’s perfect for cozy family dinners or impressing guests with minimal effort.

Chicken Cabbage Savory Pirog is a traditional Eastern European hand pie, but with a modern twist that makes it accessible to home cooks everywhere. The golden, buttery crust encases a hearty filling of juicy chicken and tender cabbage, lightly seasoned to let the natural flavors shine. What makes this dish special is its versatility. You can serve it as a main course, pack it for picnics, or even enjoy leftovers cold—it’s delicious any way you try it. If you love comforting, savory pastries like my Beef and Potato Piroshki, you’ll adore this recipe too. And if you’re new to working with dough, don’t worry. My step-by-step guide ensures success, just like my Easy Homemade Dumplings tutorial does for beginners. This pirog fits brekcakes.com’s mission perfectly: uncomplicated recipes that deliver big flavors and even bigger smiles.

Why I Love This Recipe

This Chicken Cabbage Savory Pirog holds a special place in my heart because it reminds me of Sunday dinners at my grandmother’s house. She taught me how to roll the dough thin enough to let the filling peek through, yet sturdy enough to hold all that goodness inside. Every time I make it, I feel connected to those cherished moments—and now, I get to share that joy with you. There’s something magical about how simple ingredients transform into a dish that feels like home, no matter where you are.

Health and Nutrition

Why it’s good for your body

Chicken Cabbage Savory Pirog packs a nutritious punch with lean protein, fiber-rich vegetables, and wholesome ingredients. First, the chicken delivers high-quality protein to support muscle repair and keep you full longer. Meanwhile, cabbage adds a hearty dose of antioxidants and gut-friendly fiber, which aids digestion and boosts immunity. Together, these ingredients create a balanced meal that fuels your body without unnecessary additives.

Additionally, Chicken Cabbage Savory Pirog offers a smart way to sneak more veggies into your diet. Cabbage provides vitamin C and K, while onions and carrots contribute extra flavor and nutrients. Because the dish bakes in a single crust, it cuts down on excess carbs compared to heavier pastries. Plus, you can easily tweak the recipe to reduce sodium or use whole-grain flour for added fiber.

Finally, this dish fits seamlessly into heart-healthy eating plans. Chicken lends lean protein without saturated fats, and cabbage helps regulate cholesterol levels. Whether you enjoy it as a hearty lunch or a light dinner, Chicken Cabbage Savory Pirog delivers both comfort and nutrition in every bite.

How it fits in a healthy lifestyle

Chicken Cabbage Savory Pirog adapts effortlessly to various dietary needs, making it a versatile choice for health-conscious eaters. If you follow a gluten-free diet, simply swap the flour for a gluten-free blend—the savory filling stays just as delicious. For those focusing on high-protein meals, the chicken ensures you meet your goals while keeping calories in check.

This dish also pairs well with balanced eating habits. Serve it alongside a fresh salad for extra greens, or enjoy a smaller portion as part of a meal-prep routine. Since it reheats beautifully, Chicken Cabbage Savory Pirog saves time without sacrificing nutrition. And if you’re watching your sodium intake, simply reduce the salt or use low-sodium broth.

For more inspiration on wholesome recipes, explore our healthy comfort food collection. Whether you’re cooking for one or feeding a family, Chicken Cabbage Savory Pirog proves that flavorful and nutritious meals go hand in hand.

Print
clock clock iconcutlery cutlery iconflag flag iconfolder folder iconinstagram instagram iconpinterest pinterest iconfacebook facebook iconprint print iconsquares squares iconheart heart iconheart solid heart solid icon

Chicken Cabbage Savory Pirog


  • Author: Chef Emy

Description

A hearty and flavorful Russian-style pie filled with tender chicken and sautéed cabbage.


Ingredients

Scale

For the Crust:

  • 2 cups all-purpose flour
  • 1/2 tsp salt
  • 1/2 cup unsalted butter, chilled
  • 1/4 cup cold water
  • 1 lb chicken breast, cooked and shredded
  • 2 cups cabbage, finely shredded
  • 1 onion, diced
  • 2 tbsp vegetable oil
  • 1 tsp black pepper
  • 1 tsp dried dill
  • 1 egg, beaten (for egg wash)

Instructions

1. Prepare the Crust:

  1. Preheat oven to 375°F (190°C). In a bowl, mix flour and salt. Cut in butter until mixture resembles coarse crumbs. Gradually add water until dough forms. Chill for 30 minutes.
  2. Heat oil in a pan over medium heat. Sauté onion until translucent, then add cabbage and cook until softened. Stir in shredded chicken, pepper, and dill. Remove from heat.
  3. Roll out dough into two circles. Place one in a pie dish, add filling, then cover with the second dough circle. Seal edges and brush with egg wash. Bake for 30 minutes or until golden.

Notes

You can customize the seasonings to taste.

How to Prepare This Dish

Steps and time-saving tips

Start by preheating your oven to 375°F so it’s ready when you finish assembling the Chicken Cabbage Savory Pirog. While the oven heats, shred half a small cabbage and sauté it in a skillet with a drizzle of olive oil until it softens, about 5 minutes. Next, dice one pound of chicken breast into small pieces and brown them in the same skillet, seasoning with salt and pepper. Meanwhile, whisk together two cups of flour, a pinch of salt, and one teaspoon of baking powder in a large bowl. Make a well in the center and crack in two eggs, then gradually mix in half a cup of milk until the dough comes together. Roll out the dough on a floured surface into a rectangle, then layer the cooked chicken and cabbage evenly over half of it. Fold the other half over the filling and crimp the edges with a fork to seal. Finally, brush the top with an egg wash and bake for 25-30 minutes until golden brown. For a time-saving tip, prep the filling a day ahead and store it in the fridge. Also, use a food processor to speed up dough mixing if you’re short on time.

Mistakes I’ve made and learned from

I once rushed the dough for my Chicken Cabbage Savory Pirog and didn’t let it rest, which made it tough and hard to roll out. Now I always cover it and let it sit for 10 minutes—it becomes much more pliable. Another mistake? Overstuffing the filling, which caused leaks during baking. I learned to spread it thinly but evenly, just like I do with my perfect pie crust. Also, skipping the egg wash left the top pale instead of golden. A light brush makes all the difference, similar to the technique I use for my flaky pastry secrets. Trust me, these small tweaks turn a good pirog into a great one.

Cultural Connection and Variations

Where this recipe comes from

Chicken Cabbage Savory Pirog traces its roots to Eastern Europe, where hearty pies like this one have warmed families for generations. In Russia and Ukraine, pirogi often feature savory fillings, blending humble ingredients into comforting masterpieces. My grandmother used to make her version with shredded chicken, caramelized cabbage, and a hint of dill, wrapping it all in a buttery crust. Meanwhile, in Poland, you might find a similar dish called “pierogi,” though those are typically smaller dumplings rather than a single large pie.

Across regions, cooks adapt Chicken Cabbage Savory Pirog to local tastes. Some add mushrooms for earthiness, while others swap chicken for pork or beef. In colder months, families serve it as a centerpiece during gatherings, but it’s just as beloved for weeknight dinners. The beauty lies in its flexibility—whether you prefer a flaky pastry or a denser dough, the filling always shines. Even today, my kitchen fills with the same irresistible aroma when I recreate my grandmother’s recipe, proving how food bridges generations.

How it fits in today’s cooking

Chicken Cabbage Savory Pirog remains a star in modern kitchens because it balances nostalgia with practicality. Busy home cooks love that they can prepare it ahead, making it perfect for meal prep or casual entertaining. Plus, its wholesome ingredients—lean protein, fiber-rich cabbage—align with today’s focus on hearty, nourishing meals. For a lighter twist, some bakers use whole-wheat crust or add grated carrots to the filling.

Holidays and potlucks also keep this dish relevant. Imagine slicing into a golden-brown pirog at a winter feast—it’s instant comfort. Others pair it with simple sides, like the bright salads that cut through its richness. Whether you stick to tradition or tweak it for dietary needs, Chicken Cabbage Savory Pirog proves that some classics never fade.

Taste and Texture

What makes it delicious

Chicken Cabbage Savory Pirog delivers a hearty, satisfying bite with layers of flavor and texture. The tender shredded chicken mingles with sweet, caramelized cabbage, creating a rich, savory filling. Meanwhile, the golden-brown crust offers a crisp exterior that gives way to a soft, buttery interior. Fragrant spices like black pepper and a hint of garlic deepen the taste, while a touch of dill adds a fresh, herbal note. Every forkful of Chicken Cabbage Savory Pirog balances comfort and complexity, making it irresistible.

Boosting the flavor

Elevate your Chicken Cabbage Savory Pirog with a few easy tweaks. For extra richness, swap regular butter with homemade ghee in the dough. A dollop of tangy sour cream or a drizzle of garlic herb sauce on top adds creamy contrast. If you love heat, sprinkle red pepper flakes into the filling or serve with a side of spicy mustard. Experiment with fresh herbs like parsley or thyme for a brighter finish. Small changes make a big difference!

Tips for Success

Best practices for results

Always chill the dough for at least 30 minutes before rolling it out to prevent sticking and ensure a flaky crust. Meanwhile, sauté the cabbage until it softens completely to avoid a crunchy texture in your Chicken Cabbage Savory Pirog. Additionally, use parchment paper when baking to achieve an even golden-brown finish without over-browning the bottom. For extra flavor, brush the top with an egg wash right before baking.

Mistakes to avoid

Avoid overfilling the dough, as this can cause leaks during baking. Instead, leave a small border around the edges when adding the Chicken Cabbage Savory Pirog filling. Also, don’t skip preheating the oven, since uneven heat can lead to undercooked spots. For more dough-handling tips, check out our guide on perfect pie crust techniques. Finally, resist cutting into the pirog too soon—letting it rest for 10 minutes helps the filling set. Learn more about timing baked dishes with our baking timings cheat sheet.

Serving and Pairing Suggestions

How to serve this dish

Slice your Chicken Cabbage Savory Pirog into thick wedges to showcase its golden crust and hearty filling. For a rustic touch, serve it on a wooden board with a side of fresh herbs like dill or parsley. Alternatively, plate individual portions with a dollop of sour cream or a light salad for contrast. This dish shines at family gatherings, holiday feasts, or even as a satisfying weeknight dinner. To elevate the presentation, drizzle a bit of melted butter over the top just before serving.

What goes well with it

Pair Chicken Cabbage Savory Pirog with a crisp, tangy cucumber salad for a refreshing balance to its rich flavors. If you prefer something heartier, try our creamy mashed potatoes, which complement the savory filling perfectly. For drinks, a chilled glass of dry white wine or a light herbal tea enhances the meal. If you’re serving it for brunch, our homemade apple cider adds a sweet, seasonal touch.

What is Chicken Cabbage Savory Pirog?

Chicken Cabbage Savory Pirog is a traditional Eastern European baked dish featuring a flaky pastry crust filled with a hearty mixture of shredded chicken, sautéed cabbage, and savory seasonings. It’s a comforting meal perfect for family dinners or special occasions. The dish is similar to a pie but with a distinct flavor profile from the cabbage and chicken combination.

How do you make Chicken Cabbage Savory Pirog from scratch?

To make Chicken Cabbage Savory Pirog, start by preparing a buttery dough and letting it rest. While the dough chills, cook shredded chicken and cabbage with onions, garlic, and spices like paprika or dill. Assemble the pirog by rolling out the dough, adding the filling, and sealing it before baking until golden brown. Serve warm for the best flavor.

Can I freeze Chicken Cabbage Savory Pirog?

Yes, Chicken Cabbage Savory Pirog freezes well for up to 3 months. Wrap it tightly in plastic wrap and aluminum foil before freezing to prevent freezer burn. Reheat in the oven at 350°F until warmed through for the best texture. This makes it a great make-ahead meal for busy weeknights.

What sides go well with Chicken Cabbage Savory Pirog?

Chicken Cabbage Savory Pirog pairs beautifully with light sides like a crisp green salad, pickled vegetables, or a dollop of sour cream. For heartier meals, serve it with roasted potatoes or borscht. The versatility of this dish makes it easy to adapt to different cuisines and preferences.

Best Honey Mustard Chicken Thighs – Easy & Flavorful Recipe

best-honey-mustard-chicken-thighs

Introduction

Hi there! I’m Emily, the heart and soul behind brekcakes.com. From my earliest memories, the kitchen has always been a place of warmth and creativity. It’s where I discovered the magic of turning simple ingredients into extraordinary meals and learned that the best dishes are often made with love as the main ingredient.

If you’re craving a dish that balances sweet, tangy, and savory flavors with minimal effort, you’re in the right place. This Honey Mustard Chicken Thighs Recipe delivers juicy, flavorful meat with a sticky glaze that will have everyone asking for seconds. Whether you’re cooking for a busy weeknight or a cozy weekend dinner, this recipe promises to become a fast favorite. Plus, it’s versatile enough to pair with almost any side, from roasted veggies to fluffy mashed potatoes.

Honey Mustard Chicken Thighs Recipe is a crowd-pleaser for good reason. The combination of honey’s natural sweetness and mustard’s sharp tang creates a sauce that caramelizes beautifully in the oven, locking in moisture while adding depth to every bite. Unlike fussy recipes that require constant attention, this one lets you marinate, bake, and enjoy without stress. It’s also budget-friendly, making it perfect for families or meal prep. If you love easy yet impressive dishes, you’ll appreciate how this recipe aligns with brekcakes.com’s mission: approachable cooking with big flavor. For more weeknight inspiration, check out my quick dinner ideas, or explore comfort food classics for hearty options.

Why I Love This Recipe

This Honey Mustard Chicken Thighs Recipe holds a special place in my heart because it reminds me of Sunday dinners with my family. My dad used to grill chicken with a similar glaze, and the smell alone would bring everyone to the table. Now, I love how it brings people together in my own home. The simplicity lets me focus on what really matters—sharing good food and even better conversations. Every time I make it, I’m reminded that the best meals aren’t just about taste; they’re about the memories we create around them.

Health and Nutrition

Why it’s good for your body

Honey Mustard Chicken Thighs Recipe packs a nutritious punch while delivering bold flavor. First, chicken thighs provide high-quality protein to support muscle growth and repair. Additionally, they contain iron and zinc, which boost immunity and energy levels. Unlike leaner cuts, thighs offer juiciness without sacrificing health benefits.

Moreover, the honey mustard glaze adds more than just taste. Honey brings natural antioxidants that fight inflammation, while mustard seeds contribute metabolism-boosting compounds. Together, they create a balanced sauce that enhances the dish without excessive sugar or artificial ingredients. For a satisfying meal, Honey Mustard Chicken Thighs Recipe strikes the perfect balance between indulgence and nourishment.

Furthermore, this recipe includes simple, whole-food ingredients. Olive oil provides heart-healthy fats, and fresh herbs like thyme add extra antioxidants. By avoiding processed additives, Honey Mustard Chicken Thighs Recipe keeps your meal clean and nutrient-dense. Whether you need a post-workout dinner or a family-friendly option, this dish delivers both flavor and function.

How it fits in a healthy lifestyle

Honey Mustard Chicken Thighs Recipe fits seamlessly into balanced eating habits. If you follow a high-protein diet, the chicken thighs keep you full and energized. For gluten-free eaters, the recipe naturally avoids grains, making it a safe and delicious choice. Even better, the dish pairs well with roasted vegetables or a light salad for a complete, wholesome meal.

Planning weekly meals becomes easier with versatile options like this. You can prep the chicken ahead for quick lunches or dinners, aligning with busy schedules. For more gluten-free inspiration, check out our gluten-free meal prep guide. If you love heart-healthy recipes, explore our balanced dinner ideas to round out your menu. With simple ingredients and flexible serving options, Honey Mustard Chicken Thighs Recipe helps you stay on track without sacrificing flavor.

Print
clock clock iconcutlery cutlery iconflag flag iconfolder folder iconinstagram instagram iconpinterest pinterest iconfacebook facebook iconprint print iconsquares squares iconheart heart iconheart solid heart solid icon

Honey Mustard Chicken Thighs


  • Author: Chef Emy

Description

Juicy chicken thighs coated in a sweet and tangy honey mustard glaze, baked to perfection.


Ingredients

Scale

For the Crust:

  • 6 bone-in, skin-on chicken thighs
  • 1/4 cup honey
  • 2 tablespoons Dijon mustard
  • 1 tablespoon whole grain mustard
  • 2 cloves garlic, minced
  • 1 tablespoon olive oil
  • 1 teaspoon smoked paprika
  • 1/2 teaspoon salt
  • 1/4 teaspoon black pepper
  • 1 tablespoon fresh parsley, chopped (for garnish)

Instructions

1. Prepare the Crust:

  1. Preheat oven to 375°F (190°C). Line a baking sheet with parchment paper.
  2. In a small bowl, whisk together honey, Dijon mustard, whole grain mustard, minced garlic, olive oil, smoked paprika, salt, and black pepper.
  3. Place chicken thighs on the prepared baking sheet. Brush the honey mustard mixture generously over each thigh, coating evenly.
  4. Bake for 25-30 minutes, or until chicken reaches an internal temperature of 165°F (74°C).
  5. Garnish with fresh parsley before serving.

Notes

You can customize the seasonings to taste.

How to Prepare This Dish

Steps and time-saving tips

First, preheat your oven to 375°F so it’s ready when you are. While it heats, whisk together the honey, Dijon mustard, olive oil, and minced garlic in a small bowl until smooth. This sauce is the star of your Honey Mustard Chicken Thighs Recipe, so take a moment to taste and adjust the sweetness or tanginess if needed. Next, pat the chicken thighs dry with paper towels—this helps the skin crisp up beautifully. Season both sides generously with salt and pepper, then arrange them in a single layer in a baking dish. Drizzle the honey mustard sauce over the chicken, making sure each piece gets coated evenly. For extra flavor, let the chicken marinate for 15 minutes while you prep sides or tidy up. Slide the dish into the oven and bake for 35-40 minutes, basting halfway through with the pan juices. If you want crispier skin, broil for the last 2-3 minutes. Let the chicken rest for 5 minutes before serving to lock in the juices. For a time-saving twist, mix the sauce ahead and store it in the fridge for up to 3 days. You can also bake the chicken on a sheet pan with veggies for a one-pan meal.

Mistakes I’ve made and learned from

I’ve definitely had my share of mishaps with this Honey Mustard Chicken Thighs Recipe. Once, I rushed the marinating step and ended up with bland chicken—now I always give it at least 15 minutes to soak up the flavors. Another time, I overcrowded the baking dish, which steamed the chicken instead of letting it crisp. Lesson learned: space those thighs out! If you’re new to cooking chicken thighs, check out my guide on chicken thighs 101 for more tips. I also used to skip the broiling step, but trust me, those extra few minutes make all the difference for golden, caramelized skin. And if your sauce ever separates, don’t panic—just whisk in a splash of warm water or chicken broth. For more sauce tricks, my sauce hacks post has you covered. Every mistake taught me something, and now this dish turns out perfectly every time.

Cultural Connection and Variations

Where this recipe comes from

The Honey Mustard Chicken Thighs Recipe we love today has roots that stretch across continents. While honey and mustard pairings date back to ancient Rome, the modern version likely evolved from European comfort food traditions. In France, cooks might use Dijon mustard and thyme, while Germans often add a splash of beer for depth. Meanwhile, Southern U.S. versions sometimes swap in brown sugar or hot sauce for a tangy twist.

In my family, this dish became a weeknight hero because it balances sweet and savory so effortlessly. We’d serve it with roasted potatoes or a crisp salad, depending on the season. Interestingly, Middle Eastern variations might include warming spices like cumin or sumac, while Australian cooks often grill the thighs outdoors year-round. No matter where you go, the Honey Mustard Chicken Thighs Recipe adapts beautifully to local flavors.

How it fits in today’s cooking

Today, this recipe shines as both a quick dinner solution and a crowd-pleasing party dish. Busy cooks love that it works with pantry staples, while meal preppers appreciate how well the flavors deepen overnight. During fall, it pairs perfectly with seasonal sides like maple-glazed carrots or our favorite garlic mashed potatoes.

Modern twists keep it fresh too. Some air-fry the thighs for extra crispness, while others layer the sauce over cauliflower steaks for a veggie spin. It’s also a star at potlucks alongside dishes like our classic deviled eggs. Whether you’re craving comfort or hosting friends, Honey Mustard Chicken Thighs Recipe stays timeless by adapting to how we live and eat now.

Taste and Texture

What makes it delicious

This Honey Mustard Chicken Thighs Recipe delivers a mouthwatering balance of sweet and tangy flavors with every bite. The honey caramelizes into a sticky, golden glaze, while the mustard adds a sharp, savory depth that lingers on your tongue. Juicy chicken thighs stay tender inside, with a slightly crisp skin that crackles as you cut into it. Aromatic garlic and herbs weave through the dish, filling your kitchen with an irresistible, savory-sweet fragrance. Whether you serve it fresh from the oven or as leftovers, the Honey Mustard Chicken Thighs Recipe promises a satisfying, succulent texture that keeps you reaching for more.

Boosting the flavor

For an extra flavor kick, try swapping regular mustard for whole-grain mustard—it adds a pleasant, rustic crunch. A sprinkle of smoked paprika or a dash of cayenne pepper will introduce a subtle heat that complements the honey’s sweetness. If you love fresh herbs, toss in rosemary or thyme while baking for an earthy aroma. Pair your Honey Mustard Chicken Thighs Recipe with a bright, citrusy side like lemon garlic roasted asparagus or a creamy garlic mashed cauliflower to round out the meal. Small tweaks can transform this dish into a showstopper!

Tips for Success

Best practices for results

Pat the chicken thighs dry before seasoning to help the honey mustard glaze stick better. Meanwhile, preheat your oven to 400°F for even cooking and crispy skin. For extra flavor, marinate the chicken in half the honey mustard sauce for at least 30 minutes before baking. Always use an instant-read thermometer to check that the internal temperature reaches 165°F. Finally, let the Honey Mustard Chicken Thighs Recipe rest for 5 minutes before serving to lock in juices.

Mistakes to avoid

Avoid overcrowding the pan, as this steams the chicken instead of browning it. If you prefer crispier skin, check out our guide on how to get crispy chicken skin for pro tips. Another common mistake is using cold honey straight from the fridge, which makes the glaze too thick. Instead, warm it slightly for smoother mixing. For more sauce consistency tricks, explore our sauce thickening methods to perfect your glaze every time.

Serving and Pairing Suggestions

How to serve this dish

For a stunning presentation, arrange the Honey Mustard Chicken Thighs Recipe on a rustic wooden platter or a white ceramic plate to let the golden glaze shine. Drizzle extra sauce over the top and sprinkle with fresh chopped parsley or thyme for a pop of color. Meanwhile, serve this dish family-style at casual weeknight dinners or elevate it for special occasions like holiday gatherings. If you want to impress guests, pair it with a simple side salad or roasted vegetables for a balanced meal.

What goes well with it

First, try pairing Honey Mustard Chicken Thighs Recipe with a crisp green salad featuring tangy vinaigrette to balance the sweetness of the glaze. Alternatively, roasted garlic mashed potatoes make a creamy, comforting side that soaks up the delicious sauce. For a refreshing drink, a chilled glass of Riesling or sparkling apple cider complements the dish perfectly. If you love bold flavors, serve it with our Spicy Honey Glazed Carrots for a sweet-and-heat combo. Finally, don’t forget to check out our Garlic Herb Dinner Rolls for a buttery, aromatic addition to your meal.

How long should I bake honey mustard chicken thighs?

For perfectly cooked Honey Mustard Chicken Thighs Recipe, bake at 375°F for 25–30 minutes or until the internal temperature reaches 165°F. Bone-in thighs may need 5–10 extra minutes. Always check doneness with a meat thermometer for juicy results.

Can I use boneless chicken thighs for honey mustard chicken?

Yes! Boneless thighs work great for Honey Mustard Chicken Thighs Recipe and cook faster—reduce baking time to 20–25 minutes. The marinade clings well to both boneless and bone-in cuts, though bone-in thighs tend to stay juicier.

What sides go well with honey mustard chicken thighs?

Classic pairings include roasted potatoes, steamed green beans, or a crisp garden salad. The tangy-sweet flavor of Honey Mustard Chicken Thighs Recipe also complements quinoa, roasted carrots, or garlic mashed potatoes beautifully.

Can I make honey mustard chicken thighs ahead of time?

Absolutely! Marinate the chicken overnight for deeper flavor. Cooked Honey Mustard Chicken Thighs Recipe keeps well refrigerated for 3–4 days—reheat gently in the oven to maintain texture.

Best Cilantro Lime Grilled Chicken Recipe

best-cilantro-lime-grilled-chicken

Introduction

Hi there! I’m Emily, the heart and soul behind brekcakes.com. From my earliest memories, the kitchen has always been a place of warmth and creativity. It’s where I discovered the magic of turning simple ingredients into extraordinary meals and learned that the best dishes are often made with love as the main ingredient.

There’s something undeniably special about a dish that brings both freshness and bold flavors to the table. That’s exactly why I adore this Cilantro Lime Grilled Chicken. Whether you’re hosting a summer barbecue or simply craving a zesty weeknight dinner, this recipe delivers juicy, vibrant bites every time. Plus, it’s a fantastic way to brighten up your meal prep routine—because who says healthy can’t be delicious?

Cilantro Lime Grilled Chicken is a celebration of simplicity and flavor. The marinade, packed with bright lime, fragrant cilantro, and a hint of garlic, transforms ordinary chicken into something extraordinary. What makes this dish stand out is its versatility. You can serve it with a crisp avocado ranch salad for a light meal or pair it with garlic butter rice for something heartier. Beyond taste, this recipe fits perfectly with brekcakes.com’s mission: approachable, flavorful cooking that doesn’t compromise on joy. Whether you’re a grilling novice or a seasoned pro, this dish promises to impress without stress.

Why I Love This Recipe

This Cilantro Lime Grilled Chicken holds a special place in my kitchen because it’s the recipe I turn to when I want to feed a crowd—or just treat myself. The first time I made it, my friends couldn’t stop raving about the tangy, herb-infused flavors. Now, it’s my go-to for gatherings, lazy Sundays, and even meal prep lunches. There’s something deeply satisfying about watching people light up after that first bite. To me, that’s what cooking is all about: creating moments of happiness, one flavorful dish at a time.

Health and Nutrition

Why it’s good for your body

Cilantro Lime Grilled Chicken packs a nutritious punch while keeping flavors vibrant. First, the lean chicken breast delivers high-quality protein, which helps build and repair muscles. Additionally, the dish stays low in calories, making it a smart choice for weight management. Thanks to fresh cilantro, you also get a dose of antioxidants that fight inflammation and support digestion.

Moreover, the lime juice in Cilantro Lime Grilled Chicken boosts vitamin C levels, strengthening your immune system. The marinade’s healthy fats from olive oil promote heart health by improving cholesterol levels. Meanwhile, garlic and cilantro add natural detoxifying properties, helping your body eliminate toxins. Together, these ingredients create a meal that’s as wholesome as it is delicious.

Finally, Cilantro Lime Grilled Chicken avoids heavy sauces or excessive salt, keeping sodium levels in check. Whether you’re fueling up post-workout or enjoying a light dinner, this dish nourishes your body without compromise. The balance of protein, vitamins, and antioxidants makes it a standout for anyone prioritizing wellness.

How it fits in a healthy lifestyle

Cilantro Lime Grilled Chicken fits seamlessly into a balanced diet, whether you’re focusing on high-protein meals or heart-healthy eating. The lean protein keeps you full longer, reducing cravings for processed snacks. Pair it with a fiber-rich side like quinoa or roasted veggies for a complete, nutrient-dense meal.

If you follow a gluten-free or low-carb lifestyle, this dish naturally aligns with your needs. The simple marinade relies on fresh ingredients, avoiding hidden sugars or additives. For meal prep enthusiasts, Cilantro Lime Grilled Chicken stores well and stays juicy for days. Check out our guide to easy meal prep strategies to save time while eating healthy.

Even on busy nights, this recipe comes together quickly, proving that wholesome eating doesn’t require hours in the kitchen. For more inspiration on balancing flavors and nutrition, explore our healthy dinner ideas. With its versatility and clean ingredients, Cilantro Lime Grilled Chicken makes healthy living effortless and enjoyable.

Print
clock clock iconcutlery cutlery iconflag flag iconfolder folder iconinstagram instagram iconpinterest pinterest iconfacebook facebook iconprint print iconsquares squares iconheart heart iconheart solid heart solid icon

Cilantro Lime Grilled Chicken


  • Author: Chef Emy

Description

Juicy grilled chicken marinated in fresh cilantro, lime, and spices for a zesty and flavorful dish.


Ingredients

Scale

For the Crust:

  • 4 boneless, skinless chicken breasts
  • 1/4 cup fresh cilantro, chopped
  • 3 cloves garlic, minced
  • 1/4 cup lime juice
  • 2 tbsp olive oil
  • 1 tsp ground cumin
  • 1 tsp salt
  • 1/2 tsp black pepper

Instructions

1. Prepare the Crust:

  1. In a bowl, whisk together lime juice, olive oil, garlic, cilantro, cumin, salt, and pepper.
  2. Place chicken breasts in a resealable bag and pour the marinade over them. Seal and refrigerate for at least 1 hour.
  3. Preheat grill to medium-high heat. Grill chicken for 6-7 minutes per side or until internal temperature reaches 165°F.

Notes

You can customize the seasonings to taste.

How to Prepare This Dish

Steps and time-saving tips

Start by marinating the Cilantro Lime Grilled Chicken to lock in flavor. Whisk together lime juice, olive oil, minced garlic, chopped cilantro, cumin, salt, and pepper in a bowl. Then, pour the marinade over the chicken breasts in a resealable bag, ensuring each piece gets coated evenly. Let it sit in the fridge for at least 30 minutes, but if you’re short on time, even 15 minutes will add a punch of flavor. Meanwhile, preheat your grill to medium-high heat so it’s ready when you are.

Once the grill is hot, remove the chicken from the marinade and shake off any excess. Place the breasts on the grill and cook for about 6-7 minutes per side, depending on thickness. Use a meat thermometer to check for an internal temperature of 165°F—this guarantees juicy, perfectly cooked Cilantro Lime Grilled Chicken every time. While the chicken rests for 5 minutes, quickly toast some tortillas on the grill for a warm, charred touch. Slice the chicken against the grain for tender bites, then drizzle with extra lime juice and fresh cilantro before serving.

Mistakes I’ve made and learned from

I’ve definitely overcooked Cilantro Lime Grilled Chicken by leaving it on the grill too long, turning it dry and tough. Now, I swear by my meat thermometer and pull the chicken at 160°F—it keeps cooking as it rests. Another blunder? Skipping the marinade time. Rushing the process meant bland chicken, so even a quick 15-minute soak makes a difference. If you’re new to grilling, check out my grilling tips for beginners to avoid common pitfalls. And if you love bold flavors, try my 5 easy marinades—they’re lifesavers for busy weeknights.

Cultural Connection and Variations

Where this recipe comes from

Cilantro Lime Grilled Chicken dances between cultures, blending bright Mexican flavors with the universal love of juicy, charred chicken. Originally inspired by the zesty marinades of coastal Mexico, this dish captures the essence of street food stalls where citrus and herbs reign supreme. However, families across Latin America and the Caribbean often put their own spin on it—some add a touch of cumin, while others throw in fiery chilies for extra kick. Even in my own kitchen, I’ve seen cousins argue over whether to use lemon or lime (team lime forever!).

Beyond borders, Cilantro Lime Grilled Chicken adapts effortlessly. In Thailand, cooks might swap cilantro for Thai basil and add fish sauce for umami depth. Meanwhile, in the American South, you’ll find it brushed with a hint of bourbon-infused glaze. Whether served with warm tortillas or coconut rice, the dish stays versatile. What ties it all together? That irresistible combo of tangy citrus and fresh herbs, making every bite feel like sunshine on a plate.

How it fits in today’s cooking

Today, Cilantro Lime Grilled Chicken shines as a weeknight hero and a crowd-pleasing star at summer cookouts. Busy cooks love it because the marinade does the heavy lifting—just toss it together in minutes, like these easy meal prep ideas. Plus, it’s a healthier alternative to heavy comfort foods, fitting seamlessly into gluten-free or keto diets. During holidays, I’ve seen it take center stage at backyard gatherings, paired with refreshing sides like vibrant summer salads.

Modern twists keep it exciting, too. Some grill it as skewers for parties, while others shred it for tacos or grain bowls. Meal preppers swear by doubling the batch for quick lunches. No matter how you serve it, Cilantro Lime Grilled Chicken proves that bold flavors never go out of style—especially when they’re this simple to master.

Taste and Texture

What makes it delicious

Cilantro Lime Grilled Chicken bursts with bright, zesty flavors that dance on your tongue. The tangy lime juice and fragrant cilantro create a refreshing, herbaceous punch, while a hint of garlic adds depth. Each bite delivers juicy, tender meat with a slightly charred, smoky edge from the grill. Meanwhile, the marinade infuses the chicken with a vibrant citrus aroma that makes your mouth water before you even take a bite. Whether you serve it hot off the grill or chilled in a salad, Cilantro Lime Grilled Chicken always satisfies with its bold yet balanced profile.

Boosting the flavor

For an extra flavor kick, try swapping lime juice with freshly squeezed key lime juice—its sharper acidity intensifies the tang. Alternatively, toss chopped jalapeños into the marinade for a spicy twist. A drizzle of creamy avocado dressing adds richness, while a sprinkle of cotija cheese lends salty crunch. If you love smoky notes, pair the chicken with chipotle honey glaze for a sweet-heat contrast. Experiment with fresh herbs like mint or basil to layer even more freshness into every bite.

Tips for Success

Best practices for results

First, marinate the Cilantro Lime Grilled Chicken for at least 30 minutes to lock in flavor. Meanwhile, preheat your grill to medium-high heat for even cooking. Additionally, pat the chicken dry before grilling to prevent sticking and ensure crisp edges. For extra juiciness, let the chicken rest for 5 minutes after grilling. Finally, always use fresh lime juice and cilantro to brighten the dish.

Mistakes to avoid

Avoid overcrowding the grill, as this lowers the temperature and steams the Cilantro Lime Grilled Chicken instead of searing it. Instead, leave space between each piece for proper airflow. Also, skip bottled lime juice—it lacks the fresh acidity needed for the marinade. For more grilling tips, check out our guide on grilling basics. Another common mistake? Underseasoning. Taste the marinade before adding the chicken, and adjust the salt as needed. Learn how to balance flavors with our seasoning guide.

Serving and Pairing Suggestions

How to serve this dish

For a vibrant presentation, slice the Cilantro Lime Grilled Chicken diagonally and fan it over a bed of fresh greens. Alternatively, stack the chicken on a platter with lime wedges and cilantro sprigs for a rustic yet elegant look. This dish shines at summer barbecues, but you can also serve it as a protein-packed option for weeknight dinners. To make it extra inviting, drizzle any remaining marinade over the top just before serving.

What goes well with it

Pair Cilantro Lime Grilled Chicken with a refreshing mango avocado salad for a burst of tropical flavors. The creamy avocado balances the zesty marinade perfectly. For heartier meals, try it alongside cilantro lime rice, which echoes the dish’s bright notes. If you’re hosting a gathering, our easy grilled vegetable skewers add color and crunch. Finally, a chilled glass of citrus-infused sparkling water or a light Mexican lager enhances the meal without overpowering it.

How long should I marinate cilantro lime grilled chicken?

For the best flavor, marinate your cilantro lime grilled chicken for at least 30 minutes, but ideally 2–4 hours. This allows the citrus and herbs to penetrate the meat. Avoid marinating overnight, as the lime juice can make the chicken mushy.

What sides go well with cilantro lime grilled chicken?

Cilantro lime grilled chicken pairs perfectly with Mexican-inspired sides like cilantro lime rice, black beans, or grilled corn. For lighter options, try a fresh avocado salad or roasted vegetables to complement the zesty flavors.

Can I make cilantro lime grilled chicken in the oven?

Yes! Bake at 375°F for 25–30 minutes or broil for 5–7 minutes per side for similar charred flavor. While grilling gives the best smoky taste, oven-baked cilantro lime grilled chicken still delivers juicy, flavorful results.

Is cilantro lime grilled chicken healthy?

Absolutely! Cilantro lime grilled chicken is high in protein and low in carbs, especially when using olive oil instead of butter. The fresh herbs and lime juice add flavor without extra calories, making it a nutritious weeknight meal.

Easy One-Pan Crispy Chicken with Beans and Pistachio Pesto

easy-crispy-chicken-pistachio-pesto

Introduction

Hi there! I’m Emily, the heart and soul behind brekcakes.com. From my earliest memories, the kitchen has always been a place of warmth and creativity. It’s where I discovered the magic of turning simple ingredients into extraordinary meals and learned that the best dishes are often made with love as the main ingredient.

If you’re craving a meal that’s both comforting and effortlessly elegant, you’re in the right place. One-Pan Crispy Chicken with Cannellini Beans and Pistachio Pesto is the kind of dish that feels like a warm hug after a long day. Not only does it deliver bold flavors and satisfying textures, but it also comes together in just one pan, making cleanup a breeze. Whether you’re cooking for a weeknight dinner or impressing guests, this recipe proves that simple ingredients can shine when paired thoughtfully.

One-Pan Crispy Chicken with Cannellini Beans and Pistachio Pesto combines tender, golden-brown chicken with creamy cannellini beans and a vibrant pistachio pesto. The dish balances richness and freshness, making it a standout for any occasion. What makes it special? First, the crispy chicken skin adds irresistible texture, while the beans soak up all the savory pan juices. Meanwhile, the pistachio pesto brings a nutty brightness that ties everything together. This recipe aligns perfectly with my philosophy of creating approachable yet elevated meals, much like my Garlic Herb Roasted Chicken. Plus, it’s a fantastic way to incorporate protein-packed beans and wholesome nuts into your diet without sacrificing flavor. If you love easy, one-pan wonders, you’ll also adore my Lemon Rosemary Salmon for another fuss-free favorite.

Why I Love This Recipe

This dish holds a special place in my heart because it reminds me of Sunday dinners with my family. The aroma of crispy chicken and garlic filling the kitchen instantly takes me back to those cherished moments. Beyond nostalgia, I love how One-Pan Crispy Chicken with Cannellini Beans and Pistachio Pesto effortlessly delivers restaurant-quality taste with minimal effort. It’s the kind of meal that makes you feel like a culinary rockstar, even on the busiest of days.

Health and Nutrition

Why it’s good for your body

One-Pan Crispy Chicken with Cannellini Beans and Pistachio Pesto packs a powerful nutritional punch while delighting your taste buds. First, the chicken delivers lean protein, which helps build muscle and keeps you full longer. Meanwhile, cannellini beans add fiber and plant-based protein, supporting digestion and steady energy levels. Additionally, the pistachio pesto brings healthy fats and antioxidants, which promote heart health and reduce inflammation.

Moreover, this dish balances macronutrients effortlessly. The crispy chicken skin provides satisfying texture without excessive oil, while the beans and pesto create a well-rounded meal. Furthermore, the herbs in the pesto, like basil and garlic, offer immune-boosting properties. One-Pan Crispy Chicken with Cannellini Beans and Pistachio Pesto also includes vitamin-rich ingredients, such as olive oil and lemon, which enhance nutrient absorption.

Finally, this recipe avoids processed ingredients, making it a wholesome choice. The combination of protein, fiber, and healthy fats stabilizes blood sugar, so you avoid energy crashes. Whether you seek a nourishing weeknight dinner or a meal that supports active living, One-Pan Crispy Chicken with Cannellini Beans and Pistachio Pesto delivers both flavor and nutrition.

How it fits in a healthy lifestyle

One-Pan Crispy Chicken with Cannellini Beans and Pistachio Pesto fits seamlessly into a balanced diet. If you prioritize high-protein meals, the chicken and beans provide over 30 grams of protein per serving. For gluten-free eaters, this dish naturally avoids grains, making it a safe and flavorful option. The heart-healthy fats from pistachios and olive oil also align with Mediterranean diet principles.

Busy home cooks will appreciate how this recipe simplifies healthy eating. Since it cooks in one pan, you spend less time cleaning and more time enjoying a nutrient-dense meal. Pair it with a simple salad or roasted vegetables for extra fiber, like these easy roasted vegetables. If you love meal prepping, the flavors deepen overnight, making leftovers even tastier. For more high-protein ideas, check out these protein-packed dinners.

Whether you follow specific dietary goals or just want a satisfying, wholesome meal, One-Pan Crispy Chicken with Cannellini Beans and Pistachio Pesto supports your health without sacrificing flavor.

Print
clock clock iconcutlery cutlery iconflag flag iconfolder folder iconinstagram instagram iconpinterest pinterest iconfacebook facebook iconprint print iconsquares squares iconheart heart iconheart solid heart solid icon

One-Pan Crispy Chicken with Cannellini Beans and Pistachio Pesto


  • Author: Chef Emy

Description

A flavorful one-pan meal featuring crispy chicken thighs, creamy cannellini beans, and a vibrant pistachio pesto.


Ingredients

Scale

For the Crust:

  • 4 bone-in, skin-on chicken thighs
  • 1 (15 oz) can cannellini beans, drained and rinsed
  • 1/2 cup shelled pistachios
  • 1/4 cup fresh basil leaves
  • 1 garlic clove
  • 1/4 cup grated Parmesan cheese
  • 1/4 cup olive oil
  • 1 lemon, juiced
  • 1 tsp red pepper flakes
  • Salt and black pepper to taste

Instructions

1. Prepare the Crust:

  1. Preheat oven to 400°F (200°C). Season chicken thighs with salt and black pepper.
  2. Heat 1 tbsp olive oil in an oven-safe skillet over medium-high heat. Sear chicken skin-side down for 5-7 minutes until golden and crispy. Flip and cook for 2 more minutes. Remove chicken and set aside.
  3. In the same skillet, add cannellini beans and red pepper flakes. Stir to combine with pan juices.
  4. Return chicken to the skillet, placing it on top of the beans. Transfer skillet to the oven and bake for 20-25 minutes until chicken is cooked through.
  5. Meanwhile, make the pesto by blending pistachios, basil, garlic, Parmesan, remaining olive oil, and lemon juice in a food processor until smooth. Season with salt to taste.
  6. Serve chicken and beans drizzled with pistachio pesto.

Notes

You can customize the seasonings to taste.

How to Prepare This Dish

Steps and time-saving tips

Start by preheating your oven to 400°F to ensure it’s hot enough for crispy chicken. While it heats, pat four chicken thighs dry with paper towels—this helps the skin crisp up beautifully. Season both sides generously with salt, pepper, and a pinch of smoked paprika for depth. Meanwhile, drain and rinse a can of cannellini beans, then toss them in a bowl with olive oil, minced garlic, and a squeeze of lemon juice. Spread the beans evenly in a large oven-safe skillet, creating a bed for the chicken. Nestle the thighs skin-side up on top, then slide the pan into the oven. Roast for 35-40 minutes until the chicken is golden and the beans are creamy. While everything cooks, pulse pistachios, fresh basil, Parmesan, and olive oil in a food processor for a vibrant pesto. Once the chicken is done, let it rest for five minutes before drizzling with the pesto. Serve straight from the skillet for minimal cleanup!

Mistakes I’ve made and learned from

I used to overcrowd the skillet, thinking I could fit extra chicken thighs—big mistake. The steam trapped underneath made the skin soggy instead of crispy. Now I stick to four thighs max in a 12-inch pan, giving each piece space to breathe. Another lesson? Skipping the bean-tossing step. Once, I dumped them straight from the can, and they turned out bland. Now I never skip seasoning them with garlic and lemon. For more skillet tricks, check out my guide on one-pan dinners. And if your pesto separates (mine did the first time!), this pesto troubleshooting post saves the day with tips for a silky emulsion.

Cultural Connection and Variations

Where this recipe comes from

One-Pan Crispy Chicken with Cannellini Beans and Pistachio Pesto feels like a love letter to Mediterranean home cooking, where simple ingredients shine. The dish borrows from Italian traditions, where beans and herbs often anchor rustic meals. However, the pistachio pesto adds a twist—likely inspired by Sicilian flavors, where nuts frequently enrich sauces. Some families might swap cannellini beans for chickpeas or lentils, depending on what’s local or pantry-ready. Meanwhile, in Provence, cooks might lean into herbes de Provence instead of basil, proving how adaptable this recipe truly is.

In my own kitchen, One-Pan Crispy Chicken with Cannellini Beans and Pistachio Pesto became a weeknight hero after a trip to Tuscany. There, I learned how cooks layer textures—crispy skin, creamy beans, crunchy nuts—to turn humble ingredients into something special. Across the Middle East, you’ll find similar dishes with tahini or sumac, while Spanish versions might include smoked paprika. No matter the variation, the heart of the dish stays the same: comfort, simplicity, and big flavor.

How it fits in today’s cooking

Today, One-Pan Crispy Chicken with Cannellini Beans and Pistachio Pesto fits perfectly into our crave for easy, nourishing meals. Busy cooks love it because it’s a one-pan wonder, and meal preppers swear by its reheating potential. Plus, it’s a hit for gatherings—imagine serving it alongside a bright lemony spring salad for a balanced spread. The dish also adapts to dietary needs effortlessly. For example, plant-based eaters might skip the chicken and double down on beans, while gluten-free folks already have a win here.

Seasonally, this recipe transitions beautifully. In summer, fresh basil and lemon zest make it zingy, while winter calls for heartier herbs like rosemary. It’s no surprise that it pairs well with cozy fall desserts, creating a full menu that feels intentional yet effortless. Whether you’re cooking for one or a crowd, this dish proves that tradition and modern convenience can coexist deliciously.

Taste and Texture

What makes it delicious

One-Pan Crispy Chicken with Cannellini Beans and Pistachio Pesto delivers a symphony of flavors and textures in every bite. The chicken boasts a golden, crackling skin that shatters to reveal juicy, tender meat beneath. Meanwhile, the creamy cannellini beans melt in your mouth, contrasting beautifully with the crunch of toasted pistachios in the pesto. Fragrant garlic, bright lemon zest, and earthy herbs weave through the dish, creating a vibrant yet balanced taste. Each forkful of One-Pan Crispy Chicken with Cannellini Beans and Pistachio Pesto feels indulgent, thanks to the rich pesto coating the beans and the savory pan drippings tying everything together.

Boosting the flavor

Elevate your One-Pan Crispy Chicken with Cannellini Beans and Pistachio Pesto by swapping the cannellini beans for buttery gigante beans or adding a sprinkle of chili flakes for a subtle heat. A drizzle of homemade chili oil amps up the depth, while a handful of fresh arugula tossed in at the end adds a peppery freshness. For extra brightness, try a squeeze of orange juice in the pesto or serve it with a side of roasted garlic bread to soak up every last drop of flavor. Small tweaks make this dish even more unforgettable.

Tips for Success

Best practices for results

Pat the chicken dry before seasoning to ensure maximum crispiness in your One-Pan Crispy Chicken with Cannellini Beans and Pistachio Pesto. Meanwhile, toast the pistachios lightly before blending them into the pesto for deeper flavor. Additionally, let the beans sit at room temperature for 10 minutes before adding them to the pan so they heat evenly. Finally, always use a heavy-bottomed skillet to prevent hot spots and promote even browning.

Mistakes to avoid

Avoid overcrowding the pan when searing the chicken, as this traps steam and prevents proper crisping. Instead, cook in batches if needed. Also, don’t skip resting the chicken for 5 minutes before serving—this keeps the juices locked in. For more on perfecting crispy proteins, check out our guide on searing meat like a pro. Another common misstep is over-blending the pesto, which can make it bitter. Pulse just until combined, and for extra tips on balancing flavors, explore our herb sauce mastery guide.

Serving and Pairing Suggestions

How to serve this dish

One-Pan Crispy Chicken with Cannellini Beans and Pistachio Pesto shines as a centerpiece for both casual dinners and special occasions. For a rustic yet elegant presentation, serve it family-style in the same skillet you cooked it in, letting the golden chicken and vibrant pesto take center stage. Alternatively, plate individual portions over a bed of warm crusty bread to soak up the flavorful juices. Garnish with extra chopped pistachios and a drizzle of olive oil for a touch of texture and richness. Whether you’re hosting a cozy Sunday supper or a festive holiday gathering, this dish delivers warmth and sophistication with minimal effort.

What goes well with it

Pair One-Pan Crispy Chicken with Cannellini Beans and Pistachio Pesto with a crisp, citrusy white wine like Sauvignon Blanc to balance the dish’s earthy flavors. For a non-alcoholic option, try a sparkling lemonade with a hint of thyme—it refreshes the palate between bites. If you’re serving sides, a simple arugula salad with shaved Parmesan or roasted garlic mashed potatoes will round out the meal perfectly. For dessert, keep it light with our Honey Lavender Panna Cotta or indulge in a slice of Salted Caramel Apple Pie for a sweet contrast to the savory main course.

Can I substitute the pistachios in the pesto for another nut?

Yes, you can use almonds, walnuts, or pine nuts as alternatives in the pistachio pesto for One-Pan Crispy Chicken with Cannellini Beans and Pistachio Pesto. Keep in mind that the flavor profile will change slightly, but the dish will still be delicious. Pistachios add a unique earthy sweetness, so consider toasting the substitute nuts for extra depth.

How do I get the chicken extra crispy for this recipe?

For perfectly crispy chicken in One-Pan Crispy Chicken with Cannellini Beans and Pistachio Pesto, pat the chicken dry before seasoning and use a hot pan with a thin layer of oil. Let the chicken cook undisturbed for 5-6 minutes per side to develop a golden crust. The cannellini beans will soak up the flavorful rendered chicken fat, adding richness to the dish.

What sides pair well with One-Pan Crispy Chicken with Cannellini Beans and Pistachio Pesto?

This hearty dish pairs beautifully with a simple arugula salad or roasted vegetables like asparagus or zucchini. For carbs, crusty bread works well to soak up the pesto sauce, or you could serve it over couscous. The cannellini beans already provide protein and fiber, making this a well-rounded meal.

Can I make the pistachio pesto ahead of time?

Absolutely! The pistachio pesto for One-Pan Crispy Chicken with Cannellini Beans and Pistachio Pesto can be made 2-3 days in advance. Store it in an airtight container with a thin layer of olive oil on top to prevent browning. The flavors often improve as they meld together. Just give it a stir before using.

Easy One Pot Rigatoni in Pink Sauce Recipe

easy-one-pot-rigatoni-pink-sauce

Introduction

Hi there! I’m Emily, the heart and soul behind brekcakes.com. From my earliest memories, the kitchen has always been a place of warmth and creativity. It’s where I discovered the magic of turning simple ingredients into extraordinary meals and learned that the best dishes are often made with love as the main ingredient.

If you’re craving a cozy, flavorful meal that comes together effortlessly, you’re in the right place. Today, I’m sharing my One Pot Rigatoni in Pink Sauce—a dish that balances rich tomato creaminess with tender pasta, all cooked in a single pot for maximum ease. Whether you’re a busy parent, a college student, or just someone who loves a satisfying dinner without the cleanup, this recipe delivers comfort and convenience in every bite. Plus, it’s perfect for those nights when you want something indulgent yet simple enough to whip up in minutes.

One Pot Rigatoni in Pink Sauce is a dreamy twist on classic pasta dishes, combining the tangy brightness of marinara with the velvety smoothness of cream. Unlike traditional recipes that require multiple pots and steps, this version lets you simmer everything together, infusing the rigatoni with incredible flavor while cutting down on dishes. It’s a crowd-pleaser that works for weeknight dinners or casual gatherings, and it aligns perfectly with my philosophy of making cooking accessible and joyful. If you’ve tried my Creamy Tomato Basil Pasta, you’ll adore this equally luscious but slightly bolder variation. And if you’re new to one-pot meals, don’t miss my guide on One Pot Meals for Busy Weeknights for more time-saving ideas.

Why I Love This Recipe

This One Pot Rigatoni in Pink Sauce holds a special place in my heart because it reminds me of lazy Sunday dinners with my family. My mom used to make a similar dish, and the aroma of tomatoes and cream simmering together would fill our home with warmth. Now, whenever I cook it, I feel that same sense of comfort and connection. It’s a recipe that never fails to bring people together, and I love how something so simple can create such lasting memories. Every time I take that first bite, I’m transported back to those cherished moments—and I hope it does the same for you.

Health and Nutrition

Why it’s good for your body

One Pot Rigatoni in Pink Sauce packs a nutritious punch while delivering rich, comforting flavors. First, the dish balances protein and carbs, thanks to the hearty rigatoni and savory tomato-cream sauce. Additionally, the tomatoes provide lycopene, a powerful antioxidant that supports heart health. Meanwhile, the cream adds calcium for strong bones, making this meal both satisfying and nourishing.

Moreover, One Pot Rigatoni in Pink Sauce includes olive oil, a source of healthy fats that promote brain function. The garlic and herbs not only enhance taste but also offer anti-inflammatory benefits. Since everything cooks in one pot, you retain more nutrients compared to dishes that require multiple steps. As a result, you get a meal that fuels your body without sacrificing flavor.

Finally, One Pot Rigatoni in Pink Sauce is versatile enough to accommodate extra veggies like spinach or mushrooms. These additions boost fiber and vitamins, making the dish even more wholesome. Whether you need a post-workout meal or a cozy dinner, this recipe keeps you energized and satisfied.

How it fits in a healthy lifestyle

One Pot Rigatoni in Pink Sauce fits seamlessly into a balanced diet. For gluten-free eaters, simply swap regular rigatoni for a gluten-free pasta alternative. The creamy tomato sauce remains just as delicious while keeping the dish inclusive. If you’re focused on heart health, the olive oil and lycopene-rich tomatoes make this a smart choice.

Busy weeknights call for easy, nutritious meals, and this recipe delivers. With minimal cleanup and wholesome ingredients, it’s perfect for meal prepping or family dinners. Pair it with a fresh salad from our healthy side dishes collection for a complete, well-rounded meal. For those tracking macros, the dish offers a good balance of carbs, protein, and fats.

Looking for more ways to enjoy pasta guilt-free? Check out our guide to balanced pasta recipes for inspiration. One Pot Rigatoni in Pink Sauce proves that comfort food can be both indulgent and nourishing.

Print
clock clock iconcutlery cutlery iconflag flag iconfolder folder iconinstagram instagram iconpinterest pinterest iconfacebook facebook iconprint print iconsquares squares iconheart heart iconheart solid heart solid icon

One Pot Rigatoni in Pink Sauce


  • Author: Chef Emy

Description

A creamy and tangy pasta dish made with a blend of tomato and cream sauce, cooked all in one pot for easy cleanup.


Ingredients

Scale

For the Crust:

  • 12 oz rigatoni pasta
  • 2 cups tomato sauce
  • 1 cup heavy cream
  • 1 small onion, diced
  • 3 cloves garlic, minced
  • 2 tbsp olive oil
  • 1 tsp dried basil
  • 1 tsp dried oregano
  • 1/2 tsp red pepper flakes
  • Salt and pepper to taste
  • 1/2 cup grated Parmesan cheese
  • Fresh basil for garnish

Instructions

1. Prepare the Crust:

  1. Heat olive oil in a large pot over medium heat. Add diced onion and sauté until translucent, about 3-4 minutes.
  2. Add minced garlic, dried basil, oregano, and red pepper flakes. Cook for another minute until fragrant.
  3. Pour in tomato sauce and heavy cream, stirring to combine. Bring to a gentle simmer.
  4. Add rigatoni pasta and enough water to just cover the pasta (about 2-3 cups). Stir well.
  5. Cover and cook for 12-15 minutes, stirring occasionally, until pasta is al dente and sauce has thickened.
  6. Stir in Parmesan cheese and season with salt and pepper to taste. Garnish with fresh basil before serving.

Notes

You can customize the seasonings to taste.

How to Prepare This Dish

Steps and time-saving tips

Start by heating olive oil in a large pot over medium heat. Add minced garlic and sauté until fragrant, about 30 seconds. Next, stir in diced onions and cook until they turn translucent. Toss in ground meat—whether beef, turkey, or plant-based—and brown it thoroughly, breaking it into small pieces as it cooks. Sprinkle salt, pepper, and Italian seasoning for flavor. Once the meat is done, pour in crushed tomatoes and heavy cream, then whisk them together to create that rich pink sauce. Drop the uncooked rigatoni directly into the pot, along with a cup of water or broth. Stir everything well, ensuring the pasta is fully submerged. Cover the pot and let it simmer for 15 minutes, stirring occasionally to prevent sticking. Meanwhile, grate fresh Parmesan cheese for topping. When the pasta is al dente and the sauce has thickened, remove the pot from heat. Fold in a handful of fresh basil leaves for brightness. Serve your One Pot Rigatoni in Pink Sauce hot, garnished with extra Parmesan and a drizzle of olive oil. For a quicker meal, prep your ingredients ahead or use pre-minced garlic and pre-shredded cheese.

Mistakes I’ve made and learned from

I once rushed the sautéing step, skipping the onions, and the dish lacked depth. Now I take my time—caramelizing them slightly makes all the difference. Another blunder? Overcrowding the pot with pasta. It seemed efficient, but the rigatoni didn’t cook evenly. I learned to use a pot large enough for everything to simmer freely. If you’re new to one-pot meals, check out my guide on avoiding common cooking mistakes. Also, don’t skimp on stirring—I once walked away too long, and the bottom layer stuck. A sturdy wooden spoon and frequent checks save the day. For more tips on perfecting creamy sauces, explore my creamy sauce secrets. Trust me, a little patience pays off with this One Pot Rigatoni in Pink Sauce.

Cultural Connection and Variations

Where this recipe comes from

One Pot Rigatoni in Pink Sauce carries the warmth of Italian-American kitchens, where cooks love blending simplicity with bold flavors. Originally, the dish likely evolved from classic tomato-based pasta recipes, but someone clever decided to lighten it up with cream. Today, families across Italy and beyond tweak it to their tastes. In Rome, they might swap rigatoni for bucatini, while in Sicily, they could add a pinch of chili flakes for heat.

My grandmother made her version of One Pot Rigatoni in Pink Sauce every Sunday, stirring in fresh basil from her garden. Meanwhile, in Northern Italy, cooks often fold in crispy pancetta or mushrooms for extra depth. No matter the variation, the dish always feels like a hug in a bowl. Some chefs even bake it with a cheesy crust, proving how versatile this recipe truly is.

How it fits in today’s cooking

One Pot Rigatoni in Pink Sauce fits perfectly into modern life because it’s quick, comforting, and endlessly adaptable. Busy parents love it for weeknight dinners, while meal preppers appreciate how well it reheats. Plus, it’s a star at potlucks, especially when paired with a crisp arugula salad for balance.

Health-conscious cooks lighten it up with coconut milk or add spinach for extra nutrients. Others turn it into a cozy winter staple, serving it alongside garlic butter rolls. Whether you’re cooking for one or a crowd, One Pot Rigatoni in Pink Sauce stays a timeless favorite because it’s as flexible as it is delicious.

Taste and Texture

What makes it delicious

One Pot Rigatoni in Pink Sauce delivers a rich, velvety bite that balances tangy tomatoes with a luscious creaminess. The sauce clings to every ridge of the rigatoni, creating a satisfying chew with each forkful. Fresh garlic and basil infuse the dish with a fragrant aroma, while a hint of red pepper flakes adds a subtle warmth. Meanwhile, the pasta stays perfectly al dente, offering a tender yet firm texture. One Pot Rigatoni in Pink Sauce is a harmony of bold flavors and comforting textures, making it irresistible from the first bite.

Boosting the flavor

Elevate your One Pot Rigatoni in Pink Sauce by stirring in a handful of freshly grated Parmesan for a salty, umami kick. For a smoky twist, crisp up some pancetta and sprinkle it on top. If you love heat, a drizzle of homemade chili oil will add depth without overpowering the sauce. Alternatively, brighten the dish with a squeeze of lemon or a sprinkle of herb-infused olive oil. These small tweaks transform an already delicious meal into something extraordinary.

Tips for Success

Best practices for results

For the best One Pot Rigatoni in Pink Sauce, always cook the pasta al dente since it will soften slightly in the sauce later. Meanwhile, stir the sauce frequently to prevent sticking, especially if using a heavy-bottomed pot. Additionally, reserve a cup of pasta water before draining—this helps adjust the sauce’s consistency if needed. Finally, finish with fresh basil or grated Parmesan for extra flavor.

Mistakes to avoid

Avoid overcooking the rigatoni, as mushy pasta ruins the texture of One Pot Rigatoni in Pink Sauce. Instead, check for doneness a minute early. Also, don’t skip toasting the garlic—it adds depth, so cook it just until fragrant. For more on perfecting pasta dishes, explore our guide on cooking pasta like a pro. Lastly, if your sauce thickens too much, thin it with reserved pasta water or broth, as explained in our sauce consistency fixes post.

Serving and Pairing Suggestions

How to serve this dish

One Pot Rigatoni in Pink Sauce shines when you serve it family-style in a large, shallow bowl. For a rustic touch, sprinkle fresh basil or parsley on top and add a dusting of grated Parmesan. Meanwhile, if you want to impress guests, try plating individual portions with a twist of pasta for height. This dish works beautifully for cozy weeknight dinners yet also fits right in at holiday gatherings. To make it extra inviting, pair it with warm crusty bread for dipping into the creamy sauce.

What goes well with it

A crisp green salad with lemon vinaigrette balances the richness of One Pot Rigatoni in Pink Sauce perfectly. Alternatively, roasted garlic bread adds a crunchy contrast that elevates every bite. For drinks, a light Pinot Grigio or sparkling water with lemon complements the flavors without overpowering them. If you love pairing pasta with appetizers, try our Crispy Zucchini Fritters for a satisfying starter. And if you crave something sweet afterward, our Classic Tiramisu makes the ideal finale.

What is pink sauce in One Pot Rigatoni in Pink Sauce?

Pink sauce is a creamy blend of tomato sauce and heavy cream or Alfredo sauce, giving One Pot Rigatoni in Pink Sauce its signature rosy color and rich flavor. It balances the tanginess of tomatoes with the smoothness of dairy for a deliciously comforting dish.

Can I use a different pasta for One Pot Rigatoni in Pink Sauce?

Yes! While rigatoni works great for holding the creamy pink sauce, you can substitute penne, fusilli, or farfalle. Just adjust cooking times slightly since One Pot Rigatoni in Pink Sauce relies on the pasta cooking perfectly in the sauce.

How do I make One Pot Rigatoni in Pink Sauce creamier?

For extra creaminess, stir in more heavy cream or a splash of pasta water at the end. You can also add grated Parmesan or cream cheese to your One Pot Rigatoni in Pink Sauce while it simmers for a luxuriously smooth texture.

Is One Pot Rigatoni in Pink Sauce kid-friendly?

Absolutely! The mild, creamy pink sauce and tender rigatoni make this dish a hit with kids. For picky eaters, you can reduce garlic or spices in your One Pot Rigatoni in Pink Sauce while keeping the comforting flavors.

Best Spicy Eggplant Pasta – Quick & Flavorful Recipe

best-spicy-eggplant-pasta

Introduction

Hi there! I’m Emily, the heart and soul behind brekcakes.com. From my earliest memories, the kitchen has always been a place of warmth and creativity. It’s where I discovered the magic of turning simple ingredients into extraordinary meals and learned that the best dishes are often made with love as the main ingredient.

If you’re craving a dish that’s bold, comforting, and packed with flavor, you’re in the right place. Spicy Eggplant Pasta has become one of my go-to recipes for busy weeknights and cozy gatherings alike. Whether you’re a fan of hearty vegetarian meals or just love a little kick in your pasta, this recipe delivers. Plus, it’s a fantastic way to use up those eggplants sitting in your fridge before they lose their shine.

Spicy Eggplant Pasta is a vibrant, satisfying dish that combines tender roasted eggplant with al dente pasta, all tossed in a garlicky tomato sauce with a hint of chili heat. Unlike traditional pasta dishes, this one highlights eggplant as the star, giving it a meaty texture without the meat. What makes it special is its versatility—you can adjust the spice level to suit your taste or even add extra veggies like bell peppers or zucchini. Since brekcakes.com focuses on approachable yet flavorful recipes, this dish fits perfectly. It’s quick enough for a weeknight but impressive enough for guests. If you love easy vegetarian meals, you’ll also enjoy my Creamy Mushroom Risotto or Garlic Herb Focaccia as side options.

Why I Love This Recipe

Spicy Eggplant Pasta holds a special place in my heart because it reminds me of family dinners where everyone gathered around the table, laughing and sharing stories. The first time I made it, my skeptical nephew—who claimed he hated eggplant—cleaned his plate and asked for seconds. That’s the power of this dish: it turns doubters into believers. Every time I make it, I feel that same joy of bringing people together over something delicious.

Health and Nutrition

Why it’s good for your body

Spicy Eggplant Pasta packs a nutritious punch while delivering bold flavors. First, eggplant brings fiber, which supports digestion and keeps you full longer. Additionally, it contains antioxidants like nasunin, which may help protect your cells from damage. Meanwhile, the tomatoes in the sauce offer vitamin C and lycopene, both linked to heart health.

Thanks to the olive oil, Spicy Eggplant Pasta also provides healthy fats that reduce inflammation. Furthermore, the chili flakes add capsaicin, a compound known to boost metabolism. Unlike heavy cream-based pasta dishes, this recipe keeps calories in check without sacrificing richness. Plus, the garlic and herbs not only enhance taste but also offer immune-boosting properties.

For a balanced meal, Spicy Eggplant Pasta combines complex carbs from whole-grain pasta with plant-based nutrients. Whether you’re looking for a meatless option or simply want a nutrient-dense dinner, this dish delivers. Ultimately, it’s a tasty way to fuel your body with vitamins, minerals, and antioxidants in every bite.

How it fits in a healthy lifestyle

Spicy Eggplant Pasta fits seamlessly into a balanced diet. If you’re aiming for more plant-based meals, it’s a satisfying meatless option packed with fiber and protein from the eggplant and whole-grain pasta. For gluten-free eaters, simply swap regular pasta for a gluten-free alternative like the ones we recommend in our gluten-free pasta guide.

This dish also aligns with heart-healthy eating thanks to its olive oil base and cholesterol-free ingredients. If you’re meal prepping, Spicy Eggplant Pasta stores well, making it a practical choice for busy weeks. Pair it with a simple salad or roasted veggies for extra nutrients, just like our easy meal prep tips suggest. Whether you’re cooking for one or feeding a family, it’s a versatile recipe that supports your health goals without skimping on flavor.

Print
clock clock iconcutlery cutlery iconflag flag iconfolder folder iconinstagram instagram iconpinterest pinterest iconfacebook facebook iconprint print iconsquares squares iconheart heart iconheart solid heart solid icon

Spicy Eggplant Pasta


  • Author: Chef Emy

Description

A flavorful pasta dish featuring tender eggplant with a spicy kick.


Ingredients

Scale

For the Crust:

  • 8 oz pasta (penne or spaghetti)
  • 1 medium eggplant, diced
  • 2 tbsp olive oil
  • 3 cloves garlic, minced
  • 1/2 tsp red pepper flakes
  • 1 can (14 oz) crushed tomatoes
  • 1/4 cup fresh basil, chopped
  • Salt and pepper to taste
  • Grated Parmesan cheese for serving

Instructions

1. Prepare the Crust:

  1. Cook pasta according to package instructions until al dente. Drain and set aside.
  2. Heat olive oil in a large skillet over medium heat. Add diced eggplant and cook until softened, about 8-10 minutes.
  3. Add minced garlic and red pepper flakes to the skillet. Sauté for 1 minute until fragrant.
  4. Stir in crushed tomatoes and simmer for 10 minutes, allowing flavors to meld.
  5. Toss cooked pasta with the eggplant-tomato sauce. Season with salt and pepper.
  6. Garnish with fresh basil and serve with grated Parmesan cheese.

Notes

You can customize the seasonings to taste.

How to Prepare This Dish

Steps and time-saving tips

Start by dicing the eggplant into small, even cubes so they cook quickly and evenly. Toss them in a bowl with olive oil, salt, and a pinch of red pepper flakes for that signature kick in your Spicy Eggplant Pasta. While the eggplant roasts in the oven at 400°F for about 20 minutes, bring a large pot of salted water to a boil for the pasta. Meanwhile, heat a skillet over medium heat and sauté minced garlic until fragrant, then add crushed tomatoes and a splash of pasta water to create a rich, silky sauce. Stir in the roasted eggplant once it’s tender and slightly caramelized. Drain the pasta al dente and fold it into the sauce, letting everything simmer together for a minute so the flavors meld. Finish with fresh basil and a drizzle of extra virgin olive oil for brightness. To save time, roast the eggplant ahead or use pre-minced garlic from the fridge. If you’re short on ingredients, a sprinkle of Parmesan or a dash of smoked paprika can elevate the dish effortlessly.

Mistakes I’ve made and learned from

Early on, I underestimated how much salt eggplant needs—it’s like a sponge, so underseasoning left my Spicy Eggplant Pasta bland. Now I salt the cubes generously before roasting and taste the sauce before combining. Another hiccup? Overcrowding the baking sheet, which steamed the eggplant instead of crisping it. Lesson learned: spread them in a single layer, or roast in batches if needed. For more on balancing flavors, check out my guide to seasoning secrets. And if you’ve ever struggled with soggy pasta, my pasta perfection tips will save the day. Trust me, a few tweaks make all the difference!

Cultural Connection and Variations

Where this recipe comes from

Spicy Eggplant Pasta carries a rich history, blending Italian pasta traditions with bold, global flavors. Originally inspired by Sicilian caponata, this dish traveled across borders, picking up fiery chili peppers from Asia and smoky spices from the Middle East. In southern Italy, cooks often pair tender eggplant with tangy tomatoes and garlic, while in Thailand, they might toss it with basil and fish sauce for a punchy twist. Meanwhile, my grandmother added a pinch of paprika and a splash of red wine, turning it into a Sunday staple.

Families worldwide adapt Spicy Eggplant Pasta to their pantries. Some roast the eggplant for depth, others fry it for crunch. In Greece, they might crumble feta on top, while in Mexico, a squeeze of lime brightens the dish. No matter the version, the heart remains the same: comforting, adaptable, and packed with flavor. Whether served at a bustling street market or a quiet family dinner, Spicy Eggplant Pasta always tells a story.

How it fits in today’s cooking

Today, Spicy Eggplant Pasta shines as a versatile favorite for weeknights and gatherings alike. Busy cooks love it for its one-pot simplicity, while food bloggers rave about its Instagram-worthy colors. It’s a star during summer when eggplants peak, but hearty enough for cozy winter meals. Many even swap regular pasta for gluten-free alternatives, proving how easily it fits modern diets.

Beyond convenience, this dish bridges traditions and trends. Some pair it with air-fryer garlic bread for a quick feast, while others layer it into meal prep bowls. Whether you’re craving comfort or exploring global flavors, Spicy Eggplant Pasta keeps delivering—one delicious bite at a time.

Taste and Texture

What makes it delicious

Spicy Eggplant Pasta delivers a bold, satisfying experience with every bite. The tender eggplant melts into a rich, smoky base, while the garlic and chili flakes add a fiery kick that lingers pleasantly. Fresh basil brightens the dish with a fragrant, herbal note, balancing the deep umami of roasted tomatoes. Meanwhile, the al dente pasta provides a chewy contrast to the velvety sauce. Each forkful of Spicy Eggplant Pasta bursts with layers of flavor—earthy, spicy, and subtly sweet—making it impossible to resist.

Boosting the flavor

For an extra flavor boost, try crumbling feta or ricotta salata over the finished dish—their salty creaminess elevates the heat perfectly. If you love a smoky depth, a dash of smoked paprika or a splash of roasted red pepper sauce blends beautifully with the eggplant. Fresh herbs like parsley or mint add a refreshing twist, while toasted pine nuts bring a satisfying crunch. Craving more heat? Stir in a spoonful of homemade chili oil just before serving. With these tweaks, Spicy Eggplant Pasta becomes even more irresistible.

Tips for Success

Best practices for results

Always salt the eggplant before cooking to draw out excess moisture and prevent a soggy texture in your Spicy Eggplant Pasta. Meanwhile, use high-quality olive oil for sautéing since it enhances the dish’s rich flavor. Furthermore, toast the garlic lightly to avoid bitterness, and stir the pasta sauce frequently to ensure even cooking. For the best results, finish with fresh basil or parsley to brighten the dish.

Mistakes to avoid

One common mistake is overcrowding the pan when roasting eggplant, which steams instead of caramelizing it. Instead, spread the pieces in a single layer for perfect browning. Additionally, avoid overcooking the pasta—aim for al dente since it will continue to soften in the sauce. If you need help with pasta textures, check out our guide on perfect pasta doneness. Finally, don’t skip deglazing the pan with a splash of pasta water—this trick thickens the sauce naturally, as explained in our sauce secrets post.

Serving and Pairing Suggestions

How to serve this dish

For a stunning presentation, serve Spicy Eggplant Pasta in wide, shallow bowls to showcase its rich texture. Top it with fresh basil leaves, a sprinkle of grated Parmesan, or a drizzle of high-quality olive oil for extra flair. Meanwhile, this dish shines at casual weeknight dinners yet also impresses at gatherings like potlucks or date nights. If you want to elevate the experience, pair it with crusty garlic bread or a simple side salad for contrast. The vibrant colors and bold flavors make Spicy Eggplant Pasta a feast for both the eyes and the palate.

What goes well with it

A crisp white wine, like Pinot Grigio, balances the heat of Spicy Eggplant Pasta while enhancing its savory notes. Alternatively, try a chilled sparkling water with lemon for a refreshing non-alcoholic option. For sides, roasted garlic bread or a light arugula salad with lemon vinaigrette adds texture without overpowering the dish. If you love bold flavors, our Spicy Honey Glazed Carrots bring a sweet-spicy contrast that pairs beautifully. Finally, end the meal with something sweet like our Vanilla Bean Panna Cotta to soothe the palate after the kick of heat.

What makes Spicy Eggplant Pasta spicy?

Spicy Eggplant Pasta gets its heat from ingredients like red pepper flakes, chili oil, or fresh jalapeños. The level of spiciness can be adjusted to taste, but the dish typically balances the heat with creamy eggplant and savory pasta.

Can I make Spicy Eggplant Pasta vegan?

Yes! Spicy Eggplant Pasta can easily be made vegan by omitting cheese and using plant-based alternatives like nutritional yeast or vegan Parmesan. The eggplant and pasta provide plenty of flavor, so the dish remains delicious without animal products.

What type of pasta works best with Spicy Eggplant Pasta?

Short, sturdy pasta like penne, rigatoni, or fusilli works best with Spicy Eggplant Pasta because it holds the chunky sauce well. Avoid delicate noodles like angel hair, as they may break under the weight of the eggplant and spices.

How do I prevent Spicy Eggplant Pasta from being too oily?

To avoid an oily Spicy Eggplant Pasta, salt the eggplant slices before cooking to draw out excess moisture. Also, use a moderate amount of high-quality olive oil and blot the cooked eggplant with a paper towel if needed.

Best Gnocchi with Truffle Parmesan Sauce Recipe

best-gnocchi-truffle-parmesan-sauce

Introduction

Hi there! I’m Emily, the heart and soul behind brekcakes.com. From my earliest memories, the kitchen has always been a place of warmth and creativity. It’s where I discovered the magic of turning simple ingredients into extraordinary meals and learned that the best dishes are often made with love as the main ingredient.

There’s something undeniably comforting about a bowl of pillowy gnocchi, especially when it’s draped in a rich, velvety truffle Parmesan sauce. Whether you’re craving a cozy night in or planning a special dinner, this Gnocchi with Truffle Parmesan Sauce delivers elegance without the fuss. Moreover, it’s the kind of dish that feels like a warm hug—simple yet luxurious, familiar yet exciting. Trust me, once you try it, you’ll understand why it’s become a staple in my kitchen.

Gnocchi with Truffle Parmesan Sauce is a celebration of textures and flavors. The tender potato dumplings melt in your mouth, while the sauce—infused with earthy truffle and sharp Parmesan—creates a symphony of umami. What makes this dish stand out is its versatility. You can serve it as a weeknight treat or elevate it for date night with a sprinkle of fresh herbs. Additionally, it pairs beautifully with a crisp salad or crusty bread, making it a crowd-pleaser every time. If you’re new to gnocchi, don’t worry—this recipe breaks it down into easy steps, just like my homemade pasta guide. And if you love truffle flavors, you’ll adore how this dish balances richness without overwhelming the palate, much like my truffle mushroom risotto.

Why I Love This Recipe

Gnocchi with Truffle Parmesan Sauce holds a special place in my heart because it reminds me of my first trip to Italy. I stumbled upon a tiny trattoria in Rome where the chef served homemade gnocchi with a sauce so divine, I begged for the recipe. While I never got the exact measurements, I spent years perfecting my own version. Now, every time I make it, I’m transported back to that cobblestone street, surrounded by laughter and the aroma of fresh herbs. It’s more than a dish—it’s a memory on a plate.

Health and Nutrition

Why it’s good for your body

Gnocchi with Truffle Parmesan Sauce offers a delicious way to enjoy a nutrient-rich meal. First, the gnocchi provides a satisfying source of carbohydrates, which fuel your energy levels throughout the day. Additionally, the potatoes in gnocchi deliver essential vitamins like vitamin C and potassium, supporting immune function and heart health.

Meanwhile, the truffle parmesan sauce adds a boost of umami flavor while contributing valuable nutrients. Parmesan cheese packs calcium and protein, which strengthen bones and muscles. Furthermore, truffle oil contains antioxidants that may help reduce inflammation. Together, these ingredients make Gnocchi with Truffle Parmesan Sauce a flavorful yet balanced dish.

For those watching their portions, this recipe can easily fit into a mindful eating plan. Since gnocchi tends to be lighter than traditional pasta, it keeps the meal satisfying without feeling overly heavy. Plus, the rich truffle flavor means you can enjoy bold taste without excessive calories. Whether you’re cooking for a special occasion or a weeknight dinner, Gnocchi with Truffle Parmesan Sauce brings both indulgence and nourishment to the table.

How it fits in a healthy lifestyle

Gnocchi with Truffle Parmesan Sauce works well in a balanced diet when paired with the right sides. For a heart-healthy twist, serve it with a leafy green salad or roasted vegetables to add fiber and vitamins. If you’re focusing on protein, consider topping it with grilled chicken or shrimp for an extra boost.

This dish also adapts easily to dietary preferences. For a gluten-free version, swap traditional gnocchi for sweet potato or cauliflower-based alternatives. Looking for more ways to balance rich flavors with nutrition? Explore our guide to healthy comfort food swaps for creative ideas. And if you’re planning meals ahead, check out our tips for efficient meal prep strategies to keep your eating habits on track. With a little creativity, Gnocchi with Truffle Parmesan Sauce can be a tasty part of your wellness routine.

Print
clock clock iconcutlery cutlery iconflag flag iconfolder folder iconinstagram instagram iconpinterest pinterest iconfacebook facebook iconprint print iconsquares squares iconheart heart iconheart solid heart solid icon

Gnocchi with Truffle Parmesan Sauce


  • Author: Chef Emy

Description

Fluffy homemade gnocchi served with a rich truffle-infused parmesan cream sauce.


Ingredients

Scale

For the Crust:

  • 2 lbs russet potatoes
  • 1 1/2 cups all-purpose flour
  • 1 egg
  • 1 tsp salt
  • 1/2 tsp black pepper
  • 1 cup heavy cream
  • 1/2 cup grated parmesan cheese
  • 1 tbsp truffle oil
  • 1 tsp garlic powder
  • 2 tbsp butter

Instructions

1. Prepare the Crust:

  1. Boil potatoes until tender, peel and mash them while still warm.
  2. Mix mashed potatoes with flour, egg, salt, and pepper to form a dough.
  3. Roll dough into ropes and cut into 1-inch pieces to form gnocchi.
  4. Boil gnocchi in salted water until they float to the surface (about 2-3 minutes).
  5. In a separate pan, melt butter, add heavy cream, parmesan, truffle oil, and garlic powder. Simmer until thickened.
  6. Toss cooked gnocchi in the sauce and serve immediately.

Notes

You can customize the seasonings to taste.

How to Prepare This Dish

Steps and time-saving tips

Start by boiling the gnocchi in salted water until they float to the top, which takes about 2-3 minutes. Meanwhile, heat a large skillet over medium heat and melt butter with a drizzle of olive oil to prevent burning. Whisk in minced garlic and let it sizzle for 30 seconds until fragrant, then stir in heavy cream and grated Parmesan until the sauce thickens slightly. Gently fold in the cooked gnocchi, coating each piece evenly with the creamy truffle Parmesan sauce. For extra flavor, finish with a sprinkle of black truffle oil or shavings and fresh parsley. To save time, prep your ingredients beforehand—measure the cream, grate the cheese, and mince the garlic while the water boils. If the sauce feels too thick, thin it with a splash of pasta water. Serve immediately while hot for the best texture.

Mistakes I’ve made and learned from

I once overcooked the gnocchi, turning them mushy before they even hit the sauce. Now I set a timer and scoop them out the second they float. Another blunder? Using pre-grated Parmesan that clumped instead of melting smoothly—freshly grated makes all the difference, as I learned from my perfect pasta sauces guide. And if your sauce separates, don’t panic. A quick fix is to whisk in a teaspoon of cornstarch slurry, a trick I picked up from my sauce rescues post. Trust me, even small tweaks like these elevate Gnocchi with Truffle Parmesan Sauce from good to unforgettable.

Cultural Connection and Variations

Where this recipe comes from

Gnocchi with Truffle Parmesan Sauce carries the soul of Italian comfort food, but its roots stretch deeper than you might think. While many associate gnocchi with Northern Italy, this pillowy pasta actually traces back to ancient Roman times, where cooks made it with semolina instead of potatoes. Today, regions like Lombardy and Piedmont celebrate gnocchi as a Sunday staple, often pairing it with rich sauces like the luxurious truffle Parmesan blend. Meanwhile, in my own kitchen, I love adding a splash of white wine to the sauce for extra depth—a trick my grandmother swore by.

Across the globe, cooks put their own spin on Gnocchi with Truffle Parmesan Sauce. In France, chefs might swap truffle oil for fresh black truffles, while in Argentina, families often top it with a fried egg for a hearty twist. Even within Italy, some versions use ricotta instead of potatoes for a lighter bite. No matter the variation, this dish always feels like a warm hug—a testament to how food bridges cultures and generations.

How it fits in today’s cooking

Gnocchi with Truffle Parmesan Sauce isn’t just a relic of the past—it’s a star in modern kitchens too. Busy home cooks love it for weeknight dinners because it comes together faster than traditional pasta, especially if you use store-bought gnocchi. For special occasions, though, many still hand-roll the dough, turning it into a festive ritual. Whether you’re hosting a holiday gathering or craving cozy comfort food, this dish delivers every time.

Today’s adaptations keep it fresh. Some add spinach to the gnocchi for a veggie boost, while others opt for vegan Parmesan to suit dietary needs. And let’s not forget the rise of truffle-infused oils, making gourmet flavors accessible anytime. If you’re looking for more ways to elevate your meals, check out these gourmet dinner ideas. After all, Gnocchi with Truffle Parmesan Sauce proves that classic flavors never go out of style.

Taste and Texture

What makes it delicious

Gnocchi with Truffle Parmesan Sauce delivers a luxurious bite that balances rich, earthy flavors with a velvety smooth texture. The pillowy gnocchi melts in your mouth, while the sauce wraps each piece in a creamy, umami-packed embrace. Truffle oil adds a deep, aromatic fragrance that elevates every forkful, and the sharpness of Parmesan cuts through the richness for a perfect finish. Meanwhile, the slight chewiness of the gnocchi contrasts beautifully with the sauce’s silkiness, creating a dish that feels indulgent yet comforting. Gnocchi with Truffle Parmesan Sauce is a symphony of flavors—savory, nutty, and irresistibly decadent.

Boosting the flavor

For an extra flavor boost, try topping your Gnocchi with Truffle Parmesan Sauce with crispy pancetta or toasted pine nuts for a crunchy contrast. A sprinkle of fresh herbs like thyme or rosemary brightens the dish, while a dash of lemon zest adds a zingy twist. If you love bold flavors, swap the Parmesan for aged Pecorino Romano or stir in a spoonful of homemade pesto for an herby kick. Pair it with a light, citrusy salad like this arugula salad to balance the richness. Small tweaks can transform this dish into a showstopper!

Tips for Success

Best practices for results

Always chill your gnocchi dough for at least 30 minutes before shaping it, as this helps prevent stickiness and ensures light, pillowy results. Meanwhile, use freshly grated Parmesan for the truffle sauce to achieve a smooth, rich texture that coats the Gnocchi with Truffle Parmesan Sauce perfectly. Additionally, cook the gnocchi in small batches to avoid overcrowding the pot, which can lead to uneven cooking. Finally, taste the sauce as you go and adjust the truffle oil gradually, since its flavor intensifies quickly.

Mistakes to avoid

Avoid overworking the gnocchi dough, as this can make it dense instead of tender. Instead, mix the ingredients just until combined, similar to the technique used in our perfect pasta dough guide. Another common mistake is using pre-shredded Parmesan, which often contains anti-caking agents that prevent the sauce from emulsifying smoothly. For best results, follow our cheese sauces 101 tips to create a velvety truffle Parmesan sauce every time. Lastly, don’t skip salting the gnocchi cooking water generously, as this enhances the overall flavor of your Gnocchi with Truffle Parmesan Sauce.

Serving and Pairing Suggestions

How to serve this dish

Elevate your Gnocchi with Truffle Parmesan Sauce by serving it in shallow bowls to showcase the creamy sauce. For a touch of elegance, garnish with fresh parsley or microgreens and a light drizzle of truffle oil. Meanwhile, this dish shines at dinner parties or cozy date nights, but it also makes a luxurious weeknight treat. To impress guests, pair it with warm, crusty bread for dipping into the rich sauce. Finally, consider serving it family-style in a large platter for a festive holiday meal.

What goes well with it

A crisp white wine like Pinot Grigio balances the richness of Gnocchi with Truffle Parmesan Sauce, while a light arugula salad adds a peppery contrast. For heartier appetites, try pairing it with our Garlic Herb Focaccia to soak up every last bite. Alternatively, a roasted vegetable medley brings earthy flavors that harmonize with the truffle notes. If you crave something refreshing, our Citrus Avocado Salad offers a bright, tangy counterpoint to the dish’s decadence.

What is the best way to cook gnocchi for truffle parmesan sauce?

For the best texture, boil gnocchi in salted water until they float to the top (about 2-3 minutes). Drain and toss them directly in the truffle parmesan sauce to coat evenly. Avoid overcooking, as gnocchi with truffle parmesan sauce tastes best when the dumplings are light and pillowy.

Can I use store-bought gnocchi for truffle parmesan sauce?

Yes, store-bought gnocchi works well for this dish—just opt for high-quality potato or shelf-stable varieties. Gnocchi with truffle parmesan sauce benefits from the rich sauce, so even pre-made gnocchi will taste delicious when paired with the creamy, umami flavors.

What can I substitute for truffle oil in gnocchi with truffle parmesan sauce?

If you don’t have truffle oil, use a small amount of finely grated fresh black truffle or truffle salt for a similar earthy flavor. For a budget-friendly option, sautéed mushrooms add depth to gnocchi with truffle parmesan sauce, though the taste will be milder.

How do I prevent gnocchi from getting gummy in the sauce?

To avoid gummy gnocchi, don’t overcrowd the pot when boiling and stir gently. After draining, toss them immediately in the truffle parmesan sauce to prevent sticking. Gnocchi with truffle parmesan sauce should have a tender bite, so cook in batches if needed.

Easy Sautéed Cabbage – Quick and Delicious Side Dish

easy-sauteed-cabbage-side-dish

Introduction

Hi there! I’m Emily, the heart and soul behind brekcakes.com. From my earliest memories, the kitchen has always been a place of warmth and creativity. It’s where I discovered the magic of turning simple ingredients into extraordinary meals and learned that the best dishes are often made with love as the main ingredient.

There’s something deeply comforting about a dish that’s both simple and satisfying, and that’s exactly what Sautéed Cabbage delivers. Whether you’re looking for a quick weeknight side or a way to breathe new life into humble veggies, this recipe never disappoints. Plus, it’s versatile enough to pair with everything from roasted chicken to your favorite vegetarian mains. Trust me, once you try it, you’ll wonder how you ever overlooked this kitchen staple.

Sautéed Cabbage is a dish that celebrates simplicity without sacrificing flavor. By cooking thinly sliced cabbage in a bit of butter or oil until tender-crisp, you unlock its natural sweetness while keeping a satisfying bite. It’s a budget-friendly, nutrient-packed side that works equally well for busy families or solo cooks. What I love most, though, is how easily it adapts to different flavors—toss in garlic, caraway seeds, or a splash of apple cider vinegar, and suddenly, you’ve transformed it into something entirely new. If you’re a fan of easy, wholesome recipes like my meal-prep favorites, this one will fit right into your rotation.

Why I Love This Recipe

Sautéed Cabbage holds a special place in my heart because it reminds me of my grandmother’s kitchen. She could turn the most ordinary ingredients into something memorable, and this dish was one of her go-to sides. Every time I make it, I’m transported back to those cozy evenings around her table. It’s proof that great food doesn’t need to be complicated—just made with care and a little creativity.

Health and Nutrition

Why it’s good for your body

Sautéed cabbage packs a powerful nutritional punch while keeping calories low. First, it delivers a hefty dose of fiber, which supports digestion and keeps you feeling full longer. Additionally, this dish is rich in vitamins C and K, both of which boost immunity and bone health. Since cabbage retains most of its nutrients when lightly cooked, sautéed cabbage offers a convenient way to meet daily veggie goals.

Moreover, sautéed cabbage contains antioxidants like sulforaphane, which may help reduce inflammation. The cooking process also softens the cabbage, making it easier to digest for those with sensitive stomachs. For a heart-healthy twist, you can use olive oil, which adds beneficial monounsaturated fats. Whether you enjoy it as a side or main dish, sautéed cabbage provides a versatile and nutrient-dense option.

Finally, this dish is naturally low in carbs, making it ideal for balanced eating plans. Because cabbage absorbs flavors well, you can customize sautéed cabbage with herbs and spices for extra health perks. In short, this simple dish delivers big benefits without compromising taste or convenience.

How it fits in a healthy lifestyle

Sautéed cabbage fits effortlessly into almost any diet, from gluten-free to plant-based. Its low-calorie profile makes it a smart choice for weight management, while its fiber content supports steady energy levels. If you follow a heart-healthy eating plan, pairing sautéed cabbage with lean proteins like grilled chicken creates a balanced meal. For more ideas on balancing meals, check out our guide to easy meal prep strategies.

Busy weeknights call for quick, nutritious options, and sautéed cabbage delivers. You can whip it up in minutes and pair it with whole grains or proteins for a complete dish. It also works well in meal prep, staying fresh for days in the fridge. If you love versatile veggies, explore our roundup of healthy vegetable side dishes for more inspiration. With its adaptability and nutrition, sautéed cabbage easily earns a spot in any healthy routine.

Print
clock clock iconcutlery cutlery iconflag flag iconfolder folder iconinstagram instagram iconpinterest pinterest iconfacebook facebook iconprint print iconsquares squares iconheart heart iconheart solid heart solid icon

Sautéed Cabbage


  • Author: Chef Emy

Description

A simple and flavorful sautéed cabbage dish that makes a great side or light main course.


Ingredients

Scale

For the Crust:

  • 1 medium head green cabbage, thinly sliced
  • 2 tablespoons olive oil
  • 1 small onion, thinly sliced
  • 2 cloves garlic, minced
  • 1 teaspoon salt
  • 1/2 teaspoon black pepper
  • 1/2 teaspoon red pepper flakes (optional)
  • 1 tablespoon apple cider vinegar

Instructions

1. Prepare the Crust:

  1. Heat olive oil in a large skillet over medium heat.
  2. Add sliced onion and sauté for 3-4 minutes until softened.
  3. Add minced garlic and cook for 30 seconds until fragrant.
  4. Add sliced cabbage, salt, black pepper, and red pepper flakes (if using). Stir well to combine.
  5. Cook for 12-15 minutes, stirring occasionally, until cabbage is tender but still slightly crisp.
  6. Drizzle with apple cider vinegar, stir, and cook for 1 more minute before serving.

Notes

You can customize the seasonings to taste.

How to Prepare This Dish

Steps and time-saving tips

Start by heating a large skillet over medium heat and adding a drizzle of olive oil. While the oil warms, thinly slice the cabbage into even strips for uniform cooking. Toss the cabbage into the skillet and stir occasionally to prevent sticking. For extra flavor, mince a clove of garlic and add it to the pan, letting it sizzle for about 30 seconds before mixing it in. If you love a bit of crunch, leave the cabbage undisturbed for a minute or two to lightly caramelize the edges. Sprinkle salt and pepper to taste, then finish with a splash of apple cider vinegar for brightness. To save time, prep the cabbage ahead and store it in the fridge—it’ll cook even faster when you’re ready. For a heartier twist, toss in some pre-cooked bacon or shredded carrots from your last meal prep session. Keep the heat steady, and your Sautéed Cabbage will be tender-crisp in under 10 minutes.

Mistakes I’ve made and learned from

I once overcrowded the skillet, thinking I could speed up the process, but the cabbage steamed instead of sautéing. Now I work in batches or use a wider pan for even browning. Another blunder? Skipping the acid—my Sautéed Cabbage tasted flat until I tried a dash of vinegar, which made all the difference. If you’re new to cooking greens, check out my guide on perfecting leafy greens for more tips. And if you’re juggling multiple dishes, my kitchen time management post will help you stay organized without sacrificing flavor.

Cultural Connection and Variations

Where this recipe comes from

Sautéed Cabbage carries humble roots, often tied to resourceful home cooking across cultures. In Eastern Europe, families braise it with onions and caraway seeds, turning simple ingredients into a hearty side. Meanwhile, in parts of Asia, cooks might toss shredded cabbage with garlic, ginger, and a splash of soy sauce for a quick stir-fry. My grandmother, for instance, swore by adding a pinch of sugar to balance the natural bitterness—a trick she learned from her Polish neighbors.

Seasonality also plays a role. During colder months, Sautéed Cabbage becomes a staple, especially when paired with potatoes or smoked meats. In Ireland, colcannon—mashed potatoes with cabbage—showcases its versatility. Elsewhere, like in the American South, cooks might fry it crisp with bacon for extra depth. No matter the variation, this dish adapts beautifully to local flavors while keeping its comforting essence.

How it fits in today’s cooking

Today, Sautéed Cabbage holds its ground as a budget-friendly, nutritious favorite. Busy home cooks love it for weeknight dinners, often pairing it with one-pan chicken dishes for minimal cleanup. It’s also a star in plant-based meals, fitting seamlessly into vegan or keto routines. Plus, its quick cook time makes it ideal for meal prep—just chop, sauté, and store for later.

Modern twists keep it fresh, too. Some add a squeeze of lemon for brightness, while others toss in chili flakes for heat. Holidays like St. Patrick’s Day give it a nostalgic spotlight, but it’s just as welcome in everyday rotation. For more inspiration, check out these seasonal vegetable sides to round out your menu. Whether you’re craving tradition or a quick fix, Sautéed Cabbage delivers every time.

Taste and Texture

What makes it delicious

Sautéed cabbage delivers a satisfying balance of sweet and savory flavors with a tender yet slightly crisp texture. As it cooks, the cabbage caramelizes, releasing a subtly sweet aroma that mingles with the earthy notes of garlic and onion. Each bite offers a pleasant contrast—soft edges with a delicate crunch at the core. The buttery richness coats the cabbage, while a hint of black pepper adds a gentle warmth. Whether served as a side or a main, sautéed cabbage brings comfort and depth to any meal.

Boosting the flavor

Elevate your sautéed cabbage by tossing in crispy bacon for a smoky punch or sprinkling toasted sesame seeds for nutty depth. A splash of apple cider vinegar brightens the dish, while a drizzle of honey sriracha glaze adds sweet heat. For extra umami, stir in a spoonful of miso paste or top with grated Parmesan. Pair it with a zesty lemon herb dressing to cut through the richness. With these tweaks, sautéed cabbage transforms into a standout dish every time.

Tips for Success

Best practices for results

First, always slice your Sautéed Cabbage evenly to ensure uniform cooking. Next, heat your pan properly before adding oil—this prevents sticking and boosts flavor. Additionally, stir the cabbage frequently but not constantly to let it caramelize slightly. For extra depth, try deglazing the pan with a splash of broth or vinegar. Finally, season in layers, adding a pinch of salt early and adjusting at the end for balanced taste.

Mistakes to avoid

Avoid overcrowding the pan, as this steams the cabbage instead of sautéing it. Instead, work in batches if needed for crisp-tender results. Also, don’t skip preheating the oil—cold oil makes Sautéed Cabbage soggy. For more on perfecting stovetop dishes, check out our guide on essential knife skills and pan-searing basics. Lastly, resist the urge to cover the pan, which traps moisture and ruins texture.

Serving and Pairing Suggestions

How to serve this dish

For a vibrant presentation, pile your Sautéed Cabbage high on a rustic platter and top it with a sprinkle of fresh parsley or toasted sesame seeds. Meanwhile, if you’re serving it for a holiday meal, consider pairing it with roasted meats for a colorful contrast. Alternatively, fold it into warm tortillas for a quick brunch wrap, or layer it over creamy mashed potatoes for extra texture. Since Sautéed Cabbage holds its shape well, you can also serve it in individual ramekins for an elegant touch at dinner parties.

What goes well with it

Pair Sautéed Cabbage with a crisp white wine like Sauvignon Blanc to balance its savory notes. For heartier meals, try serving it alongside our Herb-Roasted Chicken, as the juicy flavors complement the cabbage perfectly. Additionally, a tangy yogurt dip or a drizzle of tahini sauce adds a creamy contrast. If you’re craving something lighter, our Garlic Herb Quinoa makes a nutritious and flavorful base for this dish.

How long does it take to sauté cabbage?

Sautéed cabbage typically takes 10–15 minutes to cook, depending on the desired tenderness. Thinly sliced cabbage cooks faster, while thicker cuts may need a few extra minutes. Stir occasionally for even browning and perfect Sautéed Cabbage every time.

What’s the best oil for sautéing cabbage?

Olive oil, avocado oil, or butter work best for Sautéed Cabbage due to their high smoke points and rich flavor. Avoid delicate oils like flaxseed, as they can burn easily. A tablespoon of oil is usually enough to coat the pan evenly.

Can I add other vegetables to sautéed cabbage?

Yes! Onions, carrots, bell peppers, or garlic pair well with Sautéed Cabbage for extra flavor and texture. Add harder veggies first, then the cabbage, to ensure everything cooks evenly. This versatile dish adapts easily to your favorite mix-ins.

Is sautéed cabbage healthy?

Sautéed Cabbage is highly nutritious, packed with fiber, vitamins C and K, and antioxidants. Cooking it lightly preserves nutrients better than boiling. Use minimal oil to keep it low-calorie while still delivering great taste and health benefits.