Loaded Bacon Cheeseburger Alfredo Pasta: Indulgent Comfort Food Delight
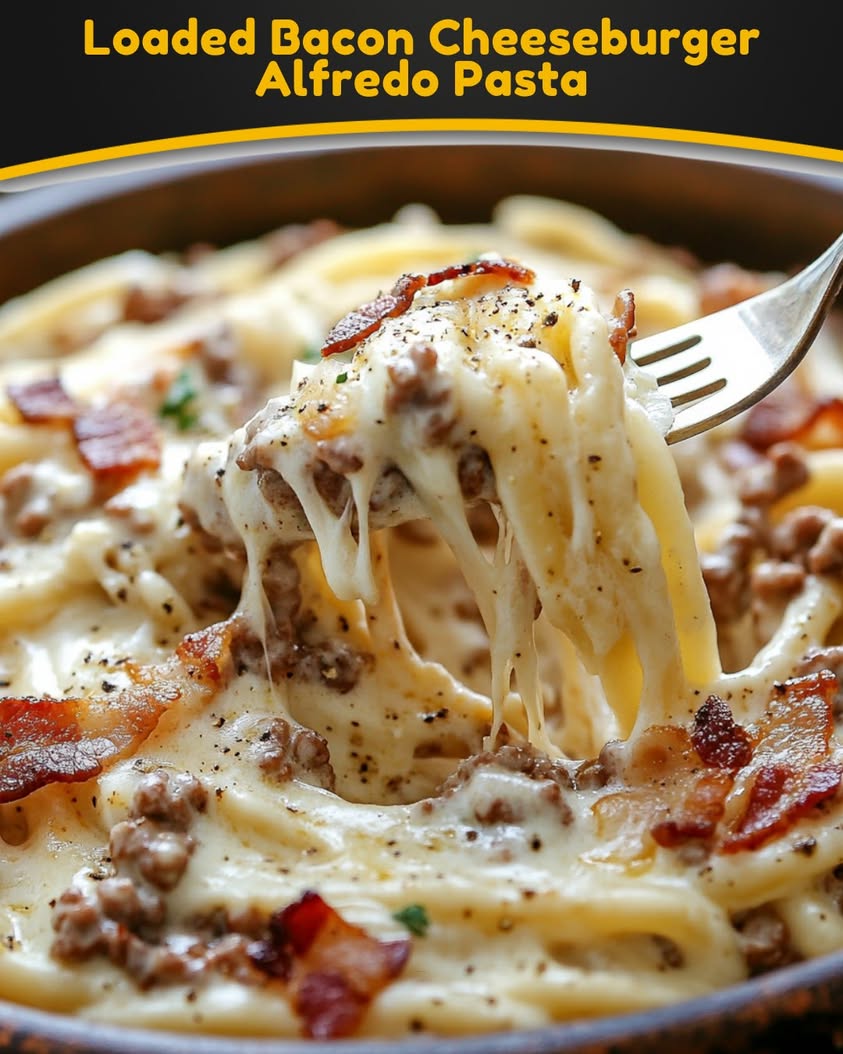
Get ready to dive into a bowl of decadence with this Loaded Bacon Cheeseburger Alfredo Pasta! This dish combines the rich, creamy texture of Alfredo sauce with the savory flavors of grilled bacon and burger patties, topped with melty cheese. Perfect for a weeknight dinner or a fun gathering, this Loaded Bacon Cheeseburger Alfredo Pasta will surely be a crowd-pleaser.
The luscious sauce envelops the pasta, delivering an unforgettable combination of comfort and satisfaction in every bite. Imagine creamy cheese lightly mingling with crispy bacon and hearty pasta, tantalizing your taste buds with every mouthful. It’s the ultimate treat for loved ones or just yourself, making even the busiest night feel special.
Quick Recipe Highlights
- Flavor Profile: The rich creaminess of the Alfredo sauce pairs beautifully with the smokiness of the bacon and the hearty taste of ground beef.
- Texture: This dish boasts a wonderful balance of creamy sauce, tender pasta, and crispy bacon, creating a satisfying mouthfeel.
- Aroma: The savory scents of sizzling bacon and garlic float through the air, making this dish as enticing as it is tasty.
- Visual Appeal: Topped with a sprinkle of chopped parsley and a generous layer of melted cheese, each bowl is a feast for the eyes.
- Skill Level Needed: While approachable, this recipe requires basic cooking skills like sautéing and boiling pasta.
- Special Equipment: A large pot for boiling pasta and a skillet for sautéing are essential for this dish.
Recipe Overview
- Difficulty Level: The recipe falls under moderate difficulty, making it suitable for home cooks who have a bit of experience working with sauce preparation and pasta cooking.
- Category: This Loaded Bacon Cheeseburger Alfredo Pasta falls under the comfort food category, perfect for hearty meals designed to please and satisfy.
- Cuisine: While inspired by American flavors, this dish creatively fuses Italian Alfredo sauce with classic American cheeseburger elements.
- Cost: The ingredients are relatively affordable, making this dish a budget-friendly choice, especially when served to a group.
- Season: Enjoy this dish year-round, although it’s especially comforting during the colder months.
- Occasion: Ideal for casual dinners, game day feasts, or family gatherings where delicious comfort food is a must!
Why You’ll Love This Recipe
When it comes to comfort food, few dishes can rival the flavors and textures found in Loaded Bacon Cheeseburger Alfredo Pasta. Its creamy, dreamy sauce coats each piece of pasta, creating an indulgent experience that feels like a warm hug. The crispy bacon pieces add an irresistible crunch, while the beef gives a satisfying heartiness—this dish is truly the perfect marriage of pasta and classic burger flavors.
Convenience is king with this recipe. With just a few familiar ingredients—pasta, bacon, ground beef, and cheese—you can whip up this delightful meal in no time. Perfect for those busy weeknights when you want something hearty but don’t have hours to spend in the kitchen. The simplicity of the steps involved allows you to focus more on the outcome—hearty satisfaction.
Nutritionally, while this dish leans heavily on indulgent ingredients, it can still fit into a balanced meal plan when enjoyed in moderation. The richness of the bacon and hearty beef provides protein that fuels your body while the cream sauce and cheese offer a delightful dose of calcium.
There’s an undeniable social aspect to this Loaded Bacon Cheeseburger Alfredo Pasta. It’s not just a dish; it’s an experience often shared with friends and family, perfect for gatherings. As you dig in, laughter and camaraderie run high, enhancing the meal and making it memorable.
Finally, its cost-effectiveness makes it a go-to for many home cooks. You can serve a crowd without breaking the bank, and with leftovers certainly expected, you’ll make this dish even more appealing for future meals.
Historical Background and Cultural Significance
Loaded Bacon Cheeseburger Alfredo Pasta is an innovative fusion of two beloved comfort foods: pasta and cheeseburgers. The origins of Alfredo sauce date back to early 20th century Italy, where it was created by Alfredo di Lelio, who made the dish for his wife to help her regain her strength after childbirth. This rich cream-based sauce became a favorite abroad, particularly in America, where it was often combined with various proteins including chicken, shrimp, and now, bacon and beef.
The cultural significance of this dish stems from its ability to bring people together. In post-war America, convenience foods became increasingly popular, paving the way for inventive recipes that combined comforting staples. Over time, the cheeseburger evolved from its humble beginnings into a culinary symbol of American culture, representing the desire for quick, satisfying meals that can be enjoyed at home or on the go.
As culinary techniques and tastes have evolved, traditional recipes like Alfredo Pasta found their way into the American kitchen, leading to modern interpretations such as this Loaded Bacon Cheeseburger variant. The marriage of flavors takes traditional favorites to new heights, showcasing creativity in home cooking.
This dish represents regional adaptations, cater to American comfort food cravings and shows how culinary traditions can be reimagined based on local tastes and preferences, allowing each cook to put their own spin on a classic.
Ingredient Deep Dive
Pasta
Pasta is a staple in many cultures, originating from Italy. It holds significant cultural importance, representing not only Italian cuisine but also the art of cooking and shared meals. Nutritionally, pasta provides carbohydrates essential for energy. Whole grain options further enhance its benefits with added fiber.
When selecting pasta for this dish, opt for a sturdy shape that can hold onto the Alfredo sauce well. Store pasta in a cool, dry place, and you can keep it for long periods. If you need to make substitutions, any short pasta such as penne or fusilli works effectively.
Bacon
Bacon’s history is rich, tracing back to ancient China and later becoming a beloved ingredient worldwide. Culturally, it symbolizes hearty breakfasts and savory recipes. Bacon provides protein and fat, making it a satiating choice in meals.
Choose high-quality, thick-cut bacon for optimal flavor. Ensure proper storage in the refrigerator to maintain its freshness and consider freezing it for longer preservation. If you need alternatives, turkey bacon or vegetarian bacon options can provide similar flavors with nutritional variations.
Ground Beef
Ground beef is a versatile protein found in numerous cuisines. Originating from the practice of utilizing leftover cuts of beef, it holds significant cultural connotations in dishes like burgers and meatballs. Nutritionally, it provides a robust source of protein, iron, and essential nutrients.
Look for lean ground beef to balance flavor and health. Store it in the refrigerator and use it within a few days of purchase or freeze it for extended use. If you prefer alternatives, ground turkey or plant-based options can be effective substitutes in flavor and texture.
Cheese
Cheese has a fascinating history, dating back thousands of years and appearing in many culinary traditions around the globe. It not only adds flavor and richness but also contributes calcium and protein to recipes. When choosing cheese, opt for freshly grated varieties, as they melt better than pre-packaged options.
Store cheese in the fridge, wrapped tightly to prevent spoilage. If you’re looking to experiment, consider using cheddar, gouda, or even a blend of cheeses for added flavor depth.
Common Mistakes to Avoid
- Overcooking the pasta: Always follow package instructions and taste to achieve al dente perfection.
- Using pre-shredded cheese: It contains anti-caking agents that prevent melting; shredding your own ensures a creamy texture.
- Not seasoning properly: Don’t forget to season every component, especially the pasta water.
- Skipping the bacon rendering: Ensuring your bacon is crispy first will elevate the dish’s overall texture and flavor.
- Using cold ingredients: Allowing your sauce to skip the initial sauté can lead to a less integrated flavor.
- Not tasting as you go: Always check the flavor profile along the way to ensure satisfaction.
- Ignoring sauce consistency: If your Alfredo is too thick, simply add pasta water gradually until desired thickness is reached.
- Overloading the ingredients: Be mindful of ratios—too much of anything can disrupt the balance of flavors.
Essential Techniques
Sautéing
Sautéing is an essential technique that creates layers of flavor in this dish. It involves cooking ingredients quickly over high heat with a small amount of oil. To master it, ensure your pan is hot before adding ingredients. Common pitfalls include overcrowding the pan, which leads to steaming rather than browning, and not allowing ingredients enough room to sear. Look for golden-brown colors as visual cues for success.
Making Alfredo Sauce
To create a smooth and rich Alfredo sauce, focus on combining butter, cream, and cheese effectively. Key mistakes include adding cheese too quickly or in large clumps, which can result in a grainy texture. Master it by whisking continuously over low heat. Look for a creamy, cohesive texture as your signal for a perfect sauce.
Browning Meat
Browning the ground beef not only enhances flavor but also ensures a satisfying texture. Avoid stirring too frequently to allow a good sear. The visual cue for success is a deep brown color signaling that the Maillard reaction has occurred, infusing your dish with flavor.
Pasta Cooking
Cooking pasta correctly is crucial to achieving a delightful texture. Always use salted water and follow the recommended cooking time for the type of pasta used. Common pitfalls include cooking pasta too long or not reserving some pasta water for sauce adjustment. Al dente is the goal, so the visual cue is a firm bite with slight resistance.
Pro Tips for Perfect Loaded Bacon Cheeseburger Alfredo Pasta
1. Use a mix of cheese for depth of flavor—combine cheddar and mozzarella for creaminess and richness.
2. Crisp up the bacon for added texture before mixing with the sauce for a satisfying crunch.
3. Don’t forget to save some pasta cooking water to adjust the sauce’s thickness as needed.
4. Incorporate fresh herbs such as parsley or chives for brightness and enhanced flavor profiles.
5. Always taste and adjust seasoning; every ingredient varies in saltiness which can affect the overall flavor.
6. Feel free to add vegetables, such as spinach or tomatoes, for a healthier twist and colorful presentation.
Variations and Adaptations
Explore the creativity within this dish by trying different regional variations; for instance, you could opt for a Southwestern twist by adding diced jalapeños and queso fresco. Seasonal adaptations can include roasted butternut squash for a fall-inspired flavor profile, or grilled asparagus during the spring.
If you have dietary restrictions, consider making this dish gluten-free using your favorite gluten-free pasta. For those on a dairy-free diet, creamy cashew or coconut-based cheese alternatives can suffice without sacrificing flavor. To modify the dish for a lighter version, consider using leaner proteins like ground turkey or opting for a veggie-rich sauce.
When it comes to flavor variations, try adding buffalo sauce for a kick or BBQ sauce for a smoky touch. For alternative textures, consider blending in some crunchy breadcrumbs on top before baking for an unexpected crispy layer. Lastly, explore different presentation styles by serving in individual ramekins or cast iron skillets for a rustic touch at your table.
Serving and Presentation Guide
To beautifully plate Loaded Bacon Cheeseburger Alfredo Pasta, fill each bowl generously, allowing the creamy pasta to take center stage. Garnish with a sprinkle of freshly chopped parsley or chives for a pop of color and added freshness.
For garnishing, consider using a few crispy bacon bits or a light dusting of grated cheese on top to entice the eye. Accompany your dish with slices of crusty bread or a crisp salad for a balanced meal experience. Serve it warm to keep the flavors vibrant, and portion control can be managed by serving individual plates.
If you wish to elevate the dining experience, consider pairing with a light, refreshing beverage or wine designed to complement creamy dishes. A crisp white wine or even a refreshing lemonade would pair beautifully with this indulgent meal.
Wine and Beverage Pairing
For the perfect wine pairing, consider a Chardonnay. Its creamy notes harmonize with the richness of the Alfredo sauce, creating a pleasing balance. Alternatively, a medium-bodied Pinot Noir can complement the smokiness of the bacon while not overpowering the dish.
If you’re looking for non-alcoholic options, pair this pasta with a cool glass of iced tea or sparkling water with a slice of lemon to cleanse the palate. The lightness of these beverages contrasts beautifully with the richness of the dish.
For coffee enthusiasts, consider serving a light roast coffee after the meal with some cream to continue the indulgent experience. Temperature is essential; serve wines chilled and allow coffee to be freshly brewed for the best experience.
Storage and Shelf Life
For optimal storage, place leftover Loaded Bacon Cheeseburger Alfredo Pasta in an airtight container and refrigerate. It should last for about 3-4 days. If you plan on storing it for a longer period, consider freezing portions in sealed freezer-safe bags for up to three months.
When reheating, it’s essential to do so slowly on the stove or microwave, adding a splash of milk or cream to regain its original creamy texture. Signs of spoilage include an off smell or change in texture, so trust your senses when assessing freshness.
When freezing, portion out the pasta to ensure that you can thaw only what you need. Avoid freezing it with additional toppings, such as fresh herbs or bacon, as these are best added fresh to enhance flavor upon serving.
Make Ahead Strategies
To streamline your cooking process, consider prepping individual components ahead of time. You can cook the pasta and store it in an airtight container in the fridge, ready to combine with the sauce on the day of serving.
Bacon can be cooked in advance and refrigerated, ensuring you’ll have crispy bits ready to toss in when assembling. Additionally, Alfredo sauce can be made ahead, but it’s best to reheat gently and adjust consistency with milk or pasta water.
When assembling, keep ingredients separate until you’re ready to serve to maintain freshness. If possible, add any garnishes just before serving for an appealing presentation that looks fresh and vibrant.
Scaling Instructions
Scaling this recipe up or down is straightforward. To halve the recipe, use half the amount of each ingredient while maintaining cooking times, as the cooking duration might remain the same unless the dish is significantly smaller.
When doubling or tripling, consider using larger pots to accommodate the additional ingredients, particularly for cooking the pasta. Timing will likely change slightly; the overall cook time may increase depending on the total volume being handled.
If you often scale a recipe like this, familiarize yourself with the base flavors to ensure that they remain balanced even when quantities are adjusted. Batch cooking might also free you for busy weeks, just be sure to store excess pasta separately from the sauce until ready to serve.
Nutritional Deep Dive
This Loaded Bacon Cheeseburger Alfredo Pasta is hearty, and while it’s high in calories, understanding the macro breakdown can help you enjoy it responsibly. One serving contains substantial protein from beef and cheese, paired with carbohydrates from the pasta.
Micronutrients are also significant; you’ll find essential vitamins and minerals from the beef and dairy. However, moderation is key; consider balancing this indulgent dish with lighter meals throughout the week.
Health benefits can include the substantial protein content that can help with muscle repair, while the carbs provide energy. It’s a satisfying choice; however, being mindful of portion sizes and incorporating veggies can improve dietary balance.
Lastly, for portion analysis, using measuring tools can help you maintain control, ensuring you enjoy this delicious comfort food without overindulgence.
Dietary Adaptations
If you require a gluten-free version of Loaded Bacon Cheeseburger Alfredo Pasta, simply swap traditional pasta for gluten-free varieties available in stores. This can accommodate those with gluten sensitivities while keeping the dish enjoyable.
For a dairy-free version, explore alternatives for cream and cheese, such as coconut cream and nutritional yeast. These options can create a similar creamy texture while avoiding dairy entirely, maintaining the essence of the dish.
Vegetans can consider substitute proteins like lentils or mushrooms instead of bacon and beef, enhancing the dish with hearty flavors without using meat. Ensure any cheese alternatives align with dietary needs, expanding your options further.
Low-carb diets can benefit too; swap regular pasta for zucchini noodles or other vegetable-based noodles to create a lighter yet satisfying dish, while still retaining the indulgent flavors of the Alfredo sauce.
Troubleshooting Guide
If your pasta turns out gummy, it’s likely due to overcooking or insufficient boiling water. Always keep a large pot of well-salted boiling water and stir occasionally while cooking.
If the Alfredo sauce separates, it commonly results from overheating. Use low heat, and stir continuously when adding cheese. If you face this issue, whisk in some reserved pasta water gradually to re-emulsify.
For flavor balance, if it’s too salty, try adding a touch of sugar or a splash of vinegar to counteract the excess. If bland, enhance with additional seasonings or a sprinkle of freshly ground black pepper.
Ingredient substitutions might not yield the same results. When changing key components, ensure balancing flavors to maintain the dish’s integrity.
For timing concerns, underestimating can mean cold pasta or sauce. Always prepare components ahead of time to streamline assembly, ensuring everything is hot and ready to serve upon completion.
Recipe Success Stories
Community feedback on Loaded Bacon Cheeseburger Alfredo Pasta has been overwhelmingly positive. Many have shared their experiences, highlighting how it has become a staple for family gatherings and celebrations.
Readers have enjoyed experimenting with variations, from different types of cheese to unique spices. One user recounted how adding a hint of smoked paprika provided delightful depth to the dish, showcasing how personalization can elevate flavors.
Photography tips from readers also emphasize capturing the creamy texture—focusing on close-up shots that reveal melty cheese and crispy bacon can entice others to give the recipe a try.
The flexibility of the dish has led people to adapt it for various tastes while maintaining its core appeal. Such adaptability allows cooks to leave their spin, making it easier to share and connect through cooking.
Frequently Asked Questions
Can I use a different type of pasta?
Absolutely! Any shape of pasta works well. Tubular shapes like penne or rigatoni hold sauce better, while spaghetti offers a classic option. Choose based on personal preference.
How can I make this dish vegetarian?
Replace the ground beef with lentils or mushrooms for protein and flavor. Use plant-based bacon alternatives and dairy-free cheese to keep the dish vegetarian-friendly.
Is there a way to make the sauce lighter?
Yes! You can use low-fat cream or substitute a portion with chicken or vegetable broth for a lighter Alfredo sauce while preserving flavor.
Can I freeze this dish?
Yes, but it’s recommended to freeze the pasta and Alfredo sauce separately to maintain texture and quality. Reheat gently to ensure it remains creamy.
What can I serve with this dish?
This Loaded Bacon Cheeseburger Alfredo Pasta pairs beautifully with a simple green salad and crusty bread. For a refreshing touch, consider pairing it with a light, crisp beverage.
Can I add vegetables to the recipe?
Certainly! Broccoli, spinach, or even roasted bell peppers can provide color, flavor, and added nutrition to the dish. Toss them in during the last few minutes of cooking.
How do I prevent the sauce from becoming grainy?
Ensure you add the cheese gradually and stir continuously while the sauce is on low heat. Avoid bringing the sauce to a rapid boil after adding cheese.
What kind of cheese works best?
For the creamiest sauce, a mix of Parmesan and mozzarella is excellent. Parmesan adds flavor, while mozzarella contributes a gooey texture.
How do I know when my pasta is done?
Always start with the cooking times on the package. For the best texture, test a piece early; al dente should have a slight resistance when bitten.
Can I make the sauce in advance?
Yes! You can prepare the sauce ahead of time and store it in the refrigerator for 2-3 days. Reheat gently before serving, adding a bit of milk to adjust the consistency.
Additional Resources
To enhance your culinary journey with Loaded Bacon Cheeseburger Alfredo Pasta, explore related recipes such as creamy chicken Alfredo or a classic macaroni and cheese. These share comforting qualities with varying ingredients.
For further technique guides, consider resources that focus on mastering simple sauces or pasta cooking to build confidence in the kitchen. Ingredient information, particularly about cheese selections and pasta types, can help elevate your meals.
Equipment recommendations can guide you on choosing the right tools for success—consider investing in quality cookware tailored to comfort food preparation. Seasonal variations, like incorporating zucchini in summer or winter squash in fall, can bring new life to your dishes.
Join the Conversation
Join our community of passionate home cooks by sharing your own experiences with this Loaded Bacon Cheeseburger Alfredo Pasta. Engage on social media with photos and ideas that inspire others to try their hand at this delicious dish.
Your feedback and recipe adaptations can spark creativity in the cooking community. We encourage you to share thoughts, suggestions, and personal touches that have worked well for you.
As you embark on each cooking journey, don’t hesitate to connect with fellow enthusiasts, seeking advice or offering encouragement. Together, we can create a vibrant space for sharing delicious experiences and culinary breakthroughs.
The Recipe
Loaded Bacon Cheeseburger Alfredo Pasta
Serves: 4
Prep Time: 15 mins
Cook Time: 30 mins
Total Time: 45 mins
Kitchen Equipment Needed
- Large pot for boiling pasta
- Skillet for sautéing
- Colander for draining pasta
- Whisk for sauce preparation
Ingredients
- 8 oz elbow macaroni
- 4 strips of bacon, chopped
- 1 lb ground beef
- 2 cups heavy cream
- ½ cup grated Parmesan cheese
- 1 cup shredded mozzarella cheese
- 1 tsp garlic powder
- Salt and pepper to taste
- Fresh parsley, chopped for garnish
Directions
- Cook macaroni according to package instructions; drain and set aside.
- In a large skillet over medium heat, cook chopped bacon until crispy; remove bacon and set aside, leaving drippings in the pan.
- Add ground beef to the skillet, cooking until browned. Drain excess grease.
- Add heavy cream and bring to a simmer, then stir in garlic powder and cheese until melted and smooth.
- Combine cooked macaroni, bacon, and beef with the sauce; stir to coat evenly.
- Season with salt and pepper to taste. Serve warm, garnished with parsley.
Recipe Notes
- Feel free to add vegetables like spinach or broccoli for added nutrition.
- Skillful cooking of the meat is key to depth of flavor; experiment with spices if desired.
- This dish is best enjoyed fresh, but can be stored for leftovers in an airtight container in the fridge.