Easy Mini Baked Potatoes – Perfect for Appetizers or Sides

Mini Baked Potatoes: A Wholesome Comfort Food Delight

⚖️
Difficulty
Easy

⏲️
Prep Time
15 mins

🕒
Cook Time
30 mins

⏱️
Total Time
45 mins

🍽️
Servings
4

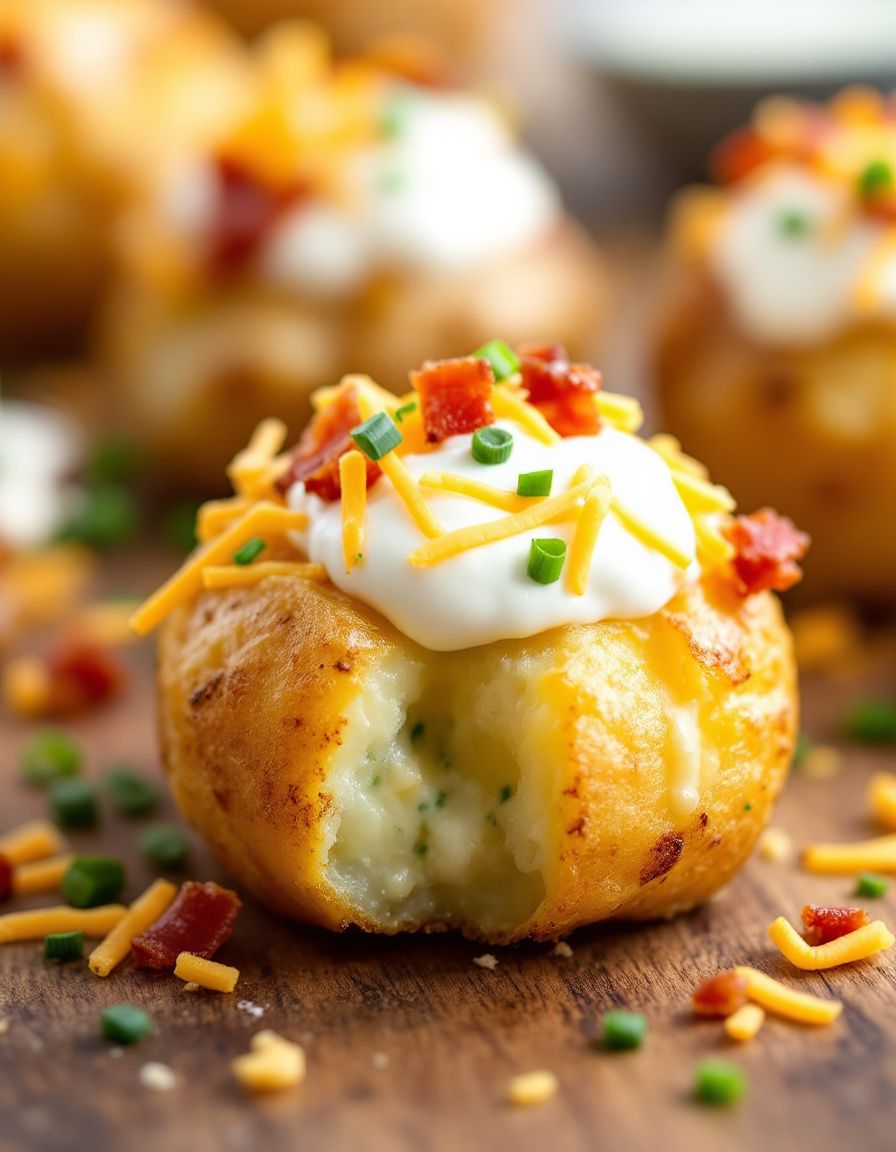
Mini baked potatoes are a delightful treat that can serve as a perfect appetizer or side dish. These little bundles of goodness offer a crispy exterior while staying soft and fluffy inside, creating a tantalizing contrast in every bite. When topped with your favorite ingredients, they transform into a versatile canvas suitable for any meal of the day. Picture them filled with creamy sour cream, crispy bacon bits, and fresh chives, delivering an explosion of flavors that will please everyone at your table.

Not only are mini baked potatoes easy to prepare, but they also infuse a comforting aroma that fills your kitchen, enticing everyone to gather around the dinner table. Their visual appeal, garnished with vibrant herbs and savory toppings, makes them as appealing to the eyes as they are to the palate. These baked potatoes bring warmth and satisfaction, making them an exceptional addition to any gathering.

Quick Recipe Highlights

  • Flavor Profile: Mini baked potatoes deliver a savory and buttery flavor that pairs perfectly with toppings like cheese, sour cream, and herbs.
  • Texture: The crispy skin contrasts with the light and fluffy potato interior, creating a delightful mouthfeel.
  • Aroma: Roasting these little potatoes brings out a fragrant and comforting scent that fills the air.
  • Visual Appeal: Their golden brown exterior and colorful toppings make them a feast for the eyes.
  • Skill Level Needed: This recipe is quite simple, making it ideal even for novice cooks.
  • Special Equipment: A baking sheet and aluminum foil are essential for this recipe.

Recipe Overview

  • Difficulty Level: Easy and straightforward, these mini baked potatoes are perfect for any skill level. The steps are simple to follow, ensuring your success in preparing a fantastic dish.
  • Category: This dish falls into appetizers, side dishes, and even main dishes category, offering versatility for your meals.
  • Cuisine: A staple in many culinary traditions, baked potatoes find their roots in comfort food worldwide, with each culture adding its unique flair.
  • Cost: Utilizing inexpensive ingredients, this recipe is budget-friendly and cost-effective to make.
  • Season: Mini baked potatoes shine during fall and winter, serving as a cozy comfort food alongside seasonal dishes.
  • Occasion: Perfect for gatherings, game days, or a simple family dinner, these potatoes are bound to be a hit.

Why You’ll Love This Recipe

Mini baked potatoes are a delightful blend of taste and texture, offering a crispy exterior with a tender, fluffy inside. Each bite feels satisfying, especially when loaded with toppings like cheese and fresh herbs. The versatility allows you to customize flavors to suit your cravings, whether savory or a hint of spice. You’ll find this comfort food irresistible, making it a staple in your culinary repertoire.

This recipe is incredibly convenient, requiring minimal prep time and cooking effort. The straightforward steps make it accessible for busy weeknights or impromptu gatherings. You can easily prepare a large batch and watch them disappear, delighting your guests with little fuss. They’re perfect for meal prep as individual servings and incredibly versatile, complementing various main courses or salads.

Nutritionally, mini baked potatoes offer a range of vitamins and minerals, especially when you choose healthy toppings. They’re an excellent source of potassium and vitamin C while being naturally gluten-free. You can enjoy guilt-free indulgence by topping them with nutritious options, from Greek yogurt to fresh veggies, making them a wholesome addition to your meals.

Socially, these mini baked potatoes are the ultimate conversation starters. Ideal for parties or casual get-togethers, they encourage sharing and experimenting with different toppings, making it a fun interactive experience. Guests will love creating their unique blend, ensuring everyone leaves satisfied.

Cost-effectiveness is another reason to love this recipe. Potatoes are inexpensive and readily available, making them a budget-friendly choice. Pairing them with affordable toppings, you can create an impressive dish without breaking the bank, perfect for families or large gatherings.

Historical Background and Cultural Significance

The history of baked potatoes dates back centuries, with their origins rooted in the Andean region of South America, where they are native. As they traveled across the globe, they became a staple in various cultures, embraced for their versatility and nourishment. The simple act of baking potatoes has been cherished as a comforting and satisfying method of preparation.

Culturally, baked potatoes have significant importance in different cuisines. In the United Kingdom, they are often filled with cheese and baked beans, known commonly as “jacket potatoes.” In the United States, the classic loaded potato topped with bacon, cheese, and sour cream reigns supreme, showcasing the baked potato’s ability to adapt across cultural lines.

Over time, the recipe for baked potatoes has evolved, incorporating modern flavors and diverse toppings. From traditional butter and herbs to more elaborate creations adorned with various ethnic ingredients, this adaptable dish meets the tastes of every generation. Today, it stands as a culinary staple known for its comforting nature and satisfying flavors.

Regionally, the baked potato has inspired countless variations. From spicy chili toppings to Mediterranean-inspired pesto spreads, this dish continues to evolve, reflecting local ingredients and culinary trends while maintaining its core identity as a beloved comfort food.

Ingredient Deep Dive

Potatoes: Potatoes are not only a staple food worldwide but also rich in history and tradition. Their nutritional profile includes vital vitamins such as vitamin C and important minerals like potassium. When choosing potatoes for baking, select firm and blemish-free ones, and store them in a cool, dark place to prolong freshness. You can substitute with sweet potatoes for a different flavor and nutritional boost.

Butter: Butter enhances the flavor and promotes moistness in baked potatoes. It adds richness, creating a delightful contrast with the fluffy potato interior. When selecting butter, opt for unsalted for greater control over salt levels. Store in a refrigerator for freshness, and consider using alternatives like olive oil or plant-based butter for healthier options.

Common Mistakes to Avoid

  • Not washing potatoes: Failing to wash the potatoes thoroughly before baking can result in dirt and grit on the final dish. Always rinse them properly and scrub away any soil.
  • Skipping the pricking step: Not pricking the potatoes can lead to explosions in the oven as steam builds. Make sure to poke several holes around each potato with a fork.
  • Overcrowding the baking sheet: Overcrowding can trap steam, leading to soggy potatoes. Space them apart on the baking sheet for even cooking.
  • Cooking at too low a temperature: Baking potatoes at a temperature that is too low will result in a longer cooking time and an unsatisfactory texture. Aim for a temperature of at least 400°F (200°C).
  • Not waiting for them to cool: Cutting into the potatoes too soon can result in a very hot interior. Allow them to rest for a few minutes before slicing.
  • Neglecting proper seasoning: Failing to season the inside of the baked potato can make for a bland experience. Generously add salt and butter after cutting them open.
  • Using the wrong potatoes: Not all potatoes are suited for baking, such as waxy varieties. Choose starchy potatoes like Russets for the best results.
  • Not adjusting for size variations: Baking different sizes of potatoes together without adjusting the cooking time can lead to uneven doneness. Size matters in cooking times!

Essential Techniques

Baking: Baking is critical for achieving that fluffy potato texture. To master baking, make sure your oven is at the right temperature and rotate the baking sheet halfway through cooking. Visual cues include a crispy skin and tender flesh when pierced with a fork.

Pricking: This technique releases steam during cooking. Use a fork to prick the potatoes on all sides. If done correctly, you should hear a soft hiss as steam escapes when they are in the oven.

Pro Tips for Perfect Mini Baked Potatoes

Ensure you choose stubby, uniform potatoes for even cooking; any variations in size will result in inconsistent textures and cooking times.

Always preheat your oven properly before baking. A hot oven ensures crispy skin and a fluffy interior.

Brush the potatoes lightly with olive oil before baking to ensure a crispier skin.

Experiment with toppings to suit your palate; try adding spices like paprika or garlic powder to your oil for extra flavor.

Once baked, let them rest for a few minutes before slicing to enhance the robust flavors inside.

Leftover baked potatoes can be transformed into a hash or potato salad the next day for meals that require minimal effort.

Variations and Adaptations

Regional variations of mini baked potatoes are abundant; in Latin American cuisine, you might enjoy them topped with spicy salsa or guacamole, adding a delightful twist to the traditional recipe.

During different seasons, experiment with seasonal toppings like fresh herbs in spring or roasted vegetables in the fall to keep the dish interesting and tied to the time of year.

Dietary modifications are easy to execute; transform mini baked potatoes into a vegan delight by substituting dairy products with cashew cream or avocado.

Flavor variations are endless, from cheesy jalapeño popper styles to Mediterranean vibes with feta and olive tapenade, ensuring every palate finds a joy in this dish.

Texture modifications are also possible; add crispy toppings like fried onions or crushed tortilla chips to create a desirable crunch.

Presentation alternatives can elevate the dining experience; serve on a rustic wooden board with a variety of dips for a beautiful and interactive setup at your next gathering.

Serving and Presentation Guide

When it comes to plating, you can create a rustic look by simply placing the mini baked potatoes on a wooden board. This creates a welcoming atmosphere for your guests.

Garnishing ideas include fresh herbs like parsley, chives, or cilantro sprinkled on top for vibrant color and freshness.

Traditional accompaniments such as sour cream, cheese, or bacon bits enhance the flavor profile beautifully and invite your guests to customize their potatoes.

Modern serving suggestions can include stylish small dishes for toppings, allowing guests to personalize their mini baked potatoes as they like.

Temperature considerations are essential; serve them warm to showcase their optimal flavor and texture.

Portion control tips: Since they are small, provide several at a time, allowing guests to indulge without feeling overly full.

Wine and Beverage Pairing

Pair your mini baked potatoes with a crisp white wine like Sauvignon Blanc, enhancing the buttery flavor. The acidity will provide a refreshing contrast.

If you prefer non-alcoholic options, serve sparkling water with a lemon twist to cleanse the palate between bites, upholding the dining experience.

For coffee or tea pairings, a rich roast coffee can balance the earthiness of the potatoes while a light herbal tea offers a calming finish.

Temperature considerations are important; serve wines chilled to highlight their crisp flavor against the warm potatoes.

In terms of serving suggestions, consider medium-sized glasses or elegant carafes for a refined presentation at your dinner table.

Storage and Shelf Life

To store your mini baked potatoes, let them cool down at room temperature before placing them in an airtight container. They can last in the fridge for up to 4 days.

Temperature requirements: Keep them away from heat sources to avoid spoilage. Frozen baked potatoes will maintain integrity for about 2-3 months when properly wrapped.

Container recommendations include glass or BPA-free plastic, which are excellent for maintaining freshness without affecting flavor.

Signs of spoilage include an off smell or visible mold; when in doubt, discard them to avoid any health risks.

Reheating instructions: Microwave individual potatoes for 1-2 minutes covered with a damp paper towel, or re-bake in the oven at 350°F (175°C) for 15-20 minutes for best results.

Freezing guidelines involve wrapping each potato tightly in plastic wrap before placing them in a freezer-safe bag to prevent freezer burn.

Make Ahead Strategies

For a prep timeline, mini baked potatoes can be prepared a day in advance; simply store them in the fridge after baking. Allow time for reheating right before serving.

Storage between steps is simple; you can bake them, fill them with different toppings, and cover them tightly until ready to serve.

Quality impact assessment: Making these potatoes ahead of time won’t compromise texture and flavor if stored correctly, making them a perfect candidate for meal prep.

Assembly tips include keeping toppings separate until ready to eat, ensuring crispy textures remain intact.

Reheating guidelines are key; a quick microwave will work in a pinch, but follow oven methods for top-notch consistency and taste.

Add fresh elements such as herbs or cheese puffs just before serving to revitalize the dish and keep it vibrant.

Scaling Instructions

For halving the recipe, simply divide the number of potatoes and toppings while keeping the same bake temperature and timing.

Doubling or tripling is straightforward; adjust based on the size of your baking sheet, making sure to space them out appropriately for even cooking.

Equipment adjustments may be necessary when cooking larger batches; consider using multiple baking sheets and rotating them halfway through cooking time.

Timing modifications should be monitored, as larger quantities may require a slight increase in baking time; keep an eye on the skin’s crispiness.

Storage considerations: Extra cooked potatoes should be stored in batches to maintain freshness and flavor over time for easier access later.

Nutritional Deep Dive

The macro breakdown of mini baked potatoes reveals a healthy balance of carbohydrates derived from the potatoes, providing essential energy for daily activities.

Micronutrient analysis shows that they are rich in potassium and vitamin C, significant for cardiovascular health and immune support.

Health benefits include being naturally low in fat and high in fiber, making them suitable for balanced diets and weight management.

Dietary considerations involve their gluten-free nature, allowing those with gluten sensitivity to enjoy them without concern.

Portion analysis typically suggests one to two potatoes per serving, depending on sides, ensuring a well-rounded meal without excess.

Weight management tips would include pairing with more vegetables as toppings for added nutrients and bulk without excess calories.

Dietary Adaptations

For a gluten-free version, this recipe is naturally gluten-free as long as toppings are checked for any hidden gluten ingredients.

Dairy-free adaptations are easy to implement using vegan cheese and plant-based sour cream for those on lactose-free diets.

Vegan mini baked potatoes can be equally tasty when topped with hummus or a generous scoop of guacamole, maintaining the dish’s integrity.

Low-carb variations may involve replacing traditional potatoes with cauliflower, delivering a similar texture with fewer carbs.

The keto approach involves incorporating high-fat ingredients like cheese and avocado, maintaining low carb counts while enhancing flavor.

Paleo adaptations lean on using whole food toppings like avocado or grilled veggies, steering clear of processed ingredients.

Low-FODMAP options should carefully consider the toppings, steering clear of beans and garlic if necessary for sensitive gut health.

Other specific diets can easily adjust with the same base ingredients by merely switching the toppings to meet various dietary restraints.

Troubleshooting Guide

Texture issues can be addressed by ensuring even-sized potatoes are selected and pricked before baking; this ensures they cook evenly and achieve the desired fluffiness.

Flavor balance can be achieved by seasoning the inside of the baked potatoes adequately before serving; always taste and adjust as needed.

Temperature problems often stem from overcrowding the baking sheet; ensure ample space between potatoes for optimal heat circulation.

Equipment challenges may arise if the oven doesn’t properly heat; utilizing an oven thermometer can help ensure accurate temperature readings.

Ingredient substitutions might lead to unsatisfactory textures; always consider the specific properties of substitutes to avoid surprises.

Timing concerns usually surface during busy meal prep; consider a timer to manage when to start other components so that everything finishes together.

Recipe Success Stories

Community feedback often highlights how these mini baked potatoes became a family favorite during gatherings. Encouraged by their tasty versatility, many readers have shared their twists on toppings.

Variation successes often showcase readers trying new twang with east Asian flavors, integrating kimchi or hoisin sauce, creating a flavor-packed experience that delighted everyone involved.

Adaptation stories show how many families have embraced them as a staple, crafting them into weeknight dinners, proving that mini baked potatoes can make a serious culinary impact.

Reader suggestions about photography tips have elevated the presentation of their dishes, showcasing the beauty and appeal of mini baked potatoes showcased on social media.

Frequently Asked Questions

Can I make mini baked potatoes in advance? Yes! You can prepare mini baked potatoes a day in advance and store them in the refrigerator. Just reheat them before serving for optimal flavor and texture.

What types of potatoes work best? Starchy potatoes like Russets are ideal for baking due to their high starch content, providing the fluffy texture you’re aiming for.

How do I ensure my potatoes cook evenly? Make sure to choose similarly sized potatoes and avoid overcrowding the baking sheet. This ensures consistent cooking and desirable texture.

What toppings can I use for my mini baked potatoes? Common toppings include sour cream, cheese, bacon bits, and fresh herbs. Feel free to get creative with your favorites!

How do I store leftovers? Allow the potatoes to cool completely, then store them in an airtight container. They can be kept in the fridge for up to four days.

Can I freeze baked potatoes? Yes! Wrap cooled, baked potatoes tightly in plastic wrap and place them in a freezer bag. They will last for approximately three months in the freezer.

What is the best way to reheat mini baked potatoes? Reheat mini baked potatoes in the microwave for a quick method. Alternatively, you can re-bake them in a preheated oven at 350°F (175°C) for a few minutes.

How long do mini baked potatoes take to cook? Typically, mini baked potatoes will take around 30-40 minutes at 400°F (200°C), but this may vary by size.

Can I use sweet potatoes instead? Absolutely! Sweet potatoes are a great alternative, offering a different flavor profile and more nutrients.

Are mini baked potatoes suitable for gluten-free diets? Yes! Mini baked potatoes are naturally gluten-free, making them a wholesome choice for those avoiding gluten.

Additional Resources

For more delicious recipes, consider exploring related dishes like loaded baked potatoes or potato skins that showcase similar flavor profiles.

Technique guides on baking and preparing potatoes can enhance your culinary skills, ensuring better results in the kitchen.

Ingredient information on potatoes will help you understand their nutritional benefits, fostering a deeper appreciation for the humble spud.

Equipment recommendations for essential kitchen tools can assist in elevating your cooking experience and ensuring you have everything you need on hand.

Seasonal variations of mini baked potatoes can encourage creativity and inspire you to try new toppings that suit the time of year, maximizing flavor and enjoyment.

Join the Conversation

We invite you to engage with us on social media! Share your mini baked potato creations with the community and provide feedback on this recipe.

Don’t forget to capture beautiful photos of your baked potatoes to inspire others and showcase your culinary talents!

We thrive on community engagement, so feel free to share variations or tips you’ve tried to personalize these delightful bites for others to see.

The Recipe

Mini Baked Potatoes

Serves: 4

Prep Time: 15 mins

Cook Time: 30 mins

Total Time: 45 mins

Kitchen Equipment Needed

  • Baking sheet
  • Aluminum foil
  • Fork
  • Airtight container for storage

Ingredients

  • 8 mini potatoes
  • 2 tablespoons olive oil
  • 1 teaspoon salt
  • 1/2 cup sour cream
  • 1 cup shredded cheese
  • 1/2 cup cooked bacon bits
  • 2 tablespoons chopped chives

Directions

  1. Preheat your oven to 400°F (200°C).
  2. Wash the mini potatoes thoroughly and dry them with a towel.
  3. Using a fork, prick each potato several times to allow steam to escape while baking.
  4. Place the potatoes on a baking sheet and drizzle with olive oil, then sprinkle with salt.
  5. Bake in the preheated oven for 30-40 minutes, or until the potatoes are tender when pierced with a fork.
  6. Once baked, let them cool for a few minutes, then slice them open carefully.
  7. Top each potato with sour cream, cheese, bacon bits, and chives as desired. Serve warm and enjoy!

Recipe Notes

  • Feel free to use sweet potatoes for a different flavor.
  • Customize toppings based on dietary preferences, such as using vegan cheese or plant-based sour cream for dairy-free options.

Irresistible Crack Chicken Tenders Recipe for Ultimate Snack Time Delight

Crack Chicken Tenders: Irresistibly Flavored Chicken Delight

⚖️
Difficulty
Easy

⏲️
Prep Time
15 mins

🕒
Cook Time
20 mins

⏱️
Total Time
35 mins

🍽️
Servings
4 servings

Crack Chicken Tenders are a mouthwatering addition to any meal, perfect for family dinners or entertaining guests. These tenders are not just your average chicken dish; they’re infused with a rich blend of flavors that create an unforgettable dining experience. Each bite showcases juicy, tender chicken enveloped in a savory blend of spices and seasonings that keep you craving more. The combination of the creamy sauce and crisp texture delivers a satisfying crunch that perfectly complements the moist chicken, making them irresistible.

This recipe is not only easy to prepare but also versatile enough to suit various palates. Whether you enjoy them on their own, in a sandwich, or over a salad, these Crack Chicken Tenders are sure to impress. With minimal prep time and a quick cooking process, you’ll have a delightful dish on the table in no time. The delightful aroma of the chicken seasoning wafts through your kitchen, setting the stage for a cozy meal that brings everyone together.

Quick Recipe Highlights

  • Flavor Profile: Savory, slightly tangy, and creamy from the mix of ranch dressing and cheese.
  • Texture: Crispy on the outside with a tender, juicy interior that melts in your mouth.
  • Aroma: An enticing blend of herbs and spices that fills the kitchen as the chicken cooks.
  • Visual Appeal: Crispy golden tenders served with a garnish of fresh herbs create an inviting presentation.
  • Skill Level Needed: Perfect for beginners, as the steps are simple and straightforward.
  • Special Equipment: A shallow dish for breading and a baking sheet for cooking.

Recipe Overview

  • Difficulty Level: This recipe is easy to follow, with clearly defined steps and minimal ingredients, making it suitable for cooks of all skill levels.
  • Category: These chicken tenders fall under the categories of finger foods and main dishes, perfect for casual meals or party snacks.
  • Cuisine: Though inspired by Southern comfort food, this dish embodies a universal appeal with familiar flavors found in many kitchens.
  • Cost: Affordability is key; with a few inexpensive ingredients, you can create a delicious meal without breaking the bank.
  • Season: These tenders are great year-round, but they shine during gatherings and barbecues, making them a crowd-pleaser in any season.
  • Occasion: Ideal for casual family dinners, potlucks, and game nights—the versatility makes them suitable for any gathering.

Why You’ll Love This Recipe

Crack Chicken Tenders stand out not just for their delicious flavor but also for their fantastic texture. Meat lovers will appreciate how the crispy coating of the tenders contrasts beautifully with the juicy, tender chicken inside. The blend of ranch seasoning and cheese adds a rich complexity that takes this dish to another level. It’s hard to resist reaching for seconds, making it an excellent option for those with hearty appetites.

Convenience plays a significant role in why these Crack Chicken Tenders are beloved. The simple ingredients are pantry staples, making this meal quick to whip up on busy weeknights. You don’t need to spend hours in the kitchen; from prep to plate, this dish comes together in under an hour. The straightforward process means even novice cooks can produce a flavorful dish effortlessly.

From a nutritional standpoint, Crack Chicken Tenders can be tailored to include more vegetables or whole wheat flour for the breading. The primary ingredient, chicken, is a lean protein source that provides essential nutrients, making it a healthier choice compared to traditional fried tenders. By adding sides of fresh veggies or a colorful salad, you can create a well-rounded meal.

Socially, these tenders are perfect for entertaining. Their finger-food nature makes them easy to serve and share, encouraging guests to mingle and enjoy themselves. Whether served at a backyard barbecue or a cozy indoor buffet, they never fail to wow the crowd. Pair them with dipping sauces for additional flavor and fun, ensuring everyone has something to enjoy.

Lastly, the cost-effectiveness of this dish makes it accessible to all home cooks. Chicken tenders are often affordable, and since this recipe requires minimal ingredients, it won’t stress your budget. The ability to create a mouthwatering dish at home from simple, inexpensive ingredients adds to its charm. These Crack Chicken Tenders are not just a meal; they are a delightful experience that offers both comfort and satisfaction.

Historical Background and Cultural Significance

The history of chicken tenders can be traced back many generations, originating from a time when simpler cooking methods defined home-style cooking. While no one knows the exact origins of marinades, the blending of spices and sauces have been recorded across various cultures as an essential practice for enhancing flavors. Chicken tenders as we know them gained popularity in the United States, especially among families looking for quick, easy meal ideas.

Culturally, chicken has long held a vital place in traditional meals across the globe. In Southern cuisine, chicken holds a prestigious reputation, often appearing during celebrations, family gatherings, and holidays. This connection elevates chicken tenders, linking them to feelings of warmth, community, and comfort—perfect for bringing friends and family together.

The evolution of the chicken tender has seen a shift from ordinary fried pieces to gourmet variations found in restaurants today. Chefs often add creative flair by incorporating unique spices, sauces, and cooking methods, pushing boundaries while still retaining that nostalgic sense of home. Crack Chicken Tenders embody this trend while still leaning on that familiar comfort food vibe.

Regional variations also enrich the narrative around chicken tenders. From Southern styles with extensive seasoning to the more straightforward, slow-cooked variations, every region seems to have its interpretation. This diversity offers home cooks opportunities to experiment and personalize their takes, further enhancing the significance of these tenders in various households.

Ingredient Deep Dive

– **Chicken Breast**: Chicken breast serves as the primary ingredient in Crack Chicken Tenders and is celebrated for its versatility and nutrition. Lean and packed with protein, it’s favored by health-conscious cooks. Select breasts that are plump, firm, and free from blemishes for the best quality. Store fresh chicken in the refrigerator and use within two days or freeze for later use. For alternative proteins, turkey breast can be a delightful substitute.

– **Ranch Dressing Mix**: The ranch dressing mix brings a blend of herbs and spices that elevate the chicken’s flavor profile. Its creation can be traced back to the ranching communities of the American West, becoming a staple in households across the U.S. Rich in flavor and subtly tangy, the mix is often a crowd favorite. When selecting, opt for a brand without artificial additives. If unavailable, homemade mixes incorporating dried dill, garlic powder, and onion powder can work wonders.

– **Cheese (Cheddar or Cream Cheese)**: Cheese adds a creamy texture and depth to Crack Chicken Tenders. Cheddar is a popular choice due to its sharp flavor, while cream cheese contributes a luscious smoothness. Both types boast significant calcium and protein content. Choose block cheese for optimal freshness, and store leftovers wrapped tightly in the refrigerator. If you’re looking for lighter options, low-fat cheese varieties can also be used without sacrificing flavor.

– **Breadcrumbs**: Breadcrumbs provide the crispy coating that makes chicken tenders delightful. Traditional breadcrumbs can be made from stale bread seasoned to your liking. This ingredient creates a satisfying crunch when fried or baked. Look for options that are plain to allow the flavors of the chicken to shine. For gluten-free variations, alternatives like almond flour or crushed cornflakes may be utilized.

Common Mistakes to Avoid

  • Not marinating long enough: Allowing the chicken to marinate enhances its flavor and juiciness. Aim for at least 30 minutes, or overnight for best results.
  • Using cold chicken: Cooking chicken straight from the fridge can lead to uneven cooking. Always start with room temperature chicken for consistent results.
  • Skipping the breading process: Breading is essential for achieving that desired crunch. Ensure each piece of chicken is coated evenly for the best texture.
  • Overcrowding the frying pan: Giving each piece space ensures even cooking. Overcrowding can cause steaming instead of frying, leading to soggy tenders.
  • Not preheating the oven or oil: For best results, always preheat your cooking surface to achieve optimal crispness.
  • Using expired seasonings or ingredients: Always check expiration dates to guarantee maximum flavor from fresh ingredients.
  • Trying to force fully cooked chicken out of the pan: Letting the chicken rest will keep its juices locked in. Trying to force them out can lead to dryness.
  • Underestimating cooking time: Always use a meat thermometer to ensure chicken reaches an internal temperature of 165°F for safe consumption.
  • Neglecting to check for doneness: Check the tenders not just for timing but visually and with a thermometer to prevent undercooked chicken.
  • Not letting chicken rest before serving: Allowing the chicken to rest post-cooking keeps the juices intact, leading to a more flavorful bite.

Essential Techniques

– **Breading**: This technique is crucial for developing that signature crispy texture of Crack Chicken Tenders. It involves coating the chicken in flour, egg, and breadcrumbs. Mastering this technique requires practice to ensure even coverage without clumps. Look for visual cues like a uniform golden color once cooked, indicating success.

– **Marinating**: Marinating chicken is essential to infuse flavors deep into the meat. This typically involves soaking the chicken in a mixture of seasonings and acids. To master it, be mindful of time—marinating too long can alter the tenderness negatively. Ideally, aim for at least 30 minutes to get the full benefit from the marinade.

– **Frying/Baking**: Achieving the just-right crispy finish relies on the cooking method used. For frying, maintain the oil temperature to avoid greasy tenders; for baking, ensure an even layer on the baking sheet. Common pitfalls are uneven cooking and undercooked chicken. Check with a thermometer, looking for that delightful golden hue.

– **Resting**: Letting your chicken tenders rest after cooking might seem unimportant, but it’s essential for preserving moisture. Master this by timing your meal prep so the tenders can rest fully before serving, leading to juicier results and more satisfying bites.

Pro Tips for Perfect Crack Chicken Tenders

– **Choose quality chicken**: Fresh, high-quality chicken breasts make a significant difference in flavor and texture. Opt for organic or free-range when possible for enhanced quality.

– **Adjust spice levels**: Customize the seasoning to cater to your taste buds. Feel free to add extra spices, chili powder, or cayenne for a spicy kick.

– **Experiment with coating**: Try different breading options like panko breadcrumbs or crushed pretzels for unique textures and flavors.

– **Oven-fry for healthier options**: Opt for a healthier twist by baking the tenders instead of frying them, ensuring they still achieve a crunchy texture.

– **Cleanup with foil**: Line your baking sheet with foil or parchment for easy cleanup.

– **Try different dips**: Serve with a variety of dips ranging from honey mustard to spicy aioli for added zest.

– **Marinate overnight for max flavor**: For a deeper flavor infusion, allow the tenders to marinate in the fridge overnight.

– **Make a larger batch**: If prepping for a gathering, double the recipe to ensure you’re well-stocked with this crowd-pleasing dish.

Variations and Adaptations

– **Regional variations**: Consider adding a Southern twist by incorporating Cajun seasonings for extra spice or BBQ flavors for a smoky profile. Each region’s flair will add a unique touch.

– **Seasonal adaptations**: Incorporate seasonal herbs like rosemary or sage in the marinade for a fresh flavor that complements the season’s palate.

– **Dietary modifications**: For gluten-free variations, substitute traditional breadcrumbs with gluten-free alternatives or crushed nuts.

– **Flavor variations**: Add cheese to the breading or use flavored ranch seasoning mixes to bring a new twist to the classic recipe.

– **Texture modifications**: Experiment with different frying techniques—air fryer options create a less oily, equally crunchy alternative.

– **Presentation alternatives**: Serve over a vibrant salad or in lettuce wraps for a fresh, healthier presentation.

Serving and Presentation Guide

To plate your Crack Chicken Tenders beautifully, consider stacking them high on a rustic wooden platter, attending to the color contrast with a vibrant dipping sauce drizzled on the side. Garnishing with fresh parsley or chives adds a touch of color and elevates the dish visually. Traditional accompaniments can include coleslaw or pickles, providing a refreshing contrast in flavor and texture.

Modern serving suggestions include adding them to sliders with fresh toppings for a fun twist. When serving, keep an eye on temperature—these tenders are best enjoyed hot and fresh. For portion control, offer smaller bites to allow guests to sample various sauces alongside. The presentation can be refined further by using parchment paper to line the serving dish, giving it a chic, restaurant-style appeal.

Wine and Beverage Pairing

Pair these flavorful Crack Chicken Tenders with a crisp white wine like Sauvignon Blanc or a light-bodied Chardonnay. These wines complement the savory notes without overpowering the dish. For those preferring non-alcoholic options, a sparkling water with a splash of lemon enhances the dish’s flavors.

If coffee or tea is more your style, try serving mild black tea or iced tea for a refreshing accompaniment. Temperature considerations are important; ensure that any beverages served are appropriately chilled or warmed, depending on preference, to enhance the overall dining experience.

Storage and Shelf Life

Store any leftover Crack Chicken Tenders in an airtight container in the refrigerator, where they can last for up to three days. Proper storage is essential to maintain their texture and flavor. When reheating, use an oven to restore their crispiness, as microwave heating tends to make them soggy.

You can also freeze uncooked, breaded tenders. Simply freeze them in a single layer on a baking sheet, then transfer them to a freezer bag once frozen. They can be kept frozen for up to three months—ideal for quick meals. Recall to label and date your containers to stay on top of freshness.

Make Ahead Strategies

Prep your Crack Chicken Tenders by marinating the chicken several hours or even the night before. This not only enhances flavor but also saves you time on the day of serving. Breading the chicken can also be done ahead of time; just ensure you store the breaded tenders in the fridge to keep them fresh.

When storing between cooking steps, keep the tenders separated on parchment paper to prevent sticking. If you’re planning a gathering, consider preparing a large batch and freezing prior to cooking. This allows you to have a stress-free meal ready to go.

When reheating, aim to get a fresh element back into the presentation, such as fresh herbs or spring onions, for a beautiful finish that looks freshly made.

Scaling Instructions

To halve or double the recipe, simply adjust the ingredient quantities accordingly while keeping the ratios the same. For doubling, ensure your cooking equipment can handle the increased volume. Timing may slightly vary with larger or smaller batches—just keep an eye on the doneness of your chicken as it cooks.

Additionally, if you increase your batch, cook in smaller increments to ensure even cooking. Store any excess intended for future meals, using proper labeling to avoid confusion.

For portion control, consider preparing smaller tenders that are easier to manage and serve for gatherings or large families, while ensuring that storage containers are sufficient for any leftovers.

Nutritional Deep Dive

Crack Chicken Tenders provide a balanced macro breakdown, primarily composed of lean protein from chicken, with the added benefits of wholesome ingredients such as spices and herbs. Healthy fats may vary depending on added cheese and cooking methods.

In terms of micronutrient analysis, chicken is an excellent source of B vitamins, iron, and phosphorus, making it a nutritional powerhouse. The herbs and spices used can introduce additional vitamins and minerals, further enhancing the health benefits of this dish.

For individuals watching their dietary requirements, being mindful of portion sizes and accompaniments can greatly assist with weight management. By serving with fresh produce or whole grains, you can spruce up the nutritional profile while enjoying satisfying flavors.

Dietary Adaptations

For those with gluten sensitivities, an easy adaptation involves substituting standard breadcrumbs with gluten-free varieties, ensuring everyone can enjoy this delicious dish. A dairy-free approach could mean using cashew cream or nutritional yeast in place of cream cheese for a similar rich taste without the dairy.

Vegan adaptations might explore textured vegetable protein (TVP) as a substitute for chicken, coated and prepared in the same manner. Low-carb or Keto variations can use almond flour instead of breadcrumbs, and brined chicken breasts can achieve that same crunch without carbs.

For a more holistic approach, consider Paleo-friendly ingredients by utilizing almond flour, natural oils, and fresh produce to sustain those dietary preferences. Finally, an approach for Low-FODMAP diets might include avoiding garlic in marinades, ensuring a suitable recipe for those affected.

Troubleshooting Guide

If you encounter texture issues, it might be because the chicken is not properly breaded. Ensure each piece is evenly coated, replacing any omitted steps. For flavor balance, taste your marinades before applying them to ensure the right seasoning levels.

If you find your tenders are undercooked, monitor cooking times more carefully and always use a reliable meat thermometer to check for doneness. If you find your oil smoking during frying, the temperature might be too high—reduce heat to achieve a gentle fry.

In case you face equipment challenges, ensure your oven temperature is calibrated correctly and that you’re using the appropriate tools for frying or baking, such as baking sheets or frying pans.

When adjusting ingredient substitutions, keep in mind that some alternatives may hold additional moisture, so adjust your cooking times as necessary to prevent sogginess.

Recipe Success Stories

Community feedback on these Crack Chicken Tenders consistently highlights their flavor and ease of preparation. Many share stories of successful gatherings where these tenders took center stage, with guests pleading for the recipe.

Variations have sprung from readers trying different marinades or spices, often leading to delightful adaptations that please picky eaters and adventurous palettes alike. These anecdotes demonstrate that food brings people together, creating lasting memories over shared meals.

Readers have provided stunning photography tips, encouraging others to capture the beauty of this dish when served at their tables. Such active engagement fosters a sense of community around the recipe while inspiring further creativity.

Frequently Asked Questions

Can I freeze Crack Chicken Tenders?
Yes, you can freeze the cooked or uncooked chicken tenders. Ensure they are well-wrapped in plastic or stored in airtight containers to maintain freshness, and they can last for up to three months in the freezer.

What can I serve with Crack Chicken Tenders?
These tenders pair beautifully with a variety of side dishes, such as coleslaw, roasted vegetables, or a side salad. Feel free to mix and match to create a well-rounded meal.

Can I make this recipe gluten-free?
Absolutely! Simply switch out the breadcrumbs for gluten-free alternatives like ground nuts or gluten-free breadcrumbs, and ensure all sauces used are also gluten-free.

How long should I marinate the chicken?
Marinating the chicken for at least 30 minutes is ideal; however, for richer flavor, marinating overnight is highly recommended.

Can I use other meats or proteins?
Yes, while the recipe is designed for chicken, you can use turkey or even plant-based proteins as an alternative. Just adjust the cooking times accordingly based on thickness.

What is the best way to reheat leftover tenders?
The oven is the best method for reheating, as it helps retain the tenders’ crispiness. Place them on a baking tray and heat at 350°F (175°C) until warmed through.

Can I bake these instead of frying?
Yes, baking is a healthier option. Lightly coat the tenders with oil and bake in a preheated oven at 400°F (200°C) until crispy and cooked through.

What type of ranch mix should I use?
You can use store-bought ranch dressing mix or make your own from dried herbs and spices to control the flavor according to your preferences.

How do I achieve the crispy coating?
Achieve a crispy coating by ensuring each chicken tender is properly breaded and not overcrowding the cooking surface, which can lead to steaming rather than frying.

Can I make this ahead of time?
Definitely! You can prep the chicken and bread it ahead of time. Store in the fridge until you’re ready to cook, or freeze originally breaded instead to have ready-made meals.

Additional Resources

Looking for more delicious recipes? Check out our collections of chicken dishes that include inventive variations on classic favorites. For techniques, explore guides on proper marinating and frying techniques to elevate your cooking skills.

Discover ingredient information that can enhance your understanding of the nutritional profiles and seasonal availability of the products you love. Lastly, consider investing in quality kitchen equipment that makes cooking simpler and more enjoyable.

Join the Conversation

We love connecting with our readers! Share your photos of Crack Chicken Tenders on social media and tag us; we’d love to showcase your creations. Leave comments on how you’ve customized the recipe or any tips you’ve discovered along the way for making it even better.

Recipe reviews play an essential role in our community. Your feedback helps others make informed decisions and sparks conversation among food lovers.

Don’t hesitate to engage with us for recipe variations or share your creative spins. The joy of cooking is a shared experience, and we’re here to celebrate each other’s culinary adventures!

The Recipe

Crack Chicken Tenders

Serves: 4 servings

Prep Time: 15 mins

Cook Time: 20 mins

Total Time: 35 mins

Kitchen Equipment Needed

  • Baking sheet
  • Shallow dish for breading
  • Mixing bowls
  • Meat thermometer
  • Oven mitts

Ingredients

  • 1 lb chicken breasts, sliced into strips
  • 1 packet ranch dressing mix
  • 1 cup shredded cheddar cheese
  • 1 cup breadcrumbs (regular or gluten-free)
  • 2 eggs, beaten
  • Salt and pepper to taste
  • Cooking spray or oil for frying

Directions

  1. Preheat the oven to 400°F (200°C) or heat oil in a frying pan over medium heat.
  2. In a shallow dish, combine the ranch dressing mix, breadcrumbs, salt, and pepper.
  3. In another bowl, beat eggs and add shredded cheese to mix well.
  4. Dip each chicken tender in the egg mixture, then coat evenly with the breadcrumb mixture.
  5. If baking, place coated tenders on a baking sheet and spray with cooking oil. Bake for 20 minutes or until golden brown and cooked through.
  6. If frying, fry tenders for about 4-5 minutes on each side until golden and cooked through. Ensure an internal temperature of 165°F (74°C).
  7. Let chicken tenders rest for a few minutes before serving.

Recipe Notes

  • For added heat, incorporate cayenne pepper into the breadcrumb mix.
  • These tenders can be served with various dipping sauces like ranch, honey mustard, or BBQ sauce.
  • If you prefer a lighter option, baking tends to retain flavor and reduces calories.

Best Crockpot Jalapeno Corn Dip – Perfect for Parties

Crockpot Jalapeno Corn Dip: The Ultimate Party Delight

⚖️
Difficulty
Easy

⏲️
Prep Time
15 mins

🕒
Cook Time
2 hours

⏱️
Total Time
2 hours 15 mins

🍽️
Servings
8 servings

Crockpot Jalapeno Corn Dip is a tantalizingly creamy dish that will make your next gathering a flavorful feast. Made with sweet corn and spicy jalapenos, this dip creates a harmonious blend of aromas and tastes that brings comfort and joy with every bite. As it slowly cooks in your crockpot, the ingredients meld together, creating a rich and luscious texture that will leave your guests craving more. Whether served with crunchy tortilla chips or fresh veggies, this dip is sure to be a crowd-pleaser, enhancing your party atmosphere.

This delightful dip is not just about flavor; it’s also deeply satisfying in its warmth and creaminess. The combination of melted cheeses, flecks of green from the jalapenos, and the golden kernels of corn make for a vibrant and appealing presentation. Each scoop promises a balanced bite of savory cheese and sweet corn, followed by just enough heat from the jalapenos. Perfect for game days, family gatherings, or any occasion that calls for sharing good food, the Crockpot Jalapeno Corn Dip encapsulates what it means to enjoy great company and delicious flavors.

Quick Recipe Highlights

  • Flavor Profile: This dip has a delightful combination of sweet and spicy, with notes of cheddar cheese that perfectly complements the corn and jalapenos.
  • Texture: The dip is creamy and smooth, with a slight crunch from the corn and the added warmth of the jalapenos giving it a satisfying mouthfeel.
  • Aroma: You’ll be greeted with an inviting aroma of melted cheese and a piquant hint from the jalapenos as it cooks in your crockpot.
  • Visual Appeal: The bright yellow corn against the vivid green jalapenos and the creamy white cheese creates an eye-catching dip that’s perfect for serving.
  • Skill Level Needed: This recipe is easy enough for beginners, with simple steps that almost anyone can follow.
  • Special Equipment: All you need is a crockpot for this dish, making it an accessible option for anyone with minimal kitchen equipment.

Recipe Overview

  • Difficulty Level: This recipe is rated easy. Featuring only a handful of ingredients and minimal prep time, it’s a straightforward dish that offers impressive flavor.
  • Category: Ideal for appetizers or snacks, this dip is a versatile choice that pairs well with both formal gatherings and casual get-togethers.
  • Cuisine: Rooted in Tex-Mex traditions, the use of corn and jalapenos reflects the vibrant culinary landscape of this region.
  • Cost: The approximate cost of ingredients is budget-friendly, making it easy to feed a crowd without breaking the bank.
  • Season: This dip is great year-round but shines especially during the warmer months when gatherings and outdoor events ramp up.
  • Occasion: Perfect for game day, picnics, and potlucks, it’s a must-have dish for events where fun and flavor meet.

Why You’ll Love This Recipe

This Crockpot Jalapeno Corn Dip is not just about taste; it’s a whole sensory experience. The creamy texture combined with the light crunch of corn and a refreshing heat from jalapenos creates an addictive snack. Every scoop captures a burst of flavor that dance on your taste buds, making it impossible to stop at just one serving. This dip evokes nostalgia and joy; it’s like a warm hug served in a bowl.

One of the great appeals of this recipe is its convenience. Simply toss your ingredients into the crockpot and let it do the work for you. This means you can spend more time enjoying your gathering without constantly hovering near the stove. The long, slow cooking process enhances the flavors, allowing the ingredients to blend beautifully. Plus, the slow cooker keeps it warm for hours, ensuring that your dip remains a delectable treat from the start to the end of the party.

Nutritionally, this dish offers several benefits. Corn is a whole grain that provides fiber and essential vitamins, while cheese adds protein and calcium. The jalapenos not only bring a pleasant zing but are also known to boost metabolism. You can feel good about serving this dip, knowing you’re offering something that’s both satisfying and packed with wholesome ingredients.

There’s also a social aspect to this recipe that can’t be overlooked. Food brings people together, and this dip is a fantastic conversation starter at gatherings. Whether everyone’s gathered around the table or milling about the room, this dip will have people sharing recipes and laughing over its irresistible taste. It creates an ambiance of warmth and comfort, making shared moments even more special.

Finally, the cost-effectiveness of this dish is impressive. With affordable ingredients, you can whip up a large batch without overspending, allowing you to feed a crowd or simply ensure there are leftovers for later. It’s an accessible dish designed to fit any budget, translating into great value for your next event.

Historical Background and Cultural Significance

Crockpot Jalapeno Corn Dip boasts a rich history rooted in Tex-Mex cuisine, a culinary tradition that emerged along the Texas-Mexico border. This region has long been a melting pot of cultures, where traditional Mexican flavors meet American staples. The use of corn in this recipe pays homage to its deep agricultural roots, highlighting the significance of corn in both Mexican and Southern U.S. cultures as a staple food.

While dips of this nature have been enjoyed for decades, the crockpot introduction has transformed them into easy, crowd-pleasing options that fit modern lifestyles. The evolution of this dish reflects the current trend of slow cooking, emphasizing convenience without sacrificing flavor. This adaptation allows for unique spins on traditional recipes, showcasing how culinary practices continue to evolve in response to changing times.

Culturally, the importance of such recipes cannot be overstated. They serve as connectors, bringing families and friends together around shared tables. Dishes like Crockpot Jalapeno Corn Dip are often made for festive occasions, reinforcing traditions while creating new memories. It’s a representation of hospitality and warmth, staples that remain integral in many cultures today.

Regional variations are abundant, with some tweaking the base recipe to include different kinds of cheeses or even incorporating meats like bacon. Such adaptations are a testament to the recipe’s versatility, proving that it can be customized to satisfy a wide range of taste preferences while still being faithful to its origins.

Ingredient Deep Dive

– **Corn:** Corn holds a significant place in both Native American and Mexican cuisines, serving as a foundational food source. Its nutritional benefits include being high in fiber, vitamins, and antioxidants. When selecting corn, aim for fresh or frozen options and store it in a cool place. Canned corn can work in a pinch, but fresh or frozen really enhances flavor. If you wish to substitute, try using roasted corn for a smoky depth.

– **Jalapenos:** Hailing from Mexico, jalapenos are a staple in many spicy dishes, adding both flavor and heat. They are an excellent source of vitamins C and B6, and they also contain capsaicin, which studies suggest may help boost metabolism. When choosing jalapenos, look for firm peppers with no soft spots. Store them in a cool and dry place. You can swap jalapenos for another mild pepper if you prefer less heat or even use pickled jalapenos for a tangy twist.

– **Cheese:** Cheese has been a beloved ingredient across various cuisines for centuries, providing richness to countless dishes. In this dip, it delivers creaminess and depth of flavor. Opt for freshly grated cheese for the best melty texture. Store cheese wrapped properly to maintain freshness. If you’re looking to change up the flavors, consider sharp cheddar or pepper jack cheese for an extra kick.

– **Cream Cheese:** This soft cheese has a rich history in American cuisine and adds an exceptionally creamy element to the dip. Nutritionally, cream cheese has a higher fat content, lending a luxurious texture to the recipe. When selecting cream cheese, opt for full-fat versions for creaminess. You can use Greek yogurt as a lighter alternative, though the flavor will differ.

Common Mistakes to Avoid

  • **Not letting it cook long enough:** Ensure the dip cooks for the full duration to achieve a rich and blended flavor.
  • **Using low-quality ingredients:** Higher quality ingredients will yield a far superior taste.
  • **Overcrowding the crockpot:** Avoid filling the crockpot beyond its capacity, as this can lead to uneven cooking.
  • **Not adjusting seasoning:** Since flavors deepen over time, make sure to taste and adjust seasoning before serving.
  • **Skipping the preps:** Properly chopping ingredients like jalapenos can affect flavor distribution.
  • **Serving it too hot:** Allow the dip to cool slightly post-cooking; temperatures can be deceiving.
  • **Choosing the wrong corn:** Opt for sweet corn; using some other variety can change the overall taste.
  • **Ignoring leftovers:** Reheated dip can still taste great, so don’t let it go to waste!

Essential Techniques

– **Chopping:** Proper chopping ensures even cooking and even flavor distribution. Use a sharp knife to finely chop jalapenos and corn for optimal consistency. Avoid large chunks as they can disrupt the creamy texture.

– **Layering ingredients:** Layer ingredients in the crockpot for better flavor melding. Start with cream cheese at the bottom, followed by corn and jalapenos, and top with cheese. This helps prevent burning and ensures even melting.

Pro Tips for Perfect Crockpot Jalapeno Corn Dip

– **Taste and adjust:** Regularly taste the mixture as it cooks and adjust seasoning to your preference, adding more jalapenos or cheese as desired.
– **Use fresh ingredients:** Fresh corn and peppers will provide superior flavor over canned options. Try to incorporate them when possible.
– **Grease the pot:** Lightly greasing the crockpot pot will prevent sticking and make cleanup easier.
– **Optional toppings:** Consider adding extra cheeses or cilantro before serving for garnishing and a flavor boost.
– **Keep it warm:** If serving over a longer period, use a warm setting to maintain the dip’s desired temperature without overcooking it.

Variations and Adaptations

– **Regional variations:** Try adding spices such as cumin or chili powder for a more complex flavor profile typical in Southwestern cuisine.
– **Seasonal adaptations:** In autumn, consider adding roasted autumn veggies like butternut squash for added sweetness.
– **Dietary modifications:** For a dairy-free option, switch to vegan cream cheese and nutritional yeast for a cheesy flavor without dairy.
– **Flavor variations:** Add crumbled bacon for a savory kick or smoked paprika for a rich, smoky flavor that pairs beautifully with the cheese.
– **Texture modifications:** For extra crunch, incorporate crushed tortilla chips as a topping for added texture.
– **Presentation alternatives:** Serve in a hollowed-out bread bowl or within a colorful vegetable platter for visual appeal.

Serving and Presentation Guide

To present your Crockpot Jalapeno Corn Dip, consider using an attractive serving vessel that holds heat—like a stoneware bowl. For a rustic touch, serve directly from the crockpot. Garnish with freshly chopped cilantro for a pop of color and serve alongside an array of dippables such as tortilla chips, crunchy vegetables, or soft bread slices. This not only elevates the presentation but allows guests to serve themselves, fostering interaction.

Keep in mind temperature control as well; the dip should be served warm but not scalding hot. If you prepare it ahead of time, consider a slow reheat just before serving. Moreover, always consider portion controls by providing small bowls for individual servings, enticing guests to come back for more without overindulging.

Wine and Beverage Pairing

A crisp white wine, such as Sauvignon Blanc, pairs beautifully with the heat and creaminess of the dip, enhancing the overall palate experience. Alternatively, a chilled light beer or ale complements the flavors without overpowering them. For non-alcoholic options, consider serving refreshing lemonade or iced tea with a slice of lime, harmonizing perfectly with the savory aspects of the dip.

When serving wine, ensure it’s chilled to balance the richness of the dip, making for a delightful pairing. If guests prefer coffee, a mild brew can provoke contrasting flavors, enhancing the enjoyment of the dip.

Storage and Shelf Life

To store your leftovers, place any uneaten dip into an airtight container and refrigerate promptly; it can last for 3-5 days. For long-term storage, consider freezing portions in individual bags for convenience, allowing you to defrost and enjoy later. Reheating can be done in the microwave or on the stovetop but ensure gentle warmth to maintain creaminess. Always check for signs of spoilage, such as off odors or unusual texture before consuming again.

When reheating, add a splash of milk or cream to retain the dip’s luscious consistency, as it may thicken upon cooling.

Make Ahead Strategies

To maximize your time, consider preparing the dip ingredients in advance—chop the jalapenos and measure out cheeses the night before. Keep those prepped ingredients stored in the fridge until it’s time to cook. Additionally, if you wish to combine flavors, mix the cream cheese, corn, and jalapenos a few hours before cooking; this enhances flavor development.

When making ahead, remember to let the dip cool completely before storing it. Reheating should be done gently to maintain its smooth texture; add a bit of liquid if necessary to restore creaminess.

Scaling Instructions

To halve the recipe for a smaller gathering, simply reduce each ingredient by 50% while keeping the cook time the same, as this ensures adequate heat exposure for all components. If doubling or tripling, be cautious about exceeding your crockpot’s capacity; consider splitting the batch across two pots if necessary. Adjusting cooking times might be necessary as well; larger quantities may need a longer cooking time to ensure everything heats thoroughly and blends nicely.

Always account for storage considerations when scaling, as larger batches mean potential for longer storage needs, so be prepared with suitable containers for leftovers.

Nutritional Deep Dive

When looking at nutrition, this dip offers an appealing macro balance of carbohydrates from corn, proteins from cheese, and healthy fats. Each serving is rich in necessary vitamins and minerals, making it an enjoyable yet wholesome addition to your meal. Corn provides dietary fiber, while the jalapenos introduce a demure source of vitamin C, contributing to your daily vegetable intake.

Besides macros and vitamins, this dip can have health benefits if consumed in moderation, supporting weight management. The fiber from corn assists with digestion while the protein from cheese helps promote satiety, reducing the chances of overindulging in other snacks.

Dietary Adaptations

– **Gluten-free:** All ingredients used in this dip are naturally gluten-free, making it a safe choice for those with gluten sensitivities.
– **Dairy-free:** Swap out traditional dairy products for vegan cheese and coconut cream, which creates a similar creamy texture without the lactose.
– **Vegan:** Stick to plant-based versions of cream cheese and cheese substitutes to maintain vegan standards while enjoying this delicious dip.
– **Low-carb:** Use reduced-carb cream cheeses and serve with crunchy celery or cucumber slices instead of chips for a health-conscious, low-carb alternative.
– **Keto:** Focus on high-fat options with full-fat cheeses and heavy cream to keep it aligned with ketogenic dietary goals.
– **Paleo:** Substitute with natural ingredients devoid of processed foods, such as cream made from nuts rather than traditional dairy products.

Troubleshooting Guide

If your dip appears too thick, add a little milk or cream during reheating to restore its creamy texture. Conversely, if it’s too watery, let it cook uncovered for a while to assist in evaporation. Balance flavors can sometimes lean too heavily on spiciness; add more cream cheese or even a touch of sugar to mellow the heat. Should you face equipment challenges, ensure your crockpot settings are correctly adjusted, as overcooking can lead to ingredient separation or burnt textures.

Timing concerns can also arise; ensure that ingredients are added in the proper order to avoid undercooking, especially with easily burnt components like cheese.

Recipe Success Stories

Our community has enjoyed countless successful adaptations of this Crockpot Jalapeno Corn Dip. Readers have reported back with enthusiasm, sharing creative tweaks such as adding different kinds of cheeses or even integrating diced tomatoes for a fresher taste. Many have found it to be the highlight of family gatherings, often requesting the recipe after their first taste.

Photographers in the community have shared stunning visuals of their completed versions, demonstrating how creativity in presentation can elevate the visual appeal of this dish. The success stories continue, showcasing how versatile this recipe is, whether made with minor changes or as it was originally intended.

Frequently Asked Questions

Can I prepare this dip in advance?

Yes, you can prepare the ingredients ahead of time and store them separately in the fridge. Combine everything in the crockpot just before cooking.

How spicy is this dip?

The spice level depends on the amount of jalapenos you add. For those who prefer a milder flavor, consider removing the seeds or using fewer jalapenos.

What is the best way to store leftovers?

Store leftovers in an airtight container in the refrigerator. It can typically last for 3-5 days. For longer storage, freeze in portions.

Can this dip be made without cream cheese?

Yes! You can replace cream cheese with Greek yogurt or a vegan alternative to keep it creamy without dairy.

Is there a way to make this dish spicier?

To ramp up the heat, consider adding sliced fresh jalapenos or a pinch of cayenne pepper in addition to the jalapenos already in the recipe.

What dishes pair well with this dip?

It pairs perfectly with tortilla chips, fresh vegetable sticks, or sliced bread. Consider adding a fresh salsa or guacamole for variety.

Can I use frozen corn instead of canned?

Absolutely! Frozen corn is a great alternative and often has better flavor than canned corn. Just thaw it before adding to the mixture.

Is the dip gluten-free?

Yes, all the ingredients included in this dip are naturally gluten-free, making it a safe choice for those with gluten sensitivities.

Can I double the recipe?

You can double the recipe! Just be cautious about capacity limits for your crockpot and adjust cooking times as needed.

How do I reheat the dip without losing texture?

Reheat the dip gently on low heat, adding a splash of cream or milk to keep it creamy. Stir frequently to prevent sticking.

Can I use different types of cheese?

Yes! Feel free to experiment with various cheeses like pepper jack for an added kick, or a blend for different flavor profiles.

Additional Resources

Check out our related recipes for more crowd-pleasing ideas like Buffalo Chicken Dip or Spinach and Artichoke Dip. Each recipe brings a twist that can complement your next gathering perfectly. Additionally, look for our technique guides that delve into crockpot cooking, ensuring you’re fully equipped to handle any dish that comes your way.

Our ingredient information section provides insight about the best fresh produce and how to select quality cheese, while our equipment recommendations will point you to the best crockpots for all your cooking needs. Seasonal variations throughout the year will inspire you to make the most of seasonal ingredients, keeping your recipes fresh and exciting.

Join the Conversation

We invite you to share your dining experiences on social media by posting a picture of your Crockpot Jalapeno Corn Dip. Use our hashtag so that others in the community can find your post and applaud your culinary creativity. Additionally, we’d love to hear your variations and personal stories about the dish. Your insights can inspire fellow home cooks and transform this delightful dip into a family favorite for many.

Feeling inspired? Don’t forget to leave reviews with your adaptation successes; whether it’s a flavor twist or an exciting new side dish, we encourage you to keep the conversation going. Let’s connect through kitchens and creativity!

The Recipe

Crockpot Jalapeno Corn Dip

Serves: 8 servings

Prep Time: 15 mins

Cook Time: 2 hours

Total Time: 2 hours 15 mins

Kitchen Equipment Needed

  • Crockpot
  • Knife
  • Cutting board
  • Measuring cups and spoons
  • Spoon for mixing

Ingredients

  • 1 can (15 oz) sweet corn, drained
  • 1 cup jalapenos, diced (fresh or pickled)
  • 1 cup cream cheese, softened
  • 1 cup shredded cheddar cheese
  • 1/2 cup mayonnaise
  • 1/4 cup green onions, chopped
  • 1 tsp garlic powder
  • Salt and pepper to taste

Directions

  1. In a large mixing bowl, combine softened cream cheese, mayonnaise, garlic powder, salt, and pepper until smooth.
  2. Stir in the drained corn, diced jalapenos, shredded cheddar, and green onions until evenly mixed.
  3. Transfer the mixture into the crockpot, spreading evenly.
  4. Cover and cook on low for 2 hours or until bubbly and heated through.
  5. Stir again before serving, adjusting seasoning as necessary.
  6. Enjoy warm with tortilla chips or fresh veggies!

Recipe Notes

  • This dip can easily be customized with additional spices or toppings.
  • For a thicker texture, consider adding more cream cheese or reducing the amount of mayonnaise.
  • Leftovers keep well in the fridge and are perfect for reheating!

Best Steak with Creamy Garlic Sauce for a Perfect Dinner

Steak with Creamy Garlic Sauce: A Decadent Delight

⚖️
Difficulty
Intermediate

⏲️
Prep Time
15 mins

🕒
Cook Time
20 mins

⏱️
Total Time
35 mins

🍽️
Servings
4 servings

Steak with Creamy Garlic Sauce is an exquisite dish that elevates a simple cut of meat into an unforgettable culinary experience. The rich, creamy sauce infused with roasted garlic complements the steak’s robust flavors and juicy tenderness perfectly. Imagine slicing into a perfectly cooked steak, with the creamy sauce dripping down the sides, creating an appetizing presentation and a mouthwatering aroma that will captivate your senses. This dish is suitable for both quiet family dinners and festive gatherings, making it a versatile favorite.

The marriage of flavors in Steak with Creamy Garlic Sauce is truly a celebration of culinary craftsmanship. The savory depth of the steak blends seamlessly with the buttery richness of the sauce, which is further enhanced by a hint of white wine and earthy herbs. Each bite offers a satisfying burst of umami that leaves you craving more. This dish not only stands out for its taste but also for its ability to transform even the simplest of meals into something special.

Quick Recipe Highlights

  • Flavor Profile: The creamy garlic sauce adds a zesty richness that balances the savory, juicy flavors of the steak.
  • Texture: The contrast between the tender steak and the velvety sauce creates a delightful mouthfeel.
  • Aroma: Aromatic notes of garlic and herbs fill your kitchen, enhancing the anticipation of this wonderful meal.
  • Visual Appeal: The rich brown color of the sauce beautifully coats the perfectly seared steak, making for an impressive presentation.
  • Skill Level Needed: This recipe requires some familiarity with cooking meat and making sauces, perfect for home cooks looking to improve their skills.
  • Special Equipment: A cast-iron skillet is recommended for achieving a nice sear on the steak, giving it a crisp exterior and juicy interior.

Recipe Overview

  • Difficulty Level: This recipe falls under the intermediate category, requiring attention to detail when cooking the steak to the desired doneness.
  • Category: Ideal for a main course, this dish is perfect for dinner parties or a special family meal.
  • Cuisine: This recipe is inspired by classic American steakhouse traditions combined with a touch of French culinary finesse.
  • Cost: Steak with Creamy Garlic Sauce can be somewhat indulgent, with the cost of quality steak and ingredients being around $20-$30 for four servings.
  • Season: This dish is best enjoyed year-round, making it suitable for both warm summer nights and cozy winter dinners.
  • Occasion: Perfect for romantic dinners, celebratory gatherings, or simply a treat for yourself after a long week.

Why You’ll Love This Recipe

Taste and texture appeal are at the forefront of this dish. The steak is seared to create a beautifully caramelized crust while remaining juicy and tender inside. Paired with the creamy garlic sauce, it becomes a dish that tantalizes the taste buds with each mouthful. You will appreciate how the garlic lends its flavor without overwhelming the dish, allowing the natural taste of the steak to shine.

Convenience is another reason to embrace this recipe. Most ingredients are kitchen staples, making it easy to prepare on a whim. The steps are straightforward, requiring only a few pans and minimal cleanup. This means you can enjoy a restaurant-quality meal without the hassle of complicated cooking processes.

The nutritional advantages of this dish are noteworthy. Steak is a great source of protein, iron, and essential vitamins, while garlic offers various health benefits, including boosting the immune system and reducing blood pressure. The balance provided by the creamy sauce allows for a satisfying yet nutritious dining experience.

Social and entertaining value is maximized with this dish, as it serves as a conversation starter at the dinner table. Impress your guests with your culinary skills while enjoying the rich flavors together. The elegance of the dish makes it perfect for sharing memorable moments.

Cost-effectiveness is often underestimated when it comes to making a gourmet meal at home. With a little investment in quality ingredients, you can create a luxurious experience that would otherwise cost much more at a restaurant. This recipe allows you to indulge without breaking the bank, making it accessible for everyone.

Historical Background and Cultural Significance

The history of steak is rich and diverse, originating from ancient pastoral societies where the domestication of cattle began. Over the centuries, steak has evolved into a staple in various cuisines worldwide, particularly in American and European culinary traditions. The combination of steak and garlic sauce resonates with the concept of elevating simple ingredients into a gourmet dish.

In many cultures, serving steak during festivities signifies abundance and celebration. In the United States, steakhouses have become cultural landmarks, representing a tradition of dining out in style. The dish embodies comfort and indulgence, catering to the desire for fine dining experiences in a casual setting.

The evolution of steak recipes has seen an increased focus on flavor pairings. Garlic, for instance, has been a beloved ingredient across cultures, celebrated for its boldness and versatility. The creamy garlic sauce used in this recipe reflects modern culinary trends, merging traditional cooking with contemporary tastes.

Regional variations are abundant, with each area adding its twist to steak dishes. From the classic French steak frites to Argentinian asado, the manipulation of flavors and techniques showcases regional pride and cultural importance, with garlic sauce frequently appearing as a beloved accompaniment.

Ingredient Deep Dive

Steak: The primary focus of this dish, steak is not only a great source of protein but also provides essential nutrients like iron and zinc, crucial for overall health. Choosing high-quality cuts such as ribeye or sirloin can significantly enhance the flavor. Look for marbling in the meat, which indicates tenderness and juiciness. Store your steak in the refrigerator and consume it within 3-5 days for optimal freshness, or freeze for longer storage. Alternatives include pork chops or chicken breast for lighter options.

Garlic: This aromatic bulb has been used for centuries, praised for its health benefits and bold flavor. Rich in vitamins and minerals, garlic can help immunity and heart health. When selecting garlic, look for firm cloves with no soft spots or sprouting. Store in a cool, dark place in a mesh bag to allow airflow. Garlic can be easily substituted with garlic powder or roasted garlic for a milder flavor.

Common Mistakes to Avoid

  • Overcooking the steak: Always use a meat thermometer and understand the desired doneness to avoid a dry steak.
  • Not letting the steak rest: Allow the meat to rest for a few minutes before slicing, ensuring juices redistribute for a juicier bite.
  • Inadequate seasoning: Season your steak generously with salt and pepper to enhance its natural flavors; an underseasoned steak can taste bland.
  • Rushing the garlic sauce: Allowing the garlic to sauté properly develops its flavors; burning it can make the sauce bitter.
  • Using cold ingredients: Bring your steak to room temperature before cooking for an even cook; cold meat will cook unevenly.
  • Piling too much sauce: Use the sauce sparingly to maintain the steak’s flavor; overwhelming it can mask the meat’s natural taste.
  • Improper pan temperature: Ensure your skillet is hot enough before adding the steak to achieve perfect searing.
  • Skipping quality meat: Investing in good quality steak will result in a richer flavor and better dining experience.

Essential Techniques

Searing is a crucial technique in this recipe. It locks in the moisture and develops the crust that enhances the steak’s flavor. To master it, heat your skillet until very hot, then place the steak down without moving it for several minutes. Look for a deep brown color as the visual cue for success.

Making the creamy garlic sauce requires understanding the balance of flavors. Begin by sautéing garlic until it’s fragrant but not burned, then deglaze the pan with white wine for added depth, scraping any caramelized bits. This process melds the flavors beautifully, while maintaining the sauce’s silky texture.

Pro Tips for Perfect Steak with Creamy Garlic Sauce

Using a meat thermometer ensures you achieve the perfect doneness, which can vary from rare to well-done depending on your preference. For steak lovers, medium-rare is often considered ideal at an internal temperature of 130°F to 135°F.

Let the steak rest for at least five minutes post-cooking; this is essential as it prevents the juices from running out when you cut into it. Resting allows for a more succulent steak that’s enjoyable to eat.

Always taste and adjust your sauce. Each ingredient can vary in strength; taste the sauce as it cooks to ensure the flavors balance well. If it tastes a bit off, consider adding a pinch of salt or a splash of vinegar.

Consider marinating the steak prior to cooking. A simple marinade using olive oil, vinegar, and spices can add layers of flavor and tenderness, enhancing the overall dining experience.

For a twist, incorporate herbs into the garlic sauce, such as thyme or rosemary. This adds nuanced flavors that can amplify the dish and match the garlic’s earthiness.

If you’re feeling adventurous, try adding a splash of heavy cream after removing the pan from heat for an extra creamy sauce, or for a lighter version, swap in Greek yogurt to bring a tangy bite.

Experiment with different cuts of beef. While ribeye is luxurious, sirloin or flank steak can also yield delicious results that are easier on the wallet.

For presentation, drizzle the sauce artistically over the steak before serving. Use fresh herbs, such as parsley or chives, for a pop of color and freshness on the plate.

Variations and Adaptations

Regional variations can be explored by altering the sauce. For instance, incorporating bleu cheese crumbles can provide a bold flavor twist, or you could use chimichurri for a South American influence.

Seasonal adaptations might include adding fresh herbs during the warmer months or incorporating mushrooms for an autumnal dish, enriching the sauce with their earthy flavor.

For dietary modifications, consider using low-fat cream or dairy alternatives in the sauce to make it suitable for those watching their fat intake. Vegan options can utilize plant-based meat substitutes and almond cream for a non-dairy version.

Flavor variations can include the addition of different spices like smoked paprika or cayenne pepper for a kick. You can also try adding caramelized onions to your sauce for an additional layer of depth.

Texture modifications could be achieved by blending the sauce for a smoother consistency or leaving it chunky by adding sautéed vegetables for extra crunch.

Lastly, for presentation alternatives, nestle the steak on a bed of sautéed spinach or serve it alongside roasted vegetables for a colorful and nutritious plate.

Serving and Presentation Guide

Plating techniques can turn a simple meal into a gourmet experience. Use a large white plate to emphasize the colors of the steak and sauce. Place a generous scoop of sauce onto the plate, then set the steak on top allows the sauce to cascade over it.

Garnishing with fresh herbs is a fantastic way to add bright color and freshness to the dish. A sprinkle of chopped parsley or microgreens can elevate the visual appeal significantly.

Traditional accompaniments to consider include mashed potatoes or a fresh garden salad to balance the richness of the steak and sauce, while modern suggestions could involve a quinoa salad or roasted sweet potatoes for a healthier twist.

Temperature considerations cannot be overstated. Ensure the steak rests at room temperature before cooking and is served immediately after preparation for optimal flavor and texture.

Finally, portion control is vital. Cutting the steak properly can ensure even distribution among guests while keeping the plated meal visually appealing and well-proportioned.

Wine and Beverage Pairing

Wine pairings with Steak with Creamy Garlic Sauce can truly enhance the dining experience. A full-bodied red wine, such as Cabernet Sauvignon or Malbec, complements the richness of the steak beautifully. The tannins in the wine cut through the creaminess, creating a balanced palate.

For those seeking non-alcoholic alternatives, consider pairing with sparkling water with lime or a sophisticated mocktail crafted from herbs and citrus to refresh your palate between bites.

Coffees or teas, particularly rich brews like espresso or herbal blends, can offer a contrasting finish to the meal. Opt for a light brew rather than a heavy roast for a satisfying pairing that doesn’t overwhelm the dish.

Temperature is also crucial; ensure that red wine is served slightly below room temperature to enhance its flavors, while sparkling water should be well-chilled.

Serving suggestions can vary as well; serve wine in elegant glassware, complement your dishes with stylish table settings, and don’t hesitate to add a few candles for an inviting atmosphere.

Storage and Shelf Life

Storage methods are essential to maintain the quality of the steak and sauce after cooking. Leftover steak should be wrapped tightly in foil or plastic wrap or placed in an airtight container to retain moisture.

Temperature requirements dictate that cooked steak should be refrigerated within two hours of cooking and consumed within 3-4 days. The sauce can generally last 3-5 days refrigerated, allowing for easy reheating.

Use glass containers for storage, as they won’t absorb flavors and are easier to clean than plastic options. When it comes to reheating, aim for gentle warmth in a skillet to maintain the steak’s texture.

Signs of spoilage include a sour smell or discoloration of the sauce. If you notice any of these indicators, it’s best to err on the side of caution and dispose of the leftovers.

For freezing guidelines, consider cutting the steak into portions before freezing if you’ll be saving leftovers. It can typically last 2-3 months in the freezer when well-wrapped, ensuring that you have a delicious meal ready to thaw and enjoy.

Make Ahead Strategies

Prep timelines can enhance your cooking experience, allowing for a more relaxed meal preparation. You might opt to season the steak a day in advance for deep flavor infusion, or you could prepare the garlic sauce ahead of time and reheat it just before serving.

Storing between steps is invaluable for meal prep. Keep sliced or seasoned steak covered in the refrigerator until ready to sear, and let the sauce cool before transferring it to an airtight container for storage.

Quality impact assessment is essential. The freshness of ingredients will impact flavor; make sure that all ingredients are as fresh as possible, particularly the garlic, to maintain flavor integrity.

Assembly tips include prepping side dishes ahead of the main event to minimize last-minute rushes. Having everything ready allows you to focus on cooking the steak perfectly.

Reheating guidelines suggest warming the sauce gently in a saucepan while ensuring that the steak is seared fresh to maintain its texture and juiciness. You can serve everything at once for an inviting table presentation.

Finally, adding fresh elements like a squeeze of lemon or a sprinkle of fresh herbs just before serving can reinvigorate flavors and elevate the dish.

Scaling Instructions

Halving the original recipe is a straightforward adjustment if you’re looking to serve just two people. Simply reduce all ingredients by half and follow the same timing.

Doubling or tripling the recipe allows for easy scaling; keep an eye on cooking times as larger quantities may require slightly longer for even cooking. Make sure to adjust the skillet size accordingly.

Equipment adjustments, such as using two skillets or batches, may be necessary to ensure even cooking for larger gatherings without overcrowding the pan.

Timing modifications should be anticipated. While the steak’s cooking time remains largely the same, allowing residual cooking from the resting period will be essential, especially with larger cuts.

Storage considerations should also include how to refrigerate or freeze leftover portions properly as larger amounts will require more space in your fridge or freezer.

Nutritional Deep Dive

Macro breakdown of Steak with Creamy Garlic Sauce reveals a meal rich in protein, offering around 30 grams per serving. The sauce will contribute fats primarily, particularly saturated fats from the cream.

Micronutrient analysis shows that this dish provides essential vitamins and minerals, including Vitamin B12 from the steak, aiding in energy production and brain health. Garlic also carries a range of beneficial compounds with anti-inflammatory properties.

Health benefits abound, as incorporating lean cuts of steak offers essential amino acids necessary for muscle building and repair, making it a great choice for those active in sports or fitness.

Dietary considerations come into play; be mindful of your overall daily fat intake when enjoying richer sauces. Balancing this meal with lighter sides like veggies can ensure a well-rounded diet.

Portion analysis suggests enjoying this dish in moderation, particularly if watching caloric intake. Keeping an eye on serving sizes can help maintain a balanced dietary approach.

Weight management tips could include pairing this steak with a larger serving of vegetables or a salad to fill your plate without excessive caloric intake.

Dietary Adaptations

For a gluten-free option, be sure to use gluten-free thickeners for your sauce, ensuring that all ingredients comply while still delivering delicious flavors.

Dairy-free adaptations can include using coconut cream or almond milk instead of heavy cream, offering a lighter sauce that retains creaminess without dairy.

Vegan adjustments will necessitate a complete overhaul of the protein source, opting for plant-based steak alternatives, and ensuring the sauce is dairy-free while incorporating nutritional yeast for added flavors.

Low-carb options can include substituting the creamy sauce with a fresh chimichurri or a sauce based on vegetables and herbs to keep the flavor while removing excess carbs.

The keto diet would allow for this recipe with modifications to the sauce using heavy cream and full-fat ingredients, combining them with non-starchy vegetables as a side dish.

For those following a paleo approach, remove processed dairy and substitute with cashew cream blended with garlic for a creamy finish that’s wholesome and satisfying.

Low-FODMAP diets can benefit from avoiding garlic; using garlic-infused oil can provide the essence without triggering symptoms, maintaining delicious flavors.

Finally, adhering to any other specific diets requires careful consideration of each ingredient and seeking alternatives that suit the required dietary needs while delivering on taste.

Troubleshooting Guide

Texture issues often arise from overcooking steak. To avoid rubbery results, keep a close eye on timing and test with a thermometer to ensure optimal doneness.

Flavor balance problems could emerge if the sauce is either too salty or too bland. Be sure to continuously taste during preparation; addition of seasonings can be adjusted incrementally to prevent overpowering the dish.

Temperature problems may occur if the skillet isn’t hot enough when searing. Setting the right pan temperature is crucial; if in doubt, test with a drop of water; it should sizzle and evaporate immediately.

Equipment challenges can hinder progress. If one skillet is insufficient to sear all meat at once, don’t hesitate to work in batches while keeping the finished steak warm in a low oven.

Ingredient substitutions should be made thoughtfully; if out of garlic, consider shallots or leeks for a subtle flavor alternate. Also, remember that the final taste may shift with different types of stock or cream substitutes.

Timing concerns can affect both sauce and steak preparation. Always prep ingredients in advance to streamline your cooking process and ensure everything comes together seamlessly.

Recipe Success Stories

Community feedback on this dish often highlights the intense flavors and ease of preparation. Many home cooks have shared their experiences of hosting dinner parties where this recipe stole the show.

Variation successes abound, with readers trying different cuts of meat or adding spices to the garlic sauce, discovering new favorites and sharing their adaptations enthusiastically.

Adaptation stories illustrate how people have used this recipe as a base for creating their signature dishes, tailoring ingredients to fit their tastes and dietary preferences while retaining its essence.

Photography tips can come from successful preparers who ventured to document their dishes, gaining confidence in food styling and capturing stunning images that showcase the beauty of the meal.

Encouragement from readers to write about their twists on this recipe fosters an interactive community, as many people bond over their love of cooking and sharing culinary experiences.

Frequently Asked Questions

Q: Can I make the creamy garlic sauce in advance?
A: Yes, you can prepare the sauce ahead of time. Just store it in an airtight container and reheat gently before serving. This allows the flavors to meld nicely.

Q: What steak cuts work best for this recipe?
A: The best cuts for this dish include ribeye, sirloin, or filet mignon. These cuts offer a perfect balance of tenderness and flavor, enhancing the dish’s overall quality.

Q: How do I know when my steak is done?
A: Using a meat thermometer is the best way to ensure perfect doneness. For medium-rare, look for an internal temperature of 130°F to 135°F.

Q: Is it possible to make this dish dairy-free?
A: Yes, you can use coconut cream or nut-based cream alternatives to create a dairy-free version of the creamy garlic sauce while maintaining a rich consistency.

Q: Can I freeze the leftover steak?
A: Absolutely! Just wrap the cooked steak tightly in foil or an airtight container and freeze it. It should maintain its quality for about 2-3 months.

Q: How do I reheat the steak without drying it out?
A: To reheat steak, place it in a warm oven (around 250°F) until heated through. This gentle warming method will help keep the steak tender and juicy.

Q: What are some good side dishes to serve with this recipe?
A: Great accompaniments include mashed potatoes, grilled asparagus, or a simple green salad, which help balance the dish’s richness perfectly.

Q: Can this recipe be doubled for a larger crowd?
A: Yes, you can easily double the recipe. Just ensure to adjust cooking times as necessary and use larger pans to avoid crowding the meat.

Q: How do I prevent the garlic from burning?
A: Keep a close eye on the heat and sauté garlic over medium heat, removing it from the pan once fragrant. This will prevent the garlic from becoming bitter.

Q: What wine pairs best with this steak dish?
A: A full-bodied red wine, such as Cabernet Sauvignon, complements the richness of the steak beautifully, enhancing the overall dining experience.

Additional Resources

If you enjoyed Steak with Creamy Garlic Sauce, check out our related recipes for sides that beautifully complement this dish, such as garlic mashed potatoes or roasted Brussels sprouts. Technique guides on how to properly sear meats and make rich sauces can further enhance your culinary repertoire.

Ingredient information is essential for choosing quality cuts of meat; we provide sources for purchasing fresh steak and checking seasonal produce to elevate your cooking. For those interested in equipment recommendations, look for high-quality skillet options that ensure even cooking and longevity in your kitchen.

Lastly, don’t miss our seasonal variations that showcase how to adapt this recipe for spring or fall, using ingredients that highlight the flavors of the month.

Join the Conversation

We invite you to share your own creations inspired by Steak with Creamy Garlic Sauce! Post your photos on social media and tag us, or leave a review to share your experience. Photography tips on capturing stunning food shots can also be found on our blog.

Engage with our community by discussing variations you’ve created or suggesting improvements. Creating a dialogue around recipes fosters a sense of connection and allows us all to learn from each other’s cooking journeys. Our goal is to inspire culinary creativity, so don’t hesitate to join us in this flavorful exploration.

The Recipe

Steak with Creamy Garlic Sauce

Serves: 4

Prep Time: 15 mins

Cook Time: 20 mins

Total Time: 35 mins

Kitchen Equipment Needed

  • Cast-iron skillet
  • Meat thermometer
  • Cutting board
  • Sharp knife
  • Airtight container for storage

Ingredients

  • 4 ribeye steaks (1-inch thick)
  • 1 cup heavy cream
  • 6 cloves garlic, minced
  • 1/2 cup white wine
  • 2 tablespoons olive oil
  • Salt and pepper, to taste
  • Fresh parsley, for garnish

Directions

  1. Season the steaks with salt and pepper on both sides and let them sit at room temperature for 15 minutes.
  2. In a cast-iron skillet, heat olive oil over medium-high heat until shimmering.
  3. Cook the steaks for about 4-5 minutes on each side for medium-rare, or until desired doneness is reached. Use a meat thermometer to check internal temperature.
  4. Remove the steaks and let them rest on a cutting board while preparing the sauce.
  5. In the same skillet, reduce heat to medium and add minced garlic, sautéing for about 1 minute until fragrant.
  6. Deglaze the pan with white wine, scraping up any bits stuck to the bottom, and allow it to simmer for 2-3 minutes.
  7. Add the heavy cream and stir to combine, letting the sauce simmer until it thickens, about 5-7 minutes.
  8. Return the steaks to the skillet, coating them in the creamy sauce for 1-2 minutes.
  9. Slice the steaks and serve with a drizzle of the creamy garlic sauce, garnishing with fresh parsley.

Recipe Notes

  • For best flavor, use fresh garlic and quality steak cuts.
  • Adjust seasoning of the sauce to personal preference; feel free to add herbs like thyme or rosemary.
  • Store any leftovers in an airtight container in the refrigerator for up to 3-4 days.

Easy Tater Tot Appetizer Cups with Cheesy Filling

Tater Tot Appetizer Cups: Your New Favorite Party Snack

⚖️
Difficulty
Easy

⏲️
Prep Time
15 mins

🕒
Cook Time
20 mins

⏱️
Total Time
35 mins

🍽️
Servings
12 cups

Tater Tot Appetizer Cups are a delightful and fun dish that brings comfort and creativity to any gathering. Imagine crispy, golden tater tots forming the perfect cup shape, filled with savory mixes that tantalize your taste buds. These appetizer cups are not only visually appealing but also packed with flavor that your guests will adore. Whether you’re looking to impress at a party or simply enjoy a cozy night in, these bite-sized wonders are the perfect solution.

This recipe takes the classic tater tot to new heights, combining the creaminess of cheese with the freshness of vegetables and the richness of meats, making it a versatile option that can be adapted to suit different palates. The warm, crispy exterior coupled with the melty fillings creates a sensory delight that’s hard to resist. Perfect for family gatherings, casual get-togethers, or even as game day snacks, the Tater Tot Appetizer Cups will quickly become a favorite in your snack repertoire.

Quick Recipe Highlights

  • Flavor Profile: These Tater Tot Appetizer Cups showcase a delicious blend of savory and cheesy flavors, making them irresistible.
  • Texture: The contrasting textures of crispy tater tots and a creamy filling create a delightful experience with each bite.
  • Aroma: A mouthwatering aroma of baked potatoes mingles with melted cheese and spices, enticing your guests.
  • Visual Appeal: The golden brown of the tater tots paired with colorful vegetable fill makes for an inviting presentation.
  • Skill Level Needed: This recipe is simple, requiring basic kitchen skills, making it accessible to cooks of all levels.
  • Special Equipment: You will need a muffin tin to shape and bake these delicious appetizer cups.

Recipe Overview

  • Difficulty Level: This recipe is categorized as easy, making it suitable for both novice and experienced cooks.
  • Category: Perfect for appetizers or snacks, these cups fit well in any meal setting.
  • Cuisine: While primarily American comfort food, they can be adapted with international flavors to enhance their appeal.
  • Cost: The ingredients are budget-friendly, typically costing around $15 for a batch that serves multiple guests.
  • Season: These appetizer cups shine at year-round events but are especially delightful in the fall and winter during holiday gatherings.
  • Occasion: Serve them at parties, picnics, game nights, or as a fun family meal addition.

Why You’ll Love This Recipe

This engaging appetizer is perfect for any occasion, thanks to its bold flavors and inviting presentation. The Tater Tot Appetizer Cups offer a satisfying crunch from the perfectly baked tater tots, melding seamlessly with a variety of fillings that range from classic cheese to gourmet options. The versatility allows you to customize these bites to suit different tastes, making it a crowd-pleaser at gatherings.

The convenience of preparing Tater Tot Appetizer Cups makes them an enticing option for hosts. You can easily prepare and assemble them in advance, allowing you more time to enjoy the festivities or simply relax with your guests. This adaptability also extends to ensuring they can be made on short notice by keeping tater tots and various fillings handy.

Nutritionally, you can incorporate ingredients rich in vitamins and minerals, such as colorful vegetables, lean proteins, and wholesome toppings, turning this tasty treat into a semi-healthy option. You can even sneak in extra veggies or swap out cheese for lighter alternatives for those mindful of their dietary choices.

Socially, these Tater Tot Cups foster interaction as guests can easily grab them from a platter, making socializing around food a delightful experience. They invite creative conversation over flavor combinations and can even inspire little culinary competitions among friends and family to see who can create the best version.

Lastly, the cost-effectiveness of this recipe stands out. With a relatively low ingredient list, you can whip up a sizable batch, making it a wallet-friendly choice for large gatherings where snacks can often add up.

Historical Background and Cultural Significance

Tater tots were devised in the 1950s by a family-run business, Ore-Ida, which initially aimed to combat potato waste while providing a new culinary innovation. Initially enjoyed on their own, tater tots have since become a staple in American cuisine, often associated with comfort food and childhood nostalgia, leading to creative adaptations like our Tater Tot Appetizer Cups.

In many households, the introduction of tater tots signified a shift in cooking, favoring convenience and quick meal solutions. As they gained popularity in school cafeterias and fast-food establishments, they became ingrained in American culture, signifying not just a meal but community and shared experiences of dining together.

Over the years, these crunchy little bites have evolved into a canvas for culinary creativity from home cooks to gourmet chefs. They pair beautifully with various toppings—ranging from chili and cheese to gourmet sauces—showing their adaptability that reflects regional tastes, confirming their status as an American classic.

Regional variations have emerged, with some areas particularly embracing cheese-filled, spicy, or vegetarian adaptations. The Tater Tot Appetizer Cups can easily be molded to highlight local flavors, tying into community traditions and variations that make them irresistibly popular across diverse gatherings.

Ingredient Deep Dive

Tater tots are the star ingredient of this dish. They are made from grated potatoes that are parboiled and then formed into small cylinders before being deep-fried or baked. The cultural significance of potatoes in global cuisines cannot be overstated; they are a staple food source providing sustenance and versatility in countless dishes worldwide. Nutritionally, potatoes are rich in potassium, vitamin C, and dietary fiber, making them a healthy choice when prepared without excess fats.

When purchasing tater tots, opt for products that feature minimal added ingredients. Look for packages that boast ingredients like real potatoes and avoid those with excessive preservatives or artificial flavors. For storage, keep them in the freezer until you are ready to prepare them, and they will maintain their freshness.

As for substitutions, sweet potatoes can work beautifully in place of regular potatoes to offer a sweeter flavor and enhanced nutritional profile. You can also consider hash browns or even baked mashed potatoes for a different base.

Another essential ingredient is cheese, most commonly cheddar, which adds a creamy, savory quality to the cups. Cheese has been an integral element in cooking, enhancing the flavor of dishes across cultures. It packs nutritional benefits such as calcium and protein, making it a sustainable option for enriching meals.

Choose high-quality, aged cheeses for deeper flavors and better melting characteristics. Proper storage in the fridge is crucial to maintain its freshness, typically lasting about a week in airtight packaging. If you’re looking for lower-fat alternatives, options like feta or part-skim mozzarella provide great flavor without the extra calories.

Finally, seasonings and vegetables round out the dish. Fresh herbs, spices, and vegetables like bell peppers, onions, and spinach not only bring flavor but also nutritional value. When selecting greens, fresh produce is always best, ensuring vibrant colors and flavors, while stored correctly will keep for days in the refrigerator.

Common Mistakes to Avoid

  • Not Thawing Tater Tots Properly: Cooking frozen tater tots without thawing can result in uneven cooking, leading to a soggy filling and undercooked tater tots.
  • Overfilling the Cups: Stuffing too much filling into the cups can make them hard to manage; it’s best to stick to about 1-2 tablespoons for optimal balance.
  • Skipping Preheating the Oven: Not preheating the oven can cause the tots to cook unevenly, compromising texture and flavor.
  • Using Low-Quality Cheese: Low-quality cheese can affect both the taste and melting of your filling. Opt for good quality, fresh cheese for the best results.
  • Not Cooking to Golden Brown: Aim for a golden-brown color for the tots to achieve maximum crunch and flavorful depth—under-baking can lead to a pale, unappetizing appearance.
  • Ignoring Seasoning: Failing to season adequately can result in bland flavors; herbs and spices enhance taste significantly, so don’t skimp!
  • Using Too Much Oil: Excess oil can lead to greasy tots. Use just enough to achieve a crisp finish, avoiding a heavy-textured final product.
  • Inconsistent Cup Sizes: Ensure your cups are even in size so they cook uniformly and present well on a platter.
  • Poor Plating: Neglecting presentation can lessen the appeal of any dish; take care to arrange the cups nicely on a serving platter.
  • Not Allowing to Cool: Serving them immediately out of the oven might result in burns; let them cool slightly to enhance the eating experience.

Essential Techniques

Baking the Tater Tot Appetizer Cups properly is crucial for achieving that perfect crisp outside while ensuring the inside is perfectly cooked. To master this technique, preheat your muffin tin with a light spray of oil to facilitate easy release. Visual cues for success include a golden brown crust and bubbling filling.

Assembling the cups requires care; avoid stuffing too much filling inside. Master the art of filling by using a tablespoon to evenly distribute the mixture into each snugly formed tater tot cup. A well-filled cup should be stable enough to hold its structure without overflowing.

Finally, seasoning is a key technique in elevating the cups’ flavor profile. Start with a base of salt and pepper and then add herbs or spices according to your chosen filling. Taste-testing before final assembly can ensure each cup bursts with optimal flavor.

Pro Tips for Perfect Tater Tot Appetizer Cups

1. **Chill Before Baking:** After filling the cups, refrigerate them for 15-20 minutes to help them hold their shape better during baking.

2. **Mix Your Fillings:** Combine various fillings for unique flavor profiles—think of a taco-themed filling with ground beef, cheese, and salsa, or a veggie-packed mix with spinach and feta.

3. **Use Leftovers:** These cups are a great way to utilize leftovers from other meals—think rotisserie chicken, veggies, or that last bit of cheese.

4. **Experiment with Spices:** Add a pinch of cayenne, smoked paprika, or a mix of Italian herbs to your filling for a delightful twist.

5. **Personalize Toppings:** Provide a variety of toppings on the side for guests to customize their cups, from sour cream to guacamole, salsa, or even unexpected items like hot sauce.

6. **Don’t Rush the Cooking:** Baking at the right temperature ensures evenly cooked and crispy tater tots. Patience leads to better texture.

7. **Mix and Match Fillings:** Try playing with flavor combinations—like barbecue chicken with cheddar or a Mediterranean flavor of spinach and feta for diverse tastes.

8. **Keep It Warm:** Serve the appetizer cups in a warm dish to maintain their crispy texture longer at gatherings.

Variations and Adaptations

For a seasonal adaptation, consider incorporating fall ingredients like pumpkin puree or stuffing for a holiday twist. In dire need of a regional spin? Reflect the flavors of different cultures through your fillings—think buffalo chicken for an American kick or Mediterranean veggies and feta.

Dietary modifications can also turn this dish into an inclusive delight. Create gluten-free options by using gluten-free tater tots, or make it vegan by substituting cheese with nutritional yeast and incorporating beans or lentils as a protein source.

For flavor variations, think outside the box! Utilize international spices, such as curry powder for an Indian flair or use taco seasoning for a Mexican-themed gathering.

In terms of texture modifications, consider roasting your vegetables for added crunch before folding them in. Presentation alternatives might include serving the cups on a colorful platter with vibrant garnishes like fresh cilantro or parsley to brighten up the dish.

Serving and Presentation Guide

When it comes to plating, arrange the Tater Tot Appetizer Cups on tiered stands to make a stunning visual impact at any gathering. Add splashes of color by laying them out alongside dips or garnishes like salsa, guacamole, or sour cream.

For garnishing, consider a sprinkle of chopped fresh herbs or a drizzle of spicy ranch on top of each serving for an extra touch of flavor and color. Traditional accompaniments can include a side of crisp salads or a platter of fresh vegetables to enhance the experience.

Serving temperature is crucial; aim to serve them warm. If they cool down too much, their texture might become chewy rather than deliciously crispy, so keeping them in a warming drawer or low oven prior to serving is advisable.

Finally, keep an eye on portion control—these cups can be addictive! About 2-3 cups per person can suffice for a gathering, but that can vary based on accompanying foods.

Wine and Beverage Pairing

When it comes to wine pairings, a light white wine like Sauvignon Blanc or a sparkling wine complements the flavors of the tater tot cups, enhancing their savory profile without overpowering the dish. Red blends or a light-bodied pinot noir can also work well, especially if your filling leans towards heartier ingredients.

For non-alcoholic options, consider serving sparkling waters infused with fresh fruits or homemade lemonade, which will resonate nicely with the dish’s flavor profile. Smoothies made with leafy greens and fruits can provide a refreshing contrast.

If you are serving tea or coffee, opt for herbal teas like mint or a light-roast coffee to cleanse the palette and keep the mood upbeat.

Storage and Shelf Life

Storing Tater Tot Appetizer Cups is essential for maintaining their freshness. Ideally, keep uneaten cups in an airtight container in the refrigerator where they will last for 2-3 days. If you have fillings that can spoil quickly, consider removing those elements before storing.

For optimum texture, reheat them in the oven at 350°F (175°C) for about 10-15 minutes rather than microwaving, which can result in sogginess.

If you need to prepare ahead of time, these cups can be frozen before baking. Lay them on a baking sheet until solid, then transfer to a freezer-safe container for up to 3 months. Bake them from frozen, adding an additional 5 minutes to the cooking time.

Signs of spoilage include an off smell or discoloration in the filling—if in doubt, it’s best to throw it out to avoid foodborne illnesses.

Make Ahead Strategies

A great tip for preparing Tater Tot Appetizer Cups ahead of time is to assemble the filling and the tater tots separately. Mix your chosen fillings and store them in an airtight container in the refrigerator one day prior.

You can also shape and semi-freeze the tater tot cups ahead of time before a gathering, allowing you to pop them into the oven when guests arrive. This makes for an effortless way to serve a hot snack without spending too much time in the kitchen.

Quality is crucial, so assess the filling’s freshness before combining; avoid making it too far in advance, as dairy and sauces might separate after being stored.

If there are fresh ingredients to be included at the end, such as herbs or sauces, consider waiting until just before serving to add these for optimal freshness and flavor impact.

Scaling Instructions

To adjust the recipe for larger or smaller gatherings, you can easily halve or double the ingredients. For smaller servings, maintain the same process but reduce the cooking time slightly to prevent overbaking.

If doubling the recipe, make sure to use a second muffin tin or batch bake in intervals. Ensure your oven can accommodate both trays comfortably to maintain even cooking.

Additionally, keep portions in mind; each cup should remain filled around the same amount to preserve texture and flavor consistency.

Lastly, always be mindful of ingredient storage, particularly if you’re preparing ahead. Avoid overcrowding the fridge or freezer to keep things organized and fresh for assembly.

Nutritional Deep Dive

Tater Tot Appetizer Cups offer a harmonious balance of macros. Each cup typically contains carbohydrates primarily from the potatoes, while the fillings can add proteins, fats, and vitamins depending on the ingredients used.

Micronutrient analysis shows that potatoes are a good source of potassium, vitamin C, and B vitamins, while the addition of vegetables in the filling enhances the fiber content and boosts vitamins A and K.

For those watching their intake, consider dividing them into smaller portions. Keep track of the type of fillings used; heartier ingredients like meats or cheese can substantially increase caloric value.

Weight management tips include serving these cups with a side salad or vegetable platter, providing satisfying lower-calorie options alongside your delectable bites.

Dietary Adaptations

For gluten-free variations, ensure to use certified gluten-free tater tots, or make your homemade version to ensure no cross-contamination occurs. For those needing dairy-free options, substitute regular cheese with plant-based alternatives and use dairy-free fillings to keep flavors rich and satisfying.

Vegan adaptations are readily possible—replace cheese with nutritional yeast for that cheesy flavor, and use black beans or lentils as hearty, protein-packed fillings.

Low-carb interpretations can involve substituting tater tots made from cauliflower or zucchini for a lighter, veggie-forward option. Experiment with flavors specific to keto or paleo diets for a unique twist that stays within dietary restrictions.

Troubleshooting Guide

If your tater tot cups are coming out soggy, check your oven temperature to ensure it reaches the proper setting before baking. Proper cooking times directly affect the crispiness of the tater tots.

Flavor balance issues can arise if too much seasoning is used; adjusting and tasting as you go can help you achieve the desired profile without being overpowering.

For ingredient substitutions, ensure you understand the implications of using replacements as they may affect flavor and texture—experiment carefully to find your preferred combinations.

In case of temperature problems, using a kitchen thermometer can help regulate the internal cooking temperature for consistent results.

If timing concerns arise, consider multitasking—preparing dips or side salads while the cups bake can streamline the process and keep you on track.

Recipe Success Stories

Feedback from the community indicates that Tater Tot Appetizer Cups have become a staple at many gatherings. Home cooks often share their variations that were particularly successful, like adding spices or using different base ingredients to cater to their audiences.

Some readers emphasize how these cups sparked creativity in their pots, leading them to experiment with unique flavor combinations, making great stories about unexpected successes at family meals or parties.

Adaptation stories abound—whether hosting an unexpected guest or facing dietary restrictions, cooks have shared how easily this recipe adjusted to their needs, allowing for the perfect dish every time.

Photography enthusiasts also find this recipe compelling as its colorful, creative appearance makes for excellent social media shares, helping spread the love for this easy and fun appetizer!

Frequently Asked Questions

Can I make Tater Tot Appetizer Cups in advance?

Absolutely! You can prepare the filling and shape the cups in advance. Just store them covered in the refrigerator and bake them when you are ready to serve.

What are the best fillings for Tater Tot Cups?

The options are limitless! Fillings can include meats, cheeses, vegetables, or even dips. Popular combinations include taco filling or spinach and artichoke dip.

How long does it take to bake these cups?

Generally, baking takes about 20 minutes. Make sure to check for that golden-brown color for the perfect texture.

Are these appetizer cups freezer-friendly?

Yes! You can freeze unbaked cups to save time. Just remember to add a few extra minutes to the cooking time when baking from frozen.

What’s the best way to store leftovers?

Store leftovers in an airtight container in the refrigerator for up to 3 days. Reheat in the oven to maintain crispiness.

Can I use sweet potatoes instead of regular potatoes?

Definitely! Sweet potatoes will give a different flavor and a slightly sweeter taste, adding a unique twist to your cups.

What dips pair well with the cups?

Favorites include ranch dressing, spicy salsa, guacamole, or a creamy cilantro lime dip that complements the savory flavors.

Is it possible to make these cups vegan?

Yes! Simply use plant-based cheese and include hearty plant-based fillings such as beans or lentils to maintain the texture and flavor.

Can I use leftover tater tots for this recipe?

Absolutely! Using leftover tater tots can save time and reduce waste while bringing in great flavor.

How can I spiff up the presentation?

Arrange them on colorful platters, garnish with breadcrumbs or herbs, or serve with a variety of sauces for guests to enjoy.

Additional Resources

For more delightful snack options, check out our other appetizer recipes such as loaded nachos or creamy stuffed mushrooms. Dive deeper into essential cooking techniques that can elevate your home cooking styles, such as mastering the art of baking or exploring various ingredient flavors.

Consider investigating ingredient guides that help you select the best produce for your Tater Tot Appetizer Cups or find out how different cheeses impact flavors and textures.

Seasonal variations are vital; as seasons change, so can your ingredients. Explore guides on which produce to source in summer versus winter to best compliment your dish.

Join the Conversation

We would love to hear from you! Join us on social media to share your version of the Tater Tot Appetizer Cups or tag us to showcase your culinary creations. Begin conversations about flavor twists and plating styles, and don’t forget to leave your feedback or suggestions for future recipes based on your experiences.

Sharing your photography tips or tricks for taking captivating food photos can inspire fellow cooks in our community to explore and express their creativity. Let’s come together to celebrate the joy of cooking and the love of food!

The Recipe

Tater Tot Appetizer Cups

Serves: 12 cups

Prep Time: 15 mins

Cook Time: 20 mins

Total Time: 35 mins

Kitchen Equipment Needed

  • Muffin tin
  • Mixing bowl
  • Measuring cups and spoons
  • Oven mitts
  • Spatula

Ingredients

  • 1 package (32 oz) frozen tater tots
  • 1 cup shredded cheddar cheese
  • 1/2 cup cooked bacon, crumbled
  • 1/2 cup chopped green onions
  • 1/4 cup sour cream
  • Salt and pepper to taste

Directions

  1. Preheat the oven to 400°F (200°C).
  2. Spray a muffin tin with cooking spray.
  3. In a mixing bowl, combine tater tots, cheese, bacon, green onions, sour cream, salt, and pepper.
  4. Evenly distribute about a tablespoon of the mixture into each muffin cup and press down lightly.
  5. Bake for 20 minutes, or until golden brown and crispy.
  6. Allow to cool for a few minutes before removing from the muffin tin.
  7. Serve with additional sour cream or your favorite dip and enjoy!

Recipe Notes

  • Experiment with fillings for a personalized touch.
  • For a healthier option, use oven-baked or air-fried tater tots.
  • Leftover cups can be stored in an airtight container for up to 3 days.

Delicious Crockpot Beef Tips and Noodles for Easy Meals

Crockpot Beef Tips & Noodles: A Hearty Comfort Meal

⚖️
Difficulty
Easy

⏲️
Prep Time
15 mins

🕒
Cook Time
8 hours

⏱️
Total Time
8 hours 15 mins

🍽️
Servings
6

Crockpot Beef Tips & Noodles is the epitome of comfort food that warms your home and your heart. With tender beef simmered to perfection in a rich gravy, this dish offers a delightful combination of savory flavors that are hard to resist. As it cooks, the aromas permeate your kitchen and lure friends and family to the dinner table in eager anticipation.

This recipe not only saves you time with its hands-off cooking method but also guarantees a satisfying meal that is great for weeknight dinners or special occasions. Pair it with a fresh green salad or steamed vegetables for a well-rounded meal that brings joy to every bite.

Quick Recipe Highlights

  • Flavor Profile: Rich and savory, with deep umami notes from the beef and hearty seasonings.
  • Texture: The beef is fork-tender, contrasting with the comforting, al dente noodles.
  • Aroma: A delightful blend of garlic, onion, and herbs fills the air while cooking.
  • Visual Appeal: The dish is visually appealing with its creamy gravy and tender chunks of beef nestled among noodles.
  • Skill Level Needed: A beginner-friendly recipe that’s simple to prepare, requiring minimal cooking skills.
  • Special Equipment: A reliable crockpot is essential for this recipe, ensuring even cooking.

Recipe Overview

  • Difficulty Level: This dish ranks as easy, perfect for novice cooks looking to impress without hassle.
  • Category: Ideal as a main course, it fits perfectly into hearty family meals or gatherings.
  • Cuisine: This recipe draws from classic American comfort food traditions, emphasizing home-style cooking.
  • Cost: Ingredients are affordable, making this a low-budget but satisfying dish.
  • Season: Best enjoyed year-round, particularly during colder months when a warming meal is desired.
  • Occasion: Perfect for casual family dinners, potlucks, or any occasion requiring a comforting meal.

Why You’ll Love This Recipe

Crockpot Beef Tips & Noodles is all about taste and texture. The succulent beef tips soak up the savory gravy, providing a mouthwatering experience that enhances every forkful of tender noodles. This dish is collectively satisfying, ensuring that each bite delivers both comfort and flavor.

This recipe also shines in terms of convenience. With just a little prep time, you can set the crockpot and walk away. Whether you’re at work or running errands, the slow cooking process allows the flavors to deepen, requiring no active cooking time and giving you the freedom to enjoy your day without stress.

Nutritionally, this meal can be beneficial, especially when paired with whole-grain noodles or fresh vegetables. The beef provides essential proteins, while the rich gravy layers in flavor without excessive calories. Choosing whole-food ingredients can enhance the health profile of the dish.

Socially, sharing a hearty meal brings people together. Crockpot Beef Tips & Noodles is ideal for gatherings, inviting family and friends to partake in a communal dining experience that sparks joy and conversation.

Finally, cost-effectiveness is a stellar feature. Utilizing affordable ingredients, this dish transforms into an economical yet delicious choice for budget-conscious households, allowing everyone to savor a fulfilling meal without breaking the bank.

Historical Background and Cultural Significance

The origin story of crockpot beef tips traces back to the classic American culinary tradition, where slow cooking was embraced as a means to tenderize tougher cuts of meat. This method has evolved over decades, becoming a staple in homes where convenience meets flavor.

The dish holds cultural importance as it reflects the values of home-cooked meals. For many families, gatherings around the dinner table are enhanced by comforting dishes that tell stories and create lasting bonds among generations.

As this recipe evolved, regional variations emerged, portraying local ingredient preferences and culinary styles. From Southern-style interpretations featuring different spices to Midwest adaptations showcasing creative twists, crockpot beef tips have found a place in various American cuisines.

Overall, the evolution of this recipe illustrates how comfort food can change yet remain fundamentally rooted in the tradition of sharing meals with loved ones.

Ingredient Deep Dive

Beef is the centerpiece of this recipe. Historically a staple in many diets, it represents nourishment and strength. It is rich in proteins and essential vitamins like B12, necessary for energy and overall health. When selecting beef, look for cuts like sirloin or chuck, which offer a perfect balance of flavor and tenderness.

Noodles are another crucial ingredient, offering texture and heartiness. Commonly enjoyed across various cultures, noodles not only fill but also balance the dish. Whole grain or egg noodles can provide additional nutrients. Ensure you store them properly to maintain freshness.

Finally, the gravy ingredients—such as broth and seasoning—add depth. Selecting low-sodium options can enhance health benefits while maintaining flavor. These ingredients should be stored in a cool, dark place to prolong shelf life, and versatile substitutions can easily adapt to dietary needs.

Common Mistakes to Avoid

  • Not browning the beef: Skipping this step can lead to a less flavorful final product.
  • Overcrowding the crockpot: Ensuring there’s enough space guarantees even cooking.
  • Ignoring ingredient proportions: Correct ratios of broth and seasonings impact flavor.
  • Cooking too briefly: A good meal requires ample time for flavors to meld deeply.
  • Using low-quality meat: Higher quality beef enhances tenderness and flavor.
  • Skipping the rest period: Allowing the dish to sit before serving intensifies flavors.
  • Not adjusting seasoning to taste: Always taste before serving to ensure the right balance.
  • Cooking on high when the recipe specifies low: This can affect texture and flavor development.
  • Failing to add vegetables: Adding carrots or peas can enhance nutrition and flavor.
  • Using too much flour or cornstarch: This can lead to a gluey texture in the gravy.

Essential Techniques

Browning the beef is crucial as it develops a deeper flavor through the Maillard reaction, enhancing the overall taste of the dish. To master this, use a hot skillet and avoid crowding the beef, allowing it to caramelize properly. Watch for a golden-brown crust to indicate readiness.

Slow cooking is about patience, allowing ingredients to break down and flavors to blend. For a perfect slow-cooked meal, set your crockpot to low for several hours, checking occasionally to avoid overcooking. The dish should come out rich and savory, with the meat easily shredding apart.

Pro Tips for Perfect Crockpot Beef Tips & Noodles

1. Always use a quality beef stock or broth to enhance the dish’s overall flavor.
2. Consider searing the beef before adding it to the crockpot for an extra layer of taste.
3. Add vegetables in the last hour of cooking to prevent them from becoming mushy.
4. Adjust seasoning according to your preference, especially with salt and pepper.
5. If the gravy is too thin, mix cornstarch with a bit of water and stir it in during the last cooking phase.
6. Allow your dish to rest before serving; it helps the flavors marry beautifully.
7. For added richness, stir in a dollop of sour cream or cream cheese before serving.
8. Experiment with spices, adding thyme or rosemary for more aromatic depth.

Variations and Adaptations

You can explore regional variations of this dish by adding robust local flavors. For instance, Southern adaptations may incorporate Cajun seasoning, while Midwestern versions may lean towards classic herbs like thyme and parsley to represent local tastes.

Seasonal adaptations can brighten your dish with vibrant flavors. Consider using fresh spring vegetables like asparagus or squash during the warmer months for a refreshing twist.

Dietary modifications can also be made; for a gluten-free version, substitute the noodles with spiralized zucchini or gluten-free pasta options that still capture the heartiness of the dish.

Flavor variations can introduce additional spices or condiments, like incorporating barbecue sauce for a smoky finish or using an Asian-inspired twist with soy sauce and ginger.

For texture modifications, you may increase the noodles or add beans for extra fiber, providing a heartier meal without compromising the dish’s classic feel.

In terms of presentation, serve in a rustic bowl with chopped parsley sprinkled for a pop of color. This makes for not only an appetizing plate but also a visually appealing dish that enhances the dining experience.

Serving and Presentation Guide

Plating techniques for Crockpot Beef Tips & Noodles can enhance the dining experience. Consider using wide, shallow bowls to showcase the tender beef and creamy gravy over the noodles. A sprinkle of fresh herbs like parsley or chives can add a touch of freshness and color.

Garnishing ideas include crispy shallots or fried onions, which can lend an unexpected crunch to the dish. Traditional accompaniments often include crusty bread or a buttery biscuit, perfect for soaking up any remaining gravy.

Modern serving suggestions may incorporate unique sides such as roasted vegetables or a simple side salad to balance the rich flavors of the beef tips. Serve everything warm, ensuring a satisfying dining experience.

Finally, portion control should allow for generous servings since this dish is usually a favorite among families, encouraging a healthy appetite for all attendees.

Wine and Beverage Pairing

When serving Crockpot Beef Tips & Noodles, wine pairings can elevate the meal. A full-bodied red, such as Cabernet Sauvignon or Merlot, complements the rich flavors beautifully, enhancing both the beef and the gravy.

For those preferring non-alcoholic alternatives, a cranberry or pomegranate sparkling drink works wonders. The acidity balances the richness of the dish, providing a refreshing counterpoint.

If you enjoy coffee or tea with dinner, a robust black tea can hold its own against the meal, especially if you opt for a smoky variety. Choose a proper brewing method to achieve the right strength that won’t dilute the experience.

Remember to serve these beverages at appropriate temperatures; red wines should be slightly chilled, while sparkling alternatives are best served cold for an enjoyable sip.

Storage and Shelf Life

Proper storage methods are key to extending the shelf life of your crockpot beef tips. Allow leftovers to cool down before transferring them to airtight containers for refrigeration.

Store your dish in the refrigerator for up to three days. Ensure it’s kept at consistent temperatures to prevent spoilage and maintain flavor integrity.

Signs of spoilage can include off smells, discoloration, or an unusual texture. If you notice any of these, it’s best to err on the side of caution and discard the meal.

Reheating instructions involve gently warming in the microwave or on the stovetop. Adding a splash of broth can help restore moisture and prevent drying out.

For those looking to store the dish long-term, freezing is an excellent option. It can last up to three months when stored properly in freezer-safe containers. Allow it to defrost in the refrigerator prior to reheating for best results.

Make Ahead Strategies

Preparing Crockpot Beef Tips & Noodles in advance can significantly ease your meal prep. A prep timeline might include marinating the beef overnight or chopping vegetables ahead of time to save effort on cooking day.

You can store ingredients separately in the refrigerator before cooking to ensure freshness. Just combine everything in the crockpot and set it for cooking when ready.

Assess the quality impact of prepping ahead. While beef cuts can improve with marinating, be cautious with pre-cooked noodles, as they may become mushy.

Assembly tips are primarily about organizing your workspace for easy access to ingredients. This improves efficiency on busy days and ensures a seamless cooking experience.

When reheating, consider adding fresh elements like herbs or a squeeze of lemon juice to brighten the flavors and enhance the dish’s freshness, making it feel newly prepared.

Scaling Instructions

Scaling the recipe is straightforward. For halving the recipe, simply adjust each ingredient quantity while retaining the same cooking times and methods.

When doubling or tripling, ensure your crockpot can accommodate the increased volume. Cooking times may vary slightly, so keep an eye on the doneness of the beef.

Equipment adjustments may include using larger pots or multiple slow cookers if the volume is significantly increased, while timing modifications can depend on the increased amount.

Lastly, make sure to account for storage considerations when scaling up. Larger portions will require appropriate container sizes to prevent spoilage and maintain quality.

Nutritional Deep Dive

Macro breakdowns reveal that this recipe typically offers a good balance of proteins from the beef and carbohydrates from the noodles. The addition of vegetables can enrich the nutrient profile, providing vitamins and minerals.

Micronutrient analysis shows that beef is an excellent source of iron and zinc, critical for energy levels and immune function. Including whole grain noodles can introduce fiber, promoting digestive health.

Health benefits extend beyond individual nutrients; this dish’s combination of ingredients can lead to satiety, helping control hunger levels throughout the day.

Dietary considerations can be made based on ingredient substitutions. Choosing lean beef or whole-grain options can elevate the nutritional value while catering to specific dietary goals.

For those monitoring their portion size, consider using smaller bowls or pre-measuring servings to maintain control over caloric intake without sacrificing enjoyment.

Dietary Adaptations

For gluten-free adaptations, using rice noodles or zucchini noodles can keep the dish enjoyable and accessible for gluten-intolerant individuals while maintaining the original essence.

Dairy-free modifications can include substituting creamy components with coconut milk or almond-based products, allowing those with lactose sensitivities to partake without worry.

Vegan versions can replace beef with plant-based proteins, such as tofu or seitan, mixed with rich vegetable broths for depth and flavor.

Low-carb dieters may opt for spiralized veggies instead of noodles, reducing carbs while adding nutrients, which also creates a fresh spin on the classic.

Keto dieters can similarly engage with this recipe by utilizing cauliflower rice or shirataki noodles to keep carbohydrate counts in check while enjoying the hearty flavors.

Paleo enthusiasts can follow suit with compliant ingredients, swapping conventional noodles for sweet potatoes or winter squash, thus embracing the dish while adhering to dietary preferences.

Troubleshooting Guide

If you encounter texture issues, like toughness in the beef, ensure you’ve chosen the right cut and allowed enough cooking time for recent-heavy meats to tenderize adequately.

Flavor balance can be adjusted through seasoning iterations. If too salty, adding a bit of sugar or acid, like vinegar or lemon juice, can help tone it down.

Temperature problems often arise from improper slow cooker settings. It’s crucial to follow the recommended low vs. high cooking times for optimal results.

Equipment challenges can be alleviated by using the right tools; ensuring the crockpot lid fits snugly preserves moisture during cooking, impacting texture and flavor.

Ingredient substitutions can alter taste and consistency; it’s essential to do thorough research before substituting core elements to preserve the dish’s integrity.

Timing concerns are crucial for crockpot meals. Adjust cooking times based on the size of your beef cuts and the overall volume to avoid overcooking or undercooking.

Recipe Success Stories

Communities often share glowing feedback praising the comfort and satisfaction this recipe brings to their table. Many report that it’s their go-to dish for family gatherings, cementing its status as a beloved favorite.

Variation successes are plentiful, with readers experimenting using different meats or noodles—these adaptations often draw enthusiastic responses, proving how versatile the recipe can be.

Adaptation stories highlight those who have increased dietary accessibility. Families are grateful for the ability to modify ingredients to cater to various tastes and dietary needs, enhancing the communal dining experience.

Photography tips from readers emphasize the dish’s visual appeal, recommending the addition of fresh herbs or colorful vegetables to brighten up the plate for social media sharing or family dinners.

Overall, success stories reinforce this recipe’s capacity to unite people around comfort food while encouraging creative culinary explorations that sustain family traditions.

Frequently Asked Questions

Can I make this recipe ahead of time?
Yes, you can prepare the ingredients in advance. Simply store them separately in the refrigerator and combine them when ready to cook.

What can I use as a substitute for beef?
For a lighter version, consider using chicken or plant-based proteins like tofu or tempeh that can absorb similar flavors.

How can I thicken the gravy?
If the gravy is too thin, you can mix some cornstarch with cold water and stir it into the slow cooker during the last 30 minutes of cooking.

Is this dish suitable for freezing?
Absolutely! This dish freezes well for up to three months. Just make sure to store it in airtight containers.

What type of beef is best for this recipe?
Cuts like chuck roast or beef tips work best, as they become tender and flavorful when cooked slowly.

Can I add vegetables to the recipe?
Yes! Adding vegetables like carrots, peas, or bell peppers can enhance flavor and nutritional value. Add them in the last hour of cooking.

How long should I cook it on high?
If cooking on high, aim for around 4-5 hours. However, low cooking yields better flavor and texture, so 8 hours is preferable.

What sides pair well with this dish?
Consider serving with a crisp green salad, roasted vegetables, or crusty bread to soak up the savory gravy.

How can I make it dairy-free?
To make it dairy-free, avoid any cream or cheese, and stick to stock or broth as your base for the gravy.

Can I use instant noodles instead?
You can use instant noodles for a quicker method, but add them in the last 15 minutes of cooking to prevent them from becoming overly mushy.

What’s the best way to reheat leftovers?
Reheating in a microwave or on the stovetop with a little added broth can maintain moisture and flavor.

Additional Resources

If you enjoyed this recipe, consider exploring related recipes that showcase slow cooking techniques or comforting meals. Look into technique guides that cover how to best utilize your crockpot for various types of meals, including soups and casseroles.

Ingredient information about beef and noodles can offer insights into nutritional benefits and selection tips, helping you make informed decisions in your cooking.

Equipment recommendations may also aid in finding the right tools to improve your cooking experience, including suggestions for versatile kitchen gadgets essential for slow cooking.

Finally, seasonal variations can inspire you to rethink this classic recipe based on what’s available in your local markets or what’s in season, keeping your meals fresh and exciting.

Join the Conversation

We encourage you to share your experiences and variations of this recipe on social media, showcasing your culinary creations to inspire others. Engage with our community by uploading photos of your finished dish or sharing tips and tricks for perfecting Crockpot Beef Tips & Noodles.

Recipe reviews are invaluable! Provide insights on what worked for you or what modifications you liked most. Your feedback helps build a vibrant culinary community where creativity flourishes and everyone benefits from shared knowledge.

Remember, cooking is not just about the food; it’s about connection and sharing moments. Bring your family and friends into the conversation, encouraging them to try cooking this comforting dish together and create memories to last a lifetime.

The Recipe

Crockpot Beef Tips & Noodles

Serves: 6

Prep Time: 15 mins

Cook Time: 8 hours

Total Time: 8 hours 15 mins

Kitchen Equipment Needed

  • Crockpot
  • Skillet for browning beef
  • Cutting board
  • Knife
  • Measuring cups and spoons

Ingredients

  • 2 pounds beef tips
  • 1 cup beef broth
  • 1 onion, chopped
  • 2 cloves garlic, minced
  • 1 tablespoon Worcestershire sauce
  • 1 teaspoon salt
  • 1/2 teaspoon black pepper
  • 1 cup egg noodles
  • Fresh parsley for garnish

Directions

  1. Heat a skillet over medium-high heat. Add beef tips and brown on all sides.
  2. Transfer beef to the crockpot. Add broth, onion, garlic, Worcestershire sauce, salt, and pepper.
  3. Cover and cook on low for 8 hours or until beef is tender.
  4. During the last 15 minutes, add egg noodles to the crockpot, stirring to combine.
  5. Once cooked, serve hot garnished with fresh parsley.

Recipe Notes

  • Feel free to add vegetables such as carrots or peas during the last hour of cooking.
  • Adjust seasoning as necessary based on your taste preferences.
  • This dish can be frozen for up to three months; ensure it is stored in airtight containers.

Best Grilled Brat Kabobs with Flavorful Marinated Veggies

Grilled Brat Kabobs with Marinated Vegetables: The Ultimate Summer Delight

⚖️
Difficulty
Easy

⏲️
Prep Time
20 mins

🕒
Cook Time
15 mins

⏱️
Total Time
35 mins

🍽️
Servings
4

Grilled Brat Kabobs with Marinated Vegetables bring the essence of summer grilling right to your table. This delightful recipe combines juicy bratwurst with a colorful medley of marinated vegetables, creating a feast for the eyes and the palate. The smoky aroma of grilling sausages mingles with the fresh, herbaceous fragrance of the vegetables, ensuring a sensory experience that is simply irresistible. Whether you’re hosting a backyard barbecue or simply enjoying a weekend meal, these kabobs are perfect for any occasion as they meld flavors that excite and satisfy.

The kabobs not only deliver on taste but also offer a range of textures, with the brats boasting a savory bite complemented by the crisp tenderness of grilled bell peppers, onions, and zucchini. Each skewer presents a vibrant display, making it as pleasing to look at as it is to eat. They’re not just meals; they’re moments of joy that bring family and friends together over delicious food and great conversations.

Quick Recipe Highlights

  • Flavor Profile: The bratwurst provides a hearty, savory taste, while the marinated vegetables add a burst of freshness and zest.
  • Texture: Enjoy the contrast between the firm sausage and the tender yet crunchy vegetables perfectly charred on the grill.
  • Aroma: The dish is characterized by the inviting smell of grilled meats paired with fragrant herbs and marinated veggies.
  • Visual Appeal: The colorful array of perky peppers, yellow squash, and hearty sausage creates a stunning presentation.
  • Skill Level Needed: This recipe is beginner-friendly, perfect for any grilling enthusiast looking to impress.
  • Special Equipment: A grill or grill pan is essential, along with skewers, to assemble and cook the kabobs properly.

Recipe Overview

  • Difficulty Level: This recipe is marked easy, making it accessible for novice cooks and enjoyable for experienced chefs alike, allowing you to focus on flavor rather than techniques.
  • Category: Grilled Brat Kabobs fall into the categories of main dishes and outdoor grilling, perfect for summer meals.
  • Cuisine: This recipe reflects a blend of American and German culinary influences, showcasing bratwurst in a modern, vibrant context.
  • Cost: The ingredients are generally affordable, with bratwurst being the star of the dish and vegetables being seasonal, which can help keep costs down.
  • Season: Ideal for summer gathering, these kabobs celebrate the bounty of seasonal produce while bringing a festive touch to any outdoor meal.
  • Occasion: Perfect for barbecues, picnics, and family gatherings, these kabobs are sure to delight guests and encourage a fun culinary experience.

Why You’ll Love This Recipe

Grilled Brat Kabobs with Marinated Vegetables shine with their incredible taste and delightful textures. The bratwurst’s savory juiciness pairs effortlessly with the colorful vegetables, creating a dish that feels both hearty and refreshing. Each bite is a taste of summer that lingers on your palate, while the marinating process infuses the veggies with flavorful oils and spices, enhancing their natural sweetness.

The convenience of preparation makes this recipe a must-try. With only a few simple steps, you can marinate the veggies while you fire up your grill. It requires minimal cleanup, making it ideal for those who want to spend more time enjoying food and company rather than being stuck in the kitchen. Plus, skewering everything together creates a beautiful presentation that impresses without demanding advanced cooking skills.

Nutritionally, this dish is a winner as it combines protein from the bratwurst with a variety of essential vitamins and minerals from the vegetables. You can easily customize the veggies to suit your preferences or to include whatever is fresh in your local market. This flexibility makes it easier to provide a balanced meal with a plethora of nutrients perfect for any dietary needs.

Socially, these kabobs are perfect for sharing. Their finger-food nature encourages communal eating, ideal for summery backyard parties or casual dinners. Picture friends laughing, sharing stories, and enjoying the delicious flavors — what better way to create lasting memories?

Finally, cost-effectiveness is an added bonus. Utilizing simple ingredients, these kabobs are budget-friendly yet feel indulgent, making them a great choice for large gatherings without breaking the bank.

Historical Background and Cultural Significance

The bratwurst, a key ingredient in our kabobs, has roots dating back to the 14th century in Germany. This traditional sausage is named for its original ingredients — “brät” meaning finely chopped meat. Over time, bratwurst has transcended borders, becoming a staple at summer barbecues, fairs, and even Oktoberfest celebrations around the world.

Grilled sausages have always held cultural importance during gatherings, symbolizing connection and quality time spent with family and friends, especially during outdoor events. The act of grilling and enjoying food together fosters community spirit and is celebrated in numerous cultures worldwide.

The evolution of bratwurst recipes shows how they have integrated into various cuisines, adapting to local flavors and preferences, leading to many variations found in the U.S. today. The inclusion of marinated vegetables represents a modern twist that embraces fresh, seasonal produce, showcasing innovation and creativity.

Regional variations are abundant; in some parts of the U.S., these kabobs might be found laden with smoky barbecue sauce or accompanied by unique regional vegetables. This makes the recipe adaptable and allows it to cater to diverse palates while still remaining anchored in its delicious origins.

Ingredient Deep Dive

Bratwurst
Bratwurst carries a rich history as a beloved German sausage, often grilled on outdoor barbecues. Its significance lies in the celebration of German culture, particularly during festivals. From a nutritional standpoint, bratwurst provides a good source of protein and essential amino acids. When selecting bratwurst, look for natural casing and high-quality ingredients, avoiding fillers and artificial flavors. Store them in the refrigerator for up to a week or freeze them for extended freshness. For substitutions, turkey or chicken sausage can create a lighter option while still delivering flavor.

Marinated Vegetables
Marinated vegetables like bell peppers, onions, and zucchini add color, flavor, and essential vitamins to this dish. Each vegetable brings unique nutritional benefits, from vitamin C in bell peppers to fiber in zucchini. Freshness is essential when selecting your veggies; look for firm, vibrant specimens. Store the marinated mix in the refrigerator for up to three days. You can easily customize with seasonal vegetables or replace them according to availability, ensuring the dish remains versatile.

Common Mistakes to Avoid

  • Overcrowding the skewers; make sure to leave space between ingredients for even cooking.
  • Neglecting to preheat the grill, which can lead to sticking and uneven cooking.
  • Marinating too briefly; allowing the vegetables to soak in the marinade for at least 30 minutes enhances flavor.
  • Choosing low-quality sausage, as the type of bratwurst greatly influences the dish’s final taste.
  • Not removing moisture from the vegetables, leading to steaming instead of grilling.
  • Skipping the soaking of wooden skewers, which prevents them from burning on the grill.
  • Cooking over direct heat without monitoring, causing the sausage to burn before cooking through.
  • Forgetting to allow brats to rest after grilling, which ensures they retain their juicy texture.
  • Not experimenting with different vegetable combinations, which can elevate flavors and textures.
  • Wasting marinade; consider using it as a dressing for salads or dipping sauces post-cooking.

Essential Techniques

Grilling
Grilling is crucial in achieving that smokey, charred flavor beloved in outdoor cooking. To master this, ensure your grill is well-preheated. Look for visual cues like grill marks appearing on the sausage and veggies to gauge doneness. Avoid flame flare-ups by adjusting the heat as needed and moving skewers if they start to cook too quickly.

Marinating
Marinating enhances the flavor of the ingredients. For optimal results, marinate for several hours or overnight to allow flavors to penetrate fully. When marinating, always use glass or plastic containers, as metal can react with the acidic ingredients. After marinating, always discard the excess marinade for safety; never reuse it unless cooked down into a sauce.

Pro Tips for Perfect Grilled Brat Kabobs

1. Vary your vegetable choices to include seasonally available produce, which enhances seasonal flavors.
2. Smoke up your kabobs by adding wood chips to your grill for extra flavor dimensions.
3. Use smaller, bite-sized pieces for uniform cooking and easier eating.
4. Consider adding fresh herbs to your marinade for an elevated flavor profile.
5. Pre-cook the bratwurst partially before grilling to ensure thorough cooking without burning on the grill.
6. Baste with a light glaze of your favorite BBQ sauce during the last few minutes of grilling for added flavor.
7. Turn the skewers occasionally for even cooking and those coveted grill marks.
8. Allow the kabobs to rest off the heat for a few minutes before serving to enhance the flavor.

Variations and Adaptations

For a regional twist, consider utilizing local sausages, like Italian sausage or even chorizo, to add zest to the kabobs. Seasonal adaptations could include swapping summer squash for roasted Brussels sprouts in the fall. Dietary modifications allow for gluten-free options by selecting gluten-free sausage, while flavor variations can be made by incorporating different herbs into the marinade, such as rosemary or thyme. Textural improvements might include grilling craft bread on the side, adding a crunchy module to your meal. Lastly, presentation can change dramatically; try stacking the kabobs vertically on a platter for an artistic touch.

Serving and Presentation Guide

Plating the Grilled Brat Kabobs beautifully enhances the dining experience. Consider arranging them on a long platter with a garnish of fresh herbs for elegant visual appeal. Garnishing with lemon wedges not only adds a pop of color but also gives a fresh squeeze for added zest at serving. Serving alongside tangy sauces, like mustard or a homemade vinaigrette, encourages guests to personalize their kabob experience. Maintain ideal serving temperature by covering them with foil after grilling or serving on heated plates. Proper portion control advice suggests serving 2-3 skewers per person, balancing variety and satisfaction.

Wine and Beverage Pairing

For wine pairings, a fruity Riesling or a light Pinot Noir complements the savory bratwurst beautifully, while a refreshing lager or pilsner enhances the grilling experience. For non-alcoholic options, consider sparkling water garnished with citrus. If coffee/tea pairings apply, a mild iced tea with lemon can balance out the flavors nicely. It’s essential to serve beverages chilled; this refreshment will enhance the summer vibe of your meal.

Storage and Shelf Life

Store any leftover Grilled Brat Kabobs in an airtight container in the refrigerator for up to 3 days. For longer preservation, consider freezing cooked kabobs — they maintain satisfactory flavor for up to 3 months. Ensure to cool the kabobs completely before placing them in the freezer. Reheating should be done in an oven or microwave, and thaw in the refrigerator to maintain texture. Watch for signs of spoilage, including off-smells or unusual texture changes, before consuming.

Make Ahead Strategies

To streamline your meal preparation, marinate the vegetables and pre-cook bratwurst a day ahead. Maintain freshness by storing everything separately in the fridge until ready to assemble. Skewers can be prepared a few hours in advance, ready to be grilled directly when guests arrive. This makes assembly a breeze while ensuring the meal is still hot and enjoyable. Fresh elements, like herbs, can be added just before serving or grilling to maintain their vibrant flavor.

Scaling Instructions

For halving the recipe, keep the marinade ratios consistent, adjusting bratwurst and vegetable amounts accordingly. Doubling or tripling the recipe requires monitoring cooking time, as larger quantities may need more grilling time. Equipment adjustments might include using multiple grills or larger skewers. When timing modifications are necessary, ensure that each batch is still cooked thoroughly for safety. Lastly, properly store any excess components to keep them fresh for later use or grilling.

Nutritional Deep Dive

A macro breakdown shows that bratwurst is rich in protein, making it a filling option, while the marinated vegetables contribute carbohydrates and fiber. When analyzing micronutrients, expect a boost in vitamins A and C from the colorful veggie selection. The health benefits are notable; the inclusion of diverse vegetables enhances overall nutrient density. For dietary considerations, consider the balance of protein and carbs when serving. Portion analysis suggests a balanced approach, promoting moderation and variety, especially suited for weight management.

Dietary Adaptations

For those looking for gluten-free options, select gluten-free bratwurst or vegetables alone. Creating a dairy-free version involves selecting compatible marinades and avoiding any dairy-based sides. For vegan preferences, substitute bratwurst with meat alternatives and focus on a mix of seasonal and hearty vegetables. Low-carb adaptations may involve skipping the bun entirely and serving with a fresh salad. Keto eaters can enjoy the kabobs as is but select lower-carb veggies, and paleo adaptations hinge on whole foods without processed ingredients.

Troubleshooting Guide

Texture issues can often arise if the vegetables are overcooked; ensure they are cut uniformly for even cooking. Flavor balance can be adjusted post-cooking; add sauces if needed to elevate the taste. Temperature problems may occur if the grill isn’t properly preheated; consider investing in a grill thermometer to monitor heat levels. Equipment challenges may arise if skewers aren’t adequately soaked; prevent burn by using metal skewers instead. If ingredient substitutions alter cooking time or texture, take careful note and monitor closely during grilling.

Recipe Success Stories

Collections of community feedback show that families love these kabobs for gatherings, claiming they’re always a hit at BBQs. Variation successes include users experimenting with different marinades or sausage types, enhancing their unique twist. Reader suggestions about added spices or herbs often find their way into the discussion, promoting a culture of creative cooking. Photography tips shared by users on social media have sparked engaging conversations around techniques and ideas, showcasing the kabobs themselves as an art form.

Frequently Asked Questions

Can I use chicken bratwurst instead of pork?

Yes, chicken bratwurst works wonderfully for a lighter alternative while maintaining similar flavors.

What vegetables pair best with bratwurst?

Bell peppers, zucchini, and red onions offer great flavor contrasts and hold up well on the grill.

How can I ensure my bratwurst is fully cooked?

Using a meat thermometer is the best way to check; bratwurst should reach an internal temperature of 160°F.

Is it necessary to marinate the veggies?

While not necessary, marinating enhances their flavor and adds depth to the dish.

Can leftovers be frozen?

Yes, leftovers can be frozen for up to three months. Just ensure they are fully cooled and stored in airtight containers.

How long can I marinate vegetables?

Vegetables can be marinated for 30 minutes up to 24 hours for the best flavor.

What is a good dipping sauce for these kabobs?

A tangy mustard or barbecue sauce pairs exceptionally well with the savory flavors of the bratwurst.

Can this recipe be cooked indoors?

Absolutely! A grill pan or broiler works well if you’re not ready to fire up the outdoor grill.

What should I serve with grilled brat kabobs?

Consider a fresh green salad, roasted potatoes, or bread as complementary sides to round out the meal.

How can I modify this recipe for a keto diet?

Focus on protein-rich sausages and non-starchy vegetables while avoiding barbecue sauces with sugar.

Additional Resources

If you enjoyed these Grilled Brat Kabobs with Marinated Vegetables, consider exploring related recipes like Spicy Grilled Chicken Skewers or Mediterranean Vegetable Kebabs. technique guides on marinating and grilling can enhance your culinary skills, while ingredient information helps you select the freshest produce. Equipment recommendations to improve your grilling method could transform future BBQ experiences. Explore seasonal variations to adapt the kabobs for year-round enjoyment by mixing up flavors and ingredients to keep things exciting!

Join the Conversation

Share your versions of the Grilled Brat Kabobs on social media and engage with other cooking enthusiasts. Include your photography tips and discuss how you’ve adapted the recipe over the years to suit your family’s preferences. Leave a recipe review or ask questions to foster community interaction. Your input helps others discover festive and flavorful meals that encourage shared experiences around the dining table.

The Recipe

Grilled Brat Kabobs with Marinated Vegetables

Serves: 4

Best Steak with Creamy Garlic Sauce – Perfect for Dinner

Steak with Creamy Garlic Sauce: A Flavorful Delight

⚖️
Difficulty
Intermediate

⏲️
Prep Time
10 mins

🕒
Cook Time
15 mins

⏱️
Total Time
25 mins

🍽️
Servings
4

If you’re looking for a show-stopping dinner that combines rich flavors and succulent textures, then look no further than this Steak with Creamy Garlic Sauce recipe. This dish features perfectly seared steak paired with a luxurious garlic-infused cream sauce that is sure to impress anyone at your table. The savory umami of the steak complements the smooth and garlicky tones of the sauce, creating a delightful harmony of flavors. Perfect for a cozy night in or entertaining guests, this recipe is a versatile addition to your culinary repertoire.

Not only does this dish deliver on taste, but it also offers incredible aroma as the garlic and herbs meld together, enticing everyone in the kitchen. As the sauce simmers, the fragrance fills the air, promising a gourmet meal that isn’t too difficult to prepare. With its modern twist on classic steak dinner, this creamy garlic sauce elevates the ordinary steak into an extraordinary dining experience, making it a staple for steak lovers everywhere.

Quick Recipe Highlights

  • Flavor Profile: The savory steak is enhanced by a creamy garlic sauce, creating a symphony of rich and buttery flavors with hints of herbs.
  • Texture: Each bite of steak is tender and juicy, seamlessly complemented by the silky smoothness of the sauce that envelops the dish.
  • Aroma: The uplifting aroma of sautéed garlic and nourishing herbs wafts through your kitchen, making it irresistible.
  • Visual Appeal: This recipe presents beautifully with the deep caramelized crust of the steak against the ivory cream sauce, garnished with fresh herbs for a touch of color.
  • Skill Level Needed: While this dish requires some culinary skill, the techniques are approachable for home cooks who want to step up their game.
  • Special Equipment: A sturdy skillet or cast-iron pan is ideal for achieving that perfect sear.

Recipe Overview

  • Difficulty Level: This Steak with Creamy Garlic Sauce is rated as intermediate due to the need for pan-searing techniques and sauce preparation.
  • Category: This dish is perfect for dinner, whether it’s a weeknight meal or a weekend feast.
  • Cuisine: This recipe draws inspiration from classic American cuisine, blending traditional steak dishes with a luxurious French-inspired sauce.
  • Cost: The ingredients for this meal can be affordable, especially if you purchase steak on sale, making it budget-friendly for a special occasion.
  • Season: While steak can be enjoyed year-round, the rich and robust flavors of this dish are especially fitting for fall and winter evenings.
  • Occasion: Ideal for gatherings, date nights, or as a decadent weeknight treat, this recipe suits many occasions.

Why You’ll Love This Recipe

There’s something undeniably satisfying about a perfectly cooked steak, but when you add a creamy garlic sauce, it transforms the dish into something spectacular. Each bite is a delightful union of textures, with the tender meat giving way to the comforting richness of garlic cream. This recipe offers convenience, as the preparation and cooking times don’t demand hours in the kitchen, allowing you to whip up an impressive meal even on a busy night.

Beyond its decadent taste, this dish brings nutritional benefits, as steak is an excellent source of protein, vitamins, and minerals. The sauce, made with fresh ingredients, can also provide healthy fats if prepared with care. Make it a centerpiece at your dining table, and it naturally becomes a social affair, inviting conversation and pleasure as guests savor every mouthful.

From a budget perspective, steak can be invested in wisely, and when paired with a homemade sauce, it proves to be a cost-effective way to create an upscale dining experience in the comfort of your home. Each step of crafting this dish not only delivers on flavor but also provides a sense of accomplishment, making it a perfect recipe to share with friends and family.

Historical Background and Cultural Significance

Originating from various culinary traditions, the delicious combination of steak and garlic sauce has been enjoyed around the world. In American cuisine, steak has held iconic status as a symbol of hearty meals, while garlic is revered for its medicinal properties and flavor-enhancing abilities. This combination is particularly popular in French cooking, where rich sauces reign supreme, seamlessly blending with robust protein options like steak.

Over time, the recipe has evolved from simple steak preparations to gourmet variations featuring unique sauces and accompaniments. This trajectory demonstrates culinary creativity and adaptiveness, maintaining the essence of hearty meals while introducing innovative flavors. Regional variations now abound, from the classic garlic butter sauce to more contemporary creamy versions highlighting different herbs and spices.

In many cultures, sharing a meal centered around steak signifies hospitality and celebration. The preparation of a well-cooked steak and its accompanying sauce is often an art form, demonstrating both skill and flair. This dish and its evolving recipes serve as a reminder of the communal aspect of cooking, as friends and family gather to enjoy something delicious together.

Ingredient Deep Dive

Steak

The type of steak used can define the dish, with options like ribeye or sirloin being popular for their tenderness and flavor. Rich in protein, steak is also a source of important nutrients such as iron and zinc, integral to a balanced diet. When selecting steak, look for cuts that are bright in color and well-marbled for the best taste and tenderness.

When it comes to storage, fresh steak should be kept in the refrigerator and consumed within a few days for optimal quality. If you need to store it longer, freezing is a great option. Just be sure to wrap it tightly to prevent freezer burn. For substitution, turkey or chicken cutlets can substitute for a lighter option.

Garlic

Garlic is known for its distinctive aroma and flavor, often symbolizing health and wellness. Rich in antioxidants, it offers numerous health benefits, including boosting the immune system. When selecting garlic, choose heads that feel firm and heavy, avoiding any that are sprouting or soft.

Garlic can be stored in a cool, dry place and can last several weeks. To substitute garlic in recipes, consider using shallots or garlic powder, though the flavor may differ. Freshness matters greatly, so always aim to use fresh garlic for the best impact on flavor.

Common Mistakes to Avoid

  • Choosing the wrong cut of steak: Opting for tougher cuts instead of more tender ones can result in a less enjoyable dining experience.
  • Improper marinating or seasoning: Failure to properly season the steak can lead to bland flavors; always ensure your meat is well-seasoned prior to cooking.
  • Overcooking the steak: Cooking steak beyond medium can result in dry, tough meat; use a meat thermometer to check doneness.
  • Not allowing the steak to rest: Cutting into the steak immediately after cooking will release juices, making it dry; allow it to rest for a few minutes before slicing.
  • Burning the garlic: Garlic can turn bitter if overcooked; add it to the pan last when making the sauce.
  • Neglecting to deglaze: Not deglazing the pan can lead to missing out on flavor-rich bits stuck to the bottom; use broth or wine to lift those flavors.
  • Incorrect sauce consistency: If the sauce is too thin, it won’t adhere to the steak; ensure you achieve a thick, creamy texture by simmering properly.
  • Skipping the garnish: A little fresh herb or sprinkle of seasoning at the end can elevate the visual and flavor profile of the dish greatly.

Essential Techniques

Cooking the perfect steak requires technique in searing. This is crucial as it develops a flavorful crust while keeping the inside tender. To master searing, preheat your pan until hot and avoid overcrowding, which can lower the temperature and result in steaming rather than searing.

Making the creamy garlic sauce involves a foundational method known as emulsification. This is vital for a smooth sauce texture. Heat your cream gently and whisk in the garlic to meld the flavors, ensuring it doesn’t boil to prevent curdling.

Pro Tips for Perfect Steak with Creamy Garlic Sauce

1. Choose quality meat: Invest in high-quality steak for superior flavor and texture.
2. Marinate: Use a marinade or simple seasoning to enhance the depth of flavor.
3. Let it rest: Always allow your steak to rest after cooking for optimal juiciness.
4. Use a meat thermometer: This ensures your steak is cooked precisely to your preferred doneness.
5. Keep ingredients fresh: Fresh garlic and cream make a world of difference in flavor.
6. Finish with acid: A splash of lemon juice or balsamic vinegar can elevate the sauce’s flavor.
7. Plate beautifully: Take the time to plate your steak attractively; it enhances presentation.
8. Experiment with herbs: Fresh parsley or thyme can add a unique twist to the garlic sauce.

Variations and Adaptations

Regional variations of this dish can feature different herbs and spices, like adding smoked paprika for a smoky flavor. Seasonal adaptations can include grilled asparagus or roasted seasonal vegetables as side dishes to complement the main dish. For dietary modifications, consider using mushrooms in place of steak for a vegetarian alternative, and make the garlic sauce using coconut cream for dairy-free options.

Flavor variations might include adding sun-dried tomatoes or freshly cracked black pepper for an extra zing. For texture modifications, serve the sauce over creamy mashed potatoes instead of steak for a comforting twist. When it comes to presentation, consider serving in bowls instead of plates for a rustic, cozy feel.

Serving and Presentation Guide

Plating techniques can transform your dish from homey to haute cuisine. Arrange the steak on a warm plate, artfully spoon the creamy garlic sauce over the top, and add a garnish of finely chopped herbs to add color. Pair with roasted potatoes for a crunchy texture, or serve with a fresh salad for a refreshing contrast.

Garnishing ideas can include a sprinkle of fresh herbs like parsley, chives, or a bit of grated Parmesan cheese on top. Traditional accompaniments such as garlic bread or sautéed green beans elegantly complement the meal. For modern serving suggestions, consider unique serving vessels like wooden boards or slate platters to present the steak and sauce. Keep temperature considerations in mind; serve the steak warm to maximize its flavors.

Wine and Beverage Pairing

When it comes to wine pairings, a full-bodied red wine like Cabernet Sauvignon or Merlot works beautifully with steak, enhancing its rich flavors. For non-alcoholic alternatives, consider serving sparkling water with a slice of lemon or a homemade rosemary lemon soda for a refreshing kick.

If coffee or tea is more your style, bold brews like a dark roast coffee or a robust black tea can harmonize nicely with the dish. Temperature is critical; ensure your wine is served at the correct temperature—red wines at room temperature and white wines slightly chilled—for the best experience.

Storage and Shelf Life

To store leftovers, allow the steak and sauce to cool completely before placing them in airtight containers. The steak can last in the refrigerator for up to 3 days. For longer storage, consider freezing; make sure to vacuum seal to avoid freezer burn. Signs of spoilage include off smells and discoloration.

When reheating, do so gently in a skillet or microwave to prevent the steak from becoming tough. If reheating the sauce, warm it slowly over low heat, adding a splash of cream if it’s too thick. Freezing guidelines recommend consuming within 2-3 months for the best quality.

Make Ahead Strategies

To streamline dinner preparations, consider marinating the steak a day in advance. This not only enhances its flavor but also tenderizes the meat. Prepare the creamy garlic sauce ahead of time; simply store it in the refrigerator and reheat gently when ready to serve.

Quality impact assessments include knowing that while the steak should be cooked fresh for the best results, the sauce can hold well in the refrigerator. Assembly tips suggest preparing side dishes in parallel to save time while cooking the steak. If desired, add fresh elements like herbs or greens just before serving to keep their flavors vibrant.

Scaling Instructions

When it comes to halving the recipe, simply divide all ingredient quantities by two. For doubling or tripling, keep an eye on cooking times, as larger portions may take longer to reach the desired doneness. Equipment adjustments might include using larger pans or more cooking appliances as needed to accommodate greater amounts.

When timing modifications are necessary, allow extra time for the additional cooking involved, especially if you’re cooking in batches. Storage considerations must be made; ensure you have enough containers for leftovers or for the prepared steak and sauce.

Nutritional Deep Dive

The macro breakdown of this dish indicates a high protein content from the steak, complemented by fats from the creamy sauce. Protein is vital for muscle repair and overall bodily function, while healthy fats provide energy. Micronutrient analysis reveals that garlic contributes vitamins B6 and C, along with manganese, adding valuable nutrients to the meal.

Health benefits include boosting your immune system with garlic and enjoying the satisfaction of a filling meal without excess carbohydrates. Portion analysis suggests a healthy serving size of steak per person is approximately 4-6 ounces, making it manageable while remaining hearty. Weight management tips lean heavily on balancing portions with nutrient-dense sides like vegetables or salad.

Dietary Adaptations

This recipe can be adapted for gluten-free diets by ensuring all sauces and seasonings are gluten-free. For dairy-free versions, substitute heavy cream with coconut cream or a non-dairy alternative like almond or cashew cream. Vegan adaptations could replace steak with grilled portobello mushrooms or eggplant slices, making the dish entirely plant-based.

Low-carb and keto-friendly options can be achieved by focusing on the steak while opting for a low-carb accompaniment like zucchini noodles instead of traditional starches. Additionally, paleo dieters can enjoy this dish by avoiding processed ingredients and embracing fresh, whole-food options. Low-FODMAP diets can limit garlic and onion while opting for acceptable flavor enhancers.

Troubleshooting Guide

For texture issues, such as a tough steak, consider checking your cooking times or ensuring proper seasoning. Flavor balance can be fixed by adding acidity, such as lemon juice, or sweetness to counteract excessive saltiness. Temperature problems often arise from an improperly heated pan; make sure it’s at the right temperature before cooking.

Equipment challenges can be mitigated by keeping essential tools within reach and prepping ingredients before starting. Ingredient substitutions need careful consideration; for instance, using different cuts of meat may also require adjustments in cooking time. Timing concerns can be resolved by tasting throughout cooking; this ensures you remain aware of how the flavors develop.

Recipe Success Stories

Community feedback showcases that many home cooks have found this Steak with Creamy Garlic Sauce to be a massive hit at gatherings. They have shared the satisfaction of serving a dish that surpasses expectations. Variation successes, such as using different cuts of steak or introducing seasonal vegetables, have been well-received, with readers encouraging others to experiment in their own kitchens.

Adaptation stories often highlight the versatility of the sauce – home cooks have used it with chicken and pork, proving that this creamy garlic sauce can apply to various proteins. Many readers suggest capturing the moment with photographs, as the dish’s presentation can be stunning, leading to many wonderful memories made around the dinner table.

Frequently Asked Questions

What steak cut is best for this recipe?

Ribeye, sirloin, or filet mignon are excellent choices as they showcase tenderness and rich flavor, perfectly matching the creamy garlic sauce.

Can I use chicken instead of steak?

Absolutely! Chicken thighs or breasts can be substituted, and they pair beautifully with the garlic sauce as well.

Is there a way to make this sauce vegan?

Yes, simply replace the heavy cream with coconut cream or any plant-based cream to maintain a rich texture without dairy.

How do I store leftovers?

Store in an airtight container in the refrigerator for up to three days. For longer storage, freeze it in appropriate containers for up to three months.

What should I serve with this dish?

Consider pairing it with roasted vegetables or a fresh salad for a well-rounded meal that offers various flavors and textures.

Can I make the sauce ahead of time?

Yes! Prepare the sauce in advance and simply reheat it gently on the stove when you’re ready to serve.

What are some good side dishes?

Mashed potatoes, garlic bread, or sautéed greens work wonderfully alongside this rich and creamy steak dish.

Is it necessary to let the steak rest after cooking?

Yes, letting the steak rest allows the juices to redistribute, resulting in a more flavorful and juicy piece of meat.

What can I substitute for garlic?

If you’re looking for alternatives, shallots or chives can provide a milder onion flavor but expect a different taste profile.

How do I know when the steak is done cooking?

Use a meat thermometer for accuracy: aim for around 130°F for medium rare and 145°F for medium doneness.

Additional Resources

Explore these additional resources to enhance your cooking journey. For related recipes, check out our delectable garlic steak skewers and creamy mushroom pasta. Technique guides are available for mastering different cooking methods, specifically searing and sauce preparation, ensuring you can replicate this dish with confidence.

Learn more about ingredient information to understand the nutritional components of each meal you create. We also provide equipment recommendations to help you find the best tools for your cooking needs, ensuring a fantastic experience in the kitchen. Seasonal variations can uplift your cooking with fresh produce and flavors, so be sure to think creatively about your ingredients!

Join the Conversation

We invite you to share your cooking experiences! Join us on social media to post your photos and tips. Photography tips for your finished dish can help inspire others and pique their interest in trying this recipe. We also encourage reviews and community engagement, fostering a friendly space where everyone can share their modifications and successes. Your input can help others navigate their cooking journey with ease, making this a truly communal experience.

The Recipe

Steak with Creamy Garlic Sauce

Serves: 4

Prep Time: 10 mins

Cook Time: 15 mins

Total Time: 25 mins

Kitchen Equipment Needed

  • Cast iron skillet or heavy-bottomed pan
  • Meat thermometer
  • Whisk
  • Chopping board
  • Knife

Ingredients

  • 4 ribeye steaks, about 1-inch thick
  • Salt and pepper to taste
  • 2 tablespoons olive oil
  • 4 cloves garlic, minced
  • 1 cup heavy cream
  • 1 teaspoon dried thyme
  • 1 tablespoon fresh parsley, chopped (for garnish)

Directions

  1. Season both sides of the steaks generously with salt and pepper.
  2. Heat olive oil in a cast-iron skillet over medium-high heat until shimmering.
  3. Add the steaks and cook until browned, about 4-5 minutes per side for medium-rare.
  4. Remove the steaks from the skillet and let them rest on a plate, covered loosely with foil.
  5. In the same skillet, add minced garlic and cook for 1 minute until fragrant.
  6. Pour in the heavy cream and stir in the thyme, scraping up any browned bits from the pan.
  7. Let the sauce simmer for a few minutes until thickened slightly, then season with salt and pepper to taste.
  8. Serve the steaks topped with the creamy garlic sauce and garnish with fresh parsley.

Recipe Notes

  • Feel free to use different cuts of steak according to your preference and budget.
  • The garlic sauce can be prepared in advance; just reheat before serving.
  • For added flavor, consider adding freshly cracked black pepper or a touch of red pepper flakes to the sauce.

Best Grilled Brat Kabobs with Marinated Vegetables

Grilled Brat Kabobs with Marinated Vegetables: A Flavorful Summer Delight

⚖️
Difficulty
Medium

⏲️
Prep Time
20 mins

🕒
Cook Time
15 mins

⏱️
Total Time
35 mins

🍽️
Servings
4

Grilled Brat Kabobs with Marinated Vegetables is the perfect summertime dish that brings together the smoky flavors of grilled bratwurst and the freshness of colorful veggies. Imagine skewering juicy bratwurst pieces with vibrant bell peppers, zucchini, and onions, then marinating them to enhance their flavor. When grilled, they achieve a delicious char and succulent tenderness that will delight your taste buds. This dish is not only a visual feast with its rainbow of colors but also a star at barbecues, family gatherings, and picnics, easily appealing to both adults and kids alike.

The combination of marinated vegetables adds a crunchy texture that balances the savoriness of the bratwurst. Each bite offers a burst of flavor—from the rich juices of the sausage to the crisp sweetness of the pepper and zucchini—creating an unforgettable eating experience. Whether served as a main dish paired with your favorite sides or as part of a larger spread, these kabobs are sure to impress everyone at the table.

Quick Recipe Highlights

  • Flavor Profile: Bold and savory bratwurst paired with sweet and tangy marinated vegetables.
  • Texture: Juicy and tender sausage balanced with crunchy, grilled vegetables.
  • Aroma: A delightful mix of smoky and sweet aromas wafting from the grill.
  • Visual Appeal: Colorful kabobs bursting with greens, reds, and yellows against the backdrop of charred bratwurst.
  • Skill Level Needed: Suitable for home cooks with basic grilling skills.
  • Special Equipment: Skewers, grill, and bowl for marinating.

Recipe Overview

  • Difficulty Level: This recipe falls under the medium category due to the marination and grilling processes involved.
  • Category: Ideal for lunches, dinners, or casual gatherings.
  • Cuisine: Influenced by German grilling traditions and American barbecue culture.
  • Cost: Relatively affordable, with ingredients costing around $15-$20 for 4 servings.
  • Season: Best enjoyed during summer, but can be made year-round with indoor grilling.
  • Occasion: Perfect for outdoor barbecues, family cookouts, or festive celebrations.

Why You’ll Love This Recipe

Grilled Brat Kabobs offer a mouthwatering blend of taste and texture that is hard to resist. The savory bratwurst complements the fresh, crisp vegetables, bringing balance to each bite. Whether you’re hosting a backyard barbecue or enjoying a family dinner, these kabobs make for a delightful centerpiece that everyone will admire and appreciate.

Convenience is a major highlight of this recipe as it requires minimal prep and cook time. The marinating process can be done ahead of time, meaning you can easily prepare these kabobs for unexpected guests or lazy weekend afternoons. Just assemble and grill for a dish that looks impressive while being simple to make.

Health-conscious eaters will appreciate the nutritional benefits these kabobs provide. Bratwurst offers protein, while the vegetables contribute vitamins, minerals, and fiber. This recipe can easily be tailored to incorporate seasonal produce, ensuring you’re eating the freshest ingredients available.

Social gatherings shine brighter with the inclusion of dishes like these kabobs. They are not only easy to share but can also spark conversation among guests as they customize their skewers to their liking. Bring a plate of these grilled delights to your next potluck, and you’ll be the talk of the party.

Lastly, the affordability of this recipe makes it accessible for everyone. With a simple shopping list that won’t break the bank, you can serve a delicious meal that is sure to impress friends and family.

Historical Background and Cultural Significance

The origins of bratwurst date back to Germany, where sausage-making is considered an art form. Local regions boast their variations of bratwurst, each with unique spice blends and preparation methods. The tradition of grilling sausage on skewers, reminiscent of German street food, has been embraced and adapted in American barbecue culture, creating a beloved summertime staple.

Grilled bratwurst has cultural significance as it represents German heritage in the United States. Festivities such as Oktoberfest showcase these sausages, bringing communities together to celebrate, eat, and enjoy traditional dishes. The kabob variation adds a fun twist that caters to modern palates while maintaining the classic flavors.

As grilling gained popularity in American cooking, brat kabobs began evolving to accommodate regional tastes and preferences. Today, you can find variations that include a mix of spicy sausages or different marinades, further enriching the culinary landscape.

Regional variations of bratwurst kabobs exist, with different regions incorporating unique vegetables and spices based on local traditions. These adaptations keep the dish fresh while still paying homage to its original roots.

Ingredient Deep Dive

Bratwursts

Bratwursts are a staple in German cuisine, enjoyed grilled or pan-fried. Made primarily from pork, they are seasoned with unique blends of spices and herbs, contributing to their distinct flavor. Nutritionally, they offer a good source of protein, providing essential amino acids for muscle maintenance and repair. When selecting bratwursts, look for high-quality brands that use natural casings without fillers. Store them in the refrigerator and consume within a few days or freeze for longer preservation. For those seeking a lighter option, chicken or turkey bratwursts can be substituted without sacrificing flavor.

Vegetables

In this recipe, vegetables such as bell peppers, zucchini, and onions play a crucial role. Each brings its unique taste and texture to the kabobs—bell peppers add sweetness, while zucchini contributes a light, refreshing crunch. These vegetables are also packed with vitamins and minerals, promoting overall health. When selecting vegetables, choose vibrant and firm specimens. They can be stored in the refrigerator for several days. If you’re looking to switch things up, consider using seasonal vegetables like asparagus or cherry tomatoes for added variety.

Common Mistakes to Avoid

  • Choosing low-quality bratwurst can result in a disappointing flavor. Always opt for high-quality sausage.
  • Not letting the vegetables marinate long enough can lead to bland kabobs. Aim for at least 30 minutes of marination.
  • Overcrowding the skewers may prevent even cooking. Leave space between the ingredients.
  • Using wooden skewers without soaking them can lead to them burning on the grill. Soak for at least 30 minutes prior to use.
  • Flipping the kabobs too soon can tear the ingredients. Wait for a good char before flipping.
  • Grilling on too high heat can cause the bratwurst to burst. Start with medium heat to achieve even cooking.
  • Not integrating seasonal vegetables can lead to missed flavor opportunities. Always adjust based on what is fresh.
  • Ignoring resting time after cooking can lead to loss of juices. Allow kabobs to rest briefly before serving.

Essential Techniques

Marinating is essential to enhance the flavors of your grilled brat kabobs. It allows the vegetables to absorb the seasoned liquid, which results in a deeper taste profile. When marinating, ensure that all ingredients are thoroughly coated and left to sit for at least 30 minutes to allow effective flavor penetration.

Grilling is another vital technique to master for this recipe. Use a preheated grill for optimal results, as it helps create grill marks and seals in moisture. Flip the kabobs gently to ensure even cooking, taking care to check for a temperature of 160°F to ensure that the bratwurst is fully cooked.

Pro Tips for Perfect Grilled Brat Kabobs

1. Experiment with different marinades to find your perfect flavor blend. Adding ingredients like garlic, mustard, or herbs can elevate your kabobs’ taste.
2. When assembling the kabobs, alternate between sausage and vegetables for an aesthetically pleasing presentation.
3. Regularly baste the kabobs with leftover marinade during grilling for extra moisture and flavor infusion.
4. Ensure your grill grates are clean and oiled to prevent sticking; this also helps achieve perfect grill marks.
5. For a smoky twist, add wood chips to your grill for extra flavor during cooking.
6. If using metal skewers, wear gloves or use tongs for easier handling, as they can get hot quickly.
7. Allow the kabobs to rest for a few minutes after grilling to let the juices redistribute, making them juicier when served.
8. Serve with your favorite dipping sauces, such as mustard or barbecue sauce, to enhance the flavor experience.

Variations and Adaptations

Consider regional variations by incorporating local sausage types, such as spicy Italian or chorizo, for a different flavor profile. Seasonal adaptations involve swapping in fresh, seasonal vegetables that are currently available, such as eggplant in the summer or squash in the fall.

For dietary modifications, opt for vegan bratwurst or replace meat entirely with firm tofu or marinated mushrooms for a plant-based alternative. Flavor variations can be achieved by adding herbs and spices, such as rosemary or chili flakes, into your marinade, offering a new twist with every batch.

Texture modifications include using different cuts of vegetables or adding in fruits like pineapple for sweetness. Presentation alternatives might also involve serving the kabobs atop a bed of rice or quinoa, adding color and nutrition to the plate.

Serving and Presentation Guide

Plating can be enhanced by arranging the kabobs on a large wooden board, garnished with fresh herbs and citrus slices around the edges. This not only elevates the visual appeal but also invites guests to serve themselves. Adding colorful side dishes such as a fresh salad or grilled corn on the cob will complement the kabobs fantastically.

Garnishing ideas include sprinkling chopped parsley or cilantro on top of the kabobs right before serving. Traditional accompaniments, such as sauerkraut or pickles, add a nice tangy contrast to the flavors. For modern serving suggestions, think about using small individual dipping bowls for sauces, allowing guests to customize their flavor experience.

Tempering considerations are essential for a delightful experience; serve kabobs warm for the best taste, and if you have leftover kabobs, reheat them gently to maintain their juiciness. Portion control tips are also important, as approximately two kabobs per person is typically sufficient for a satisfying meal.

Wine and Beverage Pairing

When it comes to wine pairings, consider a crisp German Riesling or a light Sauvignon Blanc—both complement the flavors of bratwurst beautifully. If you prefer red, a light Pinot Noir can also work. Non-alcoholic alternatives such as lemonade or iced tea provide a refreshing contrast to the savory kabobs.

For coffee enthusiasts, an iced coffee or espresso can pair well if served during brunch or an afternoon gathering, grounding the meal in a rich beverage option. Ensure that wines are served chilled to enhance their refreshing qualities, and remember to allow red wines to breathe for optimal flavor release.

Storage and Shelf Life

To store grilled brat kabobs, place them in an airtight container and refrigerate for up to 3-4 days. The recommended temperature for storage is between 32°F and 40°F. When reheating, consider using an oven or a stovetop, as these methods will retain moisture better than a microwave.

Signs of spoilage include off smells, discoloration, or a slimy texture. If your kabobs have been frozen, they can last up to 3 months in the freezer, but be sure to wrap them tightly to prevent freezer burn. When ready to eat, thaw them in the refrigerator overnight before reheating gently.

Make Ahead Strategies

To successfully make these grilled brat kabobs ahead of time, prepare the marinade earlier in the day or even the night before. Store it in the refrigerator and soak your vegetables and bratwurst prior to grilling. This process infuses more flavor and simplifies the cooking process on the day of your barbecue or gathering.

For best quality, grill the kabobs shortly before serving to enjoy their juiciness. If you need to complete the assembly beforehand, do so without grilling, then refrigerate them until ready to grill. If you are using fresh ingredients, be mindful to add any delicate herbs or garnishes right before serving to maintain their freshness.

Scaling Instructions

If you’re looking to halve or double the recipe for a smaller or larger crowd, simply adjust the quantities of the ingredients accordingly. Make sure to use appropriately sized skewers; if doubling the recipe, consider using multiple grills or batches to ensure even cooking.

Equipment adjustments might involve larger grills or mixing bowls to handle the increased volume. Take note of timing modifications, especially when grilling in larger quantities, as the kabobs may take slightly longer to cook thoroughly when close together.

For leftovers, store them according to the guidelines provided to ensure they stay fresh and tasty. This adaptability allows your grilled brat kabobs to shine whether cooking for two or a festive gathering.

Nutritional Deep Dive

Grilled brat kabobs provide a hearty meal that delivers a balance of macronutrients, with sausage contributing protein and fat, while vegetables provide fiber and essential vitamins. On average, one kabob can offer around 300 calories, depending on the specific ingredients used.

Micronutrient analysis shows that the vegetables contribute vital nutrients such as vitamin C from bell peppers and potassium from zucchini, which are crucial for maintaining good health. For those mindful of dietary considerations, the protein from the sausages helps with muscle recovery and satiety due to their fat content.

Weight management enthusiasts can benefit from portion control strategies, focusing on balancing the kabob with other lighter side dishes. A mindful approach, accompanied by physical activity, can help integrate this delicious dish into a balanced diet plan.

Dietary Adaptations

For gluten-free diets, opt for gluten-free bratwurst and ensure that your marinade and sauces are also gluten-free. Dairy-free modifications can include the omission of any dairy-based ingredients you may want to serve alongside the kabobs, focusing instead on fresh herbs.

Vegans can substitute bratwurst with plant-based alternatives, ensuring that the vegetables remain the star of the dish. For low-carb diets, consider swapping traditional sausages with meat-based or vegetable-based options to adhere to nutritional goals while still enjoying grilled skewers.

Keto and paleo dieters can easily enjoy this dish by focusing on the proteins and low-carb vegetables, making it both satisfying and compliant with dietary restrictions. For those on low-FODMAP diets, selecting appropriate vegetables and avoiding garlic or onion as part of the marinade can create a suitable option.

Troubleshooting Guide

If you’re facing texture issues, ensure that your vegetables remain firm and are not overcooked. A good grilling technique will help maintain that crunch. If the flavors seem unbalanced, consider additional seasoning or marination adjustments for rebalance.

Temperature problems might arise if the grill is too hot, causing brats to char on the outside while remaining cold on the inside; ensure proper heat management when cooking. Equipment challenges, like a broken grill, can also create obstacles, so have backup grilling methods ready, such as stovetop grills or oven-roasting.

Ingredient substitutions can lead to differences in flavor, so be sure to experiment gradually rather than all at once. Lastly, for timing concerns, if cooking larger quantities of kabobs, give yourself extra time to ensure everything is properly cooked and served hot.

Recipe Success Stories

Feedback from the community reveals that many have enjoyed this recipe for its versatility. Adjusting spices and marinades based on personal preference has led to unique variations that highlight family traditions. Users often share their newfound twists on ingredients, showcasing their personal culinary experiences within this beloved dish.

A notable success story featured a reader who crafted a completely different flavor profile by adding Mediterranean spices and vegetables, resulting in an equally delightful dish. The successful adaptations demonstrate the recipe’s flexibility, encouraging readers to experiment and find their ideal kabob combination.

Community engagement through shared photography and reviews inspires others to try this dish and make it their own. The visual success of these kabobs often encourages others to showcase their custom renditions on social media platforms.

Finally, these interactions create a positive circle where shared experiences and successes enhance the community’s joy in cooking, building a network of excited food bloggers and home cooks alike.

Frequently Asked Questions

Can I prepare these kabobs ahead of time?

Yes, you can prepare the bratwurst and vegetables by marinating them earlier in the day. They can be skewered and refrigerated until ready to grill, which saves time on busy days.

What should I serve with grilled brat kabobs?

Complement these kabobs with sides like potato salad, coleslaw, or grilled corn. They can also be served with dipping sauces like mustard, ketchup, or barbecue sauce for added flavor.

Can I freeze leftover kabobs?

Yes, you can freeze leftover kabobs. Wrap them tightly in plastic wrap and store them in an airtight container, consuming them within three months for the best quality.

What types of bratwurst can I use?

You can use any variety of bratwurst, including pork, turkey, or chicken bratwurst. Additionally, consider using spicy or flavored varieties for an exciting twist.

Can I use a grill pan instead of an outdoor grill?

Absolutely! A grill pan works perfectly for cooking brat kabobs indoors. Just preheat the grill pan and follow the same cooking instructions as you would on an outdoor grill.

What kind of marinade can I use for the vegetables?

A simple marinade of olive oil, balsamic vinegar, and your choice of herbs works excellently. Feel free to experiment with flavors to find the best combination for your palate.

Are there vegetarian options for this recipe?

Yes, you can substitute bratwurst with plant-based sausage alternatives. Additionally, increase the variety of vegetables or even add fruits like peaches or pineapple for extra sweetness.

What’s the best way to reheat leftovers?

The best way to reheat grilled kabobs is by using an oven or skillet on low heat to retain their moisture. Microwaving is faster but may make the kabobs rubbery.

How do I know when the bratwurst is fully cooked?

Bratwurst is fully cooked when it reaches an internal temperature of 160°F. Using a meat thermometer is the best way to ensure they are cooked through.

Can I use different vegetables in this recipe?

Absolutely! Feel free to use any combination of vegetables such as asparagus, cherry tomatoes, or mushrooms. The key is to choose vegetables that grill well.

Additional Resources

Explore related recipes that celebrate grilling and vibrant flavors. Check out our guides on mastering the grill, cooking various meats, and exploring different marinades that can enhance your culinary repertoire. Equip yourself with ingredient information, including the benefits of fresh vegetables and quality meats, to elevate your cooking skills. Seasonal variations will also help you make the most of your fresh produce throughout the year.

Join the Conversation

We’d love to hear from you! Share your experiences with Grilled Brat Kabobs on social media, using our dedicated hashtag. Don’t forget to post your beautiful kabob creations to inspire others in our community. Whether you’ve stuck to the original recipe or added your unique twist, we welcome your feedback and variations. Together, we can create a vibrant community of cooking enthusiasts with a passion for delicious grilled recipes!

The Recipe

Grilled Brat Kabobs with Marinated Vegetables

Serves: 4

Prep Time: 20 mins

Cook Time: 15 mins

Total Time: 35 mins

Kitchen Equipment Needed

  • Grill
  • Skewers (wooden or metal)
  • Mixing bowl
  • Meat thermometer

Ingredients

  • 1 pound bratwurst, cut into 1-inch pieces
  • 1 medium zucchini, sliced
  • 2 bell peppers, cut into squares
  • 1 large onion, cut into wedges
  • 3 tablespoons olive oil
  • 2 tablespoons balsamic vinegar
  • 1 teaspoon garlic powder
  • Salt and pepper to taste
  • Fresh herbs for garnish (optional)

Directions

  1. In a bowl, whisk together olive oil, balsamic vinegar, garlic powder, salt, and pepper.
  2. Add bratwurst, zucchini, bell peppers, and onion to the bowl; toss to coat. Cover and marinate in the fridge for at least 30 minutes.
  3. Preheat grill to medium heat. Thread marinated bratwurst and vegetables onto skewers, alternating them for an attractive presentation.
  4. Grill kabobs for about 15 minutes, turning occasionally, until bratwurst is cooked through and vegetables are tender and lightly charred.
  5. Remove from the grill and let rest briefly. Garnish with fresh herbs if desired, and serve hot.

Recipe Notes

  • Feel free to experiment with different vegetables or spices in the marinade.
  • If using wooden skewers, soak them in water for at least 30 minutes to prevent burning.
  • Leftover kabobs can be wrapped and stored in the fridge for up to 4 days.

Indulge in Gourmet Cheesy Mushroom and Garlic Toasts Today!

Gourmet Cheesy Mushroom and Garlic Toasts: A Savory Delight

⚖️
Difficulty
Easy

⏲️
Prep Time
10 mins

🕒
Cook Time
15 mins

⏱️
Total Time
25 mins

🍽️
Servings
4

If you’re looking for the perfect appetizer or snack, Gourmet Cheesy Mushroom and Garlic Toasts will tantalize your taste buds and impress your guests. Combining fresh, sautéed mushrooms with aromatic garlic and creamy cheese, these toasts are a delightful addition to any gathering or a sophisticated touch to your everyday meals. Imagine the aroma of garlic wafting through your kitchen as the earthy mushrooms caramelize, and the cheese melts into an indulgent topping—this recipe captures the essence of comfort food with a gourmet twist.

With each bite, you experience a wonderful medley of flavors: the umami richness of mushrooms, the sharp punch of garlic, and the creaminess of melted cheese layered over crispy bread. Whether you’re hosting a wine night, a cozy dinner party, or simply treating yourself, these toasts are both satisfying and easy to prepare. They can also be customized to suit your preferences, making them a versatile option for any palate.

Quick Recipe Highlights

  • Flavor Profile: Rich and savory, featuring earthy mushrooms paired with bold garlic and a creamy cheese blend.
  • Texture: Crispy on the outside with a gooey, melty cheese layer and tender mushroom filling.
  • Aroma: The intoxicating scent of garlic combined with sautéed mushrooms fills your kitchen.
  • Visual Appeal: Golden-brown toasts topped with a creamy, bubbly layer of cheese and flecks of parsley.
  • Skill Level Needed: Requires basic cooking skills but offers room for creativity.
  • Special Equipment: A good skillet and a baking tray are essential for this recipe.

Recipe Overview

  • Difficulty Level: This recipe is considered easy, making it accessible for beginner cooks while still providing impressive results that make you feel like a pro.
  • Category: Perfect as an appetizer or a side dish, these gourmet toasts fit well into any meal category.
  • Cuisine: Influenced by Italian and French cooking traditions, showcasing the classic combination of bread, cheese, and seasonings.
  • Cost: This recipe is budget-friendly, requiring only a few key ingredients that are often available in any kitchen.
  • Season: Enjoy these toasts year-round, as they are suitable for any season and pair wonderfully with various salads or soups.
  • Occasion: Ideal for entertaining guests, casual family dinners, or as a quick snack for yourself.

Why You’ll Love This Recipe

The combination of taste and texture in Gourmet Cheesy Mushroom and Garlic Toasts is exceptional, with a crispy exterior that gives way to a soft, cheesy center topped with flavorful sautéed mushrooms. Each bite is an experience, allowing for an exploration of savory notes that appeal to both comfort seekers and gourmet enthusiasts alike. Furthermore, the convenience of preparation—taking just 25 minutes from start to finish—makes these toasts a go-to option when time is of the essence.

Beyond just deliciousness, this recipe carries nutritional advantages too. Mushrooms are low in calories and rich in antioxidants, offering health benefits that complement the creamy cheese. They provide essential nutrients while still allowing for indulgence. Whether shared among friends or savored during a quiet evening at home, these toasts provide social and entertaining value that can elevate any gathering with little effort required.

Cost-effectiveness is another attractive quality, allowing you to create something that feels extravagant without draining your wallet. The simplicity of the ingredients means that you can whip up this recipe more frequently—making it a valuable addition to your collection.

Taking all of these elements into account—taste, convenience, nutrition, social bonding, and cost-effectiveness—these Gourmet Cheesy Mushroom and Garlic Toasts become more than just a recipe; they’re an invitation to gather, share, and indulge.

Historical Background and Cultural Significance

Mushroom-based dishes have been cherished across cultures for centuries, traditionally featuring in both European and Asian cuisines. The use of mushrooms in gourmet dishes reflects a celebration of earthy flavors, often intertwined with social experiences around food.

Over time, as culinary trends evolved, the integration of garlic and cheese into mushroom dishes became more common, leading to the mouthwatering recipe we adore today. From humble beginnings as a peasant food to its current prominence in fine dining, its evolution mirrors the broader changes in culinary appreciation.

Regional variations can be seen, with some cultures adding herbs like thyme or rosemary into their mushroom toppings, elevating the flavor profile even further. As a dish that combines ease with elegance, it holds a treasured place within the culinary world.

Ingredient Deep Dive

Mushrooms: These earthy delights are not only low in calories but high in nutrients. They’ve been revered since ancient times for their medicinal properties. When selecting mushrooms, choose firm varieties that are free from moisture. Store them in a paper bag in the fridge to maintain freshness. If you’re looking for substitutions, consider using different varieties of mushrooms such as shiitake or portobello for unique flavors.

Garlic: Known for its bold flavor and health benefits, garlic has played a significant role in cooking across cultures. Its antibacterial properties and heart-healthy characteristics make it a popular choice in many recipes. To ensure maximum flavor, opt for fresh garlic cloves, storing them in a cool, dark place. For those looking to adjust flavor, garlic powder can be used in a pinch.

Cheese: Cheese adds creaminess and depth to the dish. Selecting high-quality cheese, such as mozzarella or Gruyere, will enhance the overall taste experience. Pay attention to storage, keeping cheese wrapped in parchment paper in the fridge. For those who are lactose intolerant, dairy-free cheese options are increasingly available.

Common Mistakes to Avoid

  • Overcrowding the Skillet: Sautéing mushrooms in a crowded pan prevents them from browning properly, resulting in a soggy texture. Always leave ample space between the mushrooms.
  • Using Stale Bread: Fresh bread is crucial for achieving crispy toasts. Stale bread may not toast well and can lead to a disappointing texture.
  • Burning the Garlic: Garlic can burn quickly, resulting in bitterness. Cook it low and slow, adding it to the pan after the mushrooms have started to brown.
  • Neglecting to Season: Underseasoning can lead to bland toasts. Ensure to season generously with salt and pepper to highlight the flavors.
  • Skipping Broiling Step: Not broiling the toasts can mean you miss out on that beautiful, bubbly cheese top. Broiling until golden brown is key.
  • Not Toasting Bread Enough: Make sure the bread is toasted adequately before adding the topping to ensure it holds up against moisture from the mushrooms.
  • Forgetting to Preheat the Oven: Failing to preheat can lead to uneven cooking and prolong your overall time.
  • Assuming All Cheese Melts the Same: Different cheeses melt differently; choose ones that are known for their melting qualities, such as mozzarella.
  • Not Incorporating Fresh Herbs: Fresh herbs can elevate the dish, providing brightness against the rich flavors. Always consider adding a sprinkle of fresh parsley or basil before serving.
  • Skipping the Taste Test: Always taste and adjust the seasoning before serving. This final touch can make all the difference in flavor.

Essential Techniques

Sautéing mushrooms properly is crucial to bring out their best flavor. The texture should become tender and slightly crispy. To master this technique, ensure you’re cooking on medium-high heat and only add enough mushrooms to the pan to allow them to brown. Watch for them to release their juices, allowing for even cooking.

Melting cheese effectively can transform your dish. To achieve that perfect gooeyness, ensure your cheese is shredded or sliced thinly. Broiling the toasts at the end of cooking will create the ideal bubbly top. Keep an eye on them to prevent burning.

Pro Tips for Perfect Gourmet Cheesy Mushroom and Garlic Toasts

Always use fresh ingredients for the best flavor outcome. Opt for a variety of mushrooms to intensify the flavor profile; shiitake, cremini, and button mushrooms can all work wonderfully together.

Experiment with different cheeses to find your favorite combination. A mix of mozzarella for melting and parmesan for flavor can be an excellent option.

Enhance the flavor further by adding a splash of white wine when sautéing the mushrooms for a sophisticated note. Pair it with fresh herbs, like thyme or chives, to brighten the dish.

Adjust the garlic based on your preference; roasted garlic can be sweeter and mellow compared to raw garlic.

Toast the bread twice for an extra crispy base; this helps absorb the moisture from the mushrooms without getting soggy.

Serve immediately after preparation for the best texture; letting them sit can lead to a loss of crispiness.

Incorporate seasonal toppings, such as a drizzle of truffle oil or a sprinkle of crushed red pepper, for an elevated finish.

Variations and Adaptations

Explore regional variations by adding popular Mediterranean ingredients like sun-dried tomatoes or olives. These can enhance the overall flavor and presentation.

Consider seasonal variations to make the best use of fresh produce. Spring onions, asparagus, or seasonal herbs can be delicious additions that change the flavor profile.

Dietary modifications are easily achievable; for a vegan version, use plant-based cheese and substitute butter with olive oil. This makes it accessible for a broader audience.

For a heartier meal, pair these toasts with poached eggs, creating a classic brunch dish that is both filling and delightful.

Texture modifications can include adding crushed nuts on top for some crunch or a sprinkle of panko breadcrumbs before broiling for added texture.

Innovate on presentation by serving these toasts on a rustic wooden board with dips or a side salad for a beautiful, Instagram-worthy display.

Serving and Presentation Guide

Plating techniques can elevate your dish; arrange the toasts on a large, white plate to showcase their golden-brown color. Consider a drizzle of balsamic reduction for added flavor and aesthetics.

Garnish with fresh herbs, such as parsley or chives, to add a pop of color and freshness that contrasts beautifully with the rich flavors of the toasts.

Traditional accompaniments, such as a simple mixed greens salad, can provide a refreshing balance to the richness of the toasts.

For modern serving suggestions, pair with a selection of cheeses and charcuterie for an elegant appetizer spread.

Serving temperature matters; these toasts are best enjoyed hot from the oven but can be served warm if prepared ahead of time.

Portion control tips suggest serving two to three toasts per person as a starter, allowing everyone to sample without overwhelming their appetites.

Wine and Beverage Pairing

For wine pairings, a crisp Sauvignon Blanc or a light-bodied Pinot Noir complements the earthy flavors of the mushrooms beautifully.

Non-alcoholic alternatives such as sparkling water with a wedge of lemon can be refreshing without overpowering the dish.

If you prefer coffee or tea, consider a smooth herbal tea that provides a gentle backdrop without overshadowing the flavors of the toasts, such as chamomile or mint.

Pay attention to temperature; the wine should be served chilled, while teas can be enjoyed hot or iced based on preferences.

Serve alongside some cured meats or olives for a well-rounded offering that enhances the gourmet experience.

Storage and Shelf Life

Storing your Gourmet Cheesy Mushroom and Garlic Toasts properly is key to maintaining flavor. These are best enjoyed fresh, but leftovers should be kept in an airtight container in the refrigerator for up to 3 days.

Ensure they are stored in a cool area of the fridge and reheat in the oven to retain crispiness instead of microwaving, which can make them soggy.

Signs of spoilage include an off smell or a change in texture, so always check prior to consuming leftovers.

When reheating, let them warm at 350°F for about 10 minutes to ensure the cheese melts again while the bread crisps up.

Freezing these toasts is not recommended due to the texture changes; however, you can prepare the mushroom topping ahead of time and freeze it for future use.

Make Ahead Strategies

To streamline your cooking, prep the mushroom topping ahead and store it in an airtight container in the fridge. This can save time on the day you wish to serve the toasts.

For ingredients that require chopping or measuring, do this the night before to maximize efficiency in your cooking.

Evaluate the quality impact of freezing the mushroom mixture, as it may alter the texture slightly but generally holds flavors well.

Assembling the toasts can be done just before baking to ensure maximum freshness and crispiness.

Reheating guidelines suggest using the oven, keeping the toasts in their assembly to avoid any unnecessary moisture absorption.

Consider adding fresh herbs or a drizzle of balsamic glaze right before serving for a boost of freshness and flavor that’s delightful.

Scaling Instructions

When halving the recipe, be mindful to adjust cooking times accordingly, as less time is needed for smaller portions.

To double or triple the recipe, use larger baking trays and consider adjusting oven rack positions for even cooking and browning.

Always keep equipment adjustments in mind; a larger skillet may be necessary to sauté more mushrooms simultaneously without overcrowding.

Timing modifications should also be considered as larger batches may require extended cook times; check for doneness regularly.

Storage considerations should include ensuring you have enough containers to store any leftover toasts or components.

Nutritional Deep Dive

Examining the macro breakdown of Gourmet Cheesy Mushroom and Garlic Toasts reveals a healthy balance of carbohydrates from the bread, protein from the cheese, and healthy fats.

In terms of micronutrient analysis, mushrooms provide vital nutrients such as selenium and riboflavin, while garlic is rich in vitamin C and B6, promoting immune health.

Health benefits include antioxidants from the mushrooms and the potential heart benefits of garlic, making this dish as nourishing as it is tasty.

Portion analysis suggests being mindful of serving sizes, particularly due to the richness of the cheese; managing portions can assist with maintaining a balanced diet.

Weight management tips can include serving the toasts with a side salad to enhance fullness and satisfaction without increasing calorie intake excessively.

Dietary Adaptations

For those following a gluten-free diet, opt for gluten-free bread to create delicious alternatives without sacrificing flavor.

Dairy-free substitutions can easily be used, with vegan cheese brands providing similar creaminess and melt.

Vegans can also adapt this recipe by replacing butter with olive oil, maintaining flavor without dairy.

Low-carb enthusiasts can substitute bread with options like zucchini slices or cloud bread, maintaining a satisfying base.

Keto diets can be accommodated using high-fat cheeses while avoiding bread altogether, creating a mushroom-rich dish.

For paleo followers, ditch the cheese and bread, opting for mushrooms stuffed with a mixture of vegetables and seeds for a unique twist.

Always consider other specific diets, such as Low-FODMAP, which can require careful ingredient selection, especially regarding garlic and the type of bread used.

Troubleshooting Guide

Texture issues can arise with soggy toasts; to prevent this, ensure mushrooms are well sautéed to remove moisture before assembly.

Balanced flavor can be difficult; if your garlic is overbearing, counterbalance it with a dash of lemon juice or more cheese.

Temperature problems can occur if not preheating your oven completely; always ensure the correct temperature for optimal cooking.

Equipment challenges may arise with frying pans not being non-stick; ensuring the pan is adequately greased can prevent sticking.

Ingredient substitutions can lead to unintended flavors; if altering, do so with caution and understand how ingredients interact.

Timing concerns can be mitigated by preparing components ahead of time, streamlining the cooking process for best results.

Recipe Success Stories

Community feedback on Gourmet Cheesy Mushroom and Garlic Toasts highlights their versatility and ability to impress guests. Many readers report these as being the star of their parties, with requests for the recipe pouring in.

Variations shared by readers encourage creativity; some adapt the recipe by adding spicy chorizo or sautéed spinach, proving the dish’s flexibility.

Adaptation stories show how this recipe can be transformed to accommodate seasonal ingredients, allowing for a unique twist every time.

Readers often suggest photography tips for capturing the perfect shot, emphasizing proper lighting and angle to showcase the textures and colors of the dish.

Share your own success story and join the culinary conversation by posting your creations on social media.

Frequently Asked Questions

Can I use different types of cheese?

Absolutely! Feel free to experiment with various cheeses such as cheddar, Gruyere, or even a blend for enhanced flavor and melty texture.

What can I use instead of bread?

For a low-carb option, consider using slices of zucchini, eggplant, or cloud bread as a base for a similar effect without the carbs.

How do I prevent the toast from getting soggy?

Ensure that you thoroughly sauté the mushrooms to release excess moisture and also toast the bread before adding toppings.

Can I freeze leftovers?

While freezing the completed toasts isn’t recommended due to texture changes, you can freeze the mushroom mixture to use later.

How long do these toasts last in the fridge?

Stored in an airtight container, these toasts will last for up to three days, although they are best enjoyed freshly made.

What herbs pair well with mushrooms and garlic?

Fresh herbs such as parsley, thyme, and chives work beautifully and will elevate the overall flavor profile of the dish.

Can I prepare the mushroom topping in advance?

Yes, preparing the mushroom topping ahead of time is a great way to save time on the day of serving. Store it in the fridge until you’re ready to use it.

What beverages pair nicely with these toasts?

A crisp white wine, such as Sauvignon Blanc, complements the flavors well. Non-alcoholic sparkling water is also a refreshing choice.

Are there suggestions for serving these toasts?

These toasts can be served as an appetizer with a side of salad or incorporated into a charcuterie board for a more festive touch.

How can I make this recipe vegetarian-friendly?

This recipe is already vegetarian, but if you’re looking for a vegan option, replace cheese with a plant-based alternative and use olive oil instead of butter.

Additional Resources

Explore related recipes such as bruschetta or stuffed mushrooms that provide similar sensations and flavors. For further technique guidance, consult articles on how to properly sauté mushrooms or achieve the best toasting results with bread.

Ingredient information about mushrooms, garlic, and cheeses can enhance your understanding of how to manipulate flavors in various dishes. For those looking to invest in kitchen tools, recommendations on high-quality sauté pans and baking trays can elevate your cooking process.

Seasonal variations can also be explored through the use of fresh ingredients, allowing your culinary creations to reflect the best produce available throughout the year.

Join the Conversation

Engaging in social media sharing of your culinary creations can foster a sense of community. Consider taking photos and tagging them with your culinary hashtags.

Sharing your experiences and tips from your cooking journey can inspire others and promote a sense of enthusiasm around home cooking.

Reviewing this recipe on your favorite cooking platforms can provide valuable insights to others seeking delicious, easy recipes to incorporate into their meal rotations.

Continue to modify and adapt the recipe based on your personal preferences, and invite others to share their variations, enhancing the recipe experience.

Contributing your successes, from taste adjustments to creative variations, forms a dialogue that can inspire growth and creativity in the kitchen.

The Recipe

Gourmet Cheesy Mushroom and Garlic Toasts

Serves: 4

Prep Time: 10 mins

Cook Time: 15 mins

Total Time: 25 mins

Kitchen Equipment Needed

  • Large skillet
  • Baking tray
  • Knife
  • Cutting board
  • Spatula

Ingredients

  • 8 slices of fresh baguette
  • 2 cups of sliced mushrooms
  • 3 tablespoons of olive oil
  • 4 cloves of garlic, minced
  • 1 cup of shredded mozzarella cheese
  • Salt and pepper to taste
  • Fresh parsley for garnish

Directions

  1. Preheat the oven to 400°F (200°C).
  2. In a skillet, heat olive oil over medium heat. Add sliced mushrooms, and sauté until golden brown and tender, about 5-7 minutes.
  3. Add minced garlic to the skillet and sauté for an additional 1-2 minutes until fragrant.
  4. Season the mixture with salt and pepper, then remove from heat.
  5. Arrange baguette slices on a baking tray and toast in the oven for 3-5 minutes until golden.
  6. Remove the toasted bread, and top each slice with the mushroom-garlic mixture followed by a generous sprinkle of shredded mozzarella cheese.
  7. Return the tray to the oven and broil for 2-3 minutes, or until cheese is bubbly and golden brown.
  8. Sprinkle fresh parsley on top before serving.

Recipe Notes

  • Feel free to customize with additional toppings like red pepper flakes or sautéed spinach.
  • For a more gourmet experience, consider using a mix of upscale cheeses.
  • This recipe can be made vegetarian-friendly by simply using cheese alternatives.