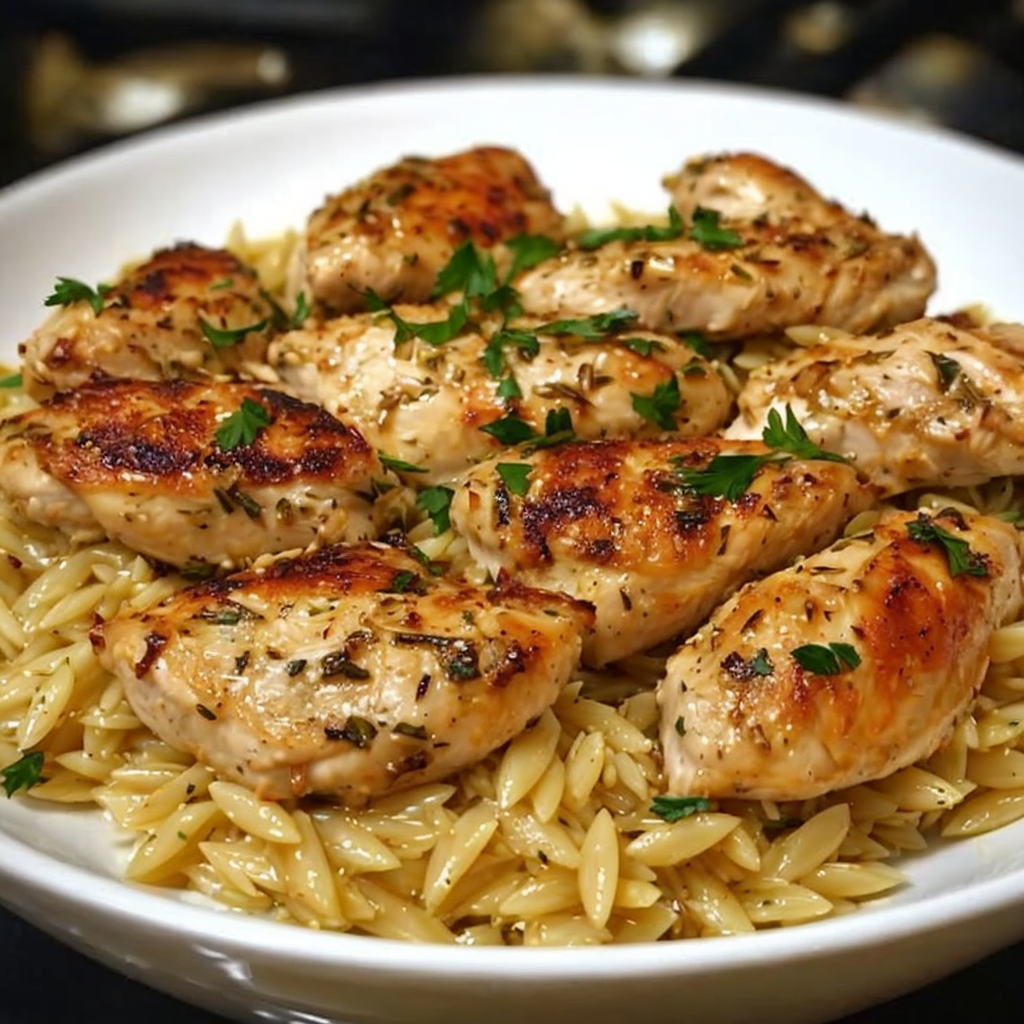
Herb-Infused Chicken & Orzo: A Fresh, Flavorful Meal
Chicken and orzo make a fantastic pairing in the beloved dish known as Herb-Infused Chicken & Orzo. The succulent chicken, marinated with a symphony of fresh herbs, comes together with the delicate, chewy orzo pasta. This dish not only stands out for its vibrancy but also brings an explosion of flavors that dance on your palate. Imagine the way fresh sage, thyme, and parsley mingle with tender chicken, then unite with a bed of buttery orzo that’s just the right amount of al dente. It’s a comforting meal perfect for family dinners or a casual gathering with friends.
The beauty of this meal is its incredible versatility. This Herb-Infused Chicken & Orzo serves as a blank canvas for culinary creativity. You can easily adapt it with seasonal vegetables or a squeeze of lemon for brightness. Whether you’re craving a warm fill for a cold evening or looking to impress guests, the rich aroma and picturesque presentation of the dish make it the perfect choice. Plus, the ease of preparation means you can effortlessly bring restaurant-quality flavors to your kitchen table.
Quick Recipe Highlights
- Flavor Profile: The blend of fresh herbs and tender chicken creates a savory sensation with a hint of brightness from lemon.
- Texture: Juicy chicken complements the slight chewiness of the orzo, making each bite satisfying.
- Aroma: Inviting aromas of herbs and garlic waft through your kitchen as the chicken cooks.
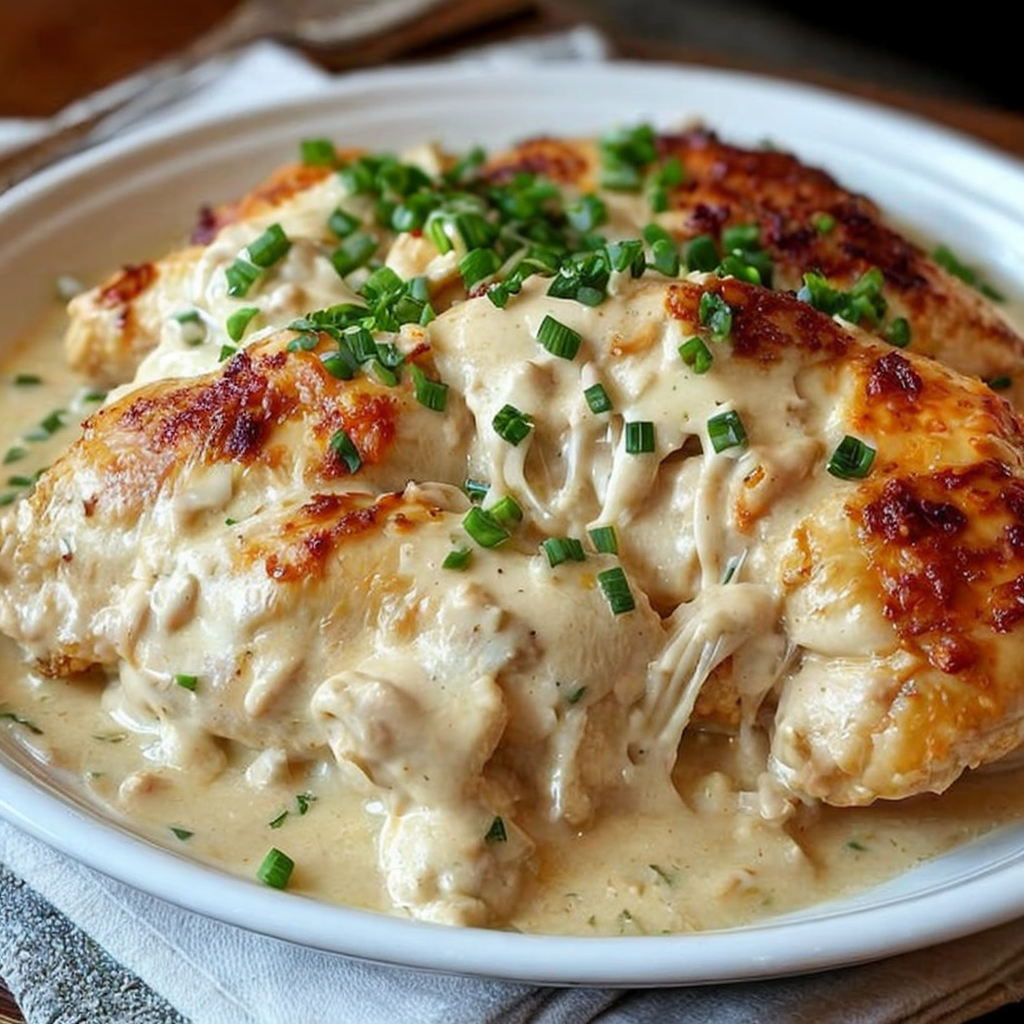
- Visual Appeal: The golden-brown chicken and creamy orzo with scattered herbs create a visually stunning dish.
- Skill Level Needed: This recipe requires some basic cooking techniques, making it suitable for those with intermediate culinary skills.
- Special Equipment: A large skillet and a pot for boiling orzo are essential for this recipe.
Recipe Overview
- Difficulty Level: This Herb-Infused Chicken & Orzo is classified as intermediate, requiring a bit of practice with cooking chicken and pasta.
- Category: This dish falls under the main course category, making it a hearty option for lunch or dinner.
- Cuisine: Inspired by Mediterranean flavors, this recipe incorporates fresh herbs and simple cooking methods typical of Italian and Greek cuisines.
- Cost: With a moderate budget, you can prepare this delightful meal, thanks to accessible ingredients like chicken and orzo.
- Season: Enjoy this recipe year-round, but it’s particularly refreshing in spring and summer when herbs are at their peak.
- Occasion: Perfect for casual family dinners, gatherings, or as a comfort food meal after a busy day.
Why You’ll Love This Recipe
This Herb-Infused Chicken & Orzo dish is a symphony of flavors that excites the taste buds with each mouthful. The juiciness of the seasoned chicken harmonizes with the soft orzo, creating a satisfying texture combination. The dish is packed with nutritious ingredients that not only fill you up but also provide essential vitamins and minerals, making it a wise choice for health-conscious eaters.
One of the standout benefits of this recipe is its convenience. The preparation is straightforward, allowing you to immerse yourself in the cooking process without feeling overwhelmed. It’s a one-pan dish that offers simplicity without sacrificing flavor, making it perfect for busy weeknights.
Nutritionally, this meal provides a good balance of protein, carbohydrates, and healthy fats, ensuring you feel satisfied and energized. The use of fresh herbs not only elevates the flavor but also adds heart-healthy antioxidants, making it a heart-friendly option.
Socially, sharing a warm, hearty meal fosters connection and invites conversation. This Herb-Infused Chicken & Orzo is a great centerpiece for gatherings due to its vibrant look and irresistible aroma, encouraging everyone to gather around the table for a delightful experience.
When it comes to cost-effectiveness, this recipe utilizes kit staples for a wholesome meal that won’t break the bank. With moderate pricing and readily available ingredients, it’s an accessible option for everyone, making it both budget-friendly and delicious.
Historical Background and Cultural Significance
The origins of the Herb-Infused Chicken & Orzo can be traced back to Mediterranean regions, where chicken dishes are celebrated for their aromatic herbs and simple yet impactful flavor profiles. Historically, these regions cultivated chicken as a staple protein, often combining it with the grains available, such as orzo pasta, popular in many traditional dishes.
In Mediterranean cultures, meals are a communal experience, and dishes like Herb-Infused Chicken & Orzo play a significant role in bringing families together. The act of sharing food reinforces familial bonds and hospitality. This particular dish embodies that tradition with its hearty nature and shareable qualities.
Over the years, the recipe has evolved through family traditions and cultural influences, leading to countless variations across regions. While some add saffron or different vegetables, the essence of combining chicken with orzo remains a hallmark of Mediterranean cuisine.
Regional variations often highlight local produce, with some opting for a richer tomato sauce or even integrating seafood. This dish exemplifies how one recipe can adapt while still maintaining a familiar core that resonates universally.
Ingredient Deep Dive
Chicken: A staple in various cuisines, chicken is rich in protein and versatile in preparation. When selecting chicken for this recipe, opt for thighs or breasts with skin for added flavor and moisture. Fresh, properly thawed chicken ensures safety and tenderness. Store uncooked chicken in the coldest part of your fridge and consume it within 1-2 days or freeze for longer storage. As alternatives, you may use turkey or plant-based proteins for a variation.
Orzo: This tiny pasta resembles rice and is a culinary favorite for its versatility. Originating from Italy, orzo works well in salads, soups, or as a side. When selecting orzo, look for whole grain varieties for added nutrition. Store dry orzo in an airtight container away from moisture. You can substitute orzo with other small pasta shapes like couscous or quinoa for a gluten-free option.
Common Mistakes to Avoid
- Overcooking the chicken can lead to dryness. Always check for doneness using a meat thermometer.
- Not seasoning early enough can result in bland flavors. Ensure to marinate your chicken well and season the orzo during cooking.
- Skipping the resting time for chicken after cooking can cause juices to escape when slicing.
- Overcrowding the pan can lead to uneven cooking. Make sure chicken pieces are spaced apart for proper browning.
- Cooking orzo too long can leave it mushy. Follow package directions for timing.
- Using old or dried herbs can diminish flavor. Opt for fresh whenever possible or make sure dried herbs are stored properly.
- Neglecting to preheat the skillet can result in uneven cooking and browning.
- Not incorporating enough liquid while cooking the orzo can lead to a dry dish. Monitor closely to prevent sticking.
Essential Techniques
Marinating Chicken: Marinating enhances flavor and tenderness. For successful marinating: Prepare your marinade well in advance, using acid (like lemon juice) to help tenderize meat. Let the chicken soak for at least 30 minutes or up to overnight for maximum flavor infusion. Watch for signs of over-marinating, like a mushy texture.
Cooking Orzo: Cooking orzo to perfection means using a generous amount of boiling salted water and stirring occasionally. Generally, cook it for 8-10 minutes until al dente. To avoid clumping, do not rinse after draining; this helps the pasta absorb sauces better.
Pro Tips for Perfect Herb-Infused Chicken & Orzo
1. For deeper flavor, use a combination of fresh and dried herbs in your marinade.
2. Always let the chicken rest after cooking to maintain its juiciness.
3. Incorporate vegetables like bell peppers or spinach into the orzo for added nutrition.
4. Adjust the liquid in the orzo based on your texture preference; add broth for richness.
5. Consider topping with freshly grated Parmesan for extra creaminess.
6. For a crunch, toast the orzo lightly in the skillet before adding liquid.
7. Use a good-quality olive oil for marinating and cooking to elevate the flavor.
8. Experiment with spices like paprika or cumin for an unexpected twist.
Variations and Adaptations
Exploring regional variations of this Herb-Infused Chicken & Orzo can introduce fascinating twists. For Mediterranean flair, consider adding olives and sun-dried tomatoes to the dish. Adjust seasonings to reflect the various culinary traditions, perhaps using za’atar for a Middle Eastern influence.
During different seasons, you can adapt the recipe by including seasonal vegetables; asparagus in spring or pumpkin in the fall creates delightful contrasts. For dietary modifications, consider gluten-free orzo alternatives like quinoa for a nutritious touch without compromising flavor.
Flavor variations can be introduced through spices and marinades; a chipotle marinade can give a spicy kick for those who enjoy heat. As for texture modifications, incorporating nuts like pine nuts after cooking for a nice crunch can elevate the experience.
Presentation can vary greatly, too. A family-style serving in a large bowl may have a rustic charm, while individually plated portions can showcase elegant garnishing with fresh herbs.
Serving and Presentation Guide
Serving this Herb-Infused Chicken & Orzo beautifully is as essential as its preparation. For plating, use shallow bowls to highlight the colorful ingredients, ensuring the chicken is positioned prominently. Garnishing with fresh parsley or lemon zest adds brightness and enhances visual appeal.
Accompany with crusty bread for a delightful textural contrast and to soak up any delicious juices left behind. Consider serving alongside a simple green salad for a refreshing balance against the heartiness of the dish.
Temperature is key; this meal is best served warm, so be mindful of preheating serving bowls. Portion control is also important; aim for equal servings to maintain balance and ensure everyone enjoys each bite.
Wine and Beverage Pairing
The right beverage can elevate your Herb-Infused Chicken & Orzo to new heights. A light white wine, such as a Sauvignon Blanc or Pinot Grigio, complements the freshness of the herbs and chicken while enhancing the overall taste. If you prefer red, a light and fruity Pinot Noir can also work harmoniously.
For those seeking non-alcoholic alternatives, consider herbal iced tea with lemon or a refreshing sparkling water with mint for a delightful palate cleanser. If serving during later hours, a rich herbal tea can serve as a warming complement to the dish.
Temperature is key: serve wines chilled for whites and slightly cooler for reds. Highlighting the flavors of the dish while respecting their profile will create the perfect pairing.
Storage and Shelf Life
Proper storage of your Herb-Infused Chicken & Orzo will maintain its flavors and freshness. Allow the dish to cool to room temperature before transferring it into an airtight container. It can be refrigerated for up to 3 days, ensuring the chicken remains succulent.
For long-term storage, consider freezing the dish without any added components that can get mushy, such as fresh herbs. Consumed within 2 to 3 months, the flavors will still be bright upon reheating.
Signs of spoilage include off smells, discoloration, or an unusual texture. When reheating, ensure the dish reaches the internal temperature of 165°F to ensure safety.
Make Ahead Strategies
This Herb-Infused Chicken & Orzo can easily be made ahead of time for your convenience. Marinate the chicken a day prior to cooking, allowing the flavors to develop further. Cook the orzo but keep it slightly underdone to maintain optimal texture during the reheating process.
Once cooled, combine the orzo and chicken just before serving to prevent the pasta from absorbing too much moisture. If you’re meal prepping, consider storing individual portions in containers for easy grab-and-go lunches or dinners.
When reheating, add a splash of broth or water to recover some of the moisture lost during storage. Fresh herbs can be added just before serving for a burst of flavor and presentation.
Scaling Instructions
Scaling this Herb-Infused Chicken & Orzo recipe is straightforward. Halving the recipe is feasible; simply adjust quantities accordingly while maintaining the marinade’s proportion for the chicken. Doubling or tripling the recipe works well too; ensure you have sufficient cooking space to accommodate additional chicken and orzo.
Timing may require slight adjustments; larger quantities may need more time for the chicken to cook uniformly. Always use a thermometer for doneness to ensure safety.
Store leftover portions in the same airtight manner for extended freshness, and keep an eye on storage times per adjusted amounts. This flexibility makes the recipe perfect for gatherings or intimate dinners.
Nutritional Deep Dive
In examining the nutritional content of this Herb-Infused Chicken & Orzo, you’ll find a balanced macronutrient profile. The chicken provides ample protein for muscle repair and satiety, while the orzo contributes carbohydrates to fuel energy levels.
Micronutrient analysis reveals essential vitamins and minerals, particularly from the fresh herbs and any added vegetables. Ingredients like parsley hold vitamins A, C, and K, contributing to overall health.
For those focusing on health benefits, this meal is relatively low in saturated fat while providing heart-healthy fats if using olive oil for cooking. Managing portion sizes offers great potential for weight management without sacrificing flavor.
This dish showcases how enjoyable healthy eating can be, allowing for indulgent flavors wrapped in nutritious ingredients.
Dietary Adaptations
To make this Herb-Infused Chicken & Orzo suitable for various dietary preferences, several adaptations can be made. For gluten-free diners, substitute orzo with rice or gluten-free pasta versions available at stores.
Dairy-free modifications can include using coconut milk for creaminess without the dairy. For those following vegan diets, replacing chicken with chickpeas or jackfruit creates a satisfying alternative while maintaining protein levels.
For a low-carb version, consider eliminating orzo and using cauliflower rice instead. This could fit wonderfully with the herb flavors, making it a low-calorie option.
Whether you are following Keto or Paleo diets, adjusting the fats and using compliant ingredients allows for flexibility while keeping the core flavors intact, proving this dish’s versatility.
Troubleshooting Guide
If your Herb-Infused Chicken comes out tougher than expected, it may indicate overcooking. Use a meat thermometer to check the internal temperature and remove it from heat once it reaches 165°F.
Flavor balance is crucial; if too salty, adding a squeeze of lemon or some additional vegetables can help cut through intense flavors. Should your orzo become mushy, take care next time to keep an eye on cooking times and test for doneness early.
Equipment challenges may arise if your stove or pan doesn’t maintain heat; adjust your cooking environment to ensure even browning. Also, if you find yourself lacking a crucial ingredient, view substitutions closely related in flavor or texture to maintain the integrity of the dish.
Timing concerns are another area to watch; use timers to help keep track of each component to avoid over or undercooking any elements within the dish.
Recipe Success Stories
Community feedback on the Herb-Infused Chicken & Orzo has been overwhelmingly positive. Many home cooks have shared how easily they adapted the recipe to fit their flavor preferences and dietary needs, showcasing its versatility and appeal.
Success persists in the form of adaptation stories, where readers frequently highlight how adding seasonal ingredients or local herbs elevated their dining experience. Photography of prepared dishes in various presentations flood social media, inspiring excitement around this culinary favorite.
Readers often comment on how engaging the dish is for family gatherings, as people naturally gravitate towards a shared bowl of comfort food, turning meals into meaningful experiences.
The opportunity to create new variations continually sparks creativity. Readers have shared personal touches and local ingredient adaptions, generating a delightful discussion of flavor experiences and cooking stories.
Frequently Asked Questions
2. How do I store leftovers? Store the Herb-Infused Chicken & Orzo in an airtight container in the refrigerator for up to three days. For longer preservation, consider freezing it without any added fresh herbs.
3. Can I make this dish ahead of time? Yes, you can marinate the chicken ahead of time and boil the orzo just before serving.
4. Is the recipe suitable for meal prepping? Yes! This dish stores well, making it perfect for meal prep. Portion it into individual containers for easy grab-and-go lunches.
5. How can I make this dish gluten-free? Substitute orzo with gluten-free pasta options or quinoa to maintain flavor without the gluten content.
6. Can I use frozen chicken for this recipe? Yes, you can use frozen chicken, but it must be thawed properly before marinating and cooking.
7. What can I substitute for herbs if I don’t have fresh ones? Dried herbs can be used instead, but be sure to reduce the quantity since they are more concentrated in flavor than fresh herbs.
8. How do I make this dish spicier? Consider adding red pepper flakes or diced jalapeños to the marinade or the orzo while cooking for a spicy twist.
9. Is it possible to add vegetables to this dish? Absolutely! Incorporating seasonal vegetables like zucchini, bell peppers, or spinach can enhance the dish’s nutritional content and taste.
10. How do I adjust the cooking time for larger portions? When cooking larger batches, extend the cooking time slightly, and always check the internal temperature of the chicken to ensure it’s thoroughly cooked.
Additional Resources
For those interested in exploring further, there are myriad related recipes that complement classic Mediterranean meals. Check out our collection of one-pan meals or delve into seasonal vegetable recipes that pair wonderfully with this Herb-Infused Chicken & Orzo.
Technique guides on marinating meats and cooking pasta will enhance your culinary skills, making each dish you prepare that much better. Find detailed ingredient information for fresh herbs and inquire about their health benefits to elevate your meals.
Equipment recommendations will help you choose the right tools for effortless cooking, while seasonal variations can introduce the freshest ingredients available to keep your dishes dynamic and exciting.
Join the Conversation
We’d love to hear how you’ve made this Herb-Infused Chicken & Orzo your own! Share your photography tips or variations in the comments below. Engage with us on social media, where we encourage you to post your recipe adaptations and experiences in creating this delicious meal.
Your feedback, suggestions, and sharing of success stories only enhance our community, fostering a space where cooking enthusiasts can connect and inspire each other. Let’s keep the conversation going as we cook and enjoy meals together!
The Recipe
Herb-Infused Chicken & Orzo
Serves: 4
Prep Time: 15 mins
Cook Time: 30 mins
Total Time: 45 mins
Kitchen Equipment Needed
- Large skillet
- Pot for boiling orzo
- Meat thermometer
- Cutting board
- Knife
Ingredients
- 4 bone-in, skin-on chicken thighs
- 1 cup orzo pasta
- 2 tablespoons olive oil
- 2 tablespoons lemon juice
- 3 cloves garlic, minced
- 1 tablespoon fresh parsley, chopped
- 1 tablespoon fresh thyme, chopped
- 1 tablespoon fresh sage, chopped
- Salt and pepper to taste
- 4 cups chicken broth
Directions
- In a bowl, combine olive oil, lemon juice, garlic, parsley, thyme, sage, salt, and pepper. Add chicken and marinate for at least 30 minutes.
- In a large skillet, heat olive oil over medium heat. Add marinated chicken skin-side down and cook until golden brown, about 5-7 minutes per side. Remove and set aside.
- In the same skillet, pour in chicken broth and bring to a boil. Stir in orzo and cook for 10 minutes.
- Return chicken to the skillet, reduce heat to low, cover, and let simmer until chicken is fully cooked, about 15 minutes.
- Serve the chicken over the orzo, garnished with extra herbs if desired.
Recipe Notes
- Feel free to add seasonal vegetables for added nutrition.
- The dish can be made ahead and reheated; just add a splash of broth when reheating.