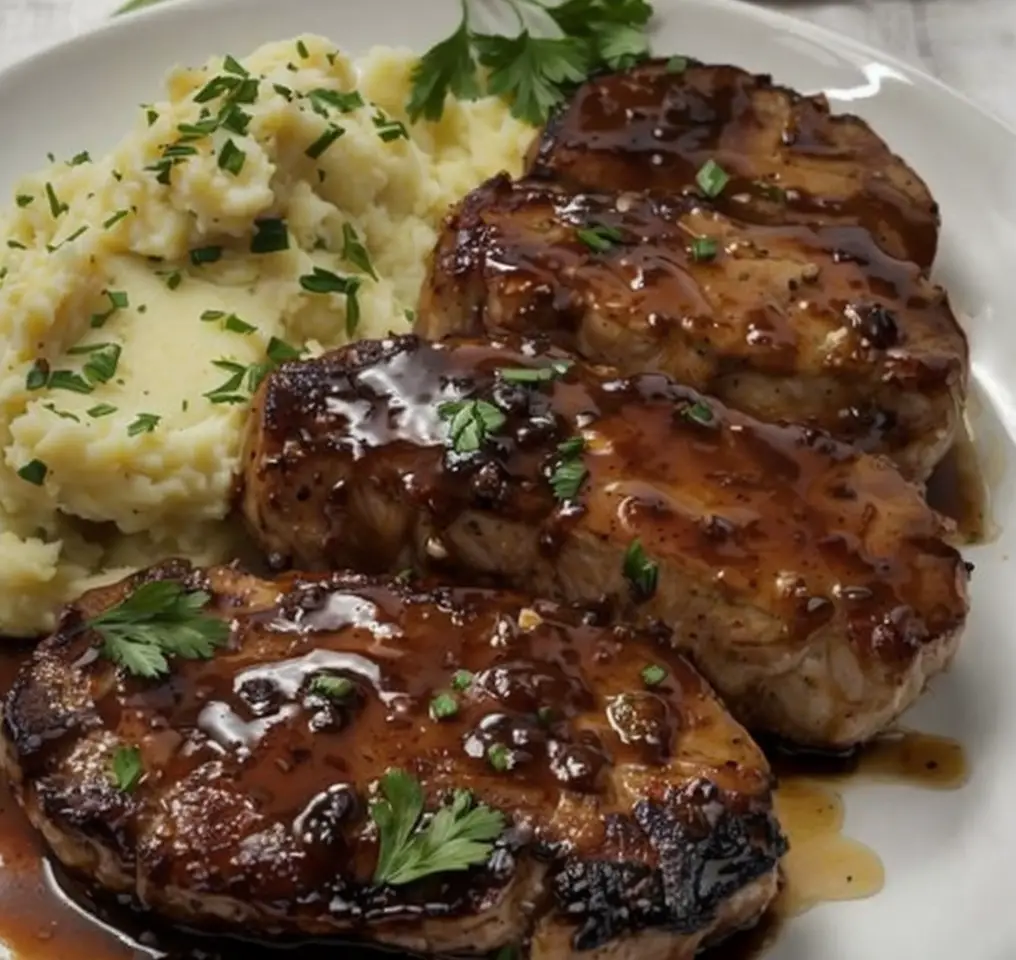
Quick and Delicious Garlic Shrimp Pasta Recipe for Dinner Tonight

Garlic Shrimp Pasta: A Delightful Seafood Dinner

⚖️
Difficulty
Easy

⏲️
Prep Time
15 mins

🕒
Cook Time
15 mins

⏱️
Total Time
30 mins

🍽️
Servings
4

Savor the rich and irresistible flavors of Garlic Shrimp Pasta, a seafood dish that brings the charm of the ocean right to your dining table. This dish is a delightful blend of juicy shrimp encapsulated in a flavorful garlic butter sauce that embraces al dente pasta strands. Whether you’re whipping up dinner for a special occasion or a weekday meal, this recipe provides a quick and flavor-packed solution that’s sure to impress.

This Garlic Shrimp Pasta recipe captures the very essence of Mediterranean cuisine while being incredibly easy to prepare, ensuring you spend less time cooking and more time enjoying this delightful dish. The succulent shrimps are perfectly seasoned and cooked to tender perfection, harmoniously blending with the aromatic garlic and savory butter sauce.

Quick Recipe Highlights

  • Flavor Profile: This dish is a symphony of savory garlic and butter notes, perfectly complemented by the delicate sweetness of fresh shrimp.
  • Texture: Expect a delightful contrast between the tender pasta and the succulent bite of juicy shrimp, making each bite a textural delight.
  • Aroma: The robust aroma of garlic infuses the kitchen, creating an inviting atmosphere that heralds a flavorful meal.
  • Visual Appeal: A vibrant mix of plump shrimp and pasta garnished with fresh parsley adds a burst of color and aesthetic appeal.
  • Skill Level Needed: Ideal for kitchen novices and seasoned chefs alike, this recipe relies on straightforward techniques and quick cooking times.
  • Special Equipment: A large skillet and a pasta pot are essential to bring this dish together seamlessly.

Recipe Overview

  • Difficulty Level: Rated as easy, this recipe is perfect for cooks of all levels, using simple ingredients and straightforward steps that require no formal culinary training.
  • Category: Perfect for dinner or a luxurious lunch, this pasta dish is versatile enough to fit any dining occasion.
  • Cuisine: Inspired by Italian and Mediterranean traditions, this dish brings a taste of coastal Europe to your home.
  • Cost: Generally affordable, this recipe leverages pantry staples along with seafood for a restaurant-quality meal without breaking the bank.
  • Season: Though delightful year-round, this recipe shines in the warmer months, celebrating fresh shrimp and aromatic herbs.
  • Occasion: Perfect for intimate dinners, family gatherings, or when you want to impress guests without extensive effort.

Why You’ll Love This Recipe

Garlic Shrimp Pasta stands out for its remarkable flavor profile, mingling sharp garlic with sweet shrimp and creamy butter in a harmonious balance. It boasts a simple preparation process that fits busy lifestyles, allowing you to create an impressive meal with minimal effort. Nutritionally, shrimp offers lean protein and essential nutrients, making this dish both delicious and health-conscious. It’s perfect for entertaining, bringing a sophisticated touch to dinner parties or casual gatherings, ensuring every guest is satisfied. With its cost-effectiveness, you can enjoy gourmet dining at home without a hefty price tag, utilizing readily available ingredients.

Historical Background and Cultural Significance

Originating from the rich culinary past of coastal regions, Garlic Shrimp Pasta draws inspiration from both Italian and Mediterranean cultures, where seafood and pasta combine in various traditional recipes. Over time, this dish has evolved, embracing influences from diverse gastronomic traditions, each adding unique flavors and techniques. Its cultural importance lies in its ability to adapt and resonate across different culinary landscapes, symbolizing the fusion of the sea’s bounty with earthy garlic notes cherished worldwide. Regional variations highlight local ingredients and cooking styles, offering endless possibilities and interpretations.

Ingredient Deep Dive

Shrimp takes center stage in this recipe, revered globally for its delicate flavor and versatile nature. Historically tied to both luxury and sustenance, shrimp has navigated culinary traditions since antiquity. Nutritionally, they deliver valuable protein, omega-3 fatty acids, and essential minerals while remaining low in calories and fat. Opt for sustainably sourced shrimp for both ecological and health benefits. Store shrimp properly in the coldest part of your fridge and consume them within two days of purchase, though freezing extends their shelf life. When substitution is necessary, scallops or firm white fish can provide alternatives, keeping the dish vibrant and satisfying.

Common Mistakes to Avoid

  • Overcooking Shrimp: Shrimp cook quickly; remove them from heat as soon as they turn opaque to keep them juicy and tender.
  • Improperly Salted Pasta Water: Ensure the pasta water is well-salted for an adequately seasoned final dish.
  • Using Low-quality Pasta: Choose high-quality pasta to maintain texture and flavor integrity after cooking.
  • Lack of Garlic Flavor: Don’t skimp on garlic; it defines the sauce’s bold taste.
  • Cold Ingredients: Bring all ingredients to room temperature before starting to ensure even cooking.
  • Skipping Pasta Water: Reserve a bit of pasta water to adjust sauce consistency if needed.
  • Ignoring Shrimp Size: Adjust cooking time according to the size of the shrimp; smaller shrimp require less time.
  • Inadequate Sauce Coating: Toss pasta thoroughly in the sauce to maximize flavor absorption.
  • Wrong Skillet Size: Use a skillet large enough to hold all ingredients without overcrowding, ensuring even cooking.
  • Omitting the Sear: Searing shrimp quickly in hot oil enhances flavor through caramelization.

Essential Techniques

Mastering the perfect pasta cook is crucial; aim for al dente texture by checking a minute or two before the package instructions. Understanding the sauté process ensures the garlic doesn’t burn, releasing its aroma and flavor without bitterness. Searing involves cooking shrimp in a hot pan until just opaque, capturing natural sweetness while maintaining tenderness. Combine pasta and sauce off the heat to let flavors meld without fear of overheating. Visual cues like vibrant shrimp color and lightly golden garlic indicate successful execution of techniques pivotal to the dish.

Pro Tips for Perfect Garlic Shrimp Pasta

  • Choose large shrimp for maximum flavor impact and an impressive presentation, cooking until just opaque for tenderness.
  • Infuse oil with garlic slowly over medium heat to create a deep, aromatic base for the sauce.
  • Use fresh parsley as a garnish to add a pop of color and brightness that complements the savory dish.
  • Experiment with lemon zest for an added citrusy note that enhances other flavors and adds freshness.
  • Boost your beurre blanc: A small amount of white wine can elevate the sauce, adding complexity and depth.
  • Get creative with pasta shapes; while linguine or fettuccine offer tradition, a penne or fusilli can provide a fun twist.
  • Incorporate red pepper flakes for heat, adjusting quantity based on spice preference for added complexity.
  • Mix in a touch of cream for additional richness, balancing the garlic’s boldness with buttery smoothness.

Variations and Adaptations

Explore regional flavors by adding Italian influences with sun-dried tomatoes or a Mediterranean twist with capers and olives. Adapt the dish for different seasons by incorporating seasonal squash or artichoke hearts in spring and summer. For dietary needs, gluten-free pasta or zucchini noodles make excellent swaps without sacrificing taste. Flavor-wise, include unique spices such as smoked paprika or cumin for a surprising departure. Texture adaptations might involve incorporating crushed nuts or breadcrumbs on top for a delightful contrast. Presentation can embrace family-style serving in large dishes or individual twirls for refined dining experiences.

Serving and Presentation Guide

For a refined presentation, consider twirling pasta neatly onto plates and topping with a few shrimp, plus a sprinkle of fresh herbs. A visual touch of lemon wedges adds color and zesty potential. Serve traditionally with a simple green salad or a modern twist using roasted vegetables. Adjust serving temperature to warm, allowing ample time for full flavor expression without compromising shrimp tenderness. Efficient portion control ensures each diner enjoys a balanced allotment of shrimp and pasta, catering to both light eaters and hearty appetites.

Wine and Beverage Pairing

Pair Garlic Shrimp Pasta with a crisp white wine such as Sauvignon Blanc or Pinot Grigio, whose acidity complements the richness of garlic and shrimp. Consider non-alcoholic options like sparkling water with a hint of lemon for refreshment that echoes citrus notes. When serving coffee or tea, choose lighter blends such as a delicate white or green tea, which won’t overpower the dish. Beverage temperature should align with room temperature pasta, creating a cohesive dining experience. Equip diners with suitable glassware to highlight each drink’s aroma and flavor, enhancing the meal’s elegance.

Storage and Shelf Life

Store leftover Garlic Shrimp Pasta in an airtight container in the refrigerator, consuming it within two days to maintain optimal taste and texture. Keep it cold until reheating, recommended gently on the stove over low heat with added pasta water or stock for moisture. Assess spoilage through smell and appearance, discarding if there are off-putting changes. For freezing, separate components and thaw in the refrigerator before reuniting over gentle heat, preserving flavor integrity. Portion leftovers accordingly for easy reheating, even on the busiest of days.

Make Ahead Strategies

Prepare elements in stages to simplify future assembly: cook pasta in advance and toss it with a bit of olive oil to prevent sticking. Store it separately from the sauce, combining right before serving. Shrimp can be pre-seasoned to save time, maximizing flavor absorption. Batch prepare sauce and freeze it in portions for quick meals. For a complete dish, reheat gently with a splash of stock to keep the sauce luscious and pasta hydrated, retaining freshness through skilful last-minute touches.

Scaling Instructions

For a smaller batch, halve ingredient quantities with attention to oil and sauce components to maintain balance. Doubling or tripling requires a larger skillet and attention to crowded shrimp, perhaps cooking in batches to preserve quality. Adjusting for more time typically involves monitoring heat levels closely, ensuring no ingredient overcooks. With larger quantities, reheating properly in batches ensures even temperature and flavor distribution. Store properly scaled portions in meal-prep containers for convenient leftovers that mirror their freshly-cooked counterparts.

Nutritional Deep Dive

Each serving of Garlic Shrimp Pasta provides a harmonious blend of proteins, fats, and carbohydrates. Shrimp supplies lean protein, vital for muscle repair and satiety, alongside healthy omega-3 fatty acids supporting cardiac health. For micronutrients, enjoy the benefits of garlic’s anti-inflammatory properties and parsley’s vitamin C. Pay attention to serving sizes when managing caloric intake, enjoying balanced components while keeping dietary goals in mind. Consider integrating fiber-rich side dishes to complete a wholesome meal without calorie overload.

Dietary Adaptations

Craft a gluten-free version effortlessly by substituting pasta with gluten-free alternatives, maintaining consistency and taste. Dairy-free transformations are seamless by using olive oil or vegan butter in lieu of traditional butter. For vegan variations, add roasted tofu or mushrooms instead of shrimp, providing comparable texture and savoriness. Low-carb adherents might opt for spiralized vegetable noodles, seamlessly blending flavor with health considerations. Paleo adjustments revolve around natural ingredients, focusing on sustainably sourced shrimp and fresh vegetables for a clean eating experience.

Troubleshooting Guide

Address texture concerns by checking shrimp’s doneness before removing from heat to avoid rubberiness. Achieve flavor balance by tasting the sauce prior to serving, adjusting salt or lemon juice to taste. Temperature discrepancies can be minimized by reheating over moderate heat, preventing component drying. Equipment limitations might be overcome by dividing tasks, such as using multiple burners or making do with available pan sizes. Ingredient substitutions should focus on preserving core flavors, such as using white fish when shrimp isn’t available. Time management is key; prepare ingredients in advance to adhere to suggested cooking times seamlessly.

Recipe Success Stories

Countless readers have delighted in the simplicity and elegance of Garlic Shrimp Pasta, sharing photos of the vibrant dish garnished impeccably. Creative adaptations have emerged, from including local spices to pairing with regional wines, inspiring a community of cooks. Feedback highlights appreciation for easy instructions, enabling families to bond over a sumptuous meal. Photography tips recommend capturing the steaming pasta with fresh garnish, inviting followers to join in the feast visually. Every shared success increases the collective expertise, each rendition a testament to the recipe’s charm.

Frequently Asked Questions

1. Can I use frozen shrimp for the recipe?
Yes, but ensure they are thoroughly thawed and patted dry before cooking to prevent waterlogged shrimp.

2. Is it possible to use another type of pasta?
Absolutely, any pasta that holds sauce well will work, though shapes like linguine or fettuccine are traditional.

3. What if I want a spicier dish?
Adding red pepper flakes or a dash of chili oil into the sauce introduces more heat without altering the core profile.

4. How can I store leftovers effectively?
Store in airtight containers, separating pasta and sauce if possible, to prevent sogginess and ensure reheated quality.

5. Is pre-cooked shrimp suitable?
While you can use pre-cooked shrimp, fresh raw shrimp provide a superior texture and depth of flavor when prepared fresh.

6. What’s a good non-alcoholic pairing?
A citrus-infused sparkling water complements the dish’s flavors well, adding lightness with its refreshing notes.

7. Can I add vegetables to the dish?
Easily incorporate vegetables such as spinach or cherry tomatoes for added color and nutrients, sautéing briefly in the sauce.

8. What if my garlic burns?
Restart the garlic stage, using a gentler heat, to avoid bitter flavors detracting from the overall experience.

9. How should I adjust for salt content?
Taste the sauce and adjust the salt at the end as needed, especially if using salted butter or pre-salted components.

10. Can I make this dish ahead of time for a party?
Assemble ingredients ahead and quickly toss fresh pasta and shrimp in sauce just before serving for optimal taste and presentation.

11. What is the best way to reheat pasta without drying it out?
Add a splash of reserved pasta water or broth while gently reheating on the stove to rejuvenate the sauce’s texture.

12. Can I freeze this recipe?
While fresh is best, freezing components separately, such as the cooked shrimp and garlic sauce, allows for a reliable make-ahead solution.

Additional Resources

Explore a range of pasta recipes to diversify your cooking arsenal, including creamy fettuccine and rustic spaghetti dishes. Techniques for perfecting homemade pasta and garlic infusion offer skills enhancement, while insights into shrimp sustainability guide environmentally-friendly choices. Learn about key garlic varieties emphasizing flavor profiles, complementing a repertoire eager for exploration of its pungent pleasures. Equipment reviews reveal ideal kitchen tools optimizing efficiency and ease during preparation. Seasonal guides highlight ingredient swaps aligning with nature’s rhythms, ensuring fresh, flavorful progressions in your culinary journey.

Join the Conversation

Connect with fellow cooking enthusiasts by sharing your culinary twists and photos of Garlic Shrimp Pasta on social media. Exchange photography tips for capturing the most mouthwatering shots of your dish. Discuss variations that resonate personally and why, adding to the communal pool of ideas. Write recipe reviews, diving deep into the aspects you cherished most, from taste to ease of preparation. Engage in community forums where this recipe sparks creativity, unveiling fresh takes and memorable shared dining experiences.

The Recipe

Garlic Shrimp Pasta

Serves: 4

Prep Time: 15 mins

Cook Time: 15 mins

Total Time: 30 mins

Kitchen Equipment Needed

  • Large Skillet
  • Pasta Pot
  • Colander
  • Mixing Spoon
  • Measuring Cups and Spoons

Ingredients

  • 12 oz linguine pasta
  • 1 lb large shrimp, peeled and deveined
  • 4 tablespoons unsalted butter
  • 6 cloves garlic, minced
  • 1/4 teaspoon red pepper flakes
  • 1 tablespoon lemon juice
  • Salt and pepper to taste
  • 1/4 cup chopped fresh parsley

Directions

  1. Cook pasta according to package instructions until al dente. Reserve 1 cup of pasta water and drain the rest.
  2. In a large skillet, melt butter over medium heat. Add garlic and red pepper flakes, sautéing until garlic is fragrant, about 1 minute.
  3. Add shrimp to the skillet, cooking until pink and opaque, about 3 minutes per side. Stir in lemon juice and season with salt and pepper.
  4. Toss in cooked pasta, adding reserved pasta water to loosen sauce as needed. Mix in parsley and serve warm.

Recipe Notes

  • If desired, add a splash of white wine when cooking the sauce for depth of flavor.
  • Substitute parsley with basil for a different herbal note.

Irresistible Crispy Cheesy Philly Cheesesteak Egg Rolls Recipe Delight

Crispy, Cheesy Philly Cheesesteak Egg Rolls: A Fusion Delight

⚖️
Difficulty
Medium

⏲️
Prep Time
20 mins

🕒
Cook Time
15 mins

⏱️
Total Time
35 mins

🍽️
Servings
4

Embark on a culinary adventure with these crispy, cheesy Philly cheesesteak egg rolls. This mouthwatering recipe offers the iconic flavors of a classic Philly cheesesteak, encased in a crunchy, golden-fried egg roll wrapper. Perfect for both a quick snack or an exciting appetizer at your next party, these egg rolls bring the best of both worlds—comfort food meets Asian-inspired cuisine. With gooey cheese melded into tender slices of beef and sautéed onions and peppers, each bite offers a symphony of flavors that delight the senses.

Quick Recipe Highlights

  • Flavor Profile: Savory steak combined with the richness of cheese and a hint of sweetness from caramelized onions.
  • Texture: A satisfying crunch from the egg roll wrapper enclosing a tender, juicy filling.
  • Aroma: The fragrance of fried dough paired with sizzling beef and melted cheese.
  • Visual Appeal: Golden-brown egg rolls with colorful bell pepper and melted cheese peeking through.
  • Skill Level Needed: Intermediate cooking skills required to handle frying and filling the wrappers evenly.
  • Special Equipment: A large frying pan and a thermometer to monitor oil temperature.

Recipe Overview

  • Difficulty Level: Moderate, due to assembly and frying steps that require attention to detail to ensure perfect crisping.
  • Category: Appetizers or snack—these egg rolls make a great starter or an addition to a party platter.
  • Cuisine: A delightful fusion of American comfort food with Asian influences, bringing new life to a traditional cheesesteak.
  • Cost: Relatively inexpensive, making use of common ingredients like beef, cheese, veggies, and egg roll wrappers.
  • Season: Ideal year-round, with comforting warmth perfect for fall and winter gatherings.
  • Occasion: Suited for casual get-togethers, game nights, or any event that calls for a deliciously indulgent snack.

Why You’ll Love This Recipe


The savory taste and appealing textures make these egg rolls a sure hit for any cheese or steak lover. Prepared with everyday ingredients, they provide a quick yet satisfying experience without complex preparation. With protein-rich steak and cheese combined with vibrant vegetables, these egg rolls offer a balanced snack that is nutritious and fulfilling. As a versatile dish, they serve well at parties, offering an unexpected twist that sparks conversation and enjoyment. The recipe is wallet-friendly, allowing for a gourmet experience without stretching your budget.

Historical Background and Cultural Significance


Crispy, cheesy Philly cheesesteak egg rolls owe their existence to the classic Philly cheesesteak sandwich, a culinary legend from Philadelphia. With roots tracing back to the early 20th century, the sandwich traditionally combines beef, cheese, and bread, reflecting local tastes and cultures. Over time, regional variants have emerged, adapting the flavors into new formats such as egg rolls. This transformation showcases cultural evolution, reflecting the American penchant for creativity and fusion in food.

Ingredient Deep Dive


Tender beef cuts, such as ribeye, are key for authentic flavor. Historically significant in many cuisines, beef offers rich iron and protein content, making it not only tasty but also nutritious. Choose marbled cuts for extra tenderness. Bell peppers and onions, aromatic and full of vitamins, add a slight sweetness and crunch. Store ingredients in cool, dry places, and substitute with mushrooms for a vegetarian twist if desired.

Common Mistakes to Avoid

  • Overstuffing the wrappers can lead to burst egg rolls—ensure even distribution of ingredients.
  • Using cold wrappers might cause difficulty in sealing them, leading to messy frying.
  • Not pre-heating the oil sufficiently results in soggy rolls instead of crispy perfection.
  • Ignoring the right cheese can alter the flavor; use provolone for authenticity.
  • Forgetting to drain excess grease from the steak can make rolls oily.
  • Over-frying causes the cheese to leak out—aim for a golden color only.
  • Skipping a taste test is an error; adjust seasoning to balance flavors.
  • Not allowing steak to come to room temperature can affect the desired cook quality.

Essential Techniques


The art of perfect frying starts with monitoring oil temperature. Using a thermometer to maintain optimal heat ensures the rolls remain crispy without absorbing excess oil. Proper rolling and sealing come next—mastering these ensures each bite is as delightful as intended. Color changes and floating as opposed to sinking provide cues for doneness. Practice with a single roll if unfamiliar before moving on to a larger batch.

Pro Tips for Perfect Crispy, Cheesy Philly Cheesesteak Egg Rolls


Start with high-quality, thinly sliced beef for the best texture and flavor absorption. Lightly sauté the veggies to maintain a bit of crunch. Seal the egg roll wrappers with a mixture of water and cornstarch to prevent unraveling while frying. Let the rolls rest on a rack post-frying; this prevents steaming and keeps them crisp. Experiment with different cheeses for unique flavors, but always ensure you’ve got a good melter. Lastly, dipping sauces like spicy ketchup or aioli can enhance or complement, adding depth to the eating experience.

Variations and Adaptations


You can adjust these egg rolls for seasonal yield by incorporating mushrooms or spinach during spring and fall. Those observing gluten-free diets might explore alternative wrappers or lettuce wraps. Vegan modifications are possible through plant-based meats and dairy-free cheese. For a spicy kick, infuse the filling with jalapeños or sriracha. If crunchy wrappers aren’t your style, bake them for a softer version or present them as open-faced for an artsy touch.

Serving and Presentation Guide


Beautiful presentation begins with cutting each egg roll diagonally for a visual burst of filling colors. Use microgreens or sliced jalapeños as garnish for added appeal. Accompany with an array of dipping sauces, including classic marinara and spicy sriracha mayo. Serve on a wooden board for rustic charm. Adjust serving temperatures based on preference but ensure they’re neither too hot nor cold to avoid flavor loss.

Wine and Beverage Pairing


Opt for a robust red wine like Zinfandel, whose bold flavors match the richness of these rolls. For a lighter option, a chilled Riesling provides balance with its acidity. Adventurous non-alcoholic alternatives could include a ginger soda or iced herbal tea infused with lemon. Keep drinks cold to refresh the palate and enhance the dining pleasure. Offer a range to accommodate diverse tastes and preferences.

Storage and Shelf Life


Properly stored, these egg rolls last for up to three days in the fridge. Use airtight containers to prevent sogginess and maintain crispness. They’re most enjoyable fresh, but gently reheating in an oven can restore some of the original texture. Check for any odors or excessive oiliness as indicators of spoilage. For extended storage, freeze them before frying, then cook directly from frozen.

Make Ahead Strategies


Prepare components in advance by slicing and pre-cooking meats and vegetables before assembly. Store these separately in airtight containers. Assembled egg rolls can rest in the fridge for a day, reducing day-of preparation stress. Reheat carefully to keep the filling delightful, adding fresh herbs or additional cheese before serving to revive flavors.

Scaling Instructions


Whether halving or doubling, maintain proportionate ingredient ratios. In larger quantities, fry in batches to prevent overcrowding and ensure even crisping. Adjust cookware size based on quantity—larger pans for more egg rolls or smaller ones for less. When scaling, consider preparation timing adjustments, keeping in mind additional cooking time doesn’t overheat oil intermittently used.

Nutritional Deep Dive


Containing balanced macronutrients, each egg roll offers proteins, carbohydrates, and fats for a satisfying meal or snack. They deliver important micronutrients through vegetables, promoting overall wellness. While reasonably low-cal, watch portion sizes for weight maintenance. Small tweaks, like reduced cheese or leaner cuts, can be health-wise without sacrificing taste or texture. Suitable for diverse diets with adequate adjustments.

Dietary Adaptations


Gluten-free versions come through using rice paper or alternative wraps. Choose almond or soy-based cheeses for dairy-free needs, and season tofu or seitan as protein substitutes for vegan variations. Use cauliflower rice for a low-carb option, aligning it with keto or paleo requirements. Adjust fillers to personal dietary needs for a meal that aligns with health goals without compromising enjoyment.

Troubleshooting Guide


If rolls lack crunch, adjust oil temperature, ensuring it’s sufficiently hot. Bland flavors call for additional seasoning, revisiting cheese selection for richer notes. If wrappers stick, dust with cornstarch before rolling, and if the filling exudes moisture, pat down meats and veggies pre-filling. Overcooked components can result from cooking too long; precise timing is vital for optimal results.

Recipe Success Stories


Our vibrant community often tweaks this recipe, with some adding blue cheese for an elevated flavor or substituting beef with chicken for a lighter touch. Enthusiastic cooks regularly tag us with stunning creations and share imaginative dips. Variations fuel creativity, affirming these egg rolls as a culinary canvas limited only by one’s imagination. Each story echoes the universal joy of sharing good food and inspiring others.

Frequently Asked Questions

Why are my egg rolls greasy?

Ensure oil is consistently hot while frying to prevent it from soaking into the wrappers.

Can I bake instead of fry them?

Yes, spraying with oil before baking can yield crispy rolls, though keep an eye on time to avoid overbaking.

What cheese works best?

Provolone or American cheese gives classic results, though feel free to get creative.

Can I use chicken instead of beef?

Definitely! Cook the chicken thoroughly and follow the same preparation for a delicious twist.

How do I keep them from falling apart?

Seal tightly with water and cornstarch, and avoid overfilling.

Can I freeze them?

Freezing before frying is best, with direct frying from frozen when ready offering good results.

What oils are best for frying?

Peanut and canola oils have high smoke points, ideal for crisping without burning.

Can I add more vegetables?

Of course, more veggies can add extra nutrients and flavors, but ensure not to overfill egg rolls.

Are there alternatives to frying?

Air-frying offers a healthier pathway, giving you crispy results with less oil.

Is there a way to make them spicy?

Add diced jalapeños or sriracha to the filling for an added kick.

Additional Resources


Pair these egg rolls with a homemade ranch dip, explore video tutorials for rolling perfection, investigate other similar fusion recipes on our blog, and consider tools like air fryers for varied results. Stay tuned for seasonal takes that offer novel flavors and never miss a chance to enrich your culinary repertoire with fresh insights.

Join the Conversation


Share your creative spins on social media using our hashtag, inspiring the community with your culinary prowess. Snap photos of your delightfully dipped rolls and discover others’ gallery-worthy plates. Your feedback drives innovation in our recipes, and your community contributions enrich our shared culinary journey. Contact us with your stories, tips, or triumphs, and be a part of our growing global food family.

The Recipe

Crispy, Cheesy Philly Cheesesteak Egg Rolls

Serves: 4

Prep Time: 20 mins

Cook Time: 15 mins

Total Time: 35 mins

Kitchen Equipment Needed

  • Large frying pan
  • Frying thermometer
  • Mixing bowls
  • Tongs
  • Chef knife

Ingredients

  • 1 pound thinly sliced beef ribeye
  • 1 cup shredded provolone cheese
  • 1 medium onion, sliced
  • 1 bell pepper, sliced
  • 8 egg roll wrappers
  • Salt and pepper to taste
  • Oil for frying

Directions

  1. Preheat oil in a large frying pan over medium-high heat.
  2. Sauté the onion and bell pepper until soft.
  3. Add sliced beef to the pan and cook until brown. Season with salt and pepper.
  4. Lay an egg roll wrapper on a clean, dry surface.
  5. Combine beef mixture with cheese, and place a spoonful onto each wrapper.
  6. Roll the wrappers, sealing the edges with water-cornstarch paste.
  7. Fry each wrapped roll until golden brown and crispy. Drain on paper towels.
  8. Serve hot, accompanied by your choice of dipping sauces.

Recipe Notes

  • Substitute different cheeses for a distinct flavor variation.
  • Include additional vegetables for enhanced nutrition.
  • Avoid overfrying for optimal texture and taste.

Delicious Baked Acorn Squash Recipe with Sweet Cinnamon Apples

Baked Acorn Squash with Cinnamon Apples: A Delightful Autumn Dish

⚖️
Difficulty
Easy

⏲️
Prep Time
15 mins

🕒
Cook Time
45 mins

⏱️
Total Time
60 mins

🍽️
Servings
4

Experience the perfect marriage of seasonal flavors with this Baked Acorn Squash with Cinnamon Apples recipe. This dish embodies the true essence of autumn, combining the rich sweetness of cinnamon-spiced apples with the buttery warmth of perfectly baked acorn squash. Whether you’re enjoying this as a cozy side dish or a hearty vegetarian main, its delightful aroma and charming presentation are sure to win over your family and guests.

The beauty of this Baked Acorn Squash with Cinnamon Apples lies not only in its flavor but also in its comforting simplicity. With just a handful of ingredients and a few easy steps, you can create a dish that is bursting with rich autumnal flavors. Perfect for cold weather and festive gatherings, this recipe offers the richness of squash and apples in a way that warms both body and soul.

Quick Recipe Highlights

  • Flavor Profile: The sweetness of baked apples is enhanced by the earthy flavor of acorn squash, topped with a dash of cinnamon for a warm, comforting taste.
  • Texture: The slightly crisp edges of the baked squash contrast beautifully with the tender, juicy baked apples.
  • Aroma: As it bakes, the cinnamon apples release a tantalizing aroma that fills the kitchen with the nostalgic scent of fall spices.
  • Visual Appeal: The vibrant orange of the squash shells contrasted with the rich, golden-brown filling makes for an eye-catching dish at your dinner table.
  • Skill Level Needed: This recipe is suitable for beginners, requiring minimal culinary skills, making it a go-to for a quick and impressive dish.
  • Special Equipment: You will need a sharp knife for cutting the squash and a baking dish to hold the ingredients as they roast to perfection.

Recipe Overview

  • Difficulty Level: Easy enough for those with basic kitchen skills, this recipe primarily involves chopping and baking, making it approachable for any home cook.
  • Category: Ideal as both a side dish and a standalone vegetarian option, appealing to a wide range of dining preferences.
  • Cuisine: Falling under American comfort food, this dish draws inspiration from traditional fall flavors and rustic farm settings.
  • Cost: Moderate cost due to seasonal produce being readily available and affordable, making it perfect for anyone on a tight budget.
  • Season: Best savored during the fall and winter when apples and squash are at their peak freshness and readily available.
  • Occasion: Suited for family dinners, Thanksgiving feasts, and cozy evenings when you crave the warming embrace of autumn flavors.

Why You’ll Love This Recipe


The appeal of this Baked Acorn Squash with Cinnamon Apples is multifaceted, combining a delightful blend of tastes and textures that make it a household favorite. The tender, caramel-like apples provide a luscious sweetness that harmonizes with the naturally sweet, yet mildly nutty, squash. As these flavors meld together in each baked bite, a comforting sensation washes over the palate, evoking feelings of warmth and satisfaction.

Beyond its irresistible taste, the convenience of preparing this dish cannot be overstated. With minimal prep and clean-up required, this recipe is perfect for busy weeknights or those last-minute dinner parties. Simply slice, fill, and bake, and you’ll have a mouth-watering dish ready in just under an hour with little hands-on time needed.

From a nutritional standpoint, this dish is a powerhouse of essential vitamins and fiber. Acorn squash is rich in Vitamin C and potassium, while apples provide dietary fiber and a host of antioxidants. Together, they create a healthy, filling meal that aligns beautifully with your dietary needs while still satisfying your taste buds.

Socially, this recipe serves as an excellent centerpiece for gatherings and family dinners. Its inviting aroma and vibrant presentation instantly draw people in, creating a warm, welcoming atmosphere. Sharing this dish with friends and family can be a bonding experience, with storytelling and laughter drifting effortlessly into the night.

Lastly, this recipe stands out in its cost-effectiveness and accessibility. The primary ingredients—apples and acorn squash—are both affordable and widely available, especially in the fall. Additionally, this dish allows you to make the most of seasonal produce without straining your budget, making it an enjoyable cooking experience for everyone.

Historical Background and Cultural Significance


The origin of baked acorn squash with cinnamon apples is steeped in the history of North American agriculture and culinary tradition. Both squash and apples have deep roots in American food history, tracing back to early indigenous tribes. Squash was one of the “Three Sisters” crops alongside corn and beans, while apples became a staple after being introduced by European settlers.

In many regions, acorn squash was a staple autumn harvest food, prized for its long shelf life and nutritional value. The dish gained cultural importance as settlers incorporated local produce into their meals, combining traditional European apple-based desserts with native vegetables to create comforting dishes that suited the changing seasons.

The evolution of this recipe saw it become a fixture in family gatherings, particularly during the fall and winter months, where the cold weather called for warm and hearty foods. Alongside pumpkin pies and mulled cider, the baked acorn squash with cinnamon apples became synonymous with the cherished autumn experience.

Regional variations of this dish began to surface, with some areas opting for spicier iterations by including ground cloves or nutmeg, while others added nuts or cranberries for texture and flavor contrast. Regardless of these variations, the dish’s fundamental appeal has remained unchanged over generations.

Ingredient Deep Dive


Acorn Squash: This humble autumn vegetable plays a key role in the recipe, bringing a naturally sweet and slightly nutty flavor. Culturally, squash has been vital in many indigenous communities for centuries, lauded for its versatility and nutritional profile. Rich in vitamins A and C, acorn squash offers immune-boosting benefits and aids in skin health. When selecting squash, look for firm, heavy ones with a rich color and no soft spots, ensuring freshness and quality.

Storage recommendations for acorn squash include keeping it in a cool, dry place for up to a month. Opt for a pantry or well-ventilated cellar if available. Should fresh squash be unavailable, consider a butternut squash or even a sweet potato as a substitution, although the cooking time may vary slightly due to texture differences.

Cinnamon Apples: The apples provide sweetness and contrast to the dish’s other elements. Culturally significant to Western cuisine, apples have long been associated with desserts and comfort foods. They are a good source of dietary fiber and Vitamin C, promoting digestive health and supporting overall wellness. For this recipe, any baking apple like Granny Smith, Honeycrisp, or Braeburn works well due to their balance of sweetness and tartness.

To extend apple freshness, store them in the refrigerator crisper drawer to maintain their crisp texture for a month or more. If you need a substitution, pears or firm peaches can work in a pinch, offering a different yet intriguing flavor twist to the dish.

Common Mistakes to Avoid

  • Overcooking the squash can lead to a mushy texture. Ensure to check for doneness with a fork; it should glide in easily but not cause the squash to fall apart.
  • Underspiced apples can make the dish bland. Don’t be skimpy with cinnamon; it should generously coat the apples for a robust flavor.
  • Choosing unripe or flavorless apples will affect the dish. Always use fresh, flavorful apples that are ideal for baking.
  • Forgetting to preheat the oven can lead to uneven cooking. Make sure to reach the correct temperature before introducing the dish.
  • Slicing the squash unevenly will cause inconsistent cooking. Make sure to cut symmetrical halves to allow for equal baking time.
  • Failing to test for seasoning can leave the dish flat. Taste and adjust the seasoning as needed before final baking.
  • Adding too much added sugar takes away from the natural sweetness. Let the apples’ natural sugars shine through.
  • Baking without sufficient moisture may result in dry apples. Ensure apples are thoroughly mixed with spices and a little water or juice.

Essential Techniques


Mastering the art of cutting and prepping acorn squash is crucial to this recipe’s success. A sharp knife and a sturdy cutting board are your best friends here. Carefully slice the squash in half, remove the seeds, and trim any uneven parts on the bottom to prevent tipping over in the oven.

Filling the squash with the right quantity of apple mixture ensures consistent flavor and baking. Gently pack the seasoned apple slices into the hollow of the acorn squash, allowing the heat to distribute evenly through both layers.

Using aromatic spices to enhance the dish’s flavor is another essential technique. Opt for fresh cinnamon whenever possible, adding it to the apples just before they are baked to maintain their full aromatic potential.

Pro Tips for Perfect Baked Acorn Squash with Cinnamon Apples


Tip 1: For an even richer flavor, drizzle a touch of maple syrup over the squash before baking.
Tip 2: Toasted pecans or walnuts can be added to the apple mixture for an extra crunch.
Tip 3: If you prefer a spicier kick, include a pinch of nutmeg or ground cloves.
Tip 4: Serve with a dollop of whipped cream or a scoop of vanilla ice cream for a luxurious finish.
Tip 5: Make sure to let the dish rest for a few minutes after baking to allow flavors to meld.
Tip 6: Roasting in a little apple cider or juice at the base of the baking dish creates a moist and aromatic environment.

Variations and Adaptations


Regionally, this dish can include different spices such as ginger or nutmeg to adapt to local preferences. In some areas, adding a pinch of cayenne or smoked paprika can introduce depth to the flavor profile.

Seasonally, adding cranberries or pomegranate arils can provide a lovely burst of color and tartness. This enhances the dish’s visual and flavor appeal, particularly during the holiday season.

To adapt to dietary needs, consider using a sugar substitute or eliminating added sugars altogether for a more health-conscious approach. The natural sweetness of the apples can be intensified with a squeeze of lemon juice.

Texture lovers might want to incorporate nuts or dried fruits within the apple filling. This not only complements the existing flavors but also adds a delightful crunchy counterpart to the baked filling.

Presentation-wise, try hollowing out the squash to create a bowl-like effect. This makes serving more elegant and can be a creative option for individual servings at dinner parties.

Serving and Presentation Guide


For a polished presentation, consider garnishing the dish with a sprinkle of fresh chopped parsley or thyme, which adds a touch of color and brightness. Smaller squash can be served whole with filling, while larger specimens might be easier to portion by slicing into wedges.

Traditional accompaniments like roasted meats or simple green salads pair beautifully, balancing the sweetness of the dish with savory or fresh components. Modern serving suggestions might include a generous crumble of feta cheese for a savory contrast.

Temperature-wise, ensuring the dish stays warm but not hot when serving prevents any overpowering sweetness from dominating the palate. If you’re hosting a larger gathering, consider a serving platter that keeps the heat consistent without drying out the squash.

Wine and Beverage Pairing


A crisp, light white wine such as a Riesling or a Chardonnay can pair wonderfully with this Baked Acorn Squash with Cinnamon Apples, balancing the sweet and savory flavors. Non-alcoholic options like a sparkling apple cider or an aromatic herbal tea are delightful alternatives for those preferring non-wine pairings.

For coffee enthusiasts, an Americano or a lightly spiced chai can complement the baked spices well. Be mindful of serving temperature, aiming for warmed drinks to meet the cozy vibe of the dish.

Storage and Shelf Life


Store leftovers in an airtight container in the refrigerator for up to three days, ensuring the flavors remain as robust as when freshly made. Before reheating, consider adding a splash of water or juice to restore moisture.

Should spoilage concerns arise, look for signs such as off odors or excessive liquid accumulation. Although freezing is possible, the squash may lose its firmness, so it’s best stored as leftovers for short-term use.

Make Ahead Strategies


Preparing the apple filling in advance and storing it in the refrigerator can save time on the day of baking. The prepared squash halves can be wrapped and refrigerated a day before, requiring just a quick assembly before going into the oven.

Reheating guidelines suggest covering with foil and warming in a moderate oven to gently reheat the dish without compromising the texture. Fresh elements like herbs or citrus zests can be added just before serving to enhance aromas.

Scaling Instructions


When halving the recipe, reduce the quantity of apple filling and seasoning accordingly while maintaining the same baking time for best results. Doubling or tripling this recipe requires additional baking dishes to ensure even cooking.

Be aware of oven capacity as more squash may elongate cooking times. Storage should also be taken into consideration, with larger batches potentially requiring more extensive refrigeration space.

Nutritional Deep Dive


Rich in vitamins A and C, this dish serves as a beneficial addition to any meal plan, supporting immune health and skin care. Apples contribute additional fiber, promoting digestive wellness and a sustained feeling of fullness.

With low-fat content, the dish aligns with weight management goals, allowing for controlled portion sizes or double portions when an indulgence is desired.

Dietary Adaptations


Gluten-free by nature, the recipe accommodates additional dietary needs with minor modifications. For a dairy-free rendition, use coconut oil or non-dairy margarine instead of butter if required within the filling.

Those following a vegan lifestyle will find this recipe already fits their diet, boasting plant-based ingredients that contribute to wholesome vegan dining. Low-carb eaters may wish to cut back on apple portions or substitute with a less sugary fruit.

Troubleshooting Guide


Should the dish emerge too moist, identify whether excess juice in the apples is the cause, and use a slotted spoon to drain before serving. Balancing sweetness can be corrected by incorporating a pinch of sea salt or a dash of lemon juice if necessary.

Temperature adjustment may be needed when baking multiple batches; verify with an oven thermometer for optimal results. Equipment challenges such as limited baking space can be addressed by taking turns with batches or investing in a second rack.

Timing concerns related to large gatherings can be mitigated by quick reheats in a microwave or toaster oven just before serving, ensuring each plate retains its baked charm.

Recipe Success Stories


Enthusiastic feedback from readers frequently mentions the dish’s adaptability and how it seamlessly fits into numerous occasions from weeknight dinners to holiday feasts. Variations like adding marshmallows have been popular during festive gatherings, resulting in delightful, caramelized tops.

Tips from our cooking community highlight using a blend of apples for added complexity, and others have shared that incorporating a touch of brandy during baking elevates the dish to gourmet levels.

For photography, multiple angles showcasing the vibrant squash contrast beautifully with rustic backgrounds, bringing a quaint, homespun look to culinary blogs and social channels alike.

Frequently Asked Questions

Q: Can I make this dish with different squash?

A: Yes, other winter squash like butternut or kabocha can substitute acorn squash, adjusting bake time as needed.

Q: What’s the best way to cut squash safely?

A: Use a sharp chef’s knife, carefully slicing through the stem end. Secure the squash on a firm cutting board to prevent slipping.

Q: Are there vegan alternatives to butter in this recipe?

A: Absolutely. Use coconut oil or a high-quality vegan margarine for similar results.

Q: How do I ensure even cooking?

A: Choose squash of similar size for uniform baking, and rotate them midway through the cooking process.

Q: How do I enhance the flavor?

A: A dash of vanilla extract or a sprinkle of toasted nuts can amplify the existing flavors.

Q: Can this recipe be made ahead of time?

A: Yes, prepare components like the apple filling in advance and store separately until ready to bake.

Q: What varieties of apples work best?

A: Granny Smith and Honeycrisp are ideal due to their balance of sweetness and tartness, perfect for baking.

Q: Any tips for reheating leftovers?

A: Cover with foil and reheat in an oven at 350°F for about 15 minutes, or microwave on medium power to avoid overcooking.

Q: How do I prevent apples from browning before baking?

A: Toss sliced apples with a bit of lemon juice to preserve their natural color.

Q: Can nuts be added to the filling?

A: Certainly, toasted pecans or walnuts offer a pleasant crunch and richness to the dish.

Additional Resources


Explore our related recipes that complement the Baked Acorn Squash with Cinnamon Apples, such as Spiced Pumpkin Soup or Harvest Apple Salad, each bringing seasonal flavors to your dining table.

Our technique guides cover everything from precision slicing to perfect roast temperatures, ensuring each culinary endeavor is a success. Dive into ingredient information that highlights how to select the best produce possible, enriching every meal with quality and flavor.

Recommended browsing includes equipment tips ensuring you have the sharpest knives and the most reliable bakeware for flawless culinary executions. For season-specific inspiration, follow our curated seasonal variations guide that aligns recipes with peak produce times, optimizing freshness and taste.

Join the Conversation


Engage with our community by sharing your own unique take on this delicious dish. Use our hashtag #BakedAcornSquashWithApples for a chance to be featured on our social media pages.

For budding photographers, our photography tips guide you in creating stunning food images that visually capture the dish’s essence. Your constructive recipe reviews and shared experiences help others in their culinary journey, fostering a shared love for home-cooked meals.

Explore reader variations and suggestions for adapting the recipe to different flavors or dietary requirements. By joining our conversation, you contribute to honing a greater cooking community while discovering new ways to enjoy familiar favorites.

The Recipe

Baked Acorn Squash with Cinnamon Apples

Serves: 4

Prep Time: 15 mins

Cook Time: 45 mins

Total Time: 60 mins

Kitchen Equipment Needed

  • Chef’s knife
  • Baking dish
  • Mixer bowl
  • Measuring spoons
  • Cutting board

Ingredients

  • 2 medium acorn squash, halved and deseeded
  • 3 cups apples, peeled and diced
  • 1 tablespoon cinnamon
  • 2 tablespoons brown sugar
  • 1 tablespoon butter, melted
  • 1/4 cup chopped pecans (optional)
  • Salt and pepper, to taste

Directions

  1. Preheat your oven to 375°F (190°C).
  2. Cut acorn squash in half and remove seeds. Place cut-side up in a baking dish.
  3. In a bowl, mix apples, cinnamon, brown sugar, melted butter, and pecans if using.
  4. Fill each squash half with the apple mixture, mounding slightly.
  5. Cover the baking dish with foil and bake for 30 minutes.
  6. Remove foil and bake an additional 15 minutes, or until the squash is tender and the tops are golden brown.
  7. Season with salt and pepper to taste before serving.

Recipe Notes

  • For added sweetness, drizzle with maple syrup just before serving.
  • This recipe can be made vegan by substituting butter with coconut oil.
  • For a nut-free version, simply omit the pecans.

Irresistible Blackened Steak and Shrimp Scampi Recipe for Dinner

Blackened Steak and Shrimp Scampi: A Luxurious Surf and Turf Experience

⚖️
Difficulty
Moderate

⏲️
Prep Time
15 mins

🕒
Cook Time
30 mins

⏱️
Total Time
45 mins

🍽️
Servings
4

Embark on a culinary journey with this exquisite recipe for Blackened Steak and Shrimp Scampi. Perfectly seasoned steak, seared to a deliciously crusty exterior, pairs seamlessly with succulent shrimp cooked in a rich, buttery scampi sauce. This surf and turf dish offers you an unforgettable taste of indulgence and pleasure, making every bite a dream come true. Whether you’re a seasoned chef or a daring beginner, this recipe brings the flair of fine dining to your home kitchen effortlessly.

Quick Recipe Highlights

  • Flavor Profile: A harmonious blend of spicy, smoky steak complemented by the delicate flavors of buttery garlic shrimp.
  • Texture: Features the perfect contrast between the crispy steak crust and tender shrimp.
  • Aroma: Exhibits invigorating hints of spices, garlic, and herbs that awaken the senses.
  • Visual Appeal: A feast for the eyes with its vibrant colors and artful plating recommendations.
  • Skill Level Needed: Suitable for intermediate cooks, though novices will find thorough instructions helpful.
  • Special Equipment: A cast-iron skillet or a heavy-duty pan is essential for achieving the perfect steak sear.

Recipe Overview

  • Difficulty Level: This dish requires moderate skill, focusing on the timing and temperature control needed to cook steak and shrimp perfectly.
  • Category: Main course featuring flavors suited for dinner or a special occasion meal.
  • Cuisine: Merges elements from American, Cajun, and Italian cuisines, celebrating diverse culinary traditions.
  • Cost: Moderate cost; steak and shrimp can be premium but occasionally affordable in sales.
  • Season: Best served year-round, with shrimp and steak available in most seasons.
  • Occasion: Ideal for celebrations, romantic dinners, or elevating your weeknight dining experience.

Why You’ll Love This Recipe


The Blackened Steak and Shrimp Scampi is a divine combination of flavors and textures that tantalizes the taste buds. The steak’s smoky char is enriched by the delicate, buttery nature of the scampi sauce, offering a delightful experience with each mouthful. Plush and tender shrimp pieces provide a refreshing contrast to the robust meat, making this combination unforgettable.

Preparation is straightforward, maximizing flavor while requiring only moderate cooking skills. Seasoned to perfection, the steak takes little time to prepare, leaving the scampi sauce to enhance the natural sweetness of the shrimp. This makes an excellent dish for impressing guests, as preparation does not consume too much time, giving you more opportunity to enjoy your company.

Nutritionally balanced, this recipe offers protein-rich steak and shrimp, boosting benefits such as iron and omega-3 fatty acids. The garlic butter sauce, loaded with herbs, adds essential vitamins and aromatic allure, promoting heart health if consumed in moderation. It’s a dish that lets you indulge without guilt.

Social gatherings and special occasions are perfect settings for this recipe, resonating well with diverse palates. A crowd-pleaser, this surf and turf delight is memorable, generating conversations and compliments when shared. It’s the ultimate choice for those who love combining land and sea on a single plate!

Despite being a premium dish, the Blackened Steak and Shrimp Scampi is relatively cost-effective when broken down. With steak on sale and shrimp from the freezer section, this upscale dining treat becomes accessible without compromising on the quality or taste of the final meal. Widely available ingredients make this recipe achievable for everyone.

Historical Background and Cultural Significance


Originating from the fusion of classic Cajun cuisine and Italian influences, this recipe highlights the melting pot of flavors found in modern cooking. Blackened steak hails from the rich traditions of New Orleans, where strong, punchy spices elevate the meat’s flavor profile. Each bite of this flavorful dish tells the story of culinary ingenuity, harnessing bold, aromatic creations.

In cultural importance, the dish reflects evolving trends in American dining, where globally inspired recipes culminate in a unique, cohesive offering. Staple ingredients like garlic, oil, butter, and herbs unite various traditions, forming a cross-cultural appreciation of land and sea flavors. Today, this dish embodies hospitality and culinary innovation.

Over time, the Blackened Steak and Shrimp Scampi has evolved through adaptations of key elements. Originally, scampi recipes centered on simplistic but richly flavored ingredients. As the fusion of Cajun blackened steak emerged, it introduced the concept of pairing beef with shellfish, enhancing sensory experiences and paving the way for infinite adaptations.

Regional variations underscore the versatility of this recipe. In the South, Creole influences often enrich the repertoire with heat and dynamic layers of seasoning. Conversely, Italian regions may focus on simplicity, savoring the natural flavors of the seafood and steak, showing that the core appeal lies in its adaptability to global palates.

Ingredient Deep Dive


The steak, a primary ingredient in this recipe, holds notable historical and cultural significance, particularly in Texas and Argentina. Known for its fiery flavor, the blackened steak technique achieves excellence through high-temperature searing. To select the perfect cut, consider well-marbled pieces, ensuring juiciness and flavor retention.

From a nutritional perspective, steak serves as a protein powerhouse, providing necessary amino acids and nutrients such as iron, zinc, and vitamin B12. Savvy marketing has expanded steak availability, offering grass-fed and organic options. Storing steak properly by using airtight packaging helps maintain freshness by preventing freezer burn or spoilage.

The shrimp in this recipe, renowned for its tender texture and mild taste, originates from Mediterranean culinary traditions. Delicate yet robust, it complements a wide range of spices and holds essential nutrients, including iodine and omega-3 fatty acids. Choose firm and translucent shrimp when shopping, with a mild ocean scent, indicating freshness.

Store shrimp in the coldest part of the fridge and consume them within two days for optimal taste. Should you require substitutions, consider delicate white fish or scallops, preserving the oceanic essence of the dish. This ensures flexibility and adjustment based on preference or availability, while delivering satisfying results each time.

Common Mistakes to Avoid

  • Overcooking the steak can lead to toughness; remove from heat just before reaching desired doneness, allowing residual heat to finish cooking.
  • Not scorching the steak surface effectively misses the signature charred flavor; a smoking-hot pan is crucial for blackening.
  • Undercooking shrimp may pose health risks; watch for opaqueness and slight curl as indicators of doneness.
  • Using pre-cooked or frozen shrimp without thawing results in rubbery textures; always defrost and pat dry for the best results.
  • Adding salt too early can dry out components prematurely; season delicately toward the end of cooking to retain moisture.
  • Skipping the rest period for steak means losing precious juices; let steak sit for a few minutes post-cooking.
  • Neglecting butter quantity impacts scampi sauce richness; a balance ensures the right level of indulgence.
  • Ignoring oil temperatures leads to uneven cooking; maintain consistent heat throughout the process for uniform results.
  • Using low-quality pans prevents adequate heat retention; a cast-iron skillet handles high temperatures effectively.
  • Failing to taste as you go risks off-flavors; adjust seasonings incrementally and sample frequently.

Essential Techniques


Achieving the perfect blackened steak relies largely on mastering the scorching technique, providing a crisp, flavorful crust. This method heavily depends on high heat from the pan and the availability of fat to develop flavor, forming appetizing aesthetics and textures. Allowing sufficient surface contact ensures even charring and superior taste integrity.

Butter basting, integral to scampi sauce, imparts silky smooth flavor to shrimp, bringing balanced sweetness to the overall dish. Start with a base of melted butter, infusing with fresh garlic and parsley, allowing aromatic oils to blend harmoniously. Patience is vital to ensure gradual marrying of flavors, avoiding overly strong notes or burnt garlic.

Paying attention to seasoning allows focused interaction between key components, enhancing steak flavors and shrimp freshness. Avoid overwhelming ingredients with powerful spices; apply moderate seasoning and season throughout the preparation process. This encourages the natural taste, balancing intense spice with subtler scampi undertones.

Timing is the vital aspect around which all techniques revolve, becoming instrumental in the dish’s overall success. Heat management, precise rotations, and continual monitoring reward the careful cook with impressive results. Visual cues such as shrimp curling or steak juiciness guide meal preparation, ensuring an elegant and enviable finish.

Pro Tips for Perfect Blackened Steak and Shrimp Scampi


Allow the steak to reach room temperature before cooking, promoting even heat distribution and an ideal sear. This prevents the interior from remaining cold while the exterior overcooks, ensuring a delectable meat texture and flavor.

Apply seasoning heavily to the steak, creating a crust essential to capturing the iconic blackened flavor. Dry spice blends also serve as thermal barriers, preventing burning and enhancing taste.

Use a properly pre-heated cast iron skillet for blackening, maintaining consistent heat that fosters thorough cooking and distinct char lines. This results in unparalleled texture and flavor depth for steak lovers.

In the case of a smoky kitchen, keep windows open or utilize a vent. Adequate ventilation prevents overwhelming fumes, allowing a pleasant environment for preparing your dish.

For juicy results, refrain from pressing the steak while cooking. Allow natural searing to lock moisture inside, producing a succulent treat with every bite.

When adding garlic to your scampi sauce, consider timing its addition to avoid bitterness. Incorporating the garlic later prevents it from overheating, retaining aromatic properties.

Variations and Adaptations


Regional variations abound with this recipe, reflecting local preferences and thriving on culinary creativity. Louisiana offerings often spice the dish with cayenne or chili pepper, enhancing the hot, bold flavors emblematic of southern palates.

During the changing seasons, adapt the recipe to incorporate in-season ingredients. Winter months allow for hearty accompaniments like creamy polenta, while summer might invite citrus zest to add refreshing brightness.

Dietary considerations can be addressed by substituting butter for quality olive oil when crafting the scampi sauce. This caters to lactose-intolerant or vegan diners, ensuring the meal retains its indulgent reputation.

Flavor variations revolve around creative seasoning combinations. Consider introducing lemongrass or ginger for subtle Asian influences or zesting with lime for a Mexican-inspired twist, yielding unique multilayered tastes each time.

Alter the mouthfeel by experimenting with different shrimp sizes or steak cuts, lending diversity to textural sensations. Thicker-cut steaks add bite, whereas jumbo-sized shrimp enhance succulence.

Displaying the dish stylishly enhances the dining experience. Use circular ramekins for molded sides to accompany, or feature the steak sliced attractively over a glossy walnut board, dazzling the senses through visual appeal and flavor symphony.

Serving and Presentation Guide


For the ultimate plating experience, consider elevating the dish by incorporating distinctive garnishing touches. Fresh parsley or lemon wedges add a pop of color, bringing aesthetics inline with upscale dining.

Engage in thoughtful plating techniques by slicing the steak and fanning it beside a generous pile of shrimp. Create interplay using contrasting colors and textures, inviting elegance and harmony to the presentation.

Traditional accompaniments include brown rice or crusty garlic bread, uplifting flavors and inviting warmth to the serving table. These side options add depth, harmonizing the dish’s richness with contrasting textures.

Explore novel serving suggestions such as arranging in personal-sized cast iron pans or using wooden boards, allowing unique dinner table experiences. This maintains immersive dining enjoyment, bringing a touch of personality to presentation.

Temperature considerations facilitate excellence. Serve the meal hot off the grill, ensuring the balance of buttery shrimp and spicy steak remains intact. Timely delivery guarantees freshness and robust flavor lines.

Managed portion control further guides diners. Organize shrimp and steak servings systematically, maintaining proportional quality and providing guests equal, satisfying bites throughout the course.

Wine and Beverage Pairing


For wine enthusiasts, consider pairing the dish with a refreshing and tangy Sauvignon Blanc. This aromatic white wine wonderfully balances the zesty scampi sauce while complementing the steak’s bold spices with its crisp acidity.

A classic red option such as Malbec adds depth, harmonizing with the blackened steak’s robust flavor while heightening the shrimp’s natural sweetness. Expert pairings allow wine notes to complement, not overpower, the dish.

Non-alcoholic alternatives such as a citrus-infused sparkling water provide refreshing effervescence. This revitalizes the palate between sumptuous bites, enhancing the holistic dining experience.

Coffee and tea pairings, where applicable, invite pleasant transitions from meal’s conclusion to dessert offerings. Light oolong teas offer floral undertones, perfectly concluding the sensory experience in gentle repose.

Engage temperature considerations when choosing your beverage. Cold drinks contrast the warmth of steak and shrimp, offering interplay that balances heat exposure with refreshing sensations.

Sophisticated serving suggestions accompany beverage diversity. Utilize polished glassware and proper pour techniques, fostering an air of sophistication while engaging friends or family beautifully in the occasion.

Storage and Shelf Life


Proper storage methods ensure the prolonged freshness of leftover Blackened Steak and Shrimp Scampi. Wrap steak securely in aluminum foil and refrigerate, while shrimp sails best in airtight containers to maintain succulence.

Adhere to temperature requirements, keeping both steak and shrimp stored below 40°F (4°C) for safety. Maintain consistent refrigeration settings to prevent premature spoilage or textural deterioration.

When storing, use quality containers to avoid freezer aroma absorption or moisture exchange. Glass containers with secure lids serve best, minimizing external factors that might conditionally affect contents.

Frequent checks for spoilage are wise, noting unpleasant odors or slimy textures indicating misstorage. Dispose of compromised ingredients and standardize kitchen practices, ensuring safety and excellent taste.

Reheating instructions encourage stamina of flavor. Warm steak in a low oven, covered with foil, or gently pan-sear if moisture can be sustained. Heat shrimp delicately to avoid hardening proteins, retaining authentic dish experience.

Consider freezing guidelines for longer storage, whereby food forms an airtight seal, preserving quality up to 3 months. Thaw in refrigeration and refresh with a flavored oil drizzle, restoring zest to re-enjoyed portions.

Make Ahead Strategies


Successful meal preparation often hinges on quality prep timelines. Organize ingredients in advance, marinading steak within a couple of hours allows seasoning absorption while peeling shrimp up to a day ahead speeds process.

Store steak and shrimp separately between steps, avoiding mixing to preserve flavors. Consider using zip-top bags for easy seasoning distribution and stack rendering when refrigerating.

Quality impact and flavor evolution proceed in harmony. Only prepare buttered scampi sauce near serving time to sustain vibrancy and appropriate texture, avoiding premature integration that causes bland results.

Assembly tips drive efficiency, suggesting cohesive table settings and utensil selection ahead of final execution. Expedite time required per cooking stage, fostering achievement of short-time preparation scenarios.

Reheat with a focal point on moistness and delicacy, retaining combined flavors and blending last-minute ingredients for sharpness. Through this approach, achieve maximum enjoyment by successfully revitalizing the dish.

Introduce fresh elements such as herbs, presenting decorative greens or spices in contrast to preserved tastes, amplifying both aesthetic and olfactory appeal throughout meal proceedings.

Scaling Instructions


To scale down the recipe effectively, reduce ingredients by half, adjusting seasoning levels in hand according to the taste balance required. Equip suitable pans to ensuring minimal burn occurrences procedures.

Increase the recipe’s magnitude by multiplying ingredients equally. Shoulder steak options may require alterations due to surface area, but retain key quantities intact. Appropriately scaled pans/timings assist in effective adaptation.

Timing modifications reflect ingredient ratios and reheating procedures, inserting more time intervals with higher yields or advancing pre-requisite adjustments when servings increase.

Storage factors accompany adapted outcomes, encouraging dedicated usage of wide, shallow containers to retain quality while guaranteeing freshness irrespective of volume or yield adjustments.

Maintain consistent seasoning strategies by prolonged tasting during scaling phases, suggesting adequate flex to preserve original vibrant flavors. Target revisiting spicing combinations per serving outcome, orchestrating a trusted formula throughout.

Balanced portions and served recommendations abide by scaling principles, extending hospitality to a larger audience without diminishing beloved impact. Remain dedicated to consistency throughout adventures of adaptation.

Nutritional Deep Dive


Profiling dietary data on Blackened Steak and Shrimp Scampi captures vital macronutrients present. This protein-laden offering is heightened through powerful beef and shrimp combination, fostering muscle repair and energy reception.

Micronutrients provide essential elements tying dietary considerations with holistic well-being. Shrimp heightens seafood-derived benefits such as omega fatty acids, supporting cardiovascular care and inflammation management.

Health benefits stemming from careful preparation techniques avoid excess frying or frying fats, ensuring superb taste without escalating caloric burdens. This recipe aligns nutritionally with balanced meal philosophies.

Dietary considerations specify audience inclusivity, embracing those eyeing low-fat, high-protein paradigms. Meals rich in functional compounds reinforce foundational well-being across dining adventures of culinary satisfaction.

Portion control aids weight management through controlled serving guidelines. Dinners of this nature satisfy without excess, providing satiety coupled with flavor delight, accentuating nourishing experience aligned with one’s goals.

(Menu) \Nutritional consciousness reigns paramount throughout Blackened Steak and Shrimp Scampi offerings, encouraging informed choice-making and empowering nutritive narratives witnessed during indulgences worth cherishing.

Dietary Adaptations


The Blackened Steak and Shrimp Scampi recipe offers plentiful avenues for gluten-free modifications. Swap traditional ingredients for certified alternatives like gluten-free pasta to avoid intolerance-associated issues naturally.

For those seeking a dairy-free option, a quality olive oil serves as a sound replacement for butter, augmenting vibrance without violating dietary norms. Make adjustments across flavor ratios and guarantee consistency.

Those leaning into vegan choices embrace the ethical shift, turning toward tofu steaks or scampi substitutes expressing creativity in respect to nature’s bounty. The vibrant spice base persists, ensuring familiar appeal.

For low-carb adaptation options, substitute carbohydrate-rich sides with cauliflower rice, pursuing a balance between maintaining signature flavors and reducing carbohydrates where possible.

Within the keto realm, limit starch inclusion and augment hearty fats, ensuring flavor profiles remain satisfyingly indulgent without carbohydrate indulgence. Strategic ingredient swaps maintain texture while retaining key benefits.

For paleo aficionados, opting for ghee instead of butter along with chosen primal ingredients capitalizes on the ancestral approach of whole living, intertwined with calorie-conscious adaptable servings.

Low-FODMAP enthusiasts achieve accord through meticulous ingredient reduction, opting for fresh herbs over garlic-heavy sauces to soothe sensitive systems while experiencing culinary finesse.

Engage dedicated audience demographics catering to specific diets while prioritizing taste integrity and meaning within an adaptable Blackened Steak and Shrimp Scampi repertoire.

Troubleshooting Guide


Conquering texture issues demands respect for cooking dynamics and attentive ingredient balance, promoting even visual appearance and satisfaction. Adjust technique from texture transitions, overseeing timespan developments.

Flavor balance remains foundational for exemplary results, necessitating careful oversight over spice ratios. Adjust seasoning minimally and remember initial flavor components, providing symphony from start to completion.

Specific temperature problems require precision management, retaining engaging components like evenly-seared crusts while reinforcing quickly-heating shrimp cohesively for culinary equilibrium.

Overcoming equipment challenges for successful results arises through investing in reliable tools like cast-iron pans or searching for equivalents with capacity to withstand temperature impacts.

Ingredient substitutions drive results when components are unavailable, ensuring plausible providers such as fish for shrimp or pork for steak develop desired results in uniquely steady harmony.

Timing becomes paramount, delivering robust dining perspectives amid extensive circumstances or interruptions. Effective management of advanced plans and time allocations brings preparation results to desirable execution.

Explore common queries faced by successful Blackened Scampi testimonies, encouraging simple yet holistic correction to potential difficulties surrounding cherished culinary pursuit, ferociously embracing dish identity vibrantly.

Recipe Success Stories


Our community has shared heartwarming success stories making Blackened Steak and Shrimp Scampi an essential dish. From beginner culinary explorers mastering sear techniques to seasoned chefs perfecting presentations, the journey captivates.

Variations prove triumphs, with reader suggestions elevating countless adaptations. Vibrant ingredient shifts and flavor progressions continually refine the recipe, sparking fresh enjoyment and new favorite taste combinations.

Adaptation narratives underscore shared triumph, wedding traditional components to form modern-day satisfaction. Reader feedback testifies successful inclusion, facilitating recipe impact across taste and healthfulness dimensions.

Community sharing resonates, generating bonds through nourishment and inspiring shared journeys. Viewer photos illuminate creative garish hints and experimental plating strategies, inviting fellowship through food presentation beauty.

Instruction adjustment continues the inspiring dialogue, growing both community size and skillset. Our gallery brims with ample suggestions for presentation excellence that inspires fellow culinarians.

Experience our Blackened Steak and Shrimp Scampi pursuits in unparalleled passion, enticing community participation to showcase memorable trials, forming unity and moments of triumph amidst the culinary experience spectrum.

Frequently Asked Questions

1. Can I use another protein instead of steak or shrimp?
Yes, substituting protein allows for creativity. Consider chicken breasts or tofu for a vegetarian adaptation, ensuring to adjust cooking times accordingly based on the protein chosen.

2. How do I achieve a perfect steak sear using my equipment?
Achieving an ideal sear necessitates heat management. Preheat your pan thoroughly, ensuring it is smoking hot before introducing steak to maximize heat-retaining potential.

3. Can leftovers be frozen?
Yes, leftovers remain delectable when stored correctly. Place in airtight containers, minimizing freezer burn risks. Consider splitting portions individually before freezing for effortless reheated luxury.

4. Should I expect any flavor shifts with ingredient substitutions?
Yes, some flavor changes occur contingent on substitutes used. Retain seasonings and add similar herbs or spices aligning to anticipated nuances, ensuring results that match intended dish vibrancy.

5. How do I know if my shrimp is properly cooked?
Shrimp cook rapidly: Look for an opaque color change and gentle curling. Over a high heat, shrimp should be ready in 2-3 minutes per side for perfected texture.

6. What is the best way to store unused steak?
Secure wrapping structures preserve steak best when wrapped in plastic or foil and stored toward the back of the refrigerator, which is typically cooler and stable.

7. How do I avoid making my dish too spicy?
Balance spice levels by anticipating tolerability among guests, applying less initially with gradual add-on increments in response, adjusting towards the desired level.

8. Are there low-calorie portions within the meal?
Yes! Favorable approaches include substituting cream-rich sides with lighter salads or vegetables, reducing dish calorie footprint while honoring compatibility aesthetically and nutritionally.

9. Can I prepare the sauce ahead of time?
Yes, early sauce preparation complements efficiency. Chill the prepared sauce, resumably heating over gentle heat before absorbing shrimp to preserve impactful flavor alignment.

10. How should I garnish my finished Blackened Steak and Shrimp Scampi?
Consider a sprig of fresh dill or lemon zest, complementing color variety nuanced through visual diversity, igniting enhanced olfactory appeal and artistic flair.

Additional Resources


Curated related recipes provide exploration prospects alongside the Blackened Steak and Shrimp Scampi, continuing dialogues surrounding synergy dishes like Garlic Butter Lobster Tails or Herb-Crusted Lamb.

Explore technique guides deepening culinary understanding on steak-searing dynamics, ensuring skillset enhancement and excellence across diverse steak preparations. Cultivate proficiency in achieving optimal results.

Ingredient exploration outlines extend over garlic parsleys, unearthing details upon historical uses and preservation guidance through seasoned stories compelling enough to continue towards broader kitchen familiarity.

Equipment recommendations foster performance completion, uncovering generous insights on reliable cast-iron pan brands or complimentary tools, offering steadfast support throughout cooking trials and enhancing results.

Seasonal variation suggestions encourage timely element inclusion, inviting courageous steps during seasonal peaks like winter nutmegs in creamy potato variations, contributing immense culinary enrichment diversifying foodie experimentation.

Embrace further culinary enlightenment through deepening sources, fostering adeptness in spectacular preparation, delivered delightfully amidst the collective gastronomic realm.

Join the Conversation


Engage with this culinary journey by sharing your Blackened Steak and Shrimp Scampi triumphs on social media, tagging us for a chance to feature within our growing gallery of radiant results.

Participate in offering photography tips and plating strategies, fostering camaraderie and inspiration within dedicated foodie communities sharing visual perspectives harmoniously.

Craft shrewd recipe reviews, articulating transformative details showcasing personal pursuits while boosting culinary motivation, galvanizing food-lovers in exhilarating exchanges.

Eagerly embrace community engagement, imparting versatile recipe variations by sharing feasts of imagination. Discover symphonic happiness amidst the joy of cooking, inspiring others to new beginnings.

Be both avid participants and resourceful visionaries, invigorating discourse over scrumptious meals suffused with creativity, warmth, and a sparkling collective zest reminiscent of treasured dishes like this cherished seafood bistro classic.

(button to printable recipes follows)

The Recipe

Blackened Steak and Shrimp Scampi

Serves: 4

Prep Time: 15 mins

Cook Time: 30 mins

Total Time: 45 mins

Kitchen Equipment Needed

  • Cast-iron skillet
  • Heavy-duty pan
  • Mixing bowl
  • Measuring spoons
  • Sharp knife
  • Cutting board

Ingredients

  • 1 lb sirloin steak
  • 1 lb large shrimp, peeled and deveined
  • 2 tbsp blackening seasoning
  • 2 tbsp olive oil
  • 3 tbsp unsalted butter
  • 4 cloves garlic, minced
  • 1 lemon, juiced
  • 2 tbsp fresh parsley, chopped
  • Salt and pepper, to taste

Directions

  1. Rub the steak generously with blackening seasoning on both sides. Let it sit at room temperature for about 15 minutes.
  2. Meanwhile, heat 1 tablespoon of olive oil in a cast-iron skillet over high heat. Sear the steak for 3-4 minutes on each side until charred. Remove and let rest.
  3. In the same skillet, add the remaining tablespoon of olive oil and 2 tablespoons of butter. Sauté garlic until fragrant, about 1 minute.
  4. Add the shrimp to the skillet and cook until pink, around 2-3 minutes per side.
  5. Pour in lemon juice and remaining butter, stirring until butter melts and forms a sauce.
  6. Slice steak against the grain and serve alongside shrimp, garnished with fresh parsley.

Recipe Notes

  • Adjust the level of spiciness by altering the amount of blackening seasoning.
  • For additional flavor, marinate shrimp in lemon juice and herbs for 10 minutes before cooking.
  • Leftovers can be refrigerated and used for a surf and turf sandwich the next day.

Irresistible Cheesy Parmesan Mozzarella Bites Perfect for Snacking

Cheesy Parmesan Mozzarella Bites: A Deliciously Irresistible Snack

⚖️
Difficulty
Easy

⏲️
Prep Time
15 mins

🕒
Cook Time
10 mins

⏱️
Total Time
25 mins

🍽️
Servings
4

Cheesy Parmesan Mozzarella Bites are the perfect blend of gooey mozzarella and sharp Parmesan for a mouthwatering appetizer or snack. Whether you’re hosting a party or enjoying a quiet night at home, these delicious bites deliver the ultimate cheesy experience. Their golden, crispy exterior envelops a molten cheese center, which melts in your mouth, offering both a textural adventure and a delightful, savory taste.

These bites are a fantastic option for cheese lovers seeking something savory yet simple. Each cheese-filled nugget is packed with rich flavors from robust Parmesan and creamy mozzarella, balanced with a hint of garlic and Italian seasoning. This unpretentious yet flavorful snack captures the essence of Italian-style cooking, making it a favorite for both adults and kids alike.

Quick Recipe Highlights

  • Flavor Profile: A delightful mix of sharp Parmesan and creamy mozzarella, highlighted with garlic and herbs.
  • Texture: Crisp on the outside, warm and gooey on the inside for a satisfying bite.
  • Aroma: Enticing herbal notes from Italian seasoning complemented with the comforting scent of melted cheese.
  • Visual Appeal: Beautiful golden-brown crust that looks as inviting as it tastes.
  • Skill Level Needed: Simple enough for beginners, yet satisfying for experienced cooks.
  • Special Equipment: A deep fryer or heavy-bottomed pan suitable for frying.

Recipe Overview

  • Difficulty Level: Rated as easy, these bites are straightforward to prepare with clear, achievable steps.
  • Category: These bites fall into the appetizer or snack category, suitable for various occasions.
  • Cuisine: Draws inspiration from Italian cuisine, focusing on classic cheese combinations and herbs.
  • Cost: Fairly economical, mainly requiring staple ingredients found in most kitchens.
  • Season: Perfect for year-round preparation, but especially enjoyable during colder months for a comforting snack.
  • Occasion: Ideal for parties, game nights, or a cozy movie night at home.

Why You’ll Love This Recipe


The Cheesy Parmesan Mozzarella Bites offer an exquisite taste and texture that will tantalize your taste buds. The contrast between the crunchy exterior and soft, melting interior provides a unique sensory experience. Additionally, these bites are quick to prepare, making them an excellent choice for last-minute gathering or a spontaneous treat.

These bites are not only delicious but also provide an easy way to incorporate some calcium and protein into your diet, thanks to the cheese. The simplicity of the recipe means you can have them ready in no time, without needing an extensive ingredient list or complex techniques.

In terms of social value, these bites are a hit at any event. Their cheesy goodness is universally appealing, making them a great choice for pleasing a crowd. Plus, they pair effortlessly with a variety of dips, wines, and other snacks to enhance your entertaining spread.

From an economic standpoint, these bites are made primarily with pantry staples, making them a cost-effective option. Their ingredients are accessible, meaning you can create delicious, gourmet-tasting bites without breaking the bank. Cheese lovers, in particular, will rejoice at the decadent blend of flavors.

Historical Background and Cultural Significance


Cheesy Parmesan Mozzarella Bites owe much of their inspiration to the rich, cheese-centric legacy of Italian cuisine. Over the centuries, Italy has been renowned for its cheese varieties, with Parmesan and mozzarella being two of the most appreciated. This recipe underscores the Italian fondness for combining cheeses to create rich, savory dishes.

Culturally, cheese has played a vital role in Italian culinary traditions, often seen as a staple in every household. These bites reflect the ingenuity of using simple, accessible ingredients to create satisfying and delicious recipes that bring people together, much like many treasured Italian dishes.

The evolution of these bites can be traced to the need for convenient, quick snacks that still deliver on flavor. Modern culinary trends have adapted them for broader audiences, incorporating various herbs and spices to appeal to different palates. This versatility ensures these bites remain popular on dining tables across the globe.

Regional variations abound, with different cheeses or coatings used based on local preferences and ingredient availability. Such adaptability highlights the universal appeal and versatility of these cheese bites, making them a star in diverse culinary settings.

Ingredient Deep Dive


Parmesan cheese, known for its sharp and nutty flavor, is a culinary treasure hailing from Italy. It enriches these bites with its pronounced taste and is celebrated for its long aging process, which concentrates its flavors. Selecting good-quality Parmesan involves looking for a finely textured, hard cheese that yields easily to grating.

Mozzarella cheese adds creaminess to the bites, offering a milder, complementary note to the robust Parmesan. Originating from Italy, mozzarella is well-loved for its versatility – particularly in dishes where melting cheese is desired. Opt for fresh mozzarella to ensure the best meltability in your cheese bites.

When storing these cheeses, keep Parmesan tightly wrapped in parchment paper and then foil to prevent drying, and store mozzarella in its water for freshness. As for substitutions, you can explore other semi-hard cheeses or fresh cheeses in place of mozzarella, while Asiago serves as a potential alternative to Parmesan.

Special equipment includes a deep fryer or a pan suitable for achieving the optimal frying temperature for golden-brown results. Precision in temperature helps avoid greasy bites, ensuring they come out perfect every time.

Common Mistakes to Avoid

  • Not preheating the oil properly can result in greasy bites. Use a thermometer to ensure the oil reaches a consistent frying temperature.
  • Overcrowding the frying pan can cause the temperature to drop, leading to uneven cooking. Fry in batches for optimal results.
  • Not sealing the cheese properly within the coating could result in cheese leakage during frying.
  • Using low-quality cheese can impact the flavor. Choose cheese with robust flavors for the best outcome.
  • Skipping the resting period for the coated bites can affect texture. Allow them to chill briefly before frying to ensure crispiness.
  • Under-seasoning the breadcrumb mixture can make the bites bland. Taste and adjust seasoning where necessary.
  • Using too much flour can lead to a thick, unpleasant coating. A light dusting suffices for adhesion and texture.
  • Not allowing the bites to drain well post-frying can cause sogginess. Use a wire rack over paper towels to retain crispiness.
  • Cooking at low heat will soak up oil, making the bites greasy. Maintain a consistent frying temperature for golden results.
  • Not cooling the bites could result in burning the mouth with hot cheese. Allow them to stand momentarily after frying.

Essential Techniques


Mastering the frying technique is crucial for these bites. Maintaining the oil temperature ensures perfect browning without excessive oil absorption. A thermometer is invaluable for monitoring oil heat, targeting 350°F as the ideal frying range to achieve crispy exteriors and fully melted centers.

Coating techniques also play a role in the success of the dish. Proper dredging in flour and breadcrumb mixtures achieves a consistent, crunchy shell. Each layer should firmly adhere to prevent cheese escape during frying, and time spent chilling the bites pre-fry is essential for structural integrity.

Pro Tips for Perfect Cheesy Parmesan Mozzarella Bites


For extra flavor, consider incorporating herbs such as oregano or basil into the breadcrumb mixture. Their fragrant aromas will enhance the overall eating experience.

Experiment with adding other cheeses such as Gruyère for a more sophisticated flavor profile. Adjust the cooking time slightly to accommodate different melt rates.

Precision in frying temperature is crucial. Invest in a reliable kitchen thermometer to ensure the oil remains consistently heated throughout the cooking process.

Chill the bites after coating them to firm up their structure. This helps achieve a more successful frying process with fewer broken pieces.

If without a deep fryer, a heavy-bottomed pan works equally well. Aim to have the oil around two inches deep for best results.

Play with spice levels by adding crushed red pepper flakes into the mix for a subtle heat that complements the cheese.

Variations and Adaptations


Depending on the region, variations of these bites might include using local cheeses or spices. This adaptability allows for experimentation with flavors that reflect personal taste or cultural influences. Substitute mozzarella for softer cheeses like burrata for a richer creaminess.

During different seasons, these bites can feature seasonal herbs or spices. In winter, opt for warm spices like nutmeg or cayenne, while summer variations might include fresh basil or sun-dried tomato enhancements.

For dietary adaptations, gluten-free breadcrumbs can easily replace regular ones, making these bites accessible for gluten-sensitive individuals. Ensure all ingredients comply with specific dietary requirements to enhance the recipe’s versatility.

For presentation, a drizzle of balsamic glaze offers a sophisticated touch and pairs well with the richness of the cheese. Additionally, consider innovative serving methods, such as mini skewers or creative dip arrangements, to elevate the dining experience.

Serving and Presentation Guide


To plate your Cheesy Parmesan Mozzarella Bites, consider bistro-style platters lined with fresh herbs or crisp napkins for visual contrast. These bites shine when served alongside a rich marinara or fresh pesto for dipping, providing flavorful balance.

Garnishing the serving plate with grated Parmesan or sprigs of thyme adds an elegant touch and further enhances the dish’s aroma. Present these bites warm, ensuring they maintain the perfect texture and meltiness.

Incorporate portion control by serving individual ramekins of dipping sauce alongside each plate, allowing guests to tailor the bites’ flavor to their liking. This approach also promotes a clean, organized presentation, making an inviting impression on the table.

Wine and Beverage Pairing


Capitalize on the cheesy richness of these bites by pairing them with a glass of well-chilled Chardonnay or a fruity Sauvignon Blanc that complements the savory notes with a crisp, refreshing finish.

For those preferring non-alcoholic options, consider pairing with bubbly sparkling water with lemon slices, offering a palate-cleansing contrast to the cheesy richness. Alternatively, a tart cranberry juice acts as a vibrant counterbalance.

Espresso or coffee pairings are less conventional but appreciated by those who enjoy the combination of melted cheese with robust beverage flavors. Serve warm for an elevated dining snacking experience at any time of day.

Ensuring the beverages complement and enhance the bites’ flavors brings the entire eating experience together harmoniously, maintaining balance and enjoyment throughout.

The Recipe

Cheesy Parmesan Mozzarella Bites

Serves: 4

Prep Time: 15 mins

Cook Time: 10 mins

Total Time: 25 mins

Kitchen Equipment Needed

  • Knife and chopping board
  • Large mixing bowls
  • Deep fryer or heavy-bottomed pan
  • Thermometer
  • Slotted spoon or wire rack

Ingredients

  • 1 cup grated Parmesan cheese
  • 1 cup shredded mozzarella cheese
  • 1/2 cup all-purpose flour
  • 2 large eggs, beaten
  • 1 cup breadcrumbs
  • 1 teaspoon Italian seasoning
  • 1/2 teaspoon garlic powder
  • Salt and pepper to taste
  • Vegetable oil for frying

Directions

  1. In a bowl, combine Parmesan, mozzarella, and a pinch of salt and pepper.
  2. Shape cheese mixture into small balls and roll in flour, tapping to remove excess.
  3. Dip each ball in beaten eggs, then coat with breadcrumbs mixed with Italian seasoning and garlic powder.
  4. Chill balls for 10 minutes to set coating.
  5. Heat oil to 350°F in fryer or pan; fry cheese balls in batches until golden brown, about 2-3 minutes per batch.
  6. Drain on wire rack to remove excess oil.

Recipe Notes

  • For added spice, incorporate crushed red pepper flakes into the breadcrumb mixture.
  • Use gluten-free breadcrumbs for dietary adaptations.
  • Serve with marinara or pesto dipping sauce for added flavor.

Deliciously Easy Zuppa Toscana Soup Recipe for Cozy Nights

Easy Zuppa Toscana Soup: A Cozy Italian Delight

⚖️
Difficulty
Easy

⏲️
Prep Time
15 mins

🕒
Cook Time
30 mins

⏱️
Total Time
45 mins

🍽️
Servings
6

Imagine curling up with a warm bowl of Easy Zuppa Toscana Soup when the weather turns cool. This soup bursts with the comforting flavors of hearty Italian sausage, tender kale, and creamy potatoes. Its simplicity in preparation makes it perfect for weeknight dinners, yet its rich, savory taste delivers a touch of Italian restaurant elegance right to your dining table. As the soup simmers, your kitchen will fill with an enticing aroma, making it irresistible even before you take your first spoonful.

Quick Recipe Highlights

  • Flavor Profile: A savory and slightly spicy blend of Italian sausage with mellow bites of potatoes and a hint of garlic and onion.
  • Texture: Creamy broth with tender chunks of potato and crispy bites of sausage and kale.
  • Aroma: Rich, hearty scent with bold hints of garlic and a touch of peppery spice.
  • Visual Appeal: A rustic, earthy presentation with rich greens and creamy broth.
  • Skill Level Needed: Perfect for beginners; simple steps with easily managed cooking techniques.
  • Special Equipment: A large pot or Dutch oven is essential for evenly cooking the soup components.

Recipe Overview

  • Difficulty Level: Rated as easy; no advanced cooking skills are required, just basic chopping and simmering techniques.
  • Category: Fall and winter comfort meal, hearty soup, family dinners.
  • Cuisine: Italian-inspired, capturing the rustic flavors and heartwarming nature of traditional Tuscan cooking.
  • Cost: Budget-friendly with readily available ingredients.
  • Season: Ideal for cooler months when warming, soul-soothing meals are most appreciated.
  • Occasion: Perfect for casual gatherings, family dinners, or a comforting meal on a chilly evening.

Why You’ll Love This Recipe


The taste and texture of the Easy Zuppa Toscana Soup is a major draw. The creamy, savory broth is balanced by the satisfying bite of sausage and soft potatoes, while the addition of fresh kale adds a delightful crispness. It’s a crowd-pleaser bound to impress guests and family members.

Convenience is another reason to appreciate this recipe. It uses common pantry staples, and the steps are streamlined to ensure minimal preparation time, making it ideal for busy weeknights.

Nutritionally, Zuppa Toscana Soup is a winner. It offers a good balance of protein, carbohydrates, and vitamins from the vegetables, particularly if you opt for a light cream or a dairy-free substitute.

When it comes to entertaining, this soup stands out as a warm and welcoming dish that can be easily scaled up for larger gatherings, providing a homely touch to any social occasion.

Finally, its cost-effectiveness is a significant advantage. With accessible ingredients and minimal cost per serving, it’s an affordable dish suited for regular rotation in your meal planning.

Historical Background and Cultural Significance


Zuppa Toscana Soup originates from the Tuscany region in Italy, known for its rustic and flavorful cuisine. Historically, soups like this were a staple for Italian households, providing nourishment using affordable, locally available ingredients.

Culturally, this soup represents the essence of Italian ‘la cucina povera,’ the tradition of creating fulfilling meals from simple, wholesome components. It’s a testament to the resourcefulness and culinary creativity found in Italian cooking.

Over time, Zuppa Toscana has evolved, with numerous variations reflecting regional preferences and ingredient availability. Yet, it continues to embody the warmth and simplicity of its origins.

Regional variations might include the use of different sausages or even the addition of beans for extra texture and protein, showcasing the flexibility and adaptability of this beloved soup.

Ingredient Deep Dive

Italian Sausage: Deeply tied to the rustic cooking of central Italy, Italian sausage brings an authentic, bold flavor to this soup. It’s rich in flavors thanks to a mix of herbs and spices. Nutritionally, it provides a substantial amount of protein and healthy fats. When selecting, opt for fresh, high-quality sausage; storing it in the fridge until use is recommended, although freezing can extend its shelf life.

Potatoes: Key to the creamy texture of Zuppa Toscana, potatoes have been a culinary staple in Tuscany due to their versatility and nutrition. They offer necessary carbohydrates and nutrients like potassium and vitamin C. For best results, choose firm and unblemished potatoes, store them in a cool, dark place, and avoid refrigerating to maintain flavor.

Kale: Originally grown all over Italy, kale adds the necessary green element to this dish, offering a slightly bitter contrast to the soup’s rich flavors. It’s packed with vitamins A, C, and K, and antioxidants. When selecting, look for firm, deep green leaves. Store kale in the fridge, wrapped to maintain crispness, and rinse thoroughly before use.

Common Mistakes to Avoid

  • Overcooking the kale: Adding kale too early can make it soggy. Add it towards the end of cooking to maintain its crisp texture.
  • Using low-quality sausage: The sausage is the key flavor contributor. Choose fresh, high-quality Italian sausage for the best flavor.
  • Heavy cream curdling: Add cream at a lower temperature to avoid curdling, ensuring a smooth soup texture.
  • Potatoes too soft: Keep an eye on the potatoes as they cook to ensure they don’t become mushy; they should retain form without being too hard.
  • Skipping the browning step: Properly browning the sausage enriches the flavor profile significantly. Don’t rush this step.
  • Under-seasoning: Taste as you cook and adjust with salt and pepper to enhance the flavors optimally.
  • Not deglazing the pan: After browning the sausage, deglaze with a splash of broth to incorporate those rich, browned bits into the soup.
  • Improper reheating: Gently reheat the soup to maintain creaminess without breaking the texture of the ingredients.

Essential Techniques

Sautéing Sausage: Properly browning the sausage is crucial. This step caramelizes the meat and locks in flavors, contributing to a deeper, richer soup taste. Ensuring an even browning without overcrowding the pan is key. The browned bits left in the pot should be deglazed with liquid to capture every bit of flavor.

Cutting Potatoes Evenly: Evenly cut potatoes ensure uniform cooking, preventing some pieces from being undercooked while others overcook. A sharp knife is essential for clean cuts, and visual cues like slight translucence and fork-tender texture indicate doneness.

Gently Simmering: Maintain a gentle simmer after adding the liquids. This technique allows flavors to meld without overcooking the soup components. Avoid boiling vigorously, as it can break down the delicate textures of the ingredients.

Pro Tips for Perfect Easy Zuppa Toscana Soup

Ensure your broth is well-seasoned from the start as potatoes absorb seasoning during cooking, making it less likely you’ll need heavy adjustments later.

Try adding a pinch of red pepper flakes for an extra kick if using mild sausage. It enhances the natural flavors and adds warmth without overwhelming the dish.

Use Yukon Gold potatoes for their natural creaminess and delicate texture. They break down just enough in the soup to add body without becoming too mushy.

Consider coconut milk as a dairy-free alternative for cream. It blends well with the flavors and provides creaminess with no additional lactose.

For a deeper flavor, include a parmesan rind to the pot while simmering. It adds a savory umami touch which enhances the overall taste.

If making ahead, wait to add the kale until just before serving to maintain its fresh color and crisp texture.

Adapting the recipe for slow cooking? Brown the sausage and onions first, then add all ingredients except the kale to the slow cooker. Add kale in the last hour of cooking.

Variations and Adaptations

Regional Variations: Some variations use pancetta or prosciutto for a different meat profile, while others add white beans for additional heartiness.

Seasonal Adaptations: Swap kale with seasonal greens such as spinach in spring or collard greens in winter. This tweak respects the seasonal produce availability.

Dietary Modifications: For a low-carb version, use cauliflower instead of potatoes, maintaining the dish’s beloved creaminess while reducing carbs.

Flavor Variations: Incorporate a hint of smoked paprika for an added smoky undertone, enriching the flavor complexity without overpowering.

Texture Modifications: Finish the soup with a dollop of mascarpone cheese or ricotta for added creaminess.

Presentation Alternatives: Serve Zuppa Toscana in rustic bread bowls for a classic touch, perfect for dinner parties or cozy gatherings.

Serving and Presentation Guide

Plating techniques involve simple rustic bowls that showcase the warm, inviting nature of the soup. For a garnish, freshly grated Parmesan and a sprinkle of parsley or red pepper flakes can add a finishing flourish.

Consider serving with warm, crusty bread to soak up every drop of the rich broth. It adds a beautiful contrast in texture, complementing the hearty soup.

Temperature plays a crucial role in serving soup. Ensure it’s hot enough to enjoy its full flavor profile without being too hot to comfortably consume.

Maintain portion control by pairing the soup with a side salad or roasted vegetables, creating a well-rounded, satisfying meal.

Explore modern ideas like serving in mini cups for an appetizer portion at gatherings, offering a taste without the need for a larger meal setup.

Wine and Beverage Pairing

For wine pairings, a crisp Pinot Grigio or a lesser-oaked Chardonnay perfectly complements the creamy and slightly spicy nature of the soup without overpowering it.

Non-alcoholic alternatives like a sparkling water infused with lemon or a lightly flavored iced tea offer a refreshing contrast to the warm, rich soup.

Consider coffee and tea pairings such as a light-bodied tea with citrus notes which can cleanse the palate between bites, enhancing the rich flavors of the soup.

Ensure beverages are served at a cooler temperature to balance the warmth and enhance the experience of enjoying the Easy Zuppa Toscana Soup.

Storage and Shelf Life

Store leftovers in an airtight container in the refrigerator for up to 3 days. This soup reheats well, retaining its flavors and texture when gently heated on the stove.

For freezing, portion the soup into individual containers, allowing space for expansion. Freeze for up to 3 months for optimal freshness. Thaw in the fridge and reheat gently on the stove.

Signs of spoilage include an off smell or separation in the broth, indicating it’s past its prime; always inspect before reheating.

Observe proper food safety guidelines by ensuring the soup is reheated to at least 165°F to maintain its quality and ensure it’s safe to eat.

Make Ahead Strategies

When preparing ahead, cook the soup through without adding the kale. Cool and store, then add fresh kale when reheating to retain its vibrant color and crispness.

For meal prep, cut and measure ingredients ahead of time, storing them in the fridge. This can save significant prep time when you’re ready to cook.

Mix the sausage and bake in the oven to lessen stovetop tending time. Once ready, add browned sausage and prepped ingredients quickly to the pot.

Assembly tips include having all your ingredients chopped and ready, ensuring the soup-making process is seamless and efficient with fewer breaks.

Keep in mind to add creamy elements at the final reheating stage to ensure a fresh, smooth texture in the finished soup.

Scaling Instructions

To halve the recipe for fewer servings, simply adjust the ingredient quantities proportionally. This can ensure you’re not overwhelmed by leftovers while still enjoying the full flavor.

Doubling or tripling requires a larger pot to handle the increased volume adequately and might need adjusted cook times to ensure even cooking, especially when browning sausage and simmering.

Storage considerations mean having extra freezer-safe containers ready for leftovers, as well as calculated reheating time to maintain quality over larger quantities.

Nutritional Deep Dive

This recipe offers a balanced nutritional profile, featuring moderate proteins from sausage, complex carbohydrates from potatoes, and vitamins and minerals from kale.

Portions can be managed easily by adjusting the sausage or substituting it with a leaner protein to fit specific dietary needs.

Rich in vitamin A, C, and K, thanks to the kale, this soup supports immune health and overall wellness when incorporated into a balanced diet.

For weight management, serve measured single servings with a side of low-calorie salad or a small portion of whole-grain bread.

Dietary Adaptations

Gluten-Free: Naturally gluten-free as long as broth and sausages without added gluten are used.

Dairy-Free: Substitute cream with coconut milk or an almond-based cream alternative.

Vegan: Swap the sausage with a plant-based version and use vegetable broth instead of chicken stock, opting for coconut milk for creaminess.

Low-Carb: Replace potatoes with cauliflower for decreased carbohydrates while maintaining volume and creaminess in the dish.

Keto: Similar modifications as low-carb, focusing on high-fat, low-carb substitutions like heavy cream instead of light cream.

Paleo: Use ghee instead of oil and ensure all processed ingredients adhere to paleo guidelines.

Low-FODMAP: Adapt by using approved vegetables and substituting garlic and onion with infused oils to retain flavor without compromising digestive comfort.

Troubleshooting Guide

For texture issues like overly soft potatoes, aim to cut them evenly and monitor cooking time closely, ensuring uniform pieces.

Balance flavor by adjusting seasoning at the end with fresh herbs or a splash of lemon juice to brighten and balance the creamy notes.

Temperature problems can be mitigated by cooling hot soup in smaller bowls before serving, preventing burns and improving taste experience.

If equipment challenges arise, replacing a Dutch oven with a large non-stick frying pan for initial steps can help distribute heat more evenly for browning.

Over time, ingredient substitutions can slightly alter flavor. Opt for testing batches beforehand to adjust seasonings or broth quantities to taste.

Timing concerns, such as drying out or over-reduction during simmering, can be countered by covering the pot partially, reducing liquid loss while cooking.

Recipe Success Stories

Community feedback often highlights the ease of preparation and the soup’s cozy, warming qualities during colder months.

Variation successes include using ground chicken sausage for a lighter version or experimenting with spices to create custom blends, adding unique twists on traditional recipes.

Many readers suggest substituting kale for spinach when serving kids, noting it tends to be more accepted due to its milder flavor and softer texture.

Photography tips from the community suggest lighting from above to capture the textures and rich colors, or using a sprinkle of fresh herbs to enhance visual appeal for photos.

Frequently Asked Questions

Can I make this soup in a slow cooker?
This soup adapts well to slow cooking. First, brown the sausage separately on the stove, then add all ingredients except the kale to the slow cooker. Cook on low for 5-6 hours, adding kale in the last 30 minutes.

What can I use instead of Italian sausage?
If Italian sausage isn’t available, you can use ground turkey seasoned with fennel seeds, oregano, and red pepper flakes to mimic the sausage’s flavor profile.

Can I freeze the soup?
Yes, Zuppa Toscana freezes well. Be sure to cool completely before freezing and consider omitting kale until reheating for a freshly added green garnish.

How can I make it spicier?
Add a touch of cayenne pepper or increase the amount of red pepper flakes for extra heat, adjusting to your preferred spice level.

What can I do if the soup is too thick?
If the soup thickens too much, simply add a splash of chicken broth or a bit more cream and slowly reheat, stirring until the desired consistency is reached.

Is it possible to make the soup lighter?
To make a lighter version, consider using turkey sausage and a light cream or a dairy-free alternative like almond milk.

Can I prepare this soup in advance?
Certainly! Prepare the soup without the kale and store. Add fresh kale during reheating to keep it crisp and vibrant.

Do I have to use kale?
Kale can be substituted with spinach or swiss chard if desired, which are milder in flavor and softer in texture.

What garnish goes well with this soup?
Parmesan cheese, crumbled bacon, or a touch of lemon zest serve as delightful garnishes, enhancing both flavor and presentation.

Why is my soup bland?
Blandness might be due to under-seasoning. Adjust with salt, pepper, and fresh herbal touches according to taste.

Additional Resources

Explore similar recipes such as Pasta Fagioli or Minestrone for further inspiration, both offering similar comforting qualities adapted to different ingredients.

Enhance your culinary skills with technique guides focused on successfully browning sausages and perfecting creamy soups.

Ingredient information sharing focuses on understanding the use of lentils and beans as protein substitutes for sausages, providing alternatives for adapting other recipes.

Equipment recommendations suggest investing in a quality Dutch oven or stock pot for efficient heat distribution, ensuring successful soup-making endeavors across various recipes.

Join the Conversation

Engage with our community by sharing your recipe experiences on social media using hashtag #ZuppaToscanaLove, showcasing your delicious results.

Photography tips include using natural light to enhance your soup’s vibrant greens and creamy tones for striking visual appeal online.

We welcome reviews and suggestions in the comments section, which can foster a broader community of food enthusiasts eager to share their twists and tips on this beloved dish.

Experimenting with different variations can encourage sharing recipe adaptations, fostering culinary creativity across home cooks seeking to perfect their ideal Zuppa Toscana.

The Recipe

Easy Zuppa Toscana Soup

Serves: 6

Prep Time: 15 mins

Cook Time: 30 mins

Total Time: 45 mins

Kitchen Equipment Needed

  • Large pot or Dutch oven
  • Wooden spoon or spatula
  • Sharp knife
  • Chopping board

Ingredients

  • 1 lb Italian sausage
  • 3 large russet potatoes, thinly sliced
  • 1 onion, diced
  • 2 garlic cloves, minced
  • 4 cups chicken broth
  • 2 cups kale, chopped
  • 1 cup heavy cream
  • Salt and pepper to taste

Directions

  1. In a large pot, brown the Italian sausage over medium heat until fully cooked. Remove and set aside.
  2. In the same pot, add diced onion and cook until translucent. Add minced garlic and cook for another minute.
  3. Add the chicken broth and sliced potatoes. Bring to a boil, then reduce heat and simmer until potatoes are tender.
  4. Return the cooked sausage to the pot and stir in the heavy cream.
  5. Add the chopped kale and simmer for an additional 5 minutes.
  6. Season with salt and pepper to taste before serving.

Recipe Notes

  • For a lighter version, consider substituting heavy cream with half-and-half.
  • For an added kick, try incorporating a few red pepper flakes into the soup.
  • Topping with freshly grated Parmesan enhances the flavors.

Discover Authentic Italian Pot Roast (Stracotto) for Cozy Dinners

Italian Pot Roast (Stracotto): A Hearty Classic

⚖️
Difficulty
Medium

⏲️
Prep Time
30 mins

🕒
Cook Time
240 mins

⏱️
Total Time
270 mins

🍽️
Servings
6

Immerse yourself in the Italian culinary tradition with this delightful Italian Pot Roast, known as Stracotto. Experience the robust yet tender flavors that this long-simmered dish offers, embodying the essence of homey comfort food. The Stracotto tantalizes your taste buds with a flavorful combination of herbs, vegetables, and a succulent cut of beef, creating a symphony of flavors in every bite.

The Stracotto recipe, a staple in many Italian households, speaks to the heart of Italian cooking through its simplicity and rich aromatic profile. Dive into this hearty meal as the aroma fills your kitchen, creating an inviting atmosphere that welcomes everyone to the table. With every slice of the juicy pot roast, you’ll discover how patience in cooking results in extraordinary taste.

Quick Recipe Highlights

– Flavor Profile: Imbued with a rich, savory essence, the Stracotto balances garlic, oregano, and rosemary beautifully.
– Texture: Expect a melt-in-the-mouth experience as the beef tenderizes beautifully over time, soaked in a robust sauce.
– Aroma: The slow-cooked dish exudes an intoxicating aroma of herby goodness set against a background of hearty beef.
– Visual Appeal: The dish presents beautifully, with a deep brown hue punctuated by vibrant vegetables.
– Skill Level Needed: This recipe demands a mid-level culinary skill, perfect for those ready to elevate their cooking game.
– Special Equipment: A heavy-bottomed Dutch oven or slow cooker ensures even cooking and flavor development.

Recipe Overview

– Difficulty Level: This dish requires controlled simmering and attention to detail during preparation, but it’s worth every minute spent.
– Category: Perfect as a family dinner, this pot roast also fits celebrations with ease.
– Cuisine: A cornerstone of Italian cuisine, this dish is rooted in rustic Italian cooking traditions.
– Cost: Utilizing a single pot and minimal ingredients, this recipe is cost-efficient, providing great value to your dining table.
– Season: Ideal for colder months, when hearty meals provide nourishment and warmth.
– Occasion: Whether for a casual family meal or a special occasion, Stracotto is versatile enough to impress.

Why You’ll Love This Recipe

Taste and texture are at the forefront of what makes Stracotto a beloved classic. The long cooking time ensures the beef is tender and the flavors well integrated throughout the dish. This pot roast offers a cozy dining experience, where every bite is reminiscent of warming Italian hospitality. Preparation is straightforward, with minimal hands-on involvement as the dish cooks at its own pace.

Nutritionally, this recipe balances protein and vegetables, offering a wholesome and satisfying meal. It’s an excellent way to introduce robust flavors to your palate without overwhelming complexity. Moreover, the economic use of ingredients turns Stracotto into an accessible choice for families looking to maximize their food budget.

Historical Background and Cultural Significance

The roots of Italian Pot Roast stretch deep into traditional Italian culinary practices. Known as Stracotto, meaning “overcooked,” this dish encapsulates slow cooking ideals, traditionally used in regions where beef was braised over many hours. Throughout history, families have gathered around such hearty meals, which reflected Italy’s agrarian lifestyle, where patience in cooking was both a necessity and an art form.

Over the years, Stracotto has evolved, with each Italian region offering its unique twist to this dish, adding or omitting certain herbs or spices. Despite these variations, the core idea remains the same – to create a fulfilling meal that brings people together in celebration of good food.

Ingredient Deep Dive

Beef Chuck Roast – A staple for this recipe, beef chuck’s marbling breaks down over hours of cooking, converting into tender perfection. Not only is it flavorful, but it also serves as an excellent conduit for the herbs and seasonings in the dish. Ensure you select a piece with visible marbling for tenderness and flavor. Store in a cool environment and use within a few days for the best quality.

Tomato Paste – Enhances the depth of flavor, providing a slightly sweet, tangy background to the rich beef. The concentrated nature means a little goes a long way, building layers of flavor. For a customer who’s mindful of sugar intake, find a sugar-free variant of tomato paste readily available in stores.

Common Mistakes to Avoid

– Don’t rush the initial searing phase; this step locks in flavor.
– Avoid overcrowding the pan, as this reduces the effectiveness of browning.
– Cook at a consistent low temperature to ensure tenderness.
– Use a fresh batch of herbs for the fullest flavor impact.
– Avoid adding too much salt early; flavors concentrate over time.
– Monitor liquid levels to prevent the dish from drying out.
– Choose the correct pot size; too large or too small can affect cooking.
– Ensure beef is adequately thawed before cooking.

Essential Techniques

Proper Searing: This locks juices within the meat while developing a savory crust, essential for flavor. Consistent heat and patience are key to achieving a perfect sear without burning.

Temperature Control: Maintaining a low, slow cooking environment ensures tenderness over time. Invest in a reliable kitchen thermometer to avoid fluctuations.

Visual and aromatic cues play a crucial role in determining the dish’s readiness.

Pro Tips for Perfect Italian Pot Roast

– Allow the beef to rest before and after cooking for maximum juiciness.
– Monitor humidity by keeping the lid closed to prevent toughness.
– Add vegetables at mid-point to keep them from getting too mushy.
– Strain excess fat from the pot for a cleaner flavor.
– Lightly reduce cooking liquid before serving for added concentration.
– Experiment with wines for braising; each brings a unique twist.

Variations and Adaptations

Regional variations may include the use of white wine instead of red or adding olives for a Mediterranean twist. Modern adaptations introduce new herbs such as thyme or apply different cuts of meat to cater to varied preferences. For dietary needs, such as gluten-free, ensure that any added stock or thickeners align with dietary restrictions.

Serving and Presentation Guide

For a traditional approach, serve the Stracotto alongside creamy polenta or homemade mashed potatoes. Lightly garnish with freshly chopped parsley for a pop of color. For those aiming to infuse modern flair, consider plating atop wilted greens or alongside roasted seasonal vegetables. Time your dish to present it warm, ensuring meat tenderness remains front and center.

Wine and Beverage Pairing

A robust red wine, such as Chianti or Barolo, compliments Stracotto beautifully, enhancing its deep flavors. For non-drinkers, consider rich berry juices or herbal teas that accentuate the dish’s richness. Whichever you choose, serve slightly chilled for balanced aroma and nuanced taste.

Storage and Shelf Life

Store leftovers in airtight containers, ensuring they are completely cooled before sealing. Refrigerate for up to 3 days or freeze for up to a month. Reheat gently in over medium heat to preserve beef’s tenderness and complexity in the sauce’s layers.

Make Ahead Strategies

The flexibility of Stracotto means you can prepare it the day before an event or social gathering, storing it in the refrigerator for flavors to intensify overnight. When ready to serve, gently reheat, reserving fresh garnishes for optimal presentation.

Scaling Instructions

Whether for intimate dinners or larger gatherings, the Stracotto is easily scalable. Simply adjust ingredient quantities to suit desired servings, ensuring you maintain proper pot size to facilitate even cooking.

Nutritional Deep Dive

Stracotto balances quality protein with the nutritional benefits of tomatoes and herbs, contributing to a meal that supports muscular health and immune function. Focus on portion control and pairing with light sides to maintain a health-conscious approach.

Dietary Adaptations

For those observing specific diets such as Paleo or Low-FODMAP, substitute key elements like wine with non-grain alternatives or omitted certain heavy carbohydrates, and ensure no added gluten in thickeners.

Troubleshooting Guide

When faced with texture issues, consider adjusting simmer time and test throughout cooking for softness. For flavor imbalances, consider using extracts or concentrated pastes sparingly initially, adding as necessary to taste.

Recipe Success Stories

Community stories often highlight family events and holidays where Stracotto became a centerpiece. It’s common to hear about personal twists on ingredient lists shared among friends, each contributing to a richer tapestry of personal flavors.

Frequently Asked Questions

What is Stracotto best served with? Pair it with mashed potatoes or polenta for a classic Italian experience.
Can I use another cut of meat? While beef chuck is recommended, alternatives like brisket can also work well.
Is Stracotto suitable for freezing? Yes, just ensure it’s cooled and stored in airtight containers.
Does it need frequent basting? Keeping the lid closed maintains moisture, reducing the need for basting.
How can I make it sear well? Use a well-heated pan to ensure even browning.
Can I add more vegetables? Sure, just monitor the cooking time to avoid over-softening.
Is it suitable for a slow cooker? Absolutely, this dish adapts perfectly for slow cooking over several hours.

Additional Resources

Explore similar recipes in the Italian culinary realm such as Osso Buco, or enhance your cooking skills with detailed technique guides on braising. Dive into the world of flavorful stocks and learn more about the ingredients that often accompany dishes like Stracotto.

Join the Conversation

We invite you to share your Stracotto photos on social media and connect with our community by offering feedback on your experience or variations you’ve tried. We love hearing what works for you and how this recipe fits into your life.

The Recipe

Italian Pot Roast (Stracotto)

– Serves: 6
– Prep Time: 30 mins
– Cook Time: 240 mins
– Total Time: 270 mins

Kitchen Equipment Needed

– Heavy-bottomed Dutch oven
– Sharp knife
– Cutting board
– Measuring spoons
– Stirring spoon

Ingredients

– 3 lbs beef chuck roast
– 2 tbsp olive oil
– 3 cloves garlic, minced
– 1 large onion, diced
– 2 carrots, diced
– 2 celery stalks, diced
– 2 cups red wine
– 2 cups beef broth
– 2 tbsp tomato paste
– 2 tsp dried oregano
– 1 tsp rosemary
– Salt and pepper to taste
– Fresh parsley for garnish

Directions

1. Preheat your oven to 325°F.
2. Heat olive oil in a Dutch oven over medium-high heat.
3. Season the beef generously with salt and pepper.
4. Sear beef on all sides, then set aside.
5. In the same pot, add garlic, onion, carrots, and celery; cook until softened.
6. Stir in tomato paste, then add wine and broth, scraping browned bits.
7. Add beef back to the pot, nestle among vegetables and liquid.
8. Sprinkle in oregano and rosemary, cover with a lid.
9. Transfer to the oven, cook for 4 hours, checking occasionally.
10. Adjust seasoning if necessary, garnish, and serve hot.

Recipe Notes

– For added richness, consider browning meat longer.
– Swap red wine with a non-alcoholic option.
– Store leftovers in the fridge for up to 3 days or freeze.

Irresistible Bacon Cheeseburger Meatloaf Recipe for Ultimate Comfort Food

Bacon Cheeseburger Meatloaf: The Ultimate Comfort Feast

⚖️
Difficulty
Moderate

⏲️
Prep Time
20 mins

🕒
Cook Time
60 mins

⏱️
Total Time
80 mins

🍽️
Servings
6

Welcome to your new favorite comfort food recipe: Bacon Cheeseburger Meatloaf. This delectable dish combines the best elements of a juicy cheeseburger with the homely comfort of meatloaf, creating a culinary marvel that’s sure to please family and friends alike. Imagine taking a bite of rich, savory meatloaf, infused with the melty goodness of cheddar cheese, and kissed with the irresistible flavor of crispy bacon. This recipe is not just a dish; it’s an experience—a nostalgic trip back to simpler times, destined to create new, cherished memories around the dinner table.

Why settle for ordinary meatloaf when you can enjoy the ultimate in flavor-packed extravagance? Bacon Cheeseburger Meatloaf is an ingenious twist on classic family fare, offering an explosion of tastes with every bite. This mouthwatering recipe calls for ground beef, savory bacon, and melted cheddar, all seasoned to perfection. The texture is tender yet hearty, with a touch of crunch from the bacon, creating a multi-layered sensory experience. Its aroma will fill your kitchen with an inviting, irresistible scent, making it hard not to sneak a taste before it’s done.

Quick Recipe Highlights

  • Flavor Profile: The Bacon Cheeseburger Meatloaf offers a perfect blend of savory beef, crispy bacon, and oozing cheddar, echoing the taste of a gourmet burger.
  • Texture: Experience a tender, juicy center complemented by bits of crunchy bacon, creating a delightful dance of textures in your mouth.
  • Aroma: Expect a rich, comforting aroma of cooked beef, smoky bacon, and sharp cheddar that fills your kitchen with nostalgic warmth.
  • Visual Appeal: A golden-brown crust with melted cheese and bacon bits scattered on top makes for an enticing presentation.
  • Skill Level Needed: This recipe is approachable for home cooks with a basic understanding of baking and meat preparation techniques.
  • Special Equipment: A standard loaf pan and mixing bowls are the primary tools needed for this recipe.

Recipe Overview

  • Difficulty Level: Moderate, due to the need to properly layer and bake the loaf without overcooking, but it’s achievable even for novice cooks following careful instructions.
  • Category: This can be categorized under comfort foods and main dishes, perfect for family dinners and cozy gatherings.
  • Cuisine: A modern American take on the classic meatloaf, influenced by the flavors of a traditional cheeseburger.
  • Cost: This is a cost-effective meal, with the primary expense being the ground beef and cheese, making it accessible for most budgets.
  • Season: While it can be enjoyed year-round, this dish particularly shines during cooler months when cozy comfort foods are most appreciated.
  • Occasion: Ideal for casual weeknight dinners, family gatherings, or anytime you’re in need of a hearty and satisfying meal.

Why You’ll Love This Recipe


There’s much to love about this Bacon Cheeseburger Meatloaf. First, the taste—it offers an incredible fusion of classic comfort food with the familiar flavors of a backyard barbecue, making it a standout at any meal. The balance of juicy beef, smoky bacon, and creamy cheese layered with subtle seasonings will tantalize your taste buds.

Convenience is another major advantage of this recipe. It comes together with minimal prep work, mainly involving assembling the ingredients and baking them to perfection. This ease makes it suitable for busy weeknights while still feeling like a special treat.

From a nutritional perspective, this dish provides a balanced intake of protein, especially when combined with side vegetables for a complete meal. Depending on your choice of beef cut and portion control, it can fit into many dietary needs.

In terms of social and entertaining value, this dish will be a sure hit. It’s a conversation starter, the smell of which will greet your guests at the door and linger in their memory long after the meal has concluded. It’s perfect for potlucks or dinners where you wish to impress without spending the whole day cooking.

Lastly, let’s talk about cost-effectiveness. The recipe uses readily available ingredients, often present in your pantry or fridge, which makes it budget-friendly without compromising quality. It serves a full family, stretching your meal budget further while delivering undeniable satisfaction.

Historical Background and Cultural Significance


Bacon Cheeseburger Meatloaf is a modern twist on a historical classic. The meatloaf itself dates back many centuries, with variations found globally, but it was during the Great Depression in America that the dish became a staple. Meatloaf provided an economical way to stretch affordable cuts of meat using fillers like breadcrumbs and eggs, an approach that sustained families during hard times.

The cheeseburger, on the other hand, was popularized in the early to mid-20th century, becoming a quintessential American favorite. Combining the two created a fusion dish that retains the comforting essence of the original while introducing a layer of indulgence with cheese and bacon.

Culturally, this recipe is a celebration of American ingenuity, bringing together staple foods to create something new yet comforting. It epitomizes transforming familial dishes into unique experiences, using readily available local ingredients.

Over the years, the Bacon Cheeseburger Meatloaf gained popularity due to its versatility and crowd-pleasing nature. The flavor combinations lend themselves well to traditional family dinners and have inspired countless adaptations reflecting regional preferences across the United States.

Ingredient Deep Dive


Ground Beef: The cornerstone of this recipe, ground beef’s history is longstanding, with roots in various global cuisines. It’s nutrient-dense, offering high-quality protein, vitamins, and minerals essential for a balanced diet. When selecting ground beef, aim for a balance between lean and fat to ensure juiciness without excess grease. Store in a cold environment, ideally at the back of your fridge. If you’re looking to diversify, ground turkey or pork can serve as an excellent substitute.

Bacon: Known for its indulgent taste, bacon adds a smoky, savory profile to the meatloaf. It’s often used to accentuate dishes due to its rich flavor and aroma. When selecting bacon, opt for thick cut with a good meat-to-fat ratio for crispy results. Proper storage in an airtight package in the refrigerator will maintain its freshness. As substitutions, turkey bacon offers a leaner option, or omit it entirely for a lighter variant.

Cheddar Cheese: A staple in many classic American recipes, cheddar cheese contributes creaminess and a slight tang to this meatloaf. Its origins trace back to England, and it’s beloved worldwide for its versatility and flavor. Aged cheddar might give more depth to the dish. Keep it refrigerated, preferably wrapped to prevent moisture loss. For dairy-free adaptations, vegan cheese substitutes melt well and maintain similar flavors.

Common Mistakes to Avoid

  • Not mixing the ingredients well. Ensure everything is evenly distributed for a consistent flavor in every bite.
  • Overmixing the meat mixture. This can cause the meatloaf to become tough, so mix just until combined.
  • Using lean beef. Opt for ground beef with some fat content to maintain juiciness.
  • Skipping the resting step post-cooking; it’s crucial for firm slices and a moist interior.
  • Ignoring oven temperature accuracy; use a thermometer to ensure consistent cooking.
  • Skipping the breadcrumb soak; it helps keep the meatloaf moist by binding moisture within.
  • Failing to remove excess grease partway through baking to avoid a greasy loaf.
  • Underseasoning; the right balance of salt and pepper is essential to enhance the flavors.
  • Adding cheese too early; mixing cheese in the middle or as a top layer helps avoid a melted mess.

Essential Techniques


Proper Mixing: Mixing is a critical step, where overworking the meat mixture can lead to a dense, tough meatloaf. The key is to gently fold ingredients together until just combined, using gentle hand motions or a wooden spoon for even distribution, ensuring a uniform texture and balanced flavors.

Cooked Bacon: Achieve the perfect crispy bacon by cooking slices in a cold skillet over medium heat, letting the fat render slowly, ensuring crispness and flavor. Keep an eye out for visual cues such as a rich golden-brown color, and remove excess oil while cooking for maximum impact on the finished dish.

Baking to Perfection: When baking the meatloaf, maintain oven consistency and use an internal thermometer to check doneness. Target a center temperature of 160°F (70°C). Placing an aluminum tent over the meatloaf in the last 15 minutes can prevent excessive browning.

Pro Tips for Perfect Bacon Cheeseburger Meatloaf


– Chill the meat mixture before forming it into a loaf shape. This helps retain the loaf’s shape better during baking.
– Use parchment paper in the loaf pan for easy removal and an intact presentation.
– Layer bacon diagonally over the top for an attractive lattice look when sliced.
– Add cheese in the final layers or as stuffing to ensure a melty center without leakage.
– For a smoky flavor, consider smoked cheddar or adding smoked paprika to the seasoning.
– Allow the loaf to rest for at least 10 minutes before slicing to enhance juiciness and prevent crumbling.
– Consider a glaze of ketchup mixed with brown sugar or barbecue sauce for a sweet finish.

Variations and Adaptations


Regional variations might incorporate local cheeses or spices, like pepper jack for a southwestern flair. Seasonal adaptations could include fresh herbs in spring, such as thyme or rosemary, providing fresh notes to the hearty loaf. For dietary modifications, consider leaner beef or poultry, or gluten-free breadcrumbs. Enhancements in flavor can be made by adding Worcestershire sauce for umami richness, while texture can be altered with a mix of bread crumbs or oatmeal. For presentation, bake the meatloaf in muffin tins for individual servings, offering portion control and a creative plate look.

Serving and Presentation Guide


Present your Bacon Cheeseburger Meatloaf sliced thickly alongside classic accompaniments like buttery mashed potatoes or a crisp green salad. For garnish, consider a sprinkle of fresh parsley or chives for color contrast. Traditionally paired sides such as pickles or tangy slaws add zest. For plating, serve on a large platter with slices slightly overlapping, topped with extra bacon bits. Mind the temperature for serving; warm is optimal to keep the cheese gooey, but room temperature can highlight the flavors without melting.

Wine and Beverage Pairing


For wine enthusiasts, a bold red wine like Merlot complements the richness of the meat and bacon. If wine’s not your choice, a craft beer with hoppy notes delivers a refreshing counterbalance. Non-alcoholic choices include a sparkling apple cider or an iced thyme lemonade, which cleanses the palate. During cooler months, pair with a spiced hot beverage like mulled cider for warmth without overwhelming flavors.

Storage and Shelf Life


Once finished, the meatloaf should be cooled to room temperature and either wrapped tightly in plastic or placed in an airtight container to remain fresh. It will keep in the refrigerator for up to three days or be frozen for future enjoyment. When reheating, use a microwave or bake covered in foil to rehydrate and warm through evenly, preventing any drying out.

Make Ahead Strategies


Prepare your bacon cheeseburger meatloaf a day in advance for easier meal prep. Assemble all ingredients, store wrapped in the refrigerator, and bake on the serving day. This allows the flavors to meld and mature. If assembling takes priority, cooked meatloaf can be sliced and frozen, providing convenient family meals for those busy nights.

Scaling Instructions


To adjust the recipe for smaller or larger groups, maintain ingredient ratios and consider loaf scale based on the pan size. For smaller servings, half the recipe and use a mini loaf or muffin pan. For larger gatherings, double the recipe and consider baking two standard loaves to ensure even cooking throughout. Storage considerations become pivotal when adjusting quantities significantly.

Nutritional Deep Dive


A serving of Bacon Cheeseburger Meatloaf offers a balance of protein from both beef and bacon, and fats that contribute to satiety and flavor. Carb content remains low, primarily depending on bread crumbs, which can be adjusted to fit dietary needs. Vitamins such as B12 and zinc aid metabolism, while iron supports oxygen transport. Emphasize portion control by dividing loaf into smaller slices, providing nutritional balance without excess calorie intake.

Dietary Adaptations


For those requiring dietary changes, gluten-free adaptations can easily be made by substituting traditional breadcrumbs with gluten-free versions. To accommodate dairy restrictions, using vegan cheese alternatives maintains the flavor profile without lactose. For a low-carb approach, skip bread crumbs or replace with almond flour, maintaining consistency.

Troubleshooting Guide


If your meatloaf results in a tough texture, focus on minimal mixing to maintain tenderness. To correct for bland flavor, ensure seasoning is added progressively, and check that coated surfaces carry consistent flavor. Should the loaf appear greasy, trim fat-based ingredients or allow the loaf to drain mid-baking. If encountering cooking time struggles, ensure an oven thermometer is used to regulate temperature for ideal results.

Recipe Success Stories


This Bacon Cheeseburger Meatloaf recipe has become a beloved staple for many, seen widely across social media platforms where community members share their creative spins and plating styles. Feedback has highlighted its ability to bring families together for meal traditions. Readers contribute back with changes catering to regional tastes, creating a recipe loved by all with flexibility in its foundational principles.

Frequently Asked Questions

  • Can I use a different cheese?
    Absolutely! Cheeses like smoked gouda or mozzarella provide unique flavors but ensure the cheese selected can melt smoothly.
  • What if I don’t have a loaf pan?
    You can shape the meatloaf on a baking sheet instead, adjusting cooking time accordingly to ensure it cooks through.
  • How do I know when it’s cooked?
    Using a meat thermometer is best; aim for an internal temperature of 160°F (70°C) for safe consumption.
  • Can leftovers be frozen?
    Yes, wrap slices in airtight containers or foil, storing them in the freezer for up to three months.
  • How can I make it spicier?
    Adding diced jalapeños or a splash of hot sauce into the mix will introduce some heat without overpowering the main flavors.
  • What’s a good substitution for breadcrumbs?
    Crushed croutons or rolled oats can work, or for a gluten-free option, finely ground almond flour usually does the trick.

Additional Resources


Explore related recipes such as classic meatloaf, or delve into guidance on perfecting various cooking techniques like searing and broiling. Ingredient-specific articles can offer deeper dives into maximizing the use of beef or bacon in diverse dishes, while seasonal variations open pathways to incorporate this meal across holiday festivities seamlessly.

Join the Conversation


Share your version of the Bacon Cheeseburger Meatloaf on social media, tagging our handles for a feature. Capturing your dish under natural light can emphasize the rich textures and colors, creating drool-worthy images to accompany your culinary story. We welcome reviews and feedback, enhancing our community’s knowledge pool, encouraging recipe personalization, and driving innovation together.

The Recipe

Bacon Cheeseburger Meatloaf

Serves: 6

Prep Time: 20 mins

Cook Time: 60 mins

Total Time: 80 mins

Kitchen Equipment Needed

  • Mixing bowls
  • Loaf pan
  • Skillet
  • Aluminum foil
  • Thermometer

Ingredients

  • 1 lb ground beef
  • 6 slices bacon, cooked and crumbled
  • 1 cup cheddar cheese, shredded
  • 1/2 cup breadcrumbs
  • 1/4 cup milk
  • 1 egg
  • 1 small onion, finely chopped
  • 2 cloves garlic, minced
  • 1 tbsp Worcestershire sauce
  • Salt and pepper to taste

Directions

  1. Preheat the oven to 350°F (175°C). Grease a loaf pan or line with parchment paper.
  2. In a bowl, combine milk and breadcrumbs; let sit for 5 minutes.
  3. In a large bowl, combine ground beef, egg, chopped onion, minced garlic, Worcestershire sauce, crumbled bacon, shredded cheese, and soaked breadcrumbs. Mix gently until all ingredients are combined, being careful not to over-mix.
  4. Shape the mixture into a loaf and place it in the prepared pan.
  5. Bake for about 50 minutes, then remove and brush with additional Worcestershire or BBQ sauce if desired. Return to oven for another 10 minutes or until the internal temperature reaches 160°F (70°C).
  6. Let it cool for at least 10 minutes before slicing.

Recipe Notes

  • Consider adding diced bell peppers for extra depth.
  • A glaze of ketchup and brown sugar adds a sweet finish.
  • For added spice, incorporate a pinch of cayenne pepper.

Delicious Baked Turkey Meatballs in a Lemon Garlic Butter Sauce

Baked Turkey Meatballs with Lemon Garlic Butter Sauce: A Delicious and Healthy Meal

⚖️
Difficulty
Easy

⏲️
Prep Time
15 mins

🕒
Cook Time
25 mins

⏱️
Total Time
40 mins

🍽️
Servings
4

Satisfy your taste buds with these delicious and healthy baked turkey meatballs in lemon garlic butter sauce. Perfect for a weeknight dinner or a special occasion, this dish combines succulent turkey with an aromatic, tangy sauce that you won’t be able to resist. The fresh flavors of garlic and lemon blend seamlessly with the richness of butter to create a sauce that enhances the mild taste of the turkey meatballs perfectly.

Freshly baked turkey meatballs offer not only a healthier alternative to their beef counterpart but also bring a light and juicy texture to your meal. The tangy lemon garlic butter sauce is the hero of this recipe, infusing each bite with a burst of flavor that lingers on the palate. Whether served as a main course or appetizer, these meatballs are sure to impress your family and friends.

Quick Recipe Highlights

  • Flavor Profile: The recipe offers a succulent blend of savory turkey meatballs with a bright and zesty lemon garlic butter sauce.
  • Texture: These turkey meatballs are tender and juicy, enveloped in a smooth, velvety sauce.
  • Aroma: The aromatic notes of garlic and lemon waft through the air, inviting anticipation with each step of the recipe.
  • Visual Appeal: The golden-brown meatballs topped with a shimmering butter sauce make for an appetizing presentation.
  • Skill Level Needed: This recipe is straightforward, requiring elementary cooking skills suitable for beginners.
  • Special Equipment: No specialized equipment is needed beyond a baking tray and a mixing bowl.

Recipe Overview

  • Difficulty Level: This recipe is designed for ease, involving basic cooking methods and straightforward steps to follow.
  • Category: It falls under the comfort food category, perfect for dinner or an appetizer.
  • Cuisine: With roots in various international kitchens, this recipe has a versatile culinary appeal, embodying flavors from Mediterranean cuisine.
  • Cost: Budget-friendly, with primary ingredients like ground turkey and standard pantry items keeping costs low.
  • Season: Ideal for all seasons but especially delightful in spring and summer due to the refreshing lemony undertones.
  • Occasion: Suitable for family dinners, potlucks, or as appetizers for gatherings and celebrations.

Why You’ll Love This Recipe

Indulge in the taste and texture that make these baked turkey meatballs a household favorite. The tender consistency of ground turkey coupled with the creamy lemon garlic butter sauce delivers satisfaction in every bite. This dish’s taste appeal lies in the umami richness of the sauce offset by the bright notes of citrus, resulting in a balanced and delectable meal that keeps you coming back for more.

Convenience comes as a major advantage of this recipe. With a total time under an hour, this dish makes a quick and easy dinner option. The use of the oven eliminates the need for constant monitoring, allowing you to focus on other tasks while the meatballs bake to perfection.

Health-conscious individuals will appreciate the nutritional benefits. Ground turkey is a lean, protein-rich alternative to other meats, while the moderate use of butter finds balance through the addition of lemon juice, offering vitamin C and refreshing flavor.

Turkey meatballs in lemon garlic butter sauce lend themselves well to entertaining. They can be served in smaller portions for hors d’oeuvres or in larger quantities as a main meal, making them versatile for various social settings. Their visual appeal is enhanced by the bright, shiny glaze of the sauce, impressing guests well beyond just taste.

Cost-effectiveness and accessibility also play a role in why this recipe is a must-try. Using common ingredients found in most households, it keeps shopping minimal and expenses in check, while delivering a gourmet feel without the hefty price tag associated with dining out.

Historical Background and Cultural Significance

The turkey meatball’s origin story ties into the broader history of meatballs, which have found a place in many cultures worldwide. While Italian and Swedish meatballs often steal the spotlight, incorporating turkey into this classic dish is a nod to healthier, contemporary cooking trends.

Culturally, the use of turkey signifies a common choice in North America, especially in the United States, where it is a staple during festive occasions like Thanksgiving. This recipe showcases another way to enjoy the healthiness of turkey beyond traditional roasted preparations.

The evolution of the turkey meatball has been influenced by the increased focus on low-fat diets and the desire for flavorful, satisfying meals that don’t compromise nutritional goals. The addition of lemon garlic butter sauce adds a modern twist to traditional preparations by infusing it with Mediterranean flavors.

Regional variations have seen spices and herbs unique to different areas incorporated into the basic turkey meatball recipe. Whether it’s Italian herbs, Middle Eastern spices, or Asian soy sauce, these meatballs provide a canvas for combining global tastes with local favorites.

Ingredient Deep Dive

Ground turkey, the star ingredient, is leaner than most ground meats and is praised for its low fat content. Its history in American cuisine is rich, especially in substitutions for red meat. When selecting ground turkey, opt for fresh rather than frozen, and choose those with lower fat content for better flavor and cooking results. Store turkey in airtight packaging in the refrigerator and consume within two days or freeze directly if not used immediately. A great substitute for ground turkey can be ground chicken or lean beef, keeping texture and flavor close to the intended profile.

Lemon juice acts as a natural tenderizer and flavor enhancer, bringing brightness and acidity that cut through the richness of the butter. Lemons originated in Asia and have traveled well, becoming key ingredients in cuisines worldwide. When buying lemons, choose those that feel heavy for their size, indicating juiciness. Store them in the refrigerator crisper drawer for best preservation. Lime juice may substitute in a pinch, although it offers a slightly more aromatic sweetness.

Common Mistakes to Avoid

  • Over-mixing the meatball blend can lead to dense meatballs, so combine ingredients until just mixed.
  • Skipping the cooling phase for cooked turkey can create dry meatballs as juices are not retained.
  • Using frozen turkey without allowing proper thawing time can lead to uneven cooking.
  • Not properly seasoning the meat can result in bland meatballs, so ensure to add seasonings generously.
  • Baking at incorrect temperatures can lead to undercooked or overcooked turkey meatballs. Keep an eye on them during cooking.
  • Forgetting to taste and adjust the seasoning of the sauce can miss out on balanced flavors.
  • Overcooking the meatballs leads to dryness; use a kitchen timer to maintain accurate cooking times.
  • Adding the sauce too early can cause it to separate or become overly reduced; introduce it towards the end of cooking.
  • Failing to whisk butter into the sauce properly may result in an oily rather than creamy consistency.
  • Neglecting to rest the meatballs before serving can cause a spill of juices essential for optimal taste.

Essential Techniques

Mixing the meatball ingredients requires a light touch to maintain tender texture—a critical technique for success. Over-mixing can compact the proteins, making meatballs tough. Use your hands gently or a spatula until the ingredients just come together. Visual cues include a uniform mixture without visible streaks of egg or breadcrumbs, indicating readiness for forming meatballs.

Whisking the butter into the lemon garlic sauce is another crucial step. It emulsifies into a smooth finish, creating a glossy, rich sauce. Common pitfalls to avoid include adding butter in one go, which can split the sauce. Introduce it gradually, whisking continuously over low heat to prevent separation. A successful technique shows a thick and cohesive sauce without any oily separation on the surface.

Pro Tips for Perfect Baked Turkey Meatballs with Lemon Garlic Butter Sauce

1. Enhance flavors by marinating turkey in spices and herbs ahead of time, ensuring a deeply rooted taste in every bite.
2. Keep meatballs uniformly sized using a scoop to ensure even cooking and avoid underdone centers.
3. Add a pinch of sugar to balance citrus acidity and elevate the overall sauce profile.
4. Infuse the breadcrumb mixture with grated parmesan for an extra depth of umami.
5. For a subtle kick, incorporate red pepper flakes or cayenne into the sauce.
6. Use fresh herbs like basil or parsley to garnish, providing a vibrant pop of flavor and color.

Variations and Adaptations

These meatballs lend themselves beautifully to regional variations, with Italian-inspired versions utilizing oregano and basil, while a twist of cumin and coriander brings out Middle Eastern influences. Seasonal adaptations can be achieved by switching fresh herbs with dry ones for a warmer winter alternative. Dietary modifications are feasible with gluten-free breadcrumbs or a dairy-free sauce using olive oil in place of butter while maintaining most of the intended taste and texture. Scale the flavors by adding smoky paprika or zest from other citrus fruits like lime or orange for exciting variations, while texture can be modified with the addition of finely chopped vegetables such as zucchini to the meatball mixture for more moisture. Presentation alternatives include serving the meatballs over a bed of rice, in a sandwich, or paired with roasted vegetables for a complete meal.

Serving and Presentation Guide

For exceptional plating, place the meatballs neatly in a shallow dish, pooling the lemon garlic butter sauce around them to highlight the glossy glaze against the tender meat. Sprinkle fresh herbs like parsley or chives as a garnish, adding a splash of color and freshness. Traditional accompaniments include rustic bread for dipping, or a light arugula and Parmesan salad to offset the richness of the sauce. Modern serving suggestions encourage individual portions in bowls paired with zoodles or standout appetizers with toothpicks in each meatball for easy serving. Maintain the optimal serving temperature with warmed plates and portion appropriately to prevent overcrowding, preserving the dish’s elegant look and texture.

Wine and Beverage Pairing

Pairing baked turkey meatballs with wine elevates the dining experience. A crisp Sauvignon Blanc or a light Pinot Grigio complements the lemony sauce, while a medium-bodied red like Pinot Noir provides enough depth without overwhelming the dish. Non-alcoholic alternatives include herbal iced tea or a lemon-infused sparkling water to keep flavors aligned. Keep beverages chilled and serve in appropriate glassware to enhance the overall visual and sensory experience. An unsweetened aromatic coffee can balance richness, providing a lingering palate cleanse to pair seamlessly with this flavorful dish.

Storage and Shelf Life

To store leftovers or prep in advance, place the cooled meatballs in an airtight glass or BPA-free plastic container, separating layers with parchment paper to avoid sticking. Refrigerate within two hours of cooking to maintain freshness for up to three days. For freezing, place the meatballs on a baking sheet to freeze individually before transferring to airtight bags, keeping them for up to two months. Check for spoilage through changes in appearance or smell before reheating. Reheat gently in the oven at 180°C (350°F) to preserve moisture without drying, and avoid using a microwave to prevent rubbery textures.

Make Ahead Strategies

Maximize convenience by preparing elements of this recipe in advance. Prepare turkey meatballs a day ahead and store uncooked in the refrigerator or fully bake them prior, cooling before refrigerating. The lemon garlic butter sauce can also be made early; just reheat gently while whisking before serving. Store each component separately, combining them fresh during meal assembly for ultimate texture and taste. When reheating, careful monitoring preserves quality, while finishing with freshly squeezed lemon and herbs ensures vibrant flavor and appearance.

Scaling Instructions

Scaling this recipe for larger gatherings is simple. Doubling or tripling the ingredients naturally adjusts cooking times slightly, necessitating the use of multiple baking trays or consecutive batches. Ensure adequate spacing if baking simultaneously to avoid steaming. Equipment adjustments may include larger mixing bowls or replacement of smaller utensils with those fit for larger quantities. Storage needs increase, so clear refrigerator space for cooked meatballs and sauces. Timing modifications involve staggered entries into the oven to manage doneness accurately. Halving the recipe similarly decreases effort, maintaining all ratios perfectly for an intimate dining occasion while keeping consistent quality and taste.

Nutritional Deep Dive

This recipe offers a macro breakdown with high protein content from turkey and moderate fats from butter, while restrictive in carbohydrate intake, aligning well with low-carb diets. Micronutrients like vitamin C from lemons and essential minerals found in garlic add to its healthful profile. Its portion analysis supports weight management by providing hearty servings that satisfy hunger without excessive calorie intake. Health benefits extend with lean proteins promoting muscle maintenance and metabolic function, supported by essential amino acids from turkey. Dietary considerations encourage mindful consumption, with a focus on balanced meal components and controlled portion sizes.

Dietary Adaptations

For gluten-free needs, replace regular breadcrumbs with a GF-certified variety or almond meal. Dairy-free swaps involve substituting butter with olive or avocado oil in the sauce, optimizing flavor. A vegan adaptation calls for a plant-based protein option, such as lentil or chickpea mixtures, paired with vegetable broth for the sauce base. Low-carb goals align with minimizing breadcrumb quantities, emphasizing turkey’s natural content. For keto dieters, maintain healthy fat levels with increased butter use while omitting any sugar. Paleo adherents thrive from using clean-seasoned turkey, whole food ingredients, and fresh herbs. Low-FODMAP adjustments can include lactose-free butter and avoiding garlic or onion powder replacements, keeping the focus on gut-friendly meal renderings. Adaptations foster inclusivity and centered eating, adhering to numerous dietary needs seamlessly and deliciously.

Troubleshooting Guide

Address texture issues by evaluating meat mixtures before cooking; overly dense meatballs can originate from over-mixing, requiring adjustments in handling. Flavor balance might necessitate more seasonings, with tasting key to identifying missing elements. Temperature problems should involve checking oven accuracy, using an oven thermometer to enhance control. Equipment challenges include maintaining sharp knives and non-stick baking surfaces for ease of preparation and cooking. Ingredient substitutions should adapt by leveraging similar textures and tastes, such as light meats or veggie bases. Timing concerns refer to ensuring meatballs are adequately, yet not overly, baked, testing via thermometer for internal temperature. Addressing these areas ensures successful outcomes every time, maintaining delicious results consistently.

Recipe Success Stories

Enthusiastic community feedback has highlighted the universal appreciation of this recipe’s flavors and ease of preparation. Variations like adding Parmesan or using chicken have led to successful reinterpretations, expanding its culinary landscape. Reader suggestions involve garnishing with toasted breadcrumbs for added texture, or incorporating zest blends for intricate depths. Culinary photography tips list creating structured shots by showcasing vibrant garnishes creatively. This dish’s adaptability forms the gateway to culinary exploration, allowing personal touches and inspiration from community experiences to shape its journey further.

Frequently Asked Questions

  • Can I substitute turkey with chicken? Absolutely! Ground chicken offers a similar, slightly superior moisture retention when cooked.
  • How do I prevent meatball dryness? Avoid over-cooking and rest for five minutes to reabsorb juices before serving.
  • What makes the sauce separate? Ensure butter is whisked gradually and consistently to emulsify well with other liquids.
  • Are gluten-free breadcrumbs recommended? Yes, GF breadcrumbs are excellent; almond meal is an alternative for added crustiness.
  • How long do leftovers last? Refrigerated leftovers stay fresh for up to three days post preparation.
  • Can lemon be substituted with lime? Lime provides a unique but suitable twist, altering the profile slightly.
  • Is there a vegetarian alternative? Swap turkey with lentils or chickpea formulations for non-meat adaptations.
  • Where can I find quality turkey? Source via trusted butchers or reputable grocery chains, ensuring premium purchase value.
  • Will using unsalted butter change results? Skip extra salt if using salted butter, but adjust taste accordingly.
  • What’s the best serving size? Cater to main course portions or appetizer offerings, ideal for any social occasion.

Additional Resources

Discover additional recipes complementing this meal, such as side dishes like garlic parmesan mashed potatoes or vibrant green salads balancing hearty meatball brightness. Access technique guides illustrating effective meatball forming and sauce whisking, creating digital learning portals. Expand ingredient understanding with informational pieces on turkey’s nutrition, lemon’s benefits, and butter’s emulsification properties, aiding recipe mastery. Equipment recommendations facilitate ease of preparation—invest in quality tools facilitating better bite enjoyment through attentive kitchen management. Seasonal variations drive creativity year-round, inspired project directions branching from this foundational recipe. Rich details ignite culinary drafts, evolving traditional foundations into boldly spectacular presentations.

Join the Conversation

Engage by sharing personalized outcomes of baked turkey meatballs on social media, tagging thematic content experiences. Offer internet advice capturing completed recipe beauty through creative photography—provide angles incorporating each dish’s allure. Submit detailed reviews reflecting journey and immersion in the recipe, inducing community curiosity. Enable further adaptations driven by reader comments encouraging change acceptance. Capture the heart of baking experiences and connection opportunities by navigating recipe enhancements collaboratively. Smile in each savory success participant nuance celebrated through digital bonds.

The Recipe

Baked Turkey Meatballs with Lemon Garlic Butter Sauce

Serves: 4

Prep Time: 15 mins

Cook Time: 25 mins

Total Time: 40 mins

Kitchen Equipment Needed

  • Baking tray
  • Mixing bowl
  • Oven
  • Saucepan
  • Whisk
  • Measuring cups and spoons

Ingredients

  • 1 lb ground turkey
  • 1 egg
  • ½ cup breadcrumbs
  • 2 cloves garlic, minced
  • 1 tablespoon fresh parsley, chopped
  • 1 teaspoon salt
  • ½ teaspoon black pepper
  • 2 tablespoons butter
  • Juice of 1 lemon
  • ¼ cup chicken broth

Directions

  1. Preheat oven to 400°F (200°C). Line a baking tray with parchment paper.
  2. Combine ground turkey, egg, breadcrumbs, garlic, parsley, salt, and pepper in a mixing bowl.
  3. Shape the mixture into small meatballs and place on the prepared tray.
  4. Bake in the oven for 20-25 minutes, or until cooked through.
  5. While meatballs are baking, melt butter in a saucepan over medium heat. Add lemon juice and chicken broth, whisking until combined.
  6. Simmer for several minutes until slightly thickened. Set aside.
  7. Remove meatballs from oven and drizzle with lemon garlic butter sauce before serving.

Recipe Notes

  • For an extra herbaceous touch, add more fresh parsley to garnish.
  • Adjust lemon juice to taste for a less or more intense citrus flavor.
  • Substitute ground chicken if preferred.

Irresistible Rotel Cream Cheese Sausage Balls for Any Occasion

Rotel Cream Cheese Sausage Balls: A Spicy Twist on a Classic Appetizer

⚖️
Difficulty
Easy

⏲️
Prep Time
15 mins

🕒
Cook Time
25 mins

⏱️
Total Time
40 mins

🍽️
Servings
24 balls

Kick your appetizer game up a notch with these irresistible Rotel Cream Cheese Sausage Balls. Combining the creaminess of cheese, the savory depth of sausage, and the fiery zest from Rotel tomatoes, this recipe will have your taste buds dancing with delight. Perfect for any gathering, these sausage balls boast a flavor that will keep guests coming back for more. With their tantalizing aroma and satisfying texture, they are not only a crowd-pleaser but also easy to whip up.

Quick Recipe Highlights

  • Flavor Profile: Savory with a hint of spice from Rotel tomatoes, balanced by the creaminess of cheese and robust sausage notes.
  • Texture: These sausage balls are tender on the inside with a slight crispy exterior, making them incredibly satisfying to bite into.
  • Aroma: A mouthwatering blend of spiced sausage and cheesy goodness fills the kitchen, enticing everyone nearby.
  • Visual Appeal: Their golden-brown exterior and hints of red from the Rotel make these sausage balls visually appetizing.
  • Skill Level Needed: This recipe is easy to prepare, requiring just basic mixing and baking skills, making it accessible to novice and experienced cooks alike.
  • Special Equipment: Only a baking sheet and mixing bowl are needed, keeping preparation simple and convenient.

Recipe Overview

  • Difficulty Level: Rated as easy, this recipe involves straightforward steps that even a beginner can master, ensuring success with minimal effort.
  • Category: Perfect as an appetizer or snack, these sausage balls fit seamlessly into any casual dining occasion.
  • Cuisine: This dish blends classic American appetizer traditions with a Tex-Mex influence, courtesy of the Rotel addition.
  • Cost: Affordable and budget-friendly, the recipe uses readily available ingredients, keeping your grocery bill minimal.
  • Season: Enjoy these sausage balls year-round, but they truly shine during game days and holiday gatherings when hearty snacks are a must.
  • Occasion: Ideal for parties, potlucks, or as a game-day snack, they provide a flavorful bite-sized treat for any event.

Why You’ll Love This Recipe


The taste and texture of these Rotel Cream Cheese Sausage Balls are unique and addictive. The combination of spicy, savory, and creamy elements ensures every bite is full of flavor. These sausage balls are incredibly convenient, requiring minimal prep and hands-on time, making them perfect for busy days. Packed with protein and satisfying flavors, they offer nutritional balance as an appetizer or snack. They are perfect for social gatherings, simplifying preparation while delivering gourmet-level taste. Cost-effective ingredients keep this dish budget-friendly, without compromising taste or quality.

Historical Background and Cultural Significance


The sausage ball has humble beginnings and is a staple at Southern gatherings. Traditionally composed of sausage and biscuit mix, this version incorporates Rotel tomatoes and cream cheese, adding a modern twist. These ingredients infuse the dish with a Tex-Mex flair, paying homage to regional culinary mashups common in American cooking. Over time, sausage balls have transcended their Southern roots to become a favorite across the U.S., loved for their simplicity and satisfying nature. Each region brings its twist, be it through spices or textures, adding unique local flavor to a cherished classic.

Ingredient Deep Dive


**Sausage**: A key element in these sausage balls, sausage contributes richness, umami, and depth. Opt for quality ground sausage to ensure flavorful results. Stored in the fridge, sausage should be consumed soon after purchase for best freshness. In need of a substitute, consider ground turkey with seasoning to maintain flavor integrity.

**Rotel Tomatoes**: These tomatoes feature diced chilies, offering both sweetness and heat. They bring Mexican influence into American dishes and are recognized for their versatility. Store unopened cans in a cool place; once opened, refrigerate and consume within a few days. For alternatives, use diced tomatoes with separately added green chilies.

Common Mistakes to Avoid

  • Overmixing: Can result in a dense texture, so mix just until combined.
  • Skipping draining Rotel: Excess moisture affects texture, so ensure thorough draining.
  • Using low-fat cream cheese: Can alter texture; aim for full-fat versions ensuring creaminess.
  • Underbaking: Negatively impacts flavor and safety. Bake until golden brown and set.
  • Preheating oven: Essential for ensuring even cooking and prevent underbaking.
  • Size consistency: Maintain uniform size for even cooking.
  • Baking pan crowding: Avoid to ensure proper airflow during cooking.
  • Ingredient substitutions: Changing ingredients ad-hoc can affect flavor balance.

Essential Techniques


Mixing Technique: The key to tender sausage balls lies in gentle mixing. Overworking the mixture can lead to dense, compact balls. To master this technique, gently fold the ingredients together until just combined. Visual cues of success include a well-incorporated, yet cohesive mixture that is easy to shape.

Pro Tips for Perfect Rotel Cream Cheese Sausage Balls


For best results, chill the mixture briefly before shaping the balls to prevent sticking and facilitate easier handling. If you’re short on time, freezing the balls for a few minutes before baking helps them hold their shape. Use an ice cream scoop for uniformly sized sausage balls, ensuring even cooking. Ensure Rotel tomatoes are thoroughly drained to avoid excess moisture which impacts texture. Balance the sausage’s saltiness by using the right amount of cheese to complement flavors without overpowering.

Variations and Adaptations


Regional Variations: Incorporate local spices such as cayenne or jalapeños for a spicier kick. For a seasonal twist, consider pumpkin spice as an autumnal flavor enhancement. Adapt to dietary needs by using gluten-free flour mixes.

Serving and Presentation Guide


For a classic presentation, serve these sausage balls on a platter garnished with fresh herbs. Offer dipping sauces such as spicy mayo or ranch to enhance flavor profiles. Temperature-wise, they maintain their appeal whether served warm or at room temperature, ensuring they remain a crowd favorite at any event.

Wine and Beverage Pairing


Pair these flavorful morsels with a crisp Chardonnay or a lighter Pinot Noir, which complements their savory profile. For non-alcoholic options, consider citrus-infused iced tea or a lemony mocktail. Balance the dish’s spiciness with chilled drinks to refresh the palate.

Storage and Shelf Life


Once prepared, store the sausage balls in an airtight container in the refrigerator for up to 3 days. For longer shelf life, freeze them, ensuring proper wrapping to avoid freezer burn. Proper reheating in an oven ensures they retain their crispness and flavor.

Make Ahead Strategies


Prepare and freeze the sausage balls before baking. Having them ready for baking saves time on event days. Plan your prep, allowing adequate thawing time if frozen, to guarantee fresh-tasting bites when serving.

Scaling Instructions


This recipe easily adapts for larger gatherings or smaller servings. Adjust seasoning proportions mildly to maintain flavor balance when altering quantities. Doubling or halving the recipe keeps the essence intact while ensuring sufficient servings.

Nutritional Deep Dive

Each serving offers a balance of macro and micronutrients. Sausage provides protein and fats, while Rotel adds a layer of vitamins from tomatoes. Mind portion sizes to manage caloric intake effectively.

Dietary Adaptations


For gluten-free options, replace flour with a suitable mix. Dairy-free versions can use vegan cheese, while keto adaptations could opt for almond flour in place of traditional flour. Customize this versatile recipe to fit various dietary needs, ensuring inclusivity at gatherings.

Troubleshooting Guide


If the mixture seems too wet, consider adding additional flour or cheese to balance moisture content. Adjust seasoning levels to tackle flavor imbalances. Ensure consistent baking temperature to avoid texture issues and ensure perfectly cooked sausage balls.

Recipe Success Stories


Our community loves this recipe for its flexibility and flavor! Many rave about their adaptations, from jalapeño versions to cheese-infused variations. Share your success stories, too, showcasing plating ideas or serving suggestions.

Frequently Asked Questions

Can I make these sausage balls ahead of time?
Yes, prepare and freeze before baking. When ready to serve, bake directly from frozen, adding a few extra minutes to the cooking time.

What’s the best way to reheat these sausage balls?
Reheat in the oven to restore their crispiness. Place them on a baking sheet and warm at 350°F for about 10 minutes.

Additional Resources


Explore related appetizer recipes for more inspiration. Our technique guides provide insights into mixing and baking to elevate your culinary skills. Dive into the world of Tex-Mex cooking, uncovering the nuances and flavors of this blend of cuisines.

Join the Conversation


Share your creations on social media using our hashtag to join the community. Engage with others by sharing your plating and adaptation ideas. Your feedback helps us refine and develop exciting new recipes.

The Recipe

Rotel Cream Cheese Sausage Balls

Serves: 24 balls

Prep Time: 15 mins

Cook Time: 25 mins

Total Time: 40 mins

Kitchen Equipment Needed

  • Mixing bowl
  • Baking sheet
  • Ice cream scoop or tablespoon
  • Parchment paper

Ingredients

  • 1 pound ground sausage
  • 8 ounces cream cheese, softened
  • 1 can (10 oz) Rotel tomatoes, drained
  • 2 cups Bisquick or similar baking mix
  • 1 cup shredded cheddar cheese

Directions

  1. Preheat your oven to 375°F (190°C) and line a baking sheet with parchment paper.
  2. In a large mixing bowl, combine the sausage, cream cheese, drained Rotel, baking mix, and shredded cheddar cheese.
  3. Mix until well combined but be careful not to overmix.
  4. Using an ice cream scoop or tablespoon, portion the mixture into balls and place them on the prepared baking sheet.
  5. Bake for 25 minutes or until the sausage balls are golden brown and cooked through.
  6. Remove from the oven and let cool slightly before serving.

Recipe Notes

  • For a spicier option, consider adding chopped jalapeños to the mixture.
  • If you prefer a milder flavor, use mild sausage instead of spicy.