Delicious Cheesy Chicken Taco Rice Recipe for Easy Weeknight Dinners

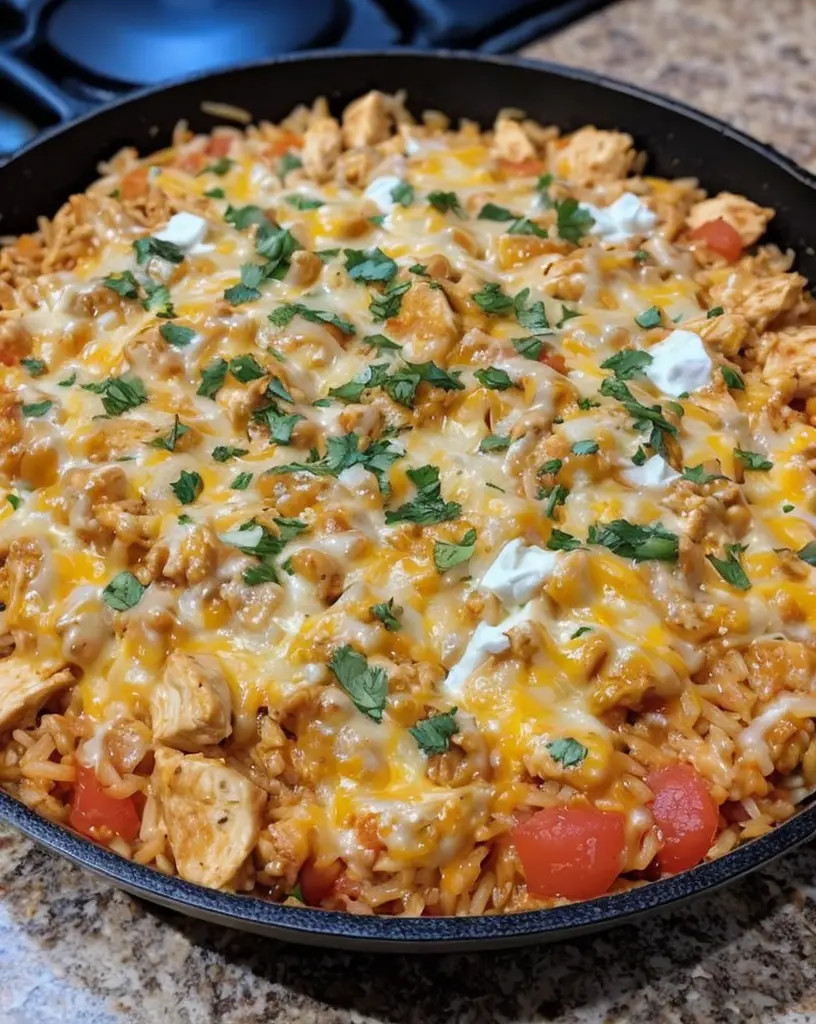
Cheesy Chicken Taco Rice: A Delicious One-Pot Meal Anyone Can Make

⚖️
Difficulty
Easy

⏲️
Prep Time
10 mins

🕒
Cook Time
30 mins

⏱️
Total Time
40 mins

🍽️
Servings
4

Cheesy Chicken Taco Rice is a mouthwatering dish that brings together all your favorite taco flavors in a simple, one-pot meal. The combination of tender chicken, seasoned rice, and creamy cheese creates an explosion of flavor in every bite. Perfect for busy weeknights, this dish is not only quick to prepare but also incredibly satisfying, making it a family favorite that you’ll want to make time and time again.

Imagine coming home after a long day to the warm, inviting aroma of cheesy goodness wafting through your kitchen. As you scoop the vibrant mix of colors onto your plate, you’ll be greeted with layers of textures – from the succulent chicken to the fluffy rice, all topped with melted cheese. This dish is both comforting and exciting, ensuring that it pleases even the pickiest eaters.

Quick Recipe Highlights

  • Flavor Profile: Savory chicken is marinated in taco spices, bringing a zesty kick to the dish while creamy cheese adds richness.
  • Texture: The fluffy rice mixed with tender chunks of chicken and melted cheese creates a delightful mouthfeel.
  • Aroma: A blend of spices, combined with the scent of cooking chicken and melting cheese, fills your kitchen with an irresistible fragrance.
  • Visual Appeal: Bright colors from diced tomatoes, shredded cheese, and chopped vegetables make this dish visually tempting.
  • Skill Level Needed: This recipe is beginner-friendly, requiring only basic cooking techniques.
  • Special Equipment: A large pot or skillet is essential for cooking everything in one place.

Recipe Overview

  • Difficulty Level: This Cheesy Chicken Taco Rice recipe is easy to follow, making it perfect for novice cooks or anyone looking to whip up a quick meal.
  • Category: This dish falls under the main course category, suitable for lunch or dinner.
  • Cuisine: It’s inspired by Mexican cuisine, showcasing traditional taco flavors while merging with hearty rice.
  • Cost: The ingredients are budget-friendly, typically costing around $15 to make a meal serving four.
  • Season: This dish is perfect for any season, as its hearty nature warms you in the colder months, while being light enough for summer.
  • Occasion: Ideal for family dinners, potlucks, or casual get-togethers, it’s sure to be a crowd-pleaser.

Why You’ll Love This Recipe

One of the most appealing aspects of Cheesy Chicken Taco Rice is its incredible taste and texture. The seasoned chicken melds beautifully with the tender rice, while the melted cheese adds a rich layer. Each bite bursts with flavor, making this dish comforting yet exciting. Kids and adults alike will look forward to seconds!

Convenience is another attractive feature of this meal. With just one pot needed, cleanup is a breeze, allowing for more time spent enjoying the meal with loved ones. The prep time is minimal, and once it’s simmering on the stovetop, you can attend to other tasks without worry.

Nutritional advantages make this recipe even more appealing. Packed with protein from the chicken and plenty of vitamins from fresh vegetables, it’s a wholesome choice for busy families. It also allows for healthy substitutions, such as brown rice or leaner cuts of chicken, catering to various dietary needs.

Socially, this recipe offers a fantastic way to bond with friends and family. Preparing this meal together can be a fun experience, allowing everyone to tailor their taco rice with toppings and flavors.

Lastly, Cheesy Chicken Taco Rice is cost-effective and accessible. With easily available ingredients, you won’t have to hunt for anything special, and the dish is budget-friendly, making it attainable for anyone.

Historical Background and Cultural Significance

The origin of taco rice can be traced back to American adaptations of traditional Mexican cuisine. Initially, tacos were enjoyed in their classic form, filled with meats, beans, and veggies. However, as culinary experimentation evolved, home cooks began to create one-pot variations that simplified preparation while retaining those beloved flavors.

Culturally, taco rice highlights the beautiful merger of comfort food with vibrant spices. In many households, this dish represents family dinners, where everyone gathers around the table to enjoy a hearty meal and share laughter. It’s seen as a communal dish, bringing people together.

Over time, as the recipe has evolved, different regions in the United States and beyond have put their own spin on taco rice. Variations can include different proteins, reflective of local tastes and preferences, showcasing its versatile nature.

Regional versions have exploded in popularity, particularly in areas with a significant Mexican influence. California, for instance, boasts various interpretations that may include fresh avocado or unique spice mixes, demonstrating how adaptable this dish truly is.

Ingredient Deep Dive

  • Chicken: As a central ingredient, chicken offers high protein levels that are essential for a balanced diet. Its versatility allows for various cuts, from breasts to thighs, each having its distinct flavor profile. When selecting chicken, look for fresh, organic options to ensure quality. For storage, raw chicken should be kept in the refrigerator for up to 2 days and can be frozen for later use. If you prefer alternatives, turkey or plant-based proteins work well as substitutes.
  • Rice: This staple ingredient not only serves as the base of the dish but is also a great source of carbohydrates. Brown rice offers higher nutritional benefits, including fiber, making it a healthier option when compared to white rice. To select rice, opt for brands that store whole grains. For storage, keep rice in a cool, dry place, and it can last for months. If you want to switch it up, quinoa or cauliflower rice could serve as great alternatives.
  • Cheese: Using cheese adds an unparalleled creaminess and richness to the dish. Traditionally, a mix of cheddar and Monterey Jack provides a delicious melt. Cheese contains calcium and protein, beneficial to bone health. When selecting cheese, choose high-quality options free of additives for the best flavor. Store cheese in the refrigerator and consume it within a week after opening. If you’re looking to reduce dairy, consider using nutritional yeast for a cheesy flavor without the animal product.
  • Bell Peppers: These vibrant vegetables not only add a colorful aesthetic but also provide vitamins A and C. When selecting bell peppers, look for firm, shiny skin and bright colors. They can be stored in the fridge for about a week. For variety, consider adding diced zucchini or corn for added texture and flavor.
  • Taco Seasoning: This blend of spices is crucial for infusing flavor into the dish. It typically contains chili powder, cumin, garlic powder, and paprika. You can easily make your own seasoning to control the heat level and avoid preservatives. Store homemade seasoning in an airtight container. If you want a milder flavor, simply reduce the spice quantities or look for pre-made mild options.

Common Mistakes to Avoid

  • Using cold chicken: Always let your chicken come to room temperature before cooking to ensure it cooks evenly.
  • Overcooking the rice: Keep an eye on your rice, as overcooking can lead to a mushy texture.
  • Skipping the seasoning: Don’t forget to season each layer, as it enhances the overall flavor.
  • Using too much liquid: Adding excessive water can make the dish too soupy; balance is key.
  • Not letting it rest: Allow the dish to sit for a few minutes before serving to let the flavors meld.
  • Choosing low-quality cheese: Opt for block cheese as opposed to pre-shredded for a better melt.
  • Using stale spices: Check your spice cabinet and replace any expired spices for optimal flavor.
  • Ignoring ingredient temperatures: Different ingredients cook at varying rates, so coordinate their addition accordingly.

Essential Techniques

  • Sautéing: This technique is vital as it helps to create a flavor base by browning the chicken and vegetables. To master sautéing, ensure your pan is properly heated before adding ingredients; this creates a nice sear and avoids sticking. Look for golden-brown colors as a cue of doneness.
  • Simmering: Simmering helps blend flavors throughout the dish. To achieve a proper simmer, maintain a gentle bubbling that allows the rice to absorb flavors without boiling over. Overdoing the heat can lead to unevenly cooked rice.
  • Melt: When melting cheese, it’s essential to maintain a low temperature to prevent burning. Stir gently as it melts into a creamy texture. Watch for bubbling and a gooey consistency for success.

Pro Tips for Perfect Cheesy Chicken Taco Rice

  • For an extra layer of flavor, consider marinating the chicken in taco seasoning for an hour prior to cooking.
  • Feel free to add your favorite vegetables, like spinach or black beans, to boost the nutrition of the meal.
  • Use a combination of cheeses for more complexity; try mixing Monterey Jack with pepper jack for a spicy twist.
  • For a crisp topping, broil the dish for a few minutes after cooking to achieve a beautiful golden crust.
  • Ensure your rice is rinsed to remove excess starch, which can lead to sticky rice.
  • While serving, provide a variety of toppings like avocado, cilantro, or sour cream to elevate the dish.
  • You can easily make this recipe in advance for a quick meal. Just reheat it gently before serving.
  • Experiment with different grains, like quinoa or farro, for a nutritious twist.

Variations and Adaptations

  • Incorporate different proteins like ground turkey, beef, or pork for a varied flavor profile.
  • For a seasonal adaptation, add fall vegetables like butternut squash or mushrooms to embrace autumn flavors.
  • Make it vegan by substituting the chicken with a plant-based option and non-dairy cheese.
  • Spice things up with additional jalapeños or hot sauce for those who enjoy heat.
  • Experiment with different rice types; try wild rice or cauliflower rice for a unique twist.
  • Enhance presentation by serving in tortilla bowls or hollowed peppers for a fun serving option.

Serving and Presentation Guide

  • For an appealing plate, layer the rice, chicken, and cheese, finishing with a sprinkle of diced fresh herbs.
  • Serve with a wedge of lime on the side to add a zesty finish that brightens the dish.
  • Use colorful garnishes such as cherry tomatoes or chopped cilantro to visually entice your guests.
  • Serve the dish warm, as it enhances the textures and flavors of the melty cheese.
  • Consider portion control by using measuring cups or small bowls to serve consistent sizes.

Wine and Beverage Pairing

  • A chilled Sauvignon Blanc complements the richness of the cheese while cutting through its creaminess.
  • If you prefer red wine, a light-bodied Pinot Noir pairs harmoniously with the spices.
  • For non-alcoholic options, serve sparkling water infused with lime or flavored iced teas that enhance the flavors.
  • Coffee can also be a delightful accompaniment, especially if served with dessert afterward.

Storage and Shelf Life

  • Store leftovers in an airtight container in the refrigerator for up to 3 days for optimal freshness.
  • Label containers with a date to keep track of how long they’ve been stored.
  • Reheat leftovers gently on the stovetop over medium heat or in the microwave on a low setting to preserve texture.
  • For longer storage, freeze the dish in appropriate containers for up to 3 months, ensuring you label them with the date.
  • When reheating from frozen, allow to thaw overnight in the fridge for best results.

Make Ahead Strategies

  • Prep the chicken and chop all vegetables the night before to streamline cooking time.
  • Cook the rice ahead and store it sealed in the fridge to save time when it’s mealtime.
  • Assemble the ingredients in a single container for an easy grab-and-cook approach if you’re in a rush.
  • Consider preparing the dish in its entirety and reheating it when ready to serve, developing the flavors further.

Scaling Instructions

  • To halve the recipe, simply divide all ingredient quantities by two, ensuring you maintain cooking times.
  • If doubling or tripling the recipe, use a larger pot and consider cooking in batches to ensure even cooking.
  • Adjust cooking times accordingly; larger batches may take a bit longer to cook through properly.
  • Be mindful of the serving size when scaling; use portion methods to maintain consistency across servings.

Nutritional Deep Dive

  • This dish provides a balanced macro breakdown, with high protein from chicken, healthy carbs from rice, and fats from cheese.
  • In terms of micronutrients, expect a good dose of vitamins A and C from vegetables, contributing to overall health.
  • It’s important to monitor portion sizes; a reasonable serving promotes satiety without leading to excess calorie intake.
  • For those managing weight, consider substituting whole grain rice and lean proteins to lower calorie density.

Dietary Adaptations

  • For a gluten-free option, ensure that your seasonings and prepared ingredients are certified gluten-free.
  • Substitute dairy cheese with cashew cheese for a creamy, dairy-free option that maintains a cheesy flavor.
  • To make it vegan, replace chicken with a plant-based protein and use vegetable broth instead of water.
  • A low-carb version can be created by using cauliflower rice as a base instead of traditional rice.

Troubleshooting Guide

  • If your chicken turns out dry, ensure you’re cooking it properly by using a meat thermometer for accuracy.
  • Should your rice be mushy, avoid overcooking in future batches and check the rice-to-water ratio.
  • For flavor balance, taste as you cook, adding a pinch of salt or more seasoning until satisfied.
  • If you encounter lumps in melted cheese, consider using a whisk to smooth it out while heating.

Recipe Success Stories

  • Our community has shared numerous twists on this recipe, proving its versatility to suit various palates.
  • Photographers have successfully showcased the colorful components, making Cheesy Chicken Taco Rice visually enticing.
  • Family gatherings become lively events with this dish at the center, sparking joy and conversations around the table.

Frequently Asked Questions

Can I use brown rice for this recipe? Yes, brown rice works well, but keep in mind it will require a longer cooking time. Adjust your liquid amounts and cooking duration accordingly.

Is this dish freezer-friendly? Absolutely! You can freeze Cheesy Chicken Taco Rice in an airtight container for up to three months. Reheat thoroughly before serving.

Can I substitute the chicken with turkey? Yes, ground turkey is a great alternative! It pairs well with taco seasoning and maintains that delicious flavor.

What are some good toppings? Fresh toppings like avocado, sour cream, jalapeños, and chopped cilantro enhance the flavors beautifully.

Is Cheesy Chicken Taco Rice spicy? The spiciness will depend on the taco seasoning you use. Opt for a mild mix if you prefer less heat.

Can I make this dish vegetarian? Yes, use a combination of vegetables like beans and corn to replace the chicken while keeping the flavor profiles intact.

What cheese is best for melting? Cheddar and Monterey Jack are excellent choices for their melting properties and flavor.

How can I make the dish healthier? Consider using brown rice, reducing the amount of cheese, or adding more vegetables to enhance the nutritional value.

Can I make this recipe in a slow cooker? Yes! Layer the ingredients and cook on low for 4-6 hours for an easy, hands-free meal.

What are good side dishes with Cheesy Chicken Taco Rice? Consider serving a fresh salad or grilled vegetables to balance the richness of the main dish.

Additional Resources

  • Explore our collection of one-pot meals for more convenience in the kitchen.
  • Check out technique guides for mastering sautéing and simmering to enhance your cooking skills.
  • Find ingredient information for optimizing your use of spices in various recipes.
  • Look into recommended kitchen equipment that will ease your cooking process.
  • Discover seasonal variations that incorporate fresh produce as it comes into season.

Join the Conversation

  • Share your Cheesy Chicken Taco Rice creations on social media using our hashtag!
  • Upload your photos and let the community see how you plated this delicious dish.
  • Leave a review or comment about your experience, and offer suggestions for new variations!
  • Engage in discussions about ingredient substitutions and tips with fellow food lovers.

The Recipe

Cheesy Chicken Taco Rice

Serves: 4

Prep Time: 10 mins

Cook Time: 30 mins

Total Time: 40 mins

Kitchen Equipment Needed

  • Large pot or skillet
  • Measuring cups and spoons
  • Wooden spoon or spatula
  • Knife and chopping board

Ingredients

  • 1 lb chicken breast, diced
  • 1 cup uncooked white or brown rice
  • 1 cup chicken broth
  • 1 cup shredded cheddar cheese
  • 1 bell pepper, diced
  • 1 package taco seasoning
  • Salt and pepper to taste
  • Fresh cilantro and avocado for garnish

Directions

  1. In a large pot or skillet, sauté the diced chicken over medium heat until browned.
  2. Add the bell pepper and taco seasoning, cooking until the pepper is tender.
  3. Stir in the rice and chicken broth, bring to a boil, then reduce heat to low and simmer for 20 minutes.
  4. Once the rice is cooked, remove from heat and stir in the cheese until melted.
  5. Garnish with fresh cilantro and avocado before serving.

Recipe Notes

  • Feel free to adjust spice levels according to your preference.
  • For a creamier texture, mix in a dollop of sour cream before serving.

Savory Spicy Honey Jalapeño Chicken Skewers for Summer Grilling

Spicy Honey Jalapeño Chicken Skewers: A Sweet and Fiery Delight

⚖️
Difficulty
Easy

⏲️
Prep Time
20 mins

🕒
Cook Time
15 mins

⏱️
Total Time
35 mins

🍽️
Servings
4

Get ready to tantalize your taste buds with our Spicy Honey Jalapeño Chicken Skewers! This recipe combines the sweet and sticky goodness of honey with the fiery kick of jalapeños, making for a mouthwatering dish that’s perfect for summer grilling or a cozy family dinner. The succulent chicken mingles beautifully with the zesty marinade, ensuring every bite is bursting with flavor. Whether you’re hosting a casual backyard BBQ or prepping a satisfying weekday meal, these skewers are sure to impress and become a family favorite.

The marriage of sweetness from the honey and the heat from the jalapeños creates a sophisticated flavor profile that is both addictive and satisfying. As you grill, the aromas wafting through the air will spark excitement, and the vibrant colors of your skewers will make for an eye-catching dish that begs to be shared. These skewers are not only delicious but also incredibly easy to prepare, making them perfect for both novice cooks and seasoned chefs alike.

Quick Recipe Highlights

  • Flavor Profile: This dish boasts a delightful blend of sweet, spicy, and savory flavors that dance on your palate, with honey balancing out the heat from the jalapeños.
  • Texture: The chicken remains tender and juicy while the slightly charred edges add a satisfying crunch, creating a delightful contrast in every bite.
  • Aroma: Expect a fragrant mix of caramelized honey and spicy jalapeños that will fill your kitchen and draw your guests towards the grill.
  • Visual Appeal: The skewers flaunt a gorgeous golden-brown color, speckled with bright green from the jalapeños, creating a visually stunning dish.
  • Skill Level Needed: This recipe is easy to follow, making it accessible for beginner cooks looking to elevate their culinary skills.
  • Special Equipment: A grill or grill pan is essential for achieving that perfect char and smoky flavor that defines these chicken skewers.

Recipe Overview

  • Difficulty Level: With only a few simple steps involved, making Spicy Honey Jalapeño Chicken Skewers is straightforward. It requires minimal cooking techniques, making it perfect for beginners.
  • Category: This dish fits perfectly into the categories of appetizers, main dishes, and finger foods, making them versatile for various meal occasions.
  • Cuisine: Rooted in fusion cuisine, this recipe brings together elements from Mexican and American traditions, celebrating bold flavors and communal eating.
  • Cost: The approximate cost of this recipe is budget-friendly, typically ranging from $10 to $15, depending on local pricing of ingredients.
  • Season: Ideal for warmer months, these skewers shine at summer cookouts, but they can also be enjoyed year-round for any festive gathering.
  • Occasion: Perfect for outdoor BBQs, parties, and casual gatherings, they can also be served at family dinners or game day celebrations.

Why You’ll Love This Recipe

The combination of sweet and spicy is incredibly appealing, with the honey providing a luscious glaze that complements the juicy chicken and fiery jalapeños. The skewers have a tender texture which is inviting, and when grilled to perfection, they have just the right amount of char that enhances their flavor profile. This dish is easy to prepare, making it convenient for cooks who want delicious results without spending hours in the kitchen.

In terms of nutrition, chicken is a great source of lean protein, while jalapeños may offer health benefits including improved metabolism and potential anti-inflammatory properties. Enjoying these skewers is a fun way to savor healthy ingredients without compromising on taste. Not to mention, they present beautifully, making them a fantastic centerpiece for social gatherings, where they can be easily shared amongst guests.

Cost-effectiveness is also a highlight here. Using affordable ingredients while achieving a gourmet feel means you can delight your friends and family without breaking the bank. The ability of the skewers to cater to various diets makes them a universally loved dish, ensuring that everyone at your gathering can enjoy them.

Historical Background and Cultural Significance

The origin of chicken skewers can be found in various cultures around the world, with many regions utilizing skewers for grilling meats. The blend of spicy and sweet elements in this recipe is reminiscent of traditional dishes found in Mexico, where jalapeños are a staple ingredient. The simplicity and versatility of skewered foods have made them popular throughout history for their ease of preparation and communal presentation.

In Mexican cuisine, the use of ingredients like jalapeños and honey reflects regional flavors that highlight the nation’s love for balance in taste. Historically, grilling over an open flame has been a method for preserving meats and vegetables, making these skewers a dish rich in tradition and culture.

Over the years, variations of chicken skewers have evolved, incorporating different spices, marinations, and side dishes based on personal preferences and regional ingredients. Each iteration tells a story, making them a dish that transcends borders and celebrates diversity in culinary experiences.

Regional variations can be found where the spice level or accompanying elements change, catering to local palates. This adaptability of the recipe not only makes it significant in various cultures but also enhances its popularity among food lovers around the globe.

Ingredient Deep Dive

Chicken, as the main ingredient, has significant cultural relevance, being one of the most widely consumed meats globally. It serves as an excellent source of protein and is versatile in many cuisines. When selecting chicken, it’s advisable to look for high-quality, free-range options where possible. For storage, keep chicken refrigerated and consume within a few days, or freeze it for later use. If you prefer, it can be substituted with turkey or tofu for a different take.

Jalapeños are another star of this recipe, known for their vibrant flavor and health benefits. They contain capsaicin, which may provide health benefits such as pain relief and improved digestion. When choosing jalapeños, select firm, unblemished peppers, as they tend to be fresher and more flavorful. Store them in the refrigerator to maintain their crispness. If jalapeños are too hot for your taste, consider using milder peppers or omitting them altogether, customizing the heat to your preference.

Common Mistakes to Avoid

  • Not marinating long enough – Ensure your chicken is marinated for at least 30 minutes for maximum flavor infusion.
  • Using wooden skewers without soaking – Soak wooden skewers in water for at least 30 minutes to prevent them from burning on the grill.
  • Overcrowding the skewers – Allow enough space between the pieces to ensure even cooking and thorough browning.
  • Incorrect temperature for grilling – Preheat the grill to medium-high heat for the best sear and to lock in flavors.
  • Not checking for doneness – Chicken should be cooked to an internal temperature of 165°F. Use a meat thermometer to ensure safety.
  • Skipping the resting time – Letting the skewers rest after grilling allows juices to redistribute, keeping the meat tender.
  • Overbasting with marinade – Use the marinade primarily for marinating rather than repeated basting while grilling to prevent flare-ups.
  • Failing to adjust for variations in jalapeño heat – Remember that jalapeños can vary in heat level; taste them before using to adjust the quantity accordingly.

Essential Techniques

Marinating chicken is crucial for enhancing flavor and moisture. Allowing the chicken to soak in a mixture of honey, jalapeños, and spices adds depth to the dish. To master marinating, aim for at least an hour and the longer, the better. Be mindful of the marinade’s acidity, as overly potent acidic ingredients could lead to mushy chicken.

Grilling is where the magic happens. Achieving the perfect grill marks and smoky flavor enhances the sensory experience of your skewers. Ensure your grill is preheated and clean to prevent sticking. Look for visual cues such as a nice char and clear juices flowing to know when your chicken is ready to come off the grill. Pay attention to the flare-ups from dripping marinade and adjust cooking techniques accordingly.

Pro Tips for Perfect Spicy Honey Jalapeño Chicken Skewers

1. For extra flavor, consider adding fresh herbs like cilantro or parsley to your marinade.

2. Alternate your chicken with colorful vegetables like bell peppers, onion, or zucchini for added variety and nutrition.

3. Preheat your grill thoroughly to establish a nice sear on your skewers.

4. Baste your skewers with extra marinade during grilling to amplify flavors, but ensure you do so safely to avoid cross-contamination.

5. Experiment with different sauces after grilling, such as barbecue or ranch, for added flavor layers.

6. Before serving, sprinkle some lime juice over the skewers to enhance the flavors and add a refreshing touch.

7. Use citrus zest in your marinade for a brightness that balances the heat of the jalapeños.

8. Allow your skewers to rest for a few minutes after grilling before serving to optimize juiciness.

Variations and Adaptations

Explore regional variations like adding different cultural spices such as cumin or paprika to the marinade to give it a unique twist. Seasonal adaptations can include grilled summer vegetables like corn or squash for a vibrant dish bursting with color. For dietary modifications, swap out chicken for shrimp or tofu, maintaining the same marinade for a different protein experience.

You can also adjust the flavor profile by experimenting with different heat levels by incorporating spicier peppers or a spicy sauce. Texture modifications can include blanching vegetables slightly before grilling to ensure a tender crunch while keeping the skewers intact. For presentation, consider arranging skewers on a platter with colorful dipping sauces for an interactive dining experience.

Serving and Presentation Guide

When plating the Spicy Honey Jalapeño Chicken Skewers, consider arranging them vertically in a tall glass for a stunning visual display. Garnishing with fresh cilantro or green onions not only adds color but also enhances aroma. Traditional accompaniments like lime wedges serve to brighten the flavors when squeezed over the cooked skewers.

For modern servings, consider incorporating fancy toothpicks or mini skewers for cocktail parties or appetizer trays. Temperature is key; serve the skewers warm off the grill alongside cooling dips like yogurt-based sauces to balance the heat of the dish. Remember portion control as well—3-4 pieces per person can ensure everyone has enough to enjoy while allowing for a variety of other dishes.

Wine and Beverage Pairing

When it comes to wine pairings, a chilled Riesling or an off-dry Sauvignon Blanc complements the spicy and sweet flavors beautifully. For those who prefer cocktails, a light mojito or a spicy margarita can add an extra kick while balancing the heat. Non-alcoholic options may include sparkling water with lime for refreshing sips or a mocktail with fruit juices and soda water.

If coffee or tea is more your style, a lightly brewed iced tea can serve as a refreshingly sweet counterpart to the heat of the skewers, especially if infused with honey or mint. Ensure that beverages are chilled and served in ample quantities for guests to enjoy with their skewers.

Storage and Shelf Life

To store leftovers of Spicy Honey Jalapeño Chicken Skewers, place them in an airtight container and refrigerate for up to two days. For longer storage, they can be frozen for up to three months. Ensure they’ve cooled down before placing them in the freezer to maintain quality. When reheating, use an oven or grill to restore the skewer’s integrity, avoiding a microwave which could make them rubbery.

Check for spoilage by ensuring there are no off smells or discolorations after thawing. When reheating, heat to an internal temperature of 165°F to guarantee safety. If you’ve made extra marinade, consider using it as a base sauce while reheating for added flavor enhancement.

Make Ahead Strategies

To streamline your cooking process, consider marinating the chicken a day in advance, allowing flavors to develop fully. Store the marinated chicken in the refrigerator until you’re ready to grill. If preparing skewers ahead of time, assemble them but wait to grill until shortly before serving to maintain the juiciness of the chicken and the texture of the vegetables.

For an optimal dining experience, consider serving fresh components, such as herbs or garnishes, separately to be added just before eating. Adjusting this way preserves their freshness and enhances the end presentation, ensuring that flavors pop at the time of serving.

Scaling Instructions

To halve the recipe, simply divide all ingredients by two, which works seamlessly for the marinade and chicken. For those wanting to double or triple the recipe, ensure you have adequate skewers and space on the grill. Be mindful of adjusting cook times based on the increased volume; larger batches may require longer cooking times to reach the appropriate internal temperature.

When scaling, also consider the dimensions of your grill and whether you need to cook in batches to maintain even cooking and avoid crowding. Storage considerations remain the same; keeping leftovers in airtight containers allows for easy reheating and enjoyment later.

Nutritional Deep Dive

Analyzing the macro breakdown of Spicy Honey Jalapeño Chicken Skewers reveals a high protein content due to the chicken, coupled with carbohydrates from the honey. This dish is relatively low in fat, making it a healthy choice suitable for various diets. Furthermore, chicken breast provides essential amino acids for muscle repair and growth, while jalapeños may support metabolism with their heat components.

Micronutrient analysis shows that this recipe offers vitamins and minerals such as vitamin C from jalapeños and B vitamins from chicken. Being mindful of portion sizes allows for enjoyment without overindulgence. Overall, this dish can be a smart addition to a weight management regimen when paired with a variety of sides like grilled vegetables or a fresh salad.

Dietary Adaptations

This recipe can easily be made gluten-free by checking all marinade ingredients to ensure they contain no gluten. For those with dairy restrictions, simply using an oil-based marinade keeps it compliant. To cater to vegan diets, swap the chicken for firm tofu or tempeh while using the same spicy marinade, allowing flavors to penetrate the meat alternatives effectively.

For low-carb or keto-friendly variations, consider using zucchini noodles or grilled vegetables in place of traditional side dishes. You can also omit the honey or use a sugar substitute to keep things keto while still maintaining the sweet-heat balance. These adaptations prevent exclusion while ensuring the recipe fits various dietary needs.

Troubleshooting Guide

If you encounter texture issues with your chicken skewers, ensure you’re not overcooking them. Always check the internal temperature to prevent dryness. If your flavors are unbalanced, adjust before serving using lime juice to add brightness or honey to enhance sweetness as necessary.

For problems with uneven cooking, ensure your grill is preheated sufficiently and that skewers are spaced appropriately to allow heat circulation. Equipment challenges like flare-ups can be mitigated by managing the heat level of your grill and moving skewers away from direct flames when necessary.

Recipe Success Stories

Community feedback on the Spicy Honey Jalapeño Chicken Skewers has been overwhelmingly positive, with many home cooks praising the ease and flavorful result. Some have shared variations, adding their choice of herbs or marinating the chicken overnight to boost flavor intensity. Adaptation stories include using different proteins, such as shrimp, resulting in delightful seafood skewers filled with the same sweet and spicy notes.

Readers have also contributed to photography tips that enhance the visual appeal of the finished dish, emphasizing the vibrant colors of jalapeños and grilled chicken. Many enjoyed sharing their success with friends and family, making these skewers a centerpiece for summer gatherings and social events.

Frequently Asked Questions

Q: Can I use other meats for this recipe?

A: Absolutely! This marinade works wonderfully with pork, shrimp, or even tofu for a vegetarian option. Adjust cooking times accordingly for different proteins.

Q: How do I store leftovers of the skewers?

A: Store them in an airtight container in the refrigerator for up to two days. You can also freeze them for up to three months.

Q: What can I serve with these skewers?

A: These skewers pair perfectly with a fresh green salad, grilled vegetables, or a side of rice or quinoa for a complete meal.

Q: Can I make the marinade ahead of time?

A: Yes, the marinade can be prepared up to a week in advance and stored in the refrigerator for convenience.

Q: What variations can I experiment with in the marinade?

A: Feel free to switch up spices or add extra elements like lime zest, cilantro, or even sriracha for an extra kick.

Q: How do I ensure my jalapeños are not too spicy?

A: Remove the seeds and inner membranes of the jalapeños before adding them to the marinade, as these parts contain the majority of the heat.

Q: Is it better to grill or bake the skewers?

A: Grilling provides a smoky flavor and desirable char, but baking is still an option. If baking, use a high temperature for best results.

Q: Can I use pre-cut chicken for the skewers?

A: Yes, pre-cut chicken works well and saves prep time, but ensure it’s consistent in size for even cooking.

Q: What can I do if my skewers are drying out on the grill?

A: Make sure to not overcook the skewers and use a marinade to baste them as they cook, helping retain moisture.

Q: Can I grill from frozen?

A: It’s best to thaw the skewers in the refrigerator overnight for even cooking. Grilling from frozen may lead to uneven cooking.

Additional Resources

For more delicious and creative recipes, check out our section on grilled dishes and barbeque favorites. For beginners, our technique guides can help you master grilling skills and marinades, ensuring that your chicken skewers come out perfect every time.

Looking to dive deeper into ingredient information? We have in-depth articles exploring the health benefits of honey, the nutritional advantages of chicken, and even more on jalapeños. Don’t forget to explore the equipment recommendations to find the best grills or tools to use for your cooking adventures.

Join the Conversation

We encourage our readers to share their photos and experiences with Spicy Honey Jalapeño Chicken Skewers on social media. Tag us in your delicious creations and inspire others with your unique twists on the classic recipe! Feedback is invaluable, so leave comments about your experiences—whether it be praise, adjustments, or personal stories tied to this scrumptious dish.

The Recipe

Spicy Honey Jalapeño Chicken Skewers

Serves: 4

Prep Time: 20 mins

Cook Time: 15 mins

Total Time: 35 mins

Kitchen Equipment Needed

  • Grill or grill pan
  • Wooden or metal skewers
  • Measuring cups and spoons
  • Mixing bowl
  • Brush for basting

Ingredients

  • 1 lb. chicken breast, cut into 1-inch cubes
  • 2-3 jalapeños, seeded and chopped
  • 1/4 cup honey
  • 2 tablespoons olive oil
  • 2 tablespoons soy sauce (or tamari for gluten-free)
  • 1 teaspoon garlic, minced
  • 1 teaspoon lime juice
  • Salt and pepper to taste
  • Wooden skewers, soaked in water for 30 minutes

Directions

  1. In a mixing bowl, combine honey, olive oil, soy sauce, minced garlic, lime juice, jalapeños, salt, and pepper.
  2. Add chicken cubes to the marinade. Mix well, ensuring each piece is coated. Let marinate for at least 30 minutes (or up to overnight in the refrigerator).
  3. Preheat the grill to medium-high heat. Thread marinated chicken onto skewers, leaving a little space between each piece.
  4. Place skewers on the grill. Grill for about 5-7 minutes on each side or until the chicken is cooked through and has nice grill marks (internal temperature should reach 165°F).
  5. Remove skewers from the grill and let them rest for a few minutes before serving.

Recipe Notes

  • Feel free to adjust the number of jalapeños based on your heat preference.
  • Add vegetables like bell peppers or onions onto the skewers for extra flavor and nutrition.
  • Extra marinade can be brushed over the skewers while grilling for enhanced flavor.

Delicious Creamy Potato Soup with Bacon for Comforting Meals

Creamy Potato Soup with Bacon: A Comforting Delight

⚖️
Difficulty
Easy

⏲️
Prep Time
15 mins

🕒
Cook Time
30 mins

⏱️
Total Time
45 mins

🍽️
Servings
6 servings

Discover the irresistible warmth and flavors of this creamy potato soup with bacon. Perfect for chilly evenings or family gatherings, this delightful soup combines the heartiness of potatoes with the rich, smoky goodness of bacon. Each spoonful offers a velvety texture that envelops your taste buds, providing comfort in every bite. This potato soup recipe stands out not only for its taste but for its ability to bring loved ones together, inviting joy and warmth into your kitchen.

As the bacon sizzles and potatoes soften, the aroma fills your home with a delicious promise. The soup boasts a beautiful creaminess balanced with crispy bits of bacon that add depth and flavor. Whether served as a standalone dish or as a starter, this soup will quickly become a favorite. Make it your own by adjusting spices or exploring different toppings, and watch as it transforms your dinner table into a heartwarming gathering.

Quick Recipe Highlights

  • Flavor Profile: A delightful blend of creamy potato goodness with salty, crispy bacon, making every bite deeply satisfying.
  • Texture: Silky smooth potatoes combined with crunchy bacon pieces offer a satisfying mouthfeel.
  • Aroma: A deliciously comforting blend of savory bacon and fresh herbs wafts through the air.
  • Visual Appeal: Golden chunks of potato, colorful herbs, and crispy bacon make for a visually enticing dish.
  • Skill Level Needed: Perfect for beginners with straightforward steps and little specialized technique required.
  • Special Equipment: A large pot and a blender or immersion blender for smooth perfection.

Recipe Overview

  • Difficulty Level: This potato soup recipe is easy enough for novice cooks, requiring basic ingredients and minimal cooking techniques.
  • Category: Ideal as a cozy comfort food dinner or a satisfying starter for any meal.
  • Cuisine: This soup reflects classic American comfort food traditions, cherished for its homestyle appeal.
  • Cost: Featuring budget-friendly ingredients like potatoes and bacon, this dish is economical for weeknight dinners.
  • Season: It shines during autumn and winter months, perfect for warming up on cold days.
  • Occasion: Great for casual family dinners, gatherings, or even cozy date nights at home.

Why You’ll Love This Recipe

When it comes to flavor and texture, this creamy potato soup will leave you craving more. The comforting blend of creamy potatoes with savory bacon delivers a taste that warms the soul. With each spoonful, you’ll experience the soft, velvety potatoes mingling harmoniously with the crunch of bacon, making it a textural delight.

Convenience is another reason to adore this recipe. With just a few simple steps, you can have a hearty soup ready in under an hour, making it an excellent option for busy weeknights. The straightforward preparation requires minimal equipment and provides maximum flavor, allowing you to focus on spending time with family and friends rather than complicated cooking techniques.

This creamy potato soup also delivers nutritional benefits. Potatoes provide essential vitamins and minerals, while the bacon adds a source of protein and flavor that makes this dish satisfying. Enjoy it guilt-free with the knowledge that you’re nourishing your body while delighting your taste buds!

The social aspect of sharing a warm soup is undeniable. This recipe is perfect for gatherings, where everyone can gather around a bowl of soup together, creating a heartwarming atmosphere. The sensation of comfort food sparks conversations and memories, enhancing your dining experience.

Furthermore, this soup is incredibly cost-effective. It requires standard ingredients that you likely have at home, making it accessible for everyone. The wholesome nature of potatoes, combined with the luxurious texture, makes this dish feel indulgent without breaking the bank.

Historical Background and Cultural Significance

The origins of potato soup can be traced back to regions where potatoes have been a staple for centuries. First domesticated in the Andean mountains of South America, potatoes made their way to Europe in the late 16th century, becoming a crucial ingredient in many cuisines.

Throughout history, potato soup has been embraced for its simplicity and the comfort it brings, especially during times of hardship. Various cultures have made it their own, often incorporating local ingredients to enhance the flavor profile uniquely.

As recipes evolved, regional variations emerged, incorporating ingredients such as cream, cheese, and different spices that define specific areas. This adaptability showcases the potato’s versatility and the ability of different culinary traditions to embrace it within their kitchens.

Today, creamy potato soup with bacon serves not only as a delicious meal but also as a reminder of the potato’s rich history and the cultural significance of comfort food across generations.

Ingredient Deep Dive

Potatoes: Potatoes are the heart of this soup, providing creaminess and substance. With a long history as a staple food, they are high in carbohydrates, vitamin C, and potassium. When selecting potatoes, look for firm, smooth skins and avoid any signs of bruising. Store them in a cool, dark place, and they can last several weeks. If you’re in need of substitutions, sweet potatoes can be a delightful variation.

Bacon: Bacon enhances the soup with a smoky, savory flavor that balances the richness of the potatoes. Known for its social significance, bacon has been a part of culinary traditions across cultures for centuries. When purchasing bacon, look for thick-cut varieties that offer a satisfying crunch. Store it in the refrigerator and consume within a week or freeze for longer storage. Alternatives include turkey bacon or plant-based bacon for different dietary needs.

Common Mistakes to Avoid

  • Not prepping the potatoes properly: Always wash and peel potatoes before cooking to remove dirt and pesticides.
  • Overcooking the potatoes: Keep an eye on cooking time; overcooked potatoes will break down too much and ruin the soup’s texture.
  • Skipping the bacon render: Ensure you render the bacon thoroughly to achieve a crispy texture that enhances the soup’s flavor.
  • Not seasoning at each step: Layering salt and pepper throughout the cooking process ensures an even and well-balanced flavor.
  • Using low-quality ingredients: Fresh, high-quality ingredients make all the difference in flavor and overall success of the dish.
  • Blending the soup too much: Blend to the desired consistency; a little chunkiness adds texture and visual appeal.
  • Neglecting the aromatics: Onions and garlic are essential for foundational flavor—don’t skip them!
  • Ignoring the final tasting: Always taste before serving to make adjustments to seasoning and creaminess.

Essential Techniques

Blending: This technique is crucial for achieving the right texture in potato soup. Use either a regular blender or immersion blender, blending until smooth. Start with small batches in a traditional blender to avoid overflow. When using an immersion blender, move it around the pot for an even consistency.

Rendering Bacon: Rendering is vital to get crispy bacon pieces that complement the creamy soup. Begin by cooking bacon on medium heat to allow the fat to render slowly, ensuring it remains tender. Pay attention to visual cues, like a golden color, indicating optimal doneness, and avoid burning for best flavor.

Pro Tips for Perfect Creamy Potato Soup with Bacon

1. For an extra creamy texture, add a splash of heavy cream or half-and-half at the end of cooking.

2. Experiment with different spices like paprika or thyme to enhance flavor.

3. Keep some bacon pieces aside for garnishing to add a crunchy topping to the soup.

4. For a more complex flavor, sauté onions before adding potatoes to deepen the soup base.

5. Add a bit of sour cream before serving for a tangy twist.

6. Use a variety of potatoes such as Yukon Gold for creaminess and russet for texture.

7. For a vegan version, replace cream with coconut milk and omit bacon, adding smoked paprika for flavor.

8. Serve with crusty bread for dipping, making for a complete meal.

Variations and Adaptations

Regional variations can include the addition of local herbs or spices, such as dill or chives, providing a unique twist to the classic recipe. Seasonal adaptations can utilize summer vegetables like corn or carrots to add color and nutrition, while heavy winter ingredients can be swapped in during colder months.

For dietary modifications, feel free to adjust ingredients for gluten-free or low-carb diets. Substituting potatoes with cauliflower can create a lower-carb version of this delicious soup, while coconut milk can cater to a dairy-free option.

Flavor variations include adding roasted garlic for a deeper flavor profile or incorporating cheese blends for a rich, cheesy potato soup experience.

Texture modifications like adding crispy shallots or fresh herbs as garnishes can elevate the visual appeal and add freshness, while presentation alternatives might involve serving it in bread bowls for a fun and unique dining experience.

Serving and Presentation Guide

When plating the creamy potato soup, use deep bowls for an inviting presentation. Swirl in a bit of heavy cream before serving to create a beautiful marbled effect. Garnishing with crispy bacon bits and fresh herbs can enhance both visual and flavor profiles.

For accompaniments, consider serving with a side salad or crusty bread to elevate the meal. Temperature is essential; ensure the soup is hot but not boiling when served, maintaining comfort for your guests while allowing the flavors to shine.

To control portions, consider using smaller bowls for starters to encourage multiple servings, perfect for parties or gatherings.

Wine and Beverage Pairing

Pairing this creamy potato soup with bacon calls for a medium-bodied white wine like Chardonnay, which complements the richness of the soup. Alternatively, a light red wine like Pinot Noir also works beautifully, bringing out the savory bacon flavors.

For non-alcoholic beverages, consider a sparkling apple cider, which balances the creamy soup’s richness with a refreshing palate cleanser. If serving during brunch, a classic Mimosa can also be a delightful pairing.

When it comes to coffee or tea, a light herbal tea, such as chamomile, provides a soothing accompaniment, while a coffee with mild notes can enhance the eating experience without overpowering the soup.

Storage and Shelf Life

Store any leftover creamy potato soup in an airtight container and keep it in the refrigerator for up to five days. Ensure the soup is cooled to room temperature before placing it in the fridge to maintain freshness.

When storing, use glass containers for easy reheating in the microwave or on the stovetop, ensuring even warming. Signs of spoilage include an off smell or a change in texture, such as excess separation or curdling due to dairy products.

For longer storage, consider freezing the soup in freezer-safe bags, eliminating excess air to prevent freezer burn. Properly stored, the soup can last for up to three months in the freezer. When reheating, mild heat is recommended to preserve texture and flavor.

Make Ahead Strategies

If you’re looking to prepare this creamy potato soup in advance, chop the vegetables and bacon the night before to save time on cooking day. Cook the bacon and store separately to maintain its crispy texture until serving.

For the best flavor, make the soup up to two days in advance; this allows the flavors to meld beautifully. Store it in the fridge and reheat gently on the stove before serving. Consider adding fresh herbs or additional seasoning just before serving for a vibrant finish.

Fresh elements like chopped green onions or cheese can be added just before serving to enhance the final presentation and flavor.

Scaling Instructions

Scaling this recipe is simple; to halve the quantity, just divide the ingredient amounts in half, adjusting the cooking time accordingly. While cooking, taste during the process to ensure flavor consistency remains balanced.

For doubling or tripling the recipe, ensure you have a pot large enough to accommodate the extra ingredients without overflowing. Adjust timing as needed, particularly for cooking the potatoes; larger quantities may take a few extra minutes.

When scaling the recipe, consider how you will store leftovers as larger batches may require more storage space, such as larger containers or freezing portions for future meals.

Nutritional Deep Dive

This creamy potato soup with bacon provides a comforting blend of macronutrients, offering carbohydrates from potatoes, protein from bacon, and fat from cream. A typical serving contains approximately 300 calories, making it a fulfilling meal option.

Micronutrient-wise, this soup boasts vitamins C and B6 from potatoes, along with essential minerals like potassium. The addition of cream contributes calcium for strong bones, while bacon adds iron for beneficial nutrition.

For those considering dietary choices, keep in mind portion sizes to maintain a balanced intake. Pairing the soup with a salad or vegetables can enhance its overall nutritional profile.

Incorporating this dish into a well-rounded diet can be satisfying and nutritious, particularly when supplemented with fresh ingredients or paired with side salads.

Dietary Adaptations

This creamy potato soup can easily cater to dietary needs. For a gluten-free version, simply ensure all ingredients, including broths, are gluten-free. Opt for gluten-free bacon options available at many stores.

For those dairy-free, replace the cream with coconut milk or nut-based milk alternatives, and skip the bacon for a lighter option. To maintain flavor, add smoked paprika for a hint of smokiness.

Vegans can enjoy this recipe using plant-based ingredients without sacrificing flavor; consider mashing the potatoes with almond milk for a creamy texture.

If focusing on low-carb options, zucchinis or cauliflower can replace potatoes, creating a similar experience while decreasing carbohydrate content significantly.

Troubleshooting Guide

If your potato soup has an unbalanced texture, it may be due to over-blending. Stop blending once you reach the desired consistency, leaving some chunks for textural contrast.

Flavor balance may be an issue if the soup tastes bland. Add salt and pepper gradually during cooking, tasting frequently to bring out the flavors without over-salting.

Whenever the soup is too thick, whisk in additional broth or cream to reach the preferred consistency. Heat gently, ensuring it’s well-mixed without compromising texture.

If the soup tends to separate when refrigerated, stir well before serving to recombine ingredients. Whisking in extra broth or cream while reheating can help restore its creamy nature.

When cooking equipment fails or seems inadequate, use a manual immersion blender if an electric one is malfunctioning to blend soup directly in the pot, saving time on pot transfers.

Recipe Success Stories

Community feedback highlights how this creamy potato soup has become a weeknight staple for many families. Readers have reported modifying ingredients, resulting in unique twists while still retaining the core comforting essence of the dish.

Adaptation stories include adding seasonal vegetables like carrots or spinach to pack more nutrition, showcasing how versatile this dish can be. Many have shared their success stories, detailing how the recipe contributes to family traditions and gatherings.

Photography tips have also emerged, with suggestions for garnishing the soup with fresh herbs like parsley or basil to elevate visual appeal, making it more Instagram-worthy.

Frequently Asked Questions

Can I freeze creamy potato soup? Yes, this soup can be frozen for up to three months. Ensure it’s stored in airtight containers to prevent freezer burn.

How do I prevent my potato soup from becoming watery? Use a firm, starchy potato such as Russet, and do not add too much broth initially; adjust as needed while cooking.

What’s the best type of potato for soup? Starchy potatoes like Russet or Yukon Gold work best for a creamy texture; avoid waxy potatoes as they do not mash well.

Can I add other vegetables to this soup? Absolutely! Carrots, corn, or celery can be added for extra flavor and nutrition.

Is this soup gluten-free? Yes, as long as you use gluten-free bacon and broth, this soup can be enjoyed on a gluten-free diet.

How can I make this soup spicier? Feel free to add cayenne pepper or chili flakes for a spicy variation, adjusting to taste.

What herbs pair well with potato soup? Fresh herbs like chives, thyme, and parsley complement the soup beautifully and add freshness.

Can I create a vegan version of this soup? Yes, use plant-based bacon and coconut milk or a nut-based alternative to create a delicious vegan option.

How do I thicken potato soup? Blend part of the soup to enhance creaminess, or add additional potatoes to achieve the desired thickness.

What can I serve with creamy potato soup? This soup pairs nicely with crusty bread, fresh salads, or a light sandwich for a complete meal experience.

Additional Resources

Looking for related recipes? Explore other comforting soups like butternut squash soup, clam chowder, or a classic tomato basil soup. Each offers unique flavors and comforting experiences perfect for various occasions.

For technique guides, consider checking out resources on proper vegetable chopping techniques or tips for sautéing that will enhance your overall cooking skills.

Ingredient information is available for those curious about the nutritional content of potatoes or bacon, essential for making informed dietary choices.

Equipment recommendations for blenders can elevate your kitchen dynamics and ensure easier processing of soups and sauces.

For seasonal variations, experiment with fresh herbs and vegetables that reflect the current season’s bounty, making your cooking experience ever-changing and exciting.

Join the Conversation

We encourage you to share your experiences and variations of this creamy potato soup with bacon on social media! Use the hashtag #CreamyPotatoSoup to join a community of fellow food lovers.

Photography tips such as using natural light can enhance your dish’s visual appeal, showcasing the inviting colors and inviting nature of your soup.

Share a recipe review or suggest modifications that worked well for you! Engaging with our community allows everyone to learn and evolve as cooks.

Have fun experimenting with this recipe, and we look forward to hearing your success stories as you enjoy this comforting dish!

The Recipe

Creamy Potato Soup with Bacon

Serves: 6 servings

Prep Time: 15 mins

Cook Time: 30 mins

Total Time: 45 mins

Kitchen Equipment Needed

  • Large pot
  • Blender (or immersion blender)
  • Cutting board and knife
  • Measuring cups and spoons
  • Wooden spoon

Ingredients

  • 4 large russet potatoes, peeled and diced
  • 6 slices of bacon, chopped
  • 1 medium onion, diced
  • 2 cloves garlic, minced
  • 4 cups chicken or vegetable broth
  • 1 cup heavy cream
  • Salt and pepper to taste
  • Chopped parsley for garnish

Directions

  1. In a large pot, cook the bacon over medium heat until crispy. Remove and set aside, leaving the drippings in the pot.
  2. Add diced onion to the pot with the bacon drippings and sauté until translucent, about 5 minutes.
  3. Stir in minced garlic and cook for another minute until fragrant.
  4. Add diced potatoes and broth to the pot. Bring to a boil, then reduce the heat and simmer until potatoes are tender, about 15-20 minutes.
  5. Once the potatoes are tender, use an immersion blender to blend the soup until smooth, or transfer to a blender in batches.
  6. Return the soup to low heat and stir in heavy cream, seasoned with salt and pepper to taste.
  7. Serve hot, garnished with reserved bacon and chopped parsley.

Recipe Notes

  • For a lighter version, swap heavy cream for half-and-half or milk.
  • Profoundly flavor the soup as desired with herbs like thyme and rosemary.
  • Consider topping with crispy onions or cheese for added texture and flavor.

Hearty Cowboy Soup Recipe: A Comforting One-Pot Delight

Cowboy Soup: Hearty Comfort in a Bowl

⚖️
Difficulty
Easy

⏲️
Prep Time
10 mins

🕒
Cook Time
30 mins

⏱️
Total Time
40 mins

🍽️
Servings
6 servings

Cowboy Soup is the ultimate warming dish, perfect for chilly days or cozy gatherings. With its variety of ingredients, including hearty meats, vegetables, and spices, this cowboy classic delivers a satisfying flavor that harkens back to the rugged kitchens of the West. The thick, filling broth and colorful veggies make each bowl visually appealing and absolutely delicious. It’s a soup that tells stories, combining simple elements to create something truly heartwarming.

As you dive into a bowl of Cowboy Soup, you can expect rich notes of tender beef, zesty tomatoes, and the vibrant crunch of bell peppers. Every bite offers a delightful marriage of flavors, while the robust nature of the dish gives it a comforting weight. Whether served on a busy weekday or for a weekend feast, this soup is bound to become a family favorite, exemplifying the joys of home-cooked meals.

Quick Recipe Highlights

  • Flavor Profile: Rich and savory with a hint of spice from chili seasoning and the freshness of herbs.
  • Texture: Thick and hearty, combining tender meat with crunchy vegetables, ensuring a satisfying mouthfeel.
  • Aroma: A fragrant blend of sautéed onions, garlic, and spices that fills your kitchen with warmth.
  • Visual Appeal: Bursting with color from red tomatoes, green peppers, and a golden hue from corn.
  • Skill Level Needed: Perfect for beginners; requires basic cooking skills and attention to detail.
  • Special Equipment: A large pot or Dutch oven to accommodate the hearty ingredients.

Recipe Overview

  • Difficulty Level: Easy – Ideal for novice cooks looking to explore the art of soup-making.
  • Category: Main Dish – A complete meal that can stand alone or be paired with crusty bread.
  • Cuisine: American – Rooted in Western culinary traditions, reflecting the hearty, rustic style of cowboy cooking.
  • Cost: Budget-friendly with affordable ingredients available at local markets.
  • Season: Best enjoyed in fall and winter when warming meals are most appealing.
  • Occasion: Perfect for family dinners, gatherings, or when you need a quick, comforting meal.

Why You’ll Love This Recipe

The Cowboy Soup offers both taste and texture appeal that make each bowl a delightful experience. The combination of tender meats and fresh vegetables creates a hearty dish that fills you up without feeling heavy. As the flavors meld, you’ll savor the rich, savory broth that warms you from the inside out. This soup is not only delicious but also provides convenience; it comes together in just 40 minutes, making it a fantastic weeknight meal option.

Aside from being convenient, Cowboy Soup packs a nutritional punch. With a mix of protein from the beef and vitamins from the vegetables, it’s a wholesome choice for any dinner table. Each serving offers a good balance of macronutrients, ensuring you not only enjoy a scrumptious meal but also cater to your dietary health.

When it comes to social and entertainment value, Cowboy Soup is a crowd-pleaser. It’s easy to make in large batches, perfect for parties or family get-togethers. Serve it alongside bread or cornbread, and you’ve got a complete, shareable meal that ignites conversation and camaraderie.

Cost-effectiveness is another reason you’ll appreciate this recipe. Using basic, widely available ingredients, you can create a filling dish that feeds a crowd without breaking the bank. So, whether you’re feeding a family or hosting friends, this Cowboy Soup will meet your needs without compromising on taste or quality.

Historical Background and Cultural Significance

Cowboy Soup has its origins in the American West, where cowboys needed hearty meals that were easy to prepare over an open fire. The simplicity and abundance of ingredients reflect the rugged lifestyle and resourcefulness of ranch life. From beans to beef, every component of the soup tells a story about the culture it came from, emphasizing traditions of using locally sourced produce and meats.

This soup is culturally significant as it embodies the spirit of the American frontier, showcasing resilience, creativity, and community. It has evolved over generations, with families incorporating personal touches and regional ingredients reflecting local culinary influences. This adaptation not only preserves the rustic nature of the dish but also keeps it vibrant and modern.

As the recipe spread across the country, variations began to emerge, from spicy renditions in southwestern kitchens to more subdued versions in the Midwest. Each area added its unique twist, resulting in a diverse range of cowboy soup that continues to be enjoyed today.

Regional variations of Cowboy Soup highlight the ingredients specific to local agriculture, showcasing pride in those bounties. As seasonal vegetables come into play, you’ll find that this recipe embodies how traditional cooking embraces the hands that cultivate the earth.

Ingredient Deep Dive

Beef: Chosen for its robust flavor and protein content, beef has long been favored in traditional cowboy cooking. It’s significant for providing the necessary sustenance in hearty dishes, especially for active lifestyles. Nutritionally, it offers essential amino acids and vital vitamins like B12. When selecting beef, look for cuts like ground beef or stew meat; they are more economical and perfect for soups. Store it properly to prevent spoilage and consider alternatives like turkey or beans for lighter options.

Vegetables: Fresh veggies, such as bell peppers and tomatoes, not only add essential nutrients but also vibrance to the dish. Each vegetable chosen plays a crucial role in the flavor profile, offering fiber and vitamins. Choose organic for better quality and lasting freshness. Store your vegetables in a cool place, and if possible, use seasonal produce for the best taste and environmental impact. For substitutions, consider zucchini or corn based on what’s available.

Common Mistakes to Avoid

  • Not browning the meat: Skipping this step can lead to a less flavorful broth. Browning adds depth and richness to the soup.
  • Overcooking vegetables: This can result in mushy textures. Add harder vegetables first, then softer ones later to maintain texture.
  • Insufficient seasoning: Under-seasoned soup can taste bland. Taste and adjust seasoning throughout the cooking process for best results.
  • Using low-quality ingredients: Quality ingredients elevate the dish significantly. Always choose the freshest produce and good-quality meat.
  • Skipping the simmering step: Allowing the soup to simmer enhances flavor and melds the ingredients effectively.
  • Not letting it rest: The flavors benefit from sitting for a few minutes post-cooking, so let it rest before serving.
  • Not keeping an eye on the consistency: Adjust the thickness by adding more broth or vegetables to ensure the right balance.
  • Assuming all soups are similar: While the technique is similar, each soup has its unique character and temperatures for serving.

Essential Techniques

Sauteing Vegetables: This method is vital for building flavors at the beginning of your soup. Start by heating oil in a pot and adding onions and garlic until fragrant. To master this technique, ensure your pot is preheated; this helps in releasing the natural sweetness of the vegetables. Watch for signs of browning—overcooking can lead to bitterness.

Simmering: Essential for combining the flavors of the ingredients, simmering involves cooking soup over low heat. The magic happens as the dish cooks gently, allowing time for flavors to meld. Be sure to keep the heat low; boiling can rupture delicate ingredients, making them undesirable in texture.

Pro Tips for Perfect Cowboy Soup

1. Use fresh herbs for seasoning—they’ll elevate the flavor profile exponentially.

2. Prepare a large batch and freeze portions for quick meals later in the week.

3. For a smoky flavor, consider adding a bit of smoked paprika or chipotle powder.

4. Balance richness by serving with a splash of lime juice or vinegar at the end.

5. Customize according to your palate by adding more heat with jalapeños or hot sauce.

6. Serve with cornbread for a delicious accompaniment that completes the cowboy experience.

Variations and Adaptations

Regional variations abound, with some areas incorporating beans for added heartiness, while others may showcase local game meats for a richer flavor. Seasonal adaptations are equally tempting; in summer, consider using zucchini and corn for a fresh twist. Dietary modifications can include swapping beef for lentils or chickpeas for a plant-based version, making the soup accessible to vegan eaters.

Flavor variations are easy to implement; cilantro and lime can bring a zesty flair, while a dash of Worcestershire sauce deepens the umami notes. Texture modifications can be achieved by pureeing part of the soup for a creamier consistency, or simply incorporating cream or yogurt as a garnish. For presentation alternatives, serve in rustic bowls garnished with fresh herbs or paired with a side salad.

Serving and Presentation Guide

Plating techniques for Cowboy Soup can turn a simple meal into a culinary delight. Use shallow bowls, pile high with soup, and add fresh herbs and a dollop of sour cream or Greek yogurt for a pop of color. Traditional accompaniments include crackers or cornbread, while modern takes could feature avocado slices or jalapeños for an exciting twist. Temperature considerations are crucial; serve soup piping hot for maximum enjoyment, and for portion control, offer smaller servings as part of a multi-course meal.

Wine and Beverage Pairing

When it comes to wine pairings, a bold red such as a Cabernet Sauvignon complements the savory flavors of Cowboy Soup beautifully. If you prefer non-alcoholic alternatives, consider a sparkling water with some citrus for a refreshing touch. For coffee enthusiasts, a robust dark roast contrasts wonderfully with the rich soup, enhancing the overall experience. Remember to serve beverages chilled or at room temperature based on preference.

Storage and Shelf Life

For proper storage of your Cowboy Soup, allow it to cool completely before transferring to airtight containers. Refrigerate for up to three days or freeze for several months. Choose freezer-safe containers to prolong shelf life effectively. Signs of spoilage include off-smells or an unusual texture in the broth. When reheating, do so gradually on the stove or microwave, and add a splash of water or broth to revive the consistency—especially if frozen.

Make Ahead Strategies

Planning ahead is simple with Cowboy Soup. Prep your ingredients a day in advance—chop vegetables and brown the meat, storing them separately in the refrigerator. The quality won’t suffer, and it saves time when you’re ready to cook. Consider batch cooking to simplify your weeknight meals—just double the recipe and enjoy the leftovers later. For maximum freshness, reheat only what you plan to serve to keep the dish vibrant and enjoyable.

Scaling Instructions

Halving this recipe is easy—just reduce the ingredient amounts accordingly and maintain cooking times. Doubling or tripling will require a larger pot and may alter cooking times slightly due to increased volume; ensure an even simmer by stirring occasionally. Be mindful of storage considerations; larger batch sizes necessitate appropriate containers to avoid spoiling or freezer burn.

Nutritional Deep Dive

The macro breakdown of Cowboy Soup shows its filling nature—each serving offers ample protein, carbohydrates, and healthy fats depending on ingredient ratios. Micronutrient analysis reveals it’s packed with essential vitamins and minerals, especially from the vegetables. This soup is a powerhouse when it comes to nutritional benefits, supporting energy levels and promoting overall health.

Dietary Adaptations

For gluten-free options, simply ensure your bouillon or broth is certified gluten-free. Dairy-free adaptations are also straightforward; coconut milk can replace any dairy elements for a creamy consistency. For those following vegan diets, employ lentils or chickpeas as meat substitutes. Low-carb and keto-friendly approaches can limit the starchy vegetables or beans in the recipe while emphasizing meats and leafy greens to enhance the dish’s appeal without compromising taste.

Troubleshooting Guide

If you experience texture issues, such as overly mushy vegetables, ensure to add them at different cooking stages based on their cooking times. Address flavor balance by gradually adjusting seasonings throughout the cooking process to prevent overwhelming the dish. For temperature problems, ensure your stove is adequately heated and that the soup is simmering, not boiling, to maintain the integrity of the ingredients.

Recipe Success Stories

Community feedback on Cowboy Soup has been overwhelmingly positive, with many sharing their unique adaptations and variations based on family traditions. Some readers have discovered that their children, originally picky about vegetables, enjoyed this soup due to its flavorful nature and presentation. Others have shared tips on photography, helping to highlight the colorful ingredients and hearty nature of the soup, making it as visually appealing as it is delicious.

Frequently Asked Questions

Can I make Cowboy Soup in a slow cooker?

Yes! Simply brown the meat and sauté the vegetables according to the recipe before transferring everything to a slow cooker. Cook on low for 6-8 hours or high for 3-4 hours, allowing the flavors to develop beautifully over time.

What spices work best in Cowboy Soup?

Common spices include chili powder, cumin, and oregano. Feel free to personalize this by adding your favorite spices or herbs to match your taste preference!

Can I freeze leftovers?

Absolutely! Cowboy Soup freezes well. Let it cool completely before transferring to freezer-safe containers. Store for up to three months, reheating as needed.

How can I make this dish spicier?

Add diced jalapeños or hot sauce to the soup for extra heat. You can also adjust spices as per your preference while cooking.

What sides pair well with Cowboy Soup?

Crusty bread, cornbread, or a fresh salad make great side dishes. They balance the hearty soup and provide additional texture to your meal.

Is it possible to make this a vegetarian dish?

Yes! By substituting beef with lentils or beans and using vegetable broth instead of meat broth, you can easily create a delicious vegetarian Cowboy Soup.

Can I use canned ingredients?

Canned beans, tomatoes, and even corn can be excellent time-savers and can add great flavor to your Cowboy Soup without compromising quality.

What is the best way to store Cowboy Soup?

Store cooled soup in airtight containers in the fridge for up to 3 days, or freeze for future meals. Make sure to cool it down first to avoid condensation.

Can I add different meats?

Certainly! Ground turkey, pork, or even chicken can be utilized in place of beef, bringing different flavors and textures to the dish.

How do I know if my soup is done?

Your Cowboy Soup is ready when the meat is tender, and the vegetables are cooked but still keeping their shape. The flavors should meld perfectly, creating a well-rounded taste.

Additional Resources

Explore other hearty recipes that complement Cowboy Soup, such as homemade cornbread or savory biscuits. Additionally, check out ingredient guides to learn more about nutritious choices and seasonal produce that works best in soups. Equipment recommendations can also help you choose the right tools for making healthy dishes efficiently.

Join the Conversation

We’d love to see your Cowboy Soup creations—share them on social media with the hashtag #CowboySoupChallenge. Join our community by leaving feedback or suggestions based on your own experiences. Whether it’s photography tips or your favorite adaptations, engaging with fellow cooking enthusiasts is what makes sharing recipes so rewarding!

The Recipe

Cowboy Soup

Serves: 6 servings

Prep Time: 10 mins

Cook Time: 30 mins

Total Time: 40 mins

Kitchen Equipment Needed

  • Large pot or Dutch oven
  • Wooden spoon or spatula
  • Knife and cutting board

Ingredients

  • 1 pound ground beef
  • 1 onion, diced
  • 2 garlic cloves, minced
  • 1 bell pepper, chopped
  • 1 can (15 oz) diced tomatoes
  • 2 cups beef broth
  • 1 can (15 oz) corn, drained
  • 1 can (15 oz) black beans, drained and rinsed
  • 1 tablespoon chili powder
  • 1 teaspoon cumin
  • Salt and pepper to taste

Directions

  1. In a large pot over medium heat, brown the ground beef until fully cooked. Drain excess fat.
  2. Add the onion and garlic to the pot, sautéing until soft and translucent.
  3. Incorporate the bell pepper and cook for an additional 2 minutes.
  4. Stir in the diced tomatoes, beef broth, chili powder, cumin, corn, and black beans.
  5. Bring to a boil, then reduce heat and let simmer for 20 minutes, stirring occasionally.
  6. Season with salt and pepper to taste, then serve hot with your favorite sides.

Recipe Notes

  • This soup can be customized with different vegetables or legumes according to your palette!
  • Add a splash of lime juice before serving for a refreshing kick.
  • Store leftovers in an airtight container in the fridge for up to three days.

Easy Savory Slow Cooker Beef Stroganoff Recipe for Comfort Food Lovers

Savory Slow Cooker Beef Stroganoff: A Comforting Delight for All Occasions

⚖️
Difficulty
Easy

⏲️
Prep Time
15 mins

🕒
Cook Time
6 hours

⏱️
Total Time
6 hours 15 mins

🍽️
Servings
4-6 servings

The Savory Slow Cooker Beef Stroganoff is a heartwarming recipe that envelops tender beef in a creamy, savory sauce enriched with mushrooms and onions. The secret to its incredible flavor lies in the slow cooking process, which allows all the aromatic ingredients to meld perfectly together, creating a dish that is bursting with flavor. When you walk into the kitchen after hours of letting it simmer away, the air will be filled with the comforting aroma of beef and spices that beckon everyone to the dining table.

One of the most appealing aspects of slow cooker beef stroganoff is its effortless preparation. Just gather your ingredients, toss them into the slow cooker, and allow the magic to happen. This dish not only feeds the hungry bellies in your home but also brings people together, offering a cozy atmosphere whether for a family dinner or a gathering with friends. The creamy texture of the sauce, combined with the juiciness of the beef and the earthiness of mushrooms, makes it a delightful meal that feels like a hug in a bowl.

Quick Recipe Highlights

  • Flavor Profile: Rich, creamy, and savory with tender beef and earthy mushrooms that create a well-balanced meal.
  • Texture: A harmonious blend of velvety sauce enveloping fork-tender beef and hearty mushrooms.
  • Aroma: A comforting mix of sautéed onions, garlic, and herbs wafting through your kitchen.
  • Visual Appeal: Creamy golden sauce poured over slices of beef with flecks of herbs and dark mushrooms.
  • Skill Level Needed: Perfect for beginners; minimal cooking skills are required for a rewarding experience.
  • Special Equipment: A reliable slow cooker is essential to achieve the depth of flavor.

Recipe Overview

  • Difficulty Level: Easy, making it accessible for cooks at any level. The slow cooker does most of the work, allowing you to focus on gatherings or tasks at hand.
  • Category: A fulfilling main dish, ideal for family dinners or entertaining guests.
  • Cuisine: This dish is rooted in Russian culinary traditions, showcasing classic flavors that have been adopted worldwide.
  • Cost: Budget-friendly, especially since it’s made with affordable cuts of beef and everyday ingredients.
  • Season: Perfect for fall and winter seasons, the dish is warm and satisfying when cooler weather kicks in.
  • Occasion: Great for weeknight dinners, holiday gatherings, or cozy weekends at home with loved ones.

Why You’ll Love This Recipe

The taste and texture of Savory Slow Cooker Beef Stroganoff create a memorable experience. Each bite offers the richness of the creamy sauce complemented by the tenderness of the beef, which melts in your mouth. The mushrooms add an earthy depth to the dish, enhancing both the flavor and the overall satisfaction.

The convenience of this recipe is one of its major advantages. You can prepare it in the morning, set it and forget it while going about your day. When it comes time to eat, a deliciously savory meal awaits you, ready to be served with minimal effort. This slow cooker dish is perfect for those with busy schedules, allowing you to enjoy home-cooked meals without spending hours in the kitchen.

In terms of nutrition, beef is a great source of protein, iron, and zinc, contributing to a well-rounded diet. When paired with whole grains or greens, this dish becomes a hearty and nourishing meal that supports energy levels. You can enjoy this dish guilt-free, knowing it provides essential nutrients while still feeling indulgent.

Socially, this recipe serves as a fantastic centerpiece for gatherings. The comforting flavors spark conversations and encourage sharing. As guests savor each bite, it creates a warm, inviting atmosphere perfect for bonding over a shared meal. Its simplicity and generous servings make it easy to entertain without tireless multitasking in the kitchen.

This dish’s cost-effectiveness stems from using affordable ingredients, including budget-friendly cuts of beef, which become tender and flavorful through the slow cooking process. You can feed a large group without breaking the bank, making it a practical choice for family nights or special occasions.

Historical Background and Cultural Significance

Beef stroganoff has an intriguing origin story linking back to 19th century Russia, where it was named after the Stroganov family, a wealthy and influential family of merchants. The dish gained popularity through the aristocracy, often featuring at formal dinners. Its development stemmed from the need for sophisticated yet simple recipes that could impress guests while being easy to prepare.

Culturally, beef stroganoff reflects the essence of Russian cuisine, which emphasizes hearty flavors and comforting ingredients. Over the years, it has transcended its borders, becoming a staple in various international culinary practices. Each region boasts its unique take, but the fundamental flavors remain ever-popular, uniting different cultures through a shared love for good food.

As times progressed, beef stroganoff has evolved from its traditional recipes into countless modern versions, reflecting contemporary taste preferences and dietary needs. Variations include everything from vegetarian adaptations using mushrooms and plant-based ingredients to international fusions incorporating different spices and sauces.

Regional variations can be found worldwide, with different countries putting their spin on the classic. In American households, for instance, it’s often served over egg noodles or rice, showcasing how the recipe has evolved in different cultural settings while still honoring its roots.

Ingredient Deep Dive

Beef: This primary ingredient is not only a rich protein source but also holds cultural significance in many cuisines. When selecting beef for stroganoff, it’s essential to look for cuts that are tender and marbled, such as sirloin or tenderloin. Freshness is key; always check for bright color and subtle smell. For storage, keep the beef in the coldest part of the refrigerator and use it within a few days for best quality.

Mushrooms: Mushrooms add not just flavor, but also texture and depth to beef stroganoff. Rich in nutrients like vitamin D and selenium, they are excellent for boosting the dish’s health benefits. When buying mushrooms, look for firm, unblemished specimens. Store them in a paper bag in the refrigerator and avoid washing them until just before use to prevent them from becoming soggy.

Sour Cream: This ingredient brings creaminess and tang to the stroganoff sauce. It’s essential for achieving the signature flavor profile. Be mindful to select high-quality sour cream, as it affects the overall taste of the dish. Sour cream should be kept refrigerated and can last about two weeks, but check for any signs of separation or off-smell before use.

Onions: Onions add sweetness and depth to the flavor. Always opt for fresh, firm bulbs without soft spots or discoloration. When stored in a cool, dry place, onions will last several weeks. They can also be substituted with shallots for a milder flavor or green onions as a garnish.

Common Mistakes to Avoid

  • Overcooking the beef: Cooking it for too long can dry out the meat, making it tough. Always check for tenderness.
  • Skipping the browning step: Browning the meat and onions adds depth of flavor, so don’t skip this crucial step.
  • Using cheap quality ingredients: Since this dish relies heavily on the flavor of each component, poor-quality ingredients will result in subpar stroganoff.
  • Not adding enough seasoning: Taste and adjust the seasoning as needed throughout the cooking process; layers of flavor are key!
  • Neglecting to monitor liquid levels: Make sure there’s enough liquid in the slow cooker to cook the beef properly; it prevents burning.
  • Not thickening the sauce: If the sauce turns out too thin, you can easily thicken it with a cornstarch slurry at the end.
  • Forgetting to stir occasionally: While slow cookers do their job well, a little stirring can help distribute flavors more effectively.
  • Allowing leftovers to sit out: Always refrigerate leftovers promptly to prevent spoilage and foodborne illness.
  • Using pre-packaged sauces: Making your sauce adds a personal touch and allows you to control the flavor profile.
  • Skipping the herb enhancement: Fresh herbs can elevate the dish’s flavor significantly; don’t hesitate to add them in moderation for a finishing touch.

Essential Techniques

Browning the meat is a crucial technique that enriches the flavors of the beef stroganoff. This step caramelizes the surface of the meat, locking in juices and enhancing taste. To master this, cook in batches if necessary to avoid steaming the meat. Look for a nice brown crust, which indicates that the Maillard reaction is taking place—a key component in building depth of flavor.

Sautéing the onions and garlic before adding them to the slow cooker helps release their natural sweetness and aroma, adding another layer to the dish. Ensure that the onions are soft and translucent before transferring them. Avoid burning them, as this can lead to a bitter taste, ruining your sauce.

Adding sour cream at the right moment is essential. Stir it in at the end of the cooking process, off the heat to prevent curdling, which can alter the sauce’s texture. Look for a smooth and creamy consistency.

Thickening the sauce may sometimes be necessary to achieve the perfect texture. An easy mix of cornstarch and water can create a slurry that thickens the sauce after cooking. Keep stirring continuously until it reaches desired thickness. Monitor the consistency closely to avoid making it too gloopy.

Pro Tips for Perfect Savory Slow Cooker Beef Stroganoff

Use high-quality beef for best results. A marbled cut will yield tenderness and juiciness, contributing to a richer flavor. Choosing fresh ingredients enhances the overall taste and quality of the final dish.

To intensify the flavor of the stroganoff, consider deglazing the pan used to brown the meat with a splash of white wine or beef broth before adding it to the slow cooker. This carries the fond from the bottom of the pan into the dish, enriching the sauce.

If you prefer a creamy texture, replace some of the beef broth with heavy cream. This will create a richer sauce that will ultimately elevate your stroganoff experience.

To incorporate a hint of sweetness, add a teaspoon of sugar or a splash of balsamic vinegar. This counterbalances the savory aspect of the dish and elevates the flavor profile without overwhelming it.

Feel free to enhance the depth of flavor by adding Worcestershire sauce, mustard, or fresh herbs like thyme or parsley towards the end of cooking. Each of these additions will provide a layer of complexity that makes the dish stand out.

For a little extra texture, consider garnishing with crispy fried onions or fresh herbs just before serving. This not only adds visual appeal but also an exciting crunch that contrasts with the creamy sauce.

Variations and Adaptations

For a regional twist, consider trying a Hungarian variation by using paprika and swapping sour cream for creme fraiche. This adds a distinctly hearty flavor that resonates with traditional Eastern European taste.

If you want to introduce seasonal adaptations, consider adding seasonal vegetables like carrots or green beans during the last hour of cooking. This not only adds nutrition but also vibrancy to the dish.

Dietary modifications can easily be made by opting for leaner cuts of beef or using chicken to lighten the dish. For a vegetarian version, substitute beef with hearty ingredients like lentils or mushrooms for a robust flavor.

For those looking to boost the flavor, try adding a splash of soy sauce or mushroom broth for a deeply umami-rich base. You can also play with spices, such as incorporating a hint of cayenne or smoked paprika for a subtle kick.

Texture modifications could involve serving the stroganoff over a bed of zoodles (zucchini noodles) instead of traditional egg noodles, making it a refreshing low-carb option.

Presentation alternatives can elevate your dish; serve it in a hollowed-out bread bowl or top it with a sprinkle of finely chopped parsley for an elegant finishing touch.

Serving and Presentation Guide

Plating your Savory Slow Cooker Beef Stroganoff beautifully will enhance the dining experience. Consider using a wide, shallow bowl to showcase the creamy sauce and robust chunks of beef.

For garnish, a sprinkle of fresh parsley or chives adds a pop of color and freshness. Place a dollop of sour cream on top for an appealing touch and an additional layer of flavor.

Offering traditional accompaniments like egg noodles or mashed potatoes allows guests to serve themselves in a customizable fashion. Alternatively, serve with crusty bread for dipping into the rich sauce.

Modern serving suggestions include pairing it with a fresh green salad on the side, balancing the hearty dish with vibrant, tangy flavors.

Temperature considerations are essential. Serve the stroganoff warm, as the flavors meld beautifully at a proper serving temperature. Preheat your serving bowls if possible for added warmth.

For portion control tips, consider serving in individual ramekins, allowing guests to enjoy personal portions without waste, while also enhancing presentation.

Wine and Beverage Pairing

A full-bodied red wine such as a Cabernet Sauvignon or Merlot pairs beautifully with Savory Slow Cooker Beef Stroganoff. The rich flavors of the wine complement the dish’s savory notes, creating a delightful pairing for a cozy evening.

For non-alcoholic alternatives, consider serving sparkling water with a slice of lemon or iced tea with mint. These options are refreshing and will cleanse the palate between bites.

If you enjoy coffee or tea, a bold black coffee works wonderfully alongside the stroganoff, enhancing the richness of the dish.

Temperature considerations are important; if serving wine, ensure it’s appropriately chilled for white wines or slightly warmer for red to enhance the flavor during the meal.

Don’t hesitate to offer a fun cocktail pairing such as a classic Moscow Mule, made with ginger beer, to invigorate the meal with its zesty flavors.

Storage and Shelf Life

To store leftovers of your Savory Slow Cooker Beef Stroganoff, place the dish in an airtight container. It can stay fresh in the refrigerator for up to three to four days.

For longer storage, consider freezing the stroganoff. Ensure it cools to room temperature before transferring to a freezer-safe container, where it can last for up to three months.

Temperature requirements are essential; always refrigerate leftovers promptly to avoid spoilage. Reheat thoroughly until steaming before consuming again.

Container recommendations include glass or heavy-duty plastic to prevent flavor absorption and allow for quick reheating. Avoid using metal containers that can react with the sauce.

Signs of spoilage to look out for include off-smells, discoloration, or unusual textures. When in doubt, it’s best to err on the side of caution and discard.

Reheating instructions suggest using the microwave or stovetop for even heating. Add a splash of beef broth or water to keep the sauce creamy, ensuring that it does not dry out.

Freezing guidelines indicate that while the dish can be frozen, avoid freezing dishes containing sour cream until reheating, as it may affect the texture and flavor once thawed.

Make Ahead Strategies

To effectively prepare your Savory Slow Cooker Beef Stroganoff, consider starting with a meal prep timeline. You can marinate the beef and chop the vegetables the night before, storing everything in the refrigerator to deepen the flavors.

Storage between steps can simplify the process. Keep your beef and sauce separately until you’re ready to cook. This helps maintain the texture of the beef while allowing flavors to meld before cooking.

Quality impact assessment is key; marinating the beef overnight not only allows for enhanced flavor but also tenderizes the meat, making for a better overall dish.

When assembling your slow cooker, layer ingredients for optimal flavor. Start with the beef, followed by mushrooms, onions, and pour the liquids on top for even distribution.

Reheating guidelines advise that when making ahead, it’s best to reheat slowly over low heat, allowing the flavors to come back together without overcooking the beef.

For fresh element additions, consider preparing a side salad with seasonal greens to complement the stroganoff. This adds freshness to your meal while enhancing the overall dining experience.

Scaling Instructions

If you need to halve the recipe, adjust the ingredients accordingly, using the same cooking method. The slow cooker may still require the same cooking time, but monitor for tenderness.

Doubling or tripling the recipe is straightforward; simply adjust the quantities of the ingredients accordingly. Ensure that your slow cooker can accommodate the increased volume without overcrowding.

Equipment adjustments may be necessary if increasing the recipe size. Consider using a larger slow cooker or cooking in batches to maintain the dish’s quality.

Timing modifications could include slightly extending the cooking time for larger quantities, monitoring the beef for tenderness to ensure even cooking.

Storage considerations are crucial when scaling up. Make sure to have extra containers ready for leftovers or to prepare additional sides that can balance the meal efficiently.

Be sure to note that while scaling, maintaining the flavor profile is equally important, so be generous with seasoning adjustments as necessary.

Nutritional Deep Dive

When analyzing the macros of Savory Slow Cooker Beef Stroganoff, you’ll find that the dish is rich in protein from the beef, essential for muscle health and recovery. Each serving can provide around 25-30 grams of protein, making it a satisfying option for dinner.

Micronutrient analysis shows a good source of iron from the beef, important for blood health, combined with B vitamins that help with energy metabolism. The addition of mushrooms and onions also provides essential vitamins, minerals, and antioxidants.

In terms of health benefits, this dish can be a comforting meal that provides a balance of protein, fats, and carbohydrates when served with appropriate sides like whole grains or a fresh salad.

Dietary considerations are critical; while delicious, be mindful of portion sizes, especially if served with calorie-dense sides. Balancing this dish with lighter options can help keep overall calorie intake in check.

When analyzing each serving, beef stroganoff can be calorically dense, especially when served with rich sides. Therefore, weighing your portions can aid in managing caloric intake, especially for those watching their diet.

Weight management tips include maintaining balanced portions and ensuring a well-rounded meal by pairing with more vegetables or whole grains. Aim for a satisfying plate without overwhelming calories.

Dietary Adaptations

If you’re looking for gluten-free options, consider substituting flour with cornstarch to thicken the sauce, and serve it over gluten-free noodles or rice.

For a dairy-free version, replace sour cream with coconut cream or a cashew cream alternative. This can create a creamy texture without using dairy while maintaining a delightful flavor.

Vegans can substitute beef with lentils or mushrooms while using non-dairy yogurt in place of sour cream. This offers a hearty meal packed full of plant-based nutrients.

For those following a low-carb or keto diet, skip the noodles and serve the beef stroganoff over zoodles or cauliflower rice, preserving the richness without the carbohydrates.

Paleo enthusiasts can adopt this recipe by using compliant ingredients like coconut flour instead of regular flour for thickening and ensuring the broth is free from preservatives.

Low-FODMAP adaptations are possible by using garlic-infused oil instead of onions and ensuring all ingredients adhere to the dietary guidelines, allowing for easier digestion.

Other specific diets can be addressed by opting for lean cuts of meat, ensuring the sauce remains as healthy as possible while retreating from processed ingredients wherever possible.

Troubleshooting Guide

If you encounter texture issues with the beef, ensure that the meat is not overcooked. Check for tenderness using a fork; it should break apart easily. If not tender, allow additional time in the slow cooker.

For flavor balance, if the dish is too salty, add a bit of sugar or vinegar to cut through the excess. Tasting while cooking enables you to adjust seasonings gradually, avoiding overpowering results.

Temperature problems can arise if the slow cooker isn’t calibrated correctly. Invest in a slow cooker thermometer to ensure cooking is happening at the right temperatures.

If faced with equipment challenges, ensure that your slow cooker is functioning properly. Old or faulty slow cookers can lead to uneven cooking, resulting in tougher meat or undercooked veggies.

Ingredient substitutions can affect flavors; taste as you go to ensure that the final result turns out as expected. It’s often wise to tweak the included flavors based on what’s available.

Timing concerns are valid; starting too late in the day can lead to undercooked dinners. Allow ample time for cooking by planning ahead and following your ideal slow cooker cooking times.

Recipe Success Stories

Community feedback around Savory Slow Cooker Beef Stroganoff has been overwhelmingly positive. Many have expressed how the dish has become a family favorite, perfect for gatherings and busy weeknights.

Variation successes include adaptions such as mushroom stroganoff from readers who swapped the beef for lentils, highlighting the flexibility of the recipe without sacrificing flavor.

Readers have shared adaptation stories that showcase personal touches, such as adding more vegetables or different spices, ultimately allowing others to adjust the dish to their taste.

Photography tips often mention using natural light for showcasing the dish, emphasizing its rich color and creaminess. Beautifully presented food often enhances the appeal and encourages sharing online.

Social media platforms have seen countless versions of this recipe, where home cooks proudly showcase their iteration of the dish, offering tips and encouragement to others who want to try it at home.

Frequently Asked Questions

Q: Can I freeze leftover Beef Stroganoff?
A: Yes, you can freeze leftover beef stroganoff for up to three months. Be sure to cool it completely, store it in a freezer-safe container, and label it with the date. When ready to eat, thaw in the refrigerator before reheating.

Q: Is it necessary to brown the meat before slow cooking?
A: While not strictly necessary, browning the meat enriches the flavor and adds depth to the dish. It’s worth taking the extra step to improve the final taste of your beef stroganoff.

Q: How can I thicken my sauce if it’s too thin?
A: If your sauce turns out too thin, mix a tablespoon of cornstarch with equal parts water to create a slurry and stir it into the slow cooker. Allow it to cook for a few more minutes until thickened.

Q: Can I make this dish dairy-free?
A: Absolutely! Substitute the sour cream with dairy-free alternatives like coconut cream or cashew cream to maintain a creamy texture while keeping it dairy-free.

Q: What sides pair well with Beef Stroganoff?
A: Traditional accompaniments like egg noodles or mashed potatoes pair well. You can also serve it with crusty bread or a green salad for freshness and balance.

Q: Can I use different types of meat for this recipe?
A: Yes, you can adapt this recipe by using chicken, turkey, or even mushrooms for a vegetarian option. Just adjust the cooking time accordingly based on the meat used.

Q: How long does it take to cook in a slow cooker?
A: For this beef stroganoff, it typically takes about 6-8 hours on low heat or 3-4 hours on high heat to achieve tender, flavorful meat.

Q: What is the best way to store leftovers?
A: Store leftovers in an airtight container in the refrigerator for up to four days. If you want to save it longer, portion it for freezing to extend its shelf life.

Q: Can I line my slow cooker for easier cleaning?
A: Yes, using slow cooker liners can simplify cleanup after cooking, reducing mess and effort in maintaining your slow cooker.

Q: How do I adjust seasoning for a larger batch?
A: When scaling up the recipe, increase seasonings incrementally, tasting as you go to ensure the flavor remains balanced without becoming overwhelming.

Additional Resources

For those looking to explore related recipes, consider other comforting dishes that can be made in a slow cooker, such as chicken curry or vegetable stew. These recipes often share similar cooking techniques and flavors.

Technique guides for preparing tender meat or creating creamy sauces can enhance your cooking skills, making these elements easier next time. Understanding these fundamentals makes each dish even more enjoyable.

Ingredient information, particularly on sourcing quality beef and vegetables, is vital for getting the best flavors in your recipe. Look for local sources or specialty markets for the freshest ingredients.

Equipment recommendations should focus on finding a reliable slow cooker that suits your cooking needs. Consider models with searing capabilities for added convenience.

Seasonal variations can inspire you to switch up your ingredients based on what is freshest and most available, fostering a new appreciation for these comforting recipes.

Join the Conversation

We invite you to share your experiences and photography of your Savory Slow Cooker Beef Stroganoff. Social media is a great platform for showcasing your culinary creations and connecting with other food lovers.

Readers are encouraged to leave comments with their adaptations and suggestions, as these interactions enrich our community and inspire others to try their variations.

Don’t forget to check for recipe reviews and feedback. Positive experiences help new cooks feel confident about trying this dish and making it their own.

Engaging with our community also helps foster creativity; feel free to ask questions or share tips on different ingredient substitutions that worked well for you.

Lastly, remember the joy of home cooking lies not only in the food itself but also in the memories and connections made during shared meals. Let’s celebrate the love for food, one scrumptious recipe at a time!

The Recipe

Savory Slow Cooker Beef Stroganoff

Serves: 4-6 servings

Prep Time: 15 mins

Cook Time: 6 hours

Total Time: 6 hours 15 mins

Kitchen Equipment Needed

  • Slow cooker
  • Skillet
  • Cutting board
  • Knife
  • Measuring cups and spoons
  • Mixing spoon

Ingredients

  • 2 pounds beef chuck, cut into cubes
  • 1 onion, sliced
  • 8 ounces mushrooms, sliced
  • 3 cloves garlic, minced
  • 2 cups beef broth
  • 1 tablespoon Worcestershire sauce
  • 1 teaspoon Dijon mustard
  • 1 cup sour cream
  • Salt and pepper, to taste
  • 1 tablespoon flour (optional, for thickening)
  • Fresh parsley, for garnish

Directions

  1. In a skillet over medium heat, brown the beef cubes until all sides are seared. Transfer to the slow cooker.
  2. Add onions, mushrooms, and garlic on top of the beef.
  3. Pour beef broth, Worcestershire sauce, and Dijon mustard into the slow cooker. Season with salt and pepper.
  4. Cover and cook on low for 6-8 hours or until the beef is tender.
  5. Once cooked, stir in sour cream and flour (if using) to thicken. Adjust seasoning as necessary.
  6. Garnish with fresh parsley before serving.

Recipe Notes

  • For a richer sauce, consider adding a splash of white wine during cooking.
  • Feel free to experiment with additional veggies such as carrots or bell peppers.
  • Leftovers can be refrigerated for up to 4 days or frozen for later use.

Indulge in Delicious Garlic Butter Lobster and Scallops Delight

Garlic Butter Lobster & Scallops: A Seafood Delight for Special Occasions

⚖️
Difficulty
Intermediate

⏲️
Prep Time
15 mins

🕒
Cook Time
20 mins

⏱️
Total Time
35 mins

🍽️
Servings
4 servings

Indulge in the exquisite flavors of garlic butter lobster and scallops, a dish that captures the essence of coastal cuisine. This recipe features succulent lobster and tender scallops, both lovingly bathed in a rich and aromatic garlic butter sauce. With every bite, you’ll experience the luxurious interplay of the ocean’s bounty and the indulgent warmth of melted butter, creating a delightful symphony that is simply irresistible.

This dish is perfect for special occasions, romantic dinners, or when you simply want to impress your guests with a gourmet experience right at home. The ease of preparation combined with the sophisticated flavors makes this garlic butter lobster and scallops recipe accessible for all skill levels, bringing a touch of elegance to your dining table.

Quick Recipe Highlights

  • Flavor Profile: The sweetness of the lobster and scallops balances beautifully with the richness of garlic and butter, creating a delectable sauce that’s hard to resist.
  • Texture: Enjoy the contrast between the tender lobster meat and the succulent scallops; each bite is a perfect blend of buttery richness and fresh sea flavor.
  • Aroma: The fragrant aroma of garlic and butter wafting through your kitchen will have your mouth watering in anticipation as it cooks.
  • Visual Appeal: Golden brown lobster and scallops served in a luscious garlic butter sauce create a visually stunning dish, perfect for impressing guests.
  • Skill Level Needed: Intermediate skills in seafood preparation and sautéing are helpful, though the comprehensive instructions make it easy to follow.
  • Special Equipment: A large skillet or sauté pan is necessary for cooking the seafood evenly, while tongs or a slotted spoon will help with serving.

Recipe Overview

  • Difficulty Level: While this recipe is marked as intermediate due to the timing of cooking seafood perfectly, it is manageable for those with basic kitchen skills.
  • Category: This recipe falls under seafood entrees, ideal for both casual and formal dining occasions.
  • Cuisine: Celebrating classic coastal cuisine, this recipe draws inspiration from various culinary traditions found in seaside regions globally.
  • Cost: High-quality lobster can be an investment, but the overall cost is reasonable considering the dish serves multiple people and elevates any dining experience.
  • Season: This recipe shines during summer and early fall when seafood is freshest and most readily available in local markets.
  • Occasion: Perfect for anniversaries, holidays, or any gathering where you want to showcase fine dining right at home.

Why You’ll Love This Recipe

Tantalizing taste and texture await you with every bite of garlic butter lobster and scallops. The sweet, succulent lobster harmonizes with the tender, juicy scallops, all enveloped in a luxurious garlic-infused butter sauce that makes each mouthful an unforgettable experience. This dish is a true celebration of seafood, providing a delightful combination of flavors that will leave your guests raving about the dinner.

In addition to its remarkable taste, the convenience of this garlic butter lobster and scallops recipe is unbeatable. With just a handful of ingredients and quick cooking steps, you can whip up a restaurant-quality meal in under an hour. This makes it perfect for those busy weekdays or spontaneous weekend guest invitations, allowing you to impress without the stress.

From a nutritional perspective, seafood is renowned for its high protein and omega-3 fatty acids, making this dish a healthy choice without sacrificing flavor. The incorporation of garlic adds its own health benefits, aiding in immune support and providing additional antioxidants alongside the delectable taste.

This recipe also serves as a stunning centerpiece when entertaining guests. Its gourmet appeal showcases your culinary skills without requiring extensive time in the kitchen. Friends and family will appreciate the thoughtfulness and elegance behind such a dish, enhancing both the dining experience and your reputation as a host.

Finally, garlic butter lobster and scallops offer a cost-effective way to enjoy a lavish seafood dinner at home. While seafood can be expensive, preparing it at home allows you to enjoy premium dining without the hefty price tag often seen at restaurants. This balance of luxury and accessibility makes it a recipe you’ll want to return to again and again.

Historical Background and Cultural Significance

The origins of garlic butter lobster date back to the traditions of coastal regions where both lobster and scallops thrive. These ingredients have been cherished as staples in various cuisines, thanks to their abundance in the ocean. The practice of cooking seafood with butter, especially in French culinary traditions, laid the groundwork for what would become a beloved method in seafood dishes worldwide.

Culturally, seafood holds a prominent place in many societies, often symbolizing prosperity and celebration. In some cultures, lobster is reserved for special occasions, reflecting its luxurious status. Dishes featuring seafood are often associated with gatherings and communal celebrations, bringing people together to enjoy the fruits of the sea.

Over time, garlic butter recipes have evolved from simple cooking techniques to more complex iterations that incorporate herbs and spices. The combination of garlic and butter remains popular, harmonizing with various proteins, but its pairing with sweet, briny seafood is particularly delightful. The evolution of garlic butter sauce has thus shaped how we enjoy seafood today.

Regionally, variations of garlic butter seafood dishes exist globally, with adaptations based on local ingredients and cultural preferences. From Italian versions featuring herbs to Asian interpretations that include chili and ginger, garlic butter seafood transcends borders while maintaining its essential deliciousness. This versatility underlines its significance in the culinary world.

Ingredient Deep Dive

Lobster: This luxury ingredient has long been a favorite in seafood cuisine, often associated with fine dining. Lobsters are rich in protein while being low in calories, making them an excellent source of nutrition. When selecting lobster, look for those with a fresh ocean scent and ensure they are lively in the tank. Store live lobsters in the refrigerator and consume them within 1-2 days for optimal freshness.

Scallops: These small, sweet shellfish are a favorite for their tender texture and mild flavor. Nutritionally, scallops are high in protein and rich in vitamins B12 and magnesium, contributing to overall health. When selecting scallops, fresh and plump varieties are best, and they should not have a strong fishy smell. Store in the coldest part of the refrigerator and use within a day or two.

Garlic: A staple in cuisines around the world, garlic holds substantial health benefits, including anti-inflammatory properties and immune boosting capabilities. When selecting garlic, choose firm bulbs without soft spots, and store in a cool, dark place to prolong freshness. Fresh garlic is favored for its robust flavor, but garlic powder can serve as a convenient substitute in a pinch, though the flavor profile may differ.

Butter: As the heart of the sauce in this dish, butter provides richness and depth of flavor. Opt for unsalted butter to control the saltiness of your dish. Choosing high-quality butter will yield the best results, enhancing the overall appeal of the garlic butter sauce. Store in the refrigerator for optimal freshness, and only bring it to room temperature before preparing your recipe for easy spreading or mixing.

Parsley: Often used as a garnish, fresh parsley brightens up the dish visually and adds a hint of freshness. This herb is rich in vitamins A, C, and K. When selecting parsley, choose vibrant green leaves without yellowing. Store fresh parsley in a glass of water in the fridge to keep it fresh longer.

Common Mistakes to Avoid

  • Overcooking seafood: Seafood cooks quickly. Overcooking lobster and scallops can make them rubbery. Aim for a cooking time of 3-4 minutes per side for scallops and a slightly longer time for lobster.
  • Not using fresh ingredients: Fresh seafood results in better flavor and texture. Frozen seafood can be used but thaw it properly before cooking to maintain quality.
  • Ignoring seasoning: While garlic and butter are flavorful, be sure to season adequately with salt and pepper for the best flavor profile.
  • Not letting the butter brown: Browning the butter slightly before adding garlic enhances the overall flavor, but be careful not to burn it.
  • Skipping the resting period: Allow cooked seafood to rest for a few minutes to retain moisture and improve flavors.
  • Inadequate heat: Make sure your skillet is hot enough before adding seafood to ensure a good sear and prevent sticking.
  • Overcrowding the pan: Cooking too much seafood at once can cause steaming rather than browning. Cook in batches if necessary.
  • Neglecting garnishing: A sprinkle of fresh parsley adds freshness and color to your dish, enhancing the final presentation.

Essential Techniques

Sautéing: This cooking method is crucial for achieving that perfect sear on your seafood. High heat allows for caramelization, which adds depth and flavor. To master it, ensure your skillet is preheated and avoid overcrowding. Look for golden-brown color as a visual cue for doneness.

Butter Emulsion: Creating a smooth butter sauce is an art. To do this, add the butter in stages and ensure to whisk vigorously while combining with the garlic. This technique locks in the flavors and prevents separation. Watch for a creamy texture to ensure success.

Cooking Seafood: Pay attention to the timing for cooking lobster and scallops. Scallops should be cooked until they are opaque, while lobster should be bright and firm. The fish needs to lose its translucent quality. Both should rest slightly off heat before serving.

Plating: Presentation matters immensely for this stunning dish. Use a wide, shallow plate to showcase the lobster and scallops beautifully arranged in the garlic butter sauce. Sprinkle with fresh parsley for a pop of color and freshness, which elevates the dish aesthetically and makes it more appetizing.

Pro Tips for Perfect Garlic Butter Lobster & Scallops

1. Use high-quality seafood: Fresh seafood ensures the best flavor and texture; visit a trusted fish market to get the best possible ingredients.
2. Don’t skimp on the butter: Use generous amounts of butter to create a rich and silky sauce that elevates the dish’s flavor.
3. Fresh garlic is key: Always opt for fresh garlic for a more intense flavor, and mince it finely to enhance its aroma.
4. Monitor the cooking time closely: Scallops and lobster should only take a few minutes to cook perfectly; overcooking results in a compromised texture.
5. Bed the seafood in butter: Serve your lobster and scallops in a pool of the garlic butter sauce to maintain moisture and flavor throughout the meal.
6. Allow for flavor infusion: Let the garlic sauté in the butter before adding your seafood; this builds a stronger flavor base for the dish.
7. Pair with delicious sides: Consider serving this dish with a light salad or crusty bread to soak up the luxuriously flavored butter sauce.
8. Experiment with herbs: In addition to parsley, consider adding fresh lemon thyme or dill for an aromatic twist to the dish.

Variations and Adaptations

Regional variations of garlic butter lobster and scallops can be found across many cultures, each adding unique local spices. In some coastal areas, a hint of chili or paprika could be added for a spicy kick, while in French cuisine, a splash of white wine can elevate the sauce further. Seasonal adaptations might involve using rare spring herbs or substituting summer vegetables alongside the seafood, adding colorful and nutritious elements to the dish.

For dietary modifications, those looking for gluten-free options can easily enjoy this recipe, as it naturally does not include gluten-containing ingredients. Low-carb variations can be found by serving with a salad rather than traditional starches. If you’re vegan, consider using plant-based butter and substituting the seafood with hearty vegetables, like mushrooms or jackfruit, and adjust the seasoning to maintain flavor.

Flavor variations can include replacing the garlic with shallots for a sweeter profile or adding a splash of citrus for brightness. Texture modifications could involve a quick broil after cooking for added color and elegance, or serving with a risotto for a creamy counterpart. Presentation alternatives include using a cast iron skillet for serving, offering a rustic touch to the dining experience that complements the dish beautifully.

Serving and Presentation Guide

Highlighting your garlic butter lobster and scallops can significantly enhance the dining experience. Use wide, shallow bowls for plating, allowing the sauce to pool and showcasing the vibrant colors of the seafood. For garnishing, consider a sprinkle of freshly chopped parsley and lemon zest, which not only adds color but a refreshing hint of citrus.

Traditional accompaniments might include a light, dressed salad or crusty bread, perfect for sopping up the garlic butter—its richness warrants a refreshing balance from lighter sides. Temperature considerations are crucial; serve immediately after cooking to ensure the seafood remains warm, and avoid letting it sit, which can lead to a loss of flavor and texture.

Portion control tips include serving two scallops per person and an appropriate amount of lobster that fits on the plate without overwhelming it. This keeps the presentation elegant and manageable, ensuring everyone can savor the rich flavors without feeling overly stuffed.

Wine and Beverage Pairing

Pairing wine with garlic butter lobster and scallops enhances the overall dining experience. A crisp, chilled Chardonnay is an excellent choice; its buttery notes harmonize beautifully with the dish’s richness. For white wine lovers, a Sauvignon Blanc with its zesty acidity can cut through the richness while complementing the seafood’s sweetness.

For those looking for non-alcoholic alternatives, consider serving sparkling water with a twist of lemon or an herbal iced tea, both of which refresh the palate without overpowering the dish. If coffee or tea is served after the meal, a light herbal tea could offer a soothing end to the rich flavors of the seafood.

Temperature considerations are key; keep white wines well-chilled before serving, and avoid serving red wines, which can overpower the delicate flavors of the seafood dish. For an elegant touch, consider chilling the glasses as well—this detail will impress your guests and enhance their experience.

Storage and Shelf Life

Proper storage of leftover garlic butter lobster and scallops is essential for maintaining freshness. Store any leftovers in an airtight container in the refrigerator and consume within 1-2 days to avoid spoilage. For longer preservation, freezing the dish is possible, but it’s best to do this before adding the garlic butter sauce for optimal texture once reheated.

When reheating, do so gently. The microwave can work in a pinch, but stovetop reheating on low heat with a bit of added butter can help preserve flavor and texture, avoiding overcooking. Look for signs of spoilage, such as off-smells or changes in texture, before consuming any leftovers.

For freezing guidelines, ensure the seafood is cooled to room temperature before placing it in a freezer-safe container. Label the container with the date to keep track of freshness and ensure enjoyment within the recommended timeframe.

Make Ahead Strategies

Planning ahead for garlic butter lobster and scallops can ease the cooking process on the day of serving. Prepare your seafood by cleaning and pre-cutting everything before the event; this allows for quick cooking when guests arrive. Store prepared seafood in the refrigerator until you’re ready for cooking.

While it’s recommended to cook seafood fresh for best results, you can make the garlic butter sauce ahead of time. Keep it stored in an airtight container, then gently reheat when you’re ready to cook the seafood. This allows all the flavors to meld and strengthens the overall profile of the dish.

Additionally, gather any garnishes and side dishes you plan to serve with the seafood in advance; timing these elements will ensure everything is ready simultaneously. This makes the cooking process smoother, allowing you to focus on the final presentation and enjoying your meal with guests.

Scaling Instructions

Scaling garlic butter lobster and scallops is straightforward and allows flexibility based on gathering sizes. For halving the recipe, adjust the ingredient quantities proportionately but maintain the same cooking techniques and times for best results. If doubling or tripling the recipe, increase the number of seafood pieces accordingly and ensure your skillet can accommodate the additional volume without overcrowding.

Timing modifications may be necessary if increasing the batch size; you may need to extend cooking times slightly to ensure all lobster and scallops are cooked evenly. For any adjustments in seasoning or flavors, taste as you go to ensure consistency and balance among the increased ingredients.

Storage considerations remain the same as for a single batch; you can store leftovers securely based on the same principles previously outlined, ensuring longevity and flavor remain intact for future meals.

Nutritional Deep Dive

Garlic butter lobster and scallops is a meal rich in nutritional value, favoring high protein content. A typical serving can range between 30-40 grams of protein, which is crucial for muscle repair and overall health. Additionally, seafood is a fantastic source of omega-3 fatty acids, contributing to heart health and cognitive function.

Micronutrient analysis reveals that this dish is rich in vitamins and minerals. Lobster provides zinc and vitamin B12, essential for immune function and energy metabolism. Scallops add another layer of nutrition with high levels of magnesium and potassium, important for cardiovascular health.

For health benefits, the garlic in this dish not only enhances flavor but also adds antioxidant properties, potentially reducing inflammation and lowering cholesterol levels. This combination of seafood and garlic produces a nutrient-dense meal that supports overall well-being.

While the dish is indulgent, portion analysis is crucial for maintaining a balanced diet. Moderation in serving size mitigates calorie intake while still enjoying the luxurious flavors. Aim for a well-rounded plate by pairing with vegetables or salads to increase fiber intake without compromising on flavors.

Weight management tips when consuming this dish could involve adapting the sides to be lighter or focusing on smaller portions of the rich garlic butter sauce without forgoing the delicious taste entirely.

Dietary Adaptations

For those following specific dietary guidelines, garlic butter lobster and scallops can be easily adapted. For a gluten-free version, this recipe is naturally gluten-free, making it suitable for those with gluten sensitivities. Ensure that any additional side dishes also adhere to gluten-free standards, such as replacing bread with gluten-free options.

Dairy-free adaptations are possible by substituting the butter with a plant-based alternative or oil. Coconut oil or vegan spreads can create a similar effect while providing richness without dairy. The flavor may vary slightly, so incorporate herbs and seasoning to find a delicious balance.

If you’re looking for a vegan option altogether, consider using jackfruit or hearty mushrooms, sautéed in garlic-infused coconut oil. While sticking to the core flavors, adjusting the protein source creates an inclusive dish that everyone can enjoy.

For those engaged in low-carb or keto diets, simply enjoy the lobster and scallops with a low-carb vegetable side, avoiding starchy accompaniments while focusing on healthy fats in the butter sauce. For those on a paleo diet, use ghee or clarified butter to maintain the dish’s essence while following dietary restrictions.

Finally, for low-FODMAP dieters, avoid excessive garlic by using garlic-infused oil rather than whole garlic cloves, allowing for flavor while adhering to dietary limitations.

Troubleshooting Guide

If you encounter texture issues with your seafood, the primary culprit could be overcooking. If the lobster or scallops are chewy or rubbery, be sure to adjust your cooking times. Aim for a quick sear on high heat to keep the seafood tender.

Flavor balance is essential—if the dish turns out too salty, consider adding a splash of lemon juice to the garlic butter sauce to offset saltiness with acidity. Conversely, if it’s bland, additional seasoning may be required to amplify the seafood flavor.

Temperature problems can arise during cooking; ensure your skillet is adequately heated before adding seafood to prevent steaming. Visual cues such as seafood turning opaque or the color changing can assist in indicating doneness.

Equipment challenges, especially with non-stick pans, could arise. If your food is sticking, it may be beneficial to ensure a proper heat level before introducing the butter and seafood.

Ingredient substitutions need to be handled carefully; when adjusting for gluten-free or dairy-free options, aim for ingredients that replicate the texture and flavor profiles closely, ensuring a satisfying dish regardless of dietary needs.

Timing concerns can cause chaos in the kitchen; prepare seafood last and only when side dishes are nearly complete. Coordinating precisely aligns everything for a seamless and incredible meal experience.

Recipe Success Stories

Community feedback for garlic butter lobster and scallops highlights its versatility and flavor, often praised for becoming a family favorite. Many home cooks share their unique twists, from the addition of herbs and spices to inventive side dishes that elevate the meal experience. Tailoring this dish to individual tastes shows how adaptable it can be while preserving its core deliciousness.

Variations success extends, with some culinary experimenters incorporating regional ingredients like citrus zest from local farms or adjusting cooking methods to create stovetop or oven versions. Recipe adaptations not only showcase culinary creativity but also emphasize the essential flavors when preparing seafood dishes.

Reader suggestions further diversify the dish, with plenty of fans opting for different vegetable pairings, like asparagus or peas, to accompany the lobster and scallops. Photography tips shared within the community focus on capturing the vibrant colors and glossy details of the dish, aimed at showcasing the meal beautifully for social media.

This success reinforces how garlic butter lobster and scallops are more than just a recipe; they become an avenue for culinary exploration, family bonding, and memorable gatherings while reinforcing the joy of good food enjoyed together.

Frequently Asked Questions

What is the best way to choose fresh lobster?
Choose lobster that is lively and has a clean ocean smell. The shells should be hard and unbroken, indicating freshness.

Can I use frozen scallops for this recipe?
Yes, frozen scallops can work well. Just ensure they are fully thawed and patted dry before cooking to achieve a nice sear.

How do I prevent overcooking my seafood?
Monitor cooking times closely; scallops take only about 3 minutes per side, while lobster should be cooked until opaque and slightly firm.

What kind of butter is best for the sauce?
Unsalted butter is recommended for greater control over the seasoning of your dish, allowing the flavors of the seafood to shine.

Can I make the garlic butter sauce ahead of time?
Absolutely, the sauce can be made ahead and stored in the refrigerator. Just reheat it gently when ready to serve.

What sides pair well with this dish?
Light salads, crusty bread, or steamed vegetables complement garlic butter lobster and scallops beautifully.

Can I substitute the lobster?
If lobster isn’t available, you can use shrimp or crab as alternatives, adjusting cooking times as needed.

Is this dish suitable for meal prep?
While best enjoyed fresh, leftovers can be stored in the fridge and consumed within a couple of days; reheating is best done slowly.

How can I add spice to the dish?
Consider adding crushed red pepper flakes or a dash of hot sauce to the garlic butter for added heat.

What’s the best way to reheat leftover garlic butter lobster and scallops?
Reheat gently on the stovetop over low heat, adding a little more butter if necessary to keep the dish moist and flavorful.

Additional Resources

For those interested in expanding their culinary repertoire, explore related seafood recipes that highlight other crustaceans like shrimp scampi or crab cakes, demonstrating similar cooking techniques and flavor profiles. Technique guides focused on seafood preparation will provide invaluable skills for your cooking journey.

Additionally, ingredient information on sourcing fresh seafood can guide you in selecting the best options at your local markets. Equipment recommendations for high-quality cookware, such as heavy-duty pans, will enhance your cooking experience further.

Seasonal variations, particularly around the holidays, can inspire your seafood preparations beyond the summer months, suggesting ways to incorporate seasonal flavors and ingredients into classic recipes.

Join the Conversation

Engaging with the culinary community around garlic butter lobster and scallops can open doors to sharing experiences and gathering tips. Connect through social media, sharing your successes and observations on photography techniques that capture the dish beautifully.

Leave reviews, providing valuable insights for others looking to try this recipe, highlighting any unique adaptations you made. Participation in community forums can foster creativity and inspiration, allowing cooks to explore endless possibilities in their culinary adventures.

Sharing recipes and engaging with others allows the joy of cooking together, creating bonds through shared tastes and stories associated with meals crafted from the heart.

The Recipe

Garlic Butter Lobster & Scallops

Serves: 4 servings

Prep Time: 15 mins

Cook Time: 20 mins

Total Time: 35 mins

Kitchen Equipment Needed

  • Large skillet or sauté pan
  • Tongs or slotted spoon
  • Sharp knife (for cutting)
  • Measuring spoons
  • Wooden spoon (for mixing)

Ingredients

  • 2 lobster tails, split
  • 1 pound sea scallops
  • 1/2 cup unsalted butter
  • 4 cloves fresh garlic, minced
  • 1 tablespoon fresh parsley, chopped
  • Salt and pepper, to taste
  • 1 lemon, zested and juiced (for garnish)

Directions

  1. Heat a large skillet over medium heat and add the butter, allowing it to melt.
  2. Add the minced garlic and sauté for about 1-2 minutes, until fragrant but not browned.
  3. Season the lobster tails with salt and pepper; add them to the skillet cut side down. Cook for about 5-7 minutes.
  4. Add the scallops to the skillet, cooking until golden brown, about 3-4 minutes per side.
  5. Once cooked through, drizzle with lemon juice and zest, and gently toss to coat.
  6. Garnish with fresh parsley before serving.

Recipe Notes

  • Feel free to substitute lobster with shrimp for a different take on flavors.
  • For a spicier kick, add crushed red pepper flakes to the garlic butter as it cooks.
  • Ensure that the skillet isn’t overcrowded for even cooking; work in batches if necessary.

Delicious Creamy One-Pan Shrimp Fettuccine Recipe for Dinner

Creamy One-Pan Shrimp Fettuccine Delight: A Delicious and Effortless Meal

⚖️
Difficulty
Easy

⏲️
Prep Time
10 mins

🕒
Cook Time
20 mins

⏱️
Total Time
30 mins

🍽️
Servings
4

Indulge in the rich and luscious flavors of this Creamy One-Pan Shrimp Fettuccine Delight. It combines perfectly cooked fettuccine pasta with succulent shrimp, all enveloped in a creamy garlic sauce that is simply irresistible. This dish not only highlights the freshness of shrimp but also boasts a depth of flavor from fresh herbs and aromatic spices. Perfect for a weeknight meal, it’s quick to prepare and presents beautifully for guests.

Imagine the satisfaction of twirling perfectly al dente fettuccine around your fork, each bite rich and creamy, with the sweet flavor of shrimp bursting in your mouth. This enchanting dish comes together seamlessly in one pan, making cleanup a breeze and letting you spend more time enjoying your meal rather than stressing in the kitchen.

Quick Recipe Highlights

  • Flavor Profile: This dish features a delightful blend of creamy garlic sauce, fresh shrimp, and a hint of lemon for brightness.
  • Texture: The fettuccine is smooth and luxurious, while the shrimp adds a tender bite, resulting in a satisfying mouthfeel.
  • Aroma: The heavenly aroma of garlic and herbs fills your kitchen, inviting everyone to the table.
  • Visual Appeal: The rich, creamy sauce coats the perfectly cooked pasta, garnished with fresh parsley for a pop of color.
  • Skill Level Needed: Ideal for beginners and seasoned cooks alike, this recipe is straightforward and requires minimal skills.
  • Special Equipment: A large skillet or pan is all you need to create this satisfying meal.

Recipe Overview

  • Difficulty Level: The Creamy One-Pan Shrimp Fettuccine Delight is rated easy, making it accessible for all skill levels.
  • Category: This recipe falls under the category of Main Dishes, perfect for lunch or dinner.
  • Cuisine: This recipe draws inspiration from Italian cuisine, known for its flavorful pasta dishes and seafood pairings.
  • Cost: With shrimp as the primary protein, this dish is budget-friendly while providing a taste of luxury.
  • Season: This dish is great year-round, but shines in the warmer months when fresh shrimp is in season.
  • Occasion: Perfect for weeknight dinners, special events, or impressing guests with minimal effort.

Why You’ll Love This Recipe

The Creamy One-Pan Shrimp Fettuccine Delight is an absolute treat for anyone who appreciates delicious comfort food. The gentle warmth of the sauce combined with garlic infuses each bite with a satisfying richness that pairs beautifully with the shrimp. Its creamy texture clings to the fettuccine, making it a truly gratifying experience with every forkful.

This recipe not only captivates the taste buds but also saves you time with its one-pan cooking method. Having fewer dishes to wash means you can enjoy more time with family or friends. This dish is a fantastic solution for busy weeknights when you crave something comforting without committing hours in the kitchen.

Nutritionally, this dish is balanced and provides a great source of protein from shrimp, carbohydrates from pasta, and healthy fats from the creamy sauce. By preparing it with fresh ingredients, you can also enjoy a boost of vitamins and minerals while indulging in a flavorful meal.

Social gatherings become even more delightful with the addition of this creamy fettuccine dish, as it’s sure to be a crowd-pleaser. Whether you’re hosting a dinner party or simply enjoying a cozy meal at home, this recipe will make everyone feel special and satisfied.

Finally, the cost-effectiveness of using staple ingredients while providing a gourmet experience means you can treat your loved ones to this delightful meal without breaking the bank.

Historical Background and Cultural Significance

The roots of shrimp fettuccine can be traced back to coastal Italian regions, where seafood is a staple in local cuisine. Pasta, a fundamental element of Italian cooking, has a storied history dating back centuries, adapted and perfected across generations. Combining pasta with shrimp embodies the essence of Italian culinary traditions, uniting land and sea.

Fettuccine itself, originating from the region of Lazio, represents the Italian penchant for incorporating exquisite ingredients into simple, yet flavorful dishes. This particular recipe exemplifies how traditional Italian values of fresh ingredients and shared meals converge into a culinary experience rich in flavor and community.

As seafood gained popularity globally, variations of shrimp pasta emerged, reflecting local palates and ingredient availability. This adaptation represents modern culinary evolution, celebrating the mix of global flavors while honoring traditional recipes.

Regional variations exist in shrimp pasta dishes worldwide, showcasing the universal love for this delightful combination. From creamy sauces to garlic-based flavors, each region offers its unique twist, adding to the beauty of global cuisine.

Ingredient Deep Dive

  • Shrimp: Shrimp is valued for its flavor and versatility, being a low-calorie source of protein. Packed with nutrients like vitamin B12, omega-3 fatty acids, and iodine, shrimp offers numerous health benefits. When selecting shrimp, look for firm, shiny specimens with a mild marine scent. Store in the coldest part of the fridge and consume within a day or two. If needed, frozen shrimp can be substituted, just ensure they are thawed properly before cooking.
  • Fettuccine: Fettuccine represents a unique type of Italian pasta that complements creamy sauces beautifully. Made from flour and eggs, it’s rich in carbohydrates and provides sustained energy. When choosing fettuccine, opt for fresh ones if possible, as they have a superior texture. Store dried fettuccine in a cool, dry place, while fresh pasta should be eaten within a few days. Gluten-free pasta is a suitable substitutes for those with dietary restrictions.
  • Heavy Cream: Heavy cream is the star of the dish, lending that signature richness and creaminess. It’s an excellent source of fat and can add indulgence to a variety of dishes. When purchasing, opt for cream with a high-fat content for best results. Keep it refrigerated and consume before the expiration date. For lighter options, consider substituting with half-and-half or a plant-based cream alternative.
  • Garlic: Garlic adds depth and flavor, celebrated in many culinary traditions for its health benefits, including anti-inflammatory properties. Fresh garlic is best, but powdered garlic can be used in a pinch. Store bulbs in a cool, dark place; once cloves are broken, use them within a week. Roasted garlic can be a fantastic substitute if you’re after a milder flavor.
  • Parsley: Fresh parsley brings color and freshness to the dish, making it visually appealing. It’s rich in vitamins A, C, and K, as well as antioxidants that promote health. When selecting parsley, choose vibrant greens with no wilting. Store it in the refrigerator, wrapped in a damp paper towel. For substitutions, fresh basil or cilantro can elevate the dish while providing different flavor profiles.

Common Mistakes to Avoid

  • Overcooking the shrimp: Shrimp cooks quickly; if overcooked, it becomes rubbery. Cook for just a few minutes until it turns pink and opaque.
  • Using low-quality pasta: Quality matters! Use fresh or high-quality dried pasta for better texture and flavor.
  • Not salting the pasta water: Salting the water is crucial for enhancing the flavor of the pasta. Don’t skip this step!
  • Scorching the garlic: Garlic can burn easily, turning bitter. Sauté it on low heat until fragrant, but not browned.
  • Adding cream too early: Pouring in the cream too soon can lead to curdling. Wait until the shrimp is fully cooked before adding.
  • Skipping the fresh herbs: Fresh herbs elevate flavor and aroma. Always add them at the end for the best taste.
  • Overcrowding the pan: Overcrowding leads to steaming rather than searing. Cook in batches if necessary to develop flavor.
  • Not tasting as you go: Always taste your dish while cooking to adjust seasonings accordingly for optimum flavor.
  • Ignoring texture: Ensure that the pasta is al dente; it should still have a firm bite to it when combined with the sauce.
  • Underestimating prep time: Setting aside enough time to prep your ingredients will ensure a smoother cooking process.

Essential Techniques

  • Cooking Pasta: Mastering the art of cooking pasta is essential for any successful dish. Use plenty of salted water, and always check for a firm bite before draining. The key is to drain promptly and mix with the sauce immediately to absorb flavors.
  • Sautéing Shrimp: Properly sautéing shrimp is vital to achieving the right texture. Start with a hot pan and cook shrimp until pink. Avoid overcrowding to ensure even cooking and browning for optimal flavor.
  • Making Cream Sauce: Creating a creamy sauce requires controlling the heat. Heat the cream gently, incorporate cheese if desired, and stir continuously to avoid curdling. It’s essential to monitor closely for a smooth texture.
  • Garnishing: Presentation can elevate a dish from good to great. Use herbs, edible flowers, or a drizzle of olive oil to make your plate visually stunning, enhancing the overall dining experience.

Pro Tips for Perfect Creamy One-Pan Shrimp Fettuccine Delight

  • For added depth of flavor, incorporate freshly grated Parmigiano-Reggiano into the sauce while it’s heating. It’ll meld beautifully into the creamy texture.
  • Substitute shrimp with scallops for a luxurious twist on this one-pan dish. Just adjust the cooking time as scallops may require slightly longer to cook through.
  • Don’t be afraid to add vegetables; spinach or asparagus can make for a vibrant and nutritious addition, just toss them in just before the shrimp finishes cooking.
  • Enhance the garlicky flavor by adding roasted garlic to your sauce for a sweet, mellow taste that complements shrimp perfectly.
  • For a lightened version, swap heavy cream for Greek yogurt or a light cream alternative while adjusting the seasoning accordingly.
  • For an extra zing, squeeze fresh lemon juice over the dish right before serving; it will brighten flavors significantly.
  • If you’re meal prepping, consider separating the sauce and pasta for optimal texture when reheating the dish.
  • Always reserve a cup of pasta water; it can be a great tool for adjusting sauce consistency as needed.

Variations and Adaptations

Regional Variations: In Southern Italy, you may find versions of shrimp fettuccine with a marinara sauce twist. Adding tomatoes and olives gives the dish a fresh, coastal flavor reflective of classic Mediterranean cuisine.

Seasonal Adaptations: During summer months, toss in seasonal vegetables such as zucchini or tomatoes for variety, enhancing both flavor and nutritional value.

Dietary Modifications: For a gluten-free version, simply replace traditional fettuccine with gluten-free pasta. Similarly, non-dairy cream alternatives can be used to meet vegan or dairy-free needs without sacrificing creaminess.

Flavor Variations: Spice lovers may enjoy adding a pinch of cayenne pepper or red pepper flakes to the sauce for a kick of heat, creating a delightful contrast with the creamy texture.

Texture Modifications: Swap out traditional fettuccine for a whole wheat or legume-based pasta. These options provide a different mouthfeel while boosting the nutritional profile of the dish.

Presentation Alternatives: For an elegant presentation, serve in individual ramekins with a sprinkle of fresh parsley and a wedge of lemon on the side for a refreshing garnish.

Serving and Presentation Guide

To achieve an inviting presentation, start by twirling the fettuccine elegantly on the plate, allowing the sauce to cascade down. A touch of fresh parsley or basil as a garnish not only enhances the visual appeal but also adds a fresh aroma.

Accompany your shrimp fettuccine with a light side salad featuring seasonal greens dressed with a simple vinaigrette. This adds not only flavor but a crisp texture that complements the creaminess of the pasta.

Serve the dish hot and immediately after preparation. If serving family-style, consider using a large serving platter and placing it in the center of the table for a communal feel. For individual servings, use rimmed plates to keep the sauce contained while allowing the vibrant colors to shine.

Lastly, be mindful of portion sizes to balance indulgence with health; a standard serving is typically around one cup of pasta and shrimp per person, but feel free to adjust based on appetite.

Wine and Beverage Pairing

When it comes to pairing wine with your Creamy One-Pan Shrimp Fettuccine Delight, look for a crisp white wine such as Pinot Grigio or Sauvignon Blanc. These wines will complement the creamy sauce and enhance the sweetness of the shrimp.

For non-alcoholic options, consider a sparkling water with a twist of lemon for a refreshing palate cleanser, or a light herbal iced tea to balance out the rich flavors of the dish.

Coffee lovers might enjoy a light roast served at a cool temperature, as its acidity can cut through the creaminess of the dish, creating a lovely contrast. Serve these beverages chilled to enhance the dining experience.

Storage and Shelf Life

To ensure the best quality and freshness, store leftover Creamy One-Pan Shrimp Fettuccine in an airtight container in the refrigerator. Consumed within 3-4 days is ideal, allowing flavors to marinate while maintaining its texture.

When reheating, opt for a low microwave setting to gently warm the dish, or reheat in a skillet with a splash of reserved pasta water to restore creaminess without drying it out.

If you plan to freeze the dish, it’s advisable to separate the pasta and sauce for optimal texture. Stored properly, it can last up to 2 months in the freezer. To enjoy later, thaw overnight in the refrigerator and follow reheating guidelines to maintain quality.

Make Ahead Strategies

To ease your meal prep, consider prepping the sauce a day in advance. Store it in an airtight container in the fridge; when ready to serve, simply cook the shrimp and pasta, incorporating the sauce until heated through.

You can also par-cook the pasta slightly al dente; just be sure to cool it completely before storing it. This allows for quicker final cooking time on your preferred serving day.

For the freshest flavors, prepare ingredients like garlic and parsley ahead of time—this way, they’ll be ready to boost your dish’s flavor profile when it’s time to sauté.

Finally, assemble any non-cooked garnishes, such as shredded cheese or extra herbs, beforehand. This will save time during cooking and let you focus on enjoying your meal.

Scaling Instructions

To adjust the recipe to suit your needs, halving or doubling is easy. For halving the recipe, simply divide all ingredients by two, maintaining the same cooking time but checking doneness earlier.

When doubling or tripling, be mindful of your pan size to avoid overcrowding, which can impact cooking quality. You might need to cook in batches to ensure even doneness and flavor development.

Lastly, for changes in quantity, it’s crucial to taste and adjust seasonings because flavors can vary based on the volume of dish being prepared. Monitor cooking times, too, as larger quantities may take slightly longer due to more food interacting with heat.

Nutritional Deep Dive

One serving of the Creamy One-Pan Shrimp Fettuccine provides a satisfying balance of macronutrients, featuring a healthy blend of carbs, protein, and fats. On average, each serving contains about 400-500 calories, depending on portion sizes and variations.

Shrimp predominantly contributes high-quality protein while remaining low in fat. The heavy cream supplies saturated fats, essential for flavor but should be consumed in moderation, especially for those Watching cholesterol levels.

Micronutrients in this dish include B vitamins from the shrimp, calcium from the cream and cheese, and antioxidants from fresh herbs. When balancing meals, consider this dish alongside a side of vegetables or salad to enhance the dietary spectrum.

Finally, mindful portion control can support weight management goals. Adjust serving sizes based on individual dietary needs while enjoying the essence of this dish.

Dietary Adaptations

For those with dietary restrictions, recipe modifications can accommodate gluten-free diets by substituting traditional fettuccine with gluten-free options readily available in stores.

For vegan considerations, skip the shrimp and heavy cream, replacing them with sautéed mushrooms for texture and cashew cream for richness, providing a satisfaction similar to traditional versions.

Low-carb enthusiasts can enjoy this dish by using spiralized zucchini or shirataki noodles, maintaining the essential flavors while reducing carbohydrate intake effectively.

Keto followers may benefit from adding more shrimp and using a fat source like avocado, along with a low-carb pasta substitute, ensuring the dish fits within their dietary regimes while still being flavorful.

For individuals following low-FODMAP diets, feature lactose-free cream and ensure to limit garlic and onion quantities or use garlic-infused oil to boost aroma without triggering sensitivities.

Troubleshooting Guide

Overcooked shrimp are a common issue; if this happens, reduce the cooking drastically next time and monitor closely as they cook very quickly. Use a timer for better time management as needed.

If the sauce is too thick, enhance the texture by adding a splash of reserved pasta water while re-heating, ensuring it’s well-mixed and reaches ideal consistency without dryness.

Flavors may develop inconsistently; always incorporate seasonings gradually and taste to adjust. Don’t forget to add a final adjustment of salt and pepper before serving to enhance overall flavor.

When using frozen shrimp, ensure they’re thoroughly thawed and brushed with a paper towel to absorb excess moisture which could lead to steaming instead of sautéing.

Timing can be simplified by prepping ingredients beforehand; this will help to streamline your experience and allow for beautiful cooking without stress.

Recipe Success Stories

Community engagement surrounding the Creamy One-Pan Shrimp Fettuccine Delight has been overwhelming. Many readers have shared their success stories of adapting the recipe to personal tastes, incorporating their favorite seasonings, and vegetables.

Photographs posted on social media showcase beautiful presentations, inspiring others to recreate the dish. There’s a shared sense of accomplishment when people taste the delightful results of following this easy recipe.

Some have highlighted their fond memories tied to the dish, often served during family gatherings, reinforcing its role as a comfort food staple. Recipe variations shared among friends reflect how this dish resonates with many, sparking creativity and culinary joy.

Feedback often emphasizes the dish being ‘restaurant-quality,’ marking its ability to elevate home cooking and leave an impression on guests—truly capturing the essence of balanced flavor and satisfaction.

Frequently Asked Questions

Can I use frozen shrimp for this recipe?
Yes, frozen shrimp can be used. Just ensure they are properly thawed and patted dry before cooking. This ensures optimal texture and prevents excess moisture in the dish.

How can I make this dish gluten-free?
You can easily make this dish gluten-free by substituting traditional fettuccine with gluten-free pasta available in most grocery stores. Just follow the cooking instructions on the package.

Is it possible to use a different type of pasta?
Absolutely! While fettuccine is traditional, you can use any pasta shape you prefer, such as linguine, spaghetti, or even penne for a fun twist.

How do I store leftovers?
Place leftovers in an airtight container and store them in the refrigerator for up to 3-4 days. To maintain quality, avoid leaving it out at room temperature for long.

Can I make this dish in advance?
The sauce can be prepared a day ahead and stored in the refrigerator. Just add the freshly cooked pasta and shrimp when ready to serve for the best texture.

What can I substitute for heavy cream?
You can use half-and-half, whole milk combined with butter, or even a plant-based cream alternative if looking for a lighter option.

What is the best way to reheat this dish?
Reheat in a skillet over low heat, adding a splash of reserved pasta water to maintain moisture and ensure a creamy consistency.

Can I omit the shrimp?
Yes, for a vegetarian version, you can omit shrimp entirely or substitute it with mushrooms, zucchini, or your favorite plant-based protein.

How can I enhance the flavor of my sauce?
Add a squeeze of fresh lemon juice or a splash of white wine while cooking, and don’t forget to season with salt and pepper to taste!

Is this dish suitable for meal prep?
Yes, this recipe is great for meal prep. Just store the sauce and pasta separately to ensure the best texture when reheating.

Additional Resources

Explore related recipes that can enhance your culinary journey! Check out our guides on perfecting pasta, tips for fresh seafood selection, and discover more delightful Italian dishes that bring the warmth of tradition and flavor to your table.

For kitchen equipment, we recommend investing in a sturdy skillet, pot for boiling pasta, and quality utensils to make preparation smoother. Consider researching seasonal ingredients that will elevate your fettuccine dish even further by showcasing local flavors.

Stay tuned to our blog for more ingredient-focused articles that dig deeper into the benefits of fresh produce, herbs, and proteins, allowing you to make informed cooking choices.

Join the Conversation

We’d love to hear your thoughts on the Creamy One-Pan Shrimp Fettuccine Delight! Share your variations and adaptations on social media, and include your photos to inspire others. Engage with the community by sharing your unique stories or tips from your own cooking experiences.

Encouragement for feedback is always welcome; we’re eager to know how this recipe turned out for you. Join us in celebrating cooking at home—there’s so much joy in preparing meals for loved ones, and we’re here to support you every step of the way!

The Recipe

Creamy One-Pan Shrimp Fettuccine Delight

Serves: 4

Prep Time: 10 mins

Cook Time: 20 mins

Total Time: 30 mins

Kitchen Equipment Needed

  • Large skillet
  • Pot for boiling pasta
  • Colander
  • Measuring cups and spoons
  • Wooden spoon or spatula

Ingredients

  • 8 oz fettuccine pasta
  • 1 lb shrimp, peeled and deveined
  • 1 cup heavy cream
  • 4 cloves of garlic, minced
  • 2 tbsp olive oil
  • 1 tsp salt
  • 1/2 tsp black pepper
  • 1/4 cup fresh parsley, chopped
  • 1/2 tsp red pepper flakes (optional)
  • Lemon wedges for serving (optional)

Directions

  1. In a large pot, bring salted water to a boil and cook the fettuccine according to package instructions until al dente. Drain and set aside.
  2. In a large skillet, heat olive oil over medium heat. Add minced garlic and sauté until fragrant (about 30 seconds).
  3. Add shrimp to the skillet, season with salt, pepper, and red pepper flakes, if using. Cook until pink and opaque (about 2-3 minutes each side). Remove the shrimp from the skillet and set aside.
  4. In the same skillet, pour in the heavy cream, stirring continuously. Allow it to simmer for 2-3 minutes until slightly thickened.
  5. Add the cooked fettuccine and shrimp back into the skillet. Toss gently to coat the pasta and shrimp in the creamy sauce.
  6. Remove from heat, add fresh parsley and toss again. Adjust seasoning to taste.
  7. Serve immediately with lemon wedges on the side if desired.

Recipe Notes

  • Feel free to add veggies such as spinach or broccoli for added nutrition.
  • This dish is best enjoyed fresh, but leftovers can be stored in an airtight container in the fridge for up to four days.
  • Experiment with different types of pasta to find your favorite texture and flavor combination.

Delicious Cracker Barrel Homemade Chicken & Dumplings Recipe Unveiled

Cracker Barrel Homemade Chicken & Dumplings: A Comfort Food Classic

⚖️
Difficulty
Moderate

⏲️
Prep Time
30 mins

🕒
Cook Time
1 hr 15 mins

⏱️
Total Time
1 hr 45 mins

🍽️
Servings
6 servings

Cracker Barrel Homemade Chicken & Dumplings is the epitome of comfort food, bringing warmth and satisfaction with every bite. This dish features tender pieces of chicken simmered in a hearty broth, accompanied by fluffy dumplings that soak up all those amazing flavors. The nostalgic recipes reminiscent of Sunday dinners will remind you of family gatherings while filling your home with the delightful aroma of home-cooked goodness. Perfect for chilly nights or when you’re just craving something hearty, this dish will leave you feeling cozy and content.

Prepare yourself for a culinary adventure that embraces both simplicity and profound flavor. The luscious, rich chicken broth serves as a welcoming base, while each mouthful of dumpling creates a delightful experience of soft texture. One bite transports you to a place of warmth and comfort, making this Cracker Barrel recipe a beloved classic to cherish, share, and savor. Whether you’re serving it for a family dinner or a potluck, Cracker Barrel Homemade Chicken & Dumplings is sure to impress.

Quick Recipe Highlights

  • Flavor Profile: This dish boasts a savory blend of tender chicken offset by the richness of the broth, enhanced with herbs that add depth.
  • Texture: The fluffy, cloud-like dumplings contrast beautifully with the succulent chicken and smooth broth.
  • Aroma: Expect a comforting, homey scent with notes of chicken, herbs, and a hint of buttery goodness wafting through your kitchen.
  • Visual Appeal: The warm, golden broth is dotted with pieces of chicken and floating dumplings, creating a mouthwatering presentation.
  • Skill Level Needed: This recipe requires some basic cooking skills, perfect for home cooks looking to elevate their skills.
  • Special Equipment: A large pot for simmering and a sturdy mixing bowl for making the dumplings are all you need.

Recipe Overview

  • Difficulty Level: This recipe is classified as moderate due to the need for timing and technique in dumpling preparation.
  • Category: Cracker Barrel Homemade Chicken & Dumplings falls under the category of main courses and comfort food.
  • Cuisine: This dish exemplifies Southern cuisine, highlighting traditional flavors and cooking methods rooted in American cultural heritage.
  • Cost: The ingredients are budget-friendly, making it a great choice for home cooks looking for economical yet delicious meals.
  • Season: Ideal for fall and winter when cravings for warm, hearty meals peak.
  • Occasion: Perfect for family gatherings, comforting sick days, or casual potluck dinners.

Why You’ll Love This Recipe

The delicate balance of flavors and textures in Cracker Barrel Homemade Chicken & Dumplings sets it apart from other hearty meals. Picture tender chicken simmered to perfection in a rich broth, surrounded by pillowy dumplings infused with savory goodness. This recipe is not only made to satisfy hunger but also designed to evoke a sense of nostalgia and warmth. It’s not just a meal; it’s an experience that can transport you back to cozy family evenings.

Another reason to love this dish is its convenience. While the chicken and dumplings can be simmered on the stovetop, the dish requires minimal hands-on time, allowing you to engage in other activities. It’s a great option for busy weekdays when you need to prepare a comforting dinner without fuss. The one-pot nature of this recipe also means fewer dishes to wash when you’re done!

In terms of nutrition, Cracker Barrel Homemade Chicken & Dumplings provides a meal that covers several food groups, delivering proteins from chicken and wholesome carbs from dumplings. The broth is a great source of hydration and warmth, making it ideal for boosting your mood on a dreary day. With careful ingredient selection, you can tailor this recipe to be even more nutritious without compromising the flavor.

This dish is also perfect for sharing during gatherings, whether it’s a backyard BBQ or a holiday feast. Its rich and comforting nature invites guests to join in and enjoy each other’s company. Bringing a pot of this homemade chicken and dumplings can spark conversations and create lasting memories.

Lastly, the cost-effectiveness of this meal can’t be overlooked. The main ingredients are affordable and often found in most kitchens. Plus, with a little creativity, leftovers can easily be transformed into a variety of other meals. Reimagining this dish not only helps minimize food waste but also maximizes your culinary creativity.

Historical Background and Cultural Significance

Homemade chicken and dumplings have origins rooted deeply within Southern cooking traditions. This culinary staple features humble beginnings, often made by families with ease and love during the harsh winters. It’s a recipe that, over generations, has evolved, showing the resilience and creativity typical of American home cooking.

The dish reflects cultural importance, as it symbolizes comfort and sustenance. Chicken and dumplings were prepared as a family meal, meant to nourish loved ones throughout the years. Grandmothers often passed down these recipes, embracing the notion of sharing food as a way to share love.

As cuisines blended through migration and influence, regional variations emerged. Some areas added vegetables or spices, enhancing flavors. Cracker Barrel’s rendition builds on traditional flavors while maintaining a sense of authenticity that resonates with home cooks across the nation.

Throughout the years, chicken and dumplings have seen adaptations to fit modern tastes while retaining their original heartiness. Whether served at family tables or featured on restaurant menus, the dish continues to hold its place as a beloved comfort food of choice.

Ingredient Deep Dive

Chicken: Chicken is the heart of this recipe. Historically, it has been a staple protein source in many cultures, providing essential amino acids. When selecting chicken, look for fresh, organic options for the best flavor. Store it in the refrigerator for up to two days or freeze for longer shelf life. For substitutions, consider using turkey or even plant-based protein.

Dumplings: Dumplings are the fluffy clouds that elevate this dish. Traditionally made with flour, they embody the comfort of home. The choice of flour can influence texture, so opt for all-purpose flour for traditional dumplings. They can be stored in an airtight container but are best made fresh. If needed, gluten-free flour blends can serve as substitutes.

Common Mistakes to Avoid

  • Using cold chicken can lead to uneven cooking; make sure to let it sit at room temperature for 30 mins prior to cooking.
  • Overmixing dumpling dough can result in dense dumplings rather than light and fluffy ones.
  • Cooking the dumplings on high heat can form a crust instead of allowing them to steam properly; keep the heat moderate.
  • Not allowing enough time for the chicken to become tender will result in chewy, tough meat; patience is key.
  • Neglecting to taste the broth before serving can lead to blandness; adjust seasoning as necessary.
  • Skipping the resting period before serving prevents flavors from fully developing; let the dish sit for a few minutes.
  • Not using enough liquid when cooking can lead to dryness; always ensure there’s ample broth for dumpling cooking.
  • Not covering the pot while simmering will evaporate the broth, drying the dish out; always cover to retain moisture.
  • Ignoring storage guidelines can affect the last day’s quality; understand how to store leftovers effectively.
  • Disregarding freshness when selecting ingredients can affect overall flavor; always choose high-quality ingredients.

Essential Techniques

Simmering: Simmering is crucial for developing flavor in the broth. Maintain a gentle bubble to extract maximum taste from the chicken. Mastering the simmer involves adjusting heat to remove boiling when necessary.

Dumpling Preparation: Mixing the dough just long enough is vital for the texture. Use your fingertips to combine the ingredients, ensuring not to overwork the mixture, which could lead to dense dumplings.

Pro Tips for Perfect Cracker Barrel Homemade Chicken & Dumplings

Start with quality, fresh ingredients for the best overall flavor. Experiment with different herbs and spices to customize the broth to your liking. Cook the chicken separately before adding to the broth to enhance tenderness. Allow the dumplings to float on top without overcrowding the pot for proper cooking. Use a lid while simmering to trap steam, creating a soft texture in the dumplings. Adjust salt and seasoning after adding dumplings to taste. Let the dish rest before serving to meld flavors. Finally, serve it with crusty bread for a complete meal.

Variations and Adaptations

Explore regional variations by adding vegetables like carrots and peas, which provide colors and nutrition. For seasonal adaptations, try using squash or sweet potatoes during fall. Modify the recipe for dietary needs by utilizing gluten-free flour for dumplings or opting for a vegan chicken substitute. Experiment with flavors by incorporating fresh herbs like thyme or rosemary for a fresh twist. Alter the texture by adjusting dumpling size—smaller for a more delicate bite or larger for a hearty feel. Consider alternative presentations, serving dumplings baked in the oven for a crispy texture.

Serving and Presentation Guide

For an inviting presentation, serve the chicken and dumplings in rustic bowls. Garnish with fresh herbs like parsley for a pop of color. Traditionally, this dish pairs well with cornbread, adding a country-style touch. Present the dish hot, making sure the dumplings float in the broth for visual appeal. Consider temperature, serving immediately after cooking for the best experience, ensuring warmth with every bite. Portion control involves serving larger amounts to family, while smaller bowls are perfect for guests.

Wine and Beverage Pairing

For wine, a light-bodied white like Chardonnay complements the richness of the chicken and dumplings without overpowering it. For non-alcoholic options, consider sweet tea or ginger ale for a refreshing contrast. Pairing this dish with a light-bodied red wine can also provide an interesting taste combination. Serve chilled drinks to enhance the comfort of warm dumplings. Offer hot tea or coffee post-meal to wind down the dining experience.

Storage and Shelf Life

To store leftovers, keep them in an airtight container in the refrigerator for up to three days. For longer preservation, freeze portions in ziplock bags, expelling as much air as possible. Always ensure the broth covers the dumplings for moisture retention. Signs of spoilage include sour smells and discoloration. For reheating, defrost overnight in the fridge, and then warm gently on the stovetop to prevent the dumplings from becoming mushy. Freezing dumplings separately can also maintain their texture.

Make Ahead Strategies

Preparing this dish can be simpler by cooking chicken and broth a day in advance; that allows flavors to marry beautifully overnight. Store cooked chicken separately until you’re ready to finish the dish. Dumpling preparation can also be done ahead, mixing the dry ingredients and storing them in an airtight container. During assembly, add fresh dumplings to the simmering broth, allowing them to absorb flavor without compromising quality. Consider adding fresh herbs or spices just before serving for a bright, vibrant finish.

Scaling Instructions

To halve the recipe, simply follow the ingredient proportions while ensuring the cooking time remains similar. For doubling or tripling, use a larger pot to accommodate increased quantities and keep a close eye on simmering times. Adjust equipment, ensuring you have enough space to simmer the broth efficiently. When scaling, remember to taste frequently, as the strength of flavors can change. Storage considerations include proportioning leftovers appropriately for meal prep conveniences.

Nutritional Deep Dive

This meal serves as a rich source of protein and carbohydrates. Chicken offers a high-quality protein that’s vital for muscle repair and growth. Dumplings, being primarily made of flour, provide energy necessary for daily activities. Nutritionally, consider adding vegetables to elevate the dish further. Each serving can shed light on the balance of dietary intake needed for optimal health. For those focused on weight management, adjusting portion sizes can help maintain desired goals without compromising flavor.

Dietary Adaptations

For gluten-free diners, swap traditional flour with a certified gluten-free blend. Dairy-free options can utilize coconut milk in the broth for creaminess while maintaining a light flavor. Vegan adaptations could replace chicken with chickpeas or a plant-based protein for a satisfying meal. Low-carb variations might forgo dumplings altogether, opting for cauliflower for a similar texture. For keto followers, utilize high-fat, low-carb options in dumpling recipes. Additionally, meal planning for paleo diets can embrace nature’s bounty by focusing on wholesome, unprocessed ingredients.

Troubleshooting Guide

If dumplings turn out too dense, check for overmixing and opt for a gentler touch next time. A lack of flavor in the broth can often be fixed with a quick taste test and adjustment of seasonings late in the cooking process. Temperature issues may arise if the pot is not covered; ensure to keep it sealed to allow for even cooking. If the chicken remains tough, consider extending simmer time to enhance tenderness. For substitutions, always verify ingredient compatibility for the best outcome.

Recipe Success Stories

Community feedback on this recipe frequently highlights its comforting nature, often citing nostalgic memories. People share personal adaptations and successes in making the dish their own, leading to unique family traditions. Many readers express gratitude for a recipe that transforms simple ingredients into a hearty feast that nourishes the body and soul. The photograph sharing aspect encourages budding cooks to share beautiful interpretations, further inspiring others to take on their culinary adventure.

Frequently Asked Questions

Q1: Can I make this recipe in advance?

A1: Yes, you can prepare the chicken and broth ahead of time, storing them separately in the refrigerator until you’re ready to add dumplings and serve. This can enhance the flavors further and make serving time easier.

Q2: How do I store leftovers?

A2: Leftovers can be stored in an airtight container in the fridge for up to three days. For longer storage, consider freezing portions, making sure they are covered with broth to maintain moisture.

Q3: Can I use frozen chicken for this dish?

A3: While you can use frozen chicken, it’s recommended to thaw it first for even cooking. You may need to adjust the cooking time accordingly if you start with frozen chicken directly in the broth.

Q4: Are the dumplings gluten-free?

A4: Traditional dumplings are not gluten-free, but you can substitute all-purpose flour with a gluten-free flour blend to create a similar texture without gluten.

Q5: Can I add vegetables to the recipe?

A5: Absolutely! Adding vegetables like peas, carrots, or celery can enhance nutrition and flavor, making the dish even more hearty and colorful.

Q6: How do I prevent the dumplings from becoming too hard?

A6: Ensure to mix the dumpling dough minimally, as overmixing can lead to tough dumplings. Also, cooking them on medium heat will help retain a light and fluffy texture.

Q7: Can this dish be made vegetarian?

A7: Yes, you can create a vegetarian version by using vegetable broth and replacing chicken with chickpeas or your favorite plant-based protein.

Q8: What is the best way to reheat chicken and dumplings?

A8: The best way to reheat is on the stovetop over low heat, adding a splash of broth if needed to get the mixture back to the desired consistency.

Q9: Can I use leftover rotisserie chicken?

A9: Using leftover rotisserie chicken is an excellent way to make this dish even quicker. Simply add the chicken towards the end of your cooking process.

Q10: What wine pairs well with this dish?

A10: A light-bodied white wine such as Chardonnay or Sauvignon Blanc works beautifully, complementing the flavors of the chicken and dumplings without overpowering them.

Additional Resources

Explore related recipes such as Slow Cooker Chicken Soup or Classic Chicken Pot Pie for more comforting meals. Technique guides on dumpling making provide extra tips for perfecting this comfort food staple. Ingredient information around chicken and flour can expand your cooking repertoire, while equipment recommendations ensure you’re well-equipped for creating delicious meals. Consider seasonal variations, exploring how to incorporate fresh ingredients for a delightful twist on the classic flavor.

Join the Conversation

We invite you to share your adaptations and experiences with this recipe on social media. Capture your dish with lovely photographs and tag us! Engaging with our community encourages sharing knowledge and learning from each other, providing tips that can benefit everyone. Review the recipe and suggest variations to inspire others looking to dive into this delicious journey of flavors.

The Recipe

Cracker Barrel Homemade Chicken & Dumplings

Serves: 6 servings

Prep Time: 30 mins

Cook Time: 1 hr 15 mins

Total Time: 1 hr 45 mins

Kitchen Equipment Needed

  • Large pot
  • Mixing bowl
  • Whisk
  • Slotted spoon
  • Measuring cups and spoons

Ingredients

  • 1 whole chicken (about 4 lbs)
  • 8 cups chicken broth
  • 2 cups all-purpose flour
  • 1 tsp baking powder
  • 1/2 tsp salt
  • 1/4 cup butter, melted
  • 1 cup milk
  • Fresh herbs (thyme, parsley) for seasoning
  • Salt and pepper to taste

Directions

  1. In a large pot, combine chicken and chicken broth; bring to a boil, then reduce to a simmer.
  2. Cook chicken for about 1 hour, or until fully cooked and tender. Remove chicken, shred, and set aside.
  3. In a mixing bowl, combine flour, baking powder, and salt. Add melted butter and milk; stir until just combined.
  4. Drop spoonfuls of dumpling dough into the boiling broth; cover and cook for about 15 minutes.
  5. Add in shredded chicken and season with herbs, salt, and pepper. Let simmer for an additional 10 minutes.
  6. Serve hot and enjoy!

Recipe Notes

  • For added nutrition, include vegetables like carrots or peas during the simmering process.
  • Substitute chicken with turkey if desired, especially for holiday leftovers.
  • Experiment with herbs for different taste profiles; rosemary adds a lovely flavor.

Indulge in Luxurious Garlic Butter Lobster Tails at Home

Luxurious Garlic Butter Lobster Tails: Indulge in a Seafood Delight

⚖️
Difficulty
Intermediate

⏲️
Prep Time
15 mins

🕒
Cook Time
20 mins

⏱️
Total Time
35 mins

🍽️
Servings
2 servings

Indulge your taste buds in the exquisite flavors of Luxurious Garlic Butter Lobster Tails. This elegant seafood dish pairs perfectly with a glass of chilled white wine, making it ideal for romantic dinners or special occasions. The succulent lobster meat, infused with rich butter and aromatic garlic, melts in your mouth, delivering a taste sensation that is truly unforgettable.

Not only is this dish visually stunning, showcasing the vibrant red hues of the lobster against the golden butter sauce, but it also offers a sensory experience that entices with every bite. Whether you’re impressing guests or simply treating yourself, these lobster tails elevate any meal into a culinary celebration.

Quick Recipe Highlights

  • Flavor Profile: The combination of garlic and butter creates a savory richness that complements the natural sweetness of the lobster, making every bite a blend of paradise.
  • Texture: The lobster tails have a firm, yet tender texture that contrasts with the creamy butter sauce, creating a delightful mouthfeel.
  • Aroma: The fragrant aroma of freshly minced garlic combined with the buttery richness wafts through the kitchen, setting the stage for a truly appetizing meal.
  • Visual Appeal: The beautifully split lobster tails, glistening with a golden garlic butter glaze, make for an impressive presentation.
  • Skill Level Needed: This recipe is perfect for those with intermediate cooking skills, as it involves precise cooking techniques to achieve tasty results.
  • Special Equipment: You will need a sharp knife for splitting the lobster tails and a broiler for optimal cooking.

Recipe Overview

  • Difficulty Level: Intermediate, suitable for cooks who have some experience with seafood and broiling techniques.
  • Category: This dish falls under seafood meals and fine dining, perfect for special occasions.
  • Cuisine: A blend of American and French culinary traditions, this recipe highlights the luxurious nature of seafood dining.
  • Cost: Expect a moderate cost, with lobster tails typically costing around $20-$30 per pound.
  • Season: Ideal for summer gatherings and holiday celebrations, this dish showcases fresh seafood at its peak.
  • Occasion: Perfect for date nights, anniversaries, or celebratory dinners, providing a gourmet experience at home.

Why You’ll Love This Recipe

This recipe for Luxurious Garlic Butter Lobster Tails is more than just a meal; it’s an experience that tantalizes your taste buds. The rich, buttery flavors blend impeccably with the fresh lobster, creating a flavor profile that is completely irresistible. The depth of flavor combined with the tender texture of the lobster will have you savoring every bite. Each mouthful evokes feelings of oceanic freshness and culinary sophistication.

Preparing lobster tails at home is incredibly convenient, breaking the stereotype of needing to go to a fancy restaurant for this type of seafood indulgence. With easy-to-follow steps and a relatively short cook time, you can present restaurant-quality lobster tails on your dining table without much hassle. This dish is also great for impressing guests, as it showcases your culinary skills while being enjoyable to prepare.

From a nutritional perspective, lobster is a great source of protein and low in fat. Rich in omega-3 fatty acids, it also contributes to a healthy heart and brain. Including this dish in your meal repertoire not only supports a balanced diet but also enhances your gastronomic experiences.

There’s no denying the social aspect of indulging in gourmet dishes like garlic butter lobster tails. Sharing this delightful meal with friends or loved ones creates wonderful memories and opens up warm conversations. It’s an excellent dish to serve when entertaining, setting a lavish tone for the evening’s festivities.

Finally, preparing Luxurious Garlic Butter Lobster Tails at home can be quite cost-effective compared to dining out. While lobster can be pricey, creating this incredible dish allows you to enjoy gourmet flavors at a fraction of the price, especially during peak lobster season when prices may be more favorable.

Historical Background and Cultural Significance

Lobster has a storied history, once considered a food for the poor. In early American colonies, it was so abundant along the coasts that it often found its way into the diets of laborers. Over time, as the demand for gourmet seafood increased, lobster transformed into a luxurious delicacy that symbolizes affluence and premium dining experiences.

Garlic butter, a classic combination in culinary traditions worldwide, has roots in French cuisine. Its use with lobster tails effectively emphasizes the rich flavor of the seafood while enhancing the luxurious experience of dining. This pairing of garlic and butter has since become a staple in various seafood recipes, reflecting the adaptive nature of culinary practices over time.

The evolution of garlic butter lobster tails reflects changing tastes and dietary preferences. As luxury ingredients become more accessible, recipes featuring these indulgent flavors continue to adapt. Modern takes on the classic dish often introduce innovative ingredients and cooking techniques, promoting interest from new generations of home and professional chefs alike.

Regional variations of lobster dishes exist around the world, showcasing local flavors and ingredients that celebrate the bounty of the ocean. From butter-poached lobster in New England to Lobster Thermidor in France, these dishes exemplify how fundamental cooking techniques remain while being reinterpreted through different cultural lenses.

Ingredient Deep Dive

Lobster is the star of this recipe, celebrated for its luxurious taste and texture. Historically, lobster was considered a poor man’s food until the 19th century, when its reputation changed dramatically. Today, it is revered for its succulent meat and versatility in various cuisines.

In terms of nutritional benefits, lobster is an excellent source of high-quality protein, essential vitamins, and minerals, including zinc and vitamin B12. When selecting lobster tails, look for those that are firm, unblemished, and have a sea-fresh scent. To maximize freshness, store lobster in the coldest part of your refrigerator and use it within a day or two of purchase.

Butter is another key ingredient that adds richness to the dish. It has been used in cooking for centuries, valued for flavor and texture enhancement. While any quality butter can work here, opting for unsalted butter allows better control over the dish’s saltiness.

Garlic stands as the aromatic backbone, bringing warmth and depth to the flavor profile. Known for its numerous health benefits, garlic has a strong historical presence in many global cuisines. To select garlic, opt for firm, papery-skinned bulbs free from spots. Store in a cool, dry place for the best shelf life and reliability.

Fresh parsley serves as a vibrant garnish, adding a pop of color to your dish. This versatile herb has long been prized for its health benefits and culinary uses. When choosing parsley, look for vibrant green leaves and avoid any yellowing, as these indicate age. It’s best used fresh but can be stored in the fridge for several days.

Common Mistakes to Avoid

  • Overcooking the lobster: Cooking lobster for too long can lead to rubbery meat. Aim for an internal temperature of 145°F.
  • Skipping the broiler: Eyeballing the cooking process instead of using the broiler can result in uneven cooking and a lack of that beautiful char.
  • Insufficient garlic: Not using enough garlic can diminish the flavor. Make sure to use freshly minced garlic for maximum impact.
  • Ignoring quality: Using low-quality butter or stale garlic can lead to subpar results. Always opt for the best ingredients you can find.
  • Not preparing adequately: Lack of preparation can lead to chaos in the kitchen. Have all ingredients prepped before cooking.
  • Inconsistent butter distribution: Pouring butter unevenly over the tails can lead to flavor inconsistency. Ensure it’s well mixed and applied.
  • Forgetting to season: Failing to season properly can leave the lobster bland. Use salt and pepper to enhance the natural flavors.
  • Disregarding garnishes: Garnishes can elevate your dish’s presentation. Don’t skip fresh herbs like parsley for a finishing touch.
  • Improper storage: Storing opened lobster tails in warm places can lead to spoilage. Always refrigerate promptly.
  • Ill-prepared plating: Not considering your plating can leave a visually appealing dish looking messy. Take time for thoughtful presentation.

Essential Techniques

One of the most crucial techniques when making Luxurious Garlic Butter Lobster Tails is broiling. Broiling helps achieve the perfect char on the lobster, enhancing its natural sweetness and flavor. To master this technique, preheat your broiler to high and place the lobster under the heat, watching closely for doneness.

Splitting the lobster tails is another essential technique, allowing for faster cooking and better flavor absorption. To do this, use a sharp knife to carefully cut down the top of the tail, starting from the head to the end. Be cautious not to cut through completely; this technique is about exposing the meat while keeping the tail intact.

Pro Tips for Perfect Luxurious Garlic Butter Lobster Tails

To perfect your garlic butter lobster tails, make sure to use a meat thermometer to check doneness, ensuring the meat is cooked just right without becoming tough.

Consider using clarified butter instead of regular butter. Clarified butter can tolerate higher heat without burning, giving your lobster tails more flavor.

Infuse your butter with additional herbs like thyme or basil to elevate the dish to a new level of flavor complexity.

For a spicier kick, add a pinch of cayenne pepper to your butter mixture before brushing it on the lobster.

Experiment with additional toppings, such as breadcrumbs or Parmesan cheese, to create a delicious crust on the lobster tails during broiling.

If serving for a special occasion, pair your garlic butter lobster tails with a side of asparagus or a light salad to balance the richness of the dish.

Lastly, let the lobster rest for a few minutes after removing it from the broiler for optimal flavor melding and juiciness retention.

Variations and Adaptations

Regional variations of garlic butter lobster tails can enhance your experience. For a New England twist, incorporate Old Bay seasoning into your garlic butter for that classic coastal flavor.

For a Mediterranean variation, consider adding lemon zest and capers to your butter mixture for a zesty and vibrant finish.

Seasonal adaptations can also bring freshness to your dish. In spring, consider adding asparagus or peas to accompany your lobster tails, making the dish feel more light and refreshing.

If dietary restrictions require it, you can substitute dairy-free margarine for the butter while maintaining flavor integrity.

For varied textures, try grilling the lobster tails instead of broiling for a smokier taste, appealing to those who enjoy grill marks and caramelization.

Presentation alternatives include serving the lobster tails on a bed of saffron rice or alongside a homemade risotto to make the dish more substantial and visually appealing.

Serving and Presentation Guide

For an elegant presentation, consider using a crisp white plate to showcase the vibrant colors of your lobster tails. Arrange the tails symmetrically and pour the garlic butter sauce elegantly over the top.

Garnish the dish with finely chopped fresh parsley or chives to introduce a pop of green color and add aromatic freshness. A squeeze of lemon served aside will enhance flavor and freshness upon serving.

Consider pairing the garlic butter lobster tails with a light side salad or seasonal vegetables for a well-rounded meal, arranged artistically on the plate.

For temperature, serve the dish immediately after cooking while hot to ensure the flavors are vibrant and the textures are at their best.

Finally, portion control can be managed by carefully splitting the lobster tails at the table, allowing guests to enjoy their meal in an engaging and interactive manner.

Wine and Beverage Pairing

To complement the rich flavors of Luxurious Garlic Butter Lobster Tails, consider pairing them with a crisp Chardonnay. Its acidity balances the buttery richness of the dish, enhancing the overall dining experience.

For a more adventurous pairing, opt for a Sauvignon Blanc. Its bright citrus notes can cut through the dish’s richness, providing a refreshing contrast that enhances the meal.

If looking for non-alcoholic alternatives, a sparkling water with a splash of lemon can cleanse the palate and enhance the dining experience.

For those who enjoy coffee or tea, consider a light herbal tea that won’t overpower the main flavors of the garlic butter lobster; chamomile or a gentle green tea can be a delightful match.

Temperature is crucial for optimal pairings; white wines should be served chilled to further enhance the refreshing experience of the dish.

When serving, consider offering options to your guests and keeping the wine chilled for easy access during the meal.

Storage and Shelf Life

To store leftover garlic butter lobster tails, refrigerate them immediately in an airtight container. They can typically last in the fridge for up to 2-3 days.

Ensure proper temperature; the ideal fridge temperature should be below 40°F to inhibit bacterial growth.

When reheating, avoid using a microwave, as it can overcook lobster and impact texture. Instead, gently reheat in a preheated oven at a low temperature, covered to prevent drying out.

Signs of spoilage may include an off smell, slimy texture, or discoloration; if any of these signs are present, it’s best to discard the lobster.

Freezing is an option if longer storage is necessary, but be mindful that freezing can affect texture. If you freeze, wrap the lobster tails tightly in plastic wrap and then foil, storing them for up to 3 months.

When you’re ready to eat frozen lobster tails, thaw them in the refrigerator overnight before reheating to preserve their quality.

Make Ahead Strategies

For a stress-free cooking experience, consider preparing the garlic butter ahead of time. You can make the garlic butter and refrigerate it in an airtight container for up to a week.

When ready to cook, simply melt the garlic butter and brush it over the lobster tails before broiling. This can save you time during meal preparation.

Another strategy is to prep your lobster tails by splitting them and season them in advance. Store the tails in the refrigerator, ready for you to pop under the broiler when you’re ready to serve.

Quality can remain intact when properly stored; keep the lobster tails tightly covered to avoid exposure to air and moisture.

Consider doing any chopping or measuring of ingredients the day before, allowing you more time to focus on cooking and presentation the day of your meal.

Fresh elements, such as garnishes, should be prepared right before serving to maximize freshness and visual appeal.

Scaling Instructions

When halving the recipe, simply divide the ingredients in half, and the cooking time will remain approximately the same, but monitor the lobster’s doneness closely.

Doubling or tripling the recipe will also work well, especially if you have a large enough broiler for multiple lobster tails. Be aware that cooking times may slightly increase, so check for doneness in batches.

Equipment adjustments may be necessary; using multiple baking sheets or a larger broiler will ensure even cooking when scaling.

For timing modifications, plan to check on the lobster tails frequently if they are placed close together, as they may cook slightly unevenly if crowded.

Storing considerations include separating the lobster tails in different containers to prevent them from sticking together in larger batches.

Nutritional Deep Dive

Luxurious Garlic Butter Lobster Tails are a source of lean protein that is essential for muscle building and repair. Each serving provides around 20 grams of protein while being low in saturated fat, making it a heart-healthy choice.

In terms of micronutrients, lobster offers significant amounts of zinc and selenium, both of which support immune function and overall health. Additionally, lobster is rich in vitamin B12, which is crucial for energy metabolism.

Health benefits from lobster include its high omega-3 fatty acid content, which contributes to heart health and reduces inflammation in the body.

When considering dietary aspects, keep in mind the butter content, which does add calories and saturated fat. Opting for moderation is key, particularly for those watching their fat intake.

Portion analysis suggests that enjoying this dish occasionally in a balanced diet can contribute positively to overall nutrition, especially when paired with a variety of colorful vegetables for additional fiber and nutrients.

Weight management tips include mindful consumption, serving smaller portions alongside healthier sides, to create a satisfying meal without excess calories.

Dietary Adaptations

For gluten-free adaptations of Luxurious Garlic Butter Lobster Tails, ensure that all ingredients used remain gluten-free, particularly any sauces or additional seasonings.

Dairy-free needs can be addressed by using a high-quality vegan butter or olive oil as a substitute for traditional butter, ensuring the dish maintains its rich flavors.

For vegan options, consider utilizing a suitable plant-based seafood alternative with similar cooking times and methods, using plant-based butter to achieve comparable flavors.

Low-carb or keto enthusiasts will love this dish, as lobster is naturally low in carbohydrates, making it an excellent choice to enjoy without guilt.

If following a paleo diet, the recipe remains compliant when made with natural ingredients, avoiding processed items altogether.

Low-FODMAP diets can be accommodated by using garlic-infused oil instead of chopped garlic and ensuring all remaining ingredients fit within the diet’s parameters.

Troubleshooting Guide

In case of texture issues with your lobster tails, such as chewiness, it often results from overcooking. Always monitor the internal temperature closely during broiling to achieve that perfect tenderness.

Flavor balance is crucial; if the dish tastes overly garlicky, leverage acidity from lemon or fresh herbs to brighten the flavors.

For temperature problems, if the lobster tails are not cooking evenly, make sure they are spread apart adequately on the baking sheet to allow for proper heat distribution.

Equipment challenges may arise if your broiler is uneven. Rotate your cooking tray halfway through to ensure an even cook on all lobster tails.

Ingredient substitutions can affect the overall flavor profile, so use caution when altering the recipe. Always choose compatible flavors to preserve the dish’s integrity.

If timing concerns arise, particularly with side dishes, preparing those ahead of time can alleviate stress and allow you to focus on the lobster.

Recipe Success Stories

Many home cooks have shared their success stories after preparing Luxurious Garlic Butter Lobster Tails for the first time. Feedback often highlights how straightforward the recipe is, even for those who initially feared cooking seafood.

Variations suggested by readers often include exciting ingredient additions like chili flakes for heat, highlighting their creativity in adapting the dish to personal tastes.

Adaptation stories reveal how people have used this recipe during special events, impressing guests and creating lasting memories around the dinner table, emphasizing the communal aspect of good food.

Photography tips shared by enthusiasts emphasize capturing the vibrant colors and textures of the dish, suggesting natural lighting and simple plating techniques to enhance visual appeal.

Online comments reflect appreciation for how this luxurious dish can fit into manageable weeknight dinners while still feeling fancy, proving its versatility and accessibility.

Frequently Asked Questions

How do I know when my lobster tails are cooked?

Your lobster tails are cooked when the meat is opaque and the internal temperature reaches 145°F. The shells also turn bright red during cooking.

Can I use frozen lobster tails?

Yes, you can use frozen lobster tails. Just make sure to fully thaw them in the refrigerator before cooking to ensure even cooking.

What is the best way to reheat leftover lobster?

The best way to reheat lobster is by using a low-temperature oven. Wrap the lobster in foil and heat it for about 10 minutes at 350°F to prevent overcooking.

Is it necessary to split lobster tails before cooking?

While it’s not strictly necessary, splitting the tails allows for faster cooking and better flavor absorption of the butter and seasonings.

Can I make this dish ahead of time?

While it’s best to cook lobster fresh, you can prepare the garlic butter ahead of time and refrigerate it for up to a week for convenience.

What type of lobster is best for this recipe?

Sustainably sourced Maine or spiny lobster tails work excellently for this recipe, bringing both flavor and ethical considerations to the table.

What should I serve with lobster tails?

Consider serving lobster tails with a light salad, roasted vegetables, or a side of creamy risotto. These pairings complement the richness of the dish.

Can I use any kind of butter for this recipe?

Unsalted butter is often recommended to control the saltiness, but you can use any high-quality butter to enhance flavor.

How do I store leftover lobster tails?

Store leftover lobster tails in an airtight container in the fridge for up to 2-3 days. Always refrigerate promptly after cooking.

Can I make this recipe dairy-free?

Yes, you can substitute butter for vegan butter or olive oil to create a delicious, dairy-free version of the dish.

Additional Resources

For those interested in exploring more seafood recipes, check out our extensive collection that includes varied preparations and flavor profiles.

Technique guides on lobster preparation can enhance your confidence in cooking with this luxurious ingredient and teach you detailed techniques for preparing shellfish.

Ingredient information can help you choose the freshest seafood options available at your local market to ensure quality in every bite.

For equipment recommendations, consider investing in high-quality knives and cookware that will last through many culinary adventures.

Explore seasonal variations throughout the year to celebrate fresh seafood availability, providing a unique twist depending on the time of year.

Join the Conversation

We encourage readers to share their own experiences and adaptations of Luxurious Garlic Butter Lobster Tails. Engaging on social media platforms can introduce your creations to a broader audience and inspire others.

Don’t forget to take photos of your lobster dishes! Sharing beautiful images can spark interest and excitement in the recipe community and friends.

Look out for recipe reviews and feedback from other home cooks to learn from their successes and tips that can enhance your next cooking experience.

Connecting with fellow cooking enthusiasts can form a supportive community, where everyone shares ideas, variations, and enjoyment of culinary arts.

Lastly, feel free to participate in discussions about favorite seafood recipes, helping each other explore new ways to enjoy delicious and luxurious meals.

The Recipe

Luxurious Garlic Butter Lobster Tails

Serves: 2 servings

Prep Time: 15 mins

Cook Time: 20 mins

Total Time: 35 mins

Kitchen Equipment Needed

  • Sharp knife
  • Broiler
  • Meat thermometer
  • Baking sheet
  • Airtight containers

Ingredients

  • 2 lobster tails
  • 4 tablespoons unsalted butter
  • 4 cloves of garlic, minced
  • Salt and pepper to taste
  • Fresh parsley, chopped for garnish
  • Lemon wedges for serving

Directions

  1. Preheat your broiler to high.
  2. Using a sharp knife, carefully split the lobster tails in half lengthwise, exposing the meat.
  3. In a small saucepan, melt the butter over low heat and add the minced garlic. Cook for 2-3 minutes until fragrant.
  4. Brush the garlic butter generously over the lobster meat, and season with salt and pepper.
  5. Place the lobster tails on a baking sheet and broil for 10-12 minutes or until the meat is opaque and slightly charred.
  6. Remove from the oven and let rest for a couple of minutes.
  7. Garnish with chopped parsley and serve with lemon wedges for added zest.

Recipe Notes

  • For extra flavor, add a pinch of cayenne pepper to your butter mixture.
  • Do not overcook the lobster, as it can become tough and rubbery.
  • Feel free to experiment with toppings such as breadcrumbs or cheese for added texture.

Sizzling Surf and Turf Delight for Your Next Dinner Party

Sizzling Surf and Turf Delight: A Flavorsome Fusion of Land and Sea

⚖️
Difficulty
Moderate

⏲️
Prep Time
30 mins

🕒
Cook Time
15 mins

⏱️
Total Time
45 mins

🍽️
Servings
4

Indulge in the exquisite flavors of our Sizzling Surf and Turf Delight, where the land meets the sea in a perfect culinary duet. This recipe combines succulent steak and tender shrimp, infused with rich marinades and herbs that tantalize your taste buds. Picture a sizzling plate, the aroma wafting through the air, enticing everyone around to rush to the table. It’s a dish designed to evoke joy and excitement, making it perfect for gatherings or a cozy family dinner.

The harmony between juicy grilled steak and plump shrimp offers an unforgettable eating experience. Each bite reveals layers of flavor—from the smoky char of the grilled beef to the delicate seasoning of the seafood. Whether you are an experience cook or aspiring home chef, this recipe not only elevates your culinary skills but also turns your dinner into an unforgettable event.

Quick Recipe Highlights

  • Flavor Profile: The bold flavors of marinated steak combined with the subtle sweetness of shrimp create a delightful contrast that is sure to impress.
  • Texture: Enjoy the tender crunch of fresh vegetables mixed with the juicy steak and soft shrimps, providing a satisfying mouthfeel.
  • Aroma: The enticing aroma of garlic, herbs, and sizzling meat fills the air, making it hard to resist reaching for a plate.
  • Visual Appeal: The vibrant colors of the dish make it a centerpiece on any table, perfect for impressing guests.
  • Skill Level Needed: While the recipe requires some grilling techniques, it’s accessible for anyone who is confident in basic cooking skills.
  • Special Equipment: A grill or grilling pan is ideal for successfully preparing the shrimp and steak, ensuring those charred, flavorful marks.

Recipe Overview

  • Difficulty Level: Sizzling Surf and Turf Delight is rated as moderate difficulty. The multi-step process requires attention to timing and temperature, particularly when grilling two different proteins.
  • Category: This dish serves as a perfect main course for dinner, suitable for special occasions or a hearty family meal.
  • Cuisine: This recipe draws from the classic surf and turf tradition, seamlessly blending two cooking worlds with influences from American and coastal cuisines.
  • Cost: Preparing this dish generally falls in the mid-range of costs, with steak and seafood typically being on the pricier side but well worth the splurge for a special dinner.
  • Season: While delightful year-round, summer is perfect for grilling outside, enhancing the experience with fresh air and warm evenings.
  • Occasion: Ideal for celebrations, romantic dinners, and family gatherings, this dish is versatile enough for any festive occasion.

Why You’ll Love This Recipe

The Sizzling Surf and Turf Delight brings together a tantalizing blend of flavors that delight the senses. The rich steak flavor melds perfectly with the naturally delicious shrimp, creating an exquisite balance that is hard not to crave. Besides, grilling adds a smoky dimension to the proteins, enriching the overall flavor profile and making each bite a unique experience.

Convenience is at the heart of this recipe. The marinade works to blend flavors in advance, saving time during a hectic dinner prep. With just a little time for marination and grilling, you will have a gourmet meal ready to serve. This ease makes the dish a go-to for both casual family nights and more sophisticated gatherings.

Nutritionally, the Sizzling Surf and Turf Delight is packed with protein from the beef and shrimp, making it a well-rounded meal. It provides vital vitamins and minerals from the accompanying vegetables, contributing to a balanced diet. With proper portion control, it makes for a satisfying yet healthy dinner option.

Social and entertaining aspects take center stage when serving this dish. It visually impresses with its vibrant colors and enticing aroma, setting the perfect mood for gatherings. Sharing a meal of this caliber enhances the communal experience at the table, inviting conversation and laughter.

Finally, consider the cost-effectiveness of this dish. While steak and shrimp are premium ingredients, they can be purchased on sale or used in smaller amounts alongside substantial sides. This allows you to indulge in fine dining at home without overspending, making Sizzling Surf and Turf Delight a smart choice for any budget-conscious home cook.

Historical Background and Cultural Significance

Surf and turf is a culinary tradition that dates back to the late 1960s, primarily popularized in American steakhouses as a way to blend seafood with red meat in a single dish. The concept pays homage to coastal regions where both land and sea produce are abundant. Initially, surf and turf dishes were considered luxury items, often served at upscale restaurants and during celebratory occasions, making them synonymous with opulence and sophistication.

Culturally, the dish has become a symbol of comfort and celebration, commonly featured at holiday meals, birthdays, and anniversaries. Its dual nature caters to diverse preferences, making it an inclusive option for gatherings where guests may have varying tastes. Over time, surf and turf has evolved to include a variety of protein combinations, allowing chefs to personalize their offerings while maintaining the essence of the original recipe.

As culinary trends have shifted, so has the interpretation of surf and turf. You can now find a myriad of adaptations that cater to health-conscious diners, opting for leaner protein sources or plant-based alternatives, showing the recipe’s adaptability. Regional variations have also emerged, such as using local fish alongside grass-fed beef or other meats, adding a unique twist to the traditional pairing.

Despite its evolution, the core of surf and turf remains the same—a celebration of the bounty of both land and sea, making it a dish that has earned its place in the hearts of food lovers everywhere. Celebrating this dish means honoring its cultural roots while simultaneously embracing modern interpretations that reflect our changing palates and lifestyles.

Ingredient Deep Dive

Steak

Steak is a beloved protein known for its rich flavors and versatility in various cuisines. Historically, beef has been a staple in many cultures, often reserved for special occasions due to its perceived luxury. The cultural significance of steak can be seen in cookouts and barbecues, symbolizing social gatherings and communal enjoyment.

Nutritionally, steak provides a wealth of protein, iron, and B vitamins, which are essential for energy and muscle health. When selecting steak for this dish, look for cuts that have a good marbling of fat for flavor and tenderness, such as ribeye or sirloin. Proper storage involves keeping it refrigerated and using it within a few days or freezing for longer-term use. If you need a substitution, consider using leaner cuts or alternatives such as turkey or portobello mushrooms for a vegetarian option.

Shrimp

Shrimp is often lauded for its sweet, seafood flavor and firm texture, highly valued in cuisines worldwide. Its historical significance dates back thousands of years, with shrimp being a key component in coastal diets. Shrimp farming has also made this delicacy more accessible and popular in modern kitchens.

Nutritionally, shrimp is low in calories yet high in protein and important nutrients, including omega-3 fatty acids which are known to support heart health. When choosing shrimp, opt for wild-caught varieties when possible, as they are typically more flavorful and sustainable. Store shrimp in the coldest part of your refrigerator and consume them within a day or two. For substitutes, fish or scallops can offer similar flavor profiles if shrimp is not an option.

Common Mistakes to Avoid

  • Overcooking the steak can result in a tough texture. Use a meat thermometer to ensure it reaches the desired doneness without overcooking.
  • Not letting the meat rest after cooking can lead to dry results as the juices redistribute. Let it sit for a few minutes before slicing.
  • Using frozen shrimp directly from the freezer often leads to uneven cooking. Thaw shrimp in the refrigerator beforehand for even temperature.
  • Confusing grilling temperatures can ruin the dish. Preheat the grill properly to achieve those desired char marks without sticking.
  • Neglecting marinade time can dull the flavors. Allow adequate time for meat and shrimp to soak up seasonings for enhanced taste.
  • Overcrowding the grill can reduce temperature and lead to steaming instead of grilling. Cook in batches if necessary.
  • Forgetting to clean and oil the grill can result in sticking. Always prepare your grill surface to ensure a perfect cook.
  • Serving without sides can leave the plate feeling incomplete. Accompanying vegetables or a salad can enhance the experience.
  • Rushing preparation can lead to missing steps. Familiarize yourself with each step before starting to ensure everything goes smoothly.
  • Not tasting as you go can lead to seasoning mistakes. Adjust flavors incrementally to match your palate.

Essential Techniques

Grilling steak is an essential technique for this recipe. It’s important to achieve a perfect sear for flavor development and tenderness. Master this by allowing the grill to reach optimal temperature before placing the meat on it. Look for visual cues, such as juices flowing to the surface, to indicate readiness for flipping. Avoid pressing down on the steak while cooking, which can dry it out.

Marinating seafood is important for flavor infusion and moisture retention. Use a balance of acids, oils, and seasonings. To master marinating shrimp, allow them to soak for at least 30 minutes, ensuring they are evenly coated. Common pitfalls include over-marinating which can lead to a mushy texture due to the acid. Properly timed marination will enhance flavor without compromising texture.

Pro Tips for Perfect Sizzling Surf and Turf Delight

Using high-quality ingredients is a game changer for flavor. Choose prime-grade steak and fresh shrimp for the best results. The quality of the proteins directly impacts the taste sensation, so don’t skimp on this aspect.

Preheat your grill or pan thoroughly to achieve better charring and to prevent sticking. A hot cooking surface seals in juices and adds flavor, making sure every bite remains juicy and tender. Test temperature by holding your hand above the grill—if you can’t keep it there for more than a second or two, it’s ready.

Let the proteins rest after cooking to enhance tenderness. This simple technique allows the juices to redistribute, ensuring moist bites when served. Prioritizing this step will take your dish to the next level.

Balance your flavors by taste-testing at every step. Experimenting with different herbs and spices can tailor the dish to your preferences. Don’t hesitate to adjust seasoning based on your flavor profile.

For a beautiful presentation, use a board or large platter to serve. Adding freshly chopped herbs as a garnish complements the vibrant colors of your cooked ingredients. This elevates the visual appeal without adding much effort.

Plan your cook time wisely by staggering your cooking process. Start with steak if it takes longer and then follow with shrimp. Timing your cooking in this way ensures everything is done simultaneously, maximizing flavor and freshness for serving.

Variations and Adaptations

Regional variations of surf and turf may include seafood native to a particular area. For instance, in coastal states, you might see lobster or crab taking the place of shrimp. These adjustments maintain the dish’s essence while showcasing local flavors and preferences.

Seasonal adaptations can be made by incorporating fresh vegetables that are in season alongside the proteins. Zucchini, bell peppers, and asparagus can be grilled and served together, enhancing the dish’s presentation and nutritional profile.

For dietary modifications, leaner meat options like chicken or turkey can substitute for steak, while tofu or tempeh can replace shrimp for a plant-based version. These swaps ensure everyone can enjoy this delicious meal, regardless of dietary restrictions.

Flavor variations can include different marinades based on your taste preferences, such as spicy sriracha for heat or a sweeter teriyaki for a different profile. Experimenting allows for personalized experiences with each preparation.

Texture modifications might satisfy those looking for crunch. Consider adding a breadcrumb topping to the shrimp before grilling or serving alongside fried plantains for a delightful contrast in texture.

Presentation alternatives can also make a significant impact. Rather than serving on a plate, consider serving in individual cast iron skillets to keep the dish warm at the table while providing a rustic presentation.

Serving and Presentation Guide

Plating techniques play an essential role in enhancing the visual appeal of your Sizzling Surf and Turf Delight. Start with a base of grilled vegetables for a colorful backdrop. Then, layer the steak and shrimp artfully on top, creating an eye-catching arrangement. Drizzling the dish with a balsamic reduction or herb oil can further elevate its presentation.

Garnishing with fresh herbs, such as parsley or cilantro, not only adds freshness but also brings vibrant color to the plate. Consider citrus slices or zest as well for a pop of brightness that complements the flavors of seafood.

Traditional accompaniments like garlic bread or a green salad provide a well-rounded meal, while modern serving suggestions could include grain bowls or wraps. These variations allow you to create a more casual dining experience if desired.

Temperature considerations are critical for optimal enjoyment. Serve your dish immediately after cooking, minimizing time on the table to maintain the ideal temperature. If guests are lingering, consider warming plates before serving.

Portion control tips can help ensure everyone enjoys a balanced dinner. Serve smaller portions on larger plates to create a feeling of abundance without risking wastage—everyone gets to feel satisfied without overindulging.

Wine and Beverage Pairing

When it comes to wine pairings, consider a robust red wine such as Cabernet Sauvignon or Malbec to complement the rich flavors of the steak. These wines enhance the overall taste experience and balance the dish’s richness.

For a white wine pairing, a crisp Sauvignon Blanc or a buttery Chardonnay can harmonize beautifully with the shrimp, offering refreshing acidity and a fragrant aroma that pairs well with seafood.

If you are seeking non-alcoholic alternatives, sparkling water with lime or a refreshing mocktail can provide a delightful complement without overpowering the flavors.

Hot beverages can also play a role; consider pairing with light herbal teas or a jolt of rich coffee for a thoughtful post-meal option.

Temperature considerations for drinks emphasize ensuring wines are properly chilled or decanted before serving to enhance their flavor profiles.

Storage and Shelf Life

Proper storage methods are essential for extending the life of your Sizzling Surf and Turf Delight. Keep leftovers in an airtight container in the refrigerator, where they can last for 3-4 days, retaining freshness and flavor.

Ensure that foods are cooled to room temperature before refrigerating to avoid condensation that can promote spoilage. This step is crucial for maintaining quality.

For longer storage, consider freezing the dish. Place leftovers in freezer-safe containers, where they can last for up to three months. Be sure to label the containers with the date to keep track of freshness.

Signs of spoilage to watch for include off-smells or changes in color. If uncertain, it’s best to dispose of the food rather than risk food safety.

When reheating, use the microwave or oven to evenly warm the dish without overcooking. Add a splash of broth or water during reheating to maintain moisture.

For freezing guidelines, separate ingredients if possible to maintain texture, especially when it comes to shrimp and beef, which may become rubbery upon thawing together.

Make Ahead Strategies

To streamline your preparation, establish a convenient prep timeline. Marinate proteins the night before, allowing flavors to develop fully. Prepare fresh vegetables a few hours ahead of time to save time later in the day.

Storage between steps can involve keeping each protein separate until it’s time to grill. If using mixed veggies, chop and store them in bags in the fridge to simplify cooking.

Assess the impact on quality—premarination can always lead to enhanced flavors in the final dish. Just be cautious about marinating seafood for too long, as it can change the texture.

Assembly tips include arranging grilled components stylishly on the plate just before serving. This keeps items fresh-looking and appealing.

Reheating guidelines suggest briefly warming sauces or sides before serving to maintain their appeal, without compromising texture or taste.

Adding fresh elements like herbs or slices of citrus right before serving can brighten flavors and refresh the dish, making it visually appealing.

Scaling Instructions

Should you wish to halve the recipe, precise measurements must be recalibrated to maintain flavor and texture balance. Use a kitchen scale for accuracy if necessary.

Doubling or tripling requires adjustments in cook time, as larger quantities will need more time on the grill. Monitor the internal temperature of proteins to ensure doneness.

Equipment adjustments might be necessary when scaling, especially if using larger cooking surfaces or multiple pans for grilling; allow for sufficient space to avoid crowding.

When it comes to timing modifications, ensure to stagger cooking times for different proteins, as shrimp typically requires less time than steak, regardless of quantity.

Consider storage needs as well—larger portions may require bulkier containers for leftovers, influencing how you store excess dishes post-meal.

Nutritional Deep Dive

The macro breakdown of this dish reveals a hearty balance of protein from both steak and shrimp. Each serving provides a significant boost to daily protein needs—essential for muscle repair and growth.

Micronutrient analysis highlights vitamins and minerals found in the fresh vegetables, beef, and shrimp. These are vital for overall health, offering essential nutrients that support immune function and energy metabolism.

Health benefits from the omega-3 fatty acids found in shrimp suggest supportive qualities for heart health, while lean cuts of beef can provide iron necessary for energy levels.

Dietary considerations must focus on mindful portion sizes, especially considering red meat consumption recommendations for a well-rounded diet.

For weight management tips, opt for larger vegetable servings alongside smaller protein portions to create a filling meal without excessive caloric intake.

Dietary Adaptations

For gluten-free adaptations, ensure all marinade ingredients and side alignments meet gluten-free standards, allowing those with sensitivities to enjoy without worry.

For dairy-free preparations, omit any butter or creamy sauces, allowing the natural flavors of the steak and seafood to shine through without compromising taste.

Vegans can replace steak with hearty mushrooms and shrimp with chickpeas or tempeh, allowing for a rich source of plant-based proteins that still deliver satisfaction.

Low-carb variations can eliminate high-carb sides like bread, focusing instead on a combination of protein and non-starchy vegetables to keep carb counts low.

Keto-friendly adaptations reinforce low-carb principles by adding more fats through oils or toppings while keeping protein levels high.

Paleo diets can thrive with this dish by focusing on whole, unprocessed foods, ensuring all ingredients are fresh and compliant with this lifestyle.

For those following low-FODMAP diets, specific ingredient substitutions, like certain vegetables, may be necessary to avoid digestive discomfort while enjoying this flavorful dish.

Troubleshooting Guide

If texture issues arise—such as overcooked shrimp—be vigilant with cooking times. Proper heating and timing are crucial to retaining the perfect texture of seafood.

Flavor balance can sometimes lean heavily towards one note. To correct this, consider adding acidity—it can brighten flavors, enhancing the overall dish.

Temperature problems often occur when grilling. Consistently monitor your grill’s heat and adjust cooking time accordingly to ensure meats are cooked to your preference.

Equipment challenges can arise if grilling in an enclosed space. Adjust your cooking methods to use a grill pan indoors or a grill outdoors to capture the best flavors.

Ingredient substitutions may impact flavors slightly, especially when using frozen seafood. Always adjust your marinades or cooking methods accordingly to maintain taste.

Timing concerns happen easily, with guests being served at different intervals. Prep ingredients in advance to ensure all proteins finish cooking at the same time for seamless service.

Recipe Success Stories

Community feedback often highlights the robust flavors and stunning presentation of the Sizzling Surf and Turf Delight. Many have graciously shared their personal stories of preparing this dish for special gatherings, resulting in rave reviews from family and friends alike.

Variation successes abound from those who have adapted the recipe to local ingredients or varying dietary restrictions. These adaptations demonstrate the dish’s versatility, making it suitable for a wide audience.

Reader suggestions frequently detail nuanced changes, such as adding specific spices that elevate flavors based on individual tastes. This collaborative energy enhances the recipe’s popularity and reach.

Photography tips regularly included in discussions help inspire cooks to showcase their own culinary creations with beautiful and appealing visuals, supporting the dish’s allure.

Readers also express how the dish has become a staple at their family gatherings, indicating that the surf and turf concept is not only delightful but also practical for modern culinary rosters.

Frequently Asked Questions

Can I substitute the steak with chicken?

Yes, you can use chicken breast or thighs instead of steak. However, chicken will require different cooking times to ensure it’s fully cooked without drying out. Adjust the marinades accordingly to match the flavor profile.

What’s the best way to thaw frozen shrimp?

The best way to thaw shrimp is to place them in the refrigerator overnight. If you’re short on time, you can run cold water over them in a sealed bag for quicker thawing, avoiding hot water that could begin cooking the shrimp.

Can I prepare the marinade in advance?

Absolutely! The marinade can be made a day ahead and stored in the refrigerator. This allows the flavors to meld together more intensively, which can enhance the flavor of your proteins.

What vegetables pair well with this dish?

Grilled asparagus, bell peppers, zucchini, and corn on the cob are great vegetable options. These not only complement the proteins but also add color and nutrition to the plate.

What internal temperature should the steak be cooked to?

The recommended internal temperature for medium-rare steak is 130-135°F (54-57°C). Be sure to use a meat thermometer for accuracy and let it rest for optimal juiciness.

What can I do with leftovers?

Leftover Sizzling Surf and Turf can be repurposed in salads, tacos, or pasta dishes. Just ensure they are reheated thoroughly before serving to maintain their safety and flavor.

Can I grill this dish indoors?

Yes, you can use a grill pan on your stovetop to attain similar results as outdoor grilling. Just make sure to adequately ventilate your kitchen as the grilling process can produce smoke.

What’s a good side dish for this meal?

A fresh garden salad or garlic mashed potatoes pairs well with Sizzling Surf and Turf Delight, balancing the rich flavors of the dish and giving a hearty feel to the meal.

Is this recipe suitable for meal prep?

Yes, you can meal prep this recipe by cooking and storing the protein separately. Heat them before serving to retain freshness, making it a convenient option for busy weeks.

Can I make this dish spicy?

Absolutely! You can add spices like cayenne pepper or a dash of hot sauce to the marinade for an extra kick. Adjust to your heat preference for the best dining experience.

Additional Resources

If you enjoyed this Sizzling Surf and Turf Delight recipe, consider checking out related recipes such as Grilled Lemon Garlic Shrimp or Herb-Crusted Rack of Lamb. Each offers unique flavors while maintaining simplicity in preparation.

Technique guides can enhance your cooking skills, particularly for grilling and marinating. Mastering these techniques will ensure consistently delicious results with every cooking adventure.

Ingredient information can be vital for understanding the best sources for quality proteins and unique seasonal produce. Stay informed on the freshest options available to enhance your dishes further.

For equipment recommendations, exploring various grills or grill pans can expand your options for cooking this delightful dish. Invest in quality tools for improved cooking experiences.

Seasonal variations should also be explored to capitalize on fresh, seasonal ingredients to further enhance the enjoyment of your Sizzling Surf and Turf Delight throughout the year.

Join the Conversation

We’d love to hear about your own experiences crafting Sizzling Surf and Turf Delight. Share your journey by posting on social media or leaving your thoughts in the comments below.

Photography tips are also welcome, as capturing the beauty of food can inspire others in their cooking endeavors—showcase your delicious versions of this delectable dish!

Recipe reviews play an essential role in adapting and perfecting the Sizzling Surf and Turf Delight, so don’t hesitate to share your feedback on your variations or takeaways from your cooking experience.

Engage with our culinary community by discussing your creative adaptations or unique ingredients you’ve incorporated. This collaborative exchange enriches the joy of cooking!

Lastly, we encourage you to experiment with variations of this recipe and share your insights, as we’re excited to continue evolving this beloved dish with contributions from food lovers everywhere.

The Recipe

Sizzling Surf and Turf Delight

Serves: 4

Prep Time: 30 mins

Cook Time: 15 mins

Total Time: 45 mins

Kitchen Equipment Needed

  • Grill or grilling pan
  • Meat thermometer
  • Mixing bowls
  • Whisk
  • Cutting board
  • Sharp knife

Ingredients

  • 1 lb steak (ribeye or sirloin)
  • 1 lb shrimp (peeled and deveined)
  • 1/4 cup olive oil
  • 2 tbsp soy sauce
  • 2 tbsp lemon juice
  • 2 cloves garlic (minced)
  • 1 tsp paprika
  • Salt and pepper to taste
  • Fresh parsley for garnish

Directions

  1. In a bowl, whisk together olive oil, soy sauce, lemon juice, minced garlic, paprika, salt, and pepper. Set aside.
  2. Marinate the steak in half of the marinade for at least 30 minutes. Marinate the shrimp in the other half for 15-20 minutes.
  3. Preheat your grill or grilling pan over medium-high heat.
  4. Remove the steak from the marinade, letting excess drip off, and grill for about 5-7 minutes per side for medium-rare. Use a meat thermometer to check internal temperature.
  5. While the steak is grilling, place the shrimp directly on the grill. Cook for about 3-4 minutes per side until they’re opaque and charred.
  6. Once done, remove the steak and shrimp from the grill and let rest for a few minutes.
  7. Slice the steak against the grain, serve on a large platter or individual plates, and add the grilled shrimp on top.
  8. Garnish with freshly chopped parsley. Serve immediately.

Recipe Notes

  • For a spice kick, consider adding a pinch of cayenne pepper to the marinade.
  • Feel free to substitute shrimp with scallops or lobster for a luxurious twist.
  • If you prefer a dry rub, eliminate the liquid components and apply the spices directly to the proteins.
  • To keep leftovers fresh, store in airtight containers in the fridge and consume within 3-4 days.