Delicious Smoky Jalapeño Popper Meatloaf with Creamy Ranch Drizzle

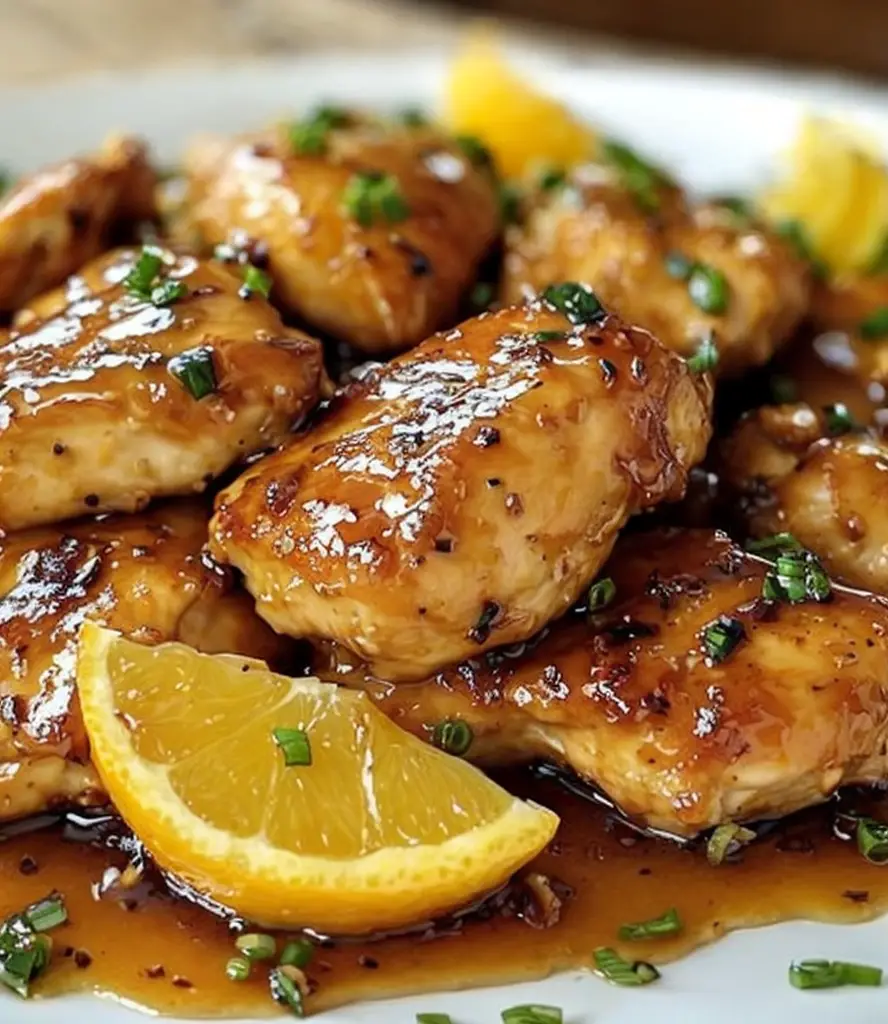
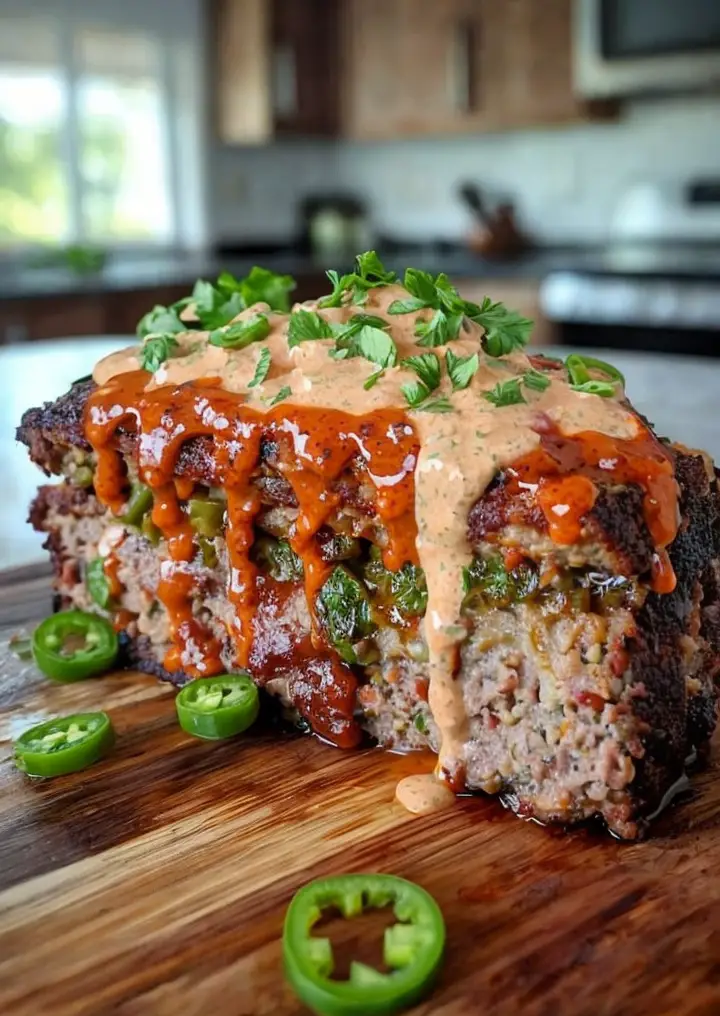
Smoky Jalapeño Popper Meatloaf: A Flavor-Packed Comfort Dish

⚖️
Difficulty
Medium

⏲️
Prep Time
15 mins

🕒
Cook Time
1 hour

⏱️
Total Time
1 hour 15 mins

🍽️
Servings
6 servings

Welcome to the delicious world of meatloaf with a twist! Our Smoky Jalapeño Popper Meatloaf with Creamy Ranch Drizzle takes this classic comfort food to extraordinary new heights. Imagine moist, savory meat infused with the smoky flavors of jalapeños and cream cheese, all while being perfectly complemented by a creamy ranch drizzle that binds the entire dish together. This recipe strikes the ideal balance between richness and flavor, offering a level of satisfaction no ordinary meatloaf can achieve.

This dish not only delights the palate but also fills the kitchen with irresistible aromas. Each bite brings together the heat of jalapeños, the creamy texture of melted cheese, and the savory goodness of seasoned beef. As you gather around the dining table, this Smoky Jalapeño Popper Meatloaf is sure to impress your family and friends, making it a perfect choice for both casual weeknight dinners and festive gatherings alike.

Quick Recipe Highlights

  • Flavor Profile: The bold, smoky taste of jalapeños mixed with savory beef and creamy cheese creates a rich and satisfying flavor experience.
  • Texture: Every slice offers a delightful mix of moistness from the meat and creaminess from the drizzle, delivering a varied mouthfeel.
  • Aroma: The enticing aroma of bacon and jalapeños fills the air as this meatloaf cooks, inviting everyone to the table.
  • Visual Appeal: The vibrant colors of the jalapeños against the golden-brown meatloaf make it incredibly appealing and appetizing.
  • Skill Level Needed: This recipe is perfect for intermediate cooks looking to enhance their meatloaf skills without feeling overwhelmed.
  • Special Equipment: You’ll need a loaf pan, mixing bowls, and measuring cups to execute this recipe effortlessly.

Recipe Overview

  • Difficulty Level: This dish has a medium difficulty level, making it accessible for cooks who have mastered basic techniques but are ready to take on something a bit more exciting.
  • Category: Smoky Jalapeño Popper Meatloaf is categorized as a main dish, perfect for dinner or lunch and can easily be paired with sides.
  • Cuisine: This recipe is a fusion of classic American meatloaf with a nod to Tex-Mex cuisine, showcasing the versatility of flavors.
  • Cost: The ingredient list is budget-friendly, with most items being staple ingredients you can keep on hand, making it economical to prepare.
  • Season: This hearty dish is perfect for any season, especially during colder months when comfort food is most desirable.
  • Occasion: This meatloaf works great for family dinners, weekend gatherings, and potlucks, offering a dish that everyone will love.

Why You’ll Love This Recipe

The Smoky Jalapeño Popper Meatloaf stands out due to its unique taste that combines comfort and excitement. The jalapeños provide just the right amount of heat, ensuring it’s not too spicy but adds a lovely kick that complements the rich flavors of the beef and cheese. The creamy ranch drizzle not only enhances the overall flavor but also adds a luxurious mouthfeel that rounds out each bite.

This recipe breaks from traditional meatloaf by introducing fresh ingredients that you might find in jalapeño poppers, bringing a party of flavors you don’t typically expect from this classic dish. Moreover, it’s straightforward and can often be prepared in advance, allowing for a convenient and impressive main course for busy weeknights when you need something special without spending hours in the kitchen.

Another reason to love this recipe is its nutritional perks. Ground beef provides protein and essential nutrients, while jalapeños are known for their health benefits, including metabolism support. The cream cheese, while indulgent, offers a rich, creamy texture that satisfies cravings without overpowering the health factor of the dish.

This meatloaf provides a fantastic social element as well. When served at gatherings, it’s a conversation starter, as guests marvel at the innovation of flavors they might not associate with a classic dish. Plus, it can serve as a family-style entree that invites sharing and interaction around the dinner table.

Lastly, it’s not just a stunning dish but a cost-effective one. Using common, inexpensive ingredients ensures that you can whip this masterpiece without breaking the bank. Its robust flavors and satisfying ingredients lead to high value for a low cost, making it a smart addition to your meal planning repertoire.

Historical Background and Cultural Significance

The origins of meatloaf can be traced back to ancient times when ground meat was combined with grains to stretch protein sources. Its evolution into a staple American dish across the 19th and 20th centuries showcased the innovation in utilizing leftovers and creating hearty meals. The introduction of flavors like jalapeños into meatloaf speaks volumes about the ongoing fusion of cuisines and flavors found in American kitchens today.

Jalapeños themselves are a beloved ingredient in culinary traditions, particularly in Mexican cuisine. Their history spans thousands of years and symbolizes the rich agricultural landscape of the region. Incorporating jalapeños into meatloaf not only celebrates these flavors but highlights the integration of cultural elements in modern cooking.

As culinary practices evolved, so did the recipes. Meatloaf has undergone numerous adaptations, including the addition of spices, cheeses, and other ingredients, reflecting individual tastes and regional preferences. Creative variations, such as our Smoky Jalapeño Popper version, demonstrate how cherished comfort foods can be reinvented while maintaining their fundamental appeal.

Regional variations of meatloaf exist worldwide, often utilizing local ingredients and spices that give each rendition a distinctive flair. The fusion of Tex-Mex and American cuisines in today’s recipes showcases how traditional flavors can inspire innovative dishes, ensuring meatloaf remains a cherished and versatile option for home cooks everywhere.

Ingredient Deep Dive

Ground Beef: The predominant protein in meatloaf, ground beef is beloved for its flavor and versatility. Historically, it has been a primary protein source in many households due to its affordability and availability. Nutritionally, it offers high protein content, essential vitamins such as B12, and iron, crucial for energy levels. When selecting ground beef, look for a lean blend to keep the meatloaf moist without being overly greasy, and ensure proper storage in the refrigerator or freezer to maintain freshness.

Jalapeños: These vibrant peppers boast a rich heritage in Mexican cuisine, enhancing dishes with their distinctive heat. They are packed with vitamins A and C and antioxidants that promote overall health. Choose fresh, firm jalapeños that carry a shiny skin for the best flavor. Store them in the refrigerator to prolong freshness, and consider roasting them for an added smokiness, or substitute with milder peppers if necessary.

Common Mistakes to Avoid

  • Overmixing the Meat Mixture: When combining your ingredients, overmixing can lead to a tough texture. Mix just until combined to ensure a moist and tender meatloaf.
  • Not Letting the Meatloaf Rest: Allowing your meatloaf to rest after baking helps redistribute the juices. Cutting into it too soon can result in dry meatloaf.
  • Skipping the Creamy Ranch Drizzle: This drizzle adds a critical finishing touch, elevating the dish from simple to sensational. Never underestimate the power of the sauce!
  • Using Too Lean of Meat: While lean meats are healthier, a bit of fat is necessary for flavor and juiciness in this recipe, so opt for an 80/20 blend.
  • Baking Without a Loaf Pan: Not using a loaf pan can lead to uneven cooking and shape. It’s essential for maintaining the integrity of the meatloaf.
  • Inadequate Seasoning: Don’t skip on seasoning! Generously seasoning the beef ensures the meatloaf has vibrant flavor throughout every bite.
  • Ignoring Temperature Guidelines: Failing to check the internal temperature can result in undercooked meat. Aim for 160°F to ensure safety.
  • Rushed Cooking Time: While it may be tempting to speed up the cooking process, cooking meatloaf at a lower temperature ensures even cooking and prevents burning.
  • Not Checking for Doneness: Always perform a doneness check; using a meat thermometer is the best way to verify.
  • Forgetting to Garnish: A simple sprinkle of fresh cilantro or parsley after drizzling gives it a fresh and inviting appearance.

Essential Techniques

Mixing Ingredients Correctly: The technique used to mix the meat and other ingredients is vital. Overmixing can lead to a tough meatloaf, so it’s important to handle the mixture gently. Aim for a uniform consistency while being careful not to compress the meat too much.

Shaping the Meatloaf: Properly shaping your meatloaf ensures it cooks evenly. Form a loaf that’s uniform in thickness to avoid overcooking the edges while undercooking the center. Use a clear baking dish to help maintain the shape.

Pro Tips for Perfect Smoky Jalapeño Popper Meatloaf

1. For extra moisture, consider adding a tablespoon of Worcestershire sauce to the meat mixture, enhancing flavor without drying it out.

2. If you prefer less heat, remove the seeds from the jalapeños before adding them to the meat mixture to reduce spiciness.

3. Experiment with different kinds of cheeses for the filling—pepper jack, cheddar, or even a blend can be exciting!

4. To make this recipe ahead of time, prepare the meatloaf without baking it, cover tightly in plastic wrap, and refrigerate overnight before baking.

5. Allow for variable cooking times depending on your oven; using a meat thermometer ensures perfect doneness every time.

6. Adding a splash of barbecue sauce to the top before baking enhances the smokiness and creates a flavorful crust.

Variations and Adaptations

For a regional twist, consider adding Southwestern spices like cumin or chili powder for a smoky profile. Seasonal adaptations can include adding diced summer squash or even shredded carrots for a nutrient boost.

To cater to dietary needs, try utilizing ground turkey or chicken as leaner options in this dish. For those following a keto diet, you can substitute breadcrumbs with crushed pork rinds or almond flour to keep it low-carb while maintaining texture.

Serving and Presentation Guide

When serving your smoky jalapeño popper meatloaf, consider plating it on a rustic wooden board for a hearty feel. Garnish with freshly chopped cilantro or parsley to add a vibrant splash of color. Pair it with sides like mashed potatoes or roasted vegetables for a complete meal.

Temperature-wise, serve it warm, allowing the creamy ranch drizzle to remain smooth and enticing. For individual servings, slice meatloaf into thick wedges and serve alongside a small bowl of extra ranch for dipping.

Wine and Beverage Pairing

For wine enthusiasts, an off-dry Riesling pairs beautifully with the heat of the jalapeños, balancing out the flavors effectively. Alternatively, a bold Zinfandel will complement the smoky undertones of the meatloaf nicely.

If you’re looking for non-alcoholic options, a refreshing lemonade or iced tea with a hint of mint will cleanse the palate between bites and keep the meal light and enjoyable.

Storage and Shelf Life

To store leftover meatloaf, place it in an airtight container and refrigerate. It should last for up to 4 days. If you want to save it long-term, consider freezing it in slices, ensuring each piece has plastic wrap around it for individual servings. Reheat it in the oven or microwave, ensuring it’s heated through for the best texture.

Make Ahead Strategies

This meatloaf can be prepared a day in advance. Mix all ingredients and shape the loaf, then cover and refrigerate it overnight. This allows the flavors to meld beautifully. When ready to serve, bake it straight from the fridge, adding a few extra minutes to the cooking time for even baking.

Scaling Instructions

For smaller gatherings, halving the recipe is straightforward; adjust cooking times accordingly, as smaller meatloaves will cook faster. Doubling or tripling is also feasible, particularly for meal prep. Just ensure you have an adequately sized baking pan to accommodate the larger loaf or use multiple pans.

Nutritional Deep Dive

Each serving of the Smoky Jalapeño Popper Meatloaf offers a balanced macro breakdown, featuring high-quality protein from the beef, healthy fats from the cheese, and vitamins from the jalapeños. The inclusion of ranch dressing adds creamy taste without excessive calories, making it a filling yet nutritious option.

Dietary Adaptations

To make this dish gluten-free, substitute traditional breadcrumbs for gluten-free options like almond flour or certified gluten-free breadcrumbs. For a dairy-free version, consider using vegan cheese alternatives or omitting the cheese altogether and using a non-dairy ranch dressing.

Troubleshooting Guide

If your meatloaf turns out too dense, it is likely due to overmixing the meat. Next time, handle the mixture gently. If you find it lacking in flavor, do not hesitate to adjust your seasoning, particularly with salt and pepper, which can drastically alter the dish’s perception.

Recipe Success Stories

Community feedback on the Smoky Jalapeño Popper Meatloaf has been overwhelmingly positive, with many praising its unique flavor profile and ease of cooking. Readers have shared their variations, such as adding different types of cheese or spicing it further for an extra kick, showcasing the flexibility of this recipe.

Frequently Asked Questions

Can I make this meatloaf without jalapeños? Yes, while the jalapeños contribute a significant flavor, you can substitute them with one of your favorite mild peppers or omit them altogether for a classic meatloaf.

How do I know when my meatloaf is done? The best way to check is through a meat thermometer. For completely cooked meatloaf, it should reach an internal temperature of 160°F (70°C).

Can it be made ahead of time? Absolutely! Prepare your meatloaf up to a day in advance and then bake it when you’re ready to serve.

What can I serve with this meatloaf? It pairs wonderfully with mashed potatoes, roasted vegetables, or a fresh green salad to balance the richness.

How do leftovers warm up? Leftovers can be heated in the microwave or oven. For the best results, reheat in the oven at 350°F (175°C) for 15-20 minutes.

Can I freeze meatloaf? Yes, meatloaf can be frozen once cooked. Allow it to cool completely, slice it, and wrap individually to store in a freezer-safe container.

Is there a vegetarian alternative to this recipe? Yes, you can adapt this recipe using lentils or chickpeas to recreate a meatless version that still holds flavor and texture.

Can I use different meats for this meatloaf? Certainly! Ground turkey or chicken are great alternatives for a lighter version, though the flavors will differ slightly.

Does meatloaf improve with time? Yes, much like many casserole dishes, the flavors tend to meld and deepen if left to rest overnight.

What should I do if my meatloaf is too dry? If your meatloaf turns out dry, consider adding more moisture next time through ingredients like diced tomatoes or additional sauces.

Additional Resources

For more delicious twists on classic recipes, check out our other meatloaf variations or explore technique guides that can enhance your cooking skills. We also offer ingredient information to help you select the best available options and seasonal variations to keep your meals exciting all year round.

Join the Conversation

We invite you to share your recreations of this Smoky Jalapeño Popper Meatloaf on social media! Tag us in your photos and let us know your variations and experiences. Join our community of food lovers who are eager to share tips, feedback, and love for cooking!

The Recipe

Smoky Jalapeño Popper Meatloaf

Serves: 6 servings

Prep Time: 15 mins

Cook Time: 1 hour

Total Time: 1 hour 15 mins

Kitchen Equipment Needed

  • Loaf pan
  • Mixing bowls
  • Measuring cups and spoons
  • Meat thermometer
  • Knife and cutting board

Ingredients

  • 1 lb ground beef
  • 1 cup jalapeños, diced
  • 1 cup cream cheese, softened
  • 1 cup breadcrumbs
  • 1/4 cup milk
  • 1 tbsp Worcestershire sauce
  • 1 tbsp garlic powder
  • 1 tsp onion powder
  • 1 tsp salt
  • 1/2 tsp black pepper
  • 1 cup ranch dressing for drizzle

Directions

  1. Preheat your oven to 350°F (175°C) and grease a loaf pan.
  2. In a large mixing bowl, combine ground beef, diced jalapeños, cream cheese, breadcrumbs, milk, Worcestershire sauce, garlic powder, onion powder, salt, and pepper until just mixed.
  3. Transfer the mixture into the prepared loaf pan, shaping it evenly.
  4. Bake for approximately 1 hour or until the internal temperature reaches 160°F (70°C).
  5. Remove from the oven and let it rest for 10 minutes before slicing.
  6. Drizzle with ranch dressing over each slice before serving. Enjoy!

Recipe Notes

  • For added smokiness, consider incorporating smoked paprika into the meat mixture.
  • You can swap out the cream cheese for a spicy cheese spread for an extra kick.
  • Try adding diced bacon to the beef mixture for a smoky flavor boost!

Zesty Glazed Citrus Chicken Delight: A Flavorful Culinary Adventure

Zesty Glazed Citrus Chicken Delight: A Refreshing Twist on Classic Chicken Recipes

⚖️
Difficulty
Easy

⏲️
Prep Time
15 mins

🕒
Cook Time
30 mins

⏱️
Total Time
45 mins

🍽️
Servings
4

Indulge in the vibrant flavors of our Zesty Glazed Citrus Chicken Delight, a dish that transforms ordinary chicken into a culinary treat bursting with citrusy goodness. Perfectly cooked chicken is glazed with a refreshing combination of orange, lemon, and lime, giving it a delightful and tangy twist. As you take your first bite, the sweetness from the glaze dances on your palate, harmonizing beautifully with the savory notes of the tender chicken. This recipe isn’t just about flavor; it’s a celebration that brings sunshine to your dining table.

What’s more, this dish is as visually appealing as it is flavorful. The golden glaze glistens against the backdrop of vibrant orange and green accents, making it a feast for the eyes as well. Serve it up on a crisp white plate for maximum contrast, and watch how it brightens any meal. Whether you’re preparing it for a family dinner or an intimate gathering with friends, Zesty Glazed Citrus Chicken Delight is sure to impress and satisfy your guests while evoking feelings of warmth and joy.

Quick Recipe Highlights

  • Flavor Profile: Sweet, tangy, and savory, this dish features a nuanced blend of fresh citrus flavors.
  • Texture: The chicken remains juicy and tender while the glaze provides a slightly sticky texture that complements the meat perfectly.
  • Aroma: The aroma from the citrus zest mingling with the garlic and herbs creates an inviting scent that draws everyone to the table.
  • Visual Appeal: This dish is a showstopper, showcasing bright colors and a luscious glaze that sparkles under the light.
  • Skill Level Needed: This recipe is beginner-friendly and perfect for cooks of any skill level.
  • Special Equipment: A non-stick skillet and a sharp knife are recommended for easy cooking and preparation.

Recipe Overview

  • Difficulty Level: This Zesty Glazed Citrus Chicken Delight is easy to prepare, making it perfect for cooks who are just starting out or those who want a quick weeknight dinner.
  • Category: This recipe falls under the main dish category, ideal for lunch or dinner.
  • Cuisine: Influenced by various culinary traditions, this dish features bright flavors typical of tropical and Mediterranean cuisines.
  • Cost: This recipe is budget-friendly, with accessible ingredients that won’t break the bank.
  • Season: Citrus fruits peak in the winter and spring, making this dish a seasonal favorite for celebrations and gatherings.
  • Occasion: Perfect for family dinners, picnics, or even casual get-togethers, it can easily fit various occasions.

Why You’ll Love This Recipe

The Zesty Glazed Citrus Chicken Delight excels in taste and texture, combining the succulent tenderness of chicken with a lively citrus glaze that elevates your meal. Each bite is an experience; the juicy chicken paired with a tangy-sweet sauce creates a delightful mouthfeel that’s sure to leave a lasting impression. Perfect for those seeking a unique twist on traditional chicken recipes, this dish offers not just flavor but also the satisfaction of a meal that bursts with freshness.

Convenience is another substantial benefit to this recipe. With minimal prep and cooking time, you can have a delicious home-cooked meal ready in just 45 minutes. The straightforward instructions ensure that even novice cooks can easily follow along without any complications. Plus, once you’ve mastered the recipe, you can easily replicate it, making it a go-to option for any busy weeknight.

From a nutritional perspective, this dish is packed with health benefits. Citrus fruits are well-known for their high vitamin C content, which can boost your immune system and promote better skin health. When combined with lean chicken, this meal becomes a balanced option high in protein and low in saturated fats, making it suitable for many dietary plans.

This chicken recipe also shines when it comes to entertaining. The vibrant colors and enticing aroma will have your guests raving long after the meal is over. As you serve this dish, you’ll surely enjoy hearing compliments as everyone appreciates not only the delicious taste but also the elegant presentation.

Lastly, the Zesty Glazed Citrus Chicken Delight is cost-effective. Using everyday ingredients means you won’t have to spend a fortune, and the recipe yields generous portions, making it a practical choice for families or gatherings. It’s a representation of how you can create an elevated dining experience without overspending.

Historical Background and Cultural Significance

The origins of citrus chicken dishes can be traced back centuries, with citrus fruits being cultivated in various parts of the world. The use of citrus in cooking has been prominent in Mediterranean and Asian cuisines, where the flavors of fresh fruits are celebrated for enhancing savory dishes. This Zesty Glazed Citrus Chicken Delight pays homage to those traditions while adding a modern twist to elevate the classic chicken dinner.

Citrus fruits have long been associated with health and nourishment, known for their refreshing taste and medicinal properties. In many cultures, they were used to ward off scurvy during long sea voyages and were valued for their ability to provide essential vitamins and hydration. Thus, this dish not only represents a fusion of flavors but also a connection to historical practices of using natural ingredients for health benefits.

Over time, recipes like this have evolved to suit contemporary taste preferences and availability of ingredients. The integration of various cooking techniques has enhanced the way we prepare chicken, allowing for a broader range of flavors and textures. This recipe exemplifies the beautiful marriage of tradition and modern cuisine, creating a dish that is as relevant today as it was in the past.

Additionally, regional variations of citrus chicken can be found worldwide, showcasing different cultural influences. From sweet sticky glazes found in Asian cooking to the zesty marinades popular in Latin American cuisine, this dish has many interpretations that reflect the diversity and richness of global culinary practices.

Ingredient Deep Dive

Citrus fruits, the star ingredients in our recipe, have a rich history and cultural significance. Historically, oranges, lemons, and limes were prized for their ability to add vibrant flavors to dishes, but they are also recognized for their health benefits. These fruits are high in vitamin C, dietary fiber, and antioxidants, making them an essential addition to any diet. When selecting citrus, look for firm, heavy fruits with smooth skin; they are likely to be juicier.

When it comes to storage, citrus fruits do well at room temperature for a few days and can last longer in the refrigerator. It is advisable to consume them within a week for the best flavor. If you have overripe citrus, consider zesting and freezing for later use. Additionally, substitutions like grapefruits or tangerines can provide a unique twist to the flavor profile, creating an exciting variation on this dish.

Chicken is another crucial ingredient in this recipe, providing a hearty source of protein. With numerous culinary traditions using chicken, it is available in various cuts and forms, allowing for versatility in preparation. Nutritionally, chicken is low in fat and high in protein, contributing to muscle health and weight management strategies.

To ensure you select the best chicken, look for fresh, high-quality cuts from reliable sources. Whole chickens can be roasted whole or cut into parts; thighs provide more flavor, while breasts are leaner. Proper storage is essential; keep chicken refrigerated and consume it within a couple of days or freeze it for extended freshness. If you prefer to substitute chicken with turkey or plant-based proteins, adjustments can be made for cooking times and flavors.

Common Mistakes to Avoid

  • Overcooking the chicken can result in dryness; use a meat thermometer to ensure it reaches 165°F.
  • Not marinating long enough can lead to less flavorful results; try marinating the chicken for at least 30 minutes.
  • Skipping the zesting process denies you the intensity of flavor that fresh citrus skins provide.
  • Using poor-quality citrus fruits can affect the taste of your glaze; always choose fresh and firm fruits.
  • Not balancing the sweetness in the glaze can overpower the savory elements; adjust sugar levels to taste.
  • Forgetting to rest the chicken post-cooking can lead to juices leaking out; let it sit for a few minutes before slicing.
  • Overloading the pan can prevent proper searing; cook in batches if necessary for better texture.
  • Not paying attention to timing can lead to burnt glaze; keep an eye on the chicken while it’s cooking.
  • Ignoring kitchen hygiene can lead to food safety issues; always practice cleanliness when handling raw chicken.
  • Not having all ingredients ready before starting can disrupt your cooking flow; prep in advance for ease.

Essential Techniques

Marinating your chicken is an essential technique that enhances flavor and moisture retention. The acid from the citrus juice helps tenderize the meat while infusing it with vibrant flavors. To master this technique, combine your marinade ingredients in a bowl and fully submerge the chicken, allowing it to sit for at least 30 minutes. Avoid marinating too long, as the acidity can make the chicken mushy.

Searing is another important technique used in this recipe; it locks in flavors and creates a delicious crust. Heat your skillet over medium-high heat before adding the chicken to ensure a proper sear. Avoid overcrowding the pan to achieve even browning. Look for visual cues such as a golden crust before flipping it over. With practice, you will learn just when to flip the chicken without compromising its tenderness.

Pro Tips for Perfect Zesty Glazed Citrus Chicken Delight

1. For a more intense flavor, let the chicken marinate overnight in the fridge. This allows the citrus flavors to fully permeate the meat.
2. Use a mix of citrus juices for a more complex glaze – combining orange, lemon, and lime can elevate the dish’s flavor profile.
3. Cook the chicken on medium heat to avoid burning the glaze while ensuring the chicken cooks through properly.
4. Always allow the chicken to rest for a few minutes before slicing to keep the juices locked in.
5. Add fresh herbs like parsley or cilantro as a garnish just before serving for an extra pop of flavor and color.
6. Serve with a side of roasted vegetables or a fresh salad for a complete and nutritious meal.
7. For a spicy kick, consider adding a pinch of red pepper flakes to the glaze during cooking.
8. If you have leftovers, they make a fantastic addition to salads or sandwiches for the next day.

Variations and Adaptations

For those looking to bring regional flair into this dish, consider adding Asian-inspired elements like soy sauce or sesame oil to the marinade for a unique twist. Seasonal adaptations, such as using autumn fruits like apples or pears in the glaze, can lend a warm, inviting flavor suitable for cooler months.

Dietary modifications are also simple to accommodate; swapping chicken for tofu or tempeh provides a delightful vegan alternative while keeping the essence of the dish. For flavor variations, incorporating ingredients like ginger or garlic can add a fragrant depth to the glaze.

Texture modifications can be achieved by using grilled or baked chicken instead of pan-seared, which can impart a smoky flavor. Lastly, consider serving it over citrus-infused rice or quinoa to enhance the overall presentation and flavor combination.

Serving and Presentation Guide

Proper plating can enhance the dining experience for your Zesty Glazed Citrus Chicken Delight. Start with a clean plate, using a generous spoonful of the glaze on the bottom as a flavorful base. Arrange the chicken slices on top, allowing the glaze to glisten. For added elegance, scatter citrus segments or fresh herbs around the plate for color contrast.

Garnishing ideas include thinly sliced scallions or a sprinkle of toasted sesame seeds to elevate the visual appeal. Traditional accompaniments like jasmine rice or a light mixed greens salad will complement the meal beautifully, adding texture and freshness.

Consider temperature when serving this dish, as it is best enjoyed warm. Serve right after cooking to maintain the glaze’s stickiness and ensure the chicken is tender. For portion control, aim for a 4-ounce serving size of chicken per person, balancing it with ample sides to create a satisfying meal.

Wine and Beverage Pairing

Pairing a refreshing white wine with your Zesty Glazed Citrus Chicken Delight enhances the dish’s vibrant flavors. A Sauvignon Blanc or a dry Riesling works beautifully; both complement the citrus notes while providing a refreshing contrast. Consider serving the wine chilled to balance the dish’s warm elements.

For non-alcoholic options, a sparkling water infused with lime or an iced herbal tea can provide a refreshing companion to this dish. If you’re looking for something warmer, consider a ginger tea, as it pairs nicely with citrus flavors while also acting as a digestive aid.

When serving wine, choose glasses that allow room for aeration, and serve at the appropriate temperatures for whites, typically around 45°F to 50°F. Consider highlighting your beverage selection by presenting it attractively alongside the meal.

Storage and Shelf Life

Storing your Zesty Glazed Citrus Chicken Delight properly ensures longevity and flavor retention. If you have leftovers, allow the chicken to cool completely before transferring it to an airtight container; it should last for 3 to 4 days in the refrigerator. For optimal taste, reheat the chicken gently on the stovetop or in the microwave, being careful not to dry it out.

Keeping an eye out for signs of spoilage is essential. If you notice any off-putting smells or changes in color, it’s best to err on the side of caution and discard the chicken.

If you wish to extend the shelf life further, freezing is an excellent option. Wrap the chicken tightly in plastic wrap or foil, then place it in a freezer-safe container. It can last for up to 3 months in the freezer. When you’re ready to enjoy your leftovers, thaw the chicken in the fridge before reheating.

Make Ahead Strategies

Preparing your Zesty Glazed Citrus Chicken Delight ahead of time can save precious moments during busy mealtimes. Consider marinating the chicken for a few hours or overnight to enhance flavor profiles and tenderness. You can also prepare the citrus glaze in advance; simply store it in the refrigerator until you’re ready to cook.

In terms of storage between steps, chop your citrus and herbs beforehand to streamline the cooking process. When ready to cook, bring all ingredients and chicken to room temperature for even cooking.

Upon reheating, you can enhance the freshness by adding a squeeze of fresh citrus juice or a sprinkle of freshly chopped herbs. This not only boosts flavor but also elevates the dish’s presentation, maintaining its visual appeal.

Scaling Instructions

To adjust the Zesty Glazed Citrus Chicken Delight for larger gatherings, you can easily double or triple the recipe. When doubling or tripling, ensure you have larger pots or baking trays to accommodate all the chicken.

Timing needs slight adjustments; while cooking multiple pieces together can take longer, keep a close eye for doneness using a meat thermometer. If you’re halving the recipe, adjust the cooking time accordingly, starting to check for doneness a few minutes earlier.

When it comes to storage considerations, ensure that the cooked chicken has room to cool down before placing it in containers, allowing for proper air circulation to prevent bacterial growth.

Nutritional Deep Dive

The nutritional profile of the Zesty Glazed Citrus Chicken Delight is impressive. Each serving provides a balanced amalgamation of proteins, carbohydrates, and healthy fats, with lean chicken offering a wealth of protein essential for muscle repair and growth.

In addition to macro nutrients, the dish is packed with micronutrients thanks to the inclusion of fresh citrus. Vitamin C, found abundantly in oranges, lemons, and limes, contributes to immune support and enhances skin health.

Moreover, this recipe adheres to dietary considerations for most individuals, offering a low-carb option that fits well within many contemporary health-focused eating plans. With its dynamic flavor profile and diverse ingredient list, this dish can also be integrated into weight management strategies, as portion control is straightforward and is naturally low in calories.

Dietary Adaptations

Adapting the Zesty Glazed Citrus Chicken Delight for specific dietary restrictions is simple and productive. For gluten-free diners, double-check the soy sauce in the glaze; gluten-free alternatives are widely available.

Dairy-free variations can be achieved as this dish is already free from dairy. If further health considerations arise, substituting chicken with options like tofu or chickpeas provides necessary protein while adhering to vegan dietary needs.

Low-carb and ketogenic diets can also incorporate this recipe effortlessly. Simply serve the chicken alongside non-starchy vegetables or cauliflower rice instead of traditional rice or grains. For those following paleo guidelines, avoid processed sugars in the glaze and focus on all-natural ingredients.

Lastly, consider modifications for low-FODMAP diets by limiting high-FODMAP ingredients like garlic, opting for oils, and fresh herbs instead while still maintaining flavor integrity.

Troubleshooting Guide

If your chicken turns out too dry, you may have overcooked it. To prevent this, monitor cooking time closely, using a meat thermometer to confirm a safe internal temperature of 165°F. If this happens, serving the chicken with a drizzle of additional glaze can help restore moisture.

For flavor balance issues, consider adding acid to cut through excessive sweetness. A splash of vinegar or additional citrus juice can help restore equilibrium in flavor profiles.

Temperature challenges can arise if the chicken is taken out of the refrigerator too soon before cooking; always allow the chicken to come to room temperature to ensure even cooking.

In terms of ingredient substitutions, if you run out of citrus or have specific preferences, consider alternative marinades and flavor profiles that fit your palate while still adhering to the original taste structure.

Recipe Success Stories

Many home cooks have shared their success stories with the Zesty Glazed Citrus Chicken Delight, showcasing how simple yet impactful this dish can be. From family gatherings to intimate dinners, readers have raved about its vibrant flavors and ease of preparation.

Feedback highlights included how the use of fresh ingredients makes a notable difference in taste. Several readers reported impressing their guests, noting how they never expected such a flavor explosion from a relatively simple recipe.

Adapting the recipe has also led to numerous creative versions. Guests have incorporated seasonal veggies into the glaze or experimented with local citrus varieties that showcased their regional flavors, enriching the overall experience.

Photodocumentation of this dish has filled social media, encouraging community engagement through hashtags; it has become a delightful point of connection among food enthusiasts eager to share their adaptations and successes, encouraging others to try their hand at it.

Frequently Asked Questions

Q1: Can I use frozen chicken for this recipe?

A1: Yes, you can use frozen chicken, but make sure to thaw it completely in the refrigerator before marinating and cooking to ensure even cooking.

Q2: How long can I store leftover chicken?

A2: Leftovers can be stored in an airtight container in the refrigerator for 3 to 4 days. Ensure it’s cooled before storing to maintain freshness.

Q3: What if I don’t have fresh citrus fruits?

A3: If fresh citrus is not available, bottled citrus juice can be used, but fresh citrus offers more vibrant flavors and health benefits.

Q4: Can this recipe be made in advance?

A4: Absolutely! You can marinate the chicken and prepare the glaze a day ahead. Store them separately in the fridge until you’re ready to cook.

Q5: What sides go well with this dish?

A5: This dish pairs wonderfully with steamed vegetables, rice, or a light salad. These sides enhance its fresh flavors without overwhelming the palate.

Q6: Can I grill this chicken instead of pan-searing it?

A6: Yes, grilling would add a delicious smoky flavor to your citrus chicken. Just be sure to keep an eye on it to prevent burning the glaze.

Q7: Is there a vegetarian option?

A7: You can substitute chicken with tofu or tempeh for a delightful vegetarian version; just ensure to adjust cooking times accordingly.

Q8: Can I make this dish spicy?

A8: Absolutely! Adding red pepper flakes or fresh chili can give it a delightful heat that pairs beautifully with the citrus flavors.

Q9: What type of orange should I use?

A9: Navel oranges are great for juicing, but you can experiment with blood oranges for a more unique color and taste.

Q10: How do I know when chicken is fully cooked?

A10: Use a meat thermometer to check that the internal temperature has reached 165°F, ensuring safely cooked chicken.

Q11: Can I use chicken thighs instead of breasts?

A11: Yes, chicken thighs will add more flavor and moisture to the dish. Adjust cooking times as thighs usually take longer to cook than breasts.

Q12: Is there a way to make this dish gluten-free?

A12: Yes! Ensure to use gluten-free soy sauce or alternative ingredients that maintain the flavor without gluten.

Additional Resources

For those wanting to explore more delightful chicken recipes, consider trying lemon herb roasted chicken or honey garlic chicken stir-fry. Each provides unique twists while utilizing similar kitchen techniques and ingredients.

If you’re looking for technique guides, consider reviewing marinating tips or grilling basics, which can empower you to explore various cooking styles.

Ingredient information is crucial, especially for those new to cooking; familiarize yourself with various types of chicken cuts and their best cooking methods.

For equipment recommendations, a reliable meat thermometer and quality non-stick skillet can enhance your cooking efficiency. Lastly, explore seasonal variations like pumpkin or squash sides to serve alongside this dish for a complete meal experience.

Join the Conversation

We love hearing from you! Share your cooking experience with the Zesty Glazed Citrus Chicken Delight on social media using our hashtags. Don’t forget to showcase your photography skills; a beautiful dish deserves to be shared!

Engagement through recipe reviews can help others discover this delightful dish. Let the community know how your variations turned out, and don’t shy away from sharing tips you may have gathered while preparing it.

Your feedback can inspire others, making the cooking journey even more enjoyable for everyone involved. Join our cooking community today and start connecting over easily adaptable, flavorful recipes like this one.

The Recipe

Zesty Glazed Citrus Chicken Delight

Serves: 4

Prep Time: 15 mins

Cook Time: 30 mins

Total Time: 45 mins

Kitchen Equipment Needed

  • Non-stick skillet
  • Measuring cups and spoons
  • Meat thermometer
  • Whisk
  • Cutting board
  • Sharp knife

Ingredients

  • 4 boneless, skinless chicken breasts
  • 1/3 cup fresh orange juice
  • 1/4 cup fresh lemon juice
  • 1/4 cup fresh lime juice
  • 3 tablespoons honey
  • 2 cloves garlic, minced
  • 1 teaspoon soy sauce (or gluten-free alternative)
  • Salt and pepper to taste
  • Fresh parsley for garnish

Directions

  1. In a bowl, whisk together the orange juice, lemon juice, lime juice, honey, garlic, soy sauce, salt, and pepper to create the marinade.
  2. Place the chicken breasts in a zip-top bag and pour the marinade over them. Seal and refrigerate for at least 30 minutes, or overnight for stronger flavor.
  3. Heat a non-stick skillet over medium heat. Remove chicken from the marinade and reserve the marinade.
  4. Add chicken to the skillet and cook for 6-7 minutes on each side, or until the chicken is cooked through and golden brown. Use a meat thermometer to check the internal temperature.
  5. While the chicken is cooking, pour the reserved marinade into a small saucepan and bring it to a boil. Reduce the heat and let it simmer for about 5 minutes until slightly thickened.
  6. Once cooked, remove the chicken from the skillet, let it rest for a few minutes, then slice it.
  7. Drizzle the thickened citrus glaze over the sliced chicken and garnish with fresh parsley. Serve immediately.

Recipe Notes

  • Feel free to experiment with other citrus fruits to suit your taste preferences.
  • For more spice, add a pinch of cayenne or crushed pepper to the marinade.
  • Leftovers can be stored in the fridge for up to 3 days.

Delicious Sweet and Savory Baked Pork Loin Recipe to Try

Sweet and Savory Baked Pork Loin: A Delicious Fusion of Flavors

⚖️
Difficulty
Intermediate

⏲️
Prep Time
15 mins

🕒
Cook Time
1 hour

⏱️
Total Time
1 hour 15 mins

🍽️
Servings
4 servings

The *Sweet and Savory Baked Pork Loin* is a culinary delight that perfectly blends rich and flavorful elements to tantalize your taste buds. This dish showcases how a simple cut of pork can become something spectacular with the right balance of sweetness from the glaze and the savory depth from herbs and spices. As you prepare this seasoned loin, you’ll be amazed at how the aroma fills your kitchen, creating anticipation for what’s to come. Each slice reveals its juicy interior, promising a satisfying meal for any occasion.

In this recipe, the pork loin is coated in a luscious blend of maple syrup, soy sauce, and garlic, resulting in a craving-inducing marinade. This not only adds a beautiful gloss but also enhances the natural flavors of the meat, making it incredibly tender and succulent. Cooking the pork at a controlled temperature ensures even cooking and a blissfully melt-in-your-mouth texture. This recipe is an ideal choice for family dinners, special occasions, or meal prep for the week ahead.

Quick Recipe Highlights

  • Flavor Profile: Sweet and salty with hints of garlic and herbs
  • Texture: Juicy and tender with a caramelized exterior
  • Aroma: Inviting garlic and herb notes with a sweet undertone
  • Visual Appeal: Beautiful golden brown hue with a glossy glaze
  • Skill Level Needed: Intermediate cooking skills for best results
  • Special Equipment: Oven-safe roasting pan and meat thermometer

Recipe Overview

  • Difficulty Level: This pork loin recipe is rated as intermediate due to the precise cooking techniques required to ensure the meat remains succulent while achieving the perfect glaze.
  • Category: This dish falls under the main course category, ideal for substantial family meals or gatherings.
  • Cuisine: This recipe highlights a fusion of American and Asian flavors, showcasing how culinary traditions can beautifully intersect.
  • Cost: With a medium pork loin costing around $10-$15, this meal is both delicious and budget-friendly, serving 4 people easily.
  • Season: Great for all seasons, but especially appealing during fall and winter for heartier meals.
  • Occasion: Perfect for holidays, family gatherings, or dinner parties, impressing guests with its complexity and flavor.

Why You’ll Love This Recipe

The alluring taste of the *Sweet and Savory Baked Pork Loin* comes from the perfect marriage of flavors. The sweet glaze permeates the juicy pork, creating a mouthwatering experience with every bite. The caramelization brings a slight crunch to the exterior, giving way to the tenderness inside. Each component harmonizes beautifully, ensuring you and your guests will savor every moment of this delightful dish.

Preparation for this recipe is straightforward and convenient, making it ideal for busy individuals or families. With just a few simple steps, you can have a delicious meal on the table in less than two hours. This adaptability is perfect for those who love to meal prep, as leftovers maintain their flavor and texture exceptionally well. You’ll find that it reheat easily, preserving the original flavors, making it a smart culinary investment during a hectic week.

The nutritional benefits of pork loin are hard to ignore. This lean meat is an excellent source of protein while being relatively low in fat compared to other cuts. Additionally, the dish can easily accommodate a variety of healthy sides, such as steamed vegetables or a fresh salad, ensuring a well-rounded meal. It’s a wonderful option for those looking to boost their protein intake without excessive unhealthy fats.

When it comes to social gatherings, the *Sweet and Savory Baked Pork Loin* stands out as a centerpiece dish that everyone will appreciate. Its impressive appearance and aroma create an inviting atmosphere, encouraging conversation and enjoyment. Serving this dish can put any host at ease, knowing that it will not only satisfy but also impress their friends and family as a memorable culinary experience.

Finally, the *Sweet and Savory Baked Pork Loin* is a cost-effective meal. With relatively low expenses for essential ingredients, this dish delivers a gourmet flair without breaking the bank. Investing in quality pork not only supports local farmers but also enhances the overall flavor and quality of your dish, making it accessible without compromising on taste.

Historical Background and Cultural Significance

The origins of pork as a staple can be traced back to various cultures, especially within Europe and Asia, where the domestication of pigs flourished. In many regions, pork loins became popular due to their versatility and ability to absorb flavors from various marinades and spices. The introduction of sweet glazes, such as those incorporating fruits or syrups, developed over time, showcasing innovative culinary techniques that highlight both taste and presentation.

Culturally, pork is often celebrated during various festivities. In many Asian cultures, for instance, pork symbolizes prosperity and abundance, making it a popular dish during celebratory occasions such as Lunar New Year. The combination of savory and sweet flavors in this *Baked Pork Loin* resonates with this belief, turning meals into celebratory experiences filled with warmth and joy.

As culinary traditions have evolved, so have the methods of preparing pork. From traditional roasting to modern sous-vide techniques, the recipes surrounding pork have adapted, integrating new flavor profiles and innovative cooking methods. The rise of global cuisine has also allowed ingredients like maple syrup and soy sauce to find their place in this timeless dish, creating a fusion that appeals to modern palates while respecting its origins.

Regional variations of baked pork loin are vast. From the herbaceous traditional Italian porchetta to the sweet and spicy Caribbean versions, there’s a diverse array of flavors to explore. Each region brings its unique flair, elevating this ingredient to new culinary heights, ensuring that pork remains a favorable choice around the globe.

Ingredient Deep Dive

The star of our recipe, pork loin, serves as a flavorful foundation for this dish. Culturally significant, pork has been a source of sustenance in many communities, and its cuts have been celebrated in dishes world-over. Nutritionally, pork loin is a fantastic protein source, providing essential amino acids necessary for muscle repair and overall health.

When selecting pork loin, look for cuts that are light pink and have minimal marbling. These signs indicate freshness and better overall quality. Storing leftover pork loin correctly involves keeping it in an airtight container in the refrigerator, where it can last up to four days. For longer storage, consider freezing and using within 3-4 months.

Maple syrup is the sweetener that elevates this dish. This natural sweetener is rich in antioxidants and has been part of North American culture for centuries, adding a distinct flavor profile to both savory and sweet dishes. When selecting maple syrup, opt for pure maple syrup for the best flavor. Store it in a cool place, and refrigerate after opening.

Soy sauce contributes to the dish’s umami flavor, adding depth and enhancing the meat’s natural tastes. Originating from ancient China, soy sauce has become a staple in various cuisines. When buying soy sauce, aim for low-sodium options to control salt intake better. Store it in a cool, dark place, and it can last indefinitely if kept sealed.

Garlic, an aromatic root vegetable, gives the dish its robust flavor and numerous health benefits such as improved immunity and heart health. Choose fresh bulbs that are firm and dry, and store them in a cool, dark place, allowing them to stay fresh longer.

Common Mistakes to Avoid

  • Not letting the pork rest: Allowing the pork loin to rest after cooking ensures juices redistribute, preventing dry meat.
  • Overcooking the meat: Using a meat thermometer helps prevent overcooking, resulting in a succulent dish.
  • Neglecting marination time: For optimal flavor, marinate the pork for at least one hour—or overnight for best results.
  • Skipping the sear: Searing the pork on high heat helps achieve a flavorful crust that locks in moisture.
  • Ignoring internal temperature: Aim for an internal temperature of 145°F for perfect pork loin doneness.
  • Using low-quality ingredients: Utilize high-quality maple syrup and soy sauce for optimal flavor enhancement.
  • Not adjusting seasoning: Taste and adjust seasonings, especially when using low-sodium soy sauce.
  • Overcrowding the pan: Roast the pork loin in a pan that allows space for air circulation for even cooking.
  • Inadequate oven preheating: Preheat your oven thoroughly to ensure even cooking throughout the meat.
  • Forgetting to slice against the grain: Cutting against the grain results in tender slices rather than chewy pieces.

Essential Techniques

To achieve a perfect bake, understanding the importance of marinating is crucial. Marinating not only infuses flavor into the pork but also helps tenderize the meat. To master this, prepare your marinade a day prior, allowing the flavors to meld, and soaking the pork for optimal taste absorption. Common pitfalls include using sauces that are too salty or not giving enough time for the marinade to work, leading to a lack of flavor.

Searing the pork loin plays a significant role in developing a rich flavor and appealing texture. When searing, it’s essential to preheat your pan adequately and avoid overcrowding. The goal is to brown the meat quickly, forming a flavorful crust while keeping the inside juicy. Look for a deep golden-brown color as your visual cue for success during this step.

Pro Tips for Perfect Sweet and Savory Baked Pork Loin

Start by selecting a high-quality pork loin for the best results. Look for cuts that are firm and have a light pink color, as this indicates freshness and better flavor.

Allow the pork to come to room temperature before cooking. This helps to ensure even cooking throughout the meat, preventing the ends from being overcooked while the center remains cold.

Prepare a flavorful glaze that complements the natural sweetness of the pork. A perfect balance of sweet and savory will elevate your dish to gourmet status.

Monitor the internal temperature throughout the cooking process. Using a meat thermometer will help you avoid overcooked, dry pork.

Baste the pork with the cooking liquid during the last few minutes of roasting for an extra layer of flavor and moisture.

Let the meat rest for at least 10 minutes after taking it out of the oven. This step allows juices to redistribute throughout the pork, resulting in moist slices.

Experiment with additional herbs and spices in your marinade for personalized flavor enhancements.

Finally, have fun with your side dish selection! Complementing the dish with seasonal vegetables can elevate your meal and provide a well-rounded dining experience.

Variations and Adaptations

This recipe can be adapted to showcase regional flavors. For a Mexican twist, incorporate spices like cumin and chili powder into your marinade. Alternatively, a Mediterranean flair can be found by infusing the glaze with fresh herbs and olives, creating a distinctly different taste profile.

Seasonal adaptations can also bring variety; during the fall, consider adding apple cider to your marinade for festive sweetness or during summer, add citrus for a zesty contrast to the rich pork.

If you’re catering to dietary modifications, replace the maple syrup with agave nectar for a vegan approach or use coconut aminos instead of soy sauce for a gluten-free adaptation. These alternatives maintain flavor without sacrificing dietary needs.

Fresh fruits or nuts can enhance texture variations; for example, adding crushed almonds to the glaze or serving with a fruity chutney creates an interesting contrast to the pork’s rich profile.

Lastly, presentation alternatives can include serving the pork on a bed of sautéed greens or with colorful roasted vegetables, adding an appealing visual element to your dish.

Serving and Presentation Guide

When plating the *Sweet and Savory Baked Pork Loin*, consider enticing plating techniques that showcase the roasted meat. Slicing the loin into thick, even pieces allows for a beautiful display of the juicy interior, revealing its golden glaze.

Garnishing your dish with finely chopped herbs or citrus slices can provide freshness and color contrast, enhancing its visual appeal. Traditional accompaniments might include savory sides like roasted vegetables or creamy mashed potatoes, which complement the dish’s flavors.

For modern serving suggestions, consider offering a sweet chutney or relish on the side, enhancing the sweet notes of the dish. Temperature considerations are also crucial: serving the pork warm but not scalding makes for a delightful tasting experience.

Finally, be mindful of portion control; serving moderate portions not only looks appealing but also encourages guests to savor each mouthful.

Wine and Beverage Pairing

When pairing wines with the *Sweet and Savory Baked Pork Loin*, consider a fruity red like Pinot Noir. Its light body and balanced acidity will perfectly complement the sweet and savory dimensions of the dish. Alternatively, a full-bodied Chardonnay pairs beautifully if you’re looking for a white wine option.

For non-alcoholic alternatives, a sparkling apple cider enhances the dish while adding a refreshing, crisp element. It lifts the flavors and balances the meal’s richness.

Coffee or herbal tea can provide wonderful after-dinner options, especially if served slightly chilled to cleanse the palate.

Consider serving all beverages at the proper temperatures: red wines should be slightly below room temperature, while whites and sparkling options are best served cold.

Storage and Shelf Life

Properly storing the *Sweet and Savory Baked Pork Loin* ensures longevity without compromising its flavor. Refrigerate the pork within two hours of cooking in an airtight container. It should last for 3-4 days in the fridge, making it a great option for meal prep.

If you want to extend its shelf life, consider freezing the pork. Wrap individual portions tightly in foil or freezer bags, ensuring to remove as much air as possible. Properly stored, it can last for 3-4 months in the freezer.

Signs of spoilage include off smells or an unusual change in texture. If reheating, ensure that the internal temperature reaches at least 165°F to guarantee safety.

For best results, defrost frozen pork in the refrigerator overnight before reheating to maintain its juicy texture and flavor.

Make Ahead Strategies

For busy days, prepare the *Sweet and Savory Baked Pork Loin* ahead of time. Marinate the pork the day before to allow the flavors to fully penetrate the meat. Store it in the refrigerator, ensuring you’re ready to cook with minimal effort.

You can also slice the pork after cooking, cooling it down before storing it in an airtight container. This strategy allows for quick assembly of meals during the week.

If reheating leftovers, consider adding a bit of broth or sauce to the container to preserve moisture. For the freshest taste, add any garnishes, such as herbs, right before serving.

Evaluate the quality impact of pre-preparing this dish. With the right strategies, the flavor and texture can remain exceptional, allowing for quick and easy lunches or dinners.

Finally, if serving at an event, consider assembling a small charcuterie board with the sliced pork, fresh bread, and assorted sides to create a vibrant centerpiece that guests will enjoy.

Scaling Instructions

When scaling the *Sweet and Savory Baked Pork Loin* recipe, halving or doubling the ingredients is straightforward. If you halve the recipe, you can use a smaller roast while keeping the same cooking technique.

For doubling the recipe, ensure that you have sufficient oven space. Cooking two pork loins simultaneously may require adjusting the cooking time slightly, so monitor internal temperatures closely.

When increasing the recipe, always add more marinade to ensure that the flavors remain consistent throughout. A larger roast may need more time in the oven, so check the doneness periodically with a meat thermometer.

Storage considerations become vital when doubling; ensure ample storage containers to avoid overcrowding and allow even cooling.

Lastly, adjust side dish portions accordingly to offer a balanced meal that satisfies guests, regardless of recipe scaling.

Nutritional Deep Dive

Analyzing the nutritional profile of the *Sweet and Savory Baked Pork Loin*, it provides a balanced meal option packed with protein essential for muscle function and repair. A standard serving contains approximately 200-250 calories and 25-30 grams of protein, making it an excellent choice for those seeking high-protein meals.

Micronutrient analysis reveals that pork loin is rich in B-vitamins, particularly B6 and B12, which are crucial for energy metabolism and red blood cell formation. Additionally, it contributes essential minerals like iron and zinc, supporting overall health.

Health benefits don’t stop at protein; the right portion size can be a part of a well-balanced diet. Pairing with vegetables increases fiber content, promoting better digestive health.

Dietary considerations should be noted for those monitoring fat intake, especially with marinated dishes. Lean cuts provide less fat comparable to other meats while still delivering robust flavor when cooked appropriately.

Lastly, this dish can fit into weight management plans if portion control is monitored, making it a satisfying yet nutritious option for various diets.

Dietary Adaptations

For those following a gluten-free diet, using tamari instead of soy sauce in the marinade allows you to enjoy the same flavorful dish without gluten.

If you’re looking for a dairy-free option, this recipe is already accommodating, as there are no dairy ingredients involved. The glaze’s sweetness comes from natural sources, making it suitable for various diets.

Vegans can adapt this recipe by using a plant-based protein, like tofu or seitan, marinating it in the same glaze mixture. Adjust the cooking method to suit plant-based proteins for optimal results.

For those on low-carb diets, incorporate cauliflower mash or steamed greens as sides instead of traditional starchy options, ensuring the meal remains satisfying without excess carbohydrates.

Lastly, those on the ketogenic diet can benefit from this recipe as it naturally fits high-protein and low-carb standards, especially when serving with keto-friendly sides.

Troubleshooting Guide

Addressing common issues, texture problems may arise if the pork is overcooked. To prevent this, always use a meat thermometer, and remember to allow the pork to rest before slicing.

Flavor balance can sometimes veer towards too sweet or salty. Tasting the marinade before applying it allows for adjustments to seasoning levels for optimal flavor.

Temperature problems can lead to uneven cooking; if you notice one side is browning faster, rotate the pan midway through cooking for even heat distribution.

Should you encounter equipment challenges, ensure your oven is properly calibrated. Test it with an oven thermometer to achieve the correct temperatures.

Ingredient substitutions can sometimes lead to unexpected results; if substituting, consider flavor profiles and adjust quantities accordingly to balance taste.

Timing concerns, especially for larger cuts of meat, often require more time than expected. Start checking the temperature earlier than suggested to avoid overcooking.

Recipe Success Stories

Many home cooks have shared their successes with the *Sweet and Savory Baked Pork Loin*. From family gatherings to celebratory dinners, this dish has delighted taste buds across diverse audiences.

Several readers have reported successful adaptations, such as using different marinades or sides, which have helped them tailor the recipe to their preference while maintaining its core flavor.

Stories of found family traditions have emerged where this dish becomes the centerpiece of special occasions, binding memories with flavors and aromas cherished by loved ones.

Photography tips have also emerged from the community, showcasing how beautifully glistening pork can encourage others to try their hand at this recipe, creating an inviting atmosphere around dinner tables.

Finally, many have expressed gratitude for the meal prep potential of the dish, finding that it tastes even better the next day, further enhancing its appeal as an ‘overnight success.’

Frequently Asked Questions

Can I use a different cut of pork for this recipe?

Yes, while pork loin is the star of this recipe, other cuts like pork tenderloin or shoulder can also work. Just be aware that cooking times may vary based on the cut and thickness of the meat.

How do I know when my pork is done cooking?

The best way to check if your pork is done is by using a meat thermometer. Pork should reach an internal temperature of 145°F for safe consumption.

Can this dish be made ahead of time?

Absolutely! This dish can be marinated a day in advance and cooked when you’re ready. Leftovers can also be stored for quick meals throughout the week.

What sides pair well with this dish?

Some excellent side options include roasted vegetables, mashed potatoes, or a fresh salad. Choose sides that balance the sweetness of the pork with hearty textures and flavors.

Can I freeze leftovers?

Yes! Leftover pork can be frozen. Wrap it well in airtight containers or freezer bags, and it will last for up to 3-4 months.

What should I do if the glaze is too thick?

If the glaze is too thick, you can thin it out with a little water or broth, stirring until you achieve your desired consistency before applying it to the pork.

Is this recipe suitable for kids?

Yes, this dish tends to be kid-friendly due to its balanced sweetness. However, you can adjust the marinade’s garlic levels based on your children’s preferences.

Can I grill the pork instead of baking it?

Definitely! Grilling adds a wonderful smoky flavor to the pork. Just be sure to monitor the temperature closely to avoid overcooking.

Are there any low-carb versions of this recipe?

Yes, maintaining a low-carb version is easy by using replacements for any sugary components, like erythritol or zoodles instead of starchy sides.

How do I prevent the pork from drying out?

To ensure your pork remains juicy, avoid overcooking it and allow it to rest after cooking. This helps redistribute the juices, resulting in tender slices.

Additional Resources

If you’re looking for related recipes, consider exploring other pork dishes like *Honey Garlic Pork Chops* or *Herb-Crusted Pork Tenderloin*.

Technique guides on marinating effectively can further enhance your cooking skills, helping you replicate this dish with various meats. Ingredient information for pork cuts can offer deeper understanding of the culinary uses and benefits associated with different choices.

Equipment recommendations such as high-quality roasting pans and meat thermometers can also be useful. Additionally, check out seasonal variations to keep your meals exciting and aligned with fresh ingredients throughout the year.

Join the Conversation

We would love to hear from our community! If you’ve tried the *Sweet and Savory Baked Pork Loin*, share your experiences in the comments below or connect with us on social media.

Feel free to post your own photography tips and meal variations, as we continuously strive to learn from each other. Engaging with our readers not only builds a supportive cooking community but also inspires creativity in the culinary arts.

Don’t forget to save or print this recipe, and share it with your friends! Whether you’re a novice or an experienced cook, this dish promises to impress at your table.

The Recipe

Sweet and Savory Baked Pork Loin

Serves: 4 servings

Prep Time: 15 mins

Cook Time: 1 hour

Total Time: 1 hour 15 mins

Kitchen Equipment Needed

  • Oven-safe roasting pan
  • Meat thermometer
  • Mixing bowl
  • Whisk
  • Cutting board
  • Sharp knife

Ingredients

  • 1 (2-3 lb) pork loin
  • 1/4 cup maple syrup
  • 1/4 cup soy sauce (or tamari for gluten-free)
  • 4 cloves garlic, minced
  • 1 teaspoon black pepper
  • 1 teaspoon dried thyme
  • 1 tablespoon olive oil

Directions

  1. Preheat the oven to 375°F (190°C).
  2. In a mixing bowl, combine maple syrup, soy sauce, garlic, pepper, thyme, and olive oil to create the marinade.
  3. Place the pork loin in a roasting pan and pour the marinade over the top, ensuring it is coated evenly.
  4. Marinate for at least 1 hour or overnight in the refrigerator for best flavor.
  5. Once marinated, roast in the preheated oven for about 1 hour, or until the internal temperature reaches 145°F (63°C).
  6. Remove from the oven and let it rest for 10 minutes before slicing.
  7. Serve and enjoy your sweet and savory baked pork loin!

Recipe Notes

  • For extra flavor, feel free to add herbs such as rosemary or parsley to the marinade.
  • Buying a larger pork loin may be economical; just ensure it cooks evenly by regularly checking the internal temperature.
  • Leftovers are perfect for sandwiches, salads, or reheated sides throughout the week!

Ultimate Tremendous BLT Sandwich Recipe for Bacon Lovers

Tremendous BLT Sandwich: The Ultimate Bacon, Lettuce, and Tomato Delight

⚖️
Difficulty
Easy

⏲️
Prep Time
10 mins

🕒
Cook Time
15 mins

⏱️
Total Time
25 mins

🍽️
Servings
2

The Tremendous BLT Sandwich is a classic that evokes warm memories of summer picnics and backyard barbecues. This sandwich features perfectly crisp bacon, fresh greens, luscious tomatoes, and creamy mayo, all stacked high between toasted bread, creating a satisfying crunch with every bite. Imagine biting into this delicious creation: the smokiness of the bacon mingles with the juicy sweetness of ripe tomatoes, while the crisp lettuce adds a refreshing contrast. This incredible combo makes for a delightful experience that is sure to please anyone craving a tasty, hearty meal.

Making the ultimate BLT goes beyond just layering ingredients; it’s about using fresh, high-quality components that harmonize perfectly. The secret lies in perfecting each element, from selecting the ripest tomatoes to achieving the ideal bacon crispiness. The simplicity of the ingredients showcases their flavors, ensuring that each bite is as good as the last. Whether you’re serving it for lunch, brunch, or a quick dinner, the Tremendous BLT Sandwich is bound to become a favorite in your household.

Quick Recipe Highlights

  • Flavor Profile: The BLT features a delicious combination of salty, savory, and slightly sweet flavors from the bacon and tomatoes.
  • Texture: Experience a perfect mix of crunch from the bacon and lettuce alongside the soft, toasted bread.
  • Aroma: The sizzling bacon aroma will fill your kitchen, inviting everyone to the table.
  • Visual Appeal: The vibrant colors of the fresh vegetables and the golden-brown bacon create an eye-catching sandwich.
  • Skill Level Needed: This recipe is beginner-friendly, requiring basic kitchen skills to prepare.
  • Special Equipment: All you need is a frying pan for the bacon and a knife for cutting the sandwich!

Recipe Overview

  • Difficulty Level: The Tremendous BLT sandwich is easy to prepare, making it perfect for novice cooks and busy families alike.
  • Category: This is a lunch or brunch sandwich that is perfect for any time of year.
  • Cuisine: The BLT sandwich has roots in American cuisine, symbolizing a classic comfort food enjoyed across the country.
  • Cost: Making a BLT is budget-friendly, as it primarily uses simple ingredients that are often on hand.
  • Season: Enjoy this sandwich year-round, but it shines brightest in summer months when tomatoes are in season.
  • Occasion: Ideal for casual family meals, picnics, and gatherings with friends.

Why You’ll Love This Recipe

The Tremendous BLT sandwich is a delightful mix of flavors and textures that’s hard to resist. The salty, crispy bacon pairs perfectly with juicy tomatoes and crisp lettuce, creating a symphony on your palate. Each layer adds to the overall experience, leaving you craving a second helping. Additionally, you can customize this classic to cater to your taste preferences, whether you prefer extra mayo or additional toppings.

Beyond taste, the preparation is simple and incredibly quick. With just a handful of ingredients and a few steps, you can whip up this satisfying sandwich in no time. This convenience makes it perfect for busy weekdays or lazy weekends, allowing you to enjoy a delicious meal without spending hours in the kitchen.

On the health front, this sandwich is surprisingly nutritious. Using fresh vegetables not only enhances flavor but also adds valuable vitamins and minerals. Bacon, when consumed in moderation, offers protein and can be part of a balanced diet. Plus, you can even make healthier modifications, such as using whole grain bread or turkey bacon, for a lighter option.

Socially, the Tremendous BLT sandwich is a crowd-pleaser. Bringing people together over food is timeless, and this sandwich is perfect for gatherings and parties. Its simple yet delicious nature encourages sharing and conversation, making it a delightful addition to any table.

Lastly, this sandwich is budget-friendly, allowing you to satisfy your cravings without breaking the bank. Ingredients such as lettuce, tomatoes, and bread are typically low-cost, making the BLT an accessible recipe for everyone. It proves that you can enjoy gourmet flavors without the gourmet price tag.

Historical Background and Cultural Significance

The origins of the BLT sandwich can be traced back to the early 1900s, with bacon, lettuce, and tomato sandwiches appearing in various forms. However, it wasn’t until after World War II that the BLT gained popularity across America. Factories began to mass-produce bacon, making it more accessible and popular. This sandwich quickly became a common feature on diner menus, solidifying its status in American culinary culture.

Culturally, the BLT represents the simplicity and satisfaction of American cuisine. It embodies the spirit of casual dining and backyard cookouts, often associated with summertime gatherings and lunch on the go. Over the years, it has been celebrated for its straightforwardness and the freshness of its ingredients, making it a beloved choice for many households.

The recipe for the BLT has evolved over the years, adapting to new culinary trends and consumer preferences. Today, variations may include avocado for added creaminess or different types of bread for a modern twist. As food sustainability comes to the forefront, many people are also opting for locally sourced ingredients to create their BLTs, further enhancing its cultural significance.

Different regions in the United States have their own variations of the classic BLT. In the Southwest, for instance, jalapeños or avocado may be added, while in the South, fried green tomatoes provide a unique twist. Each adaptation reflects local tastes and production, showcasing how this simple sandwich can transcend culinary boundaries.

Ingredient Deep Dive

Bacon: This beloved ingredient has a rich history, often regarded as a symbol of comfort food in many households. It is a great source of protein and contains essential vitamins such as B12, zinc, and potassium. When purchasing bacon, look for high-quality, thick-cut varieties for the best flavor and texture. Store it in the refrigerator, and consider freezing to extend shelf life.

Lettuce: Essential for freshness in the BLT, lettuce has been cultivated for thousands of years. It offers hydration due to its high water content and includes nutrients like vitamins A and K. When selecting lettuce, opt for vibrant green leaves and avoid wilting. Store it in a plastic bag in the fridge and use it within a week for the best quality.

Tomatoes: Known as the star of the sandwich, fresh tomatoes provide a juicy sweetness that contrasts beautifully with the savory bacon. Tomatoes are rich in antioxidants like lycopene, which can promote heart health. When choosing tomatoes, look for plump, firm varieties and avoid blemishes. To store, keep them at room temperature and only refrigerate once cut to maintain flavor.

Bread: The foundation of the BLT, bread varies per personal preference. Whole grain options provide dietary fiber, while white bread offers a classic taste and texture. Choosing bread should be based on desired taste and health benefits. Store bread in a cool, dry place, and consider freezing it for longer shelf life.

Common Mistakes to Avoid

  • Using stale bread: Always use fresh bread to ensure the best texture and flavor. Stale bread can result in an unappealing sandwich.
  • Overcooking bacon: Be careful not to overcook bacon, as it can become too greasy and lose its desirable crispness. Aim for a golden-brown finish for the perfect crunch.
  • Skipping seasoning: Do not forget to season the tomatoes with a pinch of salt; it enhances their flavor dramatically.
  • Layering incorrectly: Ensure you layer the ingredients logically to create a balanced sandwich; put the lettuce closest to the bread to prevent sogginess.
  • Using low-quality ingredients: The BLT relies on fresh, high-quality components. Avoid using subpar bacon or limp vegetables.
  • Not toasting the bread: Toasting adds texture and flavor, making all the difference in your sandwich.
  • Forgetting the mayo: A good layer of mayo adds moisture and flavor; don’t skimp on it!
  • Overstuffing: While it might be tempting to add extra ingredients, overstuffing can lead to a messy sandwich that’s hard to handle.
  • Neglecting freshness: Always opt for garden-fresh tomatoes and lettuce to maximize flavor; wilted ingredients will ruin your sandwich.
  • Serving too cold: Let your sandwich sit for a moment after making it; a cold sandwich loses some of its flavor. Try serving at room temperature.

Essential Techniques

Cooking Bacon: Cooking bacon correctly is crucial for achieving that perfect crunch. Use medium heat to slowly render the fat, allowing it to crisp evenly. Avoid high heat as it can burn quickly. A good visual cue is a rich golden brown color – this signals that it’s perfectly cooked.

Layering Ingredients: Layering your sandwich correctly is key to keeping it stable and delicious. Start with the mayo on the bread, then add the lettuce to keep moisture away from the bread. Follow with the tomatoes and bacon. Practice assembling it in this order to achieve the structural integrity of the sandwich.

Pro Tips for Perfect Tremendous BLT Sandwich

Use thick-cut bacon for optimal crispiness; it holds its shape and flavor better than thin slices.
Choose the freshest, ripest tomatoes you can find; they will enhance the overall taste significantly.
Use a hearty bread, such as sourdough or whole grain, to add flavor and structure that stands up to the fillings.
Experiment with flavored mayonnaise, such as garlic or chipotle, to add a unique twist to your sandwich.
For a gourmet touch, try adding slices of avocado or cheese for additional creaminess.
Serve the sandwich immediately after assembling to maintain texture and freshness.
Don’t rush the bacon cooking stage; patience is key to achieving perfect crispiness.
When layering, ensure sharp flavors like tomato and bacon are visible for a more appetizing presentation.

Variations and Adaptations

In different regions, the BLT may take on various flavors. In the Southwest, adding jalapeño slices or sriracha sauce can provide a spicy kick that excites the taste buds. A Mediterranean twist might involve using fresh basil and slices of mozzarella, transforming the classic into a Caprese spin.

For seasonal adaptations, consider swapping out tomatoes for grilled peaches during late summer, enhancing the sweetness and creating a juicy alternative. If you want a healthier version, opt for turkey bacon, whole grain bread, and a spread of hummus instead of mayo for a lower-calorie option.

Dietary modifications can easily be incorporated; for a vegan alternative, substitute bacon with tempeh bacon or smoked tofu and use vegan mayo. You can also create a gluten-free BLT by using gluten-free bread varieties available in stores.

Serving and Presentation Guide

Plating your Tremendous BLT sandwich can make all the difference. Serve it on a rustic wooden board or a colorful plate for a vibrant presentation. Consider cutting the sandwich diagonally to expose the layers, which adds visual appeal. Garnish with a side of pickles or a small salad to elevate the dish.

You can also add a sprig of fresh herbs, such as parsley or basil, for decoration. Serve with crispy sweet potato fries or a refreshing coleslaw to create a more balanced meal. Consider the serving temperature as well; a BLT is best enjoyed warm or at room temperature.

Wine and Beverage Pairing

A classic Tremendous BLT pairs beautifully with a crisp, chilled white wine such as Sauvignon Blanc; its bright acidity complements the richness of the bacon and freshness of the vegetables perfectly. For a more casual pairing, consider an ice-cold pale ale or a light lager that balances flavors.

For non-alcoholic options, a sparkling lemonade or iced tea can provide a refreshing counterpoint. These beverages cut through the richness while enhancing the delicious elements of the sandwich. If pairing with coffee, opt for a light roast to offset the savory flavors of the sandwich.

Storage and Shelf Life

To maximize the freshness of your Tremendous BLT sandwich, it’s best to assemble it right before serving. If storing leftovers, place ingredients separately in airtight containers. Store cooked bacon in the refrigerator for up to five days, while fresh vegetables are best consumed within three to four days.

If you’ve prepped extra bacon, you can freeze it. Lay strips flat on a baking sheet, freeze until solid, then transfer to a zip-top bag. Reheat bacon in a skillet when ready to use. If reheating a complete sandwich, use an oven or toaster oven to maintain crispiness—microwaving can make it soggy.

Make Ahead Strategies

To prepare for a busy week, cook a batch of bacon in advance and store it in the fridge. Toast and slice your bread and prepare mayonnaise or flavored spreads the day before. When it’s time to assemble, make sure you have fresh lettuce and tomatoes on hand.

Consider making a BLT salad by chopping the sandwich ingredients and tossing them together in a bowl, which can be done ahead of time. Keep the dressing separate until ready to serve to prevent sogginess. This way, you maintain freshness while enjoying all the flavors of a classic BLT.

Scaling Instructions

If you wish to prepare a larger batch of the Tremendous BLT sandwich for a gathering, doubling the recipe is straightforward. Simply increase each ingredient proportionally, and cook additional bacon accordingly.

Adjust cooking times for bacon slightly to ensure even cooking, as multiple pieces will need more space in the pan. Be mindful of portions—consider preparing them on a platter and allowing guests to build their sandwiches for a fun, interactive experience.

For a smaller scale, you can easily cut the recipe in half, ensuring you still enjoy the same delicious flavors without wasting ingredients. Just remember to adjust the ingredient measurements and cooking times slightly as needed.

Nutritional Deep Dive

The Tremendous BLT sandwich can be satisfying in terms of macronutrients. With crispy bacon providing protein and healthy fats, combined with fibrous lettuce and nutrient-rich tomatoes, each component contributes to your daily dietary needs. A single sandwich is generally moderate in calories, making it a suitable option for lunch.

When examining micronutrient content, tomatoes offer a wealth of vitamins such as C and K. The addition of fresh lettuce increases your fiber intake, promoting digestive health. Additionally, by substituting ingredients, such as using whole grain bread, you can increase its fiber content further.

Understanding portion size is essential in managing calorie intake. A standard serving of a BLT sandwich can be enjoyed as a hearty meal without guilt, especially if balanced with a side of fresh fruit or a light salad.

Dietary Adaptations

For individuals following a gluten-free diet, gluten-free bread options are widely available and work beautifully for creating a BLT. Replace traditional mayo with a gluten-free spread for a worry-free meal.

Vegans can easily adapt this recipe too; using marinated tofu or tempeh can replace bacon, offering a similarly satisfying crunch. Coconut or avocado-based spreads provide creamy texture without animal products.

People on a low-carb or keto diet can eliminate the bread altogether and opt for lettuce wraps, delivering all the flavors of a BLT without the carbs. Slicing vegetables into sticks and pairing with a mayonnaise dip can also create a fun and flavorful snack.

Troubleshooting Guide

If your bacon ends up chewy instead of crispy, ensure you are cooking it over medium heat and allowing enough time for the fat to render properly. Avoid overcrowding the pan, as this can lead to steaming rather than crisping.

For sandwiches that become soggy, consider adding lettuce as a barrier. This prevents moisture from the tomatoes from soaking into the bread. Allow the tomatoes to drain on a paper towel before adding them to the sandwich for extra precaution.

If you find your sandwich ingredients don’t marry well in flavor, consider seasoning your tomatoes and applying mayo generously. This can significantly enhance the sandwich’s overall taste and improve the balance of flavors.

Recipe Success Stories

Community feedback for the Tremendous BLT sandwich has been overwhelmingly positive. Many have shared their variations, from adding fried eggs to their sandwiches to using artisan bread and gourmet aioli in place of mayonnaise for a unique twist.

Readers have noted the ease of preparation, allowing them to whip up a fresh meal in no time. Photography tips shared among enthusiasts all point to showcasing the layers clearly; capturing the crispy bacon and vibrant veggies makes for a stunning display.

Social media posts highlight creative presentations with colorful salads and seasoned potato fries served alongside, making this classic not only satisfying to eat but also beautiful to serve.

Frequently Asked Questions

Can I make a BLT sandwich ahead of time? Yes, you can prepare components ahead of time, but it’s best to assemble the sandwich shortly before serving to maintain freshness. Store ingredients separately to avoid sogginess.

What type of bacon is best for BLTs? Thick-cut bacon is recommended for BLTs as it provides a satisfying crunch without becoming overly greasy.

Can I substitute ingredients for dietary needs? Absolutely! Feel free to substitute ingredients based on your dietary requirements, such as using turkey bacon, vegan mayo, or gluten-free bread.

Are there healthier options for a BLT sandwich? Yes, you can make a healthier BLT by using whole grain or gluten-free bread, adding more vegetables, or replacing bacon with a more plant-based option.

What is the best way to toast bread for a BLT? For optimal crunch, toast the bread in the oven or a toaster until golden brown. This helps prevent the sandwich from becoming soggy.

How do I keep the sandwich from getting soggy? Layer lettuce closest to the bread and avoid overly wet tomatoes or spreads. You can also let ingredients rest on paper towels to absorb excess moisture.

Can I use pre-cooked bacon for this recipe? While pre-cooked bacon is convenient, cooking from raw allows for better texture and crispiness, which enhances the sandwich.

What can I serve with a BLT? Consider pairing with a side of potato chips, sweet potato fries, or a simple green salad for a well-rounded meal.

Can I freeze a BLT sandwich? It’s not recommended to freeze the entire BLT sandwich, but you can freeze individual components, like bacon or bread, to use later.

How do I know when my bacon is perfectly cooked? Keep an eye on the color; perfect bacon should be crispy and golden brown. Timing varies depending on thickness, so adjust accordingly.

Additional Resources

For further culinary exploration, consider trying related recipes such as the Caprese Sandwich or a classic Club Sandwich. Techniques and guides on creating homemade mayonnaise or crispy bacon can elevate your cooking skills.

Explore ingredient information for seasonal vegetables to enhance your sandwich offerings each season. Investing in quality kitchen equipment, such as a well-made skillet or sharp knife, will also make your cooking experience much more enjoyable.

Keep an eye out for seasonal variations; during summer, try using heirloom tomatoes or locally sourced greens to create an impressive signature BLT!

Join the Conversation

We’d love to hear your thoughts on the Tremendous BLT Sandwich! Share your favorite variations, photography tips, or feeding experiences on social media. Join our community by tagging us in your BLT photos or posting reviews of your attempts at this classic sandwich.

Don’t forget to experiment and have some fun with the recipe. Each twist brings its own flavor, and we encourage collaboration and sharing ideas with fellow sandwich lovers. Let’s celebrate this timeless meal by keeping the conversation alive!

The Recipe

Tremendous BLT Sandwich

Serves: 2

Prep Time: 10 mins

Cook Time: 15 mins

Total Time: 25 mins

Kitchen Equipment Needed

  • Frying pan
  • Knife
  • Cutting board
  • Spatula

Ingredients

  • 4 slices of thick-cut bacon
  • 2 slices of bread (your choice)
  • 2 slices of ripe tomato
  • 2 leaves of romaine or iceberg lettuce
  • 2 tablespoons mayonnaise
  • Salt and pepper to taste

Directions

  1. Cook bacon in a skillet over medium heat until crispy, about 7-10 minutes. Drain on paper towels.
  2. Toast the bread slices until golden brown.
  3. Spread mayonnaise on one side of each slice of toasted bread.
  4. Layer the lettuce leaves on one slice of bread.
  5. Place bacon strips on top of the lettuce.
  6. Add tomato slices, season with salt and pepper, then top with the second slice of bread.
  7. Slice in half and serve immediately.

Recipe Notes

  • Feel free to add avocado for creaminess or switch up the mayo with flavored varieties.
  • Make sure to let the tomatoes drain on paper towels if they are overly juicy to prevent a soggy sandwich.
  • For a spicy kick, add a few slices of jalapeño or a drizzle of sriracha.

Delicious Swedish Meatballs Recipe: A Taste of Tradition

Swedish Meatballs: A Comforting Culinary Delight

⚖️
Difficulty
Medium

⏲️
Prep Time
30 mins

🕒
Cook Time
20 mins

⏱️
Total Time
50 mins

🍽️
Servings
4 servings

Swedish meatballs are a classic dish that combines the rich flavors of ground beef and pork with a delectable creamy sauce. This recipe captures the essence of traditional Swedish cuisine while delivering comfort and warmth in every bite. Perfectly seasoned and pan-fried, these meatballs exhibit a tender texture that is paired beautifully with a thick, savory gravy, making it an ideal meal for both family dinners and gatherings.

In this Swedish meatballs recipe, you’ll not only savor the delicious blend of spices and savory flavor but also find an inviting aroma that fills your kitchen as they cook. The call of fresh herbs and spices melds harmoniously, inviting you to relish this iconic dish. Whether you serve these mouthwatering meatballs over a bed of fluffy mashed potatoes or with a side of lingonberry sauce, you’re sure to experience a taste of Sweden that resonates with warmth and comfort.

Quick Recipe Highlights

  • Flavor Profile: These Swedish meatballs feature a delightful combination of ground beef and pork, infused with hints of allspice, nutmeg, and fresh parsley.
  • Texture: They boast a tender yet slightly chewy consistency, enhanced by the creamy sauce that envelopes each meatball.
  • Aroma: Expect a nostalgic aroma that mingles savory meat with aromatic spices, instantly evoking a sense of homeliness.
  • Visual Appeal: The meatballs are golden brown and glossy when finished, typically served over a snowy blanket of mashed potatoes or noodles.
  • Skill Level Needed: This recipe is accessible for home cooks with a medium skill level, encouraging exploration of various cooking techniques.
  • Special Equipment: Basic kitchen tools such as a skillet, mixing bowl, and measuring cups are all you need to create this delightful dish.

Recipe Overview

  • Difficulty Level: The medium difficulty of this Swedish meatballs recipe comes from balancing flavors and mastering the cooking technique, ensuring a savory outcome.
  • Category: This dish is perfect for dinner and makes a hearty meal, especially during the colder months.
  • Cuisine: Rooted in Swedish tradition, these meatballs reflect the country’s penchant for comfort food and culinary creativity.
  • Cost: Ingredients are generally affordable and accessible, making this a budget-friendly meal option.
  • Season: While suitable for any time of year, Swedish meatballs are particularly comforting in the fall and winter seasons.
  • Occasion: Ideal for family gatherings, holiday dinners, and potlucks, this dish resonates with nostalgia and camaraderie.

Why You’ll Love This Recipe

Swedish meatballs are an irresistible blend of flavors and textures that make them a favorite among meat lovers. The savory meatballs are often accompanied by a light and creamy sauce that elevates the overall taste. Perfectly seasoned with allspice and nutmeg, they offer the warmth of home-cooked meals while providing a comforting balance of richness and earthiness that never fails to please the palate.

Convenience is another great aspect of this Swedish meatballs recipe. It requires simple ingredients that are likely already in your pantry, and the preparation is straightforward, making it accessible for busy weeknights or leisurely weekends. Whether served atop mashed potatoes, on buttered noodles, or alongside roasted vegetables, the versatility of this dish makes it an excellent choice for any meal.

Nutritionally, these meatballs provide a satisfying serving of protein from the meat, while the accompanying sauce can be enhanced with ingredients like low-fat cream for a healthier twist. This dish not only satisfies hunger but delivers essential nutrients, allowing you to enjoy comfort food without sacrificing your dietary needs.

The social aspect of enjoying Swedish meatballs with loved ones can’t be understated. The familiar aroma wafting through the kitchen often invites family and friends to gather, share stories, and create lasting memories over their plates. This dish has become a staple at many gatherings, providing a sense of comfort, warmth, and connection.

Cost-effectiveness is an additional benefit of making Swedish meatballs at home. Ingredients are readily available and affordable, allowing you to create satisfying meals for a whole family without breaking the bank. Furthermore, any leftovers can be easily stored and enjoyed later, extending the deliciousness beyond just one meal.

Historical Background and Cultural Significance

Swedish meatballs have a rich history that dates back to the early 18th century. The dish was influenced by various European traditions, particularly from Italy and Greece, but it was Swedes who perfected the art of crafting these tender morsels. The adaptation of spices such as allspice and nutmeg provided a unique twist that defines Swedish meatballs today.

In Swedish culture, meatballs symbolize homeliness and comfort. They are often made during festive occasions such as Christmas and family gatherings, connecting generations through shared recipes and traditions. This beloved dish speaks to the heart of Swedish hospitality, where a warm meal is synonymous with love and care.

As culinary trends evolved, so did the recipe for Swedish meatballs. Over the years, variations emerged, incorporating different types of meat like turkey or chicken, and alternative grains like quinoa for modern interpretations. Despite these changes, the essence of the dish remains prevalent in Swedish homes across the globe.

Regional variations of Swedish meatballs can be found, showcasing local ingredients and preferences. For example, some recipes may include lingonberries as a sweet contrast to the savory meat, while others may prefer variations of gravies and sauces. Such adaptations highlight the dish’s continued evolution in a global culinary landscape, allowing it to remain relevant and cherished.

Ingredient Deep Dive

– Ground beef: Rich in protein, ground beef is a staple meat that adds depth and flavor. When selecting, look for lean cuts for a healthier option while enjoying its full-bodied taste. Proper storage includes refrigerating leftovers and freezing for longer shelf life.
– Ground pork: This meat adds moisture and tenderness, which is essential in achieving the best texture for Swedish meatballs. Choose fresh pork for the best flavor and ensure to freeze any unused portions properly.
– Bread crumbs: Serving as a binding agent, bread crumbs help maintain the meatball’s structure while contributing to a tender bite. Store in a cool, dry place and opt for whole grain for added nutrition.
– Onion: Aromatic and versatile, onions provide a flavor base for many dishes. Use fresh onions for the best taste and store them in a cool, dark place to prolong freshness.
– Heavy cream: This ingredient elevates sauce and adds richness to the overall dish. Choose a high-quality cream for optimal flavor, but consider alternatives like Greek yogurt for lower fat content.

Common Mistakes to Avoid

  • Overmixing the meat: This can lead to tough meatballs; mix just until combined for the best texture.
  • Not chilling the mixture: Refrigerating the meat mixture helps it firm up and hold its shape while cooking.
  • Under-seasoning: Ensure you’re adequately seasoning the mixture; don’t be afraid to taste and adjust before cooking.
  • Using low-quality meat: The flavor of your meatballs relies heavily on the quality of the meat; opt for fresh, good-quality ingredients.
  • Skipping the browning step: Browning adds depth and prevents the meatballs from becoming grey and unappealing.
  • Cooking at the wrong temperature: Cook on medium heat to achieve a golden crust without burning or undercooking the insides.
  • Ignoring gravy consistency: Make sure the gravy is creamy and thick enough; you can adjust with flour or cornstarch if needed.
  • Rushing the cooking time: Take your time to ensure that the meatballs cook thoroughly, keeping them juicy and tender.

Essential Techniques

– Proper meatball shaping: Ensuring uniform size is key for even cooking. Use a scoop to measure and roll gently without overmixing. Look for visual cues like a tight, smooth surface for the best results.
– Browning: This step creates a flavorful crust, adding layers of taste. Heat oil in a pan and place the meatballs with space in between to avoid steaming instead of searing. A golden-brown exterior signifies success.
– Sauce creation: An excellent sauce is integral to this dish. In the same pan where you browned the meatballs, sauté onions, add flour, then gradually mix in broth and cream for a rich, savory sauce.
– Flavor balancing: Tasting as you go is vital; adjust salt, sugar, or creaminess according to your preference. A balanced flavor leads you to the perfect Swedish meatball experience.

Pro Tips for Perfect Swedish Meatballs

– Use a mix of meats for added complexity in flavor; combining beef and pork yields the most delicious results.
– Experiment with spices. While allspice and nutmeg are classic, adding thyme or dill can give a fresh twist.
– Opt for fresh herbs instead of dried ones for enhanced aroma and flavor—every little detail counts!
– Prepare the meatball mixture ahead of time and refrigerate overnight for even richer flavors.
– Don’t skip the lingonberry sauce; it provides a sweet contrast to the savory meatballs that elevates the dish.
– For a gluten-free version, replace the bread crumbs with gluten-free alternatives such as almond flour.
– Use a thermometer to ensure meatballs maintain the right internal temperature; they should be cooked to an internal temperature of 160°F (70°C).
– Test-cook one meatball before the rest to ensure flavor and texture meet your standards.

Variations and Adaptations

– Regional variations may include the addition of aromatic spices unique to Swedish locality or different meat combinations.
– Seasonal adaptations could focus on incorporating vegetables such as roasted carrots or seasonal greens as a side.
– Dietary modifications can cater to gluten-free options by using alternative breadcrumbs or making a low-carb version with zucchini.
– Flavor variations might involve adding cheese such as feta or a touch of sweet barbecue sauce for a unique twist.
– To alter texture, adjust cooking methods; consider baking instead of frying for a different consistency.
– Presentation alternatives can range from serving on plates with elegant garnishes to casual serving on skewers for gatherings.

Serving and Presentation Guide

Plating of Swedish meatballs can elevate the dining experience. Use a large serving dish and nestle the meatballs in a bed of creamy mashed potatoes, drizzling the luscious gravy generously over them. Add a sprinkle of parsley for a pop of color. You may choose to serve them individually on plates garnished with fresh dill for a more elegant presentation.

Garnishing ideas include fresh parsley, dill, and a side of lingonberry sauce which offers a welcome acidity that contrasts beautifully with the rich meatballs. Traditional accompaniments such as boiled potatoes or egg noodles enhance the dish’s presentation and create a fulfilling meal.

When it comes to temperature considerations, serve the meatballs warm right after cooking for the best flavor experience. Keeping food at the right temperature ensures everyone enjoys the dish as intended. For portion control, consider serving small portions to allow for variety and encourages guests to come back for seconds.

Wine and Beverage Pairing

For wine pairings, a light-bodied red like Pinot Noir complements the savory elements without overpowering the dish. If you prefer whites, a crisp Sauvignon Blanc can balance the creaminess of the sauce.

Non-alcoholic alternatives such as sparkling water with a slice of lemon or a fruity iced tea offer refreshing contrasts to the richness of Swedish meatballs. For those who enjoy coffee, a mild and well-balanced brew can enhance the overall dining experience.

When serving drinks, consider temperature—wine should be served chilled to enhance flavors, while hot beverages should always be brewed fresh.

Storage and Shelf Life

Leftover Swedish meatballs can be stored in an airtight container in the refrigerator for up to three days. Ensure they are cooled before refrigeration to maintain freshness.

For longer storage, freezing cooked meatballs is an excellent option. Place them in a freezer-safe container or bag, and they’ll keep for up to three months. When reheating, ensure to warm thoroughly to retain flavors and ensure safety.

Signs of spoilage include an off smell or changes in texture, so always check before consuming. Reheat in a skillet with a splash of broth to keep them moist and flavorful.

Make Ahead Strategies

Preparing Swedish meatballs ahead of time can save you precious moments during busy days. Start by mixing the meat mixture and refrigerating it overnight. This allows the flavors to meld beautifully.

Store shaped, uncooked meatballs in the fridge for up to a day or freeze them before cooking for future convenience. When ready to cook, simply thaw in the refrigerator overnight before pan-frying.

Reheating is equally easy; be sure to warm slowly in your sauce on low heat to retain moisture. Add fresh elements like herbs or a squirt of lemon just before serving to brighten flavors.

Scaling Instructions

Scaling your Swedish meatballs recipe can be done easily. For smaller gatherings, halve the recipe and serve as an intimate meal. Conversely, for larger crowds, simply double or even triple the ingredients while ensuring equal cooking times.

When adjusting, use larger or multiple pans to accommodate more meatballs at once. Keep an eye on the cooking time, as larger batches may require minor adjustments.

For storage, ensure containers are appropriately sized to avoid overcrowding, and label them with dates for your convenience.

Nutritional Deep Dive

A typical serving of Swedish meatballs is rich in protein due to the meat content, offering essential building blocks for muscle and overall health. The fat content mainly comes from the meat and cream, providing energy and flavor.

Micronutrients like iron and zinc are present due to the inclusion of quality meats, crucial for immune function and energy levels. For those conscious of dietary concerns, these can be adjusted by using lean meats or alternative grains.

Understanding portion analysis can aid in weight management; balancing servings with vegetables can help maintain a nutritious diet while enjoying this classic comfort food.

Dietary Adaptations

For gluten-free options, swap breadcrumbs with ground oats or gluten-free breadcrumbs, ensuring everyone can enjoy the dish without dietary restrictions.

A dairy-free alternative can be achieved by using coconut cream instead of heavy cream, allowing for a rich texture without the lactose.

For a heart-healthy twist, consider using lean turkey or chicken in place of beef and pork, providing a lower fat content while maintaining delicious flavors.

Keto adaptations involve keeping the carb content low by skipping traditional sides and using cauliflower mash instead of potatoes, satisfying cravings without straying from dietary preferences.

For vegan variations, consider using lentils or mushrooms as a base, creating a plant-based version that maintains the robust flavors beloved in traditional meatballs.

Troubleshooting Guide

If your meatballs turn out tough, avoid overmixing the ingredients; gently combine for the best texture. If flavor balance feels off, adjust seasoning after tasting, as under-seasoning can dampen the overall dish.

Temperature problems can occur if meatballs are cooked too fast on high heat. Lowering heat allows for even cooking without burning the exterior, ensuring everything is tender inside.

If you encounter ingredient challenges, remember simple substitutions can maintain taste, like replacing cream with broth or yogurt as needed. Timing issues can be resolved by testing doneness with an instant-read thermometer to ensure thorough cooking.

Recipe Success Stories

The community has shared numerous adaptations of this Swedish meatball recipe, showcasing the flexibility of flavors and personal touches. Many readers have pointed out their success in hosting dinner parties where this dish stole the spotlight.

Feedback has highlighted the ease of preparation and the widespread appeal of the flavors, with families praising its comfort and nostalgic value. Recipe adaptations have emerged, exploring different herbs and sauces, showing how these meatballs can be personalized.

Photography of the dish has also inspired home cooks to elevate their presentation, emphasizing garnishes and serving methods to create visually appealing meals that impress guests.

Frequently Asked Questions

Q1: Can I freeze Swedish meatballs?
Yes, Swedish meatballs can be frozen for up to three months. It’s best to freeze them after cooking for maximum flavor retention. Ensure they are in airtight containers to prevent freezer burn.

Q2: How do I reheat leftover meatballs?
Reheating is simple; warm the meatballs in the skillet with a bit of broth or water on low heat until heated through. Alternatively, use the microwave, but cover the dish to maintain moisture.

Q3: Can I make meatballs ahead of time?
Absolutely! Prepare the meatball mixture ahead of time and refrigerate, or shape the meatballs and freeze them for later cooking. They can be cooked from frozen or thawed overnight before use.

Q4: What can I serve with Swedish meatballs?
Popular sides include mashed potatoes, egg noodles, or roasted vegetables. For traditional Swedish flavor, lingonberry sauce is typically served alongside.

Q5: Are Swedish meatballs healthy?
When made with lean meats and lower-fat ingredients, Swedish meatballs can be a healthy option. Adjusting recipe components allows for controlling calorie and fat content while still enjoying delicious flavors.

Q6: How do I know when meatballs are cooked through?
Use a meat thermometer; meatballs should reach an internal temperature of 160°F (70°C). Cutting one open is also a good way to check for signs of doneness.

Q7: Can I use a slow cooker for this recipe?
Yes, slow cooking is an excellent method to develop flavors; simply sear the meatballs first and then place them in the slow cooker with the sauce to simmer.

Q8: How can I make this recipe gluten-free?
Substituting breadcrumbs with gluten-free alternatives or using oats can help maintain the texture and flavor without gluten.

Q9: What sauces pair well with Swedish meatballs?
While crème sauce is traditional, experimenting with BBQ sauce or a spicy mustard sauce brings variety to the table.

Q10: Can I use turkey instead of beef and pork?
Yes, turkey is a healthier alternative, making the meatballs lower in fat while still providing deliciousness. Adjust seasoning to compensate for the milder taste of turkey.

Additional Resources

Explore related recipes such as a classic mashed potato recipe or a delightful lingonberry sauce. Technique guides on meatball shaping and sauce-making can enhance your cooking skills while ingredient information on selecting the best meats can refine your culinary knowledge.

If you want to continue exploring Swedish cuisine, consider recipes for gravlax or Scandinavian potato pancakes that complement the flavors of Swedish meatballs. Seasonal variations and ingredient substitutions can also offer new perspectives on preparing this dish creatively.

Join the Conversation

We invite you to share your experiences making Swedish meatballs! Join us on social media to post your variations, photos, and tips. Your engagement fuels our community, inspiring others to explore culinary delights.

Don’t forget to leave a review or comment on this recipe to help others discover the joys of cooking Swedish meatballs. Share your best photography tips for capturing the magic of this beloved dish, and let’s celebrate together the art of home cooking.

The Recipe

Swedish Meatballs

Serves: 4 servings

Prep Time: 30 mins

Cook Time: 20 mins

Total Time: 50 mins

Kitchen Equipment Needed

  • Skillet
  • Mixing bowl
  • Measuring cups and spoons
  • Spatula

Ingredients

  • 1/2 lb ground beef
  • 1/2 lb ground pork
  • 1/2 cup breadcrumbs
  • 1/4 cup finely chopped onion
  • 1/4 cup heavy cream
  • 1 egg
  • 1 tsp allspice
  • 1 tsp nutmeg
  • Salt and pepper to taste
  • 2 tbsp vegetable oil for frying

Directions

  1. In a mixing bowl, combine ground beef, ground pork, breadcrumbs, chopped onion, heavy cream, egg, allspice, nutmeg, salt, and pepper.
  2. Mix gently until just combined, avoiding overmixing the meat.
  3. Shape the mixture into meatballs, about 1-inch in diameter.
  4. Heat vegetable oil in a skillet over medium heat. Sear the meatballs for about 2-3 minutes on each side until browned.
  5. Add remaining broth (if making sauce) and simmer for an additional 10 minutes until cooked through.
  6. Remove the meatballs from the skillet and add heavy cream to the pan juices, stirring to create a creamy sauce.
  7. Serve warm over mashed potatoes or noodles, drizzled with the sauce.

Recipe Notes

  • For extra flavor, mix in some fresh herbs like parsley or dill.
  • For lower fat, substitute heavy cream with Greek yogurt or low-fat milk.
  • These meatballs freeze well; just make sure to thaw them before reheating.

Vibrant Roasted Beet and Goat Cheese Log Recipe Delight

Vibrant Roasted Beet & Goat Cheese Log: A Colorful Culinary Delight

⚖️
Difficulty
Easy

⏲️
Prep Time
20 mins

🕒
Cook Time
40 mins

⏱️
Total Time
60 mins

🍽️
Servings
8 servings

Experience a burst of color and flavor with our Vibrant Roasted Beet & Goat Cheese Log. This eye-catching dish combines roasted beets and creamy goat cheese into an exquisite roll that’s perfect for entertaining or elevating your everyday meals. With its rich, earthy flavor from the beets and the tangy creaminess of goat cheese, this recipe is both visually stunning and deliciously satisfying.

The warm, roasted beets lend a tender texture that harmonizes beautifully with the smooth goat cheese, and each bite reveals a delightful medley of flavors. Whether served as an elegant appetizer or a sophisticated side dish, this roasted beet and goat cheese log is sure to impress. Let’s dive into this vibrant recipe and explore what makes it a must-try!

Quick Recipe Highlights

  • Flavor Profile: The sweetness of roasted beets perfectly complements the tanginess of goat cheese, creating a balance that tantalizes the taste buds.
  • Texture: The creamy interior contrasts with the soft and slightly crunchy exterior, providing an engaging mouthfeel that lingers.
  • Aroma: A warm, earthy aroma fills the kitchen, enhanced by the freshness of herbs and the richness of cheese.
  • Visual Appeal: The striking red and purple colors of the beets make this dish a feast for the eyes, ideal for festive occasions.
  • Skill Level Needed: This dish is beginner-friendly, making it accessible for cooks of all levels.
  • Special Equipment: A food processor or blender for smooth mixing, and parchment paper for rolling.

Recipe Overview

  • Difficulty Level: This recipe is classified as easy, allowing even novice cooks to create a stunning dish with minimal effort.
  • Category: It falls under appetizers, but can also serve as a unique side dish at any gathering.
  • Cuisine: Drawing from Mediterranean influences, this dish highlights the use of fresh, vibrant ingredients common in that region.
  • Cost: The ingredients are generally affordable, making this an economical option for entertaining.
  • Season: Best enjoyed in cooler months when beets are in season and roasted flavors are most comforting.
  • Occasion: Perfect for holidays, dinner parties, or as a showstopper at potlucks.

Why You’ll Love This Recipe

The Vibrant Roasted Beet & Goat Cheese Log offers a delightful blend of taste and texture that is hard to resist. With its gently roasted beets, the natural sweetness pairs beautifully with the tangy goat cheese, creating a perfect harmony of flavors. Each bite reveals layers of creamy richness and earthy goodness, making it a standout among appetizers. The contrast of the smooth filling against the soft exterior presents an engaging texture that excites the palate.

This recipe boasts remarkable convenience, requiring just a few straightforward steps to prepare. Simply roast the beets, blend the filling, and roll it all together—all while creating an impressive dish that requires minimal culinary skills. It’s a fantastic way to impress guests without spending hours in the kitchen. Serve this delightful log chilled, letting the flavors meld beautifully as it sets in the refrigerator.

The nutritional advantages of beets make this dish even more appealing. Beets are low in calories yet high in essential nutrients, including vitamins, minerals, and antioxidants. Goat cheese, being lower in fat compared to other cheeses, adds a creamy element while also contributing calcium and protein. Together, they create a dish that not only satisfies but also nourishes.

This recipe shines in a social setting, effortlessly elevating any gathering. Its stunning presentation encourages sharing and conversation around the table, bringing loved ones closer together over a delicious creation. As a visually impressive dish, it is bound to become the highlight of your next event, creating lasting memories.

Cost-effectiveness is also a key benefit. The ingredients are inexpensive, and a single roll provides ample servings, maintaining a budget-friendly approach to entertaining. With the seasonality of the beets, this dish is both accessible and environmentally conscious, making it a smart choice for the conscious cook.

Historical Background and Cultural Significance

The origin of beets can be traced back to ancient civilizations where they were cultivated for their leaves and roots. However, the vibrant root vegetables gained popularity across Europe with the Romans adopting them for culinary use. Over centuries, their distinct color and flavor made them a staple in many kitchens, ultimately leading to diverse regional dishes centered around beets.

In Mediterranean cultures, beets are celebrated not only for their nutritional qualities but also for their visual appeal. They often appear in salads, spreads, and appetizers, showcasing the harmony of colors and flavors that define many of these culinary traditions. The combination of beets and cheese has become a classic pairing, resonating through generations.

The evolution of the roasted beet and goat cheese log reflects contemporary culinary trends, where vibrant colors and health-conscious ingredients are paramount. This dish represents the modern movement that seeks to balance aesthetics with health, providing a wholesome eating experience without sacrificing taste.

Regional variations of this dish often include additional herbs, spices, or even nuts, showcasing local ingredients and preferences. Over time, it has adapted to various culinary approaches, embracing the creativity of individual cooks while staying true to its roots.

Ingredient Deep Dive

Beets: Beets have been revered since ancient times, praised for their rich flavor and vivid color. They are versatile and can be roasted, boiled, or pickled. Nutritionally, beets are excellent sources of vitamins A and C, folate, and potassium. When selecting beets, look for firm roots without soft spots or blemishes. Store them unwashed in the fridge for up to two weeks. If you’re in a pinch, you can swap them with cooked and canned beets, though fresh offers the best flavor.

Goat Cheese: Goat cheese is known for its unique flavor profile, which can range from tangy to creamy. This cheese is rich in probiotics and lower in fat compared to cow’s milk cheese, making it a healthy option. When selecting goat cheese, seek options that are fresh, stored in brine, to maintain moisture. It should be kept in the fridge for a few weeks. For substitutes, cream cheese or ricotta can work in a pinch, but adjust the seasoning accordingly to mimic the tangy flavor.

Common Mistakes to Avoid

  • Overcooking the Beets: Ensure to roast your beets just until fork-tender; overcooking can lead to a mushy texture that doesn’t hold up well in the log.
  • Underseasoning: Don’t forget to season your goat cheese mix well. A pinch of salt and herbs can elevate the flavors significantly.
  • Skipping the Chilling Time: Let the log chill properly in the fridge before slicing. This helps it to set and makes slicing much smoother.
  • Not Using Fresh Ingredients: Fresh herbs and cheese will provide the best flavor profile. Always opt for high-quality ingredients, especially the cheese.
  • Not Peeling the Beets: Make sure to peel the beets post-roasting; the skins can be tough and unappealing in the final dish.
  • Improper Rolling Technique: When rolling the log, be gentle and keep the shape tight to avoid cracks and prevent the filling from spilling out.
  • Using Too Much Filling: Fill the log just right; too much can cause it to burst during the rolling process.
  • Ignoring Texture: Pay attention to the goat cheese’s texture; it should be creamy yet stable enough to hold the structure when rolled.

Essential Techniques

Roasting Beets: Roasting brings out the natural sweetness of beets while caramelizing their sugars. Cut them into similar-sized pieces to ensure even cooking. Wrap them in foil and bake at 400°F until fork-tender. Keep an eye out for a slightly charred exterior as a cue of deliciousness.

Rolling Techniques: When forming the log, ensure to work quickly and with gentle pressure. Use parchment paper to assist in rolling, providing support and preventing sticking. A unified seal will help maintain the shape while chilling.

Pro Tips for Perfect Vibrant Roasted Beet & Goat Cheese Log

1. Choose the freshest beets for the best flavor; firm and vibrant-colored beets yield the most delicious results.

2. Experiment with flavor by adding herbs like thyme or dill to your goat cheese mixture for an aromatic twist.

3. For heat lovers, consider adding a pinch of red pepper flakes to the goat cheese for extra kick.

4. Garnish with nuts or seeds for added crunch and another layer of flavor.

5. Allow the log to sit at room temperature briefly before serving to enhance the flavors further.

6. Consider pairing this dish with homemade crackers for added texture and taste contrast.

7. Play with presentation by slicing the log at an angle for more aesthetic appeal.

8. Don’t rush the chilling step; the longer it sets, the more the flavors meld and improve.

Variations and Adaptations

For a regional twist, consider adding nuts such as walnuts or pecans, known for their crunchy texture, to complement the creamy goat cheese. Seasonal adaptations can include adding fresh herbs or subtle spices to highlight farm-fresh summer flavors. For those with dietary restrictions, sub out the goat cheese for a vegan cheese alternative, making it entirely plant-based.

Flavor variations are endless—think of incorporating sun-dried tomatoes or olives for a Mediterranean flair, or even a drizzle of balsamic glaze before serving. Texture modifications can be achieved by adding crispy fried onions for garnish or crunchy vegetables on the side. Presentation alternatives may include serving individual portions in small bowls or elegant bites on skewers for easy appetizer handling.

Serving and Presentation Guide

For plating, consider using elegant boards or slate platters to enhance visual appeal. Garnishing the log with fresh herbs or microgreens will not only brighten the presentation but also echo the flavors within the dish. Traditional accompaniments might include earthy whole-grain crackers or slices of baguette, encouraging guests to indulge. Modern suggestions could involve serving alongside assorted nuts or colorful vegetable sticks for a contemporary twist.

Temperature considerations are key; serve the log chilled or slightly at room temperature to bring out the flavors. For portion control, aim for even slices, allowing guests to savor the dish without overwhelming their appetite.

Wine and Beverage Pairing

For wine pairings, a crisp Sauvignon Blanc complements the earthy beets while cutting through the creaminess of the goat cheese. A light Pinot Noir can also forge a delightful harmony with the herbaceous notes. For non-alcoholic alternatives, sparkling water infused with lemon creates a refreshing balance, while a herbal iced tea provides a soothing complement.

Storage and Shelf Life

Store the beet and goat cheese log in an airtight container, keeping it in the fridge for up to a week. Ensure the container is sealed to maintain freshness. Look for signs of spoilage, such as an off odor or discoloration. If desired, freezing is possible, but for best quality, it’s advisable to consume it fresh or before the week is up. To reheat, let the log sit at room temperature before serving, or lightly warm to room temperature for enhanced flavors.

Make Ahead Strategies

This recipe shines as a make-ahead option! Prepare the log a day in advance, allowing flavors to meld beautifully overnight. Keep it stored properly in the fridge—this can save you precious time on the day of your gathering. To ensure optimal quality, avoid adding any garnishes until the log is ready to serve, allowing for freshness in textures and flavors.

Scaling Instructions

When scaling the recipe, halving or doubling can be easily managed by adjusting the beet and cheese quantities accordingly. For larger gatherings, triple the ingredients and consider using a taller log or a wider platter for a grand presentation. Keep an eye on roasting times that may vary with different batch sizes, and adjust ingredients proportionately for balanced flavors.

Nutritional Deep Dive

This dish is both filling and nutritious. Beets contribute low calories, high fiber, and essential minerals, making the log a guilt-free option. Goat cheese, while creamy, offers protein and calcium without excess fat, making it a smart choice for health-conscious eaters. When considering portion sizes, understanding the macro breakdown is beneficial for those monitoring their diets. This recipe is great for maintaining balanced meals while enjoying robust flavors.

Dietary Adaptations

This recipe can be easily modified to suit various diets. For a gluten-free version, serve with gluten-free crackers or vegetable sticks. Those with a dairy intolerance can swap out the goat cheese with cashew-based cream cheese alternatives. Vegan adjustments are also simple by using plant-based cheeses or nut spreads. For Keto enthusiasts, reducing the amount of beets and pairing with low-carb snacks maintains adherence while enjoying.

Troubleshooting Guide

If your log ends up too soft, consider adding more goat cheese or a stabilizing agent like gelatin to enhance firmness. For flavor balance, always taste as you mix, adjusting while incorporating your ingredients. Equipment challenges can arise, so ensure your processor or blender is powerful enough to achieve a smooth blend, preventing lumps in your filling.

Recipe Success Stories

Many home cooks have shared enthusiastic feedback about their experiences making this log. Suggestions often highlight variations like adding herbs or spices tailored to their taste. Photography tips shared by readers underscore how capturing the vibrant colors can allure guests even more—using natural light can elevate food photography quality and highlight the dish’s elegance.

Frequently Asked Questions

Can I prepare this in advance?

Absolutely! Prepare the log a day ahead to allow flavors to meld. Just ensure it’s properly stored in the refrigerator.

How long does this log last in the fridge?

Stored correctly, this dish can last up to a week in an airtight container.

Can I freeze it?

Yes, but forbest quality, it’s recommended to consume fresh. If freezing, ensure proper sealing to avoid freezer burn.

Are there any substitutes for goat cheese?

Cream cheese or vegan cheese alternatives can work well. Adjust seasonings to immerse the desired flavor.

What should I serve it with?

Serve with whole-grain crackers, crostini, or vegetables for a delightful snack combination.

Is this suitable for a vegan diet?

Yes, simply replace goat cheese with a plant-based cheese or nut spread to maintain the creamy texture without dairy.

Can I use canned beets instead of fresh?

While fresh is ideal for flavor, canned beets can be a convenient option if you’re short on time; just drain and rinse first.

What herbs pair well with this dish?

Thyme, dill, or even chives enhance the flavors beautifully and complement the cheese wonderfully.

How do I know when the beets are done roasting?

Beets are done when they can be easily pierced with a fork but are not falling apart.

Can I add nuts to the log?

Yes! Chopped nuts can add an extra crunch and flavor depth when mixed with the goat cheese.

What if I don’t have parchment paper?

You can use plastic wrap or simply roll the log by hand, although it requires a steadier approach.

Additional Resources

For more delicious offerings, consider exploring our other beet recipes, like Beet Hummus or Beet Salad. Check out our technique guides on roasting vegetables to achieve the best flavors. Explore our seasonal ingredient guide for incorporating fresh, local produce into your meals. Conscious cooking often means utilizing seasonal ingredients—make the most out of each season!

Join the Conversation

We encourage you to share your experiences and variations on this recipe! Post your beautiful photographs on social media with our hashtag and connect with other passionate cooks. Engage with our community by commenting on what worked best for you or suggesting additional ingredients you loved. Your feedback enriches our cooking community, inspiring others to try their hands at this delightful recipe!

The Recipe

Vibrant Roasted Beet & Goat Cheese Log

Serves: 8 servings

Prep Time: 20 mins

Cook Time: 40 mins

Total Time: 60 mins

Kitchen Equipment Needed

  • Food processor or blender
  • Parchment paper
  • Baking tray
  • Knife for slicing

Ingredients

  • 4 medium-sized beets
  • 8 oz goat cheese, softened
  • 2 tbsp fresh herbs (thyme, dill, or chives)
  • 1 tbsp olive oil
  • Salt and pepper to taste

Directions

  1. Preheat your oven to 400°F (200°C). Wrap each beet in aluminum foil and roast for about 40-50 minutes until tender.
  2. Let the beets cool, peel the skin, and chop them into small pieces.
  3. In a food processor, blend the roasted beets with goat cheese, olive oil, and herbs until creamy.
  4. Lay out parchment paper and place the beet mixture onto it. Form it into a log shape.
  5. Roll the parchment around the log tightly, securing the ends. Chill in the fridge for at least 1 hour.
  6. After chilling, remove from the parchment, slice, and serve with crackers or fresh vegetable sticks.

Recipe Notes

  • Feel free to mix in chopped nuts for added texture.
  • If serving for a special occasion, consider drizzling balsamic reduction on the log.

Wholesome Hearty Sausage and Veggie Stew Recipe for All

Hearty Sausage and Veggie Stew: A Comforting Meal for All Seasons

⚖️
Difficulty
Easy

⏲️
Prep Time
15 mins

🕒
Cook Time
45 mins

⏱️
Total Time
60 mins

🍽️
Servings
6 servings

Welcome to the heartwarming world of Hearty Sausage and Veggie Stew! This delightful stew is not just a meal; it’s a cozy hug in a bowl. Infused with rich flavors of savory sausage, vibrant vegetables, and aromatic herbs, each spoonful invites warmth and comfort. This recipe is perfect for chilly nights, providing both nourishment and satisfaction, making it ideal for family dinners or meal prepping for the week ahead.

Imagine yourself on a cold evening, returning home to the inviting aroma of a bubbling pot of stew. The scent of sautéed onions and garlic mingles with the robust essence of sausage, creating an irresistible invitation to gather around the dinner table. As you ladle the stew into bowls, the colorful medley of carrots, potatoes, and celery brings a visual feast that promises a delicious and hearty experience.

Quick Recipe Highlights

  • Flavor Profile: The combination of smoky sausage and earthy vegetables creates a balanced and satisfying dish that warms the soul.
  • Texture: The tender chunks of sausage combined with the soft but still slightly firm vegetables provide a hearty mouthfeel.
  • Aroma: Expect a blend of savory and herbal notes that will fill your kitchen and welcome everyone to the table.
  • Visual Appeal: Bright orange carrots and green celery against the golden broth make for a visually appetizing dish.
  • Skill Level Needed: Even novice cooks can tackle this recipe, thanks to simple techniques and accessible ingredients.
  • Special Equipment: A large pot or Dutch oven is recommended to hold all the ingredients as they simmer together.

Recipe Overview

  • Difficulty Level: The Hearty Sausage and Veggie Stew is categorized as easy due to its straightforward steps and forgiving nature.
  • Category: This dish falls under the stews category, perfect for comforting meals especially on cold nights.
  • Cuisine: This hearty stew is inspired by rustic European culinary traditions, celebrating the use of seasonal vegetables and meats.
  • Cost: With accessible ingredients, the total cost per serving remains budget-friendly, making it great for families on a budget.
  • Season: This stew shines in the fall and winter seasons, utilizing root vegetables and warm spices.
  • Occasion: Ideal for cozy family dinners, game nights, or gatherings with friends.

Why You’ll Love This Recipe

This Hearty Sausage and Veggie Stew brings an enticing flavor experience that’s sure to please any palate. The smoky sausage adds depth and richness, while the fresh vegetables contribute brightness and texture. Each bite is a harmonious blend of savory goodness that fills you up, inside and out.

This stew is incredibly convenient. Prep time is minimal, and once everything is in the pot, you can relax while it cooks. Meal prepping? This dish keeps well, making it perfect for lunches throughout the week or a quick dinner solution after a busy day.

Nutritionally, the colorful array of vegetables means you’re getting a variety of vitamins and minerals, along with protein from the sausage. This stew not only satisfies your hunger but also nourishes your body, making it a wholesome choice for family meals.

Whether you’re gathering with family or entertaining friends, serving a hearty stew creates a warm and inviting atmosphere. This dish invites everyone to share stories around the table, making it a centerpiece for connection and joy.

Cost-effectiveness is another reason to love this recipe. Using affordable ingredients, especially in the winter months when vegetables are in season, allows you to create a delicious meal without breaking the bank.

Historical Background and Cultural Significance

The hearty stew has a long and rich history, often associated with the peasant foods of Europe designed to be filling and nutritious. Originating from humble beginnings, recipes for stews have evolved over centuries, influenced by the regions they hail from and the ingredients available.

Culturally, stews are often seen as a communal dish, bringing families and friends together. Throughout history, sharing a stew was more than a meal; it was a tradition that fostered togetherness and warmth in communities.

Over time, this recipe has adapted to include a variety of ingredients depending on local preferences, showcasing the beauty of culinary evolution. From adding seasonal vegetables to incorporating diverse spices, each version carries the fingerprints of its origins.

Regional variations also exist, with countries like France, Italy, and Ireland boasting their unique takes on stew. Nonetheless, the core idea of a hearty, warming dish remains constant, symbolizing comfort in every culture.

Ingredient Deep Dive

Sausage: Sausage is a beloved ingredient across cultures, with origins dating back to ancient civilizations. It’s rich in protein and can be made from various meats, offering a hearty base for stews. When selecting sausage, look for quality products with minimal additives. Fresh sausage is best used immediately, while cooked varieties can be stored for longer periods. Consider swapping pork sausage for turkey or vegan options for lighter, healthier alternatives.

Vegetables: The vegetables in this stew—carrots, potatoes, and celery—are all staples in many households. They provide essential nutrients like fiber and vitamins. Fresh vegetables are ideal, but frozen can be a convenient and equally healthy option. Store fresh veggies in a cool, dark place and use them within a week for optimal freshness. Don’t hesitate to experiment with seasonal vegetables to give the stew a unique twist!

Common Mistakes to Avoid

  • Skipping the browning of the sausage can lead to a lack of depth in flavor. It’s crucial to caramelize the meat to develop its full essence.
  • Overcrowding the pot can steam the vegetables instead of sautéing them, resulting in a soggy texture instead of the desired crunch.
  • Not seasoning adequately at every stage can leave the stew lacking flavor. Adjust tasting as ingredients are combined.
  • Using old or wilted vegetables can diminish the quality of the dish, leading to undesired flavors. Always choose fresh produce.
  • Rushing the cooking process may not allow the flavors to meld properly. Give it the time it needs for a delightful outcome.
  • Neglecting to stir occasionally could cause the stew to stick to the bottom of the pot or scorch, altering the flavor.
  • Overcooking vegetables will lead to mushiness and loss of texture. Keep an eye on cooking times!
  • Forgetting to let the stew sit for a moment after cooking allows the flavors to improve with residual heat.

Essential Techniques

Browning the Sausage: This is vital for enhancing the flavor of the stew. Brown the sausage until it develops a rich, dark color. Avoid overcrowding the pan, which can cause steam instead of browning. Look for a nice crust on the meat before moving on to the next step.

Sautéing Vegetables: Beginning with onions and garlic builds a flavor base for the stew. Sauté until they are translucent and fragrant, which helps release the natural sweetness of the vegetables. Keep an eye on the heat to avoid burning.

Simmering: A low-and-slow simmer is essential for melding the flavors. Cover the pot to retain moisture while allowing the stew to develop a robust taste. Stir periodically, and try not to lift the lid too often, as this will release steam.

Tasting and Adjusting: As the stew cooks, periodically taste and adjust seasoning. This ensures balanced flavors and prevents it from being bland or overly salty. Trust your palate and make the stew your own!

Pro Tips for Perfect Hearty Sausage and Veggie Stew

1. Use a variety of colorful vegetables to elevate the nutritional value and visual appeal of the dish.

2. If time allows, let the stew cool completely before refrigerating. This helps flavors continue to develop even after cooking.

3. To enhance the herb profile, experiment with fresh herbs like thyme or rosemary right before serving.

4. Consider adding a splash of vinegar or lemon juice at the end to brighten the flavors.

5. For a richer broth, you can deglaze the pan with white wine after browning the sausage, scraping to release the tasty bits.

6. If you prefer a thicker stew, mash a portion of the vegetables against the pot’s side before serving to add creaminess.

7. Top with fresh parsley or grated cheese for a delightful finish.

8. Pair with crusty bread or a simple salad for a complete meal.

Variations and Adaptations

Regional variations such as adding beans or lentils can enhance the stew’s protein content and make it even heartier. Adjust the spices to regional preferences, such as paprika for a smoky Spanish flair.

Seasonal adaptations allow you to swap vegetables based on what’s fresh in your area. Winter root vegetables like parsnips can stand in for regular potatoes, while summer zucchinis can become a part of the mix when in season.

For dietary modifications, consider using vegan sausage or plant-based proteins to cater to vegetarian or vegan diets. This keeps the hearty essence while accommodating diverse preferences.

Flavor variations can also include introducing unique elements like curry powder for an Indian twist or adding some heat with crushed red pepper flakes.

For texture modifications, try blending a portion of the stew after cooking; this creates a creamy consistency while leaving some chunks for a satisfying mouthfeel.

Presentation alternatives might involve serving the stew in individual bread bowls or pairing it with artisanal cracker sides to elevate the dining experience.

Serving and Presentation Guide

Plating techniques can include serving the stew in large bowls with a sprinkle of fresh herbs on top to add color contrast. Consider using rustic bread bowls that complement the hearty feel of the dish.

Garnishing ideas like a dollop of sour cream or a drizzle of balsamic glaze can enhance both flavor and presentation. Pair the stew with crusty bread or freshly baked rolls to complete the meal.

Traditional accompaniments like a mixed greens salad or roasted vegetables can create a rounded dining experience, while modern serving suggestions include upscale touches like gourmet olive oil or truffle salt.

Temperature considerations are vital; this stew is best served piping hot. Keep it covered until ready to serve, and offer additional hot bread for eager guests.

Portion control tips can include serving smaller amounts initially to entice guests back for seconds. Consider pairing the stew with lighter sides to complement rather than overwhelm the dish.

Wine and Beverage Pairing

For wine pairings, a medium-bodied red such as Merlot or Zinfandel complements the flavors of the sausage beautifully. Look for wines with soft tannins that won’t overpower the dish.

Non-alcoholic alternatives like infused sparkling water or herbal teas serve as refreshing pairings that cleanse the palate without competing with the stew.

If applicable, coffee or tea could make an excellent after-dinner option to round off the meal. Consider serving a light, herbal tea to aid digestion post-stew.

Temperature considerations should include serving wine at proper temperatures; reds around 60-65°F to highlight their fruity flavors.

Finally, serving suggestions can extend to themed meals. Host a stew night and pair the dish with various wines to explore flavor profiles together.

Storage and Shelf Life

Storage methods include keeping the stew in an airtight container once it has cooled to room temperature. Properly stored, it can last in the refrigerator for up to three days.

Temperature requirements dictate reheating the stew gently on the stove or microwave, ensuring it’s warmed through completely. Stir occasionally to avoid hot spots.

Container recommendations should highlight using glass or BPA-free plastic to avoid contaminating flavors. Consider labeling containers with dates to monitor freshness.

Signs of spoilage include an off smell or unintended texture change, indicating that it’s best to discard the product.

For those interested in freezing guidelines, this stew freezes well. Divide into serving sizes and store for up to three months, ensuring to leave space for expansion.

Make Ahead Strategies

For a prep timeline, consider chopping vegetables a day before and storing them in the fridge to streamline cooking day preparations.

Storage between steps can include pre-cooking the sausage in advance to expedite the overall cooking process on the final day.

Quality impact assessment reveals that while you can make the stew ahead, allowing it to rest overnight enhances its flavors through melding.

Assembly tips involve preparing all ingredients in advance so you can simply combine everything when ready to cook.

Reheating guidelines suggest gently warming up the stew on low, avoiding high heat to prevent losing moisture or flavor.

Fresh element additions can be made just before serving, such as tossing in some fresh spinach or herbs to enhance freshness.

Scaling Instructions

Halving the recipe is straightforward; use smaller quantities of each ingredient while remaining consistent on cooking times and methods.

Doubling or tripling the recipe requires ensuring your pot is big enough to accommodate the increase in ingredients to prevent overflow.

Equipment adjustments could involve using larger stockpots or multiple pots to manage the increased volume appropriately.

Timing modifications may need to account for the larger batch, as cooking might take slightly longer to reach the desired depth of flavor.

Storage considerations entail using the extra stew within three days or freezing the leftovers in manageable portions for future meals.

Nutritional Deep Dive

The macro breakdown of this stew highlights a balanced mix of carbohydrates from the vegetables, protein from the sausage, and essential fats if using any oil in preparation.

Micronutrient analysis shows that the variety of vegetables not only adds vitamins but also provides essential fiber to the dish, promoting digestive health.

Health benefits include the stew working as a hearty source of nutrients, providing sustained energy and satisfaction while being nutrient-dense.

Dietary considerations should include attention to portion sizes and total caloric intake, particularly if served with bread.

Portion analysis can help ensure a balanced diet, making it easy to enjoy the stew in moderation alongside other healthy choices.

Weight management tips can include serving the stew with a side salad to enhance nutrition while minimizing calorie density.

Dietary Adaptations

For gluten-free options, ensure that all ingredients, including the sausage, are free from gluten. This can be done by choosing certified products.

Dairy-free adaptations might involve replacing any cream or dairy elements with coconut milk or a dairy-free alternative for creaminess.

Vegan adaptations replace sausage with plant-based proteins such as lentils, beans, or vegan sausage, maintaining heartiness without animal products.

Low-carb options can include omitting potatoes and using cauliflower as a replacement to keep the stew filling while reducing carbohydrate content.

Keto modifications would emphasize higher fat content through the use of more sausages and less vegetable bulk for lower carbs.

Paleo diets would allow for the same hearty ingredients while avoiding processed items like traditional sausages, opting for natural alternatives.

Low-FODMAP adaptations can be achieved by eliminating high-FODMAP vegetables like onions and substituting with green onions for flavor.

Other specific diets can find accommodations in this recipe through creative ingredient substitutions while keeping its warming, comforting essence.

Troubleshooting Guide

For texture issues, such as the stew being too watery, let it simmer uncovered for a while to reduce the liquid. This will thicken up the stew naturally.

If the flavor balance seems off, adding a splash of vinegar or a sprinkle of salt can help enhance the flavors and resolve blandness.

Temperature problems can arise if the stew boils instead of simmers, which can make it tough instead of tender. Adjust the heat accordingly.

Equipment challenges like using the wrong pot can lead to uneven cooking. A heavy-bottomed pot helps distribute heat evenly.

Ingredient substitutions can lead to unwanted flavors; test small adjustments before adding large quantities to avoid overpowering the stew.

Timing concerns can result in overcooked ingredients. Keep track of times carefully, especially for the vegetables that should retain some crunch.

Recipe Success Stories

Community feedback from those who have made this Hearty Sausage and Veggie Stew highlights its satisfying flavor and ease of preparation. Many share their variations and enhancements, making the recipe feel personal.

Variation successes often include readers mentioning how adding different spices offered new flavor profiles, keeping the dishes fresh and exciting each time.

Adaptation stories include families making it a weekly tradition, showcasing how a simple meal can cultivate togetherness among loved ones.

Photography tips suggest capturing the stew while steaming hot and garnished beautifully, allowing its vibrant colors to shine through.

Frequently Asked Questions

Can I make this stew in a slow cooker? Yes, you can; browning the sausage and vegetables first enhances flavor, but after that, you can transfer everything to the slow cooker for hours on low heat.

How do I store leftovers? Store leftovers in airtight containers in the fridge for up to three days, or freeze for longer storage. Thaw completely before reheating.

What can I use instead of sausage? You can use ground turkey, chicken sausage, or plant-based sausage for a lighter or vegetarian version while maintaining the stew’s heartiness.

Is this stew gluten-free? Yes, if you ensure that all components, especially any broth or seasoning, are gluten-free products.

Can I add more vegetables? Absolutely! Feel free to add any seasonal vegetables you enjoy; just be mindful of adjusting cooking times as needed.

Does this recipe require any special skills? No, this recipe is designed for cooks of all skill levels with straightforward steps and accessible techniques.

Can I prepare it ahead of time? Yes, you can make the stew ahead of time; it often tastes even better the next day as the flavors meld.

Can I add beans for extra protein? Yes, adding chickpeas or white beans can enhance protein levels and give the stew a nutritious boost.

What’s the best way to reheat the stew? Reheat slowly on the stove over low heat, stirring occasionally, until warmed through.

How spicy is this dish? The recipe is not inherently spicy, but you can add spices or hot sauce to suit your preference.

Additional Resources

For those interested in related recipes, consider exploring variations like a vegetable soup or chili for more comforting meals. Technique guides on sautéing and braising can further enhance your cooking skills.

Ingredient information about seasonal vegetables can inspire creativity in your cooking, leading to delightful, fresh variations of this stew.

Equipment recommendations include durable Dutch ovens or slow cookers, which are great for creating hearty meals consistently.

Seasonal variations can include summer vegetable stews or fall harvest recipes that highlight local produce during different times of the year.

Join the Conversation

Engaging with your audience through social media sharing can spread the love for your Hearty Sausage and Veggie Stew. Encourage readers to post their versions with unique hashtags.

Photography tips of finished dishes can also draw attention and garner interest from fellow food enthusiasts, building a community around your recipe.

Recipe reviews can enhance credibility, allowing new readers to feel comfortable trying your stew knowing others have enjoyed the experience.

Lastly, foster community engagement by sharing variations, inviting readers to share their suggestions on how they customize their stew experiences.

The Recipe

Hearty Sausage and Veggie Stew

Serves: 6 servings

Prep Time: 15 mins

Cook Time: 45 mins

Total Time: 60 mins

Kitchen Equipment Needed

  • Large pot or Dutch oven
  • Cutting board
  • Sharp knife
  • Wooden spoon
  • Measuring cups and spoons

Ingredients

  • 1 lb of sausage (Italian or your choice)
  • 2 cups carrots, chopped
  • 2 cups potatoes, diced
  • 2 cups celery, chopped
  • 1 onion, diced
  • 4 cloves garlic, minced
  • 4 cups chicken or vegetable broth
  • 1 tsp thyme
  • 1 tsp rosemary
  • Salt and black pepper to taste
  • Fresh parsley, for garnish

Directions

  1. In a large pot, brown the sausage over medium heat until fully cooked. Remove and set aside.
  2. In the same pot, sauté the onions and garlic until translucent.
  3. Add the chopped carrots, potatoes, and celery to the pot. Stir and cook for an additional 5 minutes.
  4. Pour in the broth, add the cooked sausage, thyme, and rosemary, and season with salt and pepper.
  5. Bring to a boil, then reduce to a simmer and cover. Cook for 30-35 minutes until vegetables are tender.
  6. Serve hot, garnished with fresh parsley.

Recipe Notes

  • Feel free to substitute the sausage with your preferred meat or plant-based alternative.
  • Add any seasonal vegetables you have on hand for extra nutrition and variety.
  • Leftovers can be stored in an airtight container in the fridge for up to 3 days.

Delicious Slow Cooker Mongolian Beef Recipe for Easy Dinner

Slow Cooker Mongolian Beef: A Tender and Savory Delight

⚖️
Difficulty
Easy

⏲️
Prep Time
15 mins

🕒
Cook Time
6 hours

⏱️
Total Time
6 hours 15 mins

🍽️
Servings
4

Mongolian Beef made in a slow cooker is the perfect comfort food that delivers a bold blend of flavors with minimal effort. This dish typically features tender beef simmered in a savory sauce that boasts an enticing mix of soy sauce, garlic, and ginger. The slow cooking process ensures that the beef becomes incredibly tender, allowing the flavors to meld beautifully over hours. Each bite is a delightful experience, filled with rich, savory notes that warm your soul and satisfy your cravings.

This Slow Cooker Mongolian Beef is more than just a meal; it’s a culinary journey that transports you to the heart of Asian cuisine. The sweet and savory sauce is balanced perfectly with the crispness of bell peppers, making it not only delicious but also visually appealing. Serve it over a bed of fluffy rice or alongside steamed vegetables, and you have a complete, mouth-watering dish that will impress anyone at your dinner table.

Quick Recipe Highlights

  • Flavor Profile: Expect a perfect balance of sweet and savory from the soy sauce and brown sugar.
  • Texture: The beef becomes beautifully tender, while the vegetables retain a slight crunch.
  • Aroma: A fragrant mix of garlic and ginger fills your kitchen as it cooks.
  • Visual Appeal: The vibrant colors of the bell peppers meld with the rich brown sauce make it a feast for the eyes.
  • Skill Level Needed: An easy recipe that requires only basic skills, perfect for beginner cooks.
  • Special Equipment: You will need a slow cooker to achieve the ultimate tenderness.

Recipe Overview

  • Difficulty Level: This Slow Cooker Mongolian Beef is easy to prepare, making it an ideal choice for busy weeknights.
  • Category: A fantastic main course that fits perfectly into any dinner setting.
  • Cuisine: It is inspired by traditional Mongolian flavors, with a wonderful Asian twist.
  • Cost: Ingredients are generally affordable, working well for budget-conscious meals.
  • Season: This recipe is perfect for any season, especially comforting in colder months.
  • Occasion: Ideal for family dinners, gatherings, or even meal prep for the week.

Why You’ll Love This Recipe

The taste and texture of this Slow Cooker Mongolian Beef are simply irresistible. The combination of tender beef and sweet-savory sauce creates a harmony that tantalizes the palate with each bite. The additional crunch from bell peppers adds an enjoyable contrast, making for a well-rounded dish that you’ll look forward to enjoying time and again.

Convenience and preparation benefits are key aspects of this recipe. With minimal active cooking time, you can throw everything into the slow cooker in the morning and come home to a delicious dinner ready to be served. It’s perfect for busy lifestyles, as it allows you to prepare a hearty meal without sacrificing quality or flavor.

Nutritionally, Mongolian Beef can be a balanced option. The beef provides protein, while the vegetables add vitamins and minerals, creating a dish that’s fulfilling and nutritious. It’s a great way to incorporate healthy elements into a rich, satisfying meal.

This recipe also shines when it comes to social gatherings. Preparing this Slow Cooker Mongolian Beef allows you to create delightful flavors that impress friends and family while giving you more time to spend with them rather than cooking. It’s a dish that sparks conversation and brings excitement to the dinner table.

Cost-effectiveness plays a significant role in making Slow Cooker Mongolian Beef an excellent choice for budget-conscious home cooks. Most of the ingredients are pantry staples and affordable, making it easy to whip up without breaking the bank. Plus, leftovers can be stored for future meals, further enhancing its value.

Historical Background and Cultural Significance

The origin of Mongolian Beef is steeped in myth and culinary adaptation, often attributing its roots to the flavors of Mongolia but influenced heavily by Chinese cuisine. Historically, the dish showcases how flavors from various cultures can blend together, continually evolving with each cook’s touch.

Culturally, Mongolian Beef highlights the rich traditions of communal dining, where friends and family gather to share meals and create connections. The dish embodies what it means to come together over shared flavors, making it a staple in many households.

Over time, the recipe has transformed, using various cuts of beef and incorporating different vegetables. Though the classic version excels with beef and bell peppers, modern interpretations may employ variations that cater to personal preferences, enhancing its widespread appeal.

Regional variations can be seen in many Asian countries where similar sauce profiles are used. In fact, these adaptations reinforce the dish’s versatility and showcase how one meal can bridge cultural divides through shared love for flavor.

Ingredient Deep Dive

Beef: In Mongolian cuisine, beef is the star ingredient. It provides a robust source of protein and is versatile in preparation. Opt for flank steak or sirloin for this recipe, ensuring tender results. Properly selecting your beef ensures it will absorb the flavors of the sauce well, making it even more enjoyable.

When purchasing, look for cuts that are bright red with minimal marbling. Store your beef in the refrigerator but ensure it’s cooked within a couple of days for optimal freshness. If storing it longer, consider freezing for up to six months to maintain its quality.

Soy Sauce: A fundamental component that enhances umami flavor in dishes. Soy sauce has a rich history in Asian cooking, providing depth to many recipes, including this one. It balances the sweetness of sugar and adds savory complexity to each bite of beef.

Choosing a high-quality, low-sodium soy sauce can significantly impact the dish’s overall flavor. Store soy sauce in a cool, dark place, and once opened, keep it refrigerated for longevity. Light soy sauce is a great substitute if you prefer a less intense flavor.

Common Mistakes to Avoid

  • Using tough cuts of beef: Selecting a cut with adequate marbling will yield better tenderness during cooking.
  • Overcooking the beef: Exceeding cooking time can lead to dry results; monitor time closely.
  • Skipping the searing step: Browning the beef adds flavor; don’t skip this crucial part.
  • Piling too much in the slow cooker: Overcrowding inhibits proper cooking; ensure contents are spread out.
  • Not tasting the sauce: Adjust seasoning according to your palate before serving.
  • Using expired ingredients: Freshness affects flavor; check usage dates.
  • Not letting it cool before storing: Allow to cool before refrigerating to maintain food safety.
  • Not serving with rice: This dish shines with a side of rice; don’t overlook it!

Essential Techniques

Searing the meat is vital for flavor development. It locks in juices and enhances the dish’s overall richness. To master this technique, ensure your pan is hot and don’t overcrowd it, allowing a good crust to develop.

Slow cooking is crucial for achieving tender beef. This method slowly breaks down tough fibers in the meat. Monitor the cooking time; using a timer helps to ensure the beef doesn’t overcook.

Pro Tips for Perfect Slow Cooker Mongolian Beef

1. For extra flavor, marinate the beef for a few hours before cooking. This enhances the sauce’s overall depth.

2. Add the vegetables halfway through the cooking process to preserve their texture and color.

3. Experiment with different beef cuts, such as ribeye or sirloin, to discover your favorite flavor.

4. For a spice kick, add a dash of red pepper flakes to elevate the flavor profile.

5. Include additional vegetables like broccoli or snap peas for a nutrient boost.

6. Garnish with green onions and sesame seeds for added texture and flavor.

7. Serve with jasmine rice or cauliflower rice for a twist on serving options.

8. Adjust sweet and salty components to your liking based on personal preference.

Variations and Adaptations

Regional variations often involve different cuts of beef for local preferences. For example, in some Asian cultures, you might find lamb or chicken used instead. This adaptability showcases the dish’s universal appeal.

Seasonal adaptations might include adding fresh vegetables that are in peak season, enhancing flavor and nutritional value. Incorporating ingredients like asparagus during spring can freshen the dish.

For dietary modifications, consider swapping traditional beef for plant-based proteins for a vegan version. Tofu is a fantastic substitute and absorbs flavors well.

Flavor variations can be explored by changing up the sauce ingredients. Adding a splash of rice vinegar or a hint of hoisin sauce can provide new layers of taste.

Texture modifications could include topping the finished dish with crispy fried onions or slices of toasted almonds to create an exciting crunch.

Presentation alternatives involve serving it in lettuce cups for an innovative, bite-sized meal that’s great for gatherings.

Serving and Presentation Guide

When plating Slow Cooker Mongolian Beef, serve over a bed of fluffy steamed rice. A bowl with contrasting colors enhances visual appeal. Consider using a large serving dish for family-style meals.

Add vibrant garnishes like sliced green onions or sesame seeds to add color and flavor. Pairing it with contrasting-colored vegetables not only enhances appeal but also boosts nutritional content.

Traditional accompaniments include pickled vegetables or a simple salad with a light dressing, which balances the richness of the beef. For modern serving suggestions, consider offering it in taco-style wraps.

Temperature considerations are also important: ensure the dish is served warm, promoting an enjoyable dining experience.

Portion control tips recommend serving smaller plates to help guests manage their servings and encourage them to savor each bite.

Wine and Beverage Pairing

When pairing wine with Slow Cooker Mongolian Beef, consider a fruity red wine like a Pinot Noir or Zinfandel that complements the sweet-savory notes.

For non-alcoholic alternatives, a refreshing iced tea or a fruity mocktail pairs nicely, balancing the dish’s richness.

If coffee or tea is more your style, opt for a fragrant herbal tea that enhances the overall meal experience.

Temperature-wise, serve red wines slightly chilled, around 60°F, to keep them refreshing alongside warm dishes.

Always factor in serving suggestions; equipping your table with a selection of beverages ensures everyone finds an option they enjoy.

Storage and Shelf Life

When storing your Slow Cooker Mongolian Beef, transfer leftovers to an airtight container for optimal freshness. It can last in the fridge for 3-4 days when stored correctly.

Ensure to keep it at a proper temperature, ideally below 40°F to prevent spoilage. Signs of spoilage include off-odors or noticeable changes in color or texture.

Reheating instructions suggest gently warming the dish on the stove over low heat or in a microwave until it reaches 165°F to ensure food safety.

Freezing guidelines dictate that you can freeze leftovers for up to three months. Store them in freezer-safe containers, ensuring that you leave some space for expansion.

Make Ahead Strategies

For make-ahead strategies, prepare the sauce a day in advance, allowing flavors to blend perfectly before cooking. It can save time on busy days while enhancing taste.

Storage between steps involves prepping and cutting the vegetables per your recipe and storing them in the fridge until ready to use.

Assess quality impact by noting that some flavors may mellow when made ahead, which could work in your favor for a richer dish.

Assembly tips recommend layering the ingredients in your slow cooker in the order listed to maximize flavor infusion.

Reheating guidelines allow for quick setups; simply warm it back up before serving or enjoy it cold in salads!

Think about fresh element additions, like herbs or fresh vegetables, just before serving to provide a vibrant taste contrast and appeal.

Scaling Instructions

For halving the recipe, maintain the same cooking time, but keep an eye on texture and flavors for adjustments as needed.

Doubling or tripling requires larger equipment, such as a bigger slow cooker, to ensure everything cooks evenly.

Equipment adjustments may also involve cooking in batches if a larger slow cooker isn’t available, which can affect overall prep time.

Timing modifications should account for the increase in volume; larger batches may need a bit more time to reach tender perfection.

Lastly, consider storage considerations—ensure you have adequate containers on hand to preserve the freshness of leftovers.

Nutritional Deep Dive

A macro breakdown reveals that this Slow Cooker Mongolian Beef is an excellent source of protein due to the beef, while other ingredients add essential carbs and fats.

Micronutrient analysis shows that including vegetables enhances the vitamin and mineral content of every serving, contributing to a well-rounded meal.

Health benefits may include the protein-packed nature of the dish, perfect for maintaining energy levels throughout the day.

For dietary considerations, being mindful of sodium levels in soy sauce can help, especially with blood pressure management.

Portion analysis is crucial; serving sizes should generally be around one cup to maintain a balanced meal.

Weight management tips can suggest combining this dish with a side of vegetables to enhance fullness without overloading calories.

Dietary Adaptations

This Slow Cooker Mongolian Beef can easily be made gluten-free by opting for tamari sauce instead of soy sauce, making it suitable for gluten-sensitive diners.

Dairy-free is an inherent aspect of this dish, ensuring accessibility for those with lactose intolerance.

For a vegan version, replace beef with firm tofu or seitan, maintaining the savory sauce to keep the essence of the dish.

Low-carb options can involve serving with cauliflower rice instead of regular rice, perfect for keto or low-carb diets.

The paleo adaptation would also work, simply by avoiding soy sauce and choosing coconut aminos for a similar flavor profile.

Low-FODMAP adjustments suggest avoiding onion in the sauce or simply using green onion tops for a similar flavor without the digestive distress.

For those on other specific diets, keep in mind the balance of macronutrients, adjusting the ratios according to dietary needs.

Troubleshooting Guide

Texture issues often arise from overcooked beef, leading to dryness. To remedy, allow it to cook only until tender, checking for doneness periodically.

Flavor balance might be off if the dish is too salty or sweet. Adjusting soy sauce and sugar levels can help achieve the ideal taste.

Temperature problems can stem from inconsistent slow cooker settings. Using a thermometer ensures the dish reaches safe cooking temperatures.

Equipment challenges may occur if you lack the required slow cooker. In that case, consider using an oven-safe pot with a lid to mimic slow-cooking methods.

For ingredient substitutions, recognize that omitting key components could alter the flavor significantly, so make wise replacements.

Timing concerns should be addressed proactively by checking the cook time early on to ensure the dish comes together nicely without losing quality.

Recipe Success Stories

Community feedback on this dish has been overwhelmingly positive, with many finding it’s now a household favorite. Home cooks have shared how simple it is to prepare, yet the flavors impress guests.

Variation successes often highlight how experimented substitutions, like using chicken, yield equally delicious results, showcasing the adaptability of the recipe.

Adaptation stories abound, with many readers introducing their twists, such as additional spices or regional flavors, to make it their own.

Photography tips shared amongst our community showcase the beauty of the dish, often featuring vibrant garnishes like green onions that add visual appeal to the plated meals.

Frequently Asked Questions

Can I use chicken instead of beef?

Yes, both chicken thighs or breast can be used in place of beef! Just adjust the cooking time since chicken tends to cook faster.

How can I thicken the sauce?

If you prefer a thicker sauce, consider dissolving a tablespoon of cornstarch in cold water and adding it to the slow cooker for the last 30 minutes.

Can I cook this on high instead of low?

Cooking on high is possible; reduce the cooking time to about 3 hours, but keep an eye on it to avoid overcooking.

What should I serve it with?

This dish pairs beautifully with jasmine rice, steamed vegetables, or even cauliflower rice for a low-carb option.

Can I freeze leftovers?

Absolutely! Just store them in an airtight container and freeze for up to 3 months. Thaw in the fridge before reheating.

What if I don’t have a slow cooker?

You can make it on the stovetop by simmering over low heat in a Dutch oven or heavy pot, adjusting cooking times as needed.

How do I adapt this recipe for a low-sodium diet?

Use low-sodium soy sauce or tamari, and limit the amount of sugar added to help control sodium content in this dish.

Is this recipe spicy?

This dish is not spicy at all, but you can add red pepper flakes or Sriracha if you’d like a bit of heat!

Can I prepare this the night before?

Yes, you can prep all ingredients in advance and keep them in the fridge until it’s time to start cooking the next day.

How long should I cook the beef for maximum tenderness?

Cooking on low for 6-8 hours ensures the beef becomes tender and flavorful; check for doneness as slow cookers can vary.

Additional Resources

For more delightful recipes, check out our section on Asian-inspired dishes that highlight similar flavors and techniques. Additionally, our technique guides promote perfecting skills used in this Mongolian Beef recipe.

Explore ingredient information about soy sauce and its alternatives, ensuring you are well-equipped to personalize your dishes. Equipment recommendations for slow cooking are also available for those just starting out.

Don’t forget seasonal variations! Adjust your recipes based on fresh ingredients to keep your cooking exciting and inspired all year round.

Join the Conversation

We invite you to share your experiences with this Slow Cooker Mongolian Beef on social media! Your photography and feedback can inspire others to bring this delicious dish into their kitchens.

Leave reviews and comments below, sharing your unique twists or tips to help fellow cooks in their journey. We love hearing from our community and welcome any adaptations you’ve made to suit your tastes.

Participate in cooking challenges or themed nights to keep the creative juices flowing in the kitchen, showcasing your Mongolian Beef alongside your personal favorites!

The Recipe

Slow Cooker Mongolian Beef

Serves: 4

Prep Time: 15 mins

Cook Time: 6 hours

Total Time: 6 hours 15 mins

Kitchen Equipment Needed

  • Slow Cooker
  • Skillet (for searing)
  • Cutting board
  • Knife
  • Measuring cups and spoons

Ingredients

  • 1.5 lbs flank steak, sliced thinly
  • 1/2 cup soy sauce
  • 1/2 cup brown sugar
  • 1 tablespoon minced garlic
  • 1 tablespoon minced ginger
  • 1/2 cup beef broth
  • 1/2 teaspoon black pepper
  • 1 bell pepper, sliced
  • 2 green onions, sliced (for garnish)

Directions

  1. In a skillet, sear the sliced beef over medium-high heat until browned. Transfer to the slow cooker.
  2. In the same skillet, combine soy sauce, brown sugar, garlic, ginger, beef broth, and black pepper, stirring until sugar dissolves.
  3. Pour sauce over the seared beef in the slow cooker.
  4. Cook on low for 6 hours, then add bell pepper during the last 30 minutes of cooking.
  5. Serve over rice, garnished with green onions.

Recipe Notes

  • For extra flavor, consider marinating the beef overnight.
  • Feel free to substitute with different vegetables based on seasonal availability.
  • Store leftovers in an airtight container for up to 4 days in the refrigerator.
  • Thicken the sauce by adding cornstarch mixed in cold water during the last cooking hour.

Delicious Honey-Glazed Roasted Brussels Sprouts with Bacon Recipe

Delicious Honey-Glazed Roasted Brussels Sprouts with Bacon: A Perfect Side Dish!

⚖️
Difficulty
Easy

⏲️
Prep Time
10 mins

🕒
Cook Time
30 mins

⏱️
Total Time
40 mins

🍽️
Servings
4 servings

Indulge your taste buds with this delightful Honey-Glazed Roasted Brussels Sprouts with Bacon recipe! This dish is not only a feast for the eyes but also offers an irresistible flavor combination that will leave you craving more. The natural sweetness of honey beautifully complements the savory richness of crispy bacon, creating a perfect balance that enhances the earthy goodness of roasted Brussels sprouts. Whether you’re in need of a standout side for a holiday meal or simply a tasty addition to your weeknight dinner, these Brussels sprouts will surely impress.

Roasting Brussels sprouts caramelizes their natural sugars, intensifying their flavors, while the addition of honey and bacon elevates them to gourmet status. The crispy bits of bacon add a wonderful texture that contrasts perfectly with the tender sprouts, ensuring every bite is filled with savory satisfaction. Get ready to bring this delicious dish to your table; your guests and family will hit the repeat button, asking for seconds!

Quick Recipe Highlights

  • Flavor Profile: This dish bursts with a harmonious blend of sweet, savory, and slightly smoky flavors. The honey glaze adds a delightful touch of sweetness, while the crispy bacon provides a satisfying umami richness.
  • Texture: Experience a delightful contrast of textures; the outer leaves of the Brussels sprouts become beautifully crispy, while the insides remain tender. The bacon adds an additional layer of crispiness that complements the dish perfectly.
  • Aroma: As this dish roasts, your kitchen will fill with an enticing aroma of caramelized Brussels sprouts mingled with the rich scent of crispy bacon. The sweetness of honey melts into a heavenly fragrance.
  • Visual Appeal: The dish showcases vibrant, green Brussels sprouts highlighted by golden, crispy bacon bits, finished with a glossy honey glaze that makes it visually striking.
  • Skill Level Needed: This recipe is straightforward and perfect for cooks of all skill levels. Minimal preparation and simple techniques lead to an impressive outcome.
  • Special Equipment: You will need a baking sheet for roasting and a mixing bowl for combining ingredients, making it accessible for any home cook.

Recipe Overview

  • Difficulty Level: This recipe is categorized as easy, making it ideal for beginners who are learning to roast vegetables and understand flavor combinations.
  • Category: This dish falls under side dishes, suitable for various meals, including family dinners, holiday feasts, or potlucks.
  • Cuisine: Rooted in American cuisine, this recipe showcases the vibrant seasonal produce typical of autumn and winter while incorporating universal flavors of bacon and honey.
  • Cost: The ingredients for this recipe are relatively inexpensive, often totaling around $10-15, depending on your local prices for bacon and fresh Brussels sprouts.
  • Season: This dish is particularly appealing in the fall and winter seasons when Brussels sprouts are at their peak freshness, ensuring the best flavor and texture.
  • Occasion: Perfect for holiday gatherings, family meals, or even a weeknight dinner that needs a touch of elegance.

Why You’ll Love This Recipe

The taste and texture appeal of Honey-Glazed Roasted Brussels Sprouts with Bacon cannot be overstated. The combination of tender, caramelized Brussels sprouts with crispy bacon creates a mouthwatering experience. Each bite envelops your palate in contrasting textures that make every mouthful exciting. The sweetness from the honey glaze amplifies the natural flavors, ensuring this side dish is anything but ordinary.

In terms of convenience and preparation benefits, this recipe is quick and straightforward. With just a handful of ingredients and minimal prep work, you can whip up this stunning dish in under an hour. It’s an excellent option for busy weeknights when you want to serve something healthy and delicious without spending hours in the kitchen.

The nutritional advantages of Brussels sprouts are well-documented, being a powerhouse of vitamins, minerals, and antioxidants. They are low in calories yet high in fiber, which is a bonus for those looking to maintain a balanced diet. When combined with bacon, the dish not only satisfies your cravings but also nourishes your body, providing a good source of protein.

Socially, this dish serves as a fantastic conversation starter at any gathering. People love to share their favorite ways to prepare Brussels sprouts or discuss different culinary twists on this classic vegetable. It’s a fun way to connect with others over good food while catering to varying tastes.

Cost-effectiveness and accessibility make this recipe a winner. With ingredients that are easy to find and often on sale during the winter months, you can create a gourmet signature side without breaking the bank. It’s a dish that not only pleases your taste buds but also your wallet.

Historical Background and Cultural Significance

Brussels sprouts originated in ancient Rome but gained significant popularity in Belgium during the 16th century. Interestingly, these tiny cabbages were cultivated in the regions of Belgium that are now known for their rich culinary traditions. Their history paints a picture of a vegetable once thought to be a simple peasant food but transformed into a gourmet side during modern times.

In terms of cultural importance, Brussels sprouts are often associated with holiday meals across numerous cultures. They are a staple in many kitchens during Thanksgiving and Christmas dinners, symbolizing comfort and warmth. This recipe’s addition of honey and bacon represents a modern twist that speaks to the fusion of flavors and the evolution of traditional dishes.

The evolution of the recipe itself showcases how home cooks modify classic dishes to fit contemporary palates. The combination of honey, a sweet note not traditionally paired with Brussels sprouts, reflects the culinary innovation seen in today’s food landscape. Many now take pride in incorporating these kinds of creative twists into age-old recipes.

Regional variations also exist, where different countries adapt Brussels sprouts based on available ingredients and cultural preferences. For instance, in the UK, Brussels sprouts are often boiled, while in the US, roasting has made them a favorite due to the enhanced flavors that come from caramelization.

Ingredient Deep Dive

Brussels Sprouts: Brussels sprouts belong to the Brassica family and are known for their high nutritional value. They are rich in Vitamins K and C, fiber, and essential minerals, making them an excellent addition to a healthy diet. When selecting Brussels sprouts, look for firm, dark green heads, avoiding those that appear yellow or wilted. Store them in a cool, dry place, and keep them unwashed until you’re ready to use them.

Bacon: Bacon is beloved worldwide for its savory flavor and versatility. This ingredient brings a unique smokiness to the dish that complements the sweetness of honey. The key to selecting quality bacon is to choose thick-cut options for better texture when cooked. Store uncooked bacon in the refrigerator, and it can last for several weeks if properly sealed.

Honey: Honey is a natural sweetener known for its health benefits, including antioxidants and anti-inflammatory properties. It enhances the dish’s flavor profile, bringing a lovely glaze to the Brussels sprouts. Opt for raw or local honey for the best quality. Store honey in a cool, dry place, and it has a long shelf life.

Olive Oil: This heart-healthy fat is essential in enhancing the flavors while promoting crispiness during roasting. When selecting olive oil, extra virgin is typically the best choice for its added nutrients and superior flavor profile. Store olive oil in a dark, cool space, away from heat and light.

Common Mistakes to Avoid

  • Overcrowding the baking sheet can lead to uneven cooking. Ensure there is adequate space around each Brussels sprout to allow for proper roasting.
  • Not drying the Brussels sprouts before roasting can prevent them from crisping up. Pat them dry thoroughly after washing.
  • Skipping the preheating of the oven can change the cooking dynamics. Always preheat for optimal roasting results.
  • Using too much honey can overpower the dish’s flavors. Stick to the recommended amount to maintain balance.
  • Neglecting to season adequately can lead to bland sprouts. Don’t forget to add salt and pepper before roasting.
  • Using low-quality bacon can result in a dish that lacks flavor. Invest in good quality for the best results.
  • Not checking for doneness can leave sprouts undercooked. Aim for a nice golden-brown color and tender texture.
  • Opening the oven too often can interrupt the cooking process. Only open it when necessary to monitor the cooking.
  • Not letting the cooked dish rest before serving can affect the texture. Allow a few minutes for it to settle for the best experience.
  • Overcooking the bacon can lead to undesirable texture. Keep an eye on the bacon for optimal crispiness without burning.

Essential Techniques

Roasting vegetables is a critical technique that enhances flavor through caramelization. This method allows natural sugars to develop, giving Brussels sprouts a delicious brown crust while retaining moisture inside. To master roasting, slice the vegetables uniformly so they cook evenly, and ensure there’s enough space on the baking tray.

Preparing bacon properly also requires attention. For an even crisp, lay bacon strips flat on the sheet and cook them in a single layer. Monitor the bacon closely to prevent burning, as cooking times can vary depending on thickness.

Pro Tips for Perfect Honey-Glazed Roasted Brussels Sprouts with Bacon

Use fresh Brussels sprouts for the best taste and texture; they will be sweeter and less bitter than older, dried-out sprouts.

Ensure to cut larger Bruxelles in half to promote even cooking and enhance their caramelization.

Mix the honey with a bit of lemon juice to add an acidic contrast that brightens the sweet flavor.

Consider adding chopped nuts (like pecans or walnuts) for an extra crunchy texture that complements the dish.

Garnish with fresh herbs such as thyme or parsley to add a fresh, aromatic touch just before serving.

If you’re feeling adventurous, drizzle with balsamic vinegar after roasting for an additional layer of flavor.

Variations and Adaptations

For a more spicy kick, consider adding red pepper flakes to the honey mixture. This will create a sweet and spicy contrast that elevates the dish.

If you want to add a seasonal flair, try incorporating chopped apples or pears into the mix. Their sweetness complements honey and creates a delightful texture.

For those seeking a dietary modification, you can skip bacon altogether and utilize smoked paprika to create a similar flavor profile vegan-friendly.

You might also change the honey to maple syrup for a different kind of sweetness that pairs beautifully with Brussels sprouts.

Try using different types of nuts, such as almonds or hazelnuts, if you want to add another layer of flavor and crunch to your dish.

Finally, try experimenting with different glazes, such as a mustard glaze, for a tangy and fulfilling experience.

Serving and Presentation Guide

Plating is essential to making your dish visually appealing. Arrange the Brussels sprouts nicely on a large platter and sprinkle crispy bacon bits on top for emphasis.

Consider using garnishes such as freshly chopped parsley or a sprinkle of toasted nuts for a visually dynamic presentation.

Pair your honey-glazed Brussels sprouts with a complementary side, like mashed potatoes or a grain salad, to create a complete meal.

Serve at the ideal temperature, as Brussels sprouts are best enjoyed warm, where their flavors are most vibrant.

For portion control, consider using small bowls or cups, especially if serving at a buffet-style dinner or party.

Don’t hesitate to use colorful serving dishes that enhance the visual appeal of the green Brussels sprouts and crispy bacon.

Wine and Beverage Pairing

When it comes to wine pairings, a light-bodied white wine like Sauvignon Blanc complements the dish beautifully, enhancing the natural flavors of the Brussels sprouts.

For those preferring red, a Pinot Noir offers a nice contrast with its fruitiness and light tannins that won’t overpower the dish.

If you’re looking for a non-alcoholic alternative, crisp apple cider serves as a refreshing choice that echoes the sweetness of honey.

For coffee lovers, a light roast with notes of citrus can be an excellent way to elevate the meal, warming your palate after savoring the dish.

Always remember to serve your wine chilled or at optimal room temperature, allowing the complex flavors to shine.

Storage and Shelf Life

Once cooled, store leftover Honey-Glazed Roasted Brussels Sprouts with Bacon in an airtight container in the refrigerator for up to 3 days.

If you need longer storage, consider freezing the dish. Spread the cold Brussels sprouts and bacon on a baking sheet to flash freeze and then transfer to a freezer-safe container for up to 2 months.

To maintain texture, reheat by roasting in the oven rather than using a microwave, which can lead to a soggy result.

Always check for signs of spoilage when reheating leftovers, such as off odors, as a good practice to ensure food safety.

When reheating from frozen, allow them to thaw in the refrigerator overnight for better results, then reheat in the oven at 350°F (175°C) for 20-25 minutes.

Make Ahead Strategies

For busy occasions, you can prepare Honey-Glazed Roasted Brussels Sprouts by cleaning and trimming the sprouts the night before. Store them in water to keep them fresh until cooking.

Mix your honey glaze ahead of time and store it in the refrigerator, giving the flavors more time to meld and intensify.

Bacon can also be cooked in advance and reheated just before serving. This allows you to cut down on prep time on the day of the event without compromising flavor.

Consider assembling the Brussels sprouts and bacon on the baking sheet the night before, but remember to allow for some time for them to come to room temperature before roasting.

Avoid mixing the glaze in until you’re ready to cook to prevent the sprouts from getting soggy.

Scaling Instructions

If you want to halve the recipe, use half the number of Brussels sprouts and bacon, ensuring to adjust the honey and olive oil accordingly. The cook time will remain similar.

To double or triple the recipe, use multiple baking sheets, ensuring not to overcrowd for even roasting. Adjust cooking time if necessary, monitoring for doneness.

For larger quantities, consider using larger mixing bowls for combining ingredients and simplify the distribution onto baking sheets.

Re-check cooking times, as roasted Brussels sprouts may need a little extra time in the oven depending on the batch size and oven characteristics.

Store any leftovers based on the scaled recipe portions to avoid waste and enjoy delicious meals later.

Nutritional Deep Dive

This recipe is not only tasty but nutritious! Each serving of Honey-Glazed Roasted Brussels Sprouts with Bacon typically includes around 200 calories, highlighting the importance of portion control for managing caloric intake.

Brussels sprouts provide an excellent source of fiber and vitamins. One serving can offer nearly 50% of the daily recommended intake for Vitamin K and C, contributing to overall health and wellness.

Additionally, bacon adds protein to the dish while also being a source of fats, emphasizing moderation for those watching their dietary fat intake.

The combination of vegetables and protein makes this dish balanced, offering essential nutrients while satisfying cravings. Size servings carefully to manage both caloric intake and nutritional balance.

Lastly, enjoy the benefits of healthy fats from olive oil used in the recipe, which can contribute to heart health when consumed in moderation.

Dietary Adaptations

To adapt this recipe for gluten-free diets, simply ensure that any added seasonings, oils or sauces are certified gluten-free. The essential ingredients are gluten-free by nature.

For a dairy-free version, this dish already is free of dairy products, making it suitable for those with lactose intolerance.

If you want a vegan alternative, omit the bacon and consider using a smoked tofu or tempeh substitute for protein, enhancing the flavor with liquid smoke or smoked paprika.

Low-carb adaptations are straightforward. Since Brussels sprouts are naturally low in carbohydrates, this dish fits perfectly within a low-carb lifestyle.

If you follow a ketogenic diet, simply adjust portions and ensure that any added sweeteners like honey are used sparingly to keep net carbs low.

Paleo adherents can also enjoy this dish as is, just be mindful of honey intake and ensure quality ingredients are used for all components.

Troubleshooting Guide

Texture issues may arise if Brussels sprouts are not cooked enough. Ensure they are fork-tender and caramelized before serving; use the oven temperature as a guide for cooking time.

For flavor balance, if the dish seems too sweet, add a pinch more salt before serving. This can help even out sweetness from honey and enhance overall taste depth.

Temperature problems can occur if the oven is set too low. A high-temperature roast is crucial for generating the crispy texture characteristic of this recipe.

If using non-fresh Brussels sprouts yields a disappointing texture, remember to choose firm sprouts and ensure pottering time is not too long.

If ingredient substitutions are necessary, always test for flavor compatibility. Replacing honey with a different sweetener can create unanticipated results.

Timing concerns may arise during busy meals. Prepare Brussels sprouts and bacon ahead of time to simplify cooking during the main festivities.

Recipe Success Stories

Community feedback has been overwhelmingly positive for Honey-Glazed Roasted Brussels Sprouts with Bacon. Many readers rave about the simplicity and deliciousness of the recipe, making it a favorite for family gatherings.

Informal gatherings often see readers tweaked the original dish, incorporating personal touches like garlic or adding nuts for extra crunch, which were well-received.

Adaptation stories often involve adjustments made for dietary preferences, with readers sharing success in creating vegan or low-carb variations, proving the recipe’s versatility for all diets.

Photography tips frequently highlight the vibrant colors; readers recommend using natural light to catch the glistening honey glaze for social media sharing.

The recipe’s flexibility allows for continuous exploration, encouraging readers to personalize and innovate based on their tastes, leading to a rich tapestry of culinary creativity.

Frequently Asked Questions

Can I use frozen Brussels sprouts for this recipe?
Yes, frozen Brussels sprouts can be used, but fresh ones yield the best flavor and texture. If using frozen, be sure to thaw and pat dry before roasting.

How do I store leftovers?
Store any leftovers in an airtight container in the refrigerator for up to 3 days or freeze for longer storage.

What can I add for extra toppings?
Consider toppings such as roasted nuts, freshly grated cheese, or herbs to enhance the dish further.

Can I make this dish ahead of time?
Yes, you can prep the Brussels sprouts and glaze ahead and roast them just before you’re ready to serve.

What are other cooking methods besides roasting?
You can sauté, steam, or grill Brussels sprouts, though roasting provides the most flavor through caramelization.

How can I adjust the sweetness level?
You can reduce the honey to suit your taste or replace it with a less sweet option, like balsamic glaze, to balance the flavors.

Is it possible to grill these Brussels sprouts?
Absolutely! Use a grill basket for even cooking, but keep a close eye to avoid burning.

What type of bacon is best for this recipe?
Thick-cut bacon is preferred for its texture and flavor; however, any bacon of your choice will work well.

Can I substitute honey with another sweetener?
Yes, maple syrup or agave can be used as alternatives, though they will slightly alter the flavor profile of the dish.

Are there gluten-free options for the glaze?
Yes, honey is naturally gluten-free; just make sure any additional ingredients are also gluten-free.

Additional Resources

Explore more related recipes, like Roasted Garlic Mashed Potatoes or Sweet Potato Casserole, which pair excellently with Brussels sprouts, for full meal ideas.

Check out technique guides on roasting vegetables, where you can learn valuable tips and tricks for achieving perfectly caramelized results every time.

For ingredient information, delve into articles focusing on the nutritional benefits of Brussels sprouts or ways to incorporate seasonal vegetables into your cooking routine.

Equipment recommendations for the best tools can enhance your cooking experience. Consider investing in high-quality baking sheets and roasting pans for optimal results.

Lastly, embrace seasonal variations, researching recipes that highlight the best produce of autumn and winter months to keep your meals vibrant and delicious.

Join the Conversation

We invite you to share your experiences with this recipe on social media, tagging us in your culinary adventures.

Don’t forget to use vibrant food photography techniques, like natural light and colorful backdrops, to capture your delicious creations.

Your reviews and feedback are essential to us; please leave your comments so we can continue improving our recipes.

Engage with our community by discussing your own recipe variations or cooking tips, fostering a rich environment of learning and sharing.

Connect with fellow cooking enthusiasts as you try and adapt this recipe to suit your culinary style, making positive contributions to our delicious journey.

The Recipe

Honey-Glazed Roasted Brussels Sprouts with Bacon

Serves: 4 servings

Prep Time: 10 mins

Cook Time: 30 mins

Total Time: 40 mins

Kitchen Equipment Needed

  • Baking sheet
  • Mixing bowl
  • Sharp knife
  • Cutting board
  • Measuring spoons
  • Spatula

Ingredients

  • 1 lb Brussels sprouts, trimmed and halved
  • 4 slices thick-cut bacon, diced
  • 2 tablespoons honey
  • 2 tablespoons olive oil
  • Salt and pepper to taste

Directions

  1. Preheat your oven to 400°F (200°C).
  2. In a large mixing bowl, combine the halved Brussels sprouts, diced bacon, honey, olive oil, and season with salt and pepper.
  3. Toss everything together until the Brussels sprouts are evenly coated.
  4. Spread the mixture evenly on a baking sheet.
  5. Roast in the preheated oven for about 30 minutes, or until Brussels sprouts are golden brown and crispy, stirring halfway through.
  6. Remove from the oven and let it cool for a few minutes before serving.

Recipe Notes

  • Feel free to adjust the sweetness by adding more or less honey as desired.
  • This recipe can easily be doubled or halved based on your needs.
  • Consider using other types of bacon, like turkey bacon, for a healthier twist.
  • For additional flavor, try adding garlic or shallots to the mix before roasting.

Comforting Hearty Chicken and Vegetable Stew for Every Season

Hearty Chicken and Vegetable Stew: A Comforting Classic

⚖️
Difficulty
Easy

⏲️
Prep Time
15 mins

🕒
Cook Time
45 mins

⏱️
Total Time
60 mins

🍽️
Servings
4 servings

When the weather starts to cool down, there’s nothing more satisfying than a warm bowl of Hearty Chicken and Vegetable Stew. This recipe perfectly balances tender chicken with an array of vibrant vegetables, all simmered together in a rich and savory broth. The flavors meld beautifully over time, bringing warmth and comfort that feels like a hug on a chilly evening. Satisfying and nourishing, this stew not only satisfies hunger but also warms the soul, making it ideal for family dinners or cold-weather gatherings.

The aroma wafting through your kitchen as this stew cooks is truly irresistible. Imagine coming home after a long day to the rich, savory smell of chicken, herbs, and vegetables slowly bubbling away. Each spoonful provides a burst of flavor, texture, and heartiness that will leave you feeling satisfied and content. The best part? It’s adaptable and can easily incorporate whatever vegetables you have on hand, making it a great fridge-cleaning dish!

Quick Recipe Highlights

  • Flavor Profile: This stew boasts a comforting blend of savory chicken, earthy vegetables, and aromatic herbs, all simmered to perfection.
  • Texture: You’ll enjoy the tender chunks of chicken alongside soft yet slightly firm vegetables, creating a delightful mouthfeel.
  • Aroma: Expect a warm, hearty smell that combines the essence of roasted chicken with fragrant herbs like thyme and rosemary.
  • Visual Appeal: The vibrant colors of carrots, peas, and potatoes make for an inviting dish that’s as pleasing to the eyes as it is to the palate.
  • Skill Level Needed: This recipe is beginner-friendly and perfect for anyone wanting to try their hand at stew-making.
  • Special Equipment: A heavy-bottomed pot or Dutch oven is essential for even cooking and flavor development.

Recipe Overview

  • Difficulty Level: This dish is easy to prepare, making it suitable for cooks of all levels—perfect for those just starting out or seasoned home chefs.
  • Category: Hearty Chicken and Vegetable Stew is categorized as a main dish, ideal for lunch or dinner.
  • Cuisine: This recipe draws inspiration from classic comfort foods across various culinary traditions, showcasing the universal love for stews.
  • Cost: With affordable ingredients ranging from chicken to fresh vegetables, this dish is budget-friendly and accessible.
  • Season: Enjoy this stew year-round, but it is particularly satisfying in the fall and winter months when comfort food is in high demand.
  • Occasion: Perfect for family gatherings, cozy dinners, or meal prep for busy weekdays.

Why You’ll Love This Recipe

The Hearty Chicken and Vegetable Stew is not only delicious but also incredibly satisfying. It combines the tender taste of chicken with fresh vegetables like carrots, celery, and potatoes to create a balanced meal. Each bite offers a delightful interplay of flavors that warms your heart and nourishes your body.

This recipe also shines in its convenience—simply toss the ingredients into a pot, let them simmer, and come back to a flavorful dish. The one-pot nature of this recipe means less cleanup, allowing you to focus more on enjoying your meal and the company around you.

Moreover, this stew is packed with essential nutrients. It’s an excellent source of protein from the chicken, while the various vegetables provide vitamins, minerals, and dietary fiber, making it a wholesome choice for any meal. This combination supports overall health and adds vibrant colors to your diet!

Socially, serving this stew at gatherings is a sure way to impress family and friends with its home-cooked charm. It’s ideal for sharing, making it a perfect centerpiece for communal dining. Friends will appreciate the comforting flavors that evoke a sense of home and warmth.

Lastly, cost-effectiveness is another standout factor. The ingredients are often inexpensive and versatile, allowing for substitutions based on availability. This dish can be easily made in large quantities, making it a practical option for feeding a crowd without breaking the bank.

Historical Background and Cultural Significance

Stews have been a staple in culinary traditions around the world for centuries, known for their simplicity and nourishing qualities. The Hearty Chicken and Vegetable Stew draws from this rich history, embracing the essence of comfort food that has long brought families together.

In many cultures, stews were often created to make the most of leftover ingredients, showcasing the ingenuity of home cooks throughout history. As this dish evolved, it became a symbol of resourcefulness and sustenance, often enjoyed during communal and seasonal gatherings.

The recipe has regional influences, with each culture adding its own twist. For instance, French coq au vin, Italian chicken cacciatore, and Spanish pollo al chilindrón highlight the adaptability of chicken stew in various cuisines, showcasing unique spices and preparation techniques.

Today, the Hearty Chicken and Vegetable Stew has stood the test of time, remaining a beloved choice for its heartiness and practicality, resonating with those who seek comfort in their meals, regardless of culinary background.

Ingredient Deep Dive

Chicken serves as the primary protein in this stew. Historically, chicken has been a household staple due to its widespread availability and versatility in cooking. Nutritionally, chicken is a great source of lean protein, essential for muscle repair and overall health.

When purchasing chicken, it’s important to select fresh cuts that are free from blemishes and odors. Store your chicken properly in the refrigerator for up to two days or freeze it for longer storage. If chicken is not available, consider substituting with turkey or tofu for a vegetarian option.

Vegetables like carrots and potatoes add bulk and flavor to the stew. Carrots are a rich source of beta-carotene, fiber, and antioxidants, making them a healthful addition. They add sweetness, especially when sautéed, enhancing the overall taste.

Choose firm, vibrant carrots for the best flavor and nutritional value. They can be stored in the vegetable crisper of your fridge. For a seasonal twist, feel free to swap out with root vegetables or greens based on what is fresh and available.

Common Mistakes to Avoid

  • Skipping the browning process: Not browning the chicken or vegetables first can lead to a stew lacking depth of flavor. Browning caramelizes the sugars and creates a rich base.
  • Overcrowding the pot: Adding too many ingredients at once can lower the cooking temperature, leading to uneven cooking.
  • Not seasoning adequately: Stews require seasoning at multiple stages to build layers of flavor. Be sure to taste as you go.
  • Cooking on too high heat: Simmering allows flavors to blend harmoniously; cooking too quickly can make meat tough and vegetables mushy.
  • Neglecting the essential herbs: Fresh herbs can brighten the stew significantly; don’t forget to add them toward the end for optimal flavor.
  • Skipping the simmer: Allowing the stew to simmer sufficiently helps the flavors meld; rushing the process can result in a bland dish.
  • Using frozen vegetables: While convenient, using frozen vegetables can result in a watery stew. Fresh produce yields better textures and flavors.
  • Omitting acid: Adding a splash of lemon juice or vinegar at the end brightens the flavors and enhances the overall taste of the stew.
  • Neglecting storage instructions: Stews can spoil quickly if not stored properly. Always cool and refrigerate leftovers promptly.
  • Incorrectly storing leftovers: Stews are best kept in airtight containers in the fridge to retain flavor and avoid spoilage.

Essential Techniques

Browning chicken before stewing is vital for flavor development. This technique enhances the meat’s natural richness and creates a robust base for the stew. To master it, ensure your pot is hot and dry, and don’t overcrowd the pan—brown in batches for the best results. Watch for a golden color as a visual cue of success.

Chopping vegetables uniformly is important for even cooking. Taking the time to cut them into similar sizes ensures they cook at the same rate, providing a consistent texture throughout the dish. Common pitfalls include cutting them too large or too small, resulting in uneven doneness. Aim for a size that will hold its shape during the cooking process, generally about one-inch pieces.

Pro Tips for Perfect Hearty Chicken and Vegetable Stew

Always use high-quality chicken broth for maximum flavor—homemade broth is ideal, but low-sodium store-bought can work well, too. This ensures your stew has a rich, savory base without being overwhelmingly salty.

Consider adding a variety of vegetables for a burst of nutrients and color. Peas, green beans, and bell peppers can all complement the mixture beautifully and can be added near the end of cooking to retain their vibrant color.

Season your stew at multiple stages to build depth. Start with salt and pepper, and then adjust as it simmers, adding fresh herbs and spices tailored to your flavor preference.

If you prefer a thicker stew, consider adding a cornstarch slurry or mashing some of the vegetables towards the end of cooking. This will help create a heartier texture.

Don’t rush the simmering process. Letting the stew bubble gently allows flavors to meld, resulting in a tastier dish. An hour of low simmering is ideal.

Incorporate a splash of white wine for a boost of acidity and flavor balance—add it after browning the chicken and reduce it slightly before adding broth.

Make sure to taste frequently. This practice allows you to make adjustments as you go, ensuring well-balanced flavors and textures in the final dish.

Lastly, allow your stew to breathe! Letting it rest for a few minutes after cooking can help the flavors settle and develop further.

Variations and Adaptations

Regional variations of chicken stew can delight your palate. For instance, try making a Mexican-inspired version by incorporating cumin, chili powder, and corn for a southwestern twist.

Incorporate seasonal adaptations by using ingredients that are ripe and fresh during different times of the year. In the summer months, zucchini and squash can be introduced, while root vegetables shine in winter.

Dietary modifications are also simple; for a vegan version, swap the chicken for chickpeas and the broth for vegetable stock, maintaining similar vegetable selections for a hearty alternative.

If you’re looking to switch flavors, consider adding different types of stock or aromatics, such as using coconut milk for a Thai version or incorporating spices prevalent in Indian cuisine for a unique take.

Texture modifications can create intriguing variations; consider adding dumplings for a hearty twist or even serving with a crusty bread for dipping and bulk!

For presentation, consider garnishing with fresh herbs like chopped parsley or cilantro, which add color and brightness to your stew.

Serving and Presentation Guide

Plating is integral to the dining experience; serve your Hearty Chicken and Vegetable Stew in deep bowls that hold the warmth, allowing for easy scooping.

Add a splash of color with garnishes such as fresh parsley, thyme, or chives on top to enhance the visual appeal while providing a hint of freshness.

Traditional accompaniments include a crusty baguette or homemade biscuits for an extra layer of satisfaction and the perfect texture to soak up the flavorful broth.

Modern serving suggestions include pairing it with a simple green salad dressed with vinegar-based dressing to balance the richness of the stew.

Consider serving at a warm temperature to maintain the comforting feel. Stews are best enjoyed hot, so reheat gently on the stove if needed.

Portion control is also key; ensure each bowl has a good balance of chicken, vegetables, and broth to satisfy while avoiding excessive food waste.

Wine and Beverage Pairing

For a classic pairing, consider a medium-bodied white wine like Chardonnay or a light red like Pinot Noir, both of which complement the rich flavors of the chicken without overpowering it.

If you prefer non-alcoholic options, a sparkling water with lemon or a restorative herbal tea like chamomile or ginger pairs beautifully with the warm stew, cleansing the palate.

Coffee lovers might enjoy a rich brew served on the side; the flavors of dark roasted coffee can provide an interesting contrast to the stew’s sweetness.

When serving wine, be sure it’s chilled for whites and slightly cooler than room temperature for reds to enhance the tasting experience.

For optimal enjoyment, serve wine in appropriate glassware to enhance the aromas and flavors, ensuring that each sip complements your meal!

Storage and Shelf Life

To store your Hearty Chicken and Vegetable Stew, be sure to cool it to room temperature before transferring to airtight containers. It can be safely stored in the refrigerator for 3-4 days.

When freezing, portion the stew into freezer-safe containers or zip-top bags. It can last up to 3 months in the freezer. Label with the date for easy reference.

Signs of spoilage include an off smell, unusual color, or a change in texture. Always perform a sniff test before consuming leftovers.

When reheating, do so slowly on the stove or microwave, adding a splash of broth or water to avoid dryness. Ensure reheat thoroughly to a safe temperature of 165°F.

For best quality, consume leftover stew within the first few days and avoid refreezing thawed stew for safety reasons.

Make Ahead Strategies

Prep your Hearty Chicken and Vegetable Stew components a day ahead by chopping vegetables and marinating chicken in your seasoning for enhanced flavor. Store them separately in the fridge until you’re ready to cook.

Consider making a larger batch and freezing individual portions. This allows for a quick meal option on busy days, saving time while improving convenience.

If prepping ahead, cool the stew before storing; hot stews can cause condensation in the container, leading to an undesirable texture when reheating.

When it comes time to enjoy your stew, reheat slowly, adding fresh herbs or spices to rejuvenate flavors that may have mellowed during storage.

On serving day, consider adding fresh elements, such as a sprinkle of lemon juice or a dash of hot sauce to elevate flavor and excitement upon reheating.

Scaling Instructions

To halve the recipe, simply divide the ingredients by two, adjusting according to your family’s preferences in terms of seasoning for flavor balance.

For larger gatherings, doubling or tripling the ingredients is easy; however, be mindful of your equipment size. You may need a larger pot or split batches between two pots for even cooking.

When scaling up, also make note of timing modifications as larger quantities may require additional time for simmering to develop flavors adequately.

For best results, use a thermometer to ensure the chicken reaches 165°F regardless of scaling, ensuring a safe and thoroughly cooked dish.

Ultimately, adjustments should be made based on your pots and pans’ capacities, ensuring nothing gets overcrowded or overcooked during preparation.

Nutritional Deep Dive

Your Hearty Chicken and Vegetable Stew is filled with nourishing ingredients that contribute to a balanced meal. The protein from the chicken supports muscle health, while the variety of vegetables offers a wealth of vitamins and fiber.

A macro breakdown reveals the balance of protein, carbohydrates, and fats, allowing for guilt-free consumption. The chicken contributes primarily to protein, while the vegetables add healthy carbs and fibers, creating a fulfilling meal.

Micronutrient analysis shows the stew is rich in vitamins A, C, and several B vitamins, essential for maintaining energy levels and overall well-being.

Consider dietary guidelines and individual health goals when enjoying this stew, making adjustments to fit your nutritional needs without sacrificing flavor.

For weight management, serving this stew with a side salad or additional vegetables can provide bulk, helping to keep you full longer without excessive caloric intake.

Dietary Adaptations

For gluten-free diners, this stew is naturally gluten-free, offering a comforting choice for those with dietary restrictions without modifying any ingredients.

For dairy-free adjustments, simply ensure your broth is dairy-free and free from additives typically found in processed broths.

For vegan adaptations, replace chicken with chickpeas or tofu, and use vegetable broth to ensure a fulfilling meal with plant-based proteins.

Low-carb and keto options can be achieved by replacing starchy vegetables like potatoes with cauliflower or turnips, maintaining similar textures and flavors without the carbs.

Paleo eaters will likewise find this stew meets their needs; the ingredients align with whole foods, free from processed grains or sugars.

Lastly, those following a low-FODMAP diet can replace high-FODMAP vegetables with lower-FODMAP options like zucchini and green beans to keep the meal gut-friendly.

Troubleshooting Guide

If your stew lacks flavor, try adding salt gradually and tasting as you go; also consider a splash of acid, such as vinegar or lemon juice, to elevate the taste.

For texture issues, if the stew is too watery, a cornstarch slurry can thicken it up while quickly incorporating into the stew without compromising flavor.

If your stew is too salty, try diluting it with more vegetables and broth, allowing them to soak up excess salt while enhancing the overall number of servings.

Temperature problems can arise in cooking; ensure to keep it at a gentle simmer for the best results, preventing scorching and even cooking.

When substituting ingredients, pay attention to moisture levels. Ingredients like zucchini can release water, potentially changing the overall consistency of your dish.

For timing issues, remember that larger batches may require additional simmering time to ensure the chicken is thoroughly cooked and flavors meld properly.

Recipe Success Stories

Our community of home cooks has embraced this Hearty Chicken and Vegetable Stew, sharing their versions and adaptations, which reflect individual tastes and preferences across social media.

Many readers have celebrated the versatility of the recipe, sharing how they modified it based on local ingredients, showcasing the adaptability of this classic dish.

Some fans have shared thoughtful photography tips, recommending natural lighting and colorful garnishing for beautiful social media presentations of their culinary creations.

Recurring themes in feedback include the deep flavor and comfort this stew provides, making it a celebrated dish during family gatherings and personal celebrations.

Frequently Asked Questions

Q: Can I make this stew in a slow cooker?
A: Yes, you can! Simply brown the chicken and vegetables first, then transfer everything to the slow cooker with broth, and cook on low for about 6-8 hours or high for about 3-4 hours.

Q: How can I store leftovers?
A: Allow the stew to cool, then store it in an airtight container in the fridge for up to 4 days. You can also freeze it for up to 3 months.

Q: What’s the best way to reheat stew?
A: Reheat in a pot over medium heat, adding a bit of broth if it appears too thick. Ensure it reaches at least 165°F before serving.

Q: Can I use frozen vegetables in the stew?
A: While fresh vegetables are preferred for texture, you can use frozen vegetables, just be aware they may release more water and make the stew slightly less thick.

Q: Is this stew healthy?
A: Yes! It’s packed with protein from the chicken and vitamins from the vegetables, making it a nutritious choice when balanced with portion sizes.

Q: Can I make this stew ahead of time?
A: Absolutely! This stew can be made a day in advance; the flavors deepen and enhance as it rests in the fridge overnight.

Q: What can I use instead of chicken?
A: You can substitute chicken with turkey or for vegetarian versions, try chickpeas or a variety of beans.

Q: What spices can I add for extra flavor?
A: Consider adding paprika, bay leaves, or even a pinch of cayenne for a bit of extra heat to enhance the flavor profile.

Q: Can I add pasta or rice to this stew?
A: Yes! You can add a handful of uncooked pasta or rice towards the last 20 minutes of cooking for added texture and heartiness.

Q: How can I make it more visually appealing?
A: Garnishing with fresh herbs before serving adds color, and serving in a brightly colored bowl can enhance the visual experience.

Additional Resources

Explore related recipes such as Classic Beef Stew, Vegetable Barley Soup, or Creamy Mushroom Risotto for more hearty meal options during colder months.

For technique guides, check out resources on browning meat or the best methods for preserving the freshness of vegetables. Understanding these techniques can elevate your cooking skills.

Ingredient information can assist you in selecting fresh produce and protein, helping you understand what to look for when shopping to get the best quality available.

Equipment recommendations can help you find the right pots, pans, and kitchen tools to streamline your cooking process and replicate the best outcomes.

For seasonal variations, consider exploring summer variations with lighter ingredients, or seasonal casseroles that incorporate mushrooms, fresh peas, and herbs!

Join the Conversation

Engage with our community by sharing your versions of the Hearty Chicken and Vegetable Stew on social media! Use our hashtags to share photography of your culinary masterpiece.

Leave recipe reviews detailing what worked well for you and how you made the recipe your own! We love hearing about your experiences and encourage readers to share adaptation stories.

As home chefs, engaging with one another enhances the collective experience. Let’s celebrate cooking together, sharing tips and tricks in making this comforting recipe a regular part of your kitchen repertoire.

The Recipe

Hearty Chicken and Vegetable Stew

Serves: 4 servings

Prep Time: 15 mins

Cook Time: 45 mins

Total Time: 60 mins

Kitchen Equipment Needed

  • Heavy-bottomed pot or Dutch oven
  • Wooden spoon or spatula
  • Measuring cups and spoons
  • Knife and cutting board

Ingredients

  • 1 pound boneless, skinless chicken thighs
  • 2 carrots, diced
  • 2 celery stalks, diced
  • 1 onion, chopped
  • 2 potatoes, diced
  • 3 cloves garlic, minced
  • 4 cups chicken broth
  • 2 tablespoons olive oil
  • 1 teaspoon dried thyme
  • 1 teaspoon dried rosemary
  • Salt and pepper to taste

Directions

  1. Heat olive oil in a heavy-bottomed pot over medium heat.
  2. Add chicken thighs; season with salt and pepper and brown on all sides. Remove and set aside.
  3. Add onion and garlic to the pot, cooking until softened.
  4. Add carrots, celery, and potatoes, sautéing for an additional 5 minutes.
  5. Return chicken to the pot and pour in the chicken broth. Stir in thyme and rosemary.
  6. Bring to a boil, then reduce heat and let simmer for 45 minutes, until chicken is cooked through.
  7. Serve hot, garnished with fresh herbs if desired.

Recipe Notes

  • Feel free to adjust the vegetables based on what you have available.
  • This stew can be made ahead and tastes even better the next day.
  • Add dumplings for a heartier dish or serve with crusty bread.