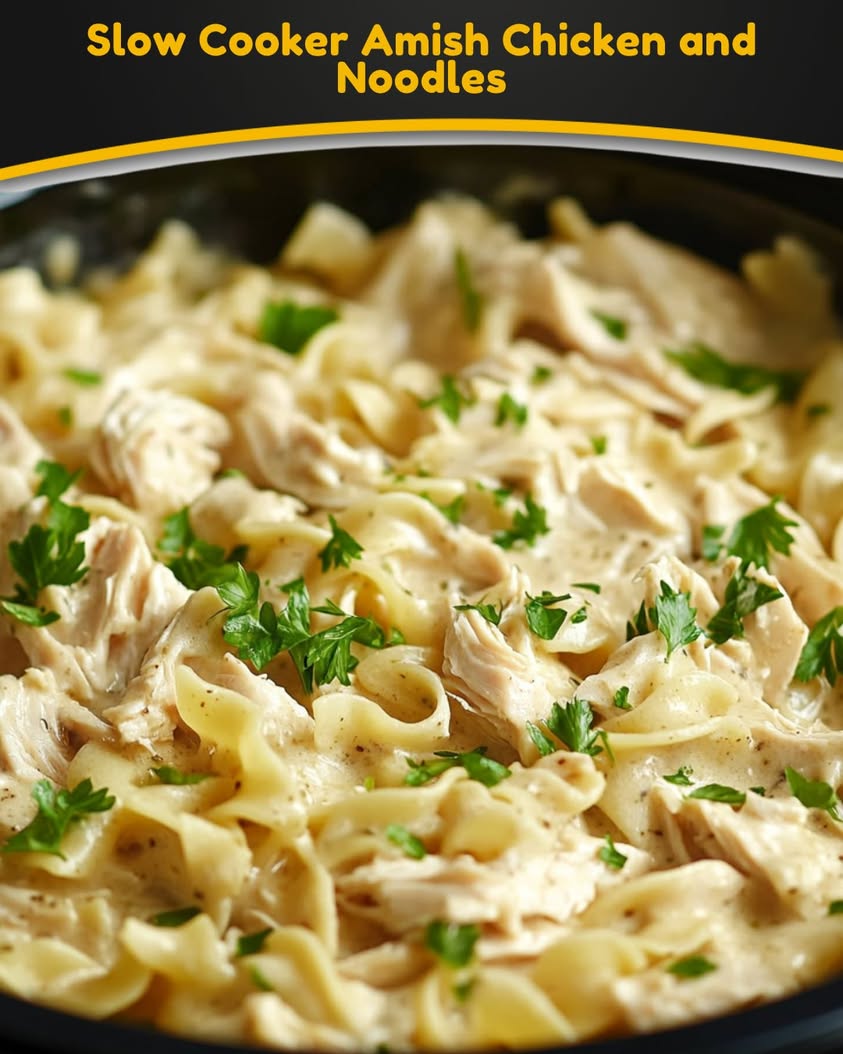
Delicious Slow Cooker Amish Chicken and Noodles Recipe for Comfort

Slow Cooker Amish Chicken and Noodles: A Comforting Delight

⚖️
Difficulty
Easy

⏲️
Prep Time
20 mins

🕒
Cook Time
6 hours

⏱️
Total Time
6 hours 20 mins

🍽️
Servings
6 servings

This Slow Cooker Amish Chicken and Noodles recipe is an embrace of comfort and nostalgia. Perfect for chilly evenings, this dish melds tender, slow-cooked chicken with hearty egg noodles, all enveloped in a creamy sauce that sings of home. The rich flavors evoke warmth, reminding you of family gatherings and cozy dinners. The slow cooker does the work for you, allowing the flavors to deepen while you go about your day.

There’s nothing quite like the sight and smell of Amish Chicken and Noodles simmering away, filling your kitchen with an intoxicating aroma that draws everyone in. This recipe is not only a hearty meal but also a nurturing experience, as each bite delivers comfort akin to a warm hug. Whether served for a family dinner or a special occasion meal, this dish promises satisfaction and delight.

Quick Recipe Highlights

  • Flavor Profile: This recipe features a harmonious blend of chicken, creamy sauce, and spices that create a savory and satisfying dish perfect for any meal.
  • Texture: The tender chicken pairs beautifully with the soft egg noodles, creating a comforting texture that is both hearty and indulgent.
  • Aroma: Expect delightful notes of garlic and herbs mingling with the richness of chicken and cream, creating an inviting cooking environment.
  • Visual Appeal: The dish presents beautifully with its saucy, creamy finish and the slight shimmer of the noodles, making it as pleasing to the eye as it is to the palate.
  • Skill Level Needed: This recipe is manageable for beginner cooks, requiring minimal preparation and straightforward cooking techniques.
  • Special Equipment: All you need is a reliable slow cooker to bring this comforting dish to life.

Recipe Overview

  • Difficulty Level: Rated as easy, this dish is perfect for novice cooks looking to hone their skills in a stress-free environment.
  • Category: This meal fits well within the categories of comfort food and hearty dinners, ideal for feeding a family or gathering friends.
  • Cuisine: Rooted in Amish culinary traditions, this dish showcases wholesome ingredients and home-cooked approaches that emphasize comfort.
  • Cost: The ingredients are budget-friendly, often using staples that are easily accessible, making it a wallet-friendly choice for any home cook.
  • Season: Best enjoyed during the colder months, its warm, hearty nature makes it a go-to for winter dinners.
  • Occasion: This recipe is ideal for cozy family dinners, potlucks, or gatherings where comfort food reigns supreme.

Why You’ll Love This Recipe

The taste and texture of Slow Cooker Amish Chicken and Noodles are second to none. The combination of tender chicken slowly cooked to perfection with seasoned egg noodles creates a comfort that is deeply satisfying. Each spoonful brings the rich flavors of chicken and creamy sauce, making it hard to resist going for seconds.

Convenience is another major draw, as the slow cooker does the heavy lifting. Just prep your ingredients, set the timer, and let the flavors meld while you attend to your day. There’s something incredibly freeing about a meal that cooks itself, allowing you precious time for other tasks or even relaxation.

From a nutritional standpoint, chicken offers lean protein while the cream can be substituted for lighter options to make the dish healthier without sacrificing flavor. Moreover, the simplicity of the ingredients ensures that those with dietary restrictions can easily modify it to suit their needs.

Socially, this dish is perfect for gatherings. It’s a classic home-cooked meal that encourages sharing and conversation around the dinner table. The inviting aroma and rich flavors make it a crowd-pleaser, sure to make you the star of any potluck or dinner invitation.

Lastly, cost-effectiveness is a significant advantage, as the ingredients are simple and relatively inexpensive. With the ability to feed a larger group without breaking the bank, this recipe is both accessible and practical for families and friends alike.

Historical Background and Cultural Significance

Originating from Pennsylvania Dutch cuisine, Amish Chicken and Noodles reflect the simplicity and comfort of Amish culinary traditions. This recipe showcases the frugality of ingredients and the emphasis on communal eating, a hallmark of Amish culture. Traditionally served during family gatherings, this dish has become synonymous with home-cooked love and nurturing.

The cultural importance of this dish stretches beyond mere sustenance. It acts as a symbol of unity and family bonding, embodying the essence of shared meals that bring people together. Historical cooking practices among the Amish often emphasize using local and seasonal ingredients, highlighting an eco-friendly approach that resonates with today’s sustainable cooking trends.

Over the years, adaptations have led to various interpretations of this dish across different regions. While some variations incorporate different types of noodles or vegetables, the core essence remains intact, celebrating the rich culinary heritage of the Amish community.

Regional variations add a creative flair to the traditional recipe, with influences from surrounding cultures often making their way into this comforting meal. Whether it’s the addition of local spices or the use of alternative thickening agents, these adaptations enrich the central theme of heartfelt, wholesome cooking.

Ingredient Deep Dive

Chicken is the star ingredient of this beloved dish. It not only serves as a primary source of protein but also brings essential nutrients like niacin and selenium. Selecting high-quality chicken can significantly enhance the final taste of the dish; fresh, organic options are preferred. When storing chicken, it’s essential to keep it refrigerated and to use it promptly, while cooked chicken can be kept in the freezer for later use.

The egg noodles provide not just substance but also contrast in texture. These noodles are typically made with eggs and flour and are a staple in many comfort dishes. When choosing egg noodles, look for those made from high-quality ingredients for the best flavor and texture. Proper storage involves keeping them in a cool, dry place, and they generally have a long shelf life. Substituting with whole wheat or gluten-free options is easily achieved for dietary needs.

The cream sauce brings richness and depth, acting as the binding element for this dish. Cream is a source of fat, adding flavor and a silky texture to sauces. When selecting cream, opting for heavy cream results in a more luscious texture, whereas lighter varieties can be used for a healthier approach. For storage, always keep cream refrigerated, and avoid using it past its expiry date. Substitutions with dairy-free options can help accommodate those with lactose intolerance.

Common Mistakes to Avoid

  • Not browning the chicken: Skipping this step can lead to a lack of deeper flavor in your dish. Browning the chicken creates a wonderful caramelization that enhances the taste.
  • Using too much liquid: Too much broth or cream can make the dish soupy rather than creamy. Stick to the recommended amounts for the best consistency.
  • Overcooking the noodles: Adding noodles too early can result in mushy pasta. Wait to add them until about 30 minutes before the dish is done cooking.
  • Skipping seasoning: Don’t forget to season well at each step; otherwise, the dish can be bland. Adjusting seasoning in stages helps develop the flavor.
  • Rushing prep time: Taking the time to chop and measure ingredients can prevent chaos in the kitchen. Rushing can lead to mistakes or misbalances in flavors.
  • Neglecting cooking times: Different slow cookers can vary in cooking time. Always check for doneness—chicken should be tender and easily shredded, and noodles should be perfectly cooked.
  • Not using fresh herbs: Dried herbs can substitute in a pinch, but using fresh can elevate the flavor dramatically, especially when added at the end of cooking.
  • Skipping the resting time: Allowing the dish to rest before serving helps flavors meld. It can also slightly thicken the sauce, enhancing the overall texture.
  • Overlooking storage techniques: Improper storage can lead to spoilage. Ensure leftovers are stored correctly in airtight containers to maintain flavor.
  • Ignoring the taste test: Always taste your dish before serving. This final check allows you to adjust seasoning as needed for the best flavor result.

Essential Techniques

Browning the chicken is critical for developing flavors. It creates a rich base through the Maillard reaction, adding depth to the final dish. To master this technique, sear the chicken on all sides until golden brown, allowing some of the flavorful bits to stick to the bottom of the slow cooker for enhanced sauce flavor. Be cautious not to overcrowd the pan, as this can prevent proper browning.

Understanding how to utilize a slow cooker is essential for this recipe’s success. Slow cookers provide consistent, low heat, allowing flavors to meld beautifully over several hours. To master slow cooking, choose the right setting based on your timing and always ensure there is adequate liquid to prevent burning. Check for doneness periodically, as cooking times can vary by device.

Pro Tips for Perfect Slow Cooker Amish Chicken and Noodles

1. **Sear the Chicken:** Always take a moment to brown the chicken before placing it in the slow cooker. This simple step dramatically intensifies the flavors.
2. **Layering Ingredients:** Place the noodles on top of the chicken to ensure they cook evenly and avoid becoming mushy.
3. **Add Vegetables:** Consider adding chopped carrots or peas during the last hour of cooking for an extra nutritional boost and added texture.
4. **Control Liquid Levels:** Keep an eye on the broth levels; if using thickening agents, you may need to adjust the amount of liquid accordingly.
5. **Experiment with Spices:** Don’t hesitate to add your favorite herbs and spices, such as thyme or rosemary, to elevate the flavor profile further.
6. **Let it Rest:** Allow the dish to sit for a few minutes after cooking. This helps thicken the sauce and enhances the overall consistency.
7. **Use Leftovers Creatively:** Reinvent leftovers by transforming them into a chicken noodle casserole by adding breadcrumbs on top before baking briefly.
8. **Consider a Cream Alternative:** For a lighter version, substitute cream with Greek yogurt for a similar tang and creamy texture without the extra calories.

Variations and Adaptations

Regional variations of this dish often add a unique flair. In some areas, you might find the dish includes local herbs or spices that give it a distinct taste, showcasing the diversity of Amish cooking across various communities. Seasonal adaptations might include fresh vegetables like zucchini or squash during the summer, providing a refreshing twist to the traditional recipe.

Dietary modifications can be easily accomplished. For gluten-free versions, replace egg noodles with rice noodles or spiralized vegetables. Vegan adaptations can be made using vegetable broth and substitute proteins like tofu or chickpeas, along with gluten-free noodles.

Flavor variations can be introduced by adding ingredients such as mushrooms or bell peppers. For a nutty component, consider incorporating toasted nuts into the dish just before serving, enhancing the overall flavor profile.

Texture modifications can create a new experience; for instance, you can substitute the cream with a cashew cream or blended silken tofu to change the richness while keeping it dairy-free.

Presentation alternatives can also set your dish apart. Serve in rustic bowls, garnished with fresh parsley or chives for color, to enhance visual appeal and create a dining experience that feels special, no matter the occasion.

Serving and Presentation Guide

Serving Slow Cooker Amish Chicken and Noodles requires a little thought to make it visually appealing. Platters or rustic bowls can enhance that cozy feel, and a sprinkle of fresh herbs on top adds an enticing touch. Consider garnishing with freshly cracked black pepper or a drizzle of olive oil to boost flavor and presentation.

Traditional accompaniments such as crusty bread or a side salad complement this hearty dish beautifully, balancing out the richness of the noodles and sauce. Modern serving suggestions could include pairing with roasted vegetables for a colorful and vibrant plate that not only looks good but tastes excellent as well.

When it comes to temperature, serving the dish warm ensures the flavors are at their peak. It’s essential to serve right after cooking for the best taste and ensure thorough heating for leftovers. For portion control, consider scooping out servings with a ladle so guests can help themselves, creating a relaxed and communal dining atmosphere.

Wine and Beverage Pairing

When pairing wines with Slow Cooker Amish Chicken and Noodles, consider light-to-medium-bodied white wines such as Chardonnay or Sauvignon Blanc. These wines offer crisp acidity that can enhance the dish’s decadent creamy sauce. For a touch of sweetness, a Riesling could also complement the flavors beautifully.

For non-alcoholic alternatives, consider serving a sparkling water with a hint of lemon or a fruit-infused iced tea, providing a refreshing contrast to the rich meal.

If you enjoy coffee or tea, a warm cup of chamomile or a light-bodied black tea can provide a soothing finish to the meal, enhancing the comfort feel as you unwind after dinner.

Storage and Shelf Life

For optimal storage, let your Slow Cooker Amish Chicken and Noodles cool completely before transferring to airtight containers, which can help prevent bacterial growth. The dish can be refrigerated for up to three to four days. Alternatively, it can be frozen for longer preservation, allowing you to enjoy it later for a quick meal.

Signs of spoilage include an off smell or a change in texture; always inspect your leftovers before reheating. When reheating, ensure the dish is heated thoroughly to at least 165°F for safety.

To maintain quality when freezing, consider separating components if possible—store chicken and noodles separately to help retain texture upon reheating. Remember to label containers with freezing dates to keep track of freshness.

Make Ahead Strategies

Preparing Slow Cooker Amish Chicken and Noodles ahead of time can save valuable cooking time on busy days. You can chop vegetables and portion out your chicken the night before, storing them in the refrigerator until you’re ready to cook. This simple step reduces prep time and makes the cooking process smoother.

Cooking in batches is an efficient strategy. You can easily double the recipe and freeze half for another day. Allow the dish to cool completely before packaging it in labeled containers for future meals, maintaining the quality of flavors and textures. When it’s time to reheat, simply thaw overnight in the fridge before warming it up.

If the recipe includes aromatics like garlic and onions, consider sautéing them ahead of time to enhance their flavor before adding them to the slow cooker. This enhances the dish without compromising on convenience, making for a deep, rich base even on busy weekdays.

For the best quality and taste, try adding fresh herbs when reheating. This technique brightens the overall flavor and adds an appealing presentation, giving a refreshing twist to the dish you prepped in advance.

Scaling Instructions

Scaling the recipe can easily accommodate larger gatherings or more significant portions. To halve the recipe, simply divide each ingredient amount by two—this is an efficient way to adapt to smaller dinner parties while minimizing waste.

Doubling or tripling the recipe poses no challenges either, just be cautious of your slow cooker’s capacity. Ensure that your device can accommodate the increased volume; if you have more than one slow cooker, utilizing both can effectively manage larger quantities.

Adjusting timing is essential as well; larger batches may require additional cooking time, whereas smaller portions might cook more quickly. Always keep a close eye on the chicken for tenderness and noodles for doneness as you scale.

For storage considerations, note that larger portions can be conveniently stored in multiple containers. This ensures the last servings are just as delicious as the first, and you can enjoy this comforting meal on several occasions.

Nutritional Deep Dive

The macro breakdown of Slow Cooker Amish Chicken and Noodles reveals a balance of protein, carbohydrates, and fats, making it an excellent choice for a fulfilling meal. On average, one serving contains approximately 30 grams of protein due to the chicken, making it a healthy protein source that can aid in muscle repair and growth.

Micronutrient analysis shows that this dish includes essential vitamins and minerals from the chicken and vegetables. Vitamins B6 and B12 from the chicken support energy metabolism, while the noodles contribute iron and magnesium.

Health benefits extend beyond nourishment; having a meal rich in protein and wholesome ingredients can promote satiety, helping to manage hunger throughout the day.

For those conscious about portion sizes, analyzing the dish through measuring cups can aid in understanding serving sizes and encourage mindful eating.

Lastly, for anyone managing weight, this recipe can easily be adjusted to lower calorie counts through options such as reducing cream or pairing with a balanced salad, ensuring it fits well within a weight management plan.

Dietary Adaptations

For gluten-free diners, substituting regular egg noodles with gluten-free pasta provides a delicious alternative that keeps the dish hearty while accommodating dietary restrictions. Many brands offer gluten-free options that don’t compromise on taste, ensuring everyone can partake in this comfort food.

Dairy-free adaptations can be achieved by replacing the cream with a sustainable cream alternative like coconut cream or cashew cream. These dairy-free options still provide a rich texture and flavor without the lactose.

Vegans can enjoy this dish too by using plant-based proteins and a plant-based sauce or nutritional yeast to mimic the creamy flavor. Adjustments also allow using vegetable broth and adding vegetables for additional nutrients.

For individuals following low-carb or keto diets, switching the noodles out for spiralized vegetables or cauliflower can significantly reduce carbohydrate intake while keeping the flavors intact.

Making this recipe paleo-friendly is also an option by using almond milk instead of dairy cream and opting for fresh herbs and spices for flavoring while avoiding processed ingredients.

Troubleshooting Guide

Texture issues can arise when using undercooked ingredients. Always ensure chicken is cooked until tender and noodles are added at the right time for optimal texture.

Flavor balance can be adjusted by adding more salt and pepper during cooking. Taste at each step to find the ideal seasoning balance that fits your palate.

Temperature problems often result from improper slow cooker settings; ensure you understand your cooker’s settings and adjust accordingly to prevent overcooking or undercooking.

Equipment challenges can often be resolved by keeping the manual nearby and familiarizing yourself with your slow cooker’s functionalities, ensuring you use it to its fullest potential.

For ingredient substitutions, familiarity with equivalent options can help avoid recipe disasters; for instance, using chicken thighs instead of breasts can offer a different flavor profile.

Timing concerns can be managed by planning correctly. If you anticipate needing extra time, adjust the cooking settings to avoid stress and ensure the chicken finishes cooking perfectly.

Recipe Success Stories

Community feedback highlights how this Slow Cooker Amish Chicken and Noodles dish resonates with many home cooks. Individuals have shared their adaptations, expressing how certain spice additions made it a family favorite.

Variation successes shine through, with readers describing their transformations of the dish into casseroles or alternative noodle choices without losing the comforting essence of the original recipe.

Adaptation stories frequently mention the introduction of seasonal vegetables, allowing cooks to utilize fresh produce creatively while enhancing both flavor and nutritional content.

Suggestions pouring in from readers have inspired mini cook-offs among friends and family members, resulting in delightful competitions that celebrate this comforting dish.

Photography tips from the community have been invaluable; capturing the beauty of this dish encourages others to try their hand at creating it, spreading the love for this hearty meal far and wide.

Frequently Asked Questions

Can I use frozen chicken in this recipe? Yes, you can use frozen chicken; however, it may take longer to cook. Ensure the chicken reaches a safe internal temperature of 165°F.

Is there a way to make this recipe dairy-free? Absolutely! You can substitute heavy cream with coconut cream or a cashew-based cream for a dairy-free alternative without compromising on taste.

What if I don’t have egg noodles? You can easily substitute with any pasta of your choice, or even spiralized vegetables for a low-carb option that still gives you a hearty meal.

Can I add vegetables? Yes! Carrots, peas, and celery work wonderfully. Just add them during the last hour of cooking to ensure they remain tender yet crisp.

How can I store leftovers? Allow leftovers to cool completely, then transfer them to airtight containers. They can be refrigerated for three to four days or frozen for longer storage.

Is this recipe suitable for meal prep? Yes, it’s perfect for meal prep! You can prepare it in advance, and it reheats wonderfully, making it a great option for busy days.

Can I halve the recipe? Yes, simply divide each ingredient amount by two, and be mindful of the slow cooker’s size when adjusting portions.

What can I do if the sauce is too thick? If your sauce turns out too thick, adding a splash of broth or water while stirring can help achieve your desired consistency.

How spicy is this recipe? This recipe is not inherently spicy, but you can add a pinch of cayenne or some chili flakes if you prefer a bit of heat.

What is the best way to reheat this dish? Reheat gently on the stove or in the microwave, ensuring that it reaches a steaming temperature throughout before serving again.

Additional Resources

For those eager to explore more comforting recipes, check out our related dishes that provide warmth and satisfaction. From soups to casseroles, these options are perfect complements to your dinner table and ideal for busy weeknights.

Techniques guides available on our site offer insights into mastering slow cooking, allowing you to perfect your craft and enjoy the benefits of this ultimate cooking method.

Ingredient information sections delve deeper into the nutritional profiles and uses of common items in your pantry, ensuring you’re well-equipped for successful and healthy meal preparation.

If you’re looking into purchasing equipment, our recommendations highlight slow cookers and kitchen gadgets that will further enhance your cooking experience and make meal preparation a breeze.

Lastly, explore seasonal variations in our archives to discover how you can take advantage of fresh, local produce and adapt them into beloved recipes like this one.

Join the Conversation

We’d love to see your take on Slow Cooker Amish Chicken and Noodles! Share your creations on social media using the hashtag #AmishChickenNoodleChallenge.

Don’t forget to capture the cooking process and final results through photography—the beauty of home-cooked meals in their rustic charm can inspire others to join in and make their own versions.

Recipe reviews are encouraged to help our community grow; your feedback can provide invaluable insights and encouragement to fellow cooks looking to try something new.

Engaging with our community through comments and recipe suggestions fosters creativity and demonstrates how home cooking can bring everyone together.

Explore various adaptations and variations, growing our shared love for this comforting dish while inspiring cooks to personalize it to suit their taste.

The Recipe

Slow Cooker Amish Chicken and Noodles

Serves: 6 servings

Prep Time: 20 mins

Cook Time: 6 hours

Total Time: 6 hours 20 mins

Kitchen Equipment Needed

  • Slow cooker
  • Skillet (for browning)
  • Cutting board
  • Knife
  • Airtight containers (for storage)

Ingredients

  • 4 boneless, skinless chicken breasts
  • 4 cups chicken broth
  • 1 cup heavy cream
  • 1 onion, diced
  • 2 cloves garlic, minced
  • 3 cups egg noodles
  • 2 teaspoons salt
  • 1 teaspoon black pepper
  • 1 teaspoon dried parsley

Directions

  1. In a skillet, heat a small amount of oil over medium-high heat. Add chicken and brown on all sides, about 5-6 minutes.
  2. Transfer the browned chicken to the slow cooker. Add chicken broth, heavy cream, onions, garlic, salt, pepper, and parsley over the chicken.
  3. Cover and cook on low for 6 hours or until the chicken is tender and easily shredded.
  4. During the last 30 minutes of cooking, stir in the egg noodles and allow them to cook until tender.
  5. Once done, shred the chicken using two forks, mixing it with the sauce and noodles before serving.

Recipe Notes

  • Feel free to add vegetables like carrots or peas during the last hour for extra nutrition.
  • For a lighter version, use half-and-half instead of cream.
  • Leftovers can be refrigerated for 3-4 days or frozen for longer storage.
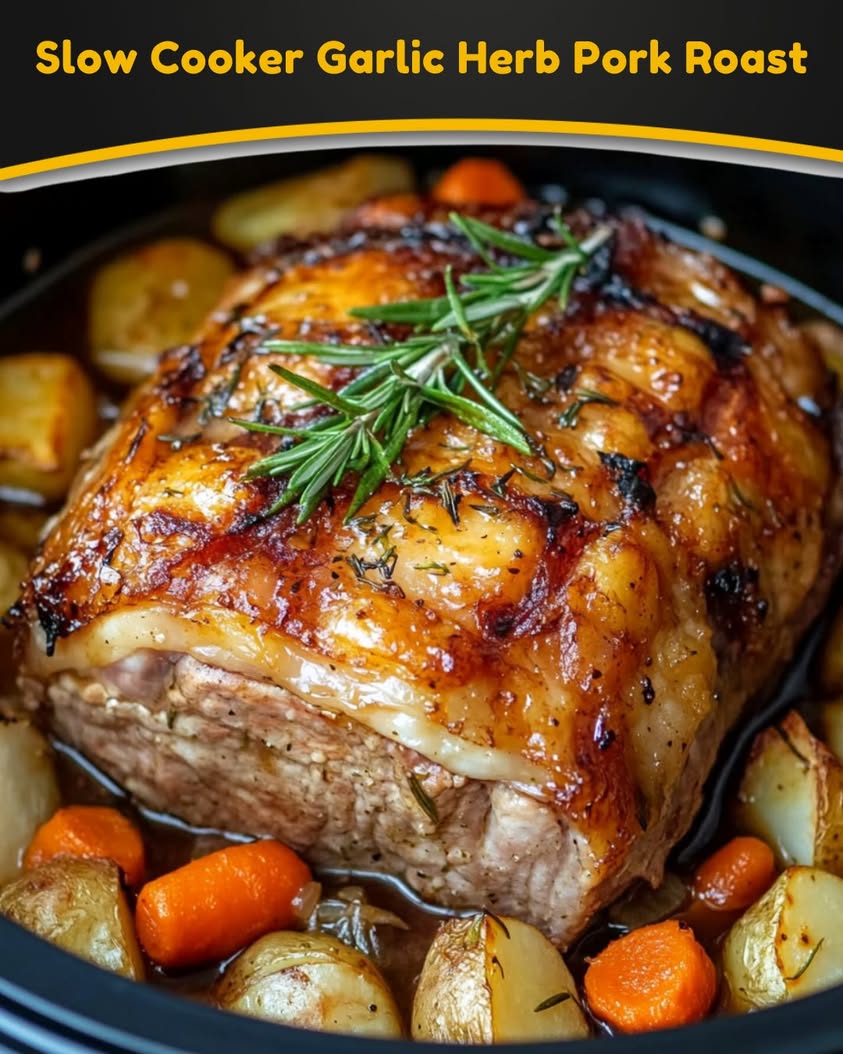
Tender Slow Cooker Garlic Herb Pork Roast Recipe for Dinner

Slow Cooker Garlic Herb Pork Roast: A Delicious, Easy Dinner

⚖️
Difficulty
Easy

⏲️
Prep Time
15 mins

🕒
Cook Time
6 hours

⏱️
Total Time
6 hours 15 mins

🍽️
Servings
6

Pork roast seasoned with garlic and herbs is one of those recipes that makes the house smell wonderful while cooking, setting the stage for a comforting family dinner. The slow cooker makes this process effortless; simply season the pork and let it work its magic while you go about your day. When you return, you will be greeted with tender, juicy meat that practically falls apart, packed with delicious flavors. This Garlic Herb Pork Roast is perfect for busy weekdays but sophisticated enough for friends or holiday gatherings.

The beauty of a slow cooker pork roast lies not just in its exceptional flavor but in its temperature consistency and moisture retention. By using quality herbs like thyme, rosemary, and sage, you’re elevating the ordinary into something extraordinary. Serve it with your favorite sides, and you have a dish that is both nourishing and satisfying.

Quick Recipe Highlights

  • Flavor Profile: The garlic and herbs blend beautifully with the natural juices of the pork, providing a savory depth that is hard to resist.
  • Texture: The slow cooking process ensures that the pork is incredibly tender, with a melt-in-your-mouth texture that will have everyone coming back for seconds.
  • Aroma: As the roast simmers, the warm notes of garlic and herbs permeate your home, creating a welcoming and cozy atmosphere.
  • Visual Appeal: The golden-brown crust paired with the juicy, pink interior makes for an appetizing dish that looks as good as it tastes.
  • Skill Level Needed: This recipe is straightforward, perfect for beginner cooks looking to impress or seasoned chefs wanting a hassle-free meal.
  • Special Equipment: Just a nice slow cooker is needed, making this recipe accessible to nearly anyone.

Recipe Overview

  • Difficulty Level: This recipe is categorized as easy, making it ideal for beginner cooks or those short on time who still want a delicious meal.
  • Category: This dish falls under main courses, suitable for family dinners or sophisticated gatherings.
  • Cuisine: The influence of traditional American cooking shines through in this comforting dish, drawing on the long-standing tradition of roasts.
  • Cost: The pork roast is generally affordable, and with simple ingredients, this meal can be prepared without breaking the bank.
  • Season: This recipe is perfect year-round but shines in fall and winter, providing warmth and comfort during cooler months.
  • Occasion: A fantastic choice for holiday meals, family gatherings, or even meal prep for a busy week ahead.

Why You’ll Love This Recipe

The taste of slow-cooked garlic herb pork roast is something you’ll crave after the first bite. The infusion of garlic and herbs into the meat results in deeper flavors developing over time, ensuring each bite bursts with deliciousness. The tenderness of the roast makes it easy to serve and even easier to eat, satisfying the comfort-seeker in all of us.

When it comes to convenience, slow cooking is a game changer. You can prep your ingredients, set your slow cooker, and go about your day with minimal fuss. This recipe effectively utilizes your time, providing a nutritious home-cooked meal with just a little advance preparation. Plus, there’s something incredibly satisfying about coming home to a meal that is ready to enjoy.

Not only is this pork roast tasty, but it’s also packed with nutritional benefits. Lean pork is an excellent source of protein, essential vitamins, and minerals. Coupled with garlic, which has numerous health benefits, this dish is as health-conscious as it is mouthwatering, ticking the boxes for a balanced diet.

This recipe is perfect for entertaining. The visual appeal of the roast combined with its divine aroma will have your guests chatting about your culinary skills. It pairs beautifully with a variety of side dishes, allowing you to create a meal that accommodates different tastes and preferences, making it an ideal centerpiece for any gathering.

Budget-wise, this pork roast is affordable and can be stretched over multiple meals. You can use leftovers in sandwiches, salads, or as a protein addition to other dishes, making it both economical and delicious.

Historical Background and Cultural Significance

Roasting meat has a storied history in many cultures around the world, tracing back to ancient cooking methods where meat was often roasted over an open fire. The introduction of the slow cooker revolutionized this technique, allowing home cooks to savor perfectly cooked meats without the constant supervision typically required. This method highlights the essence of comfort food, particularly in American cuisine, symbolizing warmth and familial gatherings.

In the American culture, potlucks and family dinners often showcase roasts. There is a sense of community and nostalgia surrounding these meals, where flavors entwine with cherished memories of celebrations and togetherness. The Garlic Herb Pork Roast is emblematic of these gatherings, resonating with many fond memories of home-cooked meals.

Throughout its evolution, this recipe has seen numerous regional adaptations, with various spices and ingredients reflecting local tastes and preferences. The infusion of herbs varies, showcasing the unique flavors of different cultures while still adhering to the comforting tradition of a roast.

From home kitchens to festive tables, the garlic herb pork roast remains a staple due to its versatility and ability to honor flavors that span generations. It continues to adapt and thrive in modern culinary practices, remaining beloved by many.

Ingredient Deep Dive

– **Pork Roast**: A centerpiece ingredient, pork roast has cultural significance rooted in both sustenance and celebrations. It is rich in protein, B vitamins, and essential nutrients that contribute to a balanced diet. When selecting pork, opt for well-marbled cuts for maximum flavor and tenderness. Proper storage in the freezer ensures its freshness until you’re ready to prepare it. If pork isn’t available, beef or lamb can be suitable substitutes, offering their distinct flavors.

– **Garlic**: Garlic adds aromatic depth and historical relevance, known for its medicinal properties throughout history. Nutritionally, it’s packed with antioxidants and may contribute to heart health. Choose fresh, firm bulbs for the best flavor, and store them in a cool, dry place. Garlic powder can be an alternative, though fresh garlic is often preferred for optimal taste.

– **Herbs (Thyme, Rosemary, Sage)**: Each herb offers a unique flavor profile and comforting warmth, with each having deep historical roots in culinary practices. Thyme is known for its earthy notes, rosemary brings a pine-like flavor, and sage adds a slight peppery bitterness. Fresh herbs are ideal for deeper flavors, and while dried herbs work too, remember to adjust the quantities as dried herbs are more potent. Store herbs in airtight containers and consider growing your own for freshness.

Common Mistakes to Avoid

  • Overcooking the meat: Leaving the pork in the slow cooker too long can lead to dryness. Aim for a cook time tailored to your slow cooker type.
  • Insufficient seasoning: Skimping on herbs and spices can lead to a bland dish. Generously season your pork to ensure rich flavor.
  • Ignoring resting time: Letting the meat rest after cooking allows juices to redistribute, making it juicier when sliced.
  • Using cold meat: Starting with cold pork can extend cooking time. Allow it to come to room temperature for better results.
  • Piling in too many ingredients: Overcrowding might not allow for even cooking. Stick to the recommended amounts for optimal texture.
  • Not adding liquid: A slow cooker needs sufficient liquid to produce steam and flavor. Don’t forget to pour in broth or wine.
  • Skipping the browning step: Browning the meat before slow cooking enhances its flavor significantly.
  • Forgetting to check the temperature: Always use a meat thermometer to ensure the pork reaches the safe internal temperature of 145°F (63°C).
  • Neglecting cleaning: Ensure your slow cooker is clean and in good condition to avoid flavors lingering from previous dishes.
  • Not following the recipe: While improvisation is fun, straying too far from tried-and-tested recipes can lead to poor outcomes.

Essential Techniques

– **Searing the Meat**: Browning your pork in a skillet before placing it in the slow cooker creates a delicious crust and deeper flavors. To master this, heat your skillet until hot and add a bit of oil before placing the pork down. Avoid overcrowding the pan, as it can steam rather than sear the meat. Look for a golden-brown crust as an indicator of success.

– **Using a Slow Cooker**: The slow cooking method is crucial for achieving tender meat. Familiarize yourself with your specific slow cooker model, as cooking times can vary. Layer aromatic vegetables at the bottom to enhance flavor, and make sure to maintain a consistent cooking temperature. Checking the meat temperature periodically with a thermometer can help ensure perfect doneness.

Pro Tips for Perfect Slow Cooker Garlic Herb Pork Roast

– Always season the meat well before cooking to ensure flavor penetrates deeply.
– For added moisture, consider adding apple cider or a splash of white wine to the slow cooker.
– Experiment with different herbs to find your family’s favorite flavor combination.
– Let leftovers rest in their juices to keep them moist when reheating.
– Serve the roast with a side of pan gravy made from the drippings for extra richness.
– Cooking on low and slow yields better results; it allows more time for the flavors to meld and the meat to become tender.
– Use the timer function on your slow cooker to avoid overcooking.
– Pair with seasonal vegetables for an all-in-one meal.

Variations and Adaptations

– **Regional Variations**: Different regions have unique adaptations of pork roast, such as adding local spices or fruits like apples or peaches that complement the flavor.
– **Seasonal Adaptations**: In the fall, consider incorporating seasonal vegetables like root vegetables or squashes to add hearty textures and colors.
– **Dietary Modifications**: For those observing low-carb diets, substituting potatoes with cauliflower can create a hearty side dish.
– **Flavor Variations**: Experiment with using citrus, such as orange or lemon, to infuse a bright flavor into the dish.
– **Texture Modifications**: Adding a crunchy topping with breadcrumbs mixed with herbs for the last hour of cooking can create a delightful contrast.
– **Presentation Alternatives**: Instead of slicing the roast, try shredding the pork for a pulled pork presentation, served in bread or with salad.

Serving and Presentation Guide

Serve this Garlic Herb Pork Roast on a large platter, garnished with fresh herbs for visual flair. Pair it beautifully with side dishes such as garlic mashed potatoes, roasted seasonal vegetables, or a fresh salad to balance the richness of the meat. Offer sauces on the side, allowing guests to customize their plates to their liking.

Consider creating a rustic dining atmosphere by incorporating wooden serving boards or cast iron skillets for a farmhouse feel. If the roast is prepared in one piece, slicing can be elegantly done at the table for a more interactive experience. Temperature considerations should guide serving; the roast is best enjoyed warm but not piping hot to taste the full range of flavors.

Wine and Beverage Pairing

A rich pork roast pairs excellently with a variety of wines. Look for reds like Pinot Noir or Merlot that complement the herbal notes without overwhelming the dish. A full-bodied white, such as Chardonnay or even a dry Riesling, can enhance the flavor without overshadowing the roasted flavors.

For non-alcoholic options, consider pairing with sparkling water infused with lemon or lime, as this refreshing note can cut through the richness of the meat. If you enjoy coffee, a medium roast blend can elevate your dining experience, balancing the savoriness of the pork. Always serve these beverages at the appropriate temperatures to ensure maximum enjoyment.

Storage and Shelf Life

Storing your Garlic Herb Pork Roast is straightforward. After cooking, allow it to cool slightly before transferring it to airtight containers. Refrigerate promptly and consume within 3-4 days for optimal freshness. When looking to preserve it for longer, consider freezing the leftovers in suitable containers or freezer bags, where they can last up to three months.

Signs of spoilage include an off smell, visible mold, and an unusual texture. When reheating, ensure the internal temperature reaches above 165°F for safe consumption. If reheating from frozen, thaw overnight in the refrigerator before warming up in the oven or microwave, ensuring even heat distribution.

Make Ahead Strategies

Prepare your Garlic Herb Pork Roast in advance by seasoning the meat the night before and refrigerating it. This step allows the flavors to meld beautifully, enhancing the overall taste. You can also chop vegetables and store them separately to minimize effort on the day of cooking.

If you prefer to assemble everything in the slow cooker, this can be done the night before and stored in the fridge. Just ensure to take it out to come to room temperature before cooking. It’s also beneficial to plan your sides to allow you to focus on the roast, ensuring a timely and seamless meal prep experience.

Scaling Instructions

Scaling your Garlic Herb Pork Roast recipe is easily achievable based on your serving needs. For halving the recipe, simply adjust the seasoning and utilize a smaller cut of pork. When doubling or tripling, ensure you have a large enough slow cooker, as overcrowding can affect cooking times and results.

Timing modifications may be necessary, as larger cuts may require longer cooking times. Always use a meat thermometer to check for doneness to avoid overcooking, which can occur with larger quantities. Storage considerations also become important when scaling up, ensuring that you have sufficient space in your refrigerator or freezer.

Nutritional Deep Dive

The macro breakdown of the Garlic Herb Pork Roast most notably showcases its protein content, essential for muscle repair and growth. This dish is also minimal in carbohydrates, making it suitable for low-carb diets. The remaining macronutrients are primarily derived from fats present in the pork, enhancing flavors and mouthfeel.

Micronutrient analysis confirms the presence of important vitamins like B6 and B12, which are crucial for energy metabolism. Garlic, known for its antioxidant properties, provides health benefits complementing the nutritious profile of the dish. Observe portion control to maintain a balanced intake, especially if tracking dietary goals like weight management or muscle gain.

Dietary Adaptations

– **Gluten-free**: This recipe is naturally gluten-free; however, ensure that any seasonings used are also certified gluten-free.
– **Dairy-free**: The dish is dairy-free as written, making it suitable for those with lactose intolerance.
– **Vegan**: A vegan alternative could be achieved by using bean-based roasts or clubbed with seasoned vegetables like lentils or quinoa, replicating texture and flavor.
– **Low-carb**: This recipe naturally aligns with low-carb diets by focusing on protein-rich ingredients without relying on starchy sides.
– **Keto**: The garlic herb pork roast can easily fit into a keto diet plan with its low-carb focus, just ensure to choose fatty cuts of pork to maximize fat content.
– **Paleo**: This dish adheres to paleo guidelines, focusing on whole, unprocessed foods.
– **Low-FODMAP**: Adjust the ingredient list by limiting the garlic used or swapping with garlic-infused oil if FODMAP sensitivity is a concern.
– **Other specific diets**: For those on weight loss plans, the dish’s protein focus aids satiety, making it a filling choice without excessive caloric intake.

Troubleshooting Guide

If you encounter texture issues, such as a dry roast, consider reducing the cooking time or ensuring ample liquid is added to the slow cooker. Overcooked pork can lose its tenderness, so always keep an eye on the cooking temperature.

For flavor balance, if the dish tastes bland, enhance it with additional seasonings or a splash of vinegar to brighten the flavors. Should temperature problems arise, check your slow cooker settings, as cooking times can vary between different models.

If you have equipment challenges, ensure your slow cooker is functioning correctly; older models might have inconsistent heating mechanisms. Ingredient substitutions can also lead to taste discrepancies; if experimenting with flavors, make adjustments gradually to control taste profiles.

Timing concerns, such as needing to cook longer than expected, can arise, so consider using a programmable slow cooker to manage cooking times effectively.

Recipe Success Stories

Our community loves sharing their experiences with the Garlic Herb Pork Roast. Many have adapted the recipe to incorporate local ingredients, creating variations that reflect personal tastes and regional flavors. Feedback often highlights how easy and satisfying this dish is to prepare, even for those new to slow cooking.

Readers have noted that leftovers are just as delicious, inspiring them to try new meals using the pork in sandwiches and salads. Success stories often suggest inspiring pairings, whether adapting it with fresh sides or robust sauces, enhancing their dining experience. Photography tips shared by readers also highlight the roast’s aesthetic appeal, encouraging everyone to capture their mouthwatering meals.

Frequently Asked Questions

How do I know when my pork roast is fully cooked?

The best way to check doneness is by using a meat thermometer. Pork should be cooked to an internal temperature of 145°F (63°C). Let the meat rest for at least three minutes before slicing to ensure juiciness.

Can I cook a frozen pork roast in the slow cooker?

Cooking frozen meat directly in a slow cooker is not recommended, as it may remain in the temperature danger zone for too long, increasing the risk of foodborne illness. Thaw the meat in the fridge overnight before cooking.

What’s the best way to reheat leftovers?

The most effective way to reheat pork roast is in the oven at 350°F (175°C) until warmed through. Alternatively, you can use the microwave in short intervals to prevent dryness.

Can I use other types of meat for this recipe?

Absolutely! Chicken, beef, or lamb can be substituted depending on your preferences. The cooking times may vary, so consult appropriate guidelines for each type of meat.

What can I serve with pork roast?

Classic pairings include mashed potatoes, roasted vegetables, and crisp salads. Consider seasonal sides that complement the dish’s robust flavors, such as stuffing or seasonal fruit salsas.

Can I cook this recipe on high instead of low?

Yes, you can cook on high for about half the time, but the texture may not be as tender as cooking on low. Plan for about 3-4 hours on high.

What should I do if my roast is cooking too quickly?

If you find that the roast is cooking faster than expected, check the temperature of your slow cooker and consider adjusting the time or moving it to a lower heat setting.

Is it safe to leave the slow cooker unattended?

Yes, slow cookers are designed to be safe for unattended cooking. However, always set them on a stable surface and don’t overcrowd with ingredients to ensure proper cooking.

What’s the best way to store leftovers?

Let the leftovers cool completely before transferring them to airtight containers. Store in the refrigerator for up to 4 days, or freeze for up to 3 months for longer storage.

Can I add vegetables to the slow cooker with the roast?

Yes! Root vegetables like carrots, potatoes, and onions can be added to the slow cooker, enhancing the flavor and providing a complete meal.

What herbs work best with pork?

Garlic, rosemary, thyme, and sage are classic choices that pair beautifully with pork. Feel free to experiment with your favorites!

Additional Resources

If you enjoyed this Garlic Herb Pork Roast, there are plenty more delicious recipes and guiding resources available on our blog. Dive into our collection of slow cooker recipes, filled with comforting meals to enjoy throughout the week. For additional technique guides, explore our articles on slow-cooking fundamentals and flavor-building methods.

Learn more about how herbs can transform your everyday cooking, and discover new seasoning combinations that could elevate your next meal. Don’t forget to check out our equipment recommendations to find the best slow cookers and tools for your culinary adventures.

Join the Conversation

We love hearing from our readers! If you try this Garlic Herb Pork Roast or create your own variations, share your feedback and experiences on social media. Tag us in your photos, and engage with our community by sharing tips, suggested pairings, or stories about memorable meals featuring this delicious roast.

By collaborating and exchanging ideas, we can create a vibrant cooking community that inspires all home chefs. Share your adaptations, new ingredient finds, or simply connect over a love for good food.

The Recipe

Slow Cooker Garlic Herb Pork Roast

Serves: 6

Prep Time: 15 mins

Cook Time: 6 hours

Total Time: 6 hours 15 mins

Kitchen Equipment Needed

  • Slow Cooker
  • Large Skillet
  • Meat Thermometer
  • Cutting Board
  • Sharp Knife

Ingredients

  • 2-3 lb pork roast (shoulder or loin)
  • 4 cloves garlic, minced
  • 2 tsp dried thyme
  • 1 tsp dried rosemary
  • 1 tsp dried sage
  • Salt and pepper to taste
  • 1 cup chicken broth
  • 1 medium onion, sliced
  • Optional: Fresh herbs for garnish

Directions

  1. Season the pork roast generously with salt, pepper, thyme, rosemary, and sage.
  2. Heat a large skillet over medium-high heat and add a bit of oil.
  3. Once hot, sear the pork roast on all sides until browned, around 5 minutes.
  4. Transfer the seared roast to the slow cooker and add the sliced onion and garlic.
  5. Pour chicken broth around the roast, ensuring it’s not directly on top.
  6. Cover and cook on low for 6 hours or until the pork reaches an internal temperature of 145°F.
  7. Remove the roast and let it rest for a few minutes before slicing.
  8. Serve warm with the pan juices drizzled over, and garnish with fresh herbs if desired.

Recipe Notes

  • For added flavor, you can marinate the pork overnight.
  • Consider adding root vegetables for a complete meal.
  • Leftovers can be stored in the fridge for up to 4 days or frozen for up to 3 months.

Ultimate Slow Cooker Casserole Recipe for Easy Family Dinners

Slow Cooker Casserole: The Ultimate Comfort Food

⚖️
Difficulty
Easy

⏲️
Prep Time
15 mins

🕒
Cook Time
6 hours

⏱️
Total Time
6 hours 15 mins

🍽️
Servings
6 servings

Slow cooker casseroles are the embodiment of comfort food—it’s like a warm hug on a chilly day. This delightful dish combines hearty ingredients with rich flavors that melt together beautifully during cooking, delivering a satisfying and wholesome meal that requires minimal effort. With its savory blend of meat, vegetables, and spices, each bite showcases a symphony of textures and tastes that will please the entire family.

Imagine the aroma wafting through your home as your slow cooker does all the hard work. Whether it’s a busy weeknight or a lazy weekend, this slow cooker casserole allows you to spend your time on what truly matters while still enjoying a delectable home-cooked meal. Its versatility makes it perfect for any occasion, whether a family dinner, potluck or simply a cozy night in.

Quick Recipe Highlights

  • Flavor Profile: Expect a rich blend of savory notes from the meats and the sweetness of the vegetables, complemented by aromatic herbs and spices.
  • Texture: A combination of tender meats, soft vegetables, and creamy elements creates a delightful mouthfeel.
  • Aroma: The dish is infused with the comforting scents of herbs, browned meat, and caramelized onions.
  • Visual Appeal: The vibrant colors of mixed vegetables and the golden-brown top give the casserole an inviting appearance.
  • Skill Level Needed: This easy recipe is perfect for beginner cooks who want to impress without spending hours in the kitchen.
  • Special Equipment: A good quality slow cooker is all you need to create this fantastic dish.

Recipe Overview

  • Difficulty Level: This casserole is rated easy, making it approachable for cooks of all skill levels. It requires basic chopping and layering techniques, allowing anyone to successfully create a delicious meal.
  • Category: This dish fits into the casserole category, known for its comforting attributes and ability to serve a crowd.
  • Cuisine: Reflecting classic American home cooking, this casserole draws inspiration from traditional comfort foods that unite family and friends around the table.
  • Cost: The ingredients for this slow cooker casserole are generally economical, making it a budget-friendly choice for feeding a family.
  • Season: Ideal for fall and winter, this casserole warms the soul and keeps you full during the colder months.
  • Occasion: Perfect for family dinners, game nights, or holiday gatherings, this casserole brings people together while providing ample servings.

Why You’ll Love This Recipe

The taste and texture of this slow cooker casserole are incredibly appealing. The delightful concoction of flavors melds together perfectly, creating a comforting blanket of taste that nourishes both body and soul. The slow cooking process ensures that the ingredients share their essence, resulting in a cohesive dish that is rich and satisfying.

One of the remarkable conveniences of this slow cooker casserole is just how easy it is to prepare. A little chopping and layering is all that’s required, allowing you to spend more quality time with loved ones or focus on other tasks. Just set your slow cooker, and let it work its magic while you go about your day.

Nutritionally, slow cooker casseroles can be a great way to sneak in plenty of vegetables and protein, providing a balanced meal in a single dish. You can customize the ingredients to enhance the nutritional profile, ensuring everyone can enjoy this wholesome meal while benefiting from its goodness.

When gathering with friends and family, serving a slow cooker casserole is an excellent choice that fosters togetherness. It creates a warm atmosphere where conversations flow, and everyone can help themselves to seconds, making it an ideal dish for social occasions.

Cost-effectiveness makes this recipe even more appealing—featuring affordable ingredients that don’t compromise on flavor. You can stretch your budget while offering a satisfying meal, allowing you to host gatherings without breaking the bank.

Historical Background and Cultural Significance

The origin of casseroles can be traced back to the necessity of using leftover ingredients while minimizing waste. These versatile dishes became popular in households as they allowed for creativity in the kitchen, varying the flavor profiles and ingredients based on what was available.

Culturally, casseroles are often associated with comfort food, reminiscent of home and family gatherings. They symbolize warmth, nurturing, and the joy of sharing meals with loved ones, a tradition just as rich today as it was in the past.

Over the years, casseroles have evolved from simple baked dishes to more complex variations that capture flavors from around the world. Today, slow cooker casseroles have taken the spotlight due to their convenience and the ability to infuse flavors through long cooking durations.

Regional variations of casseroles often reflect local ingredients and cooking traditions. Whether inspired by southern cooking with its cheesy grits or Midwestern heartiness, the slow cooker casserole showcases how communities adapt recipes to fit their tastes while preserving cultural narratives.

Ingredient Deep Dive

  • Meat: The choice of meat impacts the flavor and texture of the dish significantly. Beef, chicken, or pork provide essential proteins while contributing rich flavors. Opt for lean cuts for a healthier version, and consider grass-fed or organic options for higher quality. Store any leftover meat in an airtight container, and you can freeze it for future use.
  • Vegetables: Fresh vegetables not only introduce vibrant colors but also add essential vitamins and minerals. Incorporate a mix of seasonal vegetables for better nutritional benefits, focusing on those at the peak of freshness. Store vegetables in a cool, dark place, and try to consume them quickly for the best quality.

Common Mistakes to Avoid

  • Skipping the sautéing: Sautéing onions and aromatics before adding them to the slow cooker adds depth to the flavor.
  • Overfilling the slow cooker: This can hinder the cooking process, leading to uneven results. Ensure the cooker is filled correctly—around two-thirds full is optimal.
  • Ignoring the layers: Proper layering of ingredients ensures even cooking, with sturdier items placed at the bottom and more delicate ingredients on top.
  • Not using enough liquid: Slow cookers require adequate liquid for proper cooking and to avoid burning, so always include broth or water.
  • Opening the lid too often: Each time the lid is removed, the cooking temperature drops considerably, so only check it when necessary.
  • Neglecting seasoning: Flavor can diminish during cooking, so taste and adjust seasonings before serving, including salt and pepper.
  • Using frozen meat: Always defrost meat beforehand, as cooking frozen meat in a slow cooker may leave it in the unsafe temperature zone too long.
  • Rushing the cooking time: Give slow cookers ample time to work their magic; recipes usually need several hours for peak flavor.
  • Failing to account for toppings: Remember to add crunchy toppings like breadcrumbs or cheese near the end of cooking to keep them fresh and vibrant.
  • Serving straight from the slow cooker: For a more elegant presentation, take the casserole out once cooked, arrange on a serving dish, and garnish before serving.

Essential Techniques

  • Sautéing: This technique is vital for developing flavor. Start with a hot pan and add a bit of oil before briefly cooking your aromatics. Aim for a light golden brown, as this enhances the overall taste of the dish. A common pitfall is undercooking, which can lead to raw flavors. Visual cues include fragrant smells and slight browning.
  • Layering: Proper layering is key to ensure even cooking and flavor distribution. Begin with a base of sturdier ingredients, like potatoes or carrots, followed by proteins. Finish with more delicate ingredients, such as greens, on top to prevent overcooking. Beginners often mix everything together, which can lead to uneven results.

Pro Tips for Perfect Slow Cooker Casserole

– Invest in a quality slow cooker for even heat distribution and better results.
– Consider using fresh herbs for a lively flavor; add them at the end of cooking for a burst of freshness.
– Customize your casserole with seasonal vegetables, enhancing flavor profiles and nutritional value.
– Avoid overcooking meats to retain tenderness—monitor the cooking time carefully, especially with different cuts.
– Use leftovers creatively in your next batch, ensuring nothing goes to waste while adding unique flavors.
– Keep the lid closed as much as possible during cooking to maintain heat and moisture.
– Allow the casserole to rest for a few minutes post-cooking before serving, which allows flavors to settle and enhances the taste experience.
– Get creative with toppings—crushed crackers, fried onions, or shredded cheese can elevate the final dish.

Variations and Adaptations

– **Regional Variations:** Different parts of the world feature their unique ingredients—think Mexican flavors with black beans and corn, or Italian with pasta and marinara.
– **Seasonal Adaptations:** Change vegetables according to seasons, using hearty butternut squash in the fall or light zucchini in the summer.
– **Dietary Modifications:** Easily modify this casserole to cater to various diets, such as using quinoa instead of rice for a gluten-free option or plant-based proteins for a vegan casserole.
– **Flavor Variations:** Experiment with spices; curry powder could transform the dish into a flavorful sensation, or add barbecue sauce for an exciting tang.
– **Texture Modifications:** For crunch, add a topping of nuts or crispy onions during the last 30 minutes of cooking.
– **Presentation Alternatives:** Consider serving in individual ramekins for a sophisticated touch or pair it with crusty bread to soak up every last bite.

Serving and Presentation Guide

To serve your slow cooker casserole with style, consider using rustic dishes that evoke homey charm. A sprinkle of fresh herbs, like parsley or cilantro, can brighten the presentation. Use a large spoon to serve individual portions, ensuring everyone receives a generous helping of meat and vegetables. Pair the casserole with crusty bread or a fresh salad to balance the richness of the dish.

Temperature plays an important role in serving—ensure your casserole is hot enough to enjoy but not boiling. Allowing it to rest for a few minutes after cooking can help with portion control and prevents any uneven spilling during serving.

For those who love to entertain, consider elegant garnishes around the edges of the dish—an array of baby microgreens or edible flowers can elevate your presentation without significant effort.

Wine and Beverage Pairing

For a delightful wine pairing with your slow cooker casserole, consider a medium-bodied red, like Merlot or Pinot Noir, which can complement the richness of the dish beautifully. If you prefer white wine, a Chardonnay works well, especially those with some oak aging, bringing a buttery note that matches nicely with the casserole’s flavors.

Non-alcoholic alternatives include sparkling water with a citrus wedge for a refreshing counterpoint or a light herbal iced tea that won’t overpower the dish’s flavors. If coffee or tea is more your style, opt for a light roast coffee that offers bright flavors or herbal tea blends that align minimalistically with the casserole’s rich characteristics.

Temperature considerations are essential—ensure red wines are slightly cooler than room temperature for the best experience, and white wines should be served chilled to enhance their refreshing qualities.

Storage and Shelf Life

Proper storage of your slow cooker casserole is key to maintaining its quality. Allow the dish to cool to room temperature before transferring it to airtight containers. Store leftovers in the fridge for up to 3-4 days or freeze for longer shelf life of up to 3 months.

Monitoring signs of spoilage is crucial—if the casserole develops an off smell, changes in color, or any mold, it’s best to discard it. When reheating, ensure the dish reaches an internal temperature of 165°F to keep it safe for consumption. For frozen casseroles, allow to thaw in the refrigerator overnight before reheating, or use the microwave in short bursts to maintain its integrity.

Make Ahead Strategies

Plan ahead by preparing your ingredients the night before. Chop up vegetables and meat, storing them separately in the fridge, ready to assemble the next day. You can layer your casserole in the slow cooker insert and refrigerate overnight, allowing you to start cooking with minimal preparation in the morning.

If you’re short on time, consider doing multiple cooking sessions, making two casseroles at once. Freeze one for a future meal, ensuring you stick to proper cooling and packaging methods. When the day arrives to enjoy your casserole, simply transfer to the slow cooker or plan to reheat from frozen.

Quality impact can be assessed by making a note on how much time the casserole has spent assembled in the fridge versus when fresh—while textures might not be as pronounced, flavors often deepen and improve.

Scaling Instructions

Scaling your slow cooker casserole for a larger crowd is simple. Halving the recipe requires adjusting the cooking time slightly, while doubling or tripling may necessitate a larger slow cooker for even cooking.

Pay attention to timing—while basic ratios might hold, the layer depth impacts heating times, especially in larger batches. Witnessing the bubbling liquid around the edges is a great cue for doneness.

When scaling up, in terms of storage, ensure to check for appropriate containers, allowing it to fit without spilling over.

Nutritional Deep Dive

Analyze the macros of your slow cooker casserole, focusing on proteins, fats, and carbohydrates, ensuring a balanced meal. It might include lean proteins, and with the incorporation of vegetables, you’ll enjoy healthy fiber without excessive calories.

Micronutrient analysis can reveal a wealth of vitamins and minerals hidden within your ingredients, particularly from various colorful vegetables. Each serves its unique purpose, contributing to a wholesome meal that benefits overall health.

Health benefits extend beyond basic nutrition; with its ability to fill you up and keep cravings at bay, slow cooker casseroles are often rich in fiber, keeping digestive systems balanced while providing long-lasting energy for your day.

Remember that portion analysis matters—keeping serving sizes in check can aid in weight management, emphasizing moderation while enjoying comfort foods.

Dietary Adaptations

A slow cooker casserole is incredibly adaptable to meet various dietary needs. For those on gluten-free diets, swap regular pasta or grains for gluten-free alternatives to enjoy a satisfying meal without concerns.

Vegetarians can omit meat entirely or substitute it with beans, lentils, or tofu for protein. For a vegan version, simply avoid all animal-based products while incorporating a variety of legumes and grains that provide rich textures.

If you’re on a low-carb or keto diet, consider using cauliflower rice or zucchini noodles in place of traditional carbohydrates. Focus on incorporating more proteins and healthy fats to meet nutritional goals without sacrificing taste.

Additionally, balancing according to the low-FODMAP diet may require substituting certain vegetables known to cause discomfort, favoring items like carrots and green beans, which are often more digestible.

Troubleshooting Guide

If your casserole has texture issues, such as being too watery, it might need longer cooking time, or adding in fibrous vegetables like broccoli or beans can help thicken the consistency. For those too dry, more liquid added during the last stages of cooking can prevent dryness.

Flavor balance may suffer if not enough seasoning is applied. Tasting and adjusting herbs and spices throughout the cooking time is essential especially after opening the lid for checking.

If you encounter temperature problems, ensure the slow cooker isn’t overfilled, leading to uneven cooking. Each model has specific heating capabilities, so if food continually undercooks, it may require a unit upgrade.

For equipment challenges, always ensure your slow cooker is functioning correctly, investing in a reliable model that maintains steady heat over hours ensures consistent results.

Ingredient substitutions can lead to unexpected results; keep in mind, especially with spices, that natural flavors will vary significantly. For best outcomes, stick to closely related flavors profiles when swapping items.

Timing concerns often arise with chaotic schedules; cooking the casserole on high can reduce overall cooking duration. But remember to monitor to avoid burning the edges.

Recipe Success Stories

Community feedback on slow cooker casseroles often highlights the convenience and flavor, with many sharing success stories of last-minute preparations leading to rave reviews from friends and family.

Readers love to share their variation successes, such as introducing exotic spices or regional ingredients that elevate the basic recipe into delightful culinary explorations.

Adaptation stories feature families who have modified the recipe to accommodate dietary needs offering a sense of inclusivity by ensuring everyone can enjoy the deliciousness.

Photography tips often lead readers to capture drool-worthy shots of their casseroles, highlighting the dish’s colors and textures that do justice to the meal’s appeal and creating engagement with friends and followers.

Frequently Asked Questions

Can you prepare a slow cooker casserole the night before?

Yes, you can chop ingredients and layer them in your slow cooker insert to store in the refrigerator overnight. Simply set it to cook in the morning.

How long does food last in a slow cooker?

A slow cooker can safely keep food warm for up to 2 hours after cooking before bacteria starts to present risks. Ensure you refrigerate leftovers promptly.

Is it safe to leave a slow cooker on overnight?

Typically, leaving a slow cooker on overnight is safe if it’s cooked as per your recipe’s instructions. Always be sure to monitor your appliance for wattage and performance.

How do I know when my casserole is done?

Your casserole is done when vegetables are tender, and proteins are cooked through, reaching 165°F. A fork should easily pierce through the meat.

What’s the difference between high and low setting?

The high setting usually takes 4-6 hours for cooking while the low setting will take about 6-8 hours. Adjust the timing based on your recipe and schedule.

Can you put frozen meat into a slow cooker?

It is not recommended to cook frozen meat in a slow cooker as it can spend too much time at an unsafe temperature. Always thaw meat before cooking.

Can I use milk or cream in my casserole?

Yes, adding cream or milk can create a richer, creamier texture. But be cautious of cooking them too long, as they can curdle.

What can I substitute for cream of chicken soup?

Consider making a homemade version with chicken broth thickened with a roux, or use coconut milk for a dairy-free alternative.

Can I cook my casserole faster?

If you’re short on time, you can set the slow cooker to high, but be sure to monitor for cooking time adjustments based on your ingredients.

What are some good sides to serve with a casserole?

A light salad or some crusty bread works great alongside a slow cooker casserole, balancing the richness of the main dish.

Additional Resources

For those eager to explore further, related recipes abound! Consider checking out other slow cooker dishes like stews, soups, and pasta bakes that share similar cooking methods.

Technique guides on temperature management and layering foods in the slow cooker can enhance your cooking skills, ensuring you make the most of your appliance.

Additional ingredient information can help you understand flavor pairings better, guiding you through what works best together.

Investing in good kitchen equipment will last for years; consider finding high-quality slow cookers, knives, and cutting boards that streamline the cooking process.

Seasonal variations can inspire your next casserole; experiment with summer vegetables in the warmer months and heartier produce in the colder months.

Join the Conversation

We invite you to share your experiences and photos of your slow cooker casserole creations on social media using our hashtag! Your feedback and variations can inspire others and cultivate a community around comfort cooking.

Engaging with your followers through feedback and sharing recommendations allows you to deepen the connection with other food enthusiasts. Don’t hesitate to leave reviews and comments on our blog post; we love hearing your stories!

Explore adaptations that you’ve made to existing recipes, as these tips can help others discover new favorites while enhancing the traditional casserole they know and love.

Together, we celebrate the joys of cooking and the wonderful power of shared meals as we learn and grow together.

The Recipe

Slow Cooker Casserole

Serves: 6 servings

Prep Time: 15 mins

Cook Time: 6 hours

Total Time: 6 hours 15 mins

Kitchen Equipment Needed

  • Slow cooker
  • Chopping board
  • Knife
  • Measuring cups and spoons
  • Large mixing spoon

Ingredients

  • 1 pound ground beef
  • 2 cups mixed vegetables (carrots, peas, corn)
  • 3 cups diced potatoes
  • 1 can cream of chicken soup
  • 1 cup shredded cheese
  • 1 onion, chopped
  • 2 cloves garlic, minced
  • 1 teaspoon salt
  • 1 teaspoon black pepper
  • 1 teaspoon dried thyme

Directions

  1. In a skillet over medium heat, cook the ground beef until browned. Drain any excess fat and set aside.
  2. In the slow cooker, layer the diced potatoes, followed by the mixed vegetables, garlic, and onion.
  3. Spread the cooked ground beef over the vegetables, then pour the cream of chicken soup evenly on top.
  4. Sprinkle with salt, pepper, and dried thyme. Mix gently to combine.
  5. Cover and cook on low for 6 hours or until the vegetables are tender.
  6. During the last 30 minutes of cooking, sprinkle shredded cheese on top to allow it to melt.

Recipe Notes

  • For a vegetarian version, substitute ground meat with lentils or chopped mushrooms.
  • You can freeze leftovers for up to 3 months—let cool completely before storing in airtight containers.

Delicious Italian Sub Squares: A Perfect Party Appetizer Recipe

Italian Sub Squares: A Delicious Twist on Classic Sub Sandwiches

⚖️
Difficulty
Easy

⏲️
Prep Time
15 mins

🕒
Cook Time
25 mins

⏱️
Total Time
40 mins

🍽️
Servings
8 Squares

If you’re craving the delightful flavors of an Italian sub but want to switch up the presentation, then Italian Sub Squares are the perfect solution! These savory squares are packed with all the iconic ingredients of a traditional Italian sub sandwich, including layers of salami, ham, provolone cheese, and fresh veggies, all nestled in a fluffy, baked base. They make for an ideal appetizer, lunch option, or party dish, serving up the nostalgic taste of Italy in a fun, shareable form.

The beauty of Italian Sub Squares lies in their versatility and ease of preparation. Perfectly seasoned and topped with zesty herbs, these squares appeal to both the eyes and the palate. Each bite bursts with a combination of flavors and textures—from the meat’s savoriness and the cheese’s creaminess to the fresh crunch of ripe vegetables. These squares not only satisfy your hunger but also bring a taste of Italian cuisine to your table in an easy and accessible way that everyone will love.

Quick Recipe Highlights

  • Flavor Profile: Enjoy the savory notes of cured meats, the creaminess of cheese, and the bright freshness of the veggies, all mixed with a touch of Italian herbs.
  • Texture: The soft base contrasts beautifully with the chewy texture of the cured meats and the crisp crunch of lettuce and tomatoes, creating a mouthwatering experience.
  • Aroma: The aroma of garlic, oregano, and baked dough wafts through your kitchen as these squares bake, enticing everyone nearby.
  • Visual Appeal: With vibrant colors from tomatoes, greens, and the golden crust, these squares are not just tasty but visually stunning, perfect for gatherings.
  • Skill Level Needed: This recipe requires basic baking skills, making it accessible even for novice cooks looking to impress their friends and family.
  • Special Equipment: A baking dish and sharp knife are the only additional tools needed to create these delicious squares.

Recipe Overview

  • Difficulty Level: Italian Sub Squares are categorized as easy, making them perfect for beginner cooks or anyone looking for a quick and delicious meal.
  • Category: This dish fits into various meal categories, including appetizers, lunch, and party snacks, appealing to any gathering.
  • Cuisine: Rooted in Italian-American cuisine, this recipe pays homage to classic sub sandwiches that have become a beloved staple across the U.S.
  • Cost: The ingredients for these squares are relatively inexpensive, making it a cost-effective option for feeding a crowd or enjoying as a family meal.
  • Season: Ideal for any season, these squares are particularly popular during summer cookouts, potlucks, and family gatherings.
  • Occasion: Whether it’s a game day, a picnic, or a casual lunch with friends, Italian Sub Squares are a delightful addition to any occasion.

Why You’ll Love This Recipe

Italian Sub Squares are not just a treat for the taste buds; they offer an array of benefits that make them a must-try dish. First and foremost, the taste and texture are simply irresistible. Bite into a square, and you’ll experience a harmonious blend of savory meats and creamy cheese, enhanced by the freshness of the veggies. The fluffy base provides a comforting foundation while also serving as a delightful contrast to the zesty filling.

In terms of convenience, Italian Sub Squares shine brightly. The preparation is quick and easy, allowing you more time to enjoy with family and friends. Just a bit of chopping, layering, and baking, and your delicious meal is ready to serve. This simplicity makes them an excellent choice for busy weeknights or last-minute gatherings.

From a nutritional standpoint, these squares can be customized to include your favorite lean meats and plenty of vegetables, giving you a balanced dish that fuels your day. You can easily increase the nutrient density by adding more fresh veggies and opting for whole-grain options, making them as nourishing as they are tasty.

Here’s the fun part: Italian Sub Squares are a fantastic conversation starter. Serve them at a gathering, and you’ll see guests mingling and sharing their own variations and memories associated with Italian sandwiches. They spark excitement and are easy to share, making them not just a dish but an experience.

Finally, considering the cost-effectiveness of Italian Sub Squares, they provide excellent value for money. By utilizing budget-friendly ingredients that go a long way, you can feed a hungry crowd without breaking the bank. They prove that you don’t need to spend a fortune to create a standout dish that everyone will love.

Historical Background and Cultural Significance

The Italian sub sandwich, known variably as hoagie, grinder, or hero across different regions of the United States, has its origins in Italian immigrants who brought their culinary traditions to America in the early 20th century. These sandwiches quickly gained popularity, particularly in Italian neighborhoods, becoming a staple in delis and lunch counters. Over the decades, they evolved, integrating local ingredients and flavors, which helped solidify their place in American on-the-go cuisine.

Culturally, the Italian sub sandwich represents connection and community. It embodies the family-oriented values of sharing food, a hallmark of Italian culture. At picnics, parties, and celebrations, these sandwiches frequently grace tables, symbolizing unity and togetherness. Making Italian Sub Squares is a modern twist on this tradition, allowing families to enjoy this beloved dish in a new format while still honoring its roots.

The evolution of Italian subs has also led to numerous variations across different regions in the U.S. While some prefer a classic combination of meats and cheeses, others have embraced creative ingredients such as hummus or seasoned vegetables. Italian Sub Squares encapsulate this spirit of innovation while keeping the essence of the traditional sub.

In addition, regional variations of the Italian sub in places like Philadelphia or New York exhibit how local tastes shape its preparation. Each area contributes unique flavors and personality to the sandwich, ensuring that wherever you are, you can find an Italian sub with a personal touch.

Ingredient Deep Dive

Salami: This cured meat is a defining ingredient in Italian sub sandwiches, celebrated for its robust flavor. Originating in Italy, salami comes in various forms, each with unique seasoning blends. It’s rich in protein but should be enjoyed in moderation due to its sodium content. When selecting salami, look for firmer varieties for slicing ease, and store it in the refrigerator for optimal freshness. Substitutes include pepperoni or turkey for lower-fat options.

Ham: A great source of protein and flavor, ham offers sweetness and a mild taste that balances the spiciness of salami. It has roots deeply embedded in Italian cuisine as prosciutto, a dry-cured ham. Always choose ham with less added sugar or preservatives for a healthier choice. Store ham properly to maintain freshness, and if you want a leaner option, consider turkey or chicken.

Provolone Cheese: This semi-hard cheese is another essential component of Italian sub squares, providing a creamy texture and sharp flavor. Provolone comes from Southern Italy, known for its rich traditions in cheese-making. Opt for aged provolone for a more robust taste. Store cheese in the refrigerator wrapped tightly to keep it fresh, and it can be substituted with mozzarella or even vegan options for those with dietary restrictions.

Fresh Vegetables: Traditional Italian subs are loaded with fresh lettuce, tomatoes, and onions, adding necessary crunch and freshness. These ingredients provide important vitamins and hydration. Use crisp, vibrant vegetables for the best flavor, and store them in a cool place to maintain freshness. Substitute with seasonal vegetables like peppers or cucumbers to enhance flavors.

Common Mistakes to Avoid

  • Using stale bread: Always ensure your bread is fresh to achieve the best texture in your squares.
  • Overbaking: Keep a close watch on baking time to avoid a dry or burned base.
  • Using too many wet ingredients: Balance moisture levels to prevent sogginess in the squares.
  • Skipping on seasoning: Don’t forget to season your layers; herbs and spices enhance the overall flavor.
  • Uneven layering: Make sure to layer ingredients evenly for consistent flavor in each square.
  • Not allowing cooling time: Let the squares rest for a few minutes before cutting; this helps them hold together better.
  • Using low-quality ingredients: Choose quality meats and cheeses; they make a significant difference in taste.
  • Neglecting preheating the oven: Preheat your oven thoroughly to ensure even cooking.

Essential Techniques

Layering Ingredients: Master the art of layering by placing sturdier ingredients like cheese closest to the base. This technique prevents the bread from becoming soggy, allowing the flavors to meld beautifully while maintaining structural integrity.

Proper Baking: To achieve golden-brown squares, ensure your oven is preheated. Watch for visual cues, like bubbling cheese or lightly browned edges, to know when they are perfectly done.

Cutting Technique: Use a sharp knife and cut squares after letting them cool slightly to avoid squashing the ingredients. This ensures clean edges and neat servings.

Flavor Infusion: Allow your squares to rest after baking; this is key for letting flavors meld and intensifying the overall taste. A few minutes of patience leads to a more enjoyable dining experience.

Pro Tips for Perfect Italian Sub Squares

– Use fresh herbs to elevate the flavor; consider adding basil or oregano for an aromatic punch.
– Pre-cook any raw vegetables to reduce moisture content and enhance tenderness.
– Experiment with different cheeses to find your favorite flavor combination.
– Always taste your filling ingredients before assembling to ensure perfect seasoning.
– Serve with a side of marinara sauce for dipping; it offers an extra layer of flavor.
– If you enjoy heat, include sliced pepperoncini or spicy salami for a kick.
– For added richness, drizzle a little olive oil over the finished squares before serving.
– Batch it up; Italian Sub Squares freeze well, making them perfect for meal prep.

Variations and Adaptations

– **Regional Variations:** Incorporate local ingredients or meats, like adding Capicola for a regional flair.
– **Seasonal Adaptations:** Embrace seasonal vegetables, such as zucchini in the summer or roasted root veggies in the winter for richness.
– **Dietary Modifications:** Create a gluten-free version using gluten-free bread or entirely benefit from low-carb variations focused on meats and cheeses.
– **Flavor Variations:** Add pesto sauce for a herby twist or switch from provolone to a stronger cheese like gorgonzola.
– **Texture Modifications:** Experiment with different baking times to achieve either crispier edges or a softer center.
– **Presentation Alternatives:** Layer the squares with fresh basil or microgreens right before serving for an elegant finish.

Serving and Presentation Guide

To perfectly present your Italian Sub Squares, consider using a clean, colorful platter to showcase the rustic nature of this dish. For garnishing, sprinkle chopped parsley or a dusting of Parmesan cheese on top just before serving. Accompany the squares with small bowls of dipping sauces, such as marinara or garlic aioli, for that authentic Italian experience.

Temperature plays a crucial role; serve the squares warm for the best taste and texture. Ensure your portions are hearty but manageable, allowing for second servings. Consider pairing your Italian Sub Squares with a side salad for a complete meal experience.

Wine and Beverage Pairing

Pair your Italian Sub Squares with a chilled glass of Pinot Grigio, which complements the savory flavors beautifully. Alternatively, a light red like Chianti balances the richness of the meats and cheese perfectly.

For non-alcoholic options, consider sparkling water with fresh lemon for a refreshing touch. A robust iced tea can also be a delightful complement to the meal. When serving, ensure that all drinks are at the appropriate temperature for the best enjoyment.

Storage and Shelf Life

Store leftover Italian Sub Squares in an airtight container in the refrigerator for up to three days. For optimal freshness, ensure they are completely cooled before sealing them.

If you’d like to freeze portions, wrap them securely in plastic wrap, then place in a freezer-safe bag. Properly stored, they can last up to three months in the freezer. To reheat, bake in the oven for a few minutes until heated through, ensuring they retain their delightful crust.

Make Ahead Strategies

To make the most of your time, prep your ingredients a few hours in advance. Dice your vegetables and slice the meats, storing them separately in the fridge until you’re ready to assemble.

You can also prepare the squares a day ahead; bake them without cutting, allow them to cool, and then store them wrapped. When ready to serve, simply reheat and cut. This makes it a stress-free option for entertaining or busy evenings.

Scaling Instructions

If you’re looking to halve your recipe, adjust the ingredients accordingly, and choose a smaller baking dish. When doubling or tripling, ensure that your baking dish is large enough and that you have sufficient oven space for even cooking.

Keep an eye on baking time, as enlarging the batch may require longer heating. It’s also essential to consider how storage changes; for larger batches, separate them into smaller containers for easier reheating and portion control.

Nutritional Deep Dive

Each square of your Italian Sub creation offers a flavorful feast, but understanding its nutritional value can enhance your cooking experience. Start by analyzing the macronutrient balance; protein from meats and cheese, carbs from bread, and fats from oils contribute to a satisfying meal.

Micronutrient analysis shows that adding vegetables significantly boosts vitamins, contributing to your daily requirements. This dish can offer considerable health benefits when balanced well, allowing room for customization to fit dietary needs.

Paying attention to portion control helps with weight management, ensuring that while these squares are delightful indulgences, they remain a satisfying part of a well-rounded diet.

Dietary Adaptations

For those who follow specific diets, Italian Sub Squares can be adjusted to meet your needs. A gluten-free variant is achievable with gluten-free bread, while dairy-free adaptions can easily employ non-dairy cheeses.

Vegans can relish in this dish by replacing meats with marinated tofu or tempeh and using plant-based cheeses. To cater to low-carb or keto diets, consider a crustless version, omitting the traditional base for a meaty and cheesy feast.

Troubleshooting Guide

Should you encounter texture issues, ensure you’re not overstuffing the squares, which can lead to uneven baking. Adjust your baking time for a softer or firmer outcome as needed.

For flavor balance, taste before sealing your square; if it’s lacking, consider additional herbs or spices. When faced with temperature problems, verify your oven works correctly before starting.

If you need to make substitutions, investigate flavors; using smoked ingredients in place of regular meats can add depth. Timing concerns can arise; ensure other elements, such as side dishes, align with when the squares will be ready.

Recipe Success Stories

Community feedback increasingly highlights how Italian Sub Squares have won over family gatherings. Readers have shared delightful variations, like adding seasonal toppings, inspiring even more creativity in the kitchen.

Photography of these squares has showcased their inviting, colorful appearance, prompting viewers to try making their versions. Every shared story contributes to the collective love for this adaptable dish.

Engaging with readers on social media has created an interactive experience where cooking challenges and tips are exchanged, solidifying the success of this recipe as a beloved favorite.

Frequently Asked Questions

How can I store leftovers?

You can store leftovers in an airtight container in the refrigerator for up to three days. Make sure they are completely cooled before sealing to maintain freshness.

Can I freeze Italian Sub Squares?

Yes! Wrap them tightly in plastic wrap and place them in a freezer-safe bag. They can last up to three months in the freezer.

What kind of cheese can I use?

While provolone is traditional, feel free to experiment with mozzarella, cheddar, or even vegan cheese for a different flavor experience.

Can I add extra veggies?

Absolutely! Feel free to include peppers, spinach, or any favorite vegetables to suit your taste or make use of what’s on hand.

Is there a vegan option?

Yes! You can omit the meats and cheeses, using marinated tofu or tempeh and plant-based cheese substitutes.

What if my filling is too wet?

To remedy watery filling, pre-cook vegetables to eliminate moisture or use crusty bread that absorbs liquid better.

Can I make this ahead of time?

Indeed, you can prepare everything in advance and bake just before serving to enjoy fresh out of the oven.

What herbs should I use?

Oregano and basil are perfect, but feel free to mix in rosemary or thyme for a more personalized touch.

How do I know when they are done?

Look for a golden-brown crust and bubbling cheese as signs that your squares are ready. A toothpick test can also check for doneness in the center.

Can I customize the meats?

Definitely! Feel free to substitute with your preferred deli meats or even use a combination for more complex flavors.

Additional Resources

If you’re eager to explore more, check out related recipes like classic Italian pasta salads, or subs variations, and detailed technique guides for mastering homemade bread. Ingredient information focuses on seasonal produce that enhances your culinary creations.

Discover essential kitchen tools that make preparation simpler and learn about seasonal variations that elevate this timeless dish into new territories of flavor.

Join the Conversation

Share your versions of Italian Sub Squares on social media using our hashtag, and don’t forget to include your photography tips to help others present their dishes beautifully. Your reviews and feedback are invaluable to the community growing around this beloved recipe, and your unique variations can inspire fellow cooks to step outside traditional boundaries.

The Recipe

Italian Sub Squares

Serves: 8 Squares

Prep Time: 15 mins

Cook Time: 25 mins

Total Time: 40 mins

Kitchen Equipment Needed

  • Baking dish
  • Sharp knife
  • Cutting board
  • Mixing bowl

Ingredients

  • 1 pound salami, thinly sliced
  • 1 pound ham, thinly sliced
  • 8 ounces provolone cheese, sliced
  • 1 cup lettuce, shredded
  • 1 cup tomatoes, diced
  • 1 package (8 oz) crescent roll dough
  • 1 teaspoon oregano
  • 1 teaspoon garlic powder
  • Salt and pepper to taste

Directions

  1. Preheat your oven to 375°F (190°C) and grease a baking dish.
  2. Unroll the crescent roll dough and press it into the bottom of the baking dish to form the base.
  3. Layer half of the salami, ham, and provolone cheese over the dough.
  4. Sprinkle shredded lettuce and diced tomatoes over the cheese layer.
  5. Add the remaining salami, ham, and cheese, followed by a sprinkle of oregano, garlic powder, salt, and pepper.
  6. Cover with remaining crescent roll dough, pinching edges to seal.
  7. Bake for 25 minutes or until golden brown. Allow to cool for 10 minutes before cutting into squares.

Recipe Notes

  • Feel free to switch up the meats and cheeses based on your preference.
  • These squares can be made ahead of time and reheated when ready to serve.
  • Can be stored in an airtight container in the refrigerator for up to three days.
  • Add your favorite dipping sauce as a side for extra flavor.

Delicious Potsticker Soup with Mushrooms and Bok Choy Recipe

Delicious Potsticker Soup with Mushrooms & Bok Choy: A Comforting Bowl of Flavor

⚖️
Difficulty
Easy

⏲️
Prep Time
15 mins

🕒
Cook Time
30 mins

⏱️
Total Time
45 mins

🍽️
Servings
4

Potsticker soup is a delightful fusion of comfort and nourishment, combining the familiar essence of potstickers with the warmth of a steaming bowl of soup. This recipe for Potsticker Soup with Mushrooms & Bok Choy brings the hearty flavors of Asian cuisine right to your home, awakening your taste buds with every spoonful. Imagine the succulent dumplings nestled in a savory broth, enveloped by tender bok choy and earthy mushrooms, creating a memory with each bite.

The beauty of Potsticker Soup lies not only in its flavor but also in its versatility. Whether it’s a chilly evening or a festive gathering, this dish captures the heart of comforting meals, making it perfect for any occasion. With its rich, umami-packed broth and tender veggies, this soup is a hug in a bowl, reminding you of home-cooked meals shared with family and friends.

Quick Recipe Highlights

  • Flavor Profile: This soup boasts a harmonious blend of savory, umami flavors, enhanced by the richness of the broth and the savoriness of cooked mushrooms.
  • Texture: The contrast between the tender potstickers, crunchy bok choy, and silky broth creates a rich and satisfying mouthfeel.
  • Aroma: Aromatic ginger, garlic, and scallions mingle to create a fragrant base that invites you to enjoy every bowl.
  • Visual Appeal: Vibrant green bok choy and earthy mushrooms each add a splash of color, making the bowl visually stunning.
  • Skill Level Needed: Perfect for beginners and experienced cooks alike, as it requires simple ingredients and straightforward techniques.
  • Special Equipment: A large pot is essential for preparing the broth and cooking the soup in one go.

Recipe Overview

  • Difficulty Level: This Potsticker Soup is easy to prepare, requiring minimal technical skills, making it accessible for everyone, even those new to cooking.
  • Category: This soup falls under the category of comfort food and Asian-inspired meals, providing hearty nourishment.
  • Cuisine: Rooted in Asian culinary traditions, this recipe showcases flavors typical of Chinese comfort food, harmonizing cross-cultural influences.
  • Cost: The approximate cost is budget-friendly, utilizing common ingredients that won’t break the bank, making it perfect for family meals.
  • Season: Enjoy this dish year-round, but it’s particularly soothing during colder months, providing warmth and comfort.
  • Occasion: Potsticker Soup is ideal for casual gatherings, cozy nights in, or even as a nourishing lunch option.

Why You’ll Love This Recipe

Potsticker Soup with Mushrooms & Bok Choy stands out due to its delicious taste and unique texture. The combination of pillowy dumplings in a savory broth creates a satisfying experience that is both comforting and filling. This recipe is also highly convenient; it utilizes readily available ingredients and comes together quickly, making it a great option for busy weeknight dinners. Additionally, the soup is nourishing, featuring vegetables packed with vitamins and minerals, making it a wholesome choice for those seeking healthier meals.

Socially, serving Potsticker Soup at gatherings can elevate any occasion and encourage connection. It’s a dish that invites people to come together, sharing stories as they savor each warm bowl. Economically, this recipe stands out because it delivers great value without sacrificing flavor, demonstrating that healthy home-cooked meals don’t need to be expensive or elaborate.

Historical Background and Cultural Significance

Potstickers, originating from China, have a rich history dating back centuries. Traditionally, they were created as a means to utilize leftover ingredients, making them a sensible and practical addition to Asian households. Over time, the dumplings evolved into beloved snacks, enjoyed across different culinary landscapes.

In Asian culture, food is associated with togetherness and community. The preparation and enjoyment of dumplings, including potstickers, are often social activities, with families gathering to make batches together during festive events. This cultural significance plays a vital role in the perception of potstickers as a symbol of unity.

As cooking evolved, potstickers began to take on various regional styles, adapting to local tastes and available ingredients. Today, you’ll find numerous variations around the world, each highlighting unique flavors and techniques.

Ingredient Deep Dive

**Mushrooms:**
Mushrooms not only enhance the flavor profile of this soup, providing an earthy, umami taste, but they also boast numerous health benefits. Rich in antioxidants, they support the immune system and overall well-being. When selecting mushrooms, look for firm and plump varieties with no brown spots. Store fresh mushrooms in a paper bag in the fridge to maintain their freshness. As a substitution, you can opt for shiitake or cremini mushrooms, each offering delightful flavors.

**Bok Choy:**
Bok choy is a versatile green vegetable celebrated in Asian cuisine. It is packed with vitamins A, C, and K and provides a refreshing crunch to the potsticker soup. When selecting bok choy, choose those with a vibrant green color and firm stalks. To store, keep it in the refrigerator wrapped in a damp towel. If you’re looking for alternatives, baby spinach or Swiss chard work well in this recipe.

Common Mistakes to Avoid

  • Overcrowding the pot: Cooking too many dumplings at once can lead to uneven cooking and sticking together.
  • Undercooking the broth: Ensure the broth is simmered long enough to develop robust flavors; otherwise, the soup can taste bland.
  • Neglecting to taste: Not tasting the broth before serving may lead to missing out on flavor adjustments that enhance the soup.
  • Using stale dumplings: Fresh or frozen dumplings are ideal; stale ones can affect the flavor and texture negatively.
  • Boiling at too high a temperature: A gentle simmer is key to allowing the flavors to meld without breaking the dumplings.
  • Using the wrong type of mushrooms: Certain mushrooms may alter the soup’s taste; stick to traditional varieties for authentic flavor.
  • Skipping the aromatics: Garlic and ginger are essential for a flavorful broth; neglecting these can lead to a flat-tasting soup.
  • Holding the soup too long before serving: Served fresh and hot, this soup is best enjoyed right after cooking to maintain its texture and flavor.

Essential Techniques

One key technique to master in making Potsticker Soup is simmering the broth. This allows the ingredients to meld together, resulting in a rich flavor. Start by sautéing garlic and ginger before adding liquids—it enhances the aroma and depth of the soup. Look for small bubbles forming, indicating a gentle simmer rather than a fast boil, which can negatively affect flavor extraction.

Another essential skill is managing the cooking time of the dumplings. Dumplings should be added to the simmering broth and cooked until they float, indicating they are done. Overcooking can lead to a mushy texture, which is undesirable. Visually, you’ll want to see them puffing slightly, indicating a perfect cooking state.

Pro Tips for Perfect Potsticker Soup

Start with a flavorful base by using homemade or high-quality broth. This significantly enhances the soup’s flavor profile. When adding vegetables, such as bok choy, do so near the end to preserve their crispness. For a spicy kick, consider adding chili oil or fresh chili slices as a garnish. If using frozen dumplings, ensure they are thawed slightly to prevent them from sticking. Explore different mushrooms for varied textures and flavors, such as oyster or shiitake. Serve with fresh herbs like cilantro or green onions for an extra layer of flavor. Lastly, customize your soup with additional toppings like sesame oil or soy sauce for a more personalized experience.

Variations and Adaptations

Incorporate regional variations by using different types of dumplings, such as Jiaozi or even wontons. Seasonal adaptations can include butternut squash or spinach during fall and winter months. Dietary modifications are simple; for a more plant-based version, opt for vegetable dumplings and use a vegetable broth. Flavor variations could involve the addition of lemongrass or sesame oil, lending an aromatic twist to the traditional recipe. For texture changes, consider adding rice noodles for a heartier meal. Presenting the soup in smaller bowls garnished with fresh herbs provides a visually stunning appeal while inviting guests to enjoy their own portions.

Serving and Presentation Guide

Plating techniques for Potsticker Soup focus on a clean presentation. Use deep bowls to accommodate broth and dumplings, arranging the toppings centrally for an inviting look. Garnish with freshly chopped herbs and a drizzle of chili oil for a splash of color and added flavor. Traditional accompaniments like soy sauce on the side prompt customization and cater to individual tastes. For modern serving suggestions, pair your soup with a light salad or steamed vegetables. Ensure that the soup is served hot, and consider offering a few extra dumplings on the side for those who can’t get enough.

Wine and Beverage Pairing

To complement Potsticker Soup, consider pairing it with light white wines like Sauvignon Blanc or Riesling, which enhance the dish’s flavors without overpowering them. Non-alcoholic alternatives such as jasmine tea or a refreshing cucumber-mint iced tea create a balanced dining experience. If you prefer coffee or tea, a light green tea can elevate the overall meal with its subtle flavor profile. Serve beverages chilled to contrast the warmth of the soup, creating an enjoyable dining experience.

Storage and Shelf Life

For optimal freshness, store any leftover Potsticker Soup in an airtight container in the refrigerator for up to three days. Ensure that the dumplings and broth are kept separately if possible, as the dumplings may absorb liquid over time. For longer storage, consider freezing the soup without dumplings, as they are best cooked fresh. Signs of spoilage to look for include off odors or changes in texture. When reheating, warm the soup gently on the stove, avoiding high temperatures that can compromise the quality. If frozen, thaw in the refrigerator overnight before reheating.

Make Ahead Strategies

To simplify meal prep, batch-cook the broth and store it separately for use throughout the week. Prepare vegetables and dumplings in advance and refrigerate them until ready to cook. This way, you can assemble the soup quickly on busy nights. Quality can be maintained by using fresh ingredients and proper storage practices, ensuring they remain crisp and tasty. When you’re ready to serve, combine the components in a pot, simmer until hot, and add any fresh herbs or garnishes needed for enhanced flavor.

Scaling Instructions

To halve the Potsticker Soup recipe, simply reduce all ingredient quantities by half, ensuring the cooking time remains consistent. Doubling or tripling the recipe is easily manageable by adjusting the pot size accordingly. While larger pots may require additional cooking time to reach boiling, the overall time should align closely with the original. Keep in mind that cooking in larger batches may also necessitate careful portioning to ensure a balanced flavor across servings.

Nutritional Deep Dive

Analyzing the macro breakdown of Potsticker Soup reveals balanced proportions of protein from the dumplings, healthy fats from optional oils, and complex carbohydrates from the veggies. Each ingredient offers an array of micronutrients, with mushrooms providing B-vitamins and bok choy delivering vitamin K. This dish supports healthful eating patterns by being lower in calories yet high in volume. Consider portion size for effective weight management, offering a satisfying meal without excess calories.

Dietary Adaptations

For those following gluten-free diets, opt for gluten-free dumplings or dumpling alternatives made from rice flour. Dairy-free versions can be achieved simply by omitting any dairy components in the recipe. For a fully vegan approach, ensure the dumpling choice aligns with plant-based guidelines. Low-carb diets benefit from using zucchini noodles instead of traditional dumplings. Keto enthusiasts can enjoy this soup by maximizing low-carb veggies and choosing ketogenic dumpling options. Paleo followers should use fresh, whole ingredients without processed components, ensuring adherence to dietary restrictions.

Troubleshooting Guide

Texture issues may occur if dumplings are overcooked, leading to a mushy consistency. Always monitor the cooking time closely. For flavor balance problems, adjusting seasoning levels of soy sauce, salt, or pepper can remedy overly bland or salty soup. If there are temperature problems, ensure that the broth is heated gradually for optimal flavor extraction. Equipment challenges, such as thick pots or improperly sealed lids, may affect cooking time; use suitable cookware for better heat retention. Ingredient substitutions could alter results; stick to the recommended types for best outcomes. Timing concerns, especially with dumpling cooked, should be promptly addressed for even cooking.

Recipe Success Stories

Community feedback highlights how home cooks have embraced Potsticker Soup as a go-to comfort food for family dinners. Numerous adaptations, such as adding personal favorite vegetables or spices, showcase the versatile nature of this recipe. Readers often share photographs of their unique presentations and variations, inspiring others to try different interpretations. Engaging with the community provides opportunities for sharing tips and tricks, amplifying the enjoyment of cooking this delightful dish.

Frequently Asked Questions

Can I use store-bought dumplings?
Absolutely! Store-bought dumplings can save time and still deliver delicious results. Just ensure they are cooked thoroughly as per package instructions.

What can I substitute for bok choy?
If bok choy isn’t available, you can use baby spinach, Swiss chard, or kale as alternatives to retain a similar texture and flavor profile.

How do I reheat leftovers?
Reheat leftovers on the stove over low to medium heat until warmed through. Avoid high heat to prevent overcooking the dumplings.

Can I freeze this soup?
Yes, it’s best to freeze the broth separately from the dumplings to maintain texture. The soup may last up to three months in the freezer.

Can I make this soup spicier?
For added heat, incorporate chili oil, red pepper flakes, or fresh sliced chilies. Adjust according to your heat preference.

What type of broth should I use?
Use vegetable, chicken, or pork broth depending on your dietary preferences. Homemade broth often yields the best flavor.

Can I make this soup ahead of time?
Yes, you can prepare the broth and chop the vegetables in advance. Just assemble when you’re ready to serve.

Is this recipe gluten-free?
Use gluten-free dumplings and soy sauce alternatives to make the soup gluten-free. Always double-check labels of ingredients used.

Can I add more vegetables?
Absolutely! Feel free to add more vegetables like carrots, peas, or bell peppers for additional nutrition and flavor.

How long does it take to prepare?
The total time for this Potsticker Soup is about 45 minutes, including both preparation and cooking steps.

Additional Resources

For those interested in expanding their cooking repertoire, consider exploring related recipes like dumpling casserole or wonton soup. Check out technique guides on creating homemade dumplings or crafting flavorful broths for your meals. Delve deeper into ingredient information to learn more about the nutritional benefits of mushrooms and bok choy. If you’re looking to invest in kitchen tools, consider recommendations for quality kitchenware suited for Asian cooking styles. Seasonal variations allow for fresh interpretations, so keep an eye out for ingredient swaps throughout the year.

Join the Conversation

We encourage you to share your experiences with Potsticker Soup! Post your cooking photos and modifications on social media, and tag us to connect with fellow cooking enthusiasts. We’d love to hear your feedback and suggestions for making this recipe even better. Additionally, join our community for ongoing recipe reviews and discussion of exciting culinary adventures! Utilizing your creativity not only enhances your personal cooking journey but also inspires others to explore this delightful dish.

The Recipe

Potsticker Soup with Mushrooms & Bok Choy

Serves: 4

Prep Time: 15 mins

Cook Time: 30 mins

Total Time: 45 mins

Kitchen Equipment Needed

  • Large pot
  • Wooden spoon
  • Measuring cups
  • Cutting board
  • Chef’s knife

Ingredients

  • 2 cups chicken or vegetable broth
  • 1 pack (12-16) frozen potstickers
  • 1 cup mushrooms, sliced
  • 2 cups bok choy, chopped
  • 2 garlic cloves, minced
  • 1 inch piece of ginger, minced
  • 2 scallions, sliced
  • 1 tablespoon soy sauce
  • 1 tablespoon sesame oil
  • Salt and pepper to taste

Directions

  1. In a large pot, heat sesame oil over medium heat. Add minced garlic and ginger, sauté until fragrant.
  2. Pour in the broth and bring to a simmer.
  3. Add frozen potstickers to the pot, cooking for 5-7 minutes until they float.
  4. Stir in the sliced mushrooms and cook for an additional 5 minutes.
  5. Add chopped bok choy and soy sauce, and simmer for another 3-4 minutes until bok choy is tender.
  6. Season with salt and pepper. Garnish with scallions before serving.

Recipe Notes

  • Feel free to add more vegetables like carrots or snap peas.
  • Adjust soy sauce according to your taste preference.
  • Store leftover soup in the fridge for up to 3 days, reheating gently on the stove.

Delicious Cheesy Mashed Potato Puffs Recipe for Comfort Food Lovers

Cheesy Mashed Potato Puffs: A Delicious Comfort Food Delight

⚖️
Difficulty
Easy

⏲️
Prep Time
20 mins

🕒
Cook Time
25 mins

⏱️
Total Time
45 mins

🍽️
Servings
4 servings

Cheesy Mashed Potato Puffs are a delightful twist on the classic mashed potato dish, offering a crispy exterior filled with fluffy potatoes and gooey cheese. These little puffs pack a flavorful punch and are perfect as a side dish or a tasty appetizer. The golden, crispy surface adds an appealing contrast to the creamy interior, making them a satisfying treat that is sure to please everyone at your table.

Imagine biting into a perfectly baked puff, where the cheese stretches as you pull away, revealing the soft mashed potatoes inside. The best part? They are incredibly easy to make! With just a handful of ingredients and simple steps, you can create a dish that feels gourmet without requiring any advanced cooking skills. Whether served at a family dinner or a festive gathering, these Cheesy Mashed Potato Puffs are bound to be a hit.

Quick Recipe Highlights

  • Flavor Profile: Savory, creamy, with a hint of garlic and rich cheese notes.
  • Texture: Crisp on the outside with a soft, airy potato filling.
  • Aroma: Inviting smells of baked potatoes and melted cheese fill the kitchen.
  • Visual Appeal: Golden brown with a delightful puffed shape that tempts the eye.
  • Skill Level Needed: Perfect for beginners with simple cooking techniques.
  • Special Equipment: No special equipment needed—just basic kitchen tools.

Recipe Overview

  • Difficulty Level: This recipe is easy, focusing on basic cooking techniques like mashing and baking.
  • Category: Ideal for side dishes or appetizers, fitting seamlessly into any meal.
  • Cuisine: A comforting twist on traditional comfort food, influenced by global potato dishes.
  • Cost: Inexpensive to make, utilizing common pantry ingredients.
  • Season: Fantastic year-round, but especially comforting in the fall and winter seasons.
  • Occasion: Perfect for family meals, parties, or potlucks.

Why You’ll Love This Recipe

You’ll fall in love with the balance of taste and texture in these Cheesy Mashed Potato Puffs. They are an ideal blend of comfort food and gourmet flair, making them a go-to for family gatherings and special occasions alike. The creamy potato filling melds beautifully with the rich flavors of cheese, creating a comforting bite that warms the heart and delights the taste buds.

Another plus is the convenience of preparation. With minimal ingredients and straightforward methods, this dish can be on your table in under an hour. It’s a great way to use leftover mashed potatoes while creating something fun and exciting. Preparing these puffs can become a family activity, adding a touch of joy to your cooking experience.

In addition to their irresistible taste, these puffs also provide nutritional value. Potatoes are a great source of vitamins and minerals, while cheese adds protein and calcium to your meal. For those looking for nutritious yet delicious options, these Cheesy Mashed Potato Puffs fit the criteria perfectly.

Socially, Cheesy Mashed Potato Puffs shine during get-togethers. Their unique presentation and flavor make them an instant conversation starter and are perfect for sharing. Pair them with a variety of dipping sauces to create an interactive appetizer that engages guests and creates lasting memories.

Lastly, this dish’s cost-effectiveness is noteworthy. With budget-friendly ingredients, you can serve a crowd without emptying your wallet. Large batches can be made easily, allowing you to cater to any gathering without the stress of breaking the bank.

Historical Background and Cultural Significance

The origins of mashed potatoes can be traced back to South America, where native populations cultivated a variety of potatoes long before European contact. They were adopted by settlers in Europe, evolving into the creamy mashed potato we know today. With the introduction of cheese, particularly in dishes from areas like Switzerland and Italy, the union of these two beloved ingredients became highly popular.

In several cultures, potatoes hold significant importance as they serve as a staple food. This versatility has led to numerous adaptations worldwide, celebrating the mash with various flavors and textures. The marriage of mashed potatoes and cheese became common in many cuisines, appealing to a wide audience, each adding their local flair.

As mashed potatoes evolved, the emergence of dishes like our Cheesy Mashed Potato Puffs allowed for a new culinary expression. The recipe reflects a blend of comfort and creativity, perfect for home cooks looking to impress without fuss while capturing the essence of traditional comfort food.

Regional variations often include different types of cheeses and herbs. For example, in some Southern U.S. states, pimento cheese is popular; in Italy, provolone might find its way into the mix, showcasing how cultures adapt recipes to fit their flavor profiles and ingredients.

Ingredient Deep Dive

Potatoes are the star ingredient in Cheesy Mashed Potato Puffs. Known for their versatility, they are rich in potassium and provide essential vitamins. When selecting potatoes, choose starchy varieties like Russets or Yukon Golds for the best taste and texture. Proper storage in a cool, dark place will prolong their lifespan, while any sprouted or green potatoes should be avoided due to potential bitterness.

Cheese, another vital ingredient, adds creaminess and flavor. Varieties such as sharp cheddar or mozzarella can enhance the taste of these puffs. Cheese is known for its calcium and protein content, offering several nutritional benefits. Always choose high-quality cheese for optimal flavor; store it properly to prevent spoilage, and it can also be frozen for longer shelf life.

To enhance the flavor, herbs and spices like garlic powder or fresh chives can be added. Garlic not only boosts the dish’s taste but also offers health benefits including anti-inflammatory properties. Fresh herbs brighten up the flavor and can be adjusted based on preferences or availability.

Common Mistakes to Avoid

  • Using the wrong type of potatoes can lead to a gloppy texture; stick with starchy varieties for the best results.
  • Over-mashing potatoes can yield a gummy puff instead of a fluffy one; mix just until combined.
  • Not seasoning your potato mixture can result in bland puffs; always taste and adjust before baking.
  • Skipping the chilling step can cause the puffs to lose their shape; let the mixture set in the fridge.
  • Using too much cheese can make the mixture overly greasy; balance is key for delicious puffs.
  • Under-baking the puffs can leave a soggy exterior; ensure they are golden and crispy.
  • Not preheating the oven can affect cooking time and texture, so always preheat before baking.
  • Overcrowding the baking sheet may cause uneven cooking; give each puff enough space to crisp up.
  • Failing to use parchment paper can result in sticking, making it hard to get the puffs off the tray.
  • Not checking for doneness can lead to undercooked puffs; ensure they are golden brown for the best flavor.

Essential Techniques

Achieving the perfect texture in Cheesy Mashed Potato Puffs hinges on mastering the art of mashing potatoes. Proper technique involves boiling the potatoes until fork-tender, then using a potato ricer or masher to create a creamy base. The key is not to overwork your potatoes to avoid a gummy texture; gentle handling is crucial. Look for a smooth, fluffy consistency as your visual cue for success.

Shaping the puffs is another essential skill. After chilling your potato mixture, using a scoop helps form uniform puffs that cook evenly. Ensure your hands are slightly damp to prevent sticking. A visual cue for readiness is the ability to maintain their shape even when rolled. Practice will lead to perfect sizes and shapes that can crisp beautifully in the oven.

Pro Tips for Perfect Cheesy Mashed Potato Puffs

To ensure your Cheesy Mashed Potato Puffs turn out perfect every time, here are some expert tips. First, let your mashed potatoes cool completely before mixing in cheese and herbs; this helps maintain shape and texture. Second, consider adding an egg to the mixture for added binding; this will enhance both texture and flavor.

Try experimenting with different cheeses for varied flavor profiles—smoked gouda can elevate your puffs to new heights. Additionally, pre-baking a small test puff can help gauge seasoning and cooking time, ensuring the entire batch will be just right. If you prefer a crispier exterior, broil the puffs for the last minute of baking to achieve a beautiful golden color.

Being mindful of baking sheet placement in your oven can improve even cooking. Rotate the tray halfway through to avoid hot spots that may burn your puffs. Lastly, serve fresh for the best taste but allow them to rest for a few minutes before serving to enhance their flavors.

Variations and Adaptations

For a unique twist on your Cheesy Mashed Potato Puffs, consider adding seasonal ingredients. Roasted garlic or caramelized onions can introduce deeper flavors, while fresh herbs like rosemary or thyme bring added freshness. A spicy kick can be achieved by incorporating diced jalapeños or hot sauce for those who enjoy heat.

Dietary modifications can be made to suit various needs. For gluten-free options, ensure that all ingredients used are certified as such. Vegan alternatives can replace dairy items with plant-based equivalents: use nondairy cheeses and flax eggs for binding.

Flavor variations allow for endless creativity—sharp cheddar, feta, or even blue cheese can redefine your puffs. Texture modifications might include adding breadcrumbs on the exterior for added crunch. These little adjustments personalize the dish to your taste, showcasing its versatility.

Serving and Presentation Guide

When serving Cheesy Mashed Potato Puffs, consider elevating your presentation with creative plating techniques. Arrange the puffs on a vibrant platter, perhaps with a garnish of chopped chives or a sprinkle of paprika for color. Present alongside an array of dipping sauces, such as sour cream, spicy ketchup, or homemade aioli to enhance the tasting experience.

For garnishing, fresh herbs create visual appeal and add brightness to the dish. Traditionally, puffs can be served with a side of warm gravy, providing a comforting complement. Be mindful of portion control; these puffs are quite rich, and offering small servings encourages guests to try them all without overindulging.

Consider serving puffs warm, as they taste best right out of the oven. If they sit for too long, consider reheating them briefly in the oven to regain their crispness before serving. This little detail can greatly improve the overall taste and texture of the dish.

Wine and Beverage Pairing

Pairing wine with Cheesy Mashed Potato Puffs can elevate your meal to a new level. Creamy white wines like Chardonnay or Sauvignon Blanc complement the dish beautifully, enhancing the cheese flavors while cutting through the richness. A light-bodied red, such as Pinot Noir, can also work well, particularly if you serve them with a meaty dish.

For non-alcoholic alternatives, consider serving an herbal iced tea or infused sparkling water. Both options provide a refreshing counterbalance to the rich puffs. If you prefer a warm beverage, creamy herbal teas like chai can complement the flavors beautifully without overwhelming them.

Temperature consideration is vital, as serving wines at the correct temperature optimizes their flavors. Chilled whites and slight room temperature reds ensure a delightful experience with every bite.

Storage and Shelf Life

Storing Cheesy Mashed Potato Puffs properly can extend their shelf life and maintain quality. For short-term storage, place them in an airtight container in the fridge, where they can last for about three to four days. For longer storage, consider freezing the puffs; they freeze well before or after cooking.

When freezing, ensure they’re placed in a single layer on a baking sheet first, then move to a container once solidified. This prevents sticking and helps maintain shape. For signs of spoilage, check for unusual odors or textures before reheating.

To reheat, the oven is the best option. Set it at 350°F and heat for about 15-20 minutes until warmed through and crisped back up. Avoid microwave reheating if possible, as it can lead to a soggier texture.

Make Ahead Strategies

Making Cheesy Mashed Potato Puffs ahead of time can significantly reduce preparation stress on a busy day. Prepare the mashed potato mixture a day in advance and store it in the fridge. This allows the flavors to meld, enhancing the overall taste when baked.

You can also shape the puffs and freeze them, which is great for batch cooking. Once frozen, they can be baked straight from the freezer; just allow to cook a few extra minutes to ensure they are heated through. Keep in mind that if making ahead, ensure all components are seasoned to your liking prior to refrigerating or freezing.

When reheating, add some fresh toppings, such as herbs or a drizzle of sauce, to rejuvenate their appearance and flavor. A few minutes under the broiler can also help restore that golden crispiness.

Scaling Instructions

When scaling the Cheesy Mashed Potato Puffs recipe, adjusting ingredient amounts must be done carefully to maintain balanced flavors and textures. Halving the recipe is straightforward; just divide all ingredient measurements by two and adjust cooking times if needed.

For larger gatherings, doubling or tripling the recipe allows for more servings, but ensure your mixing equipment can accommodate the larger volume. You may also need to use multiple baking sheets for even cooking, ensuring that puffs have enough space between them for proper airflow during baking.

Timing adjustments may be required as well; larger batches might require slightly longer cooking times, so monitor visually for doneness. Store extras in an airtight container, following the proper guidelines to ensure they remain fresh for as long as possible.

Nutritional Deep Dive

Analyzing the nutritional content of Cheesy Mashed Potato Puffs reveals an engaging picture of macro and micronutrients. Each serving offers a good balance of carbohydrates from potatoes, protein, and calcium from cheese. This balance provides energy, necessary for daily activities, while also incorporating essential vitamins like Vitamin C from the potatoes.

Potatoes offer several health benefits; they’re rich in potassium, which supports heart health, and their fiber content aids digestion. The cheese adds necessary fats but should be considered for portion control, particularly for those managing caloric intake.

Consider dietary implications when enjoying these puffs; while they are comfort food, they can be adapted to fit various dietary plans. Portion analysis suggests enjoying a couple of puffs alongside a salad or grilled vegetables for a balanced meal.

Dietary Adaptations

Cheesy Mashed Potato Puffs can easily be adapted to suit various dietary preferences. For gluten-free versions, ensure all ingredients, especially seasoning blends, are certified gluten-free. Gluten-sensitive individuals can still indulge in this fabulous dish without worry.

For dairy-free or vegan options, replace traditional cheese with nut-based cheeses or nutritional yeast to mimic that cheesy flavor. Consider using mashed silken tofu to retain moisture and enhance texture without incorporating dairy.

Low-carb adaptations might involve replacing regular potatoes with cauliflower purée. This provides a similar texture while significantly reducing carbohydrates. Additionally, for those following a Keto or Paleo diet, adjusting the cheese selection to fit their parameters works excellently.

Troubleshooting Guide

If your Cheesy Mashed Potato Puffs turn out too dry, it may be due to overcooking the potatoes or not enough moisture in the mixture. Solution: Add a bit of milk or sour cream to the mashed potatoes next time for a creamier consistency.

If the puffs do not hold their shape during baking, ensure that your mixture is well chilled before shaping. Also, try incorporating an egg as a binding agent to help them maintain their form better.

For uneven cooking, ensure that the puffs are sufficiently spaced on the baking tray. Rotating the sheets halfway through can also provide more uniform cooking, ensuring every puff is perfectly crispy.

If your puffs are too greasy, consider reducing the cheese quantity. Cheese can be substantial in fat, and using less may yield puffs that are lighter in texture while still flavorful.

Recipe Success Stories

Community feedback highlights the love for Cheesy Mashed Potato Puffs with stories of family gatherings where they have stolen the show. Readers share how adapting the recipe to include local ingredients transformed their versions into unique creations, each with a special twist.

One enthusiast mentioned using garlic-infused potatoes, showcasing how personal touches can elevate traditional recipes. Another shared their success with spicy jalapeño puffs, proving that these puffs can cater to varied palates with delightful results.

Photography tips are also abundant, with many recommending natural light to enhance the presentation of the puffs. A perfectly golden exterior and cheesy pull can entice even the most reluctant eaters to give them a try. Engaging with the community on recipe variations further enriches the overall experience.

Frequently Asked Questions

Q1: Can I use leftover mashed potatoes?

Absolutely! Leftover mashed potatoes work perfectly for this recipe. Just ensure they are well-seasoned and creamy before using them.

Q2: How can I make these puffs spicier?

Add diced jalapeños or a sprinkle of cayenne pepper to the mixture. You can also serve them with a spicy dipping sauce for an extra kick.

Q3: Can I freeze these puffs?

Yes! Cheesy Mashed Potato Puffs can be frozen before or after baking. Just ensure they are in a single layer so they do not stick together.

Q4: What types of cheese work best?

Sharp cheddar and mozzarella are popular choices, but feel free to experiment with other cheeses for different flavors. Gouda and feta are excellent alternatives as well.

Q5: Can I make these puffs vegan?

Yes! Substitute traditional cheese with vegan cheese and use a flax egg instead of a chicken egg for binding.

Q6: What can I serve with these puffs?

Cheesy Mashed Potato Puffs are delicious on their own but pair well with sour cream, guacamole, or spicy ketchup for dipping. A side salad can complement the meal as well.

Q7: How long do they take to cook from frozen?

Bake frozen puffs at 375°F for about 25-30 minutes, or until they are heated through and golden brown.

Q8: Can I add vegetables to the mixture?

Yes! You can add finely chopped cooked vegetables, such as spinach or even corn, to the potato mixture for added nutrition and flavor.

Q9: How can I ensure a crispy exterior?

For a crispier texture, preheat your baking sheet and consider broiling them for the last few minutes of cooking time.

Q10: What’s the best way to store leftovers?

Store any leftovers in an airtight container in the refrigerator for up to three days. You can also freeze them for longer storage.

Q11: How do I know when they are done?

Look for a golden brown color on the outside, and ensure that they are heated through. A toothpick should come out clean from the center.

Q12: Can these be made ahead of time?

Yes! You can prepare the mixture and shape the puffs ahead of time. Just refrigerate or freeze them until you’re ready to bake.

Additional Resources

For those who enjoyed making Cheesy Mashed Potato Puffs, explore other related recipes like loaded potato skins, potato gratin, or creamy shepherd’s pie. Each dish utilizes the comforting principles of potatoes while offering unique flavors.

To further enhance your cooking skills, consider exploring technique guides for perfecting mashed potatoes, baking strategies, and more. Access ingredient information that details nutritional benefits and selections for the freshest produce.

Equipment recommendations can aid in your cooking journey. Investing in quality kitchen tools—like a potato ricer, quality baking sheets, and mixing bowls—can greatly improve your efficiency and results in the kitchen.

Seasonal variations of this recipe can showcase different ingredients best suited for fall or winter gatherings, keeping your meals exciting and dynamic throughout the year.

Join the Conversation

We love hearing from our readers! Share your experiences with Cheesy Mashed Potato Puffs on social media, and don’t forget to tag us. Your photos could inspire others to try this delightful recipe!

Engage in recipe reviews and suggest your variations to spark new ideas within the community. What unique ingredients did you add? How did your family respond to this delicious dish? Your input enriches our culinary conversations and fosters a space for shared joy in cooking.

Let’s celebrate the joy of creating and sharing recipes together, making every meal an opportunity to connect and create unforgettable moments.

The Recipe

Cheesy Mashed Potato Puffs

Serves: 4 servings

Prep Time: 20 mins

Cook Time: 25 mins

Total Time: 45 mins

Kitchen Equipment Needed

  • Potato masher or ricer
  • Baking sheet
  • Parchment paper
  • Mixing bowl
  • Spoon or scoop

Ingredients

  • 3 cups mashed potatoes
  • 1 cup shredded cheddar cheese
  • 1 large egg
  • 1/2 cup grated Parmesan cheese
  • 1 tsp garlic powder
  • Salt and pepper to taste
  • Fresh chives, chopped (for garnish)

Directions

  1. Preheat your oven to 375°F (190°C) and line a baking sheet with parchment paper.
  2. In a large mixing bowl, combine the mashed potatoes, cheddar cheese, egg, Parmesan cheese, garlic powder, salt, and pepper. Mix until well combined.
  3. Chill the mixture in the refrigerator for about 15-20 minutes to help firm it up.
  4. Using a spoon or scoop, form the potato mixture into small balls and place them on the prepared baking sheet.
  5. Bake for 20-25 minutes or until golden brown and crispy on the outside.
  6. Remove from the oven and garnish with fresh chives before serving.

Recipe Notes

  • You can add spices or fresh herbs to the mixture for different flavor profiles.
  • These puffs can be made ahead and frozen before baking for convenience.
  • Substitute any cheese you enjoy to customize the taste.

Savory Lemon Garlic Butter Chicken Recipe for Easy Weeknight Dinners

Lemon Garlic Butter Chicken: A Zesty Delight

⚖️
Difficulty
Easy

⏲️
Prep Time
10 mins

🕒
Cook Time
20 mins

⏱️
Total Time
30 mins

🍽️
Servings
4

Lemon Garlic Butter Chicken is the ultimate comfort food that marries the zesty brightness of lemon with the rich, savory essence of garlic and butter. Each bite bursts with fresh flavors, making it not just a meal but a delightful culinary experience. This recipe is perfect for busy weeknights yet elegant enough to impress guests on special occasions. The tender chicken, infused with a buttery lemon garlic sauce, can transform any ordinary dinner into a memorable feast.

This dish not only delivers on flavor but also on fragrance. As it cooks, the aroma of garlic and lemon wafts through your kitchen, inviting everyone to the table. The bright yellow sauce glistens invitingly, showcasing the culinary expertise that went into making this delicious meal. Pair this dish with rice, pasta, or a fresh green salad, and you’re set for a delightful dining experience that will have your family and friends raving.

Quick Recipe Highlights

  • Flavor Profile: This dish features a perfect balance of tangy lemon and savory garlic, complemented by the rich taste of butter.
  • Texture: The chicken remains juicy and tender, creating a beautiful contrast with the velvety sauce.
  • Aroma: Aromatic garlic mingles with zesty lemon, creating an irresistible baking scent that wafts through your home.
  • Visual Appeal: The vivid yellow of the sauce against the golden-brown chicken is both inviting and appetizing.
  • Skill Level Needed: This recipe is beginner-friendly, requiring only basic cooking skills.
  • Special Equipment: A skillet or frying pan is essential for cooking this dish to perfection.

Recipe Overview

  • Difficulty Level: The Lemon Garlic Butter Chicken is classified as easy. With simple steps and minimal cooking techniques, even novice cooks can achieve success.
  • Category: It fits perfectly into the categories of chicken entrees and quick weeknight dinners.
  • Cuisine: This recipe draws inspiration from Mediterranean flavors, where fresh ingredients and vibrant tastes dominate.
  • Cost: The overall cost of this dish is budget-friendly, with readily available ingredients keeping expenses low.
  • Season: This dish shines in spring and summer when fresh lemons are in season, enhancing its zesty flavor profile.
  • Occasion: Ideal for family dinners, casual gatherings, or even served during festive meals, allowing for versatility.

Why You’ll Love This Recipe

The taste and texture of Lemon Garlic Butter Chicken present a delightful experience for your palate. Each bite brings forth a medley of fresh flavors combined with tender chicken, creating a satisfying and fulfilling meal. The tangy lemon cuts through the rich butter sauce, preventing it from feeling heavy while ensuring a rewarding taste experience.

The convenience of preparation is another aspect that makes this recipe a must-try. With only a few ingredients and straightforward steps, you can whip up this dish in under 30 minutes. This makes it ideal for busy individuals or families seeking healthy yet delicious meals without spending too much time in the kitchen.

When it comes to nutritional advantages, chicken is a great source of lean protein, essential for muscle health and overall well-being. The use of fresh lemon adds a dose of vitamin C, contributing to your daily nutritional needs and boosting your immune system.

This dish is perfect for social occasions, whether a family gathering, a dinner party, or a casual get-together. The vibrant presentation and intoxicating aroma invite guests to dig in, creating a welcoming atmosphere. Sharing this dish can spark conversations and provide a memorable dining experience.

Lastly, the cost-effectiveness of Lemon Garlic Butter Chicken deserves praise. The ingredients are inexpensive and commonly found in many kitchens, making this recipe accessible to everyone. You get to serve a gourmet-style meal without breaking the bank.

Historical Background and Cultural Significance

Lemon Garlic Butter Chicken is rooted in Mediterranean cuisine, where fresh ingredients and simple cooking techniques are celebrated. The integration of garlic and butter has a long history, showcasing flavors that have found their way into households for generations, promoting comfort and wellness.

Culturally, this dish represents the Mediterranean lifestyle, which emphasizes healthful eating, family gatherings, and the joy of sharing meals with loved ones. It is a dish that embodies warmth and community, reminding us of the importance of taking time to savor food alongside family and friends.

Over the years, various adaptations of garlic butter sauce have emerged, with different cultures adding their unique twist to suit their palettes. Lemon Garlic Butter Chicken is just one of many ways this globally revered technique continues to evolve while staying true to its roots.

Regional variations abound, with some incorporating herbs from local gardens or using different proteins like shrimp or fish, showcasing the versatility of the foundational recipe while embracing regional flavors.

Ingredient Deep Dive

Chicken is the star of this dish, offering an excellent source of protein that helps support muscle growth and maintenance. When selecting chicken, look for fresh, high-quality cuts that are free from any additives or preservatives. Storage should be in a refrigerator for no more than two days, and freezing is recommended for longer storage. If you’re looking for alternatives, turkey can be used in place of chicken for a leaner option.

Garlic not only imparts a potent flavor but also comes packed with health benefits. This bulbous plant has been revered for its medicinal properties throughout history, including boosting the immune system and acting as a natural anti-inflammatory. Fresh garlic should be stored in a cool, dark place and can be substituted with garlic powder in a pinch for a milder flavor.

Butter is essential in this recipe, enriching the dish with its creamy texture and flavor. While traditional recipes call for salted butter, unsalted can be used for better control over seasoning. Store butter in the refrigerator, and when choosing to use a dairy-free option, look for high-quality margarine or olive oil to maintain the essence of the recipe.

Common Mistakes to Avoid

  • Overcooking the chicken can lead to dryness; always check the internal temperature for doneness.
  • Not seasoning enough can make the dish bland, so be sure to taste as you go.
  • Skipping the marinating process can result in less flavorful chicken.
  • Using low-quality butter can affect the richness of the dish; always opt for the best available.
  • Neglecting to let the chicken rest after cooking may cause juices to run out, leading to a drier meal.
  • Not using sufficient lemon can dull the flavors; fresh lemon juice is key for brightness.
  • Forgetting to add herbs can make the recipe taste flat; incorporate parsley or thyme for added depth.
  • Misjudging the cooking time can result in a poorly executed dish; always follow the recipe closely.

Essential Techniques

Mastering the technique of sautéing is important as it forms the base flavor of this dish. To achieve the perfect sauté, ensure the pan is hot before adding oil and ingredients. Common pitfalls include overcrowding the pan, which can lead to steaming rather than browning the food. Looking for a golden brown color on both sides of the chicken is a good visual cue for success.

Incorporating aromatics like garlic at the right time is crucial as well. Always add garlic towards the end of the sautéing process to avoid burning, which can lead to a bitter taste. You’ll know you’ve added it at the right time when it becomes fragrant but remains golden in color.

Pro Tips for Perfect Lemon Garlic Butter Chicken

Use fresh lemons for optimum flavor; the zest can enhance the lemony taste even further. Adjust the butter amount based on richness preference to suit your palate. Marinate the chicken beforehand for at least 30 minutes to infuse flavors directly into the meat for a juicier result. Pair with fresh herbs such as parsley or basil for added freshness and vibrant color. Serve with a side dish that complements the flavors, like garlic bread or a crisp salad. Adjust the cooking time depending on the chicken cut; thinner cuts may cook more quickly than thicker ones. Let the chicken rest after cooking to lock in juices for a tender bite.

Variations and Adaptations

Explore regional variations of Lemon Garlic Butter Chicken by adding local spices or using different proteins like shrimp or tofu. Seasonal adaptations can include fresh vegetables, such as asparagus or zucchini, added during cooking to enhance nutrition and flavor. Dietary modifications can be made by using low-fat butter or olive oil for a lighter option, catering to health-conscious eaters. Flavor variations can include adding some chili flakes for a hint of heat or replacing lemon with lime for a twist. Texture modifications can include serving over creamy polenta for a different mouthfeel. Presentation alternatives can involve garnishing with microgreens or edible flowers for an elegant look.

Serving and Presentation Guide

Plating techniques are key to creating an inviting table. Layer the chicken over a bed of rice or quinoa, allowing the sauce to drizzle over for a beautiful presentation. Garnishing with fresh herbs adds a pop of color and heightens visual appeal. Traditional accompaniments like steamed vegetables or crusty bread enhance the meal. Temperature considerations are essential; serve the dish warm for the best flavor experience. Portion control tips suggest serving in individual bowls for an intimate dining experience, ensuring everyone has equal amounts of sauce and chicken.

Wine and Beverage Pairing

Pair this delightful dish with a crisp Sauvignon Blanc, which complements the lemon flavors beautifully. For a non-alcoholic option, a citrus-infused sparkling water can refresh the palate alongside the garlic butter chicken. Alternatively, a chilled herbal iced tea provides a delightful contrast to the richness of the meal. Serve these beverages well-chilled to ensure the best experience while dining.

Storage and Shelf Life

Store leftover Lemon Garlic Butter Chicken in an airtight container in the refrigerator for up to 3 days. Make sure it’s cooled completely before sealing to prevent moisture buildup. Reheating can be done in the microwave or on the stovetop over low heat until warmed through; adding a splash of water can help restore moisture. For longer storage, freezing is an option; be sure to use a freezer-safe container and label it with the date for tracking. Check for signs of spoilage, such as off-smells or discoloration, before consuming.

Make Ahead Strategies

To streamline your cooking process, consider marinating the chicken a few hours or the night before, enhancing flavor development. Portion and store the marinade separately until ready to cook. This recipe can have components prepped in advance, such as chopping garlic and preparing side dishes like rice or salad, which can be stored in the refrigerator. Quality impact is minimal if everything is properly stored and prepared just before cooking. Assembly of the dish is straightforward, allowing for a quick turnaround time when it’s time to eat.

Scaling Instructions

When halving the recipe, adjust the cooking time as the chicken may cook faster, so keep an eye on it. Doubling or tripling will not only require a larger skillet but also additional cooking time; ensure adequate space in the pan to maintain even cooking. Equipment adjustments might be needed, such as using two pans if your dishwasher is crowded. Timing modifications will depend on the overall quantity—testing for doneness is best done with a meat thermometer. Always ensure you have storage containers for leftovers, particularly when preparing a larger batch.

Nutritional Deep Dive

This dish provides a balanced macro breakdown, showcasing high protein content from the chicken and healthy fats from the butter. Micronutrient analysis reveals significant contributions of vitamins and minerals, especially from fresh lemon, which offers vitamin C. Health benefits include sustaining muscle growth thanks to protein, while the buttery sauce adds healthy fats. Portion analysis helps in managing servings for those mindful of calorie intake, making this dish friendly for balanced diets.

Dietary Adaptations

For gluten-free individuals, this recipe is naturally safe without gluten-laden ingredients. Dairy-free diets can replace butter with olive oil or vegan butter for a similar taste profile. Vegans can modify by substituting chicken with plant-based proteins such as tofu or seitan while maintaining flavor through seasoning. Low-carb diets can be adhered to by pairing the chicken with non-starchy vegetables instead of grains. Keto modifications can further lower carb counts by avoiding starchy side dishes. Paleo eaters will find this dish to be compliant with fresh ingredients, opting for natural oils.

Troubleshooting Guide

If you experience texture issues, such as dry chicken, ensuring you don’t overcook is critical—aim for correct internal temperature. Flavor balance can be adjusted by adding more seasoning or vinegar if the dish tastes flat. Temperature problems should be addressed by adjusting heat levels, ensuring even cooking across the chicken. Equipment challenges can surface with non-stick pans; using a bit of oil can help. Ingredient substitutions require careful assessment, as the substitute may alter the overall taste, so testing first is suggested. If timing concerns arise, ensure meal prep steps are coordinated, helping keep everything on track for a seamless dinner.

Recipe Success Stories

Community feedback reveals heartfelt connections, with many sharing the love and ease of preparing this dish. Variation successes include added spices or herbs that family members appreciated, showing how adaptable this recipe truly is. Reader suggestions on ingredient swaps have led to discovering new favorites, while photography tips have inspired beautiful presentations at home. An inclusive community encourages sharing these stories, fostering a sense of engagement with fellow culinary enthusiasts.

Frequently Asked Questions

Can I use frozen chicken for this recipe?

Yes, but ensure that the chicken is fully thawed before cooking for even results. Cooking times may vary slightly with frozen vs. thawed chicken.

What can I substitute for garlic?

If you don’t have fresh garlic, garlic powder or shallots can be used. However, the flavor may differ, so adjust according to taste.

How can I make this dish spicier?

For a kick of heat, add chili flakes during cooking or serve with a spicy condiment on the side.

Can I prepare this dish in advance?

Yes, you can marinate the chicken up to a day in advance, but it is best to cook it just before serving for the best texture.

What should I serve with Lemon Garlic Butter Chicken?

This dish pairs well with rice, pasta, or a fresh green salad to balance the richness of the sauce.

How long does leftovers last in the fridge?

Leftover Lemon Garlic Butter Chicken can be stored in the fridge for up to three days. Be sure to store it in an airtight container.

Can I use chicken thighs instead of breasts?

Absolutely! Chicken thighs can provide a richer flavor and remain tender when cooked correctly, which works great with this dish.

Is this recipe good for meal prep?

Indeed, this recipe is perfect for meal prepping! Cook in bulk and store individual portions for easy lunches or dinners throughout the week.

What is the best way to reheat this chicken?

The best way to reheat is on the stovetop over low heat, adding a bit of water or broth to maintain moisture.

Can I add vegetables to this chicken dish?

Absolutely! Adding seasonal vegetables like asparagus, broccoli, or bell peppers can enhance the nutritional profile and flavor.

Additional Resources

If you’re looking to expand your culinary repertoire, check out related recipes such as our Garlic Butter Shrimp and Lemon Herb Grilled Chicken. For those keen on mastering cooking techniques, explore our guides on sautéing and marinating chicken. Ingredient information can assist you in selecting the freshest produce and meats for your meals. Finally, consider seasonal variations to make this Lemon Garlic Butter Chicken suitable for any time of the year!

Join the Conversation

We love seeing how you make Lemon Garlic Butter Chicken your own! Share your cooking stories on social media and don’t hesitate to tag us in your beautiful photos. Your reviews and suggestions help us grow the community, and we can’t wait to hear about the variations you’ve tried. Let’s connect and celebrate the joy of cooking together!

The Recipe

Lemon Garlic Butter Chicken

Serves: 4

Prep Time: 10 mins

Cook Time: 20 mins

Total Time: 30 mins

Kitchen Equipment Needed

  • Skillet or frying pan
  • Meat thermometer
  • Cutting board
  • Knife
  • Measuring cups and spoons

Ingredients

  • 4 boneless, skinless chicken breasts
  • 1/4 cup unsalted butter
  • 4 cloves garlic, minced
  • Juice of 2 lemons
  • Salt and pepper to taste
  • Fresh parsley, chopped for garnish

Directions

  1. Season the chicken breasts with salt and pepper.
  2. In a large skillet, melt butter over medium heat.
  3. Add minced garlic and sauté until fragrant, about 1 minute.
  4. Place the chicken in the skillet and cook for 6-7 minutes on each side until golden brown and cooked through.
  5. Pour lemon juice over the chicken, allowing it to simmer for an additional minute.
  6. Remove from heat, garnish with chopped parsley, and serve.

Recipe Notes

  • For a spicier version, add red pepper flakes to the garlic.
  • You can use chicken thighs for a juicier cut.
  • Serve with rice or pasta to soak up the delicious sauce.
  • This recipe can be doubled or halved easily.

Indulge in Creamy Cheesy Crab Dip for Coastal Flavor

Indulge in Coastal Delights: Creamy Cheesy Crab Dip

⚖️
Difficulty
Easy

⏲️
Prep Time
10 mins

🕒
Cook Time
20 mins

⏱️
Total Time
30 mins

🍽️
Servings
8

Craving a taste of the coast? Prepare to delight your taste buds with this Creamy Cheesy Crab Dip that captures the essence of seaside dining. Whether you’re hosting a gathering or simply indulging at home, this dip is the perfect blend of rich, creamy textures and bold flavors. The combination of sweet crab meat, tangy cream cheese, and savory spices creates an irresistible dish that’s a hit at any occasion.

Imagine a warm, bubbling dip served with crunchy baguette slices or crispy crackers, invitingly hot and fragrant. Its creamy texture envelopes the palate with every bite, making it not just a mere appetizer, but an experience to savor. Perfect for game days, family gatherings, or as a sophisticated starter for a dinner party, this crab dip brings the coastal vibe right to your table.

Quick Recipe Highlights

  • Flavor Profile: This dip boasts a fantastic flavor profile combining the sweetness of crab, creaminess of cheese, and a hint of zesty spices that elevate every bite.
  • Texture: With a creamy and luscious texture, complemented by the tender crab meat, it offers a satisfying mouthfeel that is both comforting and delightful.
  • Aroma: The warm aroma of baked cheese and seasoned crab creates an enticing invitation, sending your senses on a coastal getaway.
  • Visual Appeal: Served in a charming baking dish, the golden-brown top sprinkled with fresh herbs provides an inviting presentation that’s eye-catching.
  • Skill Level Needed: This recipe is beginner-friendly, requiring no advanced culinary skills—just a willingness to mix and bake!
  • Special Equipment: You’ll need a mixing bowl, a baking dish, and an oven for perfect results.

Recipe Overview

  • Difficulty Level: This creamy crab dip is classified as easy, making it accessible for cooks of any skill level. With minimal preparation and straightforward cooking steps, anyone can impress with this dish.
  • Category: This dip fits beautifully into the appetizer category, perfect for parties, special occasions, or casual get-togethers.
  • Cuisine: While rooted in traditional American coastal cuisine, the flavors are influenced by various regional crab dishes, capturing the essence of seaside feasting.
  • Cost: In terms of ingredients, this dip is relatively affordable, especially when compared to dining out at seafood restaurants, often coming in at under $15.
  • Season: Ideal for year-round gatherings, this dip shines brightly in the summer months during outdoor barbecues as well as the cozy winter gatherings by the fireplace.
  • Occasion: Suitable for family gatherings, holiday celebrations, or game-day parties, this crab dip adds a festive touch to any event.

Why You’ll Love This Recipe

Indulging in this Creamy Cheesy Crab Dip brings an explosion of flavor and texture that makes it a standout dish. With the perfect balance of creamy and savory, it tantalizes the taste buds and leaves guests reaching for more. The richness of the crab meat complements the cream cheese, delivering a luxurious flavor that is simply irresistible.

Moreover, the convenience of this dip is one of its highlights. It requires minimal prep and cook time, allowing you to whip up a delightful snack without spending hours in the kitchen. This seamless preparation is perfect for busy hosts or those looking to make a quick yet impressive appetizer.

Nutritionally speaking, crab is low in fat and high in protein, making this dip a healthier option than many other cheesy appetizers. It provides omega-3 fatty acids important for heart health, making your indulgence guilt-free and satisfying.

When it comes to social gatherings, this dip serves as more than just food; it becomes a conversation starter. Friends and family will gather around when they smell the enticing aroma wafting from your kitchen, fostering a warm and inviting atmosphere.

Lastly, making this crab dip at home is cost-effective, especially when compared to purchasing similar recipes at restaurants. With accessible ingredients and easy preparation, it opens the door for culinary creativity without breaking the bank.

Historical Background and Cultural Significance

The origins of crab dip date back to coastal areas where crabbing was a way of life. As communities formed around the water, local recipes began to celebrate the availability of fresh seafood. This dish represents a fusion of tradition and innovation, where families adapted personal recipes over generations.

Culturally, crab dip has traveled from home kitchens into the spotlight of culinary gatherings. It’s often featured at parties, tailgate events, and holiday celebrations, illustrating its significance in bringing people together over delicious food.

Over the decades, this dip has evolved from simple, straightforward recipes into gourmet variations. Chefs and home cooks alike have experimented with flavors, textures, and methods, elevating traditional dishes into new culinary experiences.

Regional variations of this recipe have emerged, with each area adding its unique twist by incorporating local spices and ingredients. From the addition of cheese blends to spicy elements, the crab dip has proven to be versatile while remaining true to its coastal roots.

Ingredient Deep Dive

Crab Meat
Crab meat, especially lump crab, is the star of this dish, known for its tender texture and sweet flavor. Nutritionally, it is a great source of protein, containing essential vitamins and minerals. When selecting crab meat, opt for fresh or canned varieties labeled “lump” for the best quality. Store it in the refrigerator and consume it within a few days for optimal freshness. If fresh crab is unavailable, consider using imitation crab as a more affordable option without compromising taste.

Cream Cheese
Cream cheese lends the dip its signature creaminess. Historically, it originated in the United States in the 19th century and has become a staple in many households. While providing a delightful flavor, it also contributes creaminess that balances the sweetness of crab. When selecting cream cheese, look for full-fat varieties for the best texture. Store it tightly wrapped in the refrigerator, and it can last for several weeks. For a different flavor profile, consider using flavored cream cheese versions, such as garlic or herb.

Common Mistakes to Avoid

  • Using low-quality crab meat can significantly diminish the flavor of your dip. Always select fresh or high-quality canned crab for the best results.
  • Overmixing the ingredients can lead to a mushy texture. Mix just until combined to ensure each component retains its identity.
  • Neglecting to season properly can cause the dip to taste bland. Always taste and adjust seasonings before baking to ensure full flavor.
  • Skipping the warming step can result in a dip that’s too thick. Make sure to bake until bubbly for optimal texture.
  • Using a shallow baking dish may lead to uneven cooking. Opt for a deeper dish to ensure the dip heats thoroughly.
  • Allowing the dip to cool completely before serving can mask its flavors. Serve it warm to enhance the taste experience.
  • Forgetting to garnish can lessen the visual appeal. Fresh herbs or spices can elevate the presentation significantly.
  • Not reheating leftovers correctly can dry out the dip. When reheating, do so gently in the oven to restore the creamy texture.

Essential Techniques

Mixing
Proper mixing is crucial for achieving a harmonious flavor in your crab dip. To master this technique, combine all ingredients gently until just incorporated, ensuring not to break down the crab meat. A common pitfall is overmixing, which can result in a heavy texture. Aim for a perfectly blended mix that maintains distinct flavors.

Baking
Baking the dip is essential for melding flavors and creating that delightful golden crust on top. To master baking, preheat your oven and bake the dip until bubbly. Avoid opening the oven too frequently, as this can drop the temperature. Watch for golden edges, which are a visual cue for doneness.

Pro Tips for Perfect Creamy Cheesy Crab Dip

Start with room-temperature cream cheese to ensure easy mixing, resulting in a smoother texture. Additionally, try incorporating other cheeses like cheddar or Monterey Jack for a flavorful twist. For a zing, add a splash of hot sauce or Worcestershire sauce into the mix, enhancing flavor complexity.

Consider serving the dip in individual ramekins for an upscale presentation that also helps with portion control. If you’re preparing it ahead of time, assemble the dip but bake it just before serving for maximum freshness. Lastly, garnish with fresh herbs or chives to elevate both look and taste, making your dip a focal point at any event.

Variations and Adaptations

To elevate your crab dip, consider seasonal variations by adding fresh herbs in spring or roasted red peppers in summer. Explore dietary modifications by using lactose-free cream cheese or swapping crab for shrimp for a delightful seafood variation. Flavor enthusiasts can experiment with spices like smoked paprika or cayenne pepper, while texture lovers might enjoy adding crunchy ingredients like diced celery or green onions for added contrast.

For an elegant twist, serve the dip in endive leaves or on cucumber slices for a refreshing summertime appetizer. Additionally, you can experiment with different cheeses or even create a layered dip combining crab with spinach or artichokes for a unique take on this classic.

Serving and Presentation Guide

Plating your creamy crab dip creatively can enhance its appeal. Serve in a beautiful ceramic dish, garnished with fresh herbs or a sprinkle of paprika for added color. Pair with an assortment of dippers such as toasted baguette slices, vegetables, or crisp crackers for a delightful presentation.

To elevate the experience, consider serving the dip with a light salad or seafood platter on the side, creating a cohesive meal. Temperature considerations are equally important—ensure it’s warm when served to maintain the perfect creamy consistency.

For portion control, consider using small cups or bowls to provide individual servings, making it easier for guests to enjoy while mingling. Lastly, remember to keep it covered when not being served to maintain freshness and prevent drying out.

Wine and Beverage Pairing

For the perfect wine pairing, consider a crisp Chardonnay that complements the richness of the crab dip while enhancing its delicate flavors. Alternatively, a light Pinot Grigio provides a refreshing contrast. For non-alcoholic options, a sparkling water with a splash of lemon can cleanse the palate beautifully.

For tea lovers, a light herbal tea would pair well, enhancing the flavor without overpowering the dish. Whether sipping a crisp wine or enjoying a refreshing beverage, the right pairing can elevate your crab dip experience to new heights.

Storage and Shelf Life

To extend the shelf life of your creamy crab dip, store it in an airtight container in the refrigerator, where it can last up to three days. To reheat, place it in the oven at a low temperature until warmed through to restore its creamy consistency.

Signs of spoilage include off odors or discoloration, so be sure to check before serving leftovers. Freezing is not recommended as it may alter the texture of the crab and cream cheese; however, if you must freeze, ensure it’s in a well-sealed container, but aim to consume it fresh for the best flavor.

Make Ahead Strategies

To make your preparation process smoother, consider assembling the crab dip the day before and storing it in the refrigerator. This allows the flavors to meld beautifully overnight. When ready to serve, simply pop it in the oven to bake until bubbly.

If you’re concerned about timing on the day of your event, prepping all ingredients in advance can save time and allow for quick assembly. Avoid adding any garnishes until right before serving to maintain their freshness, ensuring your dish looks appetizing.

When reheating, gently warm the dip to avoid any separation, and consider adding a splash of cream or milk to restore creaminess if needed. Keep fresh elements, like herbs, to sprinkle on just before serving for a vibrant finish.

Scaling Instructions

When you need to adjust the quantity of this delicious dip, start by halving or doubling the ingredient amounts according to your needs. Ensure your baking dish is appropriately sized to accommodate the adjusted volumes; a larger quantity may require a deeper dish for even cooking.

Keep in mind that cooking times may vary based on the size of the dish and thickness of the dip, so it’s essential to monitor doneness visually. If scaling up significantly, consider baking in batches to maintain quality and ensure the best texture.

For leftovers, refrigerate as directed, and when reheating, spread it into a shallow baking dish to facilitate even warming.

Nutritional Deep Dive

This Creamy Cheesy Crab Dip provides a delightful balance of macros and key nutrients. With a decent amount of protein from the crab and cream cheese, it offers a satisfying snack that can complement a balanced diet.

Beyond protein, crab meat is also an excellent source of omega-3 fatty acids, which support heart health, brain function, and overall wellness. However, be mindful of portion sizes, as cream cheese adds to the caloric density.

For weight management considerations, serving this dip with fresh veggies or whole grain crackers can provide additional fiber without excessive calories. This approach makes it a filling option for sharing during gatherings while maintaining a nutritious balance.

Dietary Adaptations

For gluten-free guests, pair this dip with gluten-free crackers or sliced vegetables. To make it dairy-free, substitute cream cheese with a vegan alternative, ensuring to adjust seasonings to maintain flavor.

For those following a low-carb or keto diet, use cauliflower crackers or vegetable sticks to enjoy without the added carbs from traditional dippers. Paleo diets can benefit from using fresh veggies, providing a crunchy and healthy contrast to the creamy dip.

Additionally, for a vegan twist, consider using shredded jackfruit instead of crab combined with plant-based cream cheese. This allows the dish to cater to a broader range of dietary needs while remaining delicious.

Troubleshooting Guide

If you find your crab dip too thick upon serving, adding a splash of milk can adjust the texture. Alternatively, if it’s too runny, consider baking it a little longer to evaporate excess moisture without overcooking.

If the flavor seems off, it could be an issue of under-seasoning or using low-quality crab. Always taste before serving, and don’t hesitate to add a pinch of salt or a squeeze of lemon for brightness.

If you encounter uneven cooking, checking extra time for doneness is essential. Covering it partway through baking can prevent burning while maintaining moisture.

Lastly, if you’ve made substitutions and are unhappy with the results, keep notes for future attempts to refine your version; cooking is an evolving art!

Recipe Success Stories

Communities have embraced this Creamy Cheesy Crab Dip, sharing feedback and adaptations that spotlight its versatility. Many satisfied readers have shared how small tweaks, like adding spicy peppers or using smoked cheese, took their dip to a new level.

Numerous families have made it a staple at holiday gatherings, where both generations contribute their versions, creating delightful family traditions centered around this dish. Photo submissions from happy cooks illustrate the proud moments shared over this simple yet impressive recipe.

In every successful attempt, the underlying joy remains the same—bringing people together to enjoy good food and memorable experiences, solidifying the crab dip’s place in culinary hearts.

Frequently Asked Questions

Can I use imitation crab instead of real crab?

Absolutely! Imitation crab can be a budget-friendly alternative and still yields a delicious dip. Just chop it into small pieces and mix it in as you would with real crab.

How can I make this dip spicier?

To add a kick, consider mixing in diced jalapeños or a few dashes of your favorite hot sauce. Adjust to your spice tolerance and taste as you go!

Can I prepare this dip the night before?

Prenote the dip the night before and store it in the fridge. When ready to serve, bake it until warm. This allows the flavors to meld nicely!

How long can I keep the leftovers?

Stored in an airtight container, leftovers can be kept in the refrigerator for up to three days. Reheat gently before serving.

What should I serve with crab dip?

Serve your crab dip with an assortment of dippers like toasted baguette slices, fresh vegetables, or sturdy crackers for a delightful experience.

Can I freeze this dip?

While it’s not ideal to freeze, if necessary you can, but note that the texture may change. Freeze in a well-sealed container and consume within a month.

What are some great additions to crab dip?

You can add ingredients like chopped green onions, bell peppers, cheese blends, or even spinach for a twist on the classic recipe. Get creative!

Is this recipe gluten-free?

The dip itself is gluten-free, but ensure you serve it with gluten-free dippers to accommodate dietary preferences.

Can I make this dip in advance?

Yes! Prepare the dip ahead of time, keep it refrigerated, and bake it just before you’re ready to serve. This works wonderfully for parties.

What type of crab works best?

For the best flavor, use lump crab meat, but any high-quality crab meat will work. Avoid canned crab that’s overly processed.

Additional Resources

If you enjoyed this Creamy Cheesy Crab Dip, check out more related recipes on our blog, such as Spinach Artichoke Dip or Shrimp Scampi. Learn about essential cooking techniques that can enhance your culinary skills, and discover nutritional information about various seafood types to help inform your meal planning. Equipment recommendations can also ensure you’re well-prepared, making your cooking experience enjoyable and efficient.

Join the Conversation

We love hearing from you! Share your photography and variations of this recipe on social media to inspire others in our community. Join the conversation by leaving reviews, sharing your successes, and connecting with fellow food enthusiasts. Whether you’ve made this recipe or added your unique spin to it, your insights and experiences matter!

The Recipe

Creamy Cheesy Crab Dip

Serves: 8

Prep Time: 10 mins

Cook Time: 20 mins

Total Time: 30 mins

Kitchen Equipment Needed

  • Mixing bowl
  • Baking dish
  • Spatula
  • Oven

Ingredients

  • 1 cup lump crab meat
  • 8 oz cream cheese, softened
  • 1 cup shredded sharp cheddar cheese
  • 1/2 cup mayonnaise
  • 1 tbsp Dijon mustard
  • 1 tbsp Worcestershire sauce
  • 1 tsp garlic powder
  • 1/2 tsp Old Bay seasoning
  • Salt and pepper to taste

Directions

  1. Preheat the oven to 350°F (175°C).
  2. In a mixing bowl, combine the softened cream cheese, mayonnaise, and mustard until smooth.
  3. Fold in the crab meat, shredded cheddar, Worcestershire sauce, garlic powder, Old Bay seasoning, salt, and pepper.
  4. Transfer the mixture to a greased baking dish and spread evenly.
  5. Bake for 20 minutes or until the dip is heated through and bubbly.
  6. Serve warm with your choice of dippers.

Recipe Notes

  • For a spicier kick, add diced jalapeños or hot sauce to the mixture.
  • To make ahead, prepare the dip and store it in the refrigerator before baking.
  • Garnish with fresh herbs or a sprinkle of paprika for added color and flavor.
  • Adjust seasonings to suit your taste—don’t hesitate to experiment!

Delicious Tzatziki Chicken and Veggie Naan Pizza Recipe

Tzatziki Chicken & Veggie Naan Pizza: A Flavorful Mediterranean Delight

⚖️
Difficulty
Medium

⏲️
Prep Time
20 mins

🕒
Cook Time
15 mins

⏱️
Total Time
35 mins

🍽️
Servings
4 servings

The Tzatziki Chicken & Veggie Naan Pizza is a delightful fusion of Mediterranean flavors that brings a taste of Greece right to your kitchen. Imagine a crispy naan bread base topped with juicy chicken marinated in zesty tzatziki sauce, paired with fresh, vibrant veggies. This dish perfectly balances rich and tangy notes, providing a refreshing twist that will tantalize your taste buds. Perfect for a quick weeknight dinner or a casual gathering, this pizza is not only bursting with flavor but is also visually appealing, making it a fantastic centerpiece for any meal.

As you dive into this easy-to-prepare recipe, picture the fragrant aromas wafting from your oven—the fresh mint, garlic, and lemon from the tzatziki melding beautifully with the roasted chicken and colorful vegetables. The combination of textures—from the crispy naan to the tender chicken and crunchy veggies—creates a satisfying mouthfeel that elevates your dining experience. This Tzatziki Chicken & Veggie Naan Pizza is a must-try for anyone who loves to explore new flavor profiles while enjoying the comfort of a delicious pizza!

Quick Recipe Highlights

  • Flavor Profile: The juicy chicken marinated in tzatziki sauce delivers a burst of tanginess, complemented by the freshness of the vegetables and the warm, slightly charred naan.
  • Texture: Expect a delightful crunch from the naan, a tender bite from the chicken, and a crisp freshness from the veggies making each bite enjoyable.
  • Aroma: The aromatic notes of garlic, mint, and lemon create an inviting scent that fills your kitchen while baking.
  • Visual Appeal: The vibrantly colored toppings contrast beautifully against the golden naan, creating an inviting presentation.
  • Skill Level Needed: This recipe is accessible for all skill levels, making it perfect for novice cooks and experienced chefs alike.
  • Special Equipment: A baking sheet or pizza stone for the naan, and a grill or frying pan for cooking the chicken.

Recipe Overview

  • Difficulty Level: The Tzatziki Chicken & Veggie Naan Pizza is classified as medium difficulty. It involves marinating the chicken and assembling the pizza, making it easy yet rewarding for home cooks.
  • Category: This recipe fits well into the category of casual dining, perfect for family meals, gatherings, or quick lunches.
  • Cuisine: Rooted in Mediterranean cuisine, it combines Greek influences, particularly the tzatziki sauce, with a universally loved food—the pizza.
  • Cost: This recipe is cost-effective, as it utilizes everyday ingredients that are often inexpensive and easy to find.
  • Season: Enjoy this dish year-round! The fresh ingredients shine in spring and summer, but it can warm your soul during the colder months as well.
  • Occasion: This naan pizza is perfect for casual dinners, weekend gatherings, or when you want to impress guests with minimal effort.

Why You’ll Love This Recipe

The Tzatziki Chicken & Veggie Naan Pizza is a delightful blend that guarantees satisfaction in every bite. First and foremost, the combination of grilled chicken marinated in creamy tzatziki sauce and fresh vegetables creates a vibrant flavor profile. The explosion of taste, from the tanginess of the tzatziki to the freshness of the vegetables, elevates typical pizza expectations, providing a nourishing yet indulgent option.

Convenience is another perk of this recipe. With a prep time of just 20 minutes and a cook time of 15 minutes, you can whip it up quickly, making it ideal for busy weeknights. The use of naan as a base not only cuts down on cooking time but also results in a perfect crust that’s easy to handle and deliciously satisfying.

Nutritionally, this dish offers a wholesome array of ingredients. Chicken provides lean protein, while the variety of fresh vegetables ensures you’re getting essential vitamins and minerals. The tzatziki sauce adds a probiotic boost with the yogurt base, helping with digestion.

Socially, this pizza is great for entertaining. Its unique flavor profile often piques curiosity and engages guests in conversation, leading to a fun dining experience. It’s an innovative take on pizza that impresses everyone at the table.

Finally, this recipe is very cost-effective. Most of the ingredients can be found at your local grocery store without breaking the bank. The quality of flavors and textures you get from such a simple assembly is unbeatable, making it a go-to choice for affordable gourmet meals.

Historical Background and Cultural Significance

The origins of the Tzatziki Chicken & Veggie Naan Pizza lie deep in Mediterranean culture, with tzatziki being a staple in Greek cuisine. Traditionally, tzatziki is a sauce made from strained yogurt, cucumbers, garlic, and herbs, which is known for its refreshing qualities. The use of grilled chicken in Mediterranean diets is celebrated for its flavor and health benefits, symbolizing a rich culinary history that embraces fresh ingredients and vibrant tastes.

Culturally, this dish embodies the Mediterranean lifestyle, which emphasizes the joy of sharing meals and celebrating communal dining experiences. The tradition of pizza has evolved globally, allowing for diverse interpretations across different cultures. This pizza, featuring tzatziki, is a unique representation that pays homage to both Greek and Italian influences while offering a modern twist.

Over time, the recipe has developed into various forms, incorporating local ingredients and flavors, making it a versatile dish. Whether enjoyed from a traditional pizza oven in Italy or adapted in a home kitchen, this Tzatziki Chicken & Veggie Naan Pizza maintains its roots while showcasing creativity.

Regional variations often include different proteins or vegetables, allowing it to adapt and stay relevant in a dynamic food scene where culinary fusion reigns. This recipe stands as an example of how we can blend beloved flavors, creating something new and exciting.

Ingredient Deep Dive

Chicken
Chicken has been a protein source around the globe, valued for its versatility and flavor. Lean chicken breast is an excellent option for health-conscious meals, packed with protein yet low in calories. When selecting chicken, look for pieces that are firm and have a fresh appearance. To store, keep it refrigerated and consume within a couple of days, or freeze for longer preservation. For substitutions, consider turkey or plant-based alternatives for a different twist.

Tzatziki Sauce
The origins of tzatziki sauce are deeply rooted in Greek cuisine, known for its cooling properties and health benefits associated with yogurt’s probiotics. The creamy texture of tzatziki derives from strained yogurt, typically made from sheep or cow’s milk. When selecting yogurt, opt for full-fat or Greek yogurt to maximize creaminess. Store it in an airtight container in the fridge. Tzatziki can also be made with non-dairy yogurt for a vegan option, keeping the flavor while accommodating dietary preferences.

Naan Bread
Naan bread is traditionally baked in a tandoor and is integral to South Asian and Middle Eastern cuisines. It’s known for its unique texture—soft on the inside with a slightly crisp exterior. When purchasing naan, look for brands that use natural ingredients without preservatives. Store naan in a sealed bag to maintain its softness. If you’re looking for alternatives, consider pita bread or tortillas for similar results, though the flavor profile will differ slightly.

Common Mistakes to Avoid

  • Not marinating the chicken long enough can lead to bland flavors. Aim for at least 30 minutes to allow the spices to infuse.
  • Using too much tzatziki sauce can make the pizza soggy. Apply it sparingly to maintain the base’s crispness.
  • Overcooking the chicken can result in dryness. Use a meat thermometer to ensure it’s cooked through but still juicy.
  • Failing to preheat the baking sheet may cause uneven cooking; the naan should be placed on a hot surface for optimal texture.
  • Choosing low-quality ingredients can impact the dish’s flavor. Fresh herbs and vegetables are key to a vibrant taste.
  • Forgetting to let the naan cool slightly before adding toppings can lead to embarrassing burns or a mushy base.
  • Skipping on the veggies can make for a less satisfying bite; incorporate a variety for color and nutrition.
  • Not allowing the tzatziki to drain properly can result in excess liquid, affecting the overall consistency of the dish.
  • Jumping straight to baking without preparing your assembly station can lead to a chaotic cooking experience.
  • Ignoring preferences and dietary restrictions when serving guests can make for a less enjoyable meal for everyone involved.

Essential Techniques

Marinating Chicken
Marinating chicken is crucial for flavor enhancement and tenderization. To master this technique, combine your marinade ingredients well and allow the chicken to soak for the recommended time. Watch for over-marinating as it can lead to a mushy texture. A visual cue for success is when the chicken has absorbed flavors but maintains its firmness.

Baking Naan Pizza
Baking naan pizza correctly ensures a crispy base and fully melted toppings. Preheat your oven to a high temperature (over 475°F). Place the naan directly on a hot stone or pan for an extra crisp. Avoid overcrowding the oven, and visually check for a golden-brown color indicating it’s done.

Pro Tips for Perfect Tzatziki Chicken & Veggie Naan Pizza

1. Opt for fresh herbs and organic vegetables for the best flavor profile in your toppings.
2. Grill the chicken for a smoky flavor, or bake if you prefer convenience.
3. Always taste and adjust the seasoning of your tzatziki sauce before assembly—adding salt and lemon can elevate its profile.
4. Use a combination of colorful vegetables for visual appeal—think bell peppers, red onions, and cherry tomatoes.
5. Keep the naan at room temperature until you are ready to assemble, ensuring the best texture during baking.
6. Experiment with different proteins, including shrimp or falafel, if you want to switch things up.
7. Add a sprinkle of feta cheese before serving for an extra Mediterranean touch.
8. Drizzle a little olive oil before baking for enhanced flavor and crispiness.

Variations and Adaptations

One regional variation includes substituting the chicken with lamb for a more robust flavor. You can also use seasonal vegetables like zucchini in the summer and root veggies in the winter. For dietary modifications, consider a dairy-free tzatziki made from cashew or coconut yogurt. Flavor variations are abundant as well; add red pepper flakes for heat or smoked paprika for depth. Texture modifications could include adding crunchy nuts or seeds on top just before serving, and garnishing alternatives can involve fresh parsley or a dash of sumac for flavor.

Serving and Presentation Guide

For plating, consider cutting the naan pizza into wedges for a shareable, bite-sized option. Garnish with fresh herbs like dill or parsley for color, and serve with extra tzatziki on the side for dipping. Traditional accompaniments might include a simple Greek salad, while modern serving suggestions could involve a side of roasted vegetables. Be mindful of serving temperature—this pizza is best enjoyed warm, shortly after baking. For portion control, consider serving each guest a half-pizza along with sides to balance out the meal.

Wine and Beverage Pairing

When pairing wine, a crisp, dry white wine such as Sauvignon Blanc complements the bright flavors of the tzatziki and vegetables beautifully. If you prefer non-alcoholic alternatives, consider a refreshing mint lemonade to echo the dish’s Mediterranean roots. Coffee might not pair well here, but fresh mint tea can cleanse the palate nicely. Understanding serving temperatures is key—serve whites chilled and teas warm for a holistic dining experience.

Storage and Shelf Life

Store leftover naan pizza in an airtight container in the refrigerator for up to three days. Reheat in a preheated oven to restore the crispiness, avoiding microwaves if possible, as they can lead to a soggy base. If freezing, wrap tightly in plastic wrap, followed by foil to prevent freezer burn. The ideal consumption window for frozen naan pizza is within 1-2 months. Always check for any signs of spoilage, such as off smells or discoloration before consumption.

Make Ahead Strategies

You can prep the chicken and tzatziki sauce a day ahead, allowing the flavors to meld. Store the marinated chicken in the refrigerator, and keep the tzatziki in a sealed container. Assemble the naan pizzas just before baking for the freshest outcome. When reheating, avoid overcooking to ensure the chicken retains its tenderness. For quality impact, consider adding any fresh elements, like herbs, just before serving to maintain vibrancy.

Scaling Instructions

Scaling the recipe is straightforward—halving ingredients can easily serve two, while doubling will satisfy larger crowds. Keep equipment adjustments in mind; you may need to bake in batches if using one dish. Time may remain nearly the same, though monitor the pizzas closely to avoid overbaking. Store any extras promptly in separate containers for ease in meal prep later.

Nutritional Deep Dive

The Tzatziki Chicken & Veggie Naan Pizza provides a robust macro breakdown, featuring proteins from chicken, healthy carbohydrates from naan, and varied fats through olive oil and yogurt. Each serving offers significant amounts of vitamin A from vegetables, along with critical minerals such as calcium from yogurt. Dietary considerations include a balance beneficial for weight management due to its lean ingredients. For portion analysis, be mindful of serving size, particularly with the naan portion to maintain diet objectives.

Dietary Adaptations

For gluten-free options, use an alternative flour-based naan or a cauliflower crust. Dairy-free versions of tzatziki can be made using coconut yogurt, catering to vegan preferences. Low-carb adaptations might involve substituting naan with a zucchini base or a salad-style presentation. Paleo and keto followers can enjoy this dish by using grilled vegetables instead of flatbread, providing substantial flavor while adhering to their dietary restrictions.

Troubleshooting Guide

Texture issues may arise if the chicken is not cooked properly; utilize a thermometer to ensure a safe internal temperature. If flavors are unbalanced, consider adding a touch more acid or salt slowly until desired taste is achieved. Temperature problems can occur when baking—preheating your oven adequately prevents sogginess. Equipment challenges are minimized by having all tools ready for smooth assembly; gather essentials before starting to create an efficient workspace. Lastly, timing concerns may include overbaking, which can be avoided by checking for visual cues of doneness.

Recipe Success Stories

Community feedback shows that the Tzatziki Chicken & Veggie Naan Pizza is a crowd-pleaser at family gatherings, with many sharing how the dish became a staple recipe. Variation successes have included successful adaptations for different dietary restrictions, showcasing its versatility. Reader suggestions also highlight the enjoyment of adding unique toppings, such as feta cheese or arugula, inspiring creative modifications. Additionally, many have shared their photography tips, encouraging attractive presentations that help elevate their home dining experiences.

Frequently Asked Questions

Can I use a different sauce instead of tzatziki? Yes! While tzatziki adds a distinct flavor, other options like hummus or pesto can also work beautifully as a base.

Is this pizza suitable for meal prep? Absolutely! You can prepare all components in advance and assemble right before baking for fresh, satisfying meals throughout the week.

Can I add more vegetables? Definitely! Feel free to personalize your pizza with additional vegetables such as spinach, mushrooms, or olives—just remember to balance moisture content for the crust’s texture.

How do I store leftovers? Store leftovers in an airtight container in the fridge for up to three days. Reheat them in the oven for the best results.

What is the best way to reheat naan pizza? Reheat naan pizza in a preheated oven set at 350°F for 8-10 minutes or until warmed through to maintain the crisp texture.

Can I make the tzatziki sauce ahead of time? Yes, tzatziki sauce can be made up to two days in advance. Just be sure to store it in an airtight container in the refrigerator.

How can I make this dish spicier? To add spice, incorporate sliced jalapeños or sprinkle red pepper flakes over the pizza prior to baking.

Can I freeze the cooked naan pizza? Yes, it can be frozen, although it’s best to assemble and freeze before baking to preserve texture.

What can I serve with naan pizza? Common sides include a fresh salad, roasted vegetables, or warm pita bread with extra tzatziki for dipping.

What can I substitute for naan? If you don’t have naan, pita bread or a homemade flatbread can be excellent alternatives to use as a base.

Is this pizza kid-friendly? Yes! The colorful toppings and fun nature of pizza make it a favorite among children, especially when they can pick their toppings.

Additional Resources

For more delicious recipes similar to Tzatziki Chicken & Veggie Naan Pizza, explore options like Mediterranean Pita Wraps or Greek Salad Bowls. Enhance your cooking skills with technique guides on marinating meats or making homemade sauces. Understanding the nutritional benefits of the individual ingredients can also enrich your cooking experience, helping you to appreciate the dish even more. Equipment recommendations for baking pizzas include sturdy baking sheets and pizza stones to achieve the best results, promoting even cooking.

Join the Conversation

We’d love to hear your thoughts! Share your photos and variations of the Tzatziki Chicken & Veggie Naan Pizza on social media. Community engagement is at the heart of our cooking adventures, and your feedback and recipe reviews contribute to a richer culinary experience for everyone! Don’t hesitate to recommend your favorite ingredients or share tips on how to make this dish even better.

The Recipe

Tzatziki Chicken & Veggie Naan Pizza

Serves: 4 servings

Prep Time: 20 mins

Cook Time: 15 mins

Total Time: 35 mins

Kitchen Equipment Needed

Ingredients

Directions

  1. Preheat your oven to 475°F (245°C).
  2. Marinate the chicken breasts in tzatziki sauce for at least 30 minutes.
  3. Heat a grill or frying pan over medium-high heat. Cook the chicken until thoroughly cooked and golden brown, about 6-7 minutes per side. Remove and slice into strips.
  4. Place naan breads on a baking sheet and spread a layer of tzatziki sauce evenly over each.
  5. Top each naan with sliced chicken, cherry tomatoes, bell pepper, and red onion. Optionally, sprinkle feta cheese on top.
  6. Drizzle a little olive oil over the top and bake for 8-10 minutes until the naan is crispy.
  7. Remove from the oven and garnish with fresh herbs before slicing and serving.

Recipe Notes

Delicious Teriyaki Chicken Avocado Rice Stack Recipe to Try

Teriyaki Chicken Avocado Rice Stack: A Flavorful Asian Delight

⚖️
Difficulty
Medium

⏲️
Prep Time
15 mins

🕒
Cook Time
20 mins

⏱️
Total Time
35 mins

🍽️
Servings
4

Teriyaki Chicken Avocado Rice Stack is not just a meal; it’s a symphony of flavors and textures that elevates your dining experience. Imagine juicy pieces of chicken, marinated and glazed in a sweet and savory teriyaki sauce, served over fluffy rice, perfectly topped with creamy avocado slices. Each bite delivers the umami richness of traditional Japanese cuisine, paired seamlessly with the lushness of ripe avocados. This dish is perfect for anyone seeking a quick yet delicious dinner on a weekday or a standout dish for a weekend gathering.

The combination of the warm rice and tender chicken with the cool, smooth avocado is just delightful. You can customize your stack to add colorful vegetables, adding both nutrition and visual appeal to this stunning plate. Your taste buds will thank you as you savor every layer, enjoying a balance of sweetness, saltiness, and texture that makes this dish truly mouthwatering.

Quick Recipe Highlights

  • Flavor Profile: The dish boasts a delectable balance of sweet, savory, and slightly tangy flavors thanks to the teriyaki sauce.
  • Texture: The tender chicken contrasts beautifully with the creamy avocado and fluffy rice, creating a delightful mouthfeel.
  • Aroma: The wafting scent of grilled chicken mixed with hints of soy sauce and sesame elevates the dish’s allure.
  • Visual Appeal: Layers of colorful ingredients make for a stunning presentation, with vibrant greens from the avocado and rich browns from the chicken.
  • Skill Level Needed: With basic cooking skills, anyone can master this recipe and impress family and friends.
  • Special Equipment: All you need is a skillet for quick cooking and some bowls for serving and stacking your delicious dish.

Recipe Overview

  • Difficulty Level: This recipe is classified as medium, making it approachable for home cooks with some experience in the kitchen.
  • Category: This dish fits well under the category of Asian-inspired meals, perfect for lunch or dinner.
  • Cuisine: With its roots in Japanese cuisine, the teriyaki sauce offers an authentic taste of Japanese culinary traditions.
  • Cost: The ingredients are relatively affordable, making this a budget-friendly option for those wanting a gourmet feel.
  • Season: Enjoy this recipe year-round, as avocados and chicken are readily available in all seasons.
  • Occasion: Ideal for family dinners, meal prep, or entertaining guests who appreciate flavorful and visually pleasing dishes.

Why You’ll Love This Recipe

This Teriyaki Chicken Avocado Rice Stack is a feast for your taste senses, offering an explosion of flavors in every bite. The chicken, marinated in a delightful blend of teriyaki sauce, absorbs all the sweet and savory goodness, while the creamy avocado complements the dish beautifully, ensuring a balanced meal. The rice adds a comforting element that will leave you satisfied and craving more.

What sets this recipe apart is its convenience and preparation benefits. The total cooking time of just 35 minutes makes it easy for busy families to whip up a delicious dinner without stress. Plus, the ability to prep ingredients ahead of time allows for quick assembly when you’re ready to eat, making it ideal for meal prepping or spontaneous gatherings.

In terms of nutritional advantages, this dish is not only scrumptious but also packed with essential nutrients. Chicken provides high-quality protein, avocados are an excellent source of healthy fats, and rice gives a good energy boost, making this meal balanced and fulfilling.

Serving this recipe is more than just about nourishment; it offers social and entertaining value as well. The visually appealing layers encourage sharing and make it a conversation starter among friends and family, ensuring an engaging dinner atmosphere.

Lastly, one of the most striking appeals of the Teriyaki Chicken Avocado Rice Stack is its cost-effectiveness. Using everyday ingredients that are often found in your kitchen makes this dish accessible, whether you are on a budget or just looking to create something satisfying without breaking the bank.

Historical Background and Cultural Significance

The origins of teriyaki sauce, traditionally a combination of soy sauce, sake, mirin, and sugar, date back centuries in Japanese cuisine. Initially enjoyed by the samurai, teriyaki became popular with the spread of Japanese culture. Eating teriyaki chicken symbolizes a love for flavorful, grilled meats in Japan.

In Japan, teriyaki is more than just a cooking method; it reflects the country’s dedication to culinary craftsmanship, emphasizing fresh, high-quality ingredients. As teriyaki chicken gained traction worldwide, it transformed into a beloved dish that transcends cultural boundaries, consistently represented on menus from fast casual to gourmet dining experiences.

Over the years, the evolution of this recipe has adapted to local tastes and preferences. Instead of grilling or broiling, modern takes often involve pan-frying or even air-frying for a quicker preparation time. Similarly, ingredient variations, such as using different proteins or expanding it to vegetarian formats, have become increasingly popular.

Regional variations of teriyaki chicken can be observed in local cuisine adaptations. In Hawaii, for example, teriyaki chicken has become a staple, often served with rice and mac salad, showcasing the beautiful cross-cultural fusion in American takes on traditional dishes.

Ingredient Deep Dive

Chicken: Chicken has significant cultural importance in many cuisines, including Japanese, where it symbolizes strength and sustenance. Nutritional benefits are abundant, as chicken is an excellent source of protein and essential vitamins like B6, which helps with mood regulation and energy production. When selecting chicken, look for fresh, high-quality cuts and ensure proper storage in the refrigerator to maintain freshness. For substitutions, turkey or tofu can be viable alternatives depending on dietary preferences.

Avocado: Often regarded as a superfood, avocados have a long history in Central and South American cuisines, where they are beloved for their rich flavor and creamy texture. Nutritionally, they are packed with healthy fats, fiber, and nearly 20 vitamins and minerals. When choosing avocados, opt for ones that yield slightly to gentle pressure, indicating ripeness. Proper storage in a cool, dark place preserves their integrity, while freezing can alter texture; hence it’s best used fresh. For substitution, other creamy accompaniments like hummus or nut butters can be used according to your preference.

Common Mistakes to Avoid

  • Overcooking the chicken can lead to dryness; ensure to cook to the correct internal temperature, around 165°F (75°C).
  • Using unripe avocados may affect your dish’s creaminess; always choose ripe ones for the best results.
  • Not marinating the chicken long enough can result in lack of flavor; aim for at least 30 minutes.
  • Using too much teriyaki sauce can overwhelm the dish; balance flavors by using it sparingly at first, then adding more as needed.
  • Skipping the resting time for the chicken after cooking can cause the juices to run out; allow it to rest for a few minutes.
  • If you prepare ingredients in advance, be cautious of browning; avocados can oxidize quickly, so store them properly.
  • Failing to taste and adjust seasoning at the end of cooking can result in a flat flavor profile; be sure to season to your liking.
  • Ignoring the importance of presentation can lead to an uninspired dish; take time to stack and garnish thoughtfully.
  • Not using a non-stick skillet may result in sticking; ensure your pan is suitable for cooking chicken.
  • Forgetting to rinse rice can lead to a gummy texture; always wash your rice before cooking for fluffy results.

Essential Techniques

Marinating: Marinating the chicken not only flavors it but also tenderizes the meat, making for a juicier and more enjoyable dish. To master this technique, allow the chicken to soak in the marinade for at least 30 minutes; longer is even better for deeper flavor. Avoid overcrowding in the container, which can limit the marinating effectiveness.

Layering Ingredients: The art of stacking your ingredients properly is crucial for presentation and flavor distribution. Begin with a base of rice, followed by the marinated chicken, and top with slices of avocado. Be conscious of balance and heights when assembling, as a well-structured dish is visually appealing.

Pro Tips for Perfect Teriyaki Chicken Avocado Rice Stack

1. Always choose ripe avocados, as they will yield the best texture with your dish. Test ripeness by applying gentle pressure; ripe should feel slightly soft.
2. Enhance flavors by adding a sprinkle of sesame seeds over the finished dish; they provide a delightful crunch.
3. Explore different marinades to switch up the teriyaki flavor, such as incorporating ginger or garlic for added zest.
4. If you enjoy a spicier twist, consider drizzling sriracha or adding crushed red pepper to the marinade for a heat element.
5. For optimal cooking, use a meat thermometer to ensure your chicken reaches the recommended internal temperature.
6. Keep your workstation organized; prepping ingredients in advance can simplify the cooking process.
7. Experiment with seasonal vegetables; adding seasonal favorites can enhance freshness and flavor.
8. Create a meal-prep version by stacking the ingredients in containers for easy lunch options throughout the week.

Variations and Adaptations

There are countless ways to modify this Teriyaki Chicken Avocado Rice Stack. For regional diversity, consider using different sauces that reflect local tastes, such as a spicy chili sauce or a pineapple glaze, adding a unique twist to the dish. Seasonal adaptations can introduce colorful toppings like cherry tomatoes or zucchini during summer, enhancing both flavor and nutrition.

Vegetarians can swap out the chicken for marinated tofu or tempeh, maintaining the flavorful profile while catering to different dietary needs. For those watching their carb intake, using cauliflower rice instead of regular rice is an excellent low-carb alternative that still allows for a delightful base.

Texture modifications can include grilling or air-frying the chicken for a crispier finish. Similarly, consider presentation alternatives like deconstructing the dish for a chic and modern look, or serving the ingredients separately for a fun assembly experience at the table.

Serving and Presentation Guide

Plating techniques play a vital role in showcasing your Teriyaki Chicken Avocado Rice Stack. Start by using a ring mold to stack your rice for a clean presentation, followed by arranging chicken and avocado neatly on top. Use a sprinkle of chopped green onions or cilantro to heighten the visual appeal.

Garnishing ideas could include a dollop of spicy mayo or teriyaki drizzle around the edge of your plate for a professional touch. Traditional accompaniments like pickled vegetables can add both color and tanginess to your dish.

If you’re looking for modern serving suggestions, consider creating deconstructed bowls in individual servings with all components beautifully arranged. Temperature considerations are essential; serve while the chicken is warm for the best experience, but consider cooling your avocado to preserve its creaminess.

For portion control, stack just enough for a single serving in your rings, allowing guests to admire the layers without overwhelming them.

Wine and Beverage Pairing

For wine pairings, a crisp Sauvignon Blanc complements the sweetness of the teriyaki sauce beautifully, enhancing your dining experience. Alternatively, a light, fruity Riesling can balance the flavors, especially if you incorporate additional spices.

If you’re opting for non-alcoholic alternatives, consider serving sparkling water with a slice of lime or a refreshing iced green tea to cleanse the palate between bites. For those who enjoy warmth, a cup of Japanese matcha tea brings a unique flavor depth that pairs well with the richness of the dish.

Ensure proper temperature for serving; white wines should be chilled, and sparkling options should be served fresh and cold to enhance the dining experience.

Storage and Shelf Life

To store leftovers of your Teriyaki Chicken Avocado Rice Stack, combine chicken and rice in an airtight container, ensuring it stays fresh for up to three days in the refrigerator. Avocado slices should be kept separate to prevent browning; store them in an airtight bag with a squeeze of lemon juice to retain their vibrant color.

When reheating, use the microwave, but cover it to trap steam and keep the chicken juicy. Avoid freezing avocado or rice; cooked chicken can freeze well for about two months, but reheating can affect texture. Always check for signs of spoilage, like off-odor or change in texture, before consuming.

Make Ahead Strategies

For a successful make-ahead approach, prep your chicken by marinating it the night before. Store marinated chicken in the refrigerator to allow maximum flavor development. You can also cook rice in advance and store it in the fridge for easy assembly later.

If you plan to serve this dish at a gathering, assemble all components except for the avocado beforehand to ensure a fresh presentation. When it’s time to dine, simply reheat your chicken and rice while slicing the avocado fresh for a vibrant touch just before serving.

Assess quality impacts between preparation and serving; storing made-ahead ingredients while separated retains flavor and texture. When it comes to reheating, ensure that everything warms up evenly for a consistent dish that’s delicious.

Scaling Instructions

Scaling the Teriyaki Chicken Avocado Rice Stack is straightforward. For halving the recipe, roughly adjust the amounts of each ingredient while keeping marination time consistent to maintain flavor profiles. When doubling or tripling, pay attention to cooking times, as larger amounts might require slight adjustments.

Equipment adjustments may be necessary; for large batches, consider using multiple skillets or a larger pot. Timing modifications come into play; always check for doneness, as thicker pieces of chicken may need more time compared to smaller cuts.

Stored ingredients should be monitored closely, especially if made in bulk to avoid spoilage. Portion control and distribution effects should be analyzed to ensure each serving keeps its flavorful and fresh attributes.

Nutritional Deep Dive

The Teriyaki Chicken Avocado Rice Stack provides a well-rounded macro breakdown. With chicken contributing high protein content, avocado delivering healthy fats, and rice giving carbohydrates, this dish satisfies a complete nutritional profile suitable for various diets.

Micronutrient analysis reveals that you benefit from a variety of vitamins and minerals found in each component, such as vitamin E from avocados that promotes skin health and B vitamins from chicken that assist in energy production. These nutrients play vital roles in maintaining a balanced diet and overall health.

Health benefits of this meal extend beyond pleasing taste; the combination of lean protein, healthy fats, and complex carbohydrates offers sustainable energy, supporting an active lifestyle. Dietary considerations such as portion size can impact individual needs; being aware of serving sizes helps to maintain a healthy balance.

For weight management, consider the nutritional density of ingredients; avocados are rich in fiber which promotes satiety, making your meal filling without excess calories. Pairing these components wisely will help manage intake while enjoying every bite.

Dietary Adaptations

This recipe can cater to various dietary needs, starting with gluten-free options; ensure your teriyaki sauce is gluten-free, and follow similar cooking procedures. Dairy-free adaptations involve checking the marinades and sauces used for hidden dairy ingredients.

For those interested in vegan versions, substitute chicken with tofu, ensuring to marinate it adequately for flavor. Low-carb adherents may reconsider the rice and utilize cauliflower rice, keeping the dish light yet fulfilling.

Keto enthusiasts can switch out the teriyaki sauce for a homemade version using low-carb sweeteners to maintain flavor. For paleo diets, focus on natural ingredients while replacing rice with grains like quinoa.

Consider the low-FODMAP diet by avoiding garlic and onion in marinades and sauces. Other specific diets may require personalized substitutions or adjustments based on individual dietary needs, ensuring everyone can enjoy this dish.

Troubleshooting Guide

For texture issues, the key is careful monitoring during the cooking process. If the chicken comes out dry, consider reducing cooking time or using a marinating technique more effectively to retain moisture. If the rice is overly sticky, remember to rinse well before cooking to achieve fluffy grains.

Flavor balance challenges can arise; if the dish is too salty, consider adding a splash of rice vinegar to refresh the taste. Temperature problems with ingredients often stem from improper timing; ensure that chicken is cooked evenly throughout while monitoring other components for optimal warmth.

Equipment challenges can arise if using different cooking methods; ensure you’re familiar with how heat distributes in your appliances. Ingredient substitutions may not yield the same results, so it’s essential to research prior to altering any key components.

Timing concerns during preparation can lead to rushed dishes; always think ahead, prep properly, and allow time for thoughtful assembly and cooking.

Recipe Success Stories

Reader feedback consistently showcases how accessible and enjoyable the Teriyaki Chicken Avocado Rice Stack has become in many households. Home cooks often share stories of how simple modifications made this dish their own— from adding seasonal vegetables to adapting cooking methods.

Many have praised the recipe for being an instant hit with families, where children and adults alike are delighted by the flavor balance and vibrant presentation. As for photography tips, many have successfully captured the beautiful layers and colors, sharing on social media and encouraging others to try their hand at this visually appealing dish.

Adaptation stories further reflect the versatility of the ingredients, with individuals submitting reviews on how they’ve made the dish better suited to dietary needs or personalized tastes. Suggestions often include enhancing flavors with unique marinades, topping it with unexpected ingredients, or even serving it as part of a themed dinner party for entertaining friends.

Frequently Asked Questions

Q: Can I use other proteins instead of chicken?
A: Absolutely! Tofu, shrimp, or even beef can be excellent alternatives while maintaining the dish’s essence.

Q: How do I ensure my rice is cooked perfectly?
A: Rinse the rice thoroughly before cooking to remove excess starch, which helps achieve fluffy results.

Q: Can I make this dish ahead of time?
A: Yes, you can prep the chicken and marinate it a day in advance. Just add the avocado right before serving to keep it fresh.

Q: What other sauces can I use instead of teriyaki?
A: Feel free to experiment with honey soy glaze, BBQ sauce, or even a spicy chili sauce for a different flavor profile.

Q: How do I store leftovers?
A: Store the chicken and rice in an airtight container in the fridge for up to 3 days, keeping the avocado separate to avoid browning.

Q: Can I freeze this dish?
A: You can freeze the cooked chicken and rice but avoid freezing the avocado. Thaw in the fridge overnight before reheating.

Q: What vegetables can I add to this recipe?
A: Bell peppers, carrots, or snap peas add both color and nutrition, enhancing the overall dish.

Q: Is this recipe suitable for meal prep?
A: Definitely! All elements can be prepped in advance and assembled quickly when you’re ready to serve.

Q: Can this recipe be made spicy?
A: Yes, adding red pepper flakes or a spicy teriyaki sauce can add a kick to your dish.

Q: How can I enhance the flavor without additional calories?
A: Fresh herbs like cilantro, and lime juice can add brightness without significantly impacting calories.

Additional Resources

Explore related recipes such as grilled teriyaki salmon, which offers similar flavors while switching up the protein. For more techniques, check our guide on mastering marinades or visit the ingredient section for detailed profiles on chicken and avocado.

For equipment recommendations, ensure you have a sturdy skillet and a quality rice cooker for the best results. Consider seasonal variations with fresh produce available to keep your dish exciting year-round.

Join the Conversation

We encourage you to share your experience with the Teriyaki Chicken Avocado Rice Stack on social media and engage with fellow food enthusiasts. Share your unique photos and modifications, and let us know your favorite tips for making this dish your own.

Don’t forget to leave your reviews and feedback on this recipe, helping to foster a community where everyone can find inspiring ways to enjoy cooking together. We’d love to hear your variation stories and the special moments this recipe has created in your home!

The Recipe

Teriyaki Chicken Avocado Rice Stack

Serves: 4

Prep Time: 15 mins

Cook Time: 20 mins

Total Time: 35 mins

Kitchen Equipment Needed

  • Non-stick skillet
  • Cutting board
  • Knife
  • Rice cooker (optional)
  • Mixing bowl
  • Ring mold (optional for presentation)

Ingredients

  • 1 lb boneless chicken thighs
  • ⅓ cup teriyaki sauce
  • 2 cups cooked jasmine rice
  • 2 ripe avocados, sliced
  • 2 green onions, chopped
  • Sesame seeds for garnish (optional)

Directions

  1. Marinate chicken in teriyaki sauce for at least 30 minutes.
  2. Cook the rice according to package instructions; set aside.
  3. Heat a non-stick skillet over medium heat; cook the marinated chicken for 5-7 minutes on each side until fully cooked.
  4. Remove chicken from skillet and let it rest for a few minutes before slicing.
  5. In individual plates or bowls, layer the cooked rice, top with sliced chicken, and then layer sliced avocado on top.
  6. Garnish with chopped green onions and sesame seeds if desired, serve immediately.

Recipe Notes

  • Feel free to customize with other vegetables or switches in protein.
  • Use brown rice for a healthier grain option.
  • Experiment with marinades and sauces to suit your palate.