Delicious Cheesesteak Tortellini in Creamy Parmesan Sauce Recipe

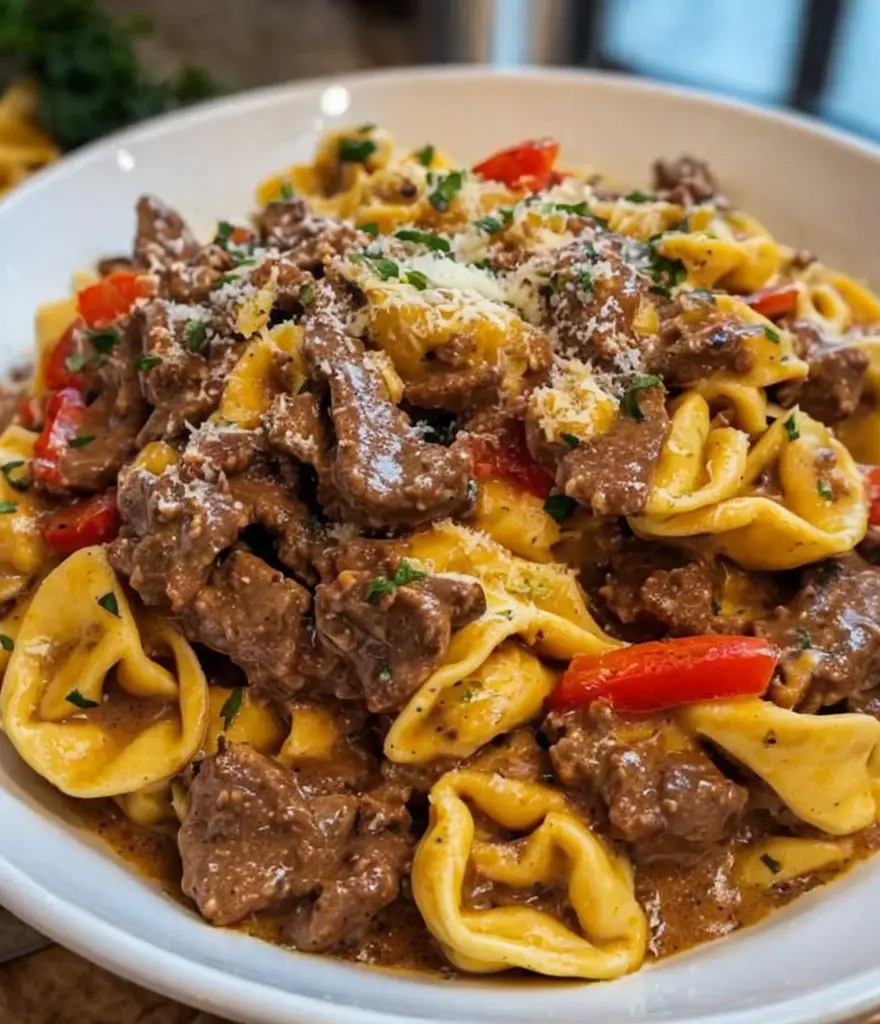
Cheesesteak Tortellini in Creamy Parmesan Sauce: A Delicious Twist on a Classic Favorite

⚖️
Difficulty
Intermediate

⏲️
Prep Time
15 mins

🕒
Cook Time
25 mins

⏱️
Total Time
40 mins

🍽️
Servings
4 servings

If you’re a fan of classic flavors with a touch of modern flair, then Cheesesteak Tortellini in Creamy Parmesan Sauce is the perfect dish for you. This delightful recipe combines the rich and savory elements of a traditional cheesesteak with the soft and pillowy texture of tortellini, all enveloped in a luxurious creamy parmesan sauce. Each bite offers a comforting burst of flavors that will warm your soul and satisfy your cravings for something hearty and delicious.

Imagine a plate filled with beautifully cooked tortellini, tossed generously in a creamy sauce that glistens with rich cheddar and parmesan. The addition of tender ribeye steak, sautéed peppers, and onions provides a colorful contrast that makes this dish not only delectable but visually appealing as well. You’ll find that this Cheesesteak Tortellini is not just a meal; it’s an experience that transports you to the bustling streets of Philadelphia with each forkful.

Quick Recipe Highlights

  • Flavor Profile: The cheesesteak flavors shine through with melted cheese, savory beef, and aromatic herbs.
  • Texture: The combination of creamy sauce with tender tortellini delivers a luxurious mouthfeel.
  • Aroma: The enticing scents of sautéed onions and peppers complement the richness of the creamy sauce.
  • Visual Appeal: The dish boasts vibrant colors from peppers and herbs, making it a feast for the eyes.
  • Skill Level Needed: Perfect for cooks with basic culinary skills aiming to elevate their dinner game.
  • Special Equipment: A saucepan, skillet, and colander are essential to create this dish beautifully.

Recipe Overview

  • Difficulty Level: This recipe falls under the intermediate category due to the coordination required for cooking multiple elements simultaneously.
  • Category: This dish works well as a main course, ideal for family dinners or casual gatherings.
  • Cuisine: While inspired by American cuisine, this dish incorporates Italian influences thanks to the tortellini and cream sauce.
  • Cost: Budget-friendly, with all ingredients easily accessible at local grocery stores.
  • Season: Perfect for year-round enjoyment, particularly on cooler days when a hearty meal is most welcome.
  • Occasion: This delicious dish is great for family dinners, weeknight meals, or even special occasions when you want to impress guests.

Why You’ll Love This Recipe

When it comes to taste and texture, Cheesesteak Tortellini in Creamy Parmesan Sauce truly excels. The savory flavors of the tender ribeye steak meld effortlessly with the creamy sauce and fresh herbs, creating a delightful symphony on your palate. The silky tortellini enhances this experience, delivering a comforting sensation that makes every bite enjoyable.

This recipe boasts impressive convenience, allowing you to prepare a wholesome meal in about 40 minutes. The straightforward steps require minimal effort, enabling cooks of all levels to enjoy a gourmet-like experience without excessive time commitment. It’s perfect for those busy weeknights where you still wish to serve a delightful dinner.

Nutritionally, this dish offers a balanced combination of protein from the steak and carbohydrates from the tortellini. Incorporating bell peppers adds essential vitamins, making it not just indulgent but nutritious as well. With the right portions, it fits into a balanced diet without compromising on flavor.

Serving this dish at your next gathering will surely be a hit. Its vibrant presentation and rich flavors make it a crowd-pleaser, prompting compliments from friends and family alike. You’ll find that the combination of classic cheesesteak elements with pasta creates engaging conversations around the table.

From a cost perspective, Cheesesteak Tortellini is budget-friendly, offering significant flavor and satisfaction without breaking the bank. Most ingredients are commonly found in home kitchens, making it easy to whip up even on short notice without a special trip to the store.

Historical Background and Cultural Significance

The cheesesteak has its origins in Philadelphia, Pennsylvania, believed to have been created in the 1930s. It embodies the heart and soul of the city’s culinary scene, symbolizing classic American comfort food. Combining this iconic sandwich with tortellini creates a fusion that respects its roots while also inviting creativity in the kitchen.

Incorporating cheesesteak flavors into Italian-inspired dishes showcases the melting pot of cultures that exist in American cuisine. The evolution of both cheesesteaks and pasta over time has resulted in endless adaptations, allowing for innovative recipes that continue to honor traditional flavors.

This recipe connects with many food enthusiasts who appreciate the harmony of various culinary influences. Regional variations of the cheesesteak include different toppings and meats, exemplifying how deeply ingrained this dish is within American culture.

Today, variations of the cheesesteak abound, with numerous adaptations emerging to accommodate diverse dietary preferences. This versatility makes it relevant and cherished, allowing people to enjoy familiar flavors in new and exciting ways.

Ingredient Deep Dive

Ribeye Steak: Ribeye is renowned for its tenderness and rich flavor. This cut is well-marbled, offering a juicy experience that elevates any dish. For selection, look for firm, bright red meat with good marbling. Store it in the coldest part of your fridge and consume within 3-5 days. If unavailable, flank steak or sirloin can serve as suitable substitutions.

Tortellini: Italian in origin, tortellini are pasta filled with a variety of meats or cheeses, providing delightful bites of comfort. They can be found fresh or frozen; opt for fresh when making this dish for the best texture. Store fresh tortellini in the refrigerator and use within a week or freeze for longer preservation. Cheese ravioli can be a delicious alternative as well.

Parmesan Cheese: Parmigiano-Reggiano is the gold standard for parmesan cheese, known for its nutty, buttery flavor. It’s rich in calcium and protein, making it a popular choice among health-conscious eaters. When shopping, always opt for cheese that has a hard texture and a strong aroma. Store in a cool, dry place and wrap in parchment paper for freshness. Grana Padano is a widely acceptable alternative for those on a budget.

Bell Peppers and Onions: Fresh vegetables add color and nutrients to the dish, providing vitamins A and C, as well as a lovely sweetness when sautéed. When selecting, choose firm vegetables that are free of blemishes. Store them in a cool place and consume within a week. If you’re looking for a different flavor, consider using zucchini or mushrooms as replacements.

Common Mistakes to Avoid

  • Overcooking the steak: Aim for medium-rare to medium for the best flavor and texture.
  • Using pre-formed tortellini without understanding the cooking time, which can lead to mushy pasta.
  • Not seasoning each layer: Insufficient seasoning can result in bland sauce and meat.
  • Pasta cooking in the sauce too long: Prevents tortellini from maintaining its structure and integrity.
  • Skipping the rest time for the steak: Allowing the steak to rest helps retain juices.
  • Rushed prep time: Preparing ingredients in advance allows for smoother execution.
  • Ignoring sauce thickness: Adjust with pasta water or stock for the desired creaminess.
  • Choosing low-quality cheese: Freshly grated cheese enhances flavor more than processed varieties.
  • Neglecting to taste: Regularly tasting the dish during preparation helps in adjusting flavors.
  • Using the wrong size pan: An overcrowded pan can lead to steaming rather than sautéing ingredients properly.

Essential Techniques

Perfectly Cooking Steak: Understanding how to cook steak to the appropriate doneness is crucial. A good tip is to use a meat thermometer; medium-rare should read about 135°F. Always rest cooked meat for about five minutes to retain juices, resulting in a flavorful bite.

Cooking Tortellini: Boiling tortellini requires a rolling boil and enough water for even cooking. Stir gently to prevent sticking. Taste the pasta a minute before the package instructions suggest to achieve your desired consistency without overcooking.

Pro Tips for Perfect Cheesesteak Tortellini

Use high-quality ribeye for the best flavor and tenderness. Sear it quickly over high heat for excellent caramelization. If you’re short on time, pre-cooked tortellini can save you several minutes. To enhance the texture of the sauce, add a splash of pasta cooking water, which contains starch to help it adhere better to the pasta.

For extra flavor, sauté your onion and peppers until caramelized before adding them to the sauce. If you’re looking for a richer flavor, try adding a splash of white wine to the sauce as it thickens.

Lastly, don’t forget to adjust the garlic and onion levels according to your preference, and use fresh herbs like parsley for a refreshing garnish right before serving.

Variations and Adaptations

Regional variations of cheesesteak flavor profiles can be explored by using different meats, such as chicken or turkey, instead of ribeye. For a seasonal adaptation, consider stuffing the tortellini with ingredients like pumpkin during autumn for a delightful twist. You can also personalize this recipe by introducing textures with crispy fried onions as a topping or substituting cheese for provolone or mozzarella for a unique flavor. Adjusting seasonings and herbs can also provide a fresh twist, making this dish vibrant year-round.

Serving and Presentation Guide

For a standout presentation, arrange the tortellini in a circular pattern on a white plate to highlight the colorful ingredients. Top with freshly grated parmesan and a sprinkle of chopped parsley. Consider serving the dish with a side of crusty bread to complement the creamy sauce and soak up any leftovers. The dish is best served hot, though be mindful of portion sizes for guests; a healthy serving should be around one to one and a half cups to avoid overwhelming your guests.

Wine and Beverage Pairing

Pair this rich dish with a medium-bodied red wine, such as Chianti or Cabernet Sauvignon, which complements the savory profile of the steak. For a lighter option, a Chardonnay would harmonize beautifully with the creamy sauce. If you prefer non-alcoholic options, try sparkling water with lemon or a crisp apple cider, providing a refreshing contrast to the richness of the dish.

Storage and Shelf Life

Store any leftover Cheesesteak Tortellini in an airtight container in the refrigerator for up to 3 days. To maximize freshness, avoid mixing the sauce with pasta until you’re ready to serve. If you’re craving leftovers, reheat gently on the stovetop with a splash of milk to maintain creaminess. For longer storage, consider freezing portions in airtight containers for up to 3 months; however, be aware that the texture may change slightly upon reheating.

Make Ahead Strategies

Prepare the filling and sauce a day in advance and store them separately in the refrigerator. Cook tortellini just before serving to ensure they are fresh and maintain their texture. You can also freeze the sauce for quick meals later on. Just make sure to prepare fresh vegetables or sauté them shortly before serving for the best flavor.

Scaling Instructions

Scaling the recipe for larger gatherings is simple—just double or triple the ingredients. Keep cooking times similar, but be sure to monitor for doneness. Use larger pots or multiple pans as needed to keep everything cooking evenly. For portioning, consider using a large salad bowl for serving family-style, making it effortless for guests to help themselves.

Nutritional Deep Dive

This dish is a well-rounded meal that incorporates protein, fiber, and essential vitamins, contributing to a balanced diet. The protein from the ribeye supports muscle growth, while tortellini provides carbohydrates for energy. The addition of bell peppers adds vital vitamins A and C. This dish offers a satisfying option that aligns well with an active lifestyle when served in appropriate portions.

Dietary Adaptations

For gluten-free dietary needs, consider using gluten-free tortellini or substituting traditional pasta with zucchini noodles. A dairy-free version is also possible by using non-dairy milk and vegan cheese blends, replacing heavy cream with cashew cream for richness. For a lighter option, you can alter the ribeye with leaner proteins such as turkey or chicken breast, alongside low-carb sauces.

Troubleshooting Guide

If your sauce appears too thin, let it simmer longer to reduce and thicken, or add a cornstarch slurry for speedy thickening. If it tastes bland, simply increase seasoning, especially salt and pepper, and add fresh herbs. If the steak is tough, it might need more resting time after cooking or could be overcooked; consider using a different cut of meat for better tenderness next time.

Recipe Success Stories

Many readers rave about their versions of Cheesesteak Tortellini, often sharing how they adapted the dish based on personal preferences. Some have used different meats or cheese combinations, emphasizing how versatile this recipe can be. Others have shared photographs of their creations, showcasing plated dishes set for family meals, sparking inspiration among other cooking enthusiasts.

Frequently Asked Questions

Can I freeze Cheesesteak Tortellini? Yes, you can freeze the dish. Ensure it’s cooled, then transfer to an airtight container for up to 3 months. Reheat on the stovetop with a little added milk for creaminess.

What type of pasta is best for this recipe? Tortellini works best for its shape and ability to hold sauce but feel free to use any stuffed pasta you prefer.

Can I make this dish vegetarian? Absolutely! Swap ribeye for sautéed mushrooms or marinated tofu for a protein-rich vegetarian version.

How do I reheat the sauce without it separating? Slowly reheat over low heat, adding a splash of milk-stirring continuously to maintain its creaminess.

What other veggies can I add? Feel free to include spinach, zucchini, or even mushrooms to enhance the veggie content.

Can I make the sauce dairy-free? Yes! Use a non-dairy cream or cashew cream and a plant-based cheese alternative.

Is this recipe suitable for meal prep? Yes! It holds up well, allowing for delicious leftovers for lunches or quick dinners.

How spicy is this dish? The spice level largely depends on seasoning; you can add chili flakes or omit them to your taste.

What wine pairs best with this dish? A medium-bodied red wine like Chianti complements the cheesy and meaty flavors beautifully.

Can I use store-bought sauce? Yes, a pre-made alfredo or cheese sauce can be used to save time, although homemade adds an extra touch of flavor.

Additional Resources

If you enjoyed this recipe, consider trying other variations like Spinach and Ricotta Stuffed Shells or Chicken Alfredo Pasta. For technique enhancement, look into guides on perfecting sauces or mastering the art of sautéing vegetables. Fresh ingredient recommendations can also influence flavor, so explore what’s seasonal at your local market to boost your culinary options.

Join the Conversation

We encourage you to share your Cheesesteak Tortellini experiences on social media! Snap a photo of your creation and tag us for a chance to be featured. We love seeing how you put your unique spin on our recipes and invite feedback on what variations worked well for you. Join our community and engage with fellow food lovers over delicious meals!

The Recipe

Cheesesteak Tortellini in Creamy Parmesan Sauce

Serves: 4 servings

Prep Time: 15 mins

Cook Time: 25 mins

Total Time: 40 mins

Kitchen Equipment Needed

  • LARGE CHAUSER
  • SKILLET
  • COLANDER
  • WOODEN SPOON

Ingredients

  • 1 lb ribeye steak, thinly sliced
  • 12 oz cheese tortellini
  • 1 bell pepper, thinly sliced
  • 1 onion, thinly sliced
  • 2 cups heavy cream
  • 1 cup grated parmesan cheese
  • 2 tablespoons olive oil
  • Salt and pepper to taste
  • Fresh parsley for garnish

Directions

  1. In a pot of boiling salted water, cook the tortellini according to package instructions. Drain and set aside.
  2. In a skillet, heat olive oil over medium-high heat. Add the sliced ribeye and cook for 3-4 minutes until browned. Remove and set aside.
  3. In the same skillet, add the sliced onion and bell pepper, sauté for 5 minutes until soft. Season with salt and pepper.
  4. Add the cooked steak back into the skillet and pour in the heavy cream. Stir to combine.
  5. Reduce heat to low and gradually mix in the parmesan cheese until melted and smooth.
  6. Toss in the cooked tortellini until well coated. Adjust seasoning if needed.
  7. Serve hot, garnished with fresh parsley and extra parmesan if desired.

Recipe Notes

  • For a lighter version, substitute heavy cream with half and half or coconut milk.
  • Feel free to add more vegetables like mushrooms or spinach for added nutrition.
  • This dish can be easily doubled for larger gatherings.

Delicious One-Pot French Onion Chicken Rice for Easy Dinners

One-Pot French Onion Chicken Rice Recipe: A Cozy Culinary Delight

⚖️
Difficulty
Easy

⏲️
Prep Time
10 mins

🕒
Cook Time
30 mins

⏱️
Total Time
40 mins

🍽️
Servings
4

One-Pot French Onion Chicken Rice is the perfect dish for those chilly evenings when you crave comfort and warmth. This delightful recipe encapsulates the rich flavors of caramelized onions and savory chicken, all simmered together with fluffy rice that absorbs the delicious broth. With just one pot required, cleanup is a breeze, allowing you to enjoy more time with loved ones at the dinner table.

Imagine the enticing aroma filling your kitchen as onions slowly caramelize to a golden brown, blending harmoniously with tender chicken and herbs. This dish not only satisfies the taste buds but also wraps you in a cozy culinary hug, making it ideal for family gatherings or a simple weeknight meal.

Quick Recipe Highlights

  • Flavor Profile: The deep, sweet flavor of caramelized onions pairs beautifully with the savory, juicy chicken.
  • Texture: Tender chicken and fluffy rice create a satisfying mouthfeel, while the onions add a silky smoothness.
  • Aroma: Expect a captivating blend of sweet caramelized onion and savory chicken scents infused with herbs.
  • Visual Appeal: A golden-brown surface topped with garnished green herbs creates a dish that is as beautiful as it is delicious.
  • Skill Level Needed: This recipe is beginner-friendly, making it accessible for cooks of all levels.
  • Special Equipment: Just a large pot or Dutch oven is needed to prepare this dish easily.

Recipe Overview

  • Difficulty Level: This One-Pot French Onion Chicken Rice recipe is straightforward and manageable, making it perfect for novice cooks.
  • Category: This dish fits within comfort food and family meals, designed for shared experiences.
  • Cuisine: With roots in French cuisine, it captures the essence of traditional cooking fused with modern simplicity.
  • Cost: This budget-friendly recipe uses affordable ingredients without sacrificing flavor, averaging around $15 for the entire meal.
  • Season: Enjoyable year-round, this recipe especially shines during the fall and winter months.
  • Occasion: Ideal for casual family dinners, cozy gatherings, or any occasion that calls for hearty comfort food.

Why You’ll Love This Recipe

The delicious flavor combination of sweet onions and savory chicken creates a dish that is both comforting and satisfying. Each spoonful offers a delightful balance of taste and texture, ensuring it can easily become a family favorite. The soft, caramelized onions provide a unique depth of flavor that elevates the dish, while the chicken offers a hearty protein option, making it a complete meal.

What makes this One-Pot French Onion Chicken Rice even more appealing is its convenience in preparation. With everything cooked in a single pot, this recipe minimizes cooking time and maximizes flavor. You can start with chopping the onions and chicken, sauté, and let simmer— leaving you free to enjoy a glass of wine or tend to other dinner preparations.

In addition to convenience, this recipe is a nutritional powerhouse. With lean protein from chicken and whole grains from rice, it offers essential vitamins and minerals that contribute to a well-balanced diet. You can easily add vegetables to amp up the nutrition and create a vibrant colored dish full of wholesome ingredients.

Whether you’re hosting friends or spending a quiet night at home, this recipe fosters a sense of warmth and sharing. The inviting aroma wafting through your home draws in friends and family, seamlessly bringing everyone together around the dinner table.

Affordability is another great reason to love this dish. A small grocery budget goes a long way with this recipe, allowing you to provide a delicious home-cooked meal without stretching financial resources.

Historical Background and Cultural Significance

The origins of French onion soup can be traced back to ancient Rome, where onions were a staple food. However, the modern iteration of French onion soup that inspired this dish gained popularity in France during the 18th century. It became a beloved comfort food, often served in bistros and homes across the country.

Culturally, the dish symbolizes the art of transforming simple ingredients into something extraordinary. Much like the One-Pot French Onion Chicken Rice recipe, it illustrates how humble ingredients, when combined thoughtfully, can lead to magical results in the kitchen.

Over the years, variations of French onion soup and its adaptations have flourished globally. Some regions incorporate local produce, making each version unique while keeping the core flavors intact. This recipe represents the evolution of traditional flavors merged with modern cooking techniques for convenience.

In the United States, the popularity of onion soup has led to myriad dishes inspired by its comforting taste, including casseroles and one-pot meals. The One-Pot French Onion Chicken Rice serves as a testament to how cultural dishes can transform and adapt while maintaining their heart and soul.

Ingredient Deep Dive

Chicken

Chicken is versatile and widely adored in cuisines around the world. It provides essential proteins and is rich in B vitamins. When selecting chicken, opt for fresh, plump pieces with no discoloration. Store it in the refrigerator for up to two days or freeze for longer storage. If you need to make substitutions, turkey works well and offers similar flavor.

Onions

Onions have a long-standing culinary history, serving as a base flavor in many dishes. They are rich in antioxidants and vitamins, contributing to overall health. For freshness, choose firm onions with no soft spots, and store them in a cool, dark place. Substitute with shallots if looking for a milder flavor, or use green onions for a bit of a twist.

Rice

Rice is a staple in many diets across the globe, offering a source of carbohydrates. When selecting, choose high-quality long-grain rice such as basmati or jasmine for a more aromatic flavor. Store in a dry, cool area, and it can last for months. Quinoa or couscous can serve as gluten-free alternatives if needed.

Broth

Using broth adds depth of flavor to your dish. Store-bought or homemade, choose low-sodium options to keep it healthier. Make sure to store broth in airtight containers in the refrigerator or freezer. Vegetable broth can be a great substitution if you’re looking for a flavor twist.

Common Mistakes to Avoid

  • Not caramelizing the onions properly: Ensure they are cooked low and slow for the best flavor. Rushing this step leads to bland results.
  • Using cold chicken: Allow chicken to come to room temperature before cooking for even cooking and better texture.
  • Skipping the resting period: Allow the dish to rest after cooking to help meld the flavors together.
  • Overcrowding the pot: Cook in batches if necessary to ensure even cooking and proper browning.
  • Not seasoning adequately: Always taste as you go and adjust seasoning levels for optimal flavor.
  • Using instant rice: Regular long-grain rice absorbs flavors better and has a more appealing texture.
  • Rushing the simmering process: Allowing the dish to simmer helps develop the flavors and ensures rice cooks perfectly.
  • Ignoring ingredient swaps: Don’t hesitate to experiment with different herbs or add vegetables to enhance nutritional benefits.
  • Not covering the pot: Covering while simmering helps maintain moisture and ensures the rice cooks thoroughly.
  • Using too much liquid: Follow the recipe closely to achieve the right balance of moisture for fluffy rice.

Essential Techniques

Caramelizing onions are crucial for this dish, creating a sweet and savory base. This technique requires patience; onions should be cooked low and slow until they are golden and soft. Stir occasionally to prevent burning. Aim for a rich, caramel hue that indicates proper cooking.

Searing the chicken before adding it to the pot enhances the flavor through the Maillard reaction. Ensure the pot is hot enough to achieve a nice brown crust, which adds complexity to the overall taste. Be careful not to overcrowd the pot; work in batches if needed.

Cooking rice properly ensures it’s fluffy and well-seasoned. Use the right water-to-rice ratio, following the recipe closely. Bringing it to a boil before covering and simmering is important for perfect texture. After cooking, allow it to rest for a few minutes before serving.

Pro Tips for Perfect One-Pot French Onion Chicken Rice

– Always slice the onions evenly to ensure uniform cooking for the best caramelization.
– For deeper flavor, consider using a mix of chicken thighs and breasts; thighs add juiciness.
– Add a splash of white wine in the final stages of cooking for an added layer of flavor.
– Customize your herbs—thyme and rosemary are fabulous but don’t hesitate to add your favorites.
– To cut down on prep time, slice onions in advance and store them in the fridge.
– Use homemade broth for a richer flavor; it contributes greatly to the dish’s overall taste.
– Incorporate seasonal veggies like carrots or peas for added nutrition and color.
– Try a sprinkle of cheese on top before serving—the melted goodness takes it to the next level.

Variations and Adaptations

Regional variations of this recipe can include differing spices and proteins; adding chorizo or seafood can provide exciting twists. Seasonal adaptations might involve using zucchini in the summer or pumpkin in the fall for added richness.

For dietary modifications, substituting chicken with tofu or tempeh creates a vegan-friendly option while still providing protein. Similarly, cauliflower rice can be used for a low-carb variant.

Flavor variations are possible by incorporating distinct spices like smoked paprika or curry powder. Linings for texture can include crunchy topping options like fried onions to enhance every bite.

When serving, consider alternative styles such as individual ramekins for unique presentation ideas, elevating the experience for gatherings or special occasions.

Serving and Presentation Guide

For plating, use shallow bowls to showcase the vibrant colors of the dish. Garnish with fresh parsley or chopped chives for a bright contrast. A sprinkle of cheese just before serving enhances the visual appeal.

Traditional accompaniments might include a side of crusty bread or a fresh green salad to balance the richness. Modern serving suggestions could incorporate trendy elements like a dollop of sour cream or a drizzle of balsamic reduction for extra flavor.

Temperature plays a crucial role; serve this dish warm, as rice that cools can become gummy. Portion control is essential for a balanced meal; aim for 1 to 1.5 cups per serving—more if guests are particularly hungry.

Wine and Beverage Pairing

A glass of Chardonnay provides a delightful complement to the flavors of One-Pot French Onion Chicken Rice. The buttery notes enhance the dish, providing a fabulous pairing experience.

For non-alcoholic alternatives, herbal teas can serve wonderfully to cleanse the palate, while a light sparkling water infused with citrus can refresh your senses.

If coffee is on the menu, opt for a mild roast that won’t overpower the subtle flavor profiles of the meal.

Serving wine or beverages at optimal temperatures enhances the overall dining experience, ensuring all drinks complement the meal beautifully.

Storage and Shelf Life

Store leftover One-Pot French Onion Chicken Rice in airtight containers in the refrigerator for up to three days. This ensures flavors thoroughly meld as they cool and make for a convenient lunch option.

For longer preservation, freezing is efficient; use freezer-safe containers, and the dish can last up to three months. Remember to label the containers with the date for easy tracking.

Signs of spoilage include off smells, discoloration, or visible mold. When reheating, always ensure it’s heated through to a minimum internal temperature of 165°F to eliminate any bacteria.

When defrosting, transfer to the fridge overnight for the best texture retention. Reheat gently on the stove or microwave, adding a splash of broth to restore moisture.

Make Ahead Strategies

To simplify meal prep, consider chopping vegetables and measuring spices a day in advance. Store them in individual containers in the fridge, making assembly during the cooking process quicker.

You can make the broth or cook the chicken ahead of time, storing them separately and combining flavors just before mealtime for the freshest taste.

Quality impacts are profound; the fresher the ingredients right before cooking, the better flavors and textures you’ll achieve in the final dish.

Reheating guidelines dictate that you should gently warm the meal on low heat, adding splashes of liquid as necessary to keep the dish moist.

If your dish contains fresh herbs, consider adding them right before serving to preserve their aroma and color for an impactful presentation.

Scaling Instructions

If you wish to halve this One-Pot French Onion Chicken Rice recipe, adjust ingredients proportionally while maintaining cooking times essentially unchanged, as rice and chicken still require thorough cooking.

For larger gatherings, doubling or tripling the recipe is possible; however, ensure your pot is large enough, or consider cooking in batches for consistent texture and flavor.

Equipment adjustments may include using additional pots for batch cooking chicken or rice to save time.

Keep in mind timing modifications; while cooking time remains similar, batch cooking may introduce minor heating adjustments.

Storage considerations are essential; leftovers from scaled portions should still be treated with the same care, keeping them fresh and flavorful.

Nutritional Deep Dive

This One-Pot French Onion Chicken Rice offers a well-rounded meal consisting of proteins, healthy carbohydrates, and essential nutrients. A macro breakdown reveals high protein content from chicken and carbohydrates from rice, essential for energy.

Micronutrient analysis indicates that this dish contributes vitamins B6 and B12 from chicken, along with minerals like iron. The onions provide antioxidants that support overall health.

The dish’s health benefits extend to supporting muscle repair and immune health. Additionally, this recipe’s wholesome ingredients promote satiety, reducing the need for snacking.

Portion analysis shows that a serving provides around 400-500 calories, depending on specific amounts of chicken and rice used.

For those managing weight, it’s a wholesome full-meal recipe that can satisfy without leading to excessive calorie consumption.

Dietary Adaptations

For a gluten-free version of One-Pot French Onion Chicken Rice, ensure to use gluten-free broth and avoid traditional flour options in any gravies or sauces, adapting it for those sensitive to gluten.

A dairy-free adaptation can replace cheese with nutritional yeast or a dairy-free cheese option, providing richness without dairy products—ideal for vegan diets.

Low-carb enthusiasts can substitute rice with cauliflower rice, which ensures low calorie and carb consumption while maintaining a similar texture profile.

For those looking to incorporate keto adjustments, a combination of chicken thighs and healthy fats can create a satisfying, delicious dish.

Additionally, Paleo followers can skip grains altogether and bulk up with vegetables like spaghetti squash or zucchini for a nourishing alternative.

Troubleshooting Guide

Texture issues can arise if the rice becomes sticky; ensuring the right water-to-rice ratio is key to perfect fluffiness. Always fluff the rice gently with a fork before serving.

Flavor balance may fluctuate if seasoning is neglected; always taste before serving, adjusting salt, pepper, and herbs as needed to ensure a well-rounded taste.

Temperature problems can occur if simmering is too rapid; keep a steady low heat to allow gradual cooking. It keeps chicken moist and rice tender.

Equipment challenges such as a stuck pot can be avoided by allowing the initial sauté stage proper time and not overcrowding surfaces. Utilize non-stick cookware if possible.

Ingredient substitutions need careful consideration; avoid replacing ingredients with strong flavors that may overpower the dish.

Timing concerns include adjusting for pre-cooked chicken or rapid simmering; always monitor doneness to prevent overcooking and drying out ingredients.

Recipe Success Stories

Community feedback on One-Pot French Onion Chicken Rice has been overwhelmingly positive, with many praising its simplicity and heartiness. Locals shared they adapted it with seasonal produce, successfully enhancing flavors while catering to local availability.

Variation successes often include adding mushrooms or different herbs, prompting participants to experiment based on personal taste preferences, making the dish their own.

Readers often mention how swiftly the dish disappears at family gatherings, with children particularly enjoying the sweetness of caramelized onions.

Photography tips from the community suggest capturing the dish fresh out of the pot, highlighting the rustic feel that embodies comfort food. This has led many to share their beautiful creations on social media, celebrating culinary success.

Frequently Asked Questions

Can I use brown rice instead of white rice?

Yes, brown rice can be utilized, but it requires a longer cooking time and more liquid. Adjust the cooking process to accommodate for this variation.

Is it possible to make this dish ahead of time?

Absolutely! You can prepare it a day ahead and reheat just before serving. Flavors may deepen when it sits for a few hours.

Can I use different proteins?

Definitely! Chicken can be swapped for turkey or firm tofu for a vegetarian option while maintaining the integrity of the dish.

What herbs pair well with this recipe?

Thyme and rosemary complement the flavors beautifully, but you can also experiment with basil or oregano based on your preference.

Is this dish freezer-friendly?

Yes, this recipe freezes well. Allow it to cool completely and store in airtight containers for up to three months.

What can I serve with this dish?

A fresh salad or crusty bread are excellent accompaniments. They balance the rich flavors while enhancing the meal.

How long can leftovers be stored?

Leftover One-Pot French Onion Chicken Rice can be kept in the fridge for up to three days. Ensure it’s in an airtight container.

Can I double the recipe for meal prep?

Yes, you can double the recipe! Just ensure the pot is large enough to accommodate the increased ingredient amounts.

What adjustments are needed for a low-carb version?

To make it low-carb, replace rice with cauliflower rice. Adjust cooking time as needed to ensure it cooks properly.

Can I use vegetable broth instead of chicken broth?

Yes, using vegetable broth will keep the dish flavorful while making it suitable for vegetarian and vegan diets.

Additional Resources

Explore related recipes like creamy mushroom risotto or a hearty chicken stew to expand your comfort food repertoire. Emphasize learning about ingredient substitutions for versatile cooking in your kitchen.

Consider technique guides on caramelization or rice cooking methods to enhance your culinary skills. Recommendations for quality kitchen equipment will empower you further in achieving the best results with similar recipes.

Keep an eye on seasonal variations; each season brings unique produce that can elevate your One-Pot French Onion Chicken Rice dish, aligning your meals with available ingredients.

Join the Conversation

Sharing your creations on social media encourages community engagement and inspires others to try this delightful One-Pot French Onion Chicken Rice recipe.

Consider photography tips; natural light enhances the colors and textures, translating well on camera.

Encourage feedback on variations, inviting others to submit their adaptations and create an interactive dialogue around this recipe.

Foster community around recipe experiences—creating a platform where home cooks can inspire creativity in the kitchen will enrich everyone’s culinary journey.

The Recipe

One-Pot French Onion Chicken Rice

Serves: 4

Prep Time: 10 mins

Cook Time: 30 mins

Total Time: 40 mins

Kitchen Equipment Needed

  • Large pot or Dutch oven
  • Chopping board
  • Sharp knife
  • Wooden spoon or spatula
  • Measuring cups and spoons

Ingredients

  • 4 chicken thighs, skinless
  • 2 large onions, thinly sliced
  • 2 cups long grain rice
  • 4 cups low-sodium chicken broth
  • 2 tablespoons olive oil
  • 1 teaspoon dried thyme
  • Salt and pepper to taste
  • Fresh herbs for garnish

Directions

  1. In a large pot, heat olive oil over medium heat. Add sliced onions, cooking slowly until caramelized, about 10-15 minutes.
  2. Add chicken thighs to the pot, seasoning with thyme, salt, and pepper. Brown on both sides for about 5 minutes.
  3. Stir in the rice until coated with oil, cooking for another 2 minutes.
  4. Pour in chicken broth, bringing it to a gentle boil. Reduce heat to low, cover, and simmer for 20 minutes or until the rice is cooked through.
  5. Remove from heat and let it rest for an additional 5 minutes before serving, garnish with fresh herbs.

Recipe Notes

  • For a richer flavor, try adding a splash of white wine after browning the chicken.
  • Feel free to add seasonal vegetables like carrots or peas for added nutrition.
  • Substituting quinoa can create a gluten-free alternative if desired.

Irresistibly Juicy Balsamic-Glazed Pork Loin Recipe for Flavorful Meals

Balsamic-Glazed Pork Loin – Irresistibly Juicy & Flavorful

⚖️
Difficulty
Intermediate

⏲️
Prep Time
15 mins

🕒
Cook Time
1 hour

⏱️
Total Time
1 hour 15 mins

🍽️
Servings
4-6 servings

Welcome to the ultimate flavor experience with our Balsamic-Glazed Pork Loin recipe! This dish combines the rich and savory flavors of pork with a tangy balsamic glaze that caramelizes beautifully during cooking. Imagine slicing into a tender, juicy piece of pork that is infused with the sweet and sour notes of balsamic vinegar, complemented by fragrant herbs and spices. It’s not just a meal; it’s a celebration of taste that your family and friends will rave about!

The beauty of this Balsamic-Glazed Pork Loin lies not only in its delicious taste but also in its ease of preparation. With just a handful of ingredients and a bit of oven time, you can create a dish that looks as stunning as it tastes. Ideal for weeknight dinners, festive gatherings, or special occasions, this recipe brings restaurant-quality results right to your kitchen. You’ll love how the aroma wafts through your home, enticing everyone to the table!

Quick Recipe Highlights

  • Flavor Profile: The pork loin is enhanced with a tangy balsamic glaze that strikes a perfect balance between savory and sweet, making every bite unforgettable.
  • Texture: Enjoy a juicy and tender texture that contrasts beautifully with the slightly caramelized glaze, delivering a satisfying mouthfeel.
  • Aroma: The dish fills your home with a warm, inviting aroma, featuring notes of garlic, herbs, and rich balsamic vinegar.
  • Visual Appeal: This dish boasts a stunning glossy finish, showcasing the beautiful caramelization against the golden-brown crust of the pork.
  • Skill Level Needed: This recipe is suitable for intermediate cooks, as it requires careful timing and attention to detail for the best results.
  • Special Equipment: You’ll need a roasting pan and a meat thermometer to ensure that the pork reaches the perfect internal temperature.

Recipe Overview

  • Difficulty Level: This recipe is categorized as intermediate due to the necessary cooking techniques and timing involved. However, it’s simple enough for those with some cooking experience!
  • Category: This fits well in the category of main dishes, perfect for both family dinners and festive occasions.
  • Cuisine: Influenced by Italian cuisine, this dish combines traditional methods with easily accessible ingredients, embodying a rustic charm.
  • Cost: The approximate cost of making this recipe is quite reasonable, with pork loin being a relatively affordable cut of meat, especially when prepared at home.
  • Season: Enjoy this delicious dish all year round, but it shines particularly during the fall and winter months, providing comfort and warmth.
  • Occasion: Ideal for holiday gatherings, family meals, or dinner parties, the Balsamic-Glazed Pork Loin is sure to impress your guests.

Why You’ll Love This Recipe

When it comes to flavor, the Balsamic-Glazed Pork Loin undoubtedly stands out. The combination of the richness of the pork and the tanginess of balsamic vinegar creates a symphony of taste that dances on your palate. As the pork bakes, the glaze thickens and intensifies, resulting in a luscious coating that keeps the meat moist and flavorful. Each bite delivers a perfect blend of sweet and savory, making it a dish the whole family will love.

One of the best aspects of this recipe is its convenience. With minimal prep work, you can easily marinate the pork loin in the balsamic mixture and let it enrich for a brief period. Once it’s in the oven, you’ll have time to prepare sides or even enjoy a quiet moment while waiting. The effortless cooking process is perfect for busy weeknights or when entertaining guests.

Nutritionally, pork loin is a lean source of protein that offers essential vitamins and minerals. This dish is not only satisfying but also provides energy and sustenance, making it a great option for those looking to maintain a balanced diet. Pairing this dish with vegetables and whole grains will further enhance the nutritional value of your meal.

Adding to the allure of the Balsamic-Glazed Pork Loin is its ability to be a showstopper when entertaining. The beautiful presentation, combined with the mouthwatering aroma during cooking, creates an inviting atmosphere for your guests. Sharing this meal at the table elevates your dining experience and encourages lively conversations and laughter.

From a cost-effectiveness standpoint, this recipe utilizes a single pork loin to serve multiple people which keeps expenses down while providing a hearty and filling dish. Plus, the easy-to-source ingredients are budget-friendly, ensuring you can enjoy gourmet flavors without breaking the bank.

Historical Background and Cultural Significance

The origins of Balsamic-Glazed Pork Loin can be traced back to the traditional Italian practice of using balsamic vinegar not just as a dressing, but as a flavorful glaze for meats. Balsamic vinegar, with its rich history in Modena, Italy, has been prized for its complex flavor profile and versatility throughout the centuries.

This dish reflects the cultural significance of combining simple, high-quality ingredients to elevate everyday meals. The use of balsamic vinegar in cooking speaks to the Italian philosophy of utilizing seasonal and local products to create layers of flavor while respecting culinary traditions.

Over time, this recipe has evolved, incorporating modern cooking techniques while retaining its rustic roots. Home cooks have adapted the traditional methods to fit their kitchens, and regional variations have emerged, showcasing the innovation and creativity of those who prepare it.

Ingredient Deep Dive

Pork Loin: This cut of pork is well-loved for its tenderness and versatility in various dishes. Rich in protein, it makes a nutritious addition to meals. When selecting pork loin, look for a cut that is firm to the touch with a pinkish color and minimal marbling. It should be stored in the refrigerator and used within a few days for optimal freshness. If you can’t find pork loin, you can substitute it with pork tenderloin, though cooking times may vary due to the smaller size.

Balsamic Vinegar: Known for its deep, complex flavor, balsamic vinegar adds a unique sweetness and tanginess to dishes. This vinegar is not only delicious but also packed with antioxidants and low in calories. When choosing balsamic vinegar, opt for higher-quality options for more intense flavors. Once opened, store it in a cool, dark place and use it within a year or so for the best taste. If you prefer, apple cider vinegar can be a suitable substitute in a pinch.

Common Mistakes to Avoid

  • Overcooking the Pork: One of the most common mistakes is overcooking the pork, which can lead to a dry end result. Always use a meat thermometer to check the internal temperature, aiming for 145°F (62°C) for perfect doneness.
  • Ignoring Marinade Time: Skipping or rushing the marinade process can result in a lack of flavor in the meat. Allowing the pork to marinate for at least an hour or overnight will enhance its taste significantly.
  • Using Low-Quality Balsamic Vinegar: The quality of balsamic vinegar greatly impacts the flavor of this dish. Cheap, low-quality vinegar may not offer the depth needed for an exceptional glaze, so invest in a good bottle.
  • Not Letting the Pork Rest: Cutting into the pork right after cooking can cause juices to spill out. Temperature should be allowed to equalize by resting the meat for at least 10 minutes before slicing.
  • Neglecting Aromatics: Skipping garlic or herbs can lessen the dish’s flavor complexity. Always include aromatic ingredients to elevate the overall taste profile.
  • Inaccurate Oven Temperature: Ovens can vary widely in temperature. Use an oven thermometer to ensure it is accurately set, which directly influences how the pork cooks.
  • Using Cold Meat: Beginning with cold pork can lead to uneven cooking. Allow the meat to sit at room temperature for about 20 minutes before cooking.
  • Forgetting to Adjust for Altitude: If you live at a higher altitude, cooking times may need adjusting. Be cautious and check for doneness earlier to avoid drying out the meat.

Essential Techniques

Marinating: Marinating the pork is vital for infusing flavor, particularly with balsamic vinegar, which tenderizes the meat. Aim to marinate for at least an hour, or up to a day for maximum flavor absorption. A good way to master marinating is to rotate the bag or container every so often, ensuring even coating.

Roasting: Roasting at the correct temperature is crucial for achieving that caramelized glaze. Preheat your oven adequately, and place your pork loin in a single layer in the roasting pan. Look for a golden-brown finish and use a meat thermometer to ensure proper cooking.

Pro Tips for Perfect Balsamic-Glazed Pork Loin

1. Choose a center-cut pork loin for uniform cooking and a better presentation.

2. Allowing the pork to marinate overnight can elevate the flavors even further.

3. For a deeper glaze, consider finishing the pork under the broiler for a couple of minutes at the end of the cooking process.

4. Baste the pork with the glaze during cooking to enhance flavor and moisture.

5. Balance the glaze with additional seasonings like crushed red pepper for a slight kick.

6. Use fresh herbs such as rosemary or thyme for an aromatic boost.

7. Slice against the grain to maximize tenderness and mouthfeel.

8. Pair the pork with seasonal vegetables for a colorful and nutritious side.

Variations and Adaptations

This recipe can easily be adapted to suit regional tastes. For a southwestern twist, consider adding chipotle seasoning and serving with grilled corn salsa. In fall, you can integrate apple slices or cider into the marinade for a seasonal flair. For dietary restrictions, opt for a gluten-free soy sauce in the marinade for those sensitive to gluten.

Serving and Presentation Guide

For an elegant presentation, slice the pork loin into medallions and fan them out on a neutral-colored platter. Garnish with fresh herbs or drizzles of extra balsamic glaze for added color and flavor. Serve it hot, accompanied by seasonal vegetables and a side of creamy mashed potatoes or rice to soak up the flavorful glaze.

Wine and Beverage Pairing

A medium-bodied red wine such as Pinot Noir or Chianti pairs beautifully with Balsamic-Glazed Pork Loin, complementing the savory notes while enhancing the dish’s flavors. For non-alcoholic options, sparkling grape juice or an herb-infused mocktail can add a refreshing touch.

Storage and Shelf Life

To store leftover Balsamic-Glazed Pork Loin, allow it to cool completely then wrap in plastic wrap or transfer to an airtight container. It can be stored in the refrigerator for 3-4 days. For longer storage, consider freezing portions and using them within three months, ensuring to thaw in the refrigerator before reheating.

Make Ahead Strategies

This dish can be prepared in stages, making it perfect for busy chefs. The pork can be marinated and stored in the fridge a day ahead, while the glaze can also be prepared in advance. When ready to cook, bring the pork to room temperature and proceed with roasting.

Scaling Instructions

If you’re hosting a larger gathering, doubling the recipe is straightforward. Adjust cooking times slightly, however, since larger cuts will take longer to roast. Ensure even spacing in the roasting pan to promote even cooking and crisp crust formation.

Nutritional Deep Dive

Balsamic-Glazed Pork Loin is rich in protein, essential for muscle repair and growth, while being lower in fat compared to other cuts. Incorporating this recipe into your diet can support weight management and provide energy for an active lifestyle. Pairing it with fiber-rich vegetables enhances its health benefits.

Dietary Adaptations

This recipe can be easily adapted for various dietary needs. For a gluten-free option, ensure your balsamic vinegar does not include added gluten. If you’re looking to reduce carbs, enjoying a smaller portion with roasted vegetables will keep it fitting for your diet.

Troubleshooting Guide

If your pork turns out dry, it can be a result of overcooking; utilize a probe thermometer in the future to ensure best results. Should flavors seem unbalanced, consider adjusting with additional balsamic vinegar or seasonings after cooking.

Recipe Success Stories

Readers have shared heartwarming feedback on their dinner successes, recounting family praises after serving Balsamic-Glazed Pork Loin. Variations have emerged from community creativity, with suggestions that add local influences or accommodate dietary preferences.

Frequently Asked Questions

1. Can I use a different cut of pork for this recipe? Absolutely! While pork loin is ideal, you can substitute it with pork tenderloin or even a bone-in loin for more flavor; adjust cooking times accordingly.

2. How can I tell when the pork is done cooking? A meat thermometer is your best friend; check that the internal temperature reaches 145°F. After taking it out, let it rest for 10 minutes to allow the juices to redistribute.

3. What sides pair well with this dish? This dish complements a variety of sides, such as roasted vegetables, garlic mashed potatoes, or a simple green salad that balances the rich flavors of the pork.

4. Can I prepare the glaze ahead of time? Yes! The balsamic glaze can be prepared a few days in advance and stored in the refrigerator. Reheat it before brushing it on the pork while it cooks.

5. Is there a vegetarian alternative to this recipe? While the main appeal of this dish centers on pork, a hearty roasted portobello mushroom could serve as a meat substitute, drizzled with balsamic glaze.

6. Can leftovers be reheated? Yes! To reheat, cover the pork with foil and warm in the oven at a low temperature to ensure it doesn’t dry out. Alternatively, use a microwave but enjoy it right away for the best taste.

7. How can I enhance the sweetness of the glaze? You can add a touch of honey or maple syrup to the balsamic mixture for an extra layer of sweetness that pairs well with the savory notes of the pork.

8. How long does leftover pork last? Properly stored, leftovers can last in the refrigerator for 3-4 days. For longer storage, freeze in portions for up to three months.

9. Can I adapt this recipe for slow cooking? Yes! For a slower cooking method, sear the pork first, then cook it on low heat in a slow cooker with the balsamic glaze for a few hours until tender.

10. What herbs work best with this dish? Fresh rosemary, thyme, or sage enhance the flavors beautifully. Feel free to experiment with your favorite herbs to customize the recipe.

Additional Resources

If you enjoyed this recipe, you might also love our collection of roasted vegetable sides or our savory gravy recipes that would pair delightfully with Balsamic-Glazed Pork Loin. Explore technique guides on marinating and roasting to further enhance your cooking skills, as well as seasonal recipe adaptations to keep your meals exciting all year round.

Join the Conversation

We invite you to share your own experiences with our Balsamic-Glazed Pork Loin in the comments! Post your cooking photos on social media and tag us; we love seeing your creativity and unique variations. Whether you stuck to the classic recipe or put your twist on it, your feedback helps build our community of passionate home cooks.

The Recipe

Balsamic-Glazed Pork Loin

Serves: 4-6 servings

Prep Time: 15 mins

Cook Time: 1 hour

Total Time: 1 hour 15 mins

Kitchen Equipment Needed

  • Roasting pan
  • Meat thermometer
  • Mixing bowl
  • Plastic wrap or resealable bag

Ingredients

  • 1 (3-4 pound) pork loin
  • 1 cup balsamic vinegar
  • 1/4 cup honey
  • 4 cloves garlic, minced
  • 2 tablespoons fresh rosemary, chopped
  • Salt and pepper to taste

Directions

  1. In a mixing bowl, whisk together balsamic vinegar, honey, garlic, rosemary, salt, and pepper.
  2. Place the pork loin in a resealable bag and pour the marinade over it. Seal and refrigerate for at least 1 hour, preferably overnight.
  3. Preheat your oven to 375°F (190°C).
  4. Remove the pork from the marinade and place it in a roasting pan. Reserve the marinade.
  5. Roast the pork for approximately 1 hour, basting with the reserved marinade every 20 minutes until the internal temperature reaches 145°F (62°C).
  6. Remove from the oven, tent with foil, and let rest for 10 minutes before slicing.
  7. Serve with additional balsamic glaze drizzled on top, if desired.

Recipe Notes

  • Feel free to add your favorite herbs to the marinade based on personal preference.
  • If you want a stronger balsamic flavor, consider adding more vinegar as per your taste.
  • This recipe freezes well, so feel free to make a larger batch!

Tender Classic Slow Cooker Pot Roast Recipe for Comfort Food

Classic Slow Cooker Pot Roast: A Perfect Comfort Food for Any Occasion

⚖️
Difficulty
Easy

⏲️
Prep Time
20 mins

🕒
Cook Time
8 hours

⏱️
Total Time
8 hours 20 mins

🍽️
Servings
6 servings

When it comes to classic comfort food, few dishes can hold a candle to the beloved pot roast. This Classic Slow Cooker Pot Roast recipe brings together the deep, rich flavors of marbled beef and hearty vegetables, all infused with aromatic herbs. As it simmers gently throughout the day, the anticipation builds, filling your kitchen with enticing scents that beckon everyone to gather around the dining table. The beauty of this dish lies not only in its comforting taste, but also in its hands-off preparation style, allowing busy home cooks to enjoy a satisfying meal without the fuss.

The slow cooker transforms tough cuts of meat into mouthwatering, tender delights, breaking down the fibers and creating that melt-in-your-mouth texture everyone craves. Paired with roasted carrots and creamy potatoes, each bite is a harmonious blend of savory and sweet, with a hint of umami from the beef and rich stock. Whether it’s a cozy family dinner or a festive occasion, this pot roast is sure to impress your guests and bring warmth to your home.

Quick Recipe Highlights

  • Flavor Profile: This pot roast features a savory blend of herbs and spices, paired with the natural sweetness of root vegetables.
  • Texture: The beef becomes incredibly tender, while the vegetables provide a hearty contrast, creating a satisfying experience with every bite.
  • Aroma: The fragrant notes of garlic, rosemary, and thyme mingle together for an irresistible scent that fills the air.
  • Visual Appeal: A beautifully browned roast surrounded by colorful veggies makes for a presentation that is as pleasing to the eyes as it is to the palate.
  • Skill Level Needed: This is an easy recipe suitable for beginners, requiring just basic knife skills and the ability to follow simple directions.
  • Special Equipment: All you need is a reliable slow cooker, which is a staple in any kitchen.

Recipe Overview

  • Difficulty Level: This recipe is classified as easy, making it perfect for novice cooks who want to impress with minimal effort.
  • Category: Ideal for family dinners, holiday feasts, or comforting weeknight meals, pot roast fits beautifully into any mealtime scenario.
  • Cuisine: Rooted in American culinary tradition, the pot roast has been a staple for generations, reflecting comfort and communal dining.
  • Cost: This recipe is budget-friendly, utilizing economical cuts of meat and seasonal vegetables to create a meal that is both satisfying and affordable.
  • Season: Pot roast is perfect for fall and winter months, embracing the heartiness of seasonal produce.
  • Occasion: Enjoy it on Sundays after a long week or during family gatherings where warmth and nostalgia reign supreme.

Why You’ll Love This Recipe

This Classic Slow Cooker Pot Roast delivers an explosion of flavor and texture that understandably makes it a household favorite. The rich, savory taste of the beef, perfectly complemented by the sweetness of the carrots and the heartiness of the potatoes, creates a symphony of flavors that dance on your palate. The slow cooking process ensures that the meat is incredibly tender, making even the tough cuts melt in your mouth. Whether you savor it solo or enjoy it with family, every bite is a comfort-filled journey.

The convenience factor is another reason to love this recipe. Simply prepare your ingredients, toss them into the slow cooker, and let the machine do its magic. Imagine coming home after a busy day to the enticing aroma of pot roast wafting through the house—a simple pleasure that adds joy to everyday life. There’s no need for constant monitoring; the slow cooker allows for flexibility in timing, making it a go-to for busy weeknights or special occasions when you want more time with your guests.

Nutritionally, this dish provides a balanced meal with protein from the beef and vitamins from the vegetables. It’s not only filling but nourishing, making it an ideal choice for families looking to ensure their meals support health and well-being. The combination of flavors and nutrients contributes to greater meal satisfaction, helping everyone feel full and content.

From a social and entertaining perspective, pot roast is designed for sharing. It brings people together, enhancing social connections and creating lasting memories around the table. Its ability to serve multiple guests makes it a perfect crowd-pleaser, whether for holidays, family gatherings, or potluck dinners. The ease of preparation combined with its rich taste makes it a staple recipe for social settings.

Cost-effectiveness is another undeniable advantage. With relatively inexpensive cuts of meat and simple ingredients, you can stretch your budget while still delivering a delightful meal. Plus, the leftovers can be enjoyed the next day, providing excellent value beyond the initial serving. The savings on meals mean you can splurge on sides or desserts without breaking the bank.

Historical Background and Cultural Significance

The pot roast has a long and cherished history in American kitchens, dating back to the original settlers who sought to create hearty meals to fuel their families. Traditionally made with less expensive cuts of beef that required slow cooking to enhance tenderness, pot roast became a staple dish in households across the nation. It symbolizes comfort and warmth, often being the centerpiece of family meals during cold months.

Culturally, this dish carries a significant value in communities that prioritize shared meals as a means to strengthen bonds. Pot roast has made its way into family traditions, often becoming the main attraction during holidays and celebratory events. The communal aspect of serving pot roast encourages gathering and interaction, emphasizing the importance of family and togetherness in American culture.

As times have evolved, so too has the preparation of pot roast. While it was once primarily cooked over an open flame, advancements such as electric slow cookers have transformed the way we approach this classic dish. Today, the slow cooker has become synonymous with convenience, allowing cooks to achieve the same savory results without as much active cooking time.

In various regions, pot roast has inspired different variations, incorporating local flavors and ingredients. Southern-style pot roast may include a kick of heat from peppers, while versions from the Midwest may focus on hearty root vegetables. Each region adds its twist, showcasing the versatility and cultural significance of this timeless dish!

Ingredient Deep Dive

Beef Chuck Roast

The beef chuck roast is a classic choice for pot roast, known for its rich flavor and marbling that enhances tenderness during cooking. Historically, tougher cuts of meat were favored for slow cooking as this method breaks down connective tissue and results in a delectable texture. Nutritionally, chuck roast is a good source of protein, iron, and other essential nutrients. When selecting, look for a cut that has good marbling, as this fat will render down and add moisture and flavor to the dish. Properly wrapping and freezing leftover roast can preserve its quality for later use.

Carrots

Carrots are not only a colorful addition to pot roast but they also lend a natural sweetness that balances the savory flavors of the meat. These roots have been cultivated for thousands of years, making them an important part of culinary traditions. Packed with vitamins A, K, and fiber, carrots contribute to a nutritious meal. When selecting, choose firm, smooth carrots with vibrant color and avoid those that are limp or have blemishes. Carrots can be stored in the refrigerator’s crisper drawer and can last several weeks if kept dry.

Potatoes

Potatoes are a classic accompaniment to pot roast, absorbing the savory broth and flavors during the cooking process. Originating in South America, potatoes have become a staple ingredient worldwide. They provide a good source of carbohydrates and potassium and can contribute to a well-rounded meal. When selecting, opt for firm, blemish-free tubers. Store potatoes in a cool, dark place, and avoid refrigerating them to prevent changes in taste and texture.

Onions

Onions add depth to the flavor of pot roast, enhancing the dish with a rich, aromatic profile. They have been celebrated in various cuisines for their versatility and ability to elevate numerous dishes. Nutritionally, onions are low in calories while providing vitamins C and B6, making them a healthy addition. Selecting onions should involve choosing firm bulbs without any soft spots or discoloration. Proper onion storage involves keeping them in a cool, dark area to increase their shelf life.

Common Mistakes to Avoid

  • Not searing the meat: Skipping this step can result in less flavor and a less appealing color. Searing the beef develops a rich crust and enhances the overall taste.
  • Overcrowding the slow cooker: Packing too many ingredients can lead to uneven cooking. Ensure there’s enough space for heat to circulate for optimal results.
  • Using low-quality meat: Cheap cuts may not break down properly during cooking. Invest in a good-quality chuck roast for the best texture and flavor.
  • Neglecting to season: A common mistake is under-seasoning. Ensure you season meat and vegetables adequately to maximize flavor.
  • Adding too much liquid: While some broth is essential, too much can result in a diluted flavor. Use just enough to cover the meat and vegetables.
  • Not allowing for resting time: Skipping this step will cause your roast to lose juices on cutting. Always let it rest after cooking for enhanced moisture.
  • Cutting meat too early: Slicing too soon can result in tough, dry pieces. Allow the meat to rest before slicing into it for best results.
  • Using vegetables that cook too long: Some veggies, like potatoes, cook faster than others. Cut them accordingly to ensure everything is perfectly tender.
  • Ignoring garnishing: A simple garnish can elevate presentation. Don’t shy away from finishing your pot roast with fresh herbs for a pop of color and flavor.

Essential Techniques

Searing the Meat

Searing is crucial as it enhances flavor and texture. Heat your pan until it’s hot, then sear the roast on all sides for a few minutes until it develops a rich crust. To master this, avoid moving the meat around too early, allowing it to form that nice brown color. Common pitfalls include overcrowding the pan, which can result in steaming instead of searing. Look for a golden-brown crust as a visual cue for success.

Building flavors involves adding seasonings, herbs, and aromatics at different stages. Start by seasoning your meat before searing it, and then add herbs and vegetables while cooking. To master flavor layering, introduce ingredients gradually and taste as you go. A common mistake is adding everything at once, which can mute distinct flavors. The aroma released during cooking serves as a reminder to monitor the balance of flavors.

Pro Tips for Perfect Classic Slow Cooker Pot Roast

1. Choose the right cut: A chuck roast is ideal due to its marbled fat, which breaks down beautifully during slow cooking.

2. Pat the meat dry: This will ensure a better sear and enhance browning.

3. Season generously: Don’t be afraid to add salt and pepper before cooking to elevate the flavor.

4. Allow the roast to rest post-cooking: This lets the juices redistribute, resulting in a more flavorful and juicy slice.

5. Experiment with herbs: Fresh rosemary, thyme, and bay leaves can take the flavor of your pot roast to the next level.

6. Store leftovers properly: Use an airtight container, and heat gently to preserve tenderness when reheating.

7. Use a meat thermometer: Ensure you reach the recommended temperature for optimum doneness.

8. Feel free to add mushrooms or celery: These ingredients will add depth and texture to your dish.

Variations and Adaptations

Pot roast is a versatile dish that can be adapted with ease. For a Southern twist, consider incorporating a spicy kick with Cajun seasoning and serving with cornbread. Seasonal adaptations can include swapping out root vegetables for a mix of seasonal produce, like butternut squash in the autumn. Dietary modifications can exist as well; for a gluten-free version, simply use gluten-free beef stock, and consider using vegetables that meet specific dietary needs.

To introduce flavor variations, consider marinating the meat overnight in red wine for an enhanced depth of flavor, or coating it with a dry rub of your favorite spices. If you prefer more texture, try adding lentils or beans, giving the dish a hearty feel. For presentation alternatives, serve in rustic bowls with fresh herbs sprinkled on top, enhancing both taste and visual appeal.

Serving and Presentation Guide

For an inviting presentation, slice the pot roast against the grain and arrange it artfully on a platter, surrounding it with the vegetables. Drizzle with the savory gravy made from the cooking liquid for added flavor and visual appeal. Use fresh herbs like parsley or thyme to garnish for an elegant touch. A warm bread basket alongside can provide a comforting contrast, while temperature considerations ensure that all components are served warm for a delightful experience. Aim for moderate portion control, allowing guests the option to return for seconds!

Wine and Beverage Pairing

When considering wine pairings for your classic pot roast, opt for a full-bodied red wine, such as Cabernet Sauvignon or Merlot, which harmonizes beautifully with the robust flavors. If you prefer non-alcoholic alternatives, consider a hearty grape juice or sparkling ginger ale that can provide a satisfying effervescence. For an additional option, a robust herbal tea served warm can complement the savory richness of the dish. Serve your beverages at the appropriate temperatures to ensure a delightful dining experience.

Storage and Shelf Life

To store leftover pot roast, place it in an airtight container and refrigerate. Consume within three to four days for best quality. If you plan to keep it longer, freezing is a great option; ensure you place in a freezer-safe container and consume within two to three months. Be mindful of signs of spoilage, such as an off smell or discoloration, which indicate that it’s time to discard. When you’re ready to savor again, gently reheat in a skillet or microwave, adding a splash of beef broth to retain moisture.

Make Ahead Strategies

To streamline your cooking process, consider prepping ingredients the night before. Chop vegetables, measure spices, and even sear the meat, allowing for an easier assembly in the morning. Proper storage between steps can enhance quality and flavor retention. Assessing the quality impact means understanding that some components, like fresh herbs, are best added just before serving. Always follow reheating guidelines to maintain texture and taste, and consider adding a fresh element just before serving to brighten flavors!

Scaling Instructions

When halving the recipe, ensure you maintain the same cooking time, as the roast size may affect tenderness. However, should you double or triple the recipe for larger crowds, you may need to adjust cooking times slightly, as larger quantities may take longer. Be sure your slow cooker is large enough to accommodate the increased volume, as an overcrowded cooker can lead to inconsistent cooking. Always remember to store any leftovers properly for future enjoyment.

Nutritional Deep Dive

The macro breakdown of this heartwarming meal provides a balanced profile of protein, carbs, and fats, making it satisfying and filling. A typical serving may include about 30 grams of protein from the roast, complemented by vegetables that enhance dietary fiber intake. In addition to macronutrients, pot roast offers micronutrient benefits, including vitamin A from carrots and potassium from potatoes. This dish supports a balanced diet, and mindful portion analysis can help maintain healthy eating practices, benefiting weight management.

Dietary Adaptations

For those needing a gluten-free option, simply replace any sauces or ingredients containing gluten with suitable substitutes, like gluten-free broth. Dairy-free individuals can enjoy the roast as-is or with plant-based milk gravies, ensuring an inclusive experience. If you’re vegan or vegetarian, consider creating a meatless version using hearty vegetables and legumes or seitan, allowing for a similarly satisfying dish without animal products. Adaptations can empower anyone to enjoy the comforts of pot roast.

Troubleshooting Guide

If your pot roast turns out tough, this could indicate it wasn’t cooked long enough; ensure you allow ample time for the meat to become tender. If the flavors are unbalanced, you may need to adjust seasoning and let it simmer longer to incorporate flavors properly. In case it’s overcooked, consider serving it with rich gravy to add moisture. Common equipment challenges can arise from using inefficient slow cookers; ensure you follow the manual for best practices.

Recipe Success Stories

Community feedback on this recipe often highlights the comforting nature and delightful ease of preparation. Readers share stories of family gatherings centered around this dish, celebrating simple traditions that make pot roast a beloved choice. Many enjoy experimenting with different cuts of meat and vegetable combinations, finding success with their own unique twists on this classic. For photography tips, ensuring ample natural light will showcase the inviting colors and textures beautifully, creating an appealing presentation for any audience.

Frequently Asked Questions

Can I use other cuts of meat for pot roast?
You can! While chuck roast is traditional, brisket, round, and even pork can yield delicious results, just ensure they are well-marbled for tenderness.

How long should I cook pot roast in a slow cooker?
For a whole roast, cooking on low for about 8 hours is ideal. Adjust time according to the size for tender, juicy results.

Can I add more vegetables?
Absolutely! Feel free to toss in any hardy vegetables that can withstand long cooking, like parsnips or turnips, for added flavor and nutrition.

Is it okay to freeze pot roast?
Yes! Pot roast freezes well. Just ensure it’s stored in air-tight containers or heavy-duty freezer bags.

How do I reheat the pot roast?
The best way to reheat is in a skillet over low heat with a little broth to keep it moist. Microwaving is also an option, just use a covered dish.

What sides go well with pot roast?
Classic sides include creamy mashed potatoes, green beans, or a simple salad. A crusty bread for dipping in gravy is always a winner!

Can I cook this recipe on high heat?
While it is possible, cooking on high heat for about 4-5 hours may not result in the same tenderness. Low and slow is the way to go!

Will leftovers taste good?
Yes! In fact, the flavors often deepen overnight, making leftovers just as delicious, if not better, than the first serving.

What’s the best way to store leftovers?
Keep leftovers in an airtight container in the refrigerator and aim to consume within 3-4 days for food safety.

Can I use a pressure cooker instead of a slow cooker?
Yes! If using a pressure cooker, cook under high pressure for about 60-70 minutes, depending on the size of the roast, for tender results.

Additional Resources

Explore related recipes that highlight hearty meals perfect for nurturing comfort, including classic mashed potatoes or savory green bean casseroles. Technique guides on mastering reductions can help transform leftover pot roast into delightful gravies. Learn about ingredient substitutions to accommodate dietary preferences, and upgrade your equipment with slow cookers designed for efficiency and ease of use. Embrace seasonal variations by adapting this recipe according to what’s fresh and available!

Join the Conversation

Share your pot roast experiences on social media using our hashtag, and don’t forget to tag us in your photography! Engage with fellow cooking enthusiasts, gather recipe reviews, and encourage a community that thrives on connecting through food. Discover variations from others and strengthen our shared appreciation for this timeless dish. Together, we can celebrate cooking and create lasting memories!

The Recipe

Classic Slow Cooker Pot Roast

Serves: 6 servings

Prep Time: 20 mins

Cook Time: 8 hours

Total Time: 8 hours 20 mins

Kitchen Equipment Needed

  • Slow cooker
  • Skillet
  • Cutting board
  • Knife
  • Measuring cups and spoons

Ingredients

  • 3-4 lb beef chuck roast
  • 4 medium carrots, chopped
  • 3 medium potatoes, peeled and cubed
  • 1 large onion, quartered
  • 4 cloves garlic, minced
  • 2 cups beef broth
  • 2 tbsp olive oil
  • 2 tsp dried thyme
  • 1 tsp rosemary
  • Salt and pepper to taste

Directions

  1. Start by searing the chuck roast in a hot skillet with olive oil until browned on all sides.
  2. Transfer the roast to the slow cooker.
  3. Add chopped carrots, potatoes, onion, and garlic around the roast.
  4. Pour beef broth over the top and add thyme, rosemary, salt, and pepper.
  5. Cover and cook on low for 8 hours, or until the meat is fork-tender.
  6. Once done, let rest for 15 minutes before slicing.

Recipe Notes

  • For extra flavor, consider marinating the roast overnight.
  • Leftover pot roast can be used in soups or sandwiches.
  • This recipe can be adapted for a pressure cooker; adjust the cooking time accordingly.

Delicious Turkey Stuffing Balls for Your Holiday Table

Delicious Turkey Stuffing Balls: A Flavorful Twist for Your Holiday Table

⚖️
Difficulty
Easy

⏲️
Prep Time
20 mins

🕒
Cook Time
30 mins

⏱️
Total Time
50 mins

🍽️
Servings
6 servings

Turkey Stuffing Balls are a delightful addition to any holiday gathering, combining the savory flavors of traditional stuffing with the convenience of bite-sized portions. Picture a warm, golden-brown exterior with a soft, flavorful center, bursting with herbs and spices that evoke a cozy feel of family gatherings. These turkey stuffing balls are not just a side dish; they can easily stand alone, offering a hearty and satisfying option that pleases everyone at the table.

With mouthwatering notes of sage, thyme, and garlic, each bite transports you to a festive holiday feast, making it a perfect treat for potlucks and dinner parties. The aroma wafting through your kitchen will have your guests eager to dig into this delectable offering. Try them alongside cranberry sauce or a drizzle of gravy for an extra layer of flavor, ensuring that your Turkey Stuffing Balls are the highlight of your holiday spread.

Quick Recipe Highlights

  • Flavor Profile: Herbaceous tones of sage and thyme complement the savory turkey, while a hint of onion and garlic deepens the flavor complexity.
  • Texture: Crunchy on the outside with a moist, fluffy inside, these stuffing balls provide the perfect mouthfeel.
  • Aroma: The delightful fragrance of roasting turkey combined with fragrant herbs fills your kitchen, enhancing the anticipation of serving this dish.
  • Visual Appeal: Golden brown and perfectly shaped, these stuffing balls are not only delicious but also an inviting addition to your table.
  • Skill Level Needed: This recipe is easy enough for beginner cooks, making it accessible for everyone who wants to impress during the holiday season.
  • Special Equipment: A baking sheet and mixing bowls are all you need, keeping the preparation simple and stress-free.

Recipe Overview

  • Difficulty Level: This easy recipe stands out for its simplicity, allowing even novice chefs to create delicious results without overwhelming effort.
  • Category: These stuffing balls fit beautifully as a side dish or appetizer for any festive occasion, from Thanksgiving to Christmas dinners.
  • Cuisine: Rooted in traditional American cooking, these Turkey Stuffing Balls celebrate the culinary influences of holiday feasts across generations.
  • Cost: A breakdown of ingredients shows affordability, with basic pantry items and turkey creating a budget-friendly meal suitable for gatherings.
  • Season: Ideal for fall and winter festivities when flavors of herbs and hearty dishes dominate, these balls perfectly capture the spirit of the season.
  • Occasion: Enjoy them at family gatherings, potlucks, or as a comforting addition to holiday meals, providing universal appeal.

Why You’ll Love This Recipe

Delicious Turkey Stuffing Balls deliver a uniquely delightful taste and texture, making them an instant favorite on any dinner table. The savory turkey is complemented perfectly by a medley of aromatic herbs, creating a balance of flavors that leave guests wanting more. With each bite, you experience a satisfying crunch followed by a delightful moistness, perfectly encapsulating the essence of holiday comfort food.

Convenience is another major advantage of this dish; they can be prepared in advance, allowing you to focus on other elements of your meal. This flexibility not only saves time but also enables you to enjoy your time with family and friends without the stress of last-minute cooking. Reheating them is easy, ensuring they remain a delicious part of your holiday experience.

From a nutritional standpoint, these stuffing balls highlight the benefits of using turkey, a lean protein that provides essential nutrients while being low in fat. Additionally, the various herbs contribute to overall health, containing antioxidants and other beneficial compounds. This makes Turkey Stuffing Balls not just a tasty option but also a wholesome addition to your meal planning.

Socially, Turkey Stuffing Balls resonate well with family and friends, becoming an instant conversation starter during gatherings. Their appealing presentation and tasty profile encourage sharing and engagement, enhancing the atmosphere of holiday celebrations. This dish is perfect for both casual family dinners and more festive occasions.

Cost-effectiveness is another splendid feature, as these Turkey Stuffing Balls use basic, readily available ingredients. This not only makes them accessible financially but also allows for easy adaptation based on personal preference or budget constraints. As a result, they become a staple for a variety of gatherings without requiring extravagant spending.

Historical Background and Cultural Significance

The origins of Turkey Stuffing Balls can be traced back to traditional stuffing recipes used in early American cuisine. These recipes often stemmed from the necessity of stretching resources during the harvest season, using every part of the turkey to minimize waste. As families gathered for large celebrations, the stuffing became a cherished element of the feast, evolving over time into versatile variations such as these flavorful balls.

Culturally, stuffing holds significant importance during American holidays, symbolizing unity and hospitality. The act of sharing a meal with family and friends fosters community and strengthens bonds, making Turkey Stuffing Balls a beloved dish during the holiday season that pays homage to generations past.

As culinary practices evolved, so did the interpretation of stuffing. While many traditional recipes still focus on bread and spices, modernization has led to the incorporation of diverse ingredients, creating endless variations. Over the years, Turkey Stuffing Balls have become a popular adaptation, allowing cooks to express creativity while preserving the essence of this timeless dish.

Various regional variations exist, showcasing the distinct flavors and traditions across the United States. From Southern-style cornmeal stuffing to the herb-infused recipes of New England, Turkey Stuffing Balls can be customized to resonate with the diverse cultural backgrounds present at the table, ensuring that each bite tells a story.

Ingredient Deep Dive

Turkey, a lean protein, serves as the star ingredient. Its cultural significance in American cuisine is profound, commonly associated with Thanksgiving and holiday gatherings. Nutritionally, turkey is an excellent source of protein, low in fat, and rich in essential vitamins and minerals. When selecting turkey for this recipe, aim for fresh or high-quality frozen options; for storage, refrigerate leftovers and consume within three to four days. Additionally, ground turkey can be substituted for a more eclectic mix to suit personal tastes.

Stuffing usually includes ingredients such as breadcrumbs which serve as the base and binding agent in stuffing mixtures. This versatile ingredient has historical roots in a variety of cuisines worldwide. Its nutritional profile varies based on type, though it generally offers fiber and carbohydrates. Choose fresh bread for a unique flavor or whole-grain options for added health benefits. Store breadcrumbs in an airtight container to keep them fresh, while crusty bread can be frozen for prolonged preservation.

Herbs and spices play a vital role in flavoring the Turkey Stuffing Balls. Integral to culinary traditions across cultures, herbs like sage and thyme are not only aromatic but also beneficial for health. Fresh herbs provide more intense flavors, while dried herbs are convenient. Whether grown at home or purchased, store them in a cool, dark place for maximum freshness. Substituting fresh herbs for dried ones can amplify flavors, adapting this recipe to suit different taste preferences.

Onions and garlic are essential aromatics that enhance the flavor profile significantly. Both ingredients have cultural importance in varying cuisines and add a depth of flavor to dishes. Rich in antioxidants and beneficial compounds, they promote health and flavor. Select fresh options and store them in a cool, dry place; both ingredients can be diced and sautéed ahead of time to streamline the cooking process for this recipe.

Common Mistakes to Avoid

  • Overmixing the ingredients. This can lead to tough stuffing balls instead of a tender texture.
  • Using stale breadcrumbs, which can affect the flavor and moisture of the stuffing balls; make sure to use fresh ones.
  • Not seasoning adequately. Failing to add sufficient salt and herbs can result in bland flavors.
  • Sizing the balls inconsistently, causing uneven cooking; aim for uniform sizes for the best results.
  • Not preheating the oven. Skipping this essential step can lead to uneven cooking times.
  • Leaving ingredients unchopped for too long, which can affect both flavor and texture in the final dish; ensure they’re finely diced.
  • Skipping the cooking of onions and garlic before mixing; sautéing them brings out their sweetness and enhances the stuffing flavor.
  • Not testing the mixture for seasoning before forming them into balls, which could lead to unexpected blandness in the final dish.
  • Overcrowding the baking sheet, which can result in steaming instead of browning; use enough space for even cooking.
  • Not allowing the stuffing balls to cool slightly before serving; serving them too hot can mask flavors and texture.

Essential Techniques

Achieving the perfect Turkey Stuffing Balls requires understanding several key techniques. First, gentle mixing of the ingredients is essential; this helps to combine flavors without compromising the texture. Use your hands or a spatula to blend the mixture until just combined, avoiding overworking the dough which can make the balls dense.

Another critical technique involves the sautéing of aromatics like onions and garlic before combining them with other ingredients. Cooking these ingredients “sweats” them, releasing their natural sugars and creating a richer flavor. Ensure you sauté until they are soft and fragrant, which beautifully enhances the flavor profile of the final dish.

Correctly portioning the stuffing into uniform sizes allows for even cooking and attractive presentation. Use a scoop or your hands to shape the balls, ensuring they are compact but not overly dense. Proper sizing prevents some from cooking faster than others, maintaining a consistent texture across the board.

Lastly, baking at the proper temperature is crucial; preheat your oven to ensure even cooking and browning. Placing them in a preheated oven allows for a perfect golden crust to form while maintaining a moist interior. Aim for a balance of heat that crisps the outside while cooking the inside thoroughly.

Pro Tips for Perfect Turkey Stuffing Balls

Consider adding a touch of moisture to your mixture with broth or leftover gravy to enhance flavor and texture. This can make the stuffing balls more succulent and pleasing to the palate.

Using a mix of freshly chopped herbs with dried versions can take your flavor profile to another level, giving depth and brightness.

Experiment with different types of bread in your breadcrumbs. Whole-wheat or artisanal varieties can add unique flavors and textures.

Let the mixture rest in the fridge for at least 30 minutes before shaping; this helps the flavors meld together.

Try adding a pinch of crushed red pepper for a slight kick if you like a hint of heat in your stuffing.

Consider making a simple dip to serve alongside the Turkey Stuffing Balls, such as ranch or a herbed yogurt sauce, to elevate the dish further.

For an extra crunchy exterior, lightly spray the stuffing balls with cooking oil before baking them. This helps them crisp up beautifully.

Serve with seasonal accompaniments like cranberry sauce or gravy to enhance the flavors and provide a touch of tradition.

Variations and Adaptations

When making Turkey Stuffing Balls, consider regional variations to bring new twists to this classic dish. For a Southern touch, add cooked diced sausage or incorporate cornbread for a richer texture. A Southern-style stuffing gives a deliciously unique flavor that changes the texture and taste entirely.

Seasonal adaptations can also play a significant role; during fall, adding chopped apples or cranberries can lend a delightful sweetness that complements the savory turkey. During spring, replace heavier flavors with vibrant herbs like parsley or dill to reflect freshness and brightness.

For dietary modifications, swap turkey for plant-based alternatives to create vegan stuffing balls that still capture the essence of the original recipe. Ingredients like chickpeas or lentils can provide a hearty and satisfying alternative while maintaining the traditional flavors.

Flavor variations can also be implemented; consider using different herbs such as rosemary or adding spices like cumin for a unique twist on the traditional recipe. Each flavoring can introduce new depths, encouraging creativity in your cooking.

Texture modifications can be explored by incorporating nuts or seeds for crunch, enhancing the overall mouthfeel of the dish. Pine nuts or chopped walnuts can be tossed in to add both nutritional value and delightful texture.

For a presentation alternative, consider shaping Turkey Stuffing Balls into larger patties, creating a unique rustic style that could easily steal the show on any party platter.

Serving and Presentation Guide

The visual appeal of your Turkey Stuffing Balls can significantly impact the meal presentation. Consider arranging them on a large platter and garnishing with fresh herbs like parsley or thyme to add a splash of color and freshness. A drizzle of gravy or a small bowl of cranberry sauce nearby allows guests to customize their servings.

Plating techniques can vary, but a simple stacking method adds volume and makes the stuffing balls appear inviting. Portion control can help guests enjoy just enough without overindulging, ensuring all guests can have a taste.

For temperature considerations, serve the stuffing balls warm but not steaming hot to allow flavors to shine. Ensure guests can recognize the dish’s inviting texture and aroma without overwhelming their senses with heat.

Pair traditional accompaniments such as roasted vegetables or mashed potatoes alongside the stuffing balls for a complete holiday feast. Modern serving suggestions such as individual serving cups or small bowls can provide an elegant twist, enhancing the overall dining experience.

Wine and Beverage Pairing

When it comes to wine pairings, opt for a light white wine like Chardonnay, which complements the flavors of turkey while providing a refreshing balance. Alternatively, a light-bodied red wine such as Pinot Noir can enhance the savory notes found in the stuffing balls, making an excellent match for the dish.

For non-alcoholic alternatives, consider cranberry juice mixed with sparkling water. This provides a festive touch that perfectly balances the flavors of your Turkey Stuffing Balls without overpowering them.

If coffee or tea fits the meal, consider serving a light herbal tea that enhances the comforting, homey feel of the dish, allowing the stuffing balls to remain the star of the show.

Remember temperature considerations for each beverage; serving wines slightly chilled and non-alcoholic beverages over ice ensures they remain refreshing throughout your meal.

Storage and Shelf Life

Proper storage of Turkey Stuffing Balls is crucial to maintaining their flavor. Store leftover stuffing balls in an airtight container in the refrigerator for up to three days to ensure freshness. For longer preservation, freezing is an excellent option; wrapping them tightly in plastic wrap and then placing them in a freezer-safe container can extend their shelf life up to three months.

Temperature requirements should be observed when reheating them; ensure they reach an internal temperature of 165°F (74°C) for safe consumption. The best reheating method is using the oven, which allows them to regain their crispy exterior. Spread them out on a baking sheet and heat at 350°F (175°C) until thoroughly warmed.

Signs of spoilage include an off smell or changes in texture, indicating they shouldn’t be consumed. Take care to monitor storage times and appearance to avoid any health risks.

Make Ahead Strategies

To streamline preparation, consider making Turkey Stuffing Balls ahead of time. They can be formed and stored in the refrigerator for up to 24 hours before baking, breaking the cooking process into manageable steps. This strategy allows flavors to meld and enhances overall taste.

If preparing more than a day in advance, consider freezing the formed balls. This allows for assembly ahead of time without sacrificing quality. To successfully freeze them, place them on a baking sheet until solid, then transfer to a freezer-safe container.

When reheating, allow the stuffing balls to thaw in the refrigerator overnight for the best texture and flavor. This avoids freezer burn and maintains moisture.

Assemble them right before serving for an appealing presentation. This includes quickly popping them in the oven at your convenience, ensuring they arrive hot and fresh for your guests.

Scaling Instructions

Scaling your Turkey Stuffing Balls recipe can be seamless, whether to accommodate more guests or for meal prep. When halving the recipe, simply divide all ingredients by two while keeping an eye on the baking time; smaller batches typically require slightly less time.

Doubling or tripling the recipe might necessitate using larger mixing bowls and trays, as well as adjusting cooking times; use two baking sheets to ensure even cooking and browning.

Equipment adjustments, like larger roasting pans or more mixing bowls, may be necessary for larger quantities to prevent potential mishaps. Ensure that your oven has the capacity to handle extra trays at once for even cooking.

Timing modifications are essential, as larger quantities may require more time in the oven to achieve the desired level of crispiness. Always use a food thermometer to check that the center reaches the appropriate temperature.

Storage considerations should also be made; larger yields may need more airtight containers or freezer bags to ensure none spoil before consumption.

Nutritional Deep Dive

The macro breakdown of Turkey Stuffing Balls reveals a balance of protein, carbohydrates, and fats. Each serving provides a healthy dose of lean protein, essential for muscle repair and maintenance, alongside carbohydrates that offer energy to keep you fueled during festive gatherings.

Micronutrient analysis shows that turkey is a great source of B vitamins and selenium, essential for metabolic function and antioxidant protection. Additionally, the herbs add their own unique range of vitamins, enhancing the nutritional profile of each serving of stuffing balls.

Health benefits extend beyond basic nutrition; the lean protein from turkey supports healthy weight management while the fiber from breadcrumbs contributes to digestive health. This synergy makes Turkey Stuffing Balls both satisfying and nutritious.

Portion analysis is essential when serving these delicious balls. A standard serving size is typically around two or three balls, allowing for a balanced intake without overindulgence, especially during festive seasons.

Weight management tips suggest balancing the stuffing balls with lighter sides, such as fresh vegetables or salads, ensuring a hearty yet healthy meal that can delight all guests.

Dietary Adaptations

For a gluten-free version of Turkey Stuffing Balls, substitute traditional breadcrumbs with gluten-free alternatives, such as crushed gluten-free crackers or cornmeal. This allows those with dietary restrictions to enjoy the same delicious flavors without gluten concerns.

For a dairy-free adaptation, simply omit any butter from the recipe, as turkey and herbs provide sufficient moisture and flavor. You can enhance the dish by using dairy-free cheese options in the mixture.

Vegans can enjoy a plant-based variant by substituting turkey with lentils or chickpeas, allowing for the same texture and flavor profile while adhering to dietary preferences. Incorporating more vegetables and spices can further enhance the experience.

Low-carb diets can also be accommodated; replace breadcrumbs with almond flour or fine cauliflower rice to create a satisfying meal while keeping carb counts in check. This maintains texture and flavor with fewer carbs.

Keto adaptations can follow similarly by using a combination of high-fiber ingredients to create stuffing balls that align with dietary goals while still being enjoyable.

For those following Paleo diets, focus on whole ingredients such as nuts, seeds, and vegetables to craft a stuffing ball that adheres to the guidelines while providing flavor and satisfaction.

Other specific diets can also be accommodated by tailoring seasonings and ingredient proportions to fit personal health requirements while ensuring delightful flavors and enjoyable culinary experiences.

Troubleshooting Guide

Common texture issues can arise when turkey stuffing balls turn out too dry; this often occurs due to inadequate moisture in the mixture. Adjusting the amount of chicken broth can help achieve the desired consistency.

Flavor balance problems may yield bland stuffing balls, often due to insufficient seasoning. Always taste the mixture before shaping and adjust seasoning to ensure robust flavors come through.

Temperature problems could cause stuffing balls to undercook or overcook; using a food thermometer is invaluable. Cooking until the center reaches 165°F is the best strategy to prevent undercooking.

Equipment challenges can emerge while adapting to different ovens; ensure your baking tray is large enough to avoid overcrowding, enabling even cooking and browning of the stuffing balls.

Ingredient substitutions may create unexpected challenges in flavor or texture; when substituting, always test out in small batches to discover how they affect the dish.

Timing concerns are also worth addressing; if you are pressed for time, batch-cooking an initial trial run of stuffing balls allows for adjustments in both flavor and cooking methods going forward.

Recipe Success Stories

Community feedback on these Turkey Stuffing Balls has been overwhelmingly positive, with many highlighting the ease of preparation and delightful flavors. Enthusiastic home cooks share stories of modifying the recipe to suit their personal traditions, bringing a sense of family to their holiday gatherings.

Variation successes inspire creative adaptations. Many families have discovered new favorites by incorporating unique spices, reflecting their diverse culinary backgrounds while maintaining the traditional elements that add to nostalgia.

Reading adaptations, personal stories of culinary experimentation often bring humor and creativity to the kitchen. Tips shared among readers highlight the joy of finding new methods for enhancing flavors and presenting the dish attractively.

Photography tips enhance the overall engagement around Turkey Stuffing Balls, as social media platforms buzz with appetizing images that capture their golden-brown perfection, inspiring others to create their own.

Frequently Asked Questions

Can I make these Turkey Stuffing Balls ahead of time?

Yes, you can prepare the stuffing balls and refrigerate them for up to 24 hours before baking. This enhances flavors and simplifies cooking on the day of your event.

How long can I store leftover Turkey Stuffing Balls?

Leftover stuffing balls can be stored in the refrigerator for up to three days. For longer storage, freeze them for up to three months.

Can I use chicken instead of turkey?

Absolutely! Ground chicken can be substituted for turkey, providing a slightly different flavor while maintaining the overall appeal of the dish.

What herbs work best in this recipe?

While sage and thyme are traditional, feel free to experiment with rosemary or parsley for different flavor profiles. Adjust based on your personal preferences.

How do I prevent them from falling apart?

Ensure that you mix the ingredients until just combined, avoiding overmixing. The breadcrumbs help bind the ingredients, but you may also use an egg as an additional binder if needed.

Can I bake these at a different temperature?

While baking at 350°F is ideal, you can adjust the temperature slightly. Just keep an eye on them, as cooking times may vary.

Can I add vegetables to the stuffing mixture?

Absolutely! Feel free to incorporate finely chopped vegetables such as bell peppers or carrots for added flavor and nutrition.

What should I serve with Turkey Stuffing Balls?

These stuffing balls pair excellently with traditional accompaniments like cranberry sauce, gravy, or roasted vegetables for a complete holiday experience.

How can I enhance the dish?

Consider adding a splash of Worcestershire sauce or Dijon mustard to the mixture for an added depth of flavor.

Can I cook these in an air fryer?

Yes, cooking stuffing balls in an air fryer can yield a delicious outcome. Preheat the air fryer and cook at 350°F for about 10-15 minutes or until golden brown.

Are these suitable for freezing after cooking?

Yes, once cooked and cooled, freeze them in an airtight container. Reheat them in the oven or microwave when ready to serve.

Additional Resources

Looking for more inspiration? Check out related recipes that perfectly complement your Turkey Stuffing Balls, such as roasted root vegetables or a classic cranberry sauce. Further technique guides provide insights into ingredient selection and cooking methods enhancing your overall culinary skills.

Deep-dive into ingredient information, giving you a broader understanding of what enhances flavors and how to choose the best options for your dishes. Equipment recommendations facilitate efficiency in your kitchen, ensuring you have the right tools for creating delightful meals.

Seasonal variations highlight how you can adapt this recipe to suit any festive occasion, keeping the flavors fresh and exciting throughout the year.

Join the Conversation

We’d love to hear about your experiences with this Turkey Stuffing Balls recipe! Join our community by sharing your photos on social media, giving honest reviews, or suggesting any personal twists you’ve made. Engaging with others who appreciate good food enhances the cooking journey and opens opportunities for delightful experimentation.

Connect with fellow food lovers or share stories that inspire creativity in the kitchen. Celebrate the love of cooking and gather new ideas as this thriving community continues to grow and evolve around these cherished classics.

The Recipe

Turkey Stuffing Balls

Serves: 6 servings

Prep Time: 20 mins

Cook Time: 30 mins

Total Time: 50 mins

Kitchen Equipment Needed

  • Baking sheet
  • Mixing bowls
  • Measuring cups and spoons
  • Wooden spoon or spatula
  • Food thermometer (optional)

Ingredients

  • 1 lb ground turkey
  • 2 cups breadcrumbs
  • 1 cup sautéed onions and garlic
  • 1/4 cup fresh parsley, chopped
  • 1 tbsp dried sage
  • 1 tbsp dried thyme
  • 1/2 tsp salt
  • 1/4 tsp black pepper
  • 1/2 cup turkey broth (optional)

Directions

  1. Preheat the oven to 350°F (175°C) and line a baking sheet with parchment paper.
  2. In a large mixing bowl, combine ground turkey, breadcrumbs, sautéed onions and garlic, parsley, sage, thyme, salt, and pepper.
  3. If the mixture is too dry, slowly add turkey broth until a desired consistency is reached.
  4. Using your hands, shape the mixture into balls about 1.5 inches in diameter.
  5. Place the formed balls onto the prepared baking sheet, spaced apart.
  6. Bake for 25-30 minutes or until they reach an internal temperature of 165°F (74°C) and are golden brown.
  7. Remove from oven and let cool slightly before serving.

Recipe Notes

  • For added moisture, consider mixing in a beaten egg.
  • Feel free to experiment with different herbs and spices; red pepper flakes can add heat.
  • Store leftovers in an airtight container for up to 3 days, or freeze for longer storage.

Deliciously Cheesy Mashed Potato Puffs That Everyone Will Love

Cheesy Mashed Potato Puffs: Irresistibly Crunchy Bites

⚖️
Difficulty
Medium

⏲️
Prep Time
20 mins

🕒
Cook Time
25 mins

⏱️
Total Time
45 mins

🍽️
Servings
4-6 servings

Indulge in the crispy goodness of Cheesy Mashed Potato Puffs, a delightful treat that combines classic comfort food with an exciting twist. These puffs are golden and crunchy on the outside while remaining soft and cheesy on the inside, making them the perfect appetizer or side dish for any meal. Whether you’re entertaining guests at a dinner party or simply enjoying a cozy family dinner, these puffs will surely impress with their rich flavor and irresistible texture.

Made from leftover mashed potatoes, these bites are not just delicious but also a fantastic way to reduce food waste. The addition of cheese enhances the already creamy texture of the potatoes, creating a savory delight that’s hard to resist. Perfectly seasoned and baked to perfection, these Cheesy Mashed Potato Puffs are a satisfying finger food that everyone will love!

Quick Recipe Highlights

  • Flavor Profile: These puffs are a blend of creamy mashed potatoes, rich cheese, and a hint of garlic, offering a comforting yet elevated taste experience.
  • Texture: The crunchy exterior contrasts beautifully with the fluffy, cheesy interior, creating a delightful mouthfeel.
  • Aroma: As they bake, the savory scent of melted cheese and roasted garlic fills the kitchen, making it hard to resist a bite.
  • Visual Appeal: Golden brown on the outside, with a hint of cheesiness peeking through; they are as pleasing to the eyes as they are to the palate.
  • Skill Level Needed: This recipe is relatively straightforward, making it perfect for both novice cooks and seasoned chefs.
  • Special Equipment: A baking sheet and parchment paper are recommended for easy cleanup and perfect puff formation.

Recipe Overview

  • Difficulty Level: These Cheesy Mashed Potato Puffs are designed to be fun and easy to make, allowing you to master your kitchen skills with minimal effort.
  • Category: Ideal as a side dish, snack, or appetizer, they fit perfectly into various meal settings.
  • Cuisine: This dish embodies a fusion of American comfort food with Italian influences, particularly through the use of cheese.
  • Cost: This recipe is budget-friendly, utilizing common ingredients that are often found in many kitchens.
  • Season: These puffs are perfect year-round, but are especially well-suited for chilly months when comfort food is a must.
  • Occasion: Great for game days, parties, or holiday gatherings, they’re a crowd-pleaser every time.

Why You’ll Love This Recipe

The moment you take a bite of these Cheesy Mashed Potato Puffs, you’ll be captivated by their rich taste and satisfying texture. The creamy mashed potatoes combined with gooey cheese create a flavor explosion that is both comforting and indulgent. Every mouthful brings the warmth of home-cooked meals, making them perfect for cozy evenings or lively gatherings with friends and family.

One of the best parts about this recipe is its simplicity and convenience. Utilizing leftover mashed potatoes means you can whip these up in no time, making it an excellent choice for those who want something quick yet impressive. The preparation is very manageable, requiring minimal ingredients and steps—ideal for busy weeknights or last-minute entertaining.

From a nutritional standpoint, these puffs are a great source of carbohydrates and protein, thanks to the mashed potatoes and cheese. By incorporating whole ingredients, you can enjoy a guilt-free treat that satisfies without sacrificing flavor. Plus, adding vegetables like spinach or broccoli can enhance their nutritional value, catering to health-conscious eaters.

Socially, Cheesy Mashed Potato Puffs are perfect for entertaining. Their bite-sized form makes them easy to share, encouraging conversation and connection around the table. They’re also a fantastic way to highlight your cooking skills, as guests will be impressed by the unique presentation and delightful taste.

Finally, this recipe is incredibly cost-effective. Many of the ingredients are staples in your pantry, making it an economical choice for feeding a crowd without breaking the bank. By transforming leftovers into delicious bites, you can truly make the most out of your groceries.

Historical Background and Cultural Significance

Mashed potatoes have a rich history in global cuisine, originating from various cultures that embraced the potato as a staple food. Over time, different methods of preparing this beloved vegetable have evolved, with mashed potatoes becoming a quintessential comfort food in America. The invention of items like Cheesy Mashed Potato Puffs speaks to an innovative approach in contemporary kitchens, utilizing leftovers creatively.

The cultural significance of mashed potatoes cannot be overstated. They symbolize comfort and warmth across many households, often featured in holiday meals and family gatherings. For generations, recipes passed down through families have incorporated regional storylines, creating a sense of nostalgia and shared history around the dinner table.

As the recipe for Cheesy Mashed Potato Puffs has evolved, so have the ingredients and cooking methods. From the traditional use of butter and milk to contemporary enhancements like garlic and herbs, cooks have personalized their versions, making these puffs a versatile and cherished dish.

Regional variations of potato dishes highlight the ingredient’s adaptability. In southern cuisine, for example, you might find a version that features cheddar cheese and green onions, while in other cultures, spices and herbs are used to elevate the flavor profile. This cross-cultural blending showcases the universal love for potatoes and their potential in culinary creations.

Ingredient Deep Dive

Potatoes: Potatoes are a versatile staple found in numerous cuisines worldwide. Rich in carbohydrates, they provide energy and are a good source of vitamins C and B6. When selecting potatoes for this recipe, opt for starchy varieties like Russets or Yukon Golds, which create a creamy texture when mashed. Store potatoes in a cool, dark place to prevent sprouting.

For substitutions, sweet potatoes can offer a different flavor profile and added nutrition, bringing a touch of sweetness and more vitamins A and C into the dish.

Cheese: Cheese is the star of this recipe, imparting flavor and creaminess to the puffs. Choose varieties like cheddar, Monterey Jack, or even a sharp cheese to add depth. Nutritionally, cheese is a good source of protein and calcium, essential for bone health. When selecting cheese, look for high-quality options with a strong aroma for enhanced flavor.

Cheese can be stored in the refrigerator in a sealed container. For a lower-calorie version, consider using reduced-fat cheese, or for vegan adaptations, try using nutritional yeast or dairy-free cheese substitutes.

Common Mistakes to Avoid

  • Not drying the potatoes: Excess moisture will lead to soggy puffs; be sure to thoroughly dry your potatoes after boiling.
  • Overmixing: Mixing the ingredients too vigorously can cause the puffs to become dense; mix until just combined.
  • Skipping the chilling process: Letting the mixture chill ensures better handling and shapes; this step improves puff structure.
  • Incorrect oven temperature: Baking at too high of a temperature can brown the puffs too quickly; maintain a moderate heat for even cooking.
  • Using low-quality cheese: Cheap cheese can lead to poor melting; always choose quality cheese for the best results.
  • Not seasoning enough: Ensure adequate seasoning; tasteless potatoes make for bland puffs.
  • Overcrowding the baking sheet: Leaving adequate space between the puffs allows for proper browning and cooking.
  • Ignoring browning: Watch for the right golden-brown color; removing them too early will lead to a soggy texture.

Essential Techniques

Boiling Potatoes: Properly boiling your potatoes is key to achieving the right texture. Peel and chop potatoes into uniform pieces for even cooking. Once boiled, let them sit to drain excess water before mashing for a smoother consistency.

Watch for visual cues such as tender texture; pierced potatoes should break apart easily with a fork, indicating they’re ready to be mashed.

Mashing Potatoes: Use a potato masher or ricer for best results. Avoid using a food processor, as this can result in gummy mashed potatoes. When mashing, aim for a smooth but not too fine texture; some lumpiness adds character.

To master this, visualize the texture you want. Add milk and butter gradually, allowing integration without overworking the mixture.

Pro Tips for Perfect Cheesy Mashed Potato Puffs

1. For extra flavor, consider adding sautéed onions, herbs, or spices to your potato mixture before forming the puffs.

2. Experiment with different cheese blends for varying flavors; sharp cheddar pairs wonderfully with potatoes.

3. Use a cookie scoop to ensure uniform size and shape for all puffs, leading to consistent cooking.

4. For a spicy kick, mix in jalapeños or add a touch of cayenne pepper to the mixture.

5. Before baking, brush the tops of the puffs with egg wash or melted butter for an extra golden finish.

6. Allow sufficient space between the puffs on the baking sheet for even heat distribution and optimal crispiness.

7. Try freezing uncooked puffs for later; simply bake from frozen, adding a few extra minutes to the cooking time.

8. Pair with a flavorful dipping sauce like ranch, aioli, or a spicy salsa for added enjoyment.

Variations and Adaptations

Regional variations often yield delightful changes to Cheesy Mashed Potato Puffs. In Southern cuisine, add crumbled bacon or sharp cheddar for a bold flavor twist. During the fall, try integrating roasted pumpkin puree for a sweet touch.

For dietary modifications, consider making these puffs gluten-free by ensuring all added ingredients are certified gluten-free. Vegan adaptations can also be made using plant-based cheese and non-dairy milk to maintain creaminess without animal products.

Serving and Presentation Guide

When it comes to plating, place your Cheesy Mashed Potato Puffs on a rustic wooden board or a bright, colorful platter to create a visually striking display. Consider garnishing with chopped herbs like parsley or chives for a pop of color.

Pair these puffs with a range of traditional accompaniments such as savory dips or fresh vegetable sticks, encouraging guests to create their own snacking experience.

Wine and Beverage Pairing

A crisp white wine such as Sauvignon Blanc complements the richness of Cheesy Mashed Potato Puffs beautifully. For a non-alcoholic option, consider pairing with sparkling water infused with citrus for a refreshing contrast.

If you prefer a comforting warm drink, a robust cup of herbal tea can round out your meal perfectly, enhancing the flavors of the dish.

Storage and Shelf Life

Store any uncooked Cheesy Mashed Potato Puffs in an airtight container in the refrigerator for up to three days. Cooked puffs, once cooled, can be kept in the fridge for up to four days and reheated in the oven to regain their crispiness.

For longer storage, consider freezing puffs before cooking. Lay them out on a baking sheet until frozen solid, then transfer to a freezer-safe bag. When ready to cook, bake from frozen, adding additional time as necessary.

Make Ahead Strategies

Prep your Cheesy Mashed Potato Puffs a day ahead by preparing the mashed potato mixture and chilling it overnight. The next day, simply scoop, shape, and bake them for a quick, warm appetizer.

For the best results, freeze any leftovers if you have made more than you need. Properly stored and reheated, these puffs will maintain their delightful flavor and texture.

Scaling Instructions

If you need to adjust the serving size, simply halve or double the ingredients accordingly, ensuring you maintain the proper ratios of potatoes to cheese and other add-ins.

For larger gatherings, consider using a larger baking sheet or batch-cooking; just keep an eye on the cooking time, as more puffs may require slight adjustments in baking time for even cooking.

Nutritional Deep Dive

Each serving of Cheesy Mashed Potato Puffs typically provides a healthy dose of carbohydrates from the potatoes, along with protein and calcium from the cheese. When prepared with whole ingredients, they can be a satisfying and nourishing option for both adults and children.

For weight management, pay close attention to portion sizes, as they can be easy to overindulge. Balancing them with a side salad or vegetables can create a well-rounded meal.

Dietary Adaptations

For a gluten-free version, utilize certified gluten-free breadcrumbs or skip the breadcrumbs altogether. This adaptation retains the flavor without compromising on texture.

If you’re looking to go vegan, substitute the cheese with a plant-based cheese alternative and replace dairy with non-dairy milk to maintain the creamy texture. This version can easily satisfy those observing vegan diets.

Troubleshooting Guide

If your Cheesy Mashed Potato Puffs turn out too dry, ensure not to overcook the potatoes initially; overcooked potatoes can lead to moisture loss. Adding a touch of milk or butter to your mixture can also help maintain creaminess.

For flavor balance, if the puffs are bland, increase seasoning and consider adding flavorful ingredients like garlic powder, scallions, or cheese variations to enhance the taste.

Recipe Success Stories

Home cooks have praised this Cheesy Mashed Potato Puffs recipe for its versatility. Many have shared their personalized takes, incorporating ingredients like roasted garlic or herbs to make it their own.

Readers often capture and share their puff-making adventures on social media, showcasing their puff perfection in delightful photographs that inspire others to try their hand at this comforting dish.

Frequently Asked Questions

Can I use instant mashed potatoes? Yes, instant mashed potatoes can be used in a pinch, but for the best flavor and texture, freshly made mashed potatoes are recommended.

How do I store leftovers? Store leftover puffs in an airtight container in the fridge for up to four days, or freeze for longer storage, baking from frozen when ready to eat.

Can I bake these instead of frying? Yes, baking is the recommended method for a healthier version while still achieving a crispy texture.

What cheese works best? Cheddar is commonly used, but feel free to experiment with other cheeses like mozzarella or Monterey Jack for different flavors.

How do I achieve a crispy outside? Ensure that the puffs are spaced properly on the baking sheet and that your oven is preheated for the best results.

Can I make them ahead of time? Yes, you can prepare the potato mixture in advance and shape it into puffs just before baking.

What other ingredients can I add? Incorporate herbs, spices, or even vegetables like spinach or bacon to personalize your puffs.

Can I freeze uncooked puffs? Absolutely, freeze them on a baking sheet until solid, then transfer to a freezer-safe bag. Bake from frozen when ready to enjoy.

How many puffs does this recipe make? This recipe yields approximately 24 puffs, depending on the size you make them.

What’s the best way to reheat them? Bake reheated puffs in the oven at 350°F for about 10 minutes to restore crispiness.

Additional Resources

For more delicious potato recipes, check out our loaded potato skins and creamy potato soup. Additionally, explore our technique guides for mastering mashed potatoes and perfecting baked goods.

Don’t forget to look at our ingredient information page to learn about selecting the best varieties of potatoes and cheeses for your recipes.

Join the Conversation

We love hearing from you! Share your variations of Cheesy Mashed Potato Puffs or post your cooking photos on social media. Engage with other food lovers in the comments section and exchange tips, findings, and creative ideas.

Consider leaving a review of this recipe or any suggestions for improvements you’ve discovered along the way. Let’s create a vibrant community of passionate cooks!

The Recipe

Cheesy Mashed Potato Puffs

Serves: 4-6 servings

Prep Time: 20 mins

Cook Time: 25 mins

Total Time: 45 mins

Kitchen Equipment Needed

  • Large pot
  • Baking sheet
  • Parchment paper
  • Mixing bowl
  • Potato masher or ricer
  • Cookie scoop or spoon

Ingredients

  • 2 cups mashed potatoes (cooled)
  • 1 cup shredded cheddar cheese
  • 1/2 cup breadcrumbs
  • 1 egg (beaten)
  • 1/4 cup chopped green onions
  • 1 teaspoon garlic powder
  • Salt and pepper to taste

Directions

  1. Preheat your oven to 400°F (200°C) and line a baking sheet with parchment paper.
  2. In a mixing bowl, combine cooled mashed potatoes, cheese, breadcrumbs, beaten egg, green onions, garlic powder, salt, and pepper. Mix until well combined.
  3. Using a cookie scoop, form the potato mixture into small balls and place them on the prepared baking sheet.
  4. Bake in preheated oven for about 25 minutes or until golden brown and crispy.
  5. Remove from oven, let cool slightly, and serve with your favorite dipping sauce.

Recipe Notes

  • Feel free to add cooked bacon or sautéed vegetables into the mixture for additional flavor.
  • If you’d like a spicy kick, experiment with pepper jack cheese or add jalapeños.
  • Store leftovers in an airtight container in the fridge for up to four days.

Delicious Grilled Shrimp and Sausage Foil Packets Recipe

Grilled Shrimp and Sausage Foil Packets: A Flavorful Summer Delight

⚖️
Difficulty
Easy

⏲️
Prep Time
15 mins

🕒
Cook Time
20 mins

⏱️
Total Time
35 mins

🍽️
Servings
4

Grilled Shrimp and Sausage Foil Packets are the perfect dish for warm-weather gatherings, offering a delightful combination of savory flavors and smoky aromas. This recipe brings together succulent shrimp and hearty sausage, cooked to perfection along with fresh vegetables and aromatic herbs, all wrapped up in convenient foil packets. The result is a meal that’s not only easy to prepare but also bursting with flavor, making it a favorite for summer barbecues and family dinners.

The beauty of this dish lies in its simplicity and versatility. Imagine pulling your foil packets off the grill, the steam escaping as you unveil a medley of shrimp, sausage, bell peppers, and onions, all mingled together in a vibrant mix of colors. This recipe is a celebration of summer, crafted to be enjoyed outdoors, and brings friends and family together to savor delicious food surrounded by nature.

Quick Recipe Highlights

  • Flavor Profile: A delightful mix of smoky sausage, tender shrimp, and vibrant vegetables, complemented by a touch of seasoning that enhances the natural flavors.
  • Texture: The contrast between the juicy shrimp and the firm sausage offers a satisfying mouthfeel, while the vegetables add a crisp freshness.
  • Aroma: This dish fills the air with the enticing scent of grilled meat, fresh herbs, and sweet notes from caramelized vegetables.
  • Visual Appeal: The colorful combination of shrimp, sausage, and assorted vegetables makes for an impressive presentation on any table.
  • Skill Level Needed: With minimal cooking techniques required, this recipe is perfect for both novice cooks and seasoned chefs alike.
  • Special Equipment: All you need is a grill and aluminum foil, making this recipe accessible for any home cook.

Recipe Overview

  • Difficulty Level: This recipe is categorized as easy, making it a great option for cooks of all skill levels. The straightforward method of assembling foil packets allows for quick preparation without complex techniques.
  • Category: Grilled Shrimp and Sausage Foil Packets serve as a fantastic main dish, ideal for summer meals, picnics, or outdoor barbecues.
  • Cuisine: This dish draws inspiration from classic Southern and coastal cuisine, showcasing the use of seafood and local ingredients to create vibrant meals.
  • Cost: The ingredients for this recipe are affordable, with shrimp and sausage being budget-friendly proteins that deliver on taste.
  • Season: Perfect for summer cooking, these foil packets shine during warm months when grilling is most enjoyable and fresh vegetables are abundant.
  • Occasion: Ideal for casual gatherings, family picnics, or outdoor parties, this recipe fosters a communal dining experience.

Why You’ll Love This Recipe

Grilled Shrimp and Sausage Foil Packets offer an unrivaled taste and texture experience. The combination of juicy shrimp infused with the smoky flavor of sausage is simply irresistible. Every bite is bursting with flavor, and the addition of bell peppers and onions adds a layer of crunchy freshness. The ease of cooking and minimal clean-up, thanks to the foil packets, makes this dish a no-fuss option for busy weeknights or weekend BBQs.

Nutritionally, this recipe is rich in protein and provides a well-rounded meal with the inclusion of vegetables. It’s a great choice for those seeking healthier options without sacrificing flavor. The communal aspect of sharing these foil packets promotes social dining, making it perfect for gatherings where everyone can dig in and enjoy.

Cost-effectiveness is another major advantage of this recipe. Shrimp and sausage are accessible ingredients that vary in price but generally provide good value. This dish does not require any specialty items, making it easy on the wallet while still delivering a gourmet feel. Overall, Grilled Shrimp and Sausage Foil Packets are a winning dish that you’ll want to make again and again.

Historical Background and Cultural Significance

The origins of foil packet cooking can be traced back to various culinary traditions, but it became popular in outdoor cooking as a practical and innovative method to prepare meals over an open flame. In coastal regions, the use of fresh seafood, including shrimp, is deeply rooted in the diet and culture, reflecting the bounty of the sea. This technique became a staple for camping and family outings, allowing for easy preparation and cleanup.

In Southern cuisine, sausage holds cultural importance, representing the varied influences of European settlers. Combining sausage with seafood captures the essence of the region’s culinary heritage, offering a unique twist that celebrates local ingredients.

The evolution of this recipe has seen many interpretations, from traditional methods to modern adaptations that incorporate different spices and vegetables. Regional variations abound; for instance, some families may add herbs like cilantro or spices like Cajun seasoning to enhance the flavor profile.

Understanding these cultural nuances and the history behind Grilled Shrimp and Sausage Foil Packets deepens the appreciation for this dish, allowing you to connect more with the food you enjoy.

Ingredient Deep Dive

Shrimp are not only a delicious ingredient but they also carry significant historical importance in coastal cultures across the world. Rich in protein and low in calories, shrimp offer a variety of nutritional benefits, including omega-3 fatty acids. When selecting shrimp, look for firm, glassy shells and a mild sea scent. Fresh shrimp should be stored in the coldest part of your refrigerator and cooked within a day or two for optimal freshness.

Sausage, a staple in many cuisines, brings an unparalleled depth of flavor to dishes. Originating from various European traditions, sausage-making has evolved to reflect local tastes and ingredients. Nutritionally, sausage can be high in fat and sodium, so consider leaner varieties when possible. Always check for freshness by smelling for strong odors and looking for firmness. Sausages should be stored in the refrigerator and used within a few days; alternatively, they can be frozen for longer shelf life.

Vegetables like bell peppers and onions add not only flavor but also texture and nutritional value, offering vitamins and fiber. Choosing vibrant, firm vegetables is crucial, as they will add both visual appeal and a crunchy bite to your foil packets. Store vegetables in a cool, dark place and utilize them while they’re still fresh for the best flavor.

Common Mistakes to Avoid

  • Overcooking the shrimp: Shrimp cook quickly, and if left on the grill too long, they can become tough and rubbery. Aim for 2-3 minutes per side for perfectly cooked shrimp.
  • Using too much seasoning: While flavor is important, it’s easy to overpower the delicate taste of shrimp with too many spices. Start with a small amount and adjust to your preference.
  • Insufficiently sealing the foil packets: If the packets are not sealed properly, steam will escape, preventing even cooking. Ensure edges are tightly folded to trap the moisture inside.
  • Neglecting the vegetables: Some vegetables may require longer cooking times, so ensure that your vegetable choices can cook in the time it takes for shrimp and sausage.
  • Allowing packets to sit too long: Once off the grill, let the packets sit for too long before opening. This can lead to overcooking the ingredients with residual heat.
  • Forgetting to preheat the grill: Starting with a preheated grill is essential to achieve the best grilling results, so make sure to preheat for optimal searing.
  • Choosing the wrong type of sausage: Using a very fatty sausage can lead to a greasy texture. Leaner varieties work best for this dish.
  • Not adjusting for cooking method: If using an oven instead of a grill, adjust temperatures accordingly for best results.
  • Skipping fresh herbs: Fresh herbs enhance flavor significantly, so don’t skip them for a bland result; they should be added just before sealing the packets.
  • Using unwashed produce: Always wash your vegetables before incorporating them in the recipe to remove any pesticides or dirt.

Essential Techniques

Creating foil packets is a key technique that not only simplifies cooking but locks in moisture and flavor. To master this technique, lay out a large sheet of aluminum foil and place ingredients in the center, leaving space around the edges for folding. The key is to fold the edges tightly, creating a little pouch. Check your packets for visual cues; they should not leak any juices.

Grilling shrimp quickly is important for achieving the perfect texture. Learn to recognize when shrimp turn pink and opaque; this indicates they are fully cooked. Using a grill basket can help with smaller ingredients, preventing them from falling through the grates.

Selecting fresh ingredients enhances each bite’s flavor. Be sure to visually assess your ingredients for freshness and seasoning. A colorful medley of vegetables will not only elevate the dish visually but also provide diverse nutrients.

Pro Tips for Perfect Grilled Shrimp and Sausage Foil Packets

– Use large shrimp for better texture and visual appeal; they hold more flavor and create a more satisfying bite.
– Marinate shrimp and sausage beforehand for added depth of flavor; even a short 30-minute marinade can significantly enhance the dish.
– Experiment with various vegetables according to the season for a fresh twist on the dish; zucchini, corn, and asparagus are great options.
– Grill the packets over indirect heat to avoid burning the outside while allowing the inside to cook evenly.
– Consider adding citrus slices inside the packets for a burst of fresh flavor alongside shrimp and sausage.
– Use a mix of fresh herbs like parsley or thyme just before serving to enhance the aroma and freshness.
– For an extra smoky flavor, try adding a few drops of liquid smoke to your marinade.
– Have extra foil on hand to create new packets on the fly if you need to adjust for portion sizes.

Variations and Adaptations

Regional variations can really personalize your Grilled Shrimp and Sausage Foil Packets. For instance, a spice rub inspired by Cajun cuisine can add a whole new level of flavor. In the colder months, you can substitute shrimp for other seafood or even chicken to ensure you enjoy this dish year-round.

For dietary modifications, consider swapping out the sausage for turkey or plant-based alternatives for a lower-fat option. If you want to increase the flavor profile, try adding different seasonings, like taco seasoning for a fiesta-themed grill night.

In terms of texture modifications, you can roast vegetables beforehand for additional crunch and sweetness or grill whole cherry tomatoes to burst with flavor. For a refreshing twist, add a dollop of creamy avocado dip or sour cream on top when serving.

Finally, experiment with creative presentations by serving the foil packets on wooden boards or plates adorned with fresh herbs and lemon wedges for an appealing display.

Serving and Presentation Guide

To present your Grilled Shrimp and Sausage Foil Packets beautifully, begin by carefully unveiling the packets at the table to create a dramatic effect with the escaping steam and aromatic scents. For plating, consider transferring the contents to a large serving platter, carefully spreading them out to showcase the vibrant colors of the dish.

Garnish with fresh herbs such as cilantro or parsley to elevate the dish visually. You can also incorporate bright citrus wedges for a splash of color and flavor balance. Serve with crusty bread or a side salad for a complete meal.

Temperature plays a significant role in enjoyment, so serve the packets warm but not scalding hot to allow guests to dive in comfortably. Consider portion control by utilizing small plates or bowls, especially when serving at gatherings, to ensure guests can sample a variety of flavors.

Finally, emphasize freshness by pairing the dish with a crisp white wine or lemonade to enhance the dining experience.

Wine and Beverage Pairing

For a delightful pairing, consider a chilled Sauvignon Blanc or a light Pinot Grigio that complements the seafood without overpowering the delicate shrimp flavors. The acidity in these wines cuts through the richness of the sausage, creating a balanced sip.

For a non-alcoholic alternative, a refreshing iced tea with a hint of lemon can offer a beautiful contrast to the savory dish. If you prefer something bolder, a light lager or wheat beer enhances the grill flavors effectively.

When serving, make sure your drinks are well-chilled to amplify the overall freshness and enjoyment of the meal. Keep in mind that adjusting serving temperatures—serving whites cold and reds at room temperature—can enhance the tasting experience.

Storage and Shelf Life

To store leftover Grilled Shrimp and Sausage Foil Packets, allow them to cool completely before transferring to airtight containers. Store in the refrigerator for up to 3 days, but be mindful that the shrimp may lose some texture over time.

Ensure to label containers with the date for easy tracking. If you need to keep them longer, consider freezing leftovers by placing them in freezer-safe bags. These can be stored in the freezer for up to 2 months but are best enjoyed fresh.

When reheating, it’s best to avoid the microwave as it can overcook the shrimp, leading to a rubbery texture. Instead, reheat in the oven at a low temperature or on the stovetop with a splash of water to maintain moisture.

Make Ahead Strategies

To make the Grilled Shrimp and Sausage Foil Packets ahead of time, prepare your marinade and raw ingredients in advance. You can chop vegetables and portion out shrimp and sausage, allowing flavors to meld overnight before cooking.

Foil packets can be assembled and stored in the refrigerator a few hours prior to grilling. Just be sure to seal them tightly and mark each packet with the contents for easy identification.

Consider cooking the ingredients slightly less than the full cooking time recommended in the recipe. This approach allows for reheating while maintaining the quality of the shrimp and sausage during grilling.

When it’s time to serve, simply grill according to the recipe, ensuring the meal is quick and convenient for you and your guests.

Scaling Instructions

If you want to adjust the recipe’s serving size, halving it is simple; just divide all ingredients by two while maintaining the same cooking method. For doubling or tripling, ensure uniform packet sizes so that cooking times remain consistent.

Equipment adjustments may become necessary with larger quantities; use larger sheets of foil or multiple grilling areas. Timing modifications might be needed as well; monitor the packets closely, as cooking time will depend on the overall heat of the grill and number of packets.

As for storage considerations, ensure to safely separate packets in one container for easy reheating, or consider how to best group like ingredients for shared cooking space, so all packets cook evenly.

Nutritional Deep Dive

The nutritional breakdown of Grilled Shrimp and Sausage Foil Packets showcases an impressive balance of macronutrients. Shrimp contributes lean protein, while sausage can offer heartier macronutrient values, depending on the type. Overall, this dish provides a solid source of protein with fewer calories compared to heavier meal options.

Micronutrient analysis points to the benefits of including vegetables, which enhance fiber and provide essential vitamins like A and C, supporting overall health. This meal is well-suited for those looking to maintain a balanced diet while enjoying flavorful options.

In terms of health benefits, the omega-3 fatty acids in shrimp are known for their heart-healthy properties, while the inclusion of fresh vegetables helps support digestive health. Portion analysis allows for flexible serving sizes, accommodating various dietary needs.

For those on weight management plans, adjusting portion sizes and selecting leaner sausages can keep calorie counts in check without compromising on flavor.

Dietary Adaptations

To cater to a gluten-free diet, ensure that the sausage used is labeled as gluten-free, avoiding any sauces or marinades that may contain hidden glutens. The base recipe itself is naturally gluten-free, providing an appetizing option for those with sensitivities.

For dairy-free adaptations, since the recipe does not require any dairy products, it is suitable for those looking to exclude dairy from their diets.

Vegan adaptations can be achieved by completely replacing shrimp and sausage with plant-based protein sources, like grilled tempeh or marinated mushrooms, to maintain a satisfying texture and flavor.

Those on low-carb or keto diets may also enjoy this dish without the sausage, adding more non-starchy vegetables instead while keeping the original grilled shrimp as the focal point.

Consideration for paleo diets involves ensuring that all ingredients align with clean eating, promoting grassy-fed sausage and fresh produce while avoiding any heavily processed items.

Troubleshooting Guide

If you encounter texture issues, such as shrimp being rubbery, assess your cooking time to ensure that they haven’t been overcooked. Conversely, undercooked shrimp will be translucent and not ideal; adjust timing as necessary based on grill heat.

Flavor balance can be an issue if using strong seasonings; this can be tackled by recognizing when to add marinades and spices—to balance the overall taste and avoid being overly salty or pungent.

Temperature problems may arise from uneven heat on the grill. Be sure to utilize even grilling methods, whether gas or charcoal, to ensure consistent cooking of all packets.

If ingredient substitutions were made, ensure that replacements are also compatible with the cooking methods discussed for best outcomes. Timing concerns arise when grilling multiple packets, so always monitor carefully.

Finally, staying mindful of visual cues and aromas helps in anticipating the dish’s readiness and ensures delicious results without compromised flavor.

Recipe Success Stories

Community feedback on Grilled Shrimp and Sausage Foil Packets has been overwhelmingly positive. Many have noted how easy the recipe is to customize, allowing them to try various protein and vegetable combinations based on preference and seasons.

Readers’ adaptations, such as adding their favorite spicy sauces, have contributed to new flavor profiles, showcasing the dish’s versatility. Success stories highlight that this recipe is not only a hit among families but also a preferred choice for entertaining guests during summer gatherings.

A number of photography enthusiasts have shared stunning images of their finished packets, often featuring vibrant colors and appetizing presentations. Tips shared in cooking forums have helped others improve their techniques, leading to a wonderful sense of community engagement around this recipe.

Overall, the collaborative storytelling about Grilled Shrimp and Sausage Foil Packets emphasizes how food can bring people together, creating shared moments around delicious meals.

Frequently Asked Questions

Can I use frozen shrimp for this recipe?

Yes, you can use frozen shrimp. Ensure they are thawed completely before marinating or grilling. This will allow for even cooking and ensures flavor absorption from the marinade.

What type of sausage is best for this recipe?

The best type of sausage depends on your personal preference. Andouille sausage offers a spicy kick, while smoked sausage gives a richer flavor. Feel free to experiment with different varieties!

Are there vegetarian options for this dish?

Absolutely! You can substitute shrimp and sausage with a combination of hearty vegetables, tofu, or plant-based sausages to keep the spirit of the dish while accommodating vegetarian diets.

How can I cook these packets in the oven instead of on the grill?

Can I make this dish vegan?

Yes, you can create a vegan version by replacing shrimp with marinated tempeh or mushrooms and using plant-based sausage options that align with vegan diets.

What other vegetables can I add?

The options are endless! Consider using zucchini, corn, cherry tomatoes, or asparagus. Seasonal vegetables are a great way to customize the dish based on what’s fresh and available.

How long can leftovers be stored?

Leftovers can be stored in airtight containers in the refrigerator for up to 3 days. For longer storage, consider freezing the packets for up to 2 months.

Can I add extra spices or marinades?

Definitely! Feel free to add extra spices or marinades to customize the flavors. Just be mindful not to overpower the delicate shrimp flavors.

What’s the best way to reheat leftovers?

The best way to reheat leftovers is on the stove over low heat or in the oven. Avoid the microwave to prevent overcooking the shrimp and preserve texture.

Is it safe to eat shrimp that have turned pink?

Yes, cooked shrimp will turn pink and opaque when they’re safe to eat. Slightly translucent shrimp can indicate that they are undercooked and should not be consumed.

Additional Resources

To enhance your culinary repertoire, check out related recipes showcasing seafood grilling techniques that complement Grilled Shrimp and Sausage Foil Packets. Additionally, dive into technique guides on properly seasoning and marinating proteins for richer flavor profiles.

For ingredient recommendations, explore options that align with seasonal cooking to maximize freshness and flavor. As summer rolls in, consider outdoor cooking essentials for the best grilling experience, from grills to barbecue tools.

Finally, explore seasonal variations that can elevate your grilling adventures all year round, ensuring you make the most out of your time spent in the kitchen and at the grill.

Join the Conversation

We’d love to hear about your experiences with Grilled Shrimp and Sausage Foil Packets! Share your creations on social media and tag us to join a thriving community of food lovers. Whether you’ve captured a stunning photograph or modified the recipe with your personal touch, each story adds to the richness of our culinary journey together.

Engage with your friends and family by inviting them to try this recipe and sharing your thoughts on their variations. Don’t forget to leave a review if you’ve enjoyed making this dish—it helps others discover such delicious options. Together, let’s celebrate the love of cooking, sharing, and enjoying good food!

The Recipe

Grilled Shrimp and Sausage Foil Packets

Serves: 4

Prep Time: 15 mins

Cook Time: 20 mins

Total Time: 35 mins

Kitchen Equipment Needed

  • Grill or oven
  • Aluminum foil
  • Mixing bowl
  • Measuring cups and spoons
  • Knife and cutting board

Ingredients

  • 1 pound large shrimp, peeled and deveined
  • 1 pound sausage, sliced (Andouille or smoked sausage)
  • 1 bell pepper, sliced
  • 1 onion, sliced
  • 2 tablespoons olive oil
  • 2 teaspoons garlic powder
  • 1 teaspoon paprika
  • Salt and pepper to taste
  • Fresh herbs for garnish (optional)

Directions

  1. Preheat the grill to medium-high heat.
  2. In a mixing bowl, combine shrimp, sausage, bell pepper, onion, olive oil, garlic powder, paprika, salt, and pepper.
  3. Cut four large pieces of aluminum foil and place a portion of the mixture in the center of each piece.
  4. Fold the foil into packets, sealing them tightly to prevent any steam from escaping.
  5. Grill the packets for 15-20 minutes, flipping halfway through, until the shrimp are pink and the sausage is heated through.
  6. Carefully remove the packets from the grill and let them cool a bit before opening.
  7. Garnish with fresh herbs if desired and serve immediately.

Recipe Notes

  • Feel free to add other vegetables like zucchini or corn to the mix.
  • If cooking in the oven, preheat to 400°F (200°C) and bake for 20-25 minutes.
  • Leftovers can be stored in the fridge for up to 3 days.
  • Use different seasonings to customize the flavor to your preference.

Delicious Grilled Shrimp and Sausage Foil Packets Recipe

Grilled Shrimp and Sausage Foil Packets: A Simple and Flavorful Delight

⚖️
Difficulty
Easy

⏲️
Prep Time
15 mins

🕒
Cook Time
20 mins

⏱️
Total Time
35 mins

🍽️
Servings
4

Grilled Shrimp and Sausage Foil Packets are the perfect solution for a delicious and hassle-free meal. This recipe combines marinated shrimp and smoky sausage with fresh vegetables, all enclosed in a convenient foil packet that locks in flavor and moisture. Imagine pulling back the foil and being greeted by a mouthwatering aroma as the shrimp glistens and the sausage sizzles, evoking the irresistible appeal of summer grilling any time of the year. Whether you are hosting a backyard barbecue or just cooking dinner for the family, these foil packets promise to deliver a burst of grilled flavor in every bite.

One of the standout features of this dish is its versatility. You can easily customize the ingredients based on your preferences, dietary restrictions, or whatever you have on hand. The ease of preparation and cleanup makes it ideal for busy weeknights or casual gatherings. Just toss everything together, seal in the foil, and let the oven or grill do all the work. Not only will you enjoy a plateful of savory shrimp and sausage, but you’ll also appreciate the beautiful medley of colors from the veggies, making it visually enticing.

Quick Recipe Highlights

  • Flavor Profile: This dish marries the sweetness of shrimp with the spicy, smoky essence of sausage, complemented by a medley of herbs and spices.
  • Texture: Expect a delightful combination of tender shrimp, juicy sausage, and crisp-tender vegetables for a satisfying mouthfeel.
  • Aroma: As you grill or bake, the fragrant combination of garlic, herbs, and smoky sausage will fill the air and entice your senses.
  • Visual Appeal: Beautiful hues of pink from the shrimp, golden-brown sausage, and vibrant veggies make for an eye-catching presentation.
  • Skill Level Needed: Even beginner cooks can master this simple recipe, requiring only basic food prep skills and a willingness to experiment.
  • Special Equipment: All you need is aluminum foil and either a grill or an oven to prepare this delightful dish.

Recipe Overview

  • Difficulty Level: This easy recipe is perfect for cooks of all levels, making it approachable for those new to meal prep.
  • Category: This dish fits well into the dinner category, especially for outdoor cooking or as a fun weekend meal.
  • Cuisine: Drawing influences from Southern and coastal cuisines, this recipe embodies the spirit of leisure and flavorful gatherings.
  • Cost: A budget-friendly meal, the ingredients can typically be found at reasonable prices, especially in sets or sales.
  • Season: It shines in the summer months but can be enjoyed year-round, making it a versatile choice for any occasion.
  • Occasion: Ideal for warm weather cookouts, family dinners, or even meal prep for busy weeks ahead.

Why You’ll Love This Recipe

The taste and texture of Grilled Shrimp and Sausage Foil Packets create a fantastic experience for your palate. The succulent shrimp paired with the hearty sausage results in an extraordinary flavor explosion, while the vegetables add a satisfying crunch. Every bite invites a burst of juiciness, making it a memorable meal that you’ll want to recreate again and again.

Another reason to love this recipe is its convenience. Preparation is as simple as mixing ingredients into packets, which can be made in advance for added ease during busy days. Cleanup is a breeze, with no dishes to scrub after dinner. Not only does this save you valuable time in the kitchen, but it also allows for spontaneous dining outdoors, where picnic-style eating reigns supreme.

Moreover, this dish boasts nutritional advantages. Shrimp provide high-quality protein and essential omega-3 fatty acids, while sausage adds additional flavor and protein. When combined with a variety of colorful vegetables, this meal becomes packed with vitamins and minerals, making it suitable for a balanced diet.

From a social perspective, Grilled Shrimp and Sausage Foil Packets are perfect for entertaining. They spark conversation and can be served directly in their foil packets as a fun twist on traditional serving methods. Sharing such a comfortable and casual meal with friends and family encourages laughter, storytelling, and cherished moments around the table.

Lastly, this recipe is cost-effective. The ingredients can easily be found in most grocery stores at an affordable price, allowing you to feed a crowd without breaking the bank. This accessibility and flavor combination ensure that Grilled Shrimp and Sausage Foil Packets are a winning choice for any amateur home chef.

Historical Background and Cultural Significance

The origins of foil packet cooking can be traced back to the methods of ancient cooking techniques where food was wrapped in leaves or animal skins. In modern times, aluminum foil has made it possible to deliver this cooking style to a wider audience. Foil packets provide an efficient way to cook seafood, which has long been a staple for coastal communities. They encapsulate flavors and retain moisture, making them perfect for grilling or baking.

Culturally, the combination of shrimp and sausage often represents a fusion of coastal and Southern barbecue traditions. Dishes featuring shrimp are prevalent in the cuisines of Louisiana and the Gulf Coast, where the seafood bounty inspires a vibrant culinary heritage. Combining sausage with shrimp reflects the essence of comfort food, inviting gatherings that celebrate the richness of regional flavors.

Over time, this recipe has evolved, showcasing various ingredients based on local products and personal preferences. From vegetables to seasonings, we’ve seen adaptations that bring global influences into this classic combo. Each cook adds their own twist, creating a unique representation of their culinary identity while honoring tradition.

Regional variations abound, from shrimp skewers to jambalaya-inspired foil packets. Each adaptation reflects the community’s tastes and resources, whether it’s incorporating local herbs or seasonal vegetables. This practice highlights how food can serve as a canvas for creativity and expression while still maintaining its historical roots.

Ingredient Deep Dive

Shrimp play an integral role in this recipe, showcasing not only their popularity in coastal cuisines but also their nutritional benefits. Packed with protein, shrimp are low in calories and high in essential nutrients such as selenium and vitamin B12. When selecting shrimp, look for ones that are firm with a fresh ocean scent. Store them in the coldest part of the refrigerator and use them within a day or two for the best quality. If substituting, consider scallops or firm fish for a similar seafood experience.

The sausage adds a hearty depth of flavor that complements the sweetness of the shrimp. Depending on personal taste, you can choose from a variety of sausages, including andouille, chorizo, or even chicken sausage for a lighter option. Look for sausages that are free of fillers and artificially derived ingredients to enhance your dish’s quality. Store opened sausage in the fridge and use within a few days or freeze for longer shelf life.

Fresh vegetables enhance the overall flavor and texture of your foil packets. Bell peppers, zucchini, and corn are ideal choices that cook well when wrapped tightly in foil. These vegetables not only provide vibrant colors but are also packed with vitamins and fiber. When selecting vegetables, opt for those with a firm texture. Store fresh produce in the crisper drawer of your refrigerator to prolong freshness. If you’re looking to substitute, consider using broccoli or asparagus for an equally delightful crunch.

Common Mistakes to Avoid

  • Not sealing the foil packets tightly enough can lead to steam escape, resulting in dry shrimp.
  • Using frozen shrimp without thawing may lead to uneven cooking and rubbery texture.
  • Overcrowding the foil packet prevents even cooking; be sure to leave some space for heat circulation.
  • Skipping the marination step can reduce flavor; take time to marinate the shrimp and sausage properly.
  • Using low-quality sausage can overpower the dish; opt for premium ingredients for the best results.
  • Neglecting to check for doneness can result in overcooked shrimp, turning them tough; always check visually.
  • Forgetting to preheat the grill or oven can lead to longer cooking times and uneven results.
  • Not using enough seasoning can result in bland flavors; always taste and adjust as needed.
  • Cooking too quickly on high heat might char the outside without cooking the inside properly; maintain a moderate heat.
  • Failing to arrange ingredients properly can lead to uneven cooking; place denser items like sausage on the bottom.

Essential Techniques

Wrapping food in foil packets is essential to the success of this dish. Proper wrapping ensures the steam circulates, keeping the ingredients moist while they cook. To master this technique, make sure to fold the edges of the foil tightly but don’t crush it. Leave enough space for the food to expand without bursting. If made correctly, you should see a puff forming as steam builds.

Grilling shrimp and sausage requires attention to heat levels. Avoid the common pitfall of using excessive heat, which can lead to charring and dryness. Aim for a medium heat setting, providing a more controlled cooking environment. Use a grill thermometer if necessary to maintain optimal cooking conditions for even results.

Bringing the ingredients to room temperature before cooking can also greatly enhance the outcome. If shrimp are too cold, they may cook unevenly, leading to a lesser quality final product. Allowing them to sit out for about 15 minutes before grilling ensures they heat evenly, maximizing flavor as they interact with the marinade.

Pro Tips for Perfect Grilled Shrimp and Sausage Foil Packets

– Always use fresh ingredients for the best flavors and nutrients; fresh shrimp and seasonal vegetables make a significant difference in taste.
– Marinate the shrimp for at least 30 minutes before cooking, but not more than two hours to avoid over-absorption of flavors.
– Experiment with different marinades or seasoning blends, such as Cajun or Mediterranean, to add and explore various flavor profiles.
– Use heavy-duty aluminum foil to avoid tearing and ensuring a tight seal, which helps retain moisture and flavors.
– Consider adding a splash of lemon or lime juice just before sealing to enhance flavor and provide acidity that balances the richness of the sausage.
– Rotate the foil packets halfway through the cooking time to ensure even exposure to heat, resulting in uniformly cooked seafood and sausage.
– To create a stunning visual effect, layer colorful vegetables and arrange them neatly in the packets, showcasing a medley of colors.
– Pair your foil packets with a refreshing side salad or rice for a more filling meal option that complements the dish beautifully.

Variations and Adaptations

Explore regional variations by incorporating local spices or sausages unique to different culinary traditions. For instance, try using Spanish chorizo for a spiced-up version or adding Cajun seasonings to elevate the Southern appeal. Seasonal adaptations can include using zucchini and corn in the summer, while root vegetables like sweet potatoes and carrots may be more suitable during fall or winter.

If you need to accommodate dietary modifications, consider opting for turkey or vegan sausage as a substitute, appealing to those who prefer a plant-based diet. The flavor still shines, especially when combined with robust herbs and spices. Additionally, for a low-carb or keto approach, simply increase the amount of shrimp and omit starchy vegetables.

For flavor variations, you might experiment with different marinades, using teriyaki or garlic butter for distinct tastes. Texture modifications can be played with by adding cubed potatoes or using larger shrimp or lobster pieces for a luxe twist. Presentation alternatives could include plating the contents on a colorful platter, garnishing with fresh herbs, or serving with extra lemon wedges for a pop of freshness.

Serving and Presentation Guide

When serving Grilled Shrimp and Sausage Foil Packets, consider using rustic wooden boards or colorful platters to create an inviting display. Plating techniques can enhance presentation; for instance, you might layer the shrimp and sausage over a bed of rice or grains. Garnishing with fresh herbs such as parsley or cilantro can elevate the visual appeal while providing an aromatic boost.

Accompany your meal with traditional sides such as crusty bread or a light salad drizzled with vinaigrette. For a modern touch, you might include dipping sauces like a spicy aioli or chimichurri to complement the flavors of shrimp and sausage. Temperature plays a crucial role; serve immediately while hot for the best experience.

Finally, consider portion control by preparing individual foil packets, allowing guests to take only what they will enjoy. This not only keeps servings organized but also adds to the fun of dining al fresco or during casual gatherings.

Wine and Beverage Pairing

For wine pairings, a refreshing Sauvignon Blanc or a zesty Pinot Grigio enhances the dish’s seafood elements wonderfully, providing a bright contrast to the richness of the sausage. For red wine lovers, a light-bodied Grenache or Pinot Noir can also complement the flavors without overpowering them.

When looking for non-alcoholic alternatives, a sparkling water with citrus slices offers a light, refreshing accompaniment that mirrors the flavors present in the dish. If coffee or tea is more your style, consider herbal varieties, such as chamomile or lemon verbena, which can round out the meal beautifully. Temperature is key here; serve wines chilled and non-alcoholic drinks cold to offset the dish’s warmth.

In more casual settings, consider serving this delightful dish with summer cocktails or iced teas featuring fresh fruits, reflecting the lightness and vibrancy of grilled flavors.

Storage and Shelf Life

To store leftovers, transfer them to an airtight container and refrigerate them within two hours of cooking. Foil packets can keep well in the fridge for 2-3 days. If you wish to prolong their life, consider freezing the packets to maintain freshness—just ensure they are well-wrapped to prevent freezer burn, which can last for up to 2 months.

Always check for signs of spoilage before consuming stored delicacies. If the shrimp smells off or the texture becomes slimy, it’s best to discard it. Reheating should be done gently; consider using an oven or microwave until heated through.

When reheating, ensure the dish reaches an internal temperature of 165°F to ensure safety. Foil packets can easily be put back on the grill or into a warm oven, allowing them to steam gently until the contents are hot once more.

Make Ahead Strategies

To make this dish ahead of time, you can prep all ingredients and assemble the foil packets a few hours in advance. Keep them in the refrigerator until you’re ready to cook, ensuring the shrimp remains fresh and flavorful. Optionally, marinate shrimp and sausage overnight to develop even richer flavors.

When preparing packets, consider laying everything flat on a baking sheet in the cooler part of your fridge to keep contents stable. Before reheating, allow the packets to come to room temperature for optimal cooking results, as placing cold food directly on heat can lead to uneven cooking and texture concerns.

Reheating leftovers is straightforward; for the best taste, add fresh elements like a sprinkle of herbs or a squeeze of lemon right before serving. This not only revitalizes the dish but also enhances its overall flavor, providing that fresh, bright taste.

Scaling Instructions

When scaling this recipe, consider how many servings you need. Halving the recipe is easy—just adjust the quantities of shrimp, sausage, and vegetables accordingly while maintaining the same marinade ratios. If you’re doubling or tripling, ensure you have enough foil and baking space available.

For equipment adjustments when increasing the recipe, use multiple baking sheets or larger grill surfaces to accommodate all packets evenly. Timing may need to be adjusted as well; providing ample space and ensuring all packets are exposed to heat may result in faster cook times.

Additionally, monitor the internal temperature for larger batches; they may cook at different rates. Consider making one or two test packets to gauge cooking times and adapt as necessary.

Nutritional Deep Dive

A serving of Grilled Shrimp and Sausage Foil Packets offers a well-rounded meal with a favorable macro breakdown. Each serving is likely to contain a healthy amount of protein, thanks to shrimp and sausage, providing energy and supporting muscle repair. Additionally, the inclusion of vegetables contributes valuable fiber and essential vitamins that bolster overall well-being.

Micronutrient analysis highlights shrimp as an excellent source of selenium and vitamin B12, which are crucial for DNA synthesis and nerve health, while vegetables provide an assortment of important nutrients such as vitamin C and potassium. This balance supports immune function and maintains overall health.

The health benefits extend to improved cardiovascular health, as shrimp supply heart-healthy omega-3 fatty acids. Furthermore, the presence of colorful veggies enhances antioxidant intake, making this a nutrient-conscious choice.

Always consider dietary patterns, especially for those with specific health needs. Adjusting sausage selections or portion sizes based on individual requirements will contribute to overall nutritional management and healthy eating habits.

Dietary Adaptations

For those adhering to a gluten-free lifestyle, ensure that all ingredient labels read gluten-free, particularly with sauces or marinades. Choosing gluten-free sausages or avoiding them altogether can keep this dish suitable for your needs.

Vegetarians or vegans may swap shrimp and sausage for hearty replacements such as chickpeas or plant-based sausages. Combining these proteins with the same seasonings rewards you with satisfying alternatives that are still bursting with flavor.

Low-carb and keto enthusiasts can embrace more shrimp while substituting starchy vegetables with options like cauliflower or zucchini noodles for a complete meal mirroring the textures and flavors of the original recipe.

Paleo followers can stick to whole food guidelines by utilizing only fresh meats and vegetables, ensuring zero processed items, which naturally aligns this dish into their dietary preferences.

Finally, low-FODMAP dieters may choose lower-garlic marinades or omit garlic altogether, adjusting seasoning to maintain flavor without causing discomfort.

Troubleshooting Guide

If you encounter texture issues such as rubbery shrimp, this often indicates overcooking; ensure monitoring cooking time closely, as shrimp only need a few minutes to become tender and juicy.

Flavor balance discrepancies can arise from either too little seasoning or not marinating adequately; always taste as you go and adjust seasonings for personal preference.

In cases of temperature concerns, using a probe thermometer can help you reach the perfect internal temperature of shrimp (145°F) without guesswork.

Equipment challenges, like inadequate grilling space, can be alleviated by adjusting packet size or cooking in manageable batches to ensure even cooking across all packets.

Ingredient substitutions that alter flavor must be approached cautiously. If using a different sausage, be mindful of the spice intensity to ensure it complements rather than overwhelms the shrimp.

Timing concerns can often be resolved by preheating the grilling surface and properly spacing packets during cooking for evenly distributed heat, ensuring consistent quality throughout.

Recipe Success Stories

Community feedback around Grilled Shrimp and Sausage Foil Packets has been overwhelmingly positive, with many homing in on the versatility as a key success factor. Adaptations shared among home cooks highlight how everyone can personalize their packets based on season and available produce, helping them feel connected to the recipe.

Variation successes include introducing different spice blends from various cuisines, showing great examples of how this dish can seamlessly fit into diverse culinary traditions while still being rooted in its original appeal.

Reader suggestions often center around optimizing steps or substituting for dietary needs. These shared experiences create a communal cooking bond, where inspiration builds from one cook to another.

Photography tips shared in comments emphasize capturing the vibrant colors and steam-emitting presentation, encouraging others to share their results on social platforms and celebrate their cooking journeys.

Overall, the ease of preparation and positive community confirmation reinforces the recipe’s creativity and adaptability, encouraging more individuals to try their hand at this delightful dish.

Frequently Asked Questions

Can I use frozen shrimp for this recipe?

Yes, but it’s essential to thaw the shrimp thoroughly for even cooking. Frozen shrimp can become rubbery if cooked directly from frozen. It’s best to purchase shrimp that is already peeled and deveined for ease of preparation.

How can I make this dish more spicy?

To add heat, consider using spicy sausage or include red pepper flakes, jalapeños, or hot sauce in your marinade. Adjusting these elements will enhance the flavor profile while providing additional kick.

Can I cook these packets in the oven?

Absolutely! Preheat your oven to 400°F (200°C) and place the foil packets on a baking sheet. Bake for about 20-25 minutes or until the shrimp are pink and opaque.

What vegetables work best in this recipe?

You can use a variety of vegetables, such as bell peppers, zucchini, corn, or even cherry tomatoes. The key is to choose vegetables that cook well together and offer a balance of textures and flavors.

Can I prepare these packets ahead of time?

Yes! You can assemble the foil packets a few hours in advance and keep them in the refrigerator until ready to cook. This makes it an excellent option for meal prep or quick dinner solutions.

What’s the best way to store leftovers?

Transfer any leftovers to an airtight container and refrigerate. They will keep well for up to 3 days. Just be sure to check for any spoilage before reheating.

Can I use other types of seafood?

Certainly! Feel free to substitute shrimp with scallops, fish fillets, or even lobster for a different seafood experience that’s still flavorful and satisfying.

How do I know when the shrimp are done?

The shrimp are cooked when they turn pink and opaque. An internal temperature of 145°F is recommended to ensure they are thoroughly cooked without being overdone.

Is this recipe suitable for kids?

Yes, it’s both nutritious and customizable, making it kid-friendly. You can adjust the seasoning to keep it mild or include favorite vegetables to encourage healthy eating.

What can I serve with these foil packets?

Pairing this dish with a fresh salad, crusty bread, or a serving of rice or quinoa can create a more rounded meal. For a lighter option, consider serving it alongside grilled vegetables or a light dressing.

Additional Resources

If you enjoyed Grilled Shrimp and Sausage Foil Packets, be sure to explore our related recipes featuring seafood and grilling techniques. Feel free to browse our collection of summer barbecue recipes, perfect for upcoming gatherings. Additionally, check out our kitchen technique guides to master everything from grilling to foil wrapping effectively. Seasoning options can also expand your culinary repertoire, so explore spice blends that can lift your dishes to new heights.

Join the Conversation

We love hearing from our readers! Share your experiences with Grilled Shrimp and Sausage Foil Packets on social media by tagging us in your cooking adventures. We encourage you to post your version of this delightful recipe, along with any adaptations you made to personalize it further. If you have photography tips or suggestions, drop them in the comments; we’re always looking to improve our recipe presentations and community engagement.

The Recipe

Grilled Shrimp and Sausage Foil Packets

Serves: 4

Prep Time: 15 mins

Cook Time: 20 mins

Total Time: 35 mins

Kitchen Equipment Needed

  • Aluminum foil
  • Grill or oven
  • Baking sheet (if using the oven)
  • Mixing bowl
  • Measuring spoons

Ingredients

  • 1 pound large shrimp, peeled and deveined
  • 1 pound smoked sausage, sliced
  • 2 cups assorted vegetables (bell peppers, zucchini, corn)
  • 3 tablespoons olive oil
  • 2 teaspoons minced garlic
  • 1 teaspoon old bay seasoning
  • Salt and pepper to taste

Directions

  1. Preheat the grill to medium-high heat or preheat the oven to 400°F (200°C).
  2. In a mixing bowl, combine shrimp, sausage, and vegetables.
  3. Drizzle olive oil over the mixture; add garlic, old bay seasoning, salt, and pepper. Toss to coat evenly.
  4. Cut pieces of aluminum foil large enough to hold the mixture. Place equal portions of the shrimp and sausage mixture in the center of each piece of foil.
  5. Fold the edges of the foil over to seal tightly, creating a packet.
  6. Place the foil packets on the grill or in the oven and cook for 20-25 minutes, turning halfway through if grilling.
  7. Carefully open the packets, avoiding steam, and serve the contents warm.

Recipe Notes

  • Feel free to experiment with different seasoning blends or vegetables based on seasonal availability.
  • If preferred, you can substitute sausage with a meat of your choice or use plant-based options.
  • These packets can be assembled ahead of time for convenient meal prep.

Irresistible Meat Lovers Pizza Tacos Recipe for Ultimate Flavor

Meat Lovers Pizza Tacos: A Flavor Explosion

⚖️
Difficulty
Easy

⏲️
Prep Time
15 mins

🕒
Cook Time
20 mins

⏱️
Total Time
35 mins

🍽️
Servings
4 servings

Indulge in the perfect blend of two culinary favorites with Meat Lovers Pizza Tacos. This unique dish marries the zest of savory pizza flavors with the handheld convenience of tacos, creating a delightful and satisfying meal that will please meat lovers and foodies alike. Picture warm, soft tortillas wrapped around the deliciousness of pepperoni, sausage, and crispy bacon, all melting together with gooey mozzarella cheese and fresh toppings.

Not only are these tacos easy to make, but they also offer a burst of flavors and textures that will leave your taste buds dancing. Imagine biting into a taco filled to the brim with perfectly seasoned meat, the salty crunch of bacon, and the comforting warmth of melted cheese. This recipe is perfect for gatherings or casual dinners, giving everyone the chance to enjoy an extraordinary fusion dish that feels both festive and comforting.

Quick Recipe Highlights

  • Flavor Profile: A delightful union of savory meats, tangy pizza sauce, and melty cheese creates a taste sensation.
  • Texture: Expect a satisfying crunch from the taco shell, combined with the tenderness of the cooked meats and the creaminess of the cheese.
  • Aroma: The rich scents of Italian spices, sizzling bacon, and freshly warmed tortillas fill the air, making it almost irresistible.
  • Visual Appeal: Vibrant colors from the meats and toppings make these tacos visually stunning on any plate.
  • Skill Level Needed: This recipe is easy enough for beginners, while still allowing experienced cooks to get creative.
  • Special Equipment: You’ll need a skillet, a spatula, and basic cooking utensils.

Recipe Overview

  • Difficulty Level: This is an easy recipe that combines familiar cooking techniques, making it accessible for all home cooks.
  • Category: Ideal for casual family dinners, game days, or as a fun party food option.
  • Cuisine: This dish reflects the beloved influences of both Mexican and Italian cuisines, melding their essences into one irresistible taco.
  • Cost: The ingredients are generally affordable, making this a budget-friendly meal option.
  • Season: Perfect for any season, but especially enjoyable during warm months or festive celebrations.
  • Occasion: Great for gatherings, informal parties, or a family night in.

Why You’ll Love This Recipe

There’s something irresistible about a good Meat Lovers Pizza Taco. Imagine sinking your teeth into a taco bursting with the rich flavors of pepperoni, sausage, and crispy bacon – for any meat lover, this is a dream come true. The combination of the juicy meats and warm, melty cheese paired with your favorite sauce results in a flavor explosion with every bite. The crunch of the taco shell adds a delightful contrast to the tender insides, making this recipe a well-rounded experience.

Preparation for Meat Lovers Pizza Tacos is a breeze, making this recipe a go-to for busy weeknights or last-minute gatherings. The effort required is minimal, and you can easily customize the ingredients to suit personal tastes or what you have on hand. This flexibility can make this dish not just a meal, but a creative culinary outlet.

From a nutritional standpoint, this recipe is packed with protein primarily from the meats and cheese, providing sustenance while still being indulgent. You can even sneak in some veggies by adding toppings like bell peppers or spinach, making it even healthier without sacrificing flavor.

This dish is also perfect for social occasions. Whether you’re having friends over for game night or hosting a casual family dinner, Meat Lovers Pizza Tacos are a sure hit. With their fun presentation and ability to be served buffet-style, everyone can create their own customized taco, making the experience interactive and engaging.

Finally, the cost-effectiveness of this recipe is commendable. It utilizes common ingredients that won’t break the bank, making it accessible for everyone looking to enjoy a delicious meal without stress. With Meat Lovers Pizza Tacos, you can serve up a mean feast while keeping your budget in check.

Historical Background and Cultural Significance

The fusion of pizza and tacos has its roots in the global love for both Italian and Mexican cuisines, each representing distinct culinary traditions. Both dishes have evolved significantly over time, with pizza originating in Naples, Italy, and tacos being a traditionally Mexican food staple. Mixing these cuisines speaks to the way food evolves and adapts to different cultures and preferences.

Culturally, pizza and tacos are often seen as comfort foods, enjoyed in casual settings and at celebrations. They bring people together, whether it’s over a family dinner or casual gatherings with friends. This recipe brings forth the societal joy of sharing a delightful dish while also allowing individuals to craft their ideal taco experience.

The evolution of the Meat Lovers Pizza Taco demonstrates culinary innovation. Chefs and home cooks alike are continuously blending flavors from different cuisines to create something fresh and exciting. This dish encapsulates the spirit of experimentation in the kitchen where creativity knows no bounds.

Regional variations of both tacos and pizza can fuel the imagination of cooks. While traditional pizza toppings may vary from region to region in Italy, tacos might be filled with local proteins and salsas in Mexico. The Meat Lovers Pizza Taco can be seen as a popularized version that showcases the bold flavors commonly enjoyed worldwide while also inviting adaptations based on personal preferences.

Ingredient Deep Dive

– Ground Beef: A staple in both Mexican and Italian cuisine, beef adds a rich flavor and hearty texture. It’s packed with protein, making it a great choice for those looking to build muscle or maintain energy levels. Look for lean cuts for a healthier option, and store it in the fridge for up to 2 days pre-cooking.

– Pepperoni: This spicy, flavorful ingredient has become synonymous with pizza. Traditionally made from cured pork and beef, it adds a delightful kick. Not only does pepperoni pack protein, but it also brings a familiar taste that enhances the overall taco experience. For freshness, keep it refrigerated and use it within a week of opening.

– Mozzarella Cheese: This cheese is celebrated for its creamy texture and mild flavor. A great source of calcium and protein, it melts beautifully, adding decadence to your dish. Always opt for fresh mozzarella when possible, and store it in the fridge to maintain its quality.

– Taco Shells: The foundation of the taco, shells can range from soft to crunchy. While corn tortillas are a common choice, flour tortillas offer a soft and chewy alternative. They’re generally inexpensive and can last in the pantry for several months when properly sealed.

Common Mistakes to Avoid

  • Overfilling tacos can cause them to break. Use a balanced amount of filling.
  • Using cold ingredients can prevent proper melting. Always allow cheese and meats to reach room temperature before cooking.
  • Not seasoning meat can lead to bland tacos. Be generous with spices and flavors.
  • Choosing the wrong tortilla type can affect texture; consider using fresh, quality tortillas for the best result.
  • Not properly cooking the meat can pose a health hazard; ensure appropriate internal temperatures are reached.
  • Waiting too long to serve can lead to soggy tacos; assemble just before serving.
  • Skipping garnishes may dull the flavors; use fresh toppings for contrast.
  • Not tasting along the way can lead to missed opportunities for better flavor; always adjust to your preference.

Essential Techniques

Mastering the art of cooking meat is crucial for creating flavorful tacos. It’s important to ground the meat evenly and season it while cooking to bring out the maximum flavor. Use a meat thermometer to ensure it reaches appropriate temperatures for safety and taste.

Properly warming tortillas is also essential – it enhances their pliability and taste. Heat them in a skillet for just a few seconds on each side until warm. This simple technique elevates the dining experience.

Pro Tips for Perfect Meat Lovers Pizza Tacos

– Always pre-season your meat a few hours ahead for deeper flavor penetration.
– Use a combination of cheeses for varying textures and flavors.
– Crisp up the taco shells in the oven for an extra crunch.
– Experiment with homemade sauce to elevate your pizza flavor.
– Use fresh herbs and quality toppings for a burst of freshness.
– Don’t be afraid to diversify your protein; try chicken or turkey!
– Opt for a light drizzle of balsamic reduction for a gourmet touch.
– Consider adding a squeeze of lime just before serving for brightness.

Variations and Adaptations

– Regional variations can include different types of meats such as chorizo or even seafood for coastal twists.
– Seasonal adaptations may dictate fresh vegetables like avocados or summer squash during the warmer months.
– Dietary modifications can be simple; opt for gluten-free tortillas and dairy-free cheese if needed.
– Flavor variations can range from spicy salsas to sweet BBQ sauce, transforming the flavor profile.
– Texture modifications can be achieved with crispy fried onions in place of raw ones for additional depth.
– Presentation alternatives like serving ingredients deconstructed on a platter can enhance the dining experience.

Serving and Presentation Guide

To plate your Meat Lovers Pizza Tacos, use a colorful platter that highlights the vibrant ingredients. Garnishing with fresh herbs such as cilantro or parsley adds a touch of color. For larger gatherings, consider a taco bar where guests can customize their creations, fostering interaction and fun.

Serve with complementary side dishes like a fresh salad or roasted vegetables to round out the meal. For temperature considerations, serve while the fillings are warm and tortillas are fresh to create the best experience.

Wine and Beverage Pairing

For wine pairings, consider a medium-bodied red like a Merlot that complements the rich flavors of meats. Alternatively, an IPA can offer a refreshing contrast to the savory taco fillings. For non-alcoholic alternatives, a sparkling water with lime is refreshing and keeps the palate clean.

If coffee or tea is desired, a bold black coffee serves as a satisfying finish following the meal, especially if enjoyed as a late-night treat.

Storage and Shelf Life

Store leftover Meat Lovers Pizza Tacos in an airtight container in the refrigerator for up to three days. Properly store all components separately to maintain texture, especially the taco shells to prevent them from becoming soggy. Signs of spoilage to monitor include discoloration, off-smells, or a slimy texture.

When reheating, use an oven to restore some crispness, and aim for a thorough warm-up in the center by checking with a thermometer.

Make Ahead Strategies

To save time, prepare your ingredients in advance. Season and cook the meat a day before, allowing it to marinate in flavors overnight. Keep it stored in the fridge, and warm it up before assembling your tacos. The toppings can also be prepped ahead of time to quicken assembly.

For optimal quality, avoid assembling the tacos until just before serving to keep the tortillas from getting soggy. If you want to add freshness, consider slicing avocados or preparing guacamole just prior to serving to include bright flavors.

Scaling Instructions

To halve the recipe, simply cut all ingredients and filling amounts in half while keeping cooking times similar. Doubling or tripling will require larger pans and possibly an adjustment to cooking times, as bulk cooking may take longer.

Be mindful of space in your refrigerator; ensure everything remains stored properly to maintain freshness. Scale slowly, measuring carefully, to keep flavors balanced.

Nutritional Deep Dive

When consuming Meat Lovers Pizza Tacos, it’s important to consider the macro breakdown, which primarily consists of protein from the meats and cheese, carbohydrates from the shells, and a small amount of fats mainly from cheese and addition of oils.

Micronutrient analysis shows a good source of vitamin B12 and iron due to the beef and sausage. Incorporating vegetables as toppings can add dietary fiber and vitamins.

Weight management tips include being mindful of portion sizes, especially if aiming to balance indulgence with nutritional goals.

Dietary Adaptations

– Gluten-free options can include corn tortillas, ensuring no cross-contamination.
– For dairy-free diets, consider using plant-based alternatives for cheese.
– Vegan adaptations can utilize lentils or mushrooms as substitutes for meat while ensuring flavor profiles are maintained.
– Low-carb enthusiasts may opt for lettuce wraps instead of traditional shells.
– Experimenting with paleo-friendly ingredients such as homemade almond flour tortillas can create a unique twist.
– The ketogenic diet can easily adapt by reducing the number of carbs in fillings.

Troubleshooting Guide

If tacos come out too dry, consider adding more sauce or using juicier meat cuts. For flavor balance, always taste and adjust seasonings while cooking, keeping a balance in spices and herbs.

Temperature problems could arise if ingredients weren’t warm enough; always preheat meats and toppings for the best eating experience.

If using alternative ingredients leads to texture discrepancies, think about loading more fresh toppings or employing a sauce to maintain moisture.

Timing concerns can arise based on the variability of cooking methods; keep an eye on each component to ensure all parts come together harmoniously.

Recipe Success Stories

Community feedback has been overwhelmingly positive. Many readers rave about making the recipe their own by incorporating different meats and sauces. Successes vary from families enjoying taco night to friends gathering over a fun dinner idea.

Adaptation stories include experimenting with buffalo chicken instead of traditional meats, appealing to a wider range of flavor preferences. Some have reported stunning photo successes on social media by layering ingredients artistically.

Reader suggestions emphasize the joy of entertaining with these tacos; they make superb finger foods for gatherings and parties, igniting creativity with each serving.

Frequently Asked Questions

Can I make these tacos ahead of time?

Yes, you can prepare the meat and toppings in advance. Just store them separately until ready to assemble, which helps keep the tortillas from becoming soggy.

What kind of cheese is best for tacos?

Mozzarella is excellent for a classic pizza flavor, but you can also experiment with cheddar, pepper jack, or a blend for varied tastes.

Are there vegetarian options for this recipe?

Absolutely! You can substitute meat with lentils, mushrooms, or cooked quinoa to create a hearty vegetarian filling.

Can I freeze these tacos?

While assembled tacos may not freeze well, you can freeze the cooked meat and toppings separately. Just reheat and assemble when you’re ready to eat.

What toppings do you recommend?

Fresh toppings like avocado, diced tomatoes, onions, lettuce, or even jalapeños will enhance the flavor and texture balance of the tacos!

How do I make the taco shells crispy?

Lightly bake soft tortillas in the oven until they are golden brown for a delicious crunch before assembling your tacos.

What sauces can I use?

Pizza sauce, ranch dressing, BBQ sauce, or hot sauce can elevate the flavor. Choose based on your personal preference!

Can I adapt this recipe for a low-carb diet?

Yes! Simply replace traditional taco shells with lettuce wraps to enjoy the flavors while staying in your carb range.

How can I make this dish spicier?

Adding jalapeños, hot sauce, or even incorporating spicy sausage will kick the heat up a notch to satisfy those looking for a spicy taco experience!

What other meats can I use?

Feel free to mix it up with chicken, turkey, or even plant-based alternatives such as tempeh for a creative spin on the dish.

Additional Resources

For those looking for related recipes, explore different taco types like fish tacos or breakfast tacos that also bring exciting flavors to the table. Technique guides on taco construction and meat preparation can further enhance your culinary skills.

Ingredient information will provide suggestions on sourcing the best cuts of meat, spices, and toppings while equipment recommendations can help streamline your processes in the kitchen.

Don’t forget to experiment with seasonal variations that can elevate your dishes year-round! Exploring new ingredients and blends for different occasions keeps things fresh and exciting.

Join the Conversation

We’d love to see your take on Meat Lovers Pizza Tacos! Share your photos on social media and engage with our community. Your adaptations and story additions could inspire others to try out this fun recipe.

Join our mailing list for exclusive updates and follow our page for more exciting recipes that push culinary boundaries. Together, let’s celebrate the joy of cooking and eating delicious food.

The Recipe

Meat Lovers Pizza Tacos

Serves: 4 servings

Prep Time: 15 mins

Cook Time: 20 mins

Total Time: 35 mins

Kitchen Equipment Needed

  • Skillet
  • Spatula
  • Tongs
  • Knife
  • Cutting board

Ingredients

  • 1 pound ground beef
  • 1 cup pepperoni slices
  • 1 cup crumbled sausage
  • 1 cup shredded mozzarella cheese
  • 1 cup taco shells
  • 1/2 cup pizza sauce
  • 1/4 cup chopped onions (optional)
  • 1/4 cup chopped cilantro (for garnish)

Directions

  1. In a skillet over medium heat, cook the ground beef until fully browned.
  2. Stir in the pepperoni and sausage, allowing them to heat through.
  3. Add in the pizza sauce and mix well to coat the meat mixture.
  4. Remove from heat and stir in the shredded mozzarella until melted.
  5. Warm the taco shells according to package instructions.
  6. Fill each taco shell with the meat and cheese mixture.
  7. Top with optional onions and garnish with chopped cilantro before serving.

Recipe Notes

  • Feel free to customize with additional toppings such as jalapeños or olives.
  • For a healthier version, consider using turkey or chicken instead of beef.
  • Leftover meat can be stored in the fridge for up to 3 days.

Delicious Crab Fettuccine Alfredo: A Creamy Seafood Delight

Crab Fettuccine Alfredo: A Creamy Seafood Delight

⚖️
Difficulty
Medium

⏲️
Prep Time
15 mins

🕒
Cook Time
20 mins

⏱️
Total Time
35 mins

🍽️
Servings
4 servings

Crab Fettuccine Alfredo is a decadent twist on the classic Italian pasta dish. The creamy Alfredo sauce, rich with Parmesan and butter, perfectly complements the sweet, succulent crab meat. Each bite is an indulgent experience, enhanced by the convenience of making it at home. The dish exudes warmth and comfort, making it an ideal choice for cozy dinners or special occasions. Whether you’re a seasoned cook or a novice, this recipe will elevate your culinary repertoire.

This delightful pasta dish not only satisfies the palate but also engages the senses. Imagine twirling strands of fettuccine around your fork, enveloped in a creamy sauce that clings to each piece. The aroma of garlic and herbs wafts through the kitchen as the dish simmers, hinting at the flavors to come. Garnish this scrumptious creation with fresh herbs for a pop of color, and serve with a crisp salad and a glass of white wine for an unforgettable dining experience.

Quick Recipe Highlights

  • Flavor Profile: The union of sweet crab and savory Parmesan creates a rich, buttery flavor that is truly irresistible.
  • Texture: The creamy sauce coats the fettuccine, while the crab adds a tender bite that balances the dish beautifully.
  • Aroma: Expect a delightful combination of fresh garlic, fragrant herbs, and creamy cheese, inviting you to dig in.
  • Visual Appeal: The dish boasts a stunning contrast of white creamy sauce against the bright red crab, elegantly plated for an impressive presentation.
  • Skill Level Needed: This is a medium-difficulty recipe that requires basic cooking skills but can be mastered with practice.
  • Special Equipment: A large pot for boiling pasta, a skillet for the sauce, and a pasta fork for serving are essential.

Recipe Overview

  • Difficulty Level: Medium, this recipe introduces important techniques like making a creamy sauce and integrating delicate seafood.
  • Category: Main Course, it’s perfect for a hearty meal that can impress guests and family alike.
  • Cuisine: Italian-inspired, featuring rich flavors and classic ingredients that characterize Italian cuisine.
  • Cost: Moderate, with crab being a premium ingredient, but other components are affordable and easily accessible.
  • Season: This dish is perfect for any season, representing warmth in winter and indulgence in summer gatherings.
  • Occasion: Ideal for date nights, anniversaries, or holiday gatherings, it creates a memorable dining experience.

Why You’ll Love This Recipe

Crab Fettuccine Alfredo is simply a showstopper, both in taste and presentation. The first forkful delivers a rich explosion of flavors that highlight the delicate sweetness of the crab against a creamy backdrop. Each component of this dish is meant to complement the other, making it a delightful harmony of taste and texture that you won’t forget.

Convenience is key in today’s busy world, and this recipe doesn’t disappoint. With a prep time of just 15 minutes and a cook time of 20 minutes, you can whip up this gourmet meal without spending hours in the kitchen. It’s perfect for those who want to enjoy restaurant-quality meals at home without the fuss.

From a nutritional standpoint, crab is an excellent source of lean protein packed with essential vitamins and minerals. The use of fresh, quality ingredients means you’re not only treating your palate but also nourishing your body. Enjoying this dish means you’re choosing a meal that’s as good for your taste buds as it is for your health.

Hosting dinner parties? This recipe offers great social and entertaining value. Impress your guests with a dish that feels luxurious but is surprisingly easy to prepare. Sharing this crab fettuccine alfredo is not just about the food; it’s an experience that brings people together around the table, sparking joy and conversation.

Lastly, while fresh crab can be pricey, this recipe is cost-effective considering the servings it provides. With a robust sauce and hearty pasta, a little seafood goes a long way. This ensures that you can savor a luxurious dish without breaking the bank, making it accessible for various occasions.

Historical Background and Cultural Significance

The roots of Fettuccine Alfredo can be traced back to early 20th century Rome. Originally crafted by Alfredo di Lelio, the dish was designed to appeal to the palate of his pregnant wife, incorporating creamy butter and cheese to create a rich pasta dish. Over the decades, its popularity skyrocketed, especially in the United States, where variations began to flourish.

In many Italian households, pasta is more than just a meal; it’s a tradition steeped in family and community. Fettuccine Alfredo holds a special place in Italian cuisine, symbolizing comfort and togetherness. By adding crab to the mix, this dish celebrates the versatility of Italian flavors, showcasing how regional ingredients can elevate timeless recipes.

As time marched on, the evolution of Crab Fettuccine Alfredo has seen chefs become more creative, experimenting with spices and additional seafood components. This adaptation pays homage to local flavors, allowing the dish to thrive in coastal regions while remaining a beloved staple across the globe.

Regional variations abound, with many adding elements like sun-dried tomatoes or herbs to customize the dish further. The basic concept remains, underscoring the universal appeal of combining pasta and cream with delightful seafood— a celebration of flavors that transcends cultural boundaries.

Ingredient Deep Dive

Crab is the star of this dish, and its cultural significance is steeped in coastal traditions. While blue crab is often preferred for its sweetness, other varieties like Dungeness or king crab can also work beautifully. Nutritionally, crab is low in fat and high in omega-3 fatty acids, making it a heart-healthy choice. When selecting crab meat, look for fresh, lump and pasteurized varieties for the best flavor, and store it in the coldest part of your refrigerator.

Fettuccine, the pasta of choice for this recipe, plays a crucial role in holding onto the sauce. Originating from the Lazio region of Italy, this flat noodle is traditionally made from egg and flour, providing a rich, velvety texture. For the best taste, choose fresh pasta if available, and store it in a cool, dry place. If you’re out of fettuccine, substitute with tagliatelle or linguine for a similar taste.

The Alfredo sauce is composed of butter, garlic, heavy cream, and Parmesan cheese. Butter adds creaminess; garlic infuses flavor, while heavy cream rounds it all out to a luscious finish. Nutty, aged Parmesan brings depth to the sauce, elevating the overall dish. Always opt for fresh, high-quality ingredients to maximize flavor, and store leftovers properly to maintain taste.

Finally, don’t forget seasonings like salt, pepper, and fresh herbs, which can profoundly impact the overall flavor. Fresh herbs bring a burst of flavor and color, adding complexity to a seemingly simple dish. Consider using parsley or chives for brightness and freshness—these add a lovely finishing touch that enhances the dish visually and gustatorily.

Common Mistakes to Avoid

  • Overcooking the pasta: Cook fettuccine until al dente for the best texture—this prevents the pasta from becoming mushy and losing its bite.
  • Using low-quality crab: Fresh, lump crab adds sweetness and texture; opting for imitation crab can ruin the dish’s authenticity and flavor.
  • Skipping the seasoning: Don’t forget to season at every stage—season the pasta water, sauce, and final dish to enhance all flavors.
  • Failing to reserve pasta water: Always save a cup of pasta cooking water to adjust the sauce’s consistency if it becomes too thick.
  • Adding cold cream directly to hot butter: Gradually warm the cream before combining with butter to avoid curdling and ensure a creamy texture.
  • Rushing the sauce: Allow the sauce to simmer gently to marry the flavors thoroughly; quick cooking often leads to a bland result.
  • Not garnishing: A sprinkle of fresh herbs or extra cheese elevates presentation and enhances flavor—don’t skip this vital step.
  • Ignoring storage guidelines: Leftovers should be stored properly to avoid spoilage; keep them refrigerated and consume within 2-3 days.

Essential Techniques

Making a **creamy sauce** is critical for Crab Fettuccine Alfredo. Start by melting butter and slowly whisking in the cream. The key is to maintain a gentle heat and stir continuously to prevent separation. Add cheese gradually, allowing it to melt into the sauce for that perfect, velvety texture. Watch for visual cues: when the sauce coats the back of a spoon, it’s ready.

Cooking **pasta perfectly** is paramount. Bring a large pot of balanced, salted water to a rolling boil. Add the fettuccine and stir immediately to prevent sticking. Taste for doneness a minute before the package instructions say; it should be al dente. Once perfect, reserve some pasta cooking water before draining, as it helps to adjust your sauce’s consistency and enhance the flavors.

Pro Tips for Perfect Crab Fettuccine Alfredo

Fresh ingredients are crucial for this dish, so always opt for premium crab meat and fresh pasta if possible. This decision dramatically influences taste and texture, elevating the dish’s overall quality.

Monitor the sauce closely and adjust if it thickens too much by adding reserved pasta water. A well-emulsified sauce is key to a perfect crab fettuccine dish, ensuring a creamy texture without clumps.

When cooking garlic, be mindful not to burn it; a gentle sauté releases its aroma without bitterness. Add garlic to the butter before the cream to infuse that beautiful flavor throughout the sauce.

Garnishing with fresh herbs adds brightness and visual appeal, transforming presentation from ordinary to extraordinary. Finish with a sprinkle of freshly grated Parmesan for added flavor.

Allow the crab to warm through gently; overcooking can result in a rubbery texture. Combine with the sauce just before serving for optimal flavor and tenderness.

Consider complementing the dish with a side salad or garlic bread to balance the richness of the Alfredo sauce, creating a well-rounded meal.

Finally, experiment with different wines to find the best pairing. A crisp Chardonnay works wonders with crab dishes, enhancing the overall dining experience.

Variations and Adaptations

Consider making **regional variations** by incorporating local seafood or herbs. Lobster or shrimp can be beautiful substitutes, adding their unique flavors while maintaining that elegant style. Explore seasonal adaptations by utilizing spring vegetables like asparagus or peas, introducing freshness to the dish.

**Dietary modifications** are also easy to incorporate. To make the dish gluten-free, substitute the fettuccine with a gluten-free pasta variety; similarly, a dairy-free Alfredo sauce can be created using coconut milk or cashew cream.

For a more flavorful profile, experiment with spices such as cayenne or red pepper flakes; this adds a delightful kick. Those looking for a different texture can add cooked spinach or mushrooms for enhanced earthiness.

For a **presentation alternative**, consider serving in individual ramekins topped with breadcrumbs and broiled for an enticing crispy finish that contrasts the creamy sauce.

Serving and Presentation Guide

For an extraordinary plating, twirl the fettuccine into nests on each plate, allowing the sauce to cascade artistically around the sides. Consider adding a sprinkle of freshly cracked black pepper for a touch of elegance and an aromatic dimension.

Garnish with finely chopped herbs such as parsley or chives, adding a burst of color and freshness. Optionally, a light drizzle of extra virgin olive oil can heighten the flavors.

Accompany the dish with traditional garlic bread or a light green salad, adding a refreshing crunch to your plated meal. An Italian-inspired salad with mixed greens and a tangy vinaigrette complements the richness of the Alfredo.

Be mindful of serving temperature; the dish is best enjoyed hot. If reserving portions, keep them warm until serving to maintain flavor and texture integrity.

Portion control is essential, particularly with rich dishes like Crab Fettuccine Alfredo; modest servings are often more satisfying.

Wine and Beverage Pairing

Pair your Crab Fettuccine Alfredo with an **oaked Chardonnay** to bring out the creamy texture of the sauce. This combination enhances the richness of the dish while refreshing the palate. For a lighter choice, a Sauvignon Blanc offers crisp acidity that perfectly balances the flavors.

For non-alcoholic alternatives, consider pairing with a sparkling water infused with lemon or lime to cleanse the palate between bites. Alternatively, an herbal iced tea can provide a refreshing complement without overwhelming the dish’s flavors.

If coffee or tea fits into your dinner routine, a rich espresso or a mild chamomile tea can serve as delightful after-dinner beverages, rounding out the meal beautifully.

Storage and Shelf Life

To store leftovers, place them in an airtight container in the refrigerator. Proper storage maintains flavor and texture, ensuring your dish is as enjoyable on day two. Ideally, consume within 2-3 days.

If reheating, do so gently on the stove over low heat, adding a splash of cream or pasta water to restore the sauce’s creaminess. Avoid using a microwave as it can change the texture and may lead to separation.

Freezing is not recommended, as the sauce may become watery upon thawing. However, if you must freeze it, keep the components separated, storing the pasta and sauce in separate containers.

Signs of spoilage include a sour smell or discoloration; always trust your senses to assess the freshness of your meal.

Make Ahead Strategies

To save time, consider prepping the components ahead of time. Prepare the sauce without the crab and store it in the refrigerator, allowing the flavors to meld overnight. Just warm it gently when you’re ready to serve.

You can also cook and cool the fettuccine, then toss it with a small amount of olive oil to prevent sticking. Store in an airtight container until needed; reheat briefly before adding the sauce.

When reheating, ensure all components reach a safe temperature; combining them right before serving maximizes freshness and taste.

Assess the quality after reheating and add fresh herbs just before serving for an aromatic touch that brightens the dish.

Ensure to keep all components separate until assembly to preserve the texture of the fettuccine and crab until serving.

Scaling Instructions

To halve the recipe, simply divide all ingredients by two but keep the same cooking techniques. You might need to adjust cooking times slightly to account for less volume.

For doubling or tripling, a large pot and skillet are essential. Ensure even cooking by rotating positions if using multiple pans. Monitor sauce consistency closely to adjust with reserved pasta water as needed.

Timing modifications may include premaking sauces or preparing crab ahead of time, especially when serving larger groups to streamline dinner preparation.

Lastly, store any leftovers following the same storage guidelines, ensuring all extra food maintains optimal flavor and quality.

Nutritional Deep Dive

Crab Fettuccine Alfredo typically features a balanced macro breakdown of proteins, healthy fats, and carbohydrates. Crab meat offers lean protein essential for muscle repair, while the sauces contribute healthy fats from cream and cheese.

Micronutrients include calcium and vitamin B12, vital for maintaining bone health and energy metabolism. The presence of garlic also adds immune-boosting properties, enhancing nutrient diversity.

Health benefits extend beyond muscle recovery, with omega-3 fatty acids found in crab supporting cardiovascular health and reducing inflammation in the body. Incorporating dishes like this into your routine can yield valuable nutritional benefits.

In terms of weight management, moderation is key due to the dish’s richness; understanding portion sizes and serving dynamics can help maintain your goals without sacrificing enjoyment.

Dietary Adaptations

For those adhering to a **gluten-free** diet, opt for gluten-free pasta variants, ensuring that any other ingredients, including sauces, are certified gluten-free to avoid cross-contamination.

Dairy-free adaptations are possible using coconut cream or cashew-based sauces. Nutritional yeast can substitute Parmesan for a hint of cheesiness without the dairy.

**Vegan** versions can be made by using plant-based pasta, dairy alternatives, and vegan cheeses. Explore legumes or tofu as a protein-rich substitute if crab is excluded.

Following a **low-carb, Keto, or Paleo** diet? Consider spiralizing zucchini or using shirataki noodles as an alternative to provide a similar texture without the carbs.

For **low-FODMAP** adjustments, avoid garlic and cream, selecting lactose-free milk instead to keep the flavors intact. Monitor specific ingredient compatibility depending on individual dietary restrictions.

Troubleshooting Guide

Experiencing texture issues? If your pasta turns mushy, it may have been overcooked. Aim for a perfect al dente to maintain a pleasant bite. If the sauce is too thick, use saved pasta water to thin it.

For flavor balance problems, incorporate additional seasonings gradually and taste throughout. If you find the creaminess lacking, a hint more fresh cheese can enhance depth without overwhelming.

Temperature problems can often arise with crab; ensure it warms gently, preventing rubberiness. Always add towards the end of cooking to preserve tenderness and natural flavor.

If equipment challenges occur, such as non-stick pans, always utilize ample butter or oil on the pan to prevent sticking and ensure easy serving.

Monitoring timing is essential; overcooking pasta or allowing the sauce to simmer too long can lead to stark differences in taste and texture. Set alarms to avoid distractions while cooking.

Recipe Success Stories

Community feedback highlights how quickly individuals fall in love with this dish. Many readers share that Crab Fettuccine Alfredo has become a staple within their family gatherings, praised for both its comfort and richness.

Variations, such as adding sun-dried tomatoes or spinach, have been celebrated, allowing cooks to adapt the recipe to their tastes while maintaining core flavors.

Consumer photography tips underline the importance of good lighting and garnishing for elevating appearance. By properly plating the dish and capturing the inviting colors, many home cooks have brought this delightful dish to their social media platforms with rave reviews.

Readers regularly suggest making this their go-to dish, especially for holiday gatherings, showcasing its ability to impress while being relatively simple to prepare.

Frequently Asked Questions

Q: Can I use frozen crab meat?

A: Yes, but make sure it is thawed properly and drained before adding to your dish. Fresh crab typically offers a superior flavor and texture.

Q: How can I make this dish gluten-free?

A: Simply substitute regular fettuccine with a gluten-free pasta of your choice. Many brands offer excellent alternatives that cook similarly.

Q: How do I prevent the sauce from separating?

A: The key is to maintain a gentle heat when adding cream and cheese. Stir continuously, and avoid boiling the sauce to keep it cohesive.

Q: Can I prepare the sauce ahead of time?

A: Yes, you can make the sauce in advance and store it in the refrigerator. Just warm it gently when you’re ready to serve.

Q: What should I serve with Crab Fettuccine Alfredo?

A: A light green salad or garlic bread makes great companions, as they balance the richness of the fettuccine.

Q: Is this dish suitable for meal prep?

A: Yes! It refrigerates well but is best enjoyed fresh. Store any leftovers properly and consume within a few days.

Q: Can I use a different type of pasta?

A: Absolutely! Other pasta types like linguine or tagliatelle can be substituted as long as you adjust cooking times accordingly.

Q: How can I make the dish lighter?

A: Try using a lighter cream or milk alternative, and reduce the amount of cheese used—this will lower calories without sacrificing too much flavor.

Q: What is the best way to store leftovers?

A: Store in an airtight container in the refrigerator. Ensure you consume within 2-3 days for optimal flavor and safety.

Q: Can this recipe be frozen?

A: Freezing is not recommended, as the texture may suffer upon thawing. However, you can freeze components separately for future use.

Additional Resources

Explore related recipes like Shrimp Scampi and Lobster Mac & Cheese for more seafood inspirations. Understanding essential techniques like creating a béchamel or mastering the art of sautéing can also elevate your cooking skills.

For ingredient information, discovering the best selection methods for fresh seafood can refine your cooking process and enhance quality. Additionally, consider stock recommendations that include essential kitchen equipment for any budding chef.

Don’t forget seasonal variations that bring out the best flavors of each season, allowing your dishes to be inspired by the ingredients available in your local market.

Join the Conversation

We love hearing your thoughts! Share your photography tips by showing off your own Crab Fettuccine Alfredo creations in the comments below or on social media using our hashtag. Engage with fellow home cooks by sharing your variations and suggestions, sparking conversation around culinary creativity.

Recipe reviews and personal stories are always welcome. How did this recipe fit into your meal planning? Let’s create a community where we can exchange tips and ideas that help everyone make the most of their cooking adventures.

The Recipe

Crab Fettuccine Alfredo

Serves: 4 servings

Prep Time: 15 mins

Cook Time: 20 mins

Total Time: 35 mins

Kitchen Equipment Needed

  • Large pot
  • Skillet
  • Pasta fork
  • Measuring cups and spoons
  • Whisk
  • Airtight storage containers

Ingredients

  • 12 oz fettuccine pasta
  • 2 cups fresh crab meat, picked clean
  • 4 tbsp unsalted butter
  • 2 cloves garlic, minced
  • 1 cup heavy cream
  • 1 cup freshly grated Parmesan cheese
  • Salt and pepper to taste
  • Fresh parsley for garnish

Directions

  1. Bring a large pot of salted water to a boil. Cook the fettuccine according to package instructions until al dente. Reserve 1 cup of pasta water, then drain and set aside.
  2. In a skillet, melt the butter over medium heat. Add minced garlic and sauté for 1-2 minutes until fragrant, being careful not to burn.
  3. Reduce heat and slowly whisk in the heavy cream, stirring constantly. Allow the mixture to simmer gently for about 5 minutes.
  4. Mix in the grated Parmesan cheese, continuing to stir until the sauce thickens slightly. Season with salt and pepper to taste.
  5. Add the cooked fettuccine to the skillet, tossing to coat evenly. Incorporate the crab meat carefully to avoid breaking it apart.
  6. If the sauce is too thick, add some reserved pasta water to reach desired consistency.
  7. Serve immediately, garnished with fresh parsley and additional Parmesan if desired.

Recipe Notes

  • For a lighter version, substitute half the heavy cream with milk.
  • Feel free to add seasonal vegetables such as asparagus or peas for added color and nutrition.
  • Leftovers can be stored in an airtight container in the refrigerator for up to 3 days.
  • For added flavor, a pinch of red pepper flakes can be mixed into the sauce for a subtle kick.