Table of Contents
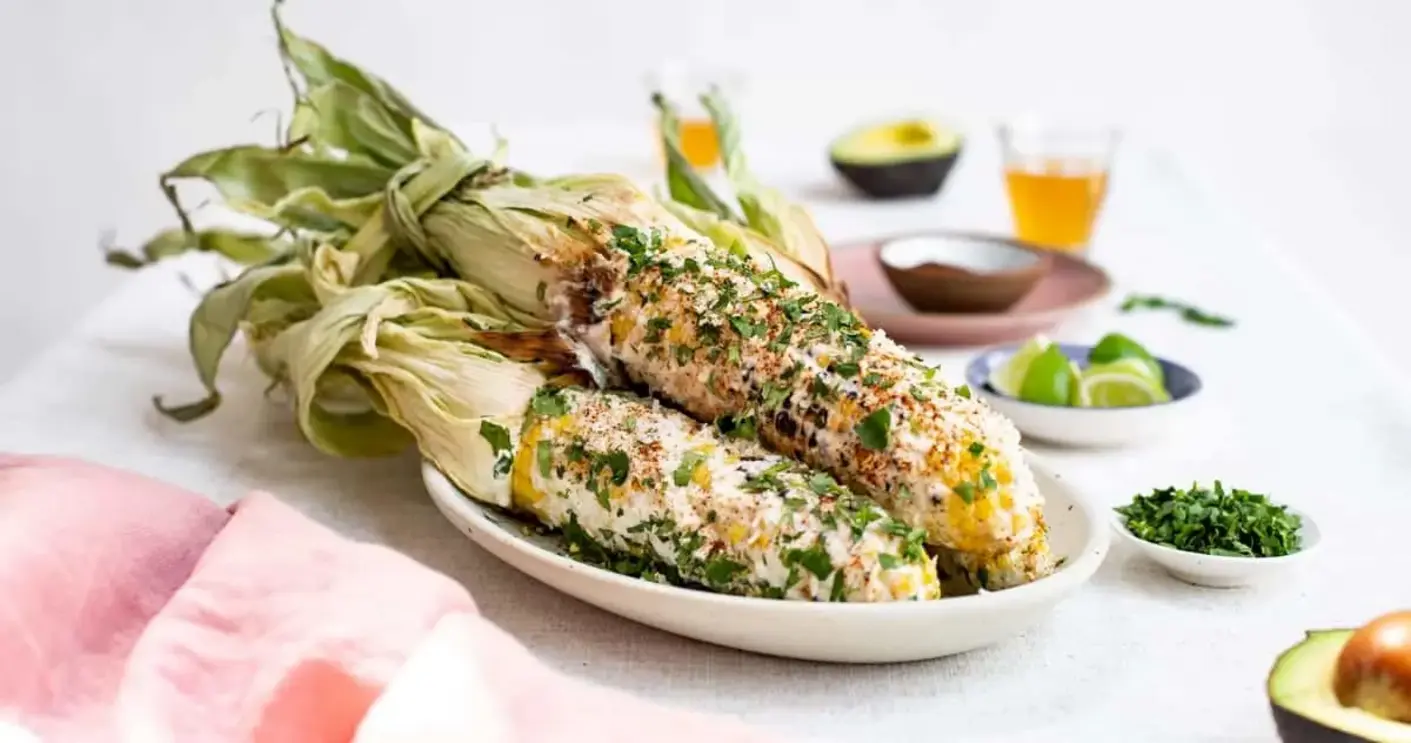
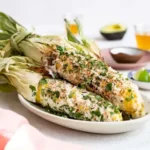
Grilled Mexican Street Corn (Elote): Two Irresistible Ways to Serve It
| Prep Time | Cook Time | Total Time | Servings | Difficulty |
|---|---|---|---|---|
| 15 minutes | 10 minutes | 25 minutes | 6 servings | Easy |
The Ultimate Guide to Grilled Mexican Street Corn
Welcome to CookingWithEmy.com! There’s something magical about the smoky aroma of corn grilling over an open flame, especially when it’s about to be transformed into the iconic Mexican street food known as Elote, or Grilled Mexican Street Corn. This isn’t just a side dish; it’s a vibrant, messy, and utterly delicious experience that captures the essence of Mexican street markets right in your own backyard. As The Kitchen Team, we’ve perfected this recipe to give you not one, but two incredible ways to enjoy it: the classic on-the-cob presentation and a fantastically easy off-the-cob (esquites) version made in a skillet.
This recipe is a celebration of contrasts: the sweet, charred kernels of corn against the creamy, tangy sauce, the salty bite of cotija cheese, and the bright, fresh finish of lime and cilantro. It’s a dish that’s equally at home at a casual weeknight dinner as it is at a bustling summer barbecue. We’ll walk you through every step, share our professional secrets for the perfect char, and provide all the tips you need to make this recipe a guaranteed crowd-pleaser. Let’s fire up the grill and bring the flavors of the streets to your table!
Why This Is The Best Mexican Street Corn Recipe
You might find many recipes for Elote online, but ours stands out for several key reasons that guarantee authentic flavor and foolproof results every single time.
First, we respect the traditional balance of flavors. Our creamy sauce isn’t just mayonnaise—it’s a carefully calibrated blend of mayonnaise and sour cream. The sour cream adds a necessary tanginess that cuts through the richness, creating a more complex and satisfying base. We also insist on fresh lime juice, never bottled, for that essential burst of citrus that brightens the entire dish.
Second, we offer unparalleled flexibility. Life isn’t one-size-fits-all, and neither should your corn be! That’s why we provide detailed instructions for both the iconic grilled corn on the cob AND a deconstructed, scoopable skillet version (often called Esquites). No grill? No problem. Want to make it ahead? We’ve got you covered. Our method ensures perfect results whether you’re using fresh summer corn, frozen kernels in the dead of winter, or even canned corn for ultimate convenience.
Finally, our recipe is built on technique. We don’t just tell you to grill corn; we explain how to get those beautiful, flavorful char marks without burning. We guide you on how to properly coat the corn for maximum flavor adhesion and the best order for adding your toppings so every bite is perfect. This attention to detail is what transforms a simple recipe into an extraordinary one.
Ingredients & Substitutions
Great food starts with great ingredients. Here’s exactly what you’ll need to create this flavor fiesta, along with smart swaps for dietary needs or pantry shortages.
| Ingredient | Quantity | Notes & Substitutions |
|---|---|---|
| Yellow Corn on the Cob | 6 medium ears | Fresh is best for grilling. For the skillet version, you can use 4.5 cups of frozen (no need to thaw) or canned corn (drained). |
| Vegetable Oil or Melted Butter | 1 tbsp | For brushing the corn before grilling. Butter adds rich flavor; oil has a higher smoke point. |
| Mayonnaise | 1/4 cup | The base of the creamy sauce. Use full-fat for best texture. For a lighter version, Greek yogurt can replace half. |
| Sour Cream | 1/4 cup | Adds essential tang. Can use full-fat plain yogurt or Mexican crema. |
| Chile Powder | 1/2 tsp | Use authentic Mexican chile powder (like ancho) for depth, not American “chili powder” blend which contains cumin and garlic. |
| Fresh Lime Juice | 1 tbsp + wedges for serving | Freshly squeezed is non-negotiable for the brightest flavor. |
| Cotija Cheese, crumbled | 1/2 cup | The classic salty cheese. Substitute: finely crumbled feta or Parmesan. |
| Fresh Cilantro, chopped | 3 tbsp | For fresh garnish. If you dislike cilantro, use chopped fresh parsley or chives. |
Step-by-Step Instructions
Follow these clear, detailed steps for perfect Grilled Mexican Street Corn, whether you choose the on-the-cob or off-the-cob method.
Method 1: Classic Grilled Elote (On The Cob)
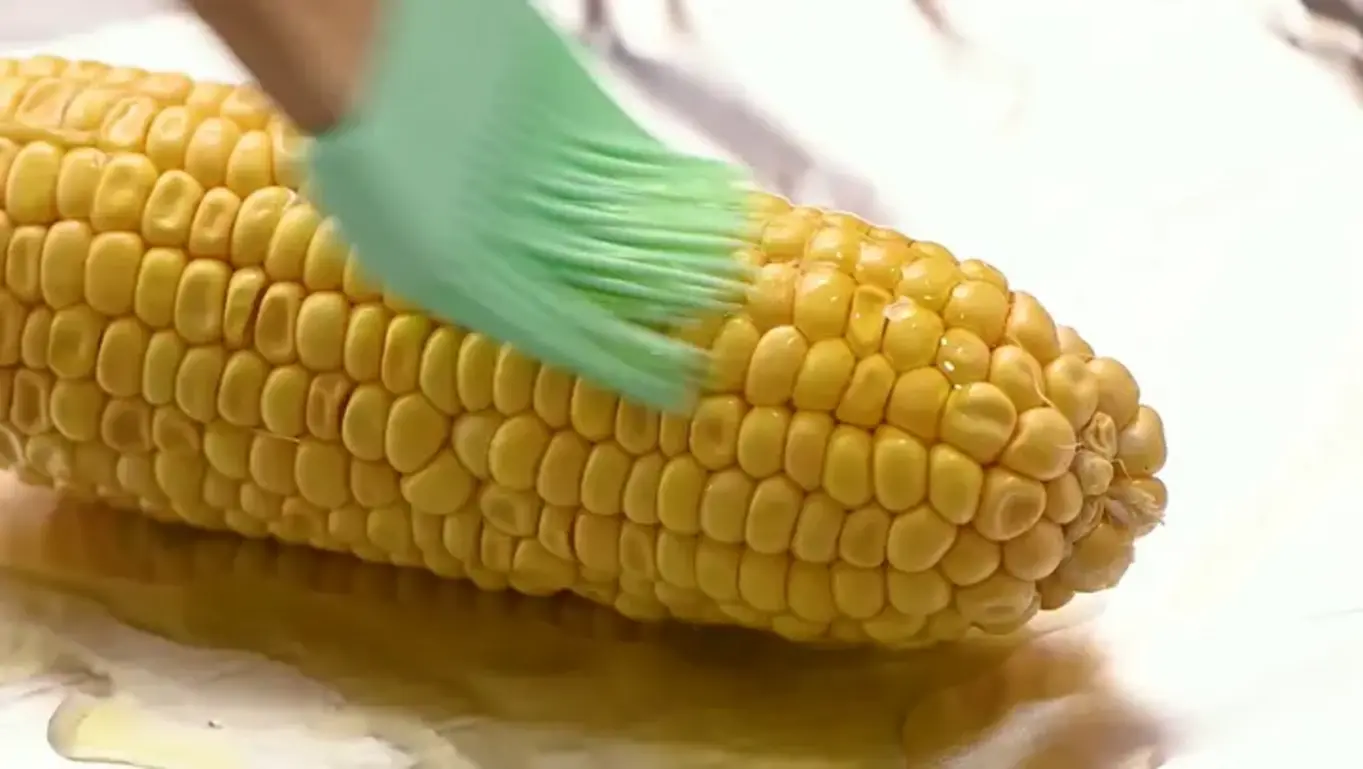
Step 1: Prep the Corn for Grilling. Gently peel back the corn husks without detaching them. Remove the silk. Pull the husks back up around the corn and tie them at the top with kitchen twine. This creates a natural handle for easy eating and helps prevent burning. Lightly brush each ear with vegetable oil or melted butter. This promotes browning and prevents sticking.
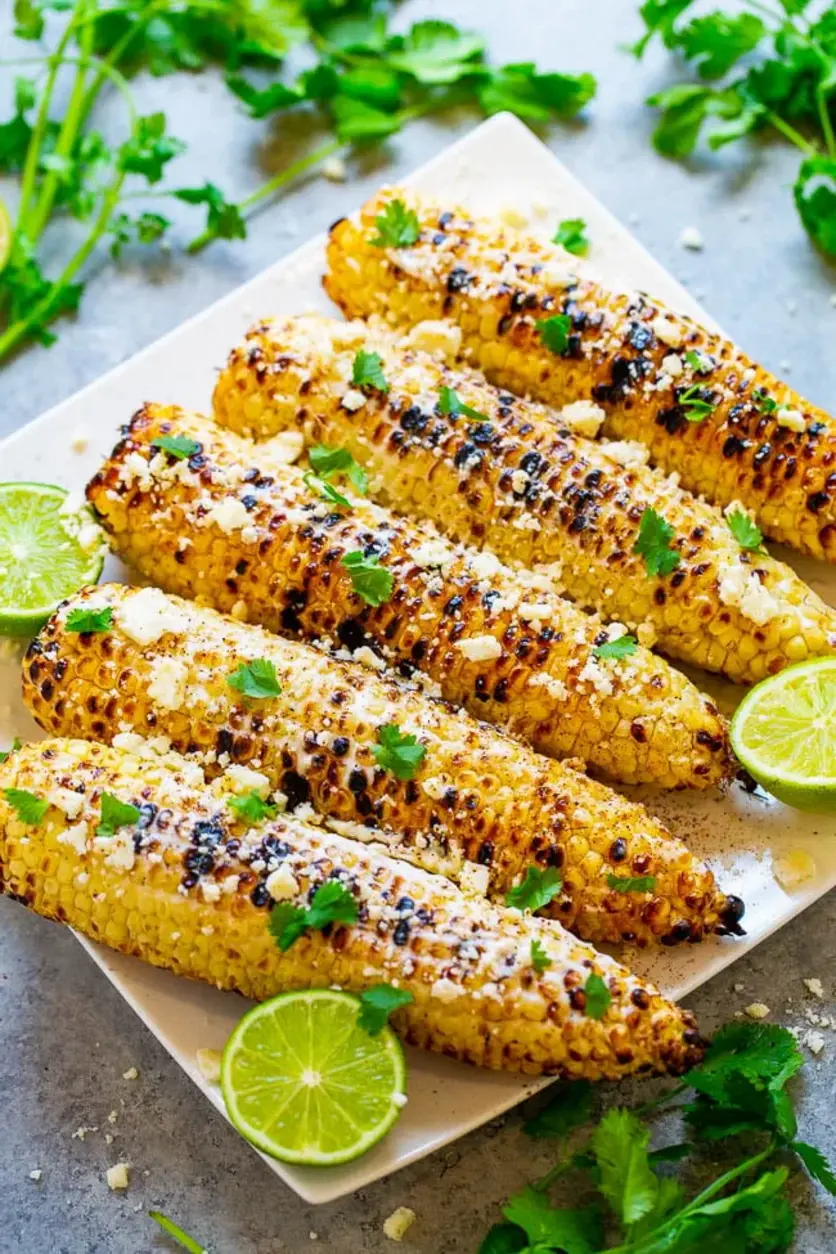
Step 2: Grill to Perfection. Preheat your grill (or grill pan) to medium-high heat (about 400°F). Place the prepared corn directly on the grates. Grill for 10-12 minutes, turning every 2-3 minutes, until the kernels are tender and have developed dark brown, charred spots on all sides. The husks may blacken—this is fine and adds flavor.
Step 3: Make the Creamy Sauce. While the corn grills, in a medium bowl, whisk together the 1/4 cup mayonnaise, 1/4 cup sour cream, 1/2 teaspoon chile powder, and 1 tablespoon of fresh lime juice until completely smooth and combined.
Step 4: Assemble & Serve. Once the corn is grilled, carefully remove the twine and husks (they will be hot!). Using a pastry brush or spoon, generously coat each hot ear of corn with the creamy sauce. Immediately roll or sprinkle the coated corn in the crumbled cotija cheese so it adheres. Garnish with chopped cilantro and serve immediately with extra lime wedges on the side for squeezing.
Method 2: Easy Skillet Esquites (Off The Cob)
Step 1: Cut the Corn. Stand a cooled, raw ear of corn upright in a large bowl. Using a sharp knife, carefully slice downward to cut the kernels off the cob. Repeat with all 6 ears. You should have about 4.5 cups of kernels. (Alternatively, use 4.5 cups of frozen or canned, drained corn).
Step 2: Sauté the Corn. Heat 1 tablespoon of oil in a large skillet (preferably cast-iron) over medium-high heat. Add the corn kernels and cook, stirring frequently, for 8-10 minutes. Let the corn sit undisturbed for a minute at a time to get some nice browned, slightly charred spots—this is where the flavor is!
Step 3: Combine & Finish. Reduce the heat to low. Pour the prepared creamy sauce (from Step 3 above) over the hot corn in the skillet. Stir until the corn is evenly coated. Remove from heat. Stir in half of the cotija cheese. Transfer to a serving bowl and top with the remaining cheese, chopped cilantro, and an extra squeeze of lime juice.
Serving Suggestions & Pairings
Grilled Mexican Street Corn is incredibly versatile. Here’s how to build unforgettable meals around it.
As an Appetizer or Side Dish: Serve the classic elotes on a large platter with plenty of napkins—it’s meant to be eaten with your hands! The skillet version is perfect for serving in bowls with spoons or sturdy tortilla chips for scooping. It’s the ultimate starter for any Mexican-themed feast.
Perfect Main Course Pairings: This corn is the ideal sidekick to grilled proteins. Serve it alongside Carne Asada Tacos, Grilled Chili-Lime Chicken, Black Bean Burgers, or Beer-Battered Fish Tacos. The creamy, tangy corn beautifully complements smoky, spicy, and rich flavors.
For a Complete Spread: Create a stunning backyard buffet by adding our Elote to a table with Fresh Guacamole, Mexican Rice, Charro Beans, and a vibrant Jicama Slaw. Don’t forget a pitcher of Classic Margaritas or Agua Fresca to wash it all down!
Storage & Reheating Instructions
Storing Leftovers: Store any leftover esquites (skillet corn) in an airtight container in the refrigerator for up to 3 days. Note: The classic grilled corn on the cob is best enjoyed immediately. If you must store it, wrap the sauced and cheesed cob tightly in plastic wrap and refrigerate for 1-2 days max.
Best Reheating Methods: For the skillet corn, reheat gently in a saucepan over medium-low heat, adding a small splash of water or milk to loosen the sauce. You can also microwave it in 30-second intervals, stirring in between. Avoid reheating the on-the-cob version in the microwave, as it can become rubbery. Instead, reheat it in a 350°F oven for 10-15 minutes or on a medium grill for 5-7 minutes to refresh the char.
Creative Recipe Variations
Once you’ve mastered the classic, try these delicious twists on the theme!
Spicy Chipotle Elote: Add 1-2 minced chipotle peppers in adobo sauce to the creamy mixture for a deep, smoky heat.
Elote Pasta Salad: Toss the creamy sauce with cooked pasta, charred corn kernels, cotija, cilantro, and diced red onion for a incredible potluck dish.
Dairy-Free/Vegan Elote: Use vegan mayonnaise and sour cream. Substitute cotija with crumbled vegan feta or a sprinkle of nutritional yeast mixed with a pinch of salt.
Elote Corn Dip: Turn the skillet version into a warm, bubbly dip by transferring it to an oven-safe dish, topping with extra cheese, and broiling for 2-3 minutes until golden. Serve with tortilla chips.
Frequently Asked Questions (FAQ)
Can I make Mexican Street Corn without a grill?
Absolutely! The skillet method (esquites) is perfect for stove-top cooking. You can also broil husked corn in the oven on a baking sheet 4-6 inches from the element, turning occasionally, for 10-15 minutes until charred in spots.
What’s the difference between Elote and Esquites?
Elote refers to the corn served on the cob, typically slathered with toppings. Esquites is the same flavorful combination, but with the kernels cut off the cob and served in a cup or bowl, making it easier to eat with a spoon.
Can I use something other than cotija cheese?
Yes, though the flavor will change. The best substitutes are other salty, crumbly cheeses like feta, queso fresco, or even a finely grated Parmesan or Pecorino Romano in a pinch.
How do I prevent the cheese and sauce from sliding off the corn?
The key is to apply the creamy sauce to the hot corn straight from the grill. The heat helps the sauce cling. Then, immediately roll it in the cheese so it sticks to the wet sauce.
Is it safe to grill corn in the husk?
Yes, it’s a traditional method that steams the corn inside, making it very tender. In our method, we tie the husk back to create a handle, but you can also soak the whole, unshucked ears in water for 30 minutes and then grill them fully wrapped for a steam-grill effect.
Can I make this recipe ahead of time?
You can prep components ahead: make the sauce, crumble the cheese, chop the cilantro, and even shuck the corn. For best texture and temperature, grill the corn and assemble just before serving.
What type of chile powder should I use?
For authentic flavor, use pure ground chile powder like ancho, guajillo, or New Mexico red chile. Avoid American-style “chili powder” which is a blend containing cumin, garlic powder, and other spices—it will alter the intended flavor profile.
My family hates cilantro. What can I use instead?
No problem! Fresh chopped parsley, chives, or even a sprinkle of thinly sliced green onion make excellent, flavorful garnishes that won’t have the polarizing cilantro taste.
Love This Recipe? Share the Flavor!
If this Grilled Mexican Street Corn recipe brought a fiesta to your table, please share it with friends and family! Pin the image below to your Pinterest boards to save it for your next barbecue, taco night, or summer party. Follow us on Pinterest @cookingwithemy for more delicious, easy-to-follow recipes from The Kitchen Team.
📌 Pin this Recipe for Later!
Click the image or button below to save this complete guide to Grilled Mexican Street Corn (Elote) to your favorite food boards on Pinterest.
[PINTEREST SAVE BUTTON EMBED CODE]
Tag us @cookingwithemy when you make it—we love seeing your creations!
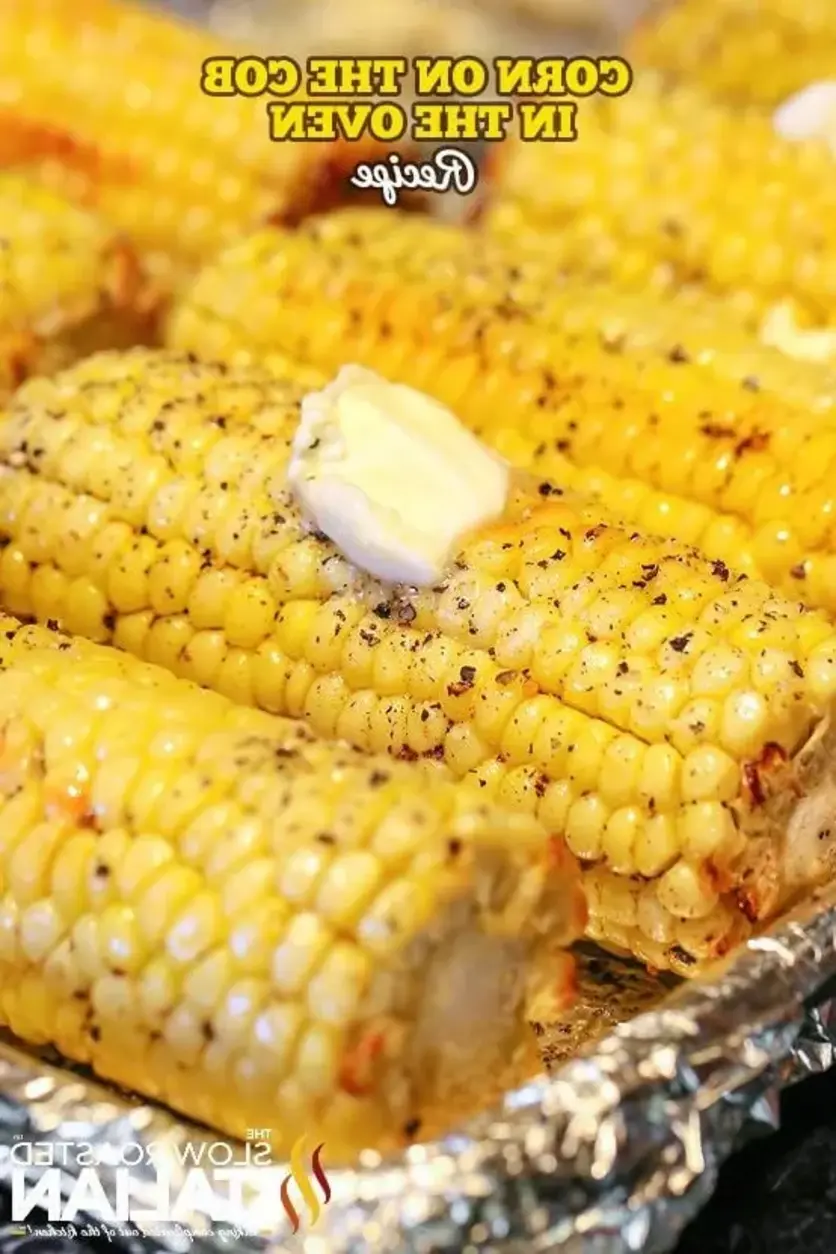
Mexican Street Corn Recipe
Description
This Mexican Street Corn recipe is a common Mexican street food that is made by grilling corn on the cob and then coating it with a mixture made up of mayonnaise, sour cream, cotija cheese, chile powder, and lime. Also called elotes, this easy to make Mexican Corn On The Cob Recipe is a perfect appetizer or side dish for any outdoor gathering. In my version here, I made it two ways – (1) on the cob and (2) off the cob or in a skillet. They are both delicious and ready in less than half an hour.
Ingredients
Scale
- 6 medium-size ears of yellow corn on the cob
- 1 tablespoon vegetable oil or melted butter
- ¼ cup mayonnaise
- ¼ cup sour cream
- ½ teaspoon chile powder
- 1 tablespoon lime juice (plus wedges of a lime for serving)
- ½ cup crumbled cotija cheese
- 3 tablespoons fresh cilantro (chopped)
Instructions
- To prep the corn: Fold the husk of each corn back leaf by leaf and tie them with kitchen twine. Lightly brush corn on the cub with oil.
- Heat a grill pan or an outdoor grill. Grill corn, turning occasionally until it is browned in spots. Keep an eye on it as this happens rather quickly.
- To make the sauce: Mix together mayonnaise, sour cream, chile powder, and lime juice in a bowl.
- Brush each grilled corn the mayo mixture and sprinkle with cotija cheese. Garnish with cilantro and serve.
- To prep the corn: Cut the corn off the cob. I used 6 ears to get about 4 1/2 cups. Alternatively, you can also use canned corn or frozen corn. If using frozen, you do not need to thaw it out.
- Sauté corn: Heat oil in a skillet over medium-high heat. Stir in the corn, and stirring frequently, sauté for 5-7 minutes until it starts to char. If you are using frozen corn, you might need to cook a few minutes longer. Transfer to a bowl and set aside.
- Make the sauce: Mix together mayonnaise, sour cream, chile powder, and lime juice in a bowl.
- Assemble: Add in the mayo mixture into the sauteed corn. Give it a mix. Stir in the cotija cheese and sprinkle with cilantro. Serve in small bowls with wedges of lime on the side.