How To Make Oatmeal

Print
clock clock iconcutlery cutlery iconflag flag iconfolder folder iconinstagram instagram iconpinterest pinterest iconfacebook facebook iconprint print iconsquares squares iconheart heart iconheart solid heart solid icon

How To Make Oatmeal


  • Author: Chef Emy

Description

Sick of boring bowls of oatmeal? Me too! This guide on how to make oatmeal shows you step by step how to make the perfect bowl and customize it to your own needs.


Ingredients

Scale
  • 1 cup dry old fashioned oats
  • 1 cup water
  • 1 cup almond milk or milk of choice
  • ¼ teaspoon cinnamon
  • 1 tablespoon maple syrup
  • Pinch of salt

Instructions

  1. Add all ingredients to a pot and bring to a low boil.
  2. Reduce heat to low and let simmer until thick, stirring occasionally. This will take about 5-10 minutes.
  3. Once it has reached your desired consistency, remove from heat and add any toppings of your choice.
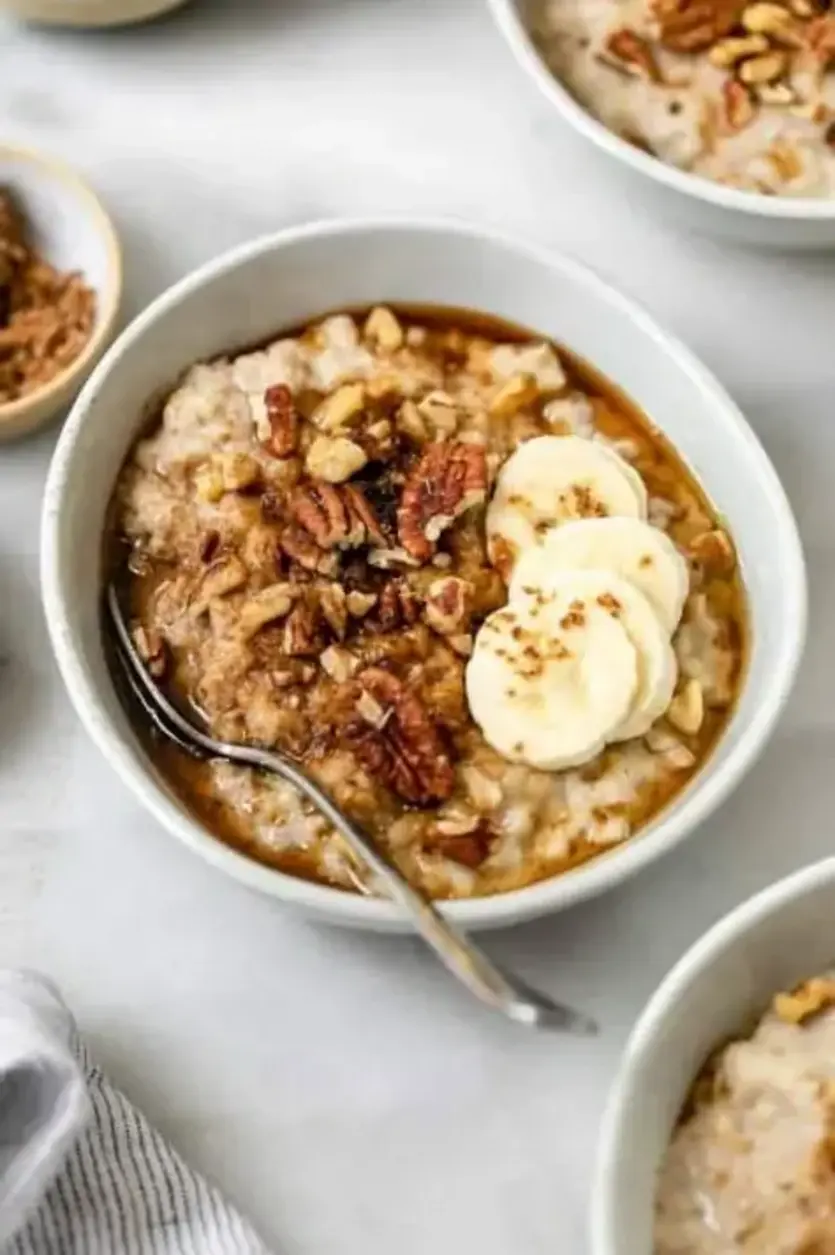
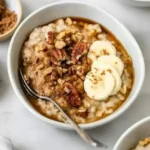
  4. I like doing a maple brown sugar style oatmeal, so I add a sprinkle of brown sugar, cinnamon, chopped nuts and banana.

Notes

You may also use all water or all almond milk as your liquid, just be sure to use a total of 2 cups of liquid. I like using half and half to give a creamy consistency, but either one works!
Once prepared, this oatmeal will keep in the fridge for about 3 days. To reheat, add to a pan with a splash of non-dairy milk and let warm over medium heat.
As written, this recipe isn’t super sweet, so feel free to adjust the sweetness as desired!

Nutrition

  • Calories: 201kcal
  • Sugar: 7g
  • Protein: 6g

Easy Chocolate Banana Muffins

Print
clock clock iconcutlery cutlery iconflag flag iconfolder folder iconinstagram instagram iconpinterest pinterest iconfacebook facebook iconprint print iconsquares squares iconheart heart iconheart solid heart solid icon

Double Chocolate Banana Muffins Recipe


  • Author: Chef Emy

Description

These Double Chocolate Banana Muffins are so easy to make, bursting with rich chocolate flavor and loaded with chocolate chips. They are soft and perfectly moist. You’ll forget you’re eating breakfast because these muffins taste like true dessert. Don’t be surprised when they disappear in seconds!


Ingredients

Scale
  • 1 cup all-purpose flour
  • 1/2 cup unsweetened cocoa powder
  • 3/4 cup semisweet mini chocolate chips
  • 2 large bananas – very ripe (about 1 cup mashed)
  • 1/2 cup plain Greek yogurt or sour cream
  • 1 teaspoon baking soda
  • 1/2 teaspoon fine salt
  • 1/4 cup grapeseed oil, (or vegetable oil)
  • 1/2 cup granulated sugar
  • 1 large egg
  • 1 teaspoon vanilla extract

Instructions

  1. Prep. Line a 12-count standard muffin pan with cupcake liners. Preheat the oven to a 350°F.
  2. Wet ingredients. In a large bowl, mash 2 overripe bananas with a fork or potato masher until chunky applesauce consistency. Scrape mashed bananas to one side of the bowl.
  3. On the other side of the same bowl add 1/2 cup plain Greek yogurt and 1 tsp baking soda. Stir yogurt and baking soda and give 1-2 mins to activate the soda.
  4. To the bowl with wet ingredients add 1/2 tsp fine salt, 1/4 cup oil, 1/2 cup granulated sugar, 1 egg and 1 tsp vanilla extract. Whisk the wet ingredients until just combined.
  5. Dry ingredients. In a medium bowl, sift, combine and whisk 1 cup all-purpose flour, 1/2 cup cocoa powder and 3/4 cup mini chocolate chips.
  6. Combine dry and wet ingredients and stir with a spatula just until combined. Do not overmix to avoid dense muffins.
  7. Bake. Spoon muffin batter equally into muffin pan, filling cups 3/4 to the top. Bake at 350°F for 18-20 minutes, or until toothpick inserted into the center, comes out clean. (some melted chocolate on toothpick is okay, but not batter).
  8. Let baked muffins cool in muffin pan for few minutes and then transfer onto a cooling rack until slightly cooled before enjoying. Muffins taste their best the first 2 days. Store at room temperature (covered) for 3 days, or refrigerate for up to 1 week.

Notes

Notes Freezing Instructions: For longer storage, cool the muffins completely, then wrap each muffin tightly in a plastic wrap, one by one. Place in a freezer bag and remove as much air as possible. They freeze well for up to 3 months. Thaw overnight in the refrigerator or unwrap and place them on the kitchen counter. They need 1-2 hours to come to room temperature. Heat up (if desired) before enjoying. Measuring Flour: To measure flour, spoon flour into a measuring cup and scrape off the top with the back of a knife. Pushing your measuring cup into the flour bin, will result in up to 25% more compacted flour. Sift Dry Ingredients: Sifted dry ingredients provide fluffy texture of the baked goods. More Banana Flavor: The chocolate flavor overpowers the banana, so don’t expect tons of banana flavor. You can add additional banana for slightly more banana flavor, but the texture will be moister and expect to have more than 12 standard muffins. Keep in mind that bananas must be very ripe and resemble applesauce consistency once mashed. Sugar: 1/2 cup of sugar produces wonderfully sweet muffins. If you’re looking for something not quite as sweet, reduce sugar to 1/3 cup or even 1/4 cup. Remember, you still get sweetness from bananas and chocolate chips.

Blueberry Banana Bread

Looking for the ultimate bake? Our Vegan Blueberry Banana Bread nails it. It’s easy, perfect for those after a gluten-free treat, and crafted with healthier swaps like maple syrup and almond flour. Dive into its moist and tender goodness, packed with juicy blueberries. A deliciously thick slice of this bread is the perfect morning boost or afternoon snack! vegan snacks | vegan desserts | fall desserts | fall recipes | fall snacks | gluten-free snacks

Print

clock clock iconcutlery cutlery iconflag flag iconfolder folder iconinstagram instagram iconpinterest pinterest iconfacebook facebook iconprint print iconsquares squares iconheart heart iconheart solid heart solid icon

Blueberry Banana Bread


  • Author: Chef Emy

Description

Looking for the ultimate bake? Our Vegan Blueberry Banana Bread nails it. It’s easy-peasy, perfect for those after a gluten-free treat, and crafted with healthier swaps like maple syrup and almond flour. Dive into its moist and tender goodness, packed with juicy blueberries. A deliciously thick slice of this bread is the morning boost or afternoon pick-me-up you’ve been dreaming of. Make the smart choice; bake fresh, eat better!


Ingredients

Scale
  • 2 overripe mashed bananas
  • 1 cup plain and unsweetened almond or oat milk
  • ¼ cup melted vegan butter
  • ¾ cup maple syrup
  • 1 teaspoon baking powder
  • 1 teaspoon baking soda
  • 1 teaspoon vanilla
  • 1 ½ cup regular or gluten-free all purpose flour
  • 1 cup almond flour or an additional ½ cup or regular or gluten-free all purpose flour
  • 1 cup fresh blueberries (in season) if not in season, ok to use frozen blueberries

Instructions

  1. Begin by preheating the oven to 375. Grease your bread loaf pan with non-stick baking spray or line it with parchment paper.
  2. In a large bowl, mash your ripe bananas with a fork. Add the milk, maple syrup, butter, baking powder, baking soda, and vanilla. Mix with the fork or a whisk. Add the regular flour and the almond flour. Mix until a thick batter is formed. Fold in the blueberries.
  3. Pour the blueberry banana bread batter into your greased pan and bake in the oven for 50 minutes or until the loaf has completely risen and is golden brown on the top. Check the center with a toothpick for doneness. If the blueberry banana bread is becoming too dark on top but is not completely cooked through the center yet, simply cover the top with foil and continue to bake until it's done.
  4. Remove the loaf from the pan. While it cools, option to whip up with vegan cream cheese frosting by mixing the vegan cream cheese, butter, and powdered sugar together with a hand mixer. Drizzle the icing on top of the loaf and serve .
  5. If you're not topping your blueberry banana bread with frosting, we recommend enjoying your warm slice with a pat of vegan butter.

Nutrition

  • Calories: 163kcal
  • Sugar: 16g
  • Protein: 2g

SOUTHERN PEACH BREAD

Here’s an easy summer breakfast if you’re wondering what to do with fresh peaches! It’s also a great snack idea to enjoy midday. Moist and packed with flavor, this southern peach bread recipe will become your new favorite!

Print

clock clock iconcutlery cutlery iconflag flag iconfolder folder iconinstagram instagram iconpinterest pinterest iconfacebook facebook iconprint print iconsquares squares iconheart heart iconheart solid heart solid icon

Southern Peach Bread


  • Author: Chef Emy

Description

This Southern Peach Bread comes together using only ingredients you may already have on hand! Packed with flavor and no yeast required, this will be a new favorite!


Ingredients

Scale
  • 1 cup peaches, peeled/diced
  • ½ cup vegetable oil
  • ½ cup sugar
  • 2 eggs
  • ½ cup sour cream
  • 1 teaspoon vanilla extract
  • 1 ½ cups flour
  • 1 teaspoon baking soda
  • ½ teaspoon salt

Instructions

  1. Preheat oven to 350 degrees and spray 3 mini loaf pans *or 1 large loaf pan
  2. In a medium bowl, combine the peaches, oil, sugar, eggs, sour cream, and vanilla extract.
  3. Stir in the flour, baking soda, and salt.mixing until just combined.
  4. Pour batter evenly into prepared pans.
  5. Place pans in preheated oven and bake for 25-30 minutes if mini loaves, 50-55 minutes if large loaf.
  6. Remove from oven and allow to cool slightly before slicing and enjoying!

Nutrition

  • Calories: 304kcal
  • Sugar: 15g
  • Protein: 4g

3 Ingredient Banana Oatmeal Breakfast Cookies (no egg, no flour)

Don’t throw out those spotty bananas! Make these quick and easy 3 ingredient banana oatmeal breakfast cookies instead! This versatile recipe requires no egg, no flour, is gluten-free (if using gluten-free oats) and sugar-free. Easy, healthy banana and oatmeal cookies recipe with no flour that’s vegan, plant-based. Top with chocolate, raisins, nuts, berries and more!

Print

clock clock iconcutlery cutlery iconflag flag iconfolder folder iconinstagram instagram iconpinterest pinterest iconfacebook facebook iconprint print iconsquares squares iconheart heart iconheart solid heart solid icon

3 Ingredient Banana Oatmeal Breakfast Cookies (no egg, no flour)


  • Author: Chef Emy

Description

Don’t throw out those spotty bananas! Make these quick and easy 3 ingredient banana oat breakfast cookies instead! This simple and versatile recipe requires no added sugar, no egg and no flour.


Ingredients

Scale
  • 2 bananas ripe and spotty, mashed, about 200g
  • 1 cup rolled oats old fashioned or quick cooking
  • 1 teaspoon ground cinnamon

Instructions

  1. Preheat oven to 350 F. Peel and mash bananas in a medium bowl with a potato masher or fork. Make sure they are well-mashed, with only small chunks remaining.
  2. Stir in rolled oats and cinnamon. Set aside for a few minutes to allow the oats to soak up the moisture. If the batter is very wet/thin still, add 1-2 tablespoons of oats.
  3. Line a baking tray with parchment paper or a silicone baking mat. (Cookies will stick if you skip this step).
  4. Drop spoonfuls of batter onto baking tray and then shape with your fingers. Cookies do not spread out while baking, so shape them into the width and height you want them to be. This recipe will make about eight medium, 3-inch wide cookies.
  5. Add optional toppings, if using.
  6. Bake cookies for 17 minutes. *See notes for adjustments for smaller or larger cookies.
  7. Remove from oven and allow to cool slightly before enjoying.

Notes

If making small 2-in wide cookies, reduce cooking time by 3-5 minutes. If making large 4-in wide cookies, increase cooking time by 2-3 minutes.
Spices & Flavoring: Instead of cinnamon, try using 1 teaspoon of vanilla extract instead. Or, ¼ teaspoon of cardamom + ¼ teaspoon of cinnamon. 1 teaspoon of pumpkin spice seasoning is another good option.
Toppings: dark chocolate chips or shavings, walnut halves, chopped walnuts, pecan halves, chopped pecans, sunflower seeds, smear of fruit preserves, jam or jelly, berries, raisins, dried cranberries, flaxseed, coconut or wheat germ.

Nutrition

  • Calories: 130kcal
  • Sugar: 7g
  • Protein: 3g

Strawberry Pound Cake

Print
clock clock iconcutlery cutlery iconflag flag iconfolder folder iconinstagram instagram iconpinterest pinterest iconfacebook facebook iconprint print iconsquares squares iconheart heart iconheart solid heart solid icon

Strawberry Pound Cake


  • Author: Chef Emy

Description

Deliciously moist and flavorful, this Strawberry Pound Cake is a one-bowl treat that has a fruity and sweet glaze and satisfies that sweet tooth! It’s a great spring and summer dessert!


Ingredients

Scale
  • 1 1/2 cup all-purpose flour
  • 2 teaspoons baking powder
  • 1/2 teaspoon salt
  • 1 cup plain greek yogurt
  • 1 cup sugar
  • 3 large eggs
  • 1 1/2 teaspoon almond extract
  • 1/2 cup vegetable oil
  • 1 cup diced strawberries about 1 ¼ cup whole

Instructions

  1. Preheat oven to 350 degrees F. Spray an 8 or 9-inch loaf pan with non-stick cooking spray, set aside.
  2. In medium-sized bowl, stir together flour, baking powder and salt.
  3. In a separate, large mixing bowl mix Greek yogurt, sugar, eggs, extract and oil. Slowly stir in the dry ingredients until just incorporated.
  4. Fold in the strawberries and spoon batter into the prepared pan.
  5. Bake for about 50 minutes or until center is set.
  6. Remove from oven and let sit 10 minutes, then turn out onto cooling rack to cool completely.
  7. While the bread is cooling, make the glaze.
  8. In a medium-sized bowl combine smashed strawberries and powdered sugar.
  9. Once cake is cooled pour the glaze over top, let set, cut and serve.

Nutrition

  • Calories: 280kcal
  • Sugar: 22g
  • Protein: 6g

Strawberry Kiss Cookies (Soft, Pretty & Easy!)

Bake the cutest cookies with these soft and sweet Strawberry Kiss Cookies! Made with strawberry flavor and topped with a chocolate or vanilla kiss, they’re the perfect treat for Valentine’s Day, spring parties, or anytime you want a pretty pink cookie. Quick, simple, and always a crowd favorite add this recipe to your dessert boards!

Print

clock clock iconcutlery cutlery iconflag flag iconfolder folder iconinstagram instagram iconpinterest pinterest iconfacebook facebook iconprint print iconsquares squares iconheart heart iconheart solid heart solid icon

Strawberry Kiss Cookies


  • Author: Chef Emy

Ingredients

Scale
  • 1 box (15.25 oz) strawberry cake mix
  • 8 tablespoons (1/2 cup) butter, melted and slightly cooled
  • 1 large egg
  • 4 ounces cream cheese, softened
  • Optional: powdered sugar or pink granulated sugar
  • 30 chocolate Hersheys Kisses, unwrapped

Instructions

    Notes

    Chilling the dough prevents spreading and keeps cookies thick.
    Expect light cracking when adding the chocolate kiss.
    Store cookies in an airtight container at room temperature for up to 3 days.

    Heavenly Lemon Raspberry Scones

    Print
    clock clock iconcutlery cutlery iconflag flag iconfolder folder iconinstagram instagram iconpinterest pinterest iconfacebook facebook iconprint print iconsquares squares iconheart heart iconheart solid heart solid icon

    Ridiculously Easy Lemon Raspberry Scones


    • Author: Chef Emy

    Description

    These heavenly, melt-in-your-mouth Lemon Raspberry Scones are not only ridiculously delicious, they’re also ridiculously easy and come together so quickly!


    Ingredients

    Scale
    • 1 cup heavy cream
    • 8 tablespoons butter
    • 2 cups all purpose flour
    • 6 tablespoons sugar
    • 1 tablespoon baking powder
    • ½ teaspoon baking soda
    • ½ teaspoon salt
    • zest of 1 medium size lemon
    • ½ cup fresh raspberries

    Instructions

    1. Preheat the oven to 400 degrees. Line a sheet pan with parchment paper (you'll need 2 sheet pans for smaller scones). Set an oven rack on the middle level of the oven. Measure 1 cup heavy cream and place in the freezer while proceeding with the recipe. (You want the cream to be in the freezer 10-15 minutes.)
    2. Place butter in a microwave safe bowl, cover with a paper towel and heat on high for 1 minute. If not completely melted, return to microwave for 10 second intervals till melted. Set aside to cool a bit while prepping other ingredients.
    3. Whisk flour, baking powder, baking soda, sugar, lemon zest and salt in a medium-size bowl. Stir to combine.
    4. After heavy cream has been chilled in the freezer for 10-15 minutes, combine it with the melted butter. Stir with a fork until butter forms small clumps or globules (see the picture above in the post).
    5. Add butter/cream mixture to dry ingredients and stir with rubber spatula until all flour is incorporated and batter pulls away from sides of bowl. The batter will be very thick, like a cookie dough. Don't over mix it, but you do make sure all the little flour bits are incorporated.
    6. Break each raspberry in half and sprinkle them evenly over the top of the batter. Stir once or twice, gently to mix the berries throughout the dough.
    7. Spray a cookie scooper (see notes above) or large spoon with non-stick cooking spray. Scoop up scones in mounds onto prepared pan. When you scoop, try to get some of the raspberries into each portion. Space the scones at least 2-inches apart to allow for some spreading.
    8. Refrigerate scones for at least 15 minutes or up to an hour. If you don't have room for 2 sheet pans in your refrigerator, put them all on one to chill. Then separate before baking.
    9. Bake for 18-22 minutes or until light golden brown. Transfer to a wire cooling rack.
    10. While the scones are baking, make the lemon glaze. Combine the powdered sugar, milk (or half and half) and lemon juice in a medium-size bowl. Whisk well until smooth to make a thick, but spoonable glaze. (If glaze is too thin, add a bit more powdered sugar, if too thick add add a little more cream.)
    11. Place a sheet pan or piece of foil under the cooling rack and spoon the glaze over scones to cover completely, allowing any excess to drip onto the sheet pan or foil.
    12. If you can wait, let scones sit for 15 minutes to let glaze set before serving.

    Notes

    See Café Tips above in the post for more detailed instructions and tips.

    Nutrition

    • Calories: 282kcal
    • Sugar: 16g
    • Protein: 3g

    Carrot Cake Jam Canning Recipe – CanningCrafts

    Carrot cake lovers, what if you could preserve the rich flavors of this delicious cake in a jar? Shredded orange carrots, chopped apples, juicy pineapples, coconut, and nuts suspended in a lovely spiced jam. Get the water bath canning recipe on CanningCrafts.com | #canningcrafts #canning #foodpreservation #preserving #homecanning #canningrecipes #recipe #canningjam #jam #carrotcake #carrotcakejam

    Print

    clock clock iconcutlery cutlery iconflag flag iconfolder folder iconinstagram instagram iconpinterest pinterest iconfacebook facebook iconprint print iconsquares squares iconheart heart iconheart solid heart solid icon

    Carrot Cake Jam Canning Recipe


    • Author: Chef Emy

    Instructions

      Strawberry Oatmeal Crumble Bars

      Strawberry Oatmeal Bars with Crumble Topping – Averie Cooks

      Print

      clock clock iconcutlery cutlery iconflag flag iconfolder folder iconinstagram instagram iconpinterest pinterest iconfacebook facebook iconprint print iconsquares squares iconheart heart iconheart solid heart solid icon

      Strawberry Oatmeal Crumble Bars


      • Author: Chef Emy

      Description

      These buttery bars are bursting with fresh strawberries! Just 10 minutes of prep, so EASY because the crust and crumble are one and the same, and a crowd FAVORITE every time!


      Ingredients

      Scale
      • ½ cup unsalted butter, melted
      • 1 cup all-purpose flour
      • ¾ cup old-fashioned oats
      • ½ cup granulated sugar
      • ¼ cup light brown sugar, packed
      • ½ teaspoon salt, or to taste

      Instructions

      1. Crust and Crumble Topping:Preheat oven to 350F. Line an 8-inch square pan with aluminum foil and spray with cooking spray; set aside. Lining the pan helps with cleanup and is recommended.
      2. In a large, microwave-safe bowl melt the butter, about 1 minute on high power.
      3. Add the flour, oats, sugars, optional salt, and stir to combine. Mixture will be dry and sandy with some larger, well-formed crumble pieces.
      4. Set 1 heaping cup mixture aside to be sprinkled on later as crumble topping.
      5. Transfer remaining mixture to prepared pan, and using a spatula or your fingers, hard-pack the mixture to create an even, smooth, flat crust; set aside.
      6. In a large mixing bowl (same one used for crust and crumble is okay), add all ingredients and toss to combine. If sugar hasnt dissolved fully thats okay because it liquifies while baking.
      7. Evenly distribute strawberry mixture over the crust.
      8. Evenly sprinkle with the reserved heaping 1 cup crumble topping mixture. Before sprinkling, I squeeze the mixture in my palm to encourage bigger crumble pieces to form.
      9. Bake for about 50 minutes, or until edges are set and center has just set. Crumble topping should appear set and very pale golden and the strawberry filling mixture will be bubbling along the edges. Bars may take longer than 50 to 55 minutes if the strawberries are very juicy. Watch your bars, not the clock, when evaluating doneness.
      10. Place pan on a wire rack and allow bars to cool for at least 1 hour before slicing and serving. If you try to slice bars before theyve cooled completely, theyll be extremely messy and could fall apart.

      Notes

      Oats: Dont use quick cook or instant, because theyre finer and behave like flour and will make the mixture too dry.
      Storage: Bars will keep airtight at room temperature for up to 1 week, in the fridge for up to 10 days, or in the freezer for up to 6 months.
      Adapted from Blueberry Oatmeal Crumble Bars.

      Nutrition

      • Calories: 308cal
      • Sugar: 27g
      • Protein: 2g