“`html
Table of Contents
- Creamy Parmesan Pasta with Garlic Butter Chicken Bites
- Why You’ll Love This Recipe
- Ingredients You’ll Need
- Cooking Timing Breakdown
- Crafting Your Creamy Parmesan Pasta
- Nutritional Highlights
- Healthier Twists on Tradition
- Serving Suggestions
- Common Pitfalls to Avoid
- Storing and Reheating
- Frequently Asked Questions
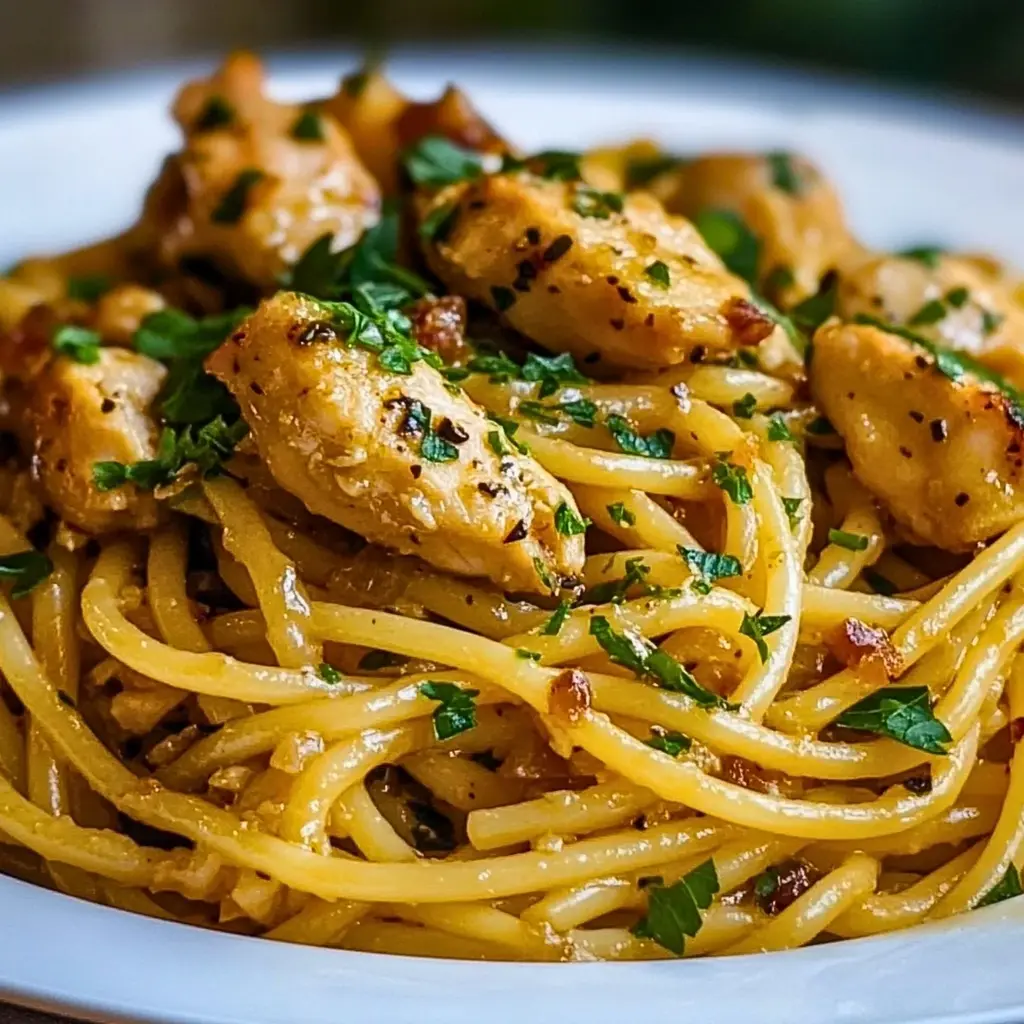
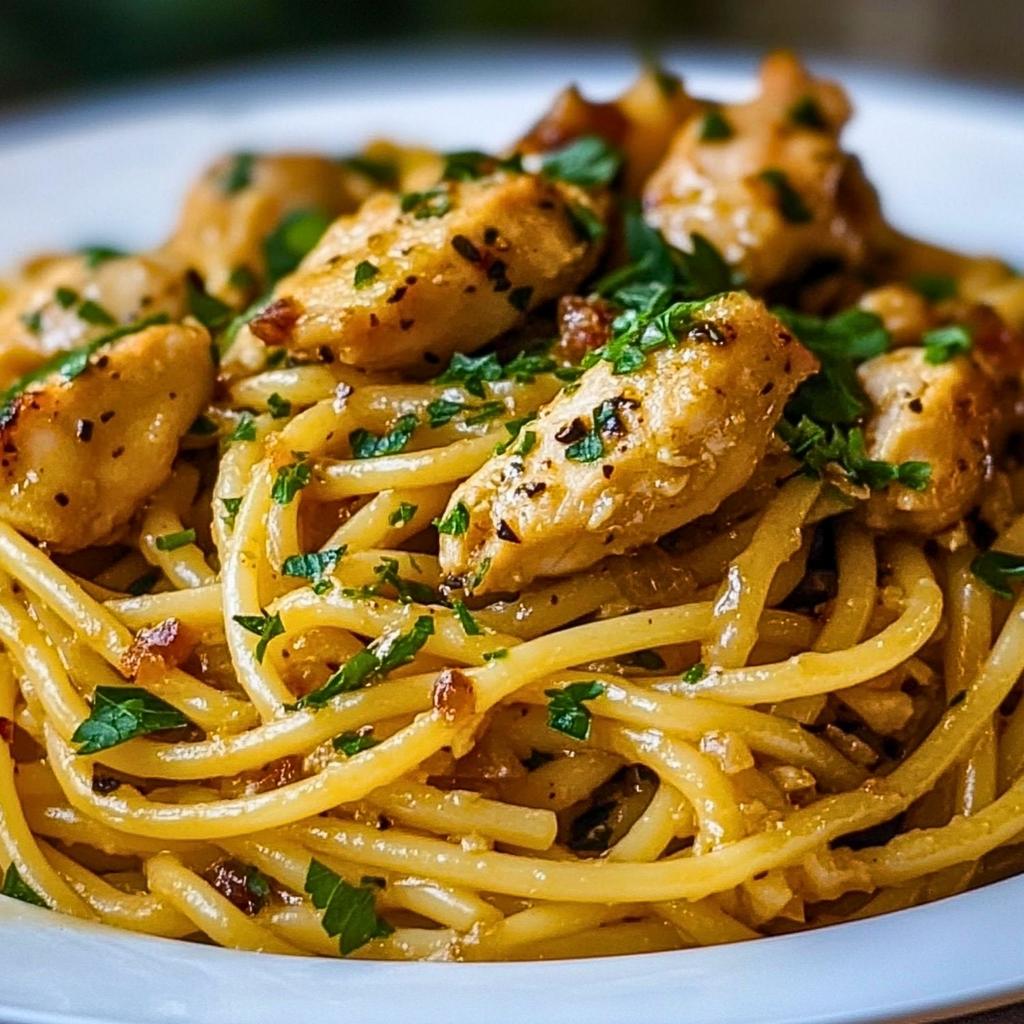
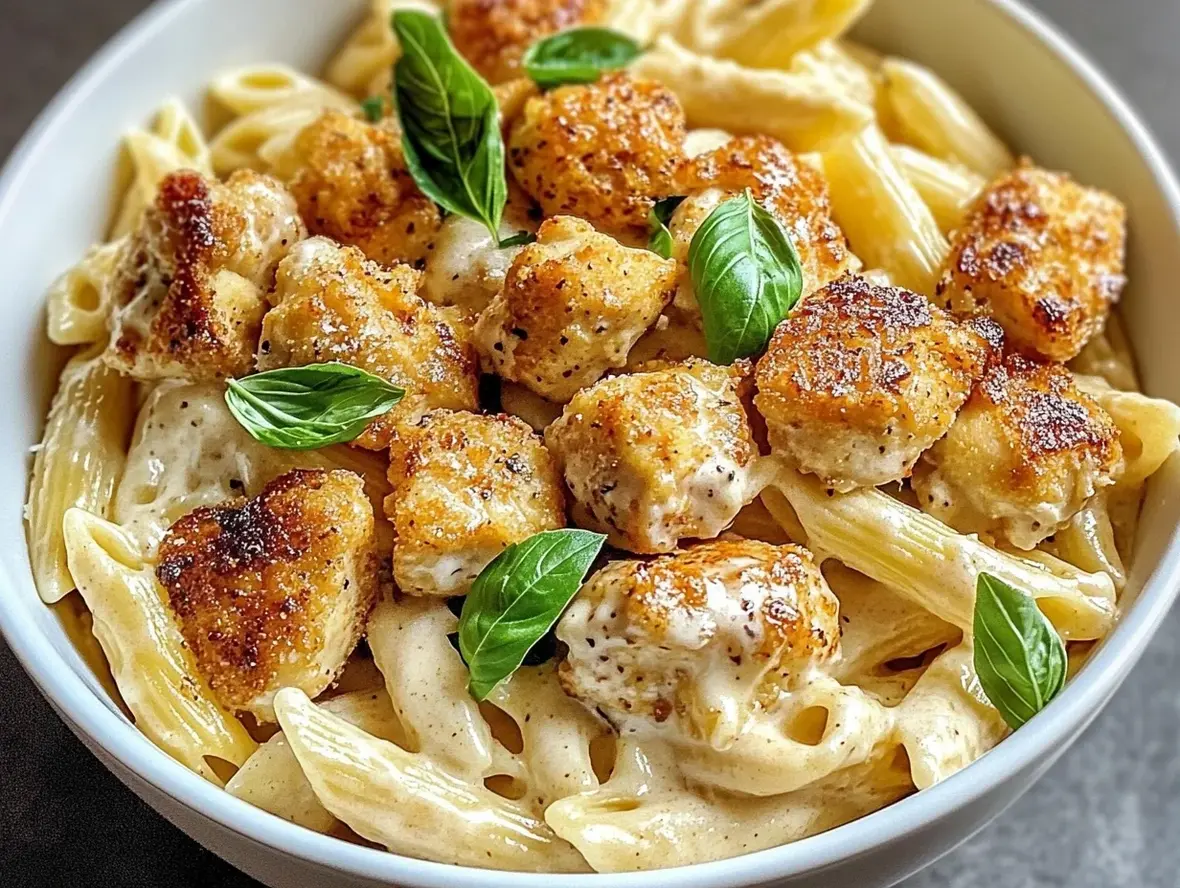
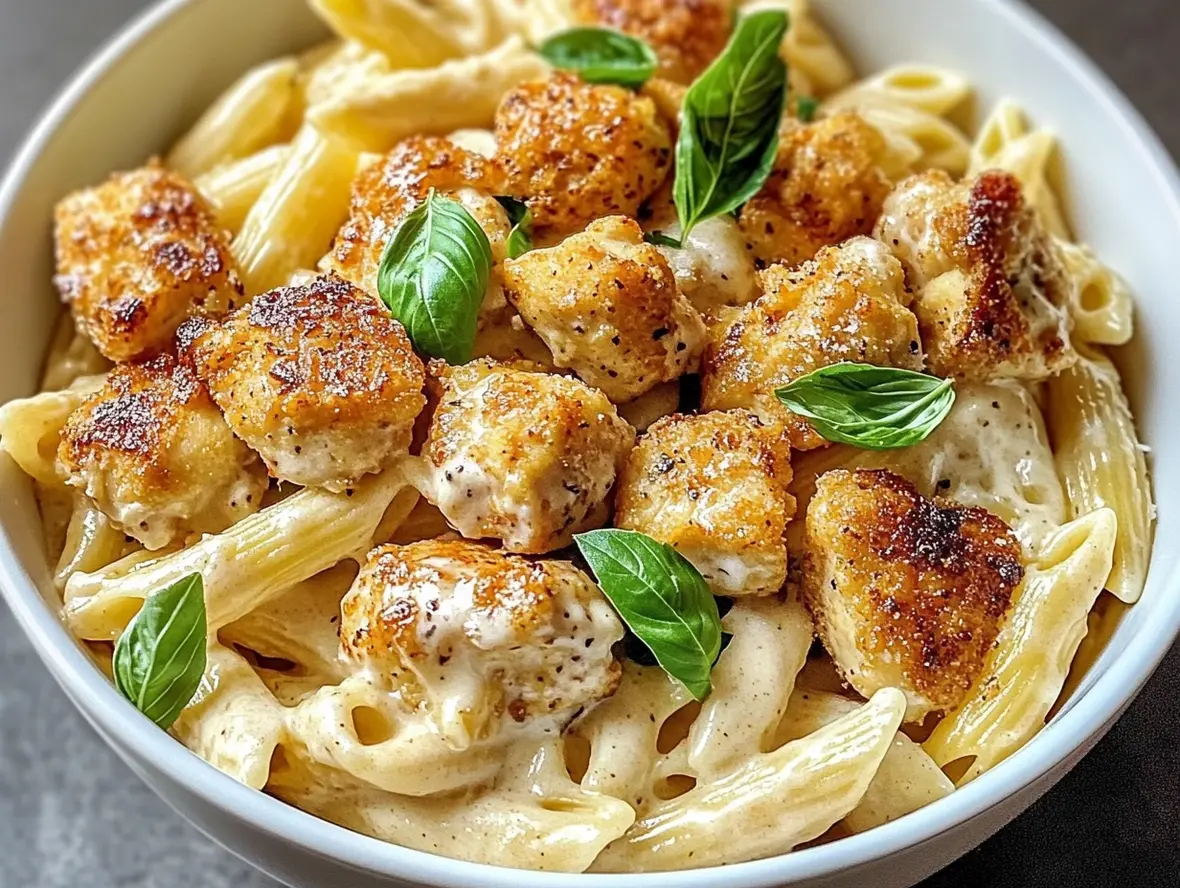
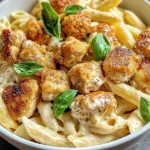
Creamy Parmesan Pasta with Garlic Butter Chicken Bites
Why You’ll Love This Recipe
Are you searching for a pasta dish that’s both incredibly satisfying and surprisingly easy to make? In a typical week, how often do you crave a meal that feels like a gourmet experience but can be on your table in under an hour? This Creamy Parmesan Pasta with Garlic Butter Chicken Bites is the answer to your weeknight dinner dilemma and weekend indulgence dreams. It perfectly balances the rich, comforting embrace of a creamy parmesan sauce with the savory, tender delight of garlic butter chicken bites. This isn’t just a meal; it’s an experience designed to bring smiles to faces and create memorable moments around your dinner table. Get ready to impress yourself and your loved ones with a dish that truly delivers on flavor and ease.
Ingredients You’ll Need
For the Chicken:
- 1.5 lbs boneless, skinless chicken breasts or thighs, cut into 1-inch cubes
- 2 tablespoons olive oil
- 3 cloves garlic, minced
- 1 teaspoon dried Italian seasoning
- 1/2 teaspoon salt
- 1/4 teaspoon black pepper
- 2 tablespoons butter
For the Pasta:
- 12 oz pasta of your choice (fettuccine, penne, or rotini work wonderfully)
- 2 tablespoons butter
- 3 cloves garlic, minced
- 1.5 cups heavy cream
- 1 cup grated Parmesan cheese (plus more for serving)
- 1/2 cup reserved pasta water
- Salt and freshly ground black pepper to taste
- Optional: Fresh parsley, chopped, for garnish
Substitution Note: For a lighter option, you can use half-and-half instead of heavy cream, though the sauce will be less rich. Chicken thighs offer more flavor and moisture than breasts. Feel free to experiment with your favorite pasta shape!
Cooking Timing Breakdown
Compared to an average creamy pasta recipe that can take up to an hour, this dish significantly cuts down on cooking time without sacrificing flavor, making it ideal for busy nights.
Crafting Your Creamy Parmesan Pasta
Step 1: Prep the Chicken
Begin by ensuring your chicken is cut into uniform, bite-sized pieces. This helps them cook evenly and quickly. In a medium bowl, toss the chicken cubes with 2 tablespoons of olive oil, 3 minced garlic cloves (for the chicken), Italian seasoning, salt, and pepper. Make sure each piece is well-coated. This marination step infuses the chicken with flavor right from the start.
Step 2: Cook the Chicken
Heat a large skillet over medium-high heat. Add the seasoned chicken pieces in a single layer, working in batches if necessary to avoid overcrowding the pan. This ensures the chicken sears nicely rather than steaming. Cook for about 5-7 minutes, flipping halfway through, until golden brown and cooked through. Once cooked, transfer the chicken to a plate and set aside. In the same skillet, melt 2 tablespoons of butter over medium heat. Add the remaining 3 minced garlic cloves and sauté for about 30 seconds until fragrant. Be careful not to burn the garlic!
Step 3: Cook the Pasta
While the chicken is cooking, bring a large pot of salted water to a rolling boil. Add your chosen pasta and cook according to package directions until al dente. Before draining, reserve about 1 cup of the starchy pasta water – this is liquid gold for creating a luscious sauce! Drain the pasta well.
Step 4: Craft the Creamy Parmesan Sauce
To the skillet with the garlic butter, pour in the heavy cream. Bring it to a gentle simmer, stirring occasionally. Let it simmer for about 3-5 minutes, allowing it to thicken slightly. Gradually whisk in the grated Parmesan cheese until it’s smooth and well combined. Now, introduce about 1/2 cup of the reserved pasta water to the sauce. This helps emulsify the sauce, making it wonderfully creamy and glossy while also thinning it to the perfect consistency. Season with salt and pepper to taste.
Step 5: Combine and Serve
Add the cooked pasta and the cooked chicken bites back into the skillet with the creamy sauce. Toss gently until everything is coated in the rich, cheesy goodness. If the sauce seems too thick, add a little more pasta water, a tablespoon at a time, until it reaches your desired consistency. Garnish with fresh chopped parsley and an extra sprinkle of Parmesan cheese, if desired. Serve immediately and savor every delicious bite!
Nutritional Highlights
- Calories: Approximately 550-650 per serving (varies based on portion size and ingredients).
- Protein: Rich in protein from the chicken.
- Carbohydrates: Primarily from the pasta.
- Fats: Contains healthy fats from olive oil and beneficial fats from butter and cream.
This information is an estimate and can vary. For precise nutritional data, it’s recommended to use a nutritional calculator for your specific ingredients.
Healthier Twists on Tradition
- Whole Wheat Pasta: Boost fiber content by using whole wheat pasta.
- Leaner Protein: Opt for chicken breast, or consider adding shrimp or white beans for a plant-based protein.
- Reduced Cream: Use a blend of half-and-half and a splash of milk, or even a dairy-free milk like unsweetened almond milk thickened with a little cornstarch, for a lighter sauce.
- Add More Veggies: Toss in steamed broccoli florets, spinach, or sautéed mushrooms for added nutrients and texture.
Serving Suggestions
This creamy parmesan pasta is a complete meal on its own, but it also pairs wonderfully with a crisp green salad tossed with a light vinaigrette. Consider serving it with crusty garlic bread to mop up any leftover sauce. A glass of crisp white wine, like a Sauvignon Blanc or Pinot Grigio, complements the richness of the dish beautifully.
Common Pitfalls to Avoid
- Overcooking the Pasta: Ensure your pasta is al dente, as it will continue to cook slightly when mixed with the sauce.
- Burning the Garlic: Garlic burns quickly. Sauté it gently until fragrant, not brown.
- Sauce Too Thick/Thin: Use reserved pasta water judiciously to achieve the perfect creamy consistency.
- Overcrowding the Pan: Don’t overcrowd the skillet when cooking chicken. Cook in batches for a proper sear.
Storing and Reheating
Leftovers can be stored in an airtight container in the refrigerator for up to 3 days. For reheating, gently warm the pasta on the stovetop over low heat, adding a splash of milk or water to loosen the sauce. Alternatively, you can microwave it, stirring halfway through. Be aware that the sauce might separate slightly upon reheating; stirring usually resolves this.
Frequently Asked Questions
***_What kind of pasta is best for this dish?_***
Any pasta shape that holds sauce well will work. Long pastas like fettuccine or linguine, or short shapes like penne, rigatoni, or fusilli are excellent choices. The sauce clings beautifully to these varieties.
***_Can I make this sauce dairy-free?_***
Yes, you can adapt it! Use a dairy-free butter, a plant-based cream alternative (like cashew or oat cream), and nutritional yeast or dairy-free shredded parmesan for a cheesy flavor. You might need to adjust the seasoning.
***_How can I add more flavor to the chicken?_***
Besides the garlic and Italian seasoning, consider adding a pinch of red pepper flakes for a little heat, smoked paprika for depth, or a squeeze of lemon juice over the cooked chicken for brightness.
***_My sauce is too thin, what should I do?_***
Simmer the sauce for a few extra minutes without the pasta to allow it to reduce and thicken. You can also create a slurry by mixing 1 teaspoon of cornstarch with 2 teaspoons of cold water, then whisking it into the simmering sauce until thickened.
***_Can I use store-bought pre-cooked chicken?_***
You can, but the flavor won’t be as intense as freshly cooked chicken. If you do, ensure it’s cut into bite-sized pieces and warmed through in the sauce at the end, perhaps sautéed briefly with garlic before adding it to the sauce.
Garlic Butter Chicken Bites with Creamy Parmesan Pasta
Description
This delightful dish combines tender, garlicky chicken bites with a rich and creamy Parmesan pasta for the ultimate comfort food. It’s an easy, satisfying meal that’s perfect for busy weeknights or a cozy dinner.
Ingredients
- 1lb chicken breast, cubed8 ozpasta (penne or rotini)4 tbspbutter2cloves garlic, minced1 cupheavy cream1 cupgrated Parmesan cheeseSalt and pepper, to tasteFresh basil, for garnish
- 8 ozpasta (penne or rotini)4 tbspbutter2cloves garlic, minced1 cupheavy cream1 cupgrated Parmesan cheeseSalt and pepper, to tasteFresh basil, for garnish
- 4 tbspbutter2cloves garlic, minced1 cupheavy cream1 cupgrated Parmesan cheeseSalt and pepper, to tasteFresh basil, for garnish
- 2cloves garlic, minced1 cupheavy cream1 cupgrated Parmesan cheeseSalt and pepper, to tasteFresh basil, for garnish
- 1 cupheavy cream1 cupgrated Parmesan cheeseSalt and pepper, to tasteFresh basil, for garnish
- 1 cupgrated Parmesan cheeseSalt and pepper, to tasteFresh basil, for garnish
- Salt and pepper, to tasteFresh basil, for garnish
- Fresh basil, for garnish
Instructions
- 1️⃣Cook the Pasta:Bring a large pot of salted water to a boil.Cook the pasta according to package directions until al dente. Drain and set aside.2️⃣Cook the Chicken:Heat a large skillet over medium heat and melt the butter.Add the minced garlic and sauté for 1-2 minutes, until fragrant.Add the cubed chicken, cooking for 6-8 minutes, stirring occasionally, until golden brown and fully cooked. Season with salt and pepper.3️⃣Make the Sauce:Lower the heat and stir in the heavy cream, scraping up any browned bits from the skillet for extra flavor.Gradually add the Parmesan cheese, stirring until the sauce is smooth and creamy. Adjust seasoning with salt and pepper as needed.4️⃣Combine and Serve:Add the cooked pasta to the skillet and toss to coat it evenly in the creamy sauce.Garnish with fresh basil leaves and serve immediately.
- Bring a large pot of salted water to a boil.
- Cook the pasta according to package directions until al dente. Drain and set aside.2️⃣Cook the Chicken:Heat a large skillet over medium heat and melt the butter.Add the minced garlic and sauté for 1-2 minutes, until fragrant.Add the cubed chicken, cooking for 6-8 minutes, stirring occasionally, until golden brown and fully cooked. Season with salt and pepper.3️⃣Make the Sauce:Lower the heat and stir in the heavy cream, scraping up any browned bits from the skillet for extra flavor.Gradually add the Parmesan cheese, stirring until the sauce is smooth and creamy. Adjust seasoning with salt and pepper as needed.4️⃣Combine and Serve:Add the cooked pasta to the skillet and toss to coat it evenly in the creamy sauce.Garnish with fresh basil leaves and serve immediately.
- 2️⃣Cook the Chicken:Heat a large skillet over medium heat and melt the butter.Add the minced garlic and sauté for 1-2 minutes, until fragrant.Add the cubed chicken, cooking for 6-8 minutes, stirring occasionally, until golden brown and fully cooked. Season with salt and pepper.3️⃣Make the Sauce:Lower the heat and stir in the heavy cream, scraping up any browned bits from the skillet for extra flavor.Gradually add the Parmesan cheese, stirring until the sauce is smooth and creamy. Adjust seasoning with salt and pepper as needed.4️⃣Combine and Serve:Add the cooked pasta to the skillet and toss to coat it evenly in the creamy sauce.Garnish with fresh basil leaves and serve immediately.
- Heat a large skillet over medium heat and melt the butter.
- Add the minced garlic and sauté for 1-2 minutes, until fragrant.Add the cubed chicken, cooking for 6-8 minutes, stirring occasionally, until golden brown and fully cooked. Season with salt and pepper.3️⃣Make the Sauce:Lower the heat and stir in the heavy cream, scraping up any browned bits from the skillet for extra flavor.Gradually add the Parmesan cheese, stirring until the sauce is smooth and creamy. Adjust seasoning with salt and pepper as needed.4️⃣Combine and Serve:Add the cooked pasta to the skillet and toss to coat it evenly in the creamy sauce.Garnish with fresh basil leaves and serve immediately.
- Add the cubed chicken, cooking for 6-8 minutes, stirring occasionally, until golden brown and fully cooked. Season with salt and pepper.3️⃣Make the Sauce:Lower the heat and stir in the heavy cream, scraping up any browned bits from the skillet for extra flavor.Gradually add the Parmesan cheese, stirring until the sauce is smooth and creamy. Adjust seasoning with salt and pepper as needed.4️⃣Combine and Serve:Add the cooked pasta to the skillet and toss to coat it evenly in the creamy sauce.Garnish with fresh basil leaves and serve immediately.
- 3️⃣Make the Sauce:
- Lower the heat and stir in the heavy cream, scraping up any browned bits from the skillet for extra flavor.Gradually add the Parmesan cheese, stirring until the sauce is smooth and creamy. Adjust seasoning with salt and pepper as needed.4️⃣Combine and Serve:Add the cooked pasta to the skillet and toss to coat it evenly in the creamy sauce.Garnish with fresh basil leaves and serve immediately.
- Gradually add the Parmesan cheese, stirring until the sauce is smooth and creamy. Adjust seasoning with salt and pepper as needed.4️⃣Combine and Serve:Add the cooked pasta to the skillet and toss to coat it evenly in the creamy sauce.Garnish with fresh basil leaves and serve immediately.
- 4️⃣Combine and Serve:
- Add the cooked pasta to the skillet and toss to coat it evenly in the creamy sauce.Garnish with fresh basil leaves and serve immediately.
- Garnish with fresh basil leaves and serve immediately.
Notes
For a touch of heat, add a pinch of red pepper flakes to the butter while cooking the garlic.Substitute half-and-half for a lighter version of the sauce, but the texture may be less creamy.Pair with a side salad or garlic bread for a complete meal.
Substitute half-and-half for a lighter version of the sauce, but the texture may be less creamy.Pair with a side salad or garlic bread for a complete meal.
Pair with a side salad or garlic bread for a complete meal.
“`