End your day with a delicious, comforting, and satisfying dinner! Whether you’re looking for quick and easy weeknight meals, cozy comfort food, or elegant dishes for special occasions, we have the perfect recipes for you.
From hearty casseroles and one-pan wonders to savory pastas, juicy meats, and flavorful vegetarian options, our collection is designed to make dinnertime effortless and enjoyable.
Busy schedule? No problem! Try our slow cooker meals, sheet pan dinners, and 30-minute recipes to save time without sacrificing flavor. Whatever your craving, these recipes will bring warmth and joy to your table every night. 🍽️✨
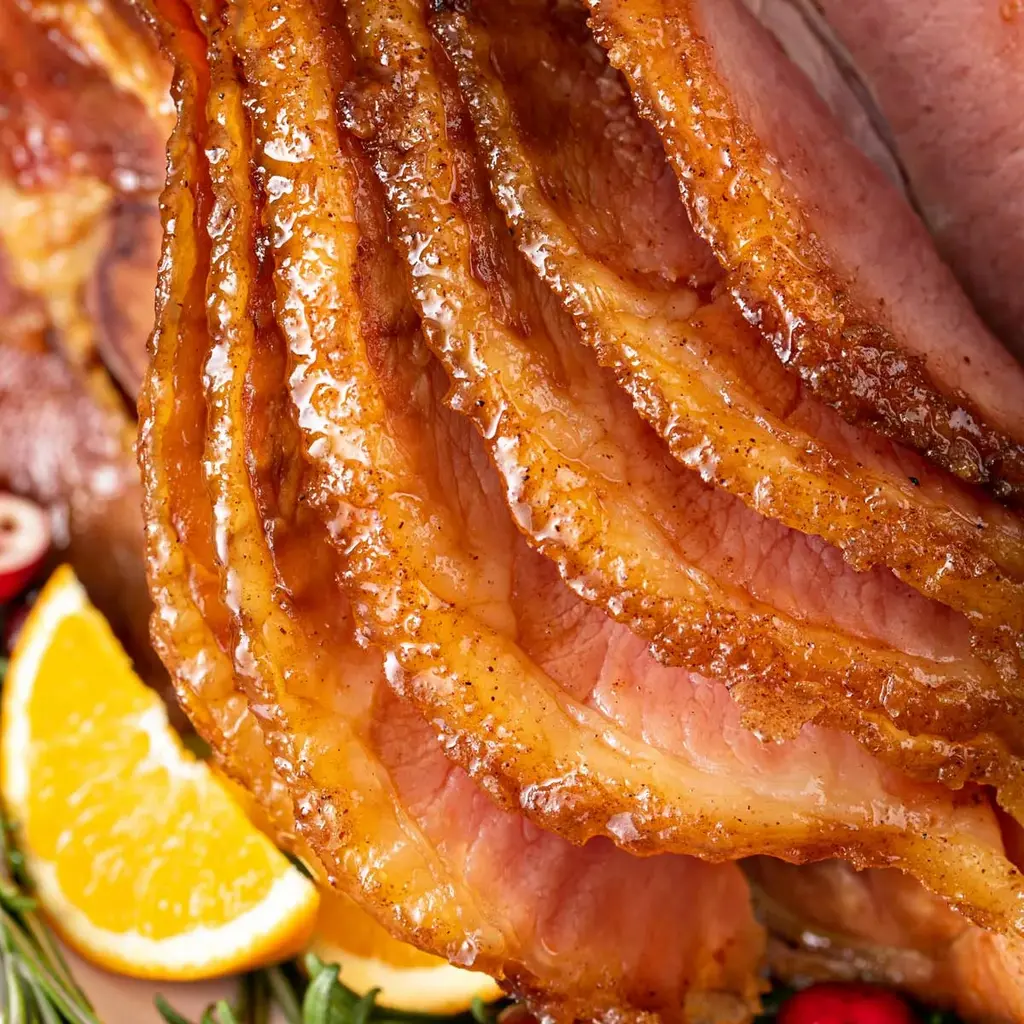
Copycat Honey Baked Ham Recipe
This copycat Honey Baked Ham recipe is insanely delicious and will definitely help you save money on your holiday meal. Juicy and tender spiral ham gets extra flavor with a caramelized and sticky layer of butter and sweet honey glaze. Oven, slow cooker and Instant pot directions provided. #lemonblossoms #honeybaked #ham #holidays #Christmas #Easter #Thanksgiving #crockpot #instantpot #baked
Copycat Honey Baked Ham made with a spiral-cut ham with a caramelized and sticky layer of butter and spiced sweet honey glaze. This juicy and tender ham can be made in the oven, the slow cooker and the Instant Pot. Directions provided.
Ingredients
Scale
1 (8-pounds) half spiral cut ham, bone in or boneless
2 tablespoons butter, melted
1/3 cup honey
Instructions
Preheat the oven to 325º Fahrenheit and place the oven rack in the lower 1/3 part of the oven. Cover a roasting pan or rimmed baking sheet with foil and coat the metal wire rack insert with cooking spray. Remove the ham from its package. If using bone in ham, remove the plastic cap thats over the bone. Place the ham flat-side down on the roasting rack
In a small bowl combine the melted butter and the honey. Pat the ham dry with paper towels. Using a pastry brush (or with your hands), slather or massage the mixture all over the outside of the ham and in between the slices. If any of the honey glaze lands at the bottom of the roasting pan, you can scoop it up and slather it on the ham.
Add about a cup of water to the bottom of the roasting pan or rimmed baking sheet. This will create a moist environment in the oven so you end up with a juicy ham. Bake covered for about 2.5 hours (about 20 minutes per pound of ham) or until an instant-read thermometer registers 140º Fahrenheit when inserted into the thickest part of the ham. Remove ham from the oven and tented with aluminum foil to keep it warm
Combine the spice sugar mixture in a small bowl. Uncover the ham. If the edges are dry, baste the ham with the pan juices then, pat half of the spice sugar mixture (about 3/4 cup) all over the surface of the ham. Alternatively, you can place the sugar mixture on a sheet pan and then roll the ham through the sugar mixture until nicely coated.
Return the ham to the oven and broil until caramelized and bubbly. You can also use a blow torch if preferred.
In a small saucepan, combine the remaining sugar mixture with about 1/3 cup of ham drippings (pan juices) or water (or a combination of both). Bring the mixture to a boil over medium heat and cook until it reaches a glaze consistency, about 2 minutes.
Pour or brush the glaze over the ham. Broil for 1-2 minutes or until bubbly. Keep an eye on it as it can burn quickly.
Remove from the oven and let rest for 5-10 minutes. Serve warm or cold.
Notes
Although the ham is already precooked, it should be baked until it reaches an internal temperature of 140 degrees Fahrenheit to make sure is warm through.
Instant Pot Honey Baked Ham:
Nutrition
Calories:765kcal
Sugar:49g
Protein:49g
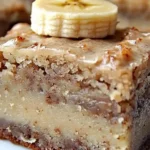
Banana Bread Brownies – A Deliciously Moist, Sweet Twist on Banana Bread!
These Banana Bread Brownies combine the best of both worlds, with the moist, dense texture of banana bread and the richness of brownies. A perfect treat for banana bread lovers who crave a little extra chocolate!
Banana Bread Brownies combine the moist sweetness of banana bread with the rich, fudgy texture of brownies for the ultimate treat. Quick, easy, and perfect for any occasion, these brownies are sure to impress. ezstandalone.cmd.push(function { ezstandalone.showAds(147); });
Ingredients
Scale
2 ripe bananas, mashed
1/2 cup melted butter
1 cup granulated sugar
2 large eggs
1 teaspoon vanilla extract
1 1/2 cups all-purpose flour
1 teaspoon baking soda
1/4 teaspoon salt
1/2 cup cocoa powder
1/2 cup milk
1/2 cup chocolate chips (optional)
1/4 cup brown sugar
1/2 teaspoon ground cinnamon
1 tablespoon butter, cut into small pieces
Instructions
Preheat Oven: Preheat to 350°F (175°C). Grease and line a 9×13-inch baking pan.
Prepare Wet Ingredients: In a large bowl, mash bananas, then add melted butter, sugar, eggs, and vanilla. Beat until combined.
Mix Dry Ingredients: In another bowl, whisk flour, baking soda, salt, and cocoa powder. Gradually add to wet mixture until just combined.
Add Milk & Chips: Stir in milk and chocolate chips (if using).
Pour Batter: Spread batter evenly in prepared pan.
Add Topping: Mix brown sugar and cinnamon, sprinkle over batter, and dot with butter pieces.
Bake: Bake 2530 minutes, until toothpick comes out with a few crumbs. Cool 10 minutes, then transfer to rack to cool completely.
Serve: Slice into squares and enjoy!
Notes
Use very ripe bananas for best flavor.
Dont overmix batter to keep brownies tender.
Add walnuts or swirl in peanut butter for variation.
Store at room temp 34 days or refrigerate up to 1 week.
This ham glaze is a combination of butter, brown sugar, pineapple juice and spices, all simmered together until thickened. Coat a ham in this glaze, then bake the ham to golden brown perfection and watch the rave reviews come in.
Ingredients
Scale
1/2 cup butter
1 cup brown sugar
1/2 cup pineapple juice
1/2 teaspoon cinnamon
pinch of nutmeg
pinch of cloves
Instructions
Add the butter, brown sugar, pineapple juice, cinnamon, nutmeg and cloves to a pan. Place the pan over medium heat.
Bring the pot to a simmer and cook for 5-7 minutes or until glaze is syrupy.
Pour half the glaze over your ham. Cover the ham with foil and bake at 350 degrees F for 15 minutes per pound.
Uncover the ham and pour the remaining glaze over the top. Increase the oven to 400 degrees F. Bake for 15-20 minutes or until ham is caramelized and browned.
Notes
Notes This recipe works with both dark brown sugar and light brown sugar. The light brown sugar produces a more neutral flavor, while dark brown sugar has a stronger molasses flavor. This glaze is best made right before use. It doesn’t store well because it will harden if chilled. If your glaze cools and becomes overly thick, you can microwave it for about 30 seconds to loosen it back up again.
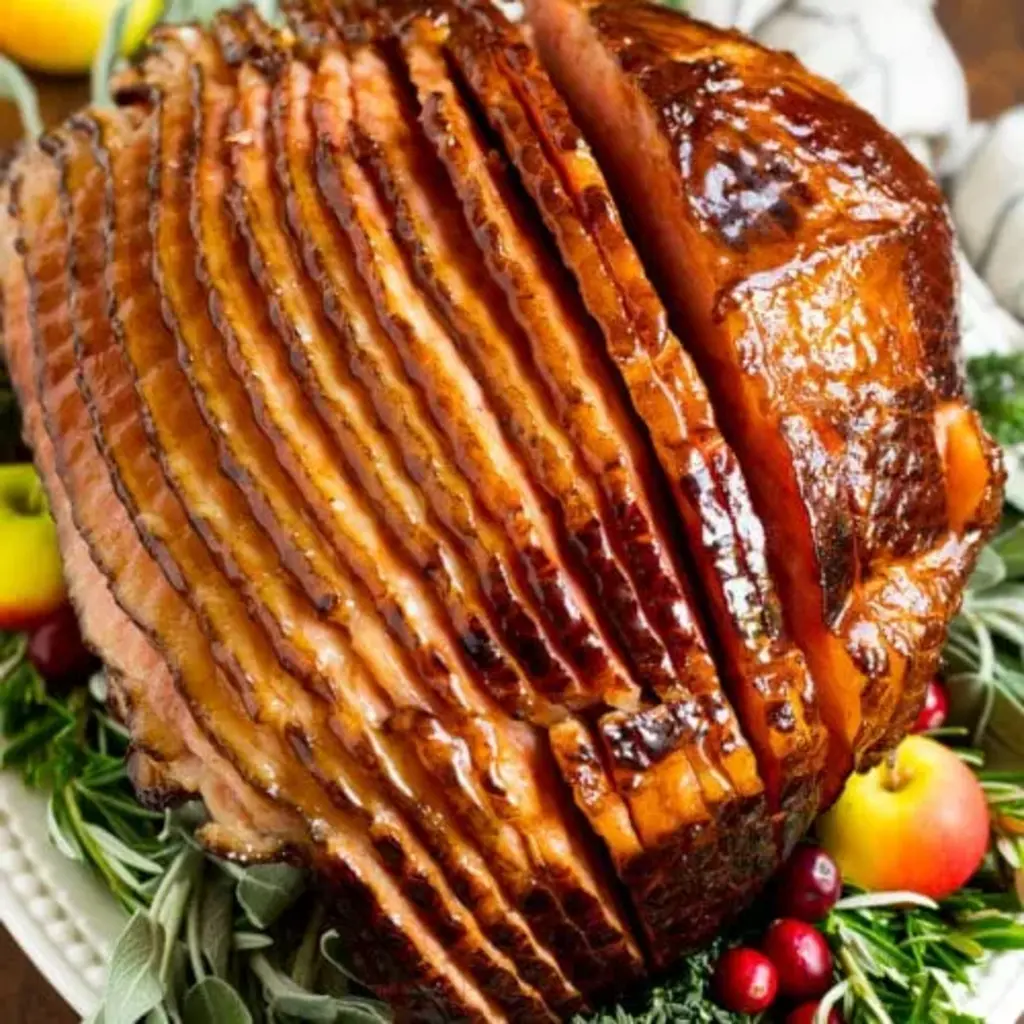
The most perfect sticky glaze is slathered all over this juicy, tender Brown Sugar Mustard Glazed Ham, with crisp edges and an incredible flavour. Dont even be intimidated by a ham this season, with all the tips and tricks you need right here!
Ingredients
Scale
8–10 pound bone-in cooked ham
1/2 cup water
1/2 cup unsalted butter reduce fat or full fat
1 cup brown sugar
1/2 cup honey
2 tablespoons dijon mustard
1/4 teaspoon ground cinnamon
1/4 teaspoon ground cloves
4 cloves garlic smashed
Instructions
Preheat the oven to 300°F (150°C) and arrange a rack in the lower third. Remove any plastic packaging or netting from the ham. Trim away the rind and discard. Set the ham aside to rest at room temperature for 1-2 hours.
Line a baking tray or dish with several sheets of aluminium foil or parchment paper if you prefer (it will make cleanup a lot easier).
Remove the rind or skin of the ham (refer to steps in post), ensuring you leave the fat on. Using a sharp knife score a 1 inch wide diamond pattern (dont cut more than ¼ inch deep) over the entire ham. Place the ham in the baking tray. Pour water into the base of the pan and cover the ham with two pieces of foil or parchment paper and bake for 30 minutes.
Meanwhile, heat the butter in a small pot or saucepan over medium heat until golden browned. Add in the brown sugar, honey, mustard, cinnamon and cloves, stirring to mix together well until the brown sugar has completely dissolved, (about 2 minutes).
Reduce heat to low and add in the garlic. Allow it to become fragrant, cooking for a further minute or two until the glaze just begins to simmer, then set it aside and let cool to lukewarm (the glaze should be the consistency of room-temperature honey).
After 30 minutes baking time, carefully remove the ham from the oven and increase the oven temperature to 425°F (220°C). Discard the foil or parchment paper and pour of the glaze all over the ham, brushing in between the cuts to evenly cover. Return to the oven and bake uncovered for 15 minutes.
Remove from the oven, brush with another third of the glaze and some of the pan juices, and repeat again after 15 minutes more minutes of baking until a dark golden brown crust has formed, (about 30 minutes total). For added depth of flavour, mix some of the ham pan juices together with the glaze in the pot which will help keep it runny enough for brushing. If your crust is still pink after there suggested baking time, turn on your broiler (or oven grill), and allow it to broil for 2-5 minutes, while keeping an eye on it so it doesn't burn from the sugar.
Let the ham rest 10-20 minutes before slicing.
Notes
Glaze Consistency: The glaze will naturally thicken as it cools. If it becomes too thick to brush easily between basting intervals, simply whisk in a tablespoon of hot pan juices (liquid from the bottom of the roasting pan) or warm it gently on the stove for 30 seconds.
Prevent Burning: Because of the high sugar content in the honey and brown sugar, the glaze can go from caramelized to burnt quickly. If you notice the ham getting too dark before its heated through, tent a piece of foil loosely over the dark spots.
Make Ahead: You can make the glaze up to 3 days in advance! Store it in an airtight container in the fridge. When ready to use, microwave it for 30-45 seconds to loosen it up.
Ham Prep: You can remove the rind and score the fat the day before. Wrap the prepared ham tightly in plastic wrap and keep refrigerated until you are ready to bring it to room temperature for baking.
Serving Size: A good rule of thumb for bone-in ham is to estimate about 3/4 pound (350g) per person. This accounts for the weight of the bone and ensures you have plenty of leftover ham for soup!
Acid Substitute: If you dont have apple cider vinegar, you can substitute with white wine vinegar or a squeeze of fresh lemon juice to balance the sweetness.
Moms Tip: Dont be afraid of the fat! Leaving a thick layer of fat (about 1/4 inch) ensures the meat stays juicy and the skin gets that irresistible crackle.
Nutrition
Calories:304kcal
Sugar:14g
Protein:27g
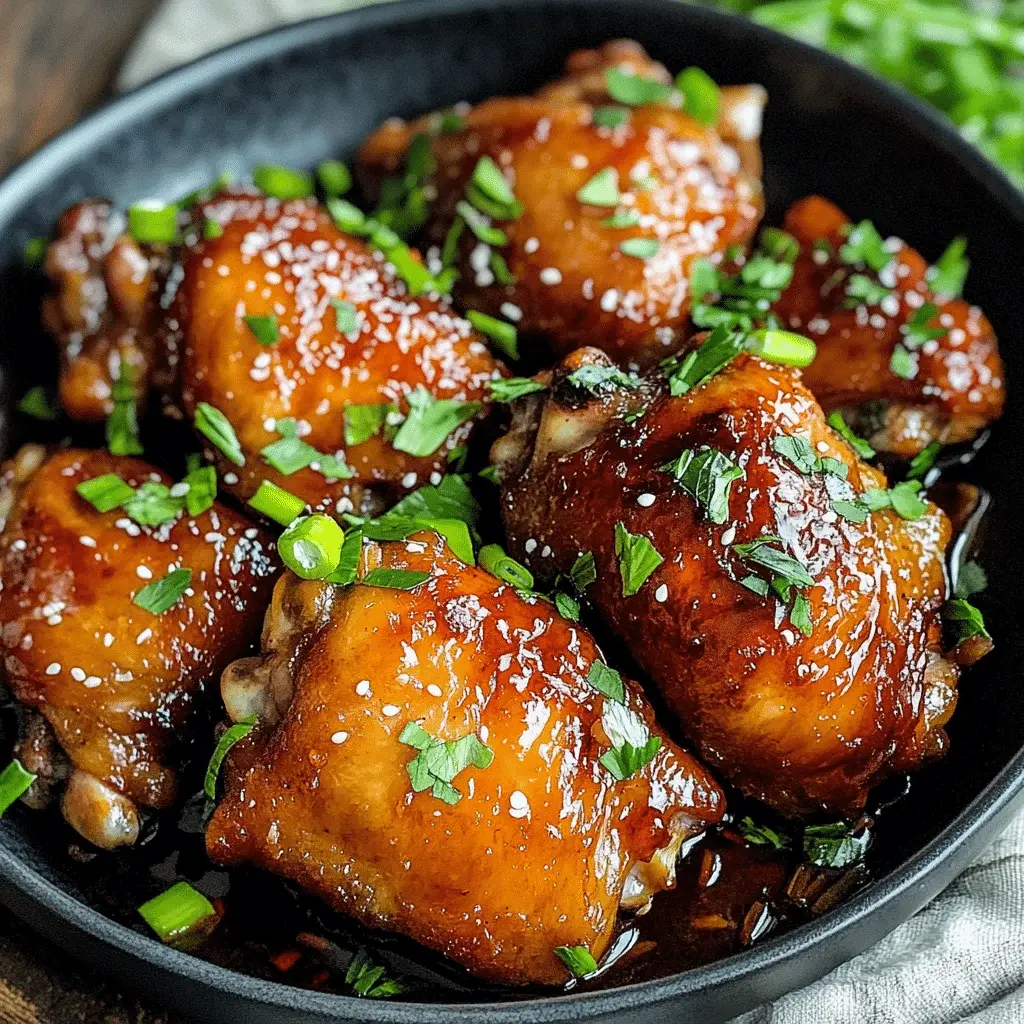
Glazed Soy Sauce Brown Sugar Chicken Thighs Recipe
“`html
Glazed Soy Sauce Brown Sugar Chicken Thighs Recipe
Did you know that a recent survey found over 70% of home cooks struggle to find a weeknight chicken recipe that is both deeply flavorful and surprisingly quick? If you’re part of that majority, your search ends here. This Glazed Soy Sauce Brown Sugar Chicken Thighs recipe is the answer, transforming simple pantry staples into a restaurant-worthy meal in under an hour. The magic lies in the alchemy of savory soy sauce and rich brown sugar, which caramelizes into a sticky, glossy glaze that clings to every tender bite of juicy chicken thigh. Forget dry, bland chicken forever. This dish delivers a perfect balance of sweet, salty, and umami that will have everyone asking for seconds. It’s the ultimate solution for a busy schedule that doesn’t compromise on taste, proving that a spectacular dinner doesn’t require complex techniques or obscure ingredients.
Ingredients List
Gather these simple ingredients for a flavor-packed meal. I’ve included sensory notes and substitutions to make this recipe work for you.
For the Chicken & Marinade:
2 lbs (about 900g) bone-in, skin-on chicken thighs – The skin renders fat for cooking and becomes incredibly crispy, while the bone keeps the meat succulent. Substitution: Boneless, skinless thighs work for a leaner option (reduce cook time by 5-7 minutes).
1/2 cup low-sodium soy sauce – Provides the foundational savory, umami depth. Using low-sodium allows you to control the salt level. Substitution: Tamari for gluten-free, or coconut aminos for a soy-free, slightly sweeter alternative.
1/3 cup packed dark brown sugar – The key to the glaze! Dark brown sugar has more molasses, offering a deeper, almost caramel-like flavor and beautiful color. Substitution: Light brown sugar or pure maple syrup.
3 cloves garlic, minced – Adds a pungent, aromatic kick that mellows into sweetness as it cooks.
1 tablespoon fresh ginger, grated – Brings a bright, zesty warmth that cuts through the richness. Substitution: 1 teaspoon ground ginger.
2 tablespoons rice vinegar – A crucial acidic component that balances the sweetness and tenderizes the chicken. Substitution: Apple cider vinegar or lime juice.
1 tablespoon sesame oil – A few drops of this toasted oil infuse an unmistakable nutty aroma. Note: A little goes a long way!
1/2 teaspoon black pepper
For Cooking & Garnish:
1 tablespoon neutral oil (avocado, canola) – For searing.
1 tablespoon sesame seeds – For a final toasty, visual crunch.
2 green onions, thinly sliced – Adds a fresh, sharp finish and vibrant green color.
Timing
Prep Time 15 minutes (plus 30 min marinating)
Cook Time 25 minutes
Total Time 1 hour 10 minutes
While the total clock reads just over an hour, the active cooking time is only about 25 minutes. Compared to the average baked chicken recipe that requires 45+ minutes of passive oven time, this stovetop-to-oven method is significantly more efficient. The 30-minute marinade is the secret “hands-off” time that builds maximum flavor—a worthwhile investment that shaves off the need for lengthy simmering or braising later. You get the depth of flavor of a slow-cooked dish in a fraction of the time.
Step-by-Step Instructions
Step 1: Prepare the Marinade
In a medium bowl, whisk together the soy sauce, packed dark brown sugar, minced garlic, grated ginger, rice vinegar, sesame oil, and black pepper. Don’t just stir—whisk vigorously for about 30 seconds until the sugar is completely dissolved and the mixture is homogenous. You should see the liquid darken slightly and thicken into a syrupy consistency. This is your flavor powerhouse. Taste a tiny drop on a spoon (it will be strong!) to understand the balance. Pro Tip: If you have time, warming the mixture for 15 seconds in the microwave can help the sugar dissolve even faster.
Step 2: Marinate the Chicken
Place the chicken thighs in a large resealable plastic bag or a shallow dish. Pour 3/4 of the marinade over the chicken, reserving the remaining 1/4 in a small bowl for the glaze later. Seal the bag or cover the dish, ensuring all chicken pieces are coated. Massage the bag gently to distribute the marinade. Refrigerate for at least 30 minutes, but for truly transformative flavor, aim for 2-4 hours. Overnight is fantastic, but if you go beyond 8 hours, the acid can start to slightly toughen the meat’s surface. Pat the chicken thighs dry with paper towels before cooking—this is non-negotiable for achieving crispy skin.
Step 3: Cook to Perfection
Preheat your oven to 400°F (200°C). Heat the neutral oil in a large, oven-safe skillet (cast iron is ideal) over medium-high heat. Once the oil shimmers, add the chicken thighs skin-side down. Do not crowd the pan; cook in batches if necessary. Let them sear, undisturbed, for 6-8 minutes until the skin is golden brown and releases easily from the pan. Flip the thighs and sear the other side for 2-3 minutes. This initial sear locks in juices and creates a flavorful fond (the browned bits) in the pan.
Step 4: Create the Glaze
Pour off excess fat from the skillet, leaving about a tablespoon. Reduce the heat to medium. Add the reserved marinade to the hot skillet. It will bubble and sizzle immediately. Use a wooden spoon to scrape up all the delicious browned fond from the bottom of the pan. Let the sauce simmer for 2-3 minutes until it reduces by about half and thickens to a syrup that coats the back of a spoon. This reduction concentrates the flavors and makes the glaze sticky.
Step 5: Rest and Serve
Return all the chicken thighs to the skillet, skin-side up, spooning some of the reduced glaze over each piece. Transfer the entire skillet to the preheated oven. Bake for 12-15 minutes, or until the internal temperature of the chicken reaches 165°F (74°C) at the thickest part. Remove from the oven and let the chicken rest in the skillet for 5-7 minutes. This allows the juices to redistribute, ensuring every bite is moist. Garnish generously with sliced green onions and toasted sesame seeds before serving.
Nutritional Information
Estimated per serving (1 chicken thigh with glaze):
Calories: 320-350 kcal
Protein: 28g
Total Fat: 18g (Saturated Fat: 5g)
Total Carbohydrates: 12g
Sugars: 10g (primarily from brown sugar)
Sodium: ~850mg (using low-sodium soy sauce)
Note: Values are approximate and can vary based on specific ingredients, portion size, and amount of glaze consumed.
Healthier Alternatives
You can easily adapt this recipe for various dietary needs without sacrificing the iconic sweet-salty profile:
Reduce Sugar: Swap half the brown sugar with a granulated sugar substitute like monk fruit or erythritol that measures 1:1 like sugar. The glaze may be slightly less sticky but will still caramelize.
Lower Sodium: Use reduced-sodium soy sauce and omit any added salt. The brown sugar and other flavors are robust enough to carry the dish.
Leaner Protein: Opt for boneless, skinless chicken breasts. Pound them to an even thickness for quick, even cooking (reduce oven time to 8-10 minutes).
Alternative Sweeteners: Pure maple syrup or honey can replace brown sugar. Note they burn at a lower temperature, so watch the reduction closely and consider adding it later in the glaze step.
Serving Suggestions
This versatile chicken is the star of the plate, but the right sides turn it into a memorable meal:
Fluffy White or Brown Rice: The classic choice. The rice soaks up the extra glaze beautifully.
Quick-Pickled Vegetables: Thinly sliced cucumbers or radishes quick-pickled in rice vinegar and a pinch of sugar provide a crisp, acidic contrast that cuts the richness.
Steamed Broccoli or Bok Choy: Simple greens steamed and drizzled with a little sesame oil make for a healthy, colorful plate.
For a Low-Carb Option: Serve over a bed of cauliflower rice or alongside a crisp garden salad with a ginger-sesame dressing.
Common Mistakes
Not Patting the Chicken Dry: This is the #1 reason for soggy skin. Moisture steams the skin instead of letting it fry to crispiness.
Crowding the Skillet: Overcrowding drops the pan temperature, causing the chicken to steam and stew in its own juices instead of searing.
Using All the Marinade for Glaze: Never boil a marinade that has touched raw chicken without first bringing it to a full, rolling boil for several minutes to kill bacteria. It’s safer and more effective to reserve a portion before marinating.
Skipping the Rest: Cutting into the chicken immediately lets all the precious juices run out, leading to drier meat.
Storing Tips
Refrigeration: Store leftovers in an airtight container for up to 3-4 days. The glaze will solidify when cold but will re-liquify when reheated.
Freezing: Freeze cooked, cooled chicken in a single layer on a baking sheet before transferring to a freezer bag for up to 3 months. Thaw overnight in the refrigerator.
Reheating: For best results, reheat in a 350°F (175°C) oven for 10-15 minutes or in a skillet over medium-low heat until warmed through. This helps restore some crispness to the skin. Microwaving is quick but will make the skin rubbery.
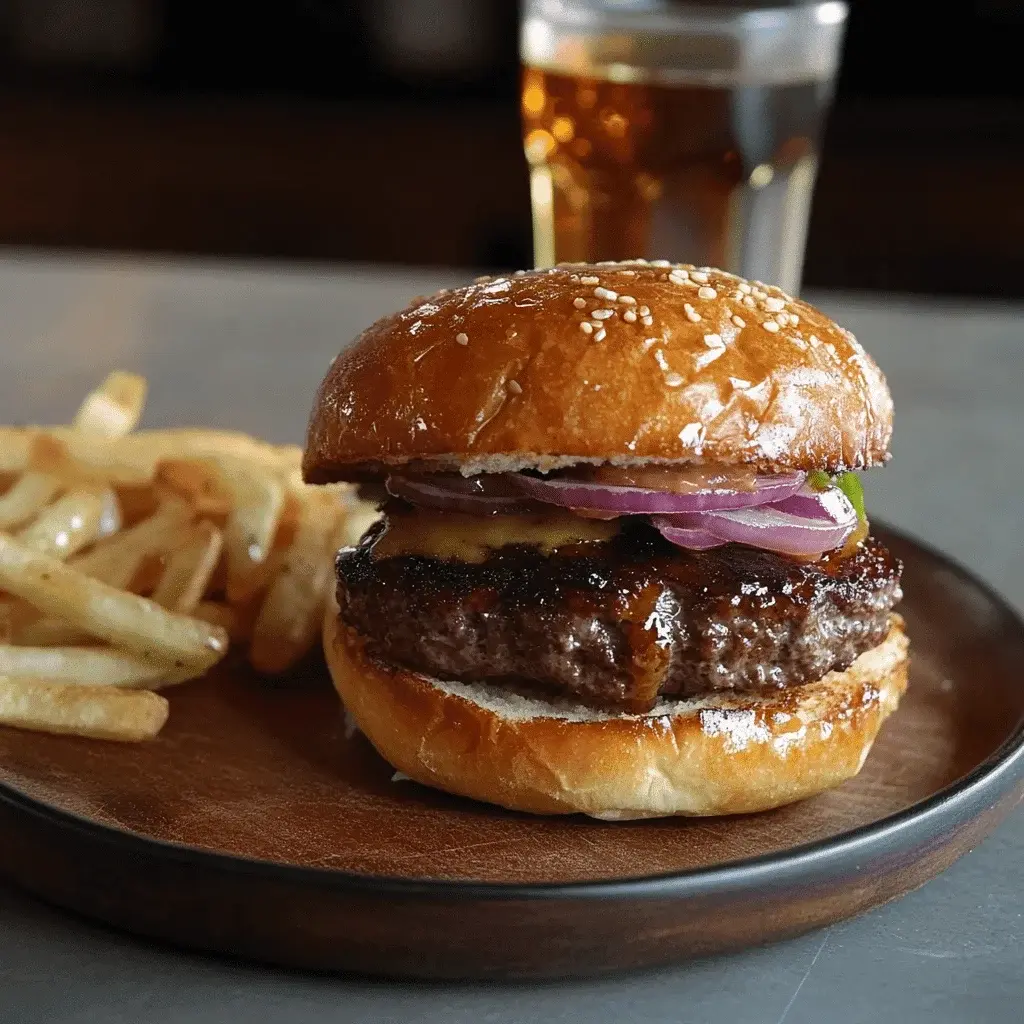
Did you know that a staggering 73% of home cooks report that their biggest grilling challenge is achieving a flavorful, juicy burger that doesn’t dry out? If you’re part of that majority, prepare to have your burger game revolutionized. This Triple Seared Whiskey Burger isn’t just another patty on a bun; it’s a culinary technique that locks in succulence and layers flavor with a precision that rivals a steakhouse. The secret lies in a three-stage searing process and a deeply aromatic marinade that uses whiskey not just for boozy flair, but as a flavor catalyst. The ethanol helps carry the savory notes of soy sauce and aromatics deep into the ground beef, while the triple-sear method creates an incredible crust without overcooking the center. This recipe is engineered for the grill master who wants to impress, delivering a burger experience that’s robust, complex, and undeniably mouthwatering.
Ingredients List
Gather high-quality ingredients for the best results. The whiskey marinade is key to the burger’s signature depth.
For the Patties & Marinade:
2 lbs (900g) 80/20 Ground Chuck: The 20% fat content is non-negotiable for juiciness. You’ll hear a satisfying sizzle as it hits the grill. Substitution: Ground brisket for richer beef flavor.
1/2 cup Bourbon or Rye Whiskey: Bourbon adds caramel sweetness; rye offers spicy notes. You’ll smell the oak and vanilla notes as it reduces. Substitution: Non-alcoholic: Use 1/4 cup beef broth + 1 tbsp apple cider vinegar + 1 tsp molasses.
1/4 cup Low-Sodium Soy Sauce: Provides umami saltiness without overpowering. Substitution: Tamari (gluten-free) or coconut aminos (lower sodium).
2 tbsp Worcestershire Sauce: Adds a tangy, fermented depth you can almost taste in the air.
4 cloves Garlic, minced: Creates a pungent, aromatic base.
1 tsp Freshly Cracked Black Pepper: For a sharp, aromatic heat.
1 tbsp Brown Sugar: Balances acidity and promotes caramelization.
For Assembly:
4 Large Brioche Buns: Their buttery sweetness and soft, golden crumb are the perfect vessel. Substitution: Pretzel buns for saltiness or sturdy potato rolls.
8 slices Sharp White Cheddar: Melts beautifully with a tangy bite. Substitution: Smoked Gouda or pepper jack.
1 Large Red Onion, sliced into rings: For crisp, pungent texture.
1 Beefsteak Tomato, sliced: Adds juicy freshness.
Crisp Lettuce Leaves: Romaine or iceberg for crunch.
While the active cooking time is similar to a standard burger recipe (about 15 minutes), the magic happens in the marinating stage. Unlike typical 10-minute prep recipes, the 1-4 hour marinade is crucial for developing the Triple Seared Whiskey Burger’s signature flavor profile. The triple-sear technique adds mere minutes but transforms the texture entirely, creating a crust that average recipes simply can’t achieve. It’s a small investment for a monumental return in taste and texture.
Witness the perfect crust achieved by the triple-sear method on our Whiskey Burger.
Step-by-Step Instructions
Step 1: Prepare the Whiskey Marinade
In a small saucepan, combine the whiskey, soy sauce, Worcestershire sauce, minced garlic, thyme, black pepper, and brown sugar. Bring the mixture to a gentle simmer over medium heat. Let it bubble for 3-4 minutes, stirring occasionally. You’re looking for it to reduce by about one-third and the raw alcohol smell to dissipate, leaving behind a rich, syrupy aroma. Remove from heat and let it cool completely to room temperature. I always do this first so it’s ready by the time I handle the meat.
Step 2: Form and Marinate the Patties
Gently divide the ground chuck into four equal portions (about 8 oz each). Handle the meat as little as possible to avoid compacting it. Form loose, thick patties, about 1-inch thick, and make a deep, wide indentation with your thumb in the center of each. This prevents the burger from puffing up into a ball. Place the patties in a single layer in a shallow dish or a large resealable bag. Pour the cooled marinade over the patties, ensuring they’re fully coated. Seal or cover and refrigerate for at least 1 hour, and up to 4 hours. This is where the flavor penetrates deep into the beef.
Step 3: The First Sear
Preheat your grill to high heat (around 450-500°F / 230-260°C). For the best results, ensure the grates are clean and well-oiled. Remove the patties from the marinade, letting the excess drip off (reserve a tablespoon of marinade for later). Place the patties on the hottest part of the grill. Listen for that instant, aggressive sizzle. Sear for 2 minutes without moving them. This creates the initial flavorful crust. Flip once.
Step 4: The Second Sear
Immediately after flipping, move the patties to a slightly cooler part of the grill (medium heat, around 375°F / 190°C). Sear for another 3 minutes. This second sear at a lower temperature continues to build the crust without burning, and begins to cook the interior more gently. Flip again.
Step 5: The Third Sear and Rest
For the final flip, move the patties back to the high-heat zone. Brush the top of each patty with the reserved marinade. Sear for 1 final minute. This last blast of heat caramelizes the marinade into a sticky, glorious glaze and locks in all the juices. If adding cheese, place two slices on each patty now, close the lid, and let it melt for 30-45 seconds. Transfer the burgers to a wire rack or plate—never a flat surface—and let them rest, tented loosely with foil, for 5 full minutes. This allows the juices to redistribute.
Step 6: Assemble Your Masterpiece
While the burgers rest, toast your brioche buns lightly on the grill until golden. Spread garlic aioli on the top and bottom bun. Start with a lettuce leaf on the bottom bun (to create a moisture barrier), followed by the rested whiskey burger patty, a slice of tomato, a few rings of red onion, and any other toppings like crispy onions. Cap it with the top bun and press down gently. The result is a towering, juicy, flavor-packed masterpiece.
Nutritional Information
(Per burger with brioche bun and cheese, estimated)
Calories: 850-950 kcal
Protein: 55-60g
Fat: 45-50g (Saturated: 18-20g)
Carbohydrates: 45-50g (Sugars: 10-12g)
Sodium: 1200-1400mg (primarily from marinade and cheese)
Healthier Alternatives
You can lighten this recipe without sacrificing the soul-satisfying flavor of the Triple Seared Whiskey Burger.
Leaner Meat: Use 90/10 ground sirloin or ground turkey (93/7). To compensate for less fat, add 2 tbsp grated onion or 1/4 cup finely chopped mushrooms to the meat before forming patties for moisture.
Reduced-Sodium Marinade: Swap low-sodium soy sauce for coconut aminos and reduce the Worcestershire sauce by half.
Bun Swap: Use whole-wheat brioche or large, sturdy lettuce wraps (butter lettuce works great) instead of classic brioche.
Cheese Choice: Opt for a single slice of reduced-fat sharp cheddar or a strong cheese like feta—a little goes a long way flavor-wise.
Cooking Method: The triple-sear method works excellently on a grill pan or cast-iron skillet with just a light spray of avocado oil.
Serving Suggestions
Classic Pairings: Serve with crispy steak fries, sweet potato fries, or a tangy vinegar-based coleslaw to cut through the richness.
Elevated Sides: A grilled corn and black bean salad with lime cilantro dressing, or truffle-parmesan potato wedges.
Beverage Pairings: The obvious choice is an extra pour of the bourbon used in the marinade, on the rocks. A robust amber ale, stout, or a dry hard cider also complements the smoky, savory notes beautifully.
Presentation: Skewer each burger with a long steak knife for stability and a rustic look. Serve on a wooden board with sides in small cast-iron pans.
Common Mistakes
Over-marinating: Marinating beyond 4 hours, especially with the acid in Worcestershire, can begin to “cook” the exterior of the beef, giving it a mushy texture.
Pressing the Patties: Never press down on the burger with your spatula while grilling. You’re squeezing out the precious juices and flavor directly into the flames.
Skipping the Rest: Cutting into the burger immediately releases all the accumulated juices onto your plate, leaving the meat dry. The 5-minute rest is mandatory.
Did you know that casserole-style dishes like this Beef Enchilada Bake are the secret weapon for 72% of busy families seeking a comforting, one-pan meal? If you’re craving the deep, savory flavors of traditional enchiladas but want to skip the tedious rolling and individual assembly, you’ve found your perfect recipe. This hearty bake layers all the classic components—spiced ground beef, creamy beans, melty cheese, and soft corn tortillas—under a blanket of rich enchilada sauce, creating a casserole that’s as satisfying to make as it is to eat. It’s the ultimate solution for a weeknight dinner that feels like a celebration, delivering maximum flavor with minimal fuss. Let’s dive into how you can bring this crowd-pleaser to your table.
Ingredients List
Gather these simple ingredients for a flavor-packed dish. Sensory notes and substitutions are included to help you customize.
1.5 lbs (680g) Lean Ground Beef (90/10): The star protein, providing a rich, meaty base. For a lighter option, use ground turkey or chicken. For a vegetarian twist, use 2 cans of black beans, rinsed and mashed slightly.
1 medium Yellow Onion, diced: Adds a sweet, aromatic foundation. A white or red onion works just as well.
3 cloves Garlic, minced: Infuses a pungent, savory depth that is essential to the flavor profile.
2 cups (16 oz) Red Enchilada Sauce: Look for a rich, brick-red sauce with a balance of chili and tomato notes. Homemade or store-bought both work beautifully.
1 (15 oz) can Pinto Beans, rinsed and drained: Adds creamy texture and fiber. Black beans or kidney beans are excellent substitutes.
12 (6-inch) Corn Tortillas: They provide the classic, slightly sweet corn flavor and sturdy layers. Flour tortillas can be used for a softer texture.
3 cups (12 oz) Shredded Mexican Cheese Blend: A mix of Monterey Jack, Cheddar, Asadero, and Queso Quesadilla creates the ultimate gooey, stretchy melt. For more heat, use a Pepper Jack blend.
1 tbsp Chili Powder: Delivers a warm, earthy heat and that signature enchilada color.
1 tsp Ground Cumin: Offers a warm, nutty, and slightly citrusy note that is quintessential to Tex-Mex cuisine.
1/2 tsp Dried Oregano (preferably Mexican): Lends a subtle, floral bitterness that rounds out the spice profile.
Salt and Black Pepper to taste: The essential flavor enhancers.
Optional Garnishes: Fresh cilantro (bright and herbal), diced avocado (cool and creamy), sour cream (tangy and rich), sliced jalapeños (for a fresh kick).
Timing
Prep Time20 minutes
Cook Time35 minutes
Total Time55 minutes
This Beef Enchilada Bake clocks in at under an hour from start to finish. Compared to the average rolled enchilada recipe, which can take 75-90 minutes due to individual assembly and potentially frying tortillas, this streamlined bake method saves you significant time without sacrificing an ounce of flavor. The 20-minute active prep is perfect for getting dinner on the table fast, while the 35-minute bake time allows the flavors to meld beautifully and gives you time to prepare sides or simply relax.
Step-by-Step Instructions
Step 1: Prepare the Beef Filling
Preheat your oven to 375°F (190°C). In a large skillet or Dutch oven over medium-high heat, brown the ground beef, breaking it up with a wooden spoon. As the pink color fades and those delicious browned bits (fond) start to form on the bottom of the pan—this is pure flavor—add the diced onion. Cook for 5-7 minutes until the onion is translucent and the beef is fully cooked. Stir in the minced garlic, chili powder, cumin, and oregano, cooking for just one more minute until incredibly fragrant. This bloomsthe spices, unlocking their full potential. Drain any excess grease if necessary. Stir in 1/2 cup of the enchilada sauce and the entire can of rinsed pinto beans. Let this mixture simmer for 2-3 minutes to combine. Season generously with salt and pepper. Remove from heat.
Step 2: Assemble the Bake
Grab your 9×13 inch baking dish. Spread a thin layer (about 1/4 cup) of enchilada sauce on the bottom—this prevents the tortillas from sticking and adds moisture. Now, let’s build! Arrange 4 corn tortillas in a single layer, slightly overlapping, to cover the bottom. You may need to tear one in half to fit the corners. Spoon half of the warm beef and bean mixture evenly over the tortillas. Drizzle with about 1/3 cup of enchilada sauce, then sprinkle with 1 cup of the shredded cheese. Repeat the layers: 4 more tortillas, the remaining beef mixture, another 1/3 cup of sauce, and another cup of cheese. For the final layer, place the last 4 tortillas on top. Pour the remaining enchilada sauce over them, spreading it evenly to cover every inch. Finally, blanket the entire surface with the last cup of cheese.
Step 3: Bake to Perfection
Cover the baking dish tightly with aluminum foil. This crucial step traps steam, ensuring the tortillas become tender and the casserole heats through evenly without drying out. Bake in your preheated oven for 25 minutes. Then, carefully remove the foil. This is the moment of transformation! Switch your oven to broil (or simply continue baking at 375°F) and cook for an additional 8-10 minutes, or until the cheese on top is gloriously bubbly, slightly golden in spots, and the edges are lightly browned. Remove from the oven and let it rest for 5-10 minutes. This rest period allows the layers to set, making it much easier to cut clean squares and serve.
Nutritional Information
(Approximate values per serving, based on 8 servings)
Calories: 480 kcal
Protein: 32g
Carbohydrates: 35g
Dietary Fiber: 6g
Sugars: 4g
Fat: 24g
Saturated Fat: 11g
Cholesterol: 85mg
Sodium: 850mg
Healthier Alternatives
You can easily lighten up this bake without losing its soul-satisfying essence. For the beef, opt for 93% lean or use ground turkey breast. Swap the pinto beans for an extra can of black beans to boost fiber and plant-based protein. Use low-sodium enchilada sauce and reduced-fat cheese to significantly cut down on sodium and saturated fat. For an even bigger veggie boost, stir in 2 cups of fresh spinach or a cup of diced zucchini into the beef mixture during the last minute of cooking—they’ll wilt and blend right in. These swaps maintain the rich, comforting texture and flavor while aligning with healthier eating goals.
Serving Suggestions
This hearty bake is a complete meal on its own, but a few well-chosen sides can turn it into a feast. For a refreshing contrast, serve it with a simple Mexican Street Corn Salad or a crisp Jicama Slaw. A bowl of Cilantro Lime Rice or Charro Beans on the side is perfect for soaking up any extra sauce. Don’t forget the garnishes! Set out small bowls of cool sour cream or Greek yogurt, chunky guacamole, pico de gallo, pickled red onions, and fresh lime wedges. This allows everyone to customize their plate, creating an interactive and fun dining experience.
Common Mistakes
Skipping the Sauce on the Bottom: This leads to dry, tough tortillas on the bottom layer. That thin layer of sauce is non-negotiable for perfect texture.
Overfilling the Layers: Piling the beef mixture too high can make the casserole unstable and difficult to cut. Aim for even, moderate layers.
Using Cold Tortillas Straight from the Fridge: Cold corn tortillas are more likely to crack. Let them come to room temperature, or quickly warm them in a dry skillet for a few seconds per side to make them pliable.
Skipping the Rest Time: Cutting into the bake immediately will result in a soupy, messy presentation. The 5-10 minute rest allows everything to set.
Not Blooming the Spices: Adding dried spices to the raw meat or at the very end misses the opportunity to deepen their flavor. Always cook them briefly in the hot fat.
Storing Tips
Refrigeration: Cool the bake completely, then cover tightly with plastic wrap or transfer portions to airtight containers. It will keep in the fridge for 3-4 days. The flavors often meld and improve by the second day! Freezing: This casserole freezes exceptionally well. Wrap the entire cooled dish (or individual portions) tightly in plastic wrap and then in foil. Label and freeze for up to 3 months. Thaw overnight in the refrigerator before reheating. Reheating: For best results, reheat individual portions in the microwave covered with a damp paper towel to retain moisture. For larger amounts, cover with foil and reheat in a 350°F (175°C) oven for 20-25 minutes, or until heated through.
Conclusion
This Beef Enchilada Bake is more than just a recipe; it’s a guaranteed path to a delicious, stress-free dinner that brings everyone to the table. With its layers of savory beef, creamy beans, soft tortillas, and melted cheese, it delivers all the comfort of traditional enchiladas in a fraction of the time. It’s forgiving, customizable, and makes fantastic leftovers. We hope this becomes a new favorite in your weekly rotation. Now it’s your turn! Give this recipe a try this week and share your creation with us. Tag @spicemingle on social media or leave a comment below—we love seeing your kitchen triumphs!
Did you know that the classic sausage and peppers sandwich is not just a street fair staple but a powerhouse of flavor and satisfaction that can be made at home in under 30 minutes? This iconic dish, beloved for its juicy Italian sausage, vibrant bell peppers, and gooey melted cheese, is the perfect answer to the question: “What’s for dinner?” Whether you’re feeding a hungry family, hosting a game-day gathering, or simply craving a hearty, flavorful meal, this sandwich delivers. The magic lies in the simplicity of its components and the symphony of textures and tastes they create when combined. The savory, slightly spicy sausage, the sweet and tender peppers, and the rich, stretchy mozzarella all nestled in a soft, toasted roll create a handheld masterpiece. Let’s dive into how you can master this crowd-pleaser in your own kitchen.
Ingredients List
Gather these fresh, high-quality ingredients for the best flavor. Sensory notes are included to help you shop and understand the role of each component.
4 Italian Sausage Links (Sweet or Hot, about 1 lb): Look for plump, fresh sausages with a fragrant, herby aroma. The casing should be taut. Substitution: Chicken or turkey Italian sausage for a leaner option. Plant-based Italian sausages work well too.
2 large Bell Peppers (1 red, 1 green or yellow): Choose firm, glossy peppers with vibrant, unblemished skin. The red ones bring a sweeter, fruitier note, while green adds a slight bitterness for balance.
1 large Yellow Onion: A sweet or yellow onion is ideal for its mellow, caramelizing quality. It should feel heavy for its size with a dry, papery skin.
2 tbsp Olive Oil: Use extra virgin for its fruity, peppery notes that will enhance the sauté.
3 cloves Garlic, minced: Fresh garlic provides a pungent, aromatic base. Substitution: 1 tsp garlic powder in a pinch.
1 tsp Dried Oregano: Its earthy, slightly bitter flavor is classic to Italian cooking.
1/2 tsp Crushed Red Pepper Flakes (optional): For a gentle heat that tingles on the palate.
Salt and Black Pepper to taste.
4 Hoagie or Sub Rolls: Seek out soft yet sturdy rolls with a slight chew. A good roll should have a golden, slightly crisp exterior and a soft, airy interior.
8 oz Fresh Mozzarella Cheese, sliced: The star of the show! Fresh mozzarella offers milky, delicate flavor and that iconic, luxurious melt. Substitution: Provolone (for a sharper taste), fontina (for creaminess), or a vegan mozzarella-style shred.
Optional for serving: Marinara sauce for dipping, fresh basil leaves for a pop of color and freshness.
Timing
Prep Time 15 minutes
Cook Time 20 minutes
Total Time 35 minutes
Compared to the average sandwich recipe, this sausage and peppers sandwich requires a bit more active cooking time (about 20 minutes) due to the need to properly brown the sausage and soften the vegetables. However, this 35-minute total is significantly faster than many slow-cooked versions or recipes that call for roasting the peppers separately. The payoff is immense flavor in a very reasonable timeframe, making it a fantastic weeknight winner.
A perfectly assembled sausage and peppers sandwich, showcasing the gooey melted cheese and vibrant peppers.
Step-by-Step Instructions
Step 1: Prepare the Sausage and Peppers
Start by prepping all your ingredients. This “mise en place” makes the cooking process smooth and stress-free. Slice the bell peppers into long, thin strips, about 1/4-inch wide. This shape is perfect for piling onto a sandwich. Slice the onion into similar half-moon strips. Mince the garlic cloves. Pat the sausage links dry with a paper towel – this helps them achieve a beautiful, crisp sear.
Step 2: Cook the Sausage
Heat 1 tablespoon of olive oil in a large skillet or cast-iron pan over medium-high heat. Once the oil shimmers, carefully add the sausage links. Cook for 8-10 minutes, turning occasionally, until they are browned on all sides and cooked through (internal temperature should reach 160°F). Don’t crowd the pan; cook in batches if necessary. Once cooked, transfer the sausages to a plate. They will finish cooking later, so don’t worry if they’re not 100% done in the center.
Step 3: Sauté the Peppers and Onions
In the same skillet with the sausage drippings (this is flavor gold!), add the remaining tablespoon of olive oil if the pan seems dry. Reduce the heat to medium. Add the sliced peppers and onions. Sauté for 8-10 minutes, stirring occasionally, until they have softened and developed some lovely caramelized edges. The onions should become translucent and sweet, and the peppers should be tender-crisp.
Step 4: Combine and Simmer
Push the peppers and onions to the sides of the skillet. Add the minced garlic, oregano, and red pepper flakes (if using) to the center. Let them sizzle for about 30 seconds until fragrant – be careful not to burn the garlic. Now, mix everything in the pan together. Slice the cooked sausages on a diagonal into 1-inch thick pieces and add them back to the skillet. Stir to combine. Reduce heat to low, cover, and let everything simmer together for 5 minutes. This allows the flavors to marry and the sausage to be fully heated through. Season generously with salt and black pepper to taste.
Step 5: Toast and Assemble the Sandwich
While the sausage and pepper mixture simmers, preheat your oven’s broiler. Slice your hoagie rolls open lengthwise, but not all the way through, creating a hinge. Place them on a baking sheet, cut side up. Toast under the broiler for 1-2 minutes until just golden – watch closely! Remove the rolls. Pile the hot sausage and pepper mixture generously into each roll. Top immediately with slices of fresh mozzarella. Return the loaded sandwiches to the baking sheet and broil for another 1-2 minutes, just until the cheese is melted, bubbly, and slightly spotted with brown. Serve immediately, perhaps with a side of warm marinara for dipping.
Nutritional Information
(Per sandwich, approximate values)
Calories: 650-750 kcal
Protein: 28-32g
Carbohydrates: 45-55g
Dietary Fiber: 3-4g
Sugars: 8-10g (primarily from peppers and onions)
Fat: 38-45g
Saturated Fat: 13-16g
Sodium: 1200-1500mg (varies greatly with sausage brand; opt for lower-sodium if concerned)
Healthier Alternatives
You can enjoy all the robust flavor of this sandwich with some smart swaps that don’t sacrifice taste:
Leaner Protein: Use chicken or turkey Italian sausage. They are significantly lower in fat but are still well-seasoned. For maximum flavor, ensure you get a good sear on them.
Cheese Choice: Opt for part-skim mozzarella or a lighter provolone. You’ll still get that essential melt and salty tang with fewer calories and less saturated fat.
Bread Base: Choose whole-wheat or multigrain hoagie rolls. They add fiber, nutrients, and a nutty flavor that pairs wonderfully with the savory filling.
Oil & Cooking Method: Use a high-quality non-stick pan and reduce the olive oil to 1 tablespoon total. You can also “sauté” the peppers and onions with a splash of vegetable broth or water to prevent sticking.
Open-Faced: For a carb-conscious option, serve the sausage and pepper mixture over a bed of leafy greens or inside a hollowed-out bell pepper, topped with cheese and broiled.
Serving Suggestions
This sandwich is a meal in itself, but it can be part of a fantastic spread:
Classic Pairing: Serve with a side of crispy oven-baked fries or sweet potato fries for the ultimate comfort food plate.
Lighter Side: Balance the richness with a simple arugula salad dressed with lemon juice, olive oil, and a pinch of salt and pepper.
For a Crowd: Set up a “sausage and peppers bar” for parties. Keep the filling warm in a slow cooker, provide an array of rolls (gluten-free included), cheeses, and condiments like hot honey, giardiniera, or different mustards.
Beyond the Bun: The filling is incredibly versatile! Use it as a topping for pasta, pizza, or polenta, or fold it into an omelet the next morning.
Common Mistakes
Overcrowding the Pan: This steams the sausage and peppers instead of browning them. Cook in batches if your pan isn’t large enough to give each ingredient space.
Underseasoning the Vegetables: Peppers and onions need salt to bring out their natural sweetness. Season them in layers as they cook.
Using Pre-Shredded Cheese: Pre-shredded cheese contains anti-caking agents that prevent it from melting as smoothly and luxuriously as freshly sliced cheese. Take the extra minute to slice your own mozzarella.
Did you know that the average American household uses their slow cooker at least once a week? This beloved appliance transforms tough, affordable cuts of meat into succulent, fall-apart masterpieces with minimal effort. Today, we’re diving deep into the ultimate comfort food: the Crockpot Italian Beef Sandwich. This isn’t just another slow cooker recipe; it’s a journey to flavor town, where a humble top round roast is transformed into a garlicky, herby, pepper-laden delight, piled high on a crusty roll and draped with melted provolone. Perfect for game day, busy weeknights, or feeding a crowd, this recipe delivers the iconic taste of a Chicago-style Italian beef with the set-it-and-forget-it convenience we all crave.
Ingredients List
Gathering the right ingredients is the first step to building those deep, complex flavors. Here’s what you’ll need, along with sensory notes and smart substitutions.
3-4 lb Top Round Roast: The star of the show. Look for a cut with good marbling for maximum tenderness and rich beefy flavor. (Substitution: Chuck roast or bottom round roast. Chuck roast will be more forgiving and fattier, resulting in an even more succulent shred.)
2 tbsp Olive Oil: For searing, creating a beautiful brown crust that locks in juices and adds a nutty, aromatic base note.
1 packet (0.7 oz) Dry Italian Dressing Mix: The secret weapon! This blend of dried herbs, garlic, and salt provides an instant flavor bomb. (Substitution: 2 tbsp homemade blend of dried oregano, basil, thyme, rosemary, garlic powder, onion powder, and salt.)
1 tsp Garlic Powder & 1 tsp Onion Powder: For an extra layer of savory, allium depth.
1 tsp Dried Oregano: Adds a warm, slightly bitter, earthy fragrance characteristic of Italian cuisine.
1/2 tsp Crushed Red Pepper Flakes: Just a hint of warmth that builds in the background. Adjust to your spice preference.
1 cup Beef Broth: The braising liquid that will become your flavorful jus. Use low-sodium to control salt levels. (Substitution: A combination of broth and a 1/2 cup of dry red wine for added complexity.)
1 (16 oz) jar Pepperoncini Peppers, undrained: The brine is liquid gold! It provides the essential tangy, vinegary punch that cuts through the richness of the beef.
2 large Green Bell Peppers & 1 large Onion: Sliced into strips. They’ll cook down into sweet, tender, flavorful companions for the beef.
6-8 Hoagie Rolls or French Bread Rolls: Must be crusty on the outside and soft within to hold up to the juicy filling without getting soggy.
8 slices Provolone Cheese: Mild, creamy, and melts beautifully, creating that iconic cheesy blanket. (Substitution: Mozzarella for a milder melt, or sharp white cheddar for a tangier kick.)
Timing
Prep Time20 minutes
Cook Time8 hours (Low)
Total Time8 hours 20 minutes
While the total clock time is 8+ hours, the active time is remarkably short—just about 20 minutes. Compare this to traditional oven-braised methods that require periodic basting and monitoring. The slow cooker does the heavy lifting while you go about your day. The “low and slow” method is non-negotiable here; it’s what breaks down the connective tissue in the lean top round, transforming it from potentially tough to irresistibly tender. Rushing on “high” for 4 hours simply won’t yield the same melt-in-your-mouth texture.
Step-by-Step Instructions
Step 1: Season and Sear
Pat your top round roast completely dry with paper towels—this is crucial for achieving a proper sear, not a steam. In a small bowl, mix the dry Italian dressing mix, garlic powder, onion powder, dried oregano, and red pepper flakes. Rub this fragrant spice blend all over the roast, ensuring every nook and cranny is covered. Heat the olive oil in a large skillet or Dutch oven over medium-high heat until shimmering. Carefully place the seasoned roast in the hot oil and sear for 3-4 minutes per side, until a deep, caramel-brown crust forms. This step, called the Maillard reaction, isn’t just for looks; it builds a foundational layer of rich, savory flavor that will permeate the entire dish.
Step 2: Slow Cook to Perfection
Transfer the beautifully seared roast to your crockpot. Pour the beef broth into the hot skillet to deglaze it, scraping up all those delicious browned bits (fond) from the bottom. Pour this flavorful liquid over the roast in the crockpot. Now, add the entire jar of pepperoncini peppers, including the brine. The vinegar in the brine will tenderize the meat further and infuse it with its signature zing. Cover and set your slow cooker to LOW for 8 hours. Resist the temptation to lift the lid! Each peek releases valuable heat and steam, adding to the cooking time.
Step 3: Prepare the Peppers
About 30-60 minutes before the beef is done, slice your green bell peppers and onion into 1/4-inch strips. In a large skillet over medium heat, sauté them with a tiny pinch of salt until they are softened and have a bit of caramelized color, about 10-15 minutes. You want them tender but not mushy, as they’ll warm through further when assembled. This quick sauté deepens their sweetness and provides a better texture than adding them raw to the crockpot.
Step 4: Shred and Assemble
Once the cook time is up, the roast should be fork-tender. Carefully transfer it to a large cutting board or bowl. Using two forks, shred the beef completely—it should pull apart with almost no effort. Return the shredded beef to the crockpot and stir it into the glorious juices. Let it sit for 10-15 minutes on the “Warm” setting to soak up all that flavor. To assemble, lightly toast your hoagie rolls. Pile a generous amount of shredded beef and peppers/onions onto each roll. Top with a slice (or two!) of provolone cheese. For the ultimate experience, place the assembled sandwiches under a broiler for 1-2 minutes until the cheese is bubbly and golden. Serve immediately with a small bowl of the extra jus from the crockpot for dipping.
Nutritional Information
(Approximate values per sandwich, based on 8 servings with a standard hoagie roll and provolone.)
Calories: 520-580
Protein: 42-48g
Carbohydrates: 35-40g
Fat: 22-26g
Saturated Fat: 8-10g
Fiber: 3-4g
Sodium: 1200-1500mg (Note: Sodium can be reduced by using low-sodium broth and dressing mix.)
Healthier Alternatives
Craving this flavor but watching your intake? You can make smart swaps without sacrificing taste:
Leaner Meat: Stick with the top round; it’s already one of the leanest beef cuts. Trim any visible solid fat before cooking.
Low-Carb/Veggie Boost: Ditch the roll and serve the beef and peppers over a bed of cauliflower rice, inside a large roasted bell pepper “boat,” or on a crisp lettuce wrap for a refreshing crunch.
Reduced Sodium: Use a homemade Italian seasoning blend (salt-free) and low-sodium beef broth. The pepperoncini brine will still provide plenty of flavor.
Lighter Cheese: Opt for a reduced-fat provolone or a thinner slice. The sharp flavor means you can use less and still be satisfied.
Whole Grain: Choose a whole-wheat or whole-grain hoagie roll for added fiber and nutrients.
Serving Suggestions
This sandwich is a hearty meal on its own, but it shines as part of a larger spread:
Classic Pairings: Serve with a side of crispy oven-baked steak fries, a tangy Italian pasta salad, or a simple garden salad with a sharp vinaigrette to cut the richness.
For a Crowd: Set up a “build-your-own” sandwich bar with additional toppings like giardiniera (hot pickled vegetable mix), sautéed mushrooms, banana pepper rings, and different cheese options.
Beyond the Bun: The shredded beef is incredibly versatile! Use leftovers for nachos, stuffed baked potatoes, omelet fillings, or even as a topping for creamy polenta.
Common Mistakes
Skipping the Sear: This is the #1 flavor-building step. Don’t rush it or omit it. A proper sear is non-negotiable.
Overcrowding the Skillet: When searing, give the meat space. If the pan is too crowded, the meat will steam instead of brown.
Lifting the Lid: It’s tempting, but don’t! Trust the process. Every peek adds 15-20 minutes to your cook time.
Using “High” Heat: Cooking on high for 4 hours will make the beef tough and dry. The collagen needs time at a low temperature to break down properly.
Using a Flimsy Bun: A soft, supermarket hot dog bun will disintegrate. A sturdy, crusty roll is essential to contain the juicy filling.
Storing Tips
Refrigeration: Store leftover shredded beef (in its juices) and peppers separately in airtight containers for up to 4 days.
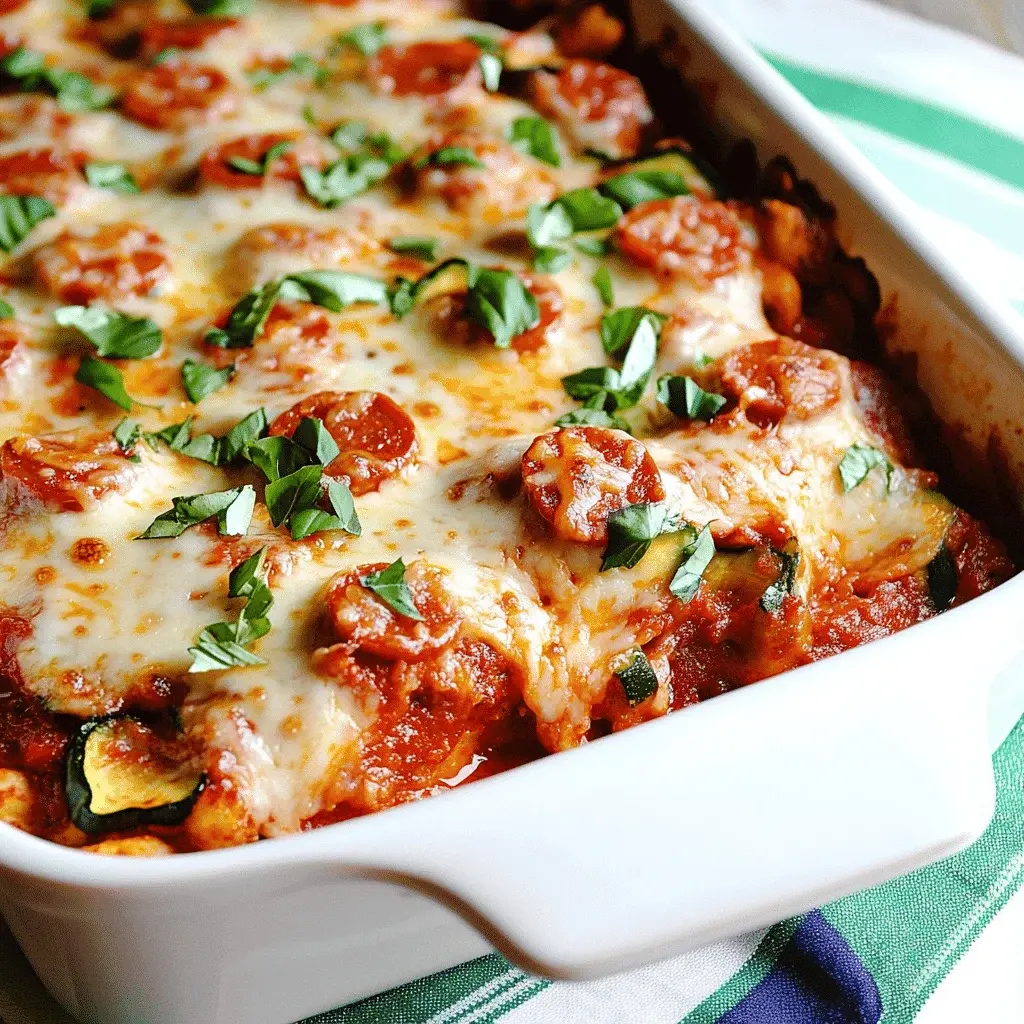
Did you know that the average American consumes over 23 pounds of pizza annually? If you’re part of that statistic but are looking for a way to indulge without the carb-heavy guilt, you’ve landed in the perfect spot. This Grated Zucchini Pizza Casserole is your new secret weapon. It masterfully transforms humble, nutrient-dense zucchini into a surprisingly sturdy and flavorful crust, creating a low-carb, high-protein masterpiece that satisfies every pizza craving. Forget the delivery menu—this casserole layers savory keto Italian sausage, earthy mushrooms, and a decadent medley of melty cheeses into a comforting, family-friendly dish that proves healthy eating doesn’t mean sacrificing flavor. Let’s dive into how you can create this game-changing meal in your own kitchen.
Ingredients List
Gather these fresh, simple ingredients to build your casserole. I’ve included sensory notes and easy substitutions to make this recipe work for you.
For the Zucchini Crust:
4 medium zucchinis (about 2 lbs), grated – Look for firm, dark green zucchinis with smooth skin. They should feel heavy for their size, promising a moist, tender base.
1 teaspoon salt – For drawing out excess moisture, crucial for a non-soggy crust.
1 large egg, beaten – Acts as the binder, giving the crust structure. For an egg-free version, a “flax egg” (1 tbsp ground flaxseed + 2.5 tbsp water) works well.
1/2 cup grated Parmesan cheese – Adds a salty, umami punch and helps with crisping. A sharp Pecorino Romano is a fantastic substitute.
1/2 cup almond flour – This low-carb flour absorbs moisture and adds a subtle nutty flavor. You can substitute with coconut flour, but use only 1/4 cup as it’s highly absorbent.
1 teaspoon dried oregano – For that classic Italian herb aroma.
For the Toppings:
1/2 lb keto Italian sausage, casings removed – Seek out sausage with minimal fillers. The fennel and garlic notes are key. For a vegetarian twist, use plant-based Italian “sausage” crumbles or seasoned lentils.
1 cup sliced cremini or button mushrooms – Their earthy, umami flavor is a perfect match. Portobello slices add a meatier texture.
1 cup sugar-free marinara or pizza sauce – Taste it first! A bright, herby sauce makes all the difference.
1 1/2 cups shredded low-moisture mozzarella cheese – The star of the show for that iconic stretch. Part-skim works, but full-fat delivers superior melt and flavor.
1/2 cup shredded sharp cheddar cheese – Adds a tangy depth. Monterey Jack or a Italian cheese blend are great alternatives.
Optional garnishes: Fresh basil leaves, red pepper flakes, a drizzle of high-quality olive oil.
Timing
Prep Time 25 minutes
Cook Time 40 minutes
Total Time 1 hour 5 minutes
While the total time is just over an hour, most of it is hands-off baking. Compared to traditional pizza-making, which involves proofing dough for 1-2 hours, this Grated Zucchini Pizza Casserole is significantly faster to get on the table. The active prep time is efficient and straightforward, making it an ideal weeknight dinner solution.
Golden, bubbly, and packed with flavor—this casserole is a low-carb dream come true.
Step-by-Step Instructions
Step 1: Prepare the Zucchini Crust
This step is the foundation of your dish. Grate the zucchinis using the large holes of a box grater or a food processor with a grating attachment. Place all the grated zucchini in a large colander set over a bowl or in the sink. Toss it thoroughly with the teaspoon of salt. Let it sit for at least 15 minutes—this draws out the water that would otherwise make your crust soggy. After resting, take handfuls of the zucchini and squeeze them aggressively over the sink. You’ll be amazed at how much liquid comes out. Get it as dry as possible; I sometimes use a clean kitchen towel to wring it out further. In a large mixing bowl, combine the dry, squeezed zucchini, beaten egg, Parmesan, almond flour, and oregano. Mix until it forms a cohesive, slightly sticky mixture.
Step 2: Cook the Toppings
While the zucchini drains, preheat your oven to 400°F (200°C). Lightly grease a 9×13 inch baking dish. In a skillet over medium heat, cook the Italian sausage, breaking it up with a spoon until it’s browned and cooked through, about 6-8 minutes. Use a slotted spoon to transfer the sausage to a plate, leaving any rendered fat in the pan. In that same skillet, add the sliced mushrooms. Sauté them in the sausage drippings (or a bit of olive oil) until they are tender and have released their moisture, about 5-7 minutes. This step concentrates their flavor beautifully.
Step 3: Assemble and Bake
Press the prepared zucchini crust mixture evenly into the bottom of your greased baking dish, forming a uniform layer. Bake this crust alone for 15-20 minutes, or until the edges start to turn golden and the top feels set to the touch. This pre-baking is non-negotiable for a firm base. Remove the dish from the oven. Now, layer on your toppings: first, spread the marinara sauce evenly over the crust. Next, sprinkle the cooked sausage and mushrooms. Finally, blanket everything with the combined mozzarella and cheddar cheeses.
Step 4: Broil and Rest
Return the assembled casserole to the oven. Bake for another 15-20 minutes, until the cheese is completely melted and bubbly. For that perfect restaurant-style finish, switch your oven to broil for the final 1-2 minutes, watching closely so it doesn’t burn, until the top is gloriously spotted with brown. Once out of the oven, let the casserole rest for 5-10 minutes before slicing. This allows the layers to set, making it much easier to cut into clean squares.
Nutritional Information
(Per serving, based on 6 servings)
Calories: ~320 kcal
Total Fat: 22g
Saturated Fat: 9g
Protein: 24g
Total Carbohydrates: 10g
Dietary Fiber: 3g
Net Carbs: 7g
Sugar: 5g (naturally occurring from zucchini and tomatoes)
Healthier Alternatives
Want to tweak this recipe further for specific dietary goals? Here are flavor-preserving swaps:
Dairy-Free: Swap the cheeses for your favorite vegan mozzarella and Parmesan shreds. For the crust, use nutritional yeast instead of Parmesan.
Lower Fat: Use turkey Italian sausage, part-skim cheeses, and reduce the total cheese by 1/4 cup. The flavor will still be robust.
Nut-Free: Replace almond flour with an equal amount of sunflower seed flour or gluten-free breadcrumbs.
Add More Veggies: Bulk up the topping layer with thinly sliced bell peppers, spinach, or olives for added nutrients and color.
Serving Suggestions
This casserole is a complete meal on its own, but it pairs wonderfully with a few simple sides. For a refreshing contrast, serve it with a crisp arugula salad dressed lightly with lemon juice and olive oil. If you’re not strictly low-carb, a side of garlic breadsticks made with fathead dough would be a crowd-pleaser. For a casual gathering, cut it into smaller squares and serve as a hearty appetizer.
Common Mistakes
Not Draining the Zucchini Enough: This is the #1 reason for a soggy crust. Be merciless when squeezing!
Skipping the Crust Pre-Bake: Don’t rush. Baking the crust first ensures it can support the juicy toppings.
Using Watery Sauce: Choose a thick, high-quality marinara. If yours is runny, simmer it in a pan for 5 minutes to reduce it first.
Cutting Immediately: Letting it rest is not a suggestion—it’s the key to perfect slices.
Storing Tips
Refrigeration: Cool completely, then store covered in the refrigerator for up to 4 days.
Freezing: This casserole freezes beautifully. Wrap individual portions tightly in plastic wrap and foil, or store the whole dish in an airtight container. Freeze for up to 3 months. Thaw overnight in the fridge before reheating.
Reheating: For best results, reheat single portions in a toaster oven or air fryer at 350°F until hot and crispy-edged. The microwave works but can make the crust slightly softer.
A perfect slice, holding its shape with a flavorful zucchini crust base.
Conclusion
This Grated Zucchini Pizza Casserole is more than just a recipe; it’s a testament to how creative, satisfying, and delicious healthy cooking can be. It delivers all the comfort and flavor of your favorite pizza while packing a powerful nutritional punch. Whether you’re following a keto, low-carb, or gluten-free lifestyle, or simply looking for a fantastic way to eat more vegetables, this dish is a guaranteed winner. I encourage you to make it your own—try different toppings, cheeses, and spices. And when you do, share your creation with us! Tag @spicemingle on social media so we can celebrate your culinary win together.
Made this recipe? We’d love to see your masterpiece! Share a photo in the comments below or on Instagram using #SpiceMingle
Hi I'm Emy
I’m passionate about sharing a diverse collection of sweet and savory recipes that I’ve meticulously tested and perfected in my own kitchen.