“`html
Table of Contents
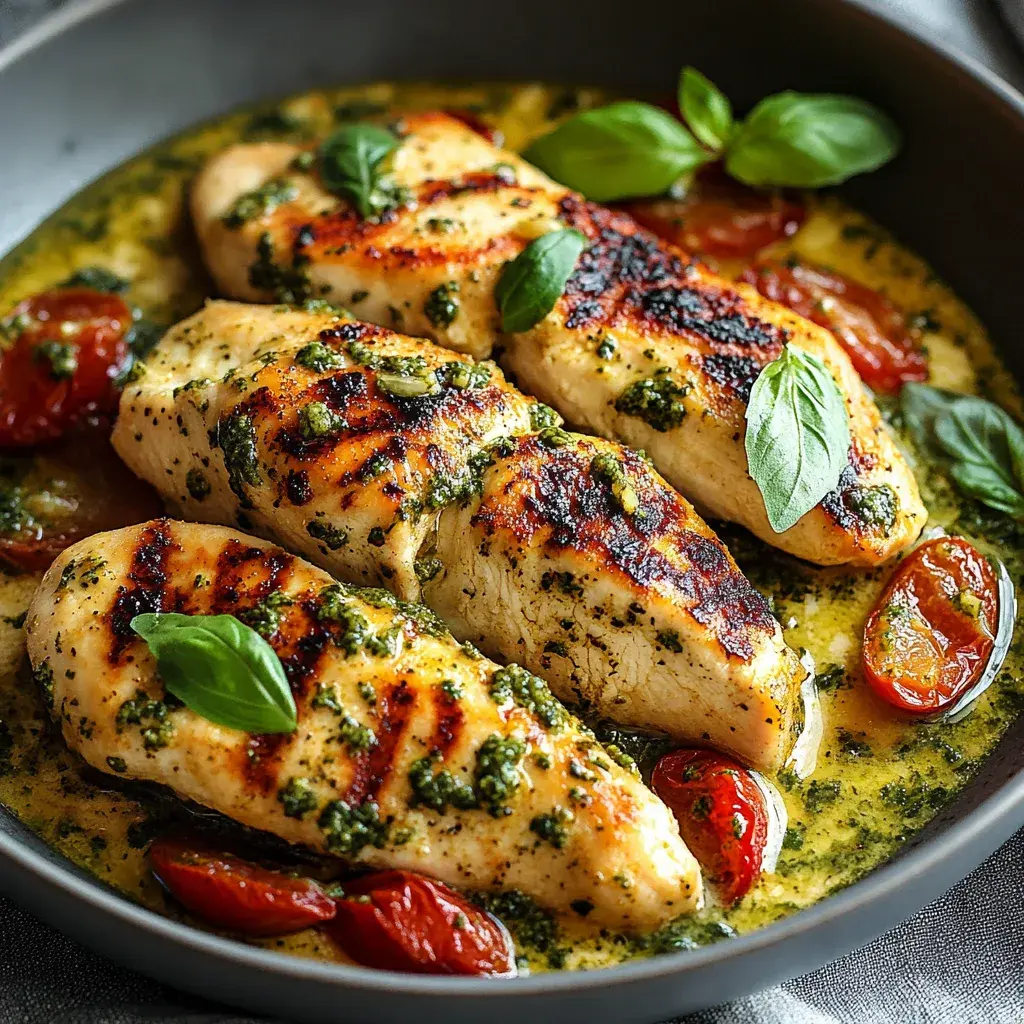
Easy Pesto Chicken
Introduction
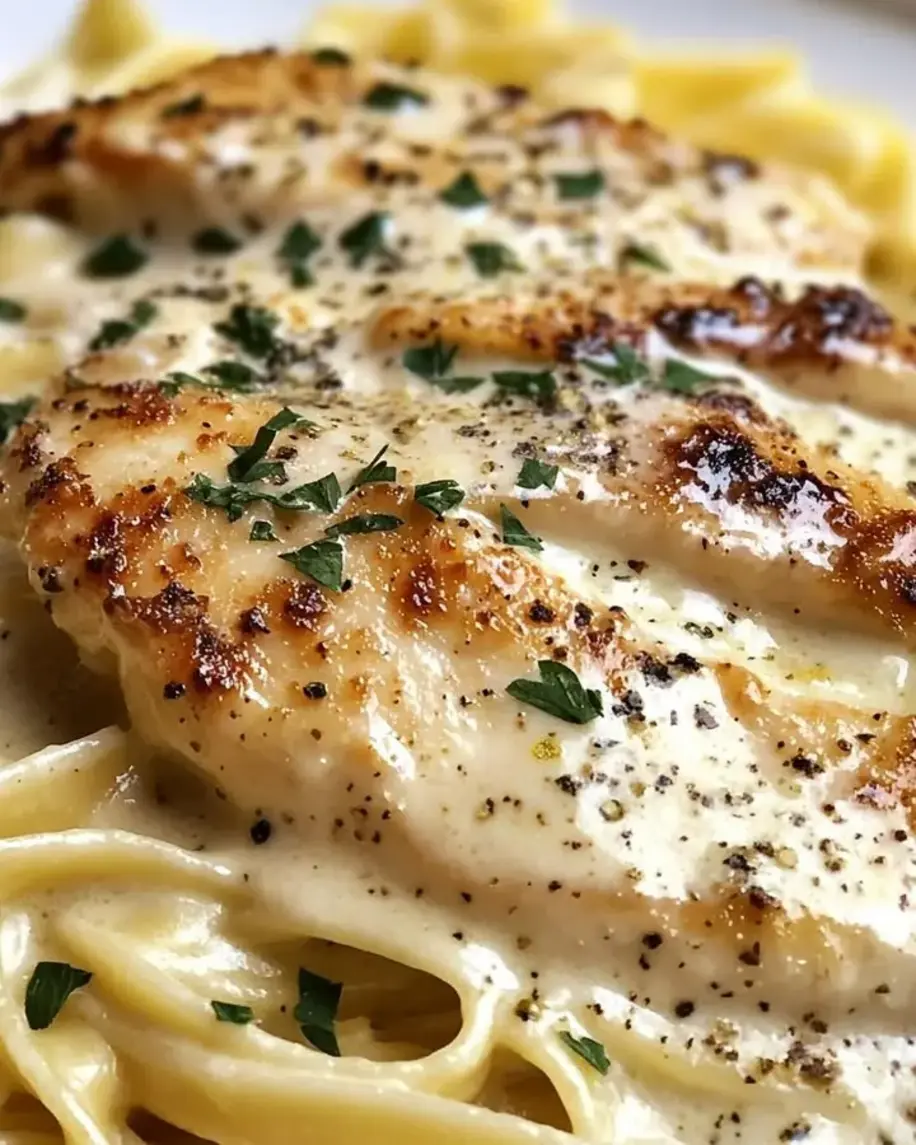
Are you looking for a weeknight dinner that feels both gourmet and incredibly simple? If you’re craving a dish that delivers a “wow” factor with minimal fuss, then “Easy Pesto Chicken” is your answer! Surveys indicate that a significant percentage of home cooks struggle to find quick, healthy, and flavorful meal options, especially on busy evenings. This dish perfectly balances fresh, vibrant flavors with hearty satisfaction. Featuring tender, juicy chicken breasts coated in a homemade pesto bursting with fresh basil, garlic, and Parmesan cheese, it’s a meal that comes together in under an hour. It’s ideal for those hectic nights but impressive enough for any gathering. Get ready to elevate your dinner table with this rich explosion of flavor, requiring surprisingly little effort. Let’s dive into creating this delightful meal that redefines simple elegance.
Ingredients
The magic of this Pesto Chicken lies in the freshness of its ingredients. We’ll break them down into two main components: the vibrant pesto and the perfectly seasoned chicken.
For the Pesto:
- 2 cups fresh basil leaves, packed (about 2 large bunches). These fragrant leaves are the soul of the pesto, offering a bright, peppery, almost sweet aroma. For a more intense flavor, ensure they are lush and green.
- 1/2 cup grated Parmesan cheese, finely grated (about 2 oz). The sharp, nutty, and salty notes of Parmesan bind the pesto together and add a savory depth. Using freshly grated will give you a superior texture and taste.
- 1/3 cup pine nuts, lightly toasted or untoasted (about 1.5 oz). Pine nuts contribute a delicate, buttery flavor and a creamy texture when blended. To toast them, gently heat them in a dry pan over medium-low heat until golden brown and fragrant. Be watchful, as they burn quickly!
- 3-4 cloves garlic, minced (about 1-2 teaspoons). Fresh garlic provides that essential pungent kick. Adjust the amount based on your love for garlic – a little goes a long way!
- 1/2 cup extra virgin olive oil (about 4 oz). This is the emulsifier and carrier of flavor. A good quality extra virgin olive oil will add a fruity, slightly peppery note to the pesto.
- Salt and freshly ground black pepper, to taste. These are essential for balancing and enhancing all the other flavors.
For the Chicken:
- 2 boneless, skinless chicken breasts (about 6-8 oz each). Choose plump, even breasts for consistent cooking. You can also use chicken tenders or thinly sliced chicken thighs.
- 1/4 cup extra virgin olive oil, for searing. Helps achieve a beautiful golden-brown crust on the chicken.
- Salt and freshly ground black pepper, to taste. A generous seasoning before cooking is key for flavor.
Timing
This Easy Pesto Chicken recipe is designed for efficiency. While the average chicken dish might take upwards of 45 minutes to an hour, our focused approach brings this delightful meal to your table in under 40 minutes. This makes it a perfect candidate for busy weeknights when time is of the essence but you don’t want to compromise on flavor or quality.

Instructions
Step 1: Prepare the Pesto
Let’s start by creating that glorious, vibrant pesto. In a food processor, combine the fresh basil leaves, grated Parmesan cheese, pine nuts, and minced garlic. Pulse a few times until everything is roughly chopped and well combined. With the food processor running on low, slowly drizzle in the extra virgin olive oil until the pesto reaches a smooth, emulsified consistency. You’re looking for a bright green, slightly thick sauce that coats the back of a spoon. Taste and season with salt and freshly ground black pepper. If it seems too thick, you can add a little more olive oil, a tablespoon at a time. If you don’t have a food processor, don’t fret! You can finely mince the basil and garlic and then whisk everything together by hand, crushing the pine nuts with the flat side of a knife before adding them for a more rustic texture. Set this beautiful pesto aside.
Step 2: Prepare the Chicken
Next, we ready the chicken breasts. If your chicken breasts are particularly thick, you might want to pound them gently to an even thickness of about 3/4 inch. This ensures they cook evenly and quickly. You can do this by placing them between two pieces of plastic wrap or in a resealable bag and using a rolling pin or the flat side of a meat mallet. Pat the chicken breasts dry with paper towels – this is crucial for achieving a good sear. Season both sides generously with salt and freshly ground black pepper. This simple seasoning forms the foundation of the chicken’s flavor before the pesto is added.
Step 3: Cook the Chicken
Now for the cooking! Heat 1/4 cup of olive oil in a large skillet (cast iron works wonderfully here) over medium-high heat. Once the oil is shimmering hot, carefully place the seasoned chicken breasts into the skillet. Sear for about 4-5 minutes per side, until a beautiful golden-brown crust forms. Avoid overcrowding the pan; cook in batches if necessary. Once both sides are nicely seared, reduce the heat to medium. Spoon a generous amount of the prepared pesto over the top of each chicken breast, spreading it evenly. You can spoon a little extra into any nooks or crannies. Cover the skillet and let the chicken cook for another 6-10 minutes, or until the chicken is cooked through and no longer pink in the center. The internal temperature should reach 165°F (74°C). The pesto will meld beautifully with the chicken as it finishes cooking.
Step 4: Rest and Serve
This is a critical step for juicy chicken! Once the chicken is cooked, remove it from the skillet and let it rest on a clean cutting board for 5-10 minutes. This resting period allows the juices to redistribute throughout the meat, ensuring that every bite is moist and tender. Skipping this can lead to dry, less flavorful chicken. After resting, you can slice the chicken breasts or serve them whole. Spoon any extra delicious pan juices and pesto over the top. Serve immediately and enjoy the burst of fresh, herbaceous flavor!
Nutritional Information
(Note: Nutritional values are approximate and can vary based on specific ingredients and portion sizes.)
- Calories: ~450-550 per serving
- Protein: ~40-50g
- Fat: ~25-35g (with healthy fats from olive oil and nuts)
- Carbohydrates: ~5-10g
Healthier Alternatives
Looking to lighten up this already delightful dish? Here are a few swaps that maintain the fantastic flavor:
- Reduced Fat Pesto: Use a blend of half olive oil and half Greek yogurt or a light salad dressing for the pesto’s liquid base. You might lose a touch of richness but gain protein and cut down on fat significantly.
- Leaner Chicken Cuts: Opt for chicken tenders or thinly sliced chicken breast to reduce overall fat and calories.
- Nut-Free Pesto: If you have a nut allergy or simply want to reduce fat, try using sunflower seeds or pepitas instead of pine nuts in your pesto. They offer a similar crunch and mild flavor.
- Baking Instead of Frying: For an even lighter version, after coating the chicken with pesto, bake it on a wire rack set over a baking sheet at 400°F (200°C) for 20-25 minutes, or until cooked through. Add the pesto in the last 10 minutes of baking to prevent it from burning.
Serving Suggestions
This Easy Pesto Chicken is incredibly versatile. Here are some ideas to complement its flavors:
- Pasta Perfection: Serve alongside your favorite pasta, tossed with a little extra pesto or a light marinara sauce.
- Grain Bowls: Dice the cooked chicken and add it to a bowl with quinoa, brown rice, roasted vegetables, and a drizzle of the pesto sauce.
- Salad Sensation: Slice the chicken and top a bed of mixed greens, cherry tomatoes, cucumber, and a light vinaigrette.
- Hearty Sides: Pair with roasted asparagus, steamed broccoli, or garlic mashed potatoes for a complete, satisfying meal.
Common Mistakes to Avoid
To ensure your Pesto Chicken turns out perfectly every time, steer clear of these common pitfalls:
- Over-Processing the Pesto: Blending the pesto for too long can make it oily and less fresh-tasting. Pulse until just combined for the best texture and flavor.
- Not Drying the Chicken: Damp chicken won’t sear properly, leading to a steamed, rather than browned, exterior. Pat it dry thoroughly!
- Skillet Too Cool: If the pan isn’t hot enough when you add the chicken, it will stick and won’t develop that delicious crust.
- Not Resting the Chicken: This is crucial for moisture. Resist the urge to cut into it immediately after cooking.
- Burning the Pesto: Pesto ingredients, particularly basil and garlic, can burn if cooked at too high heat for too long. Adding it towards the end of cooking or covering the pan helps protect it.
Storing Tips
Leftover Easy Pesto Chicken can be stored in an airtight container in the refrigerator for up to 3 days. The pesto coating might firm up slightly, which is normal. When reheating, it’s best to do so gently: either in a low oven (around 300°F / 150°C) or very carefully in a skillet on low heat to avoid drying out the chicken and burning the pesto. You can also enjoy it cold in salads or sandwiches.
Conclusion
Easy Pesto Chicken is more than just a recipe; it’s a testament to how simple, fresh ingredients can create a meal that’s both incredibly satisfying and remarkably fast to prepare. With its vibrant pesto and perfectly cooked chicken, this dish is sure to become a staple in your recipe rotation. Don’t hesitate to experiment with your favorite herbs or serve it with different sides to make it your own. Ready to transform your weeknight dinners? Give this Easy Pesto Chicken a try and taste the difference fresh, simple cooking can make!
Frequently Asked Questions
What if I don’t have a food processor for the pesto?
No problem! You can absolutely make pesto by hand. Finely chop the basil and garlic (or mince them), crush the pine nuts with the side of a knife or in a small bowl with a mortar and pestle, and then whisk everything together with the Parmesan and olive oil. It might be a bit more rustic, but it will be just as delicious!
Can I use pre-made pesto?
Yes, of course! Using store-bought pesto is a fantastic shortcut for this recipe and will still yield a delicious result. Just ensure you’re choosing a good quality pesto for the best flavor.
How can I ensure the chicken is cooked through without drying it out?
The key is even thickness and not overcooking. Using a meat thermometer is the most reliable method – aim for an internal temperature of 165°F (74°C). Resting the chicken after cooking also helps retain juices.
Can I make this recipe ahead of time?
You can prepare the pesto a day in advance and store it in an airtight container in the refrigerator. The chicken is best cooked fresh, but leftovers store well.
What are the best nuts to use if I can’t find pine nuts?
Walnuts or almonds are excellent substitutes for pine nuts in pesto. They offer a slightly different flavor profile but work wonderfully. If you have a nut allergy, consider using toasted sunflower seeds or pepitas.
Can I freeze pesto?
Yes, pesto freezes beautifully! You can freeze it in ice cube trays for easy portioning, then transfer the frozen cubes to a freezer bag. It’s a great way to preserve fresh basil flavor for later use.

Easy Pesto Chicken
Description
Pesto chicken is a delightful meal that perfectly balances fresh flavors and hearty satisfaction. This quick and easy dish features tender, juicy chicken breasts coated in a vibrant homemade pesto made from fresh basil, garlic, and Parmesan cheese. In less than an hour, you can prepare this impressive dish that’s ideal for busy weeknights or festive gatherings. Serve it alongside pasta, rice, or a crisp salad for a complete dining experience sure to impress family and friends. Each bite offers a rich explosion of flavor that elevates your dinner table with minimal effort.
Ingredients
- 3–4boneless, skinless chicken breasts
- 1 cupfresh basil leaves
- 1/2 cupgrated Parmesan cheese
- 3garlic cloves
- 1/4 cupextra virgin olive oil
- 2 tablespoonsfreshly squeezed lemon juice
- Salt and pepper to taste
Instructions
- Preheat the oven to 400°F (200°C) and grease a baking dish.
- Pat dry the chicken breasts and season both sides with salt and pepper.
- In a blender, combine basil, garlic, Parmesan cheese, olive oil, and lemon juice; blend until smooth.
- Spread half of the pesto over the seasoned chicken in the baking dish; reserve the remaining pesto.
- Bake for 25-30 minutes until internal temperature reaches 165°F (74°C).
- Allow the chicken to rest before serving; drizzle with reserved pesto.
Notes
For added flavor, marinate chicken in pesto for at least 30 minutes before cooking.Feel free to add vegetables like cherry tomatoes or spinach to the baking dish for extra nutrition.Consider using homemade pesto for an elevated taste.
Nutrition
- Calories: 328
- Sugar: 0g
- Fat: 20g
- Carbohydrates: 3g
- Protein: 31g
“`