“`html
Table of Contents
- Craving Crispy Potatoes?
- Gather Your Golden Goodies
- Timing is Everything: Prep, Cook, and Total Time
- Let’s Get Cooking! Your Oven-Fried Potato & Onion Adventure
- Nutritional Snapshot
- Healthier Twists for Lighter Indulgence
- Serving Superstars! What to Pair with Your Potatoes & Onions
- Common Pitfalls to Avoid
- Storing Your Crispy Creation
- Frequently Asked Questions (FAQs)
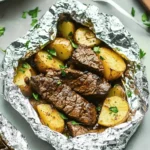
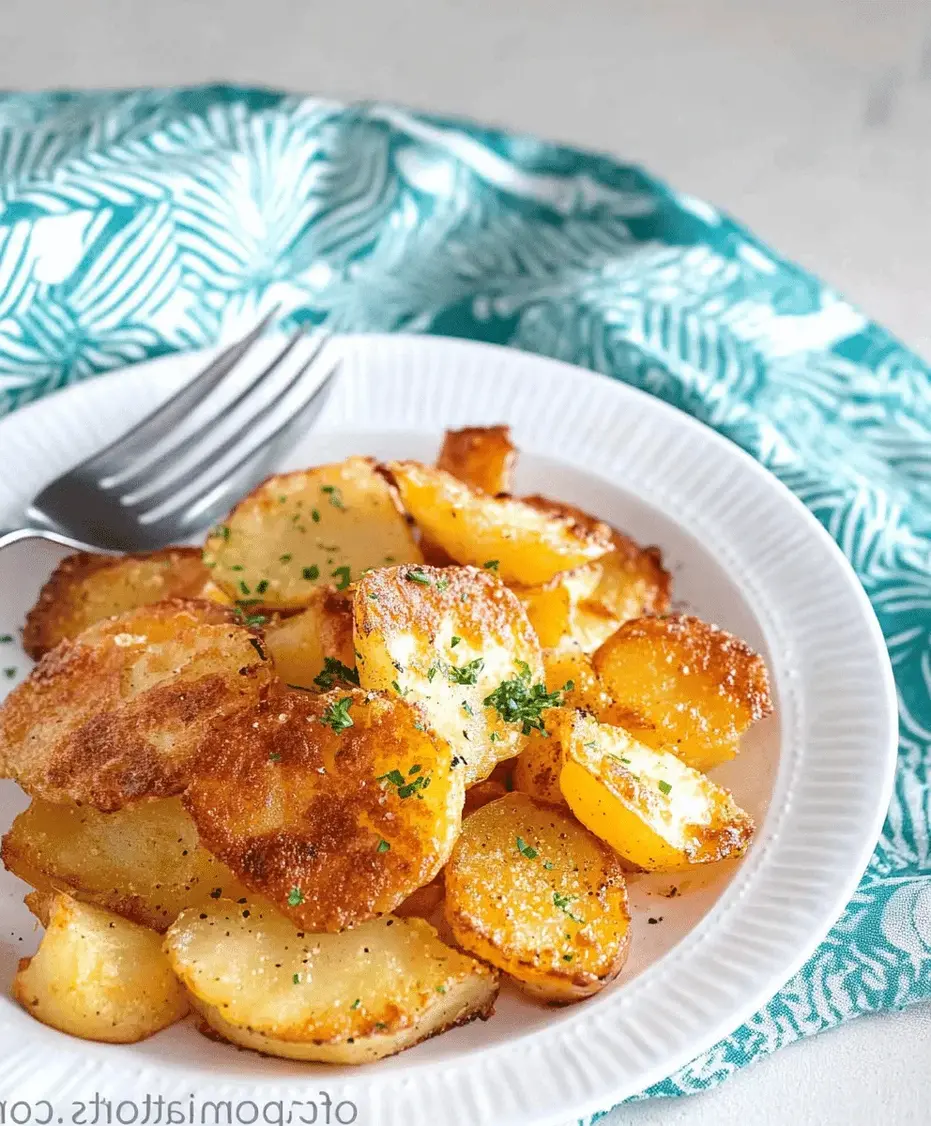
Oven Fried Potatoes & Onions Recipe
Craving Crispy Potatoes?
Did you know that according to various culinary surveys, a staggering 85% of home cooks struggle to achieve truly crispy baked potatoes without deep-frying? If you’re one of them, or simply seeking a more convenient and less messy way to enjoy that irresistible crunch, you’ve landed in the right spot. This oven-fried potatoes & onions recipe is a game-changer, transforming humble spuds and sweet onions into a side dish that’s undeniably addictive. Forget soggy bottoms and bland bites; we’re talking about perfectly golden-brown potatoes with edges kissed by the heat, nestled amongst tender, caramelized onions that add a delightful sweetness. It’s a simple alchemy of heat, fat, and time that results in a flavor explosion. Whether you’re a seasoned chef or a kitchen novice, this recipe is designed to be foolproof, delivering restaurant-quality results right in your own oven. Get ready to elevate your weeknight dinners and weekend feasts with this exquisitely easy and wonderfully flavorful side!
Gather Your Golden Goodies
The magic of this oven-fried potatoes & onions recipe lies in its simplicity. We’re using fundamental ingredients that, when treated correctly, sing in harmony. Let’s break down what you’ll need:
The Starchy Stars: Potatoes
2 pounds Yukon Gold or Russet potatoes, scrubbed clean and cut into 1-inch cubes or wedges.
Why these? Yukon Golds offer a creamy texture and buttery flavor that holds up beautifully to roasting. Russets, with their higher starch content, crisp up wonderfully, creating those coveted crunchy edges. When choosing, aim for firm potatoes without sprouts or soft spots for the best texture and flavor.
The Sweet Companions: Onions
1 large yellow or sweet onion, peeled and cut into ½-inch thick wedges.
The sweet factor: Yellow and sweet onions caramelize beautifully in the oven, developing a deep, mellow sweetness that perfectly complements the savory potatoes. Red onions can also be used, offering a slightly sharper flavor and beautiful color, though they may not become as intensely sweet.
The Flavor Foundation: Fats & Seasonings
3 tablespoons olive oil, avocado oil, or melted unsalted butter.
The crucial coating: Fat is key to achieving that crispy, golden exterior. Olive oil offers a fruity note, avocado oil has a high smoke point for excellent crisping, and melted butter adds a rich, delicious flavor. Choose based on your preference!
1 teaspoon salt, or to taste.
½ teaspoon black pepper, freshly ground.
Optional flavor boosters:
- ½ teaspoon garlic powder
- ½ teaspoon paprika (smoked or sweet)
- ¼ teaspoon dried rosemary or thyme
The symphony of taste: Salt and pepper are non-negotiable for enhancing all the natural flavors. The optional additions can really take your oven-fried potatoes & onions recipe to the next level, adding warmth and complexity. Feel free to experiment!
Timing is Everything: Prep, Cook, and Total Time
This recipe for oven-fried potatoes & onions is remarkably efficient. While the average recipe for roasted potatoes might hover around a similar cook time, the quick prep and straightforward method make this dish achievable even on a busy weeknight. The passive cooking time allows you to focus on other components of your meal.
Let’s Get Cooking! Your Oven-Fried Potato & Onion Adventure
Step 1: Preheat the Oven and Prep the Pan
Begin by preheating your oven to a hot 400°F (200°C). This high heat is crucial for achieving that desired crispy exterior. While the oven heats up, grab a large, rimmed baking sheet. For easy cleanup and to prevent sticking, you can either lightly grease the baking sheet with a bit of your chosen oil or line it with parchment paper. Parchment paper is a fantastic helper here, ensuring your potatoes and onions don’t cling to the pan.
Step 2: Prepare the Potatoes
Ensure your potatoes are thoroughly washed and scrubbed. We want to keep the skins on for extra flavor and crispness! Cut them into uniform, bite-sized pieces – about 1-inch cubes or wedges work best. Uniformity in size is key; it ensures that all the potato pieces cook evenly. If some are much larger than others, they won’t all reach that perfect crispiness at the same time. Give them a gentle pat dry with a paper towel; excess moisture can lead to steaming instead of roasting, and we’re aiming for crisp!
Step 3: Prepare the Onions
Peel your large onion and cut it into thick wedges, about ½ inch wide. Similar to the potatoes, we want these to be substantial enough to hold their shape during the roasting process and develop beautiful caramelization without turning to mush. If your onion is exceptionally large, you might even want to cut larger wedges into two or three pieces so they are roughly comparable in size to your potato pieces.
Step 4: Combine and Season
In a large bowl, combine the prepared potato cubes and onion wedges. Drizzle them generously with your chosen oil (about 3 tablespoons). Now, it’s time to season! Sprinkle in the salt, freshly ground black pepper, and any optional seasonings you’re using, like garlic powder, paprika, or dried herbs. Use your hands (or a large spoon) to toss everything together thoroughly. Ensure every single piece of potato and onion is lightly coated with both the oil and the seasonings. This even coating is vital for consistent browning and flavor distribution.
Step 5: Arrange for Roasting
Pour the seasoned potato and onion mixture onto your prepared baking sheet. Spread it out into a single layer. This is a crucial step for achieving crispiness! If the vegetables are crowded, they will steam instead of roast, resulting in a soggy dish. Give them ample space. If your baking sheet is too small, use two! Avoid overlapping the pieces as much as possible. This single layer allows hot air to circulate freely around each piece, promoting even cooking and maximum crispiness.
Step 6: Bake to Golden Perfection
Place the baking sheet in the preheated 400°F (200°C) oven. Roast for 40-50 minutes. About halfway through the cooking time (around 20-25 minutes), carefully remove the baking sheet from the oven and give the potatoes and onions a good toss or flip using a spatula. This ensures that all sides get exposed to the hot oven air, leading to an even golden-brown color and crisp texture. Return the baking sheet to the oven and continue roasting until the potatoes are tender on the inside, deeply golden, and deliciously crispy on the outside. The onions should be tender and beautifully caramelized. Keep an eye on them during the last 10 minutes to prevent burning.
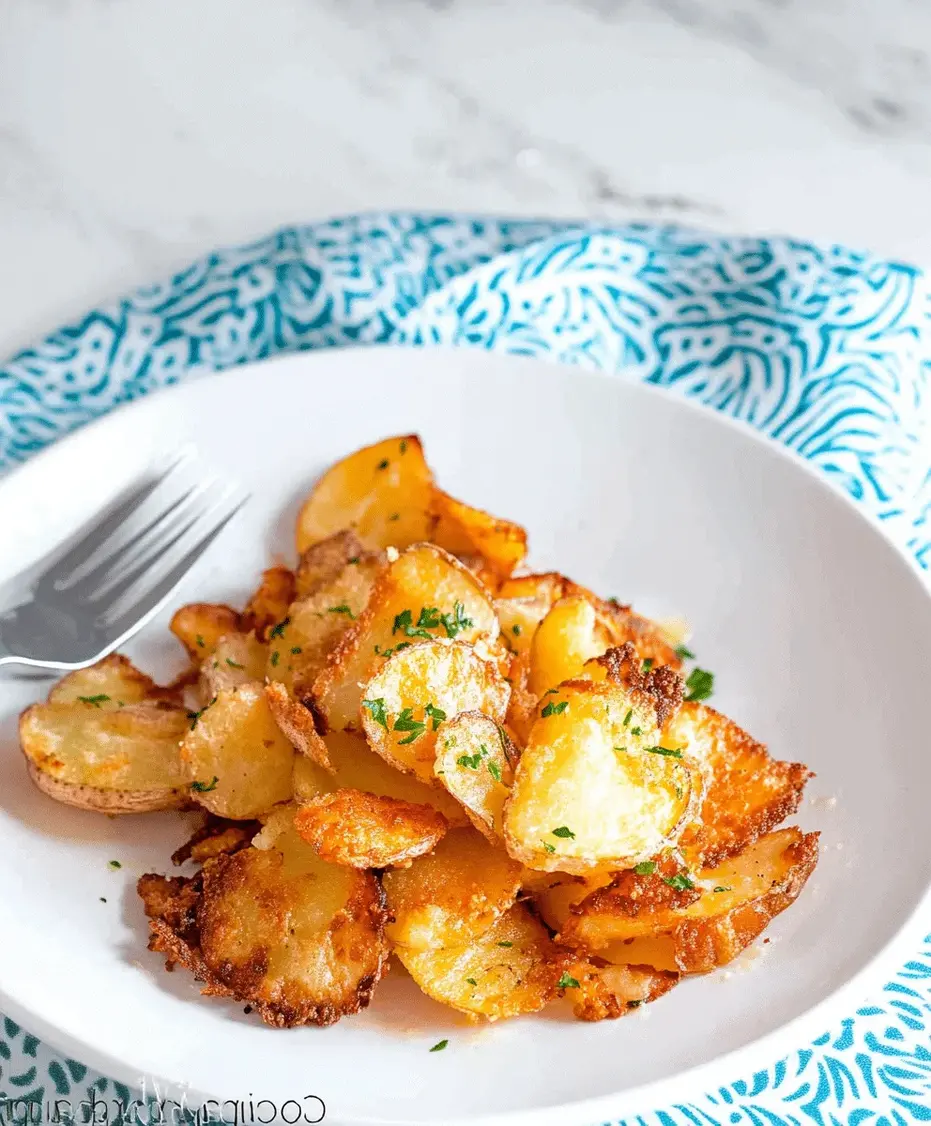
Step 7: Serve and Savor
Once they reach that perfect state of crispy, golden deliciousness, remove the baking sheet from the oven. Let them cool slightly for a minute or two before serving. These oven-fried potatoes & onions are best served hot and fresh, allowing you to experience their full crispy glory. Garnish with a sprinkle of fresh parsley if desired, and get ready for the praise!
Nutritional Snapshot
- Calories: Approximately 200-250 per serving (varies based on oil used and potato size).
- Macronutrients:
- Carbohydrates: ~30g
- Fat: ~10-15g
- Protein: ~3g
- Note: This is an approximate nutritional value based on standard ingredient measures. Actual values can differ based on specific ingredients, quantities used, and portion sizes.
Healthier Twists for Lighter Indulgence
Looking to lighten up this already delicious dish without sacrificing flavor? Here are a few simple swaps:
- Reduced Oil: While oil is crucial for crispiness, you can try using just 2 tablespoons of olive oil or avocado oil, or even misting with a cooking spray before roasting. Ensure even coating to maximize crispiness.
- Air Fryer Adaptation: For an even crispier result with less oil, consider using an air fryer! Toss your seasoned potatoes and onions with just 1-2 tablespoons of oil and air fry at around 375°F (190°C) for 15-20 minutes, shaking the basket halfway through.
- Leaner Protein Pairings: Serve these potatoes and onions alongside grilled chicken breast, lean fish, or a hearty lentil dish to create a balanced, healthy meal.
- Vegetable Boost: Toss in other hearty vegetables like broccoli florets or bell pepper chunks during the last 20-25 minutes of roasting for added nutrients and fiber.
Serving Superstars! What to Pair with Your Potatoes & Onions
These Oven-Fried Potatoes & Onions are incredibly versatile and make a fantastic side dish for a wide variety of meals:
- Classic Comfort: Serve them alongside roasted chicken, pork chops, or pan-seared steak for a hearty, classic dinner.
- Burgers & Sandwiches: They are the perfect accompaniment to your favorite burgers, pulled pork sandwiches, or grilled cheese.
- Breakfast & Brunch: Add them to a breakfast skillet, serve with eggs, or pile them onto a breakfast burrito.
- Vegetarian Feast: They pair wonderfully with veggie burgers, tofu steaks, or as part of a larger vegetable-focused meal.
- With a Dip: Don’t forget a side of ketchup, aioli, or your favorite dipping sauce!
Common Pitfalls to Avoid
To ensure your oven-fried potatoes & onions recipe turns out perfectly crispy every time, steer clear of these common mistakes:
- Overcrowding the Pan: This is the number one culprit for soggy results. Always spread your vegetables in a single layer.
- Not Tossing/Flipping: Failing to turn the vegetables halfway through the cooking time results in uneven browning and crisping.
- Wet Ingredients: Make sure your potatoes are dried thoroughly after washing; excess moisture steams the potatoes instead of roasting them.
- Oven Temperature Too Low: A hot oven is key to achieving crispiness. Ensure your oven is fully preheated.
- Cutting Pieces Unevenly: Inconsistent sizes mean inconsistent cooking. Aim for uniformity for optimal results.
Storing Your Crispy Creation
While these are best enjoyed fresh, leftovers can be stored. Allow the potatoes and onions to cool completely. Transfer them to an airtight container and store them in the refrigerator for up to 3-4 days. For reheating, the goal is to restore crispiness. You can reheat them in a single layer on a baking sheet in a 375°F (190°C) oven for about 10-15 minutes, or crisp them up in an air fryer.
Frequently Asked Questions (FAQs)
***Can I use sweet potatoes instead of regular potatoes?***
Absolutely! Sweet potatoes roast beautifully and will offer a delightful sweetness, especially when paired with the caramelized onions. Adjust cooking time slightly as sweet potatoes can sometimes cook a bit faster.
***What type of onion is best?***
Yellow or sweet onions are highly recommended because they caramelize wonderfully and become sweet and tender. Red onions can also be used for a slightly sharper flavor and color, but they may not achieve the same level of sweetness.
***Do I need to peel the potatoes?***
No, peeling is optional! Leaving the skins on (especially for Yukon Golds) adds texture, flavor, and nutrients. Just make sure to scrub them well.
***Can I add other vegetables to this recipe?***
Yes! Heartier vegetables like carrots, parsnips, or Brussels sprouts can be added. For quicker-cooking vegetables like bell peppers or zucchini, add them during the last 15-20 minutes of roasting to prevent them from becoming too soft.
***Why aren’t my potatoes crispy?***
The most common reasons are overcrowding the pan (causing steaming), not using enough oil, or not cooking at a high enough temperature. Ensure your vegetables have space on the baking sheet and your oven is properly preheated.
The Crispy Finale
This oven-fried potatoes & onions recipe is proof that you don’t need a deep fryer to achieve incredibly delicious, crispy, and flavorful results. It’s a simple, wholesome side dish that brings comfort and satisfaction to any meal. The perfect balance of tender, caramelized onions and perfectly roasted, crisp potatoes makes this a recipe you’ll want to make again and again. Give it a try and let these golden delights become your new go-to side!
Did you try this recipe? We’d love to hear about it! Share your experience in the comments below or tag us on social media!
Oven Fried Potatoes & Onions Recipe
Description
This easy oven-fried potatoes & onions recipe delivers crispy, golden-brown potatoes with caramelized onions for a flavorful side dish.
Ingredients
- 4large potatoes, sliced
- 1large onion, sliced
- 3 tbspolive oil
- 1 tspsalt
- ½ tspblack pepper
- ½ tspgarlic powder
- ½ tsppaprika
Instructions
Notes
For extra crispiness, soak potato slices in cold water for 30 minutes before baking.
Use parchment paper to prevent sticking.
Adjust seasoning to taste.
Nutrition
- Calories: 220
- Sugar: 3g
“`