Introduction
There is something incredibly comforting about a steaming bowl of soup that feels like a warm hug on a chilly evening. You crave a meal that is both effortless to prepare and deeply satisfying for the whole family. This recipe for Tortellini Soup with Sausage and Arugula delivers exactly that, transforming simple ingredients into a vibrant and hearty one-pot wonder. Furthermore, it promises to become your new go-to solution for busy weeknights when you need something truly special on the table fast.
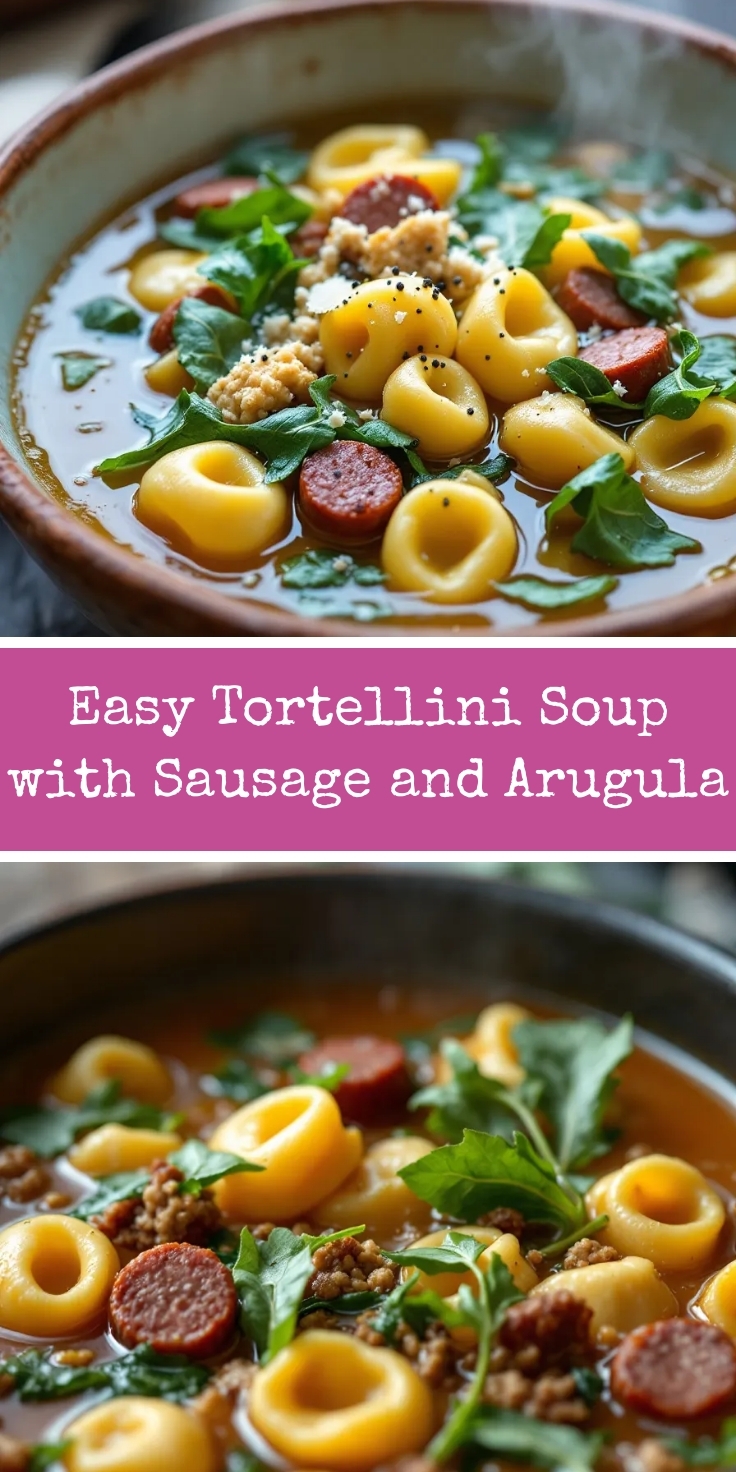
Tortellini Soup with Sausage and Arugula is a robust, Italian-inspired dish that combines cheesy pasta, savory sausage, and fresh greens in a rich, flavorful broth. This soup matters because it perfectly balances convenience with gourmet taste, offering a restaurant-quality meal you can easily make at home. It fits our blog’s tone by being a reliable, family-friendly recipe that doesn’t sacrifice flavor for simplicity. Moreover, it utilizes a fantastic one-pot method, which significantly minimizes cleanup. The beauty of this dish lies in its versatility; you can easily adapt it based on what you have in your pantry. For instance, you can swap the arugula for spinach or use a different type of sausage. This flexibility makes it a practical choice for any home cook. Ultimately, a bowl of this soup provides complete comfort food satisfaction. If you enjoy this style of cooking, you will absolutely love our collection of easy weeknight dinners designed for your busiest days. The recipe consistently yields a nourishing and impressive result, making it ideal for both casual dinners and entertaining guests. Additionally, the peppery arugula adds a fresh, bright contrast to the rich broth and sausage, creating a wonderfully complex flavor profile in every spoonful.
Why I Love This Recipe
This Tortellini Soup with Sausage and Arugula holds a special place in my heart because it was my grandmother’s ultimate quick-fix dinner for our large family. She taught me how the simplicity of a one-pot meal could bring everyone together around the table without any stress. I now make it for my own family on those hectic evenings when we need a reminder to slow down and connect. The aroma of Italian sausage and garlic simmering on the stove instantly makes our house feel like a home. It truly embodies the spirit of my favorite comfort food classics, delivering warmth and love in every single bite.
Health and Nutrition
Why it’s good for your body
This Tortellini Soup with Sausage and Arugula truly nourishes you from the inside out. First, the cheesy tortellini and savory sausage provide a satisfying source of protein, which is essential for building muscle and keeping you full. Furthermore, the dark leafy arugula wilts perfectly into the hot broth, delivering a powerful punch of vitamins A, C, and K. Consequently, you support your immune system and bone health with every delicious spoonful.
Additionally, the tomato-based broth is rich in lycopene, an antioxidant known for its heart-healthy properties. Moreover, the combination of fiber from the vegetables and protein helps to create a balanced meal that steadily releases energy. Therefore, you avoid the sharp blood sugar spikes that come with less thoughtful meals. Ultimately, a warm bowl of this Tortellini Soup with Sausage and Arugula comforts your soul while actively fueling your body’s needs.
How it fits in a healthy lifestyle
This soup fits beautifully into a balanced eating plan. You can easily tailor it to meet specific goals, like using a whole-wheat or gluten-free tortellini to suit your dietary needs. The lean protein from the sausage and cheese helps with muscle repair, making it a great option for active individuals. For more ideas on crafting meals that support your fitness journey, explore our guide on high-protein meal prep.
It also encourages cooking at home, which gives you complete control over ingredients like sodium. You can swap in low-sodium broth and lean chicken sausage for a heart-healthy twist. Enjoying a bowl with a side salad turns it into a complete, satisfying dinner that prevents overeating. Remember, healthy living is about consistency, not perfection. For more inspiration on building lasting habits, check out our tips for healthy weekly dinner ideas.

How to Prepare This Dish
Steps and time-saving tips
First, grab your favorite large pot or Dutch oven and set it over medium-high heat. Next, brown the sausage, breaking it into small, bite-sized crumbles with your spoon as it cooks. This step builds a fantastic flavor foundation for your entire Tortellini Soup with Sausage and Arugula. Then, add your diced onion and let it soften for a few minutes until it becomes fragrant and translucent. After that, stir in the garlic and tomato paste, cooking for just one more minute to wake up all those delicious flavors. Now, pour in your chicken broth and crushed tomatoes, and bring everything to a lively boil. Once boiling, gently add the cheese tortellini and let them simmer according to the package directions, usually about 7 to 9 minutes. Meanwhile, wash and dry your arugula so it’s ready to go. For a brilliant time-saving tip, use pre-crumbled sausage and pre-diced onions from your grocery store’s refrigerated section. Finally, turn off the heat and stir the fresh arugula directly into the hot soup; it will wilt perfectly from the residual heat. Ladle your incredible Tortellini Soup with Sausage and Arugula into bowls and finish with a generous sprinkle of Parmesan cheese.
Mistakes I’ve made and learned from
I have absolutely overcooked the tortellini more times than I care to admit, turning them into mushy little pillows that fell apart in the broth. The key is to remember they will continue to cook a bit even after you turn off the heat, so pull them out just when they’re al dente. Another classic error of mine was adding the arugula way too early, which made it disappear completely into a sad, slimy green mess. Now I treat it like a garnish, stirring it in right at the end so it stays bright and peppery. Getting the seasoning right was another hurdle; I once used a very salty sausage and broth combination, which created an overwhelmingly salty Tortellini Soup with Sausage and Arugula. I learned to always taste my broth before adding any extra salt, a lesson I also applied when perfecting my homemade chicken stock. For a foolproof way to balance flavors if you go too far, my guide on fixing over-salted soup has saved dinner more than once.
Cultural Connection and Variations
Where this recipe comes from
This soul-warming Tortellini Soup with Sausage and Arugula feels like a hug from an Italian grandmother you never knew you had. Its roots dig deep into the culinary heart of Northern Italy, specifically the Emilia-Romagna region, which proudly claims both tortellini and many of Italy’s finest cured meats. Traditionally, families would craft their own tortellini, stuffing them with rich meats and cheeses, and then simmer them in a delicate brodo. Meanwhile, the addition of hearty sausage and peppery arugula tells a different story. It speaks to the Italian-American experience of adapting Old World recipes with New World abundance and flair.
Consequently, you find beautiful variations everywhere. In some families, they swap the sausage for meatballs or use spinach instead of arugula. Other regions might add a splash of cream for richness or a hit of red pepper flakes for a spicy kick. My own nonna always insisted on finishing her version with a generous sprinkle of Parmigiano-Reggiano and a drizzle of good olive oil. Ultimately, every pot of this Tortellini Soup with Sausage and Arugula tells its own unique, delicious story.
How it fits in today’s cooking
This recipe absolutely thrives in modern kitchens because it masterfully balances convenience with from-scratch flavor. For today’s busy home cook, it delivers incredible depth without requiring hours of simmering. Furthermore, its versatility makes it a perfect candidate for a quick weeknight dinner or a relaxed weekend feast. You can easily adapt it to your schedule; use store-bought tortellini and stock for a 30-minute meal, or take your time crafting a homemade broth.
Its comforting nature also makes it a star during the colder months, fitting right into holiday gatherings or cozy seasonal meals. Many modern cooks love to incorporate it into their meal prep routine, as the flavors often improve the next day. For another comforting dish that’s perfect for a crowd, consider this Easy Chicken Pot Pie. And if you’re looking for more ways to use that fresh arugula, it makes a fantastic peppery base for a Classic Caesar Salad on the side. This soup truly proves that timeless dishes continue to evolve and find a place at our tables.
Taste and Texture
What makes it delicious
This Tortellini Soup with Sausage and Arugula delivers a deeply savory and satisfying experience. First, the rich, fennel-spiced sausage and garlic create a fragrant, meaty base that fills your kitchen with an incredible aroma. Then, the plump cheese tortellini add delightful pockets of creamy, chewy texture in every spoonful. Finally, the fresh arugula wilts perfectly into the hot broth, providing a subtle, peppery bite that cuts through the richness. Each bowl of this Tortellini Soup with Sausage and Arugula is a warm, comforting, and perfectly balanced meal.
Boosting the flavor
You can easily elevate this soup with a few creative tweaks. For instance, try a spicy Italian sausage to add a wonderful kick of heat. Furthermore, a dollop of homemade pesto stirred in at the end introduces a bright, herby freshness that complements the savory broth beautifully. Additionally, a sprinkle of red pepper flakes or a squeeze of fresh lemon juice just before serving can truly make the flavors pop. For more inspiration on building flavor, explore our guide on creating your own spice blends. Moreover, finishing with a generous grating of parmesan cheese adds a salty, umami-rich finish that ties everything together, much like the techniques in our perfect pasta sauce.
Tips for Success
Best practices for results
First, always brown the sausage thoroughly to build a rich, deep flavor foundation for your Tortellini Soup with Sausage and Arugula. Furthermore, add the cheese tortellini during the last few minutes of cooking so they stay pleasantly firm. Finally, stir the fresh arugula in just before serving so it wilts perfectly from the residual heat.
Mistakes to avoid
A common error is overcooking the tortellini, which causes them to become mushy and fall apart. Instead, follow the package instructions carefully and remember they will continue to cook slightly in the hot broth. Additionally, do not skip toasting the garlic with the sausage, as this step is essential for unlocking its full aromatic potential. For more guidance on building flavors, read our guide on how to make homemade chicken broth. Also, avoid adding the arugula too early; otherwise, it will lose its vibrant color and texture. If you find your greens wilting too much, our tips on how to keep salad fresh can help you manage delicate greens.
Serving and Pairing Suggestions
How to serve this dish
Immediately ladle this Tortellini Soup with Sausage and Arugula into deep, pre-warmed bowls. Consequently, you will keep every spoonful wonderfully hot. For a beautiful finish, top each serving with an extra handful of fresh arugula and a generous sprinkle of Parmesan cheese. Moreover, a final drizzle of high-quality olive oil adds a lovely sheen and rich flavor. This cozy soup truly shines on a chilly evening, making it a perfect centerpiece for a casual family dinner or a festive holiday gathering.
What goes well with it
For a complete meal, start with a simple side salad. Specifically, our classic Italian Salad provides a crisp, refreshing contrast to the rich, savory notes of the Tortellini Soup with Sausage and Arugula. Furthermore, no Italian feast is complete without the perfect bread. A slice of our soft and chewy Focaccia is ideal for sopping up every last bit of the delicious broth. Finally, a glass of medium-bodied red wine, such as a Chianti, beautifully complements the hearty sausage and cheese-filled pasta.
Italian sausage is the best choice for Tortellini Soup with Sausage and Arugula. You can use either mild or hot Italian sausage, depending on your preferred spice level. Removing the sausage from its casings and browning it in crumbles adds the most flavor to the soup base.
You can prepare the broth and sausage base ahead of time, but for the best texture, cook the tortellini and add the arugula just before serving. This prevents the pasta from becoming mushy and the arugula from wilting too much. Store the base in the fridge for up to two days, then reheat and add the final ingredients.
Yes, spinach is an excellent substitute for arugula if you prefer a milder, less peppery green. Baby spinach will wilt quickly and seamlessly into the hot soup. The final dish will still be a delicious and hearty Tortellini Soup with Sausage.
To prevent soggy tortellini, add them to the simmering broth only during the last 5-7 minutes of cooking, following your package’s instructions. Avoid boiling the soup vigorously after adding the pasta. For the best results, serve your Tortellini Soup with Sausage and Arugula immediately after it’s ready.
Tortellini Soup with Sausage and Arugula
- Total Time: PT35M
- Yield: 6 servings 1x
Description
This hearty Cheese Tortellini Soup combines Italian sausage with cheese tortellini in an easy broth with tomatoes, onions, garlic, arugula, and Italian herbs.
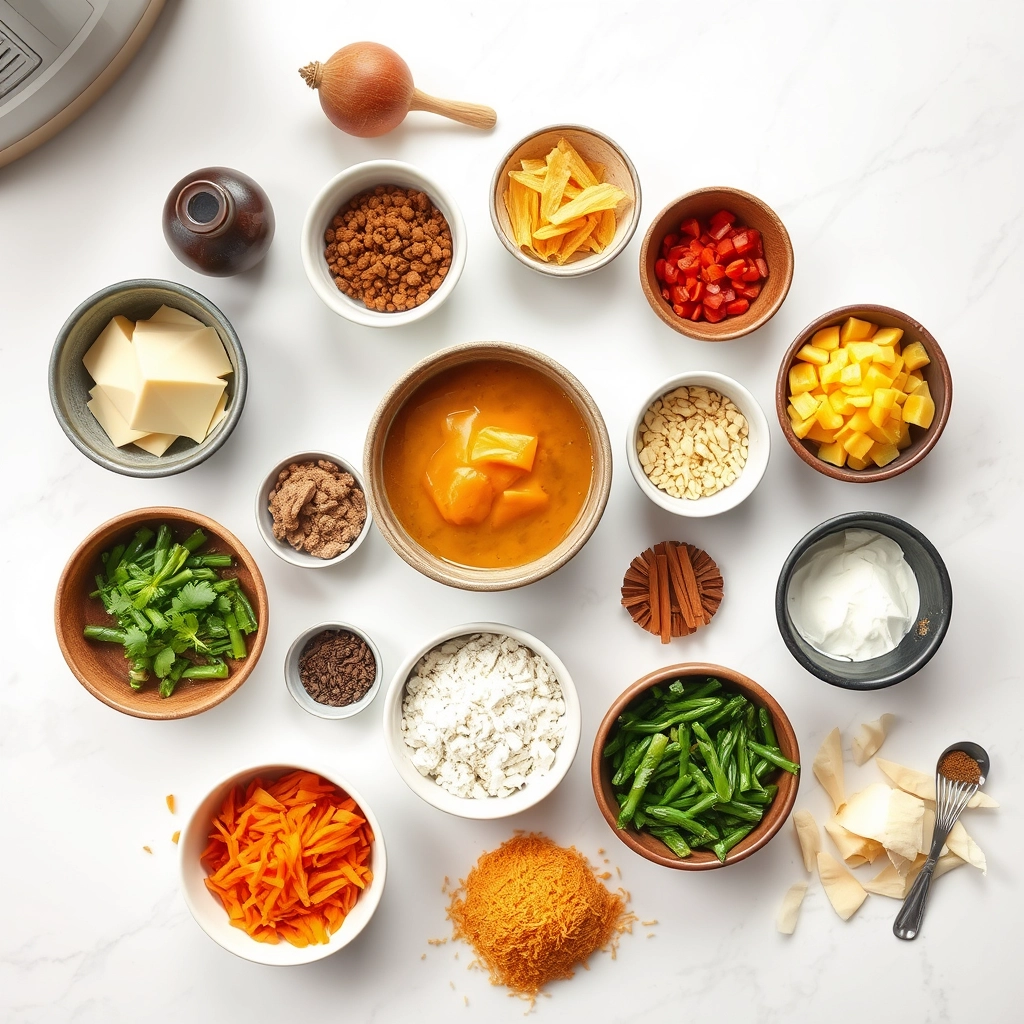
Ingredients
- Main Ingredients
- 1 lb Italian sausage
- 1 medium onion, finely chopped
- 3 cloves garlic, minced
- 1 tsp dried oregano
- 1 tsp dried parsley
- 1/2 tsp dried thyme
- 2 pinch crushed red pepper
- 2 cups beef broth
- 1 1/2 Tbsp tomato paste
- 1 can fire roasted tomatoes
- 4 cups vegetable broth
- 10 oz refrigerated cheese tortellini
- 3 cups arugula (or spinach)
- Grated Parmesan cheese
Instructions
- How To Make Sausage Tortellini Soup
- Step 1: Brown the Italian Sausage in a Dutch Oven or stockpot over medium-high heat. When it is almost fully browned add the onion and cook until the sausage is done browning and the onion has softened.
- Step 2: Turn the heat to low and add the garlic, basil, oregano, parsley, thyme and crushed red pepper; cook for 1 minute stirring constantly.
- Step 3: In a small bowl whisk the tomato paste with about 1/2 cup beef broth. Add the vegetable broth, remaining beef broth, fire roasted tomatoes and thinned out tomato paste. Increase the heat to medium and bring to a low boil. Then reduce the heat to a simmer and simmer for 3-4 minutes.
- Step 4: Add the cheese tortellini and simmer for 10-15 minutes or until the tortellinis are cooked to your desired tenderness.
- Step 5: Remove the pan from the heat and stir in the arugula. Add salt and pepper to taste. Sprinkle each bowl with 1-2 tablespoons freshly grated Parmesan cheese.
- Prep Time: PT5M
- Cook Time: PT30M
- Method: Soup
- Cuisine: Italian